

POS Installation Guide (Windows)
Prerequisites
- Windows 10
- MariaDB 10.3 installed and running, with ‘enactorpos’ Data Base Schema and ‘enactorpos’ User Created – follow MariaDB Install Instructions
- Minimum 10GB of free disk space
- Build directory = {drive letter}:/enactorinstall
- Install directory = {drive letter}:/ – recommend to install on a separate partition to the Windows drive
- Install script = EnactorPOS.bat
- Install ini file = enactorpos.ini
- Install msi = EnactorPOS-x.x.x.msi
- Any other 3rd party applications to be installed prior to Enactor
- Network Connectivity to the Estate Manager (and store server if applicable).
- Java should NOT be installed on the machine prior to the MSI installation – it will be installed by the Enactor POS MSI.
- Estate Manager available and configuration completed for device(s) to be installed.
- Details of all required Estate Manager endpoint URLs
Installer Batch File
Installer Parameters
| Script entry | Descrition | Notes |
| Msi.exe | windows msg command | |
| /i | msi install flag | |
| EnactorPOS-x.x.x.msi | msi file to install | |
| /L*V | msi logging flags | Include all information and verbose information |
| “installer.log” | install log name | logfile will be placed in c:\enactorinstall\ |
| TARGETDIR=”C:\” | Defines where the “Enactor” directory will be installed | Roll out value to be define i.e which drive to install enactor |
| INSTALLER_INI_LOCATION | Location of ini file and ini file name | contains variables for enactor.xml
if the file is named “installer.ini” and is located in the same folder as the MSI, this is not required. |
Batch File Sample
The below is the format for the installer batch file. :: is used to specify the line is a comment and ^ to specify a new line.
See below for variables that must be set via the POS MSI Installer script
Example batch (version 1.16.1) used to install 1.0 20 Nov 2017
Batch Script
::
:: EXAMPLE INSTALLER BATCH FILE
:: This file includes all of the available command line parameters for configuring the Enactor
:: installer, populated with sensible defaults for the POS Installer
::
@echo off
msiexec /i EnactorPOS-x.x.x.msi /L*V “installer.log”^
TARGETDIR=”C:\”^
INSTALLER_INI_LOCATION=”C:\enactorinstall\installerpos.ini”^
The batch script should be edited with the correct MSI name, and the location of the installer.ini file as required.
Installer.Ini File Sample
See below for variables that must be set via the POS MSI installer.ini file.
Required Settings
EM Server Addresses and Ports
The appropriate base URL for each server should be maintained in the SERVER_*_URL_BASE section of the installer.ini file. An example base URL may be: https://em.client.enactorondemand.com for a SAAS environment, or http://1.2.3.4:39832 for an on-premise server
Database Settings
| INI Setting | Driver | Examples |
| DATABASE_DRIVER | Dependent on the DBMS used on the POS | com.mysql.jdbc.Driver for MySQL/MariaDB |
| com.microsoft.sqlserver.jdbc.SQLServerDriver for SQL Server | ||
| DATABASE_IDENTIFIER | Dependent on the DBMS used on the POS | MYSQL, MSSQL |
| DATABASE_USERNAME | Set as required; schema, username and password must match what has been configured on the local db installation | e.g. enactor |
| DATABASE_PASSWORD | ||
| DATABASE_SCHEMA | e.g. enactorpos | |
| DATABASE_URL | Dependent on the DBMS used on the POS | jdbc:mysql://localhost:3306/enactorpos?defaultFetchSize=1000&useCursorFetch=true for MySQL/MariaDB |
| jdbc:sqlserver://localhost:1433;databaseName=enactorpos for SQL Server |
Device-Specific Settings
- Use device id provided for each till and update DEVICE_ID value.
- Use location id provided for each till and update LOCATION_ID value.
- User device type for each till (e.g. POS or MASTER_POS)
A set of example installer.ini files will be supplied to cover some of the key scenarios.
; — EXAMPLE ENACTOR INSTALLER CONFIGURATION FILE —
; This file includes all of the available ini file values used for configuring the Enactor
; installer, populated with sensible defaults for the Standard – Windows POS Installer project
; It is provided as a starting point for new installers, and should be copied, edited to add settings
; appropriate for the customer and device and then managed with other project configuration
ENACTOR_ROOT=C:\Enactor\

APPLICATION_URL=http://[EM_ADDRESS]:39833/axis2

AXIS2_PASSWORD=axis2

AXIS2_USERNAME=axis2

BACK_OFFICE_APP_HOST=[EM_ADDRESS]

BACK_OFFICE_APP_PORT=39832

BACK_OFFICE_APP_RMI_PORT=

BACK_OFFICE_APP_SECURE_PORT=

BACK_OFFICE_SERV_HOST=[EM_ADDRESS]

BACK_OFFICE_SERV_PORT=39833

BACK_OFFICE_SERV_RMI_PORT=

BACK_OFFICE_SERV_SECURE_PORT=

BUMPBAR_HOST=

BUMPBAR_PORT=

BUMPBAR_SECURE_PORT=

BUTTON_CLICK_ENABLE_SOUNDS=

CARD_AUTH1_HOST=[EM_ADDRESS]

CARD_AUTH1_PORT=39856

CARD_AUTH1_PROTOCOL=HTTP

CARD_AUTH1_SECURE_PORT=

CARD_AUTH2_HOST=[EM_ADDRESS]

CARD_AUTH2_PORT=39856

CARD_AUTH2_PROTOCOL=HTTP

CARD_AUTH2_SECURE_PORT=

CARD_AUTH3_HOST=[EM_ADDRESS]

CARD_AUTH3_PORT=39856

CARD_AUTH3_PROTOCOL=HTTP

CARD_AUTH3_SECURE_PORT=

CARD_AUTH4_HOST=[EM_ADDRESS]

CARD_AUTH4_PORT=39856

CARD_AUTH4_PROTOCOL=HTTP

CARD_AUTH4_SECURE_PORT=

CRM_HOST=

CRM_PORT=

CRM_SECURE_PORT=

CUSTOMER_ACCOUNT_HOST=

CUSTOMER_ACCOUNT_PORT=

CUSTOMER_ACCOUNT_SECURE_PORT=

CUSTOMER_SEARCH_HOST=

CUSTOMER_SEARCH_PORT=

CUSTOMER_SEARCH_SECURE_PORT=

CUSTOMER_SERV_HOST=

CUSTOMER_SERV_PORT=

CUSTOMER_SERV_SECURE_PORT=

DATABASE_DRIVER=com.mysql.jdbc.Driver

DATABASE_IDENTIFIER=MYSQL

DATABASE_PASSWORD=En4ct0r2019

DATABASE_SCHEMA=enactorpos

DATABASE_URL=jdbc:mysql://localhost:3306/enactorpos

DATABASE_USERNAME=enactor

DATASOURCE_PARAMETERS=${installer.datastoreParameters}

DEVICE_ID=B0990T49

DEVICE_TYPE=MASTER_POS

ENACTOR_CLIENT_XML_LOCATION=C:\Enactor\pos\config\enactorClient.xml.templ

ENACTOR_XML_LOCATION=C:\Enactor\pos\config\enactor.xml.templ

ENV_TEST=

ESTATE_MANAGER_APP_HOST=[EM_ADDRESS]

ESTATE_MANAGER_APP_PORT=39830

ESTATE_MANAGER_APP_SECURE_PORT=

ESTATE_MANAGER_PROC_HOST=[EM_ADDRESS]

ESTATE_MANAGER_PROC_PORT=39832

ESTATE_MANAGER_PROC_SECURE_PORT=

ESTATE_MANAGER_SERV_HOST=[EM_ADDRESS]

ESTATE_MANAGER_SERV_PORT=39833

ESTATE_MANAGER_SERV_SECURE_PORT=

FILEREPOSITORY_URL_BASE=http://[EM_ADDRESS]:39832/WebCore/Downloads

INVENTORY_MANAGER_APP_HOST=[EM_ADDRESS]

INVENTORY_MANAGER_APP_PORT=39832

INVENTORY_MANAGER_APP_SECURE_PORT=

INVENTORY_MANAGER_SERV_HOST=[EM_ADDRESS]

INVENTORY_MANAGER_SERV_PORT=39833

INVENTORY_MANAGER_SERV_SECURE_PORT=

JDK_LOCATION=

JRE_LOCATION=

KEYSTORE_PATH=${installer.keystorePath}

KEYSTORE_PASSWORD=${installer.keystorePassword}

LOCAL_JVM_MS=256M

JVM_MX_POS_APPLICATION=768M

JVM_MX_POS_SERVICES=1024M

LOCAL_PORT=${installer.localPort}

LOCAL_SECURE_PORT=${installer.localSecurePort}

LOCAL_THEME=${installer.localTheme}

LOCATION_ID=292

MINIMUM_TRANSACTION_SEQUENCE_NUMBER=

MODULE_CRM=true

MODULE_CUSTOMER_COLLECTIONS=false

MODULE_INVENTORY=true

MODULE_ORDER=true

MODULE_REPAIR=false

MODULE_TIME_ATTENDANCE=false

ORDER_MANAGER_APP_HOST=[EM_ADDRESS]

ORDER_MANAGER_APP_PORT=39834

ORDER_MANAGER_APP_SECURE_PORT=

ORDER_MANAGER_SERV_HOST=[EM_ADDRESS]

ORDER_MANAGER_SERV_PORT=39833

ORDER_MANAGER_SERV_SECURE_PORT=

PARENT_PROCESS_SET=NextGen

PARENT_THEME=NextGen

POS_REPORTS_HOST=[EM_ADDRESS]

POS_REPORTS_PORT=39831

POS_REPORTS_RMI_PORT=

POS_REPORTS_SECURE_PORT=

PROCESS_CONNECTION_DEFINITION=FrasersPosEstateManager

PROCESS_SET=SportsDirect

REPORTS_HOST=[EM_ADDRESS]

REPORTS_PORT=39831

REPORTS_SECURE_PORT=

RESTAURANT_LOCAL_STATUS_STORE=

RESTAURANT_SERV_HOST=

RESTAURANT_SERV_PORT=

RESTAURANT_SERV_RMI_PORT=

RESTAURANT_SERV_SECURE_PORT=

RMI_HOST=localhost

RMI_PORT=39847

SELF_SERVICE_CUSTOMER_USER=

SERVER_BOAPP_URL_BASE=http://[EM_ADDRESS]:39830

SERVER_BOPROCRMI_URL_BASE=

SERVER_BOPROC_URL_BASE=http://[EM_ADDRESS]:39832

SERVER_BOREPORTS_URL_BASE=http://[EM_ADDRESS]:39831

SERVER_BOWS_URL_BASE=http://[EM_ADDRESS]:39833

SERVER_BP_URL_BASE=http://[EM_ADDRESS]:39832

SERVER_CARD_AUTH1_URL_BASE=http://[EM_ADDRESS]:39856

SERVER_CARD_AUTH2_URL_BASE=http://[EM_ADDRESS]:39856

SERVER_CARD_AUTH3_URL_BASE=http://[EM_ADDRESS]:39856

SERVER_CARD_AUTH4_URL_BASE=http://[EM_ADDRESS]:39856

SERVER_CMAPP_URL_BASE=

SERVER_CMPROC_URL_BASE=

SERVER_CMWS_URL_BASE=http://[EM_ADDRESS]:39833

SERVER_EMAPP_URL_BASE=http://[EM_ADDRESS]:39830

SERVER_EMPDP_URL_BASE=

SERVER_EMPROC_URL_BASE= http://[EM_ADDRESS]:39832

SERVER_EMREPORTS_URL_BASE= http://[EM_ADDRESS]:39831

SERVER_EMWS_URL_BASE=http://[EM_ADDRESS]:39833

SERVER_GIFT_CARD_AUTH1_URL_BASE=http://[EM_ADDRESS]:39856

SERVER_GIFT_CARD_AUTH2_URL_BASE=http://[EM_ADDRESS]:39856

SERVER_HMCONSUMER_URL_BASE=

SERVER_HMKITCHENDISPLAY_URL_BASE=

SERVER_HMRMI_URL_BASE=

SERVER_HM_URL_BASE=

SERVER_IMBP_URL_BASE=

SERVER_IMPROC_URL_BASE=

SERVER_IMWS_URL_BASE=

SERVER_OMBP_URL_BASE=

SERVER_OMPROC_URL_BASE=

SERVER_OMWS_URL_BASE=

SERVER_PDP_URL_BASE=

SERVER_PMAPP_URL_BASE=

SERVER_PM_URL_BASE=

SERVER_PMWS_URL_BASE=

SERVER_PROCESS_ID=${installer.serverProcessId}

SERVER_SOLR_URL_BASE=

SERVER_TMS_URL_BASE=

SERVICE_USERNAME=LocalSystem

SERVICE_PASSWORD=

SETTLEMENT_HOST=

SETTLEMENT_PORT=

SETTLEMENT_SECURE_PORT=

SOLR_HOST=

SOLR_PORT=39846

SWING_LISTBOX_USE_IMAGE_WORKER=true

SYSTEM_USERNAME=${installer.systemUsername}

SYSTEM_PASSWORD=${installer.systemPassword}

TASK_PASSWORD=taskadmin

TASK_USERNAME=taskadmin

THEME=${installer.theme}

TRANSACTION_NUMBER_START_VALUE=1

TRANSACTION_NUMBER_WRAP_AROUND_VALUE=9999

TRUSTSTORE_FILENAME=enactor.truststore

TRUSTSTORE_PASSWORD=changeit

USE_PAYMENT_SERVICE=false
Install steps using installer GUI
- Create install directory: C:/enactorinstall/
- Copy install msi into build directory: EnactorPOS-x.x.x.msi
- Copy install script into the install directory
- EnactorPOS.bat
- installer.ini
- Edit the Batch file and Installer INI file as required
- Run install script with administrator permissions, EnactorPOS.bat
- You may be prompted to allow the Windows Command Processor to make changes, select “Yes”
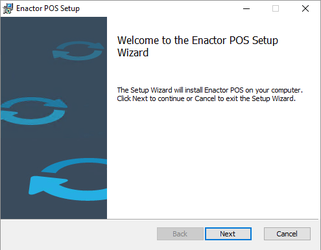
- You will be prompted with the Enactor POS Setup screen,
- Select Next to continue
0
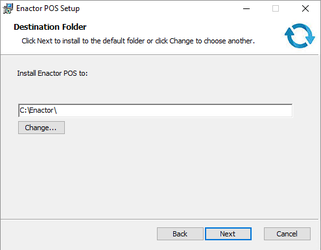
- Destination folder Screen
- Install Directory value is pre populated from install script
- Select Next to continue
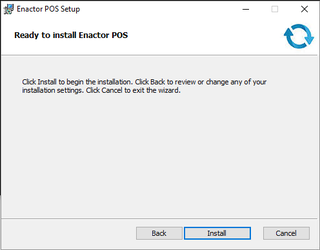
- Ready to Install Screen
- Select Install to continue
-
- The Enactor POS Setup screen will display the status of the installation while installing
- Complete Enactor POS Setup:
Select Finish to complete installation
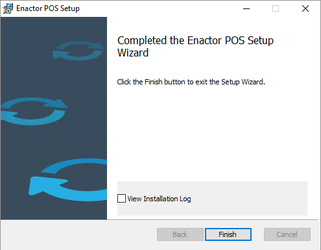
- Installation has completed and the enactor pos application will be installed in the install directory e.g. C:/Enactor/pos
- If the installation is not successful, review the install log in the build directory C:\enactorinstall\installer.log
- The pos will start up using the C:\Enactor\pos\scripts\NodeployStartPos.cmd. This is included in the “Startup” Items and will be automatically used when any user logs in to Windows.
Windows services created by POS MSI installer
| Windows Service name | Windows Service Display Name | MSI Installer | Functionality |
| EnactorPOSServices | Enactor POS Services | POS | Runs pos background services for messaging and scheduled jobs |