Application Processes
Use standard outcomes (AP-001)
When exiting a process, use one of the following outcomes:
-
Success
-
Fail
-
Cancel
If the above do not make sense for the exit outcome of a process, you can use your own. It should however be the responsibility of the caller process to decide what to do.
For instance, let's assume you have the RichProductSearch process and a sub process LoadSearchMenu. LoadSearchMenu should not exit with "GoToMainSearchScreen" just so that RichProductSearch can "easily" go to the right state. Instead it should clearly return Success and Fail and RichProductSearch should then decide to go to the MainSearchScreen on failure. This is to allow reusability (the LoadSearchMenu could be used in a context where returning GoToMainSearchScreen makes no sense)
Outcome Action Naming Convention (AP-002)
The outcome action should usually named EndProcessXXX where XXX is the actual outcome, for instance EndProcessSuccess.
Add Notes where necessary (AP-003)
When an action is complex or the reason for a link obscure, please add a notes to help the next developer to understand the implementation.
Do not add a note for self explanatory process (this is similar to obvious comments in code that do not add more than what the code already indicate)
Use Null action where necessary (AP-004)
Use Null action when necessary. You can sometimes add the links on the previous action rather than adding a null action just for the branching. But sometimes it makes more sense to add an explicitly null action.
In all cases, make sure to name the action sensibly. "Null Action 1" is not a good name.
Use Switch Statement (AP-005)
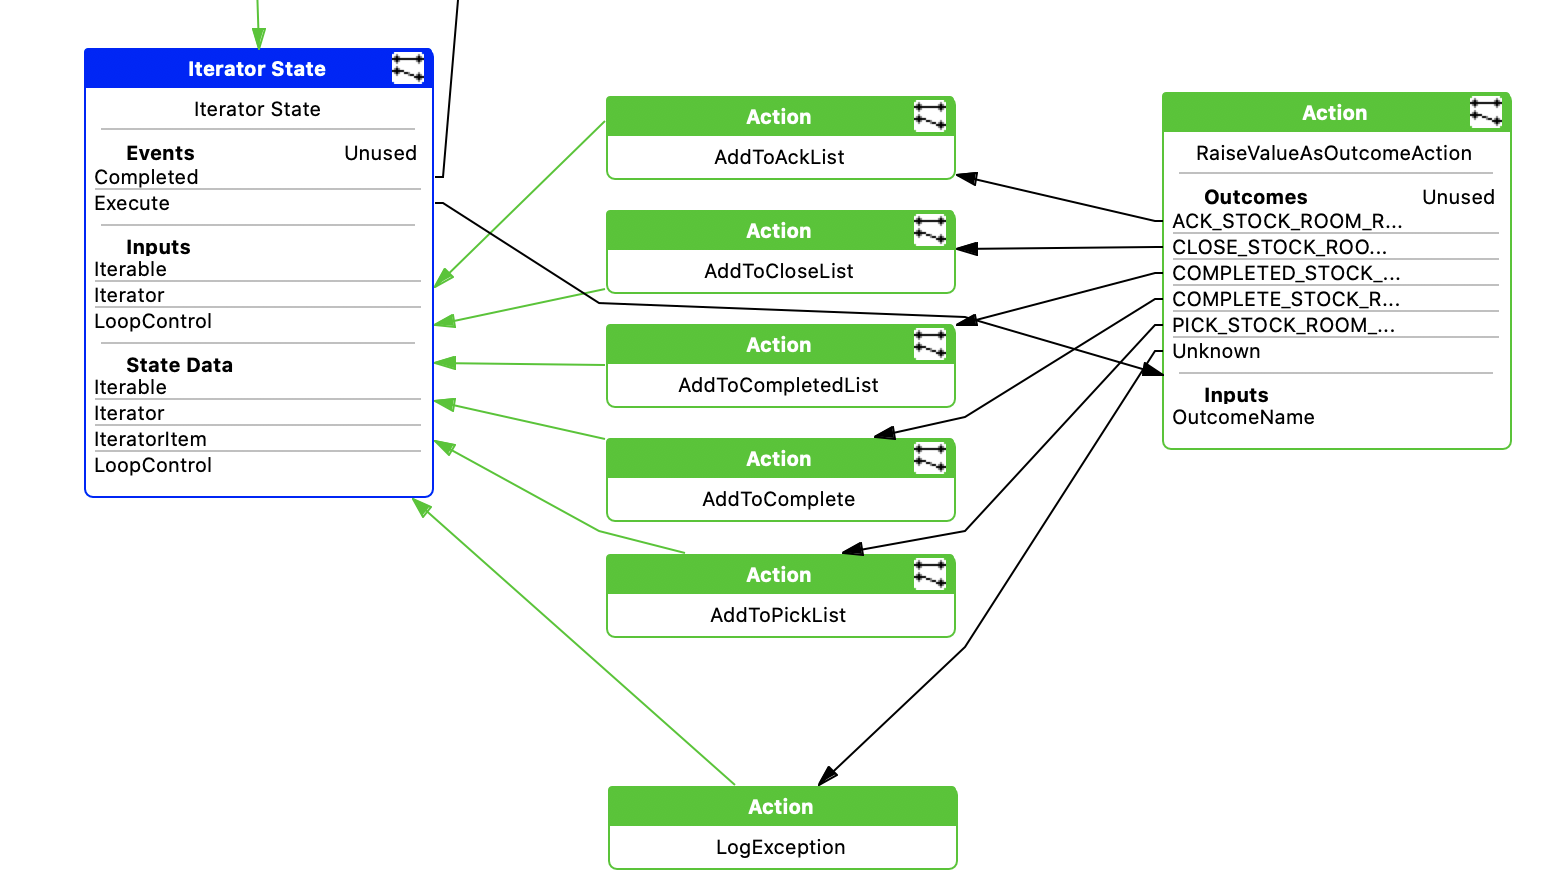
There is no switch statement in the Enactor Framework for Application Processers. For a small number of case, you can chain Null action with one conditional link or a single Null action with multiple links (equivalent to an if-else-if pattern). Once there are 3 or more statements, consider using RaiseValueAsOutcomeAction, especially if the condition is based on the value of a variable.
RaiseValueAsOutcomeAction
Single Null Action
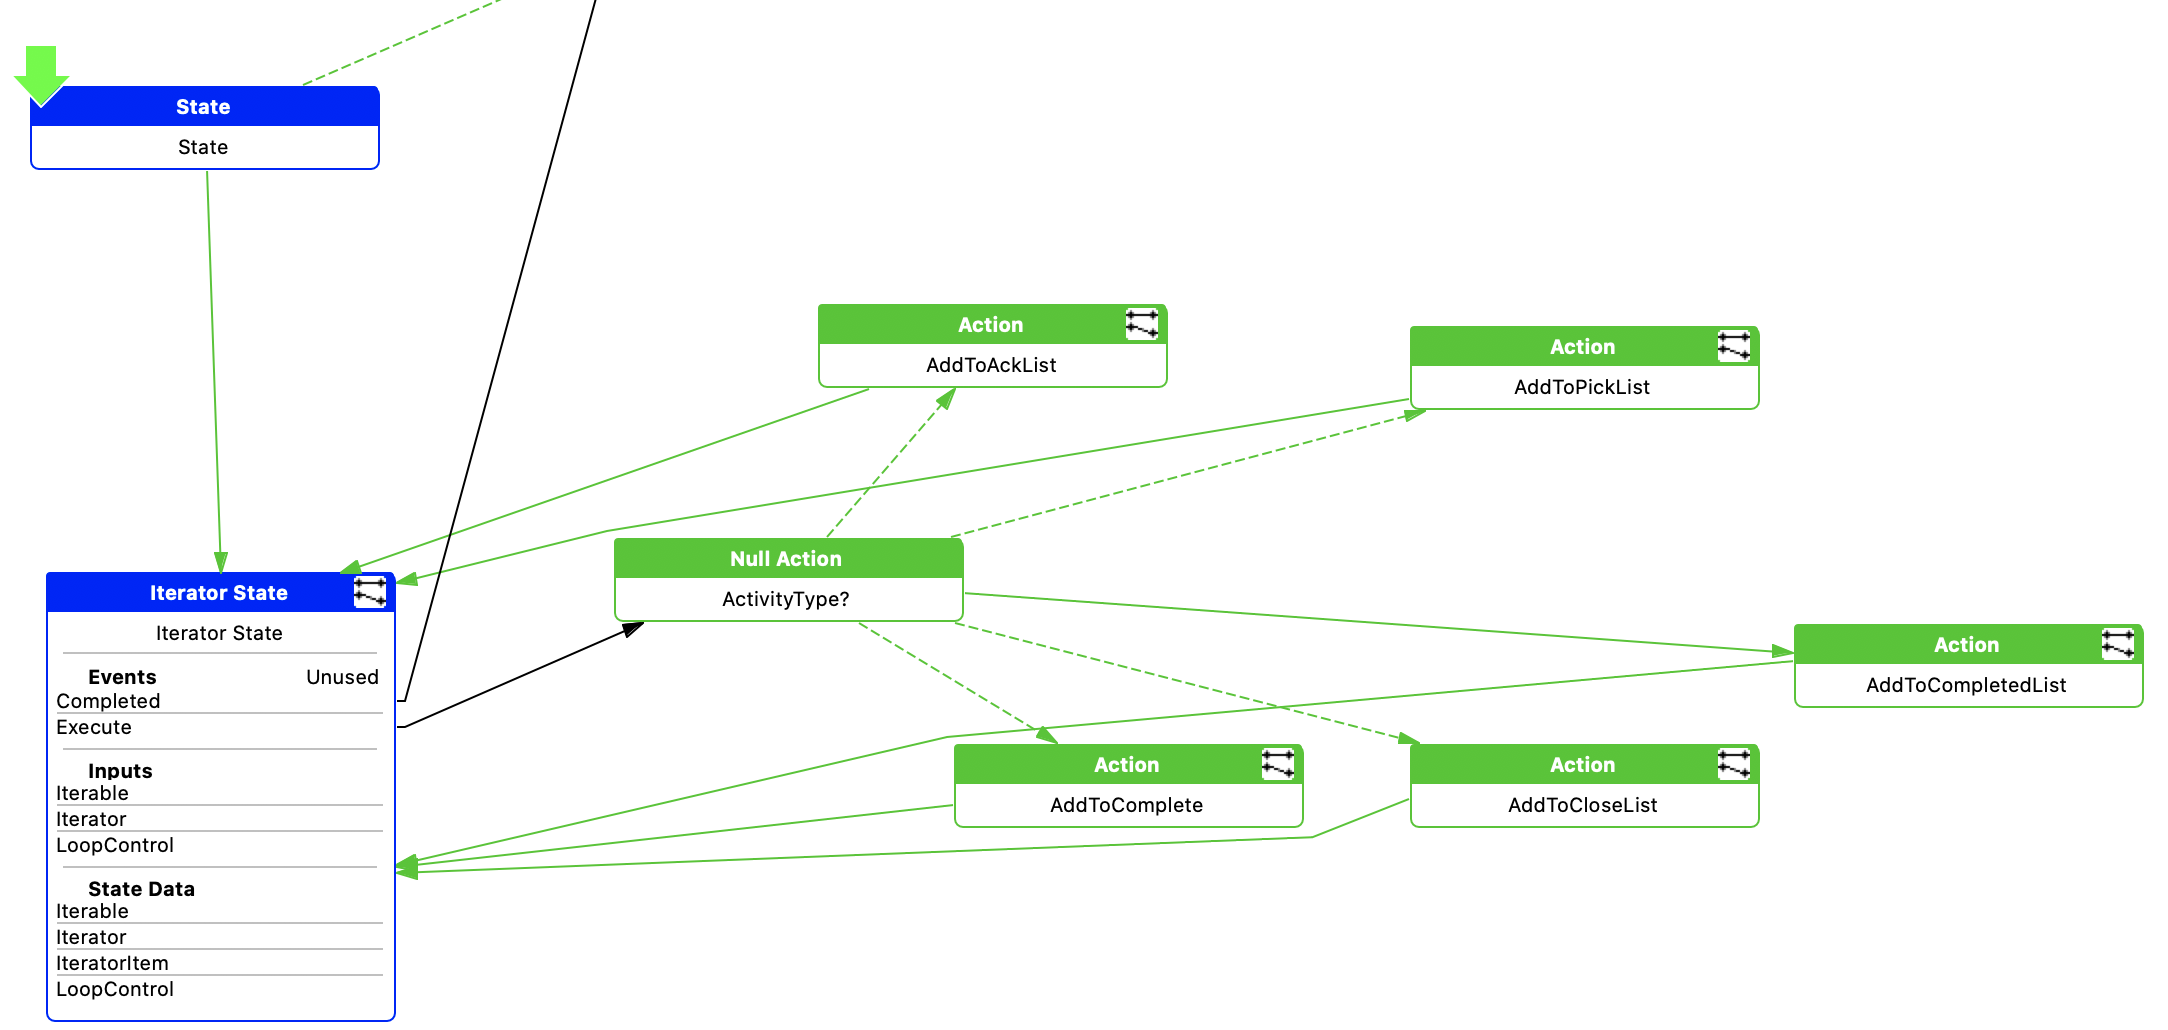
Clearer
Probably never a good pattern if more than 1 or 2 conditional links
Please also note that the "Unknown" link (or the default link in the case of using the Null action) is better handled as the exception case and would normally be logged as an exception.
Conditional links (AP-006)
Try to keep the number of conditional links small. It is better to chain few null actions rather than a single one with many links.
One conditional link is the recommended number (so it represents the simple if else statement) although more conditional links might make sense in some scenario.
Keep Application Process Small (AP-007)
There's no hard limit on the number of actions in a process. However, when you reach 30-40 actions, it might be time to refactor some of the work being done in sub process. This not only help readability but also reusability as a small process doing one thing is more likely to be generic enough that it can be reused.
The toolkit will show a warning on the process if the number of actions, states, links reach the default limits.
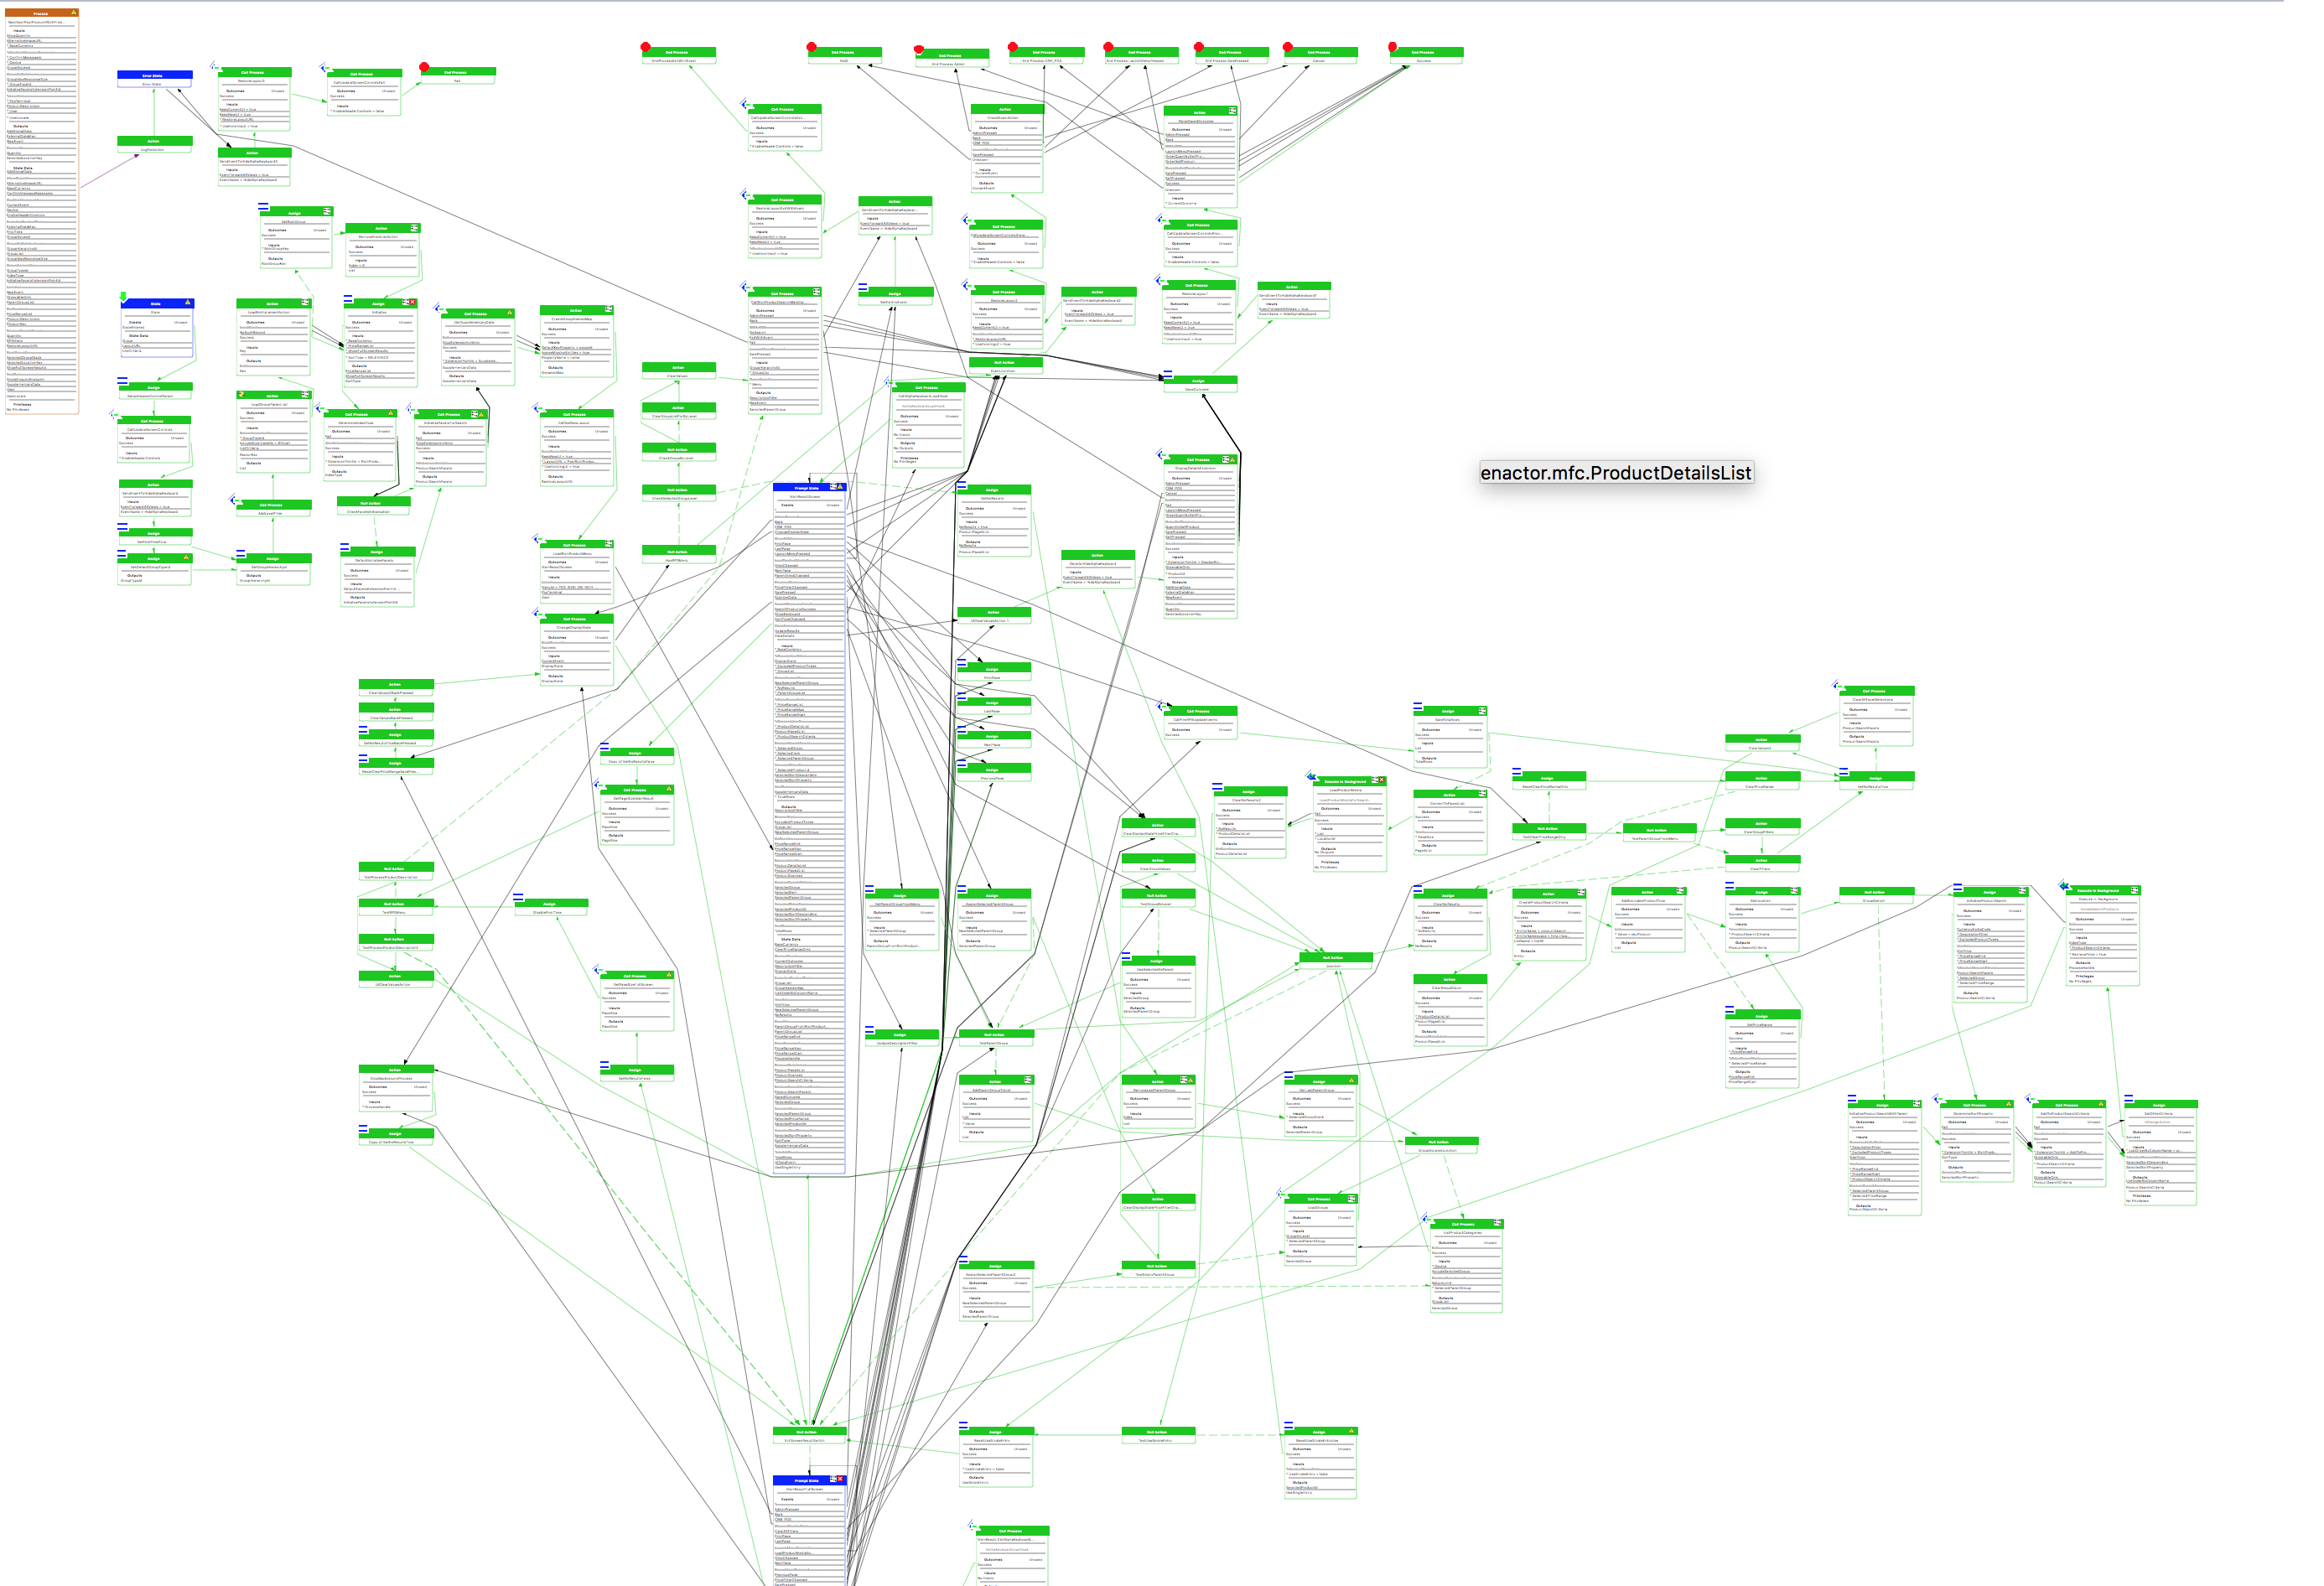
There are some important processes in the pos that are not good example. For instance the RichProductSearch has over 130 actions... and should be refactored
- Just Fine
- Getting Too Big
- Too Big
Arrange Flow Left to Right (AP-008)
There isn't one style of writing a process and there isn't only one correct way of arranging the actions.
Here're some advice to write process to help readability:
-
Overall flow should be left to right. Try to avoid going in a loop (unless you implement a loop)
-
Try to group the outcome (either at the top or to the right of the process)
-
Don't squeeze a new action in a random place just because you don't want to re-arrange the other actions
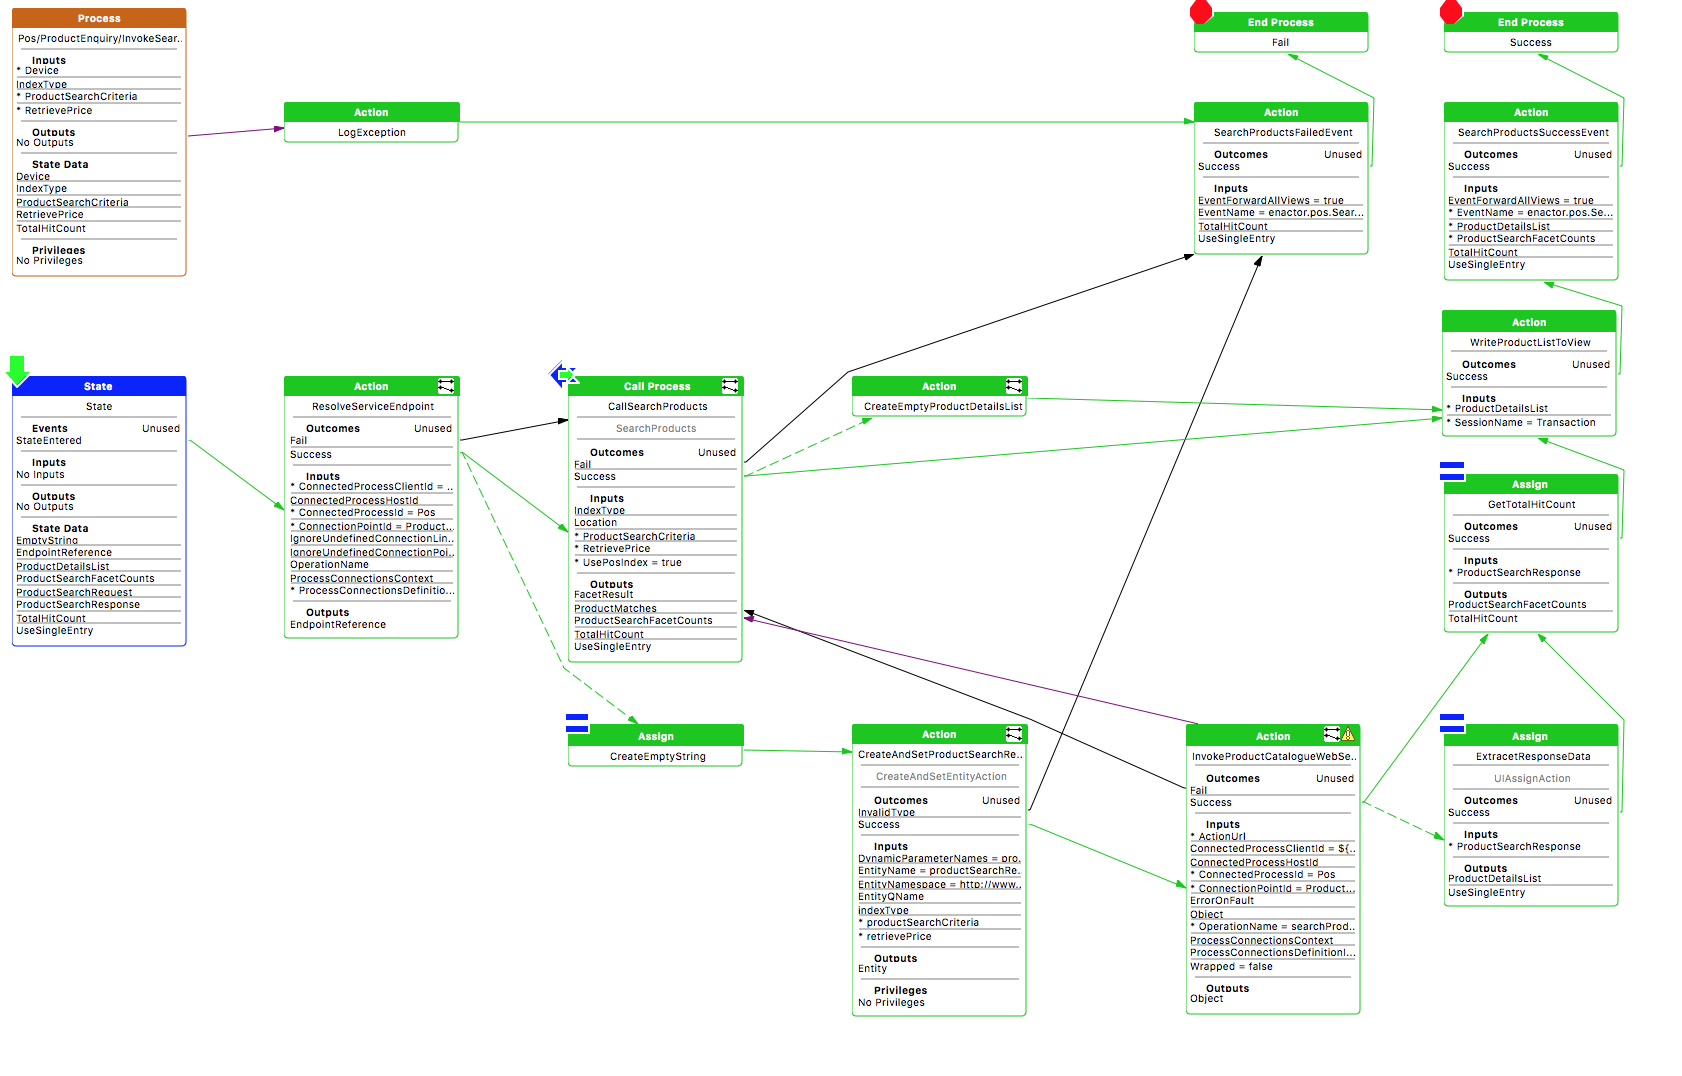
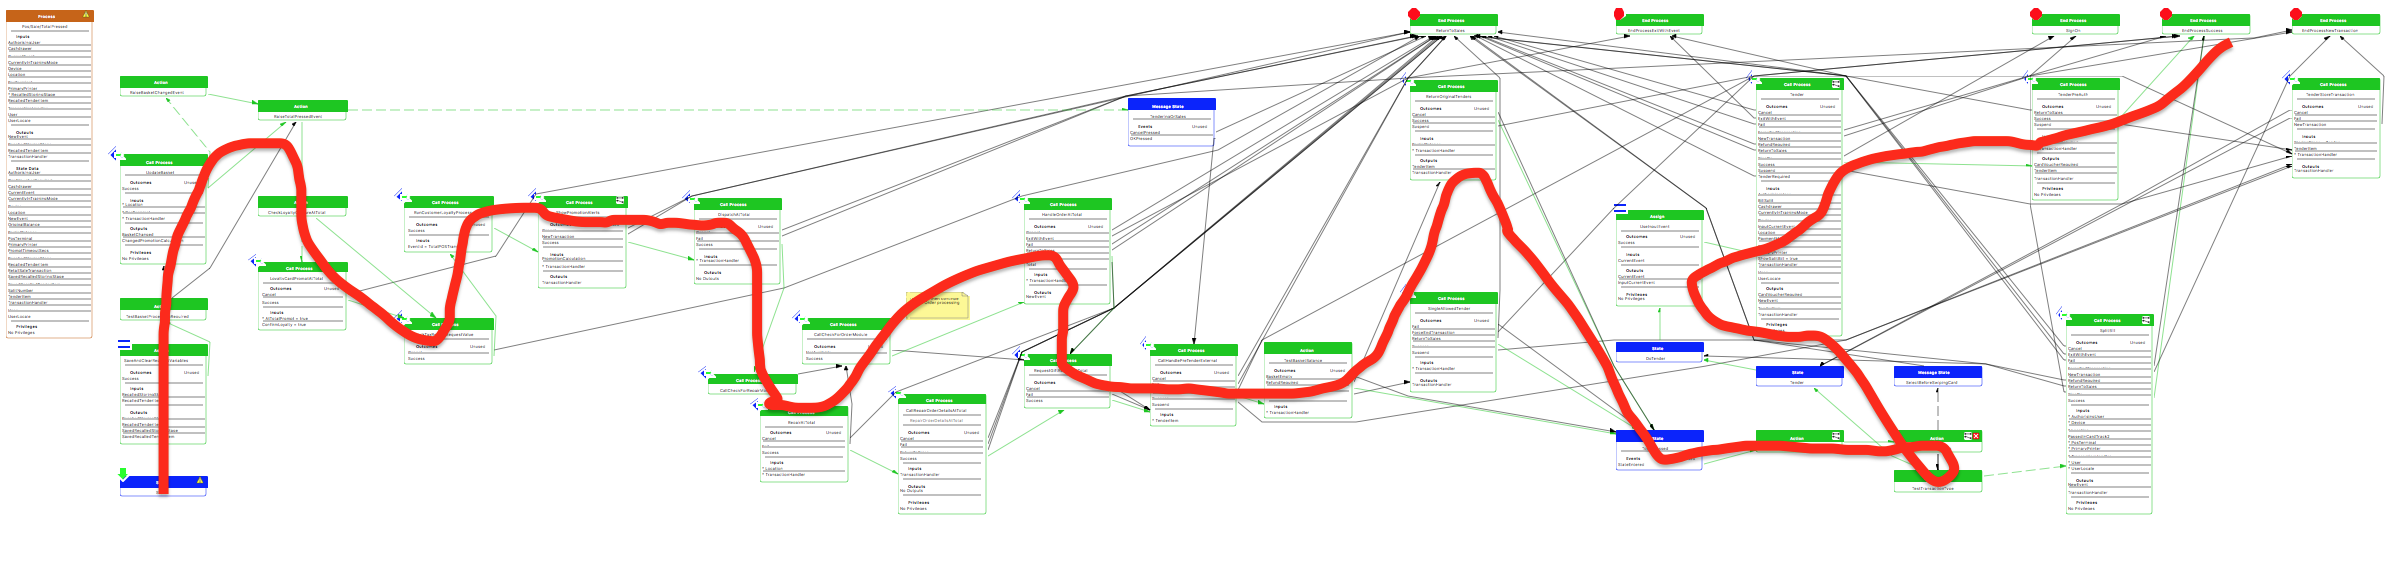
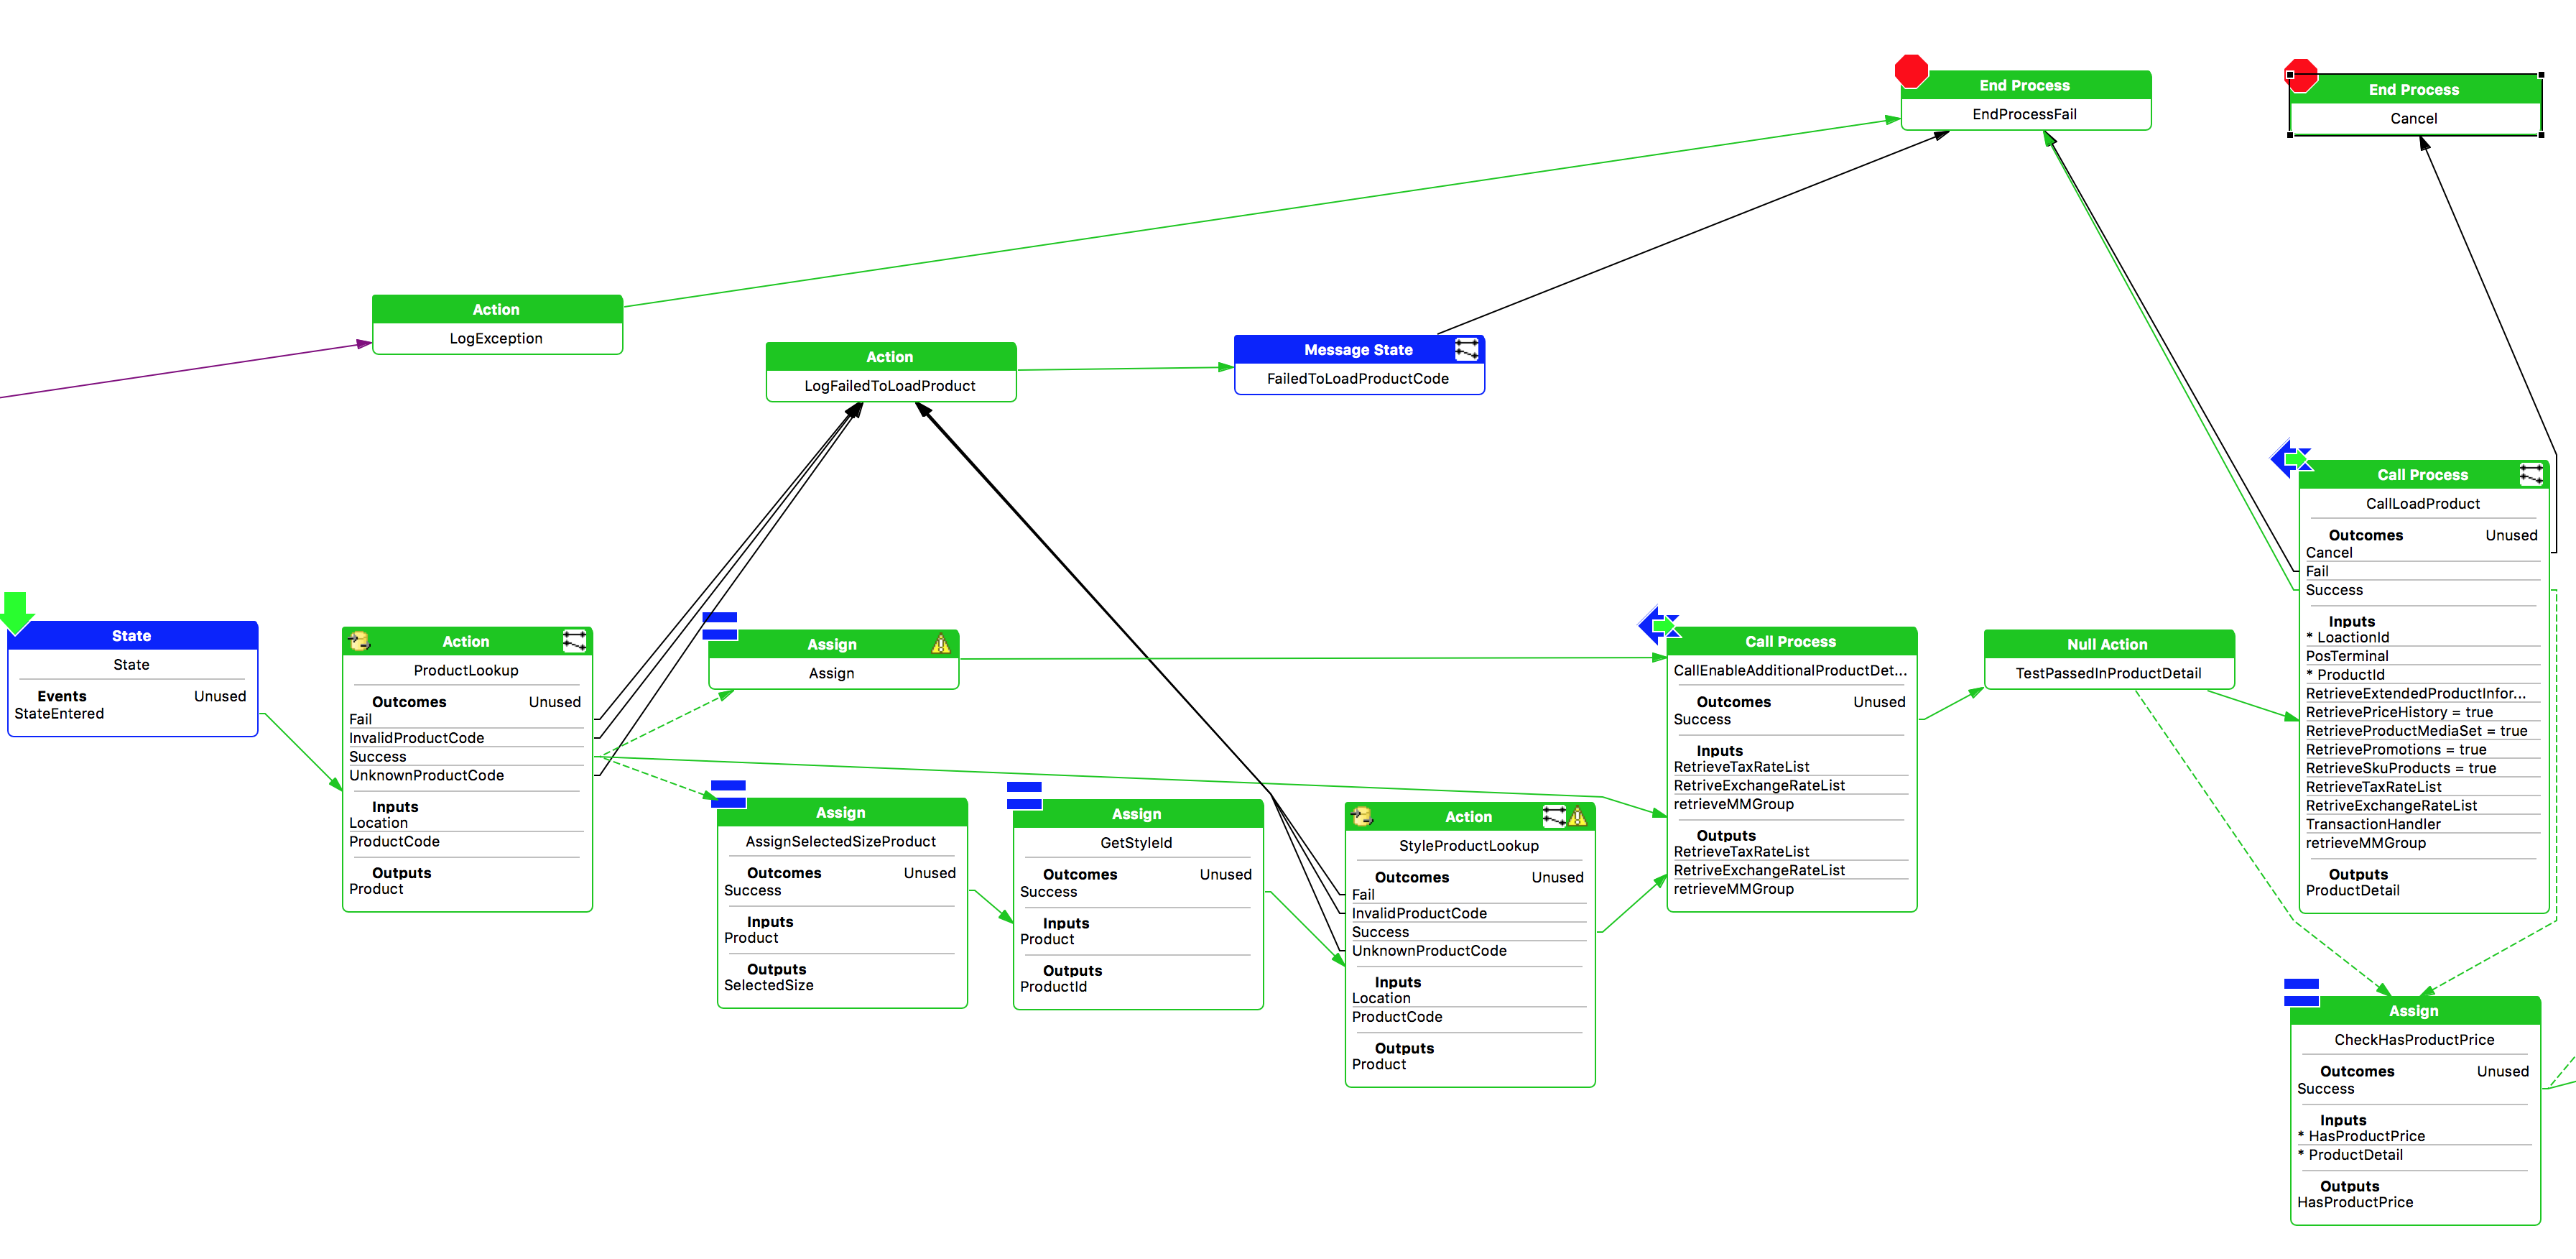
The following process (TotalPressed) is overall layed out from left to right. There is however a bit too much up and down and even a backtracking towards the end
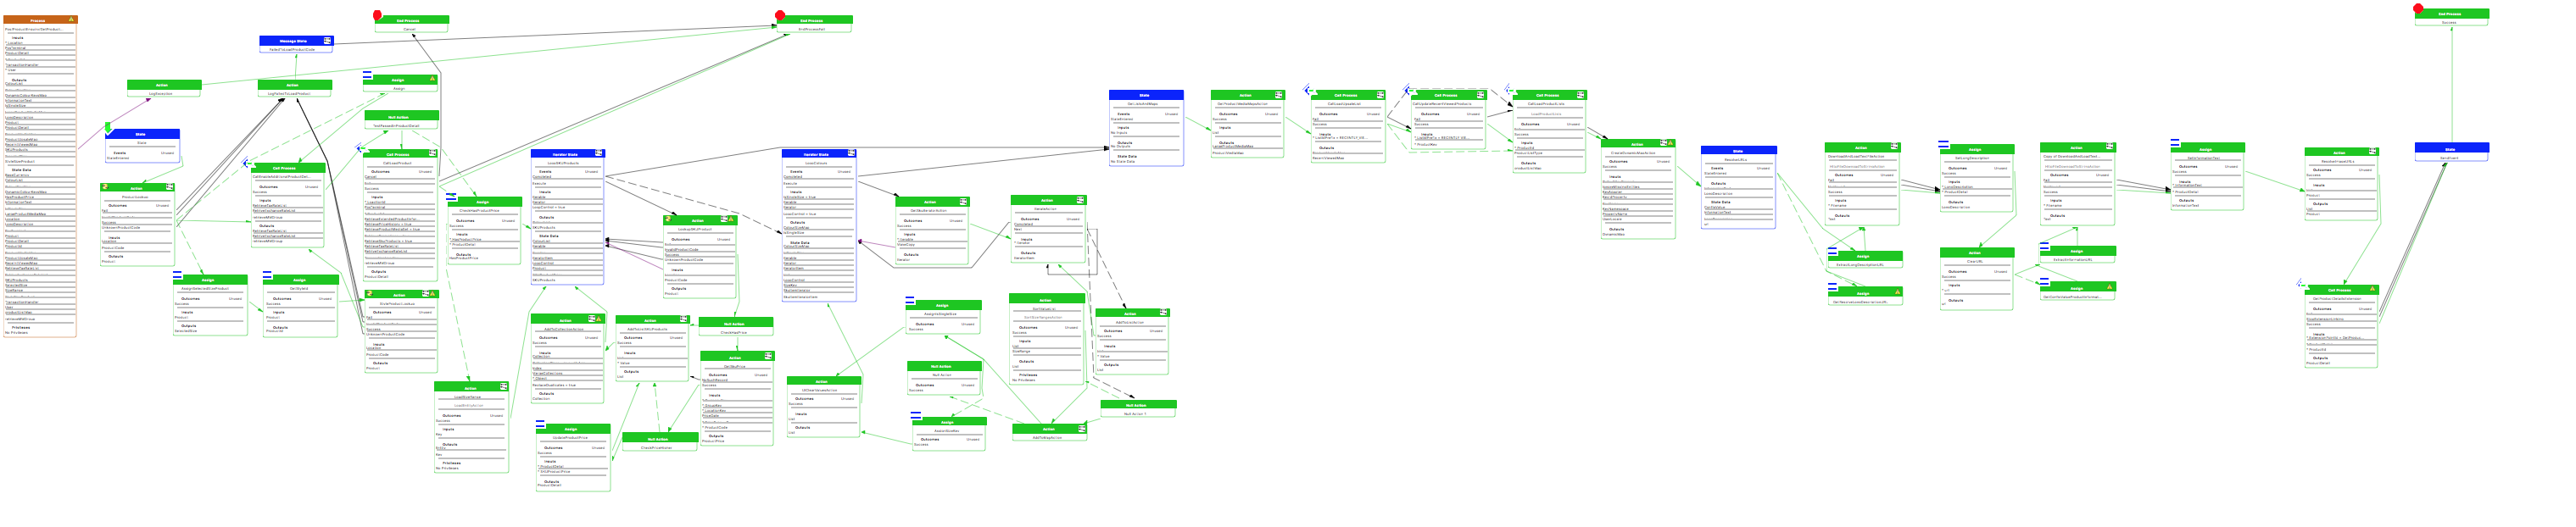
Below is the GetProductDetails process in its current form (on the left) and after refactoring (to arrange it more left to right). The most visible improvement is that it becomes clearer that the CallEnableAdditionalProductDetailSearchHook action is always called, no matter the type of product (sku, style or otherwise). It wasn't clear on the original version. Some might prefer the more "compact" version but keep in mind to keep the process as readable as possible.
Current
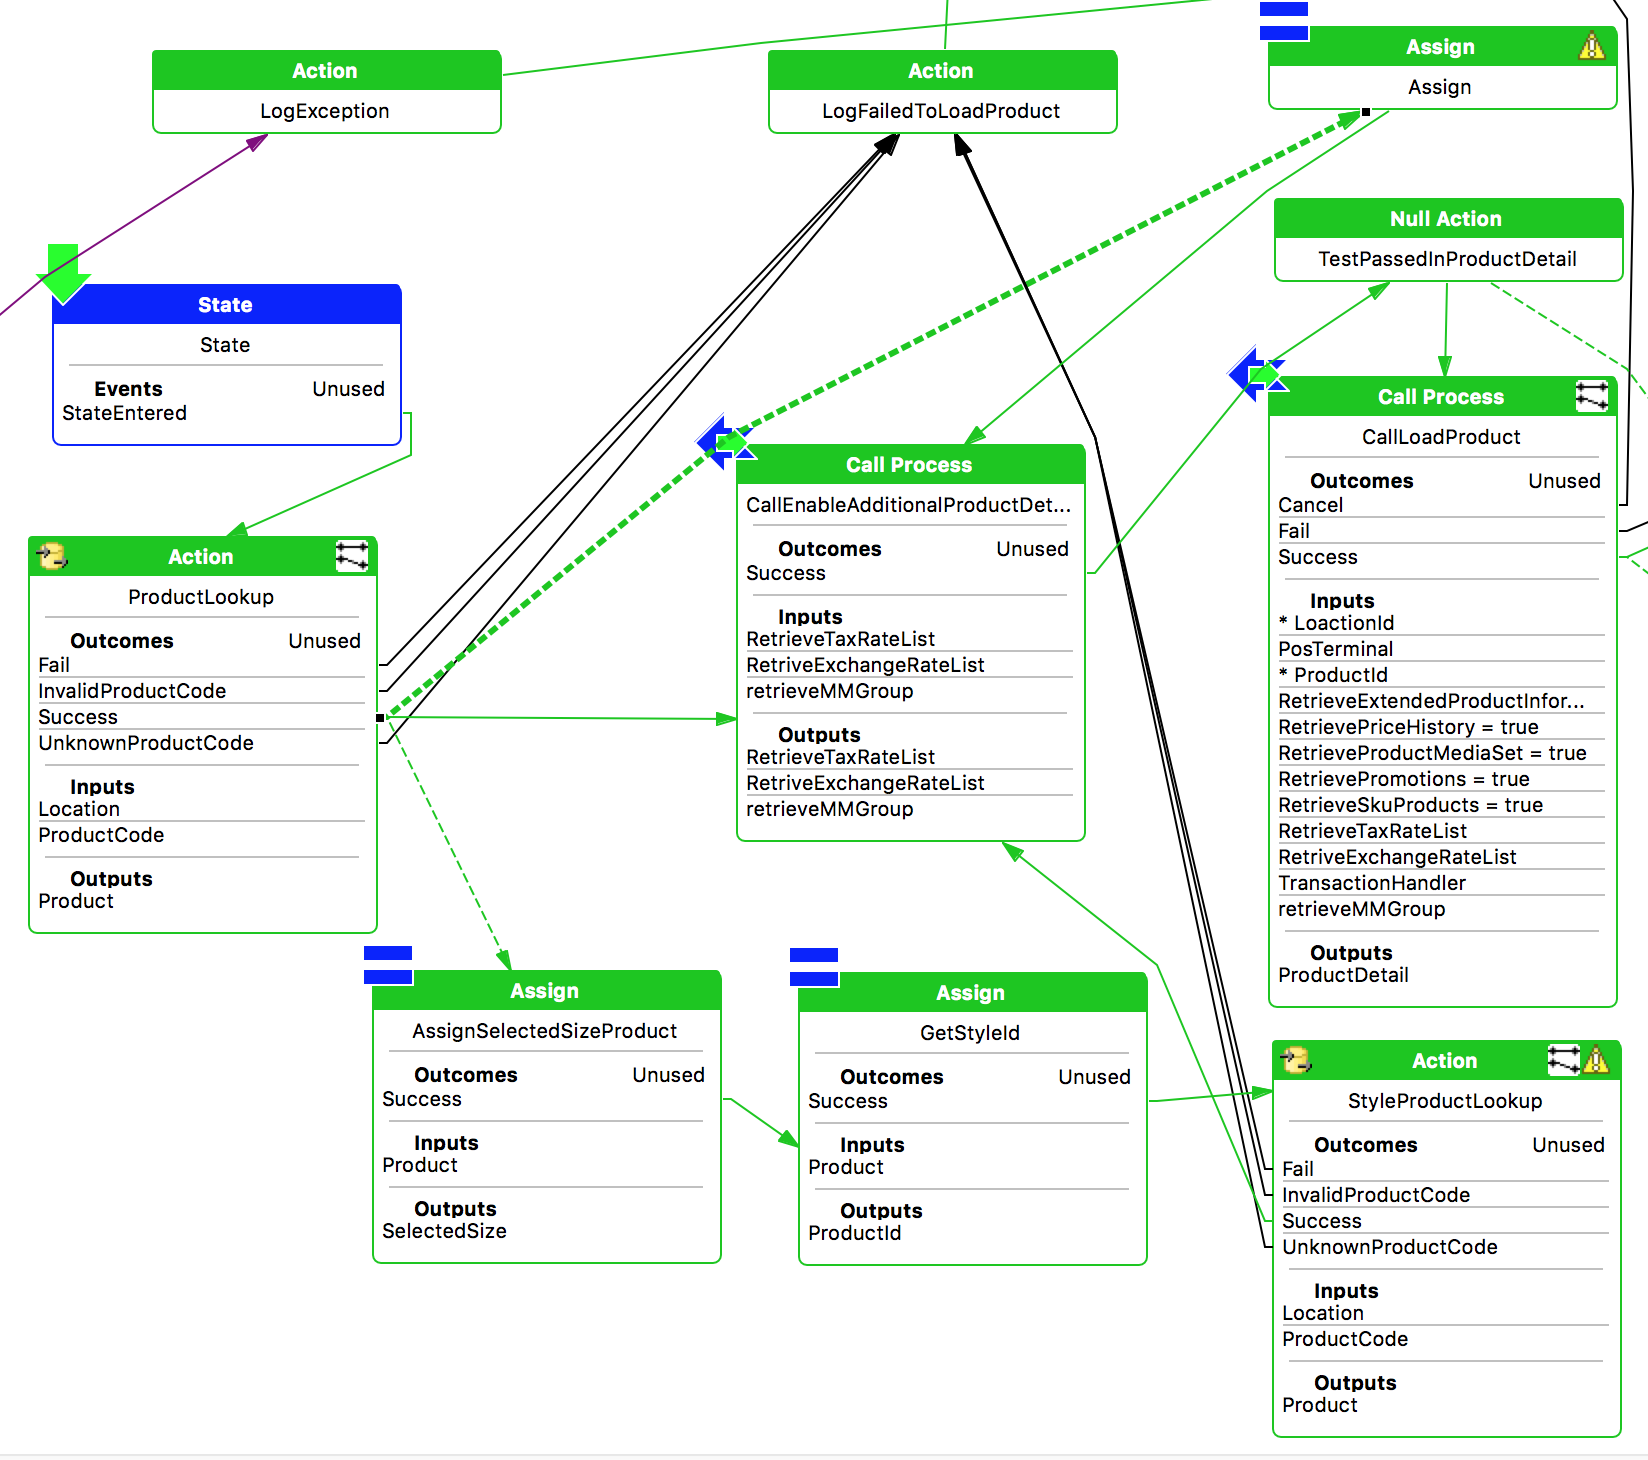
Refactored
Only show the relevant Style (AP-009)
The following component can be shown for each action and state:
-
Detail
- Rarely used. Most of the time, the name of the action should match the name of the process or the java action being called. So the detail would be the same as the title of the action/state
-
Events
- Should almost always show for states. Exception: the only event is StateEntered
-
Outcome
- Should almost always used. Exception: only one outcome. Even when there is only 2 outcomes such as Success and Fail (which are rendered green and back respectively), it is useful to show the outcome
-
Input
- Only show if there is one or more input
-
Output
- Only show if there is one or more output
-
Privileges
- Only show if there is a privilege
-
State Data
- Only show if the state declares state data
Show only the relevant style but don't hide any relevant style either (for instance if an action requires a privilege, it can be confusing if it is not visible at first glance)
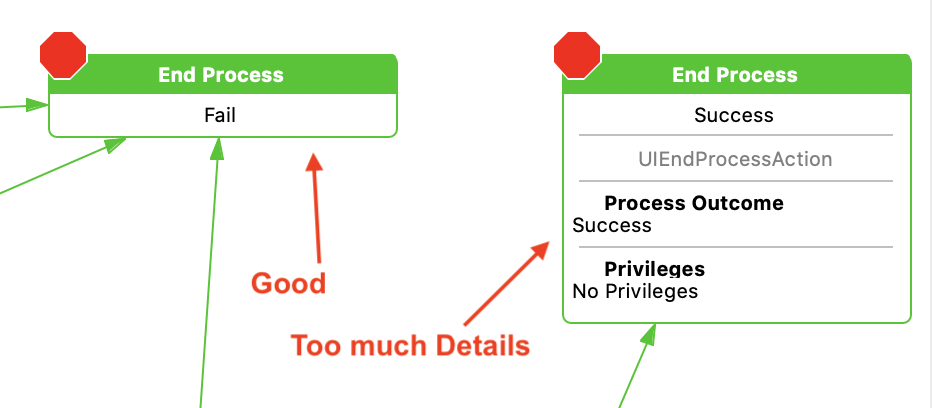
Example 1
For Process outcome, we usually only show the name of the action as the outcome itself usually match
Example 2
The following shows an example of a process that doesn't conform to the recommendations above and how it could be refactored
Before

After
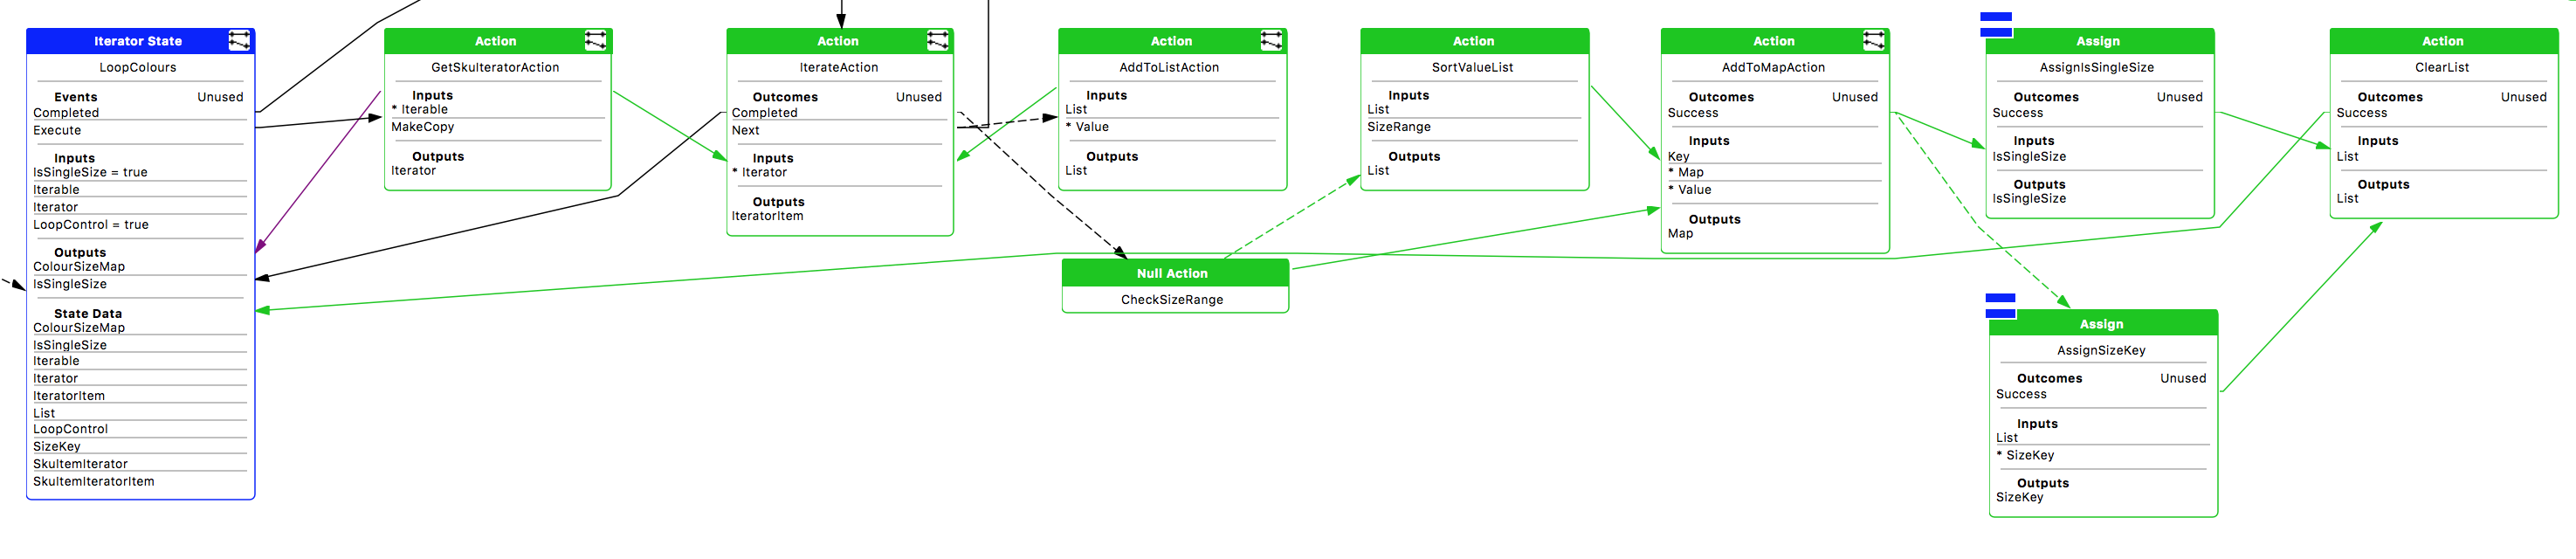
-
Outcome is not necessary if there's only one
-
Action name should describe the actual action
-
Privileges does not need to be shown if empty
-
flow more left to right
-
One null action removed
-
Actions renamed
Allowed and Authorises Privileges (AP-010)
When creating a user privilege, the common pattern is to have two privileges:
-
Allowed - Is the user allowed to execute this action. Usually, the function will not be visible if the user is not allowed to perform it.
-
Authorised - If the user is allowed to perform an action, he/she might not be authorised to do so directly and would need to ask another user to authorise it.
Based on the above, the current user must have at least the Allowed privilege and then, the current user or another user need to authorise it.
Example
<core:message key="enactor.pos.VoidDispatchAllowed.Name">Void Dispatch Allowed</core:message>
<core:message key="enactor.pos.VoidDispatchAllowed.Description">Void Dispatches are allowed</core:message>
<core:message key="enactor.pos.AuthorisesVoidDispatch.Name">Authorises Void Dispatch</core:message>
<core:message key="enactor.pos.AuthorisesVoidDispatch.Description">The user can authorise void dispatches</core:message>
Make sure to also have the privileges defined in the resource message file (both the Name and the Description) so that role application maintenance shows a human readable message instead of the id.
A helper application process already exists to implement this pattern: use the Pos/SignOn/AuthorisePosFunction. The key inputs are
- enactor.pos.AllowedPrivilege - The string representation of the Allowed privilege, e.g.
enactor.pos.VoidDispatchAllowed - enactor.pos.AuthorisesPrivilege - the string representation of the Authorised privilege, e.g.
enactor.pos.AuthorisesVoidDispatch
Register Privileges in Message Resources (AP-011)
When adding a new privilege in an Application Process, the privilege also needs to be registered in the relevant message resources so that the User Role Maintenance application can display the User Friendly message.
Two messages are required:
-
<Privilege>.Name- This is the short name of the privilege, usually the last part of the privilege id but with spaces between the words -
<Privilege>.Description- This is the long description which explains the purpose of the privilege. It needs to be a sentence with a verb.
Example
<core:message key="enactor.pos.VoidDispatchAllowed.Name">Void Dispatch Allowed</core:message>
<core:message key="enactor.pos.VoidDispatchAllowed.Description">Void Dispatches are allowed</core:message>
Handle All Outcomes that can be returned by a Process (AP-012)
When an application process A is calling an application process B, if the application process B can return the following outcomes: Success, Fail, then the application process A must handle both outcomes.
Only Handle Outcomes that can be returned by a Process (AP-013)
When an application process A is calling an application process B, if the application process B can only return the following outcomes: Success, Cancel, then the application process A must not handle a non-existent outcome. It should only handle Success and Cancel (and it must handle Success and Cancel).
Application Processes should be Registered in the Packages.xml (AP-014)
When creating a new application process, please ensure it is registered to the Packages.xml of the project.
Application Process Extension Name should relate to the caller process (AP-015)
The name of an extension should not be about how the extension is being used in the specific scenario being implemented but about the generic purpose of the extension.
For instance, if an extension is required at the start of EndTransaction process for the purpose of validating if a voucher in the basket has been redeemed already, the extension should be named ValidateEndTransaction, not ValidateVoucher. The reason is that the extension might be used for something else in the future and therefore the name should be generic.
"Stop Linking" outcome when calling an extension should not be explicitly handled (AP-016)
When extensions were first implemented, the standard outcome that we supported was Success, Fail, and StopLinking. The purpose of StopLinking is to stop the execution chain of extensions (the use case is some Processing Handler where the execution needs to stop after the first successful extension execution). However, it was not possible to return the actual outcome of the extension alongside it.
The correct pattern is to return the actual outcome of the extension (e.g. Success, Fail, NotFound...) with a flag to indicate to break the chain (i.e. Stop Linking).
Use SkipDefault outcome in extension to skip the default Enactor behaviour (AP-017)
If the default Enactor behaviour needs to be overridden/skipped, the convention is to:
-
add a process extension and call it just before where the default Enactor behaviour is implemented
-
Make the extension return the "SkipDefault" outcome (the extension chain will most likely need to be stopped as well, using StopLinking, see above)
-
When calling the process extension, the "SkipDefault" outcome should be linked to after the Enactor default behaviour.
See for instance: Pos/Void/PostTransactionVoidProcessItems
Register Generic Message Resources (AP-018)
When there are Message resource used by so many processes, instead of registering them against each individual process, register the Message Resource in Package.xml Where the Message Resource file exist.
Extension Point should be unique (AP-019)
When adding an extension point to multiple processes, it should be a unique extension in each of the process (alternatively, passing an "Operation" parameter)
Replacing a java action with a call process and an Extension (AP-020)
When a java class needs to be overridden for a customer, the best practice is to replace the action call by a process call. A new Application process therefore needs to be implemented. In that new application process, an extension point should be added so that the default behaviour can be replaced. The extension point success outcome should go to the java class action and the outcome should be mirrored between the extension point and the java class.
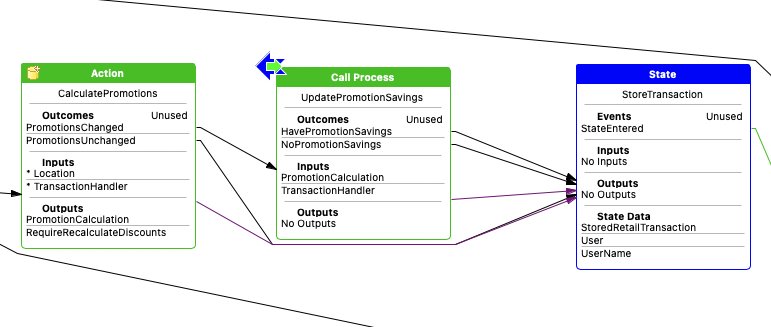
For instance, if this was the process before the refactoring:
Then it should be changed to:
For reference, the following was done:
-
Click on the action and change the
Typeproperty toCall Process -
Enter a new process id for the
Execute Process IDproperty.
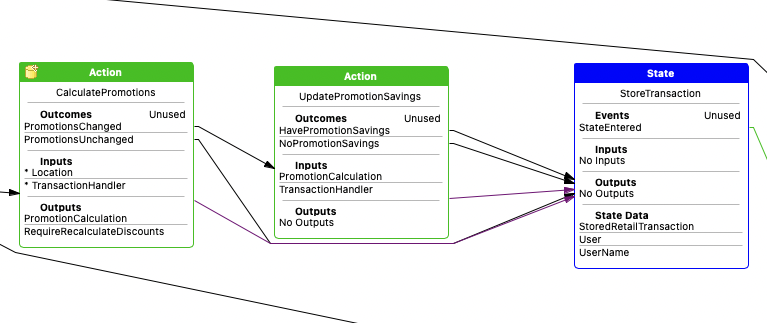
With the implementation of the new UpdatePromotionSavings process as follow:
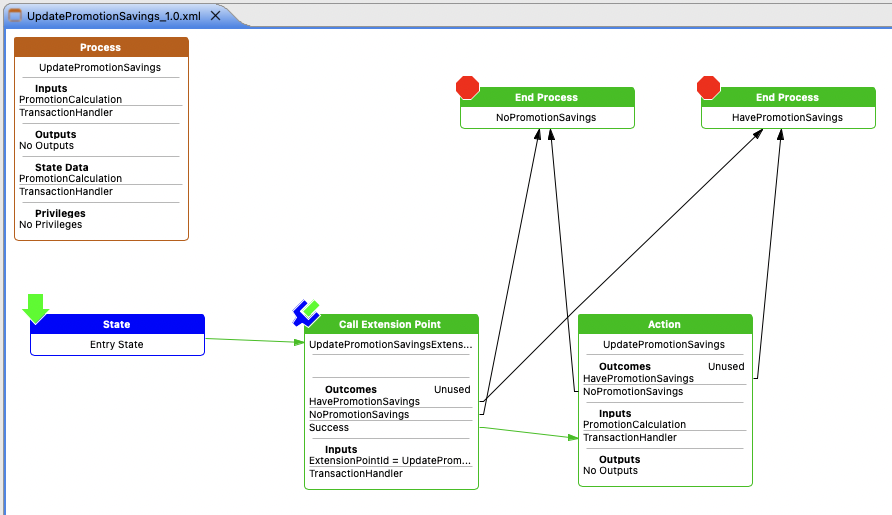
-
The outcomes of the process match the outcome of the action
-
The extension point is called right at the start of the process and only goes to the default behaviour if the outcome is Success (which is the case when there is no implementation of the extension, or if the extension decides that it wants the default behaviour)
Enactor Out-Of-the-Box Behaviour should not be done directly as an extension (AP-021)
If an out-of-the-box behaviour needs to be refactored as an extension, so that a customer can override the default behaviour, then then best practice is to extract the out-of-the-box behaviour into a sub process. In that sub process, an extension point can then be added at the start of the process. The convention is to use a "SkipDefault" outcome when the extension implementation returns to indicate that the out-of-the-box behaviour should be skipped. Additional outcomes can also be specified as a return outcome of the extension and those outcomes should be linked to the same outcome of the process.
See above AP-021 for the pattern applied on a single java class action. The same would apply if it is a group of actions, or even several states with call processes.
Calling a Background process using ExecuteAndWait (AP-022)
When calling an endpoint, it is important to do so in a background thread so that the UI is not locked while the service call is in progress. This pattern can be achieved by using the ExecuteAndWait process that wraps the service call (or any application process that would execute slow code). Do not reimplement the same logic in your process.
Reference: CommonUI/ExecuteAndWait in Common UI Base Implementation project
Example: Pos/Devices/UndockDevice in POS project
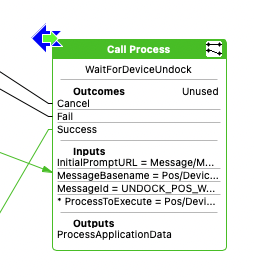
This process is available in the Palette, under "Common Processes"
Refactoring a Process Hook to a Process Extension (AP-023)
When a process already contains a Process Hook (this is an old method to plug in customisation using overriding processes with Process Set), we shouldn't add an extension point to do the same thing. Instead, the Call Process Hook should be converted to a Call Process Extension.
For instance, the following ValidatePostVoidExternal process hook (taken from Pos/Void/PostTransactionVoidMain application process):
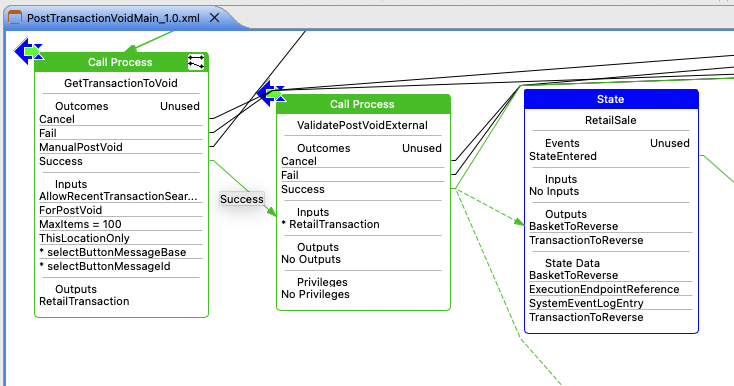
should be converted to an extension point
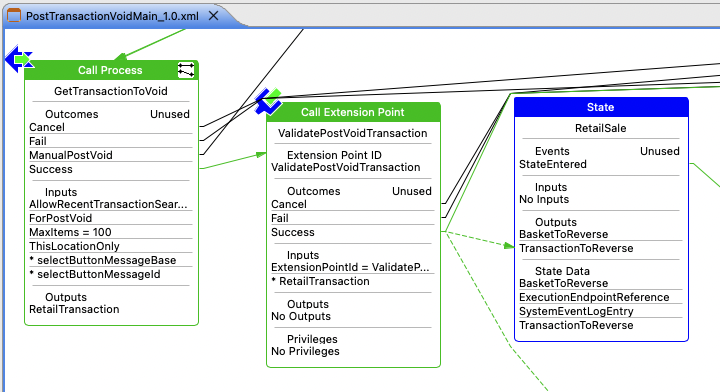
The Outcomes, Inputs, and Outputs are identical, but it's an extension call instead of a process call.
For backward compatibility, the original Process hook needs to be registered as an extension for the new extension point. For the example above, the following would need to be added to the Packages.xml
<core:packageExtension>
    <core:extensionId>Validate Post Void Transaction</core:extensionId>
    <core:extensionPoint>ValidatePostVoidTransaction</core:extensionPoint>
    <core:applyBeforePackages/>
    <core:extensionOverrides/>
    <core:extensionType></core:extensionType>
    <core:extensionUrl>Pos/Void/External/ValidatePostVoidExternal</core:extensionUrl>
</core:packageExtension>
Use UIGetViewDataAction explicitly to get view data instead of Process input (AP-024)
The input data of an application process can either be explicitly specified from the caller or mapped automatically from the view. This has been the standard practices for common data such as User, Location, Pos Terminal, Transaction Handler. However, it should not be used for other data that one might expect to be retrieved from the view. Instead you should be using UIGetViewDataAction.
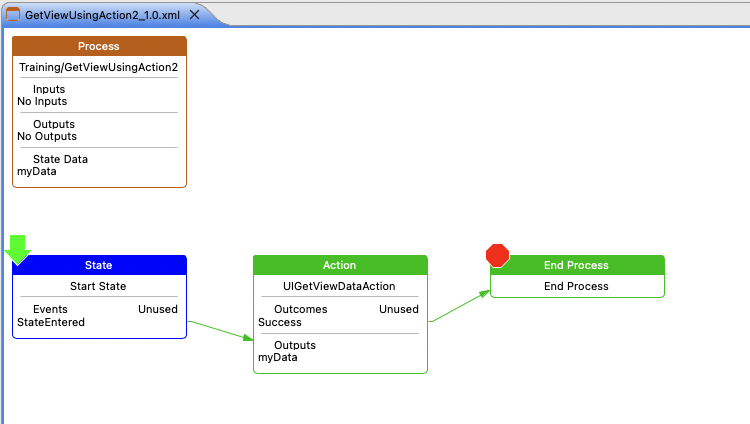
The following show the variable myData being automatically retrieved from the view. This pattern should not be used.

Instead, the example below shows how UIGetViewDataAction action is used to retrieve the variable from the view. This pattern is the recommended approach.