How to Configure Employee Sales
Introduction
The purpose of this guide is to show how to configure various aspects to effectively manage Employee Sales. While Enactor supports multiple ways of providing products at a discount to Employees, this guide will focus on the Employee Sale which provides the most robust flexibility and control.
Overview
The following areas will be reviewed as part of configuring the Employee Sale:
-
Employees
-
Reason Codes
-
Employee Cards
-
Employee Grades
-
Employee Accounts
-
Promotions
Prerequisites
Resources
Before starting, you should have the following resources in place:
-
Enactor Estate Manager
-
Enactor POS (configured within the UK Region, connected to the Estate Manager)
-
Standard Configuration, including:
-
Base Configuration
-
UK Retail (I have used UK in this example, but it could be other regional config packs. If you import the UK Retail config, the tax configuration described will already exist. Please note that in this guide we will go through the process of creating the configuration from scratch, as an example.)
-
-
Examples of Data to be used as models, particularly Employee
Prior Training/Experience
You should be familiar with the following:
-
Estate Manager configuration
-
Enactor configuration concepts, including Locations, POS Terminals, Products, Discounts, Promotions etc.
-
Data broadcasting
-
Standard POS Sales processes
Fundamentals
Selling to Employees
Retailers understand that having employees who use, understand and are passionate about the products and services that they offer can be an asset. By providing additional discounts to their employees, retailers not only get product into the hands of the people responsible for selling it but also create an important recruiting and retention tool. Tighter margins have caused many retailers to reduce or eliminate Employee Discounts.
The Enactor solution supports numerous options on ways to manage an Employee Sale. Discounts can be calculated and applied based on the Employee, Employee Grade, Employee Group or MM Group. Additionally, Employees can be limited on the value of product purchased or amount of discount received over a period of time. The Enactor Promotions Engine can even be leveraged to create meaningful Employee-only offers that can help increase basket size and recover lost margin.
Manual Employee Discounts
While not covered in detail within this guide, Enactor does support the use of manually applied Employee Discounts. These are created and managed using Item and Transaction Discount Reason Codes and therefore do not offer the enhanced flexibility and control found when using the Employee Sale Transaction Type.
Employee Sale
An Employee Sale is a unique Transaction Type within the Enactor solution. This provides the ability to reconsider any number of business rules and change their behaviour when compared to a traditional retail transaction. In addition to specifying the type of discount, an Employee Sale Reason also has the ability to enforce employee validation, track spending/received discount, enforce allowable tenders as well as other discount related parameters.
Discount Types
There are many different Discount Types that can be supported by an Employee Sale. Each Discount Type will drive various configuration requirements:
Fixed: All employees receive a single, fixed Discount Percentage as specified in the Employee Sale Reason.
Employee: When selecting the Employee Discount Type, the discount percentage is specified within the Employee Record which permits the use of different discount percentages for different employees. This Discount Type supports a 2-level discount scheme which utilises an accumulated discount balance threshold to determine the appropriate level.
Employee Spend: Similar to the Employee Discount Type above with the exception that accumulated spend balance is used to affect the discount level. Spend is based on the pre-discount value of merchandise.
Employee Grade: The Employee Grade Discount Type permits assigning a Discount Percentage based on the Employees Grade within the organisation. As with the Employee Discount Type mentioned previously, a 2-level discount scheme can be defined which utilises an accumulated discount balance to select the appropriate level.
Employee Grade Spend: This Discount Type is selected when it is preferred to use an accumulated spend balance to select the appropriate Employee Grade discount level. Spend is based on the pre-discount value of merchandise.
Employee Grade By MMG: This is a variation of the Employee Grade Discount Type. When selecting Employee Grade by MMG, it is possible to specify 2 discount levels for multiple MM Groups. A pre-set accumulated discount threshold is used to determine discount level as with other Discount Types. The Employee Grade by MMG Discount Type also permits specifying discounts by Product ID.
Employee Grade Spend By MMG: Conceptually similar to the above Discount Type with the exception that accumulated spend is used to determine discount level. Spend is based on the pre-discount value of merchandise.
Promotions: While not an actual Discount Type, it is worth noting that the Enactor Promotions Engine supports the utilisation of Promotions within an Employee Sale. Promotions for general customers can be allowed within an Employee Sale and Promotions can be configured to only be available in Employee Sales. Promotions can also be specific to Employee Grades as well as Employee Groups. Promotions can be used in conjunction with all the Discount Types mentioned above. The discount amount received from a Promotion can contribute to the accumulated discount balance.
Configuration
Each Discount Type mentioned previously drives a different approach for configuration. The following sections on the configuration of Employees, Employee Sale Reason Type and Employee Cards cover the core settings that are independent of Discount Type. Additional instructions specific to each Discount Type are found later in the document.
Employee Configuration
Enactor maintains Employee records independently from User records for the purpose of managing Employee Sales. It is important to note that these entities are truly independent so that a User record entry does not imply an Employee record. Typically, Employee data will be interfaced to Enactor from a 3rd party system, but we will cover manual entry in this guide to reinforce the concepts.
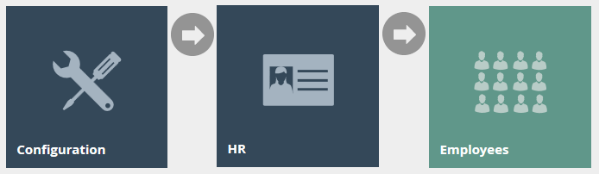
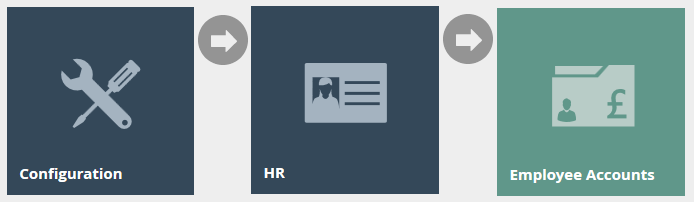
Employees are defined using the Employees option, obtained via the selection sequence shown at right starting from the Main Menu:
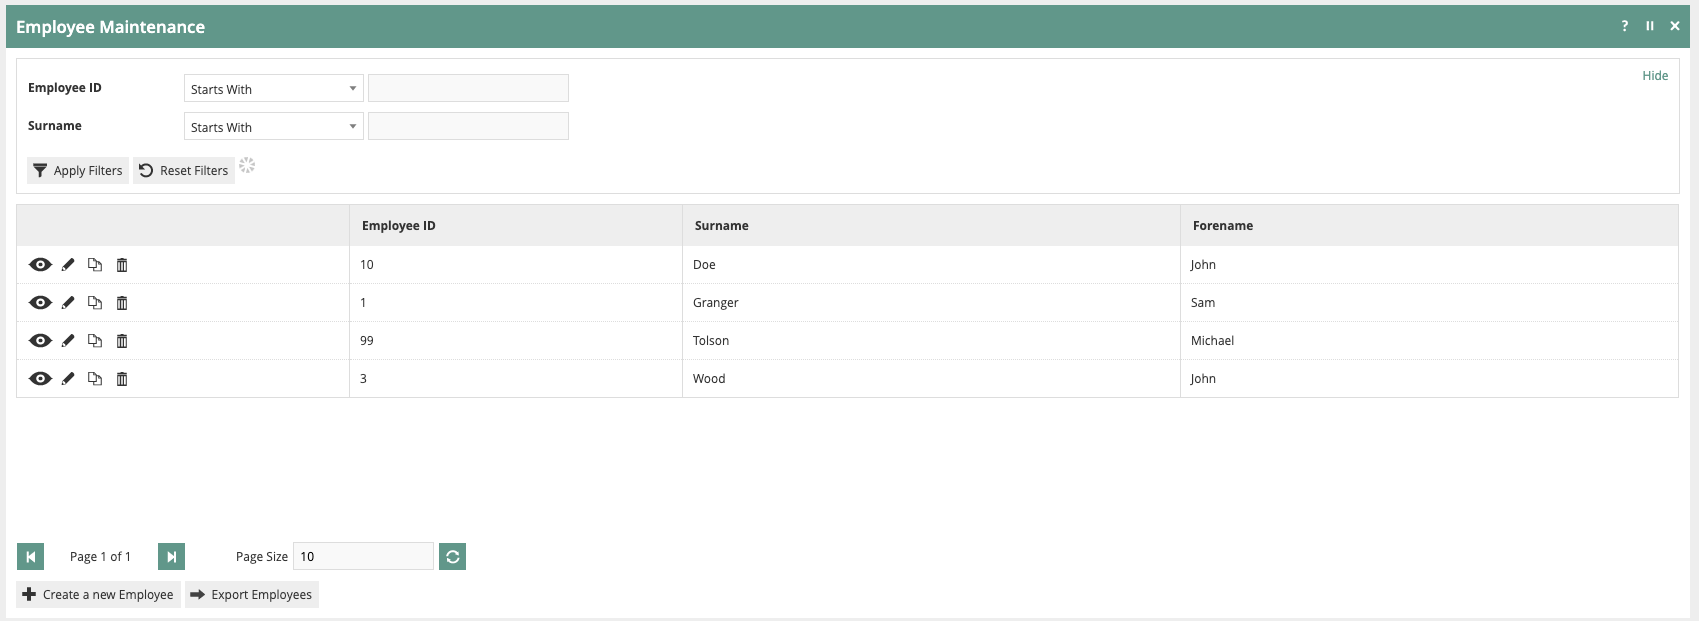
To create a new Employee record, click ‘Create a new Employee’.

The Employee ID can be entered, or the system can be generated.
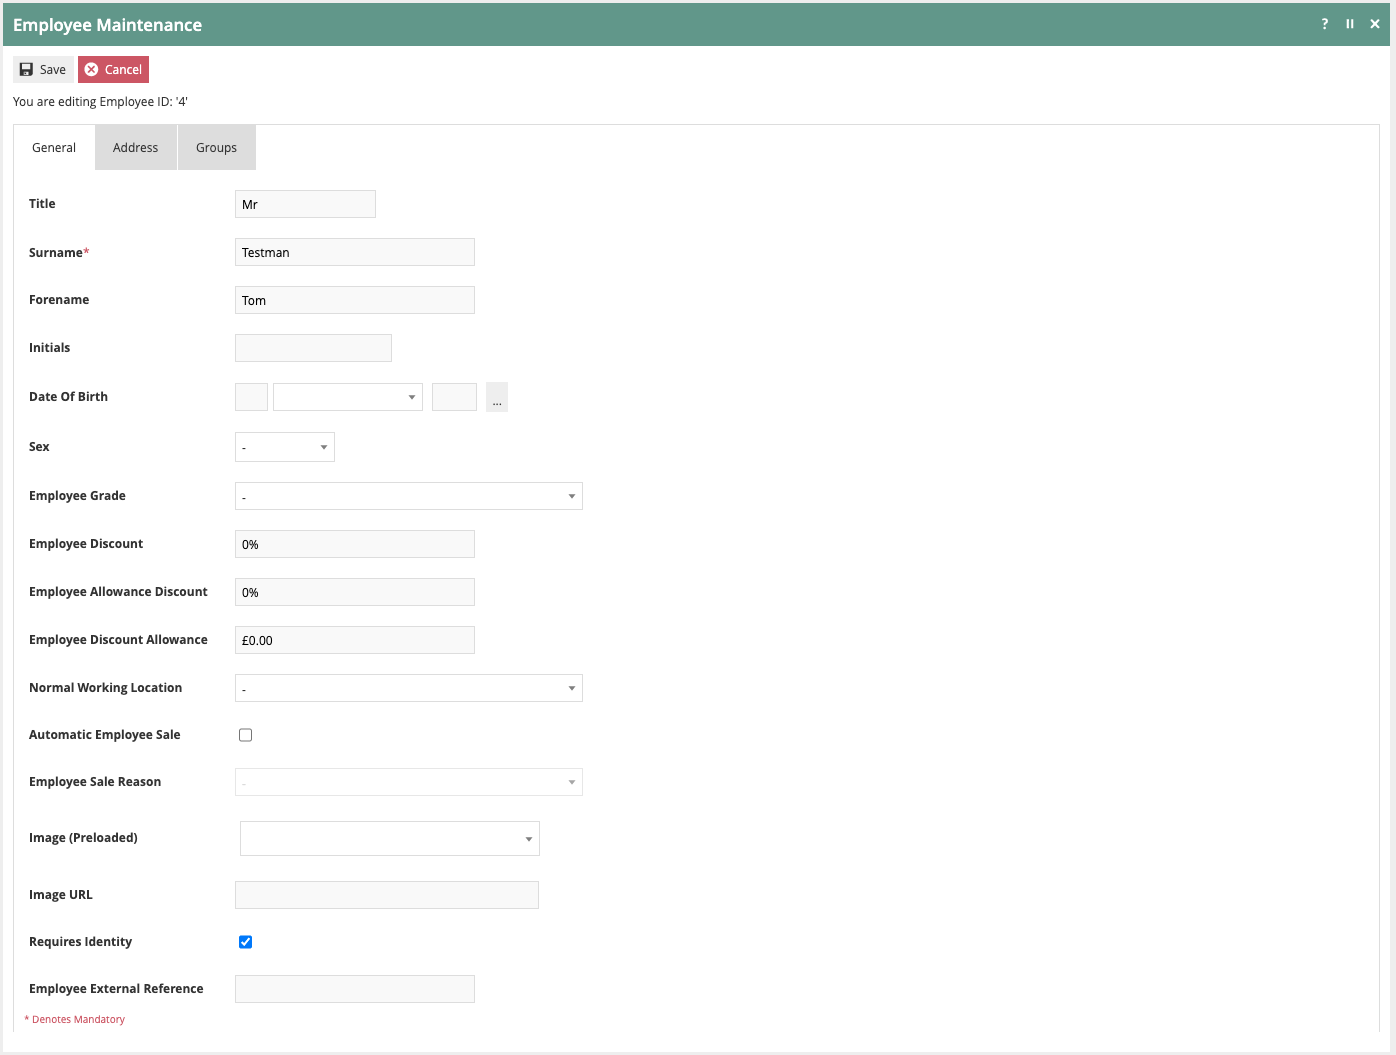
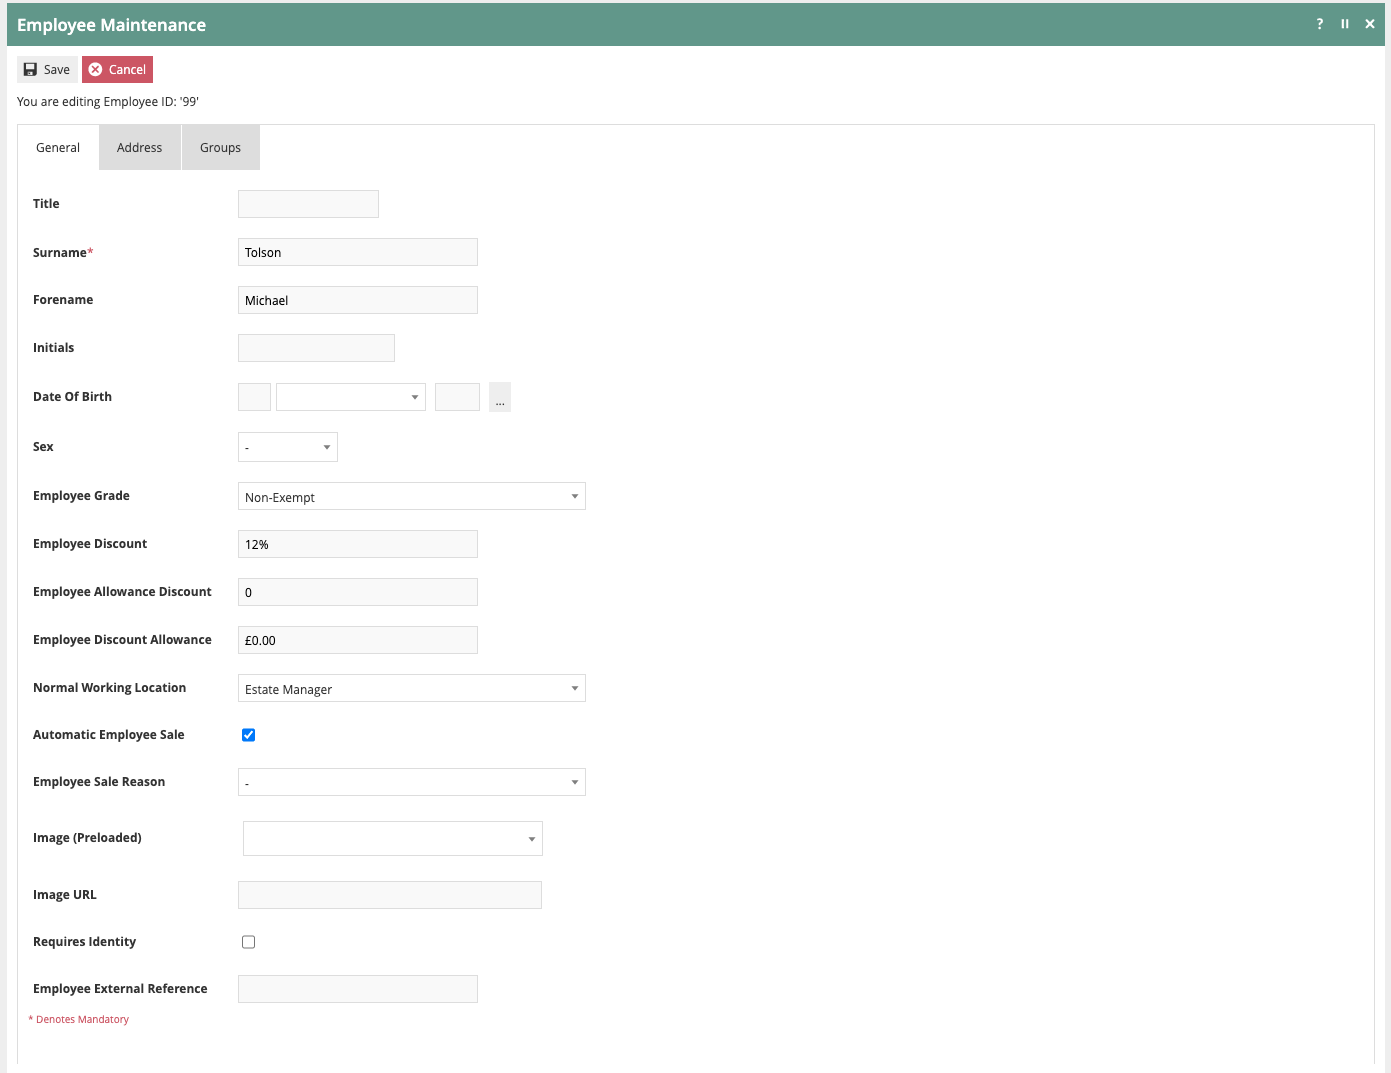
Very limited information is mandatory in the Employee record. Some of the optional fields directly influence the Employee Sale functionality regardless of the Discount Type selected. The Normal Working Location ties an Employee to a Location which can be helpful when searching for an Employee. The Automatic Employee Sale option initiates an Employee Sale when the Employee is added to the transaction via Loyalty if enabled. When using the Automatic Employee Sale option, select the Employee Sale Reason from the dropdown.
The following options are handled differently depending on the Employee Discount Type being used: Employee Grade, Employee Discount, Employee Allowance Discount and Employee Discount Allowance. Configuration of these options will be reviewed by Discount Type later in this document.
Employee Sale Reason Type
The configuration of Reasons is covered in a separate guide. Please refer to that guide for information on navigating to and use of the Reason Maintenance application.
The Employee Sale Reason Type governs the authorization and business rules when executing an Employee Sale transaction.

The General tab is consistent with all other Reason Types. Please review the configuration guide on Reasons for more information regarding these options.
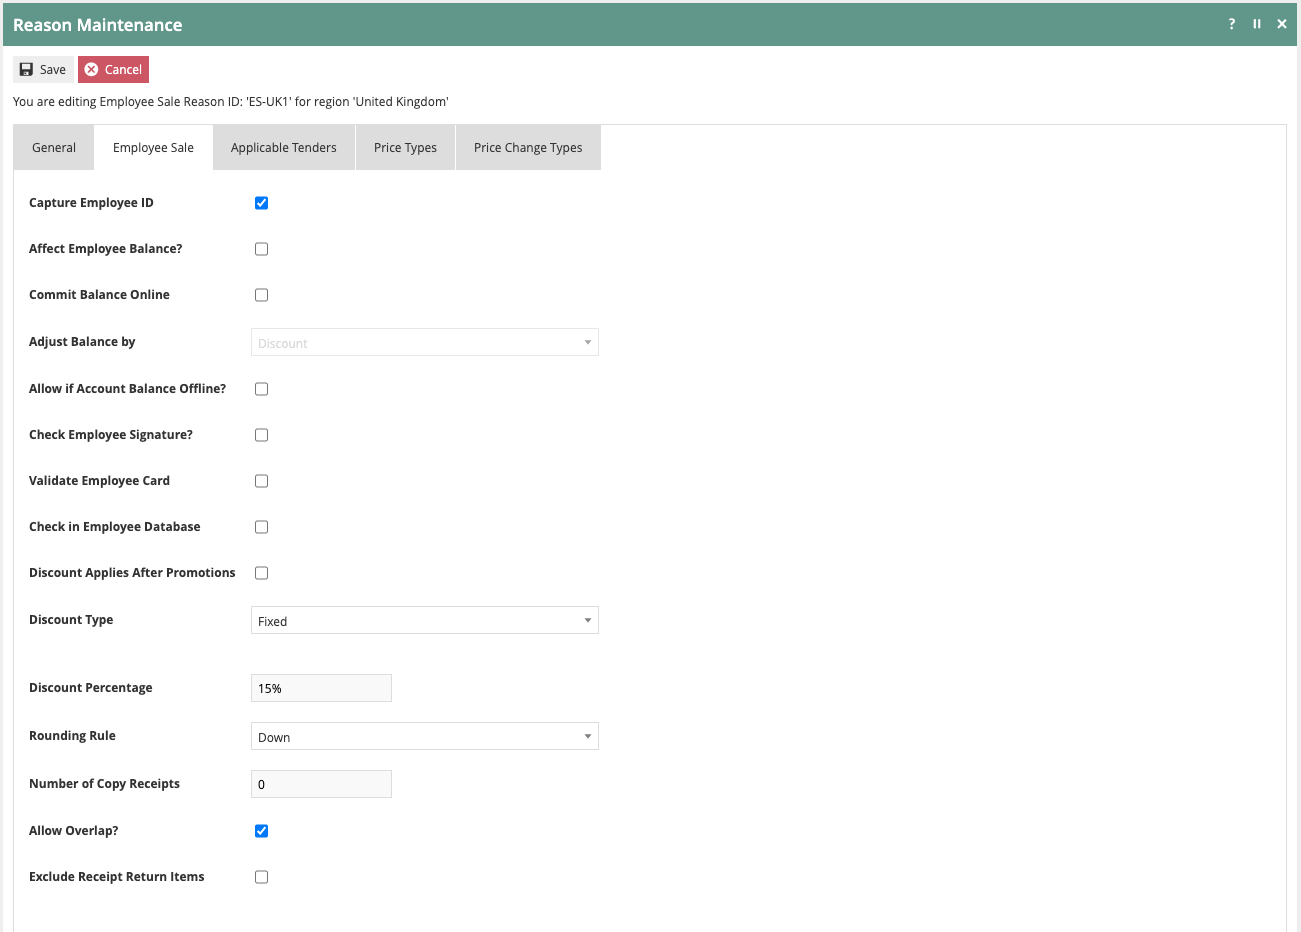
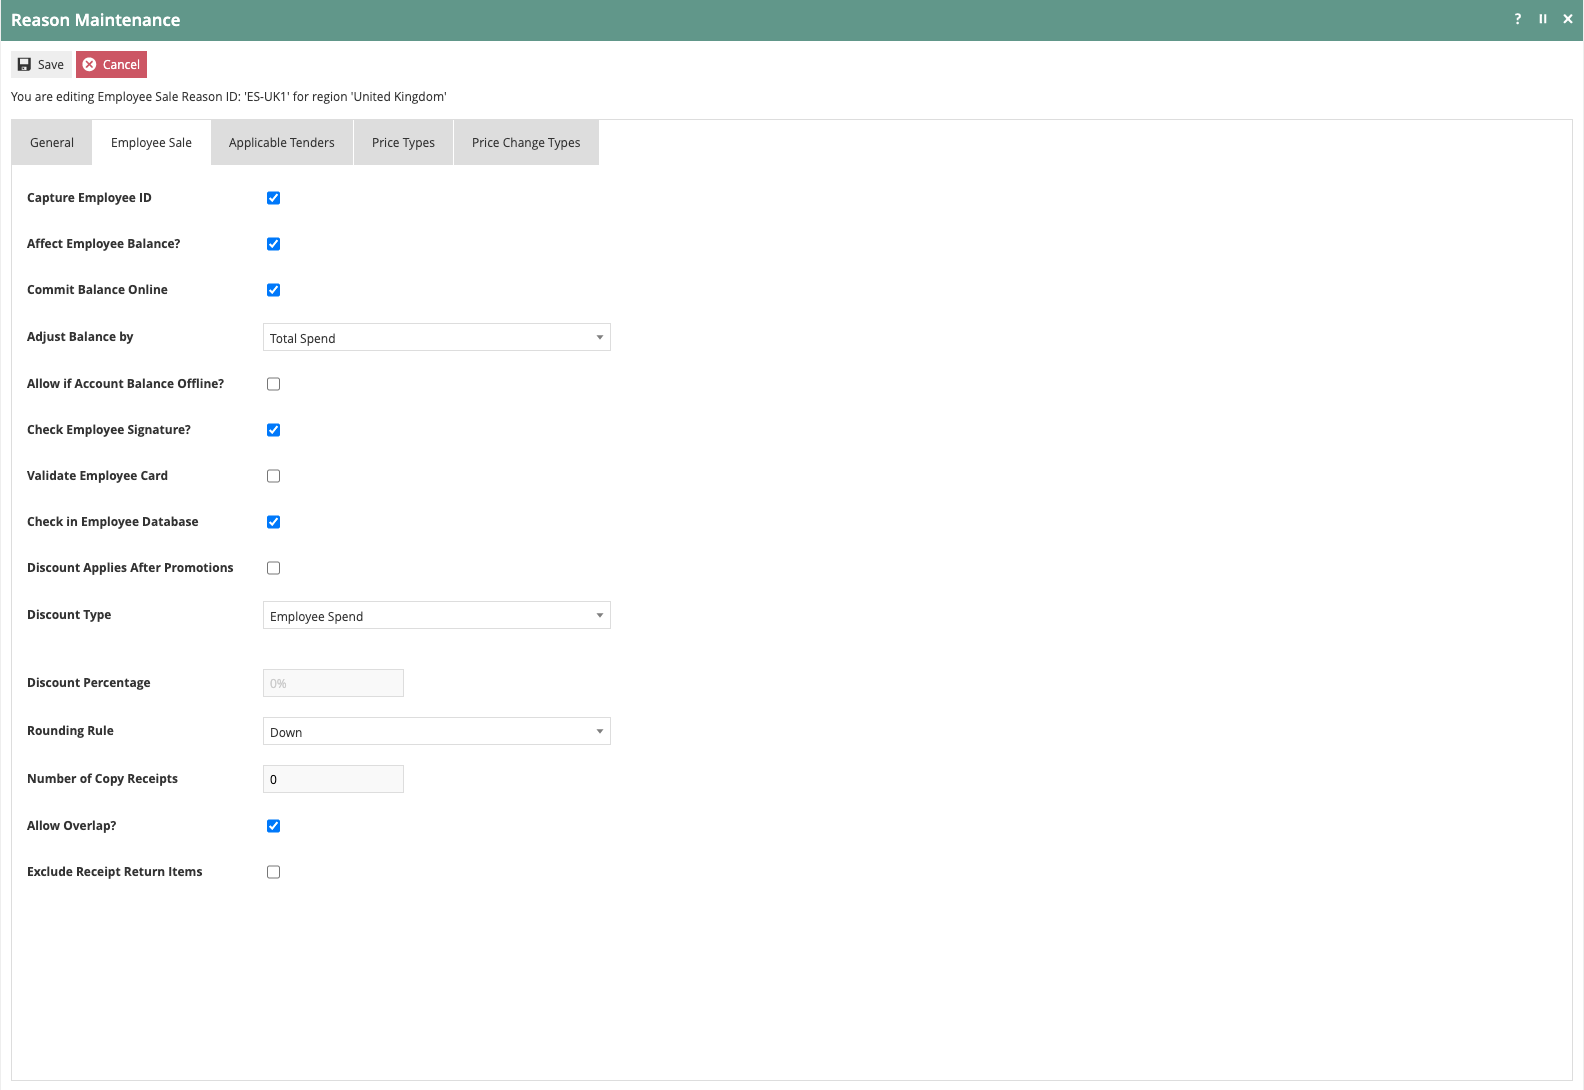
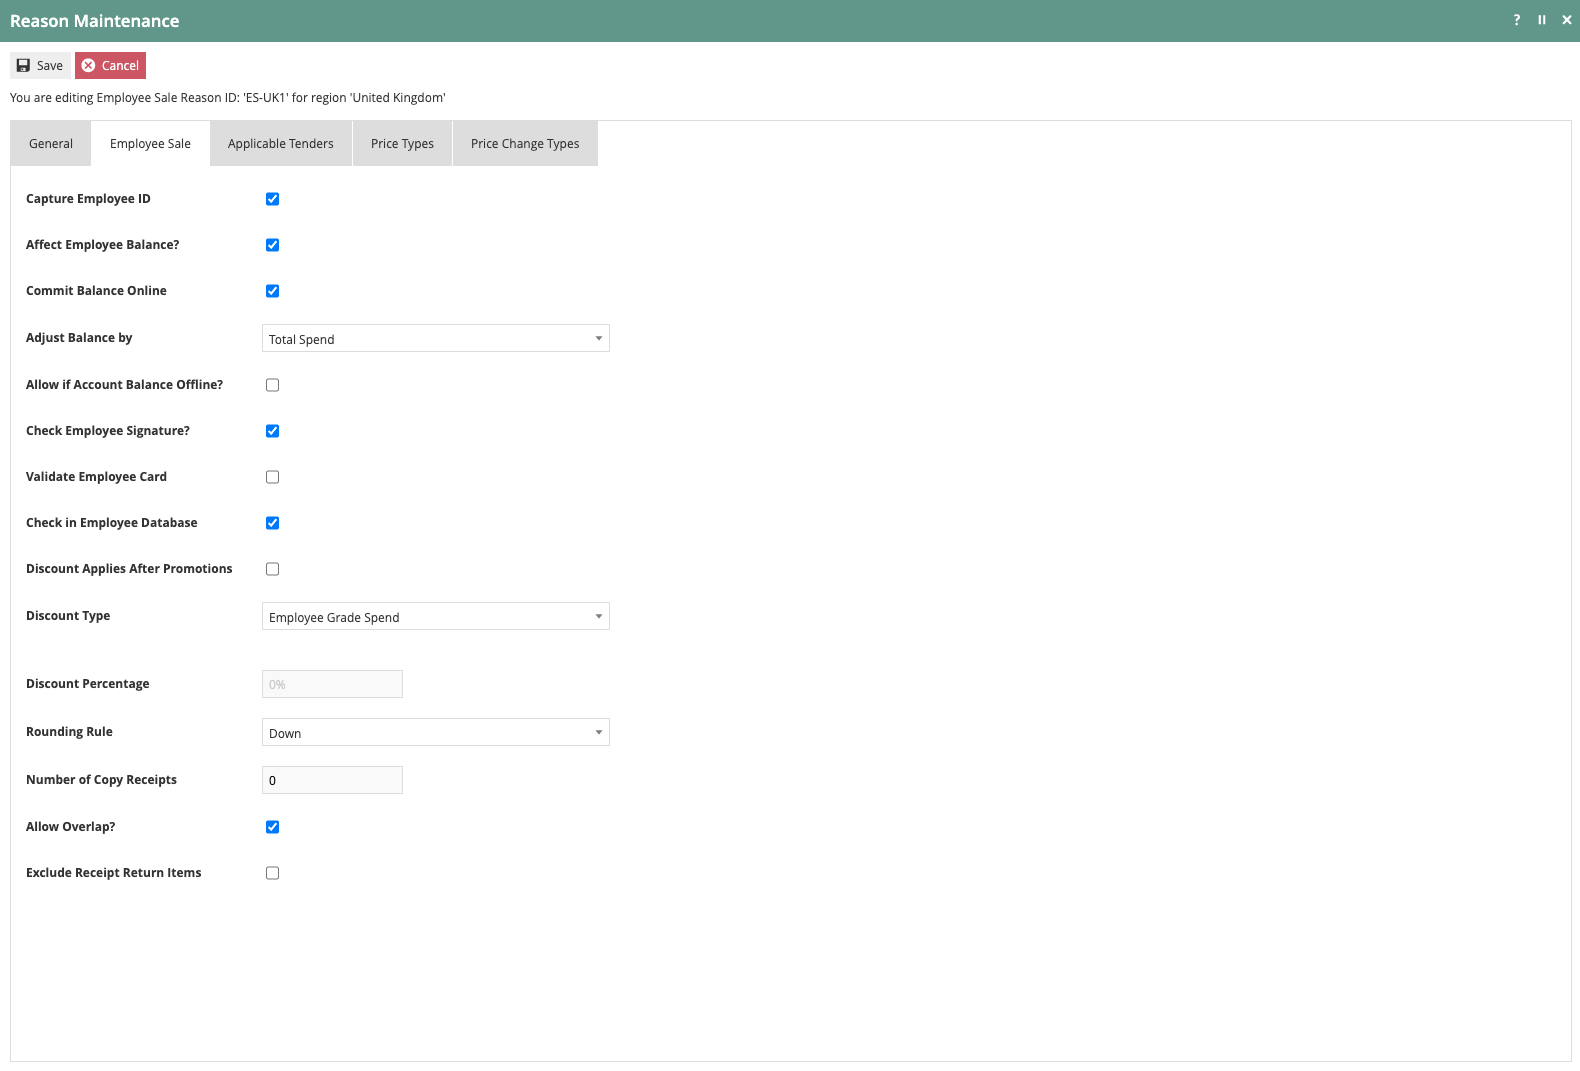
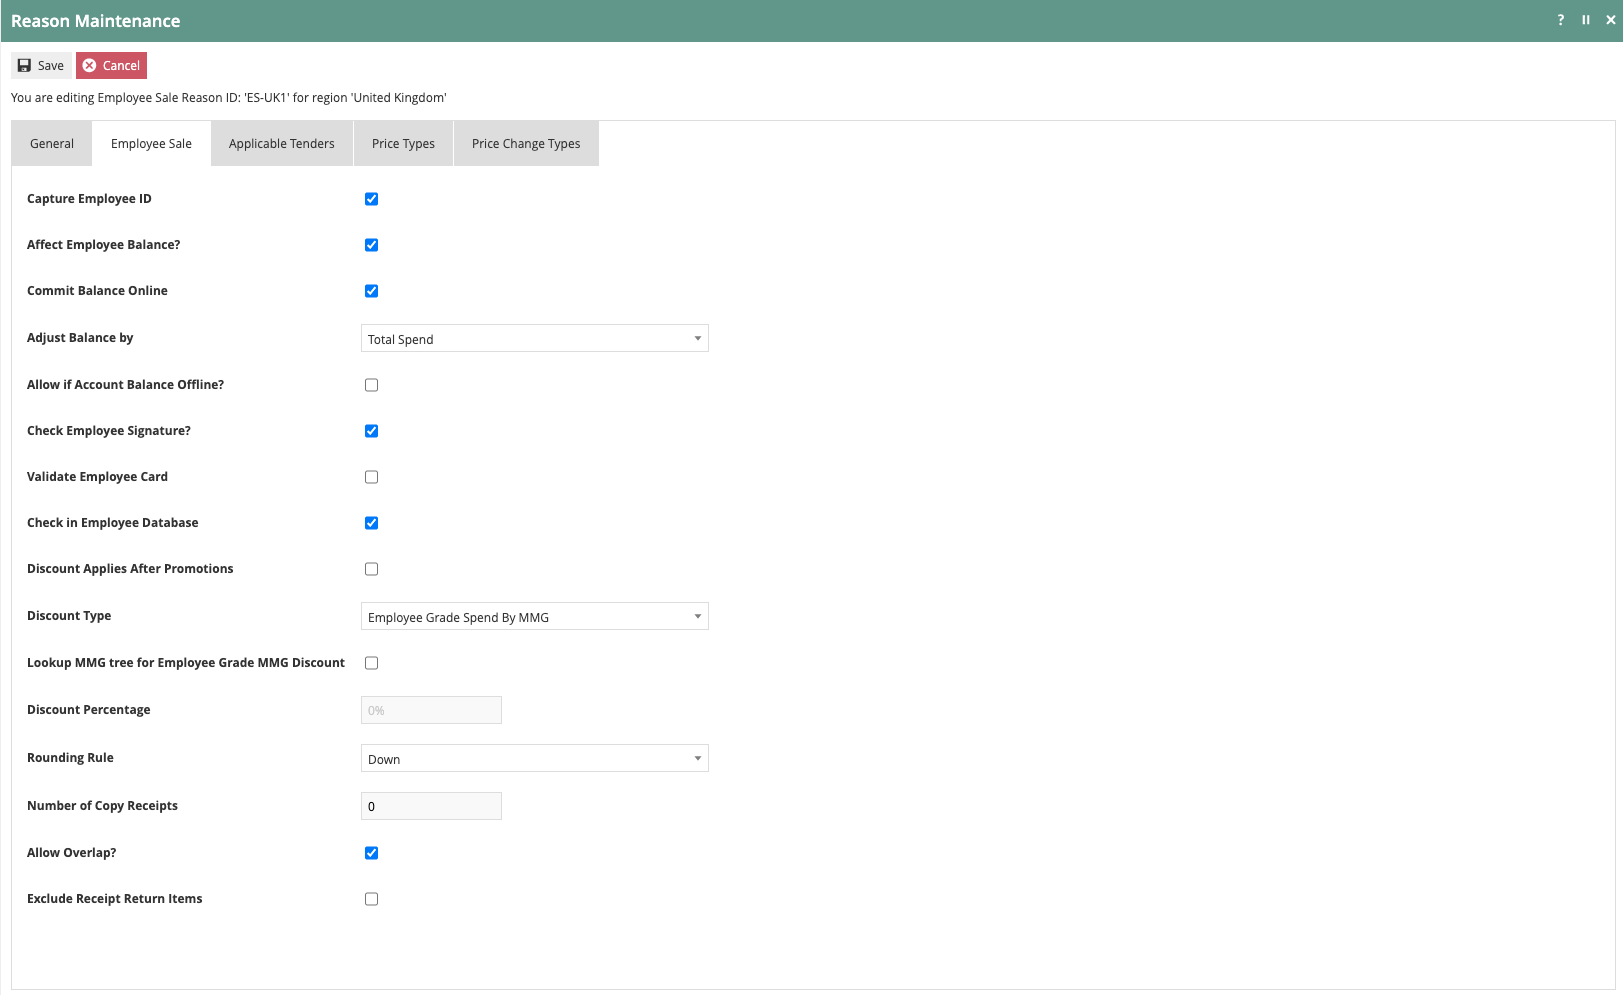
The Employee Sale tab includes settings related to employee validation, discount eligibility and discount methodology.
The Capture Employee ID option requires that an Employee ID be entered at the start of an Employee Sale. If the Employee ID is to be validated, the Check in Employee Database option must also be selected. If an Employee Card with a number different from the Employee ID is to be used for validation the Validate Employee Card option should be selected. See the following section on configuring Employee Cards if appropriate.
Additional Settings on the Employee Sale tab can impact how discounts are applied regardless of the Discount Type being used. The Discount Applies After Promotions will apply the selected discount after any eligible Promotions are applied. The Allow Overlap? option permits the Employee Sale Discount to overlap with other Reason Type driven Discounts. The Exclude Receipt Return Items will not apply the Employee Sale Discount to items that are part of a Receipt Return assuming they were originally purchased without an Employee Sale Discount.
Many of the remaining settings will be used differently depending on the Discount Type selected. These items will be reviewed in detail by Discount Type later in this document.
Employee Cards
As discussed previously, it is possible to issue Employee Cards that must be scanned to initiate an Employee Sale. For security reasons, the ID used for the Employee Card is not a derivative of the Employee ID. The initial step of setting up Employee Cards is defining the IIN Range so POS can recognize the card.
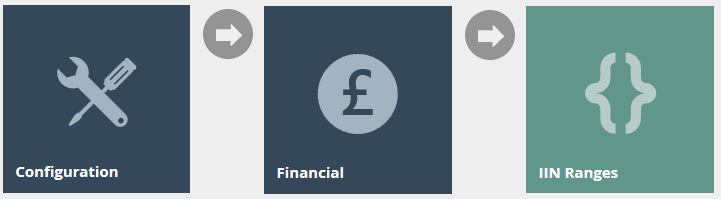
IIN Ranges are defined using the IIN Ranges option, obtained via the selection sequence shown at right starting from the Main Menu:
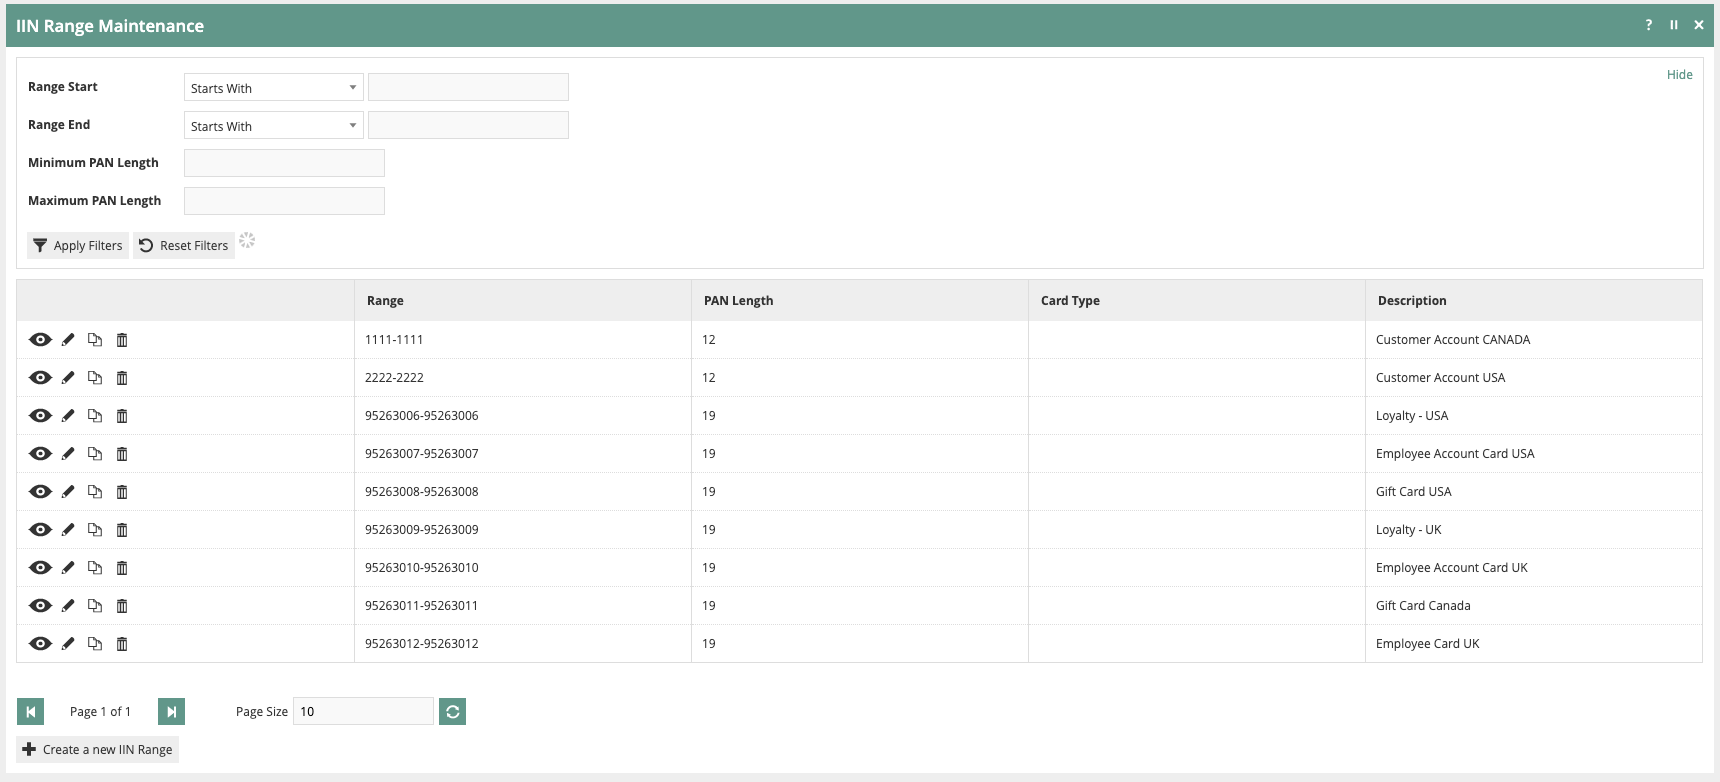
To create a new IIN Range click ‘Create a new IIN Range’.

The first step is to specify the Range Start and Range End for the Employee Card. The Minimum and Maximum PAN Length is also specified on the initial screen. Once the fields have been completed, click ‘Create’.

There are multiple tabs displayed within IIN Range Maintenance. On the General tab, only a Card Description is required. Assuming the card number does not include a LUHN Check Digit, be sure that option is selected.
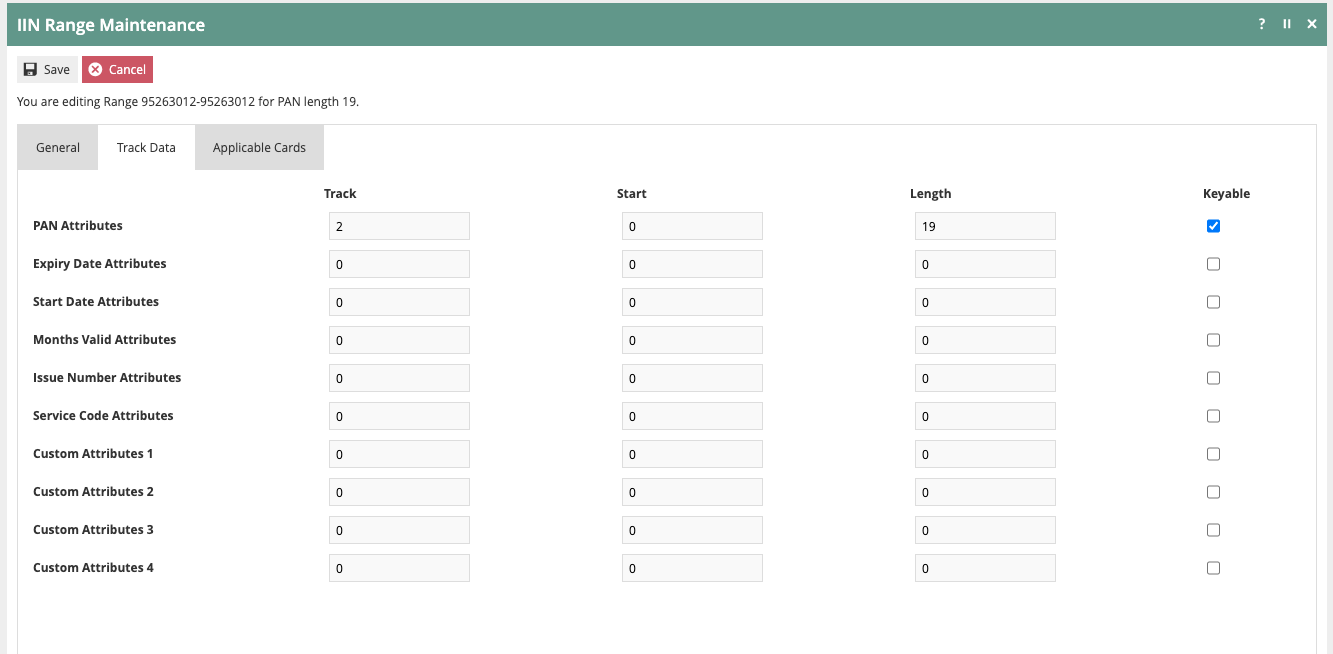
If the Employee Card is to use a magnetic strip, the details on where the PAN exists must be specified on the Track Data tab.
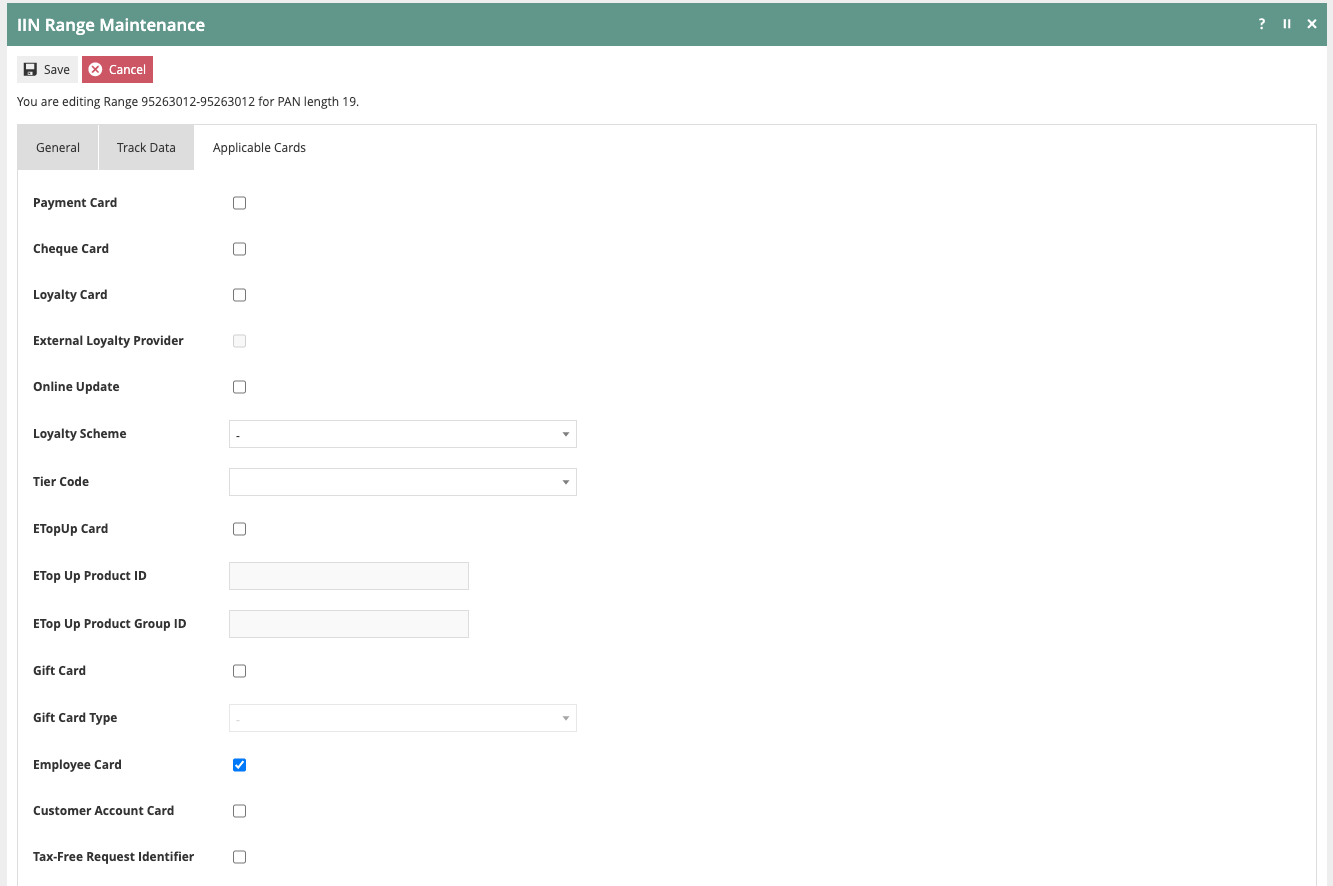
In the Applicable Cards tab, select the Employee Card option.
Once the IIN Range for Employee Cards have been established, it is possible to associate a card with an Employee ID by using the Employee Card Maintenance application.
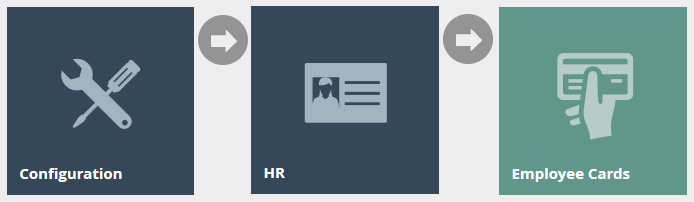
Employee Cards are configured using the Employee Cards option, obtained via the selection sequence shown at right starting from the Main Menu:
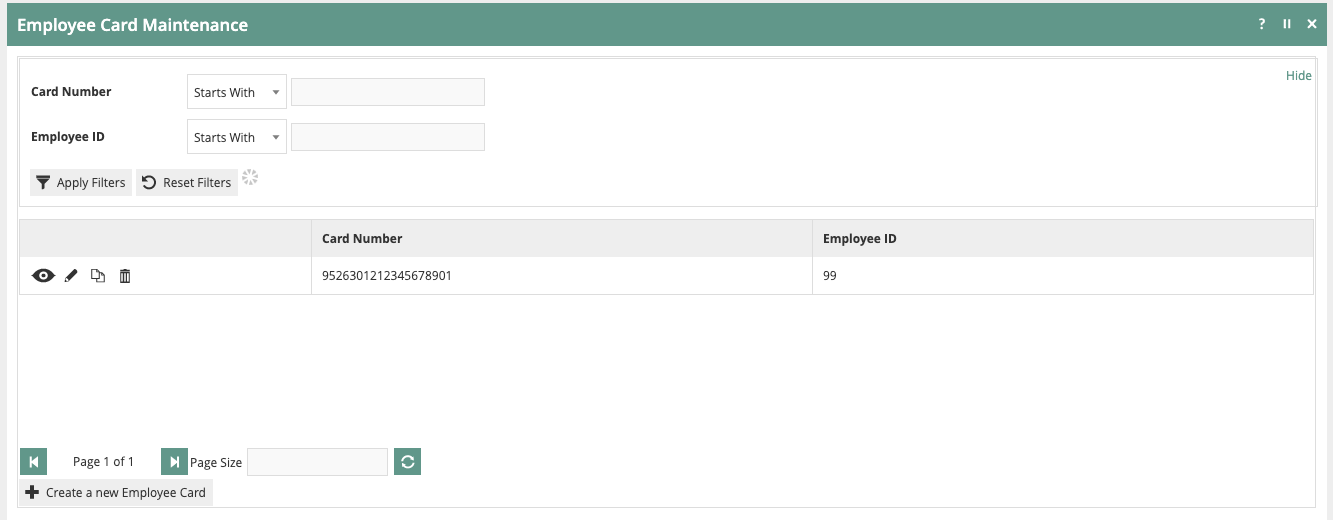
Begin by clicking ‘Create a new Employee Card’.

Enter the Card Number and click ‘Create’.

Enter the Employee ID that is to be associated with the Employee Card Number and save.
Now, when using the Validate Employee Card option in the Employee Sale Reason, the Employee Card will be required for employee validation.
Discount Types
At this point, each Discount Type will be reviewed individually. This will include the specific configuration required within the Employee Record, Employee Sale Reason and other areas. The following examples all have the Capture Employee ID and Check in Employee Database options enabled to perform employee validation at the start of the transaction.
Fixed Discount
All configuration needed to support a Fixed Discount Type can be completed within the Employee Sale Reason.
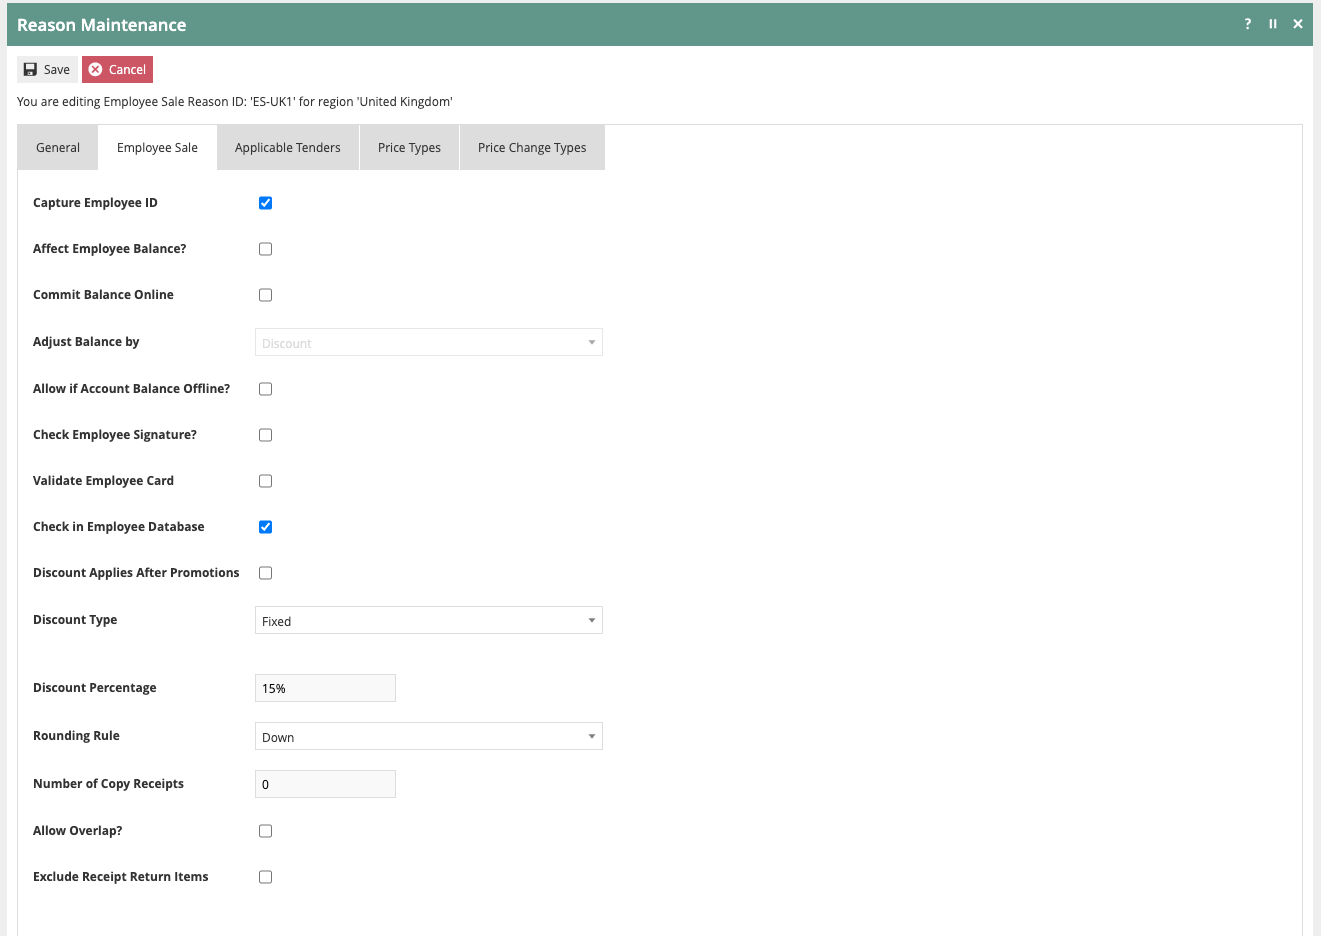
In the Discount Type dropdown, select ‘Fixed’. Enter the desired Discount Percentage and Rounding Rule.
Employee Discount
Without Balance Tracking
To support the Employee Discount Type, configuration of the Employee Sale Reason and the Employee Record are required.
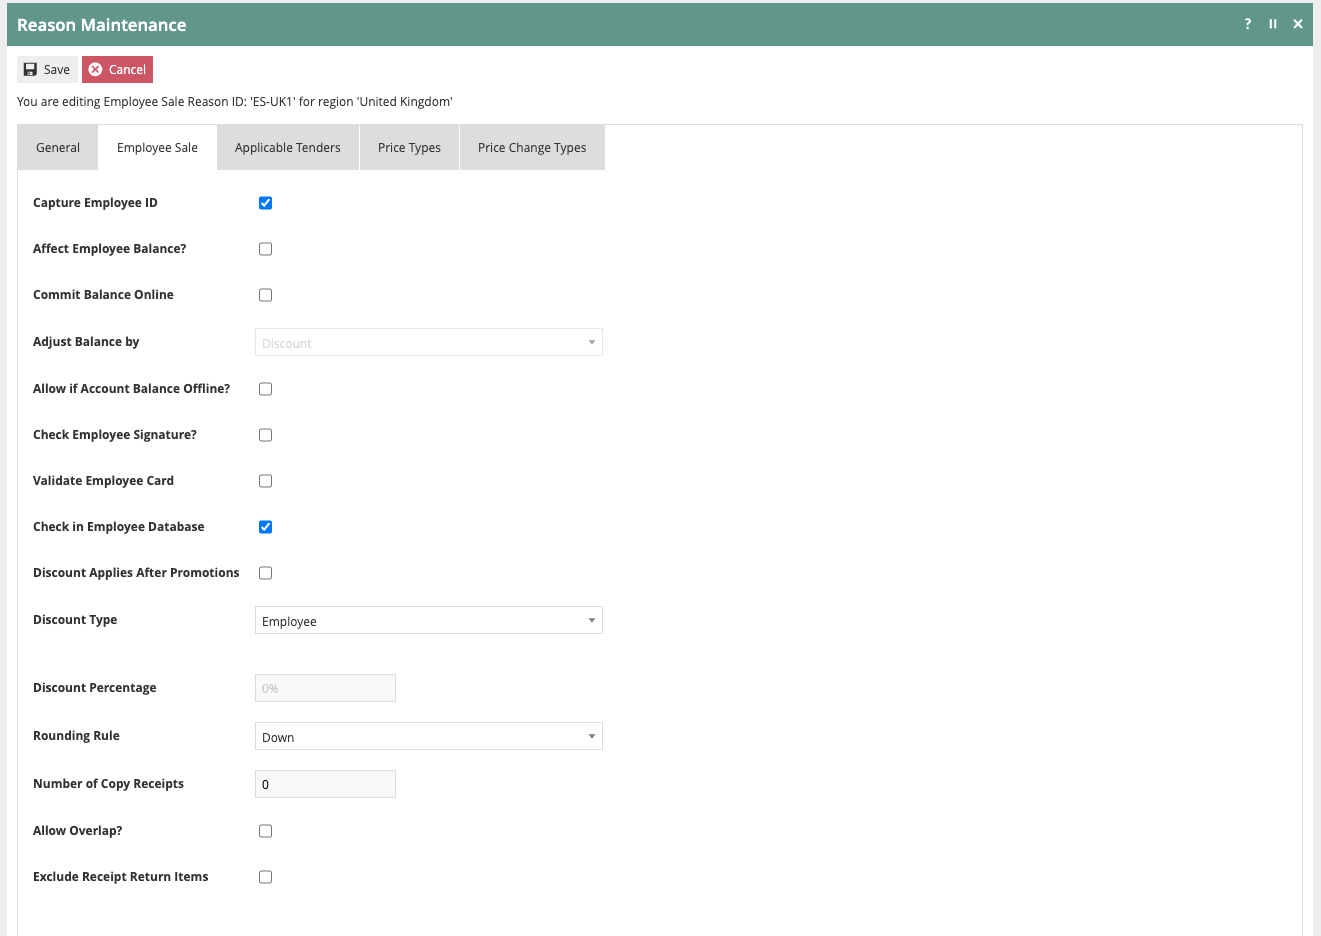
In the Employee Sale Reason, set the Discount Type as Employee on the Employee Sale tab.
Within the Employee Record, enter the desired Employee Discount percentage. The Employee Allowance Discount and Employee Discount Allowance fields will not have entries since a Discount Balance is not being tracked. Each Employee Record must have an Employee Discount percentage specified.
With Balance Tracking
When using the Employee Discount Type, it is possible to configure a 2-tier discount scheme. This permits a retailer to offer a higher Employee Discount amount initially but reduce it once an employee has received a certain level of benefits over a period of time. The following example assumes that the accumulated discount balance will be tracked within Enactor.
Configuration of the Employee Sale Reason is done in the same manner mentioned previously with a few additional settings.
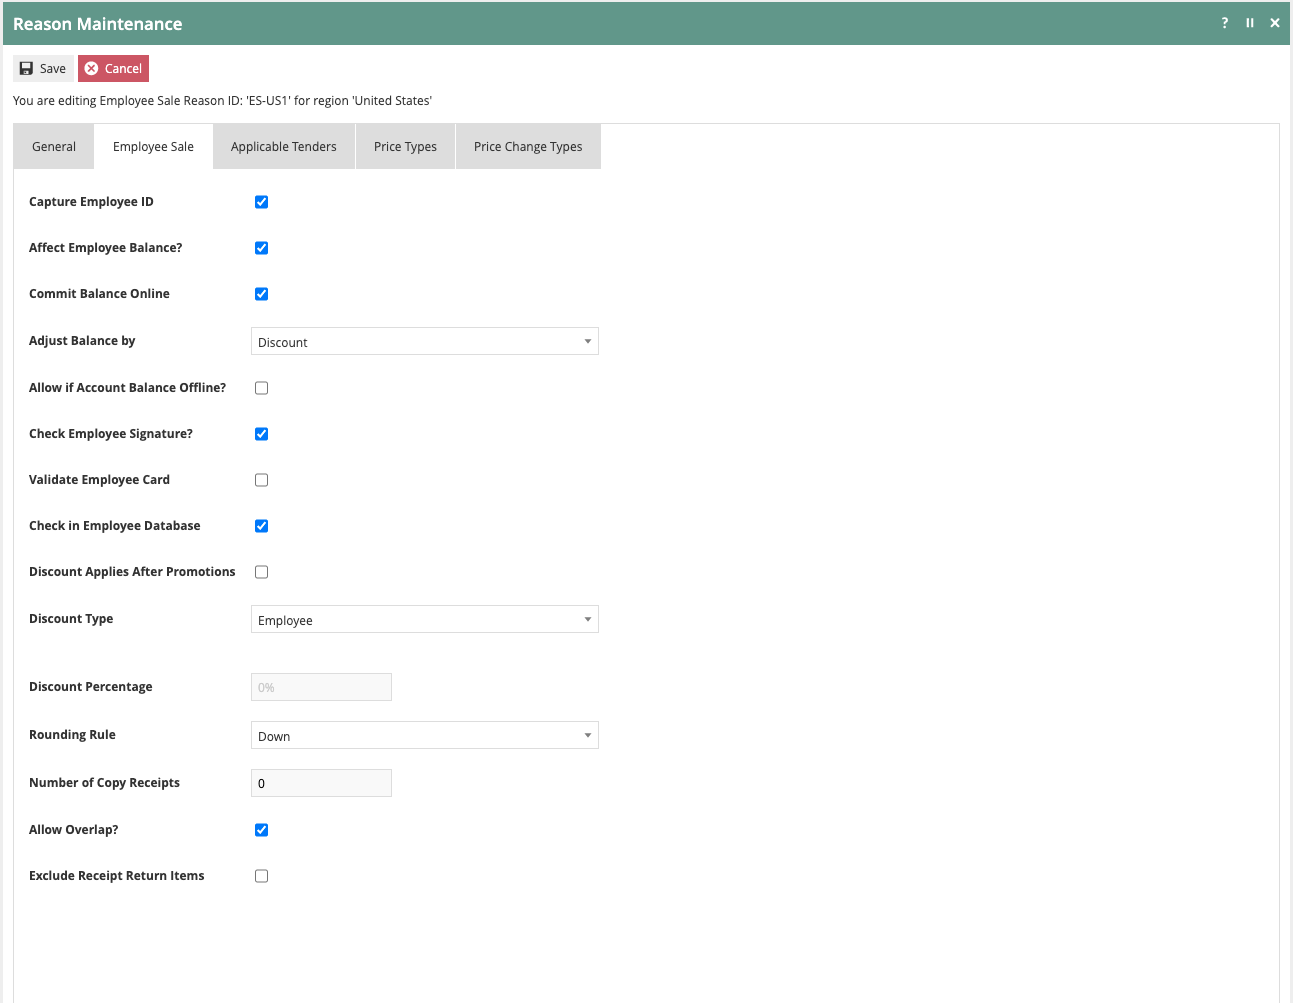
Selecting the Affect Employee Balance? initiates the processes needed to validate and update employee balances. The Commit Balance Online option indicates that the tracking will be done within Enactor. The Adjust Balance by option indicates if the discount levels are based on accumulated Discount or Spend. In this case, the balance will be maintained by accumulated Discount.
The Employee Record is configured in the same manner as before, but additional options will now be specified.
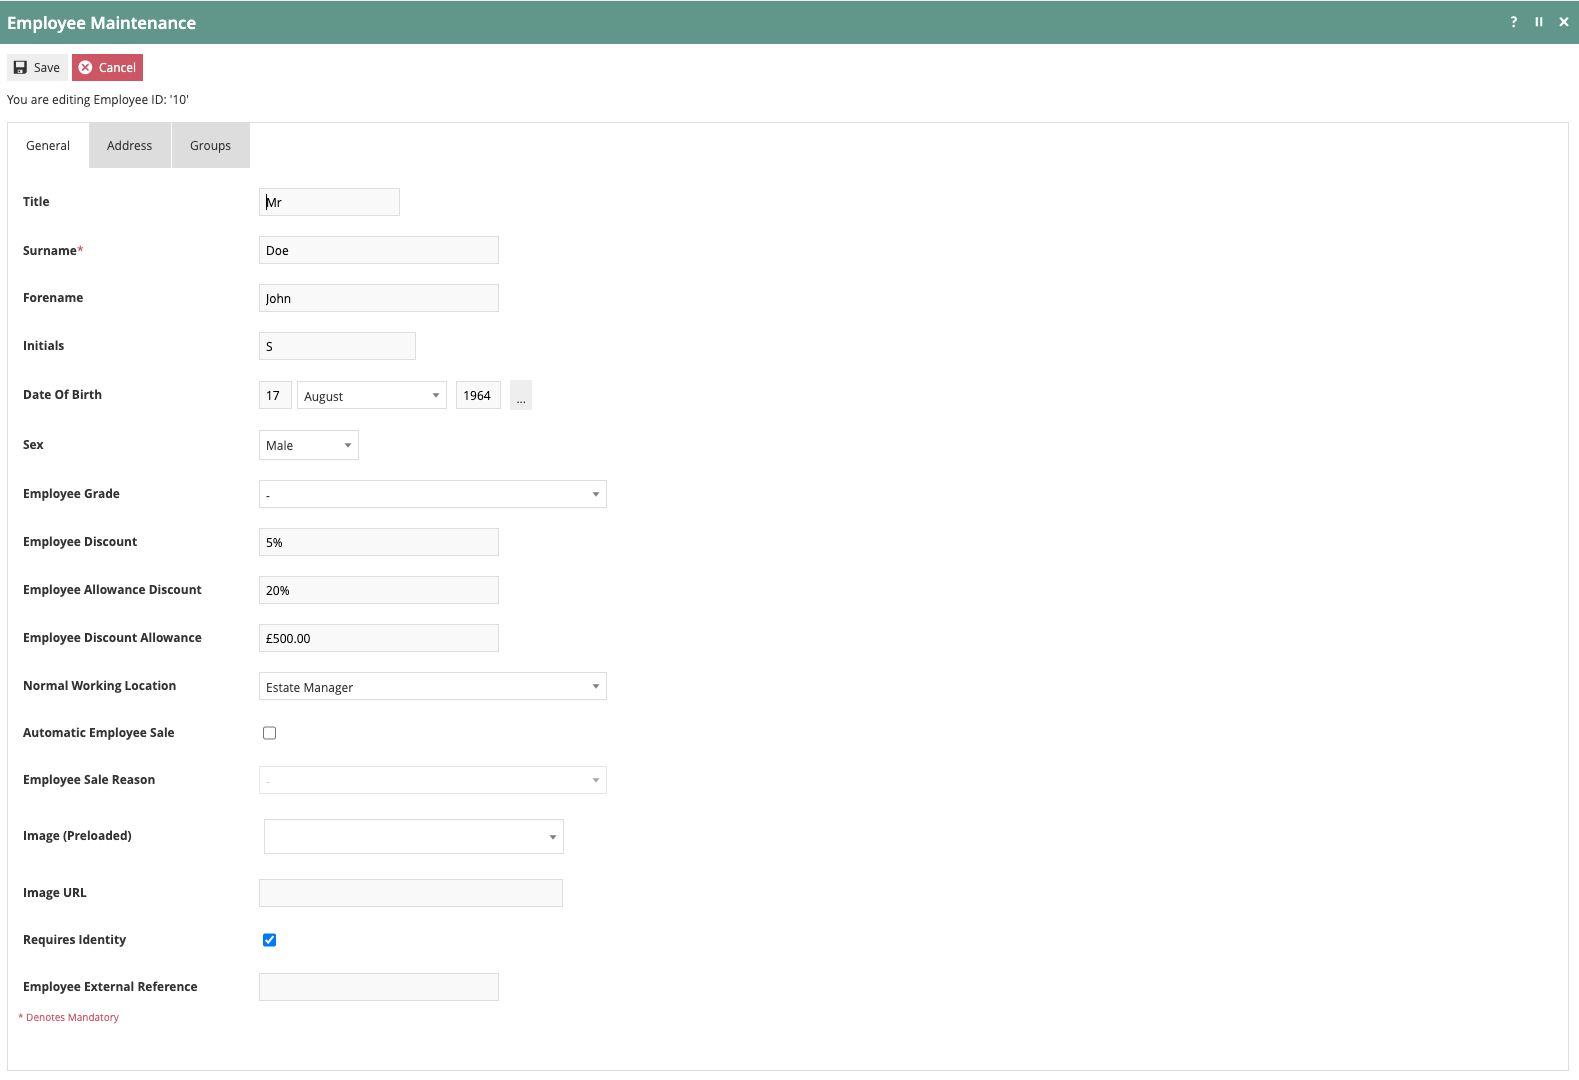
To configure a 2-level discount scheme, the initial discount amount is entered as the Employee Allowance Discount. The discount amount after the threshold is exceeded is entered as the Employee Discount. The threshold amount is the Employee Discount Allowance.
In the example above, an Employee will receive a 20% employee discount at the start of a period. Once they have accumulated $500 in Employee Discounts, they will only receive a 5% discount through the end of the period.
When using a Discount Type that depends on Balance Tracking, an Employee Account must be created. This is where the balance will be maintained.
 Employee Accounts are maintained using the
Employee Accounts option, obtained via the selection sequence shown at
right starting from the Main Menu:
Employee Accounts are maintained using the
Employee Accounts option, obtained via the selection sequence shown at
right starting from the Main Menu:

Click the ‘Create a new Employee Account’ button.

Select the Type of account from the dropdown. Since the account is tracking accumulated discount in this example, select Discount Balance. The Account ID is set to the Employee ID. The account can now be created.
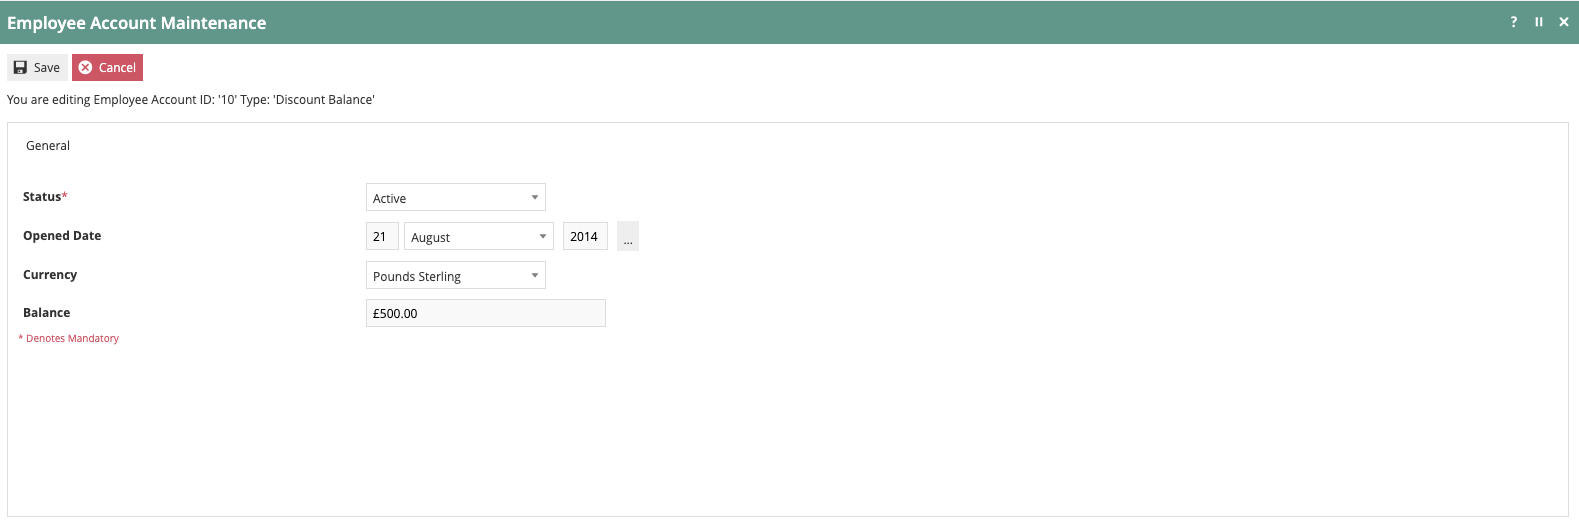
Since the account is being created manually, the amount entered on the Employee record for the Employee Discount Allowance must be entered as the Balance for the Employee Account. The account can now be saved. Once the changes have been broadcast, discounts received on Employee Sales will accumulate in the account. Be sure to set the Status to Active to fully enable the account.
When an Employee Sale is initiated at POS, the Employee information along with the Account Balance is displayed. The Account Balance represents the amount of discount value available at the Employee Allowance Discount level. Once the Account Balance reaches £0.00, the discount level will be switched to the Employee Discount.
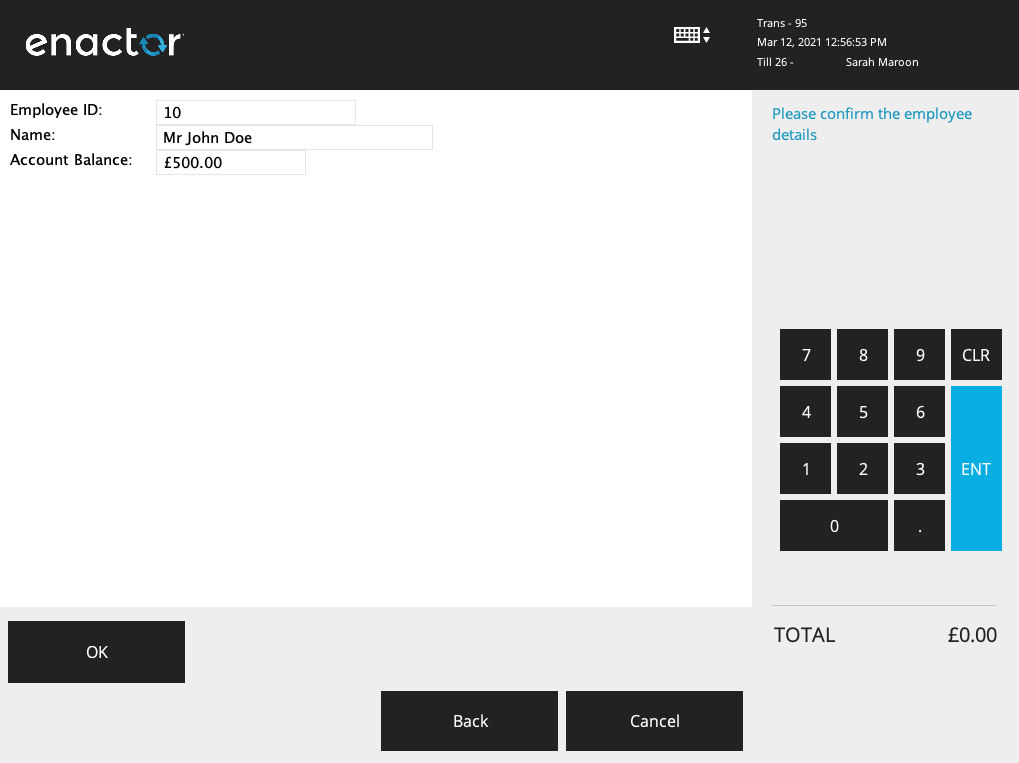
Once the Employee Discount Allowance is reached, the discount percentage will switch from the Employee Allowance Discount to the Employee Discount Amount. The retailer will reset the Account Balance when they reach the end of their defined period.
Employee Spend
The Employee Spend Discount Type is a variation of the Employee Discount Type with Balance Tracking. This Discount Type uses an accumulated spend balance to determine which discount level is available.
There Employee Sale Reason configuration is very similar to the previous example. The changes required can be seen below.
In the Employee Sale Reason configuration, select a Discount Type of Employee Spend and set the Adjust Balance by option to Total Spend.
The Employee Record is configured in the same way as the previous example. Note that it is not necessary to make an entry for the Employee Discount Allowance when using this Discount Type.
When tracking by Total Spend, a different Employee Account Type is required. This Discount Type is used with a Discount Spend Employee Account Type. The setup is similar to the previous example.

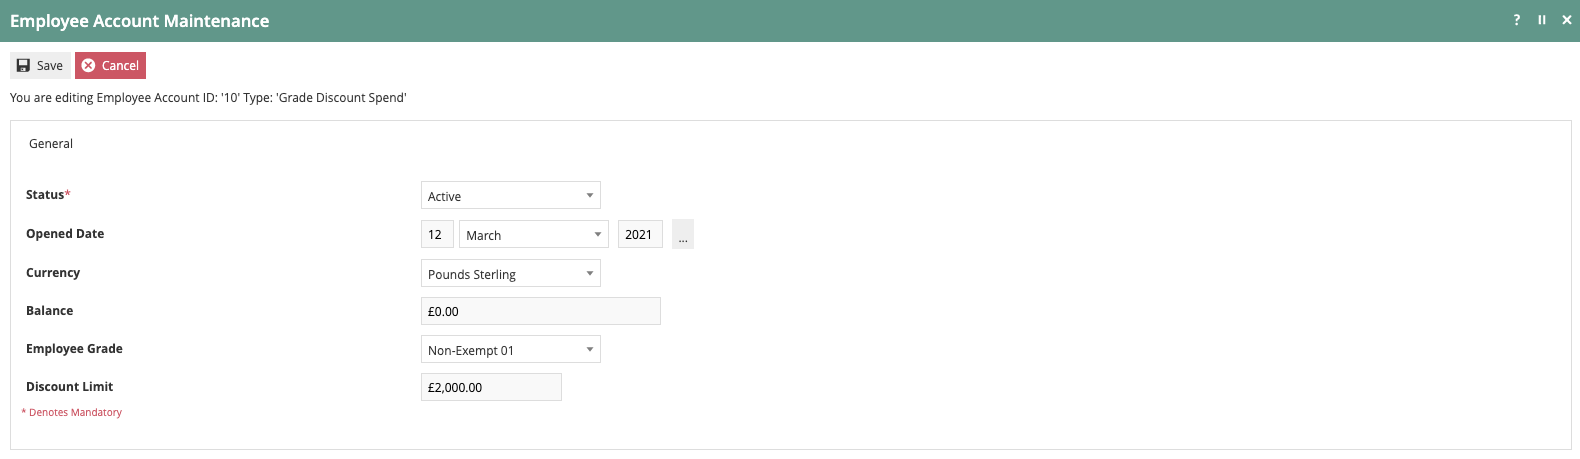
Select Discount Spend from the Type dropdown and enter the Employee ID as the Account ID and click ‘Create’.

Once the account is created, enter the Discount Limit. The Discount Limit represents the allowable amount of accumulated spend within Employee Sale transactions before the discount changes from the Employee Allowance Discount to the Employee Discount specified in the Employee Record. Be sure to set the Status to Active to fully enable the account.
When initiating an Employee Sale at POS, the Employee Information will be displayed along with the current Account Balance. The Account Balance represents the remaining amount that can be spent within Employee Sales before the shift in discount level.

Employee Grade
In the previous examples, it has been demonstrated how to apply a consistent level across all Employees as well as being able to specify discount level by Employee. An additional option is available that permits setting the Employee Discount by Employee Grade. An Employee Grade is part of the retailer’s HR structure that groups similar job roles and or pay ranges into Employee Grades. When using a Discount Type of Employee Grade, the Employee Account Balance will be tracked by Discount.
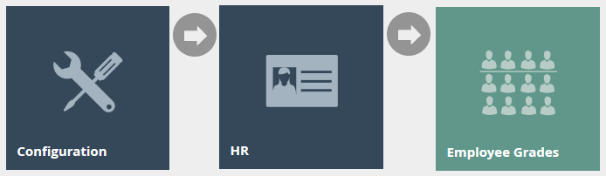
Employee Grades are defined using the Employee Grades option, obtained via the selection sequence shown at right starting from the Main Menu:
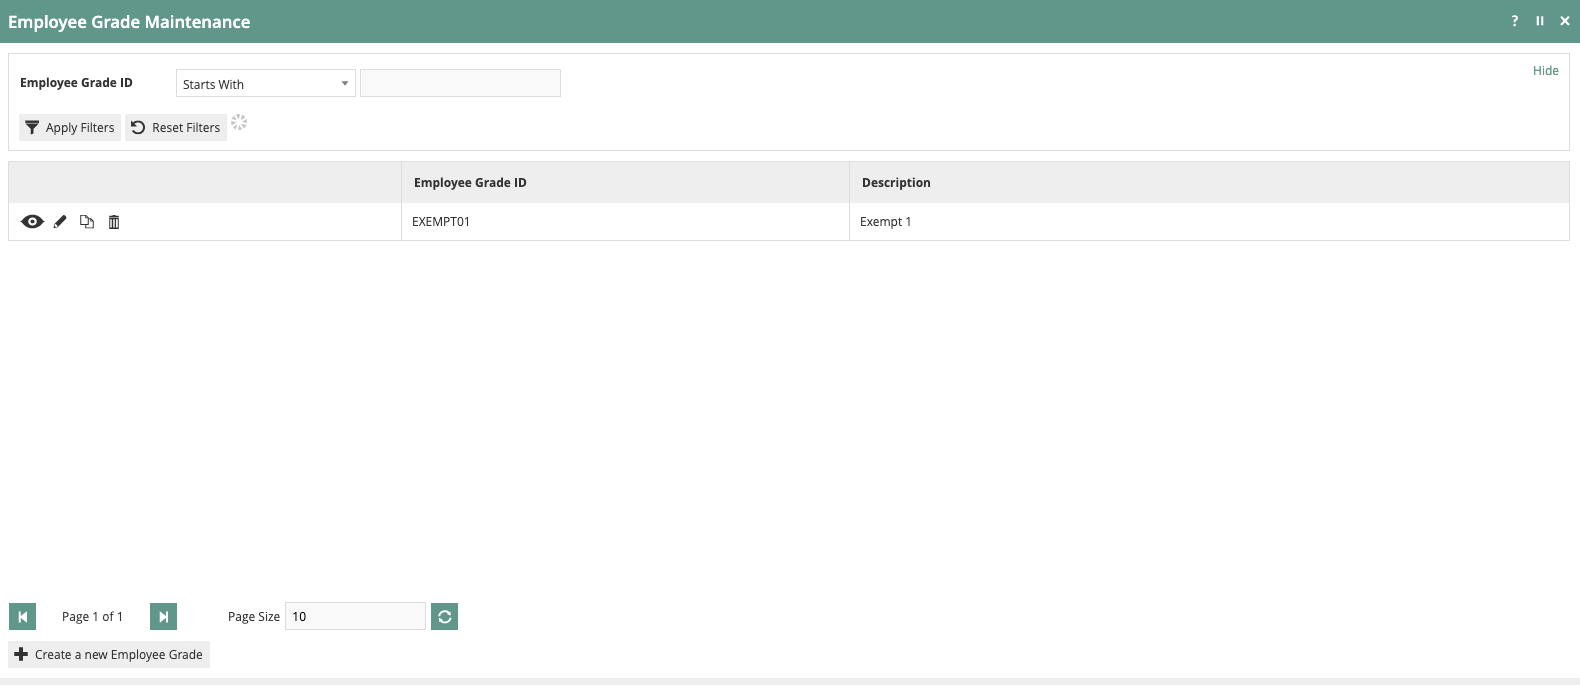
From the Employee Grade Maintenance application, click ‘Create a New Employee Grade’.

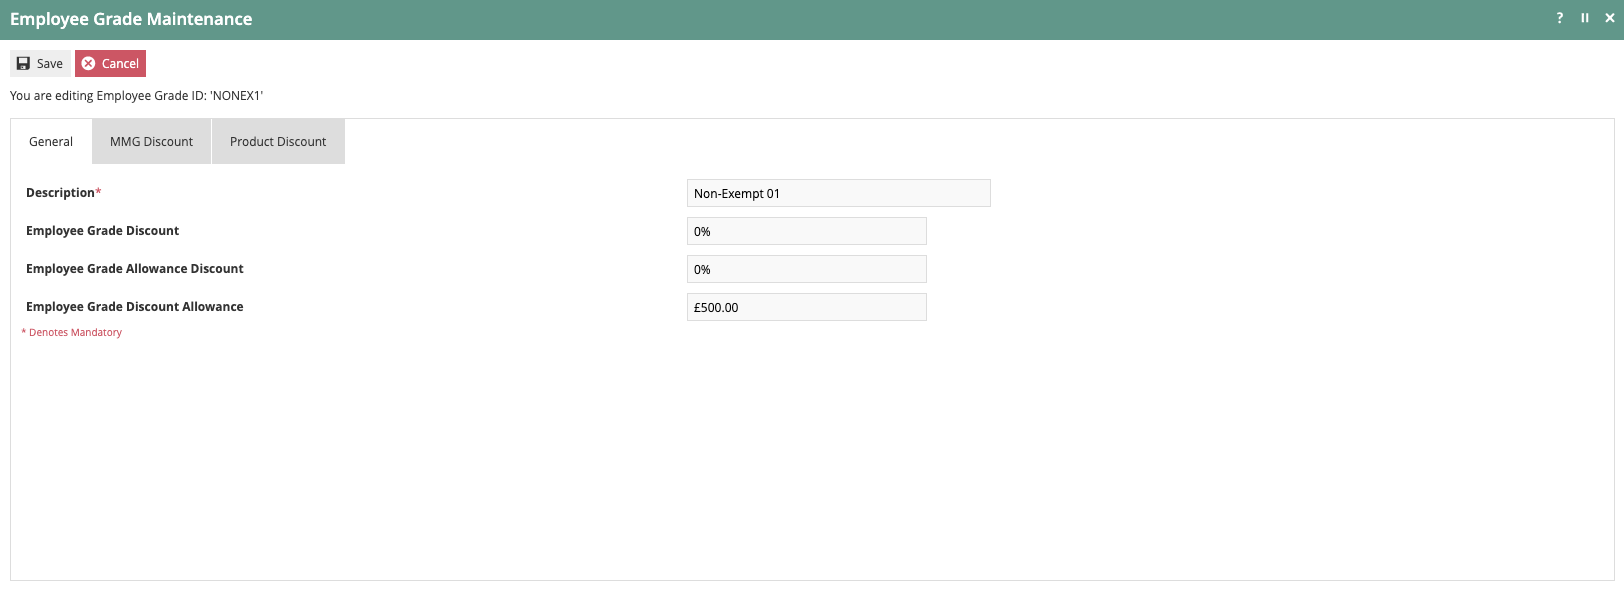
Enter the Employee Grade ID and click ‘Create’.
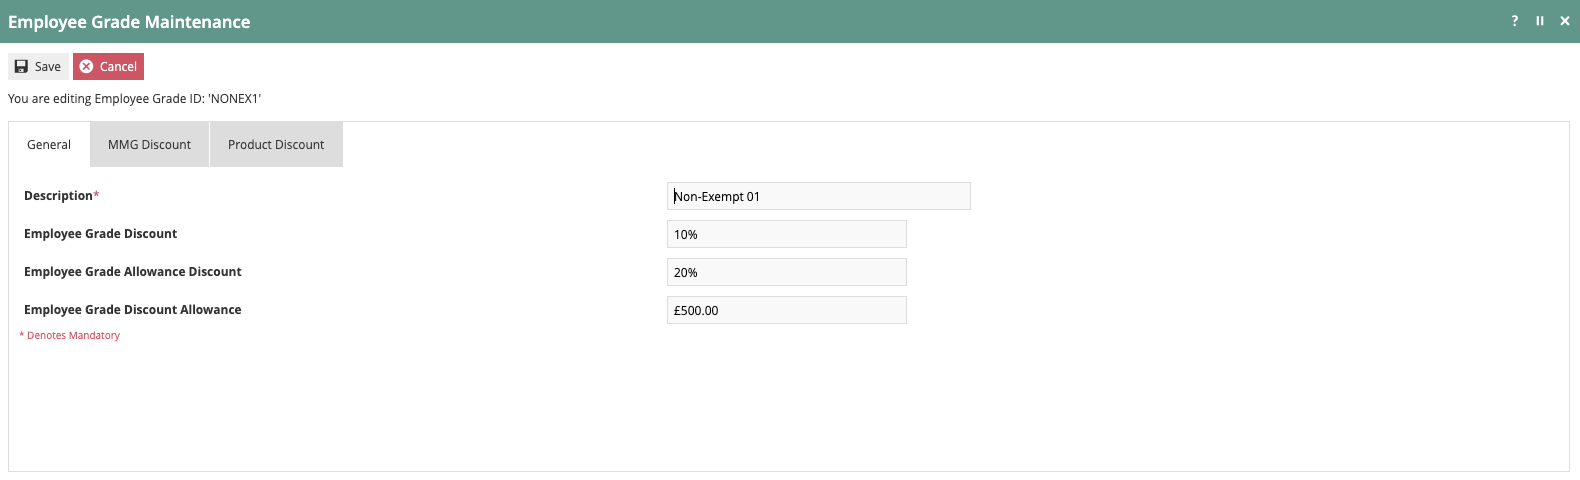
Once the Employee Grade has been created, enter a Description for the Grade. Similar to the Employee Discount Type, multiple levels of Employee Discount can be specified. The Employee Grade Allowance Discount represents the Discount that will be applied before the Employee Grade Discount Allowance level is met. The Employee Grade Discount is the Discount that will be applied after Employee Grade Discount Allowance level is exceeded. The MMG Discount and Product Discount tabs are only used with other Discount Types.
Once all Employee Grades have been created, proceed with the following configuration.
The Employee Sale Reason configuration is similar to previous Discount Types.
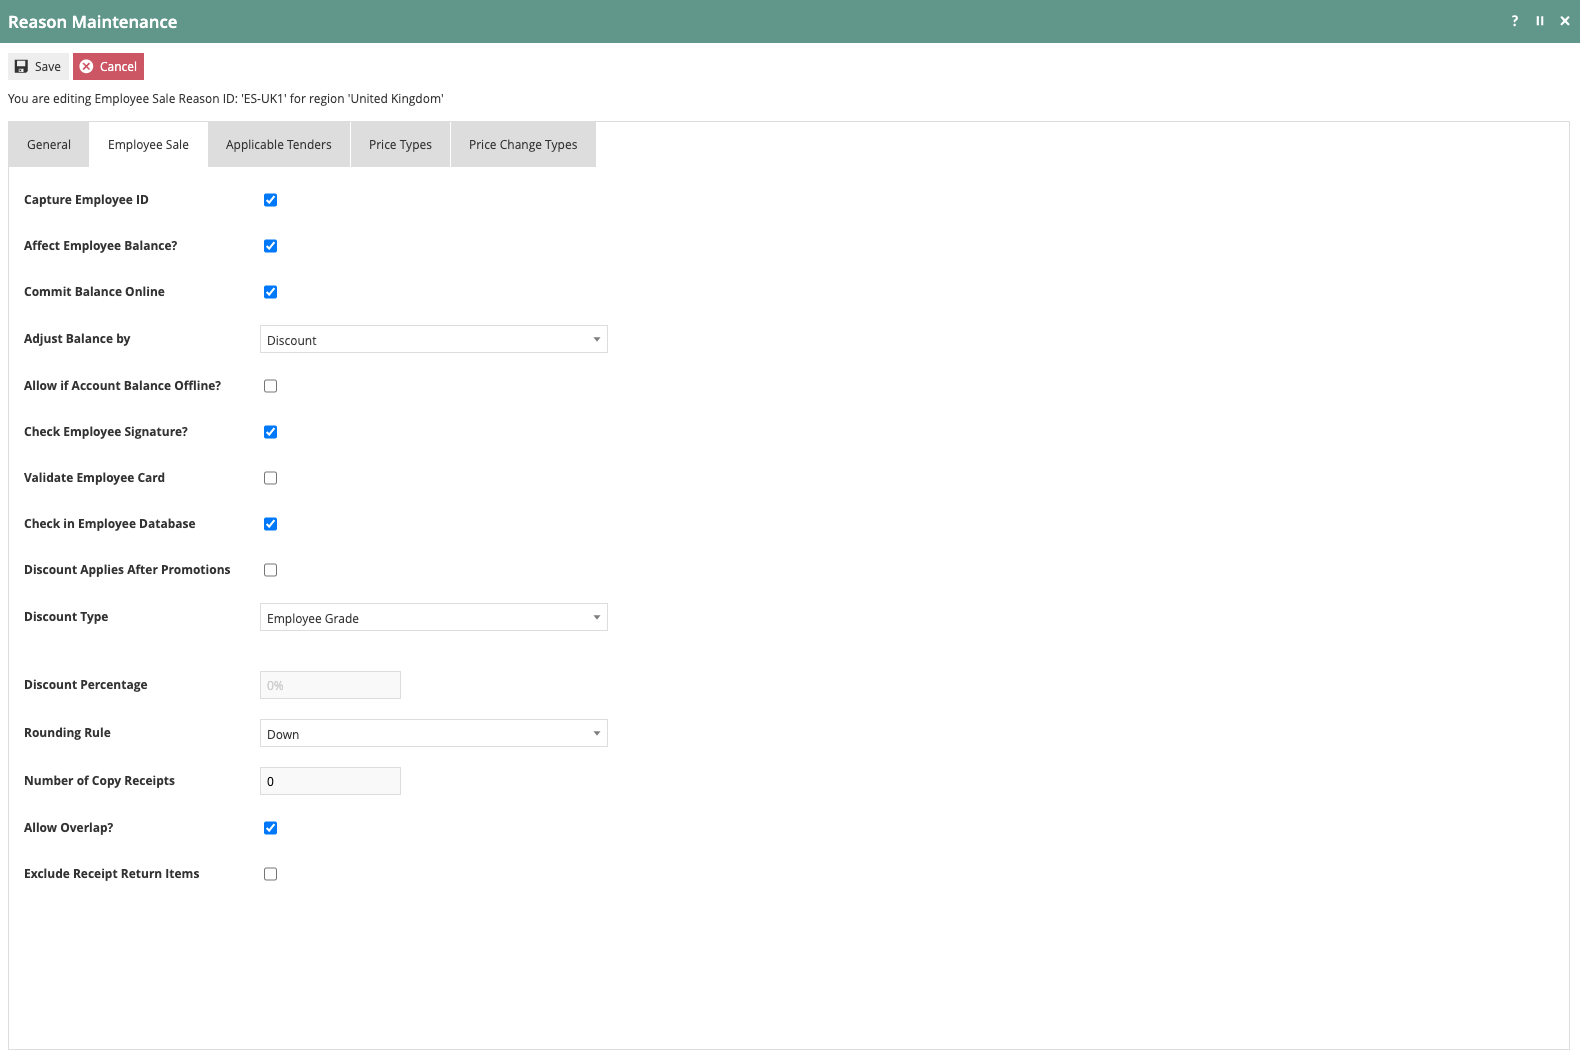
The Discount Type should be set to Employee Grade and select Discount for the Adjust Balance by option.
An Employee Grade must be specified for each Employee.
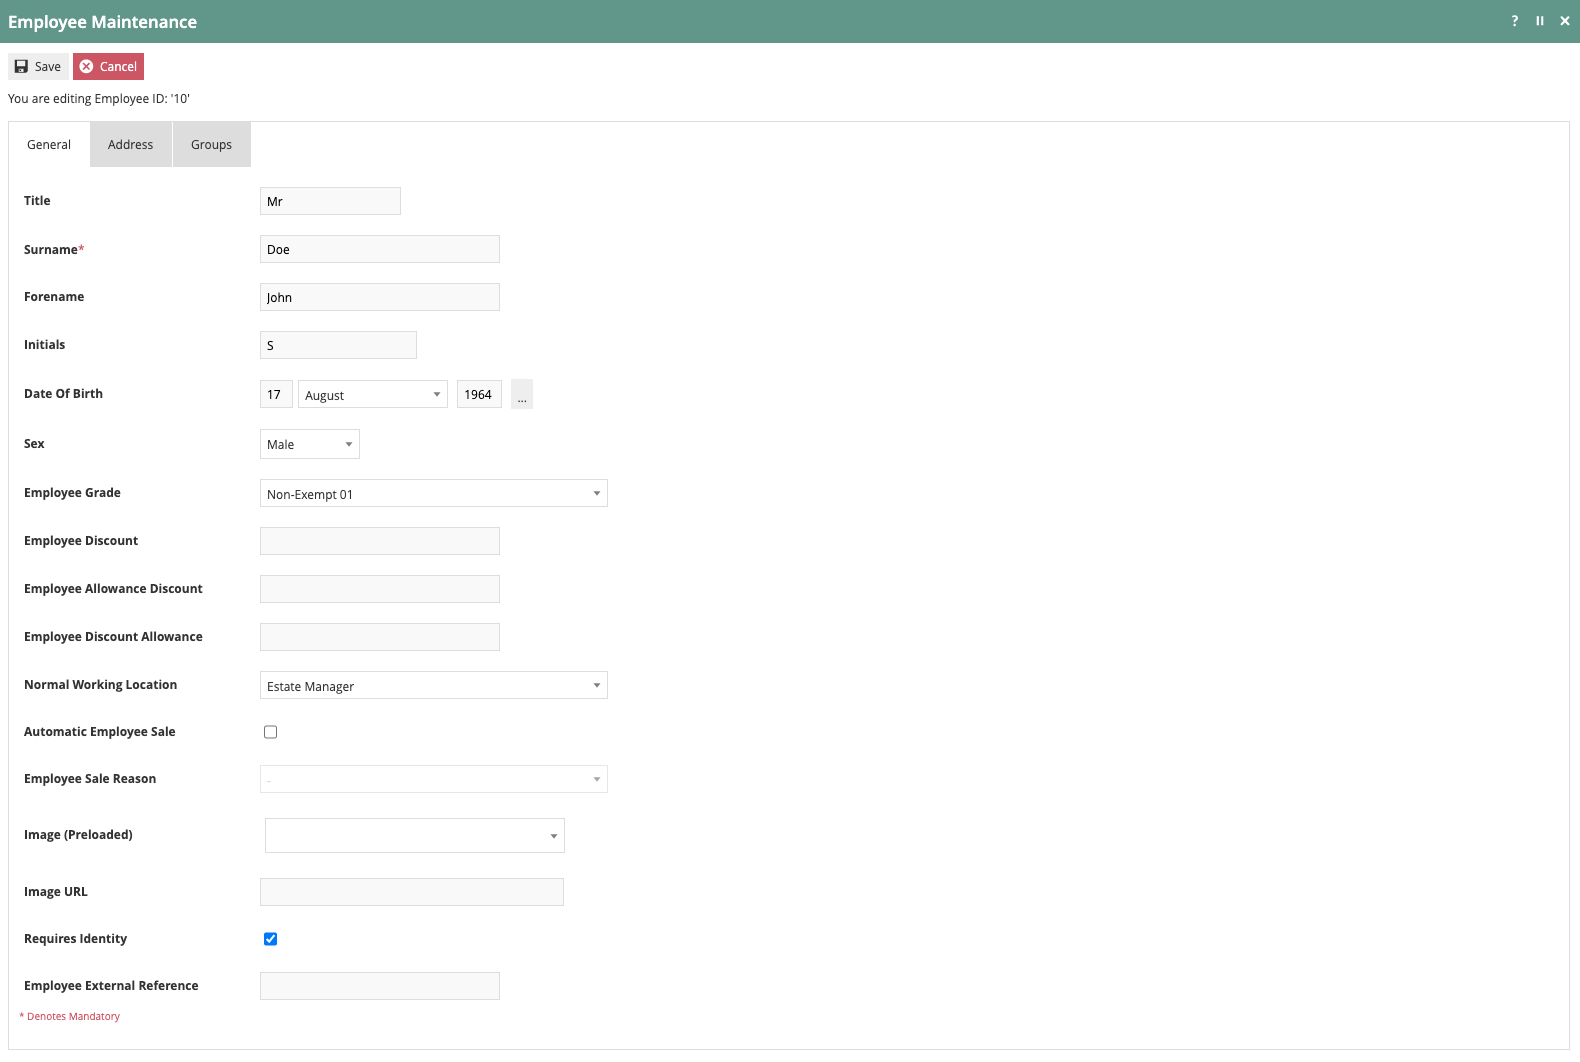
Select the appropriate Employee Grade for the Employee. Note, it is not necessary to specify Employee Discount, Employee Allowance Discount or Employee Discount Allowance in the Employee record when using the Employee Grade Discount Type.
An Employee Account will need to be created to be used with the Employee Grade Discount Type.

When creating the Employee Account, select Grade Discount Balance as the Type. The Account ID is set to the same value as the Employee ID.
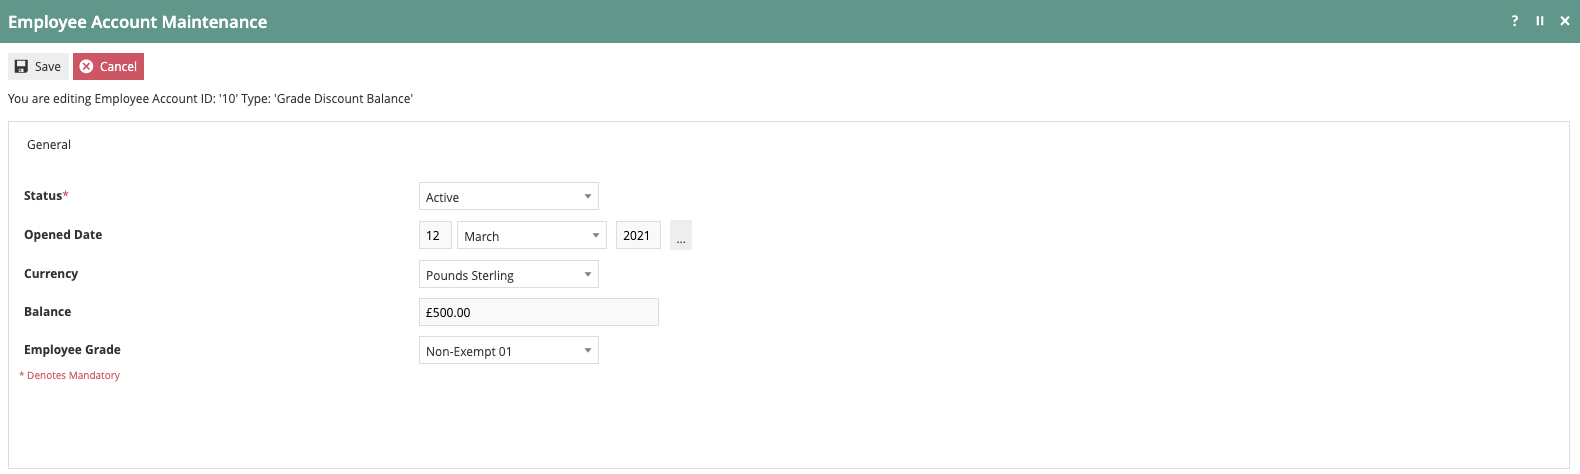
Once the Account has been created, set the Balance to the desired Employee Grade Discount Allowance and select the employee’s grade from the dropdown. Be sure to set the Status to Active to fully enable the account.
At POS, the information shown at the beginning of an Employee Sale is consistent with other Discount Types that use Discount Balance tracking.
Employee Grade Spend
This Discount Type is a variant of the Employee Grade Discount Type. The Employee Grade Spend Discount Type differs in that Balance Tracking is done by Spend as opposed to Discount.
The configuration of Employee Grades and associated changes to the Employee record are done as explained in the previous section.
The configuration of the Employee Sale Reason is shown below.
Be sure that the Adjust Balance by option is set to Total Spend and the Discount Type is Employee Grade Spend.
An Employee Account will need to be created to be used with the Employee Grade Spend Discount Type.

The Employee Account Type is set to Grade Discount Spend. The Account ID should be set to the associated Employee ID.
Once the account has been created, the appropriate Employee Grade should be selected, and the Employee Grade Discount Allowance is entered. Be sure to set the Status to Active to fully enable the account.
At POS, the information shown at the beginning of an Employee Sale is consistent with other Discount Types that use Spend Balance tracking.
Employee Grade By MMG
The Employee Grade By MMG Discount Type not only allows different discount levels based on Employee Grade but it also permits specifying different discount levels by MM Group and Product ID. The Employee Grade By MMNG Discount Type utilises Balance Tracking by Discount to determine discount level.
Employee Grades are created in the same manner as described in the Employee Grade Discount Type.
The Employee Grade Discount and Employee Grade Allowance Discount fields are not used with this Discount Type. The Employee Grade Discount Allowance is still used to specify the Discount Balance level that will result in a change of discount levels.
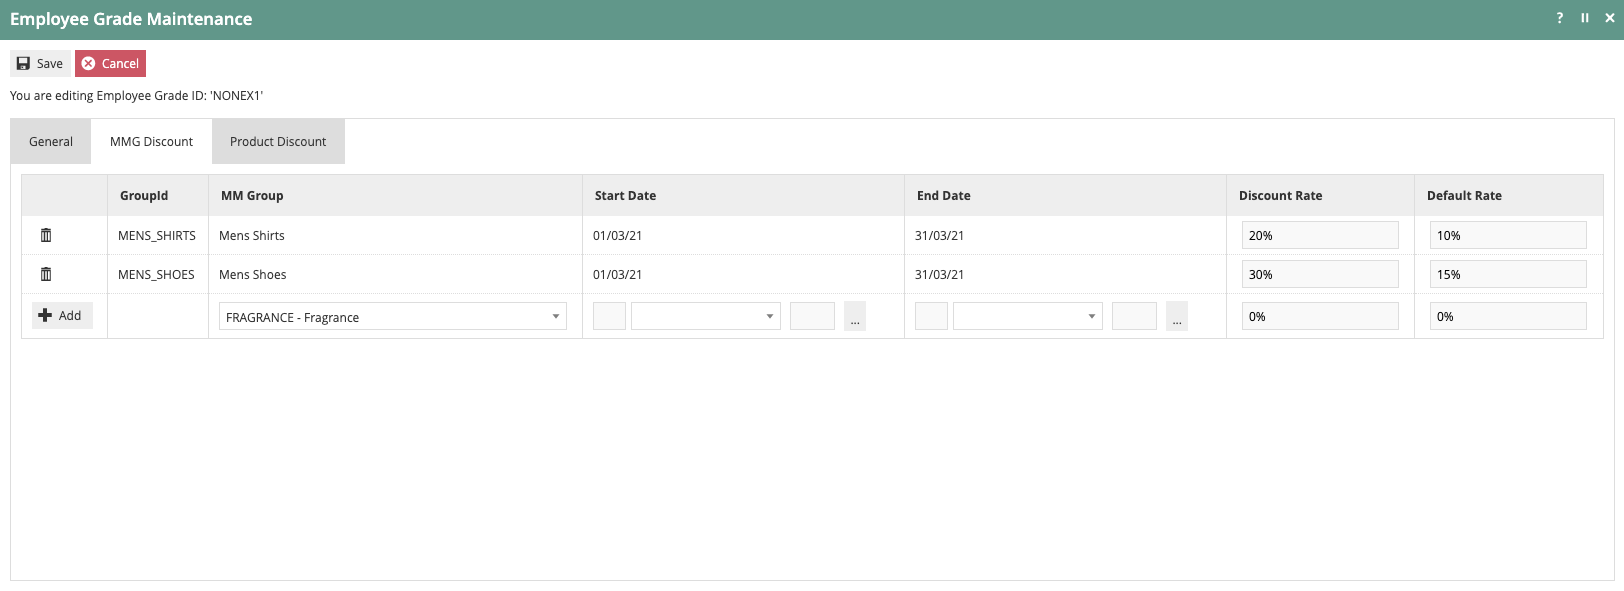
On the MMG Discount tab, specify the desired MM Group, effective dates and Discount Rates. Start by selecting the MM Group from the dropdown. Specify the Start Date and the End Date for the discount. The Discount Rate will be applied before the Employee Grade Discount Allowance is met and the Default Rate will be used after the allowance is met. Once all entries have been made, click the ‘Add’ button.
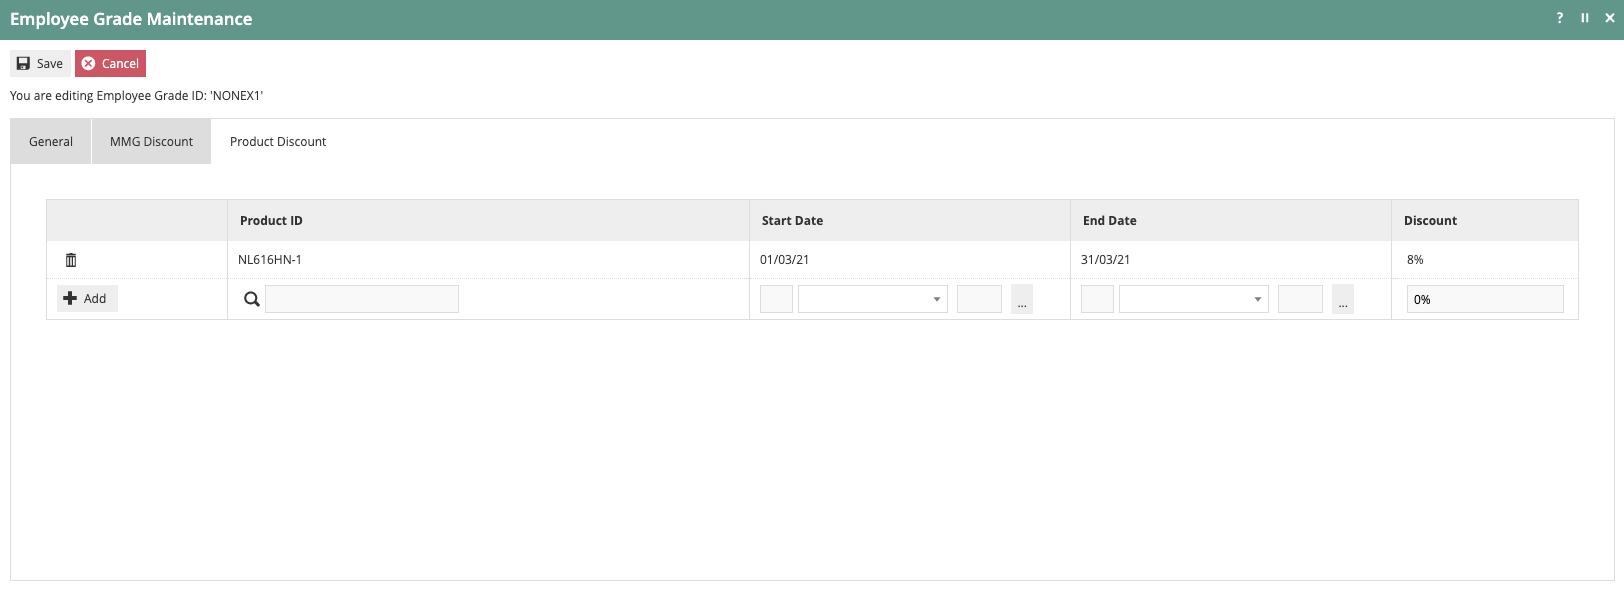
On the Product Discount tab, it is possible to specify a Discount for a specific Product ID. Enter a Product ID or click the magnifying glass to search for a product. Enter a Start Date and an End Date for the Discount. A single Discount level is supported when creating a Product Discount.
It is important to note that products that are not listed on the Product Discount tab or are part of an MM Group specified on the MMG Discount tab, will not be discounted in an Employee Sale.
The Employee Sale Reason configuration is shown below.
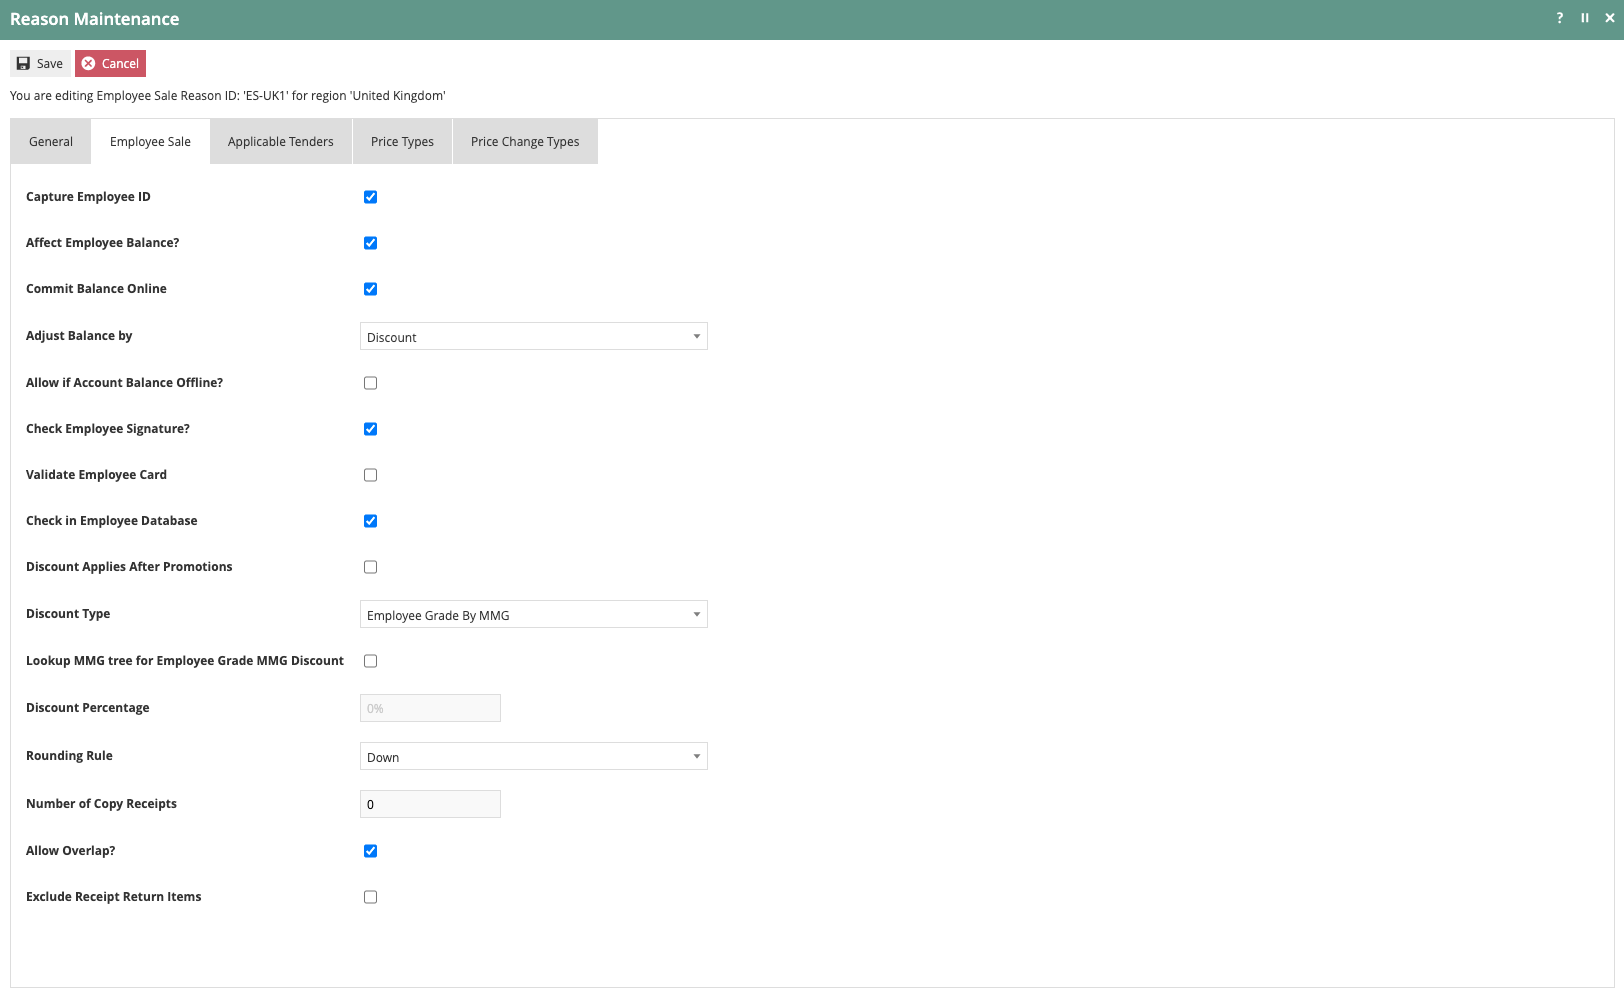
An Employee Account will need to be created to be used with the Employee Grade By MMG Discount Type. Employee Account setup will mirror what was described for the Employee Grade Discount Type.
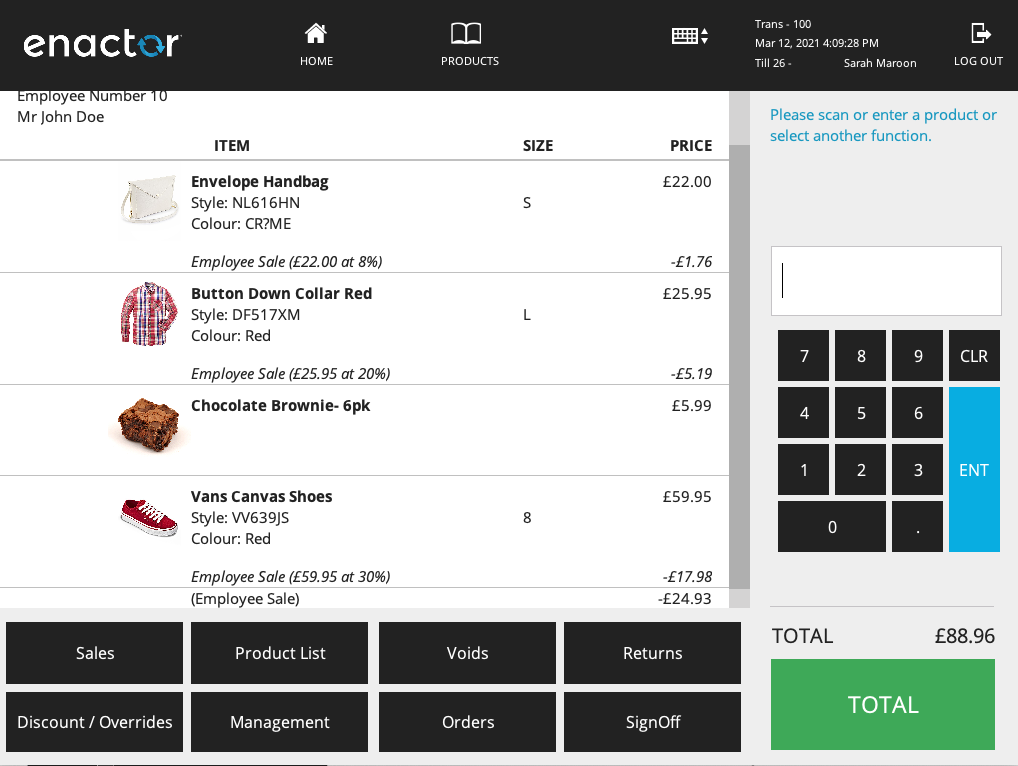
At POS, the information displayed at the beginning of an Employee Sale transaction is consistent with other Discount Types that utilise Balance Tracking by Discount. Unlike other Discount Types, it is likely that various discount levels, including no discount, may be shown in the transaction.
Employee Grade Spend By MMG
This is a variant of the Employee Grade By MMG Discount Type where Balance Tracking is done by Spend. When configuring the Employee Grade Spend By MMG Discount Type only the Employee Sale Reason and Employee Account differ from what was explained in the previous section.
The Employee Sale Reason configuration is shown below.
Adjust Balance by should be set to Total Spend. Select Employee Grade Spend By MMG as the Discount Type.
An Employee Account will need to be created to be used with the Employee Grade Spend By MMG Discount Type. Employee Account setup will mirror what was described for the Employee Grade Spend Discount Type.
At POS, the information displayed at the beginning of an Employee Sale transaction is consistent with other Discount Types that utilise Balance Tracking by Spend. Unlike other Discount Types, it is likely that various discount levels, including no discount, may be shown in the transaction. An example can be viewed in the previous section.
Promotions
Promotions are discussed in detail in a separate configuration guide. Please reference that document for detailed information on setting up offers. Once a Promotion has been created, it can be made available in an Employee Sale or can be made exclusive to an Employee Sale.
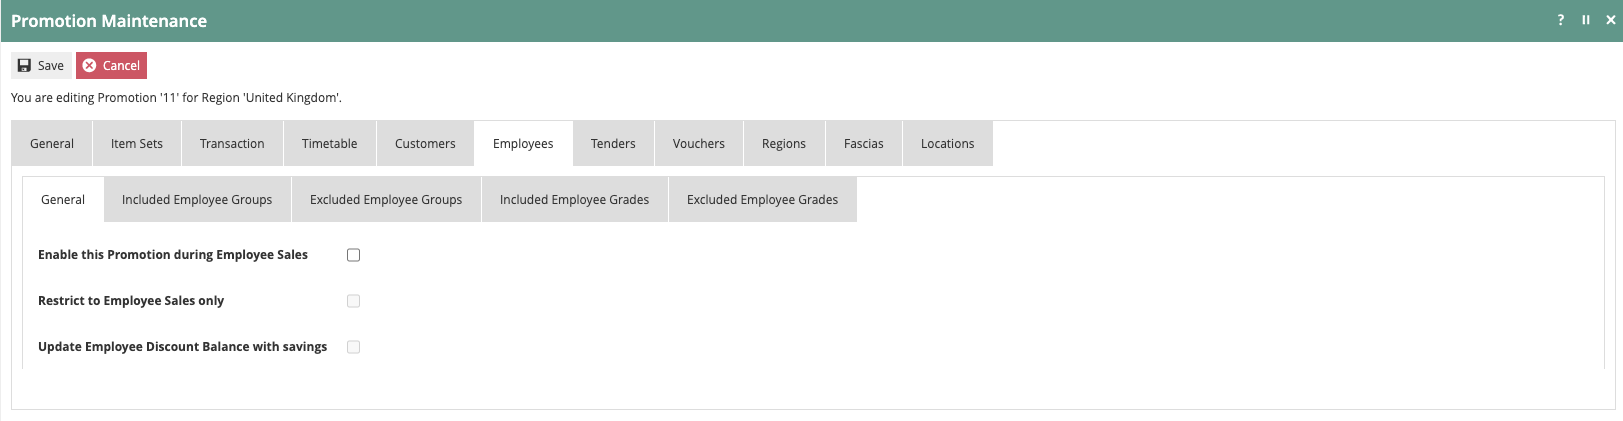
In the Promotion Maintenance application, navigate to the Employees tab. On the Employees – General tab, select the Enable this Promotion during Employee Sales option to allow the Promotion to apply in an Employee Sale transaction. By selecting the Restrict to Employee Sales only the promotion will only be available in Employee Sale transactions. If the Employee Sale Reason is set to Adjust Balance by Discount, the discount obtained from the Promotion can be added to the balance when the Update Employee Discount Balance with savings option is selected.
Additionally, it is possible to Include or Exclude specific Employee Grades by selecting and adding them on the appropriate tabs. This can also be done by Employee Groups. The configuration of Employee Groups is reviewed below.
The general creation of Groups is discussed in the Organisation Structure guide. To create an Employee Group, navigate to Group Maintenance and select the Employee Group as the Group Type.

Click on ‘Create New Employee Group Hierarchy’.

Enter a Hierarchy ID, select the appropriate Region and then click ‘Create’.

Use the Add Employee Group function to create the desired Employee Group Hierarchy. Once created, the Employee Group can be set on the Employee Record.

In Employee Maintenance, select the desired Employee and navigate to the Groups tab. Select the desired Employee Group from the dropdown and click ‘Add’. Repeat until all applicable groups have been added.
Product Restrictions
Using the Employee Grade by MMG Discount Type variants allow some control over what products are eligible for Employee Sales. In many cases, it may be more practical to simply exclude specific items from being discounted in an Employee Sale which can be done in Product Maintenance.
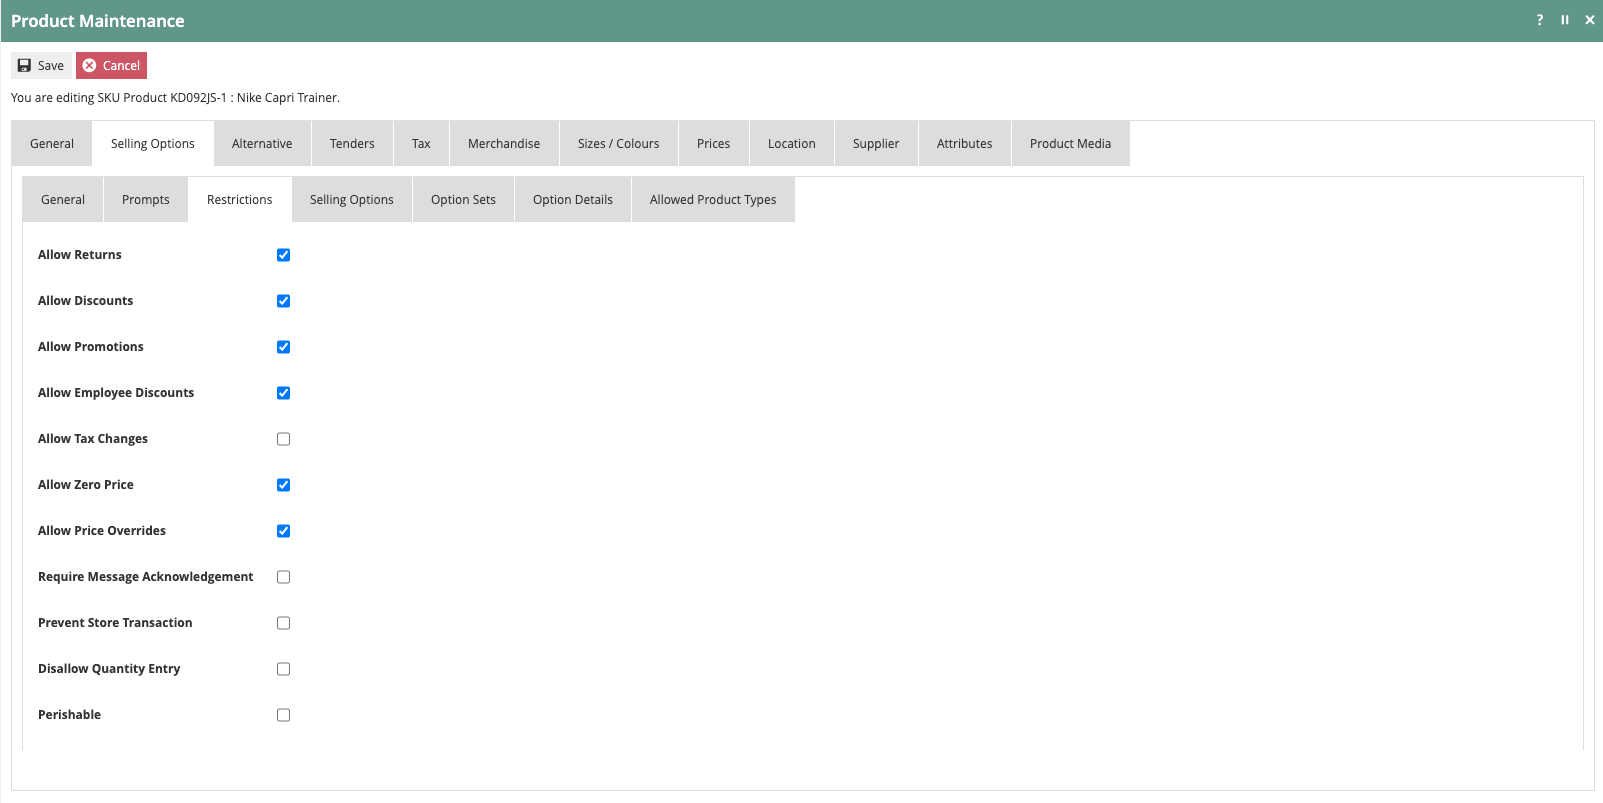
After finding and selecting the Product in Product Maintenance, select the Selling Options – Restrictions tab. Deselect the Allow Employee Discounts option to prevent discounts during an Employee Sale.