How to Configure Loyalty
Introduction
The purpose of this guide is to show how to configure Loyalty that will enable the user to set up their own loyalty scheme and get customers to engage in it. This guide provides a foundational understanding of defining and configuring a new Loyalty Scheme, creating new customers, new customer loyalty accounts and issuing new loyalty cards. This will further enable the user to carry out loyalty-based transactions of loyalty customers such as capturing and redeeming points based on the Loyalty Scheme that had been configured.
Overview
This guide will cover the configuration for the following:
-
Loyalty Schemes Configuration – Setting up loyalty tiers and the rules associated with them for loyalty-based transactions.
-
Role Configuration – Enabling privileges and configuring the Sale and Tender menus to run Loyalty-based functions in the POS.
-
Customer Loyalty Configuration – Setting up an IIN range, customer accounts, customer loyalty accounts and loyalty cards to carry out loyalty-based transactions based on the Loyalty Scheme configuration.
-
Capturing of Loyalty Points – Using a loyalty customer to earn points from a basic sales transaction.
-
Redeeming of Loyalty Points – Using the available points of a loyalty customer as a tender option.
Configuration Steps
The Loyalty Scheme Configuration function provides the option to create Loyalty Schemes that allow users to define different Loyalty Tiers and the rules associated with them when carrying out loyalty-based transactions. At what rate do loyalty customers earn loyalty points, at what rate are the points redeemed, what promotion strategy is used for calculation of loyalty and after how many points or total value spent would the customer be able to advance to the next Tier, are examples for some rules that are configured in the Loyalty Scheme.
Loyalty Schemes are associated with individual customer loyalty accounts and the POS terminal. A diverse number of Loyalty Schemes may be defined based on the requirements.
Create a new Loyalty Scheme
To create a new Loyalty Scheme, follow the below steps.
The Loyalty Scheme Maintenance application can be accessed through:
Configuration -> Financial -> Loyalty Scheme
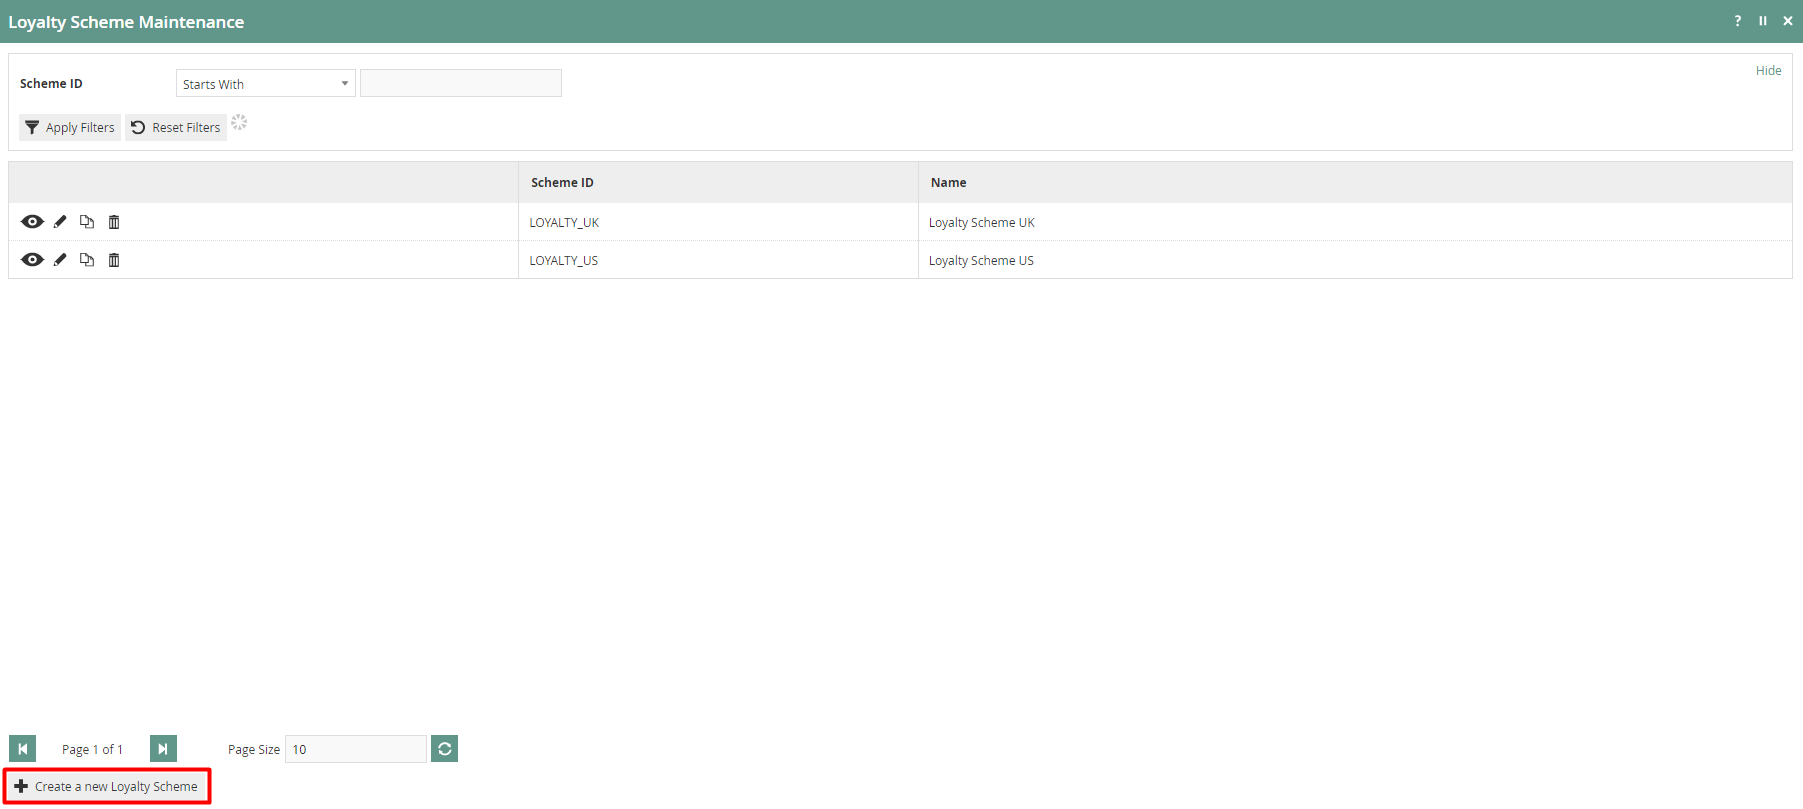
To create a new Loyalty Scheme, select Create a new Loyalty Scheme on the Loyalty Scheme Maintenance page.
Enter a unique Scheme ID for the new Loyalty Scheme. The ID can be alphanumeric and contain a maximum of 20 characters and will be used to uniquely identify this new Loyalty Scheme.

Select Create.
Loyalty Scheme – General Tab
The General tab is the most important in configuring the Loyalty Scheme where the Name, Tier Promotion Strategy and Loyalty Tiers are defined.
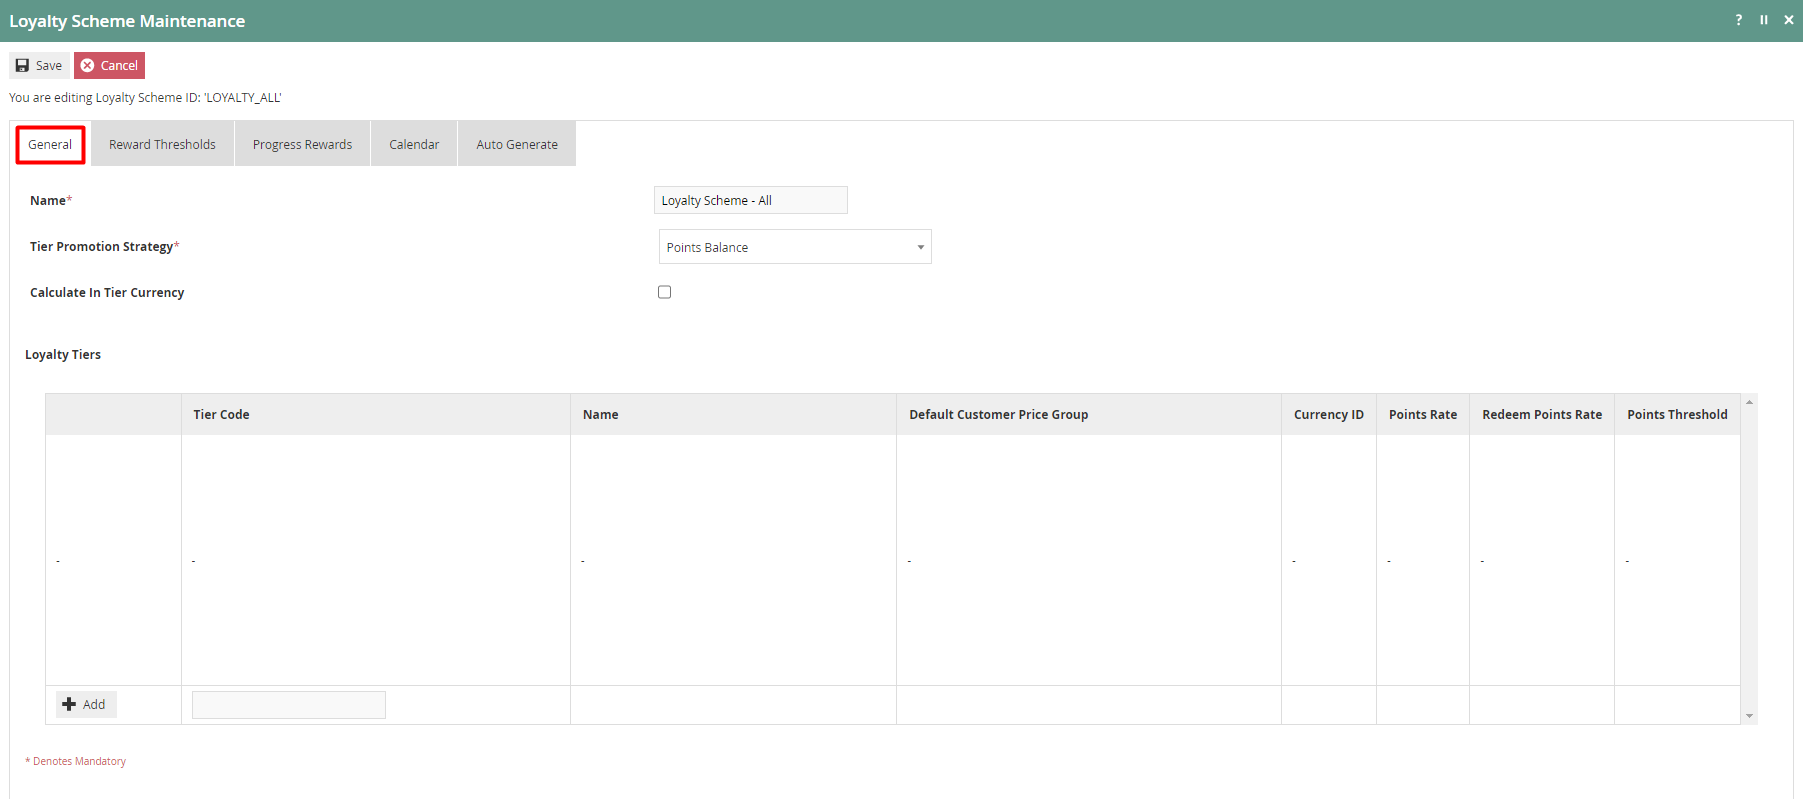
Set the appropriate values on the General tab as follows:
| Configuration | Description |
|---|---|
| Name | Enter a User-Friendly, meaningful name by which Users will be able to identify and select the Roles in other locations of the Estate Manager. The use of some systematic and business-specific naming convention is recommended. Maximum 30 alphanumeric characters. |
| Tier Promotion Strategy | Select an applicable Tier Promotion Strategy from the dropdown list of four available options as follows:
|
| Calculate In Tier Currency | Select the checkbox to consider all calculations of this Loyalty Scheme to be done using the Currency that is defined in the Loyalty Tiers. |
| Loyalty Tiers | Discussed in detail below. |
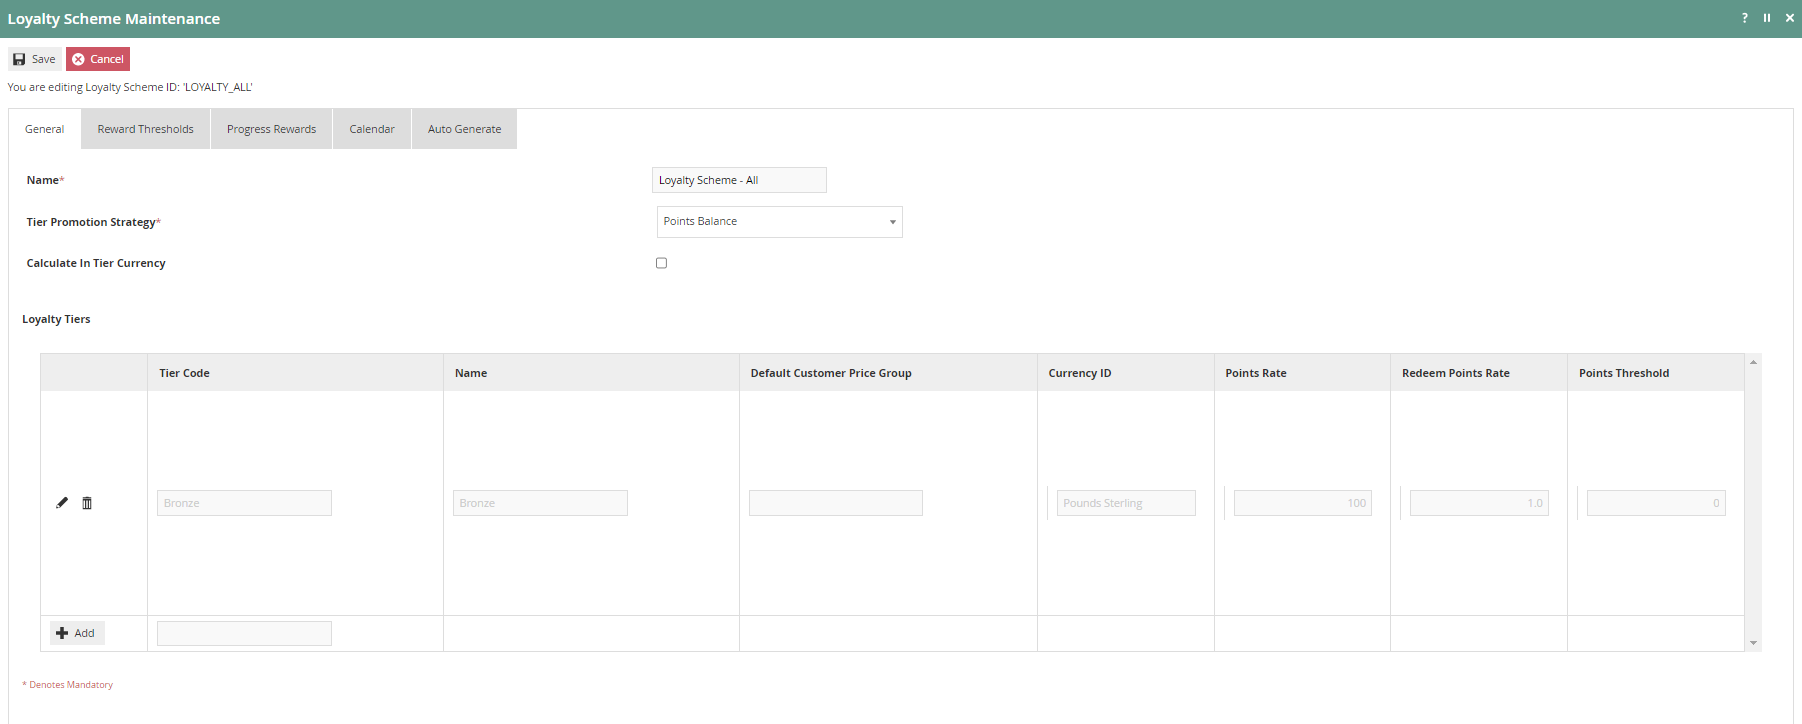
To add Loyalty Tiers for this Loyalty Scheme, enter a suitable Tier Code and select Add.
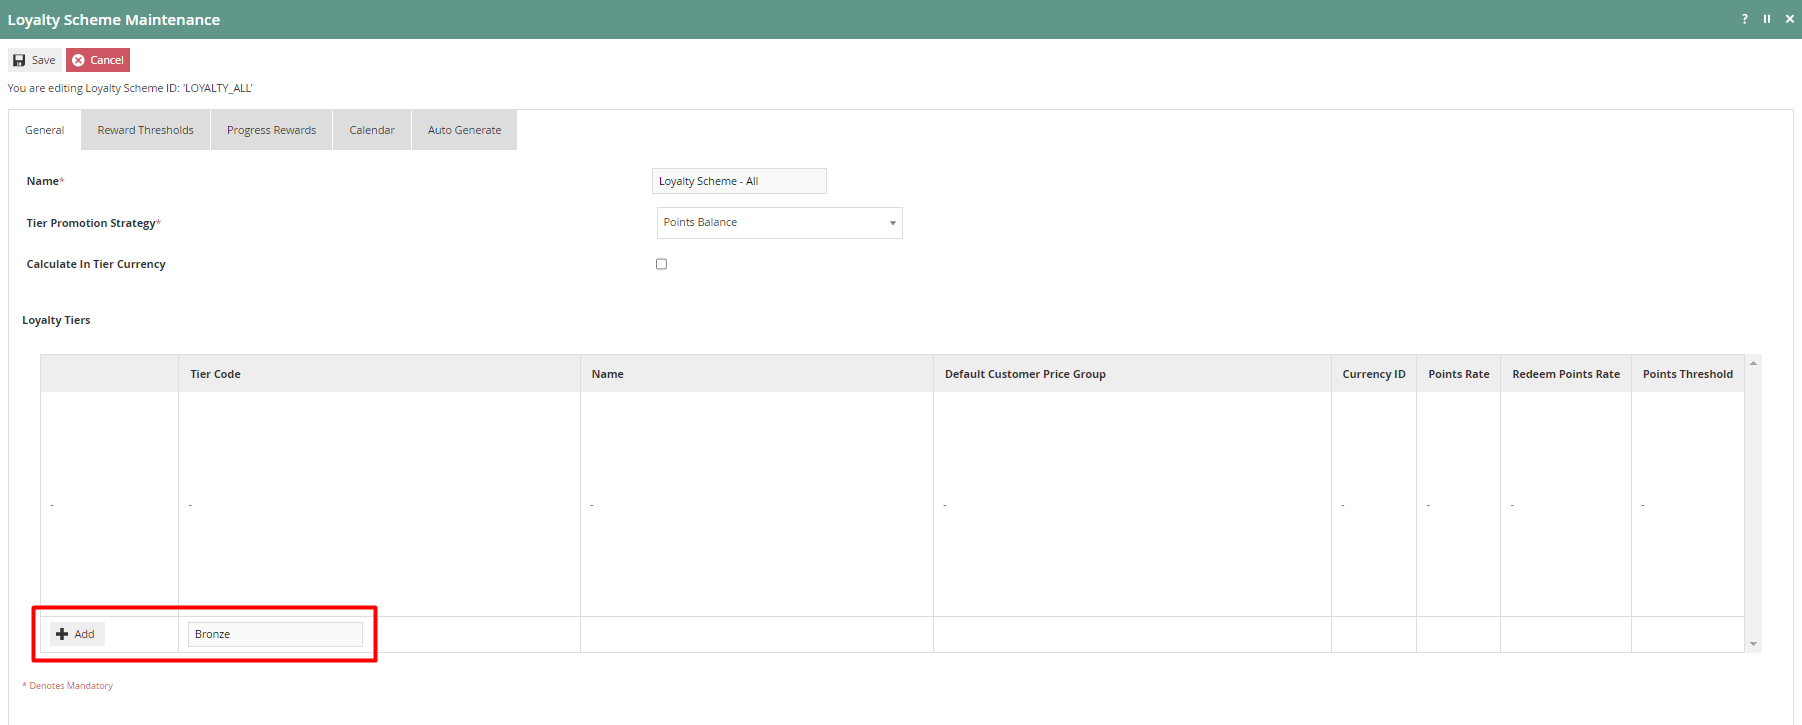
This will navigate the user to the Loyalty Scheme Maintenance of the new Loyalty Tier that was just added.
Loyalty Scheme – Loyalty Tier – General Sub-tab
In the General Tab, enter a name for this Loyalty Tier for which (optionally) a Default Customer Price Group can be selected if required.
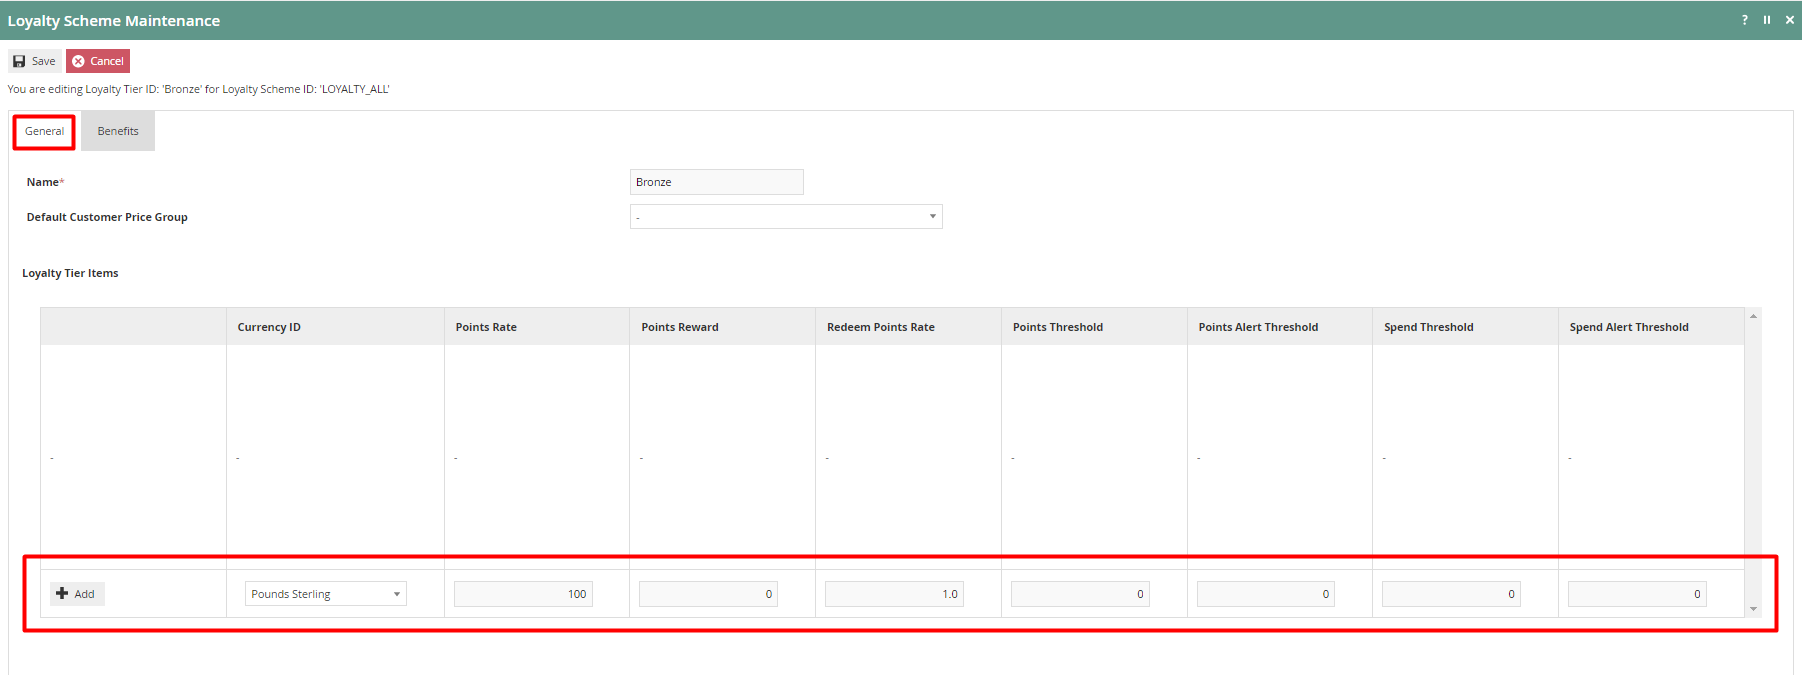
Different values for the Loyalty Tier are to be configured for each column as shown below:
The following table details the properties of Loyalty Tier Item:
| Configuration | Description |
|---|---|
| Currency ID | Select from a dropdown list of configured Currencies. This identifies the association with a specific Currency. |
| Points Rate | Specify the number of basic units of the applicable currency (Eg: If Pounds Sterling, then pence) required to accrue one Point to the Customer Loyalty Account. (Eg: 100 yields One Point per Pound, 50 yields Two Points per Pound). |
| Points Reward | Specify the number of Loyalty Points accrued to the Customer Account per Transaction. |
| Redeem Points Rate | Specify the number of Loyalty Points to redeem to contribute one basic unit of the applicable currency (Eg: One Penny). |
| Points Threshold | Specify the number of Points accumulated in Total required for Promotion to the next Tier. |
| Points Alert Threshold | Specify the number of Points accumulated in Total at which the Customer may be alerted of imminent Promotion to the next Tier. |
| Spend Threshold | Specify the amount of Total Spend accumulated by the Customer required for Promotion to the next Tier. |
| Spend Alert Threshold | Specify the amount of Total Spend accumulated by the Customer at which the Customer may be alerted of imminent Promotion to the next Tier. |
The values will be added as follows for the below example:
-
100 for Points Rate which sets this Bronze Tier to award 1 loyalty point for each 100 pence spent.
-
1 for Redeem Point Rate which sets this Bronze Tier to be able to redeem points at a rate where 1 loyalty point is equal to 1 penny.
Enter the appropriate values to the new Loyalty Tier and select Add.
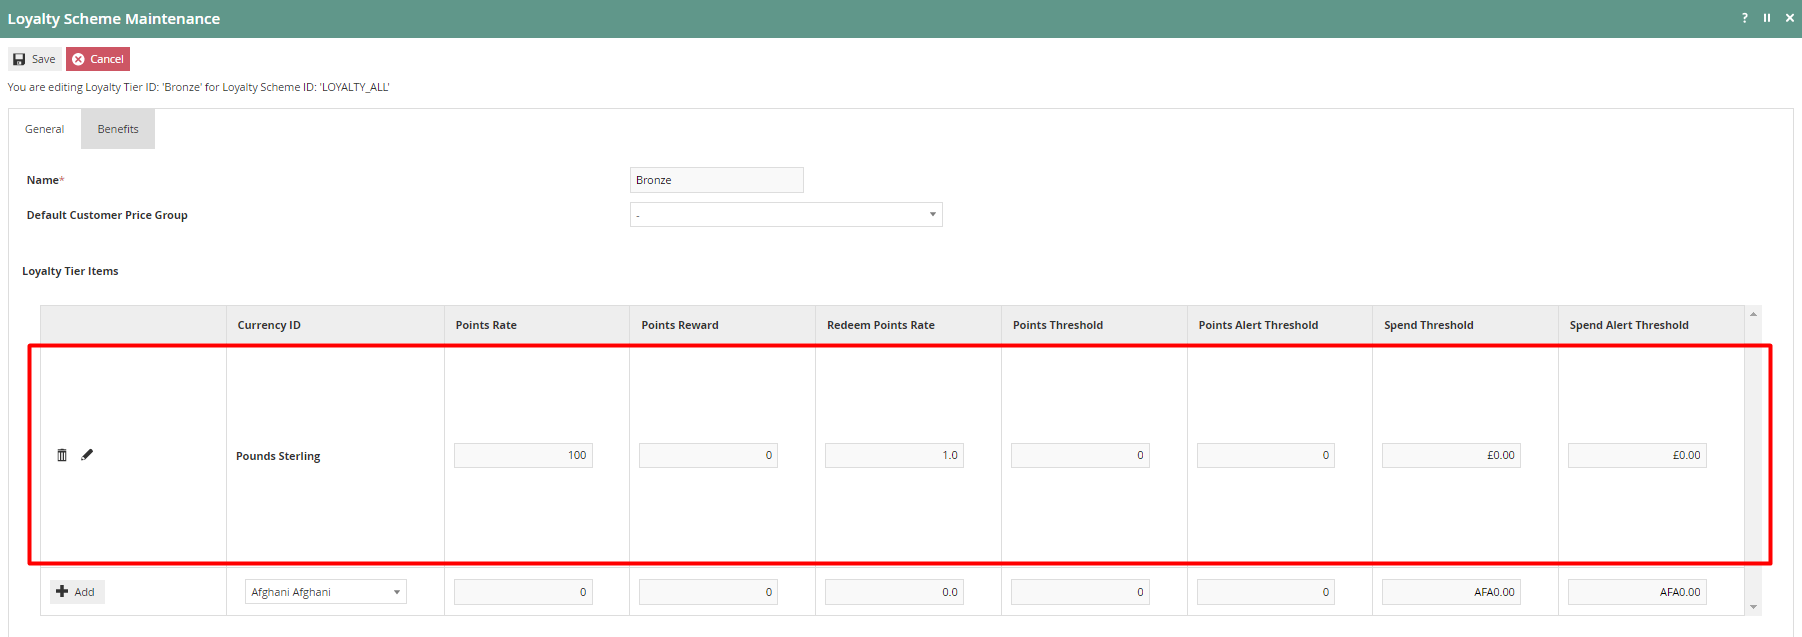
Select Save.
The new Bronze Tier has been successfully added to the Loyalty Scheme as shown below:
More Tiers can be added to the Loyalty Scheme using the same method as above and will display multiple tiers as shown below:
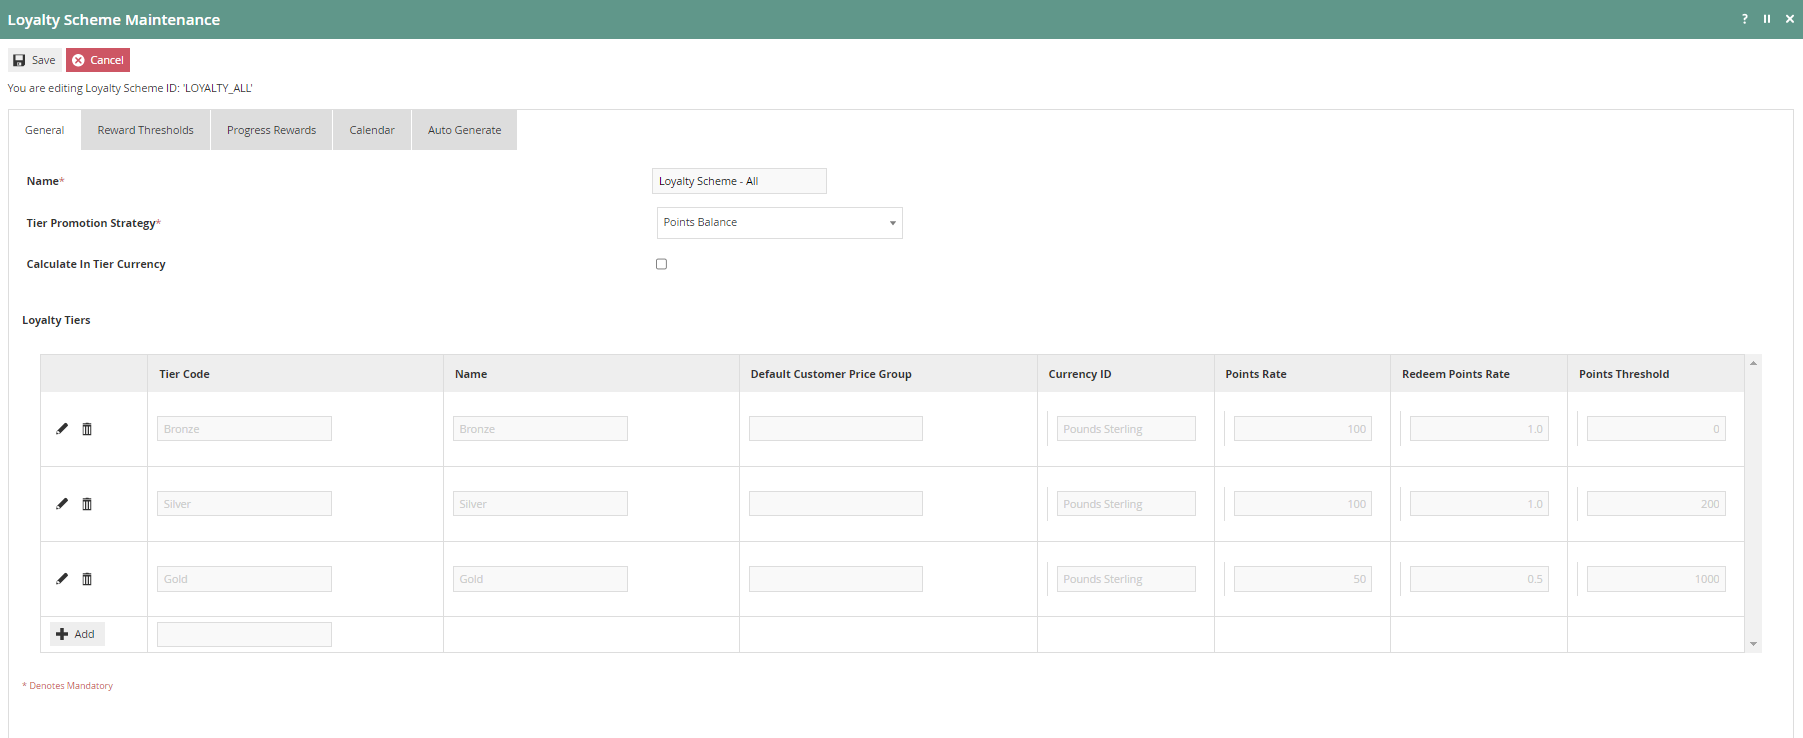
Note: The values of the Points Threshold column are different for each Tier, as it is necessary for the customer to have that required number of points for them to be able to qualify for the next Tier. Also, note that the Points Rate and Redeem Points Rate are different in the Gold Tier since the customers in a higher loyalty Tier should be having more benefits.
Select Save to successfully add the new Loyalty Scheme.
Broadcast the Loyalty Scheme entity to the applicable device(s) to use this new Loyalty Scheme.
Configure Loyalty Scheme in the POS terminal
There are Loyalty-based configurations that can be made in the POS terminal to increase the efficiency of using Loyalty-based functions in the POS. To configure the POS terminal with Loyalty Scheme configurations can be added to the POS terminal in the POS Terminal Maintenance application.
The POS Terminal Maintenance application can be accessed through:
Configuration -> Organisation -> POS Terminals
In the POS Terminal Maintenance page, select the Edit icon of the desired POS Terminal.
POS Terminals – Loyalty Tab
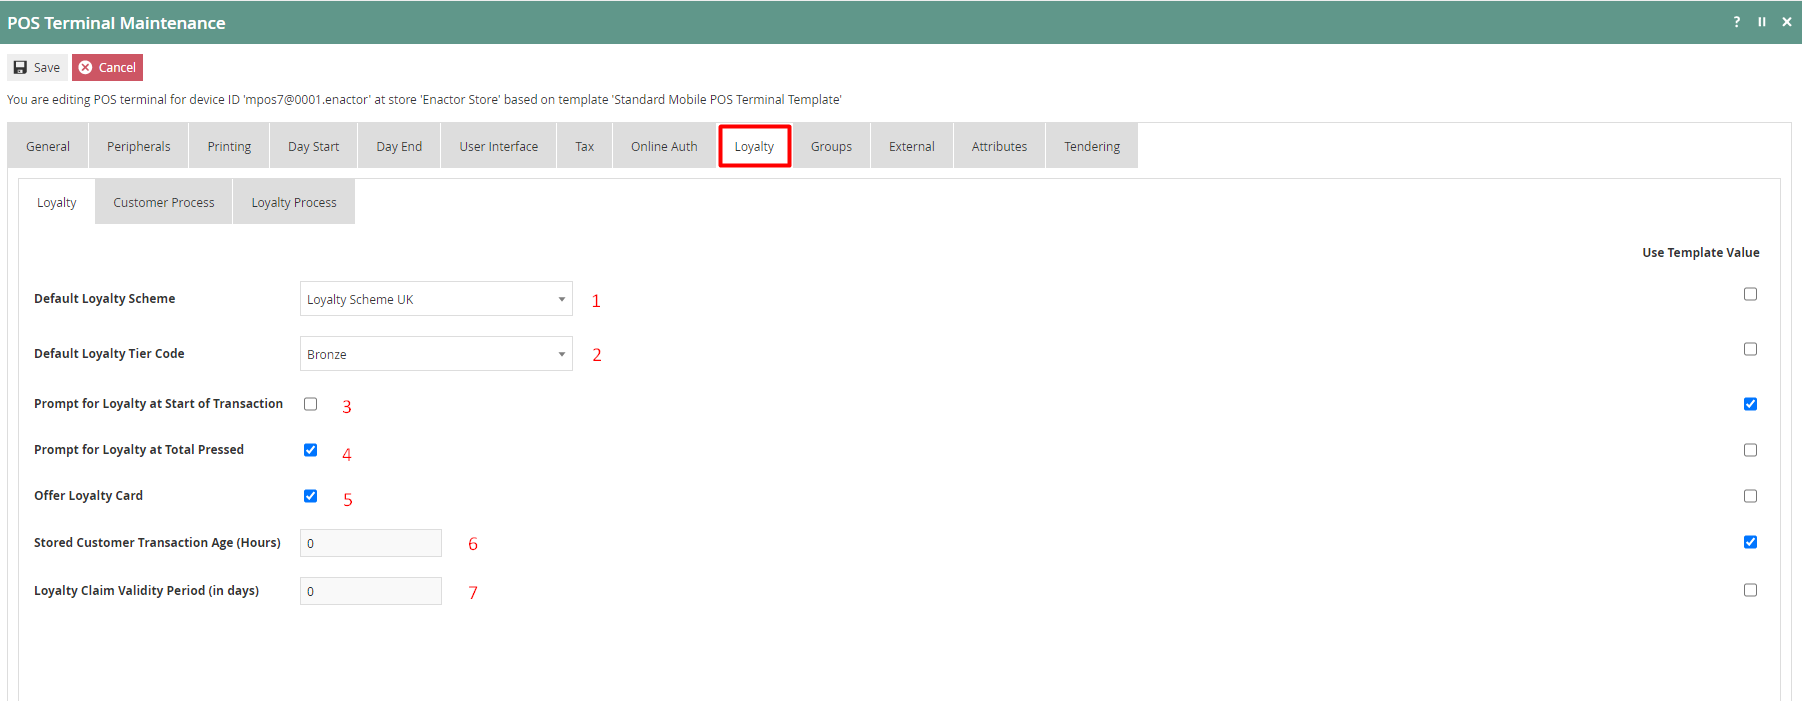
Set the appropriate values on the Loyalty tab as follows:
| Configuration | Description |
|---|---|
| Default Loyalty Scheme | Select the desired Loyalty Scheme from the dropdown list selection of defined Loyalty Schemes. |
| Default Loyalty Tier Code | Select the desired Loyalty Tier Code from the dropdown list selection of defined Loyalty Tier Codes. These are defined in Loyalty Scheme Maintenance. |
| Prompt for Loyalty at Start of Transaction | Select checkbox, to prompt the operator to enter loyalty information, at the start of a transaction for loyalty capture on this POS Terminal. |
| Prompt for Loyalty at Total Pressed | Select checkbox, to prompt the operator to enter loyalty information, at the Total Pressed stage of a transaction for loyalty capture on this POS Terminal. |
| Offer Loyalty Card | Select checkbox, indicate that a Loyalty card should be offered at the Total Pressed stage of a Transaction, if the there is no Loyalty Customer captured. |
Select Save.
Broadcast the POS Terminal entity to the desired device(s) to use the above Loyalty functions on POS.
Role Configuration
For the users of Loyalty functions, specific Loyalty-based privileges and menu configurations must be configured to access the Loyalty functions in the POS. This section lists the privileges and menu functions that are specific to Loyalty.
Privileges Configuration
The User Role Maintenance application can be accessed through:
Configuration -> HR -> User Roles

In the User Role Maintenance, select the Edit icon of the desired User to enable the privilege for.
Navigate to the Authorised Functions tab of that selected User and apply the following filters:
Application Package > Enactor POS
Function ID > Contains, loyalty
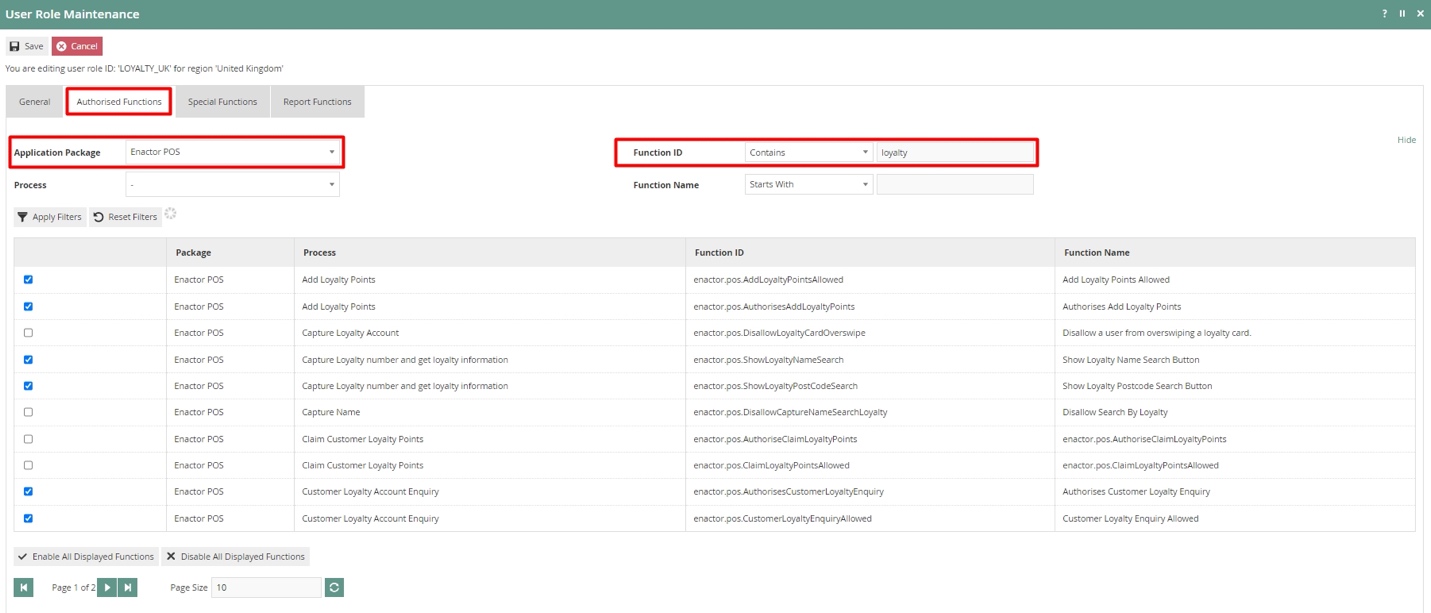
This lists the privileges that are required to access some of the Loyalty-based functions:
| Package | Process | Function ID | Function Name |
|---|---|---|---|
| Enactor POS | Add Loyalty Points | enactor.pos.AddLoyaltyPointsAllowed | Add Loyalty Points Allowed |
| Enactor POS | Add Loyalty Points | enactor.pos.AuthorisesAddLoyaltyPoints | Authorises Add Loyalty Points |
| Enactor POS | Claim Customer Loyalty Points | enactor.pos.ClaimLoyaltyPointsAllowed | enactor.pos.ClaimLoyaltyPointsAllowed |
| Enactor POS | Claim Customer Loyalty Points | enactor.pos.AuthoriseClaimLoyaltyPoints | enactor.pos.AuthoriseClaimLoyaltyPoints |
| Enactor POS | Display Loyalty Account | enactor.pos.AllowLoyaltyDetailsPrint | Allow loyalty details print |
| Enactor POS | Do Capture Loyalty Account | enactor.pos.VoucherRedeemInCaptureLoyaltyAllowed | Redeem Customer Voucher in Capture Loyalty Allowed |
| Enactor POS | Issue New Loyalty Card | enactor.pos.LoyaltyGenerateCardNumberAllowed | enactor.pos.LoyaltyGenerateCardNumberAllowed |
| Enactor POS | Issue New Loyalty Card | enactor.pos.LoyaltyIssueNewCardAllowed | Issue New Loyalty Card Allowed |
| Enactor POS | Issue New Loyalty Card | enactor.pos.AuthorisesLoyaltyIssueNewCard | Authorises Issue New Loyalty Card |
| Enactor POS | Loyalty Account Tender | enactor.pos.LoyaltyAccountTenderAllowed | Loyalty Account Tender Allowed |
| Enactor POS | Loyalty Account Tender | enactor.pos.AuthorisesLoyaltyAccountTender | Authorises Loyalty Account Tender |
Ensure that the selected User has the required privileges enabled by ticking on the necessary functions that are listed.
Select Save.
Now the user will be able to carry out all Loyalty-based functions in the POS.
Menu Configuration
To run the Loyalty-based functions in the POS, the menu should be configured with the functions that are required by the user.
The Menu Maintenance application can be accessed through:
Configuration -> System -> User Roles

Select the appropriate menu (E.g., Sales Menu) that the Loyalty-based functions are to be added.
Loyalty Basic Menu Functions
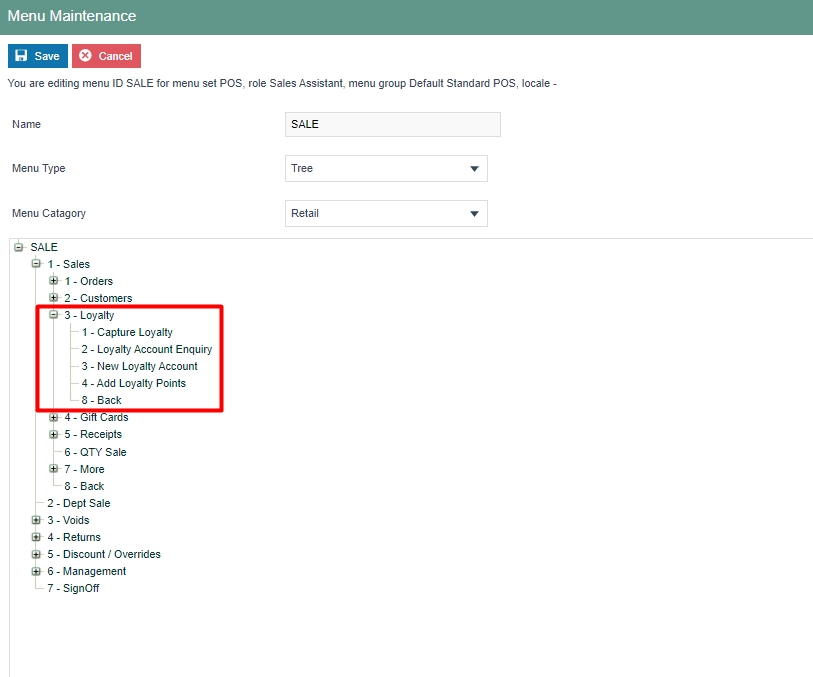
The basic functions of Loyalty can be configured in the existing Sales menu by adding a new folder named Loyalty and configuring the menu functions as required under this folder.
Following is an example of a configured Sales Menu which contains all the basic Loyalty functions:
Following is an example of the Customer Loyalty Account Enquiry event of this menu:
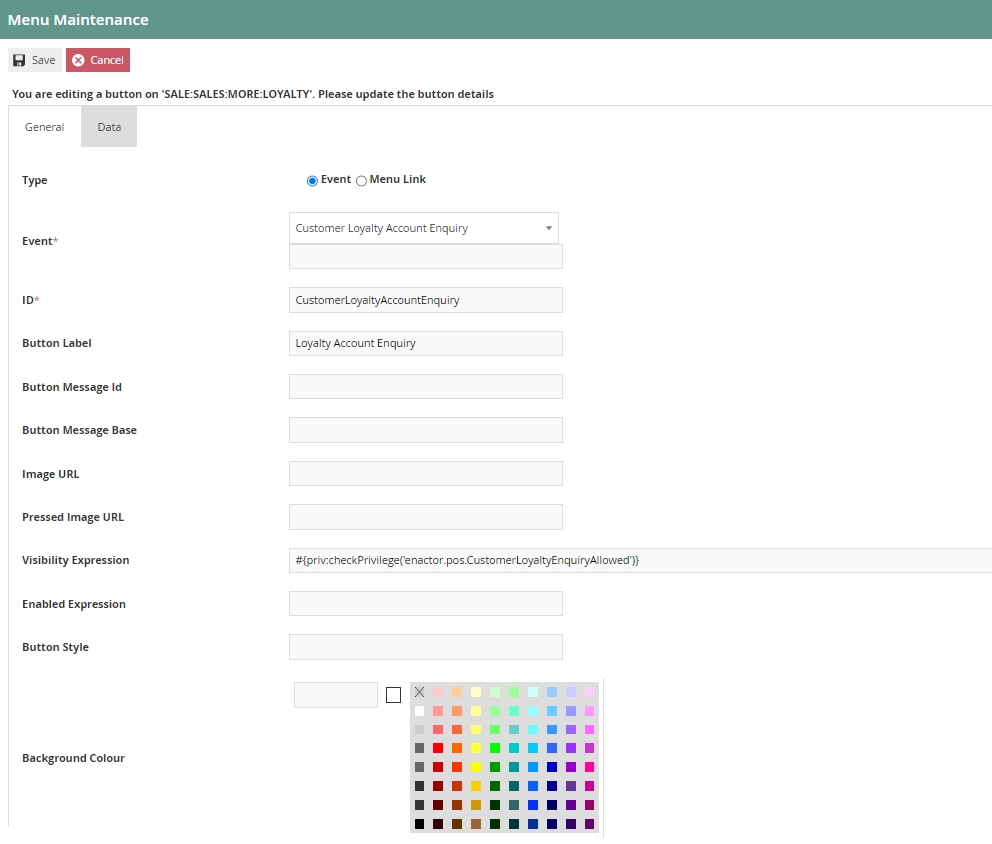
Following are the details of the Loyalty-based events that can be configured:
| Event Name |
| Privileges |
|---|---|---|
| Capture Loyalty | Allows the user to capture the customer as a Loyalty customer in the current transaction. | No privileges are required. |
| Customer Loyalty Account Enquiry | Allows the user to enquire the details of an existing customer Loyalty account. | enactor.pos.CustomerLoyaltyEnquiryAllowed |
| New Loyalty Account | Allows to user to create a new Customer Loyalty account using the POS. | enactor.pos.LoyaltyIssueNewCardAllowed |
| Add Loyalty Points | Allows to manually add Loyalty Points, for the current transaction using the POS, using the “Add Loyalty Points” reasons that have been configured. | enactor.pos.AddLoyaltyPointsAllowed |
The usage of some of these events is demonstrated in latter sections of this guide.
Loyalty Tender Menu Functions
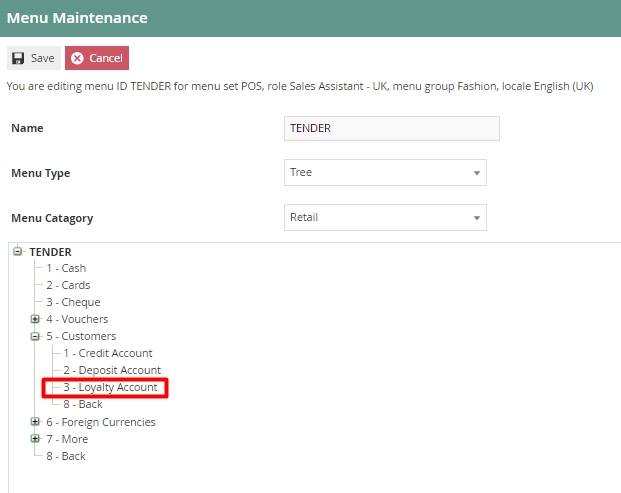
Redemption of Loyalty points can be done as a Tender option in the POS by configuring the Tender menu. Before making configurations in the menu itself, a Tender for this purpose must be configured. Configuring Tenders is covered in a separate How-to guide. Once a Tender is configured, navigate to the Menu Maintenance application, and select the Tender menu that you wish to add the Loyalty tender option to.
Following is an example of a configured Tender Menu which contains Customer Loyalty:
Following is an example of the Loyalty Account event of this menu:

Once the Loyalty Tender has been configured in the Tender Maintenance, the Loyalty Account Tender button should be configured to use the Loyalty Tender that has been configured.
To do this, click on the Data tab of the Loyalty Account Tender button and select from the dropdown the Loyalty Tender that has already been configured in the Tender Maintenance and click on Add as follows:
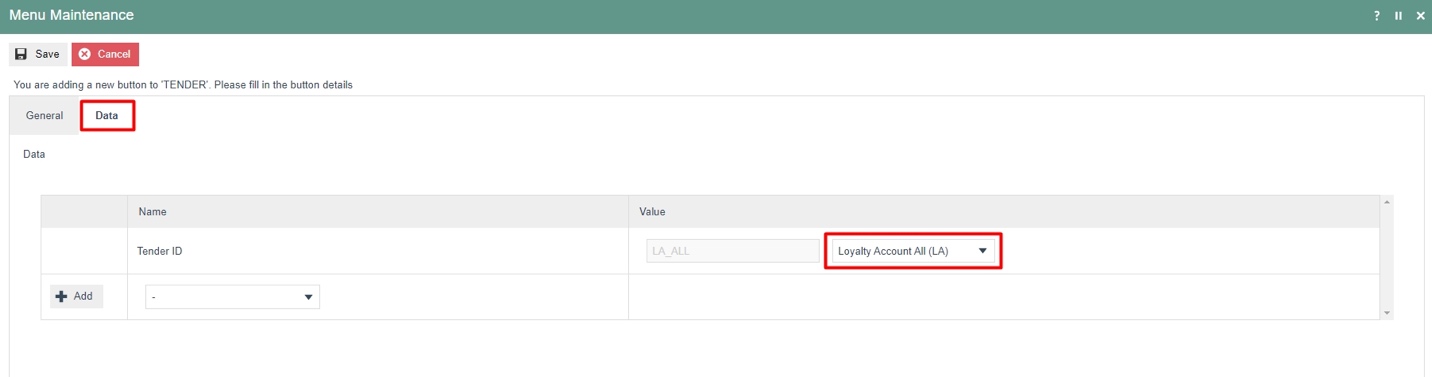
This would allow the user to select the option of using loyalty points
to redeem for the current transaction as a tender option in the tender
menu.
Note: Make sure that the “enactor.pos.LoyaltyAccountTenderAllowed”
privilege has been assigned to the user to allow Loyalty Account Tender.
The usage of this menu event is demonstrated in a latter section of this guide.
Customer Loyalty Configuration
To use the Loyalty Scheme that was configured, a customer, a customer loyalty account and a customer loyalty card must be created. Before creating a customer loyalty card, the IIN range for the customer loyalty card must be configured to ensure that the card is identified as a loyalty card which is associated with the loyalty scheme created.
Create a new IIN Range
To create a new IIN Range follow the below steps:
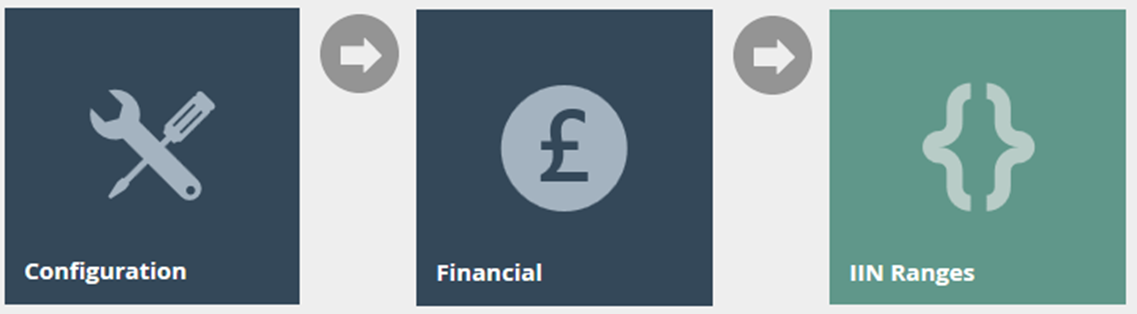
The IIN Range Maintenance application can be accessed through:
Configuration -> Financial > IIN Ranges
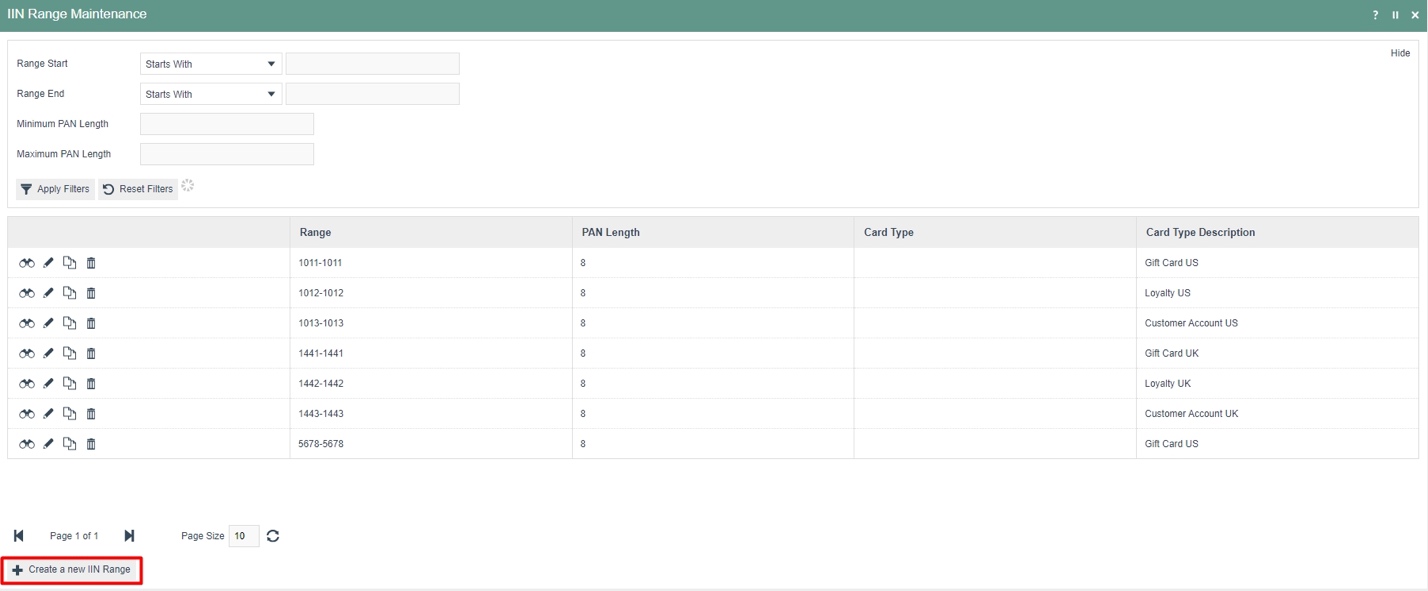
To create a new IIN Range, select Create a new IIN Range on the IIN Range Maintenance page.
Enter a Start and End IIN Range for the new customer loyalty card which will be a fixed value that indicates what type of card.
Enter the Minimum and Maximum PAN Length of the card.
According to the following configurations set, the card starting with
the four digits “1212” and has a length of 8 digits is considered as a
Customer Loyalty Card.
E.g.: 12120001
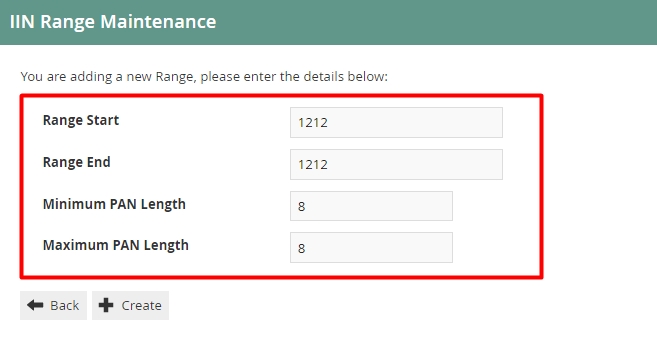
Select Create.
IIN Range – General Tab
The General tab captures the basic information of the new IIN Range.

Set the appropriate values on the General tab as follows:
| Configuration | Description |
|---|---|
| Card Description | Enter a User-Friendly, meaningful description by which to identify the Card Range in other locations of the Estate Manager. Maximum 40 alphanumeric characters. |
| Issuer Description | Enter a User-Friendly identification of the Card Issuer. Maximum 40 alphanumeric characters. |
| No LUHN Check Digit | Checkbox, if true indicates that no LUHN check should be applied to this IIN Range (Last digit must otherwise conform to LUHN Check calculation). |
| Country | Select from a dropdown list of all configured Countries. |
| Currency | Select from a dropdown list of all configured Currencies. |
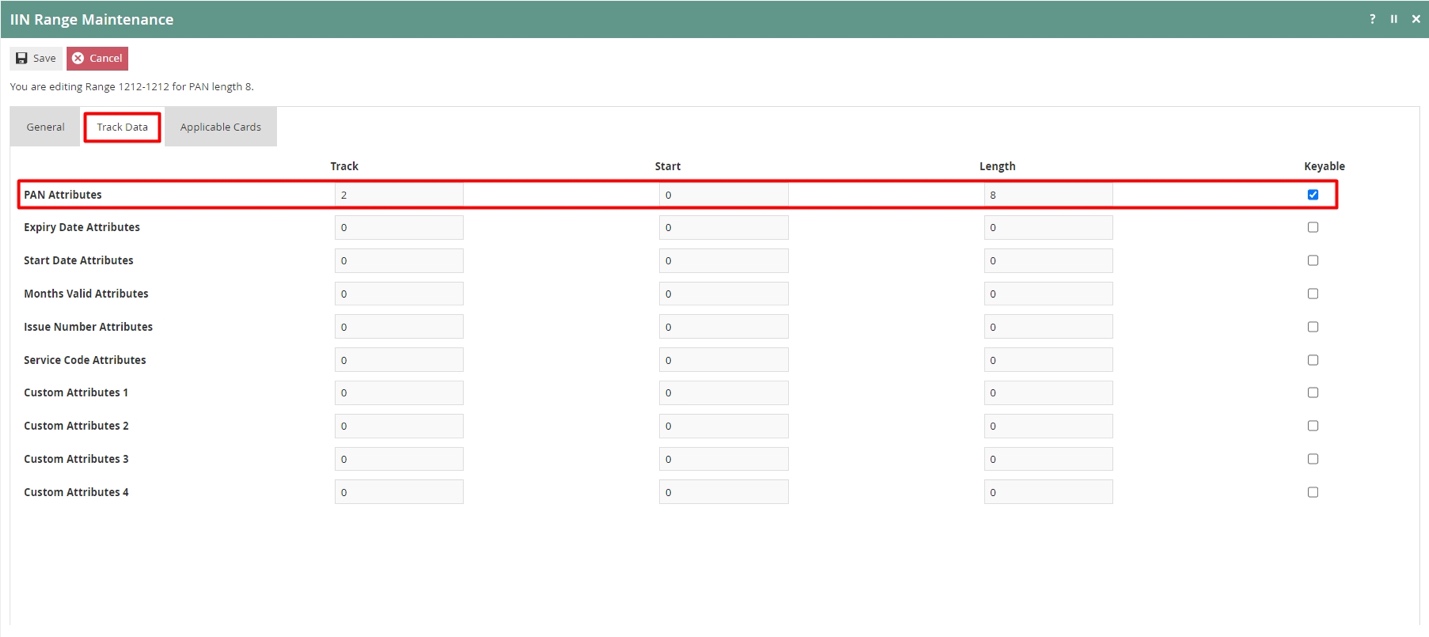
IIN Range – Track Data Tab
The Track Data Tab is used to configure how the data of the card is to be read.
Enter the value 2 for the Track Field, the PAN Length for the Length field and tick the Keyable option as shown below:
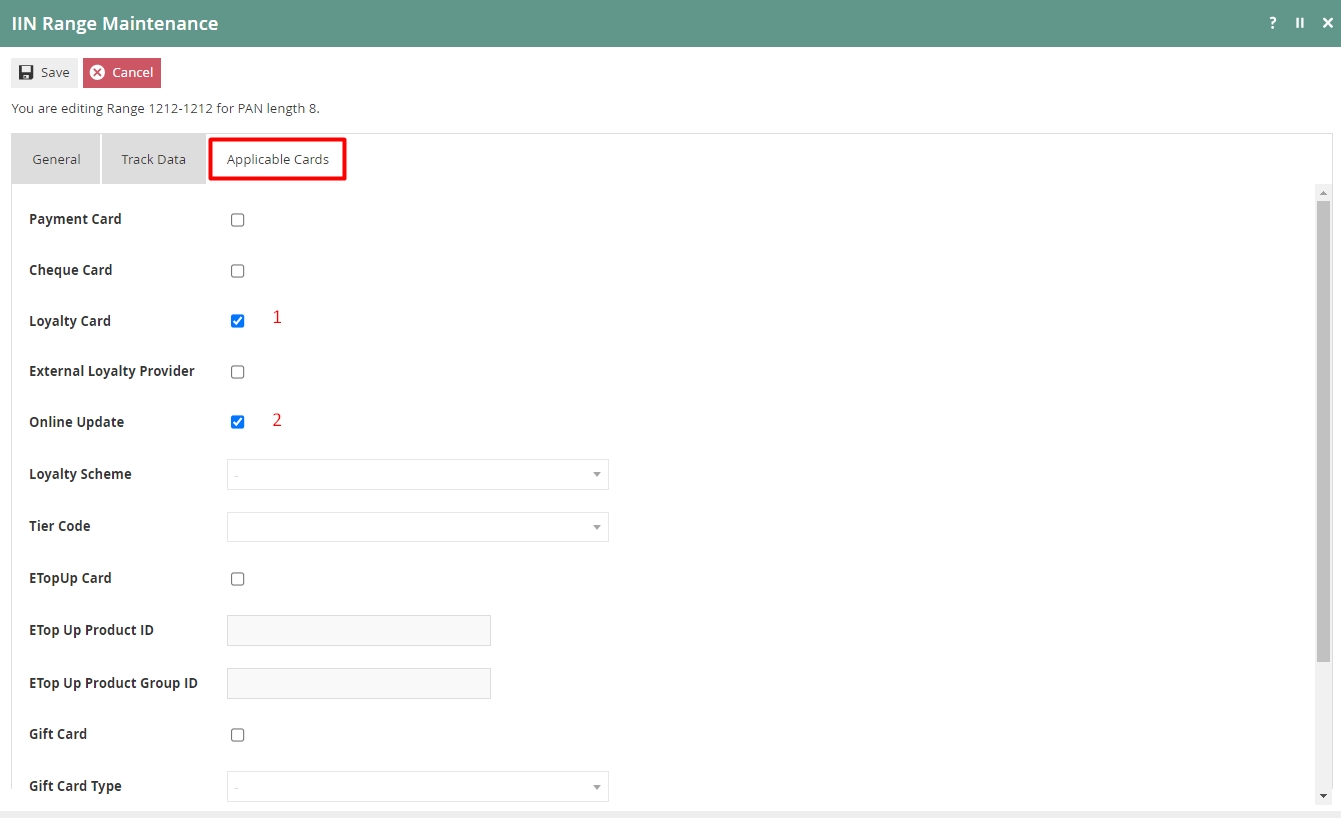
IIN Range – Applicable Cards
The Applicable Cards Tab is used to configure the card related configurations for this IIN Range.
Make sure to tick on the Loyalty Card and Online Update checkboxes as shown below:
Set the appropriate values on the Applicable Cards tab as follows:
| Configuration | Description |
|---|---|
| Loyalty Card | Select checkbox, to enable the card for use as a Loyalty Card. |
| Online Update | Select checkbox, to enable online update of loyalty accounts. It defaults to true. |
Select Save to successfully add the new IIN Range.
Broadcast the IIN Range entity to the desired device(s) to use this new IIN Range to create new Customer Loyalty Cards.
Create a new Customer, Customer Loyalty Account and Customer Loyalty Card
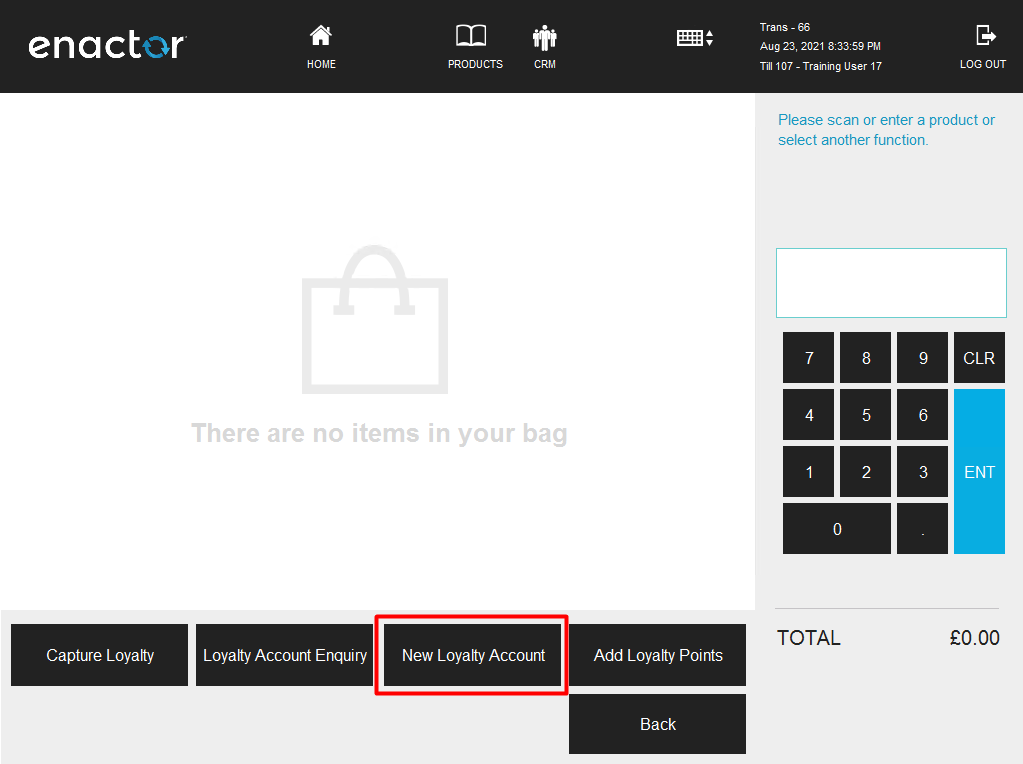
Following setting up a loyalty scheme and an IIN range for the customer loyalty card, a customer, a customer loyalty account, and a customer loyalty card must be created. This can be done on the New Loyalty Account function in the POS:
-
Navigate to Sales -> More -> Loyalty and use the New Loyalty Account function in the menu.
-
Enter a new Customer Loyalty Card number which is within the IIN range that has been configured in the previous section (Eg:12120001, 12120002) This will be the new loyalty card that will be issued for the new loyalty customer and will be associated with both the new customer account and the customer loyalty account.
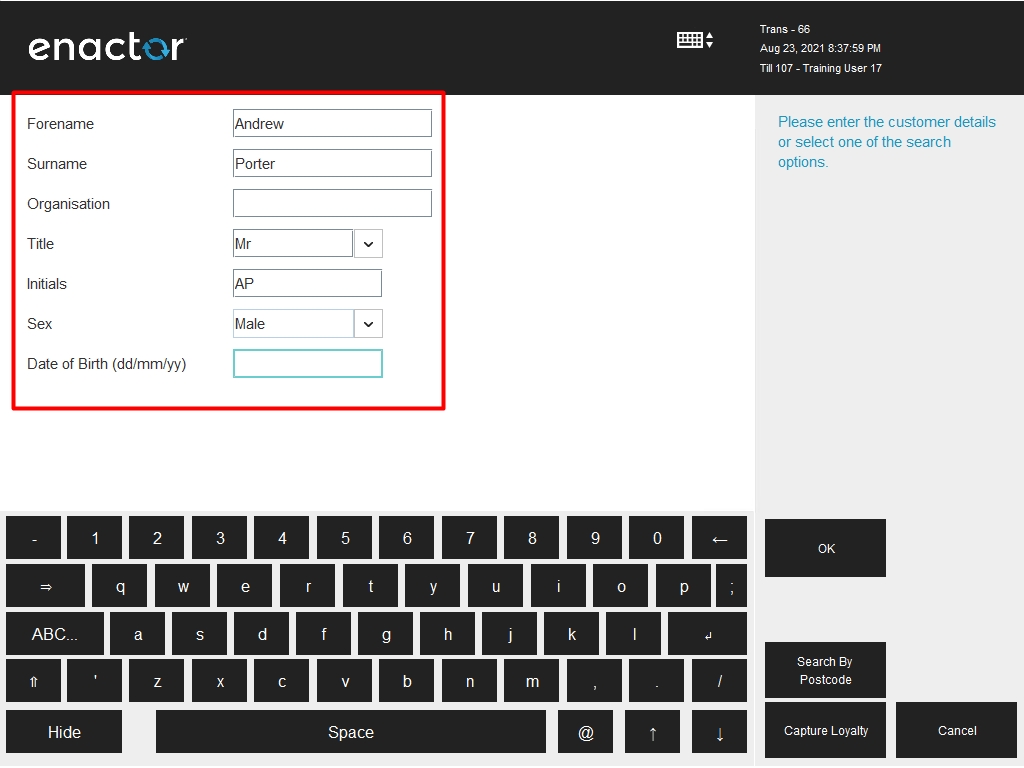
-
Enter the basic identification details of the new customer account and select OK.
-
Enter the address details of the new customer account and select OK.
1. 2.

3. 4.

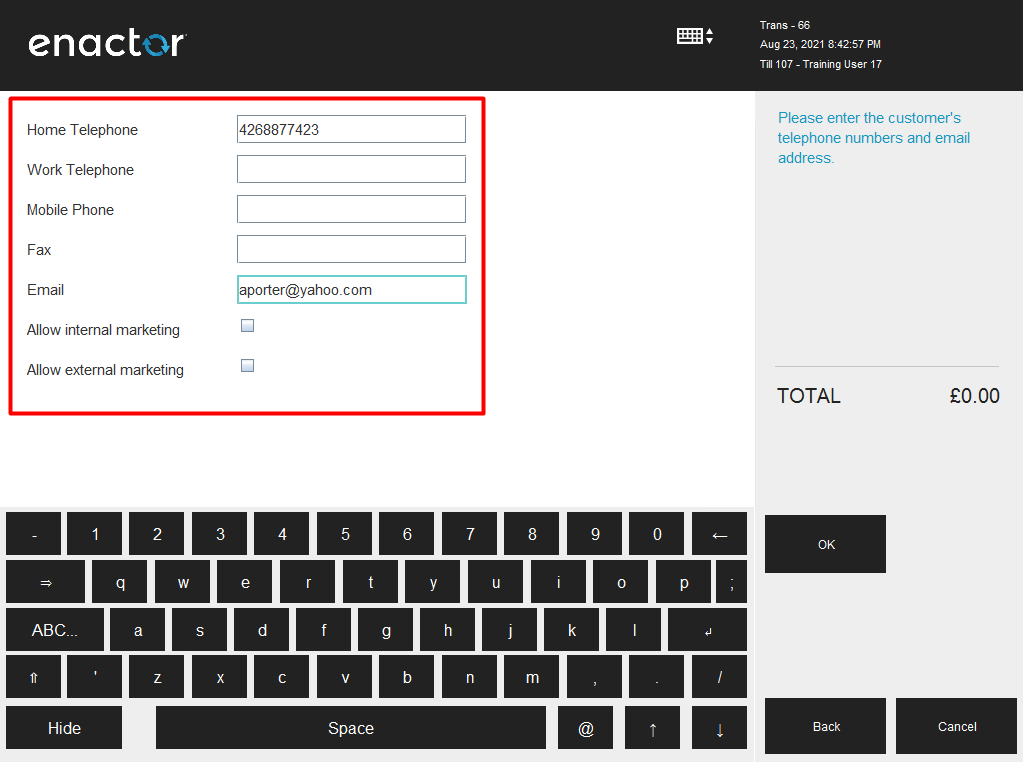
-
Enter the contact details of the new customer account and select OK.
-
At this stage, the right loyalty scheme must be selected in association with this new customer account to a new customer loyalty account. Select the Loyalty Scheme and the Loyalty Tier to be applied to this customer and select OK.
-
If the new customer, customer loyalty account and the loyalty card have successfully been created; the loyalty customer’s details will be displayed as shown below:
5. 6.

7.
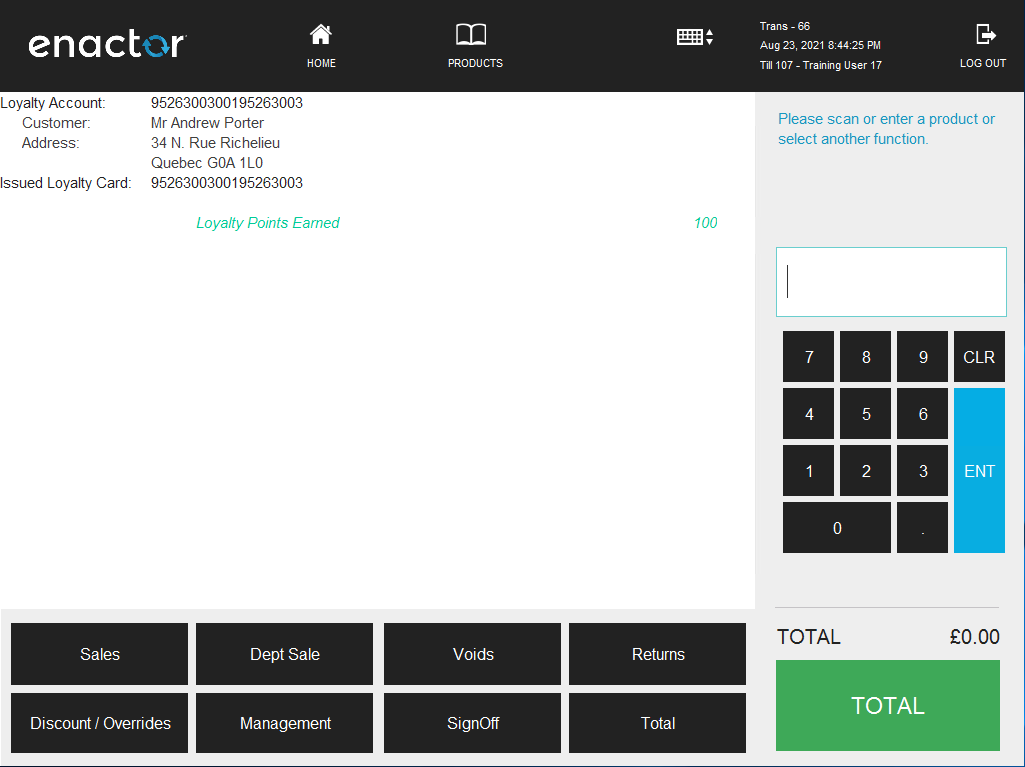
This new Loyalty Customer is now ready to carry out Loyalty-based transactions such as capturing and redeeming of Loyalty points.
Capturing of Loyalty Points
Once a new customer is created who is associated to both a customer loyalty account and a loyalty card, sales transactions can be performed to capture loyalty points based on the Loyalty Scheme defined. Following steps describe of how to execute this using the POS:
Before or after adding products to the basket, the loyalty customer must be added to captured loyalty points.
-
Navigate to Sales -> More -> Loyalty and use the Capture Loyalty function in the menu.
-
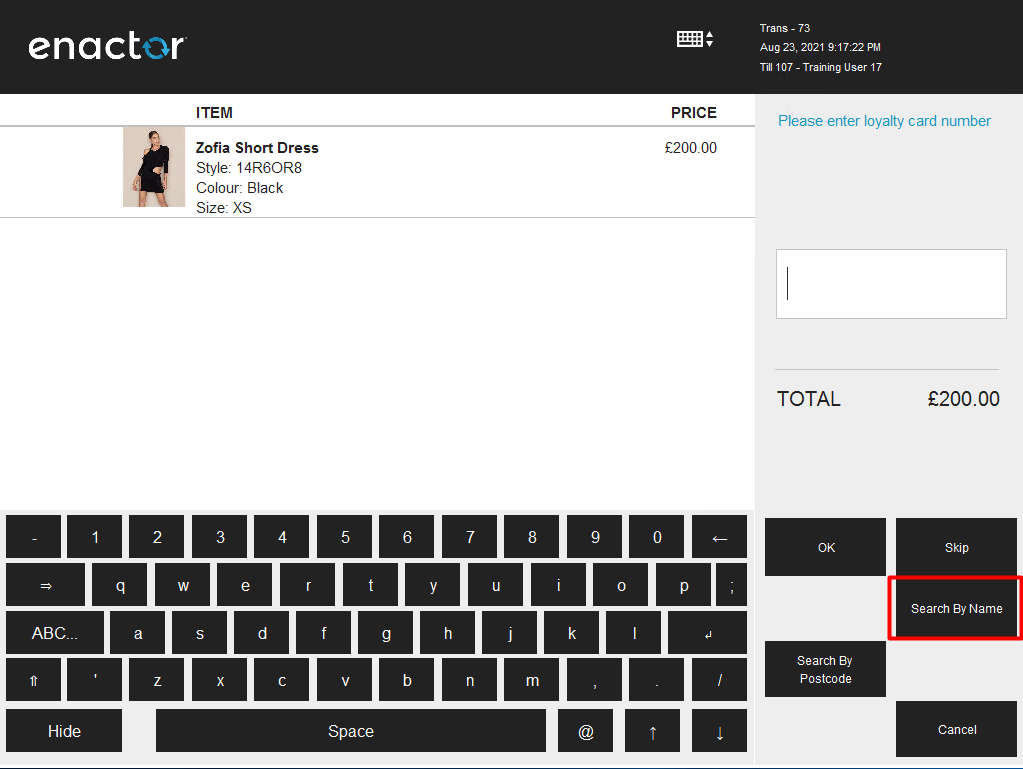
The user will be prompted to enter a loyalty card number. Enter the loyalty card number and select OK.
-
Alternatively, select the Search By Name button.
-
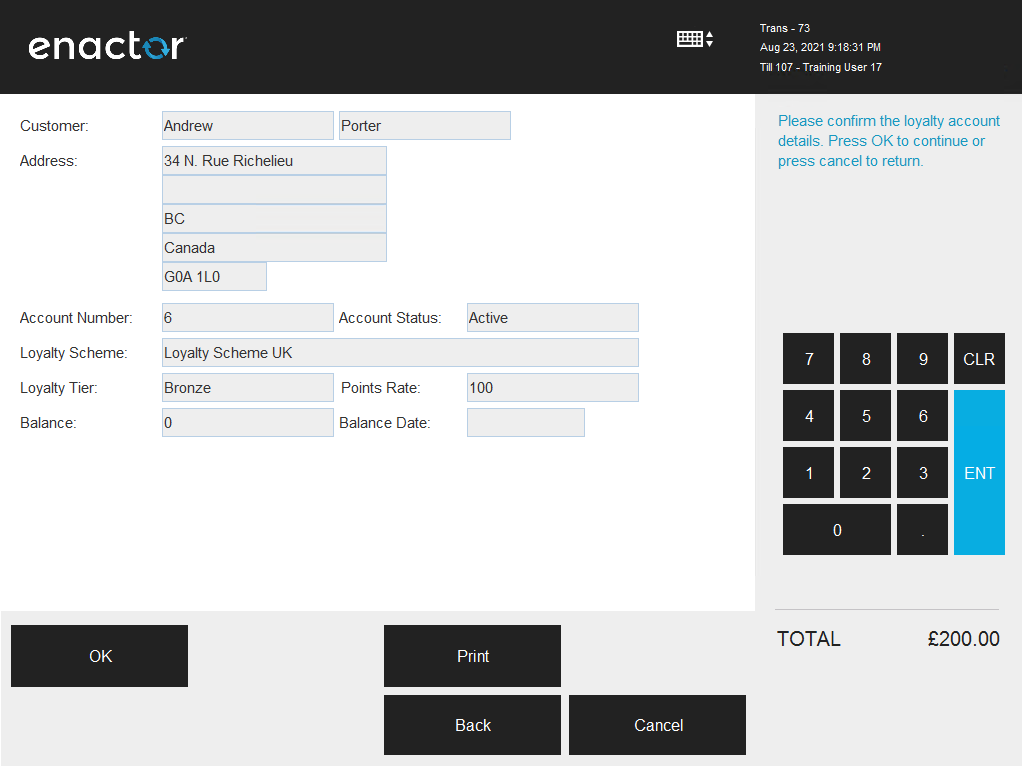
The following screen will be displayed to confirm the Loyalty account. Select OK to confirm.
-
If the Loyalty account is successfully added, and it is ready for capture, the loyalty customer’s details will be displayed along with the points earned from the products in the basket.
1. 2.
 

3. 3.

4. 5.

- Select Total and complete the tender of this transaction. The customer loyalty account details will also be visible in the receipt as shown below:
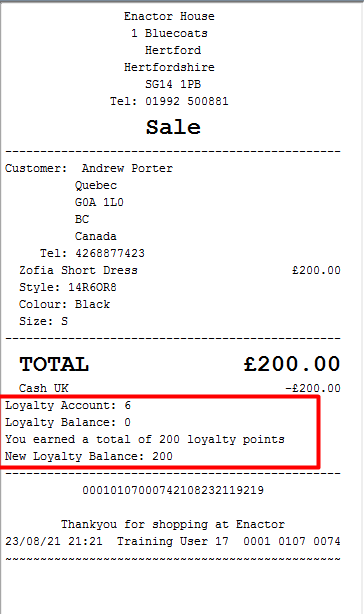
This is another way to verify that the captured loyalty customer has points added to their loyalty account based on the loyalty scheme configured.
Redeeming of Loyalty Points
After Loyalty Customers have earned points to their Loyalty Accounts, they are able to redeem their available points as a tender option to pay for transactions. The rate at which these points can be redeemed is configured in the Loyalty Scheme that is defined. Following are the steps to redeem loyalty points during a transaction in the POS:
-
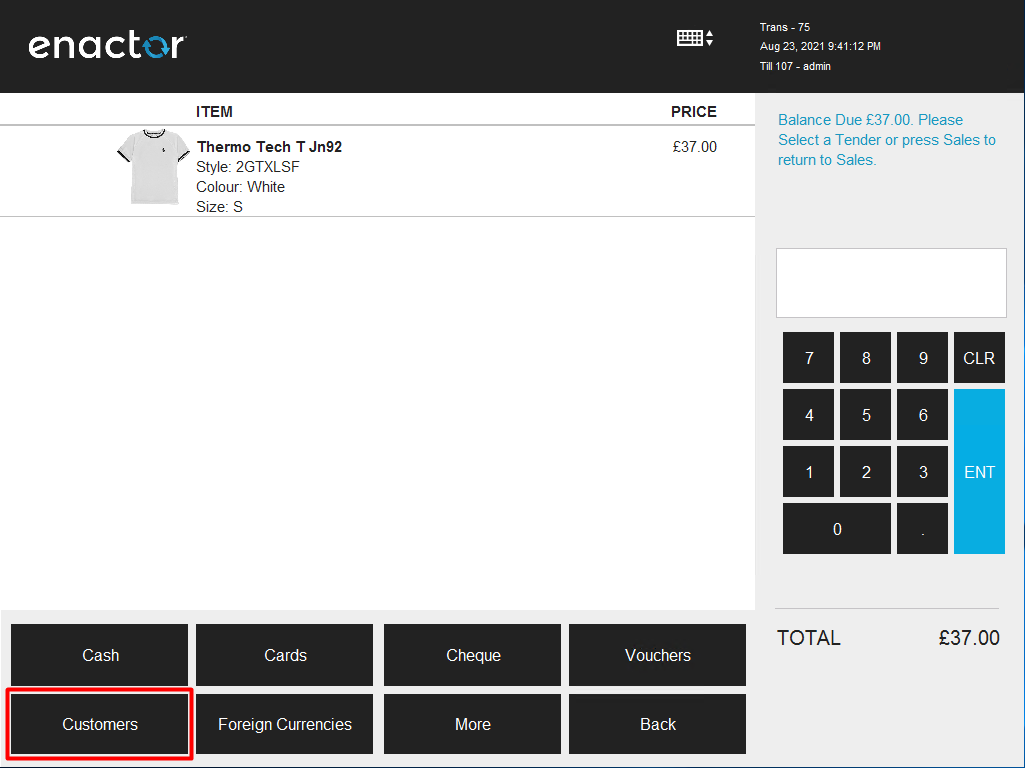
After adding the products to the basket, select on the Total function to navigate to the Tender menu. The available tender options will be displayed as shown below. Select Customers.
-
Select the Loyalty Account button to select the loyalty account that the user wishes to redeem points from.
-
The user will then be asked to enter a loyalty card number. Enter the loyalty card number or Search by Name as done when Capturing Loyalty. Select OK. The user will then be navigated to a screen that will request for the amount that the customer wishes to redeem from the loyalty account. Enter the amount the customer wishes to redeem and select OK.
-
If the loyalty account and redeemed the point have been successfully added, the loyalty customer’s details will be displayed along with the points redeemed.
1. 2.

3. 4.
 

- Once Cash or any other tender option is selected to complete the tender of this transaction, the customer loyalty account details will also be displayed in the receipt as shown below:
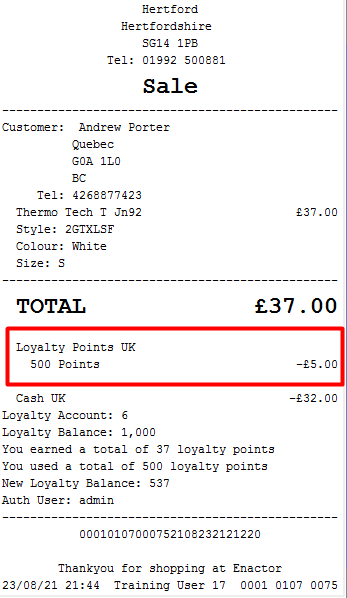
This is another way to verify that the points have been redeemed from the customer loyalty account based on the loyalty scheme configured.