How to configure a new Restaurant
Introduction
The purpose of this guide is to provide a foundational understanding of the options and capabilities available when configuring a Restaurant Store.
Often, users would leverage the Template capabilities within Enactor to set up new and manage existing locations. The use of Templates is covered in a separate guide. This document will focus on completing the core configuration steps manually.
Overview
All activities required to define and configure a new Restaurant Store is provided here.
This guide will cover the configuration for the following:
-
Restaurant Location
-
Restaurant Areas
-
Device
-
POS Terminal
Region configuration is covered in the How to configure a base Organisation Structure guide.
Prior Training / Experience
You should be familiar with the following:
-
Estate Manager configuration
-
Data broadcasting
Restaurant Location
Enactor supports multiple Location types: Store, Warehouse, Office, and Restaurant etc. This guide will focus on setting up a new Restaurant (Hospitality) Location.
Creating a Restaurant Location
The location maintenance application can be accessed through:
Configuration -> Organisation -> Locations
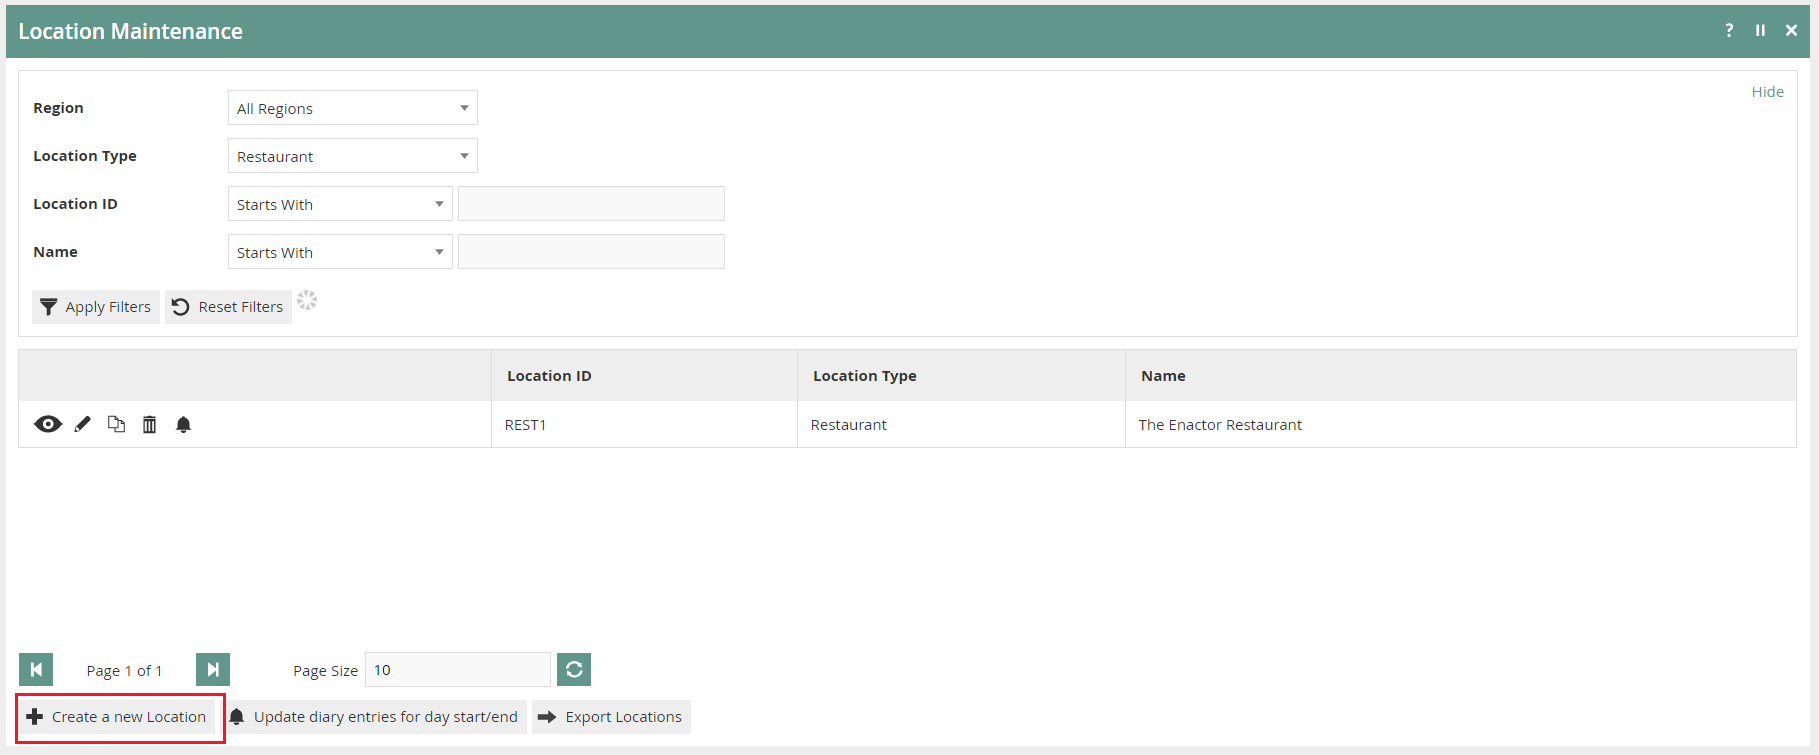
To create a new Restaurant Location, select Create a New Location on the Location Maintenance page**.**
Select the Location type Restaurant, from the Location Type drop-down.
No selection should be made for Template. The creation and use of Templates are covered in a separate How-to Guide. This document covers how to manually configure the mandatory and common settings relating to location maintenance.
Enter a unique Location ID for this location. The ID can be alphanumeric and contain a maximum of 20 characters.
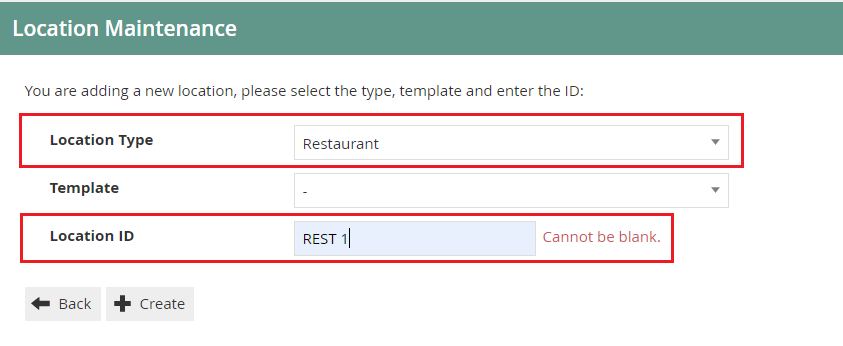
Select Create.
* The Location ID cannot be changed once the Location has been created.
Location Maintenance
Numerous tabs and sub-tabs are presented under location maintenance. This guide is focused on the core Location aspects that are required to create a restaurant location and the key tabs are General and Restaurant.
Address, Purging, Cash Management, Receipt, and Display tabs are briefly explained within the context of setting up a new restaurant location.
Location - General Tab
 The General tab has all the basic information
that captures the general behaviour and identity of the restaurant
location.
The General tab has all the basic information
that captures the general behaviour and identity of the restaurant
location.
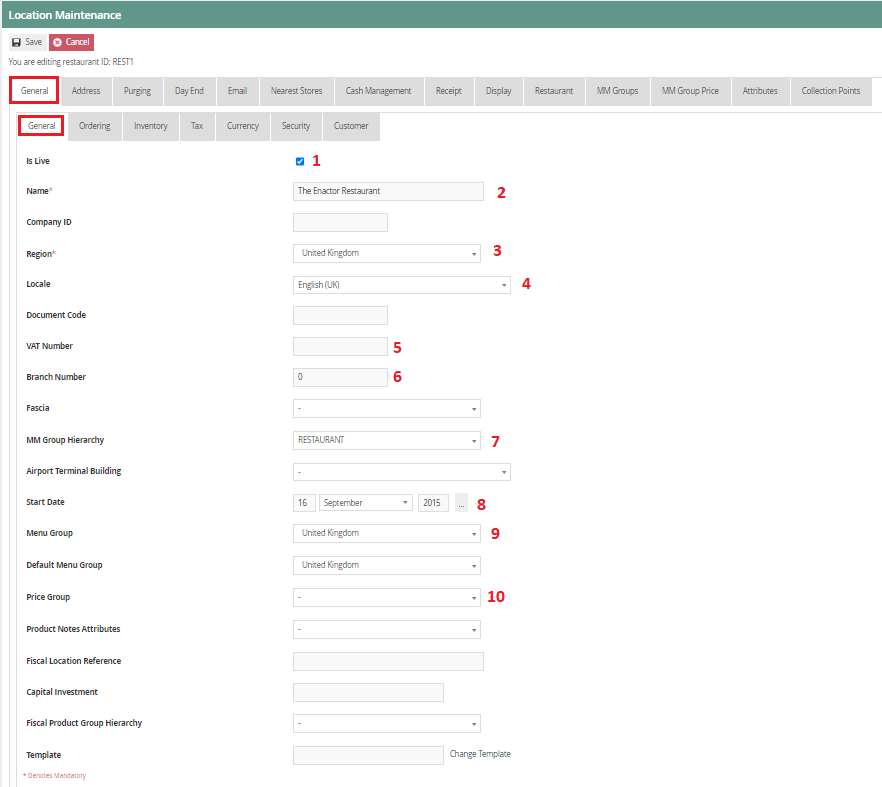
Location - General Tab - General Sub-tab
Set the appropriate values on the General tab as follows:
| Configuration | Description |
|---|---|
| Is Live | Checkbox, if selected indicates that the Location is currently “live”, “available for service”, or “active". Select if the restaurant is ready for transacting. |
| Name | Enter your location name in this field. This could be the same as the location ID or it could be the name of the restaurant location. This name will be shown on other configuration pages when referring to the location, therefore must be conclusive and recognisable. |
| Region | Select the appropriate Region from the drop-down list. If the desired Region does not appear, it must be created. Refer to the “How to configure a base Organisation Structure” guide for assistance. |
| Locale | Select the appropriate Locale from the drop-down list. This selection will affect locale-dependent operations such as language. |
| VAT Number | Enter the restaurant's VAT number here. If you do not have a VAT number, leave the field blank. The VAT Number is typically printed on receipts and is included with the transaction data. |
| Branch Number | Enter a numeric value that can be up to 8 digits or set it to match the location ID. |
| MM Group Hierarchy | Select Restaurant from the MM Group Hierarchy drop-down. |
| Start Date | If not set to "Is Live" enter the date when this restaurant will be available for service in this field. |
| Menu Group | This determines a specific group of menus that the location should display. Select the appropriate menu group from the drop-down list or set to default. Configuring groups is covered in a separate How-to Guide. |
| Price Group | This is used to identify groups of Product Prices in a hierarchical structure. Select price group applicable for restaurant from the drop-down list. Configuring groups is covered in a separate How-to Guide. |
Location – Address Tab
The Address Tab provides two Sub-Tabs to capture the Address and Contact Details of the Location. Enter Address properties of the location and contact details in the appropriate fields. These fields are used in receipt printing.
Location – Purging Tab
Data Purging functions, enables purging of files from the File System and data from the Database. The two sub-tabs Directory Purging applies to Directories of the File System and Entity-Purging applies to Entities in the Database. Retention requirements are specified in Days (if set to zero there will be no purging). This is covered in a separate How-to Guide.
Location – Cash Management Tab
The Cash Management tab provides the necessary settings to configure the appropriate Cash Management settings for the location. The configuration of Cash Management is covered in a separate How-To guide.
Location – Receipt Tab
The Receipt tab allows location specific information to be added to
Receipts. 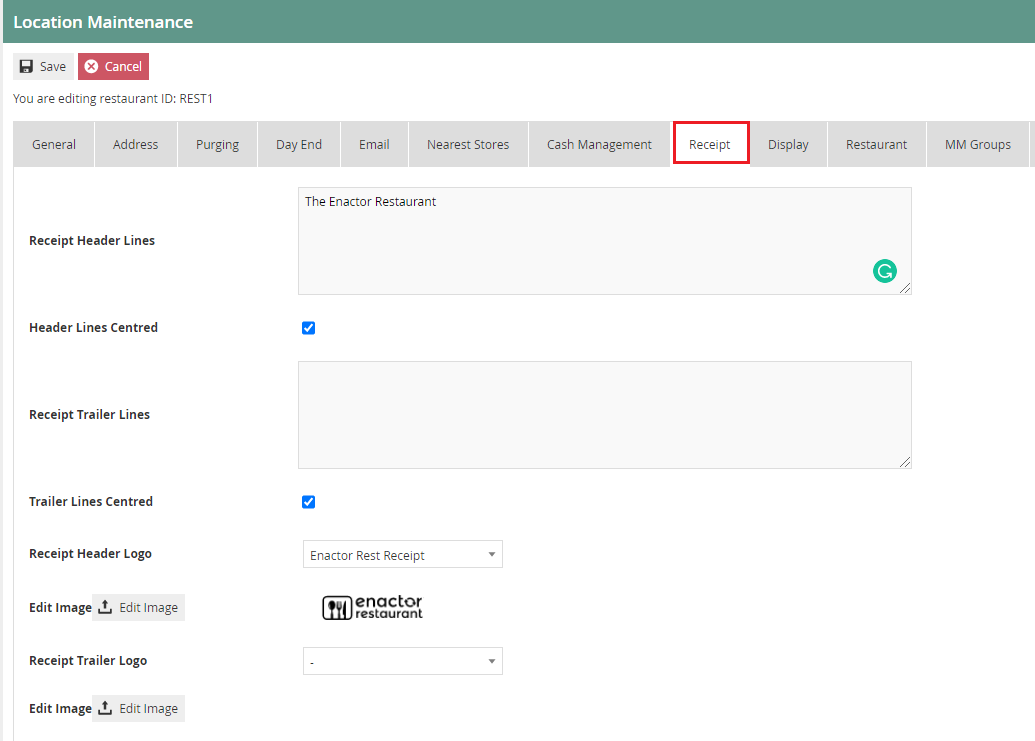
Set the appropriate values on the Receipt tab as follows:
| Configuration | Description |
|---|---|
| Receipt Header Lines | Enter the text that should appear in the header of the receipt. The text can be formatted further by selecting the check box Header Lines Centred. |
| Receipt Trailer Lines | Enter the text that should appear in the trailer lines of the receipt. The text can be formatted further by selecting check box Trailer Lines Centred. |
| Receipt Header Logo | Select the appropriate Header logo from the drop-down list. A preview of the Logo is also provided for confirmation. |
| Receipt Trailer Logo | Select the appropriate Trailer Logo from the drop-down list. A preview of the Logo is also provided for confirmation. |
*If you need to add Receipt Logos, please refer to the How-To guide covering Media Management.
Location – Display Tab
The Display tab is used only if customer-facing line displays are in use. If the restaurant has deployed terminals with line displays, the Till Closed Message and Customer Welcome Message is defined here.
Location – Restaurant Tab
Location – Restaurant Tab – General Sub-tab
The Restaurant General tab includes the option to configure how Set Menus Products are displayed on the customer's receipt.
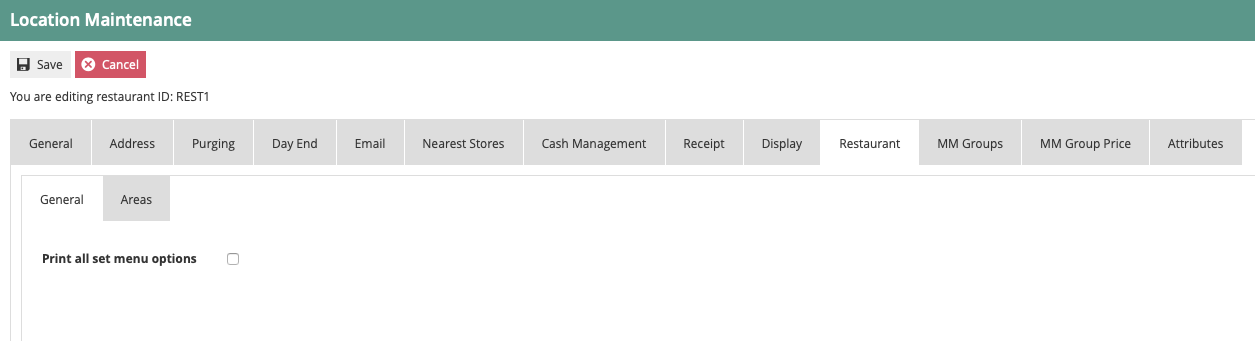
Print all set menu options checkbox works in conjunction with the Hospitality Receipt documents templates. If selected, the set menu and all options chosen by the customer will be printed on the customer's receipt. If not, only the set menu product will be printed ensuring any price contributions are consolidated.
Location – Restaurant Tab – Areas Sub-tab
Restaurant areas allow for physical areas of a restaurant to be defined such as Main, Bar, Terrace, Garden, etc.
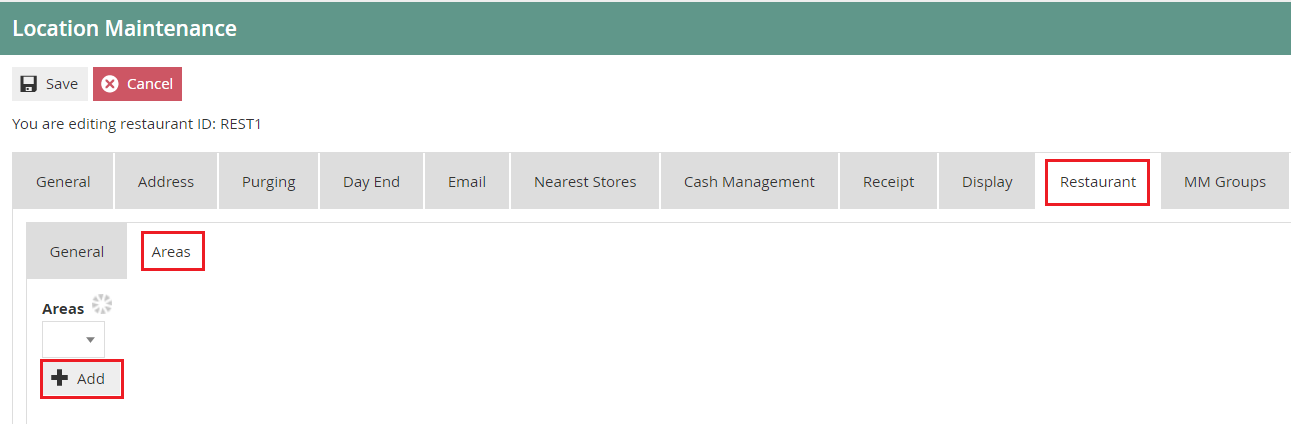
Creating a Restaurant Area
A restaurant can have multiple Location Areas that can be configured differently. These areas can be defined based on the services provided in each area. (i.e Table Service, Bar Service, Takeaway Service)
To create a new Restaurant Area, select the Add button.
Enter an area ID that is alphanumeric and contains maximum of 20 characters.

Select Ok.
Adding Restaurant Area information
Select the desired area from the Areas drop-down. You will be presented with the following options.
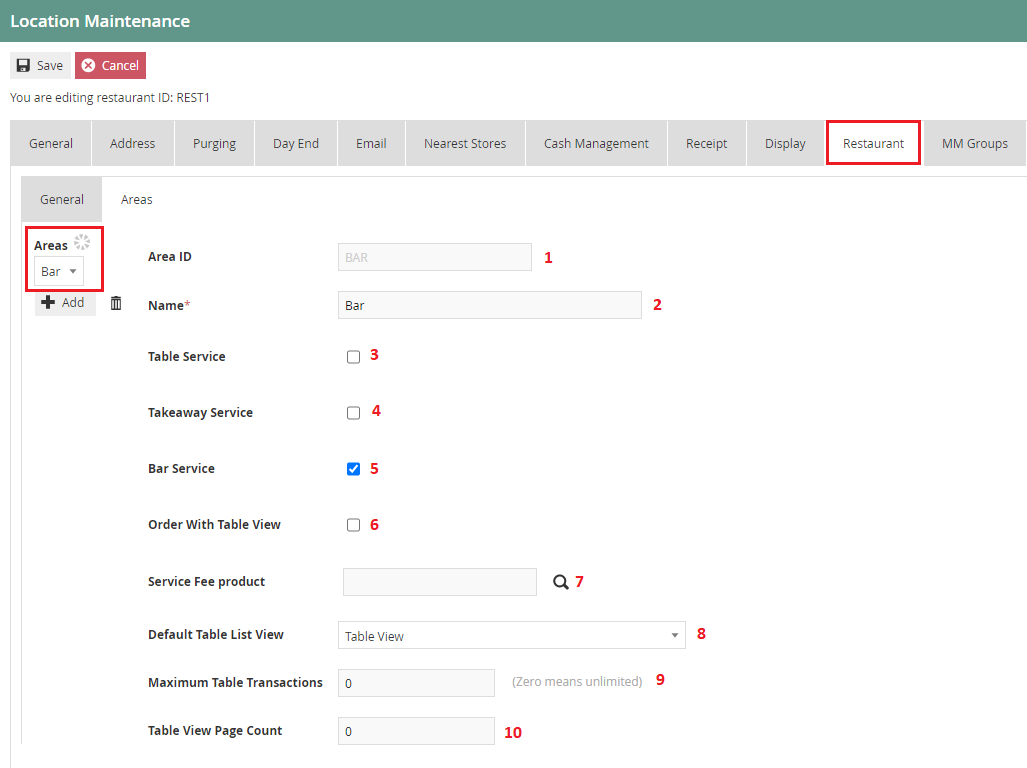
Set the appropriate values on the Areas tab as follows:
| Configuration | Description |
|---|---|
| Area ID | This is already defined when creating the restaurant area. |
| Name | Enter the area name. This mandatory field can contain up to maximum of 40 alphanumeric characters. This name will be shown on other configuration pages when referring to the restaurant area, therefore must be conclusive and recognisable. |
| Table Service | This defines if table service is offered in this area of the restaurant. Select the checkbox if the POS terminal should allow the function for table service for this area. |
| Takeaway Service | This defines if takeaway service is offered in this area of the restaurant. Select the checkbox if the POS terminal should allow the function for takeaway service for this area. |
| Bar Service | This defines if bar service is offered in this area of the restaurant. Select the checkbox if the POS terminal should allow the function for bar service for this area. |
| Order With Table View | This enables a table view that indicates each diner on the table. Select the checkbox to indicate that the POS terminal is allowed the function for table service with a digital table view for ordering. This can be primarily used for fine dining and will provide a custom view of the table. (Currently in experimental stages) |
| Service Fee product | This indicates the product ID of products that include a service fee. Search from a pre-defined list of products and select if applicable. Service Fee products are further explained in the How-To guide on the configuration of hospitality products. |
| Default Table List View | This applies only to table service. From the drop-down menu, select if the POS terminal should display a Table View or a Floor View for this area. |
| Maximum Table Transactions | This applies only to table service. Set a maximum number of transactions per table in this area. If set to zero (0) unlimited transactions are allowed. |
| Table View Page Count | This applies only to table service. Set a maximum number of tables to be displayed on the POS terminal before paging. (Allow navigation to a new page in the POS application screen) |
*Although all services (Table Service, Bar Service, Takeaway Service) can be provided in the same area. The standard practice is to have separate location areas setup for different services. Such as Bar, Main, Takeaway etc.
Device Configuration
A device is not merely thought of as a specific hardware item. The Enactor Device configuration element is considered as a Service Device representing the software that runs on the hardware. (Which in the case of a POS is the POS Application). Therefore, multiple devices of diverse nature may be running on the same physical hardware, which has no fixed relationship to Location configuration.
The device options can be vast in a restaurant environment. For example, point of sale devices, mobile devices, handheld terminals, and servers. All endpoints are of a specific type and need a unique device ID. The specific device type is used by the process connection diagram to determine which endpoint to use. Defining a new device type is described in a separate how-to guide.
Any device that will connect to the Enactor system needs a device type and a unique device ID.
Creating a new Device
The Device Maintenance application can be accessed through:
Administration -> Devices -> Devices


To create a new Device, select Create a New Device on the Device Maintenance page.
Enter a unique device ID for this location. The ID can be alphanumeric and contain a maximum of 40 characters.
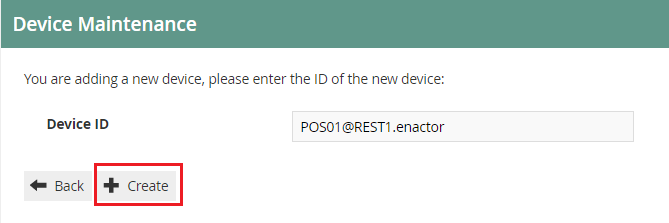
Select Create.
Device maintenance
There are three main tabs under Device maintenance application. The General tab has all the basic information that captures the general device behaviour and identity of the device.
Device Maintenance - General Tab
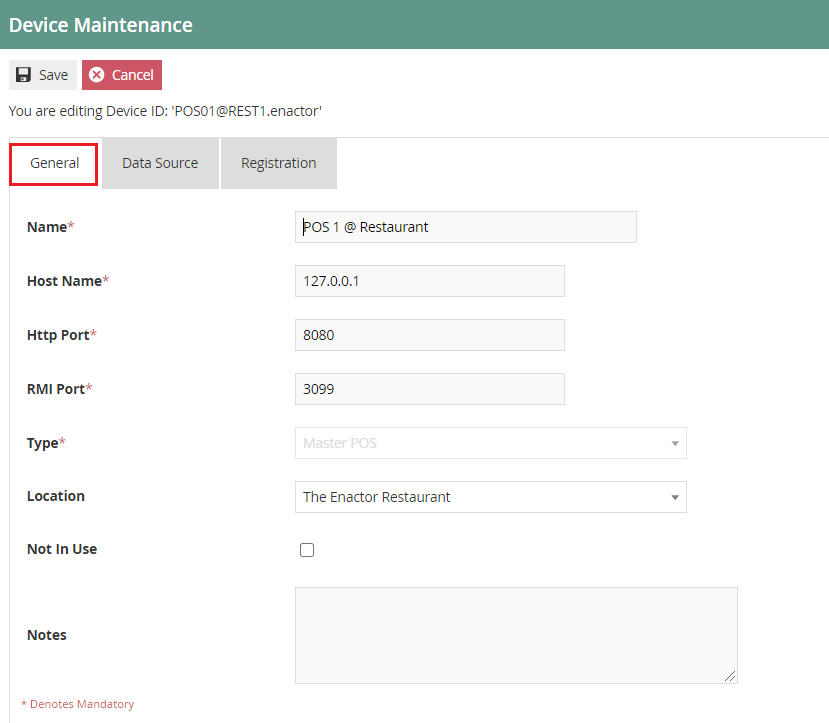
Set the appropriate values on the General tab as follows:
| Entry | Example Value | Description |
|---|---|---|
| Name | POS 1 @ Restaurant | Enter the device name. This mandatory field can contain up to maximum of 40 alphanumeric characters. Set a user-friendly identifier for the device that will be displayed in screens and other configuration options. |
| Host Name | 127.0.01 | Enter the IP address, domain name or ‘Localhost’ to identify the server hosting the Device. |
| Http Port | 8080 | Enter credentials of the HTTP port of the device which will allow for remote connections. |
| RMI Port | 3099 | Enter credentials of the RMI port of the device which will allow for remote connections. |
| Type | Master POS | Select the appropriate device type from the drop-down list. Master POS, Mobile POS, POS etc. |
| Location | The Enactor Restaurant | Select the device location from the drop-down list. |
| Not In Use | Select the checkbox to indicate that the device is not in use. Can be used to disable devices. |
POS Terminal
All Devices that provide POS Application functionality should have a POS Terminal configuration. This is associated with the Device ID, which stores POS Terminal-specific configuration. Therefore, devices should be configured before configuring a POS terminal.
Each POS Terminal can have unique configuration to support the specific task that the terminal will perform. This guide will focus on the Configuration of a restaurant POS Terminal.
Creating a POS Terminal
The POS Terminal Maintenance application can be accessed through:
Configuration -> Organisation -> POS Terminals

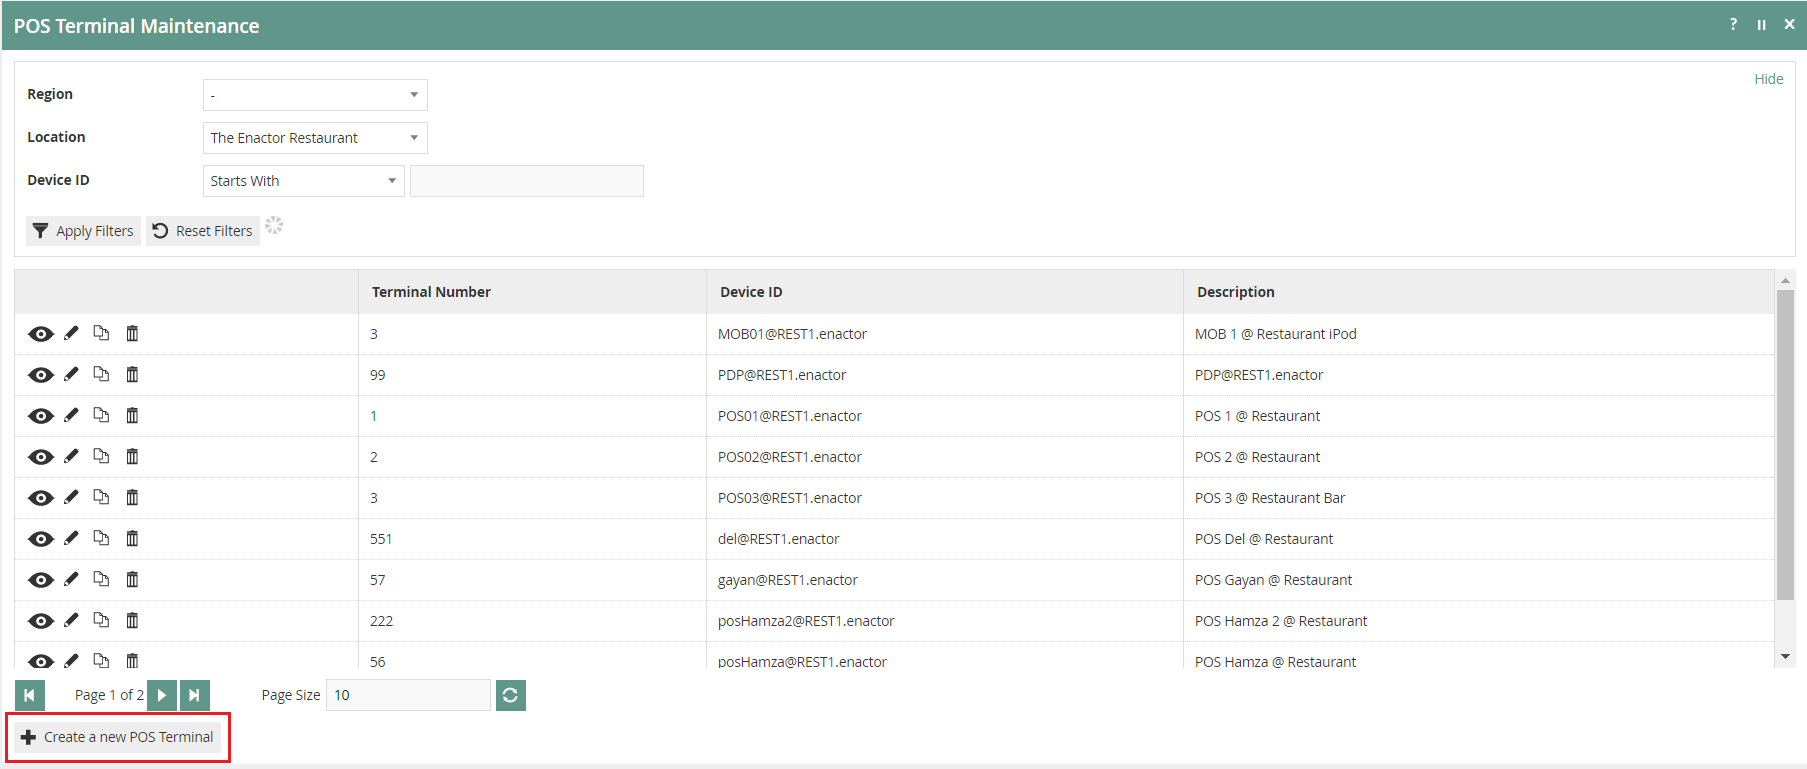
To create a new POS Terminal, select Create New POS Terminal on the POS Terminal Maintenance page.
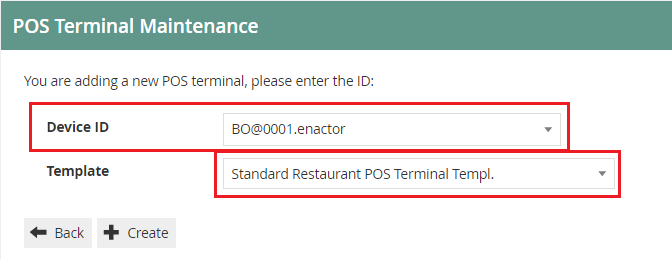
Select a device ID configured for a restaurant location form the Device ID drop-down list.
Form the Template drop-down list you can opt to select the Standard Restaurant POS Terminal Template which will determine the standard POS terminal functions required by a restaurant. Templates simplify the process by configuring common element values in a single place for frequent re-use. Configuring Templates is covered in a separate how-to guide.
Select Create.
*Only one device can be associated with one POS Terminal.
POS Terminal maintenance
Numerous tabs and sub-tabs are presented under POS Terminal maintenance. This guide is focused on the core aspects that are required to create a restaurant POS Terminal and the key tabs are General, Printing, User Interface, and Restaurant.
POS Terminal Maintenance - General Tab
The General tab has all the basic information that captures the general behaviour and identity of the restaurant POS Terminal.
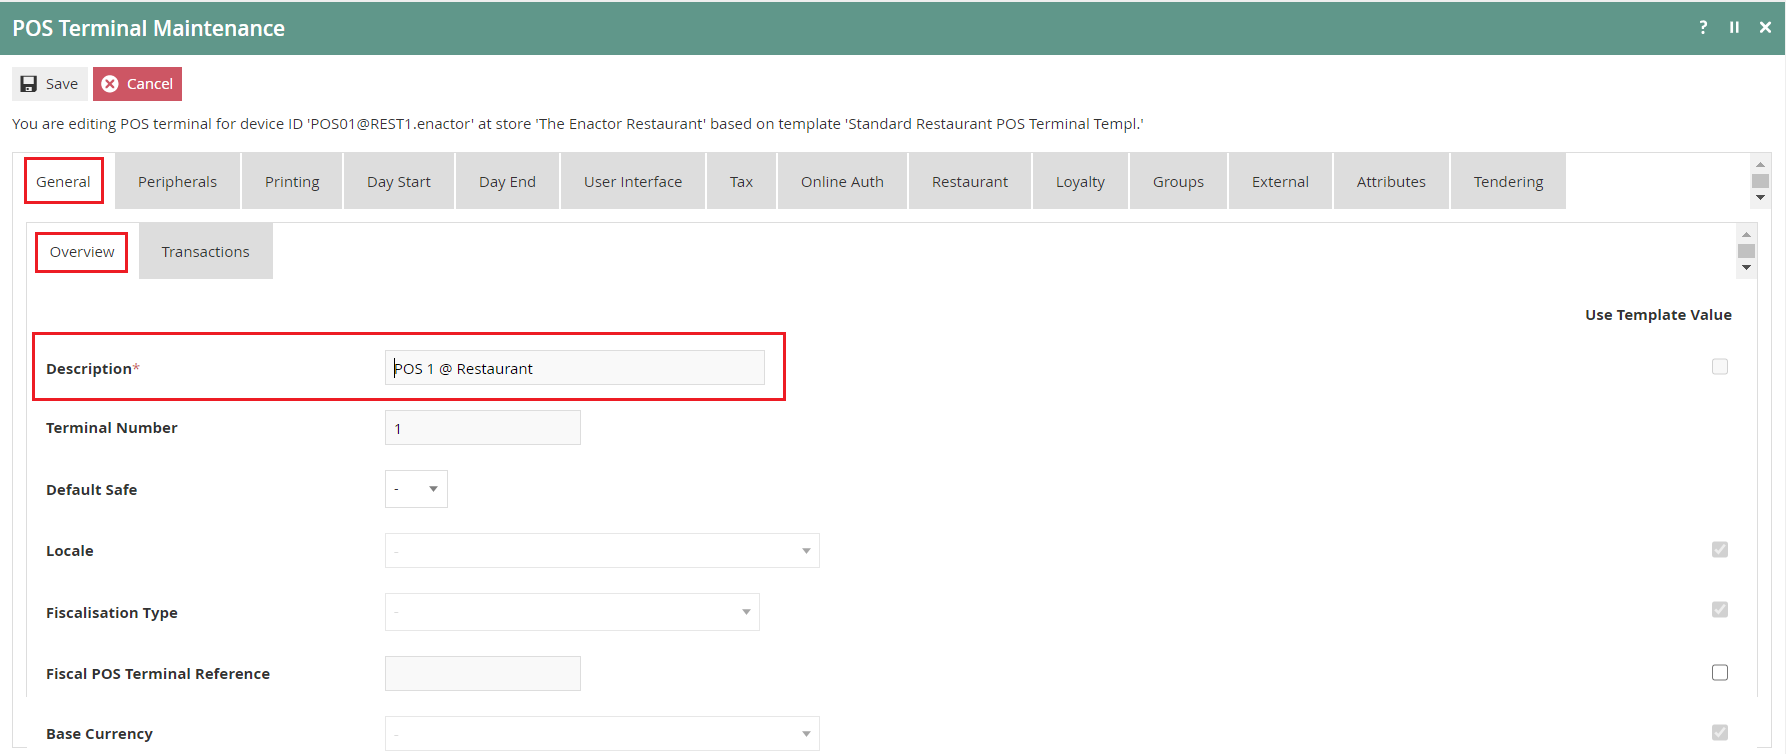
Set the appropriate values on the General tab as follows:
| Configuration | Description |
|---|---|
| Description | Enter POS Terminal description. This mandatory field can contain up to maximum of 40 alphanumeric characters. This will be displayed in screens and other configuration options. |
*Checkboxes listed against individual fields indicate the use of template values. If selected, the default value for the chosen template will be applied for the specific field/s.
POS Terminal Maintenance – Peripherals Tab
Peripherals Tab provides Input and/or Output configuration for peripheral devices attached to the POS Terminal. Select the appropriate device type from drop-down lists in both input and output sub-tabs.
POS Terminal Maintenance – Printing Tab
The Printing Tab provides configuration of Page Definition Details applicable to various printing operations that may be conducted at the restaurant POS Terminal.
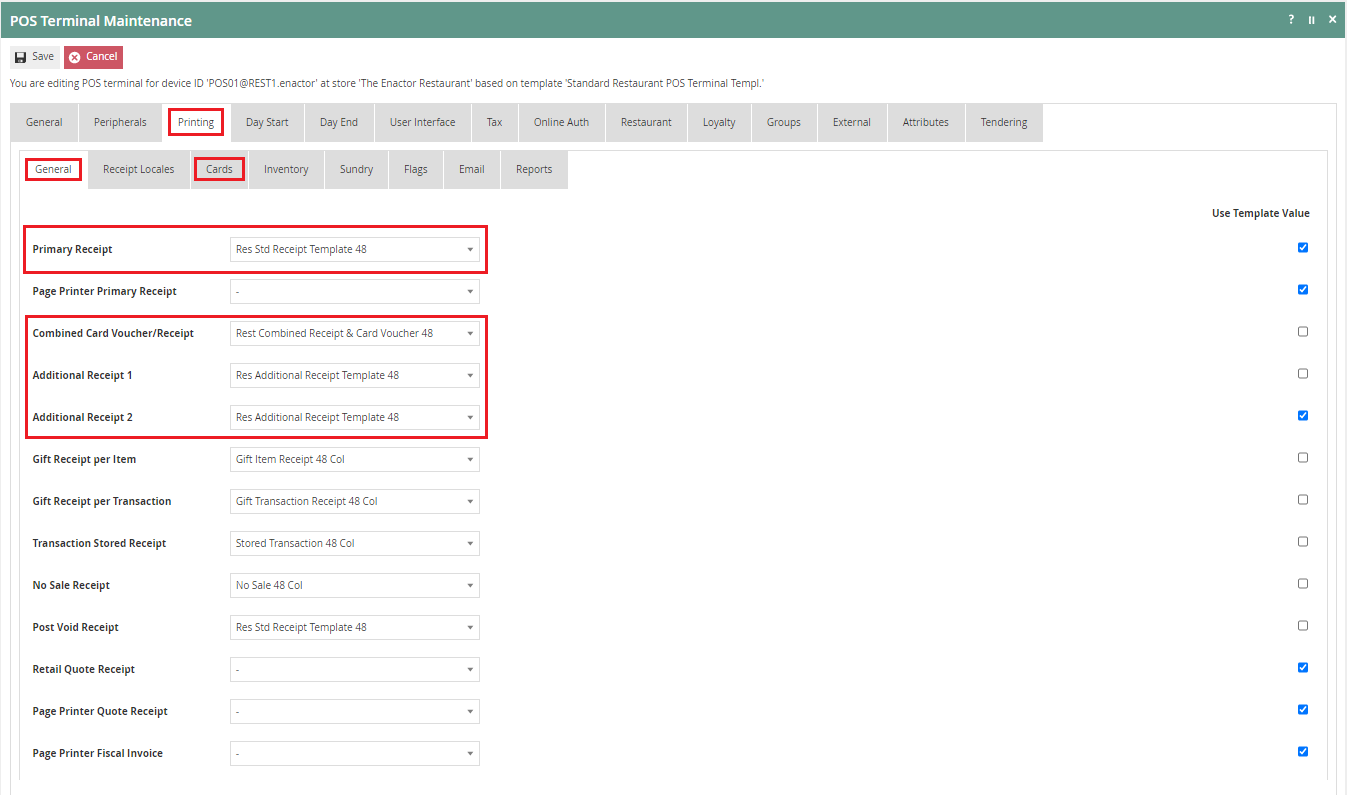
Set the appropriate values on the General sub**-**tab as follows:
| Configuration | Description |
|---|---|
| Primary Receipt | Select Res Std Receipt Template 48 from the drop-down list. |
| Combined Card Voucher/Receipt | Select Rest Combined Receipt & Card Voucher 48 from the drop-down list. |
| Additional Receipt 1 | Select Res Additional Receipt Template 48 from the drop-down list. |
| Additional Receipt 2 |
Set the appropriate values on the Cards sub-tab as follows:
| Configuration | Description |
|---|---|
| Split Bill Partial Receipt | Select Res SplitBill Template 48 from the drop-down list. |
POS Terminal Maintenance – User Interface Tab
The User Interface Tab of POS Terminal Maintenance captures properties used by the POS Terminal software to determine the appearance and behaviour of the User Interface presented to the Operator.
POS Terminal Maintenance – User Interface Tab – General Sub-tab
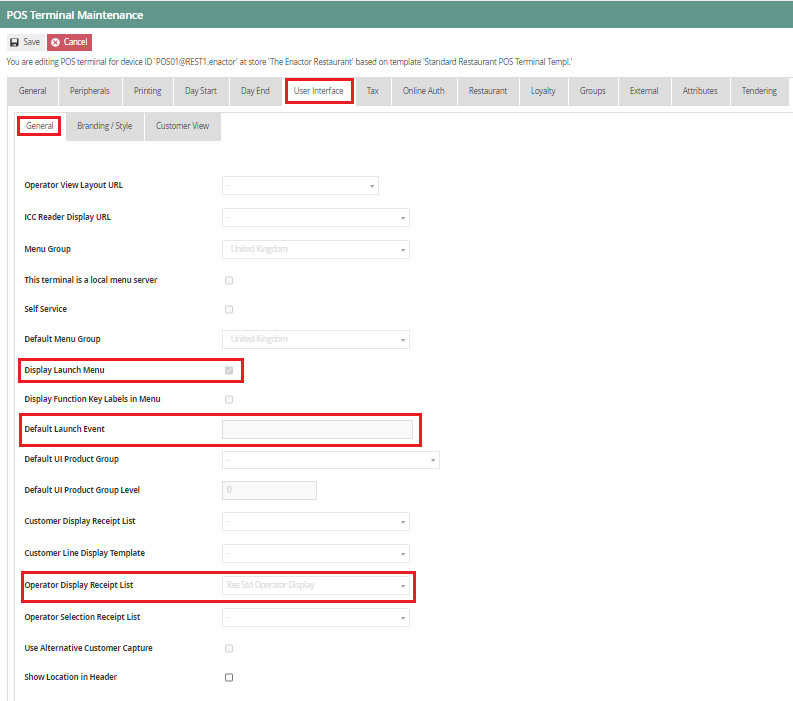
Set the appropriate values on the General sub-tab as follows:
| Configuration | Description |
|---|---|
| Display Launch Menu | Select this checkbox for the POS Terminal to present an initial Launch Menu. Menu Configuration is covered in a separate How-to Guide. |
| Default Launch Event | This indicates the Launch Screen Event that should automatically be shown to allow for a terminal to display a specific function. This avoids the need for the user to select a specific function such as the Bar Mode View. This option can be used loosely in conjunction with a Restaurant Area, where an area is defined as only supporting bar service, thus the terminal should automatically display the Bar Mode View and not allow select of any other mode. The following launch events are supported: SelectTable: Will display the Table Mode View; BarOrder: Will display the Bar Mode View; SelectTakeaway: Will display the Takeaway Mode View; NonTableSaleReturns: Will display a view similar to retail where the transaction is not linked to any of the previous modes. |
| Operator Display Receipt List | Select the default and recommended option Res Operator Display from the drop-down list. This will ensure the POS Terminals Operator display is formatted correctly for the restaurant. |
POS Terminal Maintenance – User Interface Tab – Branding/Style Sub-tab
This defines the look and feel of the entire POS Application at runtime. Themes contribute mainly to styles and positioning of screen elements.
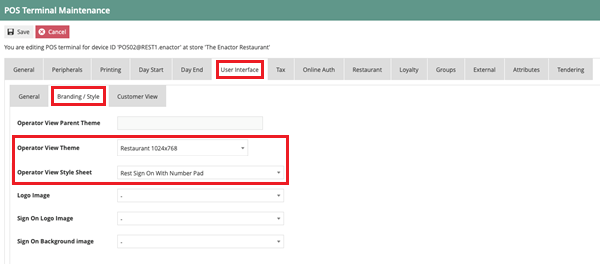
Set the appropriate values on the Branding/Style tab as follows:
| Configuration | Description |
|---|---|
| Operator View Theme | Select from a predefined list of available themes available on the drop-down list that is suitable for restaurant**.** |
| Operator View Style Sheet | Select the default stylesheet named Rest Sign On With Number Pad. This optional setting is applicable if you want to use a numeric keyboard on the sign on screen in the POS application. |
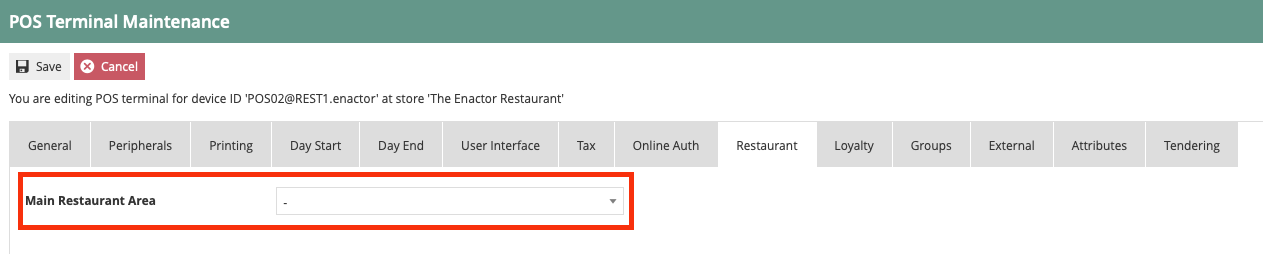
POS Terminal Maintenance – Restaurant Tab
The Restaurant Tab of POS Terminal Maintenance enables user to configure what Restaurant Area the terminal belongs to. Select the restaurant area from the drop-down menu to be configured against the POS Terminal.
Broadcasting
To deliver the configuration changes to the POS, broadcast the following entities.
-
Location
-
Location Template
-
Device
-
POS Terminal