How To Configure A4 Printing
Introduction
The purpose of this guide is to provide a foundational understanding of the options and capabilities available when configuring an A4 Printer for printing of Standard A4 Receipts on an Enactor POS.
Overview
This guide will cover the configuration for the following:
-
Location Printers
-
Document Printer Mapping
-
POS Terminal
Prior Training / Experience
You should be familiar with the following:
-
Estate Manager Configuration
-
Data Broadcasting
Location Printer
Location Printers define the printers available at a Location which can be used for printing and are typically shared by several POS terminals. Printers in a store are configured in the Location Printer Maintenance application.
Create a Location Printer
The Location Printer Maintenance application can be accessed through:
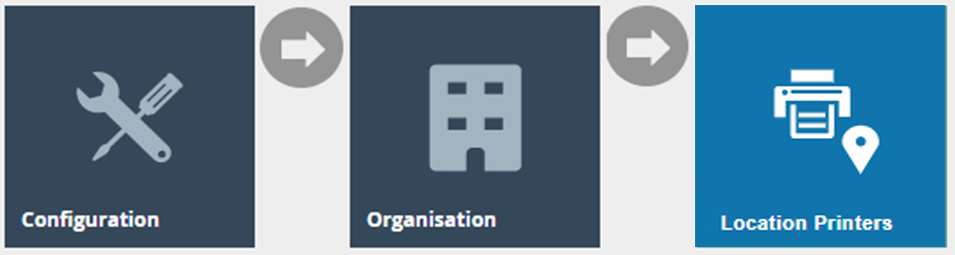
Configuration > Organisation > Location Printers
To create a new Location Printer, select Create a New Location Printer on the Location Printer Maintenance page.

There can be multiple Location Printers defined against the same physical printer.
Select a Location from the Location drop-down.
Enter a unique Peripheral ID that can be alphanumeric with a maximum of 20 characters.
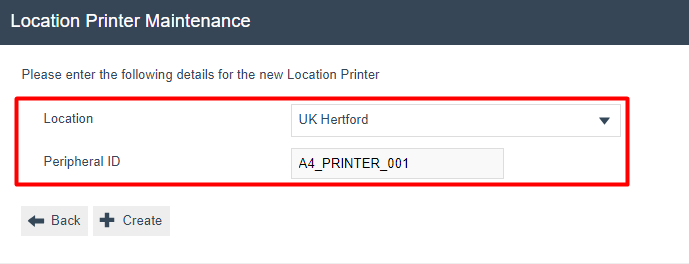
Select Create.
You will be presented with the following options to complete creating the new location printer.

Set the appropriate values on Location Printer Maintenance application as follows:
| Configuration | Description |
|---|---|
| Name | Enter a Name that can be alphanumeric with a maximum of 30 characters. This will be visible in screens and other configuration options. |
| Printer Category | Select A4 Document Printer, from the drop-down list. |
| Printer Type | Select System (Named) Printer from the drop-down list. |
| Printer Address | Enter the name of your printer, as it appears on the machine that you have installed the printer and are using to print. E.g.:  |
Select Save to create the new Location Printer.
Document Printer Mapping
Document Printer Mappings defines the configuration to assign a Document Function (such as Print Receipt) to a Location Printer in a particular Location. This is configured in the Document Printer Mapping Maintenance application.
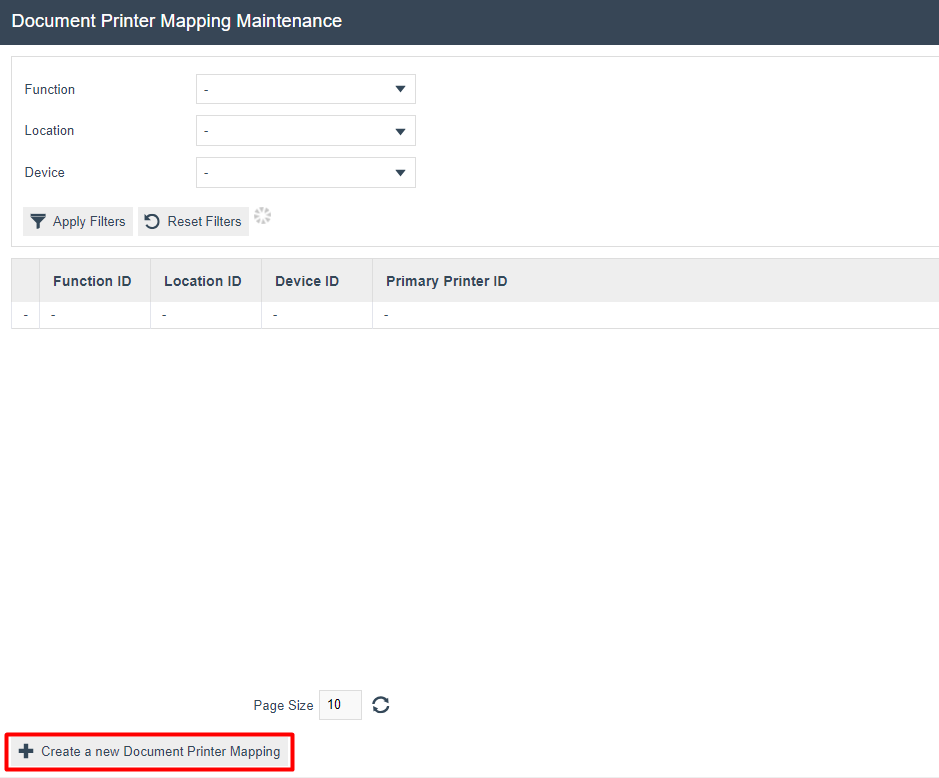
Create a Document Printer Mapping
The Document Printer Mapping Maintenance application can be accessed through:
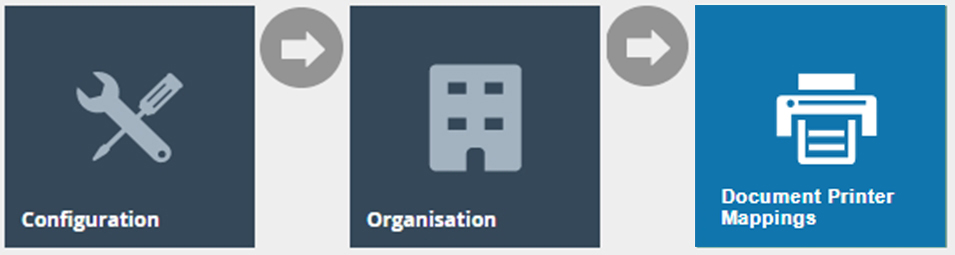
Configuration > Organisation > Document Printer Mappings
To create a new Document Printer Mapping, select Create a Document Printer Mapping on the Document Printer Mapping Maintenance page.
Select Print Receipt from the Function drop-down.
Select the Location that the printer is to be used from the Location drop-down.
Select the Device that the printer is to be used from the Device drop-down.
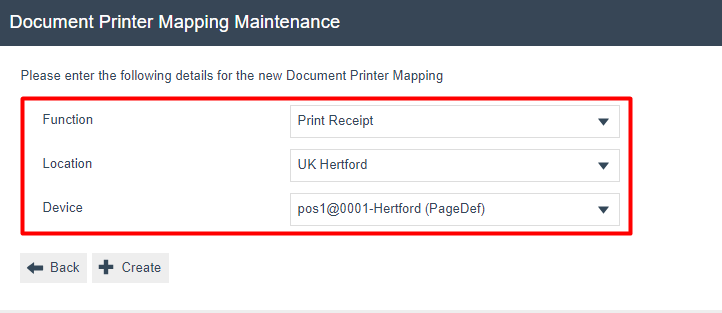
Select Create.
You will be presented with the following options to complete creating the Document Printer Mapping.
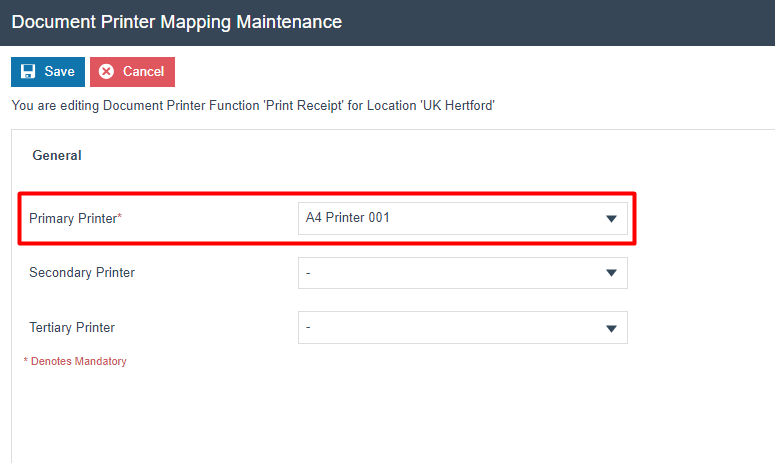
Set the appropriate values on Document Printer Mapping Maintenance application as follows:
| Configuration | Description |
|---|---|
| Primary Printer | Select the configured Location Printer, from the drop-down list. |
POS Terminal
The Receipt Printer Type and Receipt Template which is to be used by the POS while printing in the A4 Printer needs to be defined in the POS Terminal Configuration and this configuration is done in the POS Terminal Maintenance.
Configuring POS Terminal
The POS Terminal Maintenance application can be accessed through:
Configuration > Organisation > POS Terminals
Select your POS Terminal and navigate to Peripherals > Output.
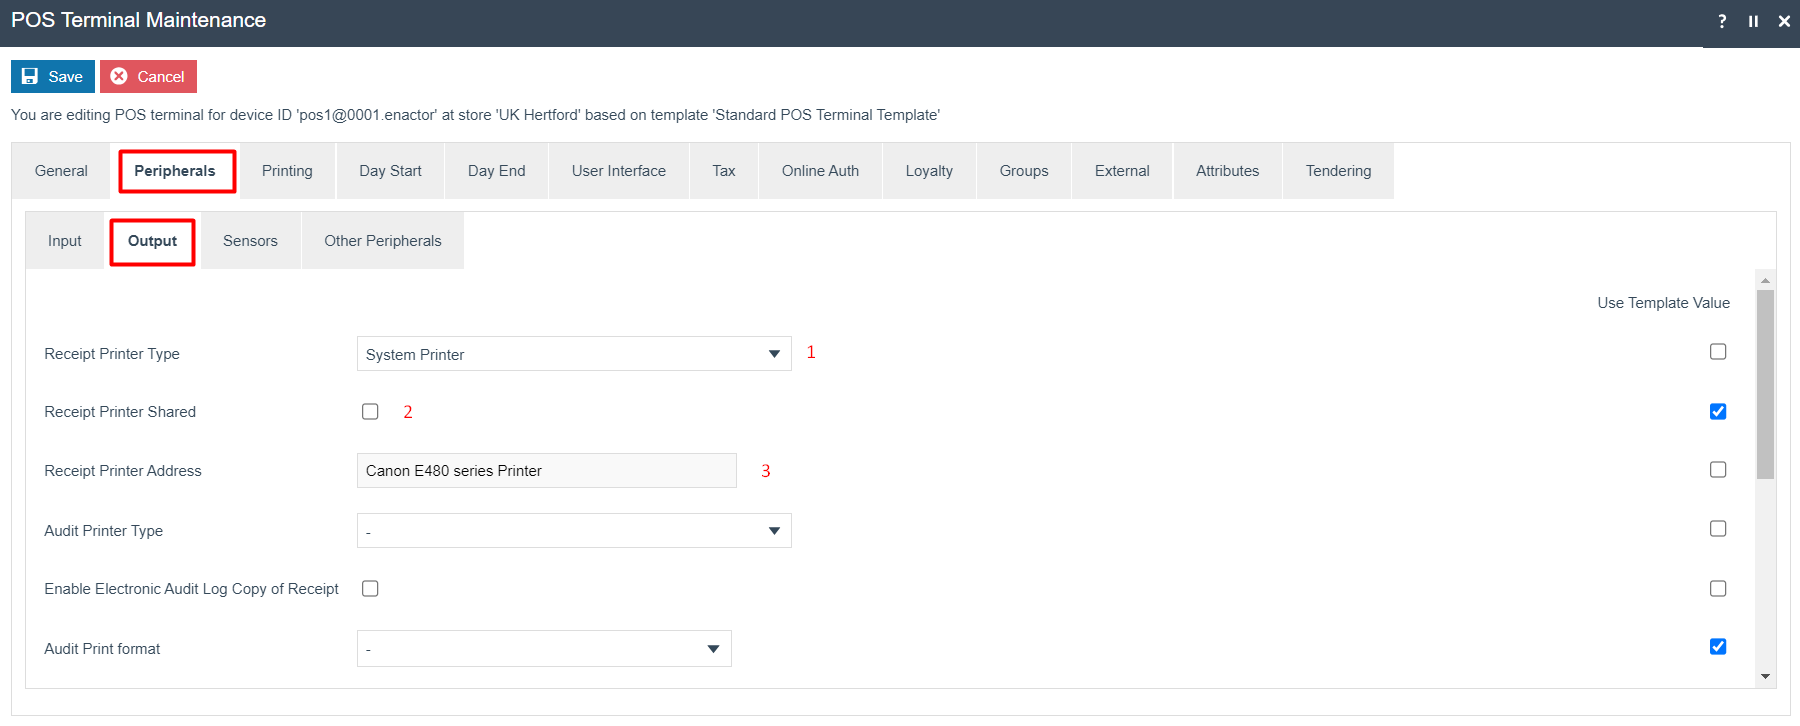
Set the appropriate values as follows:
| Configuration | Description |
|---|---|
| Receipt Printer Type | Select System Printer from the drop-down list. |
| Receipt Printer Shared | Checkbox, if checked indicates that the device may be shared by another POS. |
| Receipt Printer Address | Enter the name of your printer, as it appears on the machine that you have installed the printer and are using to print. This will be the same Printer Address entered in the Location Printer Maintenance. |
To configure the Receipt Template to print, navigate to Printing > General and select the Page Printer Primary Receipt as A4 Receipt.
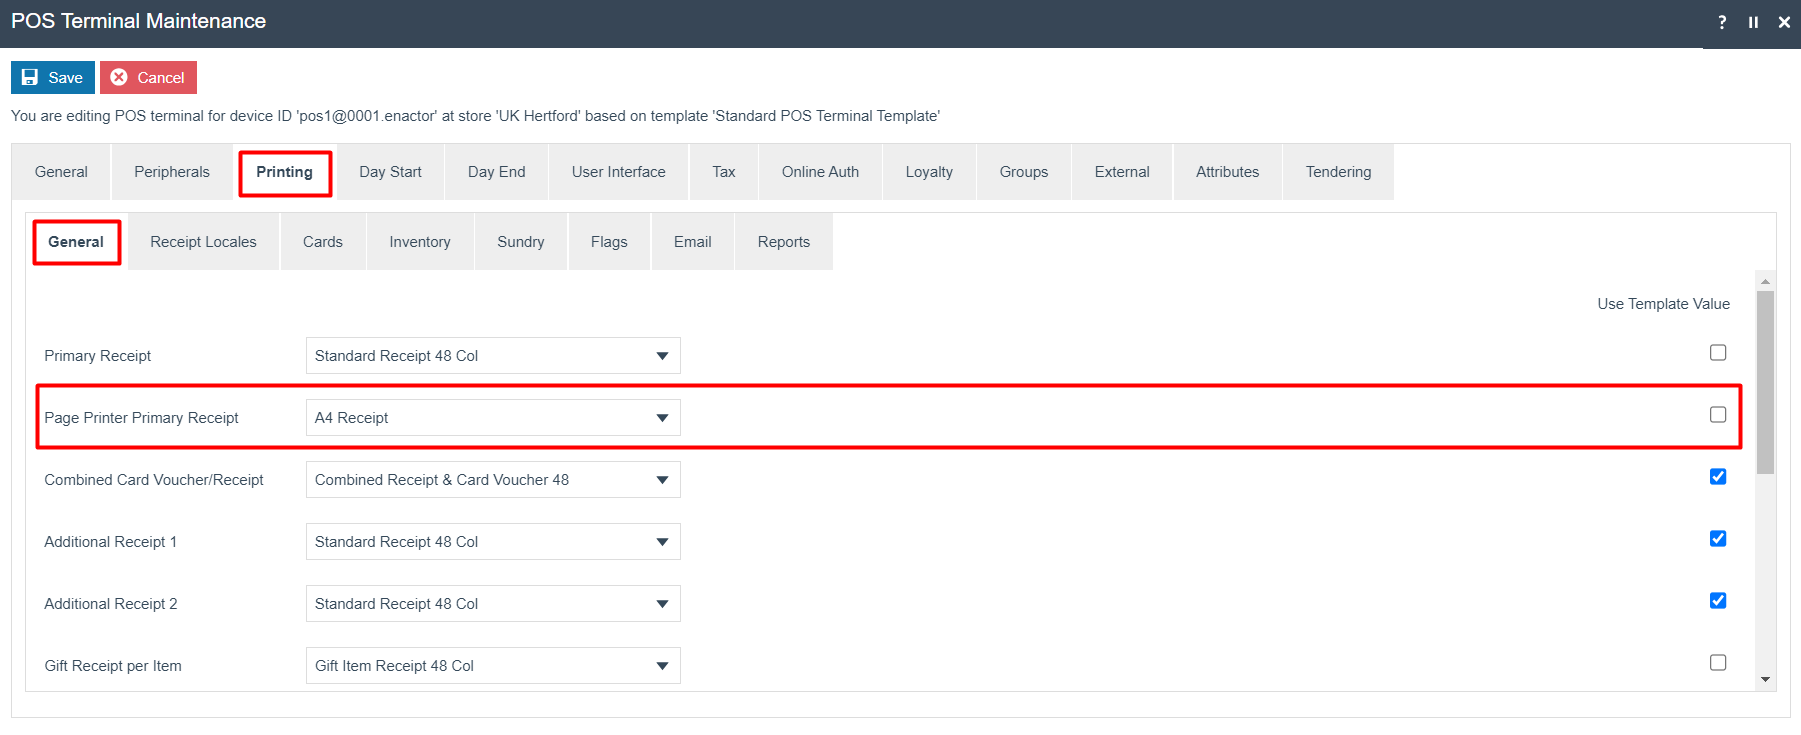
If a Page Printer Primary Receipt is not selected, the Primary Receipt selected will be printed in the A4 printer, scaling up the receipt (even if it is a 48 column) to be printed on the entire A4 page.
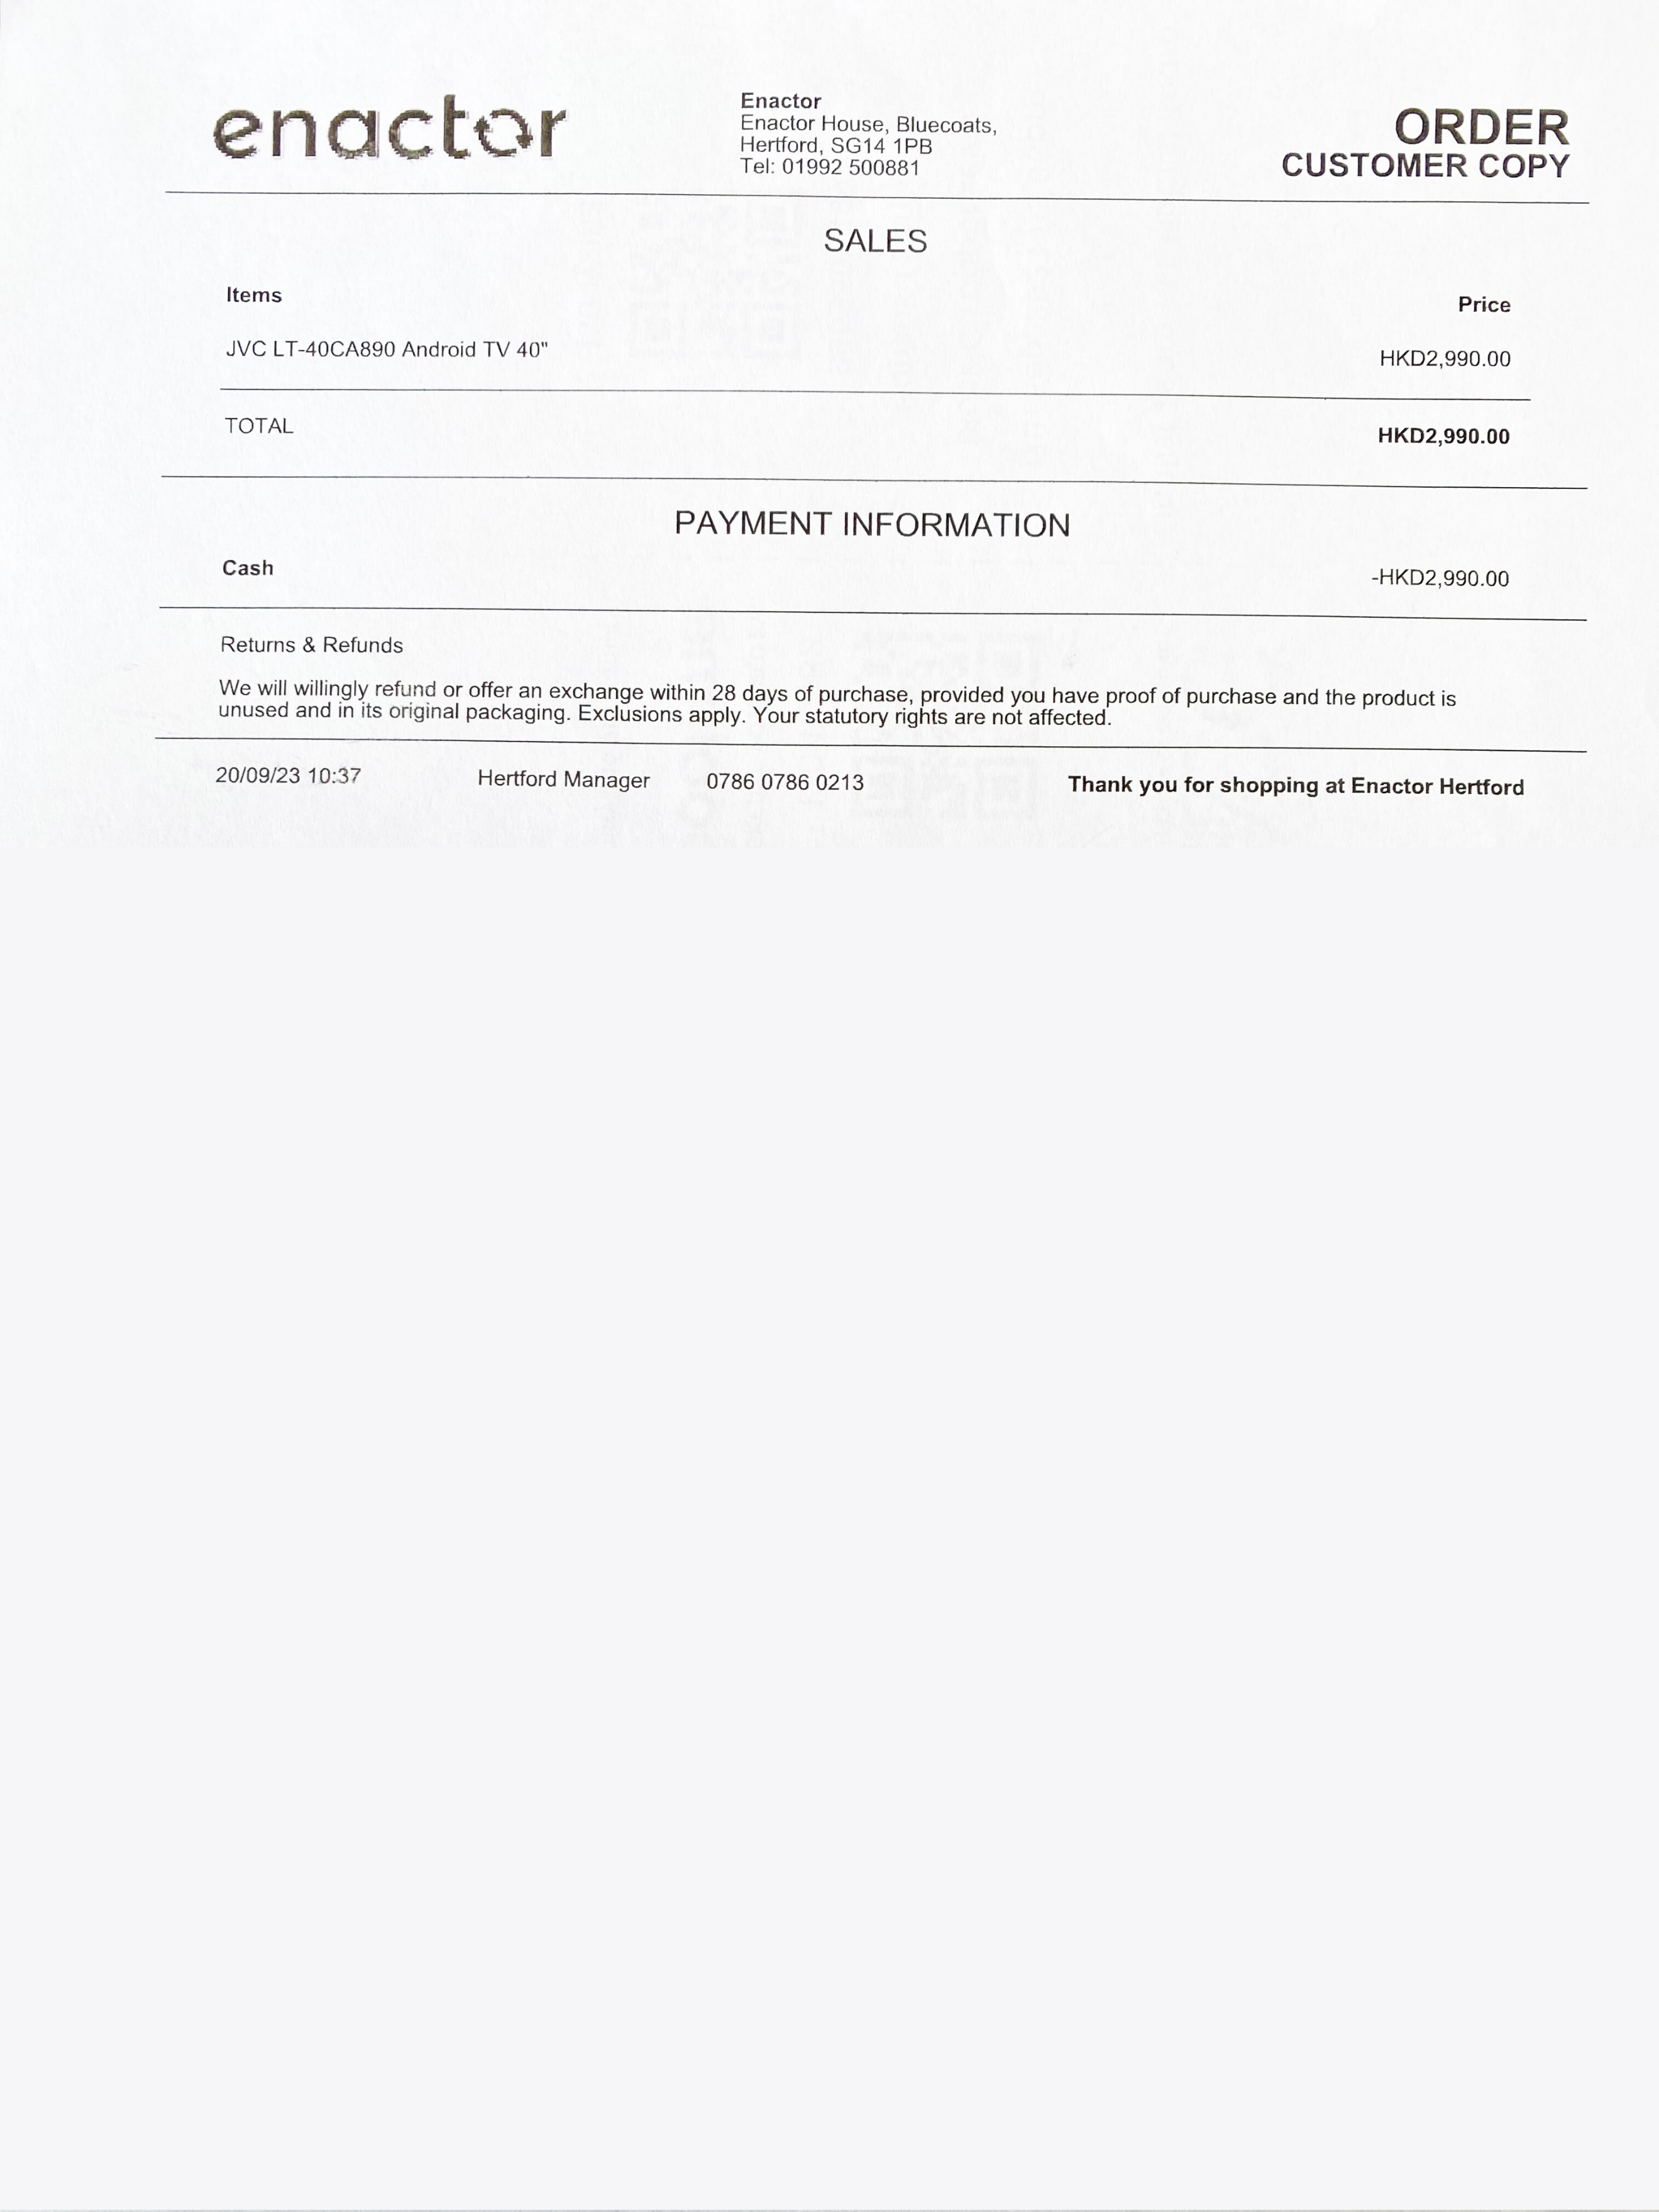
Following is the A4 Receipt which is printed if all configurations have been made successfully:
Broadcasting
To deliver the configuration changes, broadcast the following entities to all the devices.
-
Location Printer
-
Document Printer Mapping
-
POS Terminal