How To Configure Airport Sales
Introduction
Airport sale transactions differ from normal retail transactions in that the prices and international tax provisions applicable to transactions will vary depending on the associated destination flight zone of a customer.
This guide explains the configuration required to set up a POS enabled to undertake Airport Sale transactions.
Overview
The following steps are required to configure UK Tax:
- Flight Zone Configuration
- Airport Configuration
- Airport Terminal Building Configuration
- Location Configuration
- POS Terminal Configuration
- Flight Configuration
- User Role Configuration
Configuration Steps
Flight Zone Configuration
Flight Zone is the key configuration element in the Airport sale configuration.
A Flight Zone allows the grouping of multiple destinations that share common duty-free tax rules.
A Flight Zone also allows the use of different price groups at the POS depending on the Zone the flight belongs to.
Before specifying any Destination Zones (detailed below), all Flight Zones should be configured. Once this is completed, then the Destination Zones in each Flight Zone should be added.
Navigate to Flight Zone Maintenance using the search or the path:
Configuration > Organisation > Flight Zone
Select Create a new Flight Zone to add a new record.
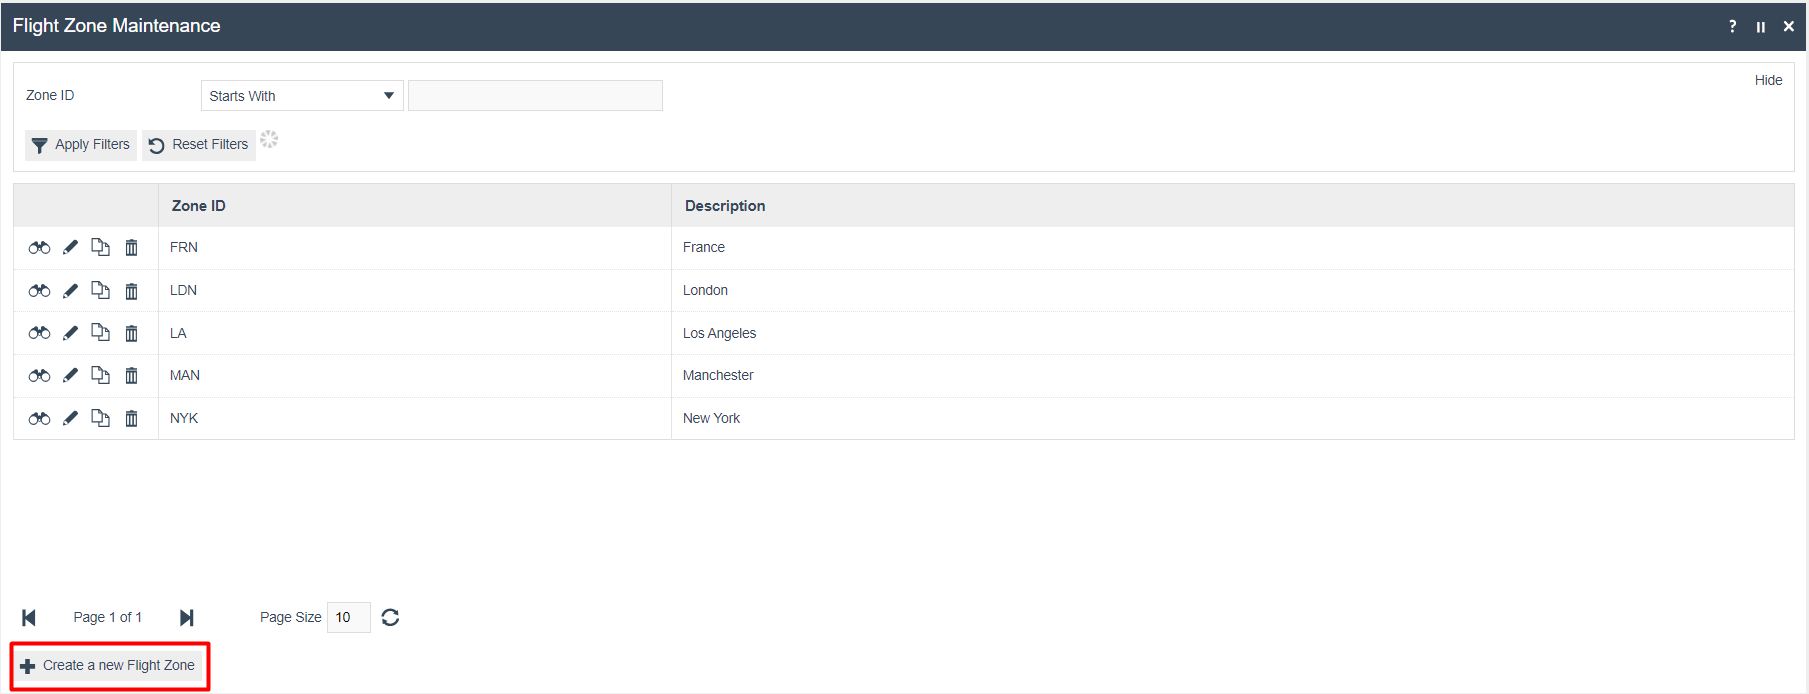
In the subsequent page specify a Flight Zone ID and select Create:

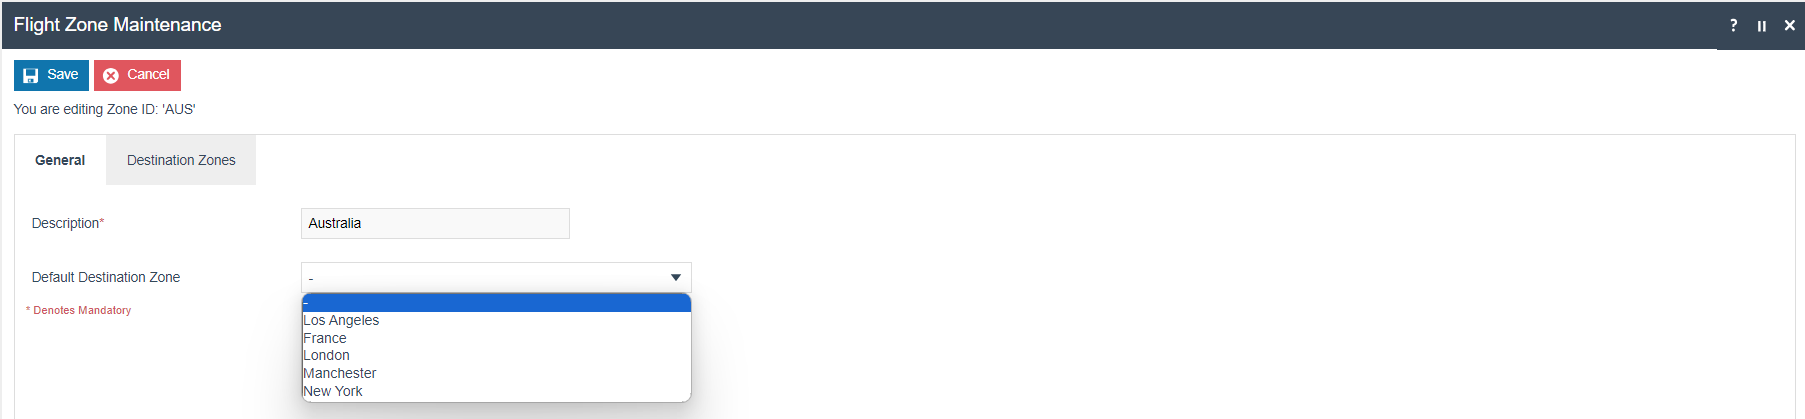
In the General Tab of the Flight Zone Maintenance page, enter a user-friendly Description. The Default Destination Zone can be selected from a dropdown list of previously created Flight Zones.
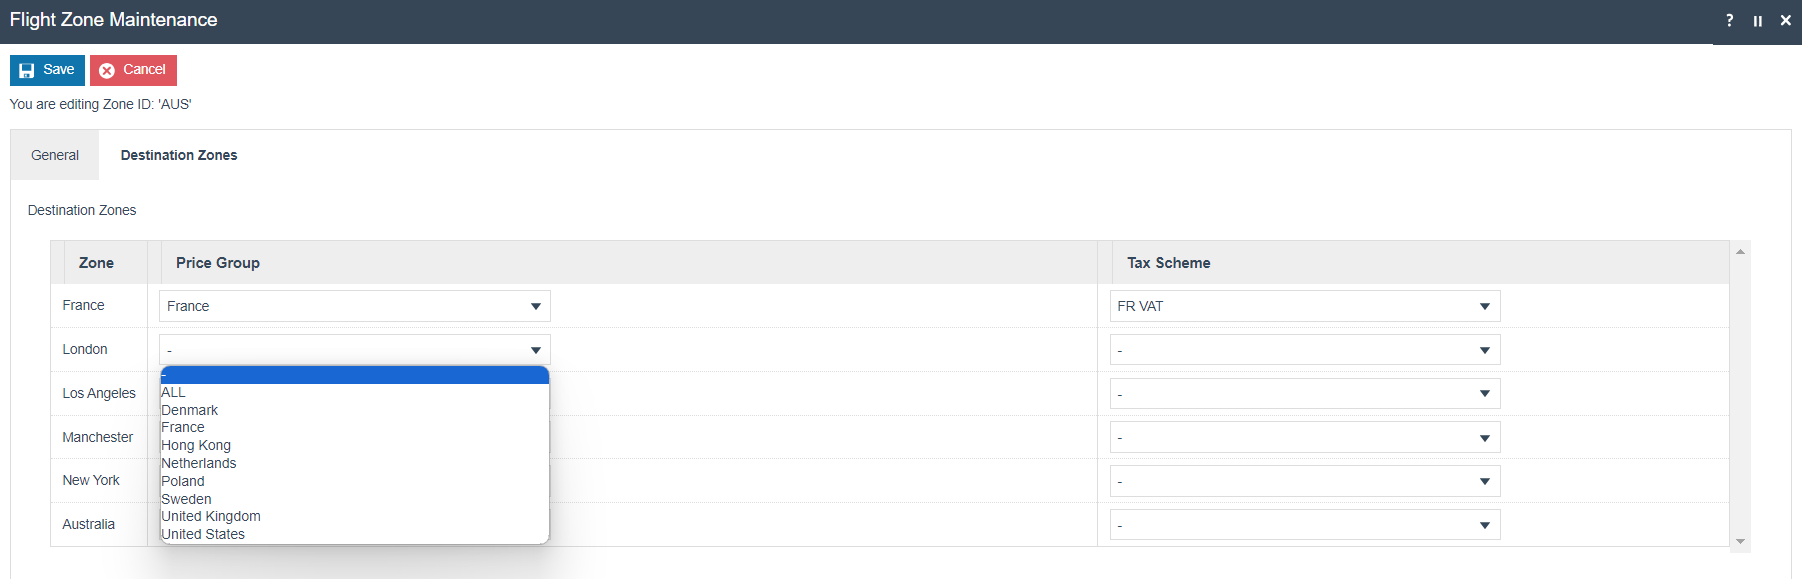
In the Destination Zones Tab of the Flight Zone, a Price Group and/or Tax Scheme may be specified for any one or more of the destination Flight Zones. The relevant data is selected from dropdown lists of all the Price Groups and Tax Schemes defined in configuration.
Destination Zones should be specified for every Flight Zone that is served by the Flight Zone being edited.
Airports Configuration
Airport represents the destination of a flight, the location of the Airport Terminal Building, and is associated with a Flight Zone.
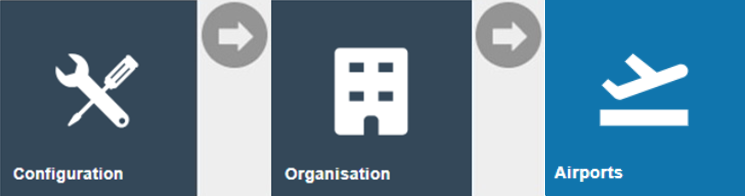
Navigate to Airport Maintenance using the search or the path:
Configuration > Organisation > Airports
To add an airport, select the Create a new Airport option.
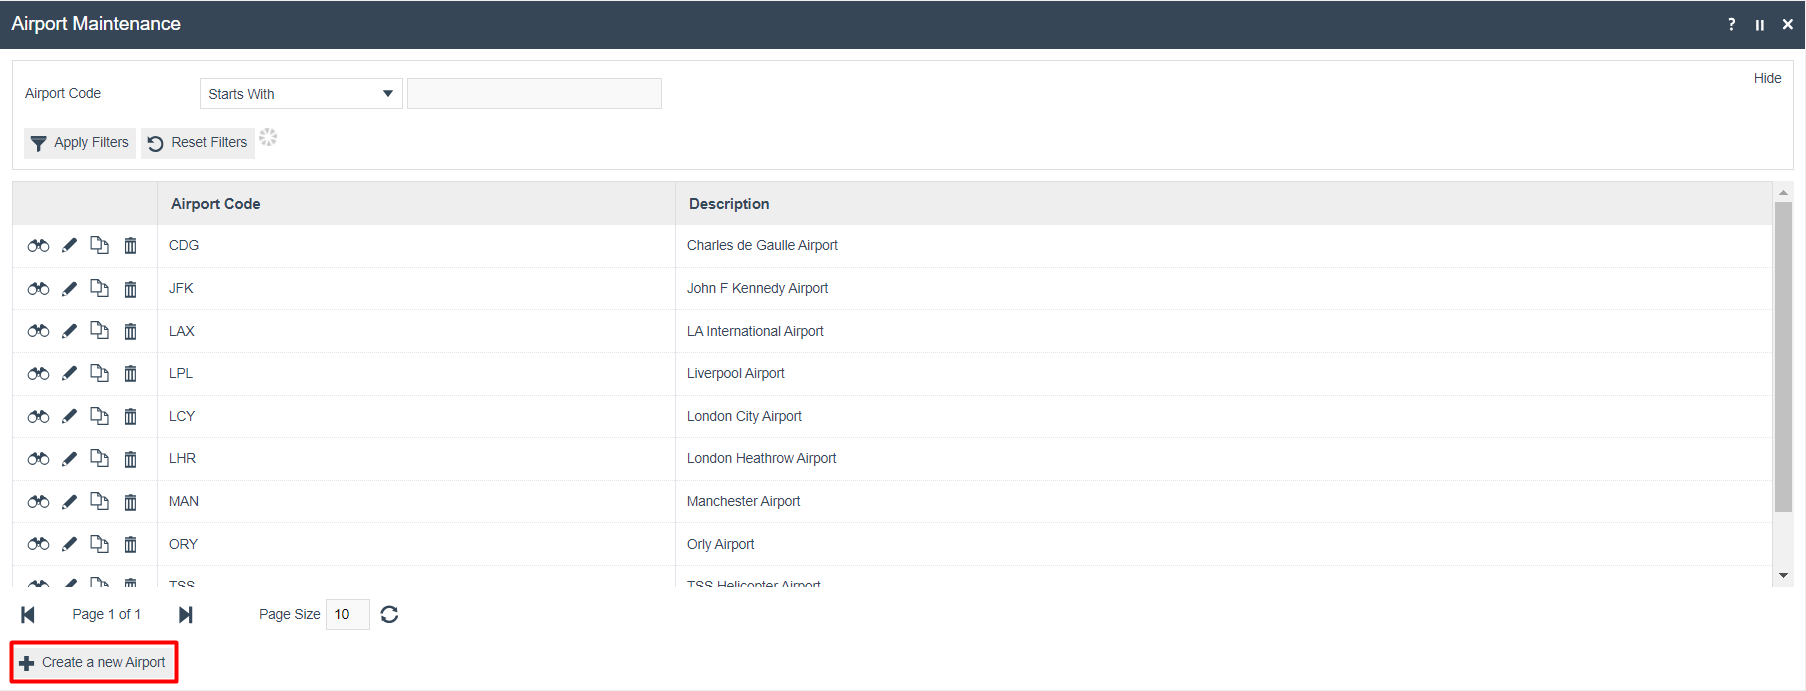
In the subsequent page specify an Airport Code (exactly three alphanumeric characters) and select Create.

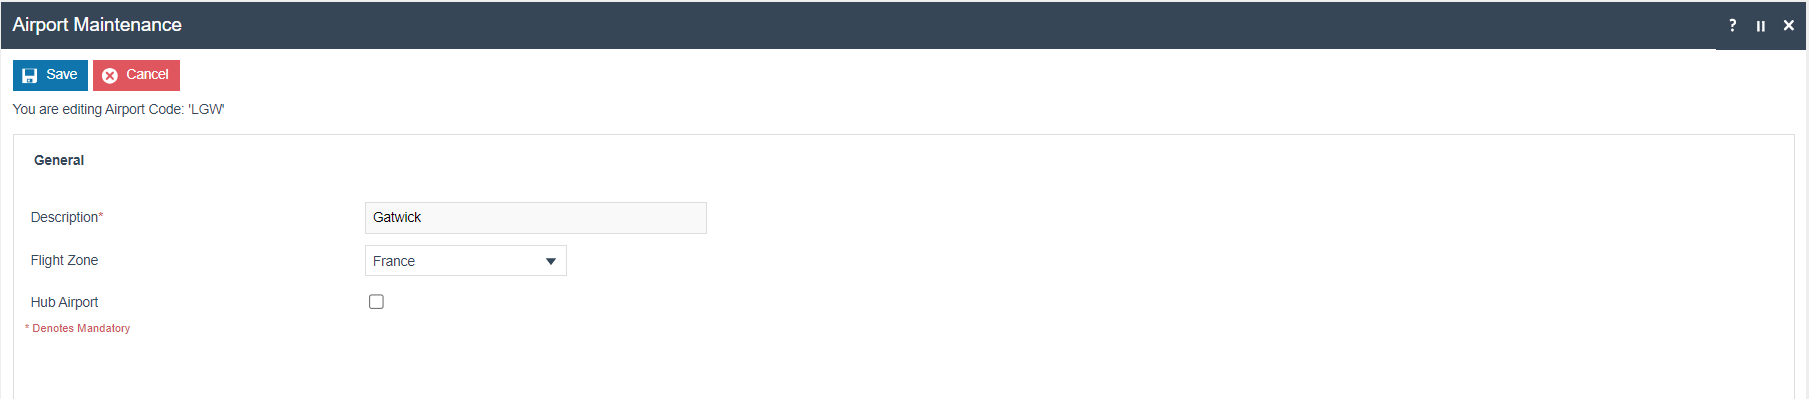
In the General Tab of the Airport Maintenance page, enter a user-friendly Description and select the Flight Zone from a dropdown list of all Flight Zones previously defined. If the Hub Airport checkbox is checked this indicates to the software that this may not be the customer's final destination. The user may therefore be prompted for the destination.
Airport Terminal Building Configuration
The Airport Terminal Building may be referenced in the General subtab of the General tab of Location Maintenance (this configuration is discussed later in this document under Location Configuration). If defined, this triggers the processing of Airport Store related Pricing and Tax provisions.
The Airport Terminal Building configuration element is created in association with the Airport in which it is located.
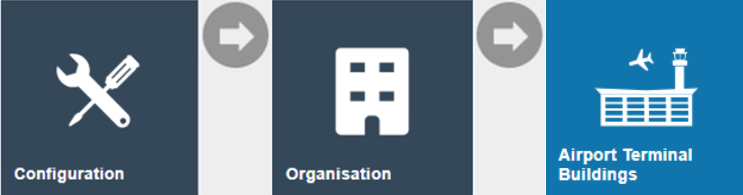
Navigate to Airport Terminal Building Maintenance using the search or the path:
Configuration > Organisation > Airport Terminal Buildings
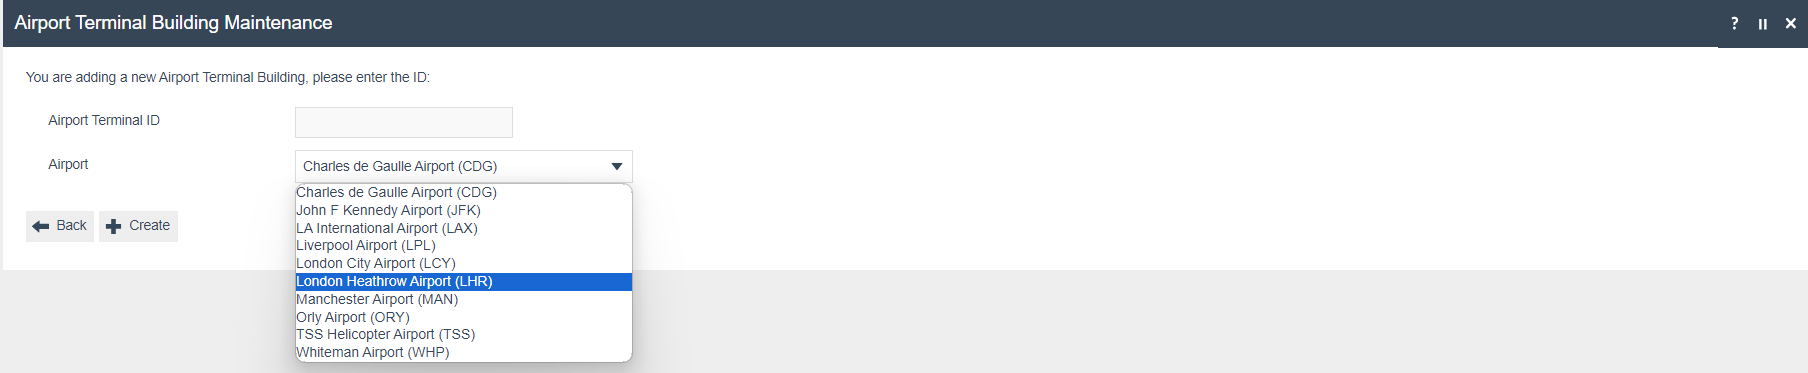
Select the Create a new Airport Terminal Building option.
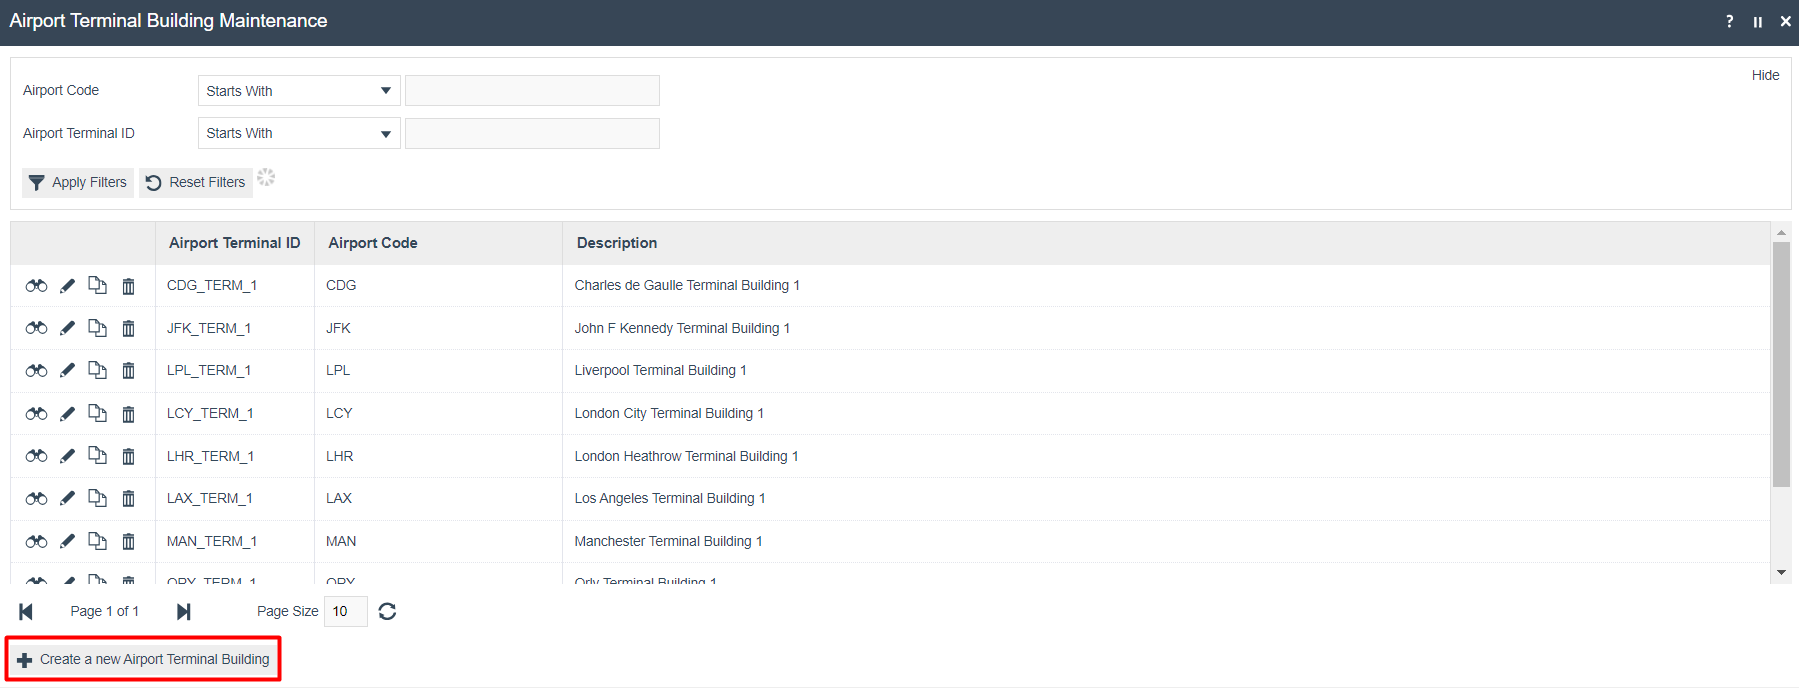
In the subsequent Airport Terminal Buildings Maintenance page specify a (unique) Airport Terminal ID and select the associated Airport from the dropdown list of all Airports currently configured.
Location Configuration
When configuring Flight Zones, the Price Group and Tax Regime can be configured against each Destination Zone. Airport and Airport Terminal Building configurations refer to a Flight Zone, hence the Price Group and Tax configurations are inherited from it.
Consequently, when an Airport Terminal Building is configured in a Location, any Location-specific Price Group and Tax Scheme configuration may be overridden by that of a Destination Flight Zone if specified and applicable.
Navigate to Location Maintenance using the search or the path:
Configuration > Organisation > Location
A new Location must be created for the retail store located in an airport.
Location configuration is covered in a separate How-to Guide and will not be discussed in-depth here. Only the configuration required to set up a POS to carry out airport sales is discussed.
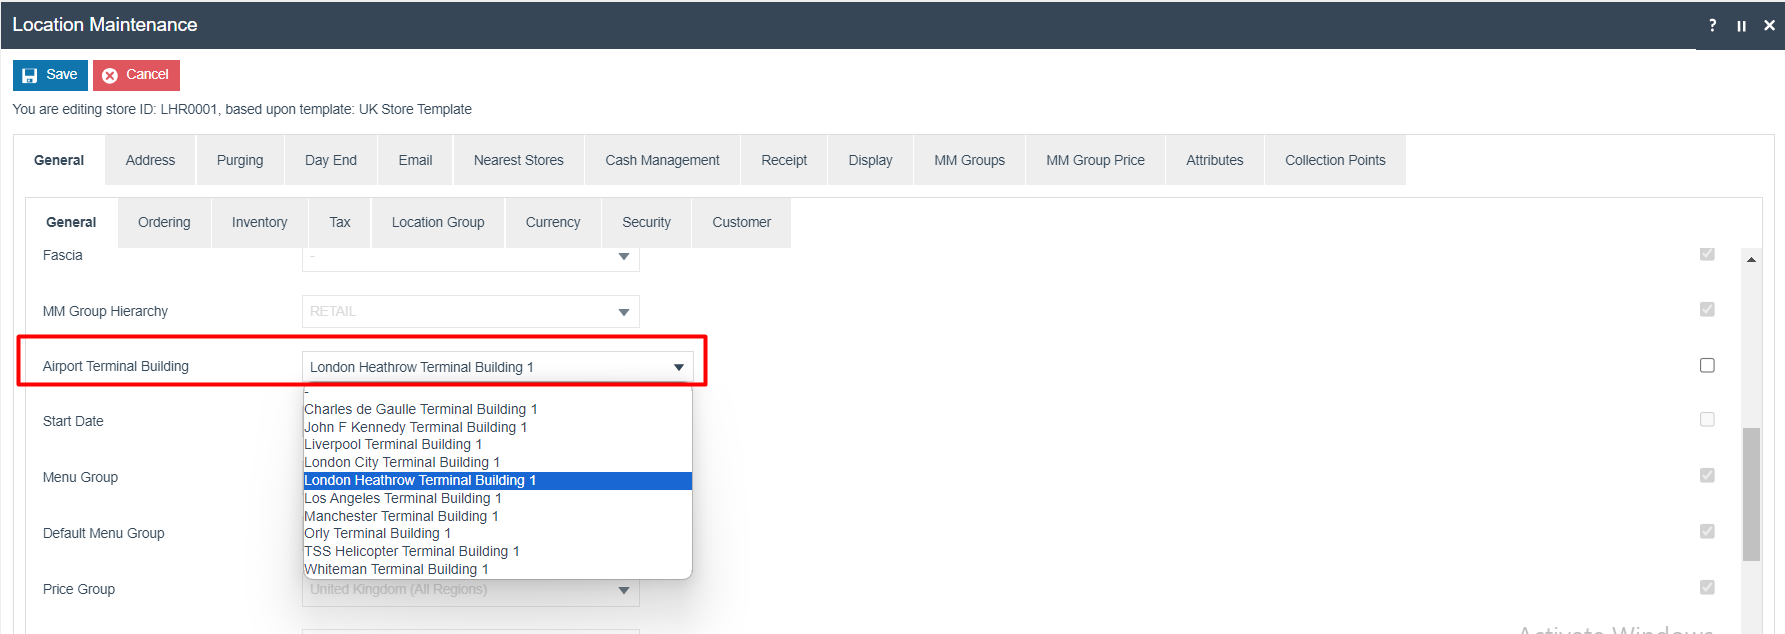
In the General > General sub-tab, update the Location with the Airport Terminal Building from the dropdown list selection of all configured Airport Terminal Buildings.
POS Terminal / POS Terminal Template Configuration
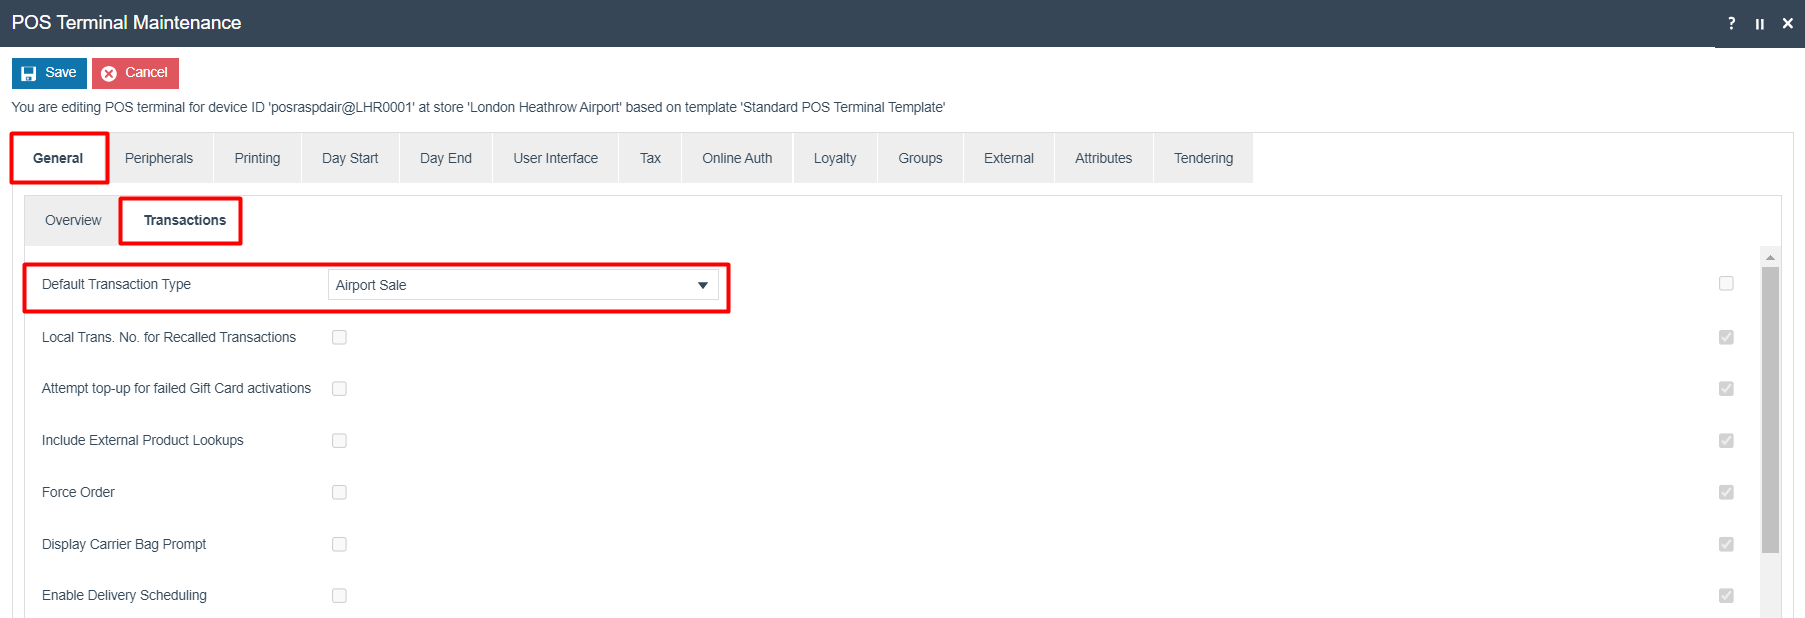
The Default Transaction Type of the POS Terminal should be changed to accommodate airport sales. This can be configured either in the POS Terminal, or in the POS Terminal Template. In the example below, it is configured in the POS Terminal.
Navigate to POS Terminal Maintenance using the search or the path:
Configuration > Organisation > POS Terminals
Edit the POS Terminal for the Airport POS.
In the General > Transaction sub-tab, set the Default Transaction Type to Airport Sale.
Flights Configuration
Flights are defined in association with Airport Terminal Buildings. Flight details are added based on the Flight Number obtained from the customer's Boarding Pass.
While steps have been added here for the manual creation of flight data, this data will usually be populated by a flight file import.
Navigate to Flights Maintenance using the search or the path:
Configuration > Organisation > Flights
To add a new Flight entry, select the Create a new Flight option.
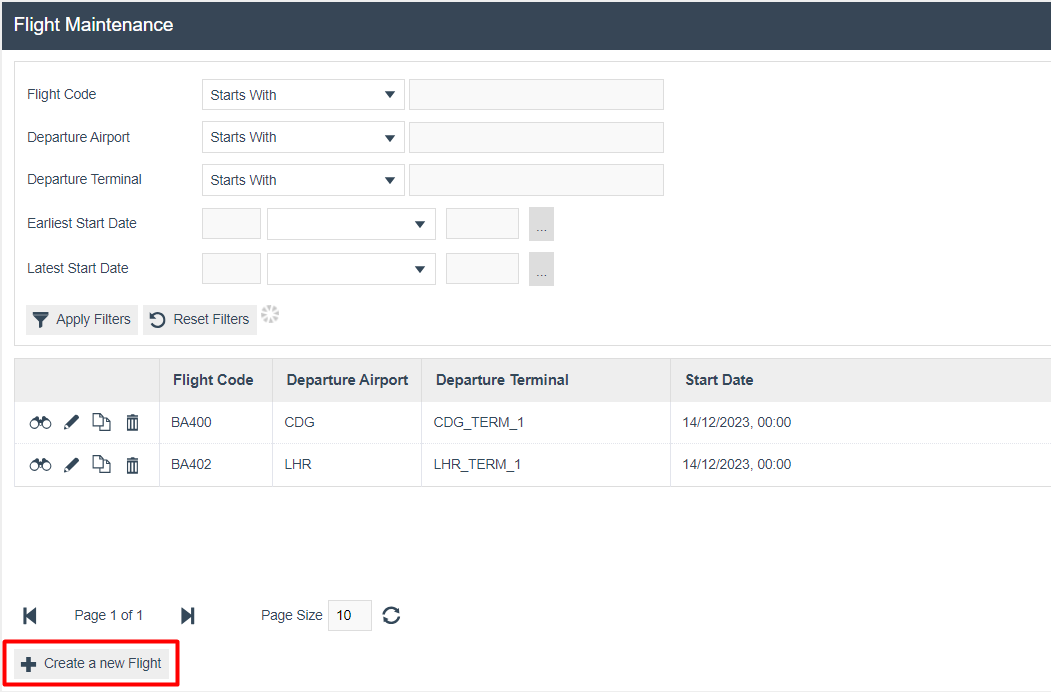
Enter a Flight Code and select the Airport Terminal Building departure point from a dropdown list of all those currently configured. The Start Date is an effective date and defaults to the current date on which the Flight configuration is being created. This, however, may also be set to a date on which the Flight route commences operation.

Select Create to proceed.
In the General Tab of the Flight Maintenance page specify the departure time of the flight. The optional End Date indicates when the Flight route expires, and the Flight Code Entry Method indicates to the POS how the customer's Flight Number will be captured.
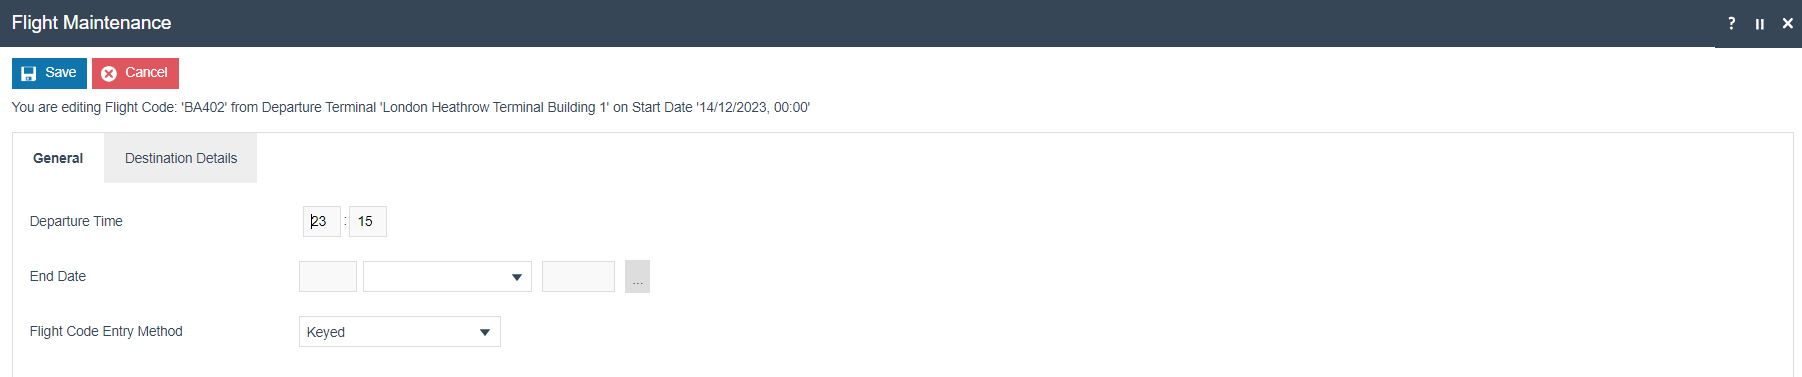
The Destination Details Tab captures a Destination Flight Zone and Destination Airport, both of which are selected from dropdown lists of those currently configured entities.

User Role Configuration
Enable the following privileges for a role of the user, in order for the user to be able to initiate and complete Airport Sale transactions on a POS.
The User Roles Maintenance application can be accessed through:
Configurations > HR > User Roles
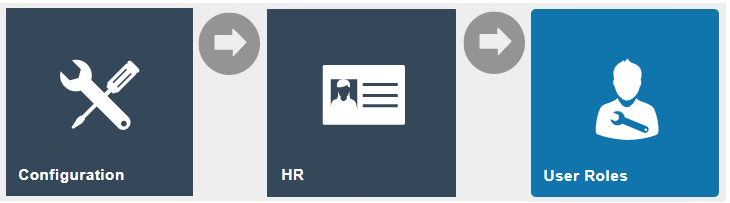
Select the appropriate Role to be edited and select the Application Package and configure the privileges as below:
Process - Capture Flight Details
| Application Package | Function ID | Description |
|---|---|---|
| Enactor POS | enactor.pos.AirportCodeEntryAllowed | Allows the POS User to enter an Airport code for the customer's destination on an Airport POS. |
enactor.pos.AuthorisesSkipFlightDetailsCapture | Allows the POS User to complete skipping customer's flight details capture on an Airport POS. | |
enactor.pos.DestinationZoneSelectAllowed | Allows the POS User to select a destination zone for the customer's flight on an airport POS. | |
enactor.pos.SkipFlightDetailsCaptureAllowed | Allows the POS User to start skipping customer's flight details capture on an Airport POS. A User with privilege enactor.pos.AuthorisesSkipFlightDetailsCapture can complete this action. |
Process - New Airport Sale
| Application Package | Function ID | Description |
|---|---|---|
| Enactor POS | enactor.pos.AirportTransactionAllowed | Allows the POS User to start an Airport transaction. |
| Enactor POS | enactor.pos.AuthorisesAirportTransaction | Allows the POS User to complete an Airport transaction. |
Broadcasting Data
In order to deliver the configuration changes to the POS, broadcast the following entities:
- Flight Zone
- Flight
- Airport
- Airport Terminal Building
- Location
- POS Terminal
- Role
POS Functionality
Once the User logs in to the POS, the Basket loads the Airport Transaction Header and flight code prompt:
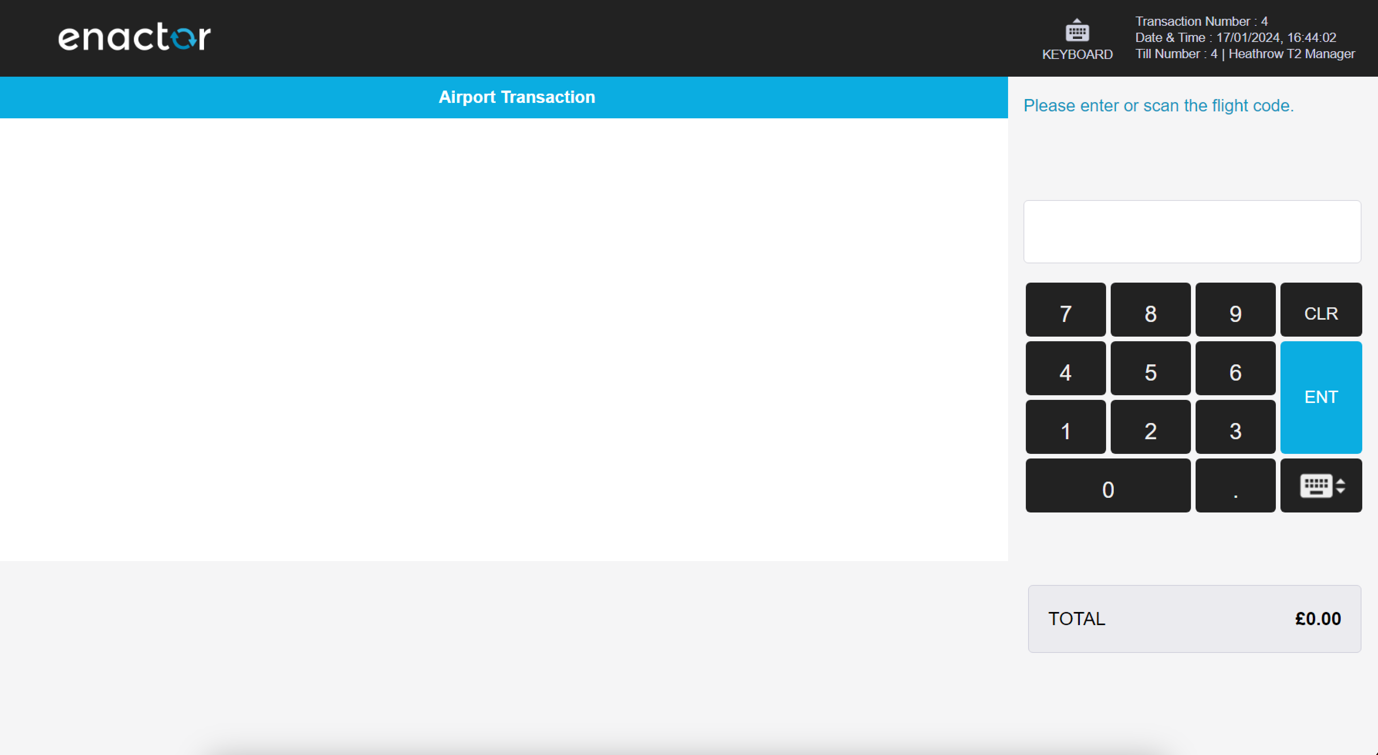
Scan or key enter the flight number - the POS prompts for confirmation.
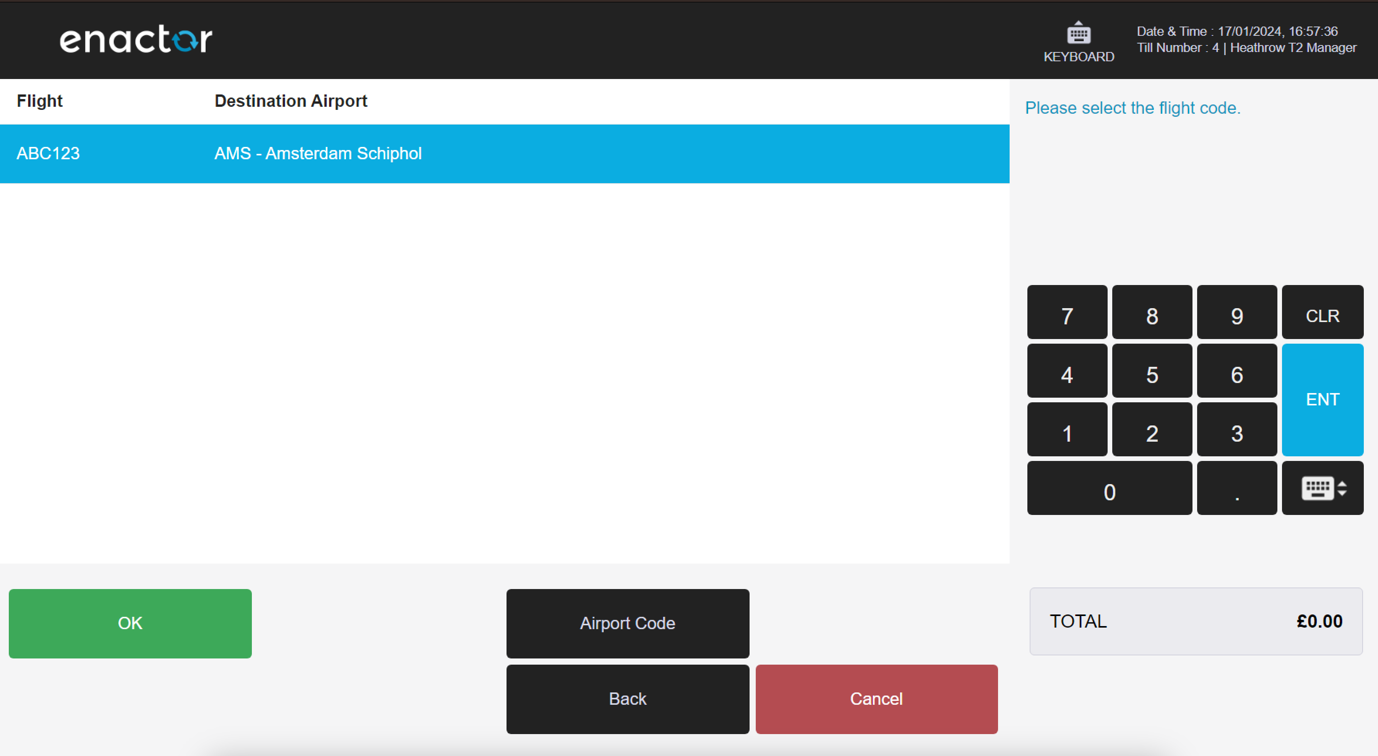
Select OK to confirm the correct flight has been selected.
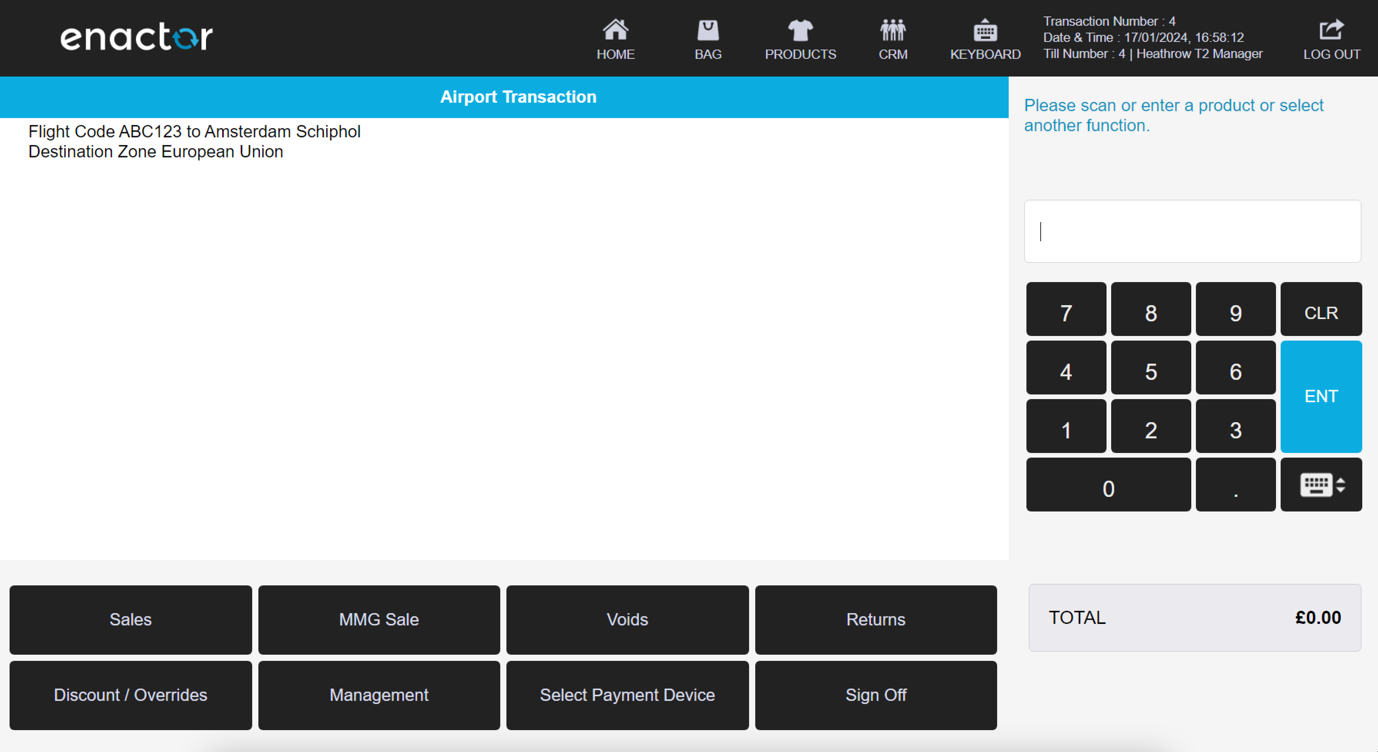
The POS begins an Airport Sale with the Flight Destination Zone loaded. The tax rules configured in the Destination Zone are applied to the transaction.
Items can be added to the basket and the transaction completed in the same way as a standard retail transaction.
An additional basket item is added to the transaction XML data that captures the flight information.