How-to Guide - Configuring Auto Cashup and Finalise
Introduction
The purpose of this guide is to describe the steps required to configure the Auto Cashup and Finalise job for the Back Office. This allows you to schedule a diary job that runs the cash management functions of Terminal Cashup and Empty, Terminal Finalise and opens a new Terminal Session as scheduled in the diary job.
This will only work for the following:
- Devices that are of the Device Type Mobile POS (MPOS).
- Session Owners with the Session Type of Pay Point.
- Tenders that are configured to be Auto Picked Up.
In the POS Terminal, if there are any tenders that have been configured to be picked up manually (not Auto Picked Up), then this diary job will fail.
Overview
This guide will cover the following:
- Session Owner - Enable Auto Close And Finalise and map the Pay Point session owner to the MPOS terminal
- Diary Entry - Create and configure a System Job to schedule the Auto Cashup and Finalise process
- Tender - Enable the Auto Picked Up setting for all tenders used by the POS
- Broadcasting - Deliver configuration changes to all devices
- Auto Cashup and Finalise Behaviour - Verify the job runs correctly
Prerequisites
Before starting, you should have the following resources in place:
- Enactor Estate Manager
- Enactor POS (MPOS device configured within the appropriate region)
- Standard Configuration, including base configuration and regionally appropriate data
You should be familiar with the following:
- Estate Manager configuration
- POS Terminal configuration
- Tender configuration
Configuration Steps - Session Owner
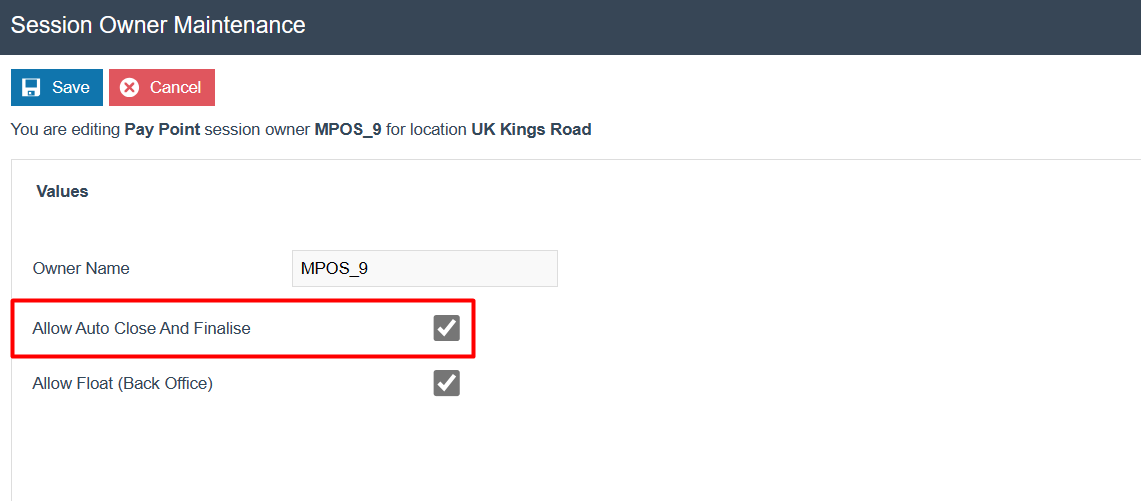
The Session Owner must have Allow Auto Close And Finalise enabled for the Auto Cashup and Finalise job to work. This configuration is made in Session Owner Maintenance.
Accessing Session Owner Maintenance
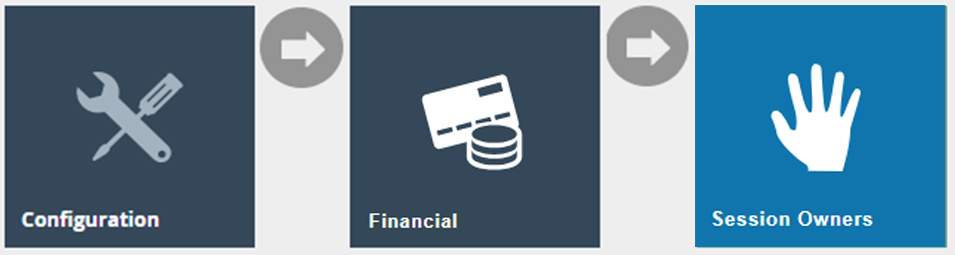
Navigate to Session Owner Maintenance using the Search or the path:
Configuration > Financial > Session Owner
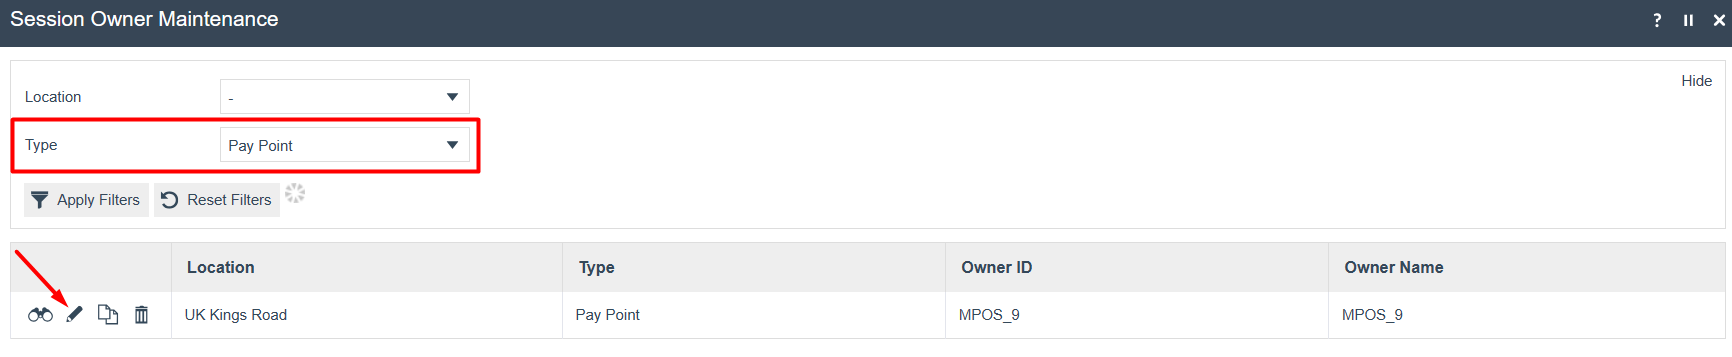
Since Auto Cashup and Finalise is supported only on MPOS devices and for Session Owner Type of Pay Point, make sure to select the Pay Point Session Owner which will be mapped to your MPOS device.
Configuring the Session Owner
In Session Owner Maintenance, select the Edit icon of the Pay Point Session Owner which will be used for Auto Cashup and Finalise:
Enable Allow Auto Close And Finalise and select Save:
Session Owner Field Reference
| Field | Description |
|---|---|
| Owner Name | The name of the session owner. This identifies the Pay Point in the system. |
| Allow Auto Close And Finalise | Tick to enable the Auto Cashup and Finalise job for devices using this session owner. Required for the diary job to succeed. |
| Allow Float (Back Office) | Tick to allow the Back Office to manage the float for this session owner. |
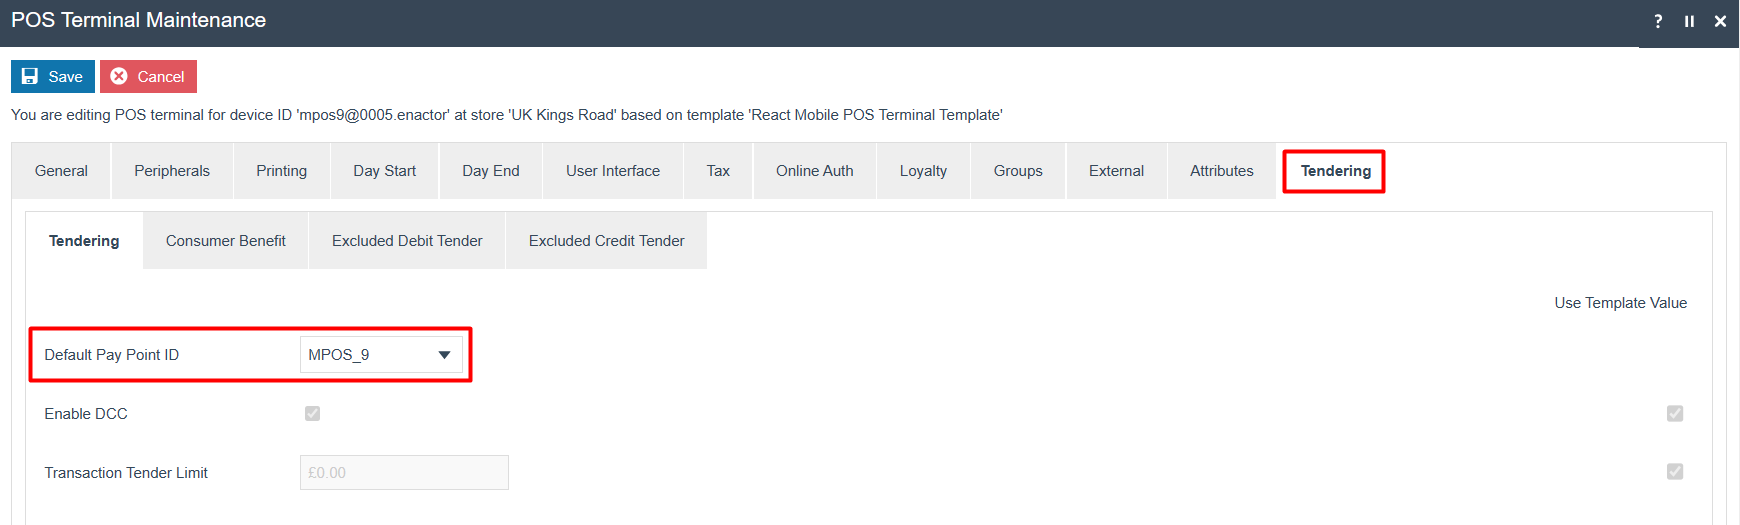
Mapping the Session Owner to the MPOS Terminal
The Pay Point Session Owner must be mapped to the MPOS Terminal in POS Terminal Maintenance. Navigate to the Tendering tab and set the Default Pay Point ID to the session owner:
This completes the Session Owner configuration.
Configuration Steps - Diary Entry
The Diary Entry Maintenance allows you to schedule specific process executions within the Enactor Application. A new System Job will be created to schedule the Auto Cashup and Finalise process.
Accessing Diary Entry Maintenance
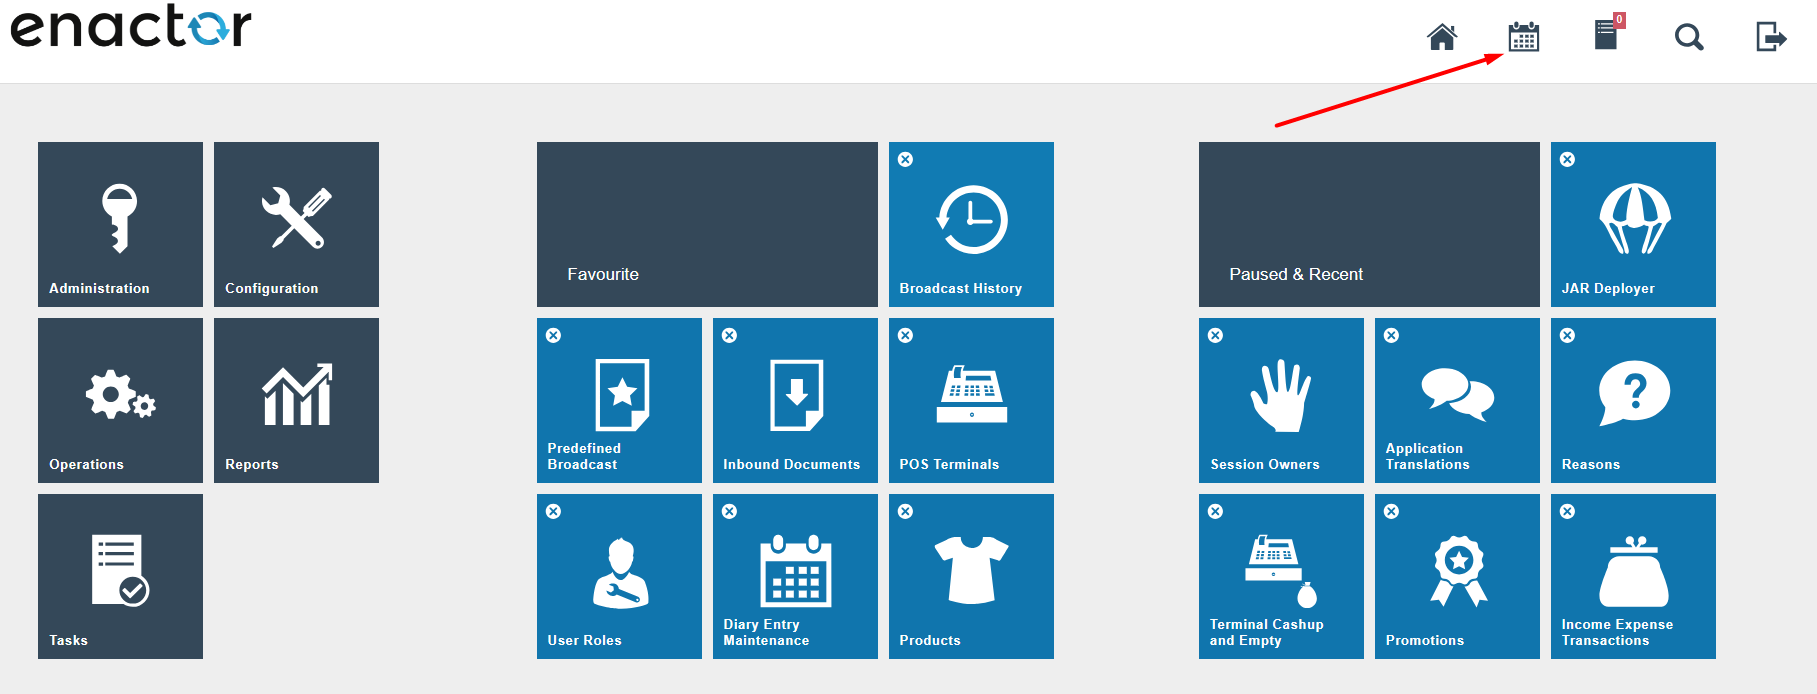
The Diary Entry Maintenance application can be accessed by selecting the diary icon in the Estate Manager home screen:
Creating a New System Job
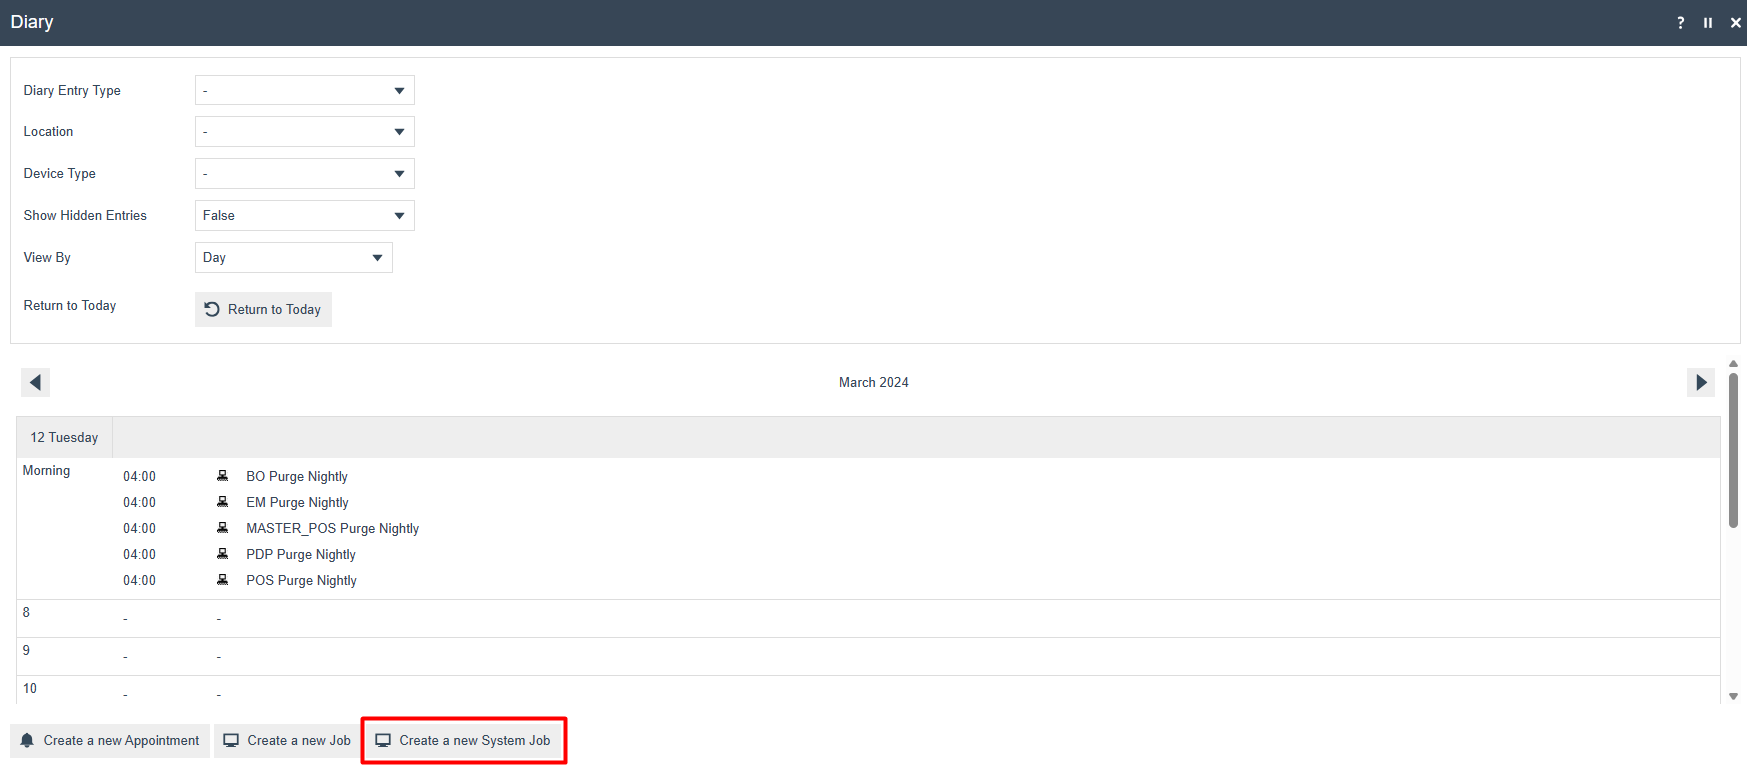
Select Create a new System Job in Diary Entry Maintenance:
Diary Entry - General Tab
The General tab captures the basic information of the new Diary Entry:
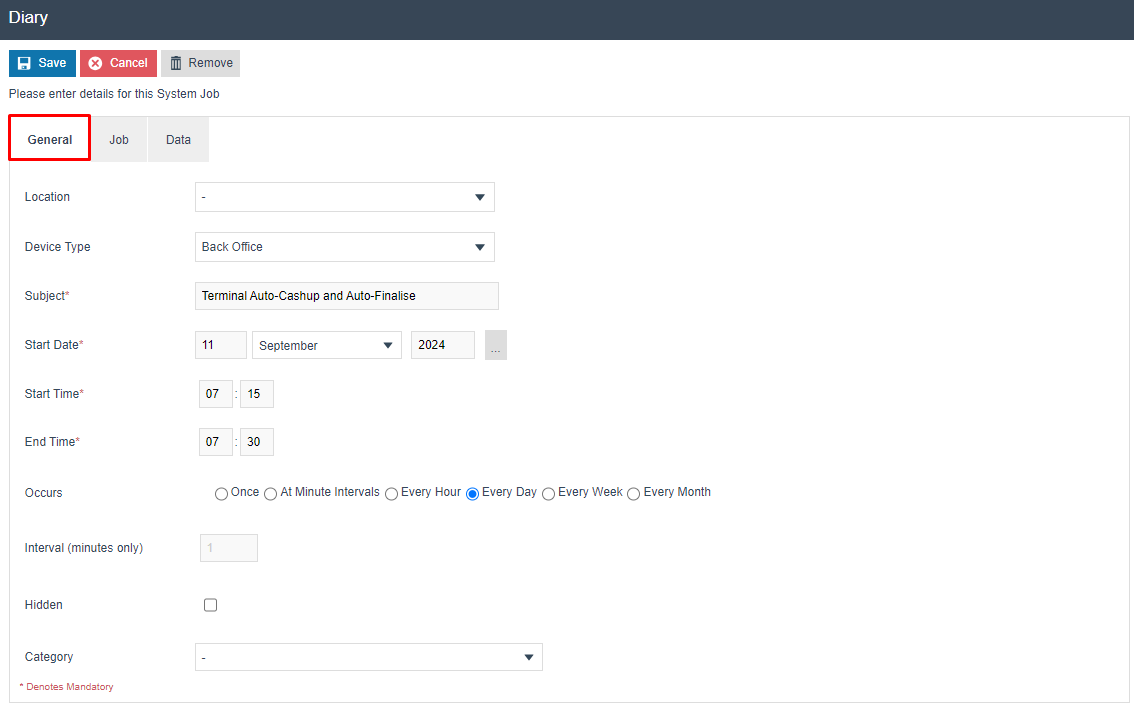
Set the following values on the General tab:
| Configuration | Description |
|---|---|
| Location | Select - as the Location. This ensures no specific location is selected, applying the job to all locations for the selected Device Type. |
| Device Type | Select Back Office. This ensures the job runs in the Back Office of the selected Location. |
| Subject | Enter any appropriate name to identify this Diary Entry (e.g. Terminal Auto-Cashup and Auto-Finalise). |
| Start Date | Specify the start date for this job. |
| Start Time | Specify the start time for this job. |
| End Time | Specify the end time for this job. This is the time at which the job schedule expires. If the job has not started before this time, it will not run. A running job will not expire. |
| Occurs | The frequency at which this job is to be run. Select Every Day for a daily schedule. |
Diary Entry - Job Tab
The Job tab captures the process to be executed. Enter CashManagement/AutoCashup/StoreAutoCashup in the Process ID field:
This is case-sensitive.
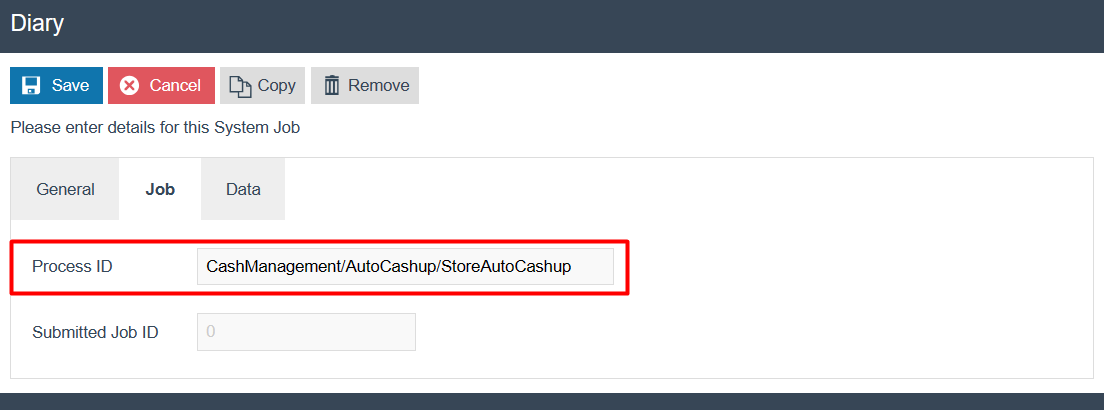
CashManagement/AutoCashup/StoreAutoCashup. This value is case-sensitive.
Diary Entry - Data Tab
The Data tab captures the user who will execute this Diary Entry. Enter the following values:
| Configuration | Description |
|---|---|
| Name | Enter enactor.mfc.UserId (case-sensitive). |
| Java Type | Select String. |
| Value | Enter the User ID used to log into the Back Office (e.g. ADMIN). |
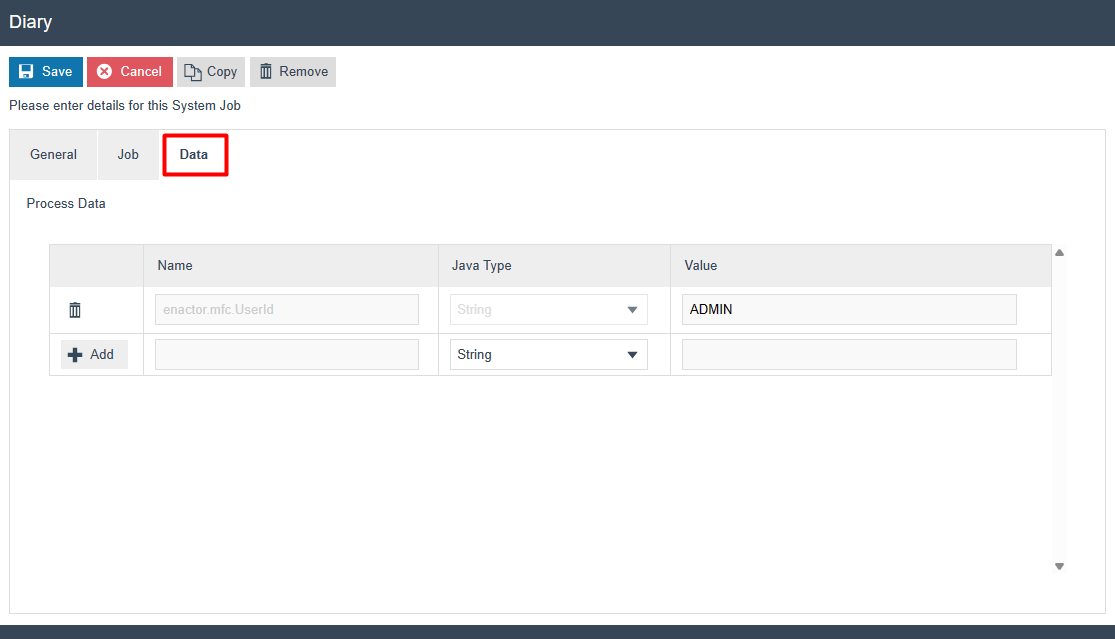
enactor.mfc.UserId, Java Type set to String, and Value set to the Back Office login User ID.
Select Save. The new Diary Entry is created:
This completes the Diary Entry configuration.
Configuration Steps - Tender
The Auto Cashup and Finalise job will only work for tenders configured as Auto Picked Up. This setting is configured in Tender Maintenance.
Accessing Tender Maintenance
Navigate to Tender Maintenance using the Search or the path:
Configuration > Financial > Tenders
Enabling Auto Picked Up
Select the tender to configure, navigate to the Cash Management tab, and enable Auto Picked Up:

Select Save. This tender will now be included in the Auto Cashup process.
The Auto Picked Up configuration is essential for the Auto Cashup and Finalise job to succeed. If the POS has even one tender that does not have Auto Picked Up enabled, the job will fail. Ensure all tenders used by the POS have Auto Picked Up enabled.
This completes the Tender configuration.
Configuration Steps - Broadcasting
To deliver the configuration changes, broadcast the following entities to all devices:
- Cash Management Session Owner
- POS Terminal
- Diary Entry
- Tender
Ensure all four entities are broadcast before the scheduled job runs. The Auto Cashup and Finalise job will not function correctly if any entity has not been broadcast to the target devices.
This completes the Broadcasting configuration.
Auto Cashup and Finalise Behaviour
Once the configuration is complete and broadcast, the Auto Cashup and Finalise job runs at the scheduled time. The following sections demonstrate the expected behaviour.
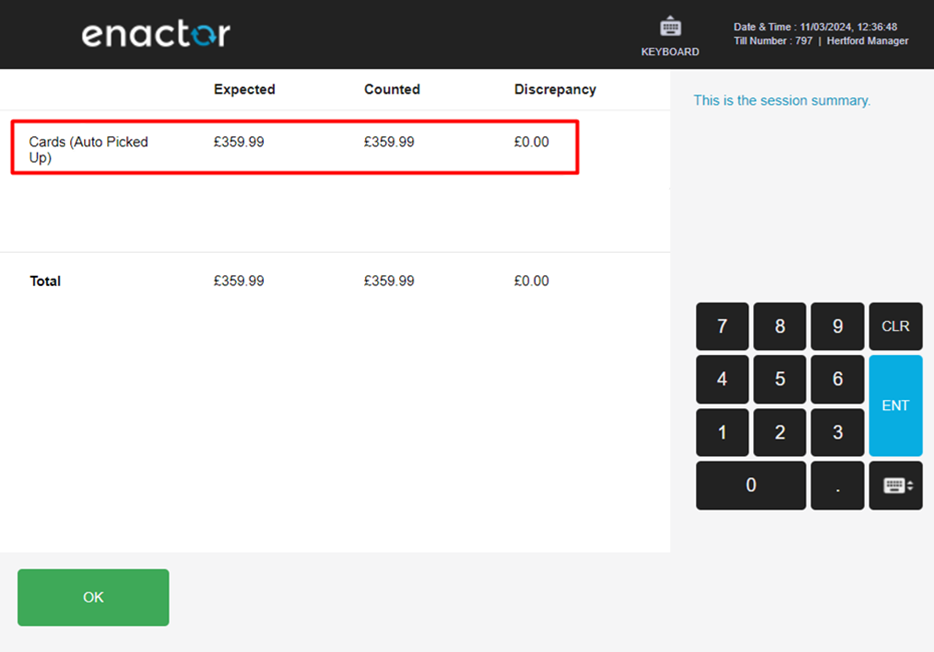
Verifying the POS Spot Check
In the POS, when a spot check is performed, the tenders configured as Auto Picked Up and their values are displayed:
Terminal Cash Management History - Before Job
Navigate to Terminal Cash Management History in the Estate Manager or Back Office to view the cash management activities:
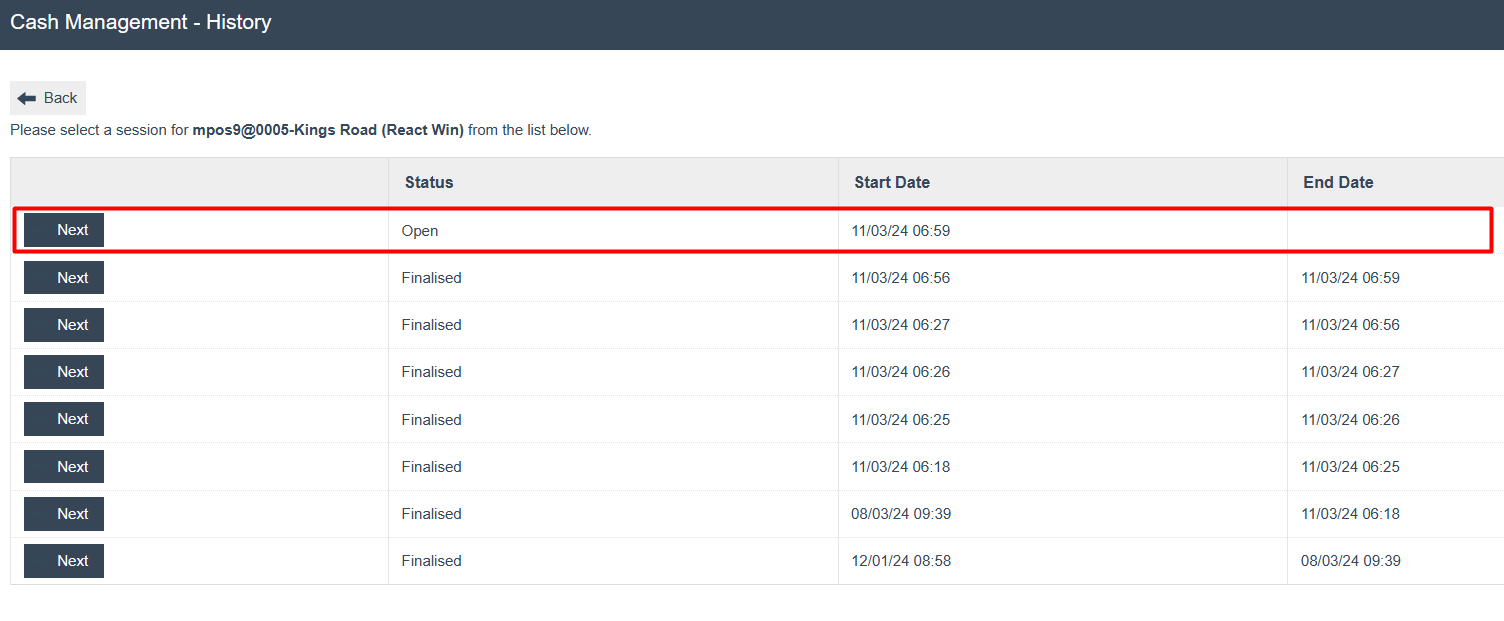
Select Next to view more details on the Open session:

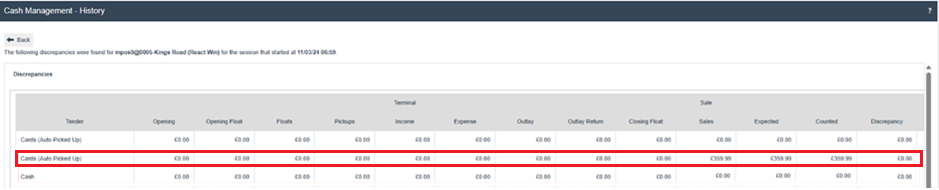
When a Terminal Spot Check is run, the following results are displayed for this Open session:

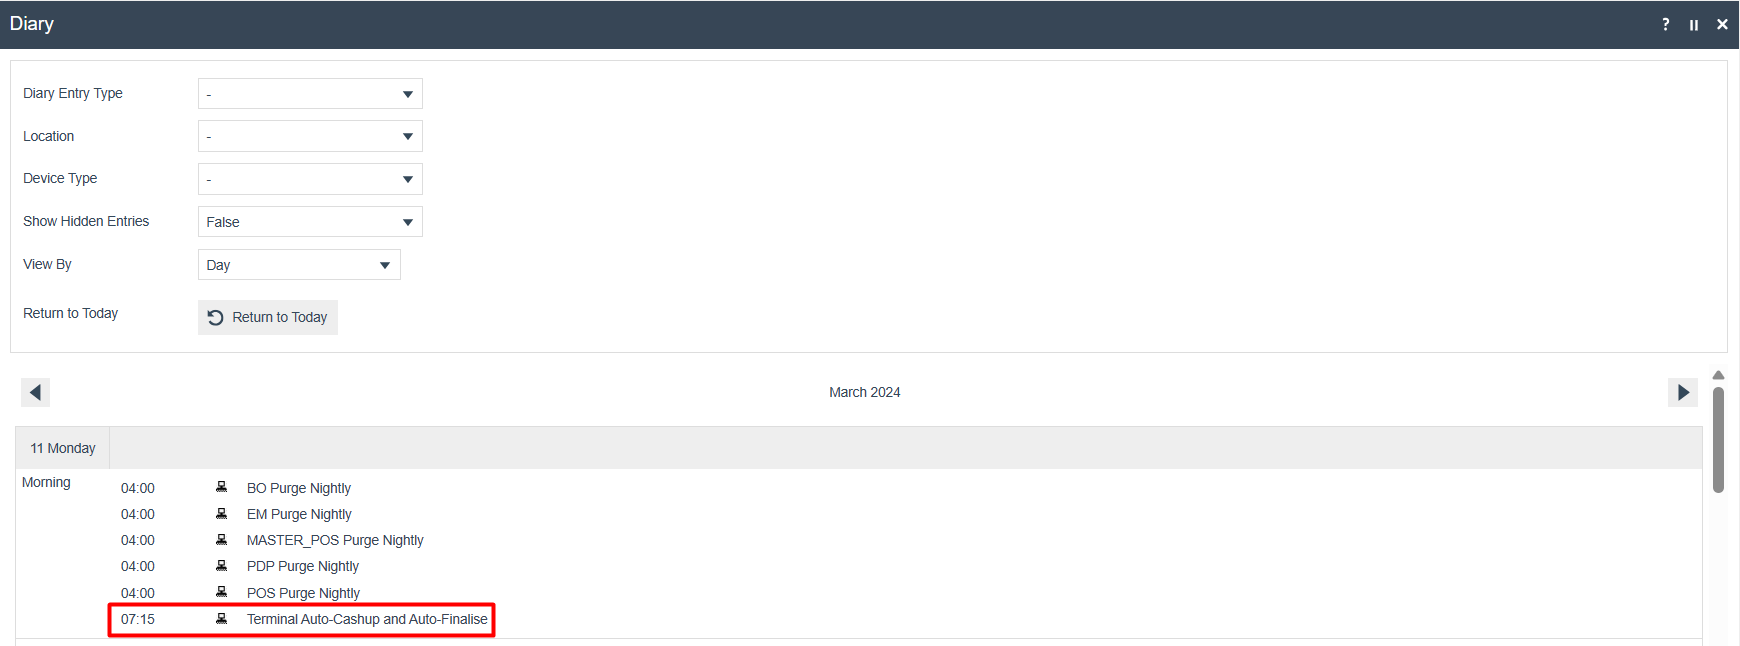
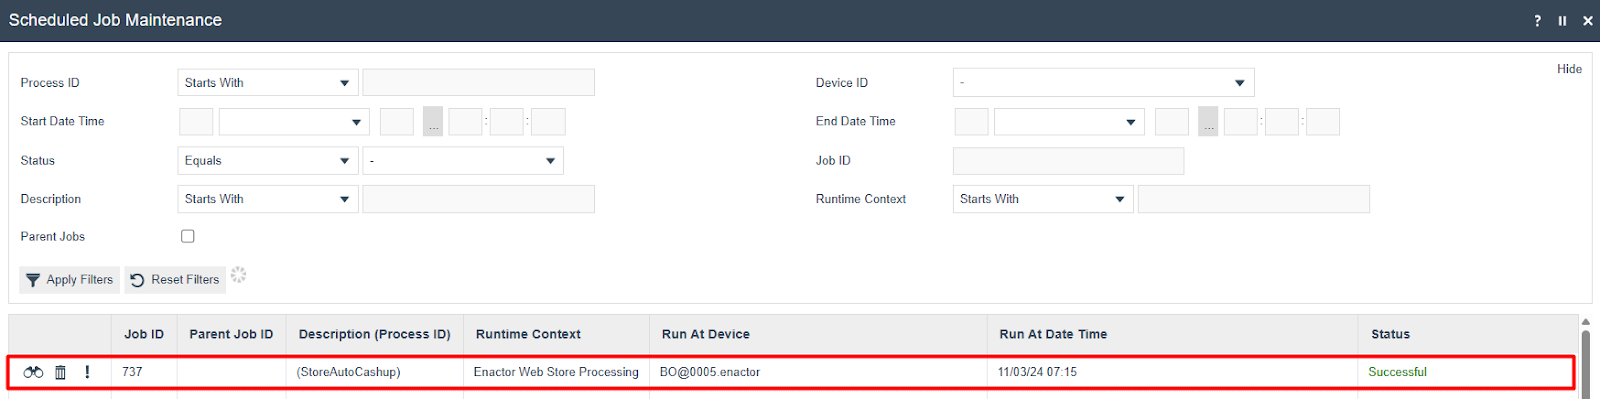
Scheduled Job Status
After the Auto Cashup and Finalise job runs at the scheduled time (07:15 in this example), the status can be viewed in Scheduled Job Maintenance:
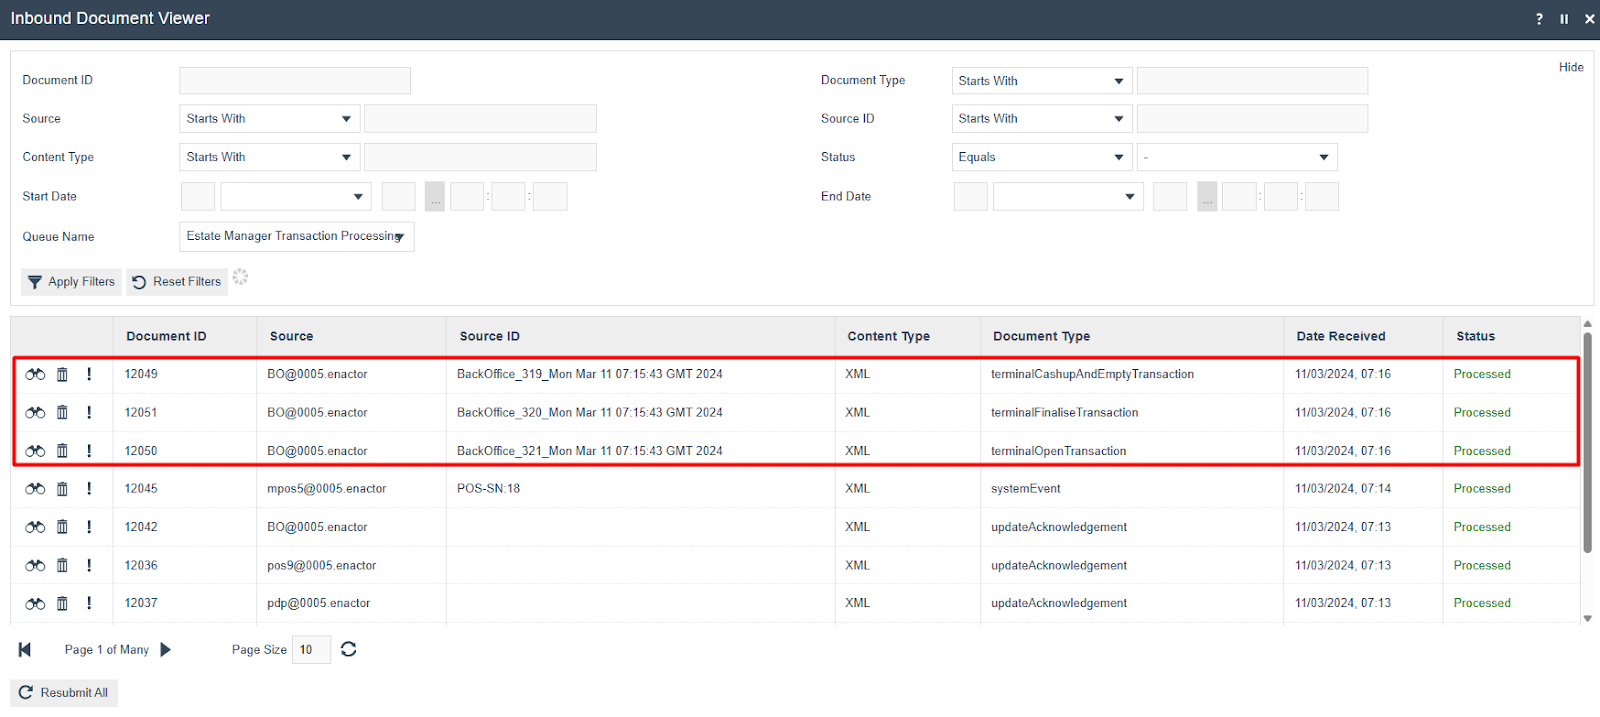
Inbound Documents Confirmation
Navigate to Inbound Documents in the Estate Manager to confirm the cash management functions that were executed:
Terminal Cash Management History - After Job
Navigate back to Terminal Cash Management History and select the POS Terminal:

Navigate into the 06:59 Closed Session to view the automated cash management functions:
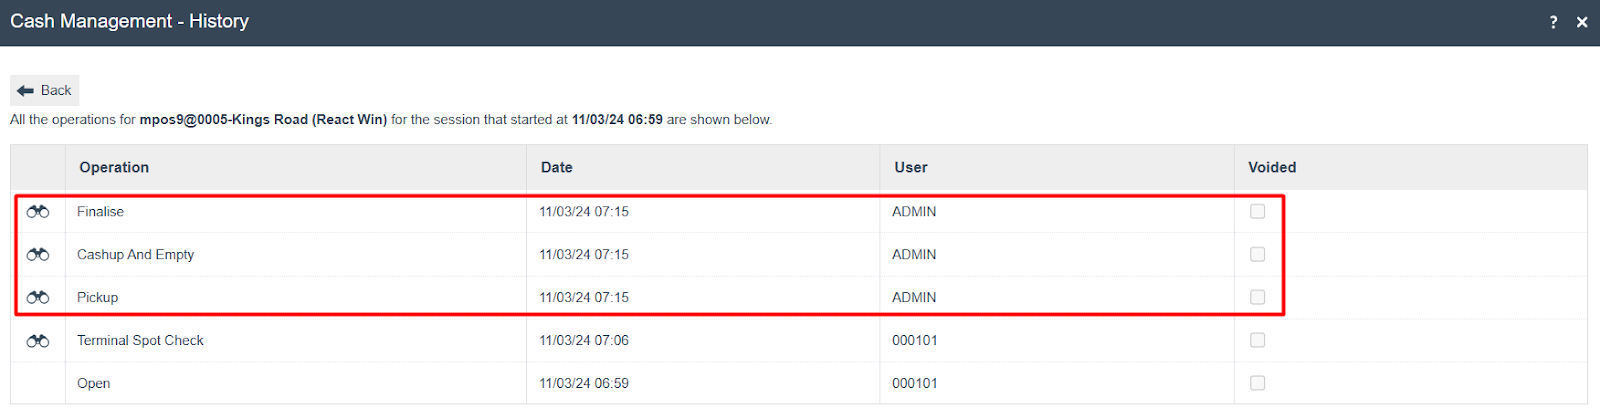
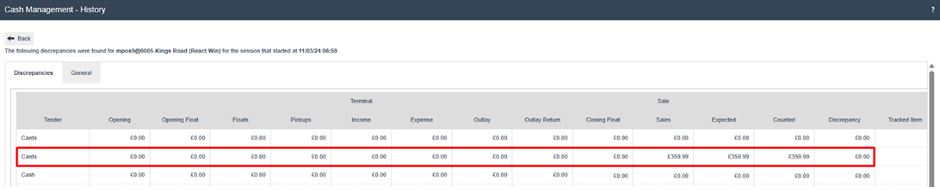
The individual cash management function details:
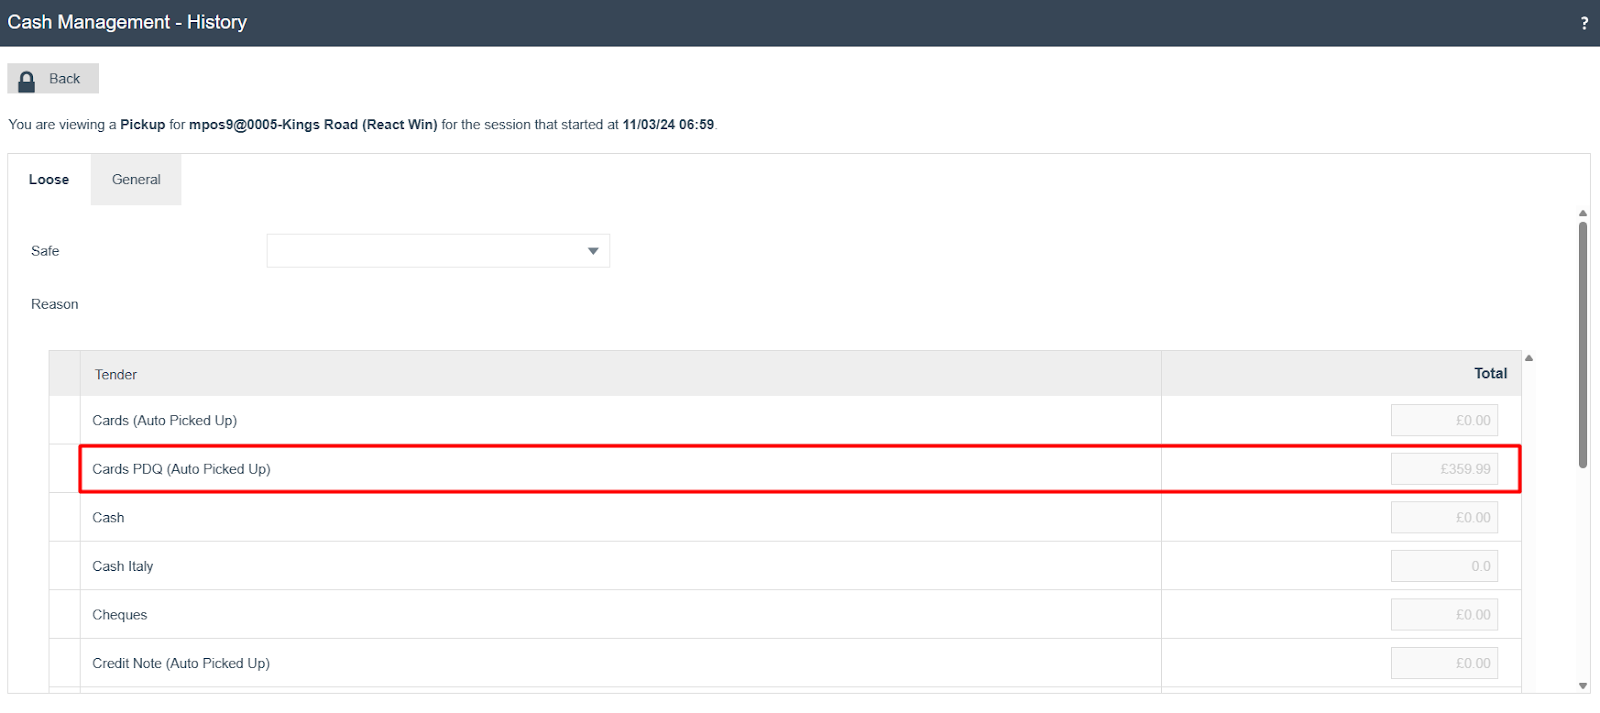
Pickup
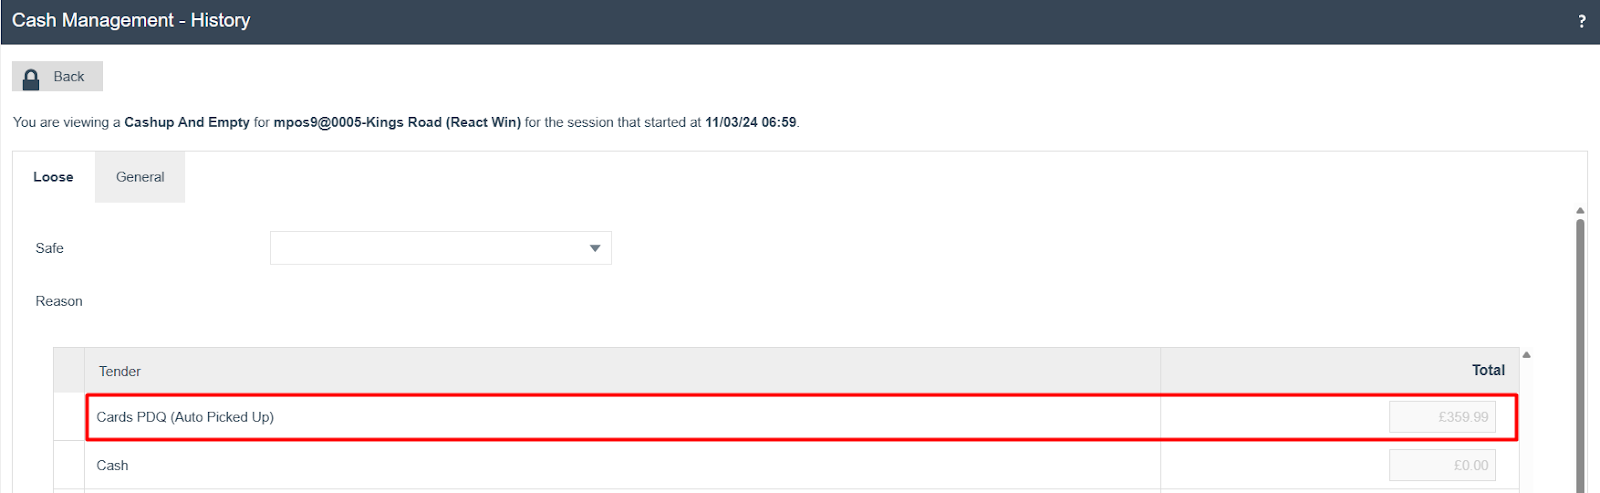
CashUp And Empty
Finalise
The new session opened at 07:15:

About This Document
(c) 2026 Enactor Ltd
All documents produced by Enactor Ltd are supplied to customers subject to Copyright, commercial confidentiality, and contractual agreements and must not be copied or transferred without permission.
Document Context
This document is part of the Enactor Product Documentation Series. All Enactor products include a comprehensive documentation set designed to improve understanding of the product and facilitate ease of use.
Document Inquiries
If you find that a document is inaccurate or deficient in any way, please contact:
Email: documentation@enactor.co.uk