How To Configure Card Payments
Introduction
This guide explains how to set up the Card payment method (tender type) to be used at the POS, and how to set the various rules to be applied for handling card payments.
The configuration covers creating card tenders, defining card types with their associated payment schemes and processing rules, establishing IIN ranges for card identification, and setting up tender menus so that card payment options appear on the POS.
The purpose of this guide is to demonstrate the steps to configure the POS to support card payments including card types, IIN ranges, and tender menu buttons.
The intent of this guide is to provide basic guidance on configuration including required and the most common options. Please refer to the full solution documentation for a detailed explanation of all available settings.
Overview
The following steps are required to enable card payments:
- Tenders - Create and configure a card tender with payment rules, restrictions, and card-specific settings
- Card Types - Define card types (e.g. Visa, Mastercard) with payment schemes, actions, authorisation, PIN, AVS, and ICC settings
- IIN Ranges - Establish IIN (Issuer Identification Number) ranges to identify card types by their number prefixes
- Tender Menu - Add a card tender button to the POS tender menu
- Broadcasting - Deliver all configuration to the POS
Configuration
Tenders
The Tender configuration is maintained using the Tender Maintenance function. This section covers creating a new card tender and configuring its properties across multiple tabs.
Accessing Tenders
Navigate to Tender configuration using the Search or the path: Main Menu > Configuration > Financial > Tenders
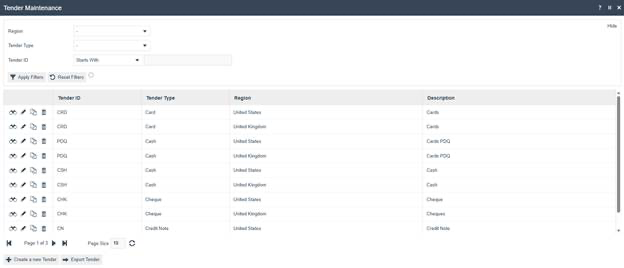
The Tenders option opens the Tender Maintenance select page. This page lists currently configured tenders and enables you to add, view, edit, copy, or delete tenders.
Creating a New Card Tender
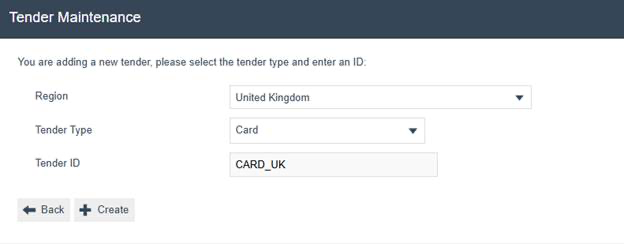
In the Tender Maintenance select page, select Create a new Tender. An initial page captures the Region, Tender Type, and Tender ID. To configure a card tender, either select a pre-existing card tender for your region or create a new one.
| Configuration | Example Value | Description |
|---|---|---|
| Region | United Kingdom | The region this tender applies to |
| Tender Type | Card | The type of tender being created |
| Tender ID | CARD_UK | A unique identifier for this tender |
General Tab
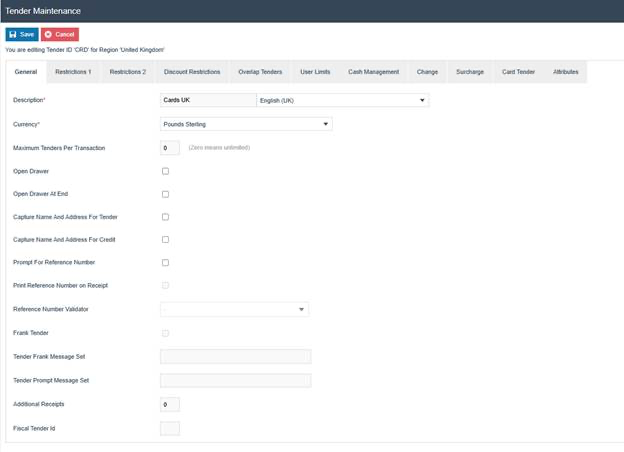
On the General tab, provide a description of the tender type and select the appropriate currency.
| Configuration | Example Value | Description |
|---|---|---|
| Description | Cards UK | Display name for the tender |
| Currency | Pounds Sterling | The currency used for this tender |
| Maximum Tenders Per Transaction | 0 | Maximum number of this tender per transaction (0 means unlimited) |
| Open Drawer | Unchecked | Whether to open the cash drawer on tender |
| Open Drawer At End | Unchecked | Whether to open the cash drawer at end of transaction |
| Additional Receipts | 0 | Number of additional receipts to print |
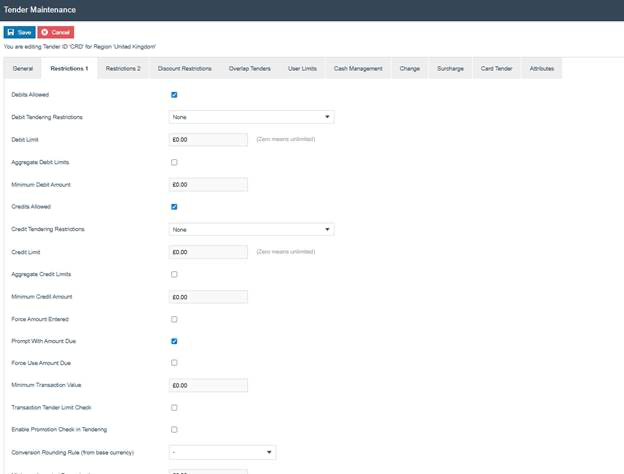
Restrictions 1 Tab
On the Restrictions 1 tab, configure debit and credit permissions and limits.
| Configuration | Example Value | Description |
|---|---|---|
| Debits Allowed | Checked | Allows debit (payment) transactions with this tender |
| Debit Tendering Restrictions | None | Restrictions on debit tendering |
| Debit Limit | 0.00 | Maximum debit amount (0 means unlimited) |
| Credits Allowed | Checked | Allows credit (refund) transactions with this tender |
| Credit Tendering Restrictions | None | Restrictions on credit tendering |
| Credit Limit | 0.00 | Maximum credit amount (0 means unlimited) |
| Prompt With Amount Due | Checked | Pre-fills the tender amount with the balance due |
| Minimum Transaction Value | 0.00 | Minimum transaction value for this tender |
Credit Tendering Restrictions should be set to Amount less than or equal balance when limiting card refunds to the original transaction amount.
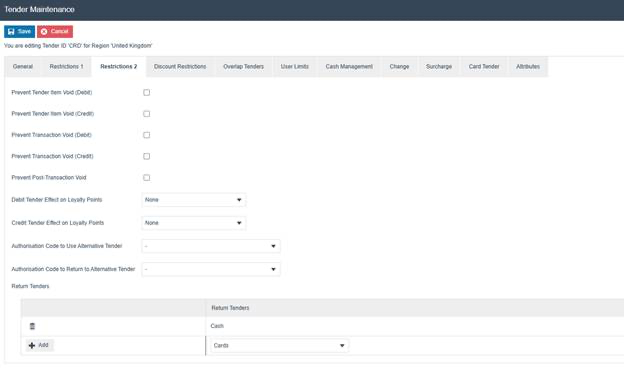
Restrictions 2 Tab
On the Restrictions 2 tab, specify return tenders and void permissions.
| Configuration | Example Value | Description |
|---|---|---|
| Prevent Tender Item Void (Debit) | Unchecked | Whether to prevent voiding a debit tender item |
| Prevent Tender Item Void (Credit) | Unchecked | Whether to prevent voiding a credit tender item |
| Prevent Transaction Void (Debit) | Unchecked | Whether to prevent voiding a debit transaction |
| Prevent Transaction Void (Credit) | Unchecked | Whether to prevent voiding a credit transaction |
| Prevent Post-Transaction Void | Unchecked | Whether to prevent post-transaction voids |
| Debit Tender Effect on Loyalty Points | None | Effect on loyalty points for debit transactions |
| Credit Tender Effect on Loyalty Points | None | Effect on loyalty points for credit transactions |
| Return Tenders | Cash | Alternative tenders available for refunds |
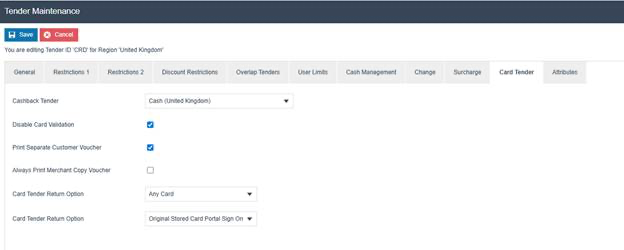
Card Tender Tab
The Card Tender tab contains card-specific settings such as cashback and card return options.
| Configuration | Example Value | Description |
|---|---|---|
| Cashback Tender | Cash (United Kingdom) | The tender used for cashback amounts |
| Disable Card Validation | Checked | Disables card validation checks |
| Print Separate Customer Voucher | Checked | Prints a separate customer copy voucher |
| Always Print Merchant Copy Voucher | Unchecked | Whether to always print the merchant copy |
| Card Tender Return Option | Any Card | Whether returns can be done to any card or only the original card |
To enable basic card tender functionality, no settings changes are necessary under Discount Restrictions, Overlap Tenders, User Limits, Change, Surcharge, or Attributes. Information regarding these additional options can be found in the full Enactor documentation.
A separate guide covering Cash Management has been published. Cash management settings at the tender level are covered in the separate Cash Management guide.
This completes the Tender configuration.
Card Types
Card Types define the processing rules for different card brands (e.g. Visa, Mastercard, Amex). Each card type specifies its payment scheme, authorisation rules, PIN handling, AVS requirements, and EMV settings.
Accessing Card Types
Navigate to Card Types configuration using the Search or the path: Main Menu > Configuration > Financial > Card Types

The Card Types option opens the Card Type Maintenance page. This page lists currently configured card types.
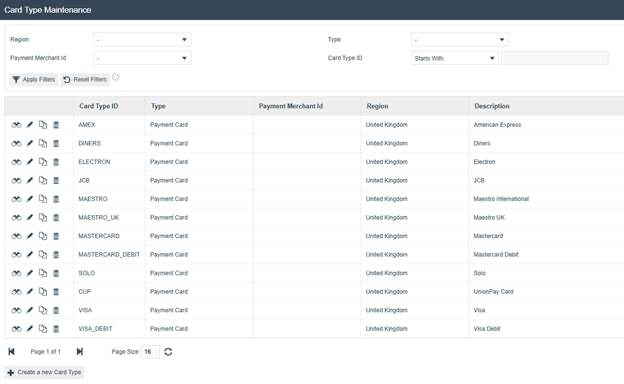
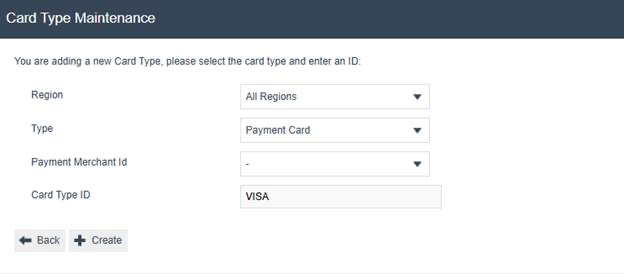
Creating a New Card Type
Select Create a new Card Type and specify the Region, Type, Payment Merchant Id, and Card Type ID.
| Configuration | Example Value | Description |
|---|---|---|
| Region | All Regions | The region this card type applies to |
| Type | Payment Card | The built-in type classification |
| Payment Merchant Id | - | Optional payment merchant identifier |
| Card Type ID | VISA | A unique identifier for this card type |
General Tab (Card Type)
On the General tab, enter a description and select the tender type and acquirer.

| Configuration | Example Value | Description |
|---|---|---|
| Type | Payment Card | The card classification (read-only) |
| Description | Visa | Display name for the card type |
| Tender | Cards (United Kingdom) | The tender type this card uses |
| Acquirer | WorldPay Saas Test | The payment acquirer for processing |
| Card Group Name | Empty | Optional grouping for card types |
| Display Image | - | Optional image shown on POS for this card type |
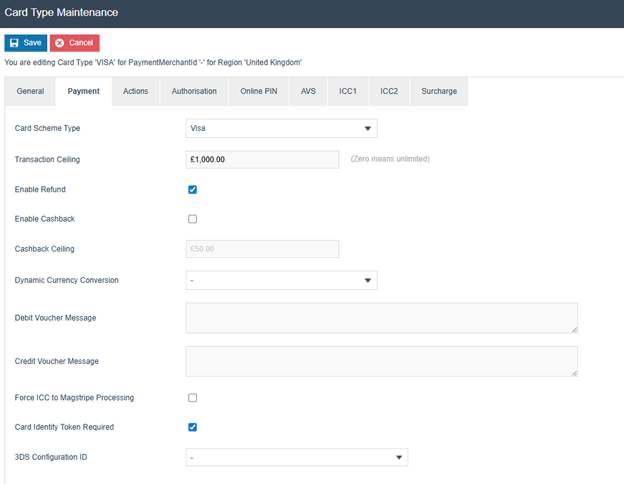
Payment Tab
On the Payment tab, configure the card scheme, transaction limits, and refund/cashback settings.
| Configuration | Example Value | Description |
|---|---|---|
| Card Scheme Type | Visa | The card scheme for processing |
| Transaction Ceiling | 1,000.00 | Maximum transaction value (0 means unlimited) |
| Enable Refund | Checked | Whether this card type accepts refunds |
| Enable Cashback | Unchecked | Whether cashback is supported |
| Cashback Ceiling | 50.00 | Maximum cashback amount |
| Card Identity Token Required | Checked | Whether a card identity token is required |
| Force ICC to Magstripe Processing | Unchecked | Forces chip cards to use magstripe processing |
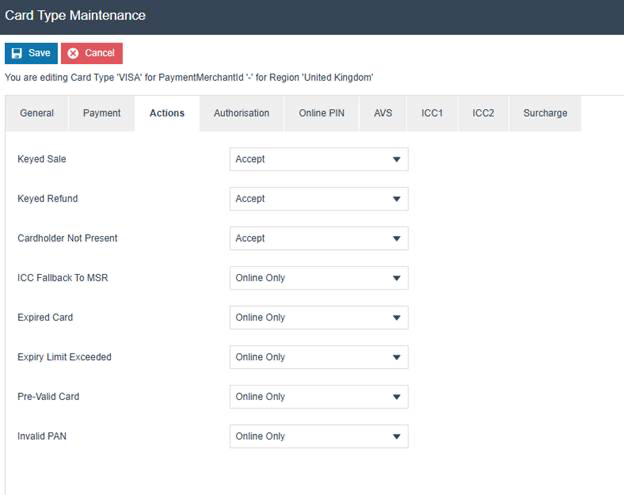
Actions Tab
The Actions tab configures how non-conforming transactions are handled. Each exception can be set to always accept, always reject, or require an online connection to the host.
| Configuration | Example Value | Description |
|---|---|---|
| Keyed Sale | Accept | Action for manually keyed sale transactions |
| Keyed Refund | Accept | Action for manually keyed refund transactions |
| Cardholder Not Present | Accept | Action when cardholder is not present |
| ICC Fallback To MSR | Online Only | Action when chip card falls back to magstripe |
| Expired Card | Online Only | Action for expired cards |
| Expiry Limit Exceeded | Online Only | Action when expiry limit is exceeded |
| Pre-Valid Card | Online Only | Action for cards not yet valid |
| Invalid PAN | Online Only | Action for invalid card numbers |
Authorisation Tab
The Authorisation tab defines the business policy and acquirer requirements for handling the card type, including floor limits, fallback limits, and reversal settings.

| Configuration | Example Value | Description |
|---|---|---|
| Debit Floor Limit | Empty | Floor limit for debit transactions |
| Debit Fallback Limit | 0.00 | Fallback limit for debit when offline |
| Debit Offline Mode Fallback Limit | 50.00 | Maximum offline debit amount |
| Credit Floor Limit | 0.00 | Floor limit for credit transactions |
| Credit Fallback Limit | 50.00 | Fallback limit for credit when offline |
| Cashback Floor Limit | 50.00 | Floor limit for cashback transactions |
| Online Refund Authorisation | Checked | Requires online authorisation for refunds |
| Online Reversal | Checked | Enables online reversal of transactions |
Any changes made on the Authorisation tab will be specific to retailer and acquirer requirements. A complete explanation of these fields can be found in the full Enactor documentation.
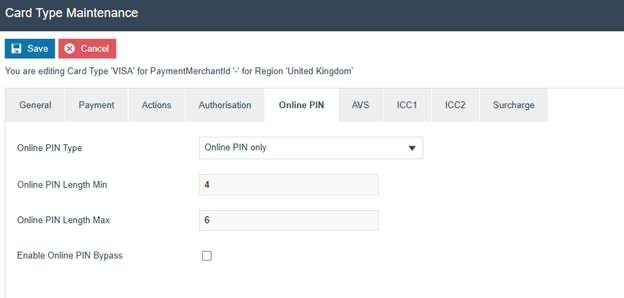
Online PIN Tab
The Online PIN tab specifies PIN handling requirements for the card type, including PIN type, length, and bypass options.
| Configuration | Example Value | Description |
|---|---|---|
| Online PIN Type | Online PIN only | The PIN verification method (None, Online PIN only, Online PIN + Signature) |
| Online PIN Length Min | 4 | Minimum PIN length |
| Online PIN Length Max | 6 | Maximum PIN length |
| Enable Online PIN Bypass | Unchecked | Whether signature fallback is allowed when PIN entry fails |
AVS Tab
The AVS tab specifies Address Verification System security provisions for the card type. These options control when the card security code and customer address are collected during card processing.

| Configuration | Example Value | Description |
|---|---|---|
| Capture Card Security Code for CNP | Checked | Captures CVV for cardholder-not-present transactions |
| Capture Card Security Code for Keyed | Unchecked | Captures CVV for manually keyed transactions |
| Capture Card Security Code for Swiped | Unchecked | Captures CVV for swiped transactions |
| Allow Empty Card Security Code | Unchecked | Whether an empty CVV is accepted |
| Card Security Code Length | 3 | Expected length of the card security code |
| Capture Address for Cardholder Not Present | Checked | Captures address for CNP transactions |
| Capture Address for Keyed | Unchecked | Captures address for keyed transactions |
| Allow Empty Address | Checked | Whether an empty address is accepted |
| AVS Configuration | Standard AVS Configuration | The AVS configuration profile to use |
The values for AVS options will be driven specifically by the retailer's business rules and the acquirer's processing requirements.
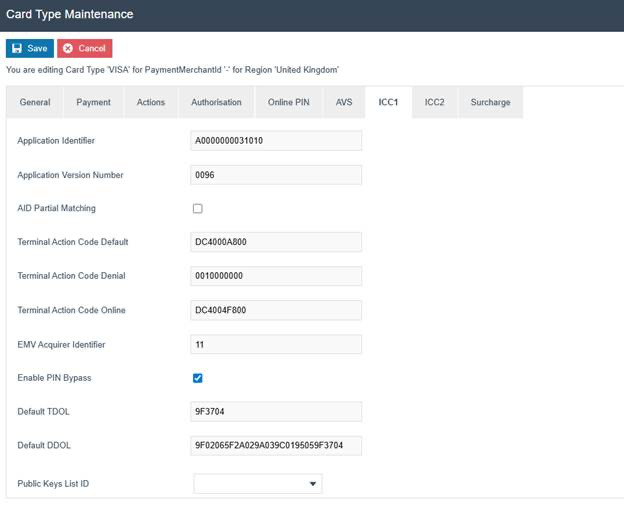
ICC1 Tab
The ICC1 tab contains EMV chip processing settings. These attributes are specified by the issuer and acquirer.
| Configuration | Example Value | Description |
|---|---|---|
| Application Identifier | A0000000031010 | The EMV Application Identifier (AID) |
| Application Version Number | 0096 | The application version number |
| AID Partial Matching | Unchecked | Whether partial AID matching is enabled |
| Terminal Action Code Default | DC4000A800 | Default terminal action code |
| Terminal Action Code Denial | 0010000000 | Terminal action code for denial |
| Terminal Action Code Online | DC4004F800 | Terminal action code for online processing |
| EMV Acquirer Identifier | 11 | The acquirer identifier for EMV |
| Enable PIN Bypass | Checked | Allows PIN bypass (signature fallback) |
| Default TDOL | 9F3704 | Transaction Data Object List |
| Default DDOL | 9F02065F2A029A039C0195059F3704 | Dynamic Data Object List |
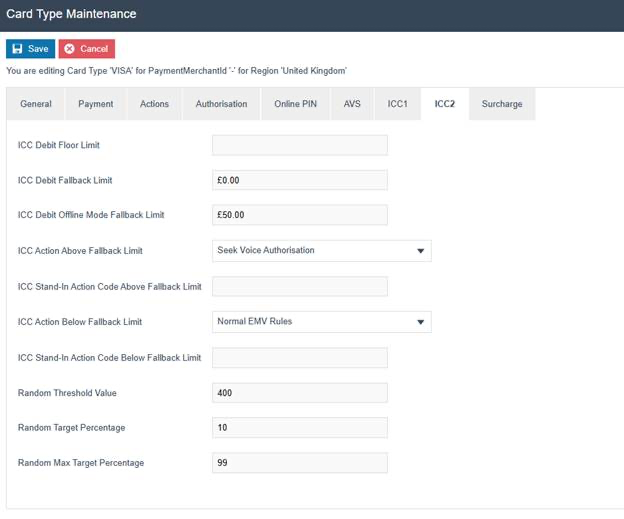
ICC2 Tab
The ICC2 tab contains additional EMV settings for offline processing and random selection.
| Configuration | Example Value | Description |
|---|---|---|
| ICC Debit Floor Limit | Empty | ICC floor limit for debit transactions |
| ICC Debit Fallback Limit | 0.00 | ICC debit fallback limit |
| ICC Debit Offline Mode Fallback Limit | 50.00 | Maximum offline ICC debit amount |
| ICC Action Above Fallback Limit | Seek Voice Authorisation | Action when above the fallback limit |
| ICC Action Below Fallback Limit | Normal EMV Rules | Action when below the fallback limit |
| Random Threshold Value | 400 | Threshold for random online authorisation selection |
| Random Target Percentage | 10 | Target percentage for random selection |
| Random Max Target Percentage | 99 | Maximum percentage for random selection |
ICC1 and ICC2 settings are specific to EMV processing. These attributes will be specified by the issuer and acquirer and will be covered in more detail as part of the payment processing setup guide.
This completes the Card Type configuration.
IIN Ranges
IIN Ranges (Issuer Identification Number) define the card number prefixes that identify each card type. Once a card type has been defined, IIN ranges must be established so that the card type can be identified when a card is presented at the POS.
Accessing IIN Ranges
Navigate to IIN Range configuration using the Search or the path: Main Menu > Configuration > Financial > IIN Ranges

The IIN Ranges option opens the IIN Range Maintenance page.
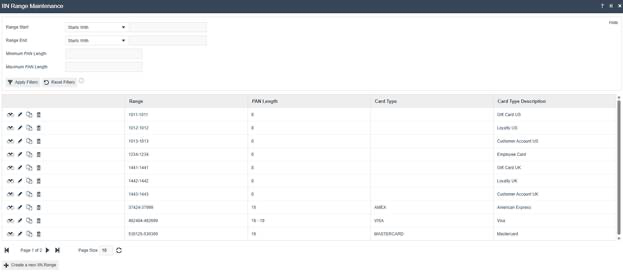
Creating a New IIN Range
Select Create a new IIN Range and specify the Range Start, Range End, Minimum PAN Length, and Maximum PAN Length.
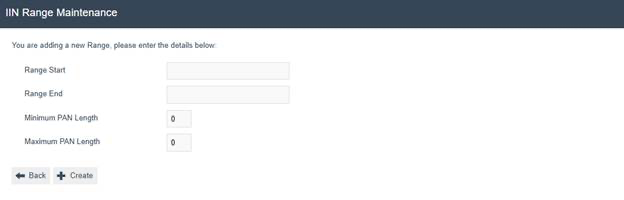
| Configuration | Description |
|---|---|
| Range Start | The starting IIN prefix for this range (up to 15 digits) |
| Range End | The ending IIN prefix for this range (up to 15 digits) |
| Minimum PAN Length | Minimum card number length (0-99) |
| Maximum PAN Length | Maximum card number length (0-99) |
General Tab (IIN Range)
The General tab controls identification and usage features of the IIN range.
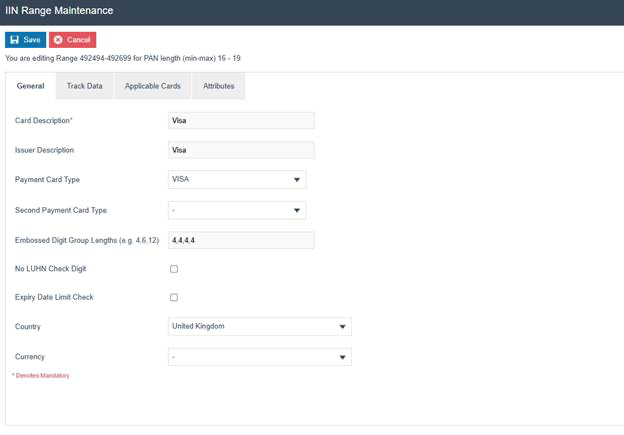
| Configuration | Example Value | Description |
|---|---|---|
| Card Description | Visa | Display description of the card |
| Issuer Description | Visa | Description of the card issuer |
| Payment Card Type | VISA | The card type this IIN range maps to |
| Embossed Digit Group Lengths | 4,4,4,4 | The grouping pattern for the card number |
| No LUHN Check Digit | Unchecked | Disables Luhn check digit validation |
| Expiry Date Limit Check | Unchecked | Whether to validate the expiry date |
| Country | United Kingdom | The country associated with this IIN range |
Track Data Tab
The Track Data tab specifies where specific data can be found on the magnetic stripe reader (MSR).
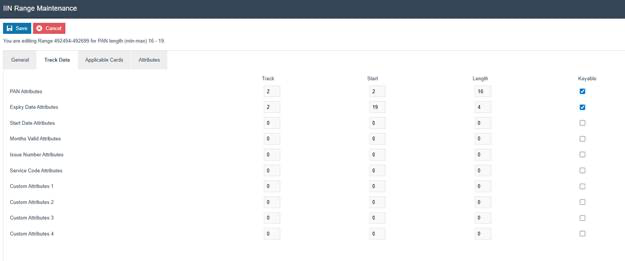
| Configuration | Track | Start | Length | Keyable | Description |
|---|---|---|---|---|---|
| PAN Attributes | 2 | 2 | 16 | Checked | Card number location on track data |
| Expiry Date Attributes | 2 | 19 | 4 | Checked | Expiry date location on track data |
| Start Date Attributes | 0 | 0 | 0 | - | Start date location (if applicable) |
| Service Code Attributes | 0 | 0 | 0 | - | Service code location (if applicable) |
An IIN range can be defined for many different kinds of cards including payment, cheque guarantee, loyalty, employee, gift card, and others. The type of card is specified on the Applicable Cards tab. A regular payment card would be marked as Payment Card, but a combination debit card (e.g. Visa-Debit) may be marked as both Payment Card and Cheque Card.
This completes the IIN Range configuration.
Tender Menu
The creation and setup of the POS menu structure is covered in a separate guide. This section focuses on creating and setting up a Tender menu within an existing menu structure to add a card payment button.
Accessing Menus
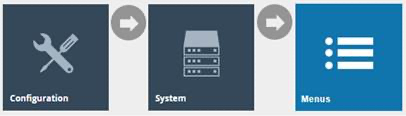
Navigate to Menu configuration using the Search or the path: Main Menu > Configuration > System > Menus
The Menus option opens the Menu Maintenance select page. This page lists currently configured menus.
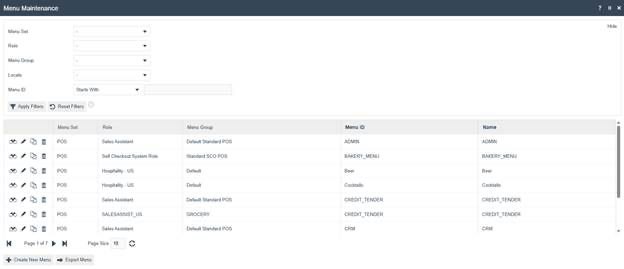
Creating a New Tender Menu
Select Create New Menu and configure the menu identity fields. For a new tender menu, set the Menu Set to POS, select the Role (typically Sales Assistant), and choose the Menu Group.
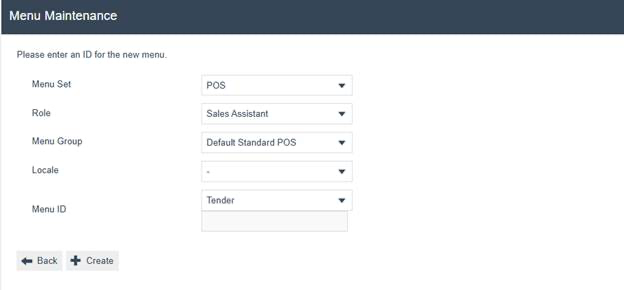
| Configuration | Example Value | Description |
|---|---|---|
| Menu Set | POS | The menu set this menu belongs to |
| Role | Sales Assistant | The user role that will access this menu |
| Menu Group | Default Standard POS | The menu group containing this menu |
| Menu ID | Tender | A unique identifier for this menu |
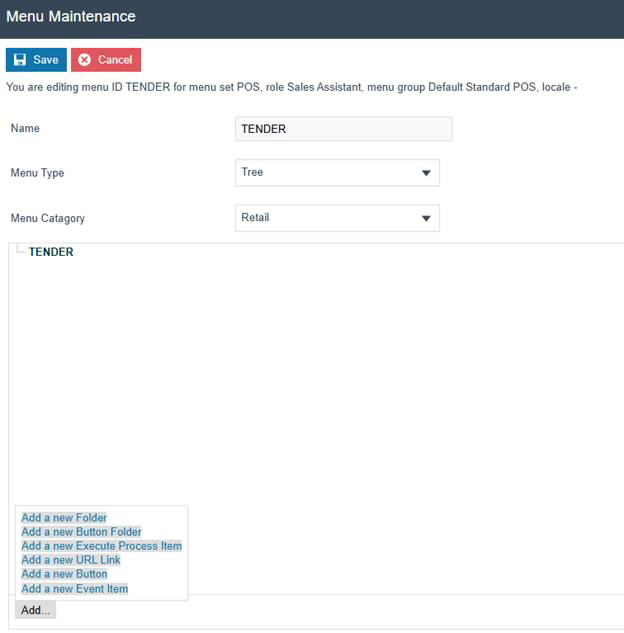
Adding a Card Tender Button
Once the menu is created, click Add... and select Add a new Button to add a card tender button.
Button General Tab
On the button General tab, set the Event to Card Tender and configure the button label and visibility.
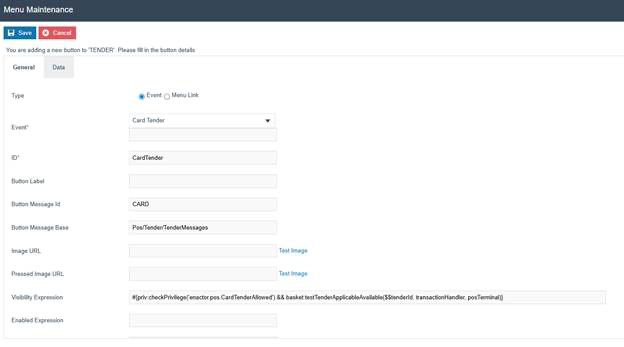
| Configuration | Example Value | Description |
|---|---|---|
| Type | Event | The button type |
| Event | Card Tender | The event triggered when the button is pressed |
| ID | CardTender | Internal identifier for the button |
| Button Message Id | CARD | The message ID used for the button label |
| Button Message Base | Pos/Tender/TenderMessages | The message resource base path |
| Visibility Expression | Privilege and tender check | Controls when the button is visible |
Button Data Tab
On the Data tab, add the tender ID data item that links this button to the card tender created earlier.
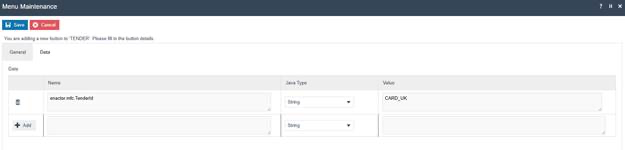
| Configuration | Example Value | Description |
|---|---|---|
| Name | enactor.mfc.TenderId | The data item name identifying the tender |
| Java Type | String | The data type |
| Value | CARD_UK | The Tender ID of the card tender created in the Tenders section |
This completes the Tender Menu configuration.
Broadcasting
After completing all configuration steps, the following entities must be broadcast to deliver the configuration to the POS:
- Tenders - the card tender configuration
- Card Types - all card type definitions
- IIN Ranges - the IIN range mappings
- Menus - the updated tender menu with the card payment button
All configuration changes must be broadcast to the POS before they take effect. Use the Broadcasting function in Estate Manager to broadcast each entity type to the appropriate locations.
This completes the card payment configuration.