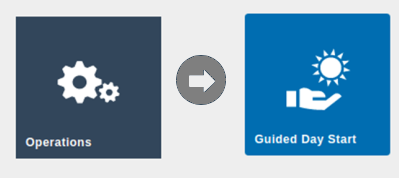
How To Configure Guided Cash Management
Introduction
This document describes the configuration and use of the Guided Cash Management process in a store location. These processes are performed at Day Start and Day End and are referred to as Guided Day Start and Guided Day End.
The Guided Day Start and Guided Day End processes incorporate the following Cash Management functions:
- Terminal Cashup
- Terminal Cashup and Closing Float
- Safe Cashup
- Safe Cashup & Banking
- Safe / Terminal Finalise
- Safe / Terminal Spot Check
The purpose of this guide is to describe the Guided Day Start and Day End processes along with their associated configuration.
Overview
Configuration in the following areas is required to configure the Guided Cash Management processes:
- Role - Privileges are added to the required Roles to enable the Guided Cash Management functions.
- Menu - The Guided Cash Management buttons are configured in the Back Office menu.
- Location / Location Template - Guided Cash Management functions are only supported where the Cash Management Method is configured as Manage by Terminal or Manage by Pay Point.
- POS Terminal / POS Terminal Template - Depending on the configuration of Force Cash Declaration method, the Guided Cash Management process will differ. If the Location of the POS Terminal is configured with Cash Management Method as Manage by Pay Point, then defining a Default Pay Point ID against each POS Terminal is mandatory.
For Locations configured as Manage by Cashier, Guided Cash Management functions cannot be used.
Configuration Steps
Role
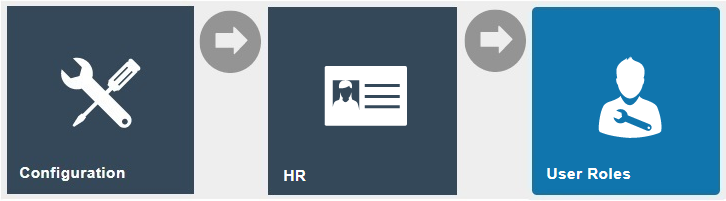
Navigate to User Roles using the Search or the path: Organisation > User Roles
Authorisation to run the specific functionality documented here is controlled with privileges maintained in roles.
Select the appropriate role to edit. The example role here is CASHMAN_UK.
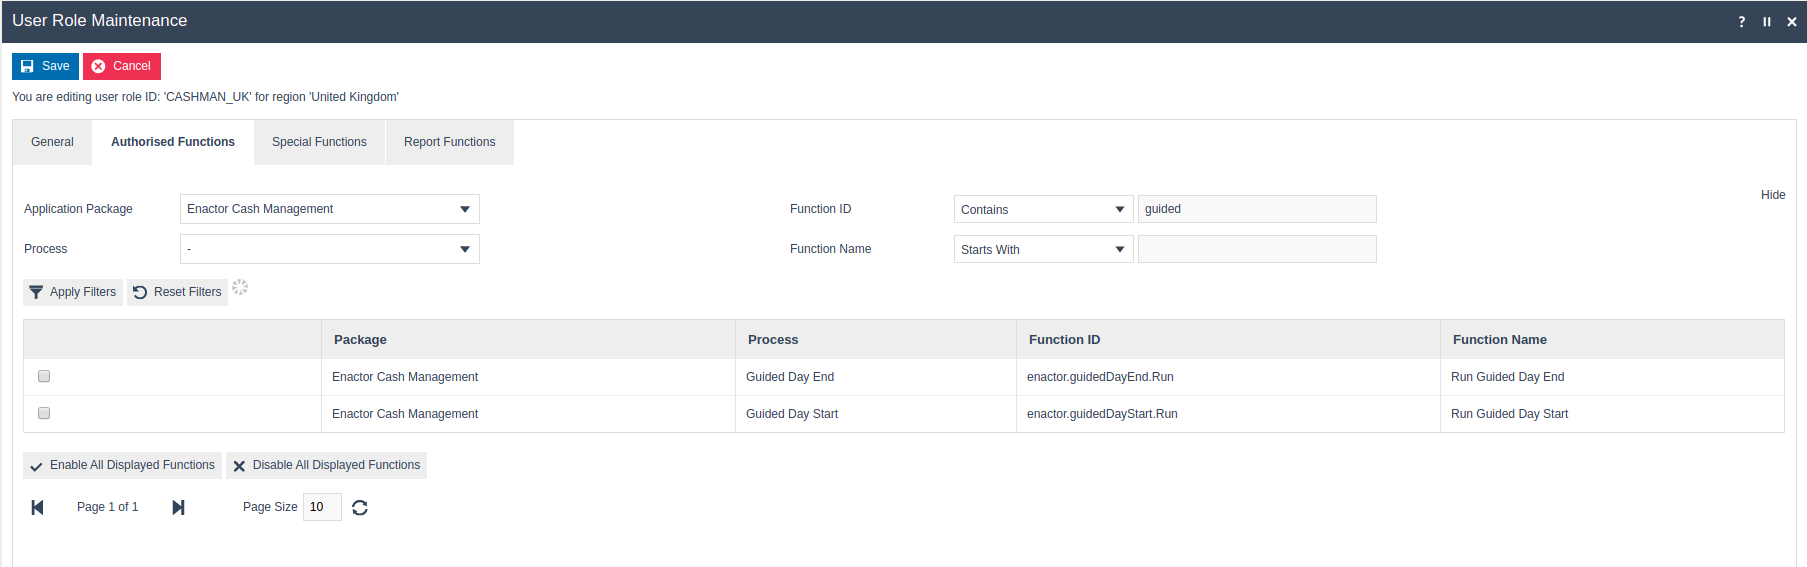
Select the Enactor Cash Management package and enable the following privileges:
| Package | Function ID | Details |
|---|---|---|
| Enactor Cash Management | enactor.guidedDayStart.Run | Enables the user to run the day start function on the Back Office for the selected Terminal/PayPoint. |
| Enactor Cash Management | enactor.guidedDayEnd.Run | Enables the user to run the day end function on the Back Office for the selected Terminal/PayPoint. |
| Enactor Web Maintenance | enactor.deleteStoredTransactions.DeleteSingleTransactionAllowed | Enables the user to delete a single stored transaction record when the Guided Day End happens. |
| Enactor Web Maintenance | enactor.deleteStoredTransactions.AuthorisesDeleteSingleTransaction | Authorises the user to delete a single stored transaction record when the Guided Day End happens. |
| Enactor Web Maintenance | enactor.deleteStoredTransactions.DeleteAllTransactionsAllowed | Enables the user to delete all stored transactions when the Guided Day End happens. |
| Enactor Web Maintenance | enactor.deleteStoredTransactions.AuthorisesDeleteAllTransactions | Authorises the user to delete all stored transactions when the Guided Day End happens. |
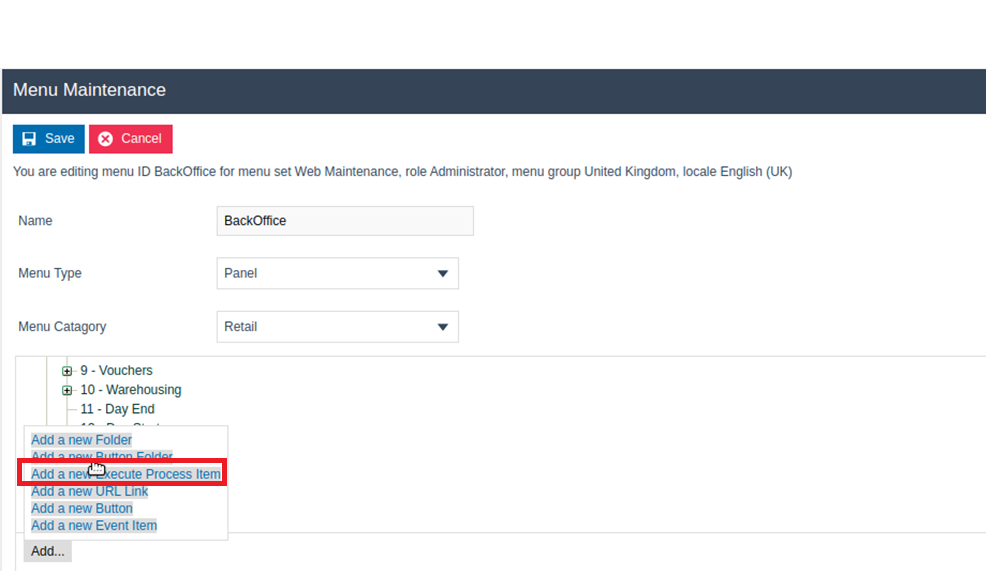
Menu
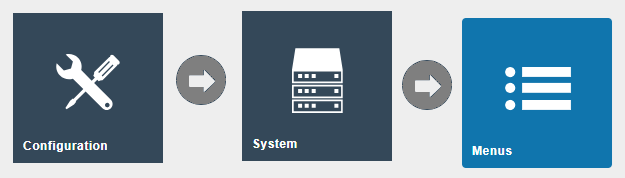
Navigate to Menu Maintenance using the Search or the path: Organisation > Menu Maintenance
The configurable Guided Cash Management events are configured in the Back Office menu.
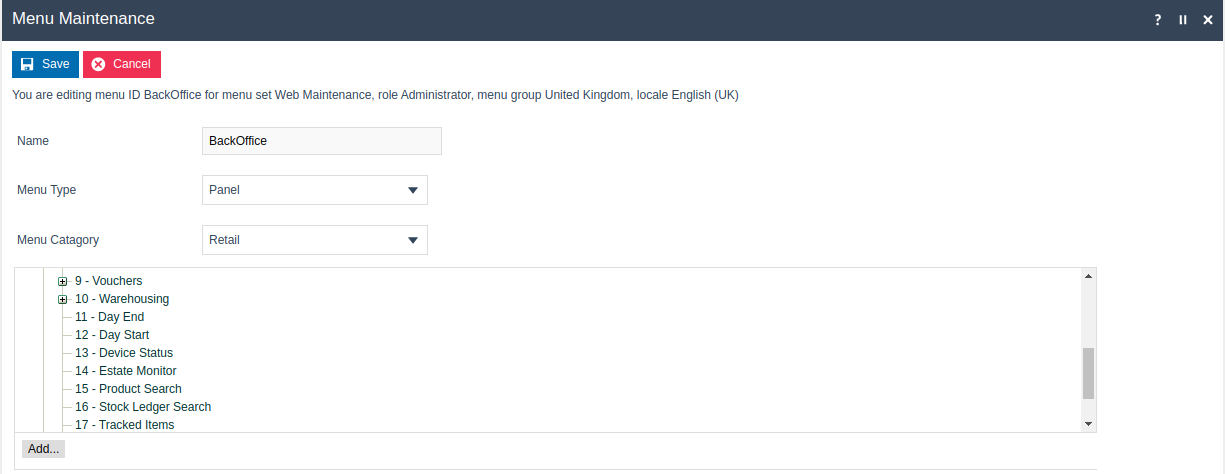
Select Add > Add a new execute process item.
For the Guided Day Start, the Application Process to Run selected is Guided Day Start.
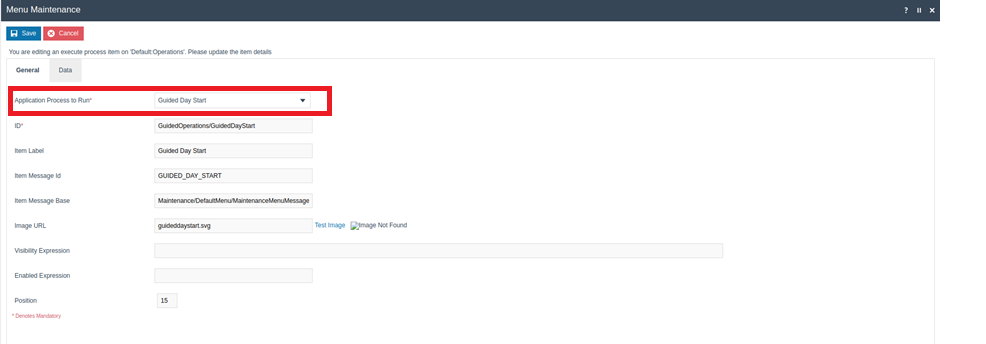
For Guided Day End, the Application Process to Run selected is Guided Day End.

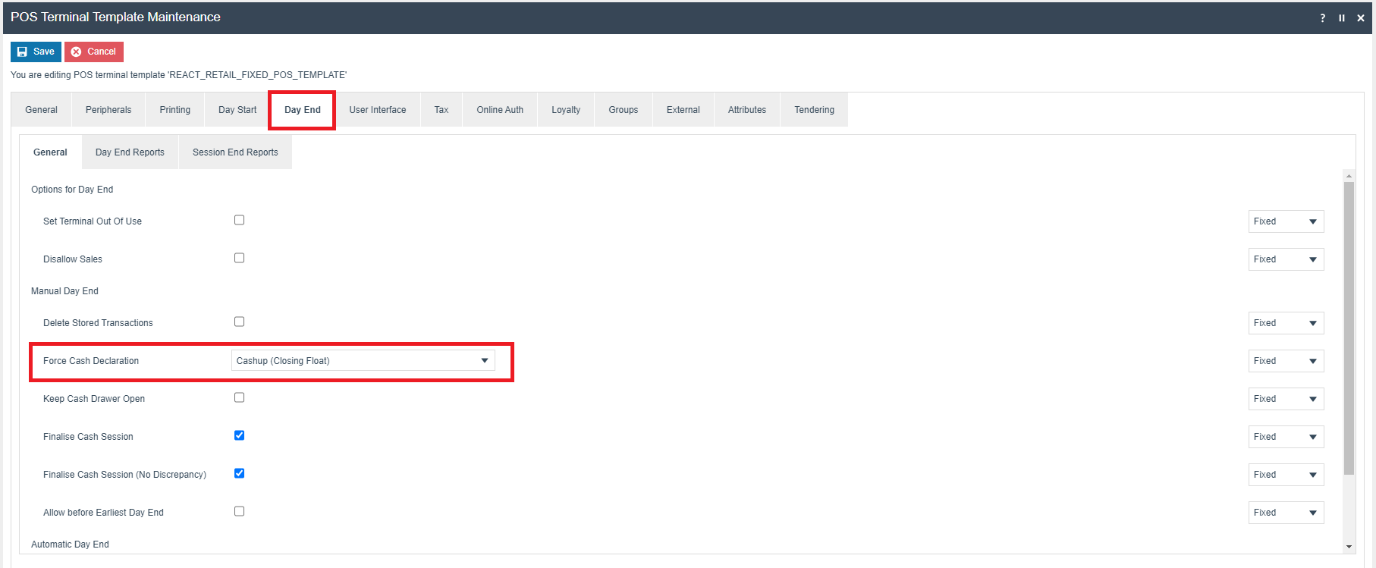
POS Terminal / POS Terminal Template
The flow of the Guided Cash Management processes is determined by the Force Cash Declaration method in the POS Terminal / POS Terminal Template configuration.
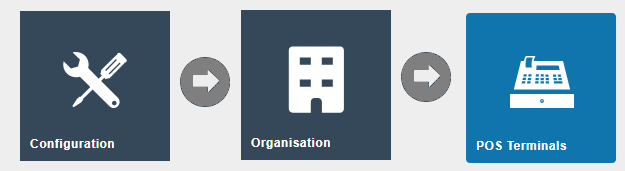
Navigate to POS Terminal Maintenance / POS Terminal Template Maintenance using the Search or the path: Technology > POS Terminal Maintenance
Select the appropriate POS terminal and navigate to the Day End > General tab.
| Configuration | Example Value | Description |
|---|---|---|
| Force Cash Declaration | Cashup and Closing Float | If set to Cashup (Empty), the Guided Day Start follows: Day Start > Cashup (Safe) > Finalise (Safe) > Opening Float. If set to Cashup and Closing Float, the Guided Day Start follows: Day Start > Terminal Spot Check. |
Guided Day Start Process
Guided Cash Management processes are performed at the Store Server.
Select the Guided Day Start function (the menu path for this button may vary depending on the Store Server Menu configuration).
Safe Cashup
When the user selects the Guided Day Start button, the Back Office navigates to the Safe Cashup screen.
When the selected location has two or more safes, the user is prompted to select the safe which is associated with the day start process. If only one safe is defined, that safe is automatically selected.

The Safe Cashup is completed against the currently open safe session. If there are no open sessions for the safe then the Guided Day Start process will end.
Assuming there is an open safe session, the user can cash up this session. If there are any discrepancies recorded in the Cashup process then the session will be marked as Cashed Up and the user is given the option to recount the session totals.
Safe Finalise
If the safe is cashed up without a discrepancy, then the process navigates to the Safe Finalise screen where the user can finalise the cashed up session.
Terminal Spot Check and Opening Float
Once the Safe session is finalised, the process opens the Terminal Spot Check / Opening Float of the Pay Point or Terminal. Whether the process moves to the Terminal Spot Check or Opening Float first is determined by the Force Cash Declaration configuration in the POS Terminal configuration.
Opening Float Process
When the Force Cash Declaration in the POS terminal is configured as Cashup and Empty, then the Opening Float function is the first step.
The process opens the Opening Float screen where each Terminal or Pay Point can be selected using the Play button.

The following screen is displayed to perform the opening float to the configured POS terminals. This declares the cash amount that the POS will start the session with.
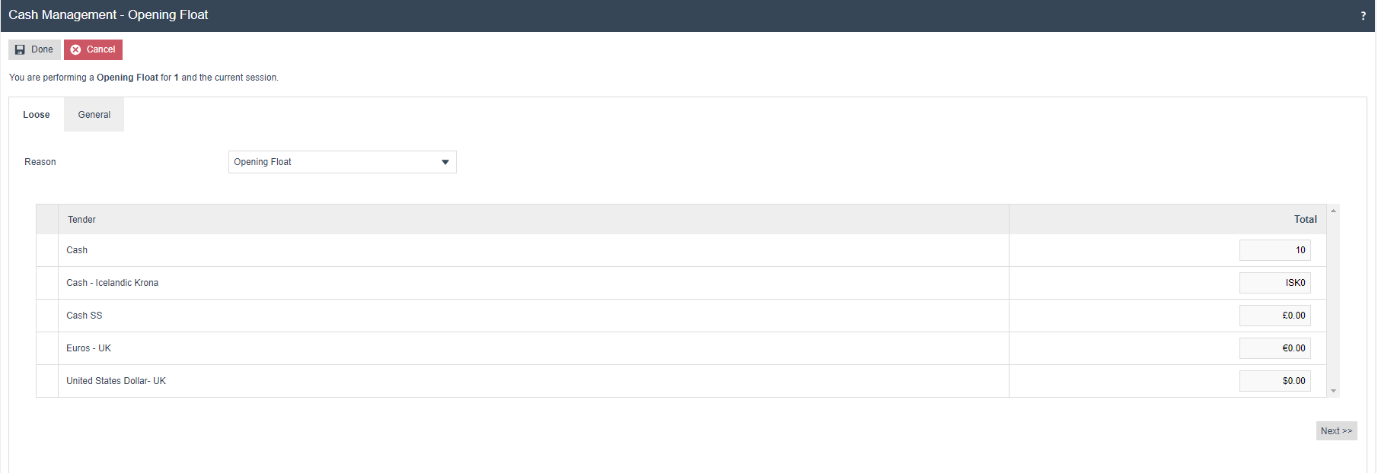
The Terminal Opening Float can be completed for each of the POS Terminals. Once each Opening Float is completed, the completed date and time is recorded against the terminal in the Guided Day Start screen.

Once the Opening Float has been declared for each terminal, selecting the Next button completes the Guided Day Start process.
The following confirmation popup is displayed:

Terminal Spot Check Process
When the Force Cash Declaration in the POS terminal is configured as Cashup and Closing Float, then the Terminal Spot Check function is performed as the first step in the Guided Day Start. The float for each terminal has already been declared during the Cashup process for the previous session.
The user is directed to the Terminal Spot Check after the Safe Finalise, and a list of terminals is displayed.

When the user selects the Play button against the terminal, the Terminal Spot Check screen is displayed.
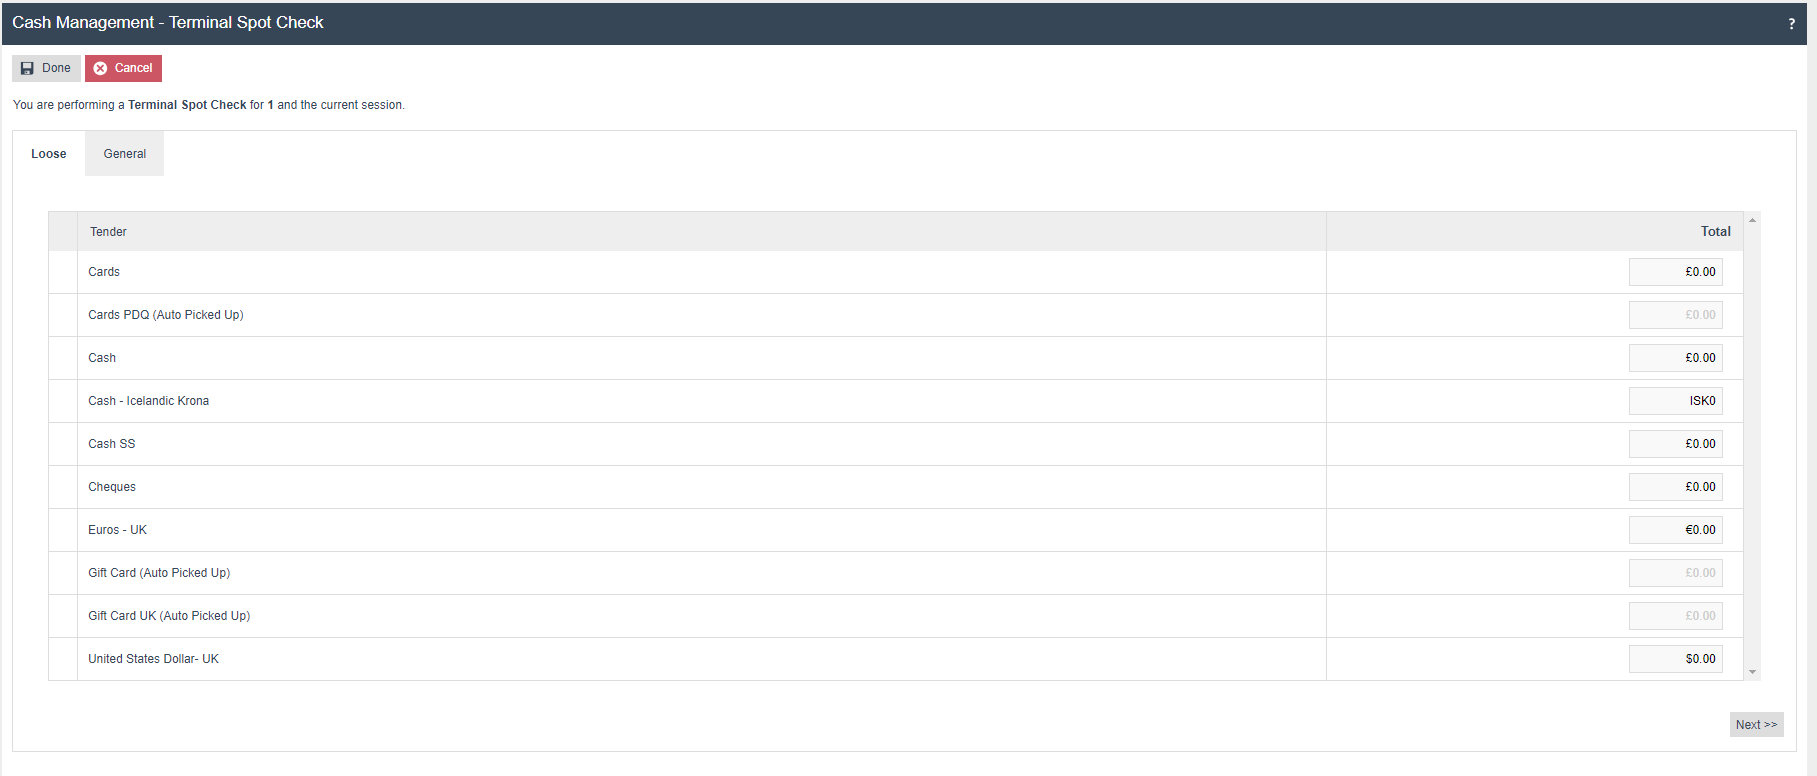

Once a terminal spot check has been completed, the completed date and time are recorded against the terminal.

The Terminal Spot Check in Guided Day Start is a simple verification process. The user can complete the Guided Day Start without completing a terminal spot check against each terminal.
On selecting the Next button, the Guided Day Start process completes and the following confirmation popup is displayed:
Guided Day Start Process Completion Activities
During the Guided Day Start process, transactions are created and sent to the Estate Manager. These transactions will be created according to the flow of the Guided Day Start. For example:
safeOpenTransactionsafeFinaliseTransactionterminalSpotCheckTransaction
Guided Day End Process
Select the Guided Day End function (the menu path for this button may vary depending on the Store Server Menu configuration).
Similar to the Guided Day Start process, the Guided Day End process has several steps.
Delete Stored Transactions on a Guided Day End Process
When the user selects the Guided Day End function, the system will first check whether there are any stored transactions against the location. If there are any transactions stored, the user is directed to the following screen:
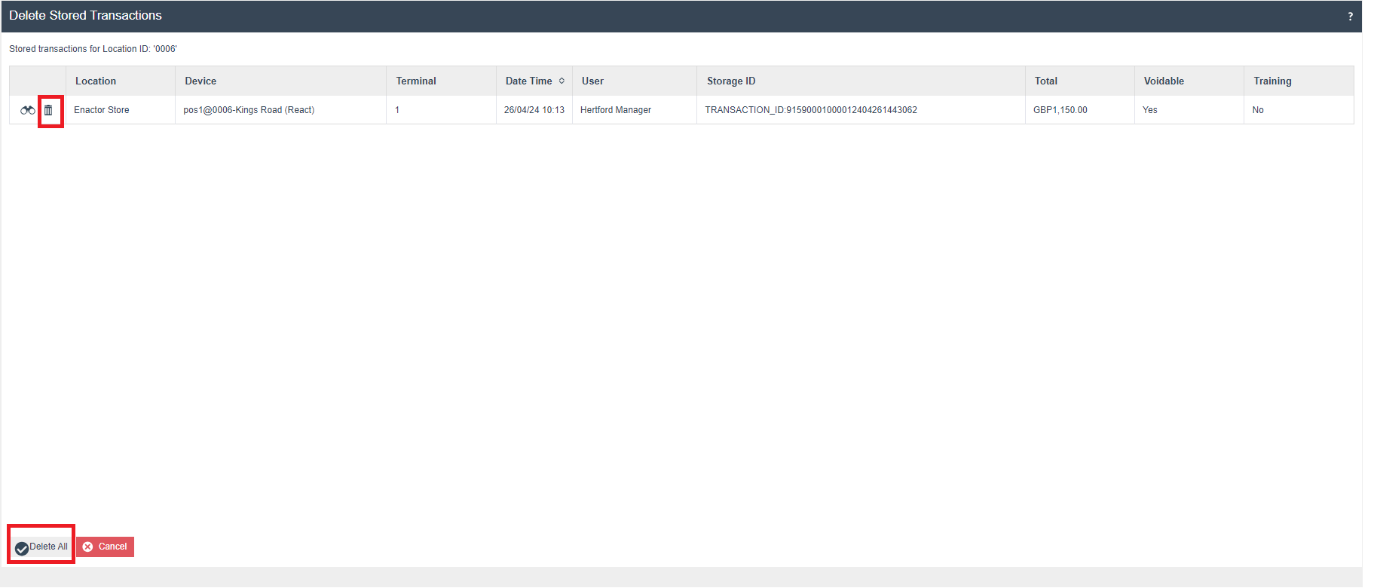
Any stored transactions must be dealt with before the process can continue. This can involve recalling them at a POS and either completing or voiding them, or using the delete function provided in the above screen.
To delete stored transactions, the user needs to have the relevant privileges assigned to one of their User Roles. These are described in the Role section.
According to the privileges set to the user, the following buttons are displayed:
| Button | Action | Details |
|---|---|---|
| Delete All | Deletes all stored transactions listed in the Delete Stored Transaction screen. | Requires the delete all privilege described in the Role section. |
| Cancel | Cancels and exits the Guided Day End process. | When selected, a message is displayed to advise the Guided Day End process is cancelled. |
Day End Declaration on Guided Day End Process
Once the stored transactions are completed and there are no stored transactions for the specific location, the system navigates to the next screen for Day End declarations.
Guided Day End Process where the Location Cash Management Method is Manage by Pay Point or Manage by Terminal
If the Cash Management method is Manage by Pay Point or Manage by Terminal, the next step is the Terminal Cashup process.
The following screen is displayed for the user to select from:

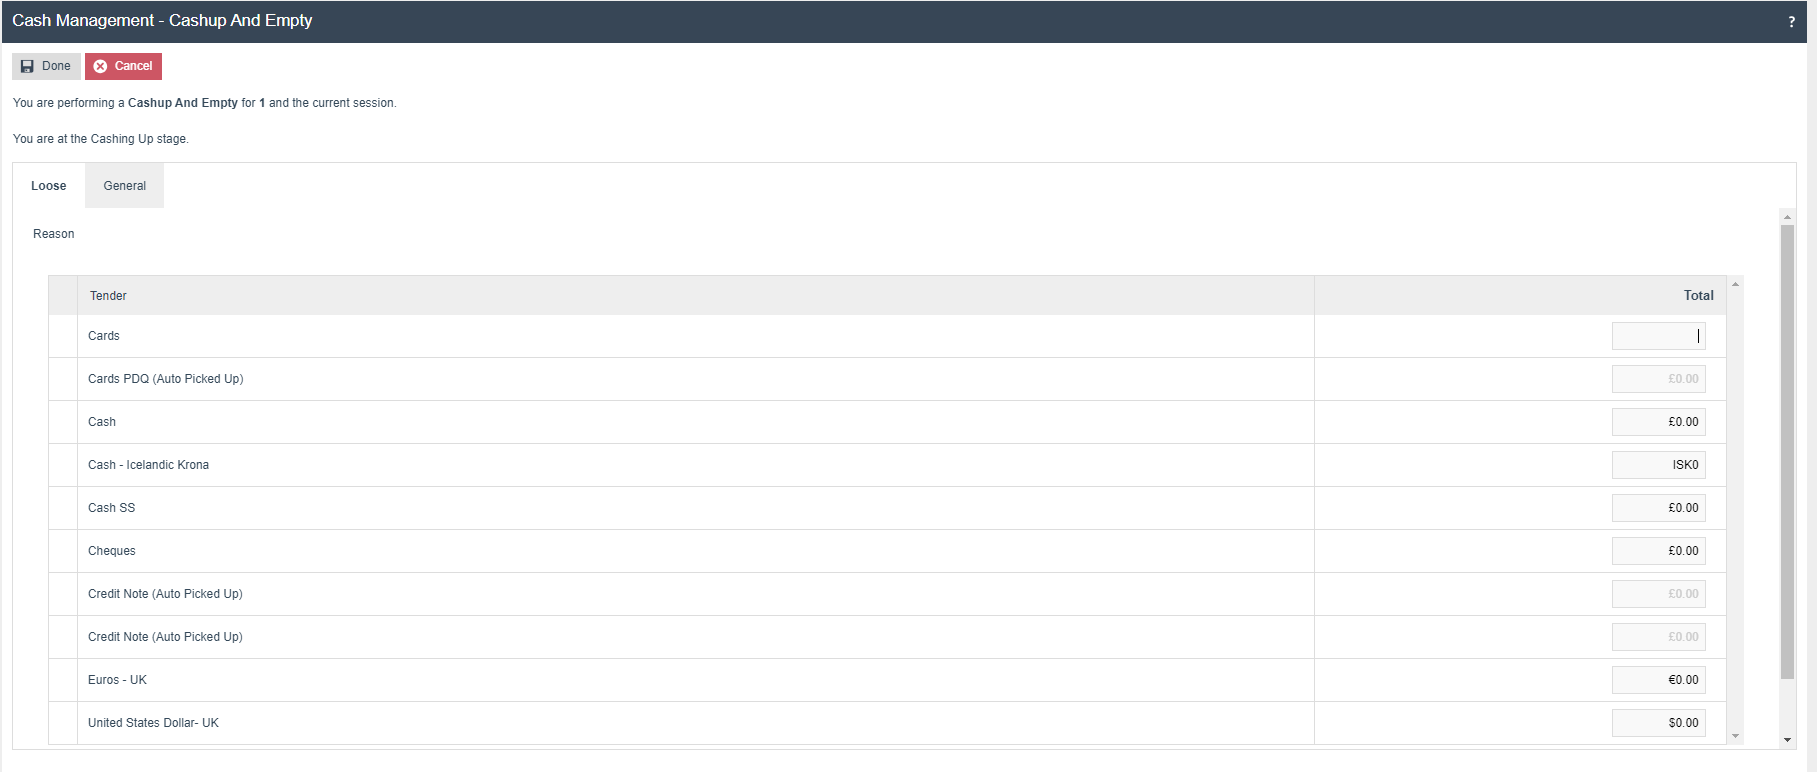
Terminal Cashup on a Guided Day End Process
When the user selects the Play button, the Back Office navigates to the declaration method defined for the location's terminals. This could be either Terminal Cashup and Closing Float or Terminal Cashup.
If Terminal Cashup and Closing Float is configured in the terminal, the user is presented with the following screen:

This screen allows the user to declare the Closing Float - this is the money that will remain in the drawer and be used as the float for the next session.
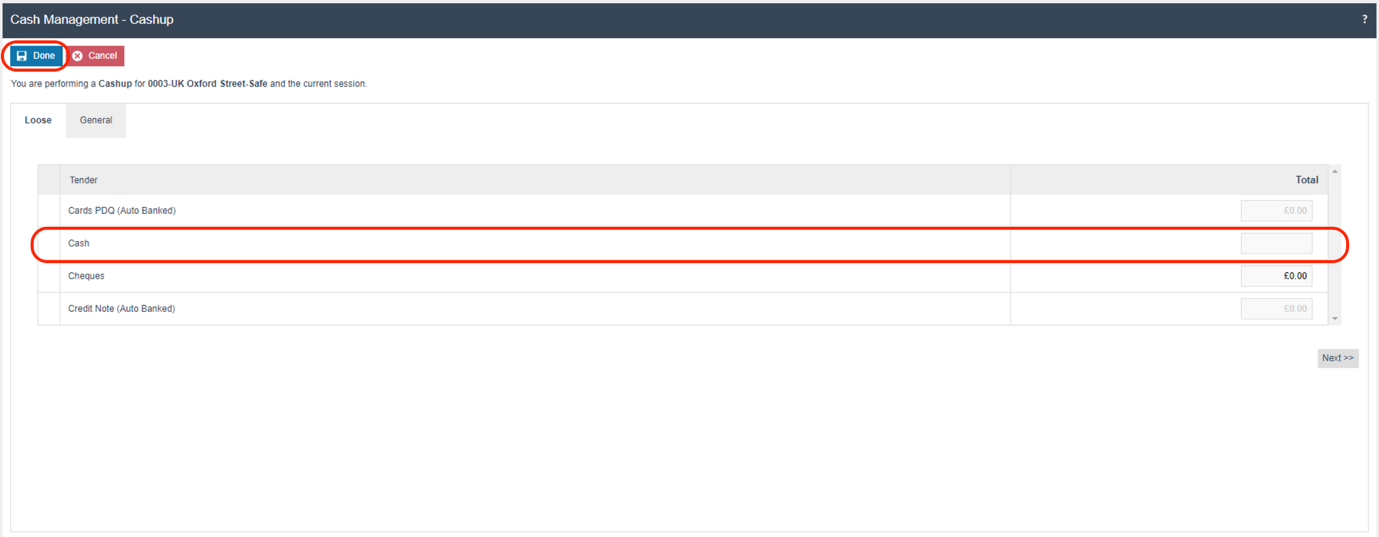
When the Closing Float is declared and the Done option selected, the user is presented with the Cashup screen:

This screen allows the user to record the cash being removed from the drawer and added to the safe. On selecting Done, the Cashup and Closing Float process is complete.
If the Terminal Cashup and Empty is configured in the terminal, the user is presented with the following screen:
There is no float declaration, and the user declares the entire amount of cash in the drawer to transfer to the safe.
Terminal Finalise on a Guided Day End Process
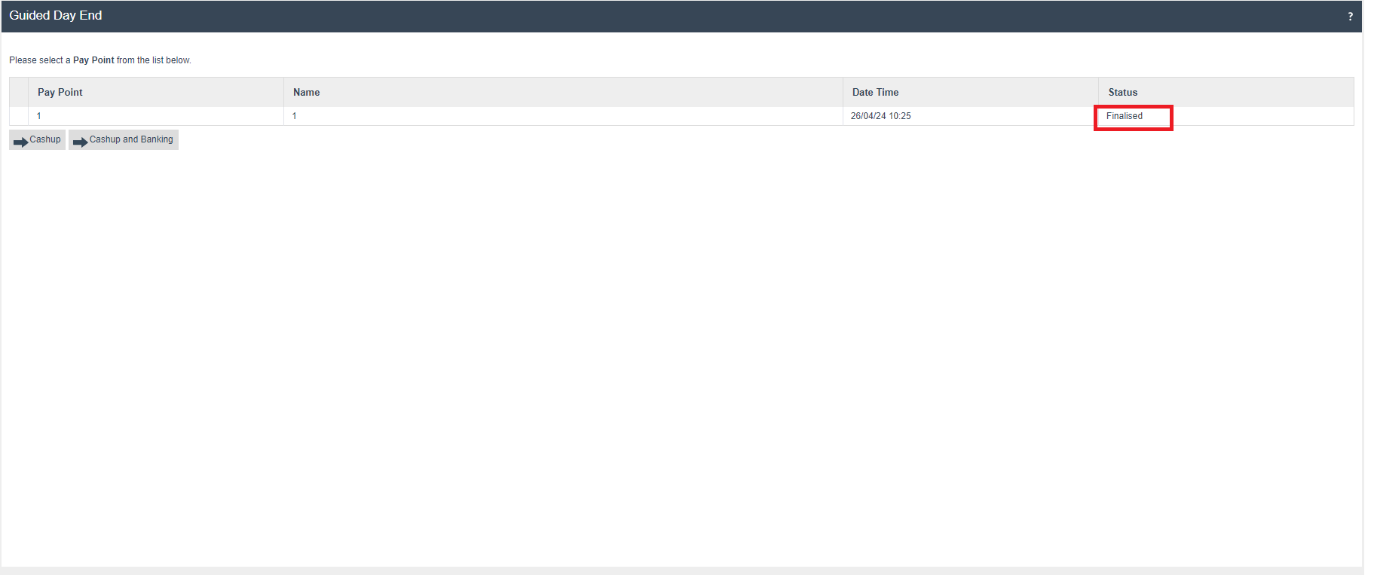
Once the Cashup for the terminal is completed, then the session is finalised:
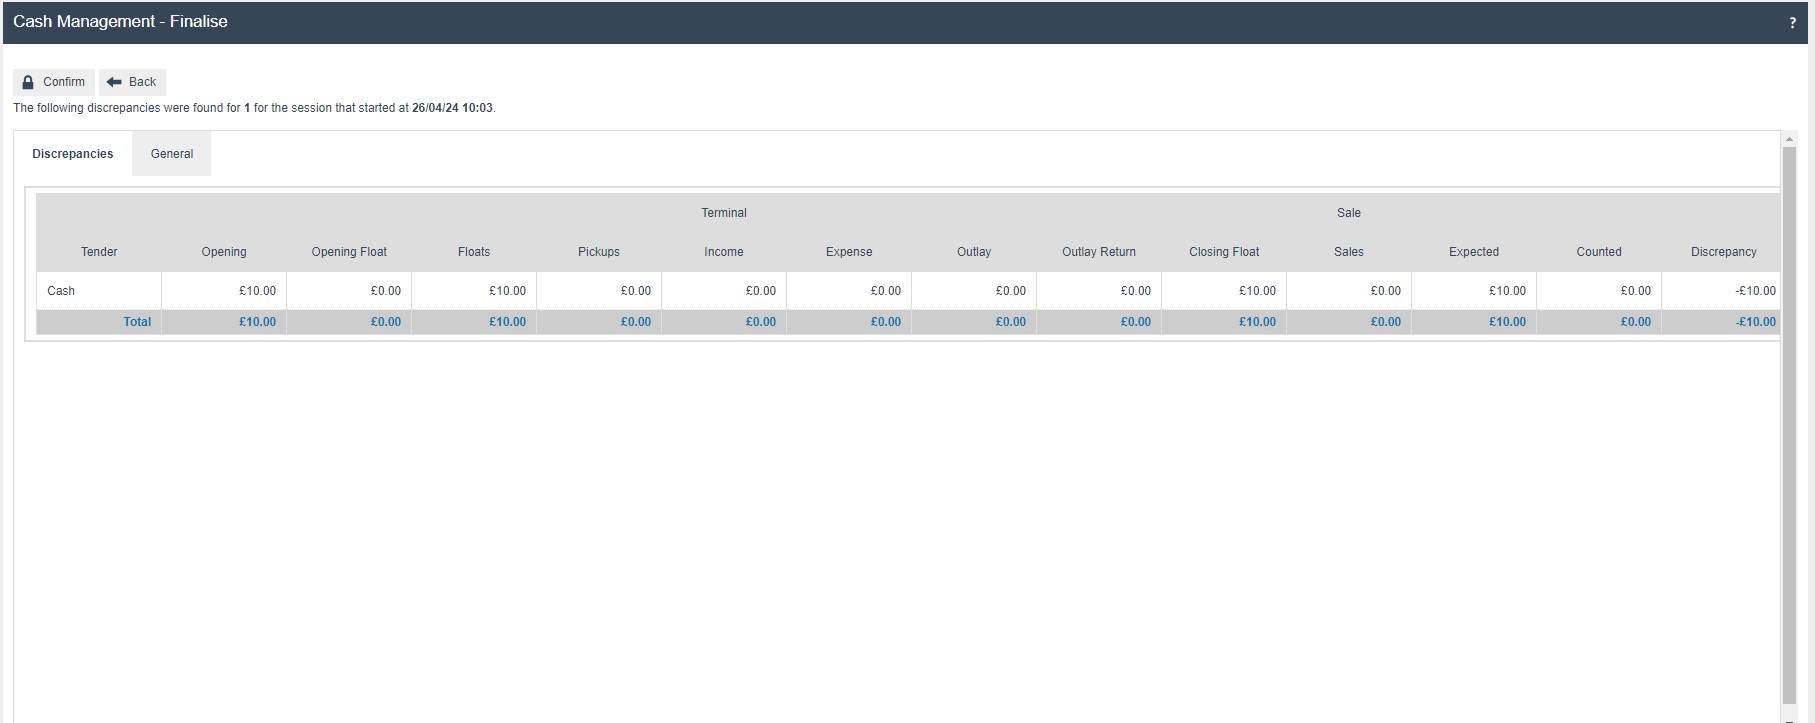
Finalising locks the previous session and it can no longer be edited.
On finalising the session, the process returns to the Guided Day End screen, and any further terminals can be cashed up.

Once the declaration and finalisation is completed, the status moves to Finalised.
Safe Transactions on a Guided Day End Process
Once the terminal sessions are completed, the user can select either Safe Cashup or Safe Cashup & Banking. This enables the user to optionally go through the Safe Banking process in addition to cashing it up.
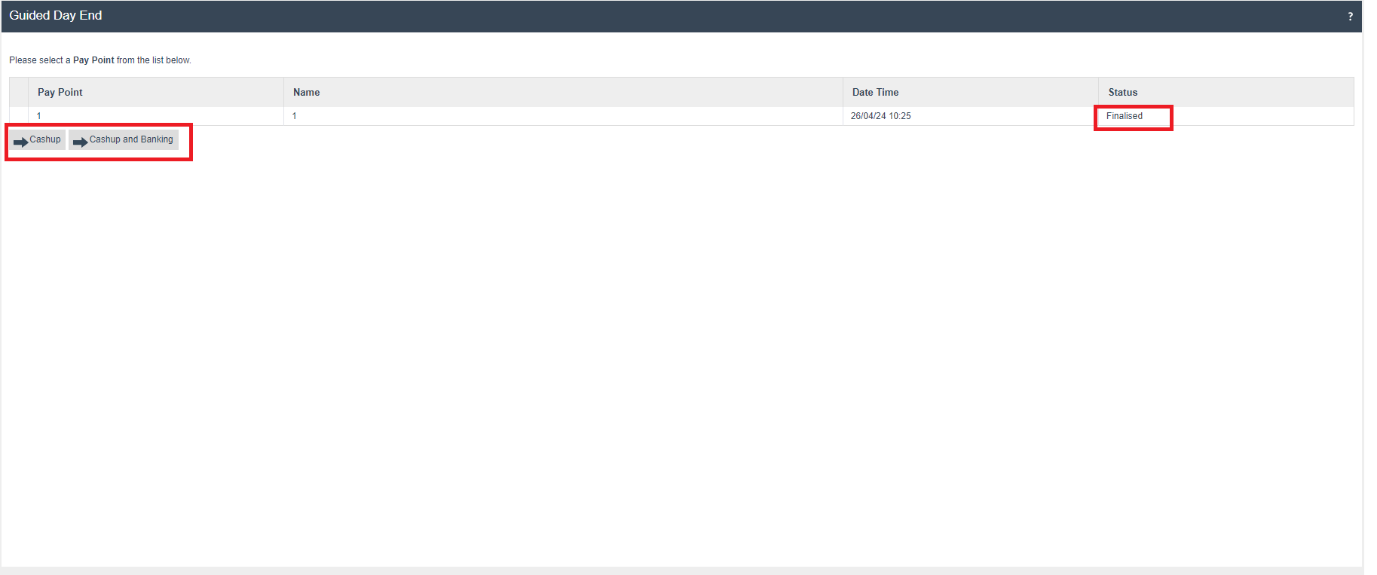
| Button | Action |
|---|---|
| Cashup & Banking | Safe Cashup and Banking. |
| Cashup | Skip Banking and continue to Safe Cashup. |
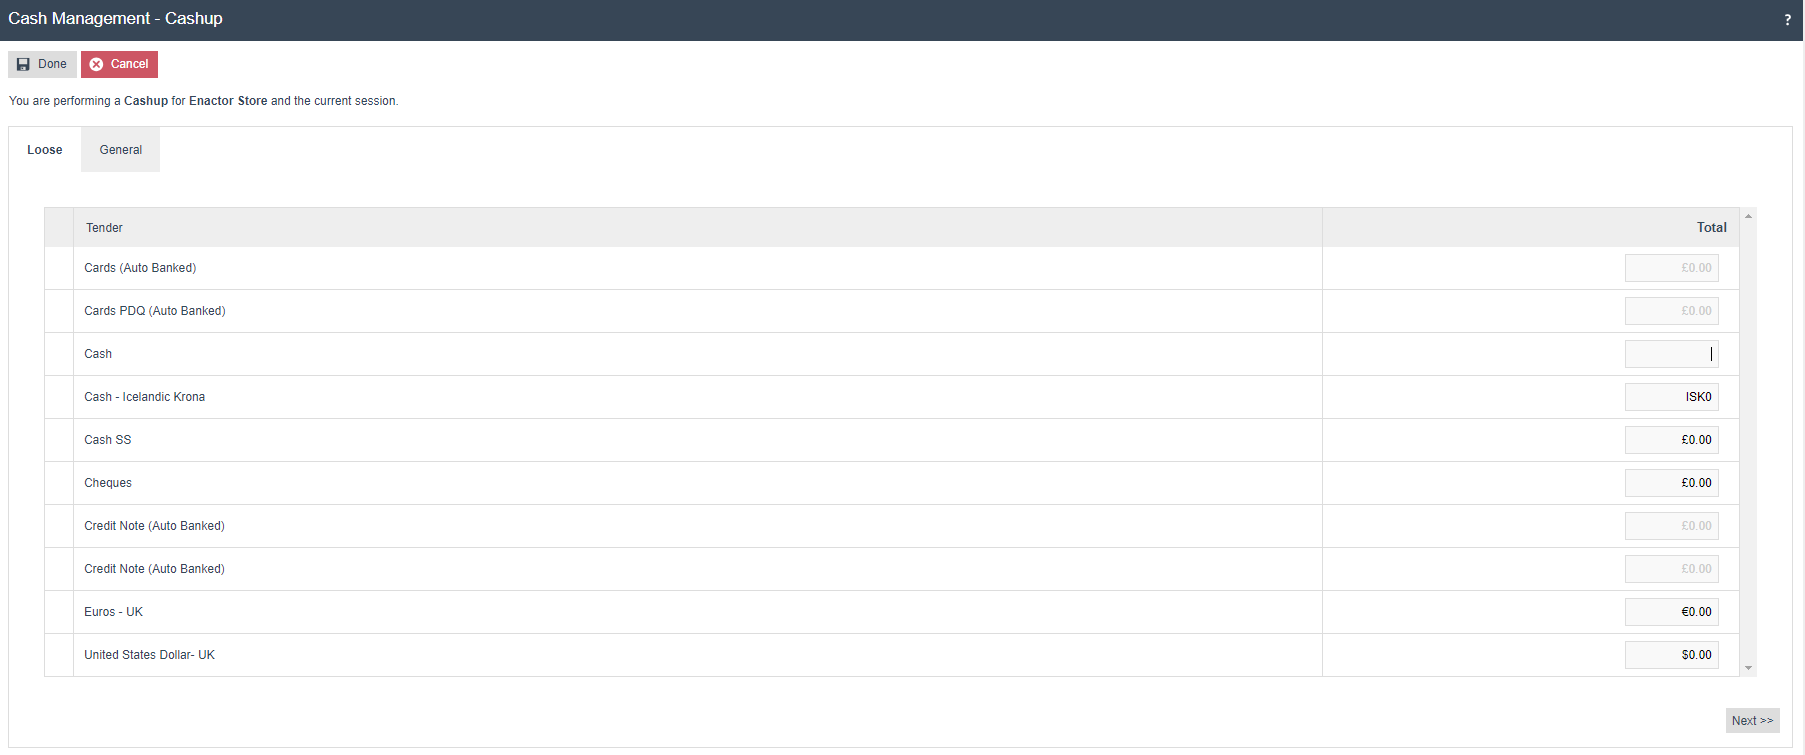
Safe Cashup on a Guided Day End Process
If the user selects Cashup, the Back Office navigates to the Safe Cashup process where the safe is declared. The following screen is displayed:
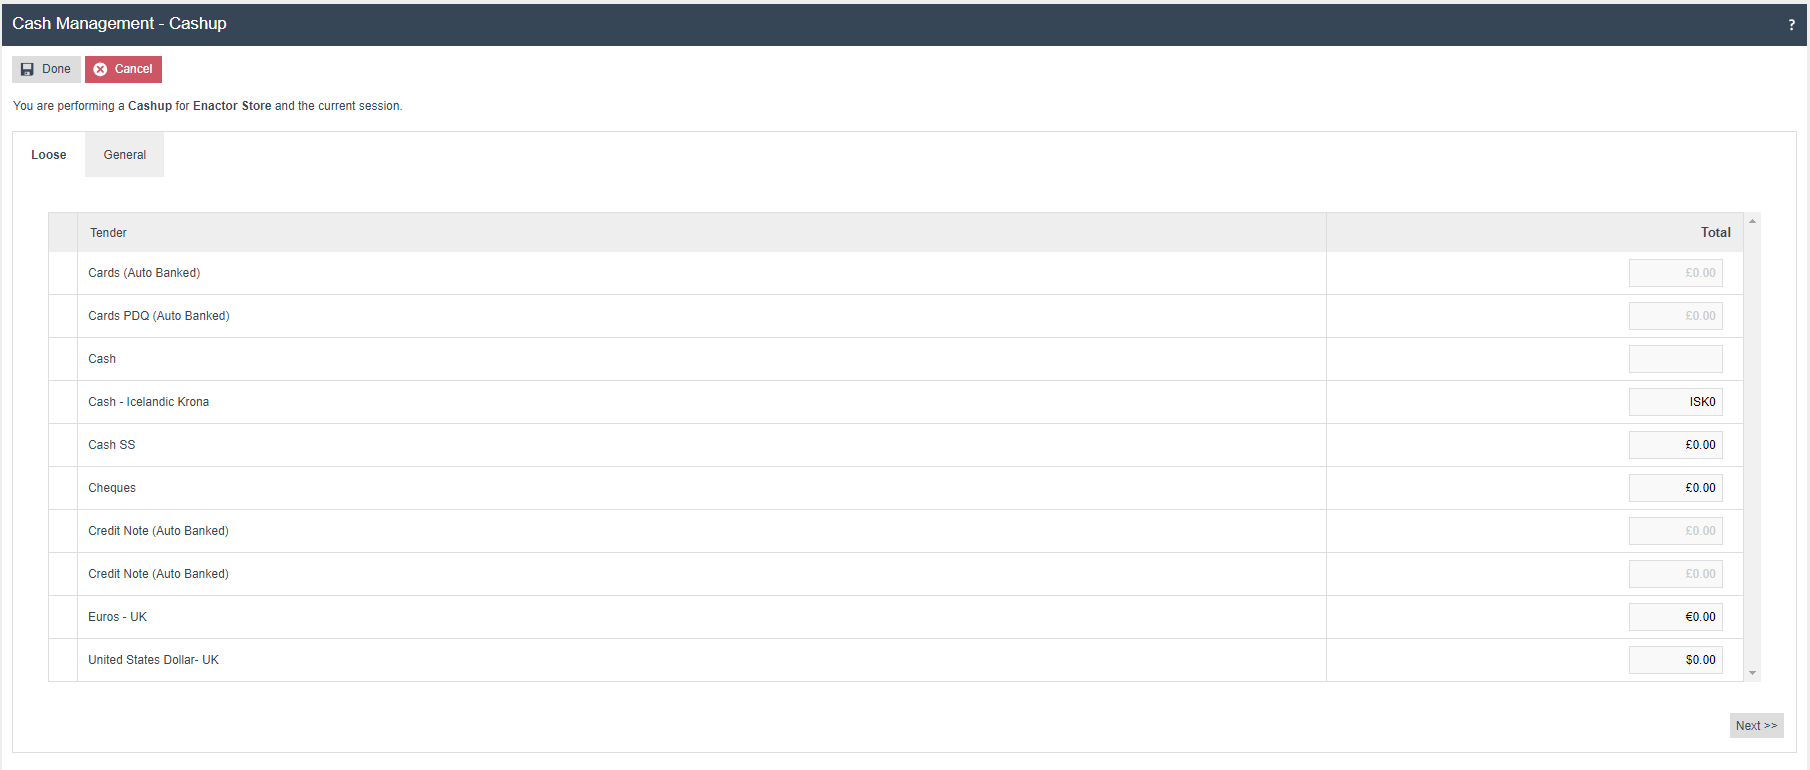
The user enters the counted amounts in the safe then selects Done.
There is no requirement to declare any Tenders configured as Auto Banked - these are declared automatically.
Cashup & Banking
Once the terminal sessions are finalised and the user selects Cashup & Banking, a slightly different process is followed:

First the process navigates to the Safe Cashup screen where the user is prompted to declare the money that will remain in the safe. The following screen is displayed:
The user declares any cash amounts and then selects Done to complete the process.
The Back Office then moves to the Safe Banking step. This screen allows the user to declare any cash amounts to be banked:
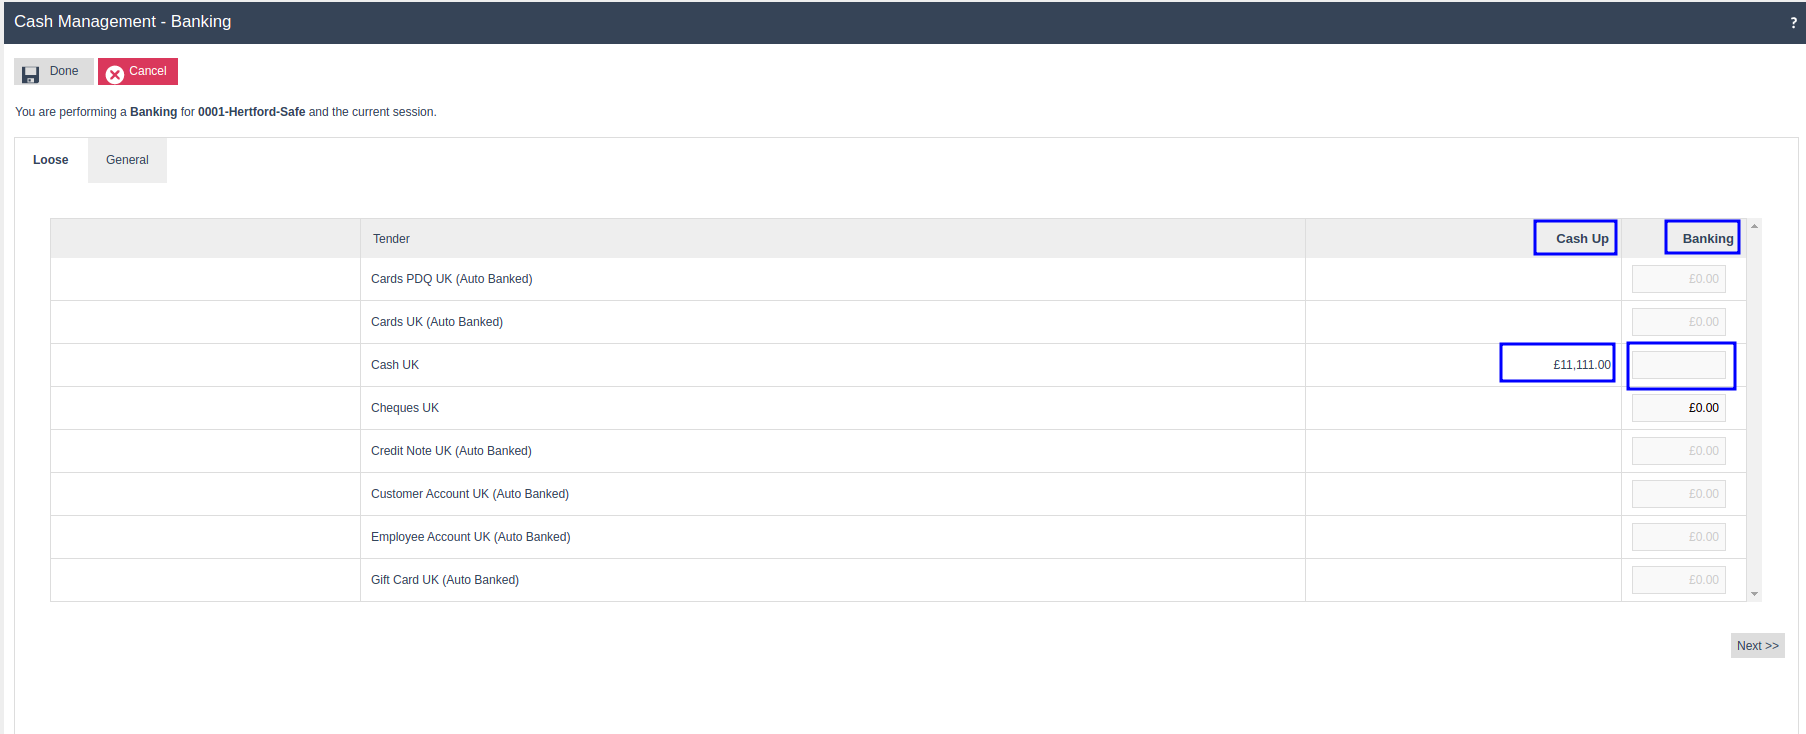
In this screen, the user records the cash amounts to be banked in the Banking column. Once the amounts have been added, the user can navigate to the General tab and record any Banking details such as the Banking Slip Reference, the Banking Bag Reference and any notes.
Once all Banking tenders have been recorded, the user can complete the process by selecting the Done button. The Back Office will navigate to the Safe Finalise screen.
Safe Finalise on a Guided Day End Process
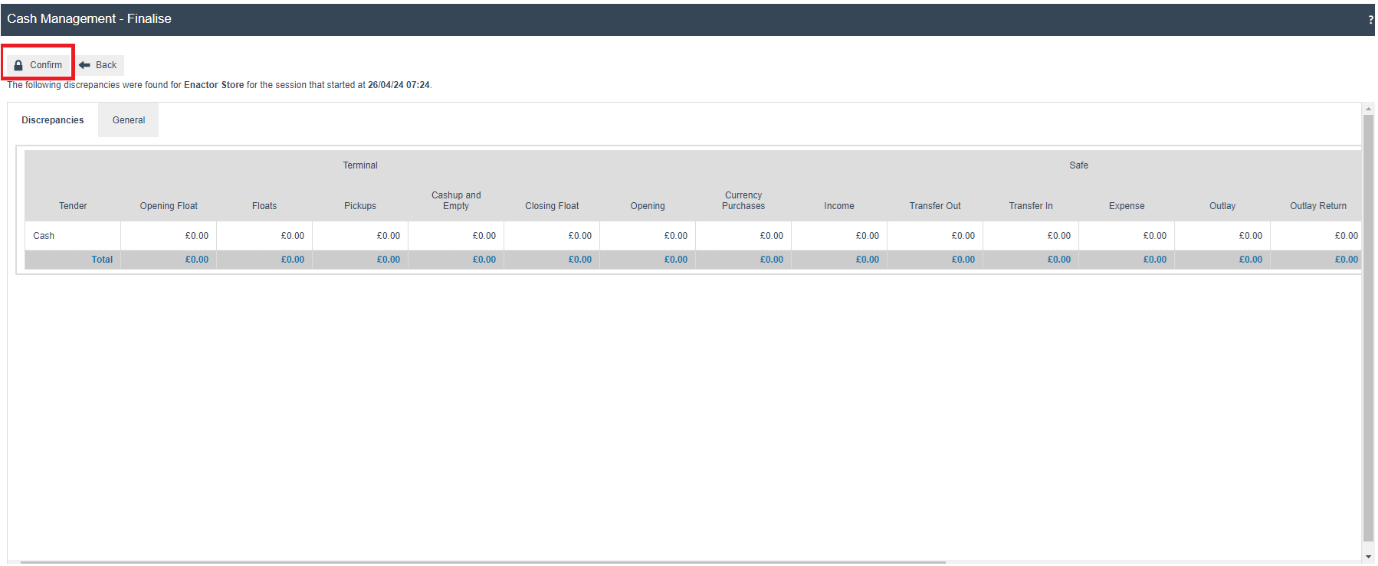
On selecting the Done button, the Back Office navigates to the Safe Finalise screen. If the safe is configured to auto-finalise after Cashup then the finalise screen is shown with any discrepancies.
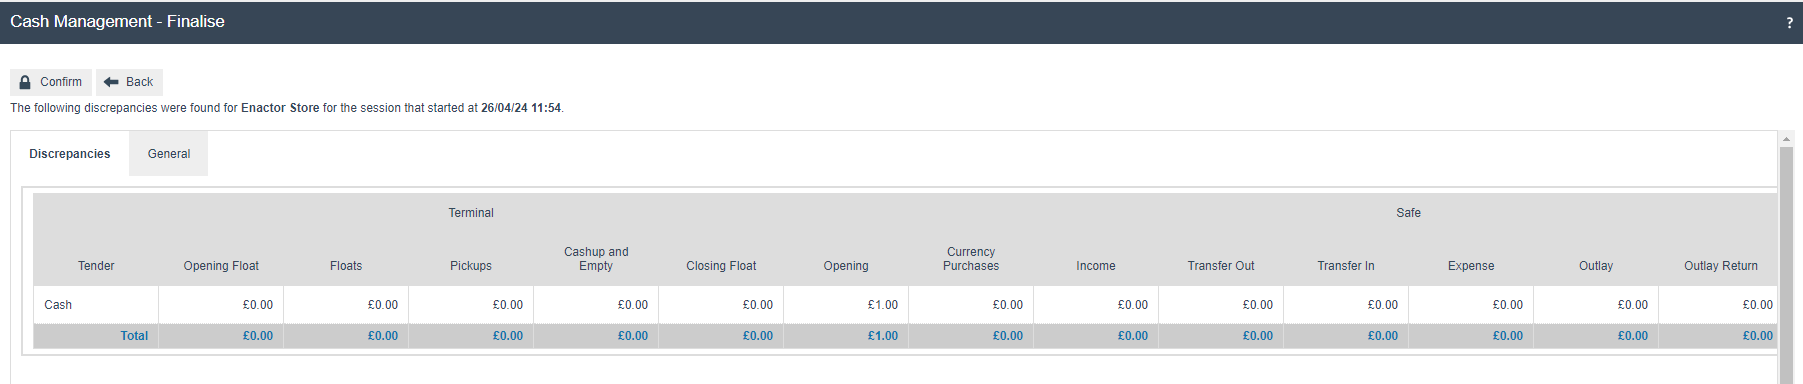
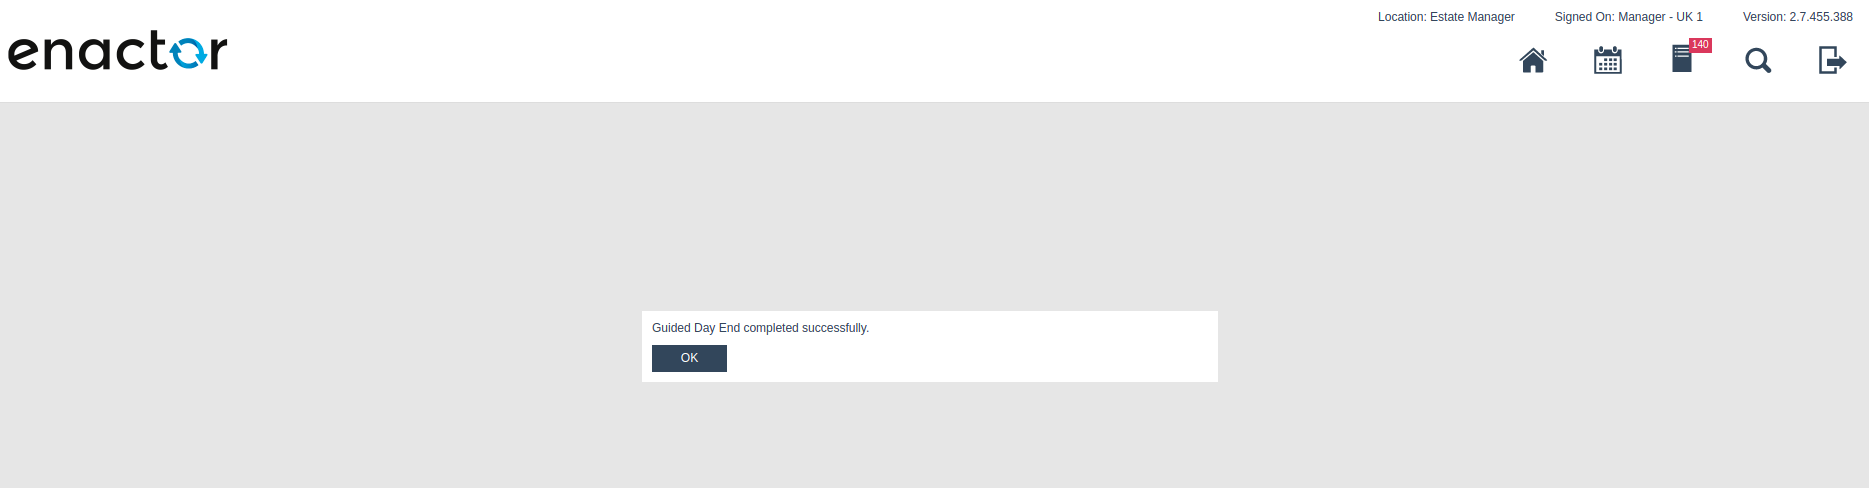
If the user selects Confirm to finalise the session, then the Guided Day End process completes and the following prompt is displayed:
If the user selects the Back option, then the Guided Day End process does not complete and the user is redirected to the Safe Cashup screen.
Tender Bags on a Guided Day End Process
If the Location is configured to allow Tender Bags, when the user selects either Cashup or Cashup & Banking then the New Bag tab is displayed.

Here the user can declare the cashup amounts and add them to tender bags. The user can create a new tender bag from the New Bag tab and record the tender amounts.
Using the New Bag tab the user can record the following tender bag details:
| Configuration | Description |
|---|---|
| Bag Number | A unique name for the new tender bag. This is used for identification of the Tender Bag. |
| Serial Number | A unique number for the new tender bag. This is used for identification of the Tender Bag. |
The following buttons are displayed:
| Button | Action |
|---|---|
| Clear Values | Deletes the amounts added against each tender. |
| Bag Tenders | Creates a new tender bag with the recorded values. A new Existing Bag tab is created once this is completed. |
| Next | Used to navigate to the next tab. |
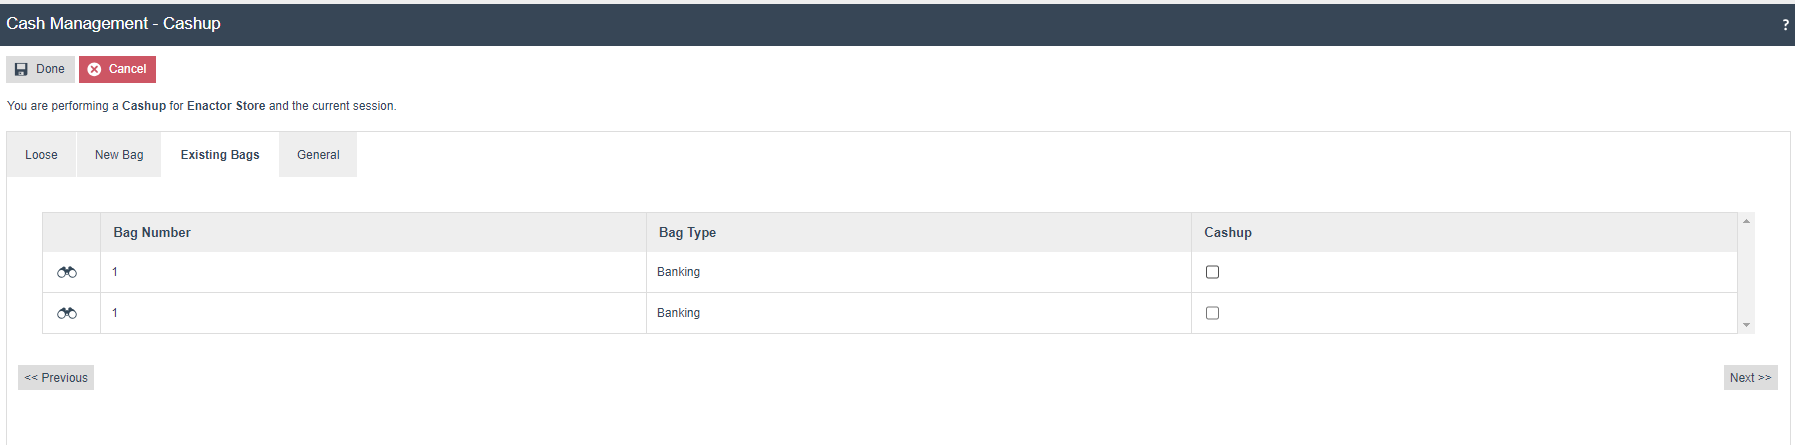
The Existing Bags tab gives details of any bags that were created for that safe.
If the user has selected the Cashup & Banking process, they can also create one or more Banking Bags during the Banking process.
Guided Day End Process Completion Activities
During the Guided Day End process, transactions are created and sent to the Estate Manager. These transactions will be created according to the flow in which the Guided Day End has happened. An example list of the transaction types generated is shown below:
TerminalCashupTransactionTerminalFinaliseTransactionsafeCashupTransactionsafeCashupAndBankingTransactionsafeFinaliseTransactionsafeOpenTransaction