How To Configure a New Country
Introduction
The purpose of this guide is to describe the steps to add an additional country to the Enactor estate. It is assumed that the retailer is already operating in at least one country.
The guide walks through the key configuration relevant to any new country. It should be used as a reference - the information is based on Enactor's standard approach to adding a new country, but configuration may differ between businesses.
The guide excludes fiscalisation, translations, and integration - further information can be provided to support these areas.
To demonstrate the configuration steps, the guide uses Denmark as the new country and the UK as the source for templated data.
Overview
The following areas are covered when configuring a new country:
- Locale - create the language/locale for the new country
- Country Code - create the country code and associated general settings
- Currency - create the currency used by the new country
- Groups - create the Region, Price Group, Tax Region, and Menu Group for the new country
- Tax - create the Tax Rate, Tax Scheme, Tax Group, and Tax Group Tax Method for the new country
- Location Templates - create a location template for the new country
- POS Terminal Templates - create a POS Terminal template for the new country
- Roles - copy or create user roles for the new country
- User Templates - copy or create user templates for the new country
- Reasons - review and copy country-specific reasons
- Tenders - copy and configure tenders for the new country
- Menus - review and update menus with country-specific changes
- Gift Card Types - copy and configure gift card types for the new country
- Credit Notes Types - copy and configure credit note types for the new country
Prerequisites
Resources
Before starting, you should have the following resources in place:
- Enactor Estate Manager
- An existing, working country configuration to use as a template (this guide copies from an existing UK configuration)
Prior Training/Experience
You should be familiar with the following:
- Estate Manager configuration
- Enactor configuration concepts, including Locations, Regions, Tenders, and Roles
Locale
The Locale entity is used to differentiate language requirements in presentation in user interfaces and documents such as receipts, and may also influence number formatting (for example, whether a decimal notation uses a comma or a point). Enactor Locales are defined based on selection from the underlying Java Locales, which are in turn used by the software that uses the configured Locale.
The following steps describe creating a new locale.
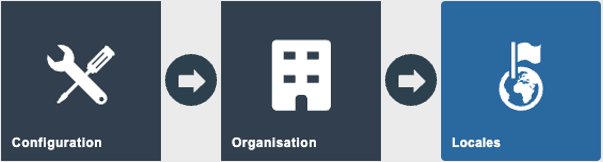
On the Estate Manager, navigate to Locale configuration using the Search or the path shown below.
Main Menu > Configuration > Organisation > Locale
Select Create a new Locale to add the new locale.
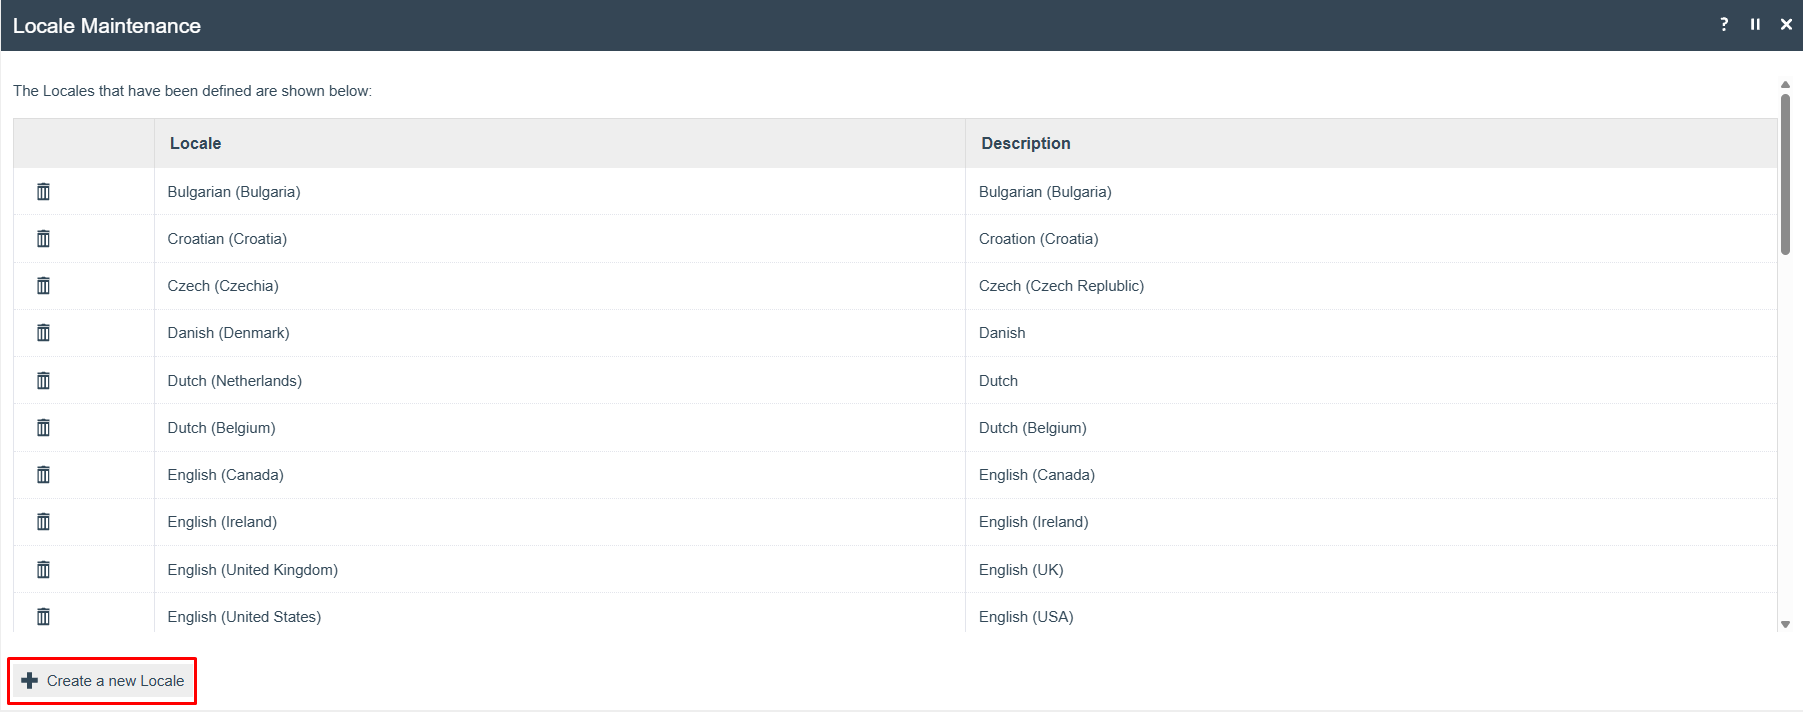
Select the new locale from the available drop-down selection, add a description, and save the changes.

Set the appropriate values for the new country:
| Field | Example Value | Description |
|---|---|---|
| Locale | Danish (Denmark) | Selected from a drop-down list of ISO standard locales. Locales are country and language specific - it's common to have more than one spoken language in different parts of a country, so you may need to set up more than one locale for a country, e.g. Belgium. |
| Description | Danish (Denmark) | Alphanumeric; maximum 30 characters. |
This completes the Locale configuration.
Country Code
The Country Codes for a specific group of countries in which the business operates may be captured from the ISO information built in to Java and stored in Enactor Country configuration, associated with either the ISO Standard codes (by default) or codes of the retailer's choice.
The following steps describe creating a new country code.
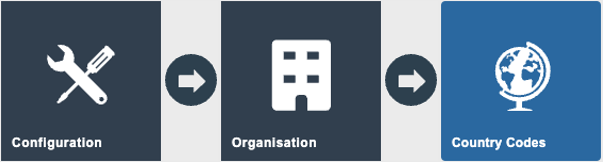
On the Estate Manager, navigate to Country Codes configuration using the Search or the path shown below.
Main Menu > Configuration > Organisation > Country Codes
Select Create Country Code to add the new country code.
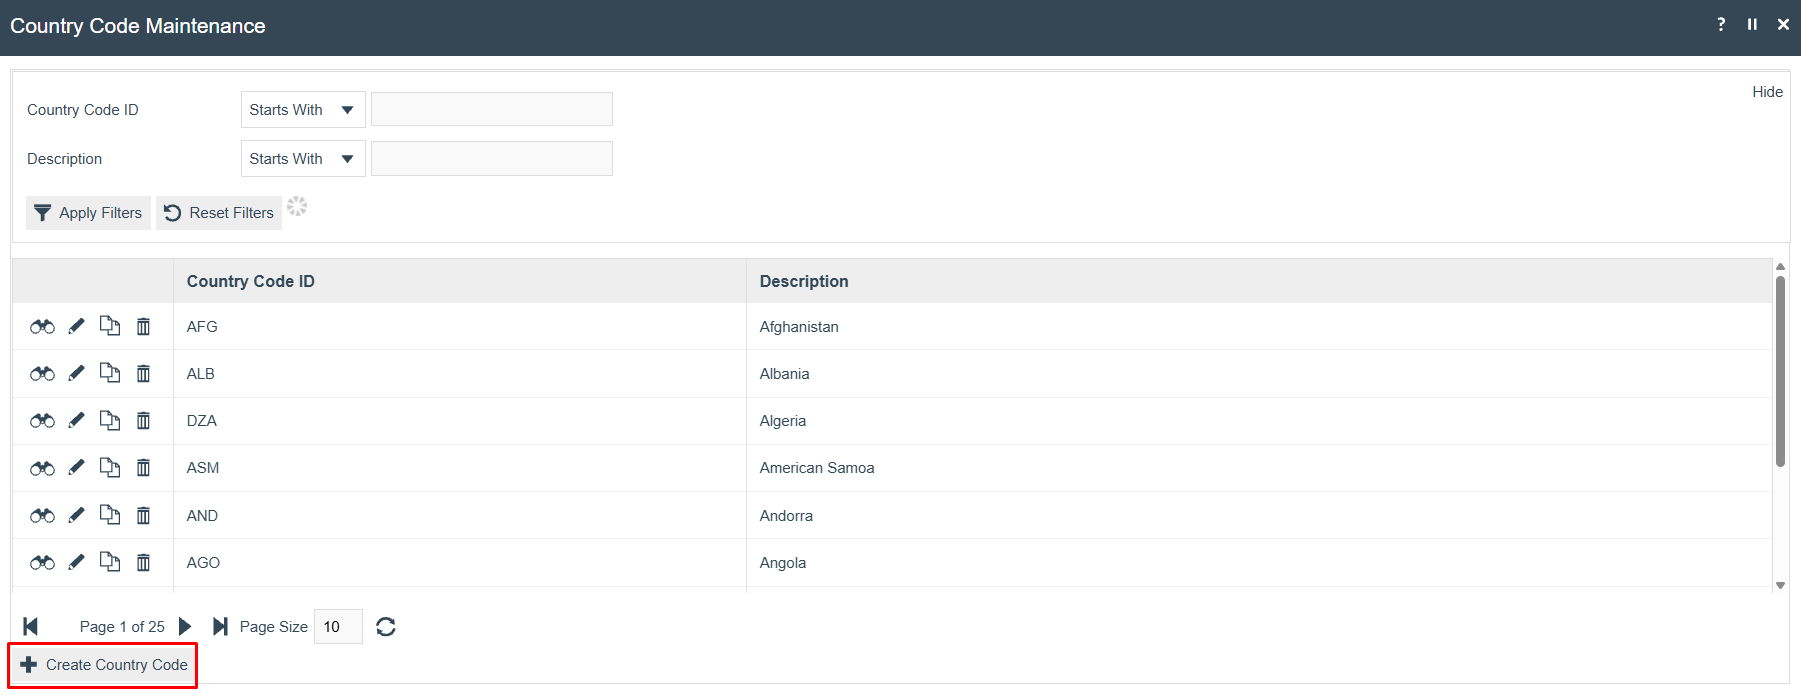
Enter the new country code and select Create, selecting the country from the drop-down list.

Set the appropriate values for the new country:
| Field | Example Value | Description |
|---|---|---|
| Country Code ID | DNK | Example Country Code ID follows the ISO 3166 ALPHA-3 country code structure. |
| Country Selection | Denmark | Select the country from the drop-down selection. |
The key tab in the Country Codes configuration for European countries is the General tab.

Enter appropriate values for the configured country under the General tab as follows:
| Field | Example Value | Description |
|---|---|---|
| Description | Denmark | Configure the locale description for English (UK) and the country locale description being configured, e.g. Danish (Denmark). |
| ISO Country Code | DK | Maximum 2 alphabetic characters, selected from a standard list of ISO country codes. |
| List Order | 1 | Numeric, user-defined value optionally applied to determine placement in list order. |
| Address Lookup Enabled | True | Checkbox - if checked, indicates that address lookup is enabled for this country code. |
| Require Postcode | True | Checkbox - if checked, indicates that the postcode is required in addresses. |
This completes the Country Code configuration.
Currency
Currencies are defined for the Retail Application as a subset of the ISO standard data, by selection in the Currency Maintenance function.
The following steps describe creating a new currency.
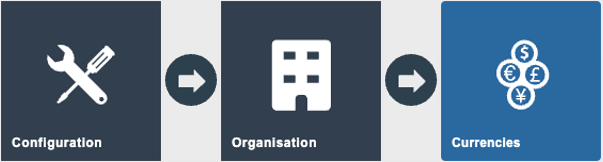
On the Estate Manager, navigate to Currencies configuration using the Search or the path shown below.
Main Menu > Configuration > Organisation > Currencies
Select Create a new Currency to add the new currency.
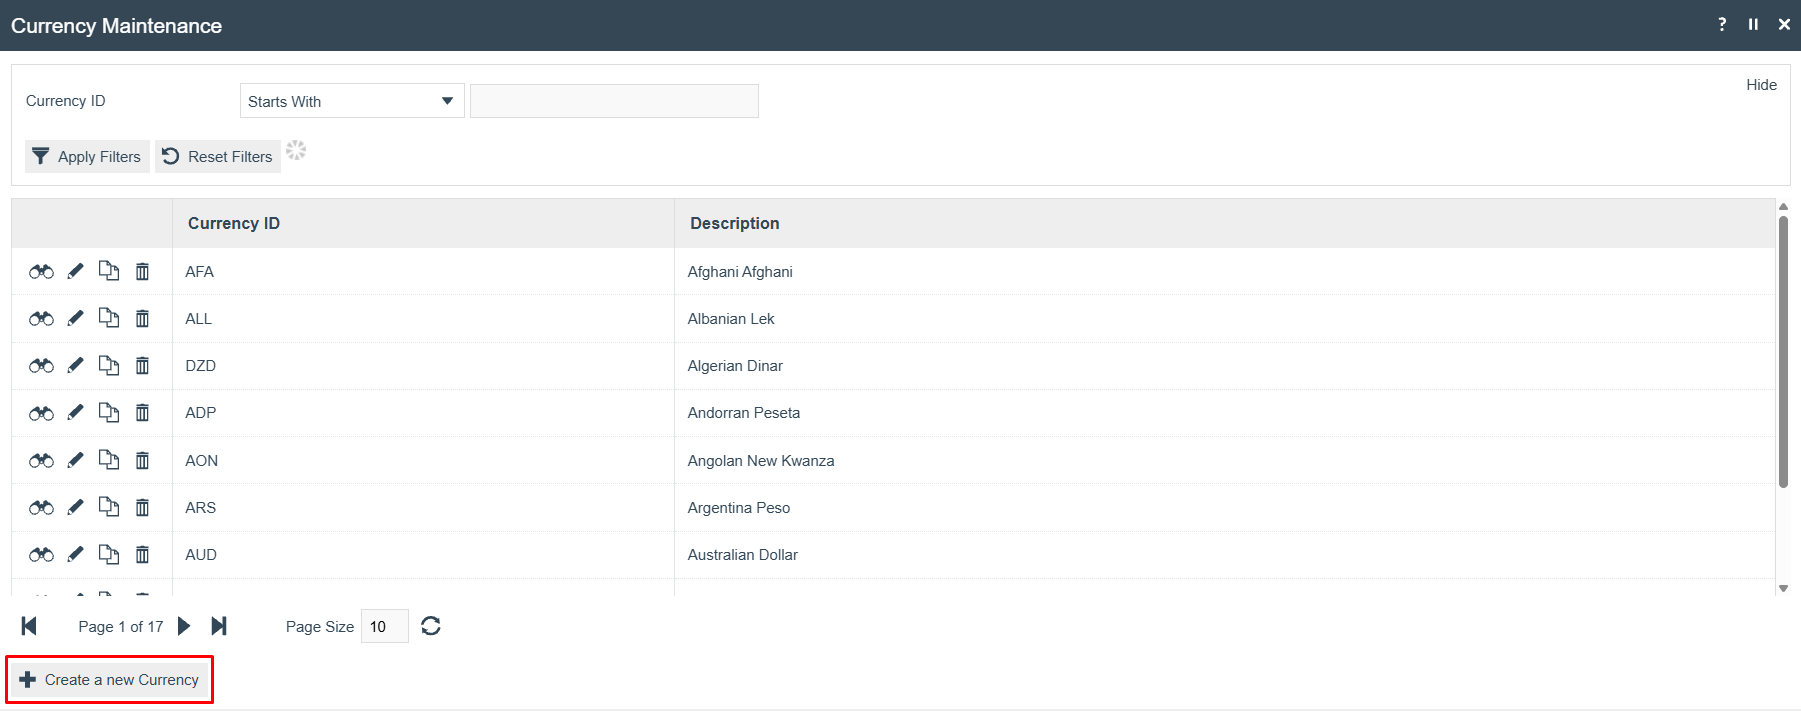
Select the new currency from the drop-down selection - this populates the ID - and select Create. Set the appropriate values:

| Field | Example Value | Description |
|---|---|---|
| Currency ID | DKK | Alphanumeric; maximum 3 characters. An existing ISO Standard or user-defined Currency Code, selected from a fixed drop-down list of all defined ISO Standard Currencies. |
The key tab in the Currencies configuration is the General tab.

Enter appropriate values for the configured currency under the General tab as follows:
| Field | Example Value | Description |
|---|---|---|
| Description | Danish Kroner | Alphanumeric; maximum 40 characters. A user-friendly identifier for the currency. This field is mandatory and should be given a meaningful name, e.g. Danish Kroner. |
| Country | - | Drop-down selection from a list of configured Country Codes. The country associated with the currency. |
| Minimum Accepted Denomination | 1 | Positive numeric value. Represents the lowest denomination of the currency that can be accepted as valid tender in transactions. Note: this accommodates currencies without a minimum denomination of 1, and foreign currencies of which only notes may be accepted. |
| Minimum Currency Denomination | 1 | Positive numeric value. Represents the lowest denomination of the currency. |
| Default Symbol | - | Alphanumeric; maximum 10 characters. The currency symbol used to prefix amount representations of the currency. Note: if default and alternative symbols are not specified, standard Enactor Retail Applications use the standard ISO currency symbol. |
This completes the Currency configuration.
Groups
The Groups architecture provides for a variety of predefined Group Types, all managed in the Group Hierarchy Maintenance application of Estate Manager Web Maintenance. Groups configuration is foundational - especially the Region Group Type described below - with which many other configuration elements are associated. Several configuration elements are grouped in relation to these Group Types.
On the Estate Manager, navigate to Groups configuration using the Search or the path shown below.
Main Menu > Configuration > Organisation > Groups
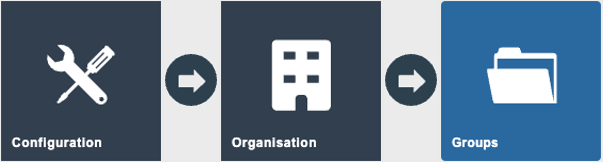
Group > Regions
The Region Group Type permits only one Region Hierarchy (All Regions), used to represent geographical areas. For example, a UK-based company may have a regional hierarchy based on geographic subdivisions of the UK, whereas a Europe-wide company may have a regional hierarchy based on countries. The Region Hierarchy may be used in conjunction with the MM Group Hierarchy to vary details such as prices, promotions, or reports on a group basis. Several configuration entities such as Location, Reason, Role, Tender, and Product have a Region association.
The following steps describe creating a region.
Select Region from the group type drop-down selection. The list will be filtered and present a single All regions result - select the edit icon to add a new region.
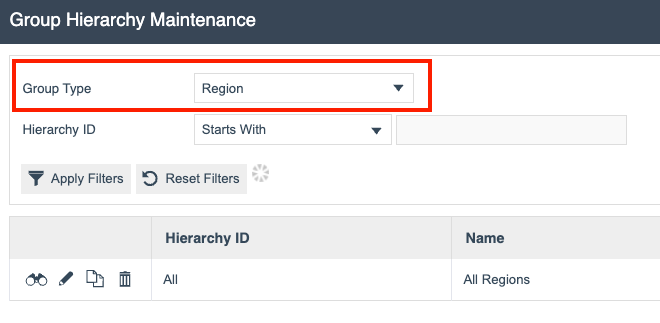
All new regions, e.g. countries, are configured under the All Regions hierarchy.
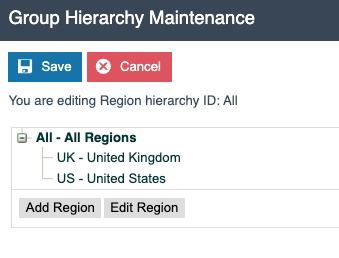
Select Add Region to create the new region, and enter the group ID.
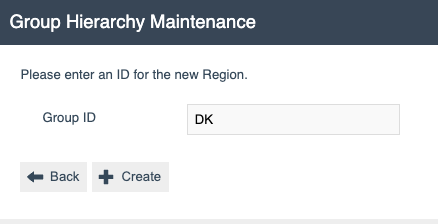
| Field | Example Value | Description |
|---|---|---|
| Group ID | DK | Example ID follows the ISO 3166 ALPHA-2 country code structure. |
Enter appropriate values as follows:
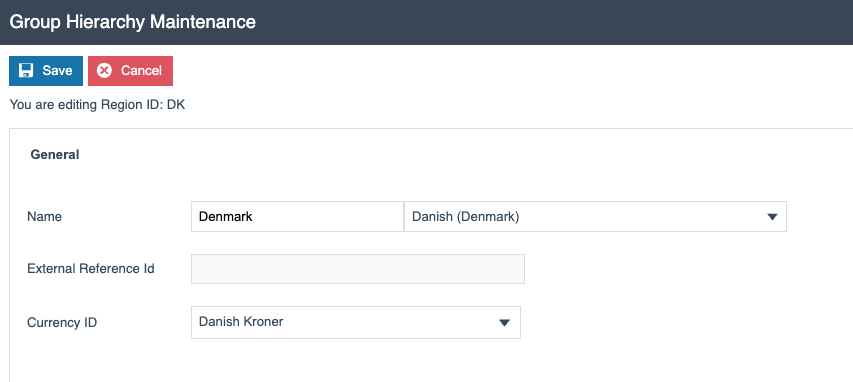
| Field | Example Value | Description |
|---|---|---|
| Name | Denmark | Configure the locale description for English (UK) and the country locale description being configured, e.g. Danish (Denmark). |
| Currency ID | Danish Kroner | Select the region's currency from the available drop-down list. |
This completes the Group / Region configuration.
Group > Price Groups
The Price Group Type is used to identify groups of Product Prices in a hierarchical structure of up to 10 levels. In Product Price Maintenance, Price Groups differentiate Product Prices and may be used to assign Product Prices by Price Group for use at a POS in POS Terminal configuration.
A Product Price identified by Price Group is only applied if there is no Product Price configured for the Location.
The following steps describe creating a price group.
Select Price Group from the group type drop-down selection. The list will be filtered and present a single All regions result - select the edit icon to add a price group.
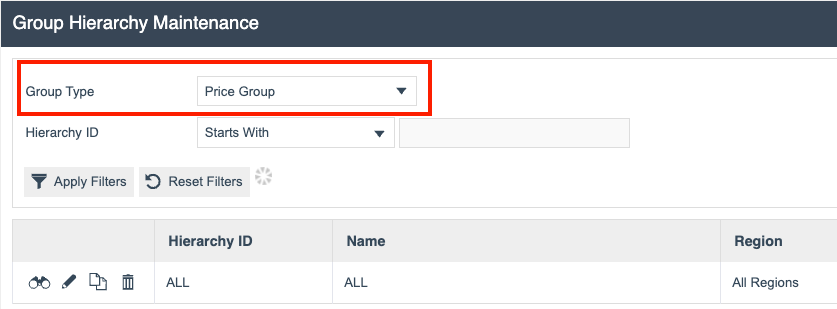
All new price groups for each country are configured under the All Regions hierarchy.
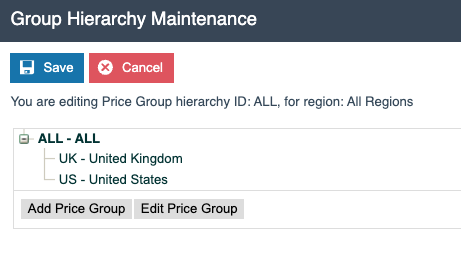
Select Add Price Group to create the price group, and enter the name and group ID.
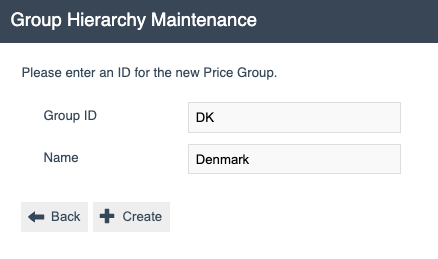
| Field | Example Value | Description |
|---|---|---|
| Group ID | DK | Example ID follows the ISO 3166 ALPHA-2 country code structure. |
| Name | Denmark | Enter a name that references the country for the configured price group. |
Enter appropriate values as follows:
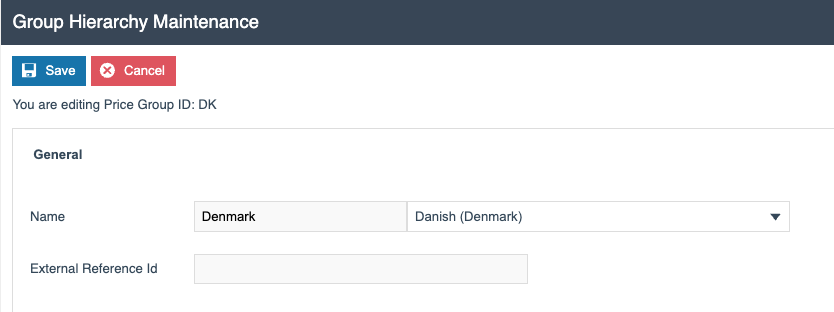
| Field | Example Value | Description |
|---|---|---|
| Name | Denmark | Configure the name for the country, and select the country locale description, e.g. Danish (Denmark). |
This completes the Group / Price Group configuration.
If prices are integrated into Enactor, they will use this price group and price to represent the country-specific pricing for a product.
Group > Tax Region
The Tax Region Group Type is bound to the Region Group Hierarchy and is used to identify Tax Regions in a separate but related hierarchy of up to 10 levels. There can be more than one Tax Region Hierarchy, potentially bound to different Regions in the Region Hierarchy. Tax Regions are typically used to apply regionally distinct tax regimes.
The following steps describe creating a tax region.
Select Tax Region from the group type drop-down selection. The list will be filtered and present a single All regions result - select the edit icon to add a tax region.
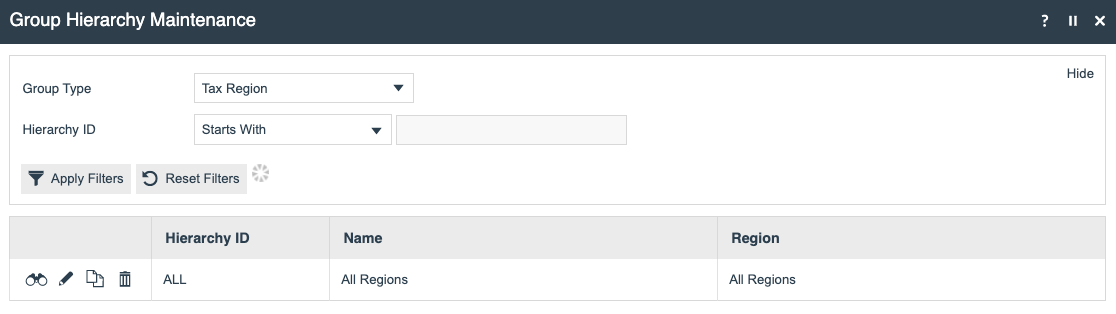
All new tax regions for each country are configured under the All Regions hierarchy.
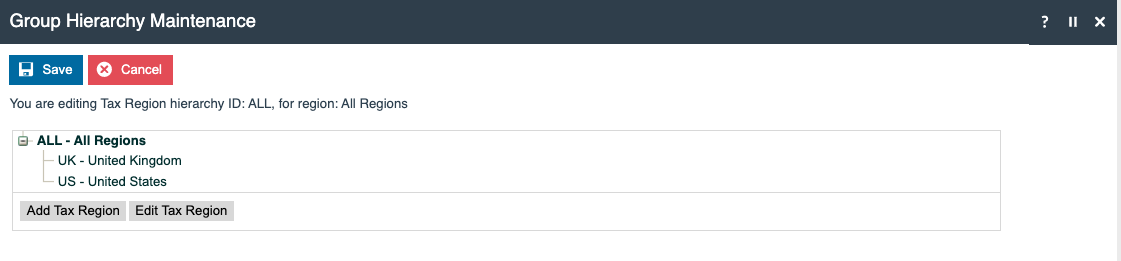
Select the add icon ( ) to create the new tax region, and enter the name and group ID.
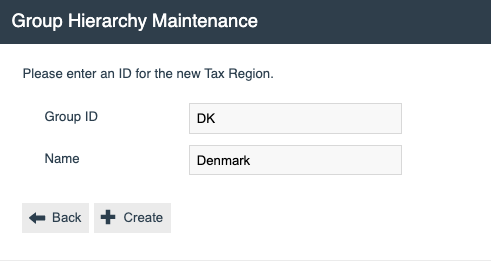
| Field | Example Value | Description |
|---|---|---|
| Group ID | DK | Example ID follows the ISO 3166 ALPHA-2 country code structure. |
| Name | Denmark | Tax region name. |
Enter appropriate values as follows:
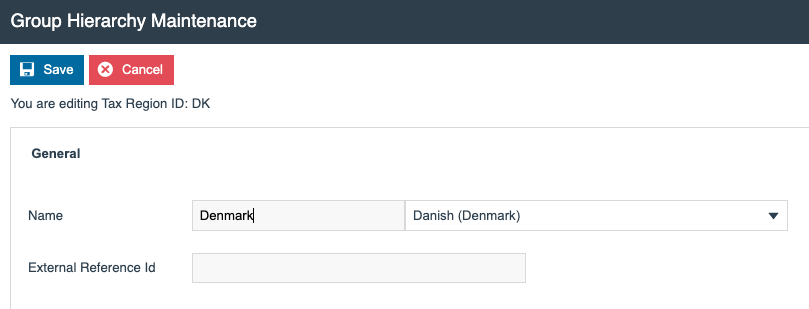
| Field | Example Value | Description |
|---|---|---|
| Name | Denmark | Configure the locale description for English (UK) and the country locale description being configured, e.g. Danish (Denmark). |
This completes the Group / Tax Region configuration.
Group > Menu Groups
The Menu Group Type allows 2 levels and is used to identify a given set of menus applicable to a Location or POS Terminal context, and in Role maintenance to identify a Menu Group applicable to a given Role.
The following steps describe creating a menu group.
Select Menu Groups from the group type drop-down selection.
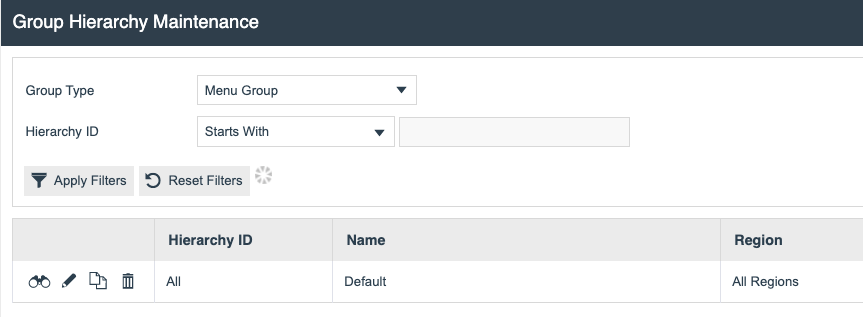
The list will be filtered and present a single All regions result - select the edit icon to add a country-specific menu group.
It's best practice to have a default menu group for each store Enactor application, and a country-specific menu when country-specific menus are required.
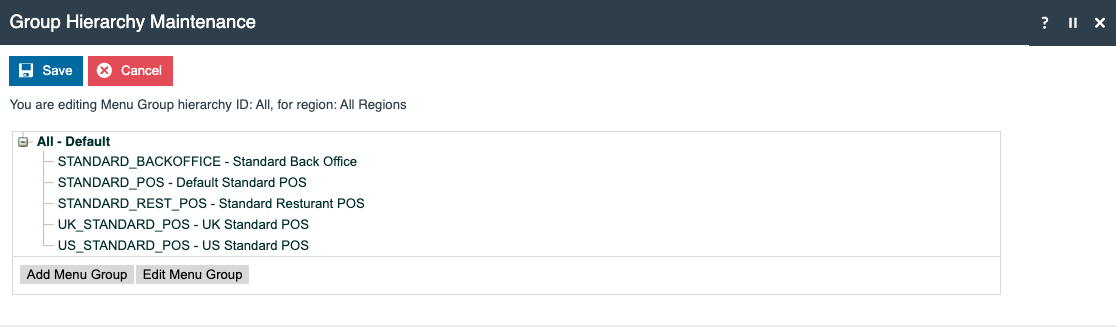
Select Add Menu Group to create the menu group hierarchy, and enter the hierarchy ID and region.
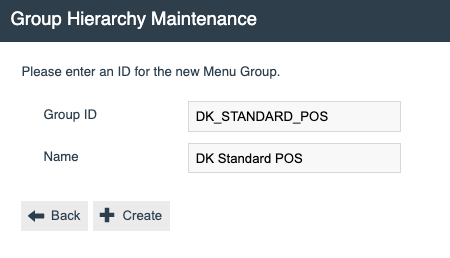
| Field | Example Value | Description |
|---|---|---|
| Group ID | DK_STANDARD_POS | Example structure <CountryID>_STANDARD_POS. If you need specific menus for mobile POS, you might use <CountryID>_STANDARD_MPOS. |
| Name | DK Standard POS | Configure the locale description for English (UK) and the country locale description being configured, e.g. Danish (Denmark). |
Select Edit Menu Group to edit the DK_STANDARD_POS group, and update the name and the additional locale description.
| Field | Example Value | Description |
|---|---|---|
| Name | DK Standard POS | Configure the locale description for English (UK) and the country locale description being configured, e.g. Danish (Denmark). |
This completes the Group / Menu Group configuration.
Additional menu groups might be required for different device types, e.g. mobile devices.
Tax
The Enactor Retail Applications provide, as standard, a built-in, configurable Tax Engine, which accommodates diverse options for addressing taxation requirements applicable to Retail or Hospitality.
Tax Rate
Tax Rates are named, individual Tax Rate values, which may be independently associated with Tax Schemes.
On the Estate Manager, navigate to Tax Rates configuration using the Search or the path shown below.
Main Menu > Configuration > Financial > Tax Rates
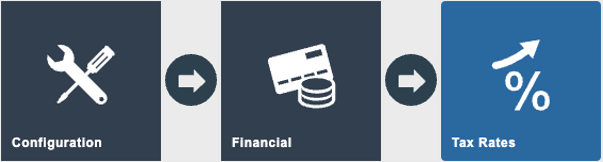
Select Create a new tax rate and complete the tax rate details. This example assumes the configured tax rate is a VAT tax rate type.
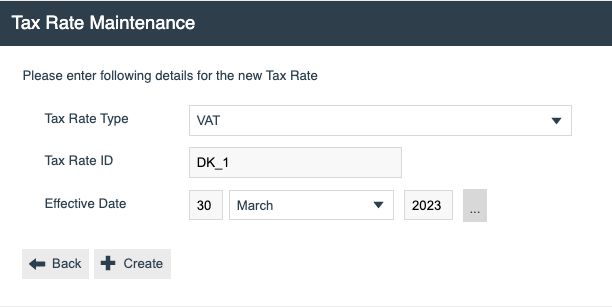
| Field | Example Value | Description |
|---|---|---|
| Tax Rate Type | VAT | Drop-down selection of fixed options: VAT, Composite, Tax Percentage Table, or Tax Value Table. |
| Tax Rate ID | DK_1 | Alphanumeric; maximum 20 characters. Enter a user-defined but unique identifier for the tax rate. |
| Effective Date | - | Date from which the tax rate is valid (defaults to the current date). |
Key fields under the General tab:
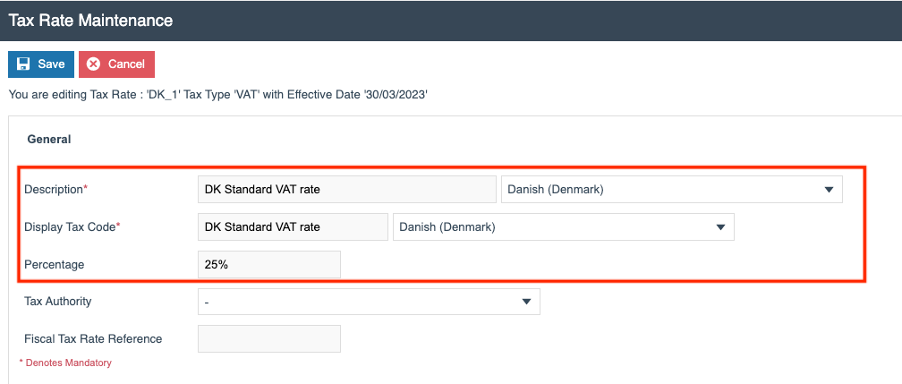
| Field | Example Value | Description |
|---|---|---|
| Description | DK Standard VAT rate | Alphanumeric; maximum 30 characters. Enter a user-friendly description for the tax rate by which users may identify it. |
| Display Tax Code | Standard VAT rate | Alphanumeric; maximum 30 characters. A tax code (typically an official identifier for the tax) used to identify the tax in display contexts, e.g. receipts. |
| Percentage | 25% | Numeric value; range 0-100. The rate of tax to apply (the digits and decimals are interpreted as a decimal number regardless of inclusion of the % symbol). |
Multiple tax rates could be required in a country - create the additional tax rates required. This completes the Tax Rate configuration.
Tax Scheme
The Tax Scheme is an independent entity that is specifically associated only with a set of Tax Rates.
A Tax Rate should not be associated with multiple Tax Schemes unless it is intended that any change to the rate should be applicable to all the Tax Schemes.
On the Estate Manager, navigate to Tax Schemes configuration using the Search or the path shown below.
Main Menu > Configuration > Financial > Tax Schemes
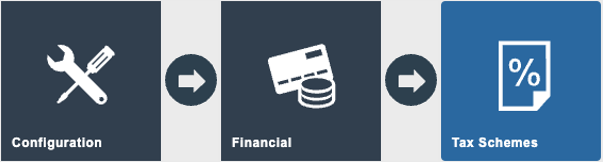
Select Create a new tax scheme and complete the tax scheme details.
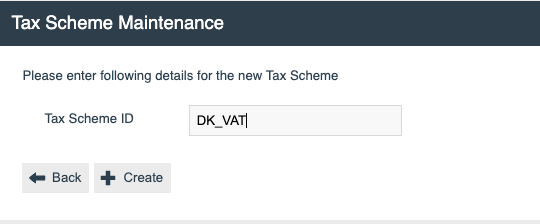
| Field | Example Value | Description |
|---|---|---|
| Tax Scheme ID | DK_VAT | Alphanumeric; maximum 20 characters. Enter a user-defined but unique identifier for the tax scheme. |
Key fields under the General tab:
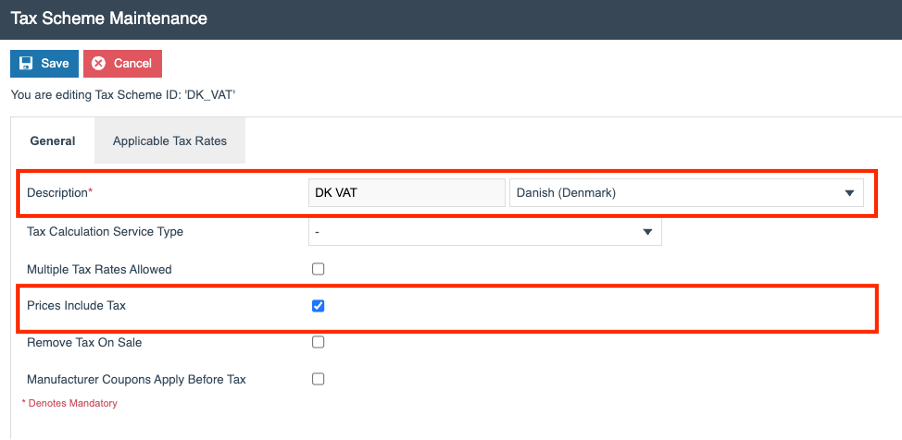
| Field | Example Value | Description |
|---|---|---|
| Description | DK VAT | Alphanumeric; maximum 30 characters. Enter a user-friendly description for the tax scheme by which users may identify it. |
| Price Include Tax | True | It's very common in the EU for the price to include tax; other regions add tax to the sale at the end of the transaction. |
Key fields under the Applicable Tax Rates tab:
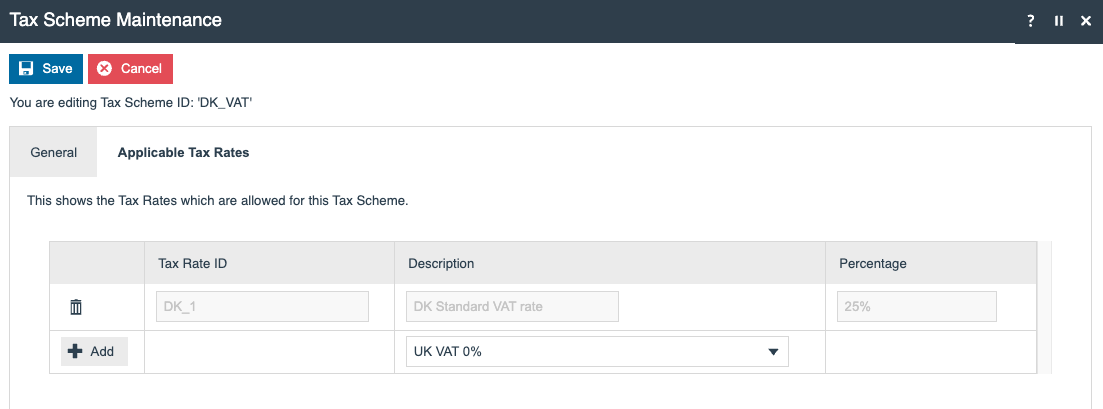
Add configured tax rates to the tax scheme. This completes the Tax Scheme configuration.
Tax Group
The Tax Group provides an identifier and description with which Products may be associated, and thereby collectively referenced for the purposes of associating them with a Tax Scheme, either regionally or universally.
On the Estate Manager, navigate to Tax Groups configuration using the Search or the path shown below.
Main Menu > Configuration > Financial > Tax Groups
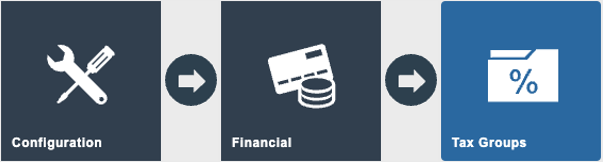
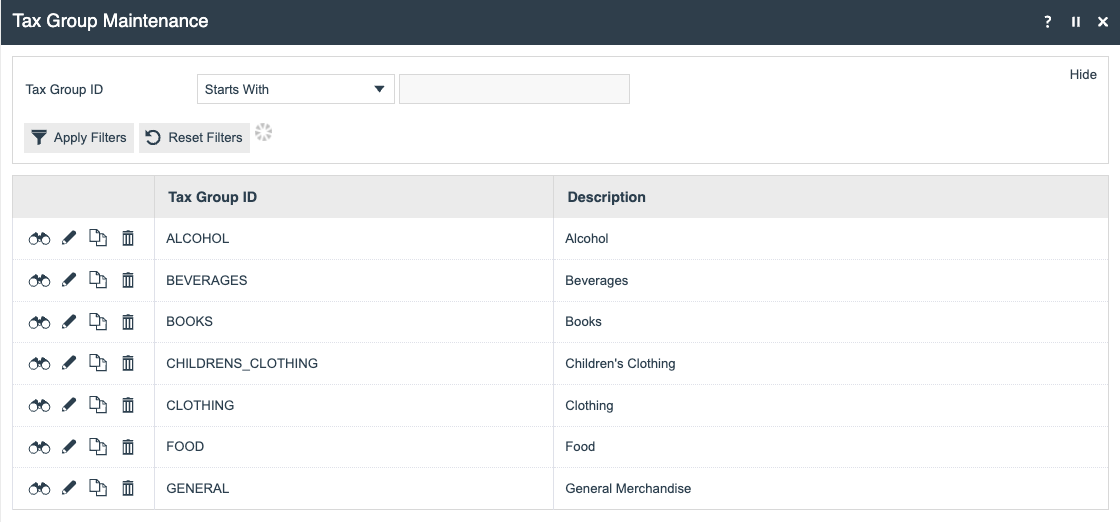
Select Create a new tax group and complete the tax group details.
It's recommended that groups represent goods and services where different tax rates may apply. In the example below, alcohol is created as a tax group.
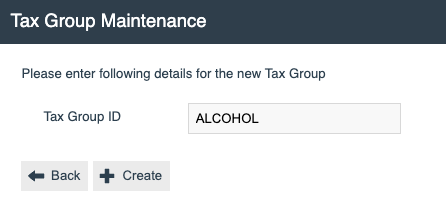
| Field | Example Value | Description |
|---|---|---|
| Tax Group ID | ALCOHOL | Alphanumeric; maximum 20 characters. Enter a user-defined but unique identifier. |
Key fields under the General tab:
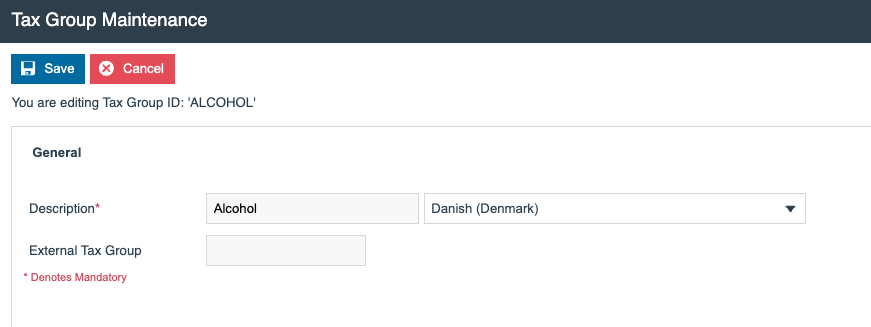
| Field | Example Value | Description |
|---|---|---|
| Description | Alcohol | Alphanumeric; maximum 30 characters. Enter a user-friendly description for the tax group by which users may identify it. |
Add configured tax groups for each tax rate. This completes the Tax Group configuration.
If products are integrated into Enactor, this tax group will be part of the product data - this is required for the system to be able to calculate the tax values.
Tax Group Tax Method
The Tax Group Tax Method provides a composite key consisting of Tax Group, Tax Scheme, and Tax Region, by which a specific Tax Rate or set of Tax Rates may be identified for a Product, based on the Tax Group to which the Product belongs and the Tax Scheme and Tax Region associated with the Location in which it is being sold.
On the Estate Manager, navigate to Tax Group Tax Method configuration using the Search or the path shown below.
Main Menu > Configuration > Financial > Tax Group Tax Method
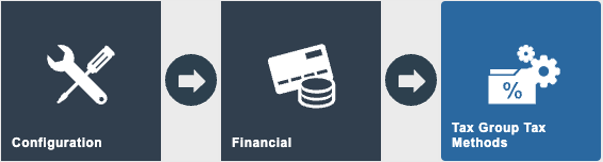
Select Create a new tax group tax method and complete the details.
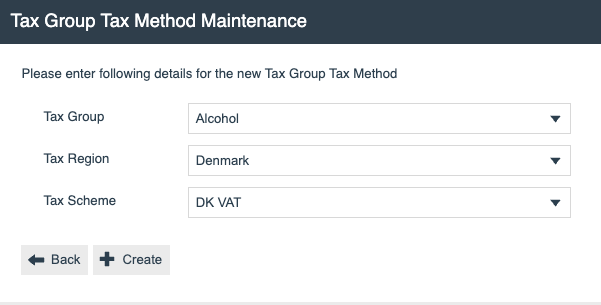
| Field | Example Value | Description |
|---|---|---|
| Tax Group | Alcohol | Configured Tax Group. |
| Tax Region | Denmark | Configured Tax Region. |
| Tax Scheme | DK VAT | Configured Tax Scheme. |
Key fields under the General tab:
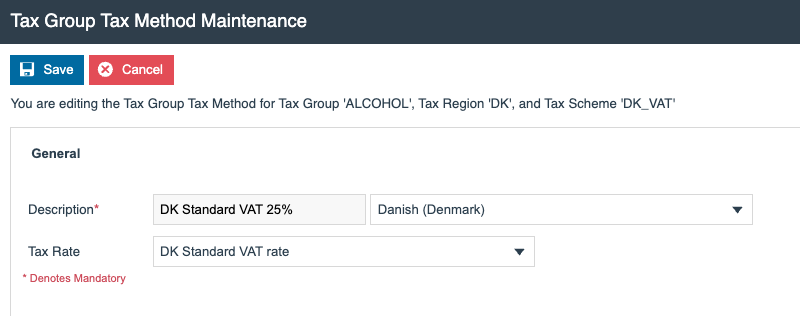
| Field | Example Value | Description |
|---|---|---|
| Description | DK Standard VAT 25% | Alphanumeric; maximum 30 characters. Enter a user-friendly description for the tax group by which users may identify it. |
| Tax Rate | DK Standard VAT rate | Configured tax rate. |
Add a configured tax group tax method for each tax rate. This completes the Tax Group Tax Method configuration.
Location Templates
The Location Template, in common with the Location, is defined based on a Location Type, and the Location Type differences are also reflected in the Edit page of Location Template Maintenance, as per the description in the section on Location Maintenance.
On the Estate Manager, navigate to Location Templates configuration using the Search or the path shown below.
Main Menu > Configuration > Organisation > Location Templates
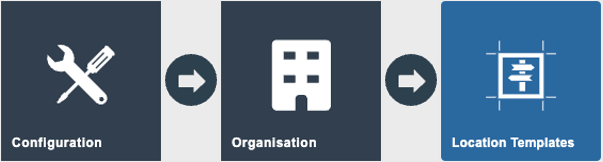
New location templates can be copied from existing location templates or created new. Select the copy icon to copy another location template - country-specific changes will need to be made to the new location template.
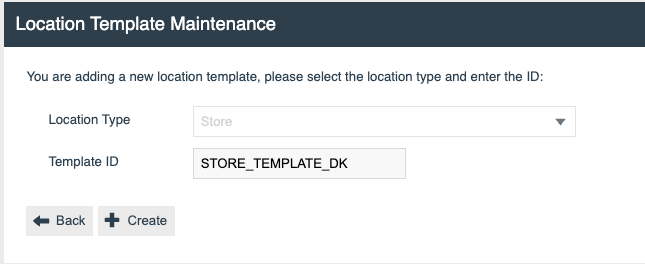
| Field | Example Value | Description |
|---|---|---|
| Location Type | Store | Select/validate that the location type is Store. |
| Template ID | STORE_TEMPLATE_DK | Example structure STORE_TEMPLATE_<CountryID>. |
Key fields under the General / General tab:
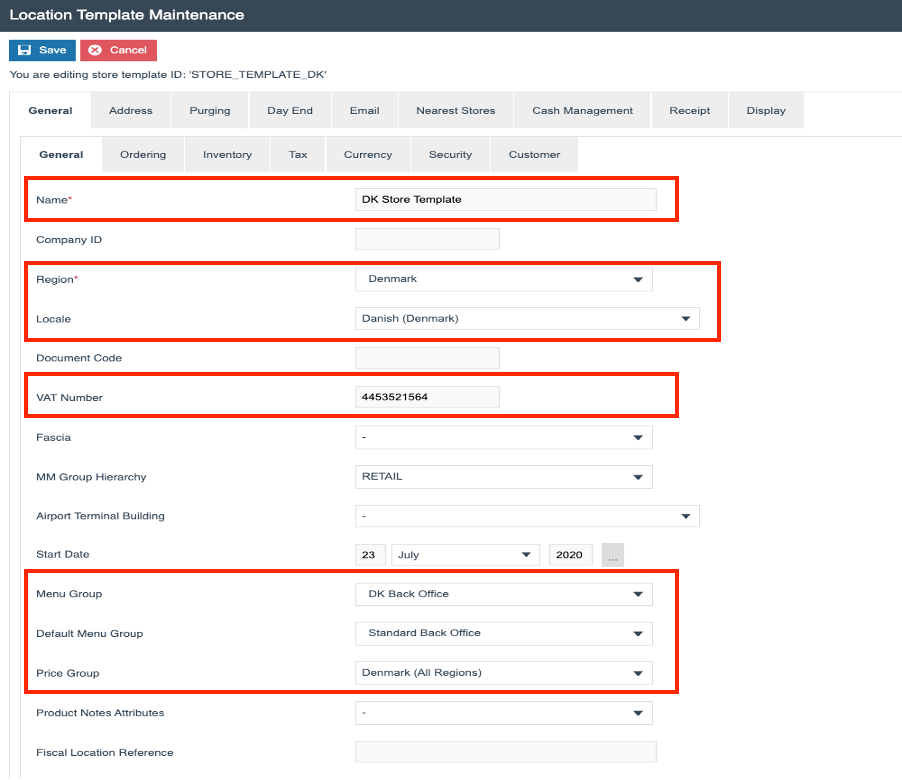
| Field | Example Value | Description |
|---|---|---|
| Name | DK Store Template | - |
| Region | Denmark | Selected from the drop-down selection. |
| Locale | Danish (Denmark) | Primary language for a country. If a country has different languages across the region, the locale should be configured at the location, not the location template. |
| VAT Number | 4453521564 | The company's VAT number. |
| Menu Group | DK BackOffice | Can override the back office menu if configured, otherwise uses the default menu group - useful if you have a generic menu across multiple countries. |
| Default Menu Group | Standard Back Office | - |
| Price Group | Denmark (All Regions) | Drives the country-specific price for any location linked to this location template. |
Changes under the General / Tax tab:
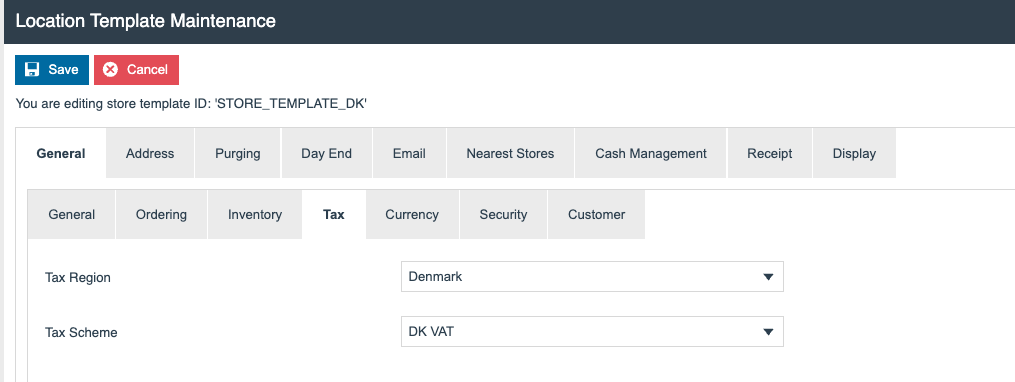
| Field | Example Value | Description |
|---|---|---|
| Tax Region | Denmark | Identifies the tax region for any locations using this template. |
| Tax Scheme | DK VAT | Identifies the tax scheme for the locations using this template. |
Changes under the General / Currency tab:
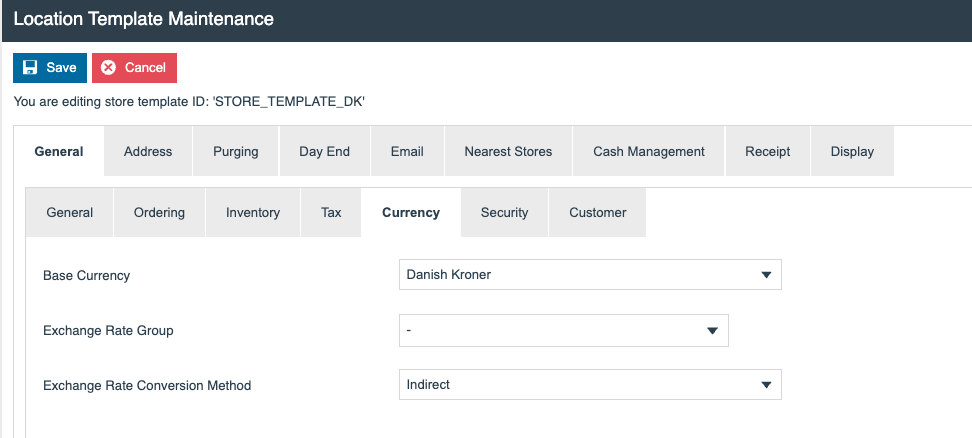
| Field | Example Value | Description |
|---|---|---|
| Base Currency | Danish Kroner | Select the appropriate currency for the country. |
Changes under the Address / Address tab:
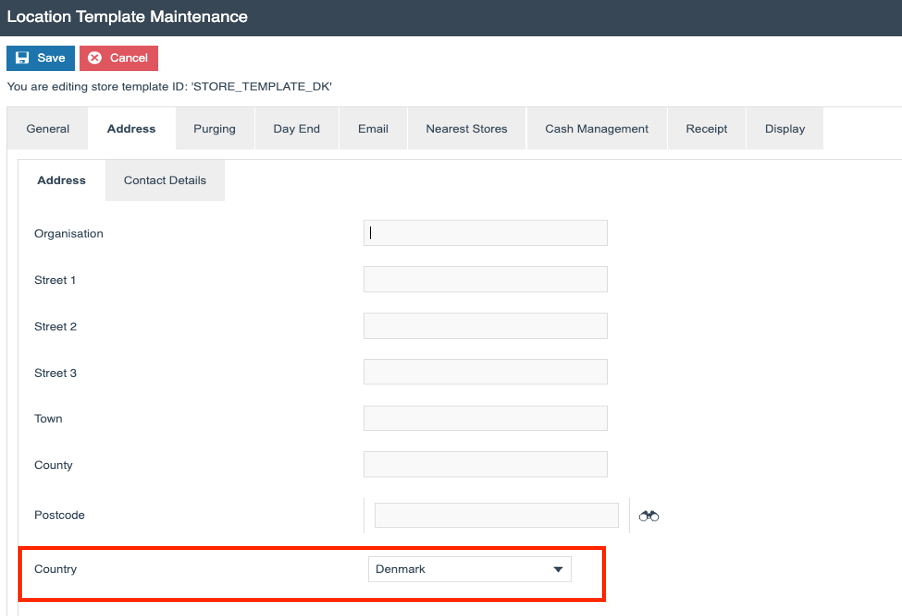
| Field | Example Value | Description |
|---|---|---|
| Country | Denmark | Select the appropriate country. |
Changes under the Receipt tab:
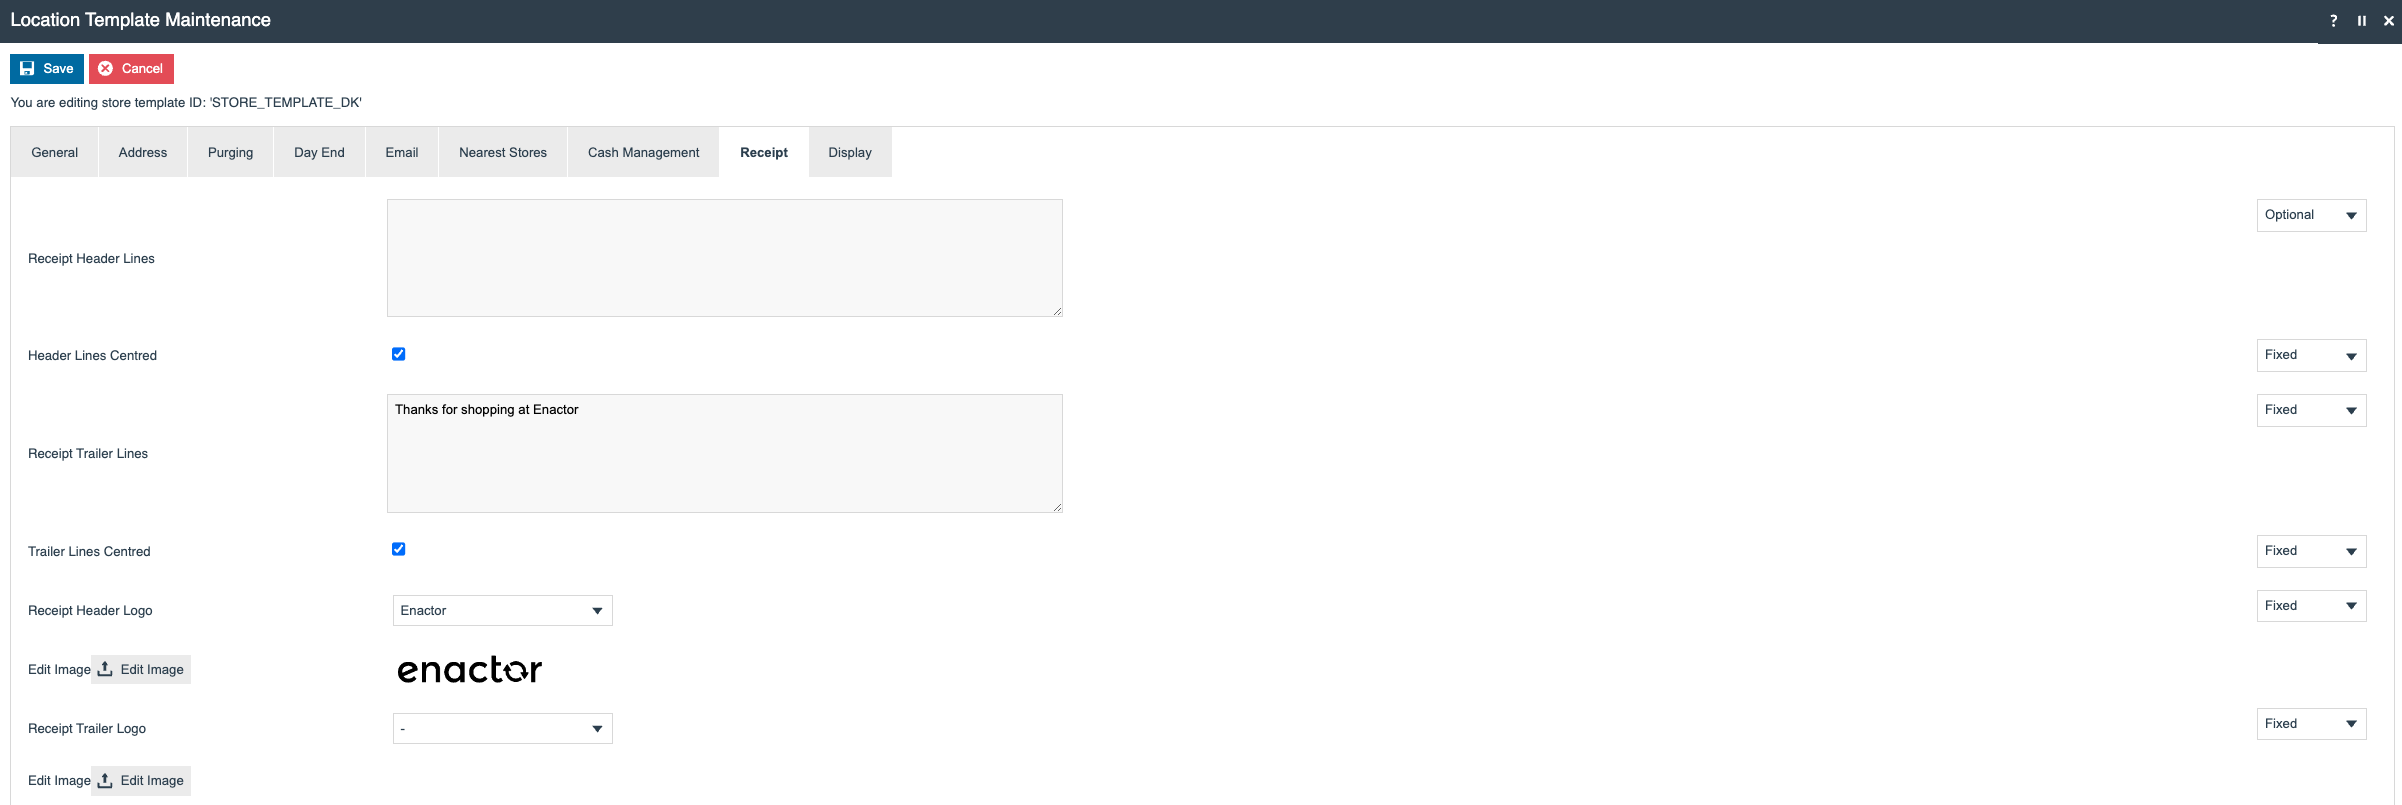
| Field | Example Value | Description |
|---|---|---|
| Receipt Trailer Lines | Thanks for shopping at Enactor | If the receipt trailer line is common across the country, configure it in the location template; otherwise leave it optional and configure the trailer lines at the location. |
| Receipt Header Logo | Receipt image | Select the company's receipt header from the drop-down selection. |
Changes under the Display tab:

| Field | Example Value | Description |
|---|---|---|
| Till Closed Message | Till is closed | Message displayed on the customer display when the operator is signed off from the POS. |
| Customer Welcome Message | Till is open | Message displayed on the customer display when the operator is signed onto the POS. |
This completes the Location Template configuration. Individual locations will need to be configured and linked to the location template - this data is generally integrated into Enactor.
POS Terminal Templates
Unlike the POS Terminal, the POS Terminal Template may be defined without reference to a Device, the specification of which is deferred until the POS Terminal based on the template is configured.
Select the copy icon to copy another POS terminal template - country-specific changes will need to be made to the new POS terminal template - or create a new POS terminal template. Enter a unique template ID.
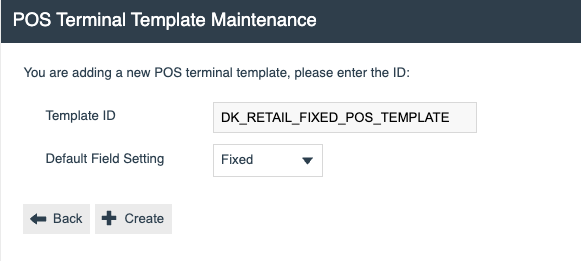
| Field | Example Value | Description |
|---|---|---|
| Template ID | DK_RETAIL_FIXED_POS_TERMINAL | Follows the common structure already created: <CountryID>_RETAIL_FIXED_POS_TERMINAL. |
Changes under the General / Overview tab:
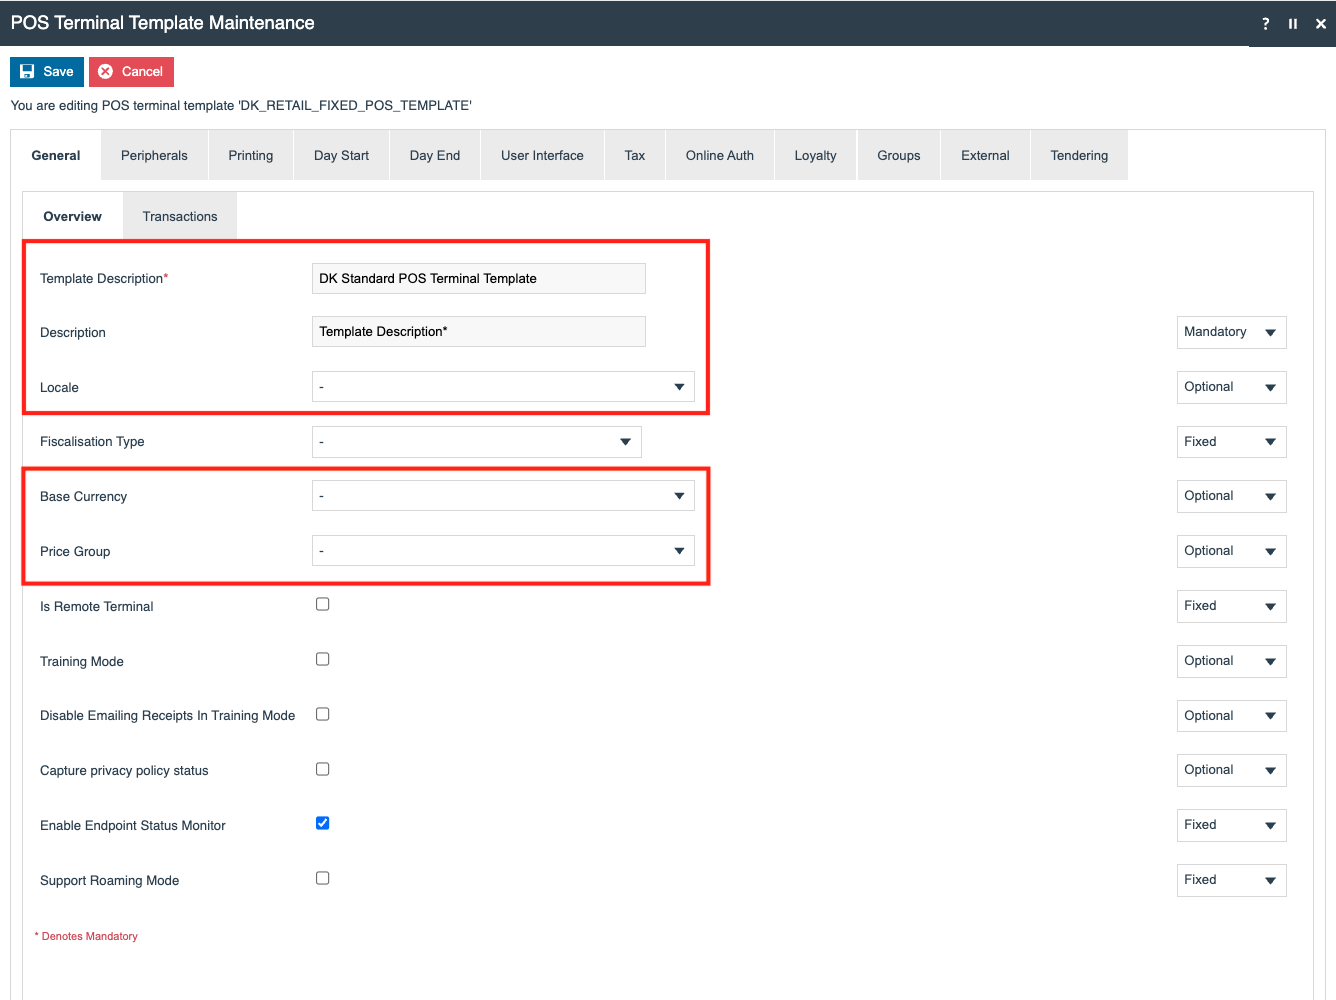
| Field | Example Value | Description |
|---|---|---|
| Template Description | DK Standard POS Terminal Template | Template description. |
| Description | Template Description | Populates the POS terminal description. |
| Locale | - | Primary language for a country. If already assigned at the location template level, it's not required here. |
| Base Currency | - | Select the appropriate currency for the country, if not already assigned at the location template level. |
| Price Group | - | Select the appropriate price group for the country, if not already assigned at the location template level. |
Changes under the User Interface tab:
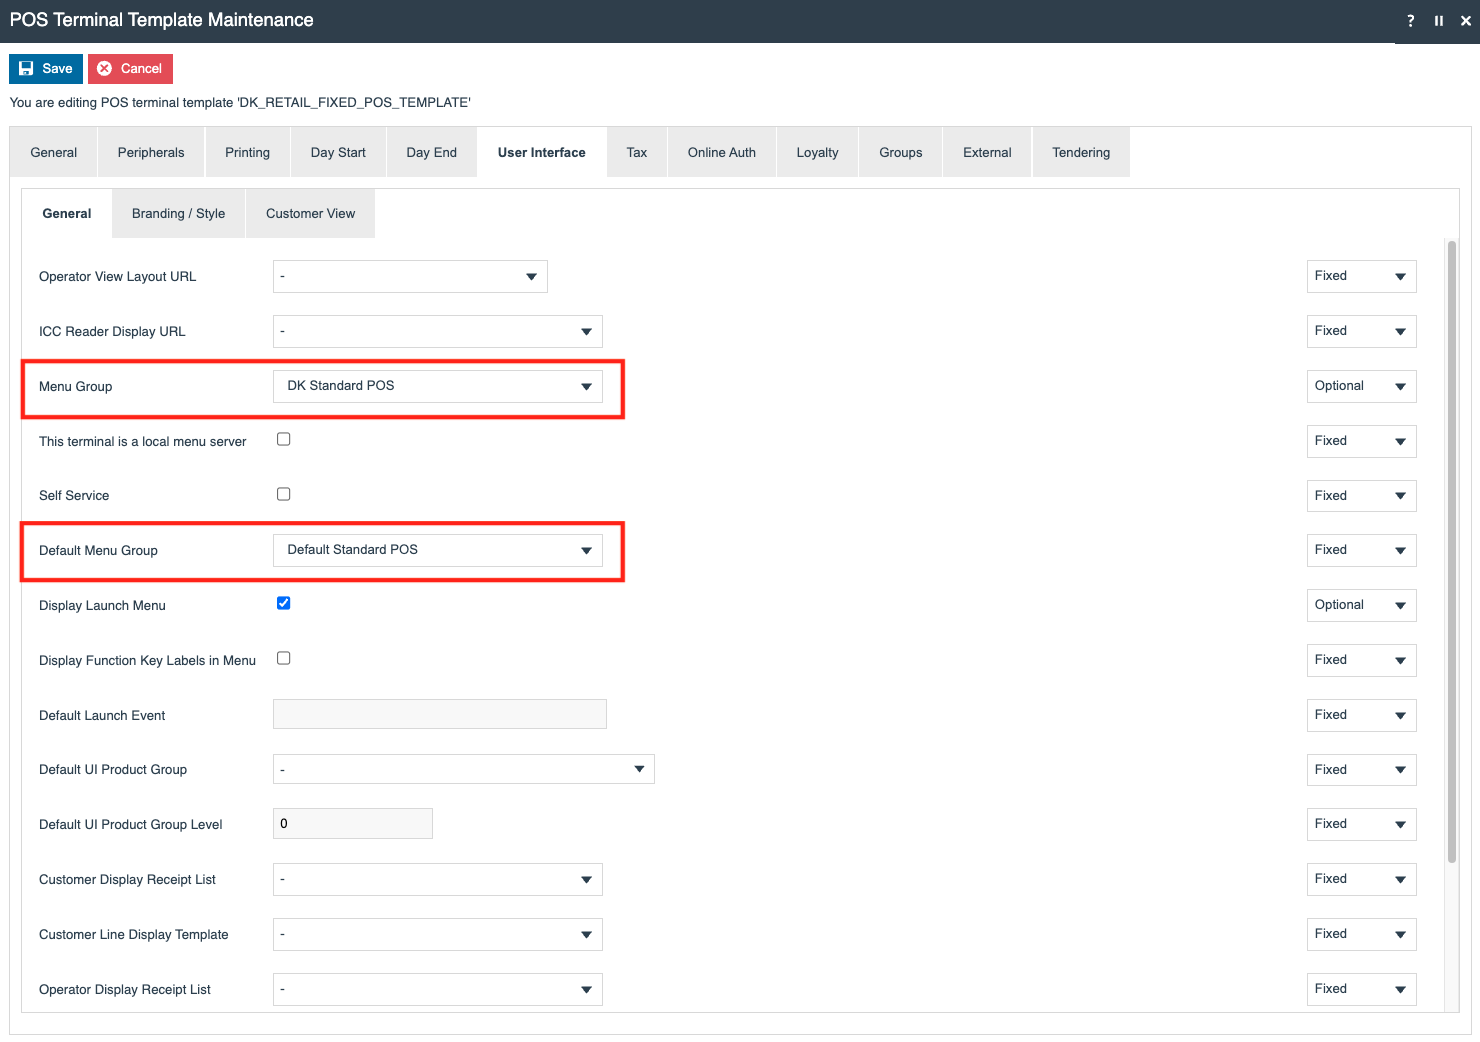
| Field | Example Value | Description |
|---|---|---|
| Menu Group / Default Menu Group | DK POS | Drives the menus displayed for this device type ('POS'). Setting the default to standard POS provides a common set of menus for multiple countries. |
This completes the POS Terminal Template configuration.
If peripherals are different between countries, include those changes in the POS Terminal Template. Individual POS terminals and devices will need to be configured - this data is generally integrated into Enactor.
Roles
The User Role configuration element provides a convenient intermediary for grouping together logically related software access Permissions, which may then be associated with one or more Users who require them. The Permissions available to associate with a Role are identified with elements embedded in the software.
It's recommended that roles are created at the All Region level. However, if you want more granular control over functionality in specific countries, you may decide to create new roles - this can be done by copying existing roles as a template or creating the role from scratch.
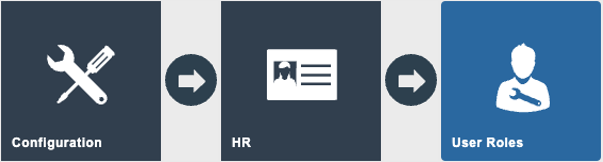
On the Estate Manager, navigate to User Roles configuration using the Search or the path shown below.
Main Menu > Configuration > Organisation > User Roles
Select a region that already has the roles/privileges configured closest to those in the new country being configured.
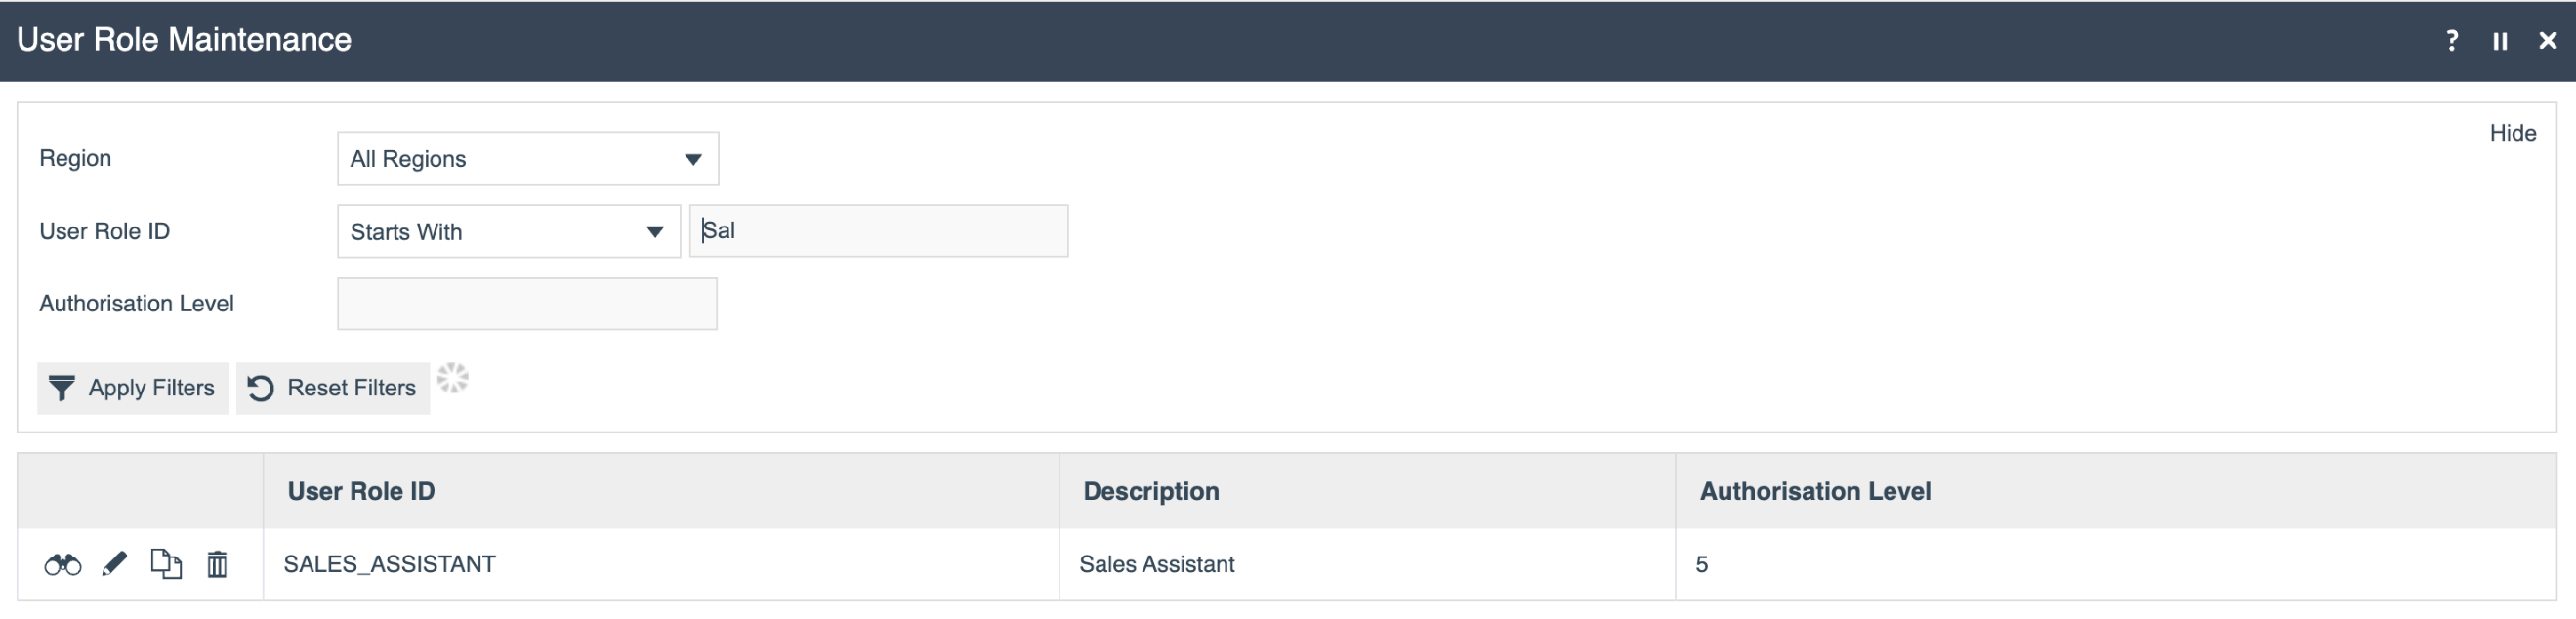
Select the copy icon to copy the selected role, and change the region to the country being created - in this example, Denmark is selected.
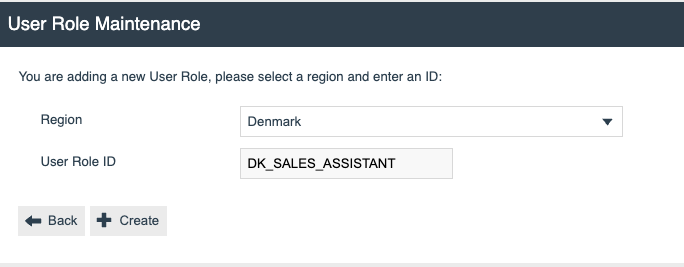
| Field | Example Value | Description |
|---|---|---|
| Region | Denmark | Selected from a drop-down list of all configured Regions. |
| User Role ID | DK_SALE_ASSISTANT | Alphanumeric; maximum 20 characters. Enter a user-defined, unique identifier for the role. |
Changes under the General tab:
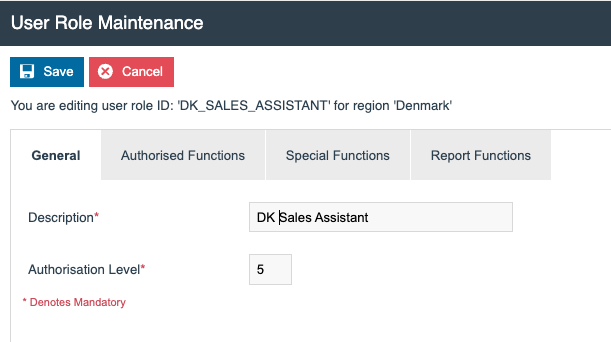
| Field | Example Value | Description |
|---|---|---|
| Description | DK Sales Assistant | Maximum 30 alphanumeric characters. Enter a user-friendly, meaningful value by which users will identify and select the role in other UIs. Use of a systematic, business-specific naming convention is recommended. |
| Authorisation Level | 5 | Numeric value; enables this role to be ranked against others, range 0-100. |
Navigate to the Authorised Function tab to update the available configured functions, if required.
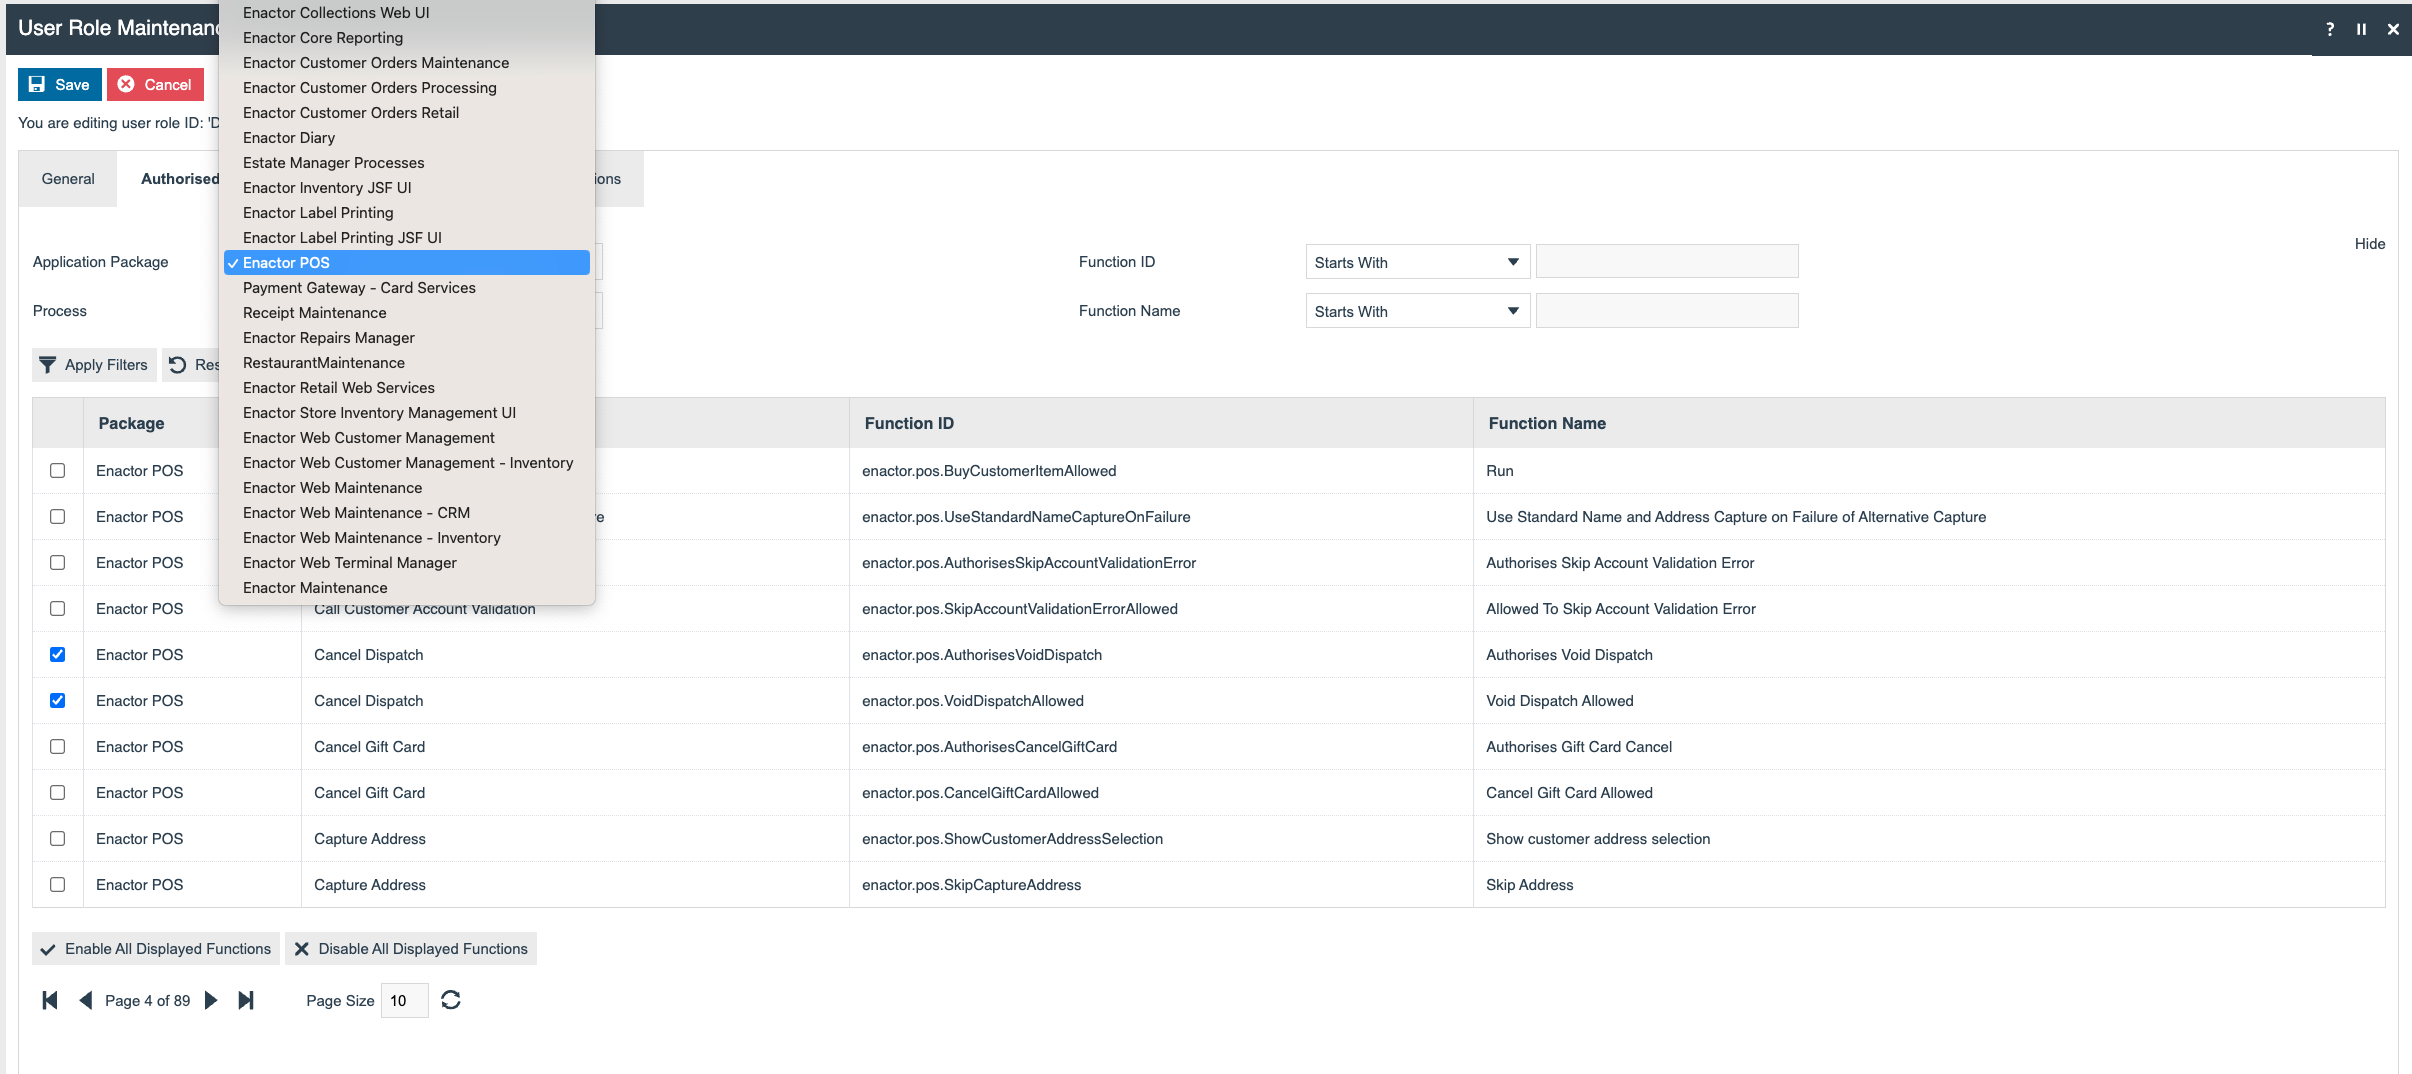
| Field | Description |
|---|---|
| Packages | Selected from a drop-down list of available packages, e.g. Enactor Web Maintenance. The various applications of the Enactor retail system are organised into Packages. |
| Processes | Drop-down selection from a list of all available Processes defined for the Applications in the Package. |
| Functions | Checkboxes which, if checked, indicate the Function is enabled for this Role. A fixed set of Functions and checkboxes is presented for the selected Process. Convenience options are available to select or unselect all Function checkboxes for the selected Process. |
Repeat these steps for any additional roles that might need to be created, and save changes.
This completes the Roles configuration.
User Templates
The User Template configuration is maintained using the User Template Maintenance function described below.
On the Estate Manager, navigate to User Templates configuration using the Search or the path shown below.
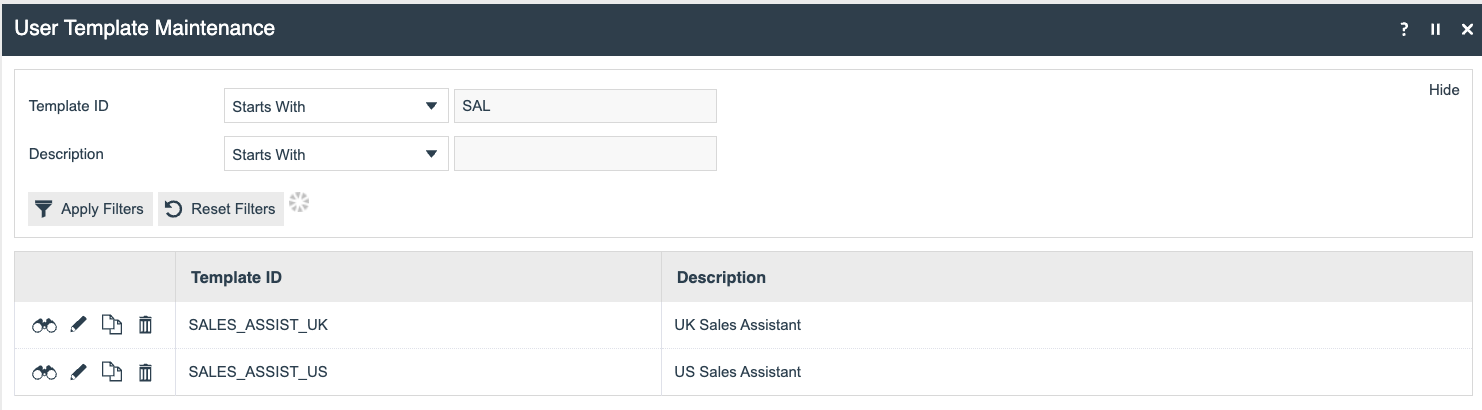
Main Menu > Configuration > Organisation > User Templates
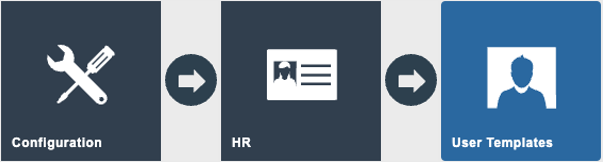
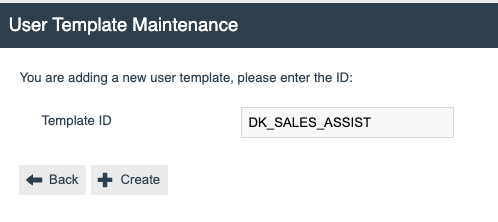
Select the copy icon to copy an existing user template, or create a new one from scratch - this guide assumes you are taking a copy, as most values will be common across different countries.
| Field | Example Value | Description |
|---|---|---|
| Template ID | DK Sales Assistant | Alphanumeric; maximum 20 characters. Enter a unique template ID. |
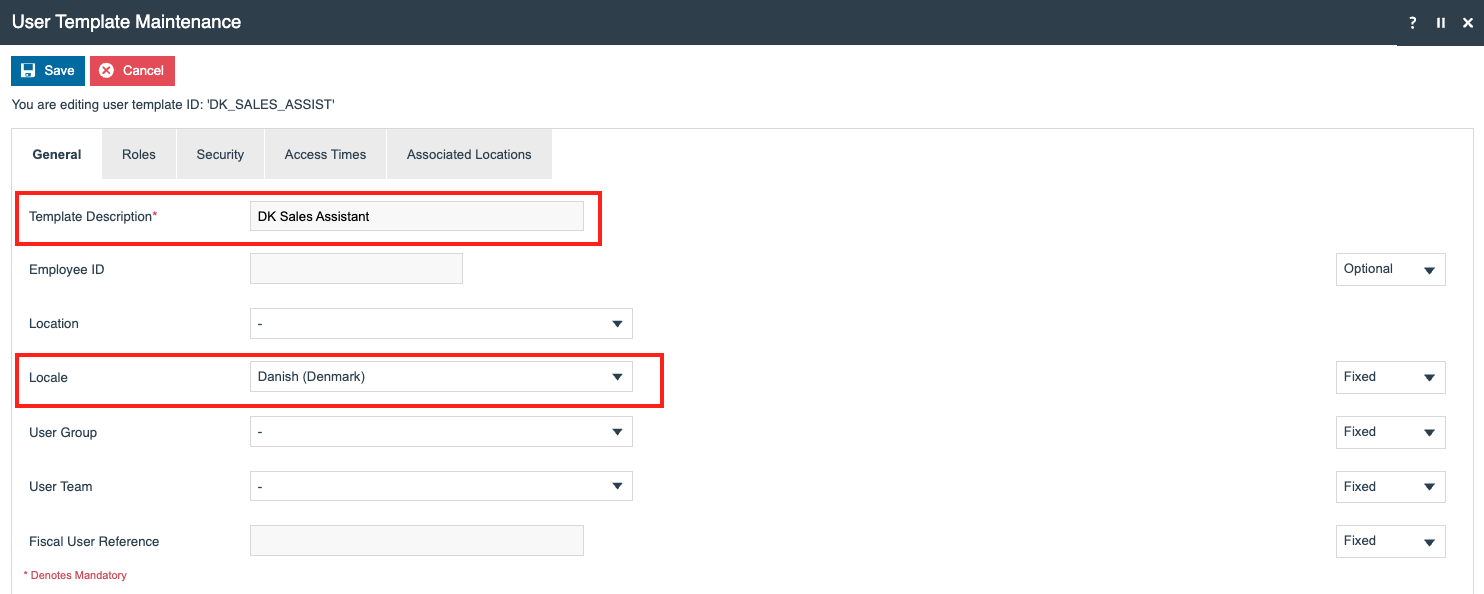
Changes under the General tab:
| Field | Example Value | Description |
|---|---|---|
| Template Description | DK Sales Assistant | Maximum 30 alphanumeric characters. Enter a user-friendly, meaningful value by which users will identify and select the role in other UIs. Use of a systematic, business-specific naming convention is recommended. |
| Locale | Danish (Denmark) | Primary language for a country. If a country has different languages across the region, the locale should be configured at the location, not the location template. |
Changes under the Roles tab:
If the roles are configured at the All Region level, no additional changes are needed to the selected roles. However, if you have created a new set of roles specific to the country being configured, select these in the Roles tab.
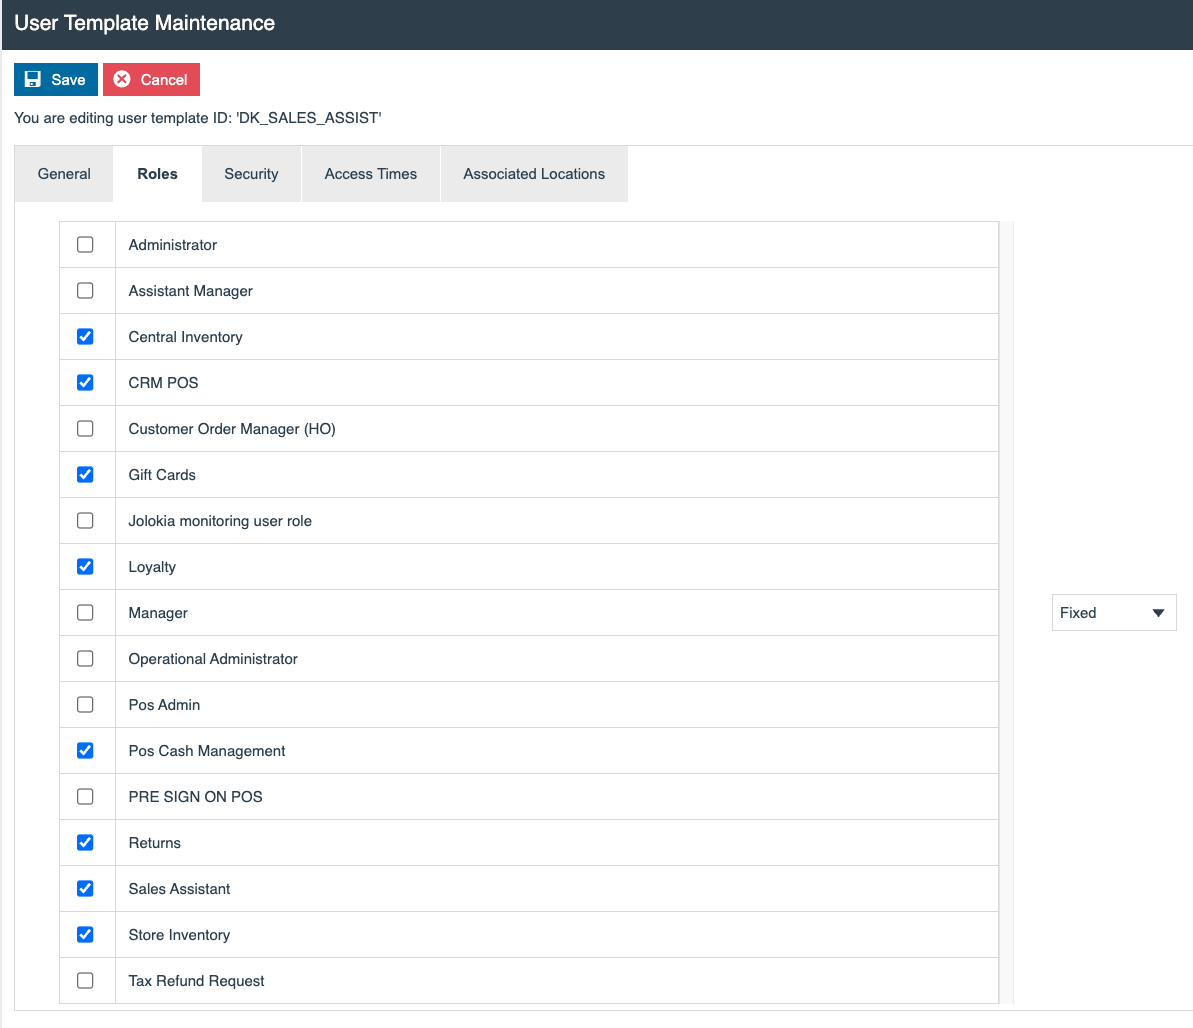
Repeat these steps for any additional user templates you need to set up, and save changes.
This completes the User Templates configuration.
Reasons
Reason configuration fundamentally provides the means to capture and record reasons for access to specific application functions, but configuration associated with the selected Reason is also applied. Reasons are defined based on a Reason Type - the Reason configuration and related processing is defined for and in the Reason Type, and the configured values that influence processing are specified for the individual Reasons associated with it.
On the Estate Manager, navigate to Reasons configuration using the Search or the path shown below.
Main Menu > Configuration > Organisation > Reasons
It's very common to have a set of reasons configured at the All Region level that do not require country-specific configuration, such as void reasons.
The reasons listed in the tables below include country-specific configuration, such as value or tender rules. It's recommended that the relevant country-specific reasons are copied into the new country configuration.
Transactional Reasons - all transactional reasons and the country-specific changes required:
| Reason Type | Country Changes |
|---|---|
| Item Discount | General tab: Description, Parent Reason ID (if required). Discount tab: Discount Percentage or Value (driven by discount type). Item Discounts and Transaction Types tabs: overlap rules. |
| Item Return | General tab: Description. Applicable Tenders: country tenders. |
| Overpayment | General tab: Description. |
| Post Transaction Void | General tab: Description. |
| Receipt Return | General tab: Description. Return tab: rules related to return. |
| Transaction Discount | General tab: Description, Parent Reason ID (if required). Discount tab: Discount Percentage or Value (driven by discount type). Item Discounts and Transaction Types tabs: overlap rules. |
Cash Management Reasons - all cash management reasons and the country-specific changes required:
| Reason Type | Localised Changes |
|---|---|
| Expense | General tab: Description. Applicable Tenders: select the targeted country's cash tender. |
| Income | General tab: Description. Applicable Tenders: select the targeted country's cash tender. |
| Terminal Cash Up | General tab: Description. Applicable Tenders: select the targeted country's cash tender. |
| Terminal Float | General tab: Description. Applicable Tenders: select the targeted country's cash tender. |
| Terminal Pick Up | General tab: Description. Applicable Tenders: select the targeted country's cash tender. |
This completes the Reasons configuration.
Tenders
Tenders configuration provides the means to authorise, enable, and control the conduct of payment options, and to accommodate diverse Tender types in Cash Management. The various forms of payment that may be accepted in transactions - currently Cash, Card, Cheque, Credit, Gift Card, Customer Account, Employee Account, Credit Note, Voucher, Loyalty Account, PayPal, and Payment Service - are all identified by Tenders configuration.
On the Estate Manager, navigate to Tenders configuration using the Search or the path shown below.
Main Menu > Configuration > Financial > Tenders
Select the copy icon to copy the tenders from the current region - this inherits the common configuration and the country-specific configuration that will need to be updated. Change the region to the country being created.
The example below demonstrates configuring the new cash tender.
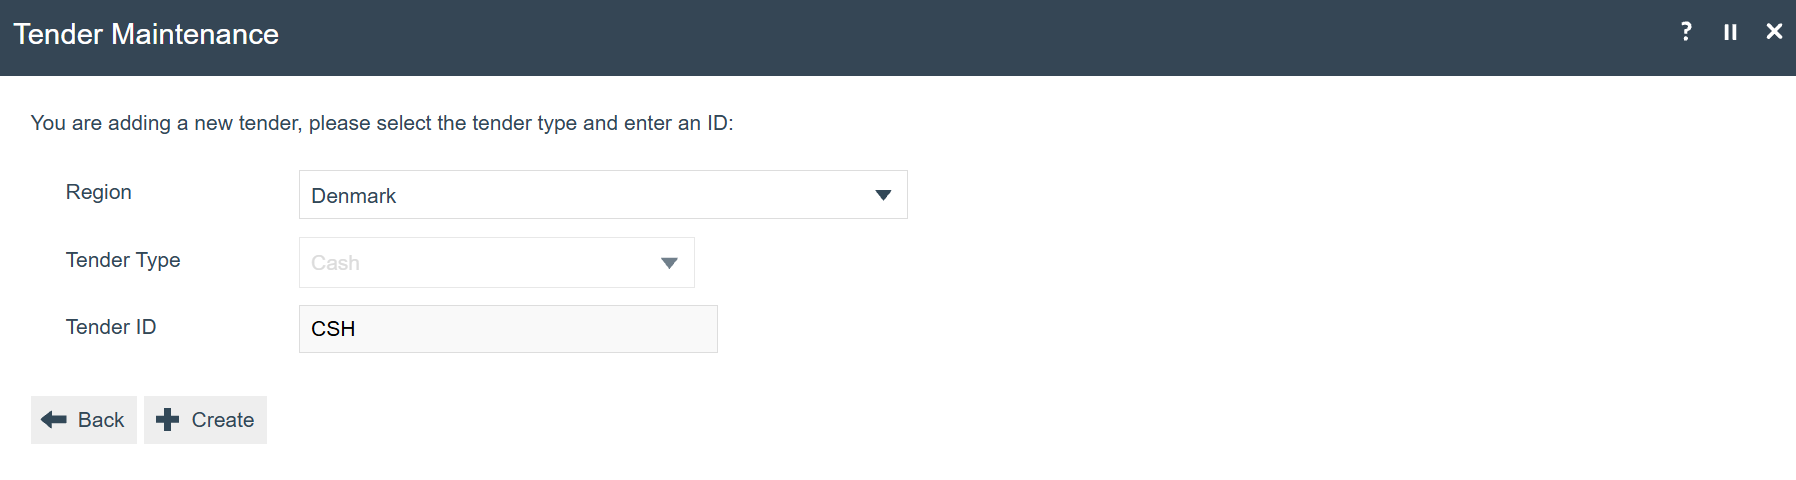
| Field | Example Value | Description |
|---|---|---|
| Region | Denmark | Select from a drop-down list of all configured Regions. |
| Tender Type | Cash | Select from a drop-down list of fixed options: Cash, Card, Cheque, Credit, Gift Card, Credit Note, Voucher, Payment Service. This option is non-selectable if copied from an existing tender. |
| Tender ID | CSH | Alphanumeric; maximum 20 characters. Enter a user-defined but unique identifier. |
Changes under the General tab:
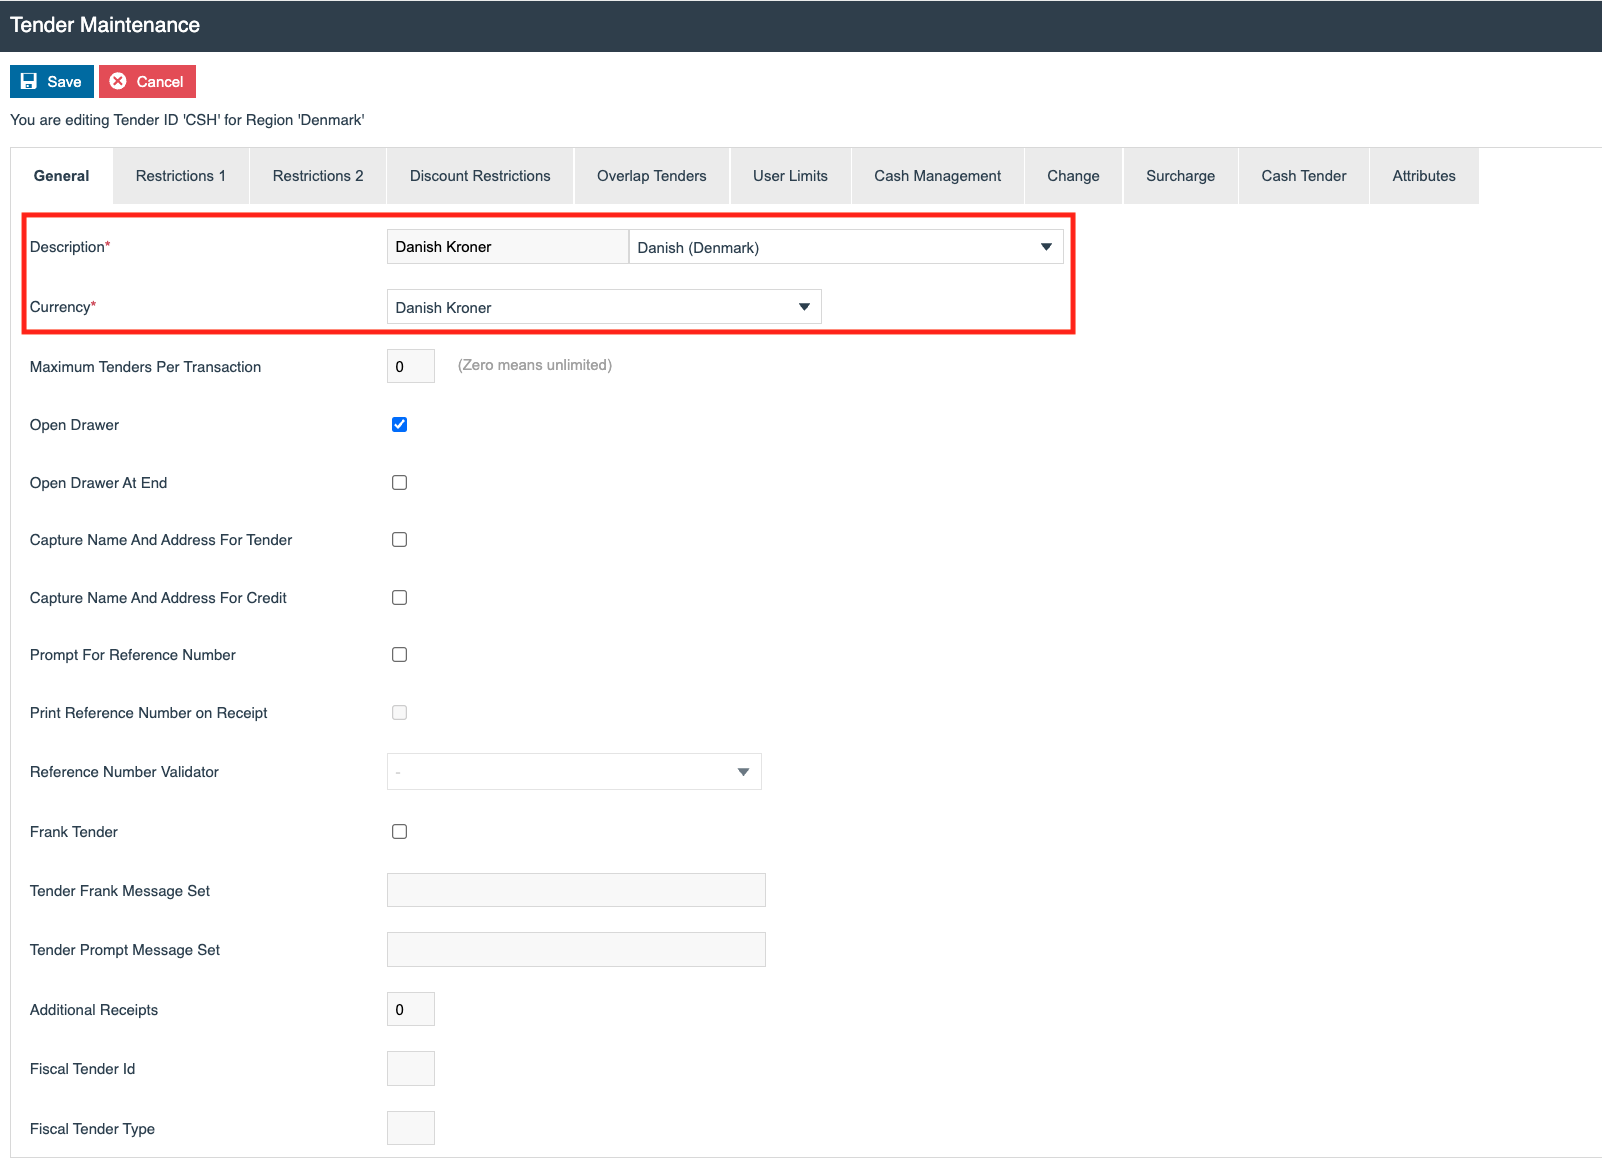
| Field | Example Value | Description |
|---|---|---|
| Description | Danish Kroner | Alphanumeric; maximum 30 characters. Enter a user-friendly description against the appropriate locale. |
| Currency | Danish Kroner | Selection from a drop-down list of all configured Currencies. |
Changes under the Restrictions 1 tab:
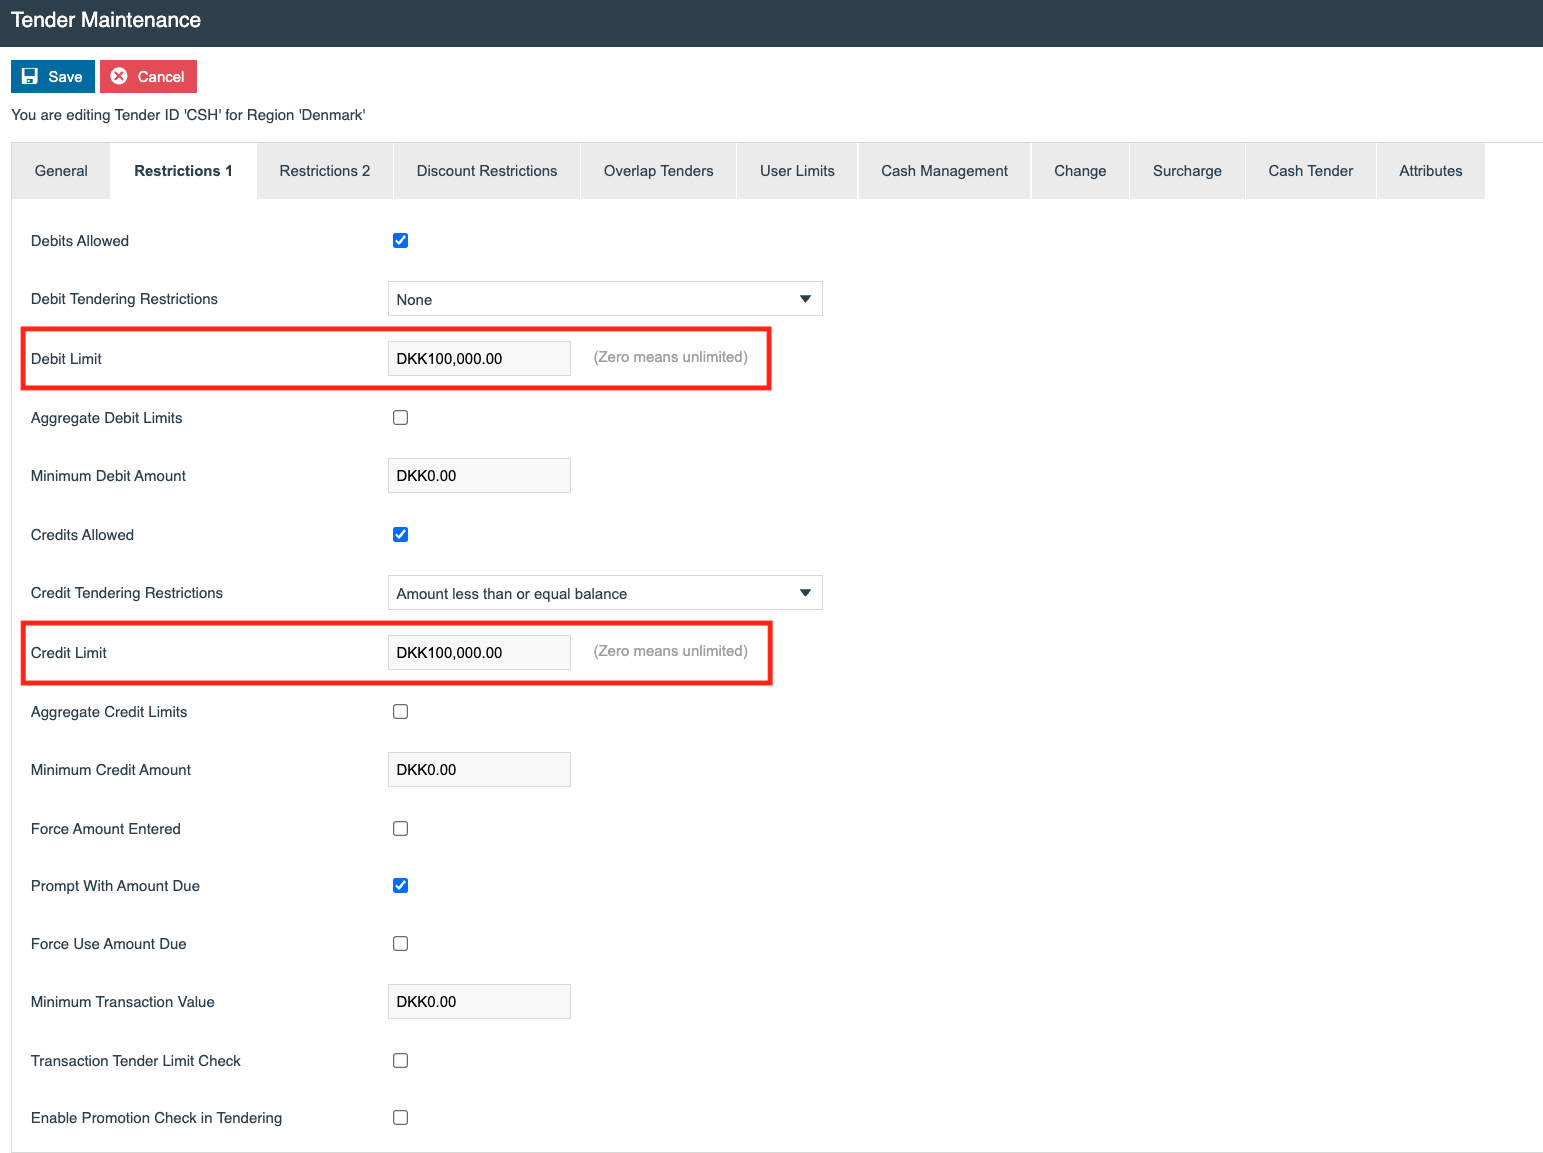
| Field | Example Value | Description |
|---|---|---|
| Debit Limit | 100,000 | Numeric value; range 0-9999999999. Maximum amount that may be paid using this tender (zero means unlimited). |
| Credit Limit | 100,000 | Numeric value; range 0-9999999999. Specifies a threshold amount below which this tender cannot be used for full or part payment. |
Changes under the Restrictions 2 tab:
This section should be configured after all tenders have been created.
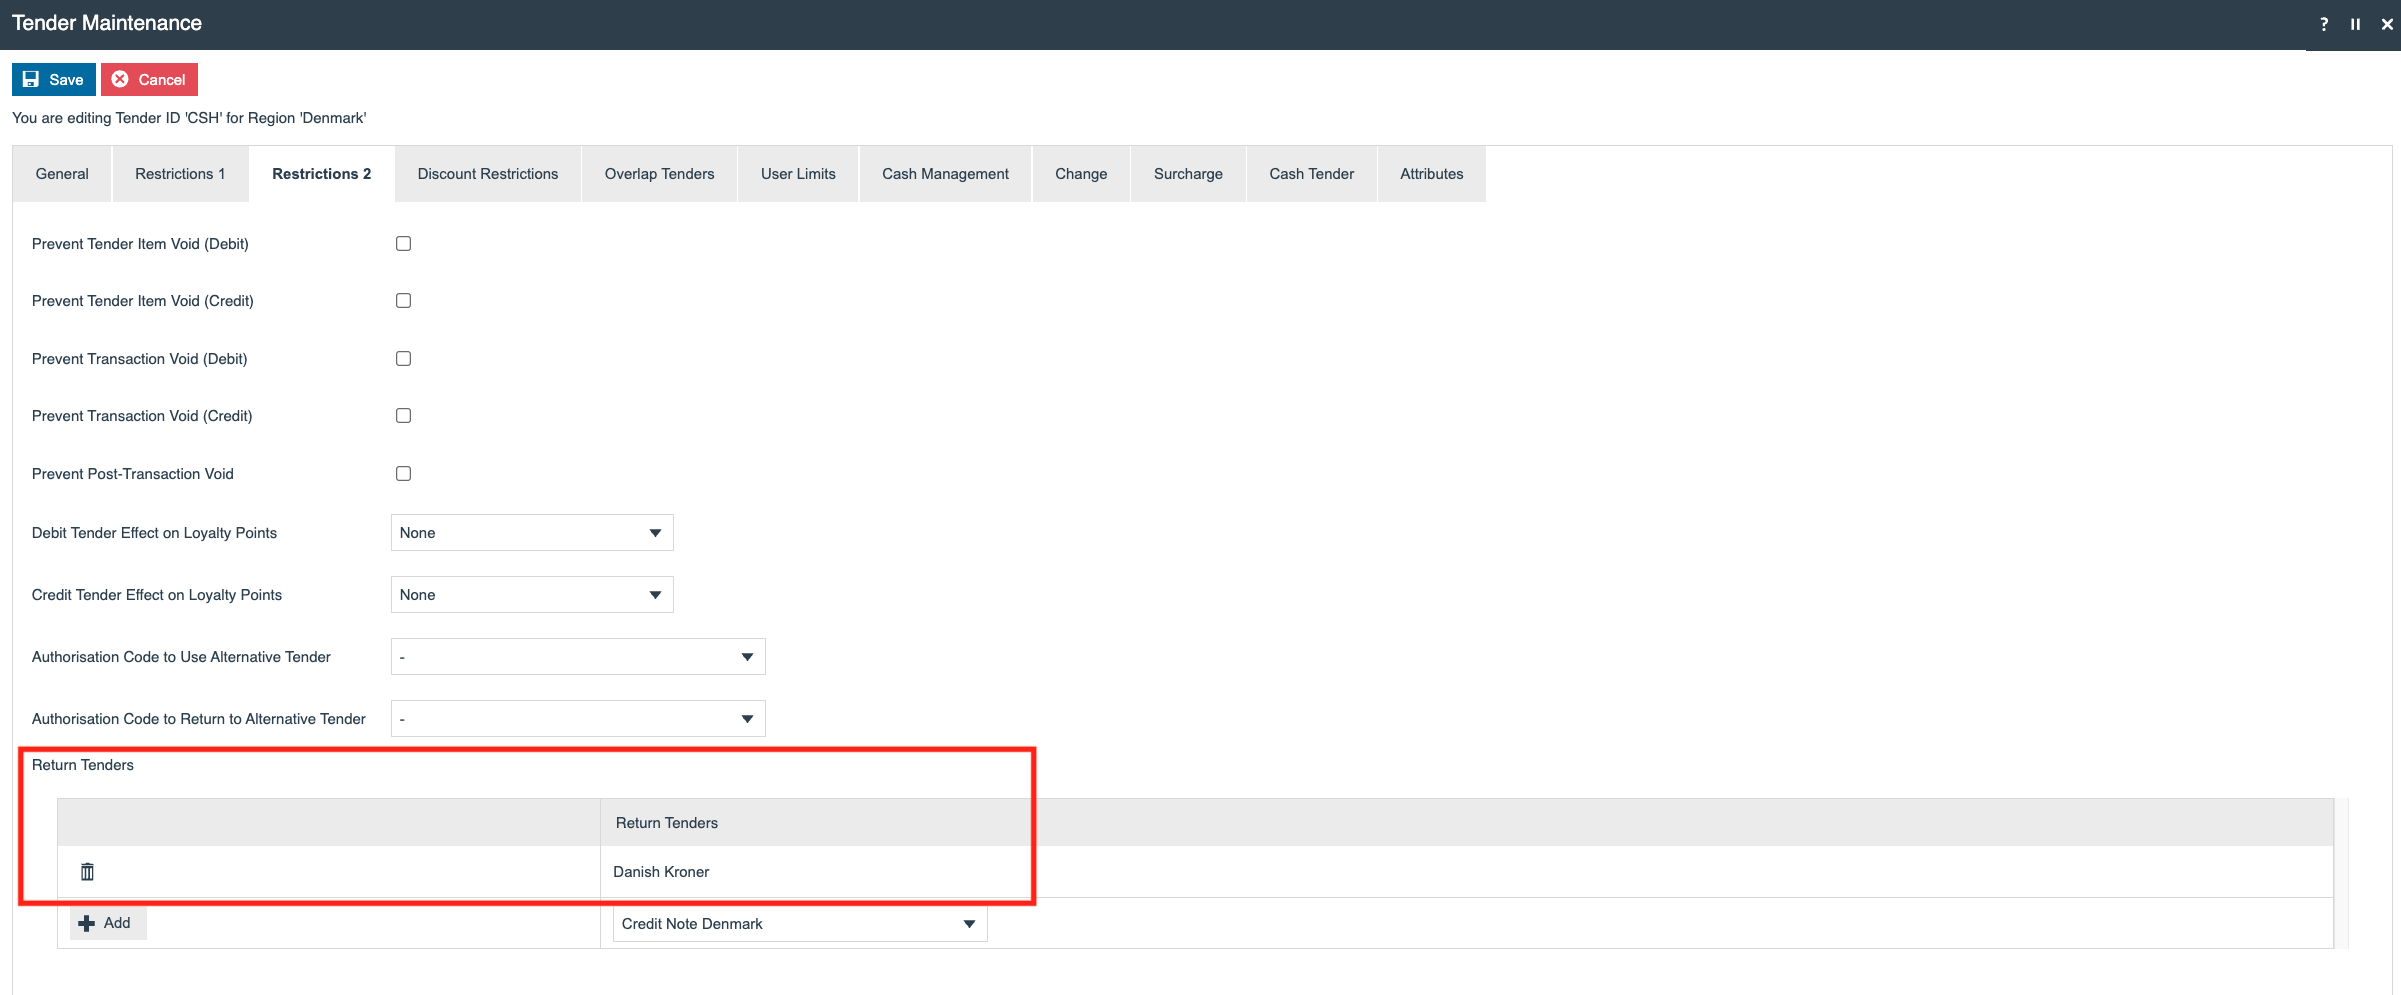
| Field | Example Value | Description |
|---|---|---|
| Return Tenders | Danish Kroner | Select the sequence in which the return tender is shown, and the applicable return tenders. |
Changes under the Cash Management tab:
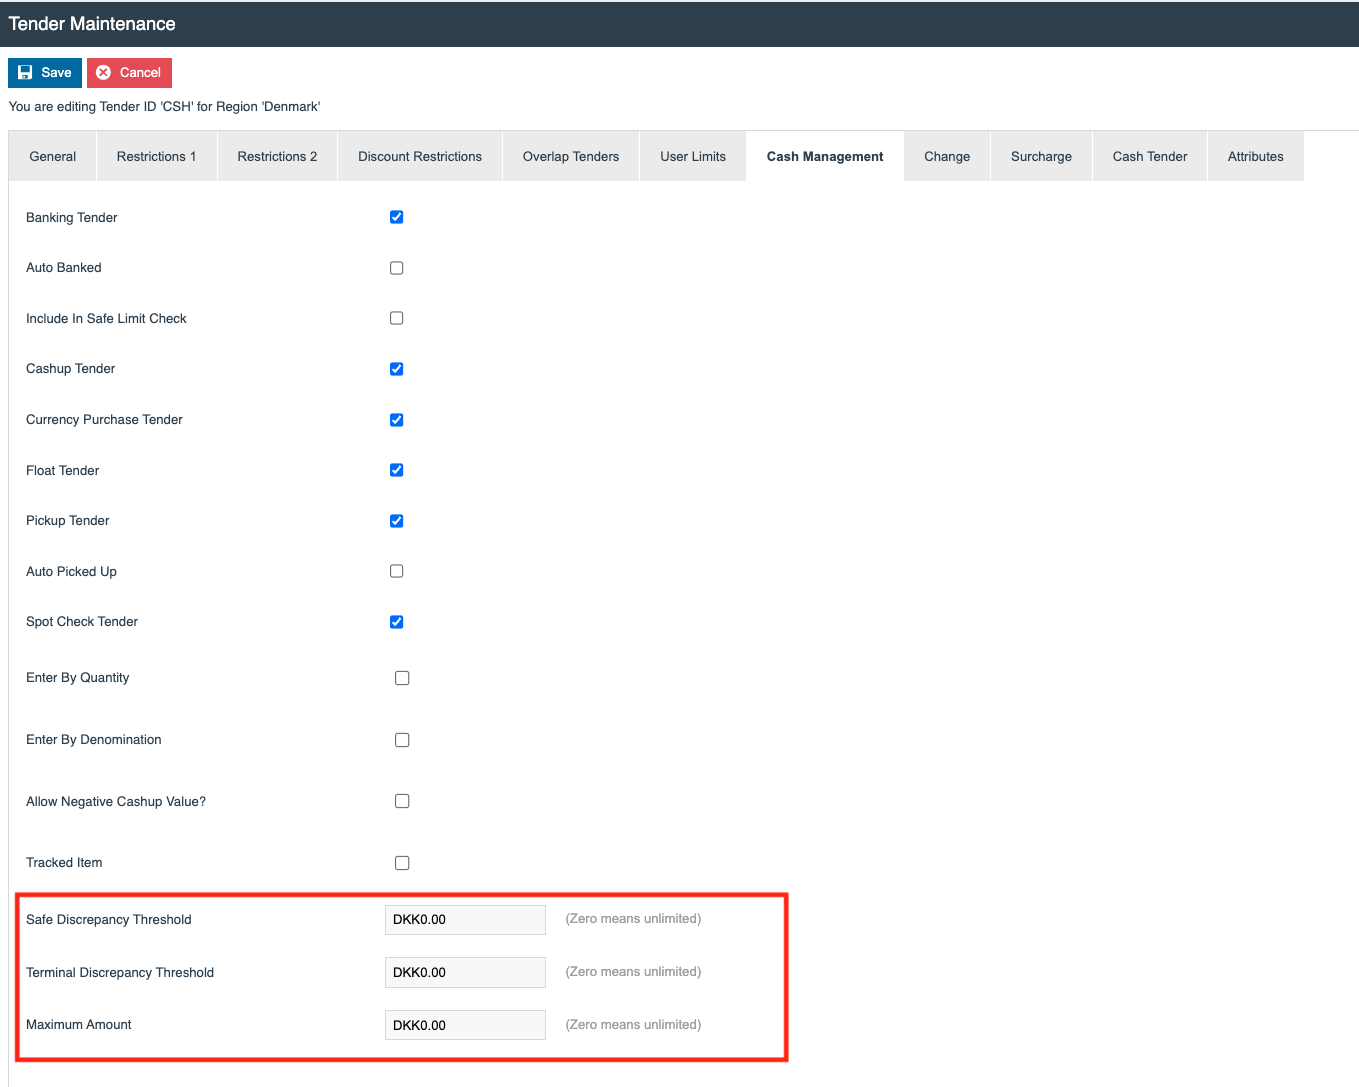
| Field | Description |
|---|---|
| Safe Discrepancy Threshold | Acceptable value for the safe discrepancy when completing the safe cash-up. |
| Terminal Discrepancy Threshold | Acceptable value for the terminal discrepancy when completing the terminal cash-up. |
Changes under the Change > General tab:
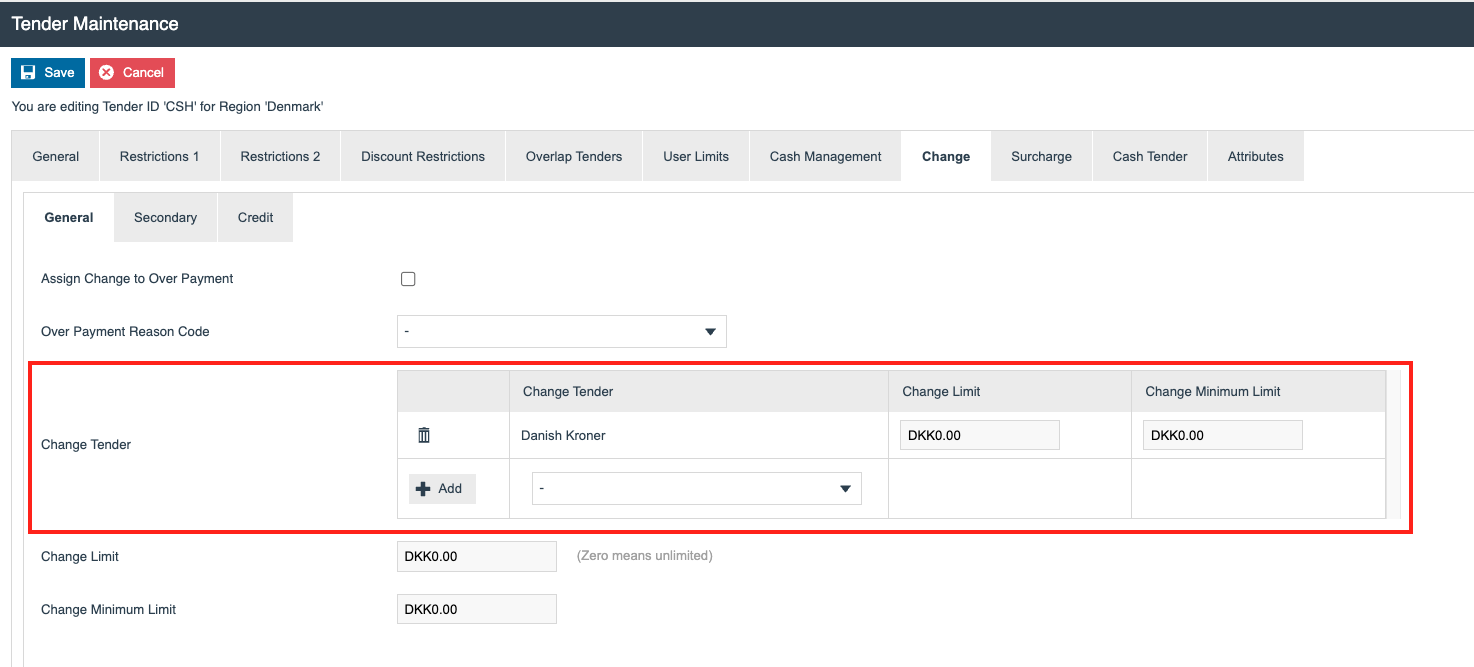
| Field | Example Value | Description |
|---|---|---|
| Change Tender | Danish Kroner | Selection from a drop-down list of all Tenders configured for the same Region. If not specified, the primary change type defaults to the Tender type itself. |
| Change Limit | 0.00 | Numeric value; range 0-9999999999. Specifies a maximum value on the amount of change that may be issued using this tender when accepting it as payment. A limit of zero means no limit. When exceeded, remaining change is assigned to the secondary change tender if specified, otherwise to overpayment. All limits are applied in the currency of the selected change tender. |
| Change Minimum Limit | 0.00 | Numeric value; range 0-9999999999. Specifies a minimum value on the amount of change that may be issued when accepting payment using this tender. |
This is the most common set of changes across the different tender types. Additional changes might be required depending on the region and different financial rules. Repeat these steps for all of the required tenders.
This completes the Tenders configuration.
Menus
Menus are constructed based on a set of basic tasks selected from a Menu Set, specific to an Application, associated with a Menu Group and Role for access, and identified to the software by a Menu ID.
Navigate to Menu Maintenance using the Search or the path shown below.
Main Menu > Configuration > Organisation > Menus
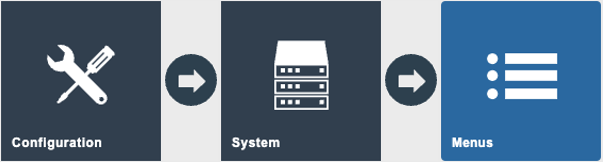
Described below is the full set of menus that may need to be configured for the new country. In some cases, menus might be shared across different regions, and button labels are translated using Application Translations maintenance in the Estate Manager.
| Menu ID | Specific Country Changes |
|---|---|
| ADMIN | N/A |
| CREDIT_TENDER | Applies to all menu events. Visibility Expression: Tender ID changed to the targeted country ID. Data tab > Tender ID changed to the targeted country tender ID. |
| DISPLAY_REPORTS | N/A |
| MODIFIER_ITEM | N/A |
| LAUNCH | N/A |
| NONSALE | N/A |
| PRINT_REPORTS | N/A |
| RECEIPT_DESTINATION | N/A |
| RICH_PRODUCT | Applies to all menu events. General tab: button labels require translation. Data tab > Tender ID: Region ID changed to the ISO 2-character country code. |
| SALE | N/A |
| TENDER | Applies to all menu events. Visibility Expression: Tender ID changed to the targeted country ID. Data tab > Tender ID, if tender IDs are unique in each configured country. |
| TERMINAL_CASH_MANAGEMENT | N/A |
This completes the Menus configuration.
Gift Card Types
The Gift Card Types function provides for the specification of characteristics, processing, and behaviour of both Gift Cards issued by external Gift Card providers and those issued and managed by the business.
Navigate to Gift Card Types maintenance using the Search or the path shown below.
Main Menu > Configuration > Financial > Gift Card Types
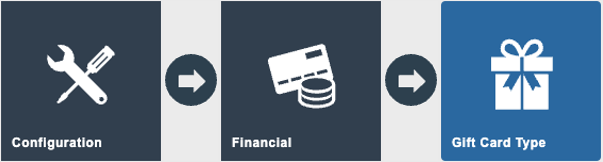
Select the copy icon to copy the Gift Card Type from the source region - this inherits the common configuration and country-specific configuration that will need to be updated. Change the region to the country being created - in this example, Denmark is selected.
The example below demonstrates configuring the new gift card type.
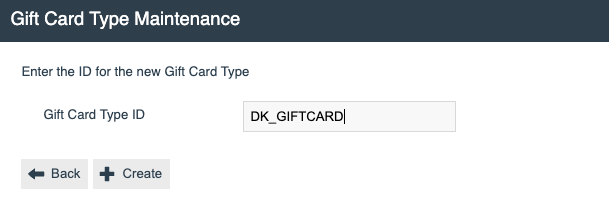
| Field | Example Value | Description |
|---|---|---|
| Gift Card Type ID | DK_GIFTCARD | Alphanumeric; maximum 20 characters. Enter a user-defined but unique identifier. |
Changes under the General tab:
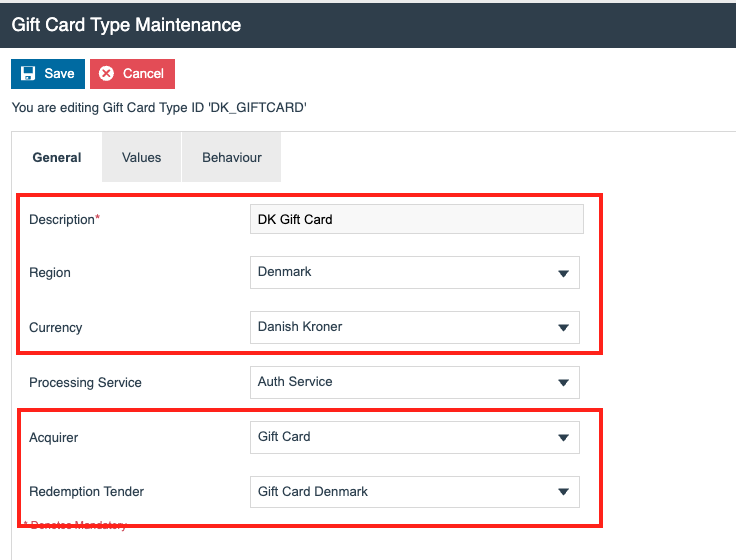
| Field | Example Value | Description |
|---|---|---|
| Description | DK Gift Card | Alphanumeric; maximum 20 characters. Enter a user-defined but unique identifier. |
| Region | Denmark | Selected from a drop-down list of all configured Regions. |
| Currency | Danish Kroner | Selected from a drop-down list of all configured Currencies. |
| Redemption Tender | Gift Card Denmark | Selected from a drop-down list of all configured Gift Card Tenders. |
This completes the Gift Card Types configuration.
Credit Notes Types
Credit Notes provide a form of Refund Tender and may be configured in a variety of Credit Note Types defined for retailer requirements and used for different purposes. They are serial-number-tracked for issue and redemption, in the manner of tracked vouchers.
Navigate to Credit Note Types maintenance using the Search or the path shown below.
Main Menu > Configuration > Financial > Credit Note Types
| Field | Example Value | Description |
|---|---|---|
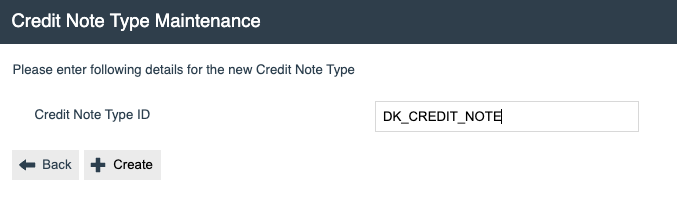
| Credit Note Type ID | DK_CREDIT_NOTE | Alphanumeric; maximum 20 characters. Enter a user-defined but unique identifier. |
| Field | Example Value | Description |
|---|---|---|
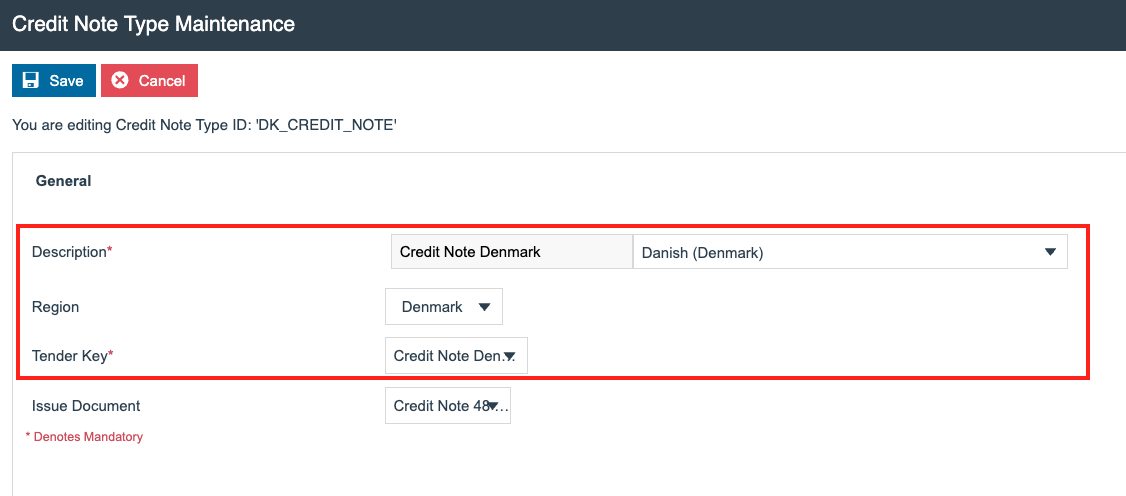
| Description | Credit Note Denmark | Alphanumeric; maximum 20 characters. Enter a user-defined but unique identifier. |
| Region | Denmark | Selected from a drop-down list of all configured Regions. |
| Tender Key | Credit Note Denmark | Selected from a drop-down list of all configured Tenders of type Credit Note. |
This completes the Credit Note Types configuration.