How To Configure Option Set Products
Introduction
This guide explains how to configure an Option Set to support the parent-child relationship for products. It covers adding different types of options and attributes to customise a product or a product range. These are configured and managed through the Attribute / Option Set Maintenance application.
The guide also explains how option sets behave during a sale transaction. The parent product or child product can be configured individually or together with the following capabilities:
- Manual basket-level discounts
- Promotions
- Returns
- Different prices per item
- Single mixed-rate tax calculation per item
- Option sale type per item
The purpose of this guide is to walk you through all the core elements of product option set configuration, from creating merchandise products and product lists through to verifying the result on the POS.
Overview
The following configurations are required to work with product option sets:
- Product - Product Maintenance is where products are configured with all required attributes.
- Product List - A product can be listed according to a specific context and includes a set of properties in common.
- Option Set - The Option Sets function is used to systematically configure parent-child products.
- Product Price - Each product may have a retail price assigned to it.
- Broadcasting - Delivering configuration changes to the POS.
Configuration Steps
Product Maintenance
Products are configured based on a set of specific attributes and characters in the application, identified to the software through a unique Product ID. Product Maintenance provides a list of configurable attributes for a product.
The process to configure an option product type follows all the steps described for a standard merchandise product type.
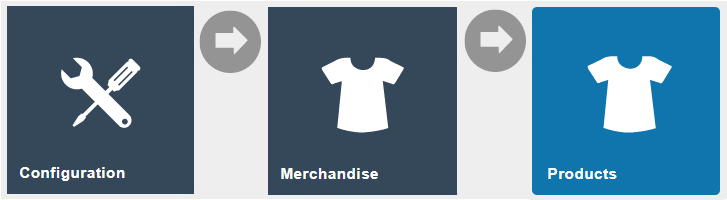
Navigate to Product Maintenance using the Search or the path: Main Menu > Configuration > Merchandise > Products

To create a new option product, select Create a new Product on the Product Maintenance page.
Select Merchandise Product from the Product Type drop-down.
No selection should be made for Template. The creation and use of templates are covered in a separate guide.
Enter a unique Product ID for this product. The ID can be alphanumeric and contain a maximum of 20 characters.
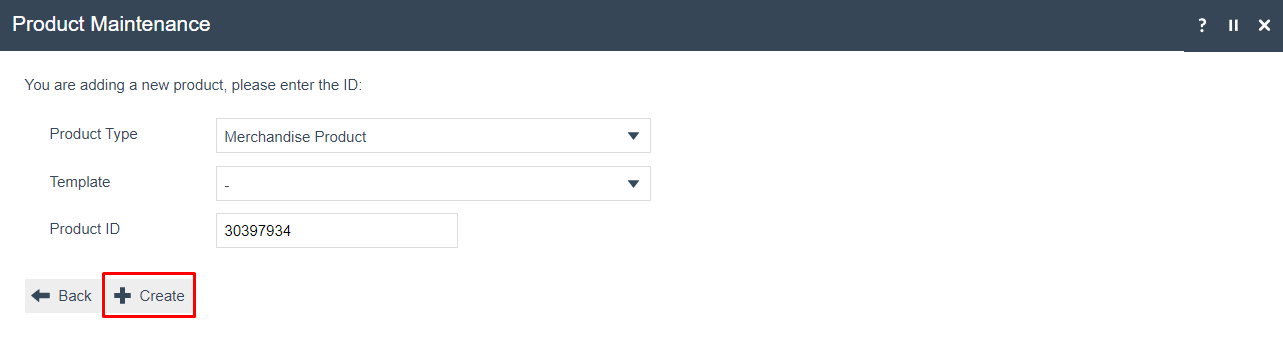
Select Create.
The Product ID cannot be changed once the product has been created.
Several tabs and sub-tabs are presented under Product Maintenance. This guide focuses on the core aspects required to create option products against merchandise products. The key tabs are General, Prices, Selling Options and Tenders.
Product - General - General Sub Tab
The General tab captures the basic identity information for the product.

Set the appropriate values on the General tab as follows:
| Configuration | Description |
|---|---|
| Product Description | Enter a user-friendly name for the product. Alphanumeric, maximum 30 characters. Select the locale from the drop-down list. |
| Product Long Description | Enter an extended description if necessary. Alphanumeric, maximum 30 characters. Select the locale from the drop-down list. |
| Product Long Description URL | Enter a URL pointer to an externally defined, usually HTML-formatted, description of the product. |
| Product Information URL | Enter a URL pointer to an externally defined, usually HTML-formatted, set of information about the product. |
| Image (Preloaded) | Select the ID of an image from the drop-down list. Images are managed through Image Maintenance. |
| Image URL | Add a URL that points to an externally stored image. |
| Product Status | Select an appropriate status: Live (currently available), Discontinued (unavailable), or Suspended (terminated). |
Product - Prices Tab
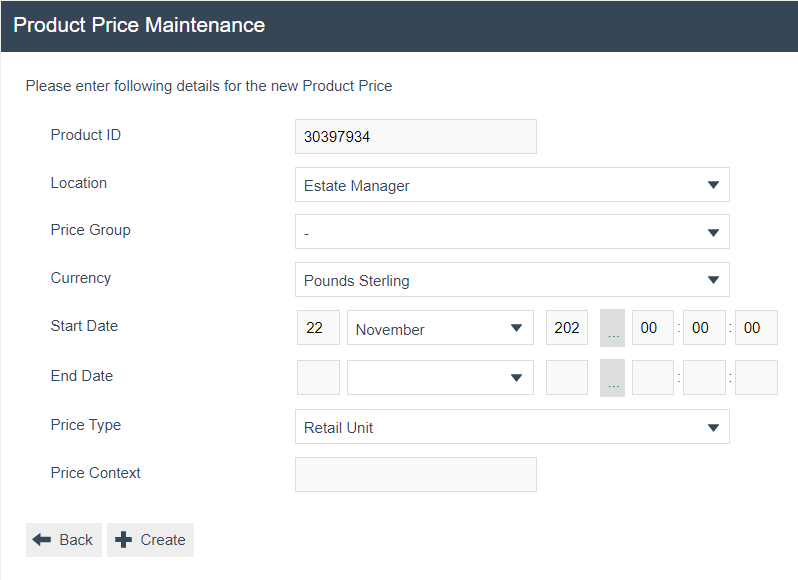
The Prices tab contains all price details for the selected product.
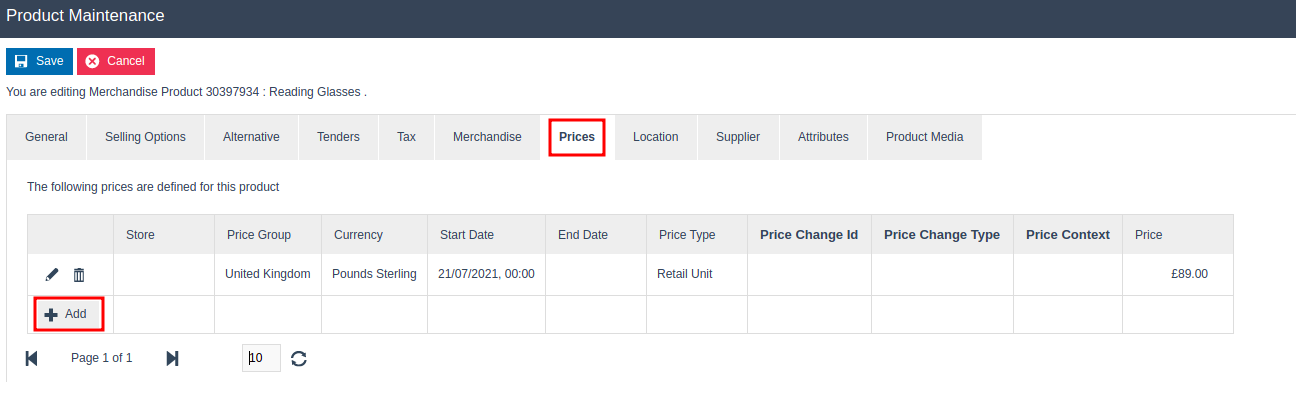
Context pricing can be configured for option products. It is also possible to define a single product with different context prices against different option sets.
To add a context price to a specific product, select Add. You will be navigated to the Product Price Maintenance screen.
Product - Selling Options - Option Sets Sub Tab
The Option Sets sub-tab under Selling Options is where the parent product is linked to its option sets to complete the parent-child configuration.
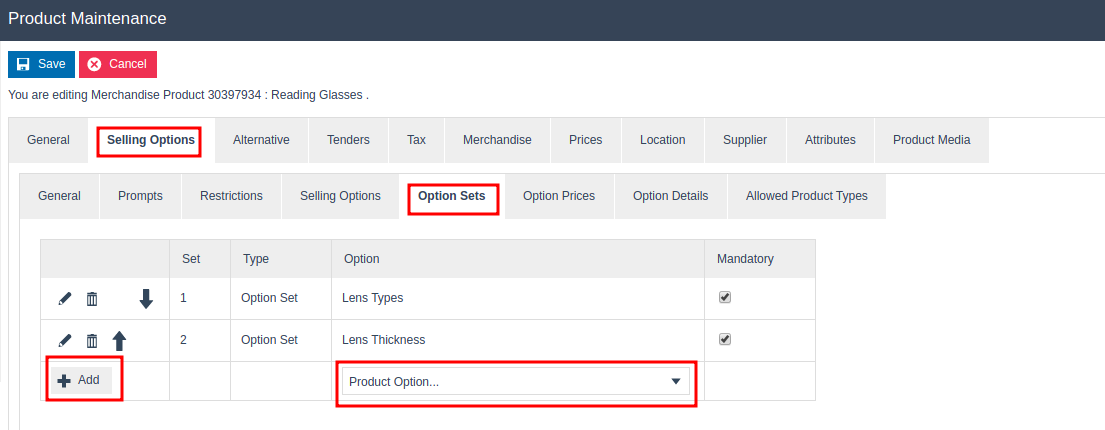
Select the desired option set from the drop-down list that contains all available product options (for example, LENS TYPES, LENS THICKNESS).
Select Add.
The option set drop-down values come from the Attribute / Option Set Maintenance configuration, which is described later in this guide.
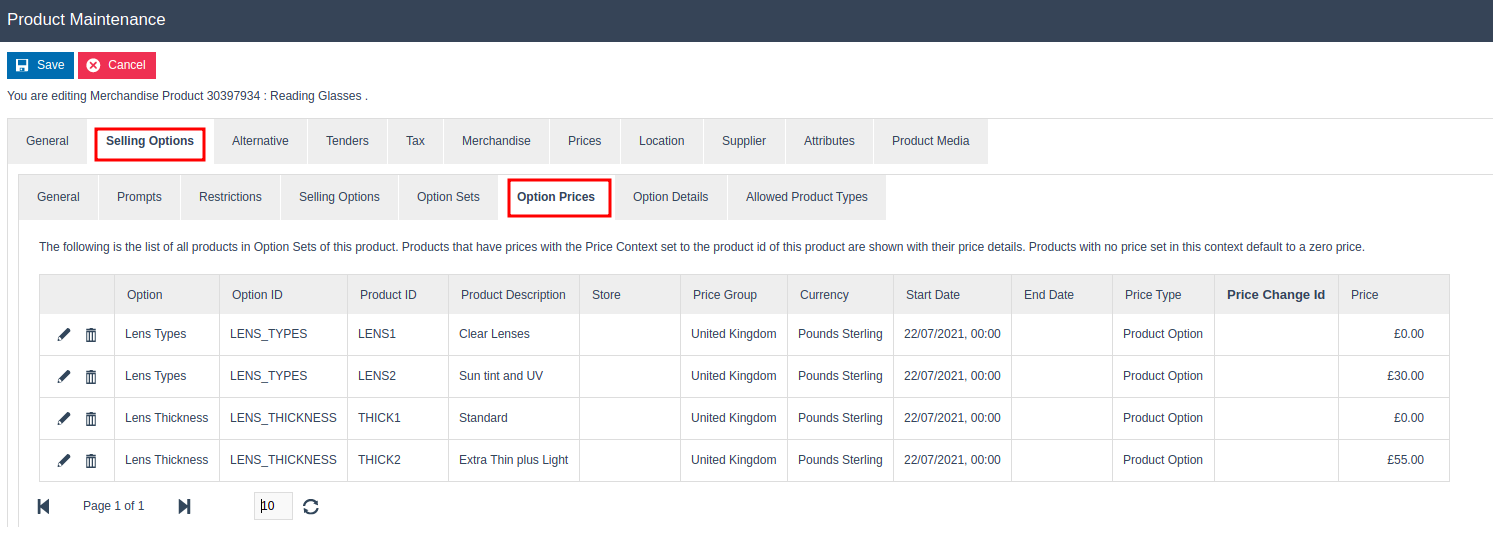
Product - Selling Options - Option Prices Sub Tab
The Option Prices sub-tab is mapped to the child products added to the option sets. Products that have prices with the price context set to the product ID of this product are shown with their price details. Products with no price set in this context default to a zero price.
Product - Selling Options - Option Details Sub Tab
The Option Details sub-tab configures how the parent and child products are handled during a transaction.
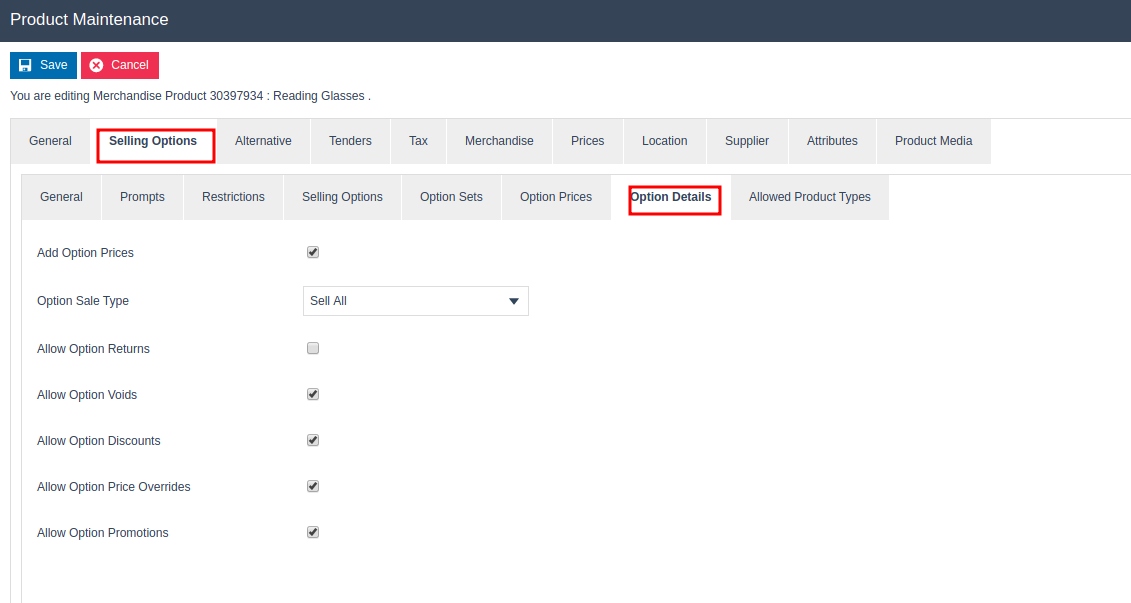
Set the appropriate values on the Option Details tab as follows:
| Configuration | Description |
|---|---|
| Add Option Prices | Tick to indicate that the child product price will be added to the transaction total when the option set is used. |
| Option Sale Type | Select the combination of product options to apply: Sell One or None, Sell One, Sell Multiple or None, Sell Multiple, or Sell All. |
| Allow Option Returns | Tick to allow the parent product to be returned along with the child product. The child product cannot be returned individually. |
| Allow Option Voids | Tick to allow the product to be voided. When a parent product is voided, the child product is automatically voided. This also allows a child product to be voided individually if necessary. |
| Allow Option Discounts | Tick to allow discounts to be configured for the parent/child product individually or for both. |
| Allow Option Price Overrides | Tick to allow price overrides on both parent and child products. |
| Allow Option Promotions | Tick to allow promotions to be configured for the parent/child product individually or for both. |
Product - Tenders Tab
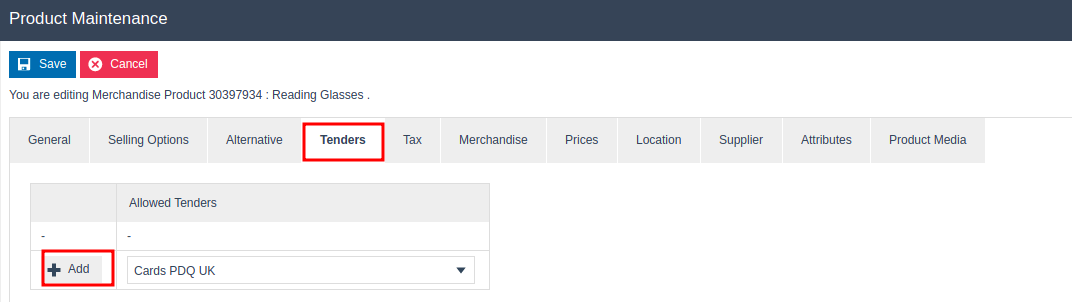
In Product Maintenance, the user can configure which tenders may be used to purchase the product. A list of one or more allowed tenders may be associated with the product.
Select the desired Allowed Tender(s) from the drop-down list and select Add.
This completes the Product Maintenance configuration.
Product List Maintenance
A Product List is a collection of products referenced by an ID and a specific region. Each product ID in the collection is associated with predefined product attributes (also referred to as option sets). These products serve as child products and are used for option set configuration.
Product lists are configured through the Product List Maintenance application.
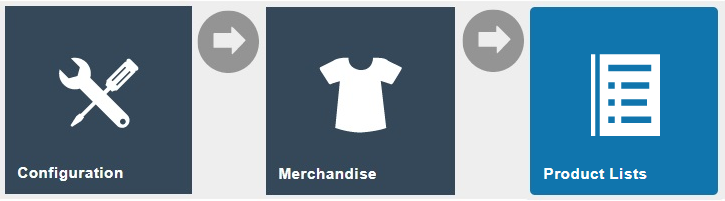
Navigate to Product List Maintenance using the Search or the path: Main Menu > Configuration > Merchandise > Product Lists
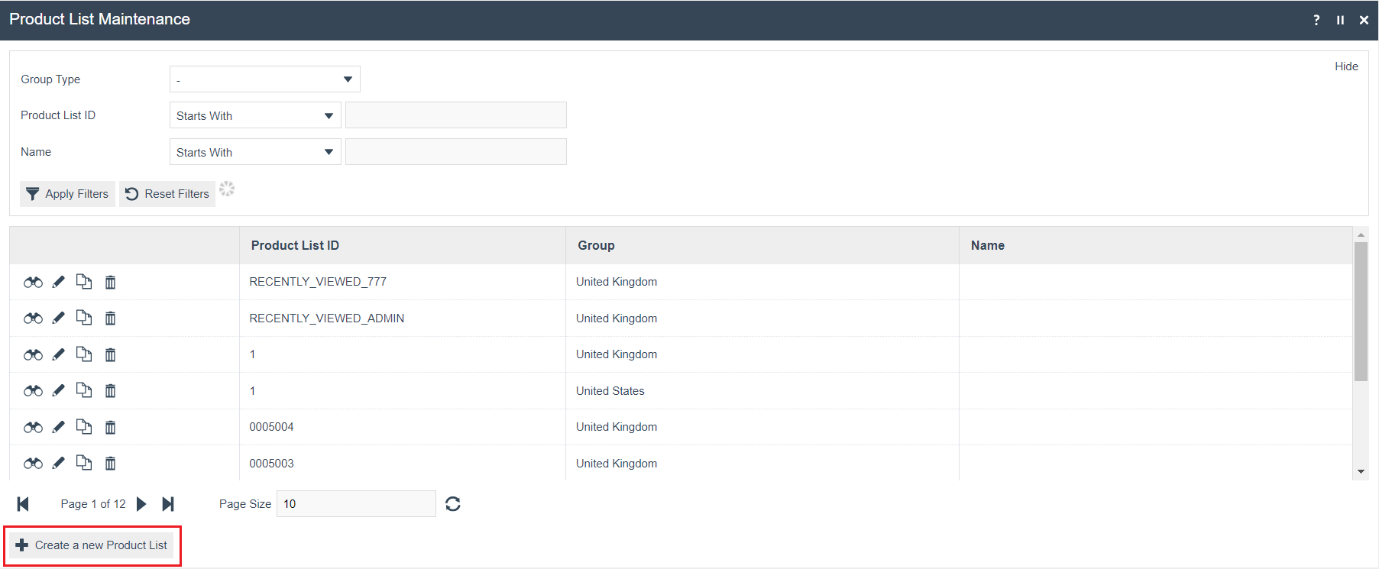
To create a new product list, select Create a new Product List on the Product List Maintenance page.
Enter a unique Product List ID. The ID can be alphanumeric and contain a maximum of 50 characters.
Select the group type Region from the Group Type drop-down.
Select an applicable region from the Group drop-down in which the POS terminal is configured. You may select All Regions.
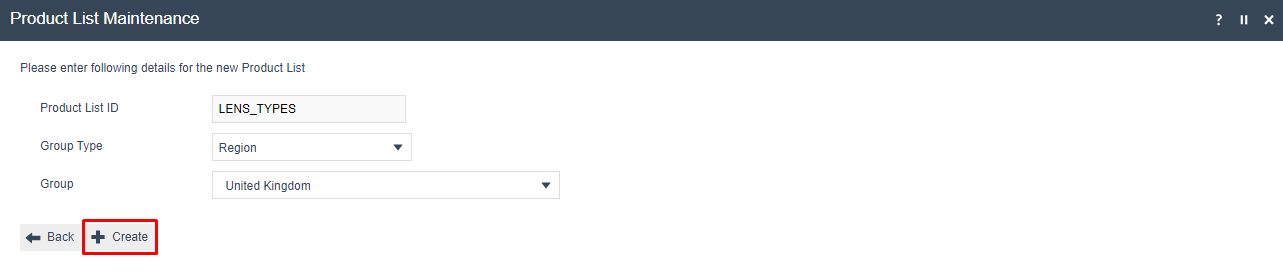
Select Create.
The Product List ID cannot be changed once the product list has been created.
Product List - General Tab

Set the appropriate values on the General tab as follows:
| Configuration | Description |
|---|---|
| Name | Enter the product list name. Alphanumeric, maximum 40 characters. This name is displayed in screens and other configuration options. The name is locale-dependent - select the appropriate locale from the drop-down list. |
Product List - Items Tab
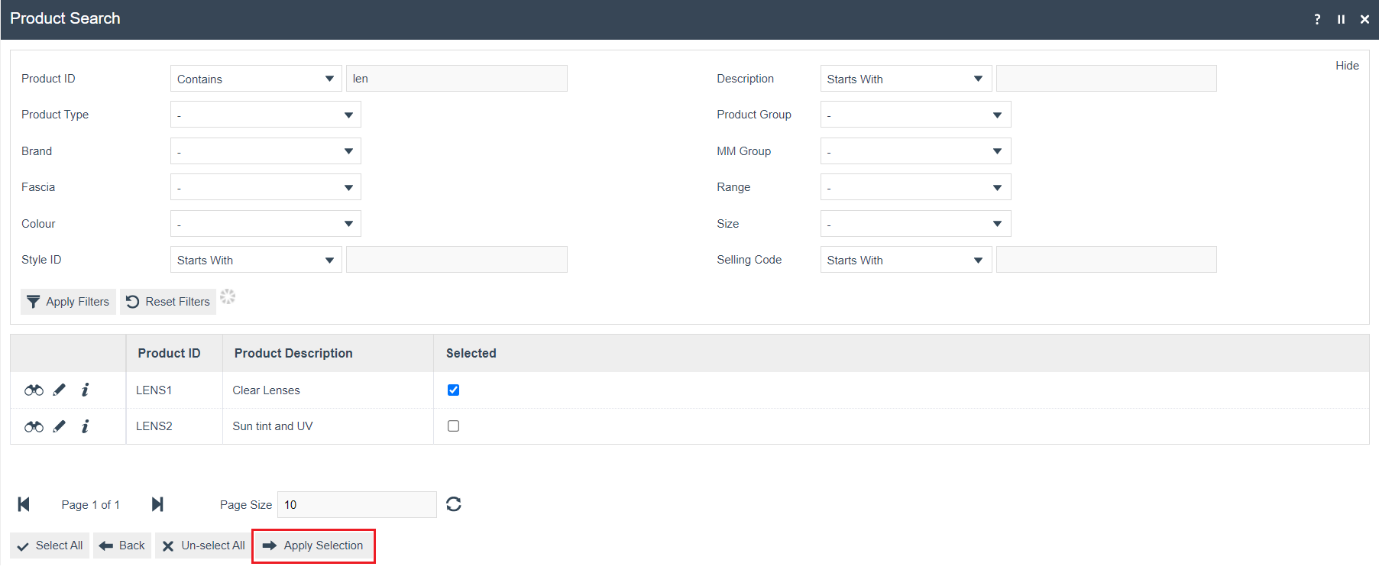
The Items tab is used to build and maintain the product list - an ordered list of product IDs. For each product, either enter the Product ID directly or use the search icon to access Product Maintenance and select the required product.
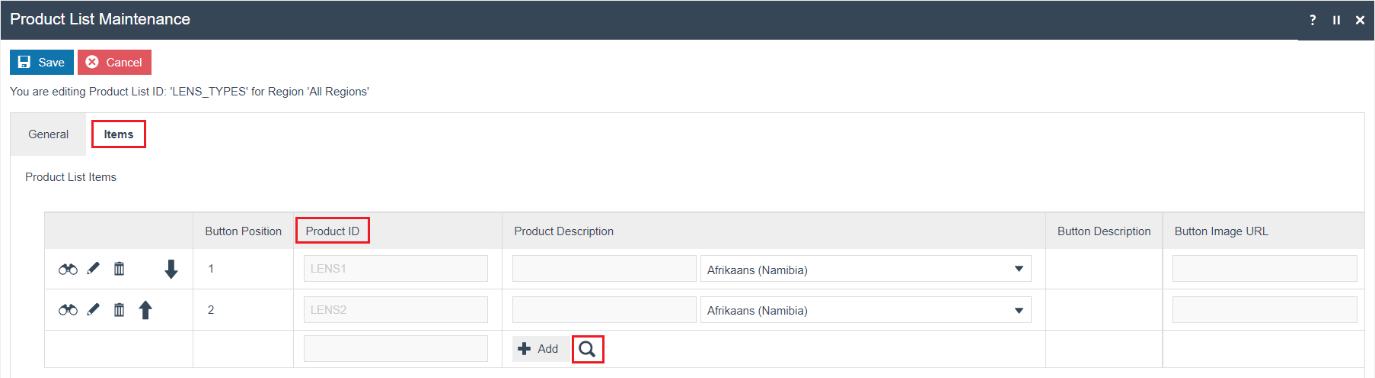
To add a new product, enter the Product ID and select Add, or select the search icon to navigate to the product search screen.
All products added to the list will be displayed under the product list:

| Configuration | Example Value | Description |
|---|---|---|
| Button Position | 1, 2, 3 | A read-only value indicating the position of the button on the POS. |
| Product ID | LENS1 | A read-only value indicating the product ID of the product added to the list. |
| Product Description | Clear Lenses | Alphanumeric, maximum 40 characters. The description displayed on the POS button. The original value from product configuration can be edited. Select the locale from the drop-down list. |
| Button Image URL | image://PRODUCT/hildonstill33.png | A read-only value indicating the URL for the image displayed on the POS button. |
You can edit the order of product list items using the directional arrow buttons. Select the edit icon to navigate directly to Product Maintenance to edit product details.
This completes the Product List Maintenance configuration.
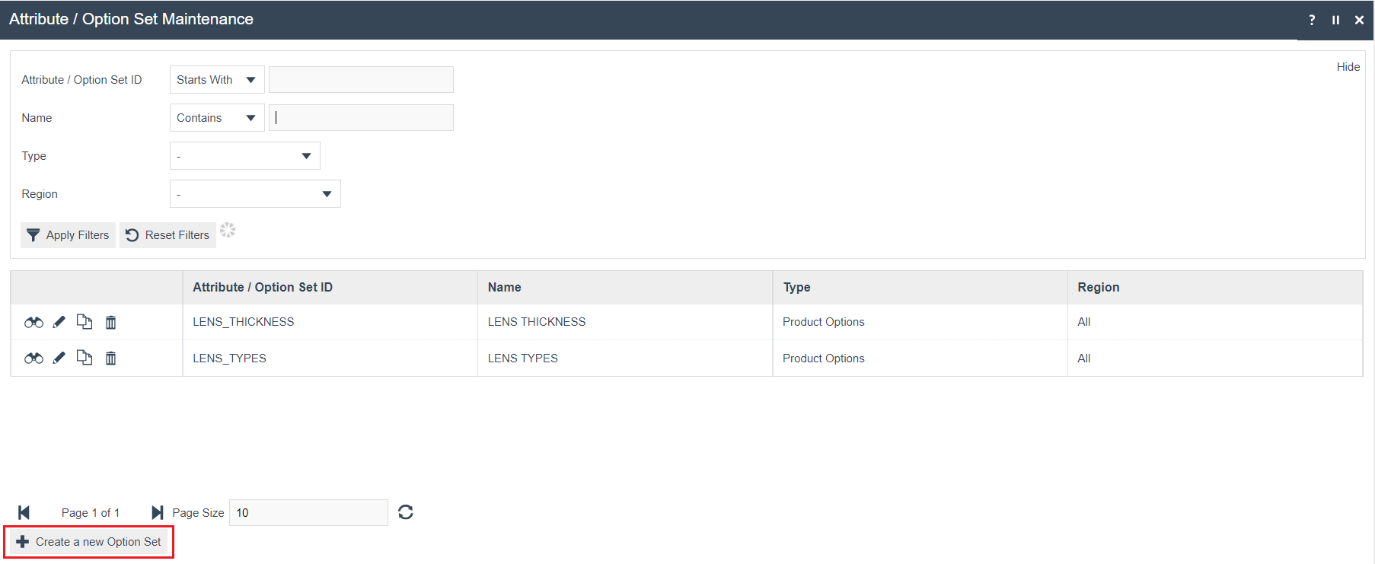
Attribute / Option Set Maintenance
Option Sets are used to create user-configurable data entry fields that map a product and a product list against an option set. The purpose and function of the option set is defined by the Option Set Type, which determines the flow in which the product is added to the basket. The parent-child relationship configuration is done under the Attribute / Option Set Maintenance.
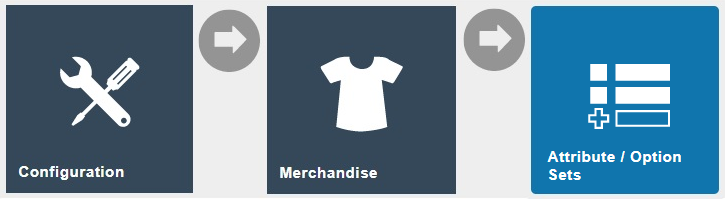
Navigate to Attribute / Option Set Maintenance using the Search or the path: Main Menu > Configuration > Merchandise > Attribute / Option Sets
When a user maps a product option in the Option Set tab under Product Maintenance, the defined product acts as a parent product. This calls the child products through the mapped option set. One or more child products can be configured in an option set by mapping either a single product or a product list.
To create a new option set, select Create a new Option Set on the Attribute / Option Set Maintenance page.
Enter a unique Option Set ID. The ID can be alphanumeric and contain a maximum of 40 characters.
Select Product Options from the Type drop-down list.
Select the appropriate Region from the drop-down list.
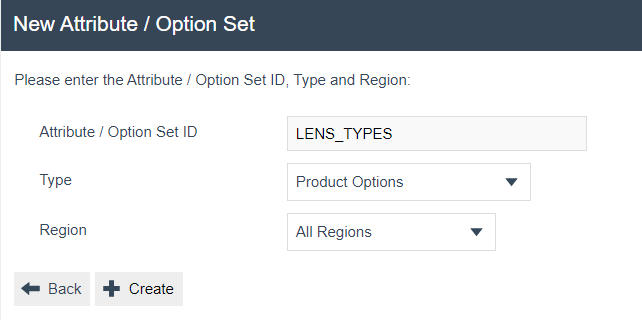
Select Create.
The Option Set ID cannot be changed once the option set has been created.
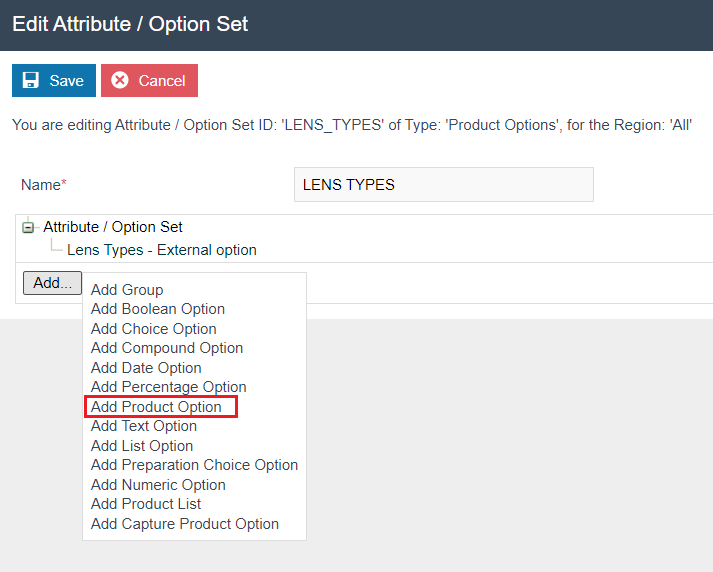
Enter an alphanumeric value for the Name.
Select Add Product Option from the list displayed against the Add button.
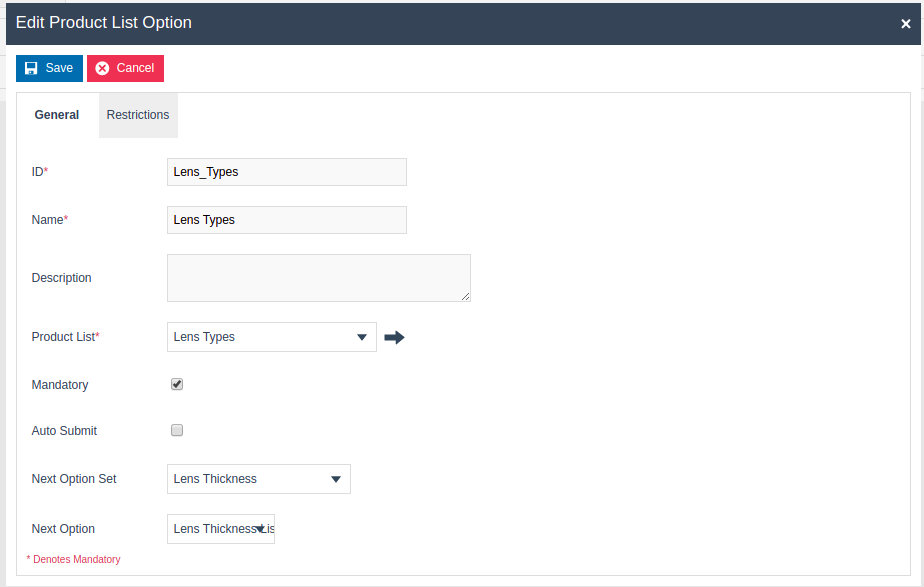
Edit Product Option - General Tab
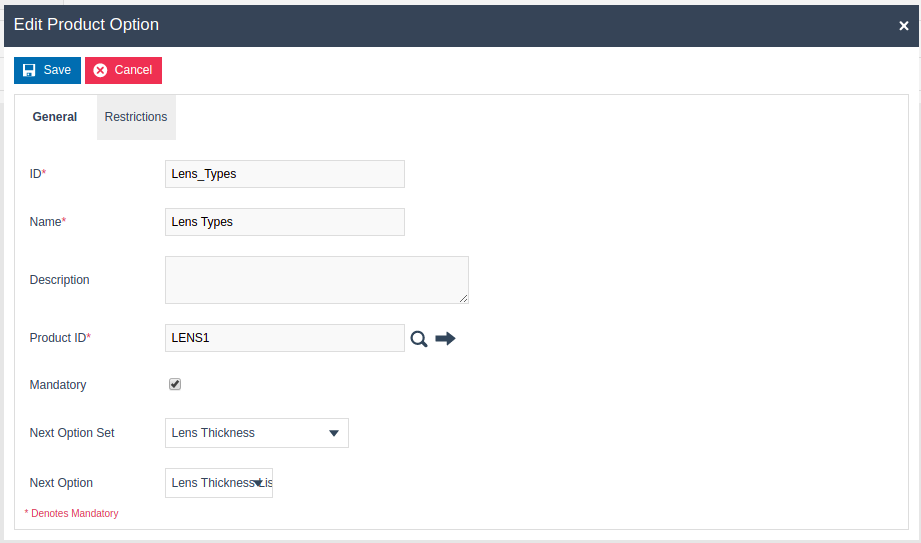
Set the appropriate values on the General tab as follows:
| Configuration | Description |
|---|---|
| ID | Enter an alphanumeric value for the product option ID. This is displayed in screens and other configuration options. |
| Name | Enter an alphanumeric value. This is displayed in screens and other configuration options. |
| Description | Enter an optional description for the product option. |
| Product ID | Enter the appropriate product ID or select the search icon to find and select the product through Product Maintenance. |
| Mandatory | Tick to indicate that at least one option from this product option set must be selected on the POS. |
| Next Option Set | Optionally configure the next option set to be displayed after this one. Select from the drop-down. |
| Next Option | Once an option set is selected, optionally select the next option within that set to be displayed. |
Edit Product Option - Restrictions Tab
Set the appropriate values on the Restrictions tab as follows:
| Configuration | Description |
|---|---|
| Allow Option Returns | Tick to allow the parent product to be returned along with the child product. The child product cannot be returned individually. |
| Allow Option Voids | Tick to allow the product to be voided. When a parent product is voided, the child product is automatically voided. This also allows a child product to be voided individually. |
| Allow Option Discounts | Tick to allow discounts for the parent/child product individually or for both. |
| Allow Option Price Overrides | Tick to allow price overrides on both parent and child products. |
| Allow Option Promotions | Tick to allow promotions for the parent/child product individually or for both. |
Adding a Product List to the Option Set
To add a product list as an option instead of an individual product:
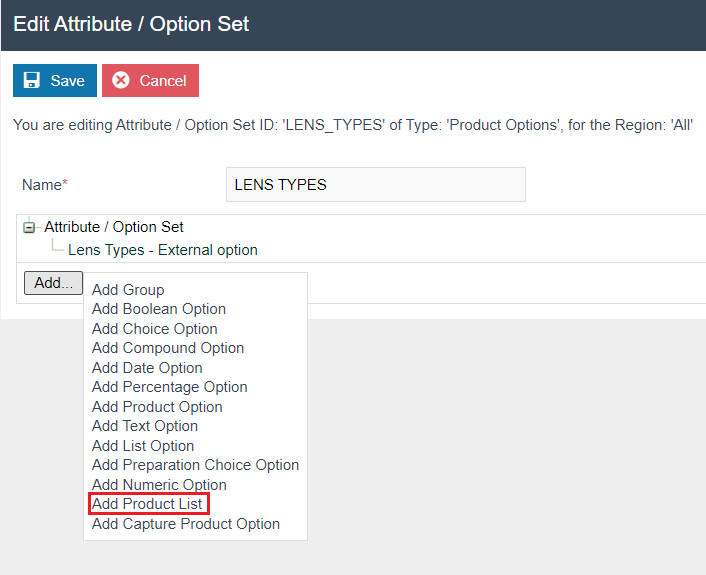
Select Add Product List from the list displayed against the Add button.
Edit Product List - General Tab
Set the appropriate values on the General tab as follows:
| Configuration | Description |
|---|---|
| ID | Enter an alphanumeric value for the product list ID. This is displayed in screens and other configuration options. |
| Name | Enter an alphanumeric value. This is displayed in screens and other configuration options. |
| Description | Enter an optional description for the product list. |
| Product List | Select the pre-defined product list from the drop-down, or use the search icon to find and select it through Product Maintenance. |
| Mandatory | Tick to indicate that at least one option from this product option set must be selected on the POS. |
| Next Option Set | Optionally configure the next option set to be displayed after this one. Select from the drop-down. |
| Next Option | Once an option set is selected, optionally select the next option within that set to be displayed. |
Edit Product List - Restrictions Tab
Set the appropriate values on the Restrictions tab as per the product option restrictions described above.
This completes the Attribute / Option Set Maintenance configuration.
Broadcasting Data
To deliver the configuration changes to the POS, broadcast the following entities:
- Products
- Product List
- Product Price
- Option Set
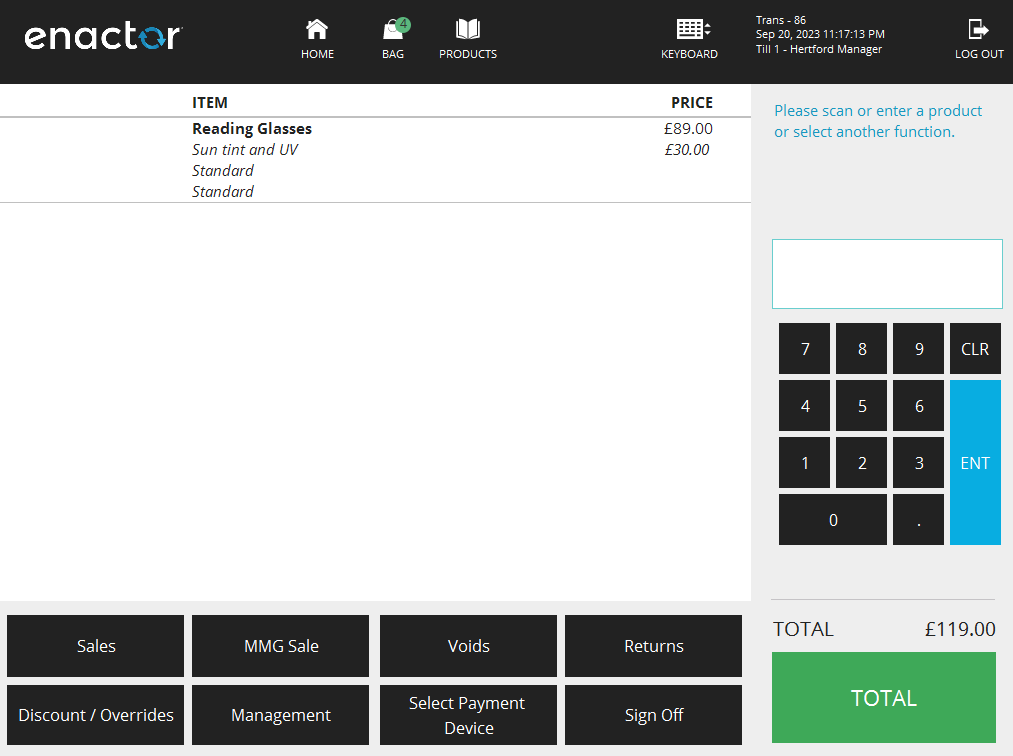
POS Functionality
Enter the parent product ID on the POS device.
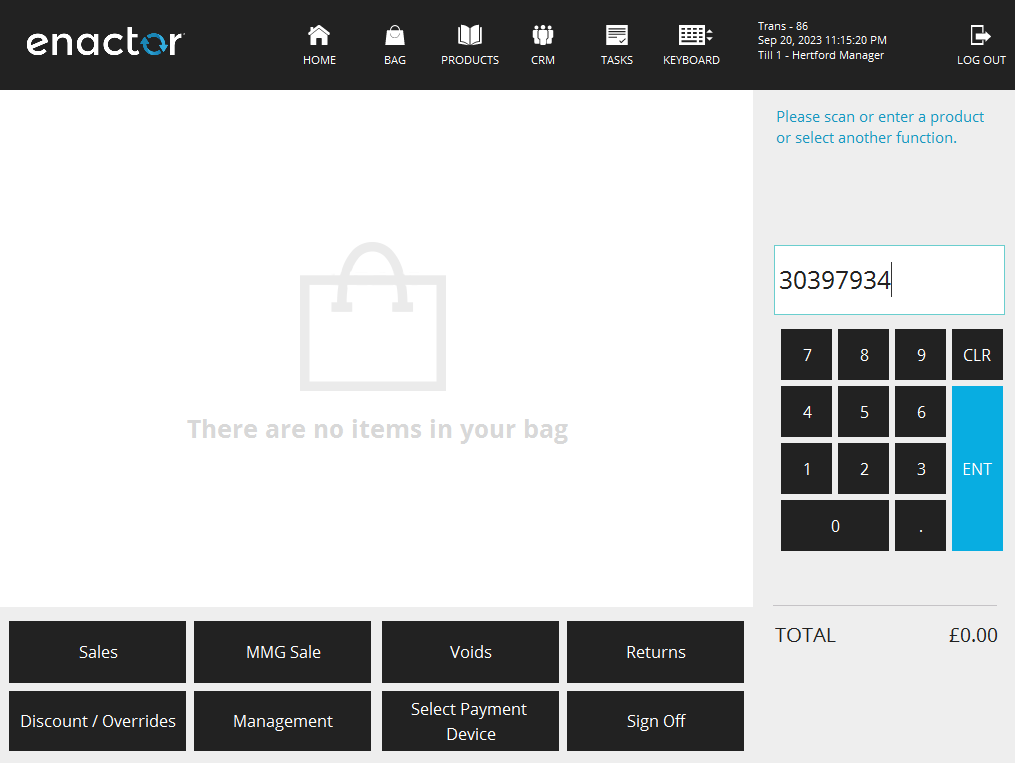
The child product options will be displayed in the configured order.
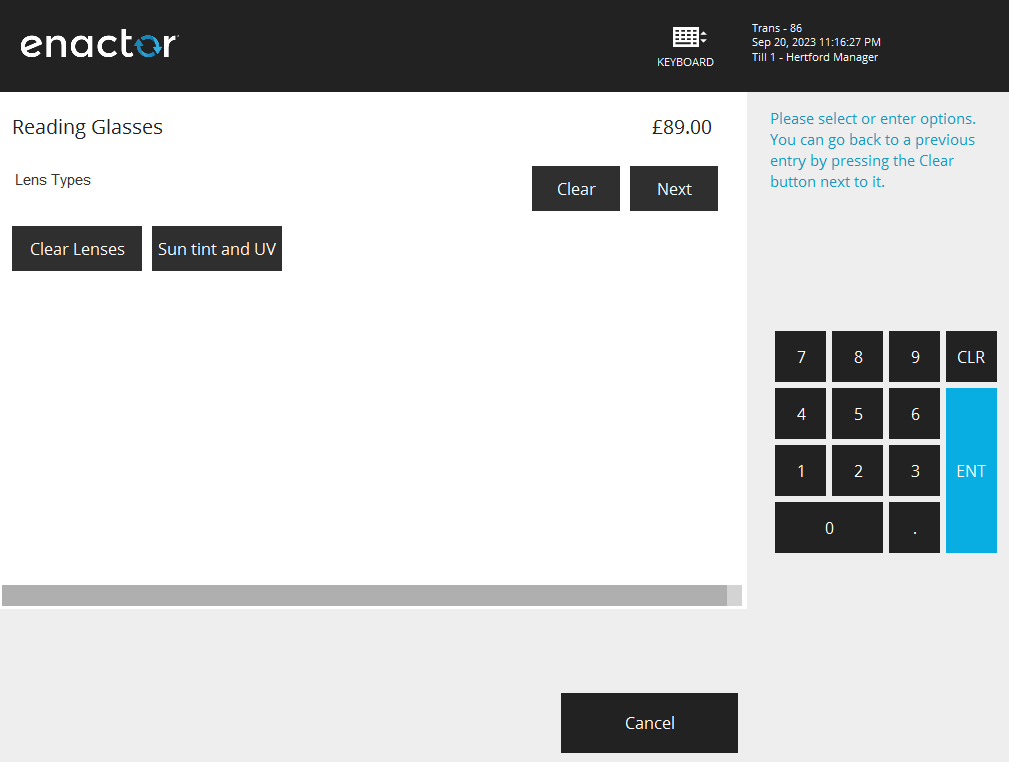
Select the desired options. Those with a price context configured will be added to the total.
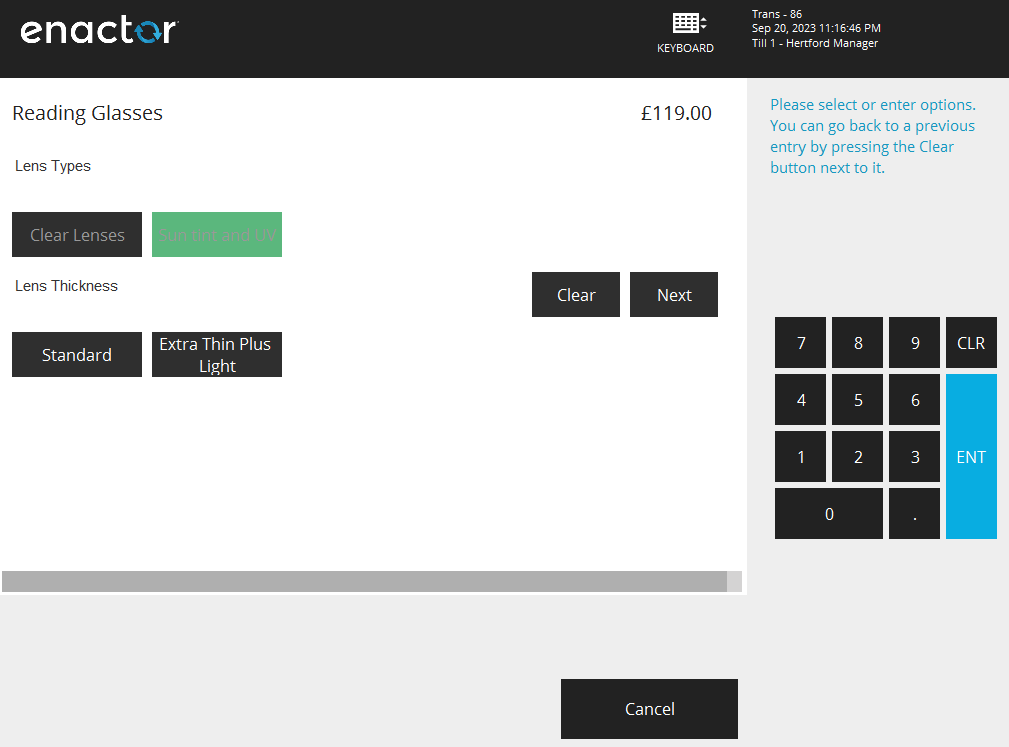
The final product price is displayed along with a breakdown of the product options added.