How To Configure Tender Bags
Introduction
This guide describes how to configure a store to use Tender Bags for cash management functions. Tender Bags are physical bags designed for storing cash collected from a Terminal or from a Safe.
For identification purposes, each bag is assigned a Bag ID and a Seal Number. These details are documented in the relevant cash management sessions that are currently active in the Safes or at the Terminals.
Tender Bags are associated with numerous cash management functions such as:
- Terminal Float
- Terminal Pickup
- Terminal Cashup and Closing Float
- Terminal Cashup and Empty
- Terminal Spot Check
- Terminal Bag Tender
- Terminal Unbag Tender
- Safe Bag
- Safe Float
- Safe Pickup
- Safe Cashup
- Safe Spot Check
- Safe Banking
- Safe Unbag Bag
- Safe Bag Collection
- Safe Bag Deletion
The purpose of this guide is to demonstrate the steps to configure Tender Bags and explain each cash management function that supports their use.
Overview
The following configuration entities may need to be modified to enable Tender Bags in a store:
- User Roles - Ensuring POS, Back Office, and Estate Manager users have the appropriate privileges to carry out cash management functions
- Location - Configuring the method by which Tender Bags are used at a Location
- Cash Management Session Owners - Creating Terminal sessions
- Menu - Adding cash management functions to the POS and Back Office
- Tenders - Enabling Tenders with denominations
- Reasons - Configuring Reasons to support the use of Tender Bags
- Currency - Configuring denominations
The following common terms are used throughout this guide:
- Existing Bags - A list of bags that have been generated within the currently open cash management session. The composition of this list differs based on the types of Tender Bags used, aligning with the specific requirements of each cash management function.
- New Bag - Creating a new bag during a cash management function. This requires a Bag ID and a Bag Seal Number.
- Loose - Tenders recorded in a session which are not added to a Tender Bag.
User Roles
Authorisation to run the specific functionality documented here is controlled with privileges maintained in User Roles.
Navigate to User Roles Maintenance using the Search or the path: Organisation > User Roles

Select the appropriate role to edit. The example used here is SALES_ASSISTANT.
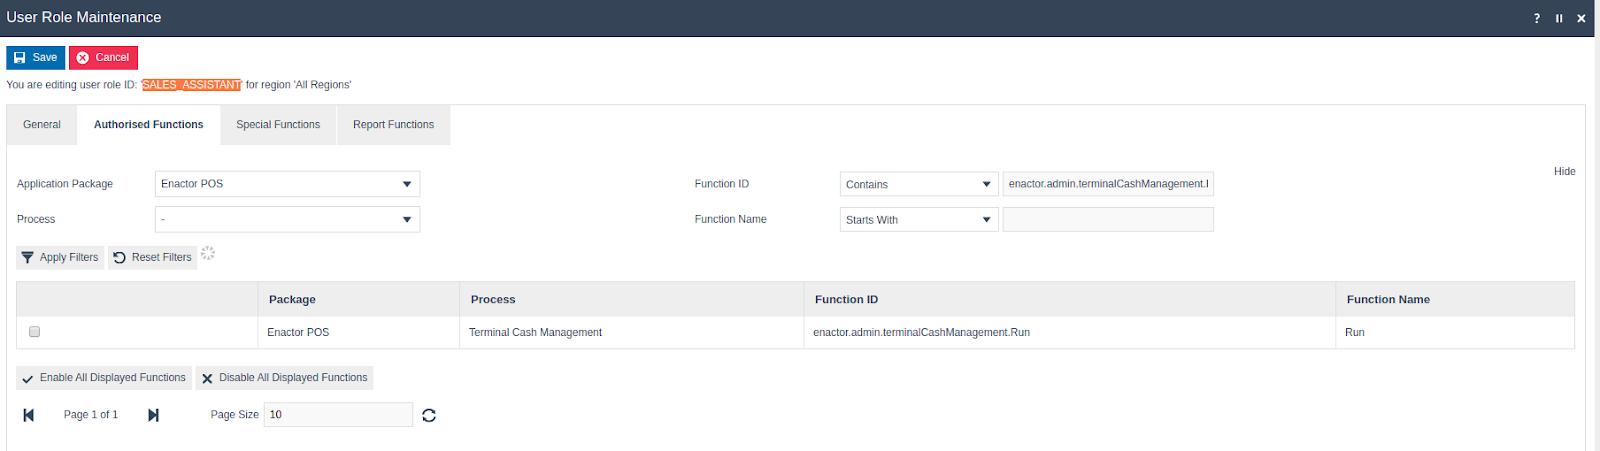
Select the appropriate Application Package and configure the required privileges from the table below:
| Package | Function ID | Description |
|---|---|---|
| Enactor Cash Management | enactor.safeBagCollection.Run | Allows the user to run Safe Tender Bag Collection on Back Office. |
| Enactor Cash Management | enactor.safeBagDeletion.Run | Allows the user to delete Bank Deposit Bags and return the money to the Safe. |
| Enactor Cash Management | enactor.safeBagTenders.Run | Allows the Back Office user to run the Safe Bag Tenders. |
| Enactor Cash Management | enactor.safeCashup.AutoSubmitNewBags | Automatically submits the data entered in the New Bag tab in Safe Cashup, without pressing the Bag Tenders button. The Bag Tenders button is hidden. |
| Enactor Cash Management | enactor.safeCashup.HideBagSealNumber | Hides the Seal Number label and input field in Safe Cashup. |
| Enactor Cash Management | enactor.safeCashup.HideClearBagValuesButton | Hides the Clear Bag button in Safe Cashup. |
| Enactor Cash Management | enactor.safeCashup.HideExistingBagsTab | Hides the Existing Bags tab in Safe Cashup. |
| Enactor Cash Management | enactor.safeUnbagTenders.Run | Allows the Back Office user to unbag Safe Tender Bags. |
| Enactor Cash Management | enactor.tenderBagMaintenance.List | Allows the user to list all entries in the Tender Bag Maintenance application. |
| Enactor Cash Management | enactor.tenderBagMaintenance.Run | Allows the user to run Tender Bag Maintenance. |
| Enactor Cash Management | enactor.tenderBagMaintenance.View | Allows the user to view Tender Bag Maintenance. |
| Enactor Cash Management | enactor.terminalBagTenders.Run | Allows the Back Office user to run Terminal Bag Tenders. |
| Enactor Cash Management | enactor.terminalCashup.HideExistingBagsTab | Hides the Existing Bags tab in cash management. |
| Enactor Cash Management | enactor.terminalCashup.HideNewBagTab | Hides the New Bags tab in cash management. |
| Enactor Cash Management | enactor.terminalSpotCheck.HideBagsTab | Hides the Bags tab in cash management. |
| Enactor Cash Management | enactor.terminalUnbagTenders.Run | Allows the Back Office user to run Unbag Tenders. |
| Enactor POS | enactor.safeBagTenders.Run | Allows the Back Office user to run the Safe Bag Tenders. |
| Enactor POS | enactor.safeUnbagTenders.Run | Allows the Back Office user to unbag Safe Tender Bags. |
| Enactor POS | enactor.terminalBagTenders.Run | Allows the Back Office user to run Terminal Bag Tenders. |
| Enactor POS | enactor.terminalUnbagTenders.Run | Allows the Back Office user to run Unbag Tenders. |
Location
Navigate to Location configuration using the Search or the path: Organisation > Locations
The guide below shows editing of a Location, but this configuration can equally apply to a group of Locations configured with a Location Template.
The configuration for Tender Bags is located on the Cash Management > General tab.

Set the appropriate value in the Tender Bags field as follows:
| Configuration | Description |
|---|---|
| Tender Bags | If set, the user can allocate cash to be stored in a Tender Bag. The following options are available: Allowed - the operator must use a Tender Bag while performing cash management functions that support their use. Disallowed - the operator is not able to use Tender Bags. Optional - the operator can choose whether to use a Tender Bag while performing cash management functions that support their use. |
Cash Management Functions
The following section further describes the cash management functions that support the use of Tender Bags and primarily focuses on the Optional configuration, where the operator is given the choice whether to use them or not.
Three different types of Tender Bags can be created:
- Float Bag - Float Bags can be created in Safe Bag Maintenance. These bags are used for adding a float to the POS.
- Banking Bag - Banking Bags are created by the Banking function when cash is being transferred from a store safe to the bank.
- Pickup Bag - Pickup Bags are created by the Terminal Bag and Pickup Bag function.
Terminal Float
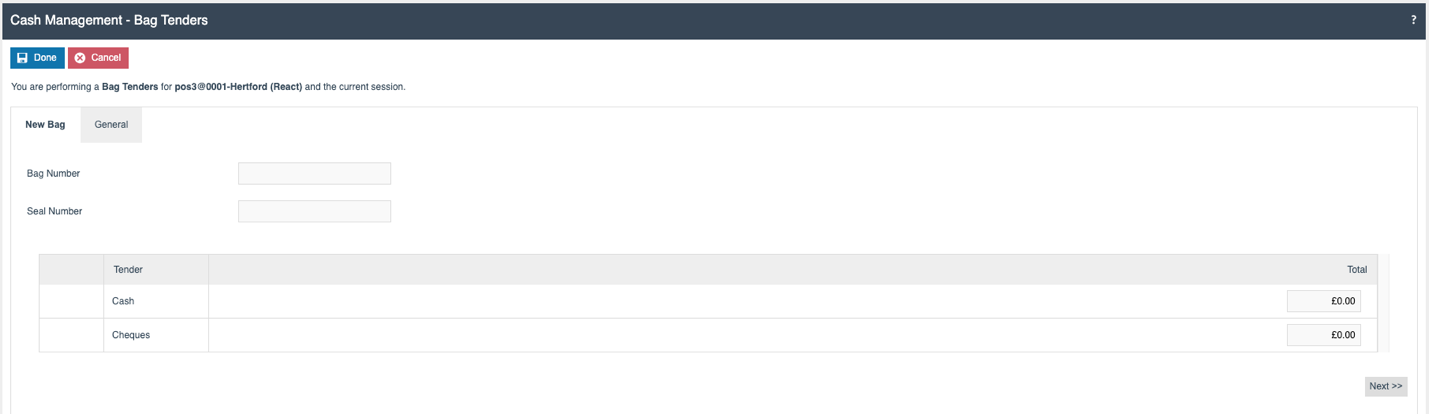
The Terminal Float function is used to add cash to a POS (usually so the operator has sufficient cash to give change to customers). It records the cash amount transferred from the Safe to the Terminal. Float Bags can be created using the Cash Management - Bag Tenders function at the Back Office.
Float functions using Tender Bags are explained further in the following sections.
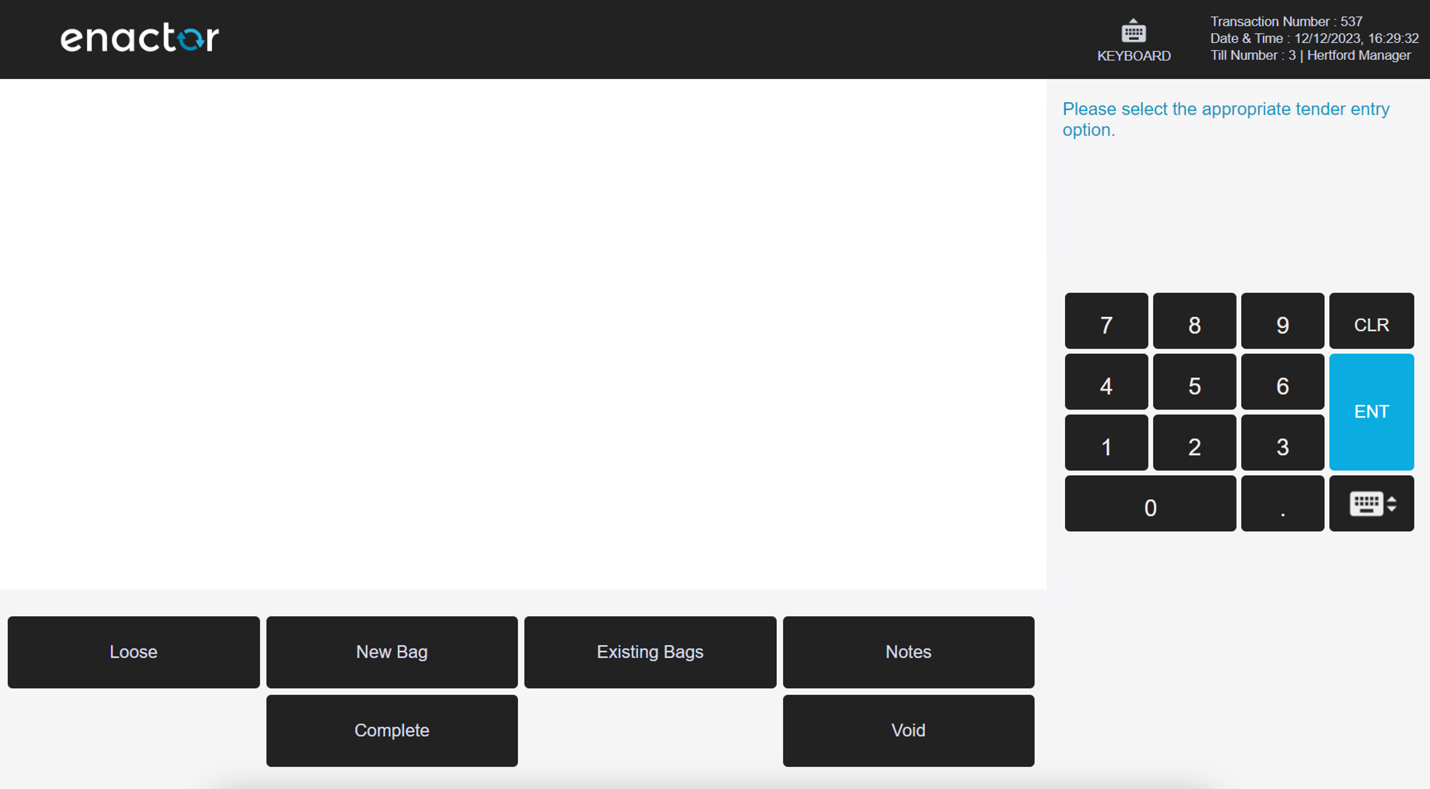
POS

| Function | Outcome |
|---|---|
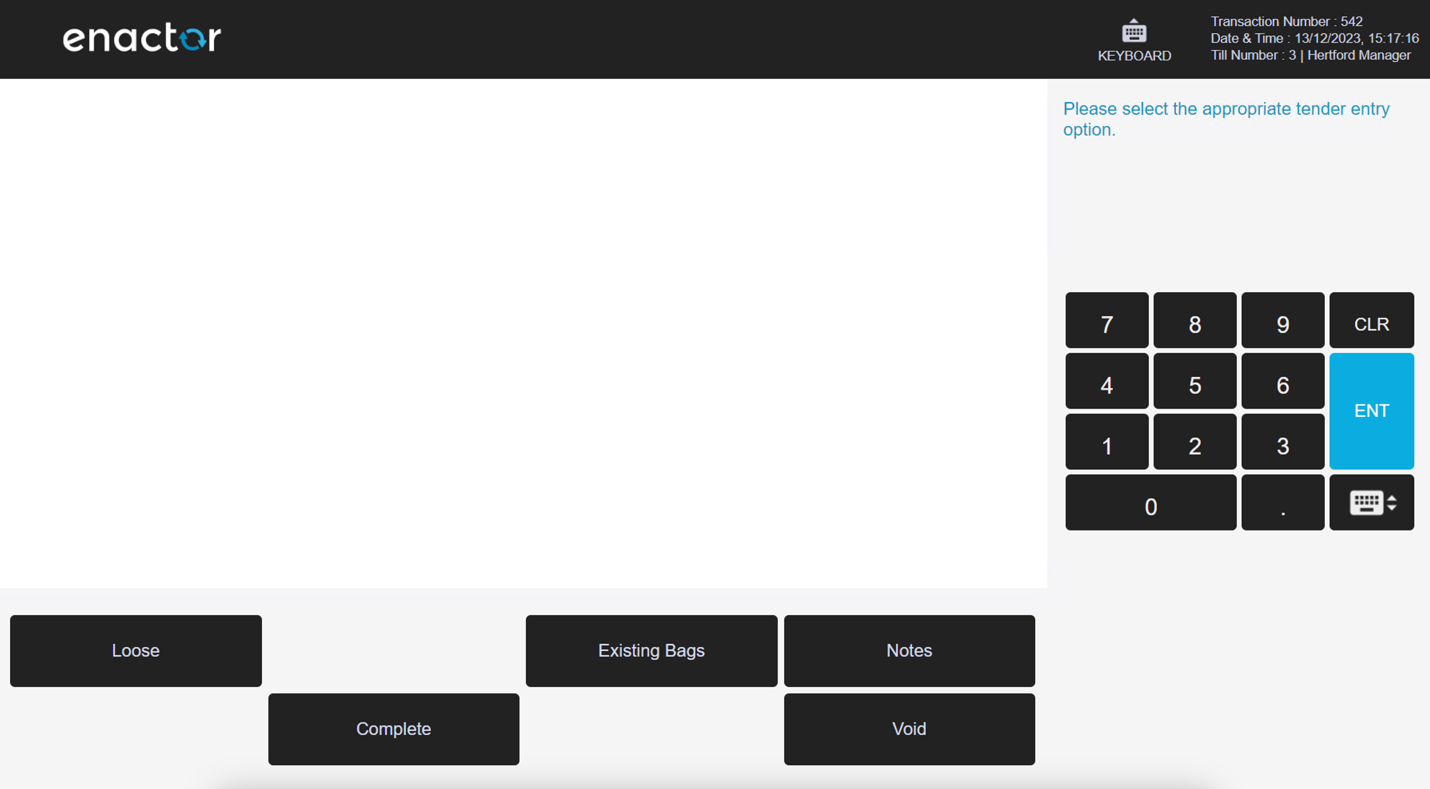
| Loose | The Float Tender list is displayed. |
| Existing Bags | A list of Existing Bags is displayed. |
| Notes | Free text notes field. |
| Complete | Completes the Terminal Float. |
| Void | Voids the Terminal Float. |
The Loose button is only displayed when the Location's Tender Bag configuration is set to Optional. If it is configured as Allowed, this button is not available.
Terminal Float - Existing Bag (POS)
When the user selects Existing Bag, the available Float Bags are shown.
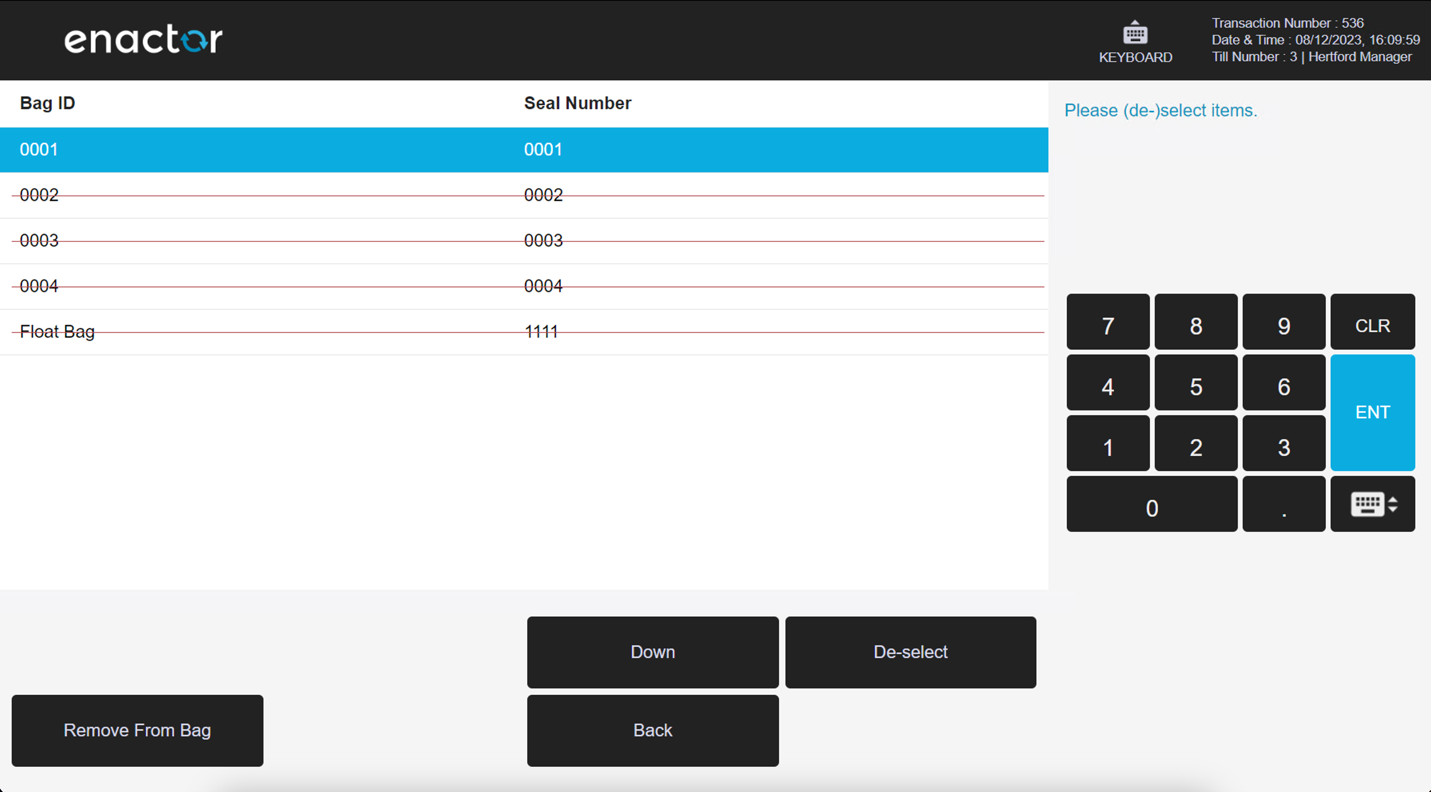
| Function | Outcome |
|---|---|
| Select | Selects a Bag from the list. |
| De-Select | De-selects a Bag from the list. |
| Remove From Bag | The tender amounts are retrieved from the bag and added to the Terminal's cash totals. |
| Back | Navigates to the Terminal Float screen. |
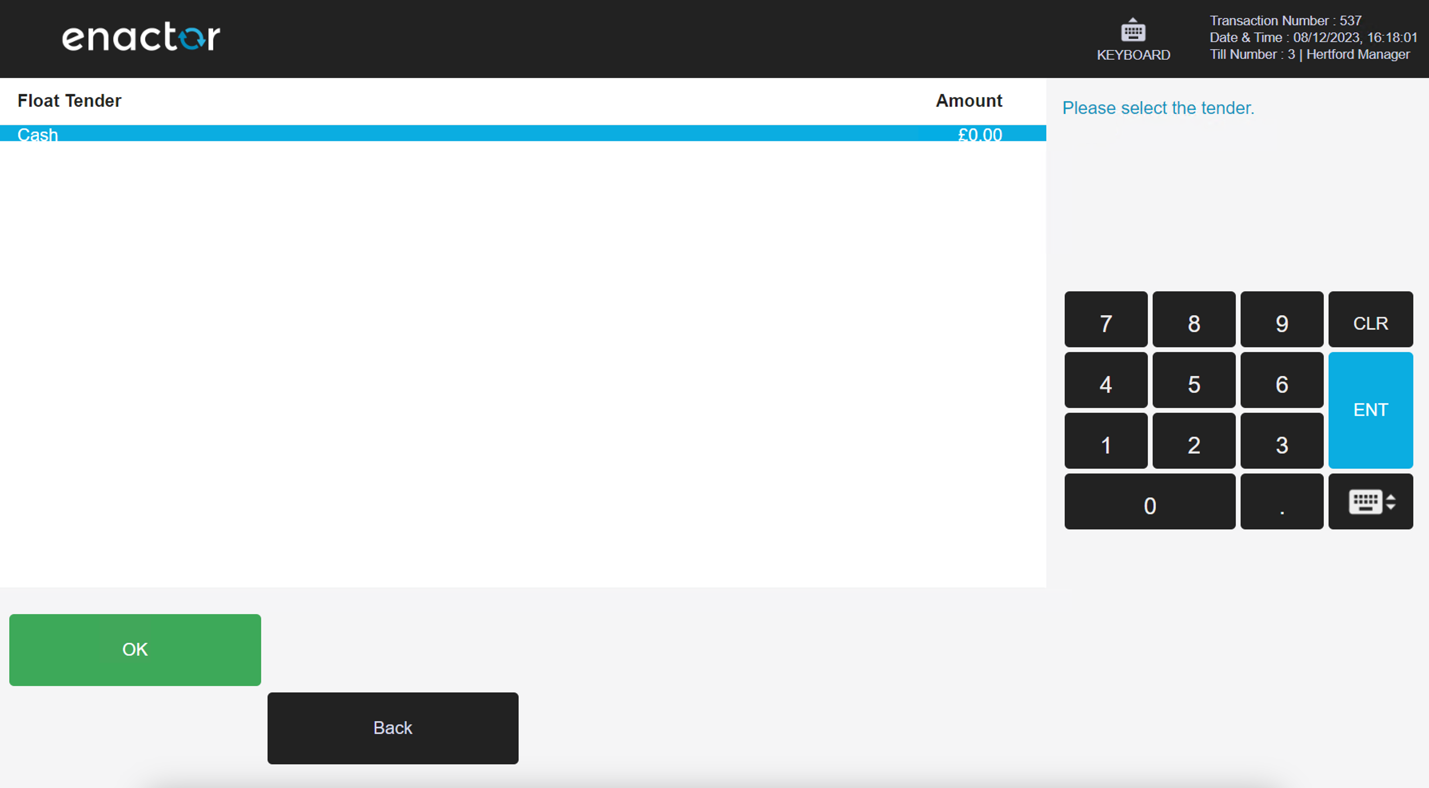
Terminal Float - Loose (POS)
When Loose is selected, the Float Tender list is displayed. The user can add the required Tender values and complete the Float action.
Store Server
| Tab | Outcome |
|---|---|
| Loose | The Float Tender list is displayed. |
| Existing Bag | The list of Existing Bags is displayed. |
| General | Notes can be recorded. |
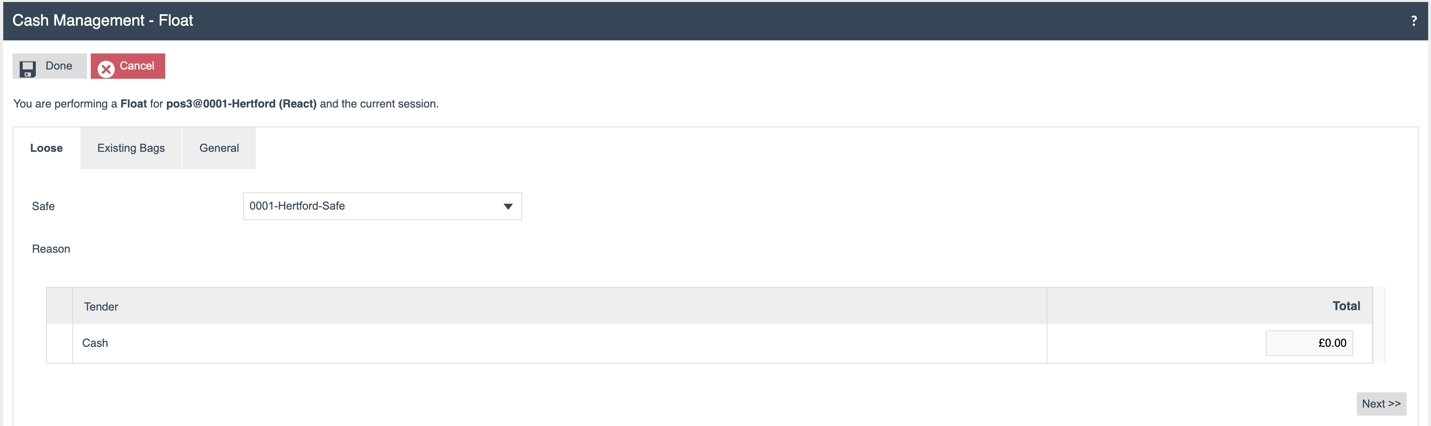
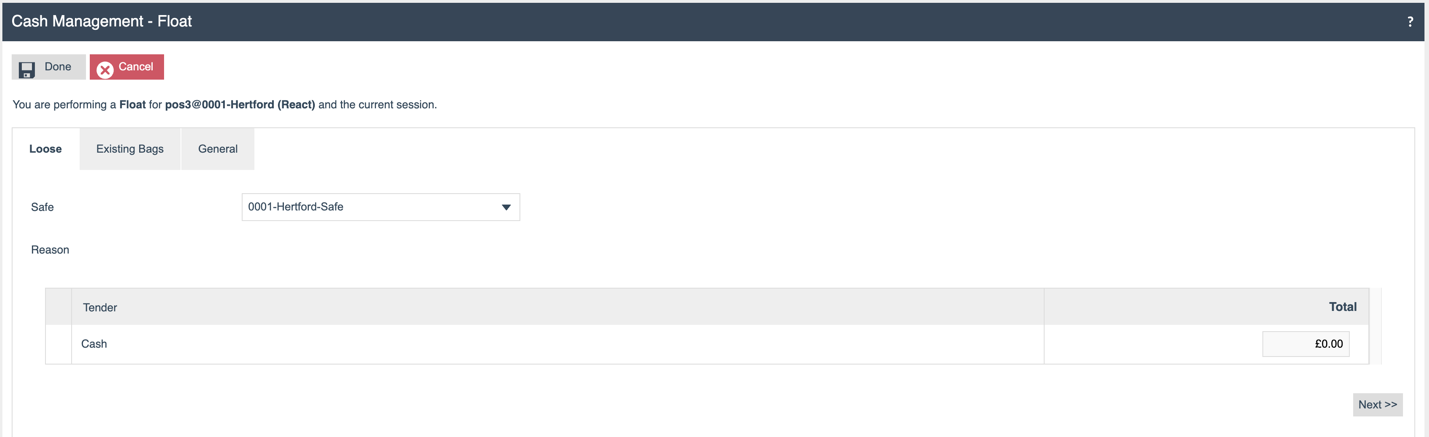
Terminal Float - Loose (Store Server)
When the user opens the Float screen on the Store Server and the Location's Tender Bag configuration is set to Optional, the initial tab displayed is Loose. In this tab, the user can add Float Tenders that are not contained in a Tender Bag. The list of available Tenders depends on each Tender's configuration.
If the Location's Tender Bag option is set to Allowed, this tab is not accessible.
Terminal Float - Existing Bag (Store Server)
Selecting the Existing Bags tab shows the available Float Bags.
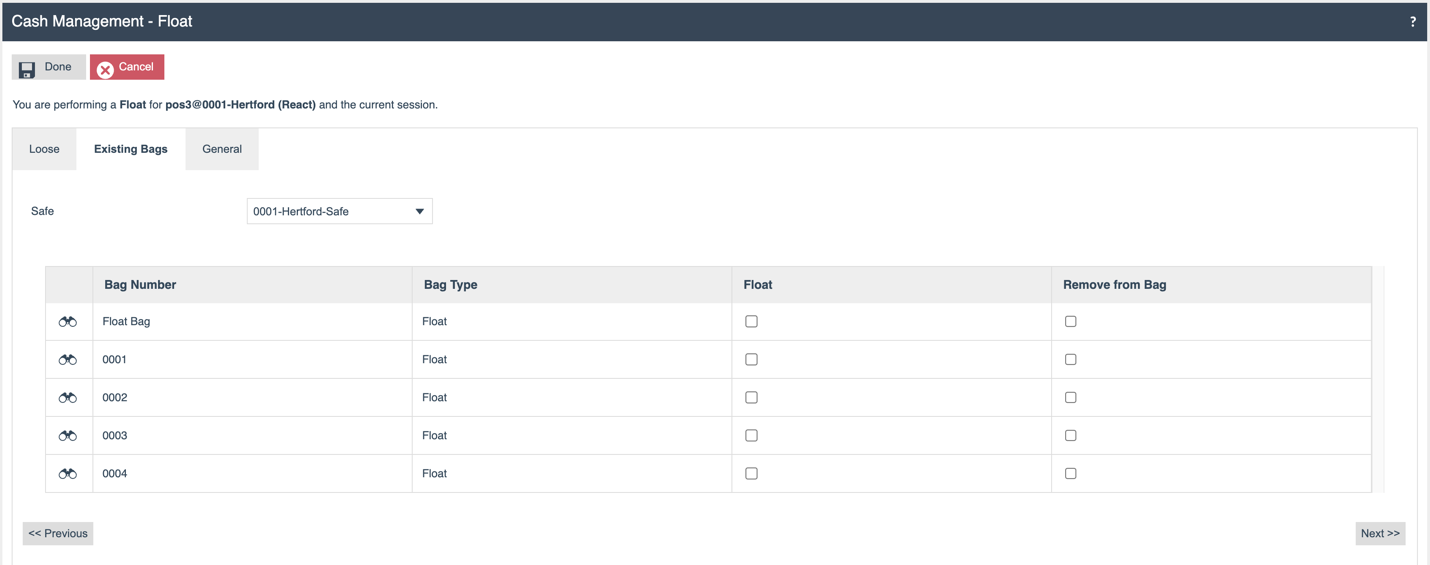
In the Existing Bag tab, the user selects the appropriate Safe (if more than one is configured against the Terminal's Location). Any available Tender Bags of type Float are listed.
One or more bags can be selected, and the float value added to the Terminal Session. If the Remove from Bag flag is selected, the tender amounts are retrieved from the Bag and categorised as Loose tender.
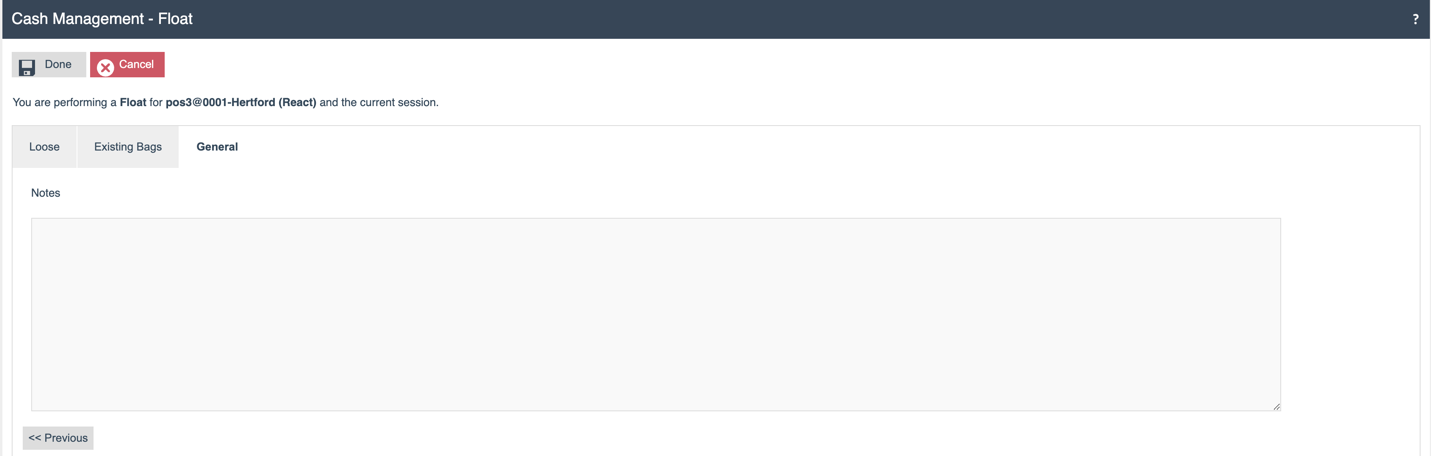
Terminal Float - Notes (Store Server)
Terminal Pickup
If it becomes necessary to move cash from the POS to the Safe during a session (for example, the cash drawer is over its allowed value), the operator can execute a Pickup function. This action records a transfer from the POS to the Safe.
The Pickup functions that make use of Tender Bags are described in the following sections.
POS
| Function | Outcome |
|---|---|
| Loose | The Pickup Tender list is displayed. |
| Existing Bags | The list of existing Float Bags is displayed. |
| New Bag | Enables the creation of a new Tender Bag. |
| Notes | Free text notes field. |
| Void | Voids the Terminal Pickup. |
| Complete | Completes the Terminal Pickup. |
The Loose button is only displayed when the Location's Tender Bag configuration is set to Optional. If it is configured as Allowed, the button is not available.
Terminal Pickup - Existing Bag (POS)
When the user selects Existing Bag, the Float Bags available to the session are listed.
| Function | Outcome |
|---|---|
| Select | Selects a Bag from the list. |
| De-Select | De-selects a Bag from the list. |
| Back | Navigates back to the Terminal Pickup screen. |
From this screen the user can complete a Pickup function for the cash management session.
Terminal Pickup - New Bag (POS)
When the user selects New Bag from the Pickup screen, they are directed to add a Bag Number and a Seal Number for identification purposes.

Once the data is captured, the Pickup Tender screen is displayed.
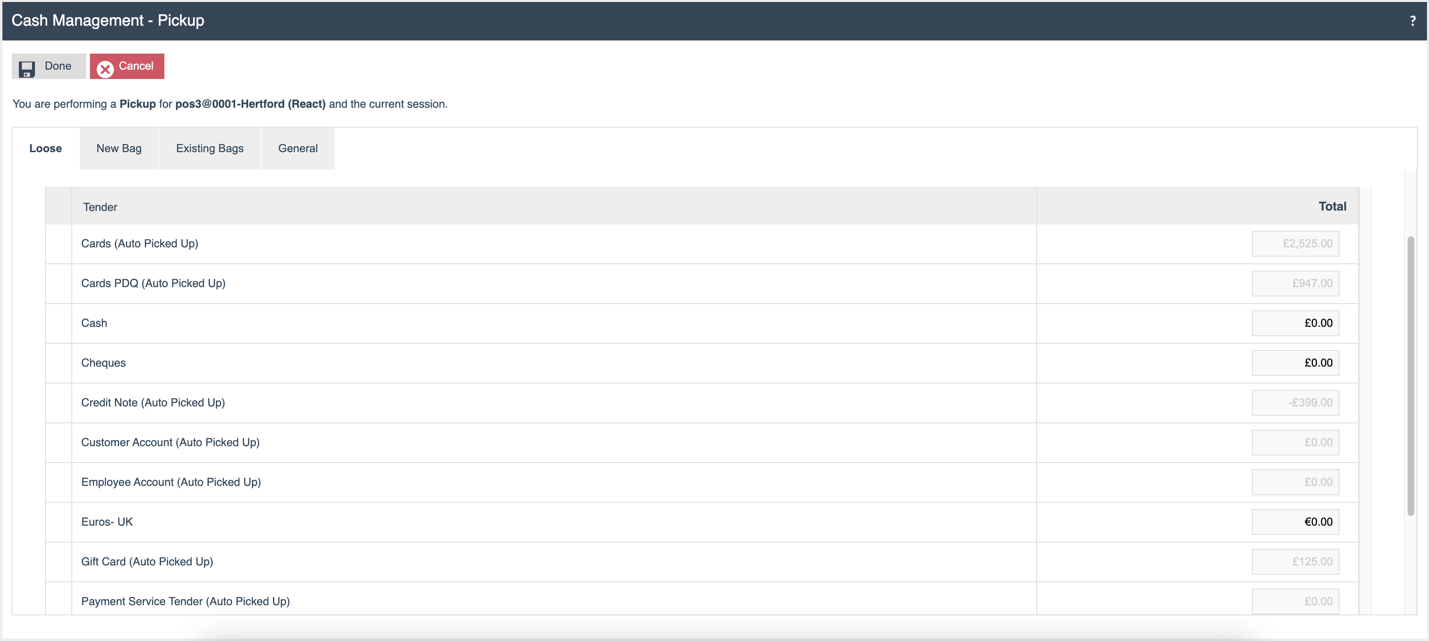
Terminal Pickup - Loose (POS)
Selecting Loose displays the Pickup Tender list. The user can add the required Tender values and complete the Pickup action.
Store Server
| Tab | Outcome |
|---|---|
| Loose | The Pickup Tender list is displayed. |
| Existing Bag | The list of Existing Bags is displayed. |
| New Bag | Enables the user to create new bags while completing a Pickup. |
| General | Free text notes field. |
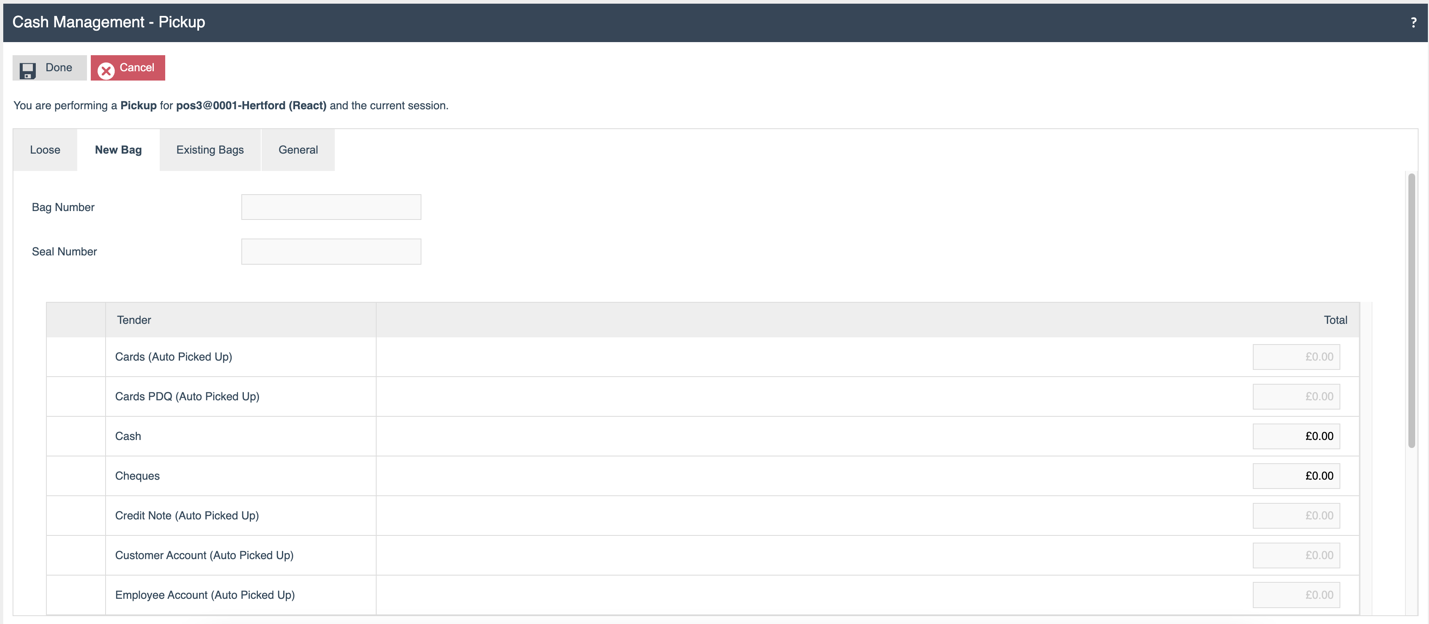
Terminal Pickup - New Bag (Store Server)
When the user selects the New Bag tab from the Pickup screen, they can add a Bag Number and Seal Number for identification purposes. Subsequently, the user can specify the values for the Pickup Tenders and complete the Pickup function.
Terminal Pickup - Existing Bags (Store Server)
When the user selects the Existing Bags tab, the applicable Bags available to the session are listed.
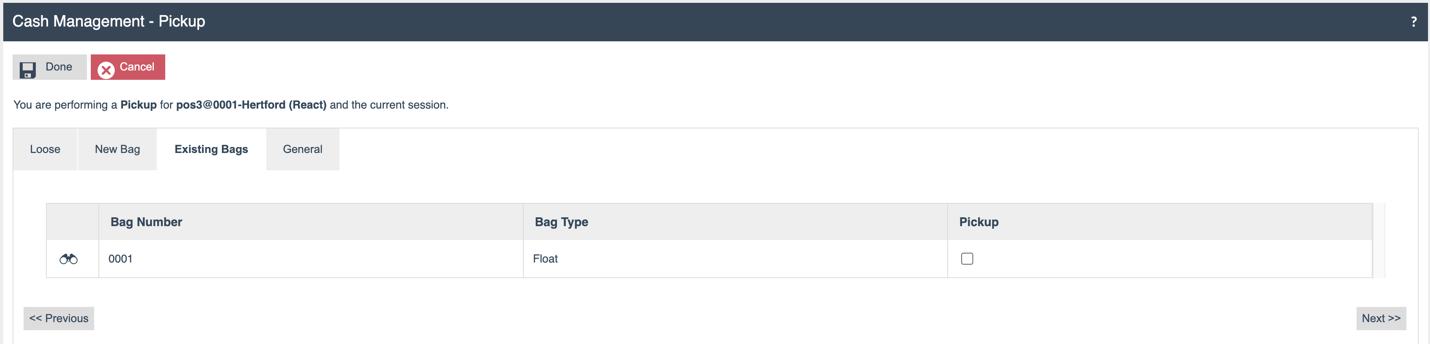
Within the Existing Bag tab, the user can choose any existing Bags to transfer from the POS to the Safe. To select a specific bag, the user must tick the Pickup checkbox.
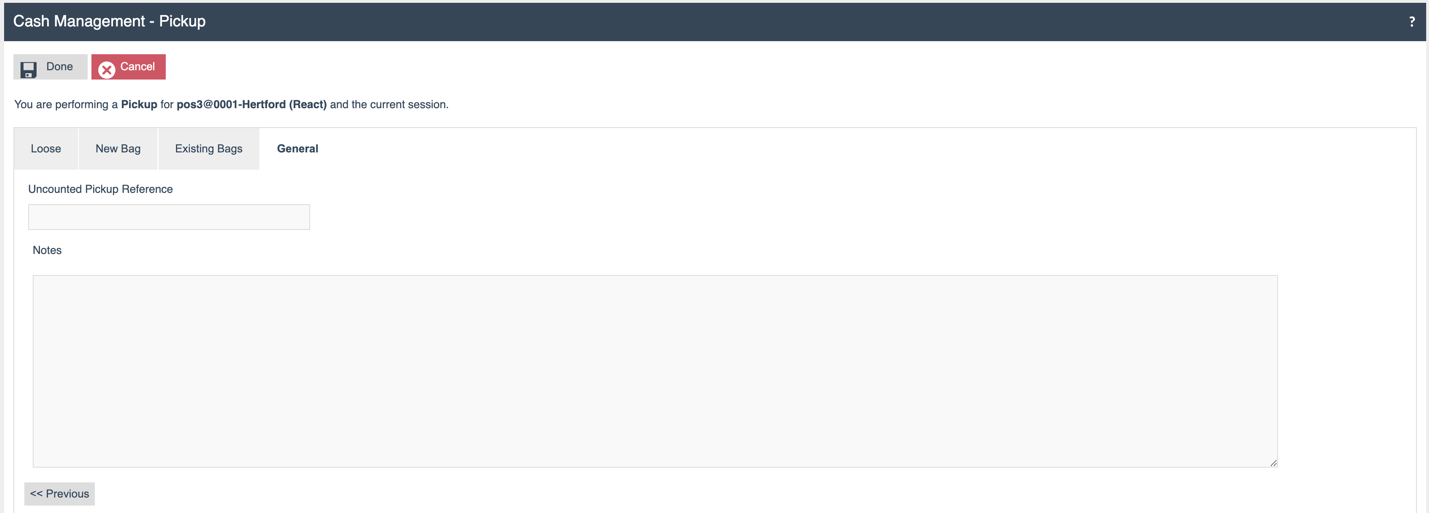
Terminal Pickup - General (Store Server)
Cashup Functions (Safe/Terminal)
When the operator needs to finalise an open session, they can complete the Cashup process and finalise the Terminal or Safe's cash management session.
The Cashup function is available for both Safe and Terminal cash management.
For Safe Cashup, two options are available - Safe Cashup and Safe Cashup and Banking.
For Terminal Cashup, the options available are Cashup and Float, Cashup and Empty, and Cashup and Leave.
Depending on the selection of Cashup functions for both the Safe and Terminal, the screens associated with the Tender Bags vary.
Terminal Cashup and Closing Float
This option allows the operator to perform a count and transfer a portion of the cash to the Safe. The remaining balance stays within the Terminal and is considered as the Float for the next session.
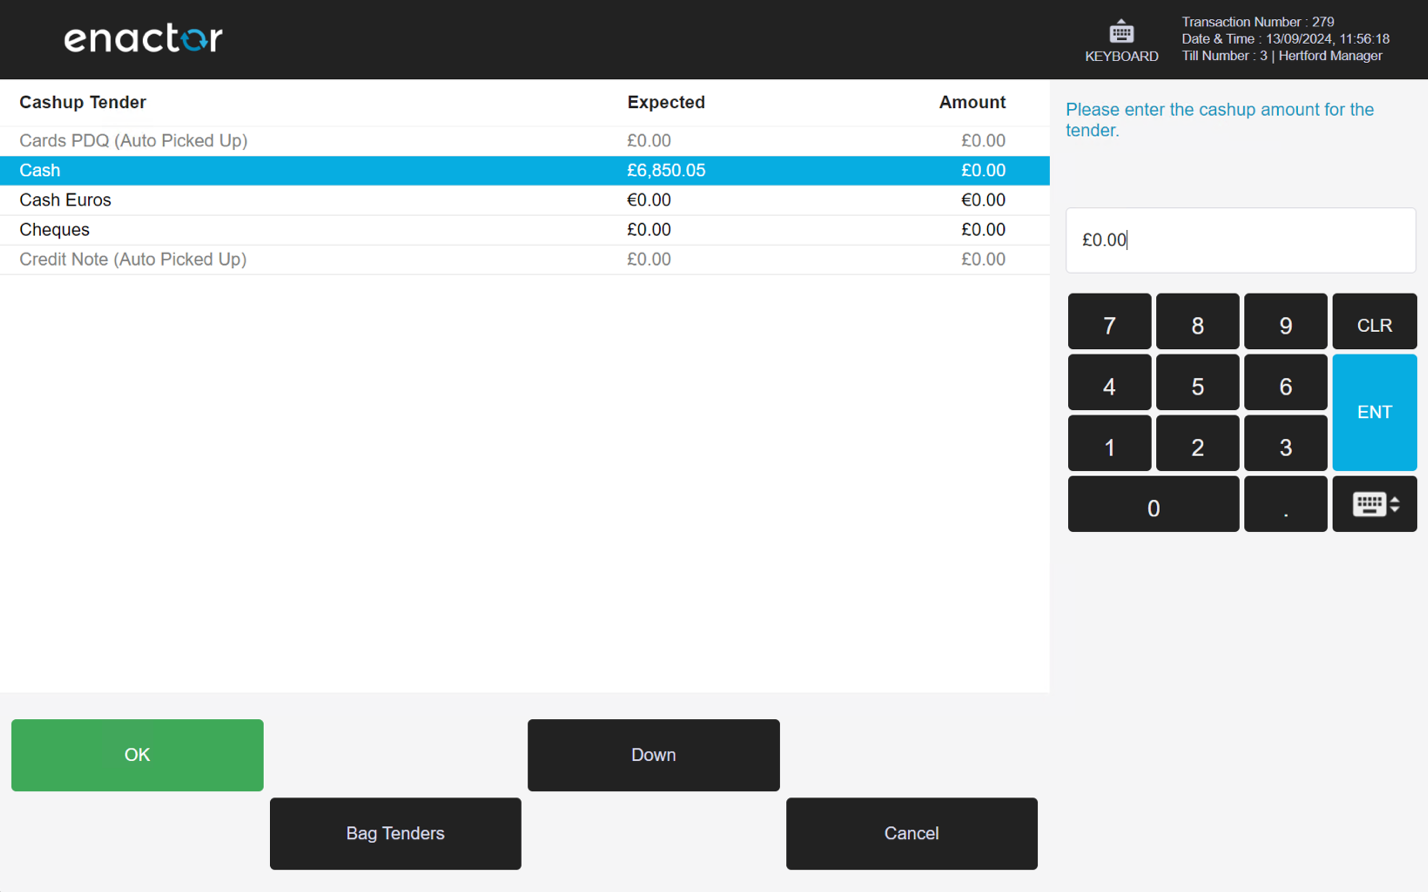
POS - Closing Float
On selecting Cashup and Closing Float, the first screen allows the operator to record the Closing Float. Following this, the Cashup is completed.
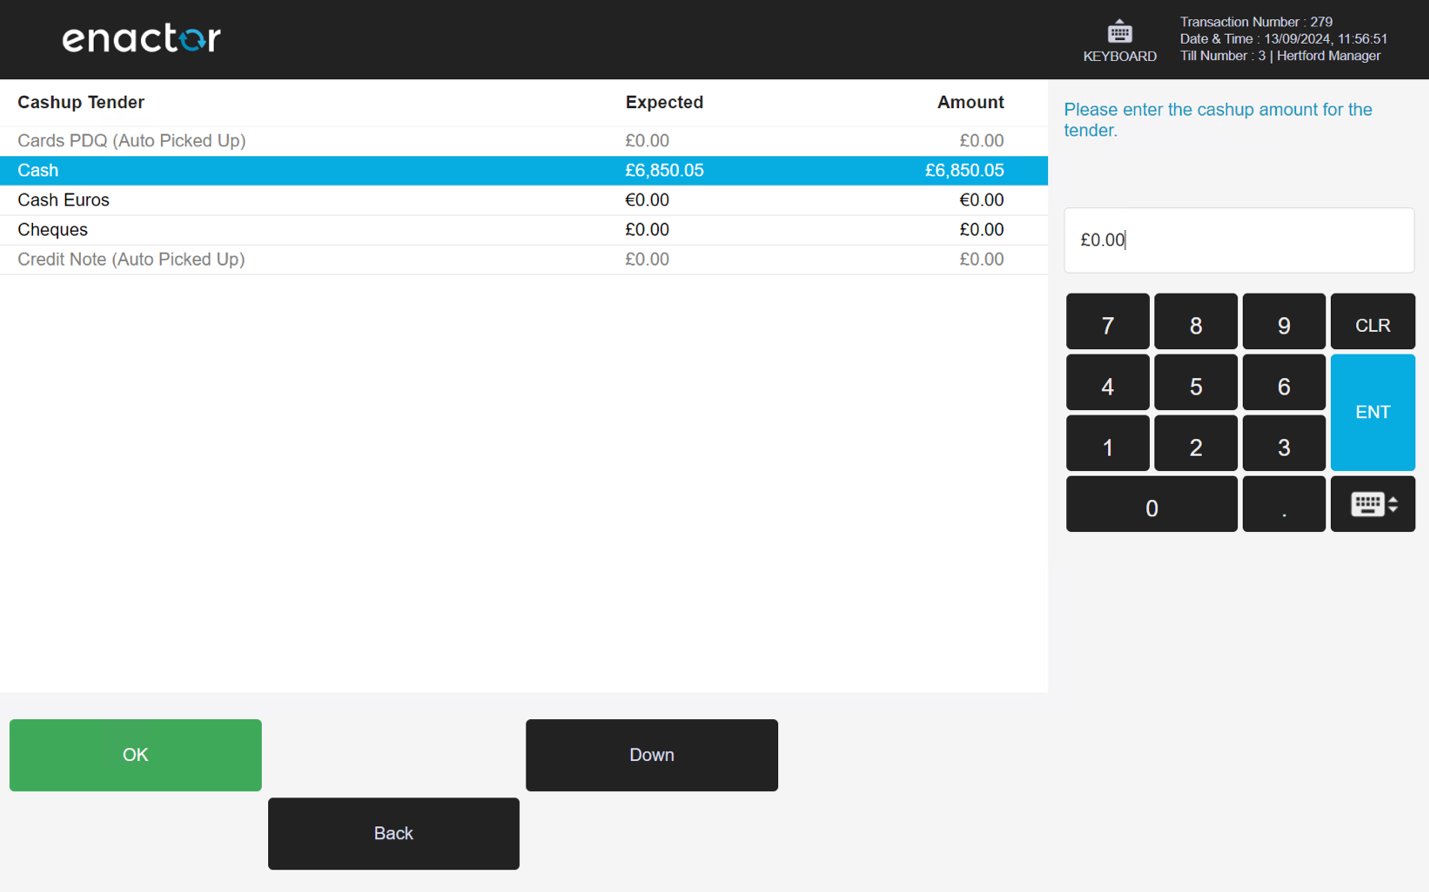
POS - Cashup
| Function | Outcome |
|---|---|
| Loose | The Cashup Tender list is displayed. |
| Existing Bag | The list of Existing Bags is displayed. |
| New Bag | The user can create new bags while completing Cashup. |
| Notes | Free text notes field. |
| Void | Voids the event. |
| Complete | Completes the event. |
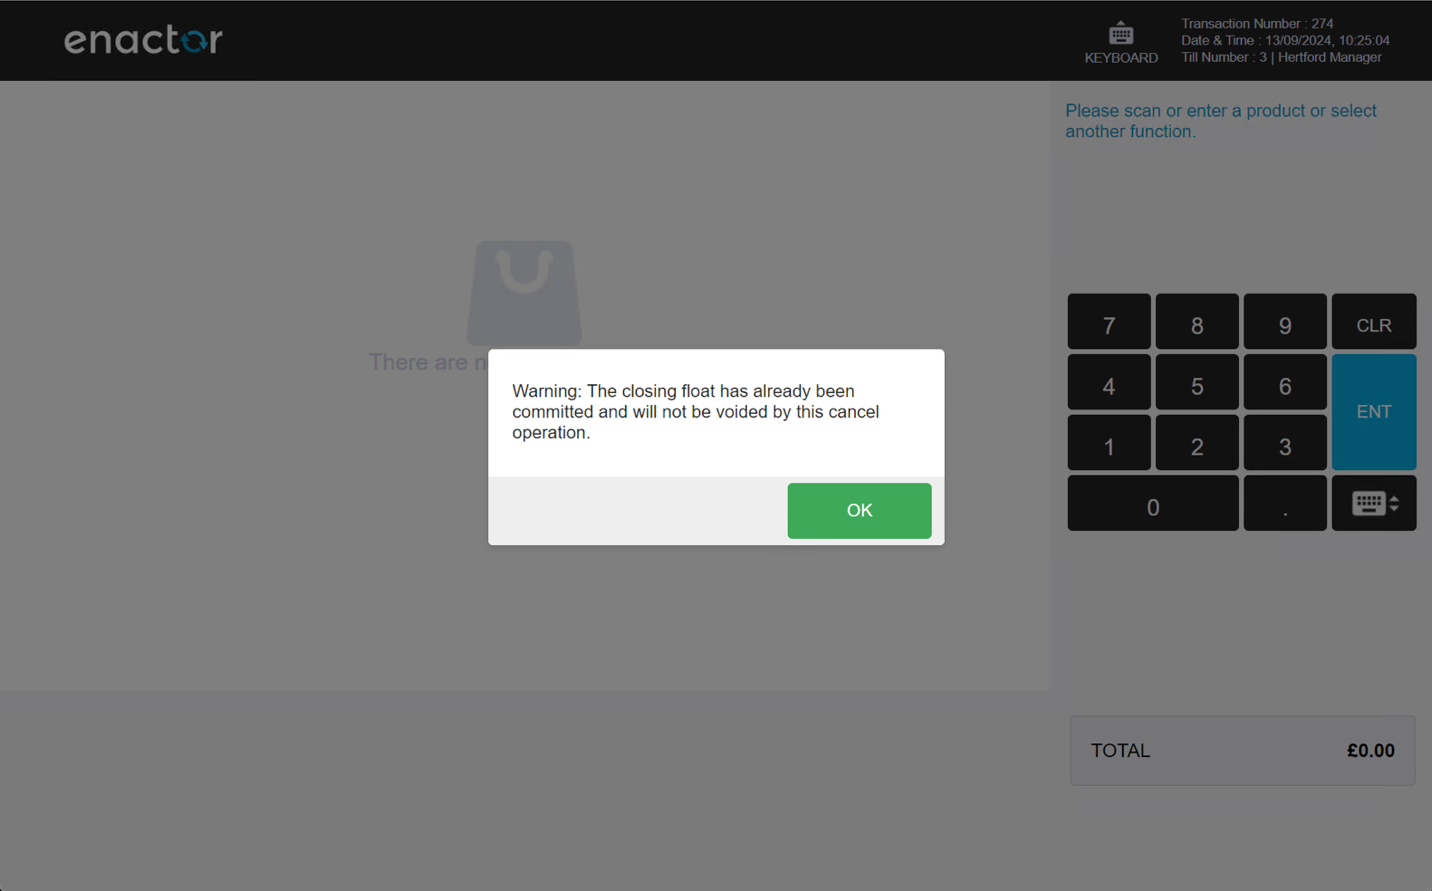
If the user selects Void during the Cashup state, the recorded Closing Float value is not voided. A warning message is displayed.
Terminal Cashup and Closing Float - Existing Bag (POS)
When the user selects Existing Bags, any available bags are listed. The user can select an existing bag to transfer the Cashup amount into.
| Function | Outcome |
|---|---|
| Select | Selects a Bag from the list. |
| De-Select | De-selects a Bag from the list. |
| Remove From Bag | The tender amounts are retrieved from the bag and categorised as Loose tender. |
| Back | Navigates to the Terminal Cashup screen. |
Terminal Cashup - New Bag (POS)
On selecting New Bag from the Cashup screen, the user is directed to add a Bag Number and a Seal Number for identification purposes. The Bag is created during the Cashup process.

Once the Bag information is entered, the user is directed to the Cashup applicable tender list. This list is defined by Tender configuration - any applicable Tenders where Cashup Tender is configured are shown.
Terminal Cashup - Loose (POS)
When the Location's Tender Bag configuration is set to Optional, the Loose button is available. In this screen, the user can add Cashup Tenders that are not related to a Tender Bag and are transferred directly to the Safe. The list of available Tenders is based on the configuration in Tender Maintenance.
If the Location's Tender Bag option is set to Allowed, this button is not visible.
Store Server - Closing Float
The POS functions described above are also available on the Store Server. The following section shows the Store Server screens.
Closing Float - Loose

Closing Float - Existing
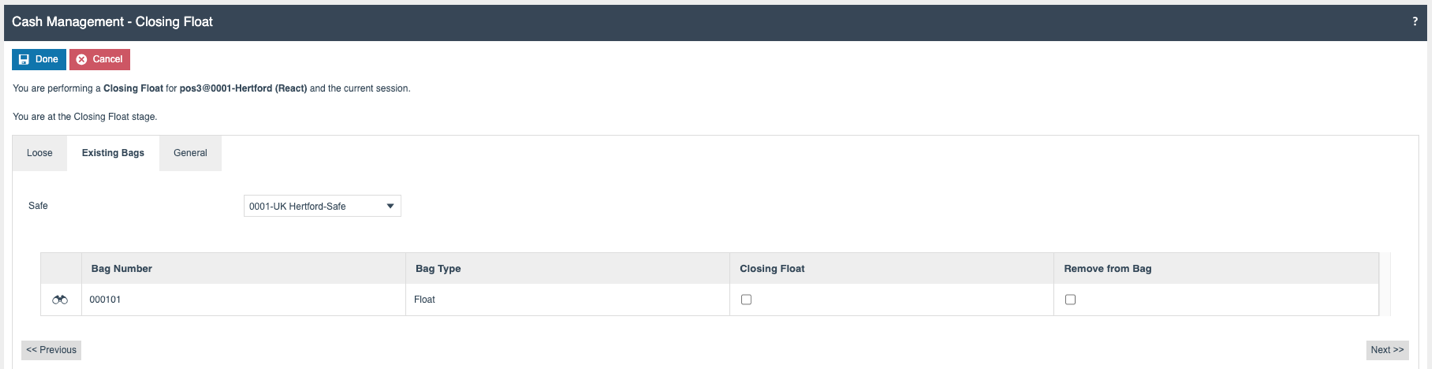
Closing Float - General

Store Server - Cashup
Cashup - Loose
Cashup - New Bag
Cashup - Existing Bag
Cashup - General
Terminal Cashup and Empty
The Terminal Cashup and Empty process does not include a float declaration and moves the entire contents of the cash drawer either into a Tender Bag or into the Safe.
The following section describes the Terminal Cashup and Empty screens and available functions on the POS and Store Server.
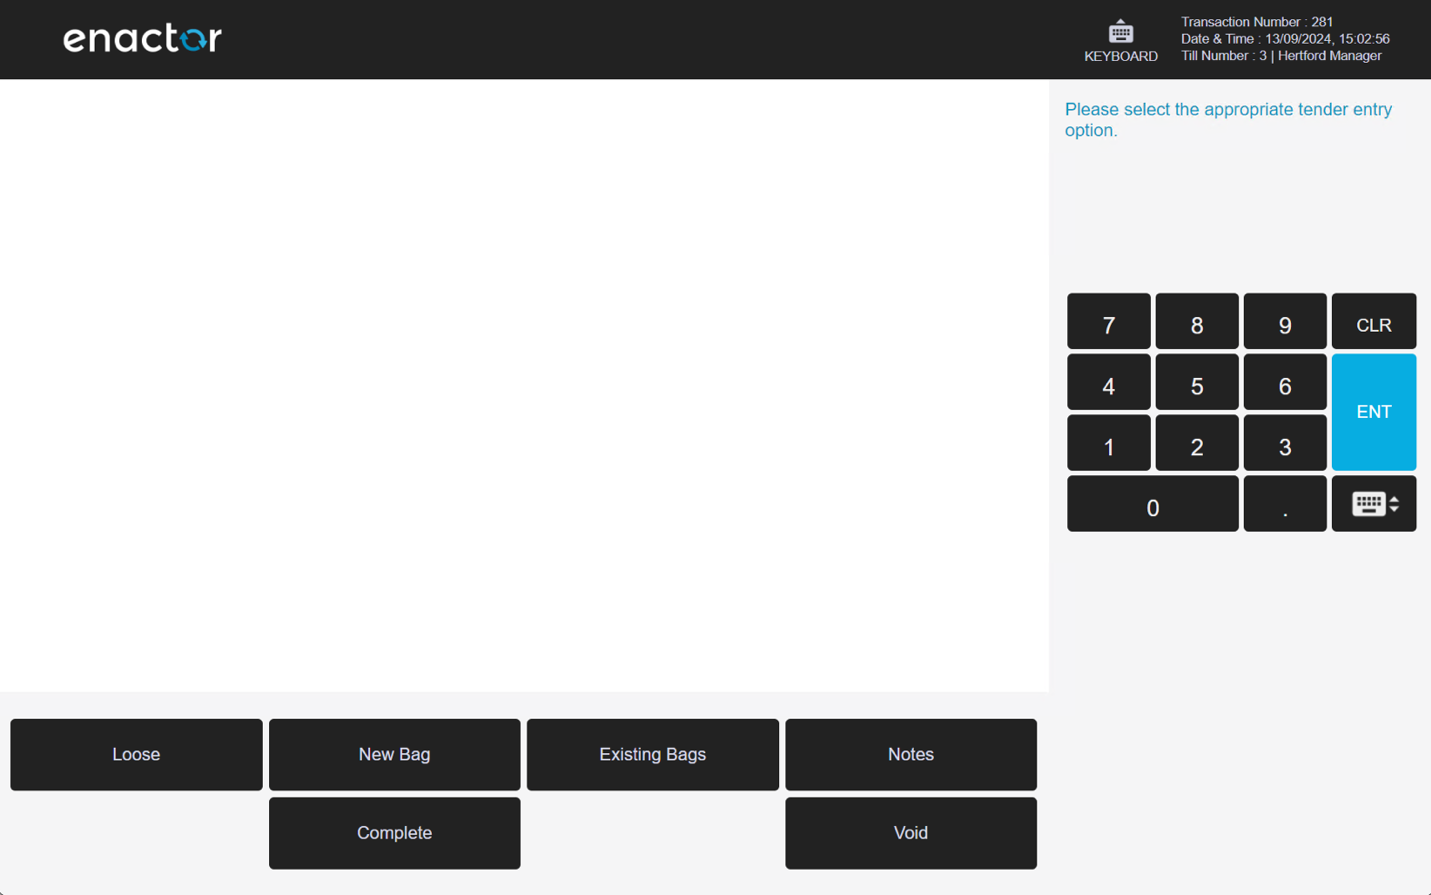
POS
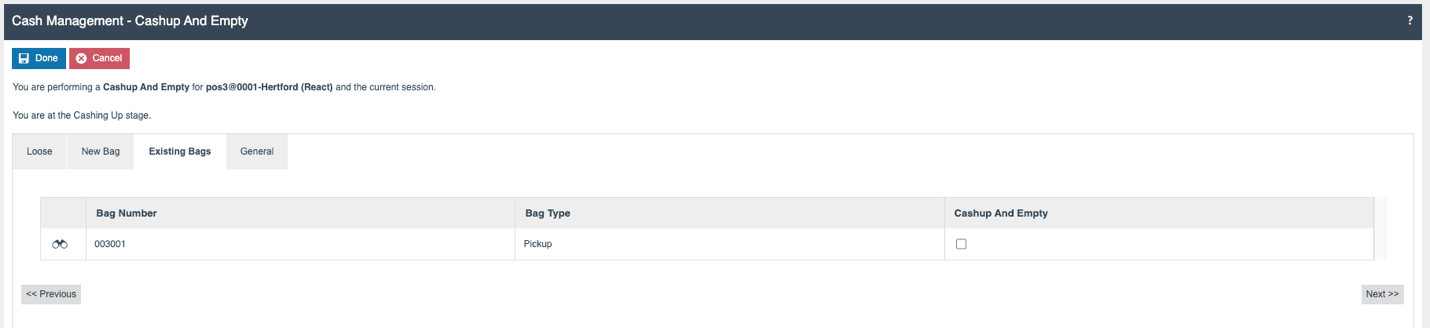
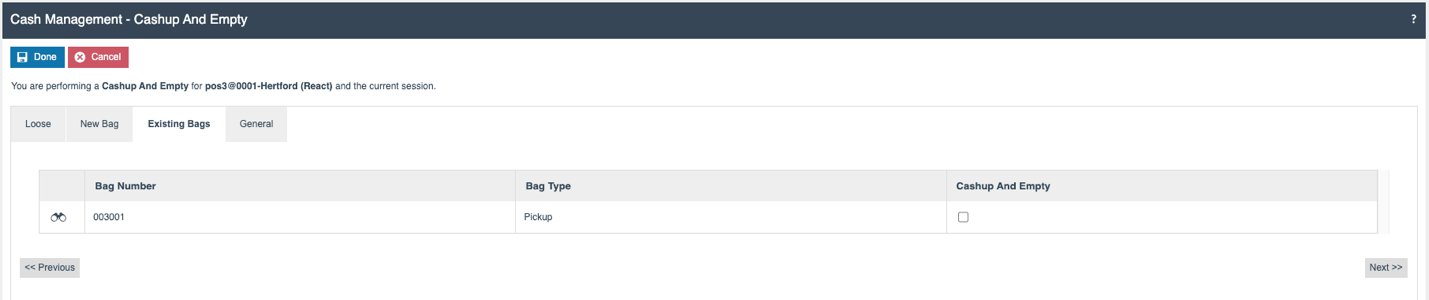
Terminal Cashup - Existing Bag (POS)
When the user selects Existing Bags, the available Bags are listed. The user can select an existing Bag to move money into and complete the Cashup function.
| Function | Outcome |
|---|---|
| Select | Selects a Bag from the list. |
| De-Select | De-selects a Bag from the list (only visible when a bag is selected). |
| Back | Navigates to the Terminal Cashup screen. |
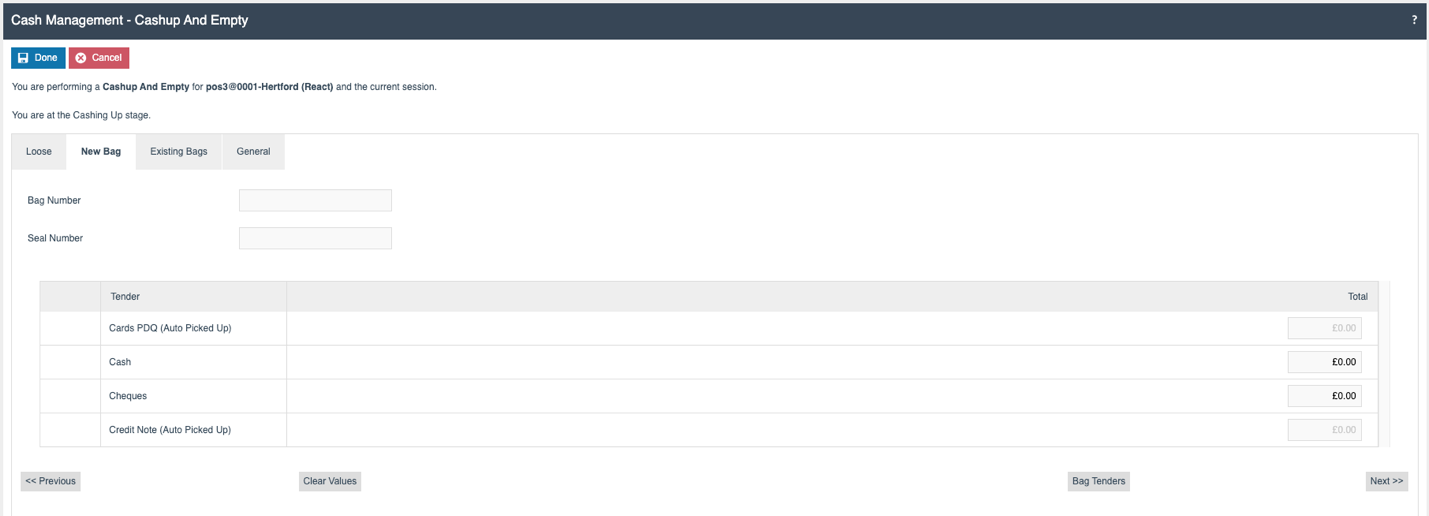
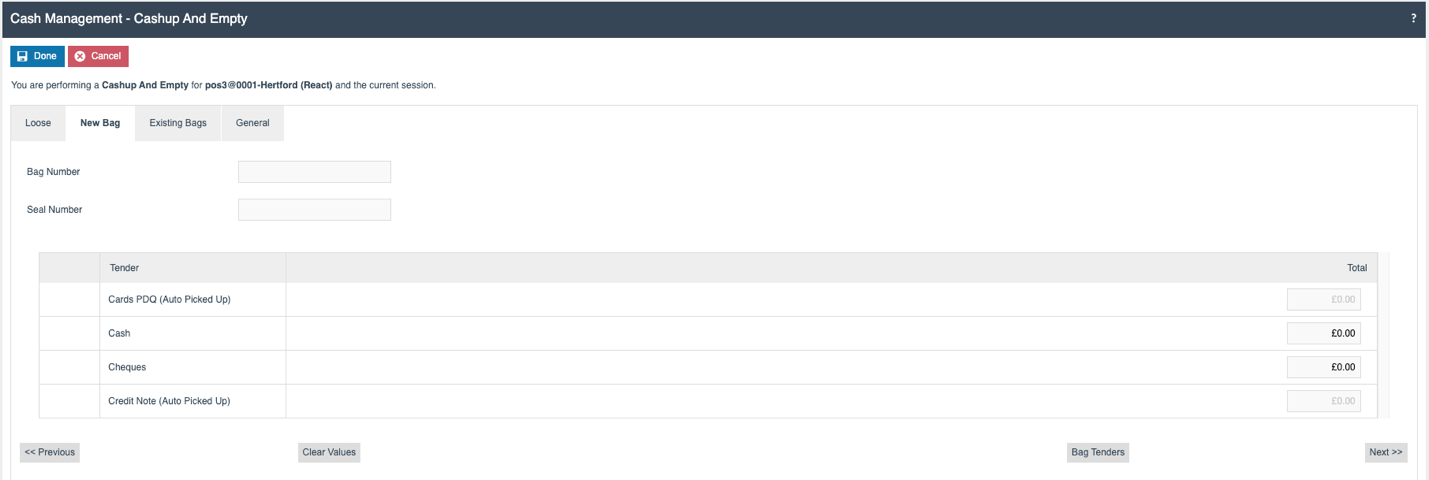
Terminal Cashup - New Bag (POS)
On selecting New Bag from the Cashup screen, the user is directed to add a Bag Number and a Seal Number for identification purposes. The Bag is created during the Cashup process.
Once these values are recorded, the user can record the Tender values to add to the new bag.
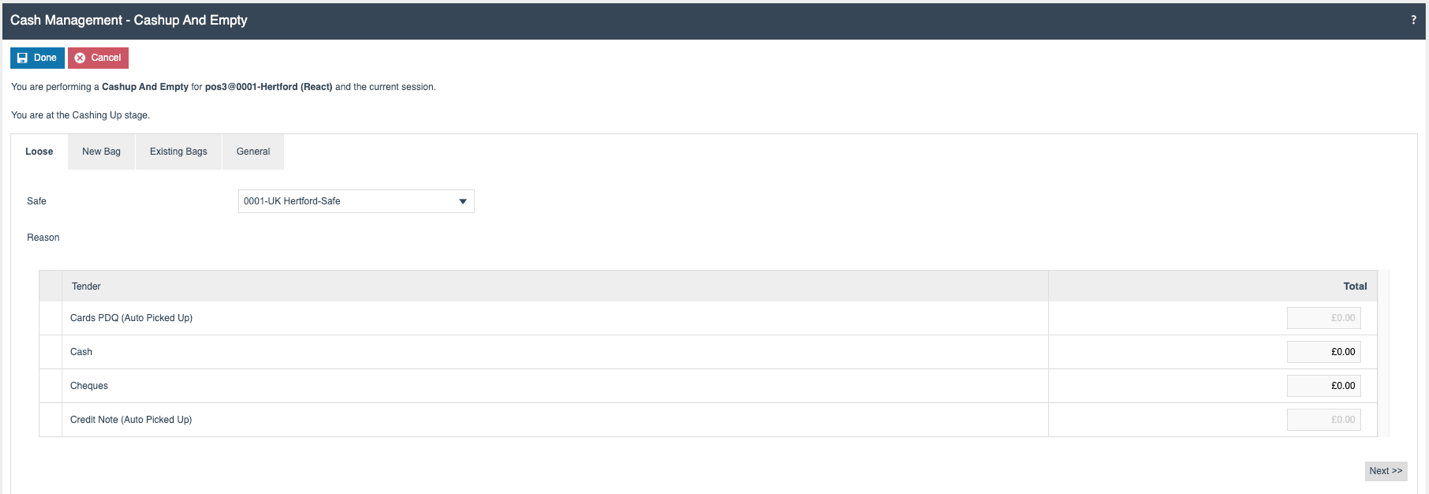
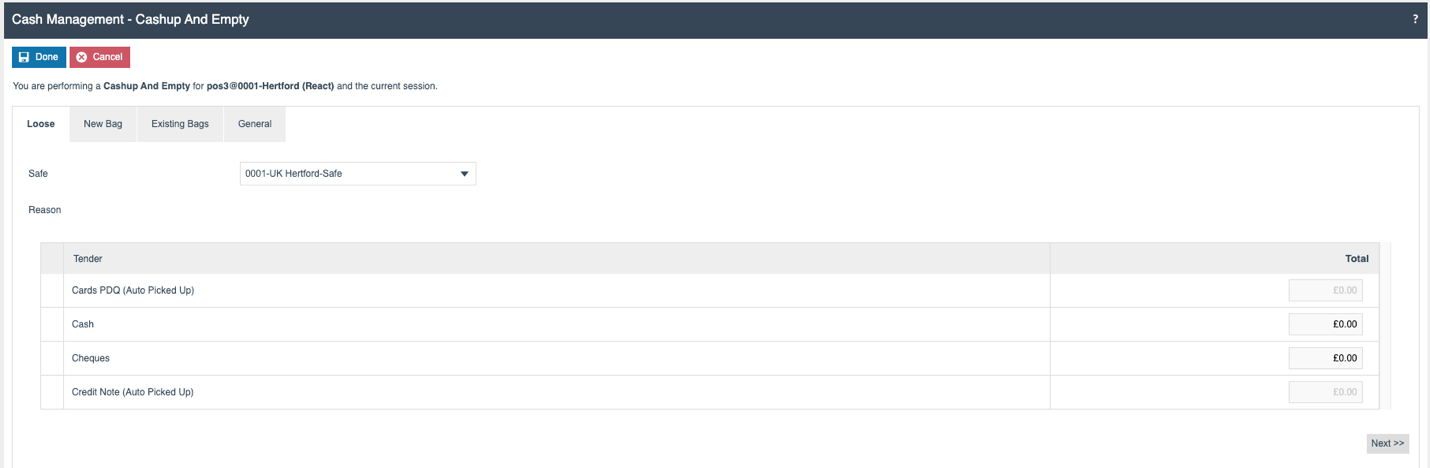
Terminal Cashup - Loose (POS)
The Loose option is only displayed when the Location is configured with Tender Bags as Optional. A Loose declaration moves the tenders directly into the Safe.

Store Server
The POS functions described above are also available on the Store Server. The following section shows the Store Server screens.
Cashup - Loose
Cashup - New Bag
Cashup - Existing Bag
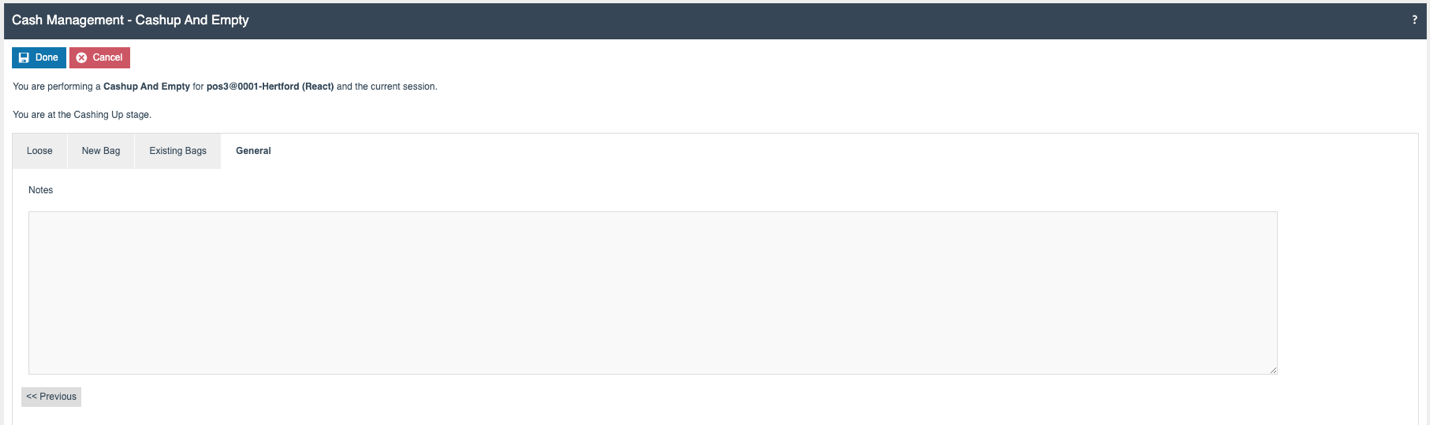
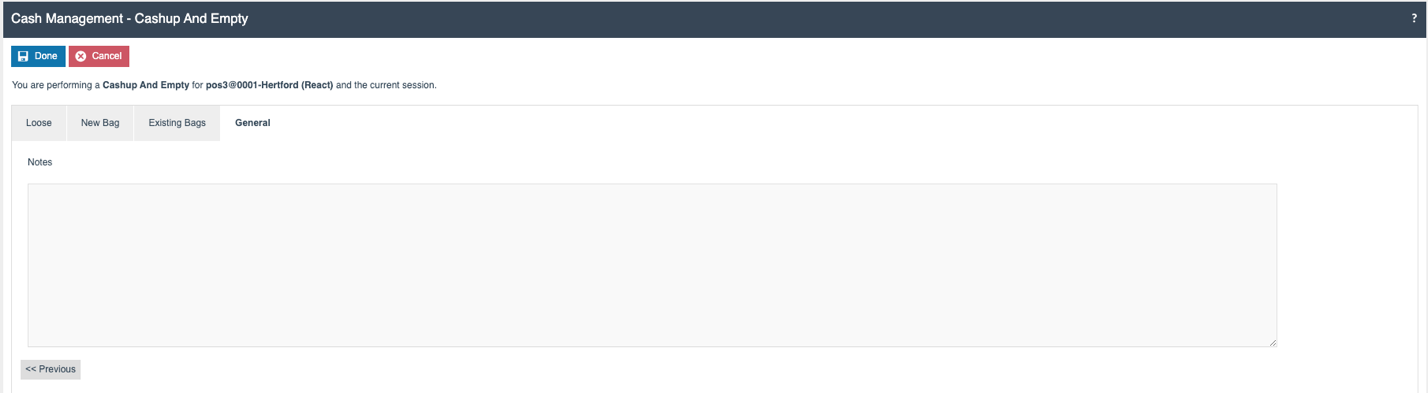
Cashup - General
Safe Cashup
The Safe Cashup function allows the user to finalise the Safe session, concluding the cash management session.
Safe Cashup is completed on the Store Server. The following section describes the Safe Cash Management flow.
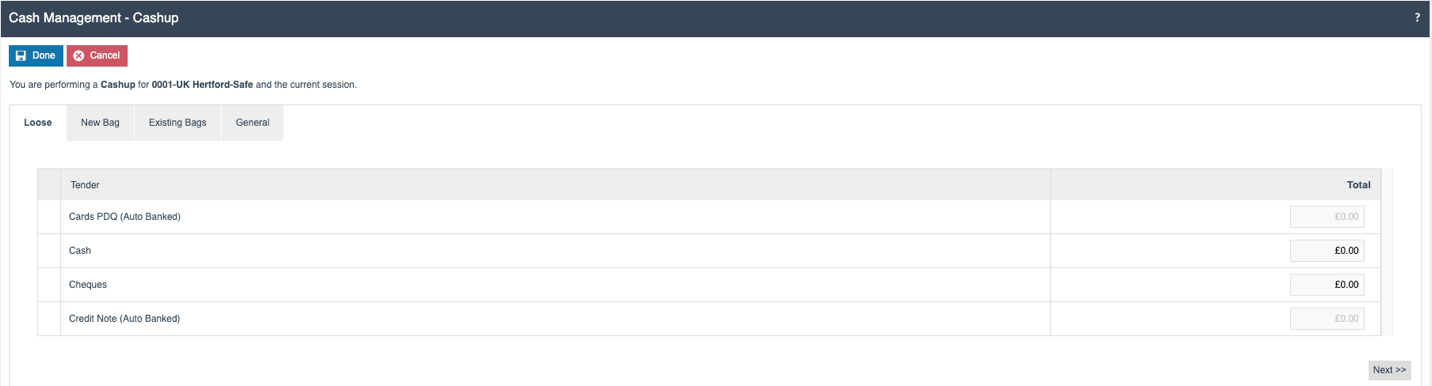
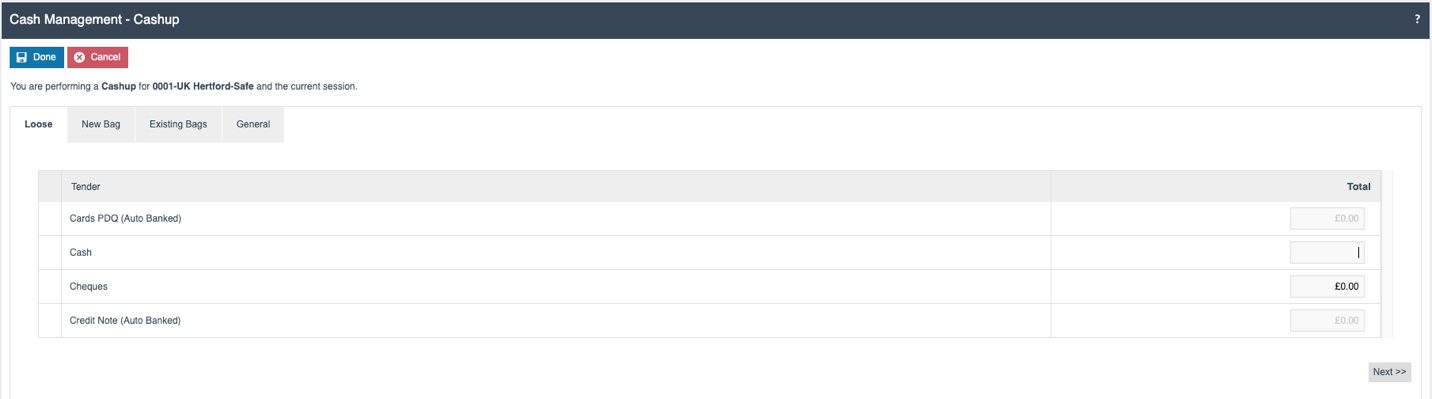
Store Server - Loose
On selecting the Safe Cashup option, if the Location's Tender Bag configuration is set to Optional, then the initial tab displayed is Loose.
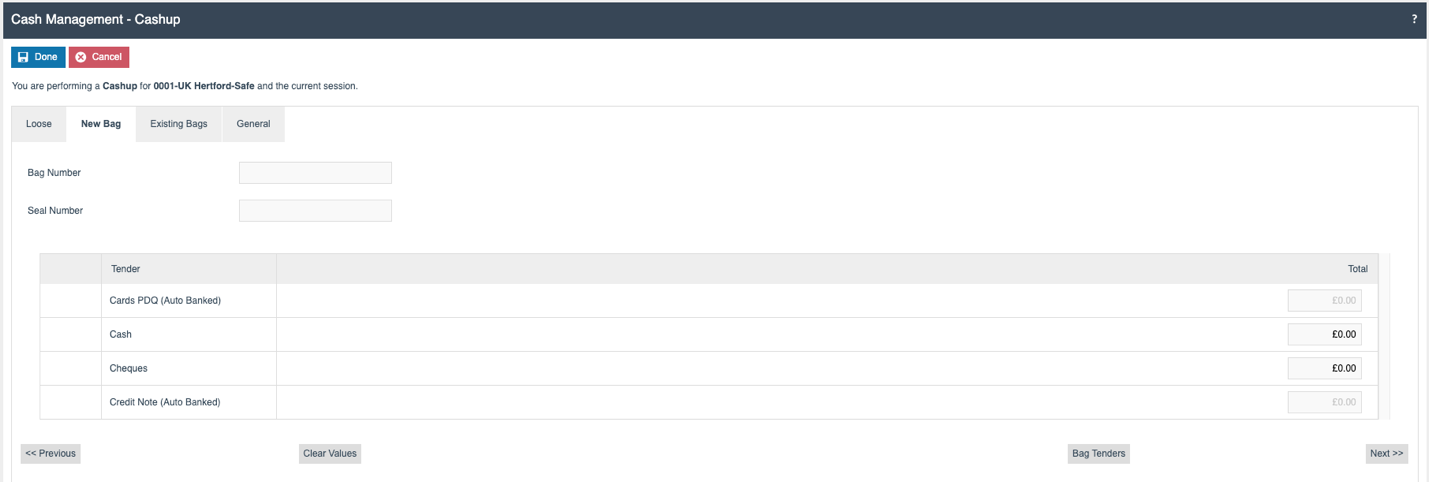
Store Server - New Bag
This tab is used to create a new bag while performing the Safe Cashup function. The user adds the Bag ID and the Seal Number to create the bag.
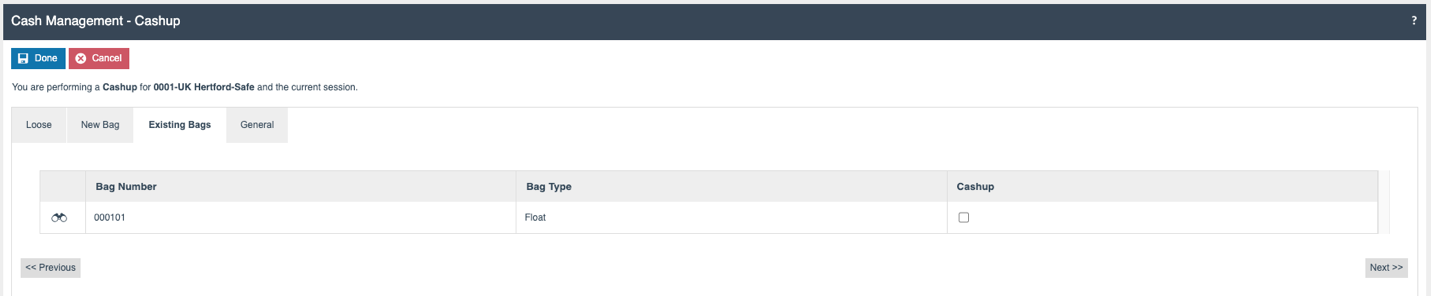
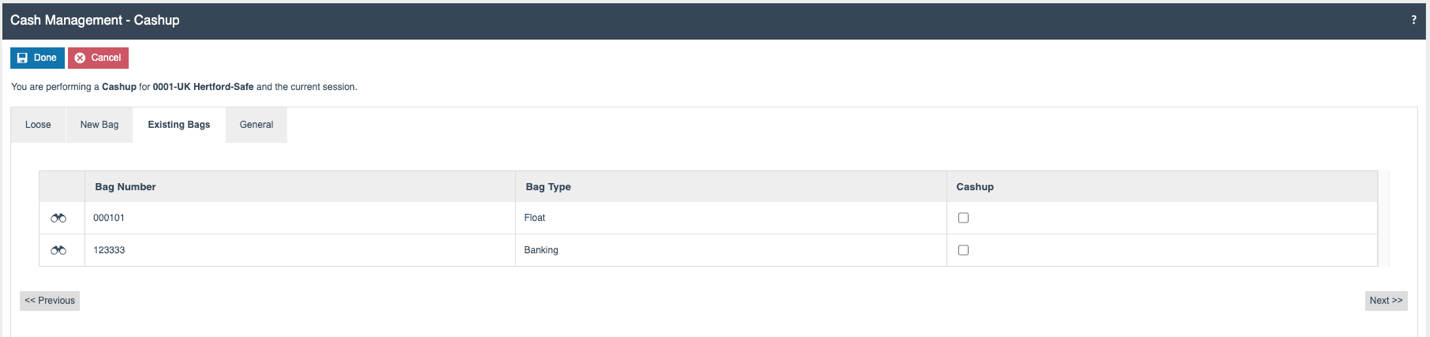
Store Server - Existing Bag
The Existing Bag tab displays the bags which need to be cashed up in the active session. This displays the list of Pickup bags which have been transferred from Terminal to Safe using the Terminal Pickup function, and any Float bags that have been created.
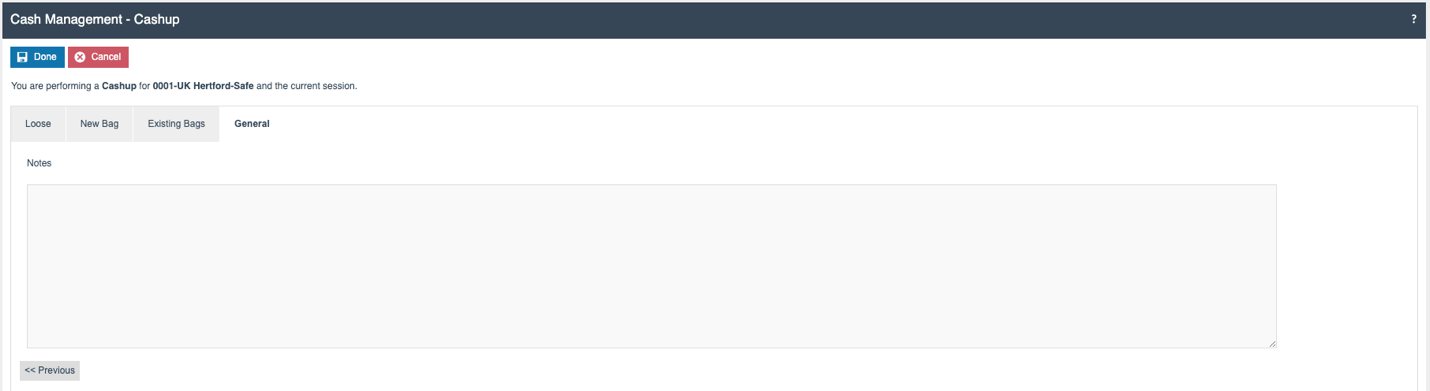
Store Server - General
Any notes related to the Safe Cashup action can be recorded here.
Terminal Bag Tender
This function allows the operator to create a Bag of type Pickup.
Only new bags are created during this process, and these are accessible for Terminal sessions only. The following section explains how the function operates on both the POS and the Store Server.
POS

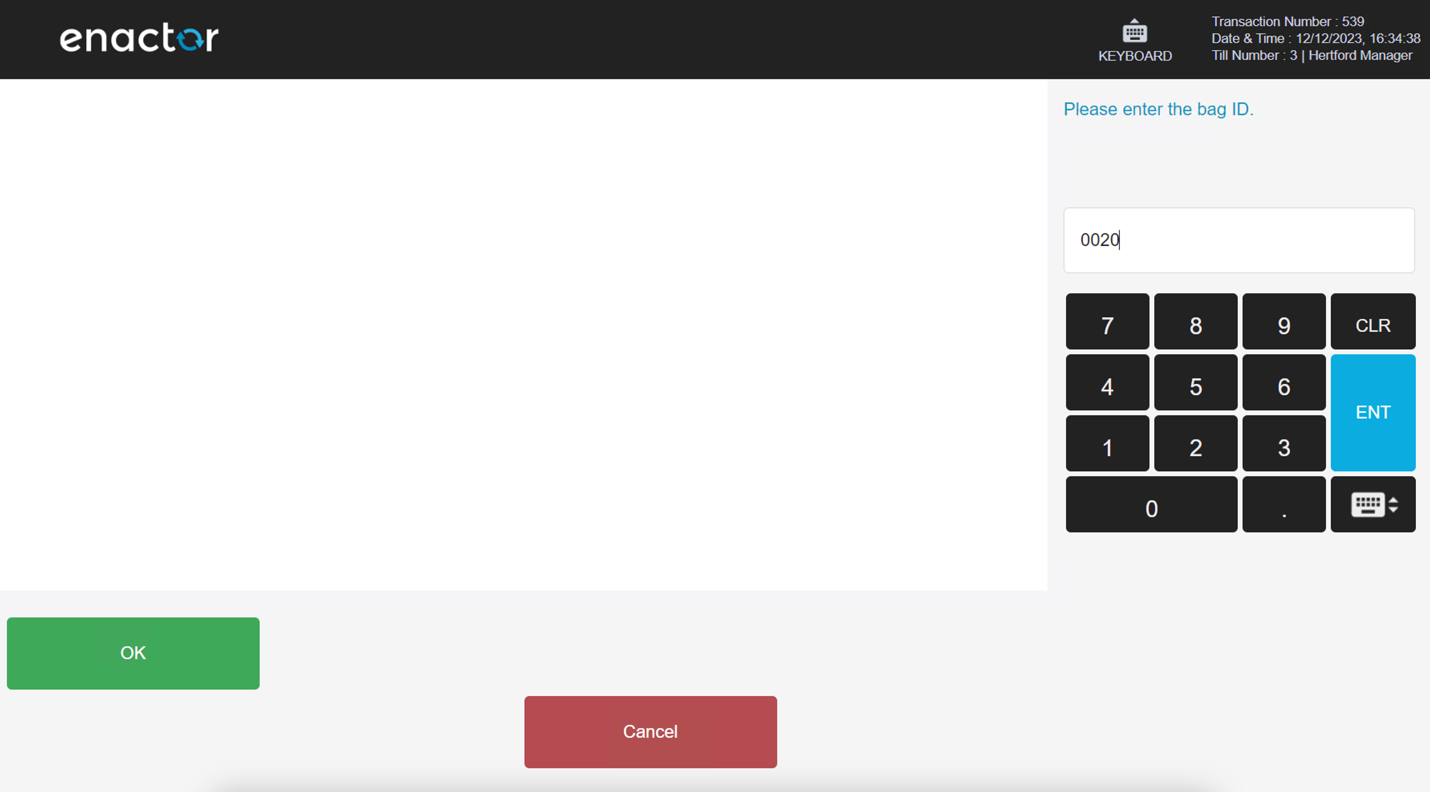
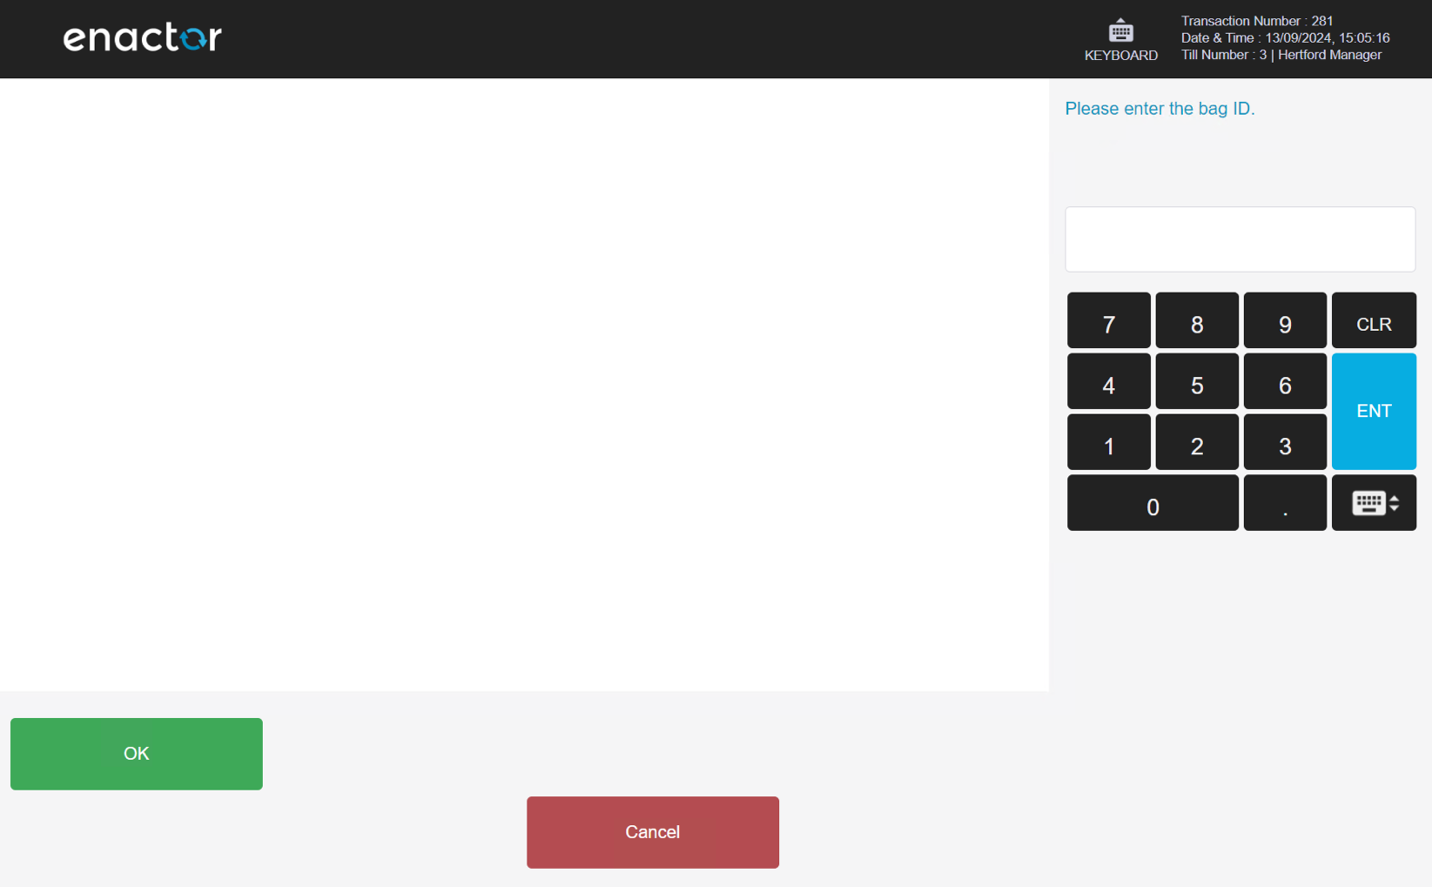
| Function | Outcome |
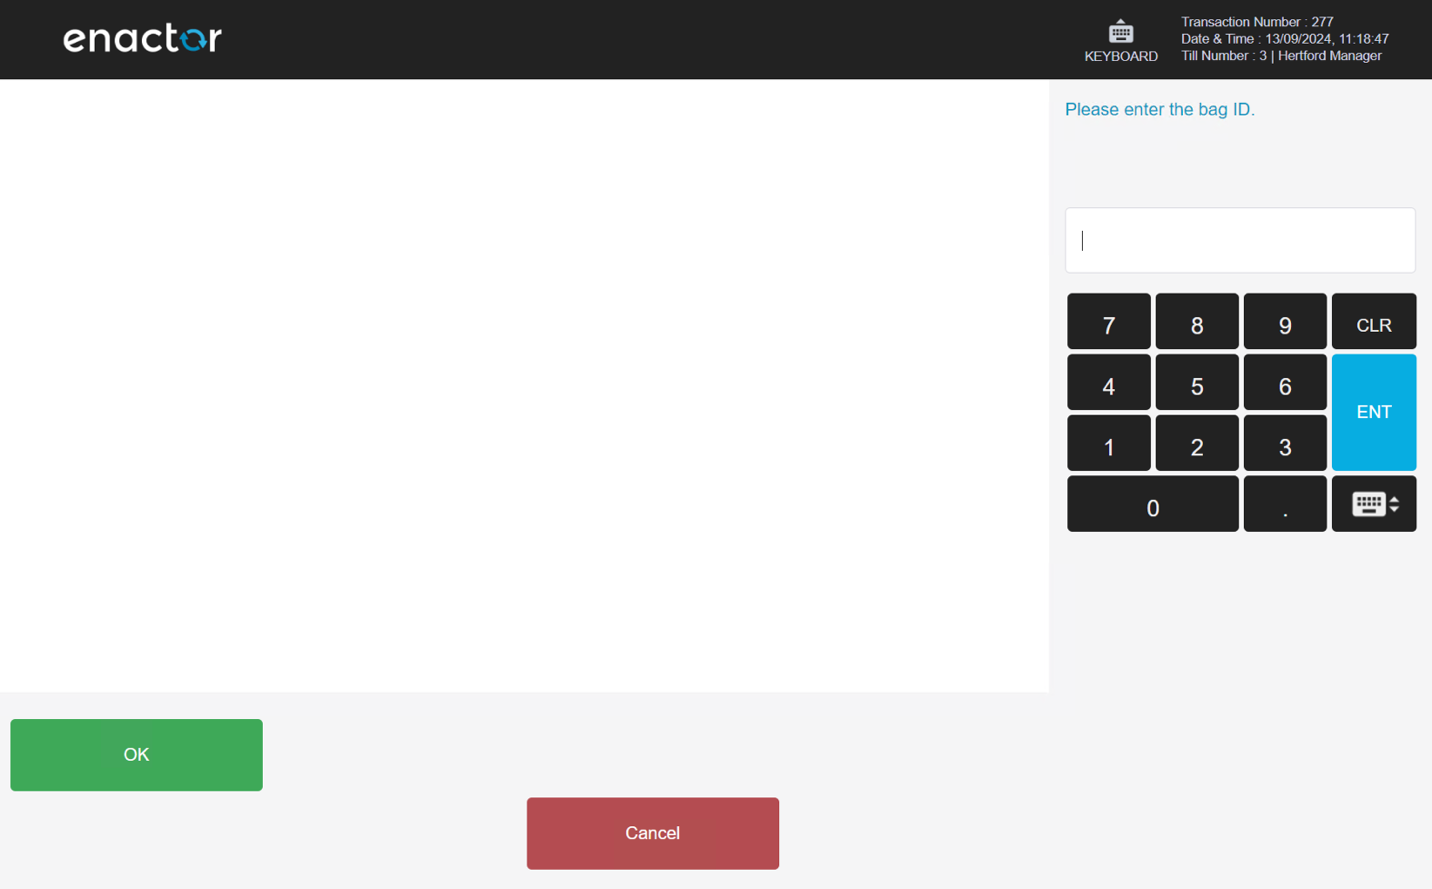
|---|---|
| OK | Allows the user to continue after the Bag ID is entered. |
| Cancel | Cancels the process. |

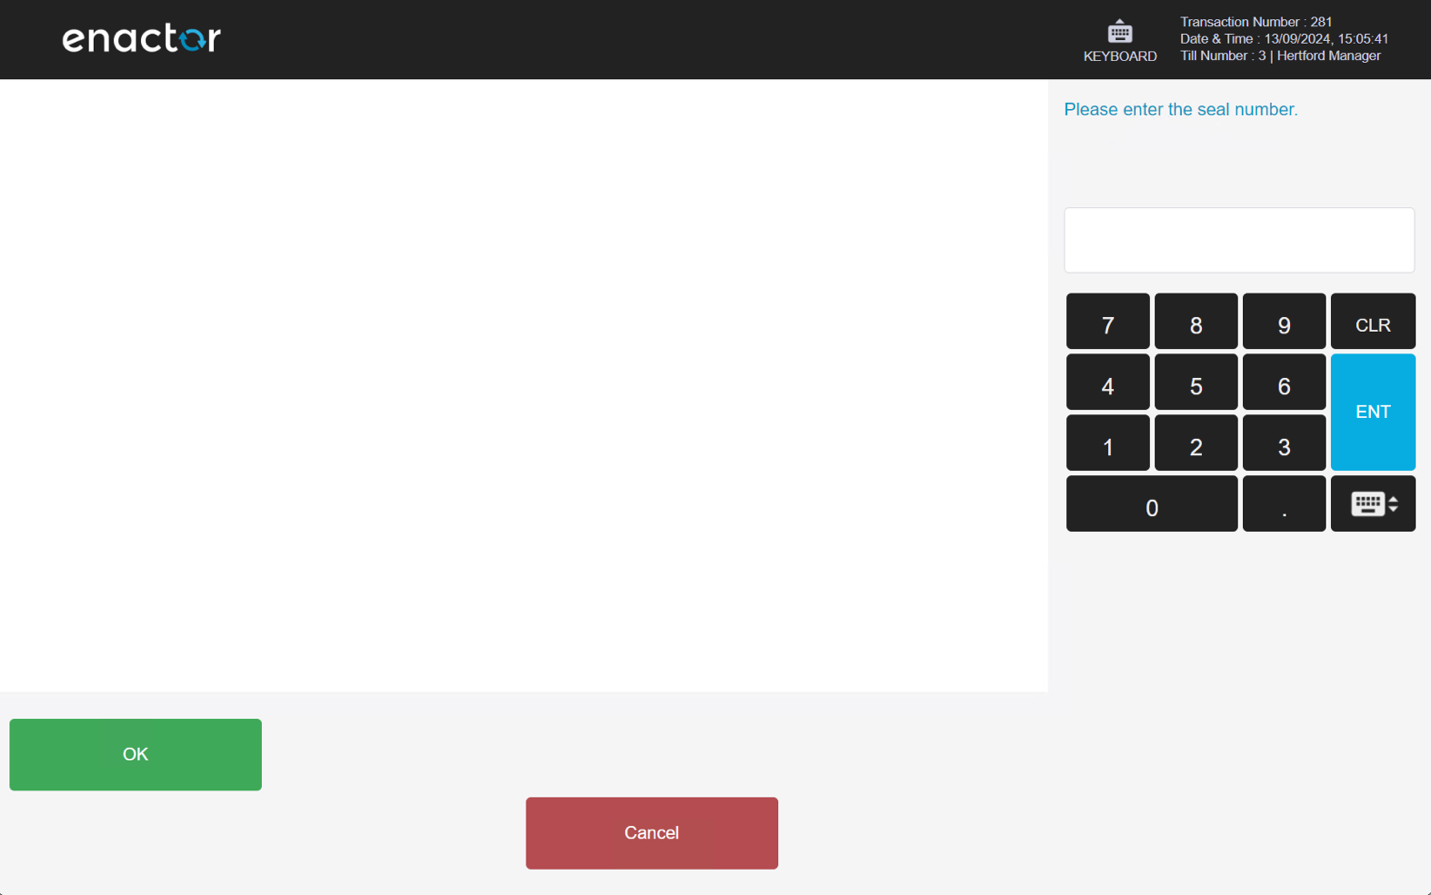
| Function | Outcome |
|---|---|
| OK | Allows the user to continue after the Seal Number is entered. |
| Cancel | Cancels the process. |

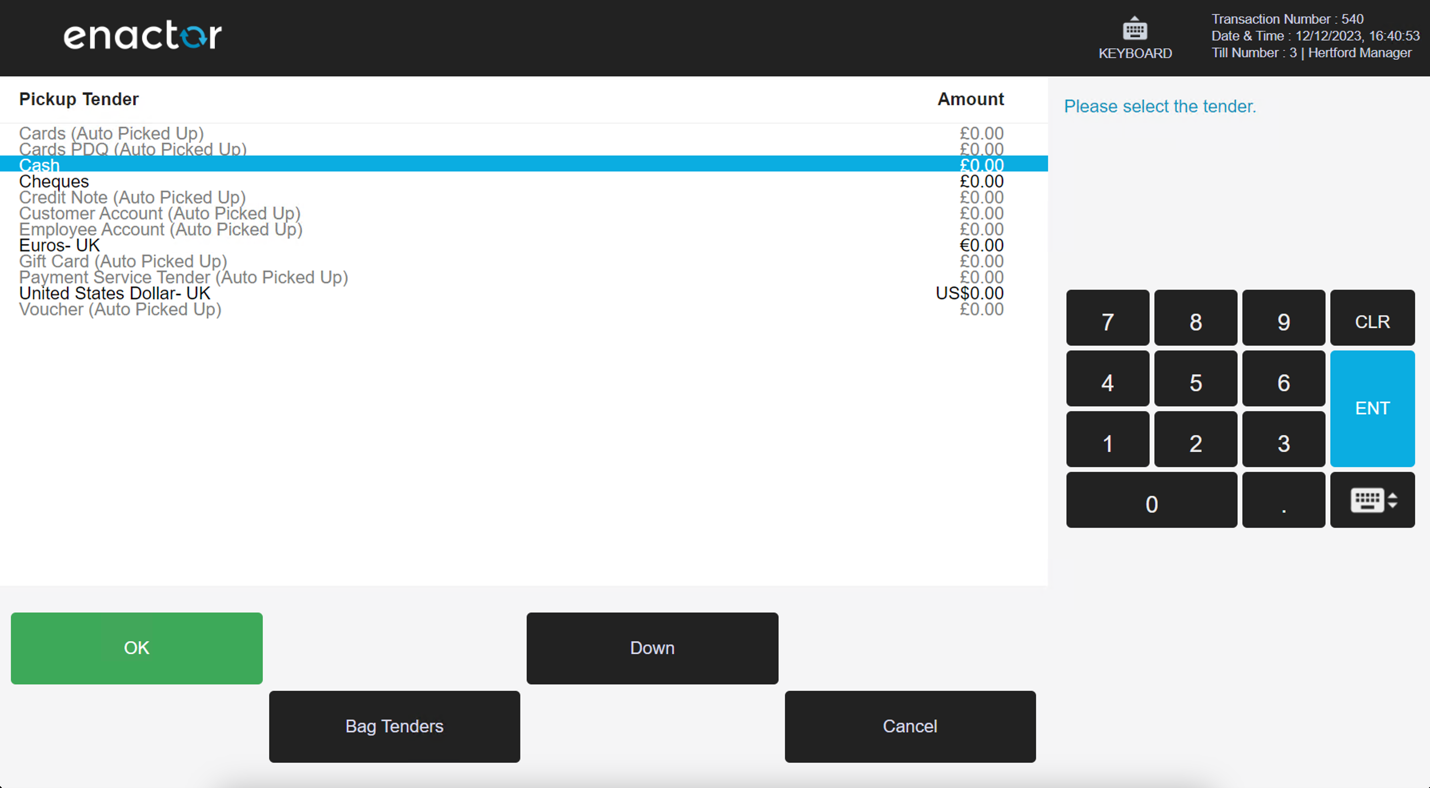
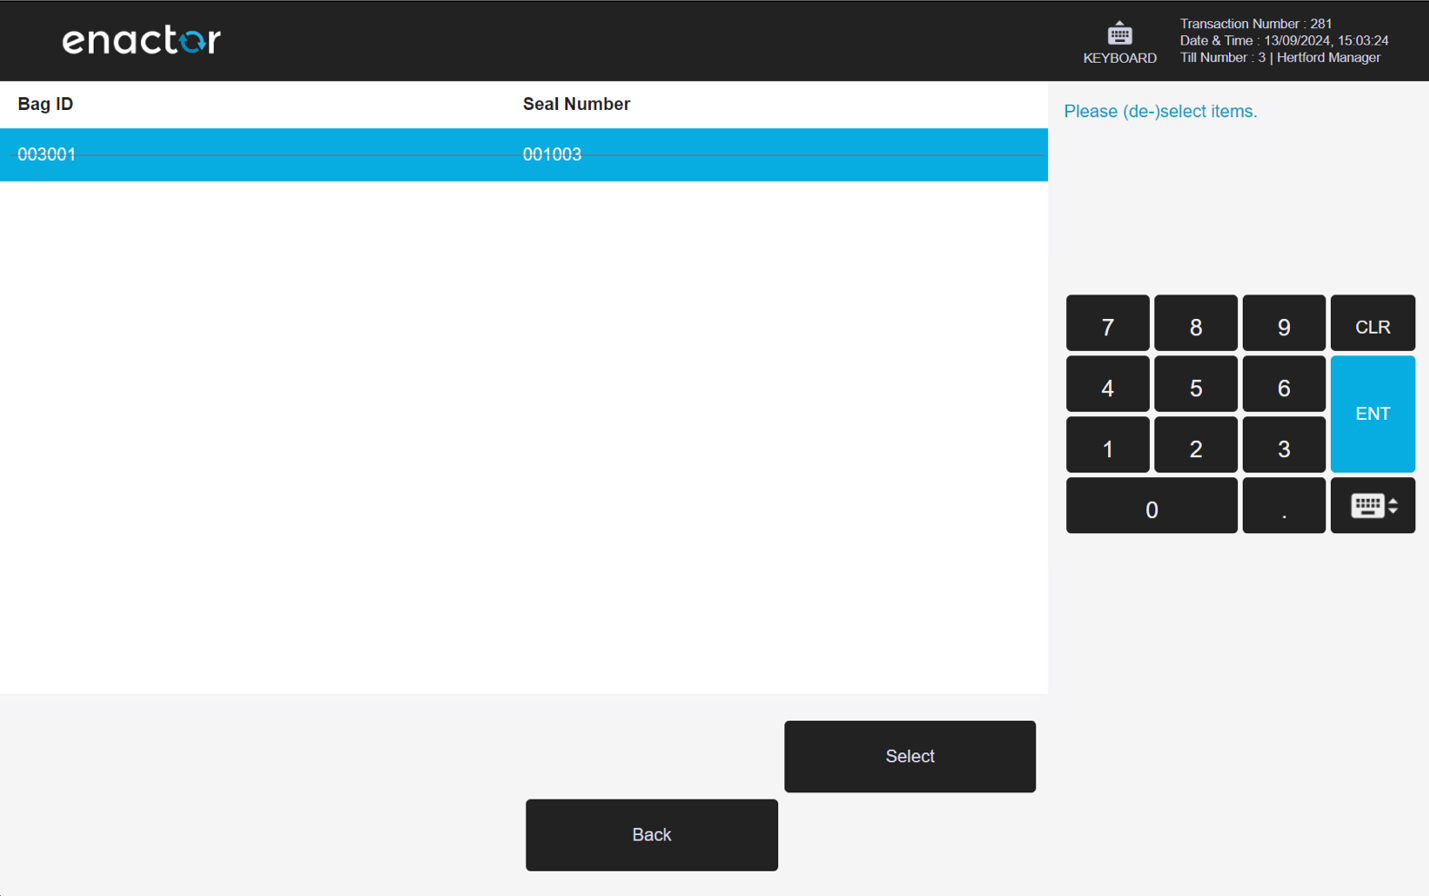
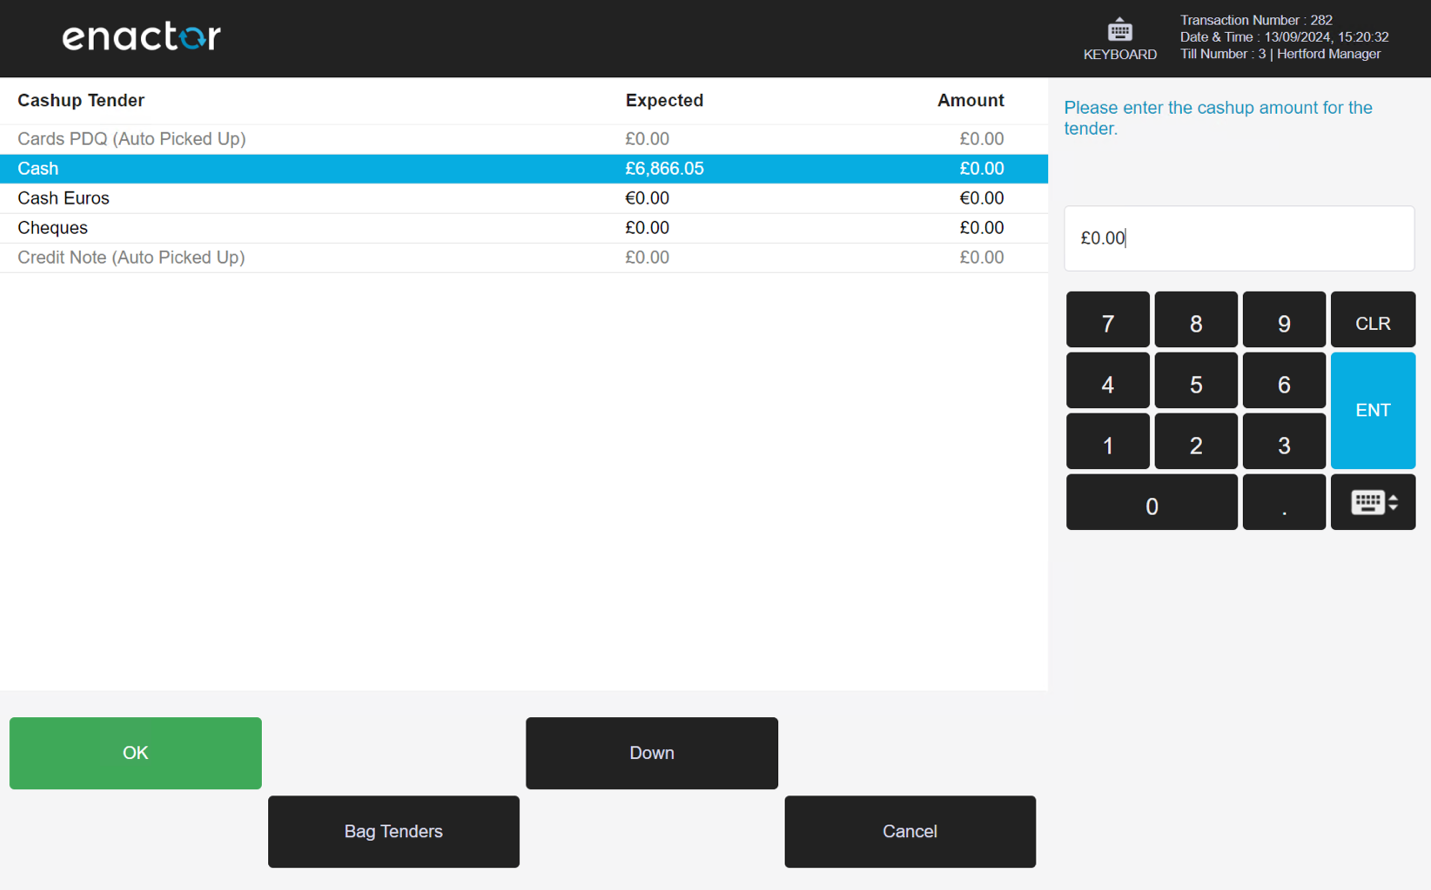
| Function | Outcome |
|---|---|
| OK | Selects the highlighted tender. |
| Notes | Allows the user to enter notes in a free text field. |
| Void | Voids the process. |
| Complete | Completes the process. |
Store Server
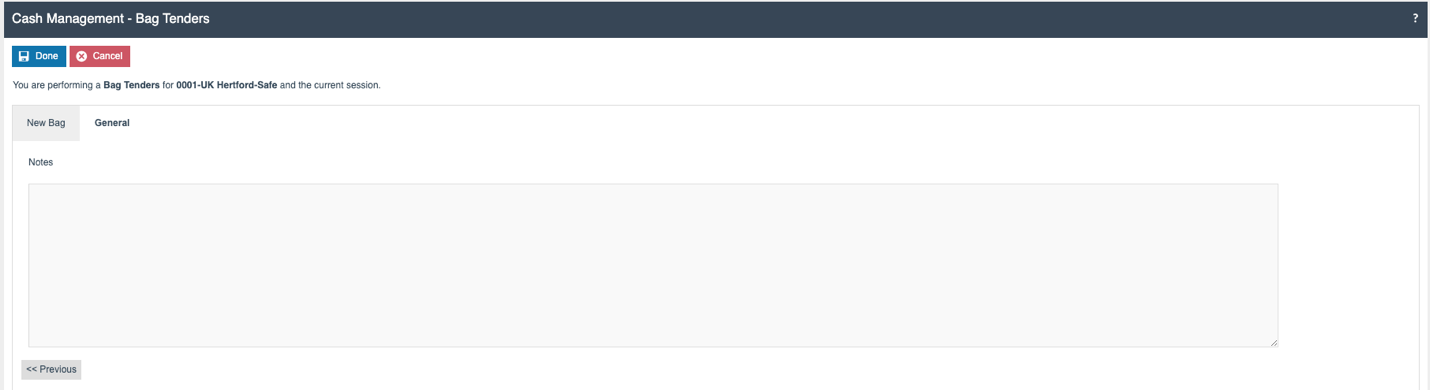
Terminal Bag - New Bag
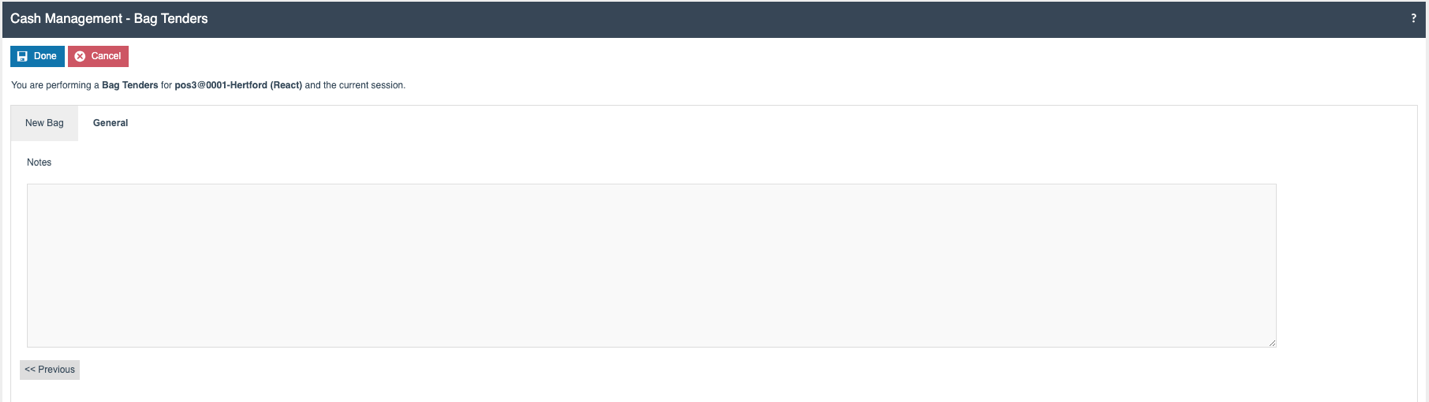
Terminal Bag - General
Terminal Unbag Tenders
This function allows the user to unbag any Float and Pickup type bags in the active Terminal Cash Management session. The list displayed is determined by the bag type. An authorised user can perform this function at the POS or the Store Server.
POS
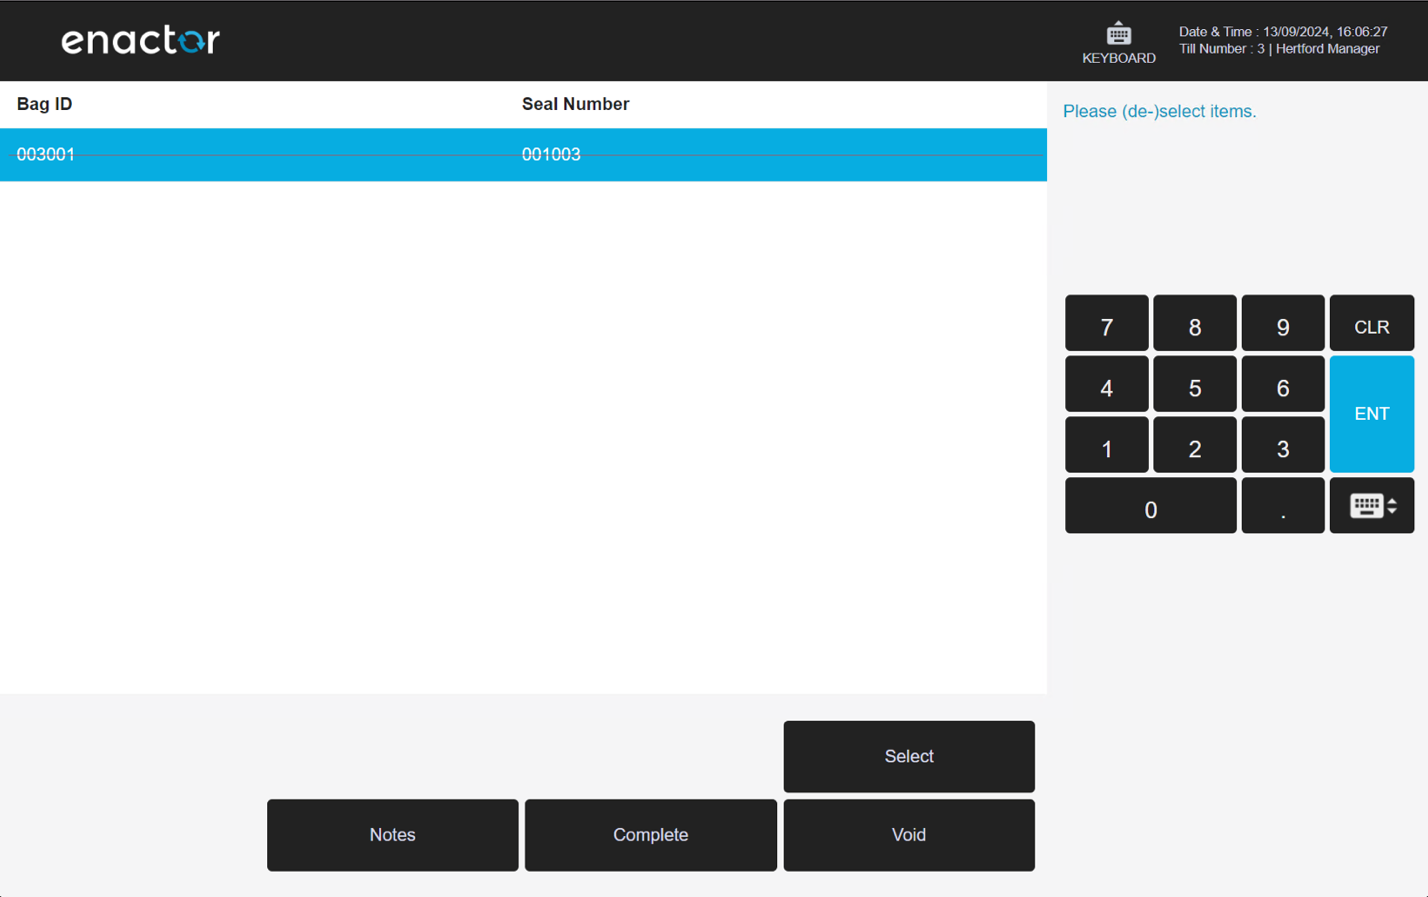
| Function | Outcome |
|---|---|
| Select | Selects a Bag from the list. |
| De-Select | Deselects a Bag from the list. |
| Void | Voids the process. |
| Complete | Completes the process. |
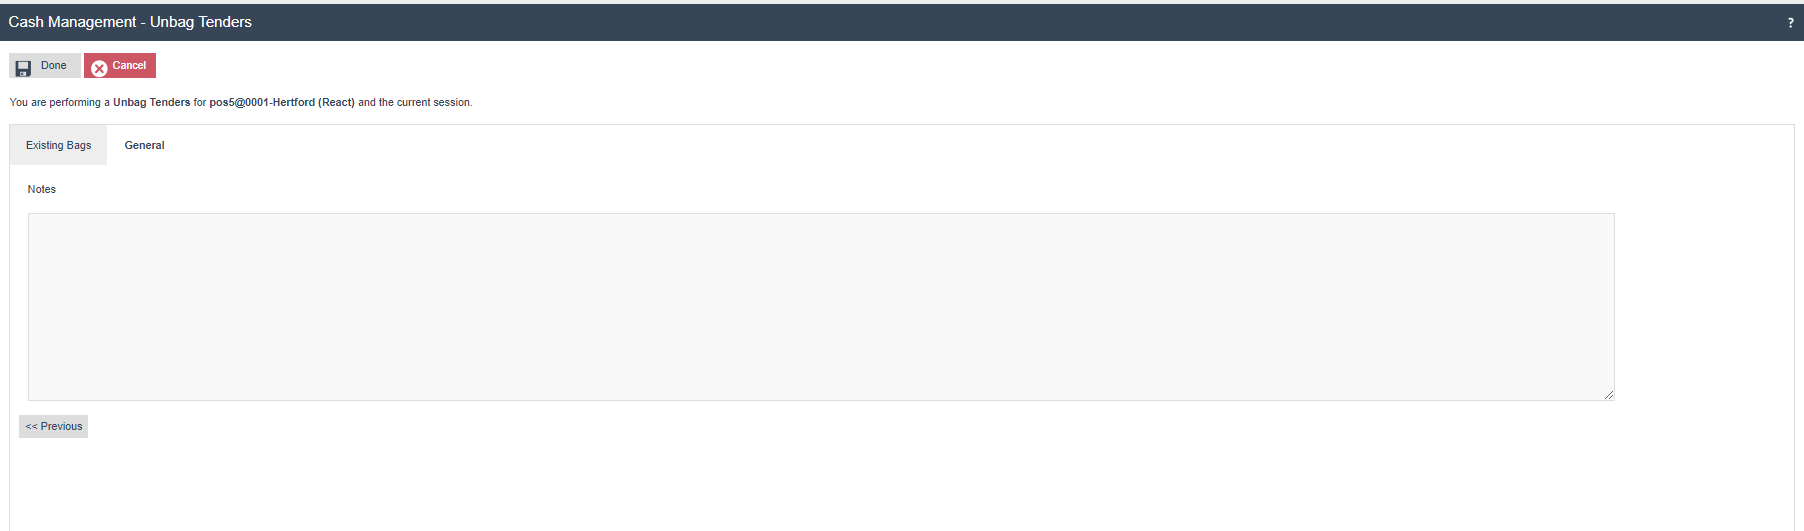
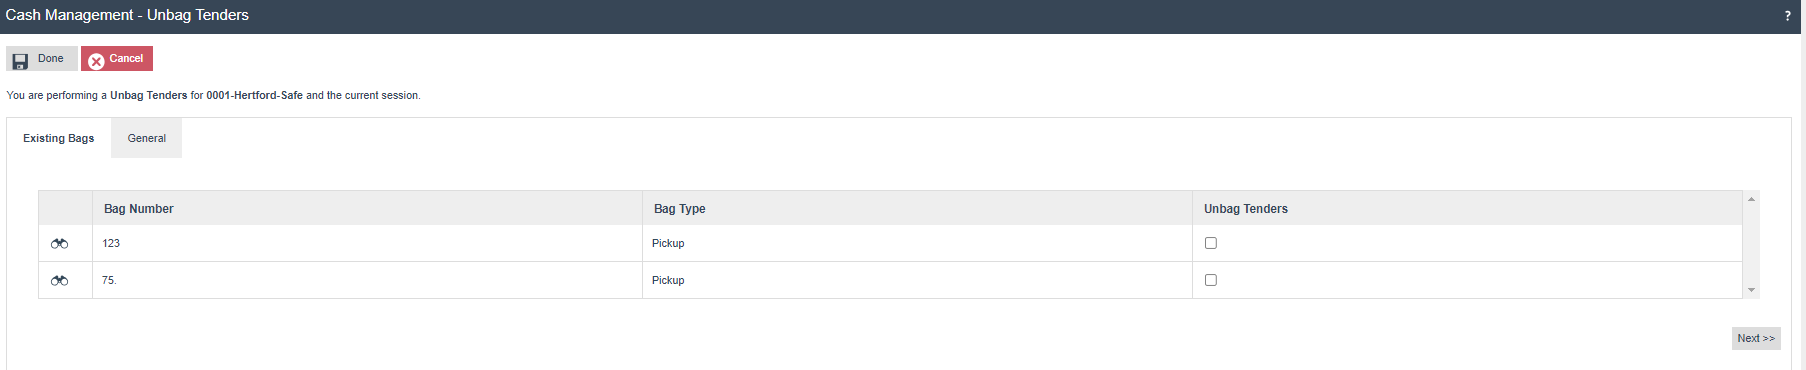
Store Server

Unbag - General
Safe Bag
The Safe Bag function allows users to create Banking and Float bags. Once created, these Bags can be selected for banking and terminal float functions.
Store Server
Safe Bag - New Bag

The Bag can be created by adding the Bag Number, Seal Number, and Bag Type. The Bag Type selected here can be either a Banking bag or a Float bag.
Safe Bag - General
Safe Unbag
The Safe Unbag function can be used to unbag Pickup bags that have been sent from the Terminal to the Safe. The following section describes the Store Server process for unbagging bags.
Store Server
Safe Unbag - Existing Bag
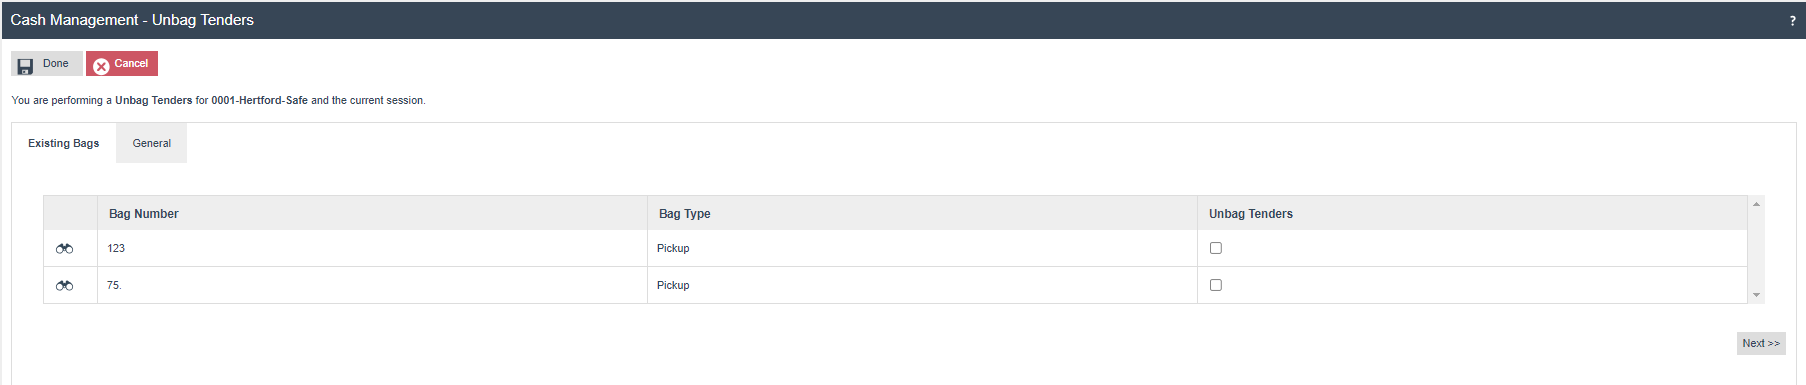
If the user selects the Unbag Tender option against the Bag ID, the selected bag is unbagged and the Tenders within it are returned to the Safe.
Safe Unbag - General
Safe Bag Collection
In this function the user can select the bags which are sent to the bank. The user can select the applicable bags collected for Banking. An authorised user can perform this function on the Store Server.
Store Server
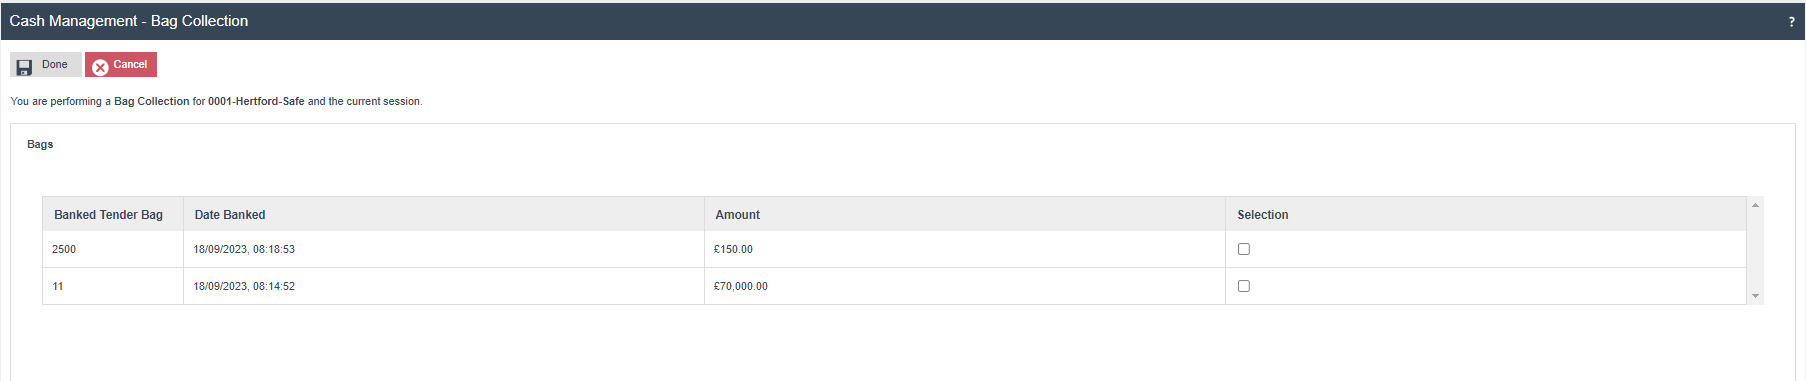
When the user selects the Selection flag and selects the Done button, a confirmation popup is displayed. When the user selects OK, the selected bag is marked as collected.
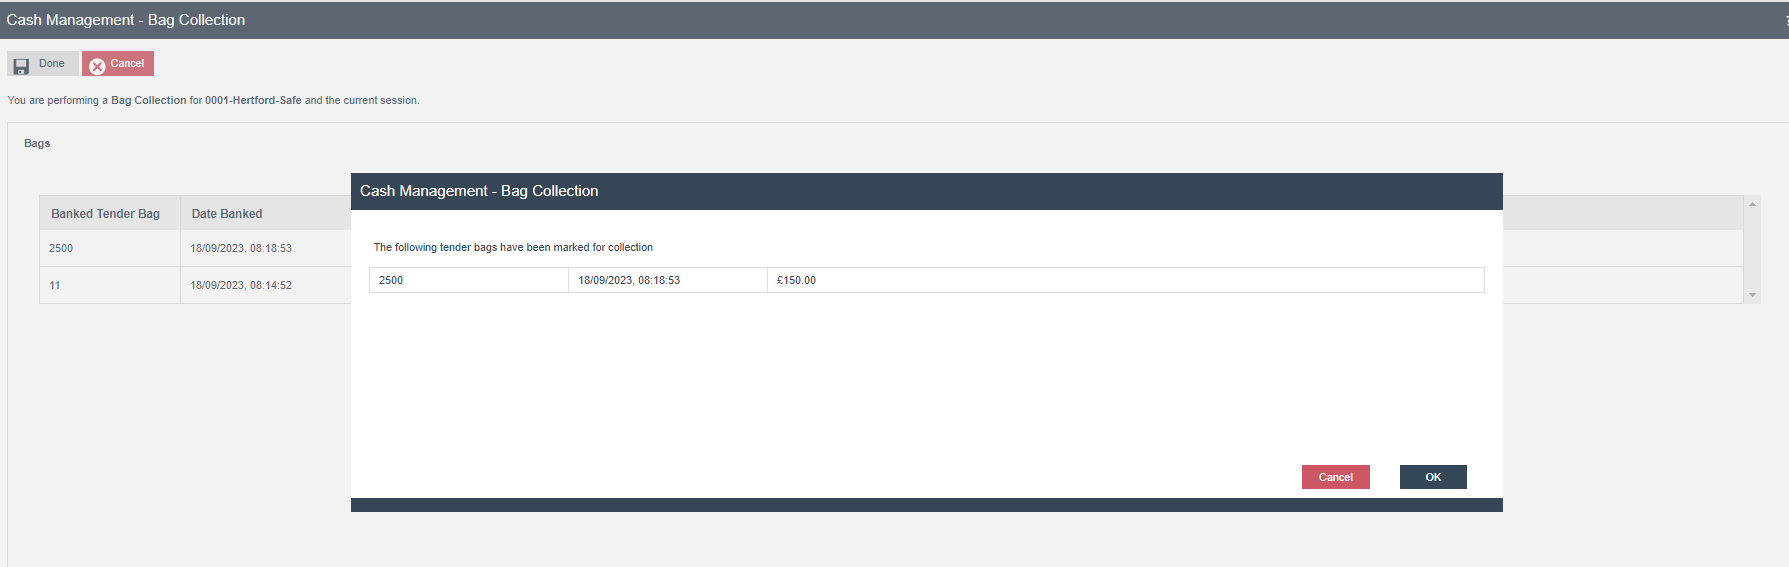
A Tender Bag Collection by Transaction report is generated.
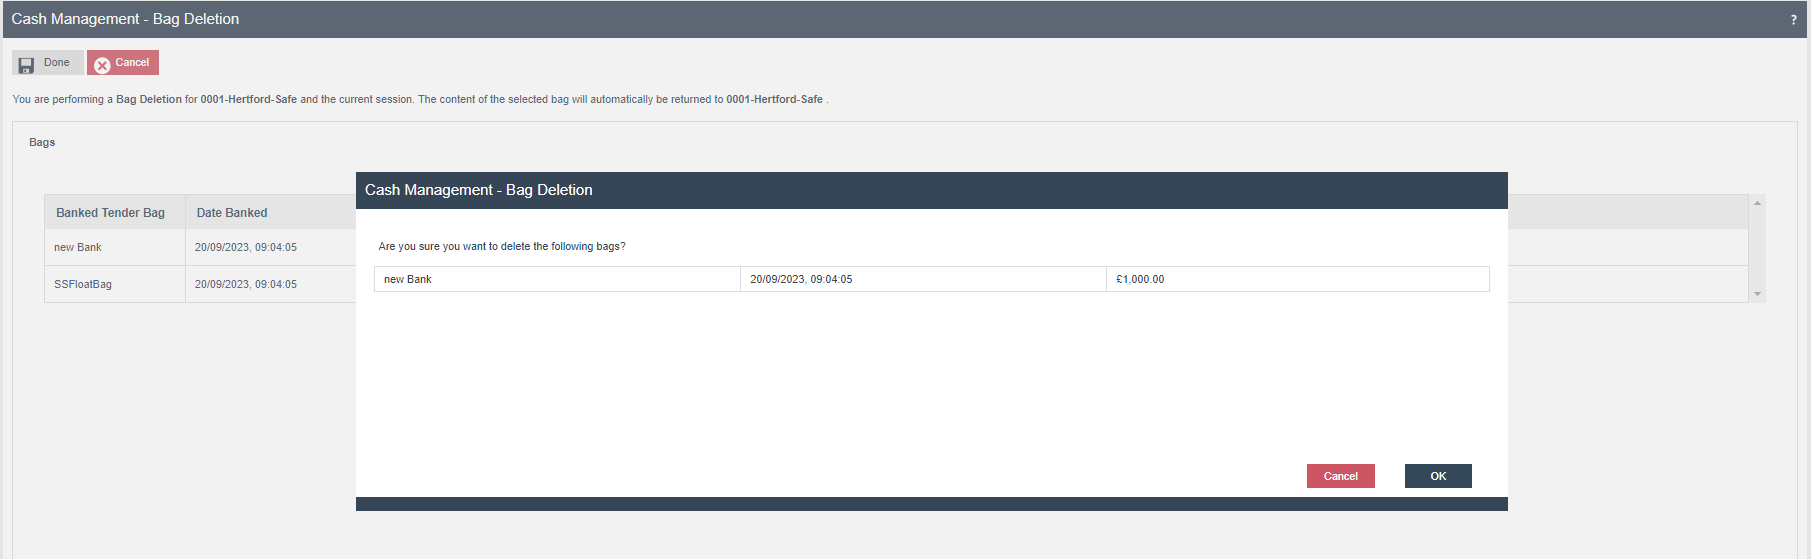
Safe Bag Deletion
The Safe Bag Deletion function can be used to delete a safe bag. This could be used if an incorrect seal number has been given to a bag or if there is a miscount.
Store Server

When the user selects a bag and selects the Done button, a confirmation popup is displayed to delete the bag.
Banking
The Banking function allows the recording of Tenders which are removed from the Safe and transferred to the Bank. Only Banking type Bags can be banked.
Banking is the final stage in the Safe Cash Management process and concludes the active safe session.
Store Server
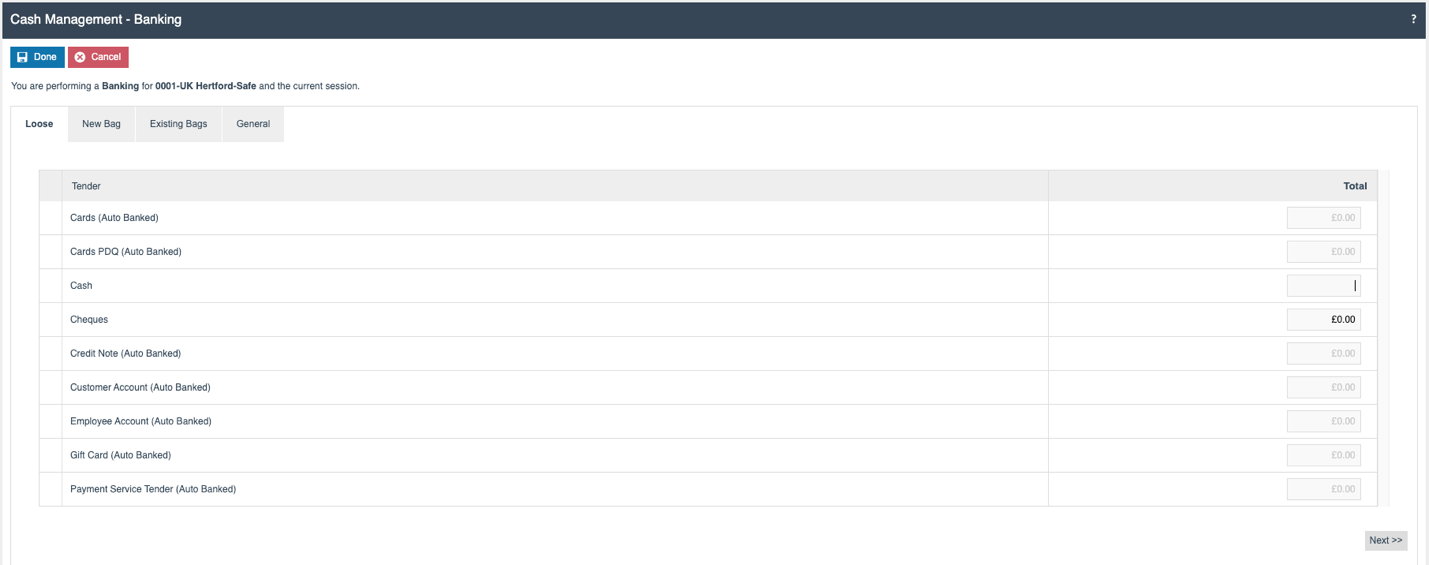
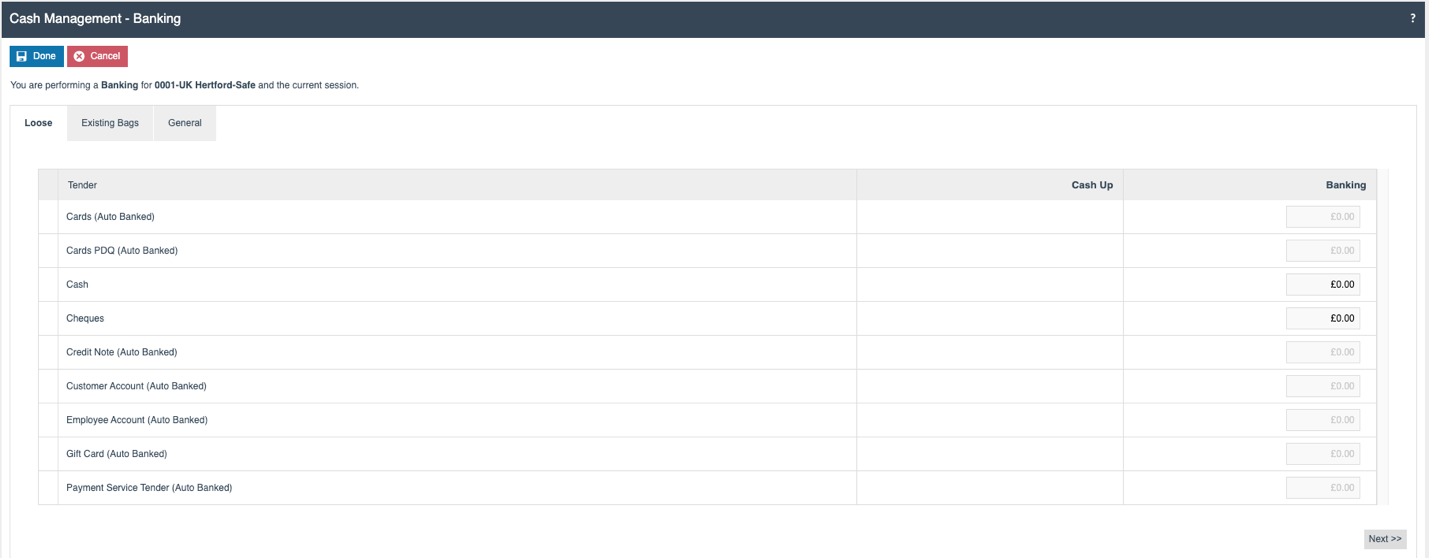
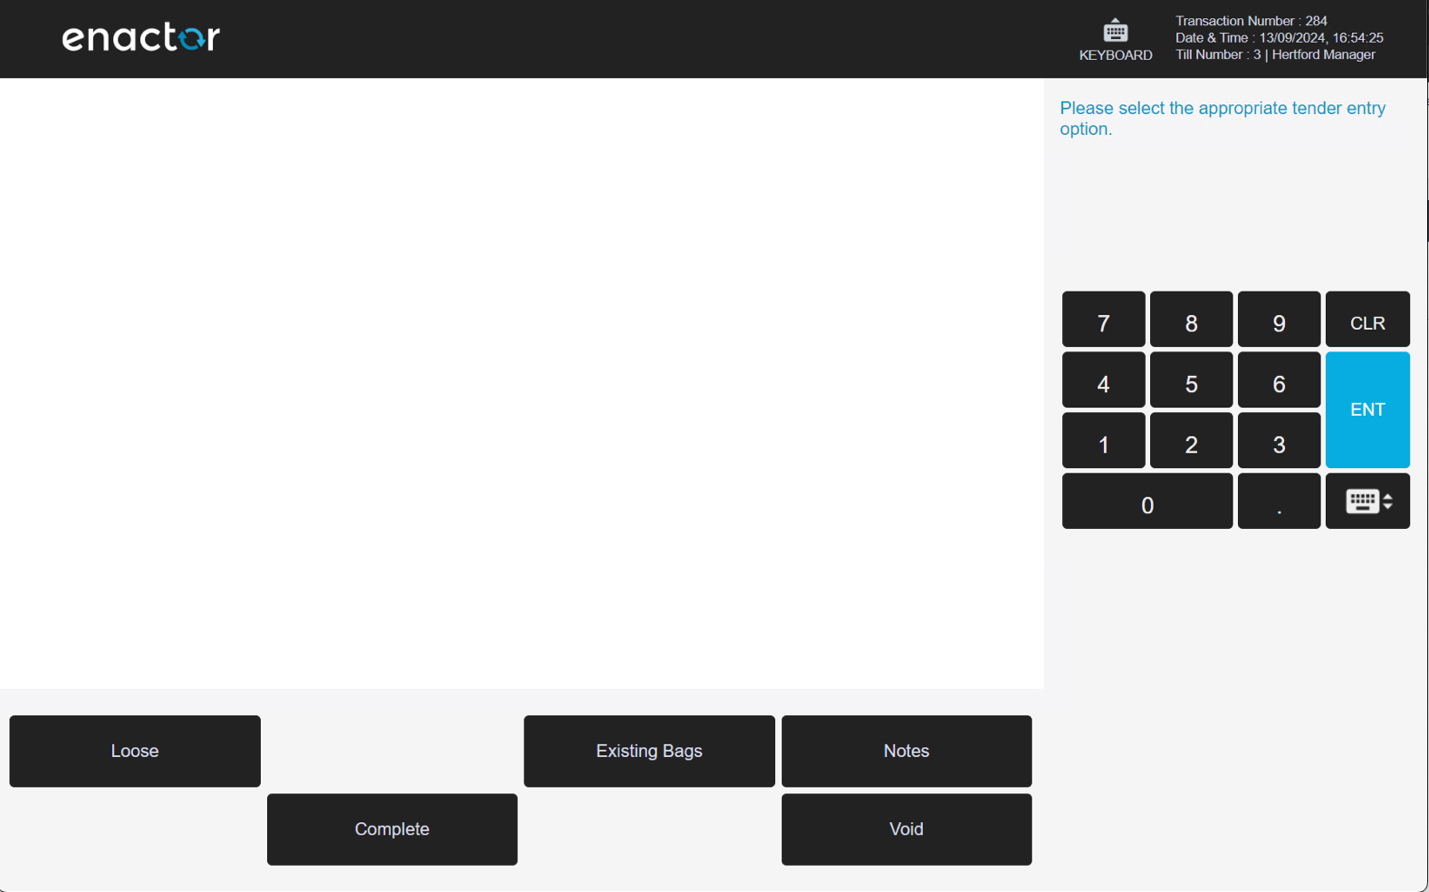
Banking - Loose
The Loose option is only displayed when the Location is configured with Tender Bags as Optional. Adding tenders in the Loose tab allows the banking of tenders that have not already been added to a Banking Bag.
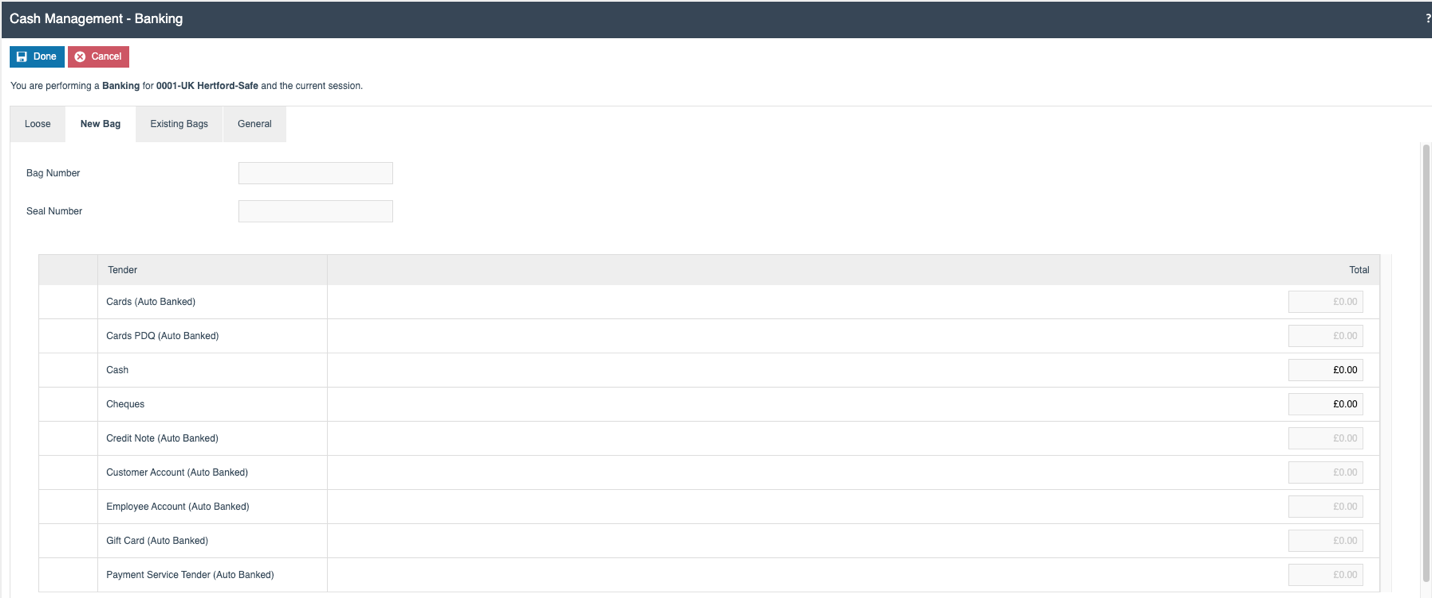
Banking - New Bag
The New Bag tab allows the user to create a new Banking bag.
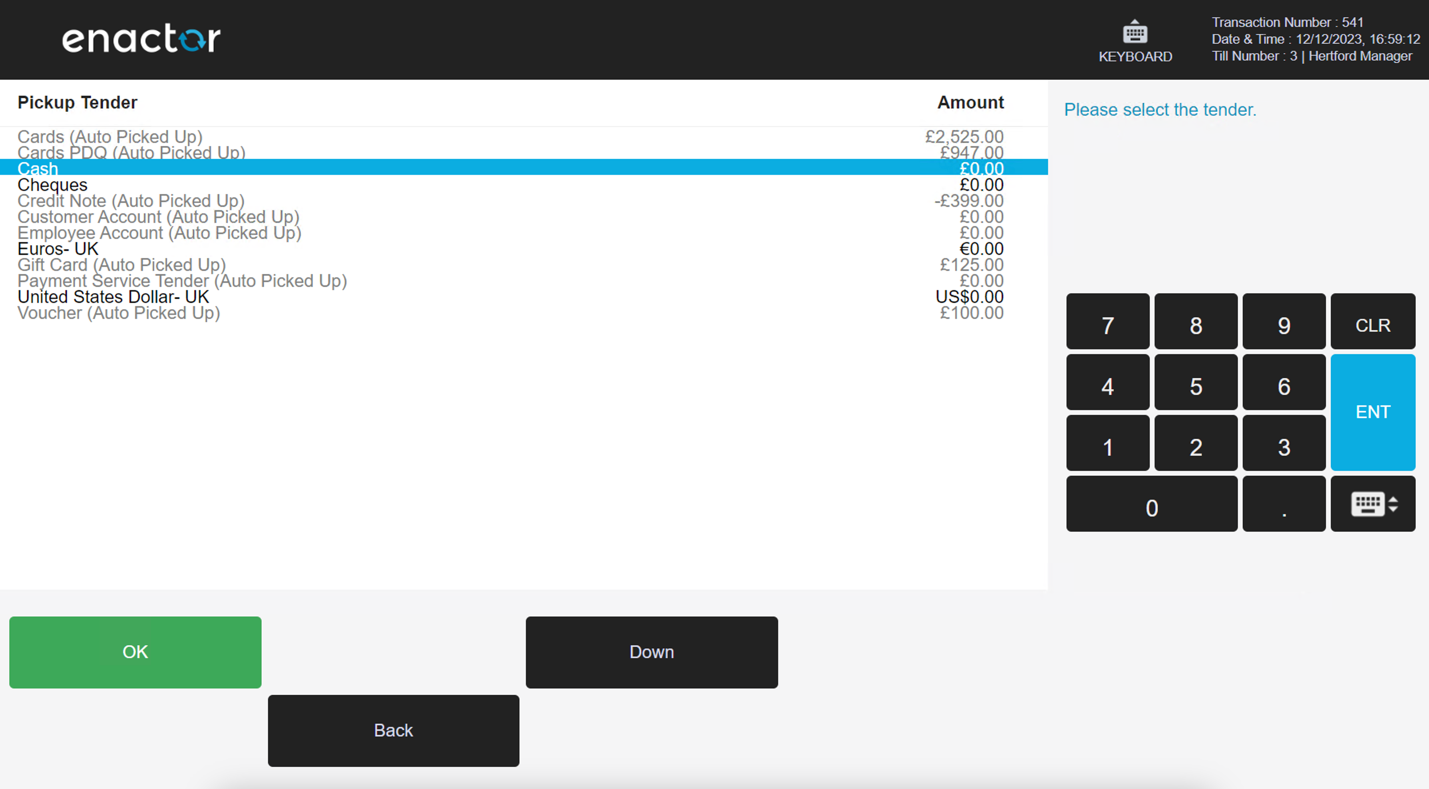
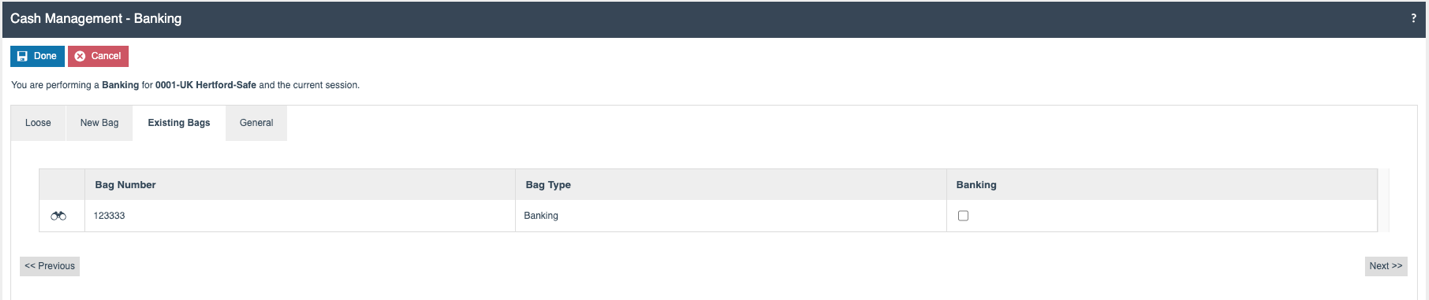
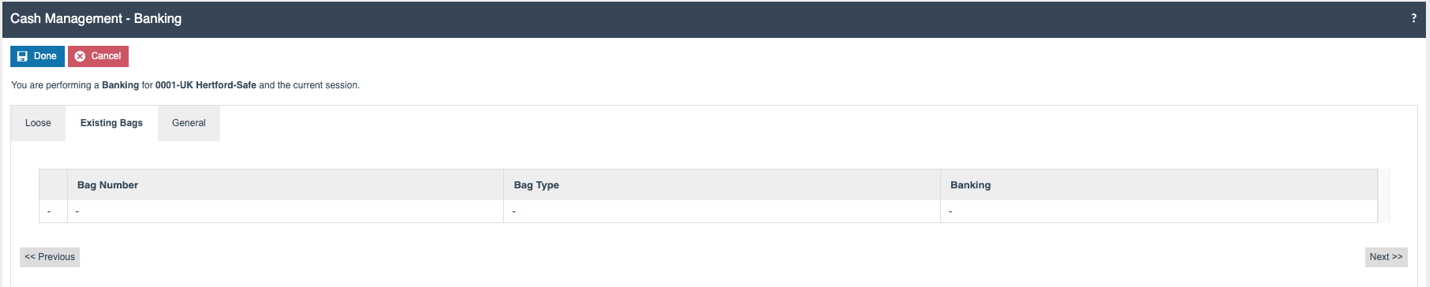
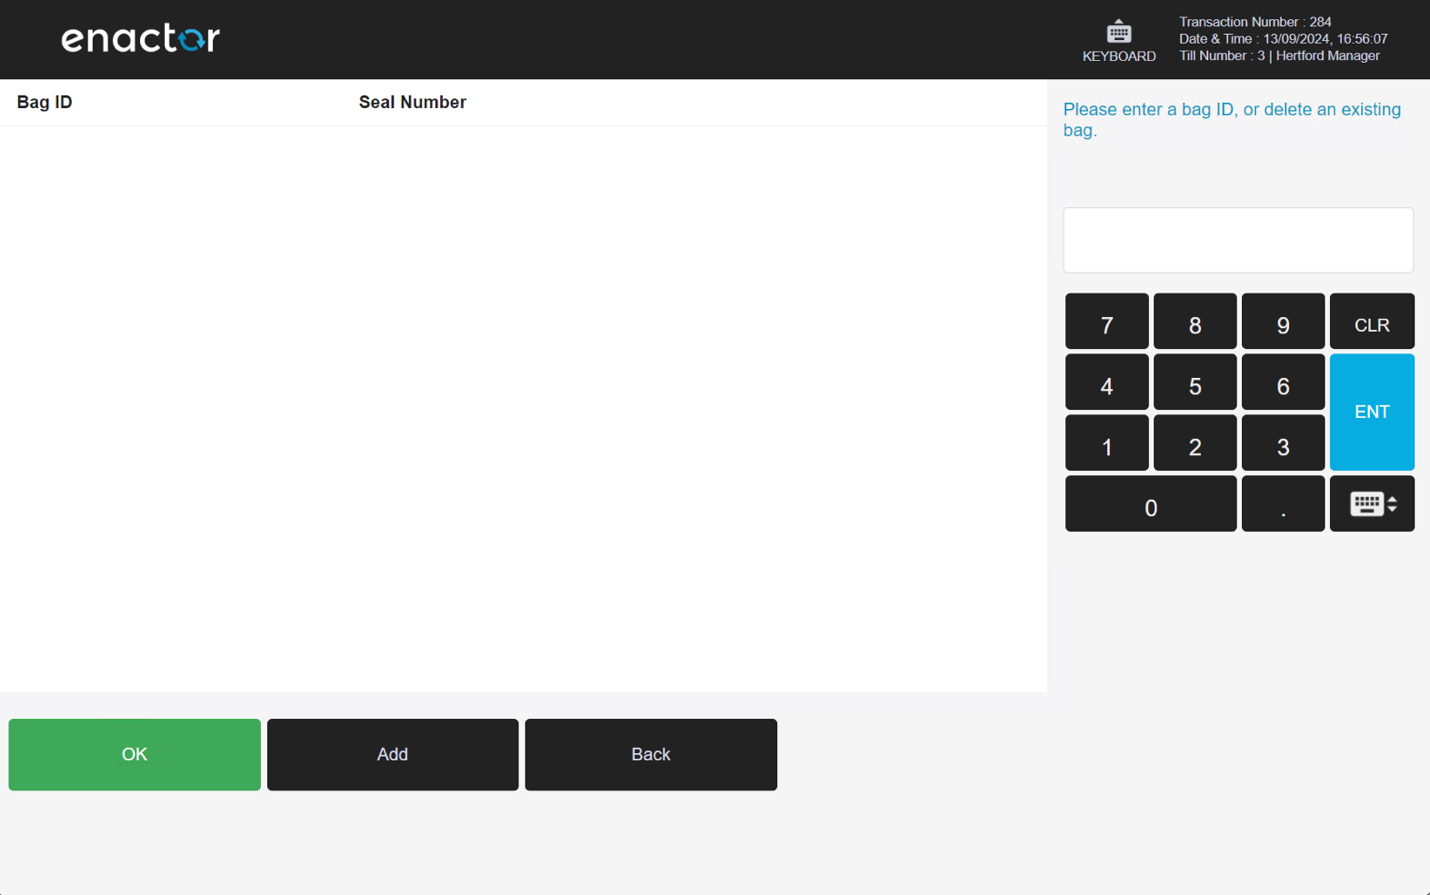
Banking - Existing Bag
In the Existing Bag tab, the user can select an existing Banking Bag to be banked.
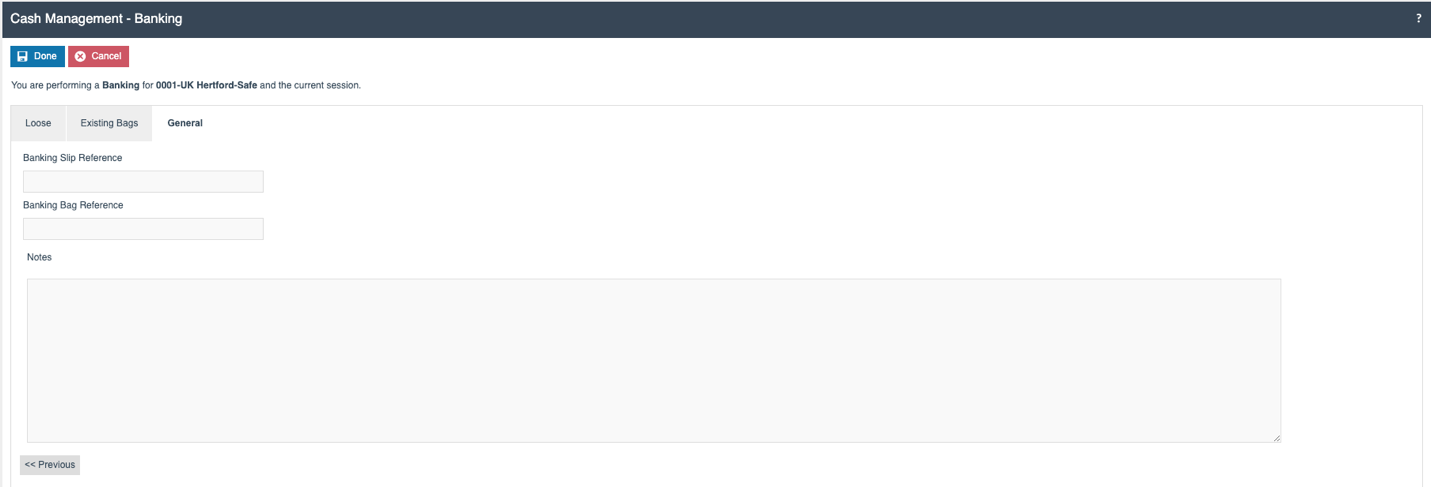
Banking - General
This tab records the Banking details and the user can record any notes related to the Banking action.

Safe Cashup and Banking
This function allows the Safe Cashup and the Banking processes to be combined.
Store Server
Store Server - Loose
If the Location's Tender Bag configuration is set to Optional, then the initial tab displayed is Loose.
Store Server - New Bag
This tab is used to create a new bag while completing the Safe Cashup function. The user adds the Bag ID and the Seal Number while creating a bag.

Store Server - Existing Bag
The Existing Bag tab displays the bags which need to be cashed up in the active session. This screen lists Pickup bags which have been transferred from Terminal(s) to the Safe using the Terminal Pickup function, plus Float and Banking bags.
Store Server - General
The user can record any notes related to the Safe Cashup action.

Banking - Loose
The Loose option is only displayed when the Location is configured with Tender Bags as Optional. The Loose tab allows Banking Tenders that are not associated with a physical bag to be recorded.
Banking - Existing Bag
In the Existing Bag tab, the user can select any pre-existing Banking Bags to be banked.
Banking - General
This tab records the Banking details and the user can record any notes related to the Banking action.
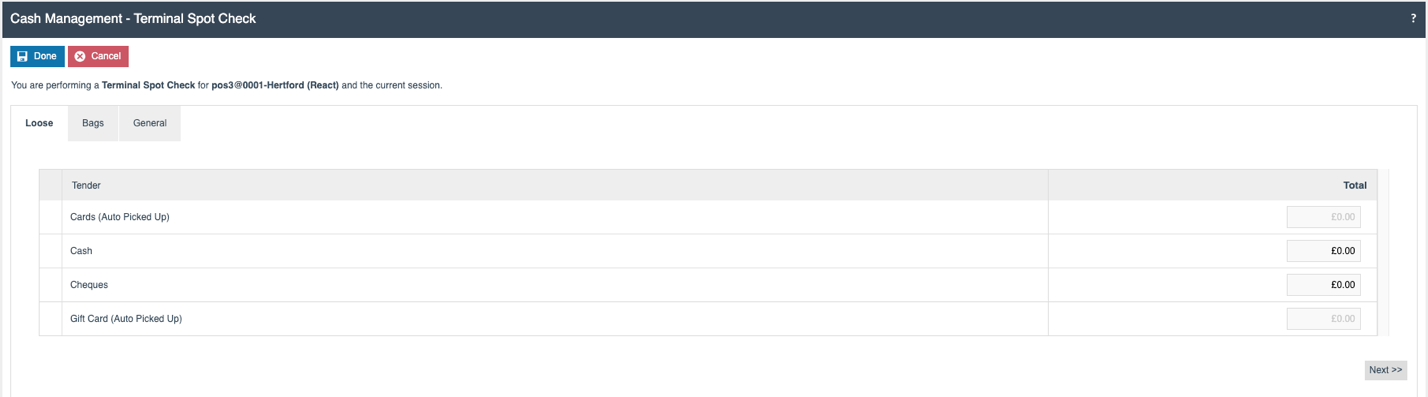
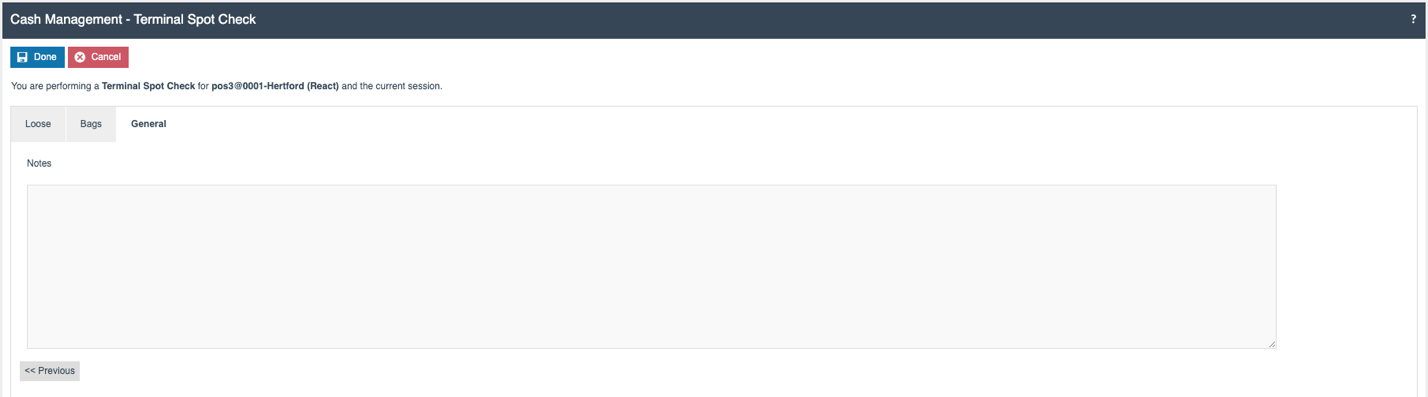
Terminal Spot Check / Safe Spot Check
The Terminal Spot Check and Safe Spot Check functions are used to check the counted amounts versus the expected amounts for either a Terminal or a Safe, without performing a formal declaration.
POS
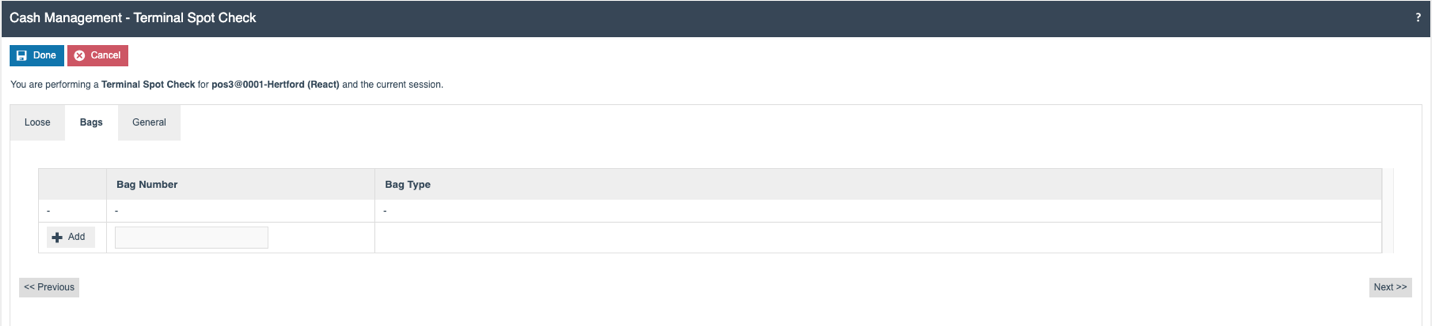
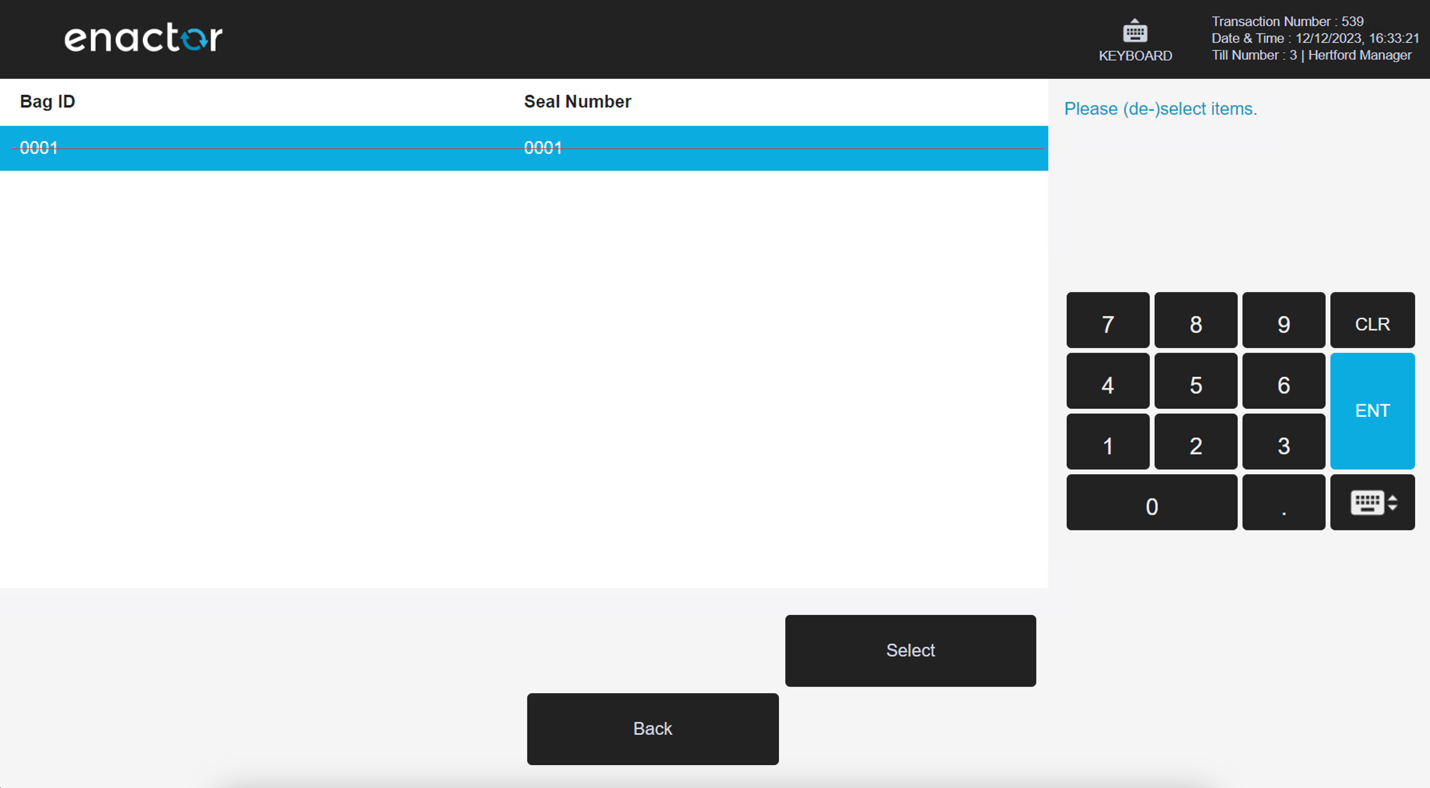
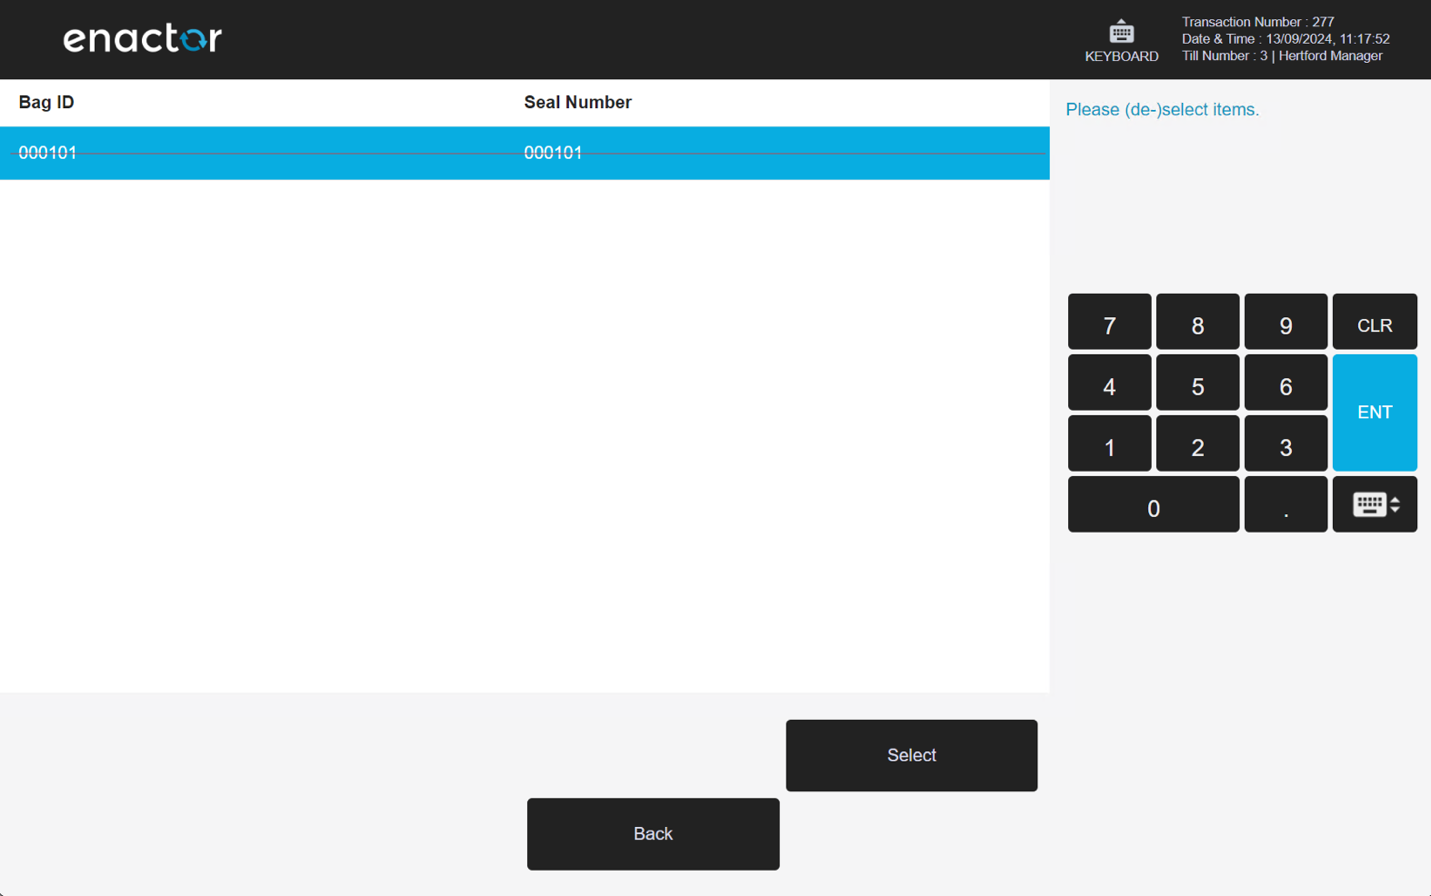
Spot Check - Existing Bag (POS)
When the user selects Existing Bag, the Bags available to the session are listed.
The user can search for existing bags by using the Bag ID.
Once the Bag ID has been entered, the user can add the bag using the Add button so that it is included in the Spot Check.
Store Server