How To Configure Data Purging
Introduction
Purging is the process of freeing up space in the database or of deleting obsolete data that is not required by the system. The purge process can be based on the age of the data or the type of data. Regular purging of aged or redundant data from the system improves the efficiency of both storage and processing.
Enactor Retail has facilities to automate the process by creation of Scheduled Jobs that perform regular purging of files and data to a policy-determined age of retention (specified in days). Purging of files and data may also be applied manually and more specifically targeted by scheduling one-off jobs using the Purging tool described in this guide.
Overview
This guide covers the configuration for the following:
- Purging Configuration - a convenient interface for manual purging of data and files, allowing one-off targeted purge operations
- Location Configuration - automated purging of data and files using the Purging tab on Location or Location Template Maintenance, executed as a scheduled job via the Diary
- Diary Configuration - creating a scheduled System Job to run the
SysPurgeProcessorprocess for regular automated purging - Monitoring - viewing purge job status and results via Scheduled Job Maintenance
Prerequisites
Before starting, you should have the following resources in place:
- Enactor Estate Manager
- Enactor POS (configured within the UK Region, connected to the Estate Manager)
- Standard Configuration, including base configuration and regionally appropriate data
You should be familiar with the following:
- Estate Manager configuration
- Data broadcasting
Configuration Steps - Purging Configuration
The Purging configuration option provides a convenient interface for manual purging of data and files. This is a more specifically targeted approach by scheduling one-off jobs using the Purging tool described below.
The purging option facilitates deletion of all files from a specified Directory or all instances of an Entity (i.e. entries of a database table) subjecting to a "Purge entities older than (days)" parameter.
Accessing the Purge Tool
Navigate to the Purge application, or the path:
Main Menu > Administration > Data Management > Purging
The Purge screen is displayed:
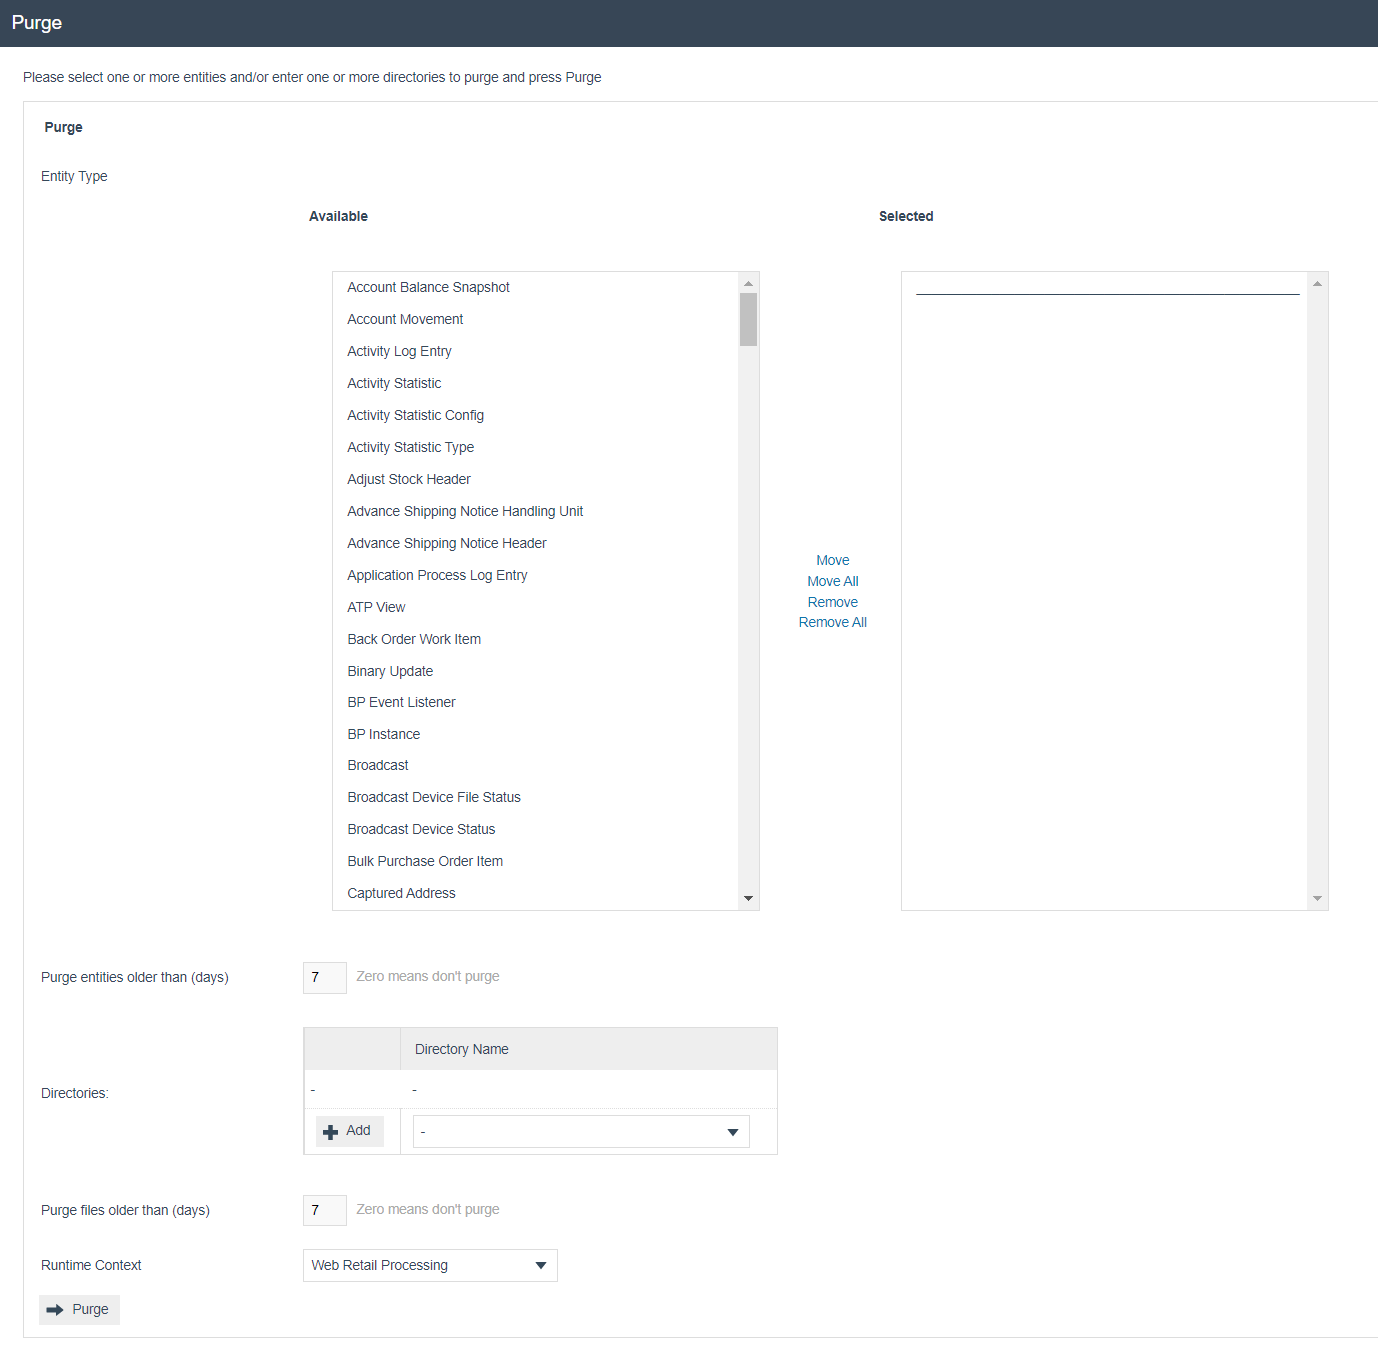
Purge Configuration Fields
Set the appropriate values on the Purge option as follows:
| Field | Description |
|---|---|
| Entity Type - Available | Lists all available entity types. Select the entities that require purging by transferring them from the left table to the right table. Use Move, Move All, Remove, Remove All options as appropriate. |
| Entity Type - Selected | The transferred entities will be listed in this field. |
| Purge entities older than (days) | Enter a numeric value in the range 0-9999 indicating the number of days after which purging of entities should occur. Zero indicates that the selected entities will not be purged. |
| Directories | Select the required directories to purge from the dropdown list and select the Add button to confirm the selection. Multiple directories can be added. |
| Purge files older than (days) | Enter a numeric value in the range 0-9999 indicating the number of days after which purging of files should occur. Zero indicates that the selected files will not be purged. |
| Runtime Context | Select the runtime context in which the service is expected to execute: Web Retail Processing, Web Order Processing, or Web Customer Processing. |
When data is purged it will no longer be available. Ensure that your retention periods are appropriate for your business requirements before executing a purge.
Select Purge to execute the purge operation.
Configuration Steps - Location Configuration
An alternate means of data purging is provided under the Purging tab of Location and Location Template Maintenance. This automates purging of files from the file system and data from the database. It will attempt to apply the purging policy on any physical device (POS or Server) on which it executes in a given Location.
The process is normally executed as a Scheduled Job and typically scheduled for regular execution in the Diary function.
Use the Location Template Maintenance for a more convenient way of configuring purging, if the purging configurations are to be the same across a set of locations.
Accessing Location Maintenance
Navigate to Location Maintenance, or the path:
Main Menu > Configuration > Organisation > Locations
Edit the location you wish to define the purging instructions and navigate to the Purging tab.
Directory Purging Sub Tab
The Directory Purging sub-tab applies to directories of the file system. Multiple directory entries may be specified for purging by specifying the file system pathname and optionally a Purge Age property value.
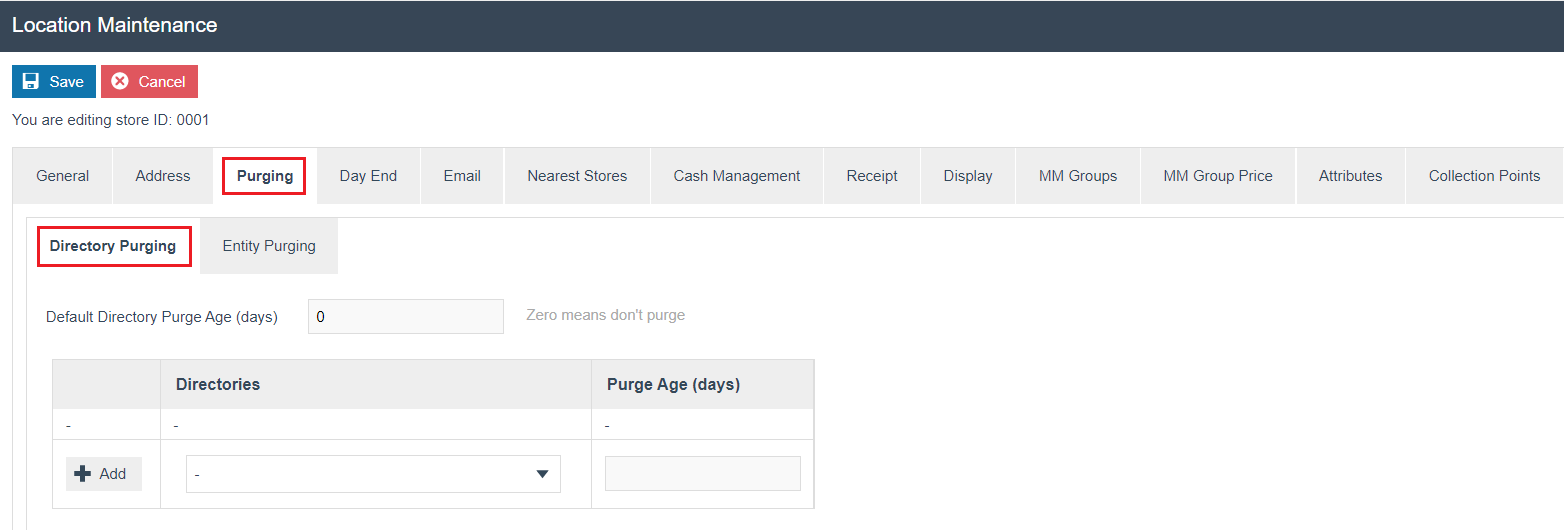
Set the appropriate values on the Directory Purging sub-tab as follows:
| Field | Description |
|---|---|
| Default Directory Purge Age (days) | Enter a numeric value in the range 0-9999. Zero means do not purge. The default directory purge age (days) when populated will purge all data within the directories listed. |
| Directories | Select the required directories to purge from the dropdown list and select the Add button to confirm the selection. Multiple directories can be added. |
| Purge Age (days) | Enter a numeric value in the range 0-9999 for the purge age of the directory specified in the previous field. The data in the system will be purged according to the values here using a regular job which will run as defined by the user, e.g. daily, weekly, etc. |
In the event that a purge age is added to each individual directory, this will overrule the default value set in the first field.
Available Purge Directories
The following directories are available for selection, along with their descriptions and the devices on which they exist:
| Directory | Description | Devices |
|---|---|---|
${Common.ApplicationHome}/logs | Contains all the log files that are generated from the device start to end time. | Estate Manager, Back Office, Mobile Server, Master POS, POS |
${Common.ApplicationHome}/logs/OldLogs | Log files are moved into this directory from the logs directory when they are older than 24 hours. | Estate Manager, Back Office, Mobile Server, Master POS, POS |
${Common.ApplicationHome}/Downloads | Contains files that are generated and ready for other devices to download from during a broadcast. | Estate Manager |
${Common.ApplicationHome}/Queues/TransactionsIn/processed | Contains files that are processed when manually importing any type of transaction files in the Estate Manager. | Estate Manager |
${Common.ApplicationHome}/Queues/TransactionsIn/failed | Contains files that have failed when manually importing any type of transaction files in the Estate Manager. | Estate Manager |
${Common.ApplicationHome}/Queues/BackOfficeTransactionsIn/processed | Contains files that are processed when manually importing any type of transaction files in the Back Office. | Back Office |
${Common.ApplicationHome}/Queues/BackOfficeTransactionsIn/failed | Contains files that have failed when manually importing any type of transaction files in the Back Office. | Back Office |
${Common.ApplicationHome}/Queues/Transactions/tmp | Contains files that have been used when manually importing retail and employee transaction files. | Estate Manager |
${Common.ApplicationHome}/Queues/CMTransactions/tmp | Contains files that are Cash Management related such as terminal float, terminal cashup, safe finalise, etc. | Estate Manager |
${Common.ApplicationHome}/Queues/SystemEvents/tmp | Contains files that are system events related such as logging in and out of the device, etc. | Estate Manager |
${Common.ApplicationHome}/Exports | Contains files that have been generated when File Exports is run in the Estate Manager. | Estate Manager |
${Common.ApplicationHome}/ManuallyImportedFiles | Contains files that have been dropped into this directory to manually import into the Estate Manager. | Estate Manager |
${Common.ApplicationHome}/Imports/Employee | Contains files that have been dropped into this directory to manually import Employees. | Estate Manager, Back Office |
${Common.ApplicationHome}/Imports/Organisation | Contains files that have been dropped into this directory to manually import Organisations. | Estate Manager, Back Office |
${Common.ApplicationHome}/Imports/Price | Contains files that have been dropped into this directory to manually import Prices. | Estate Manager, Back Office |
${Common.ApplicationHome}/Imports/Product | Contains files that have been dropped into this directory to manually import Products. | Estate Manager, Back Office |
${Common.ApplicationHome}/Imports/Product_Other | Contains files that have been dropped into this directory to manually import data containing other product related details. | Estate Manager, Back Office |
${Common.ApplicationHome}/Imports/SellingCode | Contains files that have been dropped into this directory to manually import Selling Codes. | Estate Manager, Back Office |
${Common.ApplicationHome}/Imports/Users | Contains files that have been dropped into this directory to manually import Users. | Estate Manager, Back Office |
Entity Purging Sub Tab
The Entity Purging sub-tab applies to entities in the database. The entities available for purging are pre-defined and listed for entry of individually applied data retention policies. This enables override of a globally applied default policy.
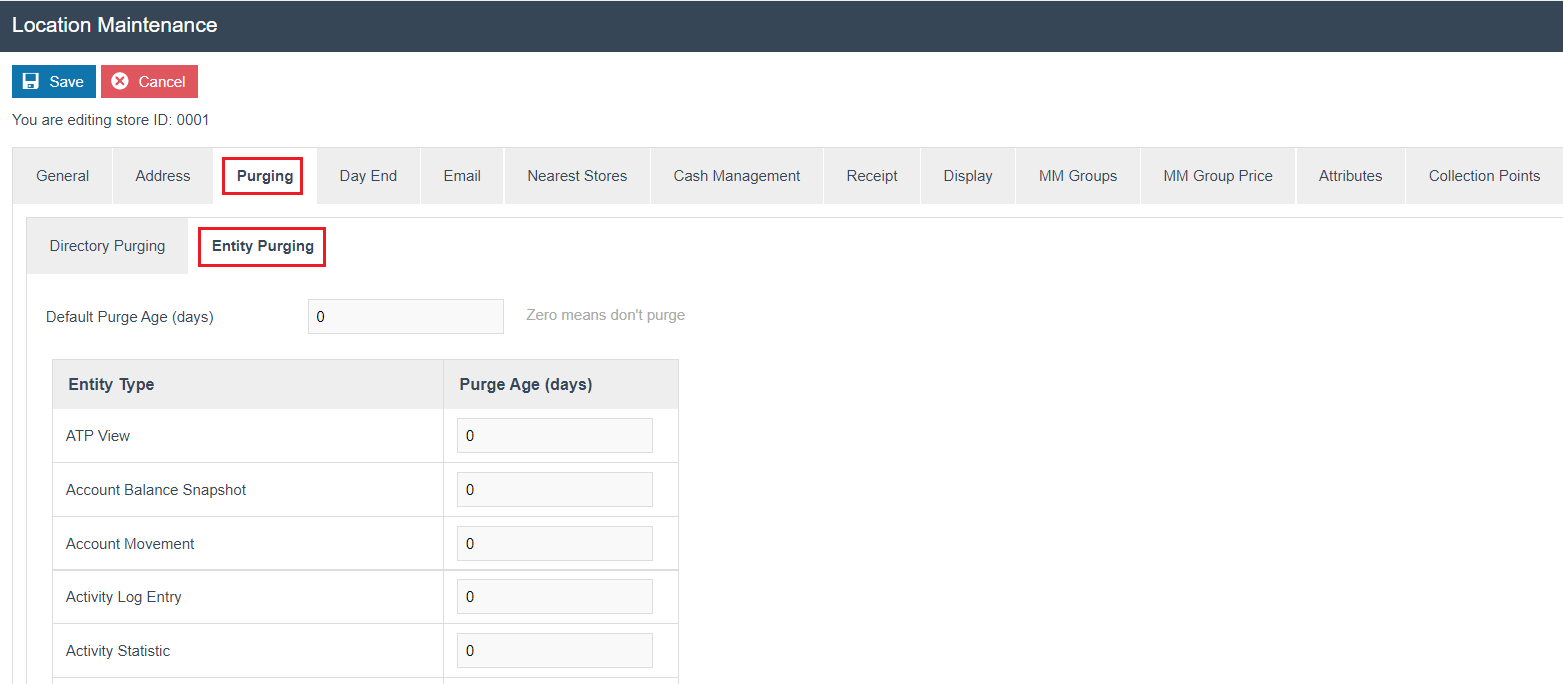
Set the appropriate values on the Entity Purging sub-tab as follows:
| Field | Description |
|---|---|
| Default Purge Age (days) | Enter a numeric value in the range 0-9999. Zero means do not purge. The default purge age (days) when populated will purge all data within the entity types listed. |
| Entity Type | All purgeable entities are shown in a list. |
| Purge Age (days) | Enter a numeric value in the range 0-9999 for the purge age of the entity specified in the previous field. The data in the system will be purged according to the values here using a regular job which will run as defined by the user, e.g. daily, weekly, etc. |
In the event that a purge age is added to each individual entity, this will overrule the default value set in the first field.
Select Save.
Configuration Steps - Creating the Purging Diary Event
The purging policy can be applied in a given location by scheduling regular execution of the SysPurgeProcessor process using the Diary function.
Accessing the Diary
Select the Diary icon in the top right corner after signing in to the Estate Manager.

The Diary screen is displayed:

Creating a New System Job
Select Create a new System Job.
Set the start date and select System Job as the Diary Entry Type.
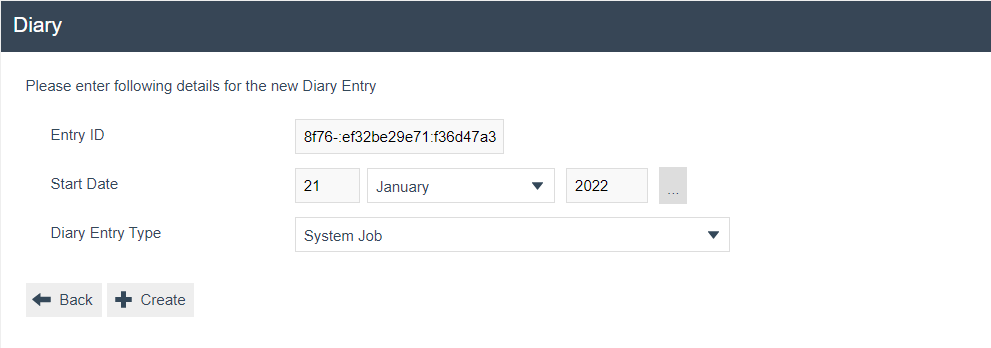
Select Create to proceed.
Diary - General Tab
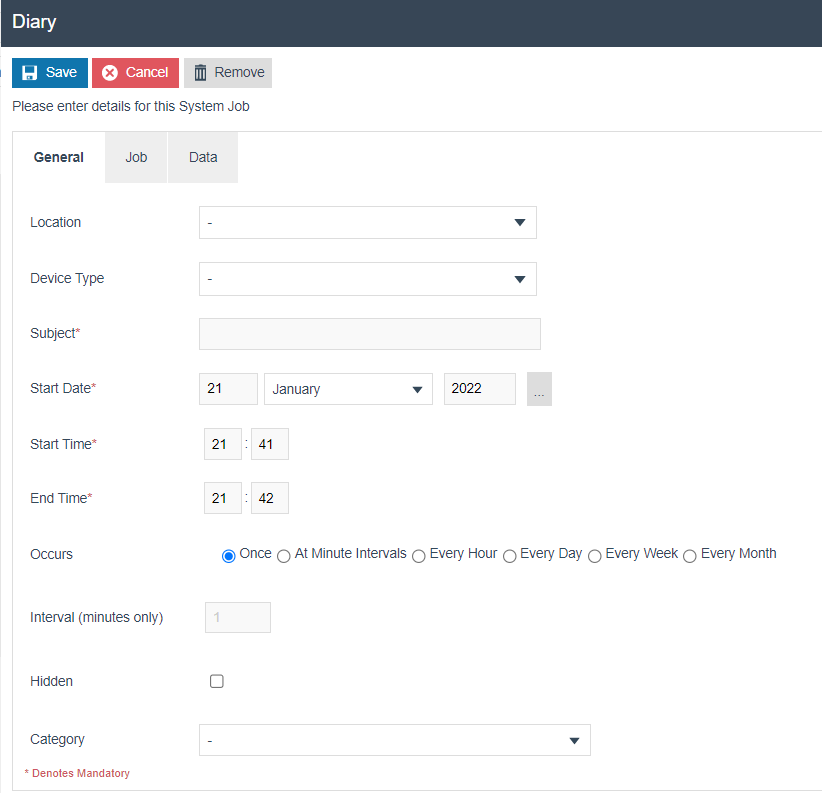
Set the appropriate values on the General tab as follows:
| Field | Description |
|---|---|
| Location | Select the location you wish to link the scheduled job to from the dropdown list. |
| Device Type | Specify the device type on which you wish the Purging Policy applied. |
| Subject | Enter a user-friendly, meaningful subject that can be alphanumeric. |
| Start Date | Enter a date specifying the first day on which the job runs. |
| Start Time | Enter a time specifying the time the job will run. |
| End Time | Specify an expiry time, some hours ahead, by which the job must complete. The job may be queued or require a retry, but will need to be completed before the end time. |
| Occurs | Specify the frequency of the job by selecting one of the available options: Once, At Minute Intervals, Every Hour, Every Day, Every Week, Every Month. Typically run daily. |
| Interval (minutes only) | Enter a numeric value indicating the time between executions. |
| Hidden | Select checkbox to indicate not to display in listings of Scheduled Jobs unless explicitly requested. |
| Category | Select the appropriate category from the dropdown list of all available categories. |
Diary - Job Tab
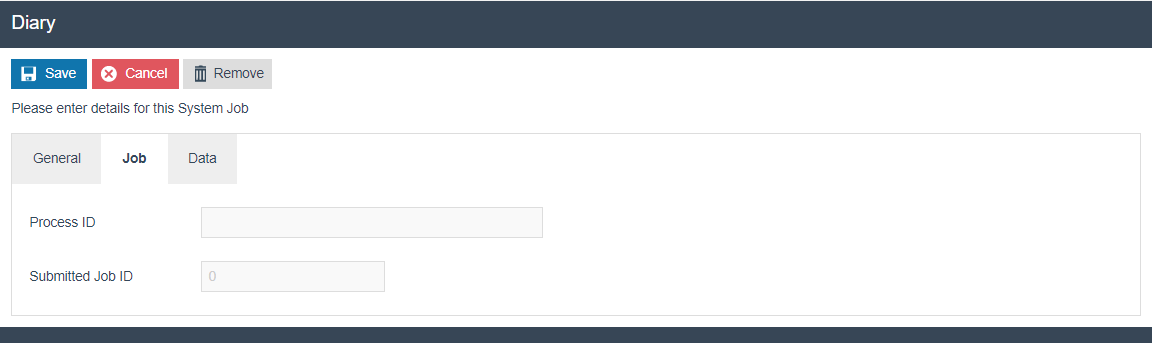
Set the appropriate values on the Job tab as follows:
| Field | Description |
|---|---|
| Process ID | Enter EstateDirector/Purge/SysPurgeProcessor. This identifies the process the job runs against. Note: This is case-sensitive. |
| Submitted Job ID | Enter an applicable Job ID as necessary. |
Select Save.
Monitoring Purge Jobs
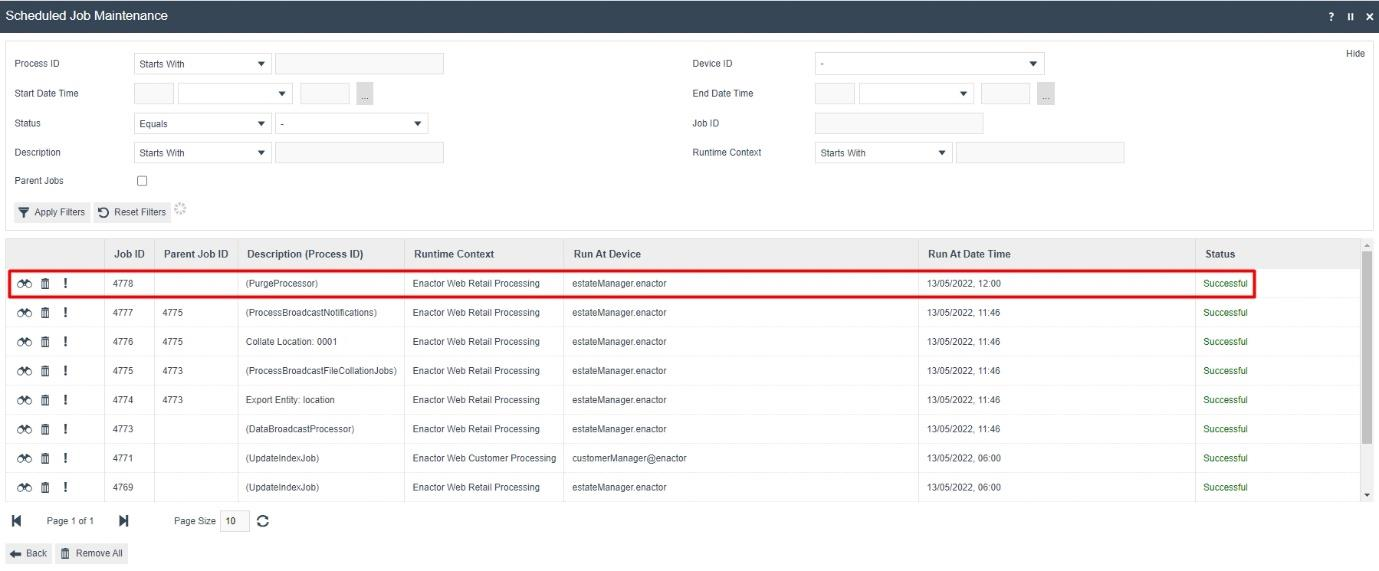
When the purge function is run, either through the Purging maintenance or as scheduled in the Diary, there is a scheduled job that is run for it. The status and other information of this can be viewed by navigating to the Scheduled Job Maintenance.
Accessing Scheduled Job Maintenance
Navigate to Scheduled Job Maintenance, or the path:
Main Menu > Administration > Processing > Scheduled Jobs
There will be a purging job record with the Description of (PurgeProcessor) as follows:
Viewing the Application Process Log
Clicking on the ! icon of that record will navigate to the Application Process Log of that entry where more information regarding the purging record can be found:
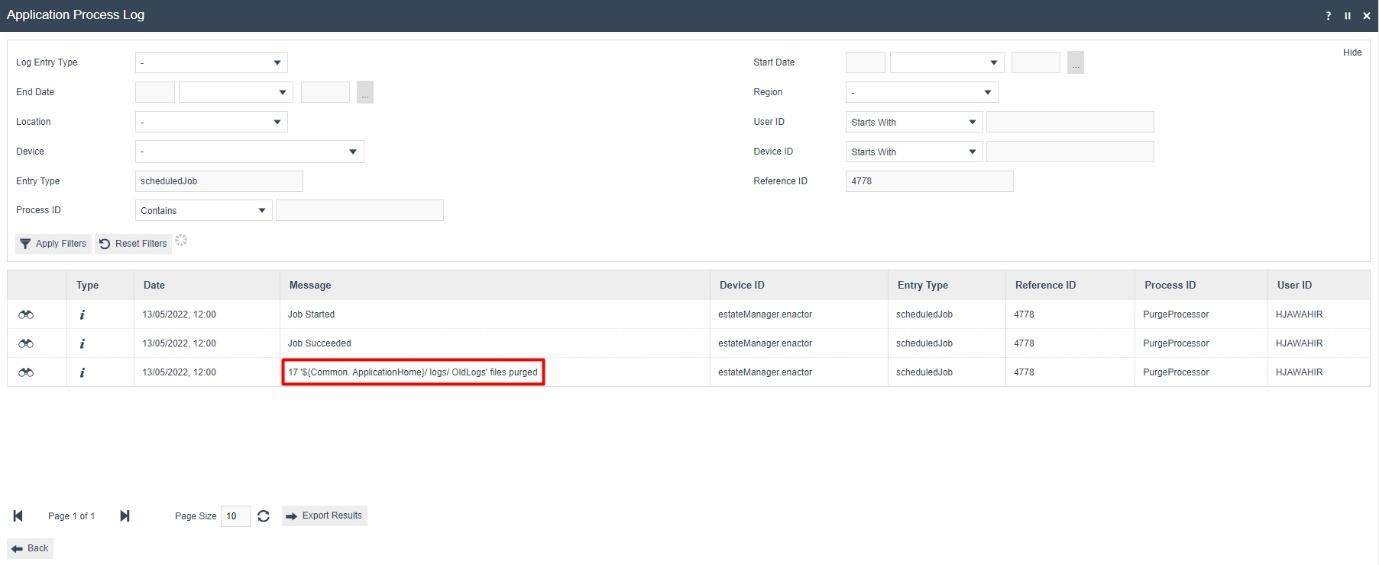
The message "17 '${Common.ApplicationHome}/logs/OldLogs' files purged" displayed above shows that there have been 17 files that have been purged from the Old Logs directory when this purging job was run.
Broadcasting
To deliver the configuration changes to the POS, broadcast the following entities:
- Locations
- Diary Event
If store server purging is configured, the diary event entity would need to be broadcast to the appropriate store server.