How To Configure Gift Cards
The purpose of this guide is to show how to configure the Enactor Gift Card solution. This includes all the supporting entities required to enable gift cards to be issued, topped up, merged, cancelled, and redeemed at the POS.
This guide covers Enactor's internal gift card solution. It does not cover configuration of third-party gift card providers such as Givex. For a comprehensive explanation of every configurable option, refer to the Enactor Configuration Management guide.
Overview
The Enactor Gift Card solution supports the following POS functions:
- New Gift Card - Issue and load a gift card in a single transaction.
- Gift Card Top Up - Add value to an already-issued gift card.
- Gift Card Enquiry - Check the balance of a gift card.
- Gift Card History - View the transaction history of a gift card.
- Gift Card Merge - Combine the balance of two gift cards onto one card.
- Gift Card Cancel - Cancel a gift card and refund the balance.
- Gift Card Tender - Redeem a gift card as a payment method.
The following configuration entities are required to enable these functions:
- Acquirer - The internal gift card processing service acquirer, configured per country.
- Authorisation Server Config - Links acquirers to the authorisation service configuration.
- Authorisation Server - The central gift card authorisation server.
- Service Definition - The Card Authorisation Server service.
- Card Type - The Gift Card card type.
- Gift Card Maintenance - Ongoing management of individual gift card accounts.
- Gift Card Types - Defines gift card rules and behaviour per country.
- IIN Ranges - Card number ranges used to identify gift cards.
- Menu Configuration - POS menu buttons for gift card functions.
- Gift Card Tender - The Tender used when a gift card is redeemed.
Prerequisites
Resources
Before starting, the following resources should be in place:
- Enactor Estate Manager with the Enactor Web Card Authorisation service deployed and configured
- Enactor POS configured to use the Enactor EFT authorisation service
- Enactor Standard Configuration imported and broadcast to the POS
Prior Training/Experience
You should be familiar with the following:
- Estate Manager configuration
- Enactor configuration concepts: Regions, Tenders, Menus, User Roles
- Data broadcasting
Configuration
Acquirer Configuration
The Enactor standard configuration includes several Gift Card acquirers. For the purposes of this guide, the UK acquirer (EGC_UK1) is used as the base.
Navigate to Acquirers using the Search or the path: Main Menu > Configuration > Financial > Acquirers

To create a new acquirer for an additional country (e.g. Ireland), copy the existing acquirer. Return to the Acquirer Maintenance list and select the Copy icon next to EGC_UK1:

In the copy dialog, change the Region to the new country (e.g. Ireland) and assign a new Acquirer ID (e.g. EGC_IE1), then select Create. Once created, amend the Description (e.g. 'Gift Card Ireland') and save:

This completes the Acquirer Configuration.
Authorisation Server Config
The Authorisation Server Config assigns acquirers to an authorisation service configuration. This is provided as part of the Enactor standard configuration.
Navigate to Authorisation Server Config using the Search or the path: Main Menu > Configuration > Financial > Authorisation Server Config

Select the Edit icon against OLAServer1. To assign the new country acquirer (e.g. EGC_IE1), select it from the acquirer list and click the + icon to add it to the configuration:

This completes the Authorisation Server Config configuration.
Authorisation Server
An Authorisation Server is provided as part of the Enactor standard configuration. It defines the Gift Card Authorisation Server and links it to the Authorisation Server Config.
Navigate to Authorisation Server using the Search or the path: Main Menu > Configuration > Financial > Authorisation Server

Select the Edit icon against the Central Gift Card Authorization Server entry. The Description can be amended and the Authorisation Server Config ID can be selected. In the standard configuration, select Main Authorisation Server Configuration:

This completes the Authorisation Server configuration.
Service Definition
The Service Definition for the Card Authorisation Server is included in the Enactor standard configuration. It defines the service that processes gift card requests from the POS.
Navigate to Service Definitions using the Search or the path: Main Menu > Administration > Services > Service Definitions
When the application opens, select Card Authorisation Server from the Service Type dropdown and select Apply Filters:

Select the Edit icon against the service to view and amend its parameters:

Select the Card Auth tab to view processing configuration:

Queue Name and Server Configuration should only be specified when it is necessary to override the defaults - for example, if running more than one authorisation service on one machine. The Number of Threads may be increased depending on the size of the estate and the number of concurrent requests.
This completes the Service Definition configuration.
Card Type
The standard configuration includes a single Gift Card Card Type applicable to all regions.
Navigate to Card Types using the Search or the path: Main Menu > Configuration > Financial > Card Types
Filter by Card Type = Gift Card to locate the standard entry:

Select the Edit icon to view the card type. The description may be amended; no other fields require configuration for the standard gift card setup:

This completes the Card Type configuration.
Gift Card Maintenance
The Gift Card Maintenance application allows administrators to view and manage individual gift card accounts. It can be accessed from: Main Menu > Configuration > Financial > Gift Cards

Selecting the Edit icon next to a gift card shows the account details. The Status, Balance, and Expiry Date may be amended and saved:

Changes made in Gift Card Maintenance take effect immediately - no broadcasting is required.
This completes the Gift Card Maintenance configuration.
Gift Card Types
Gift Card Type configuration defines the rules and behaviour for gift cards, including the processing service, acquirer, and redemption tender. Each country or currency typically requires its own Gift Card Type.
Navigate to Gift Card Types using the Search or the path: Main Menu > Configuration > Financial > Gift Card Types

Select the Edit icon next to EGC_UK1 to open the General tab:

| Field | Description |
|---|---|
| Region | The country/region for this gift card type. |
| Currency | The currency used for this gift card. |
| Processing Service | Set to Auth Service for the Enactor internal gift card service. |
| Acquirer | The acquirer configured for this country (see Acquirer Configuration above). |
| Redemption Tender | The Tender Type used when this gift card is redeemed at the POS. |
Select the Values tab to configure value limits and rules:

Select the Behaviour tab to configure processing behaviour options:

To create a Gift Card Type for a new country (e.g. Ireland), copy the UK Gift Card Type and amend the Region, Currency, Acquirer, and Redemption Tender.
This completes the Gift Card Types configuration.
IIN Ranges
IIN Ranges allow the POS to identify a gift card from its card number. The Enactor standard configuration includes example IIN ranges for gift cards.
Navigate to IIN Ranges using the Search or the path: Main Menu > Configuration > Financial > IIN Ranges

Enter the range start value and select Apply Filters to find the Gift Card UK range:

Select the Edit icon to open the General tab:

Select the Track Data tab:

Select the Applicable Cards tab:

To create a new IIN range for a different country, copy the UK range and amend the Card Description, Country, Currency, and Gift Card Type to match the new country.
This completes the IIN Ranges configuration.
Menu Configuration
Gift card functions are added to POS menus to make them available to cashiers. The Enactor standard configuration already includes Gift Card function buttons - this section describes how to verify and adjust them.
Navigate to Menus using the Search or the path: Main Menu > Configuration > System > Menus
Apply the following filters: Menu Set = POS, Menu Group = Standard POS, then select Apply Filters:

Adding Gift Card Functions to the SALE Menu
Select the Edit icon against the SALE menu:

Select the + symbol next to 1. Sales, then select the + symbol next to 3. Gift Cards to expand the gift card functions:

Select one of the Gift Card functions (e.g. Gift Card Enquiry) and then select the Edit button at the bottom of the page:

The Visibility Expression controls which POS operators see the button. For Gift Card Enquiry, the button is only shown to operators with the enactor.pos.GiftCardEnquiryAllowed privilege. Gift Card function buttons can be assigned to any menu used while the POS is in Sale mode - they cannot be used in Tender mode.
Adding the Gift Card Tender Button
Return to the filtered menu list and select the Edit icon against the TENDER menu:

Select the + symbol next to 4. Vouchers to expand the voucher tender options:

Select 3. Gift Card and then select Edit:

Select the Data tab and confirm the Tender ID value matches the Gift Card tender configured for this region (e.g. EGC_UK):

This completes the Menu Configuration.
Gift Card Tender
When a gift card is redeemed, the redemption is processed against a Tender. A separate Tender is recommended per country so that the correct currency is used.
Navigate to Tenders using the Search or the path: Main Menu > Configuration > Financial > Tenders
Enter EGC_UK in the Tender ID filter and select Apply Filters:

Select the Edit icon. On the General tab, only the Description and Currency fields are mandatory. Set the Currency to match the region:

Navigate to the Restrictions 1 tab:

| Field | Recommended Setting | Description |
|---|---|---|
| Debits Allowed | Checked | Permits the gift card tender to be used for purchases. |
| Debit Tendering Restrictions | Amount less than or equal to balance | Prevents the tender exceeding the transaction balance (no change from gift cards). |
| Credits Allowed | Checked | Permits the gift card tender to be used for refunds. |
| Prompt With Amount Due | Checked | Pre-fills the tender amount with the outstanding transaction balance. |
Navigate to the Cash Management tab:

| Field | Recommended Setting | Description |
|---|---|---|
| Banking Tender | Checked | Includes the gift card in the banking process. |
| Auto Banked | Checked | The tender is automatically banked - no manual banking required. |
| Pickup Tender | Checked | Includes the gift card in the pickup process. |
| Auto Picked Up | Checked | The tender is automatically picked up - no manual pickup required. |
| Spot Check Tender | Checked | Includes the gift card in spot check processes. |
To create a Gift Card tender for a new country, copy the EGC_UK tender and assign a new ID, Description, Region, and Currency.
This completes the Gift Card Tender configuration.
User Role Privileges
Gift card functions at the POS are controlled by user privileges. The following privileges can be assigned to User Roles to enable and authorise gift card operations. Refer to the How-to Guide - Configuring Users, User Roles and User Templates for details on assigning privileges to roles.
Navigate to User Roles using the Search or the path: Main Menu > Configuration > HR > User Roles
All gift card privileges are found in the Enactor POS Application Package:

| Process | Function ID | Function Name |
|---|---|---|
| Gift Card Enquiry | enactor.pos.AuthorisesGiftCardEnquiry | Authorises Gift Card Enquiry |
| Gift Card Enquiry | enactor.pos.GiftCardEnquiryAllowed | Gift Card Enquiry Allowed |
| Gift Card History | enactor.pos.AuthorisesGiftCardHistory | Authorises Gift Card History |
| Gift Card History | enactor.pos.GiftCardHistoryAllowed | Gift Card History Allowed |
| Gift Card Item Void | enactor.pos.AuthorisesVoidGiftCardItem | Authorises Gift Card Item Voids |
| Gift Card Item Void | enactor.pos.AuthorisesVoidGiftCardTenderItem | Authorises Gift Card Tender Voids |
| Gift Card Item Void | enactor.pos.VoidGiftCardItemAllowed | Void Gift Card Items Allowed |
| Gift Card Item Void | enactor.pos.VoidGiftCardTenderItemAllowed | Void Gift Card Tenders Allowed |
| Gift Card Refund Tender | enactor.pos.AuthorisesGiftCardRefund | Authorises Gift Card Refund |
| Gift Card Refund Tender | enactor.pos.GiftCardRefundAllowed | Gift Card Refund Allowed |
| Gift Card Tender | enactor.pos.AuthorisesGiftCardTender | Authorises Gift Card Tender |
| Gift Card Tender | enactor.pos.GiftCardTenderAllowed | Gift Card Tender Allowed |
| Issue Gift Card | enactor.pos.AuthorisesIssueGiftCard | Authorises Gift Card Issue |
| Issue Gift Card | enactor.pos.AuthorisesTopUpGiftCard | Authorises Gift Card Top Up |
| Issue Gift Card | enactor.pos.IssueGiftCardAllowed | Issue Gift Card Allowed |
| Issue Gift Card | enactor.pos.TopUpGiftCardAllowed | Top Up Gift Card Allowed |
| Issue Gift Card as Change | enactor.pos.AuthorisesIssueGiftCard | Authorises Gift Card Issue |
| Issue Gift Card as Change | enactor.pos.IssueGiftCardAllowed | Issue Gift Card Allowed |
| Issue Gift Card as Reward | enactor.pos.AuthorisesIssueGiftCard | Authorises Gift Card Issue |
| Issue Gift Card as Reward | enactor.pos.AuthorisesTopUpGiftCard | Authorises Gift Card Top Up |
| Issue Gift Card as Reward | enactor.pos.IssueGiftCardAllowed | Issue Gift Card Allowed |
| Issue Gift Card as Reward | enactor.pos.TopUpGiftCardAllowed | Top Up Gift Card Allowed |
| Issue Gift Card Main | enactor.pos.AuthorisesIssueGiftCardAlreadyIssued | Authorises Gift Card Issue of Already Issued card |
| Issue Gift Card Main | enactor.pos.OverrideMaximumGiftCardValue | Override Maximum Gift Card Value |
| Merge Gift Cards | enactor.pos.AuthorisesIssueGiftCardAlreadyIssued | Authorises Gift Card Issue of Already Issued card |
| Merge Gift Cards | enactor.pos.AuthorisesMergeGiftCard | Authorises Gift Card Merge |
| Merge Gift Cards | enactor.pos.MergeGiftCardAllowed | Merge Gift Cards Allowed |
Using Gift Card Functions at the POS
This section demonstrates how each gift card function operates at the POS.
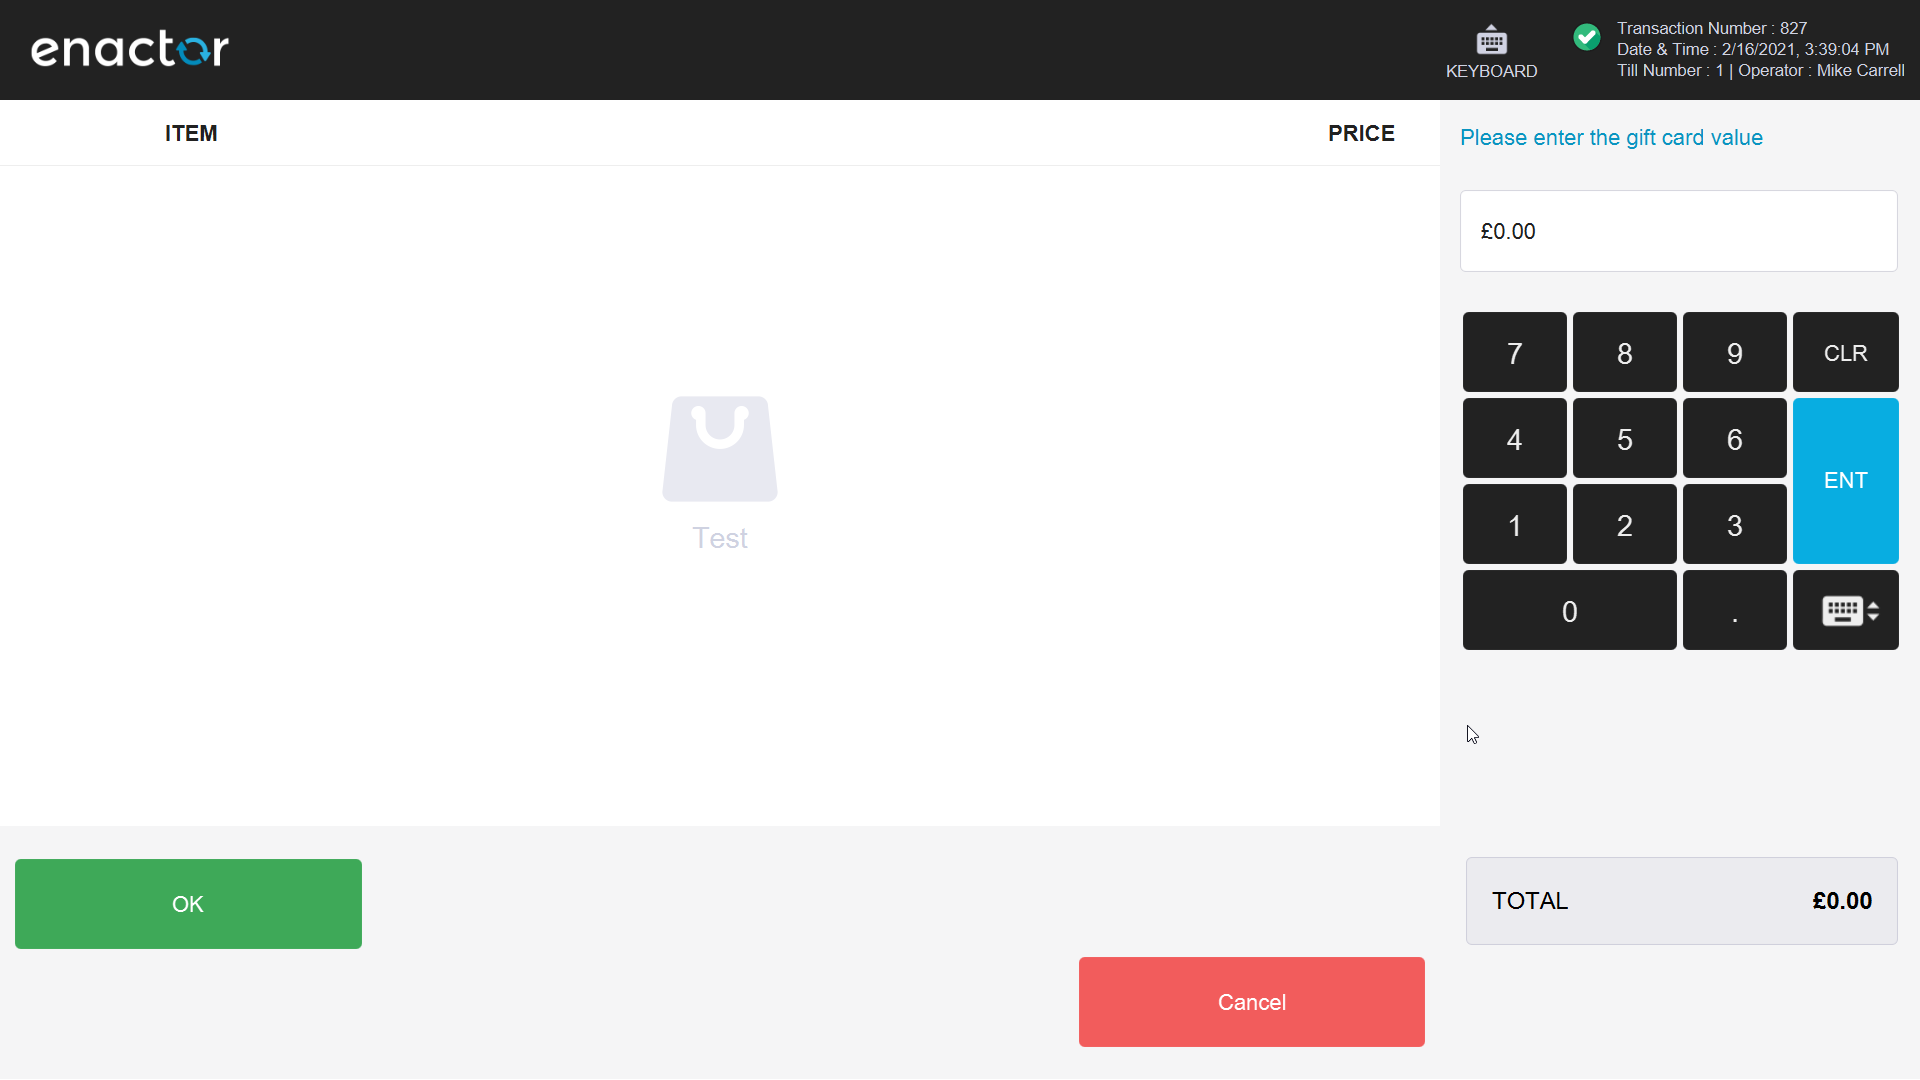
New Gift Card
Select the New Gift Card function from the POS Sales menu:


In addition to the till receipt, an advice slip is printed showing the initial top-up amount:

Gift Card Top Up
Select the Gift Card Top Up function from the POS Sales menu:

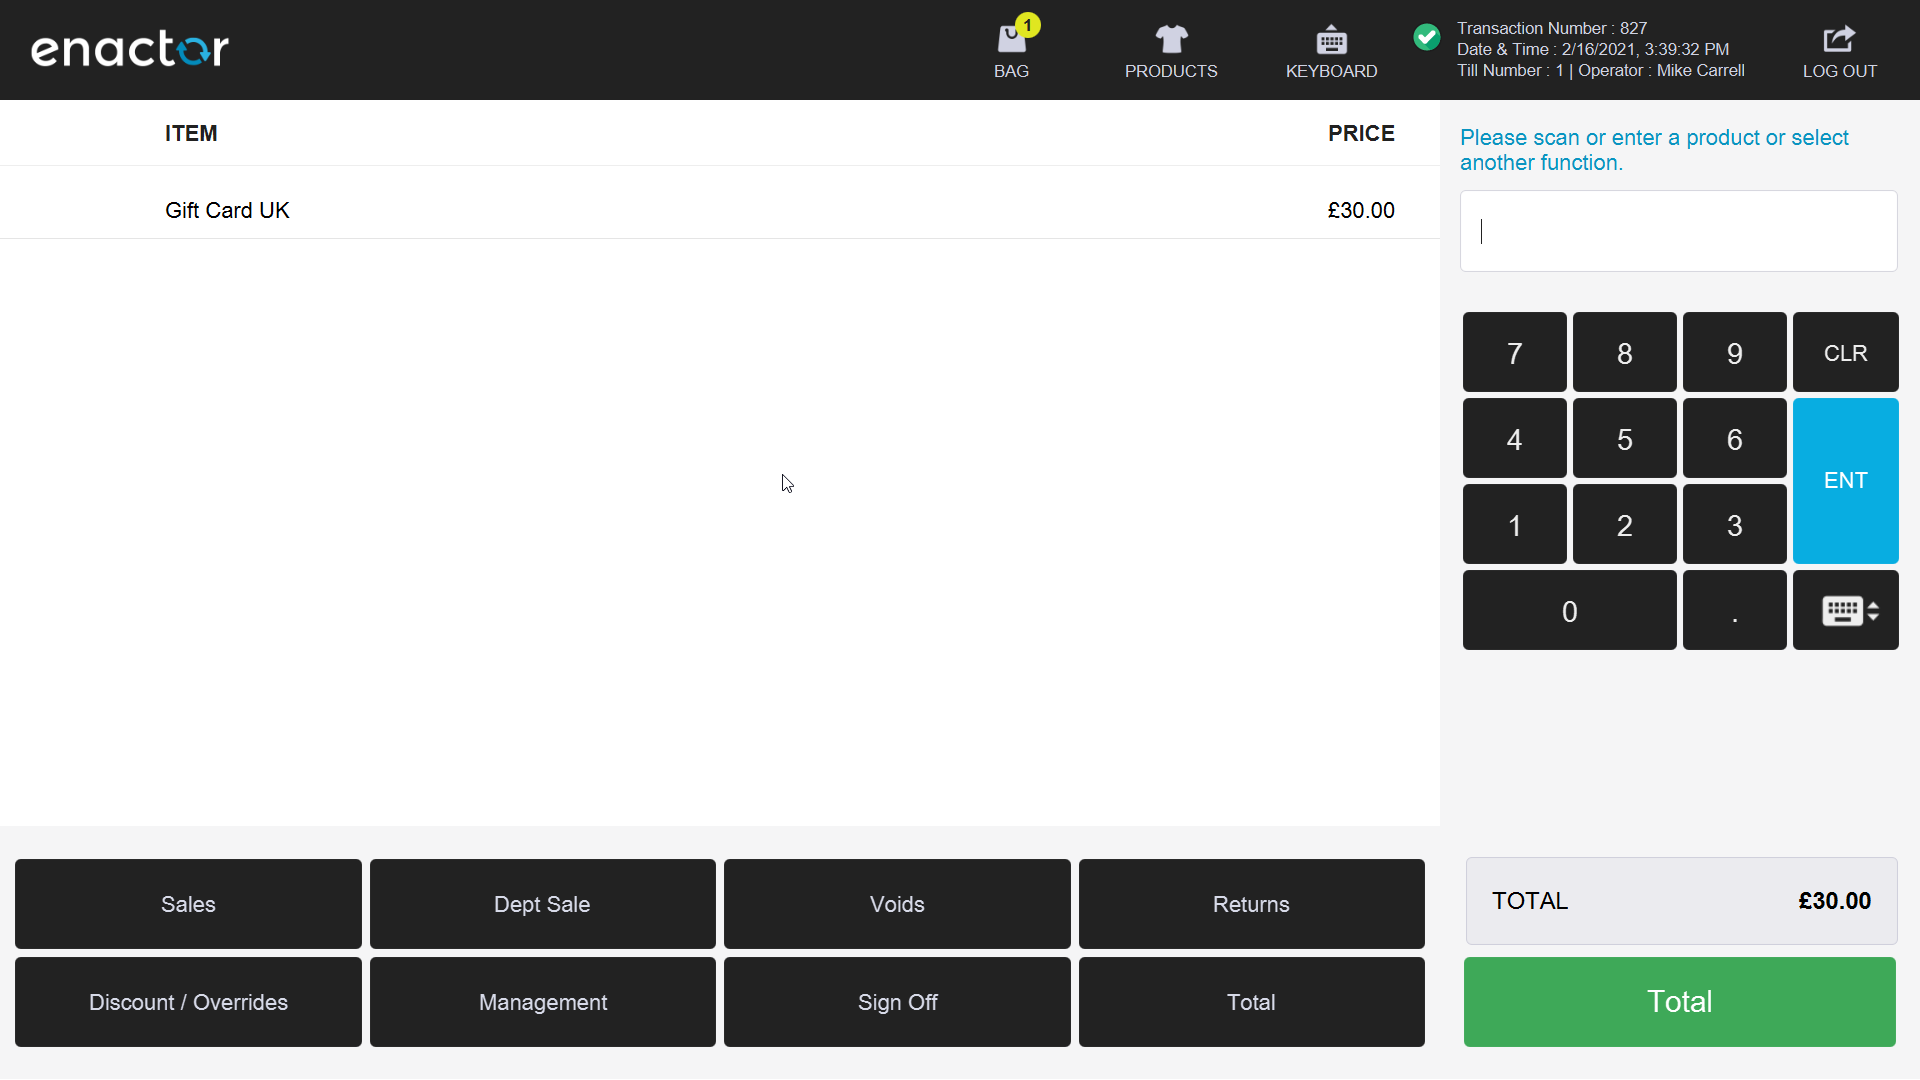
An advice slip is printed showing the top-up amount and the new card balance:

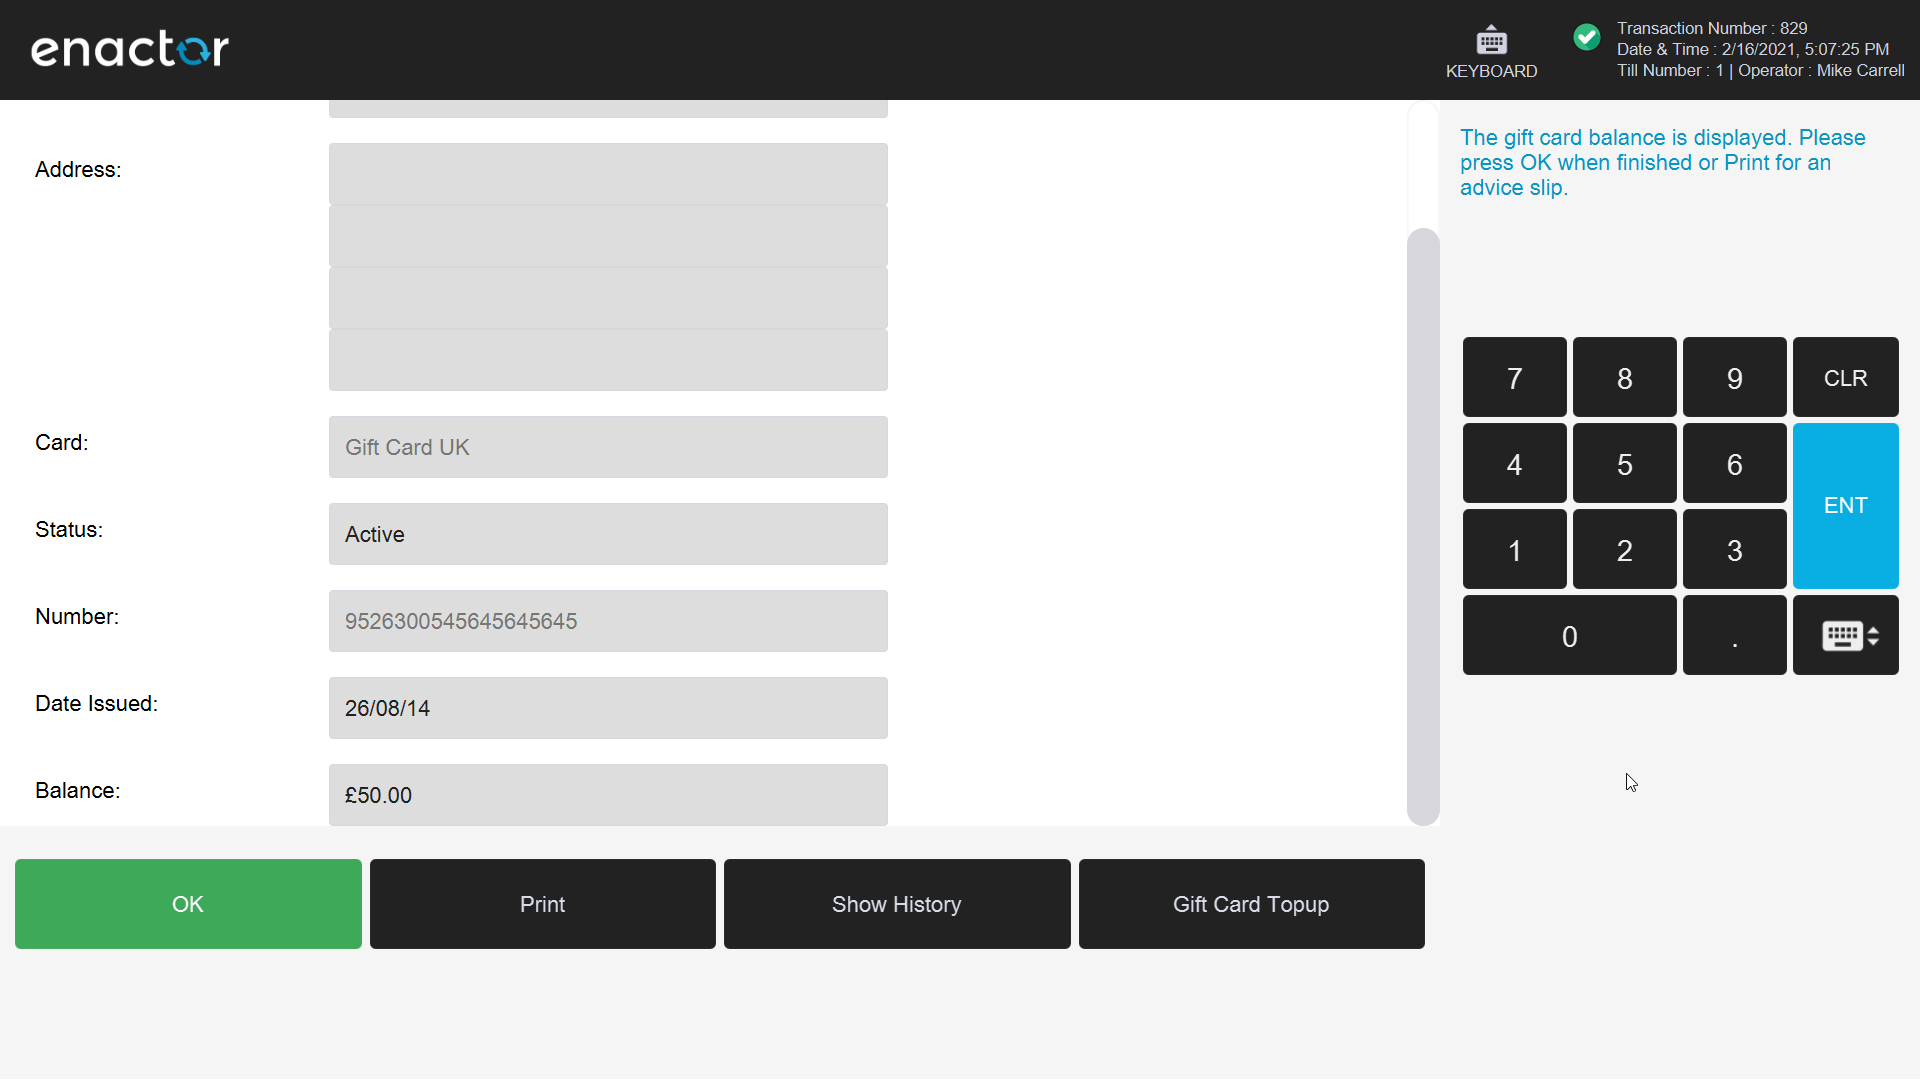
Gift Card Enquiry
Select the Gift Card Enquiry function from the POS Sales menu:

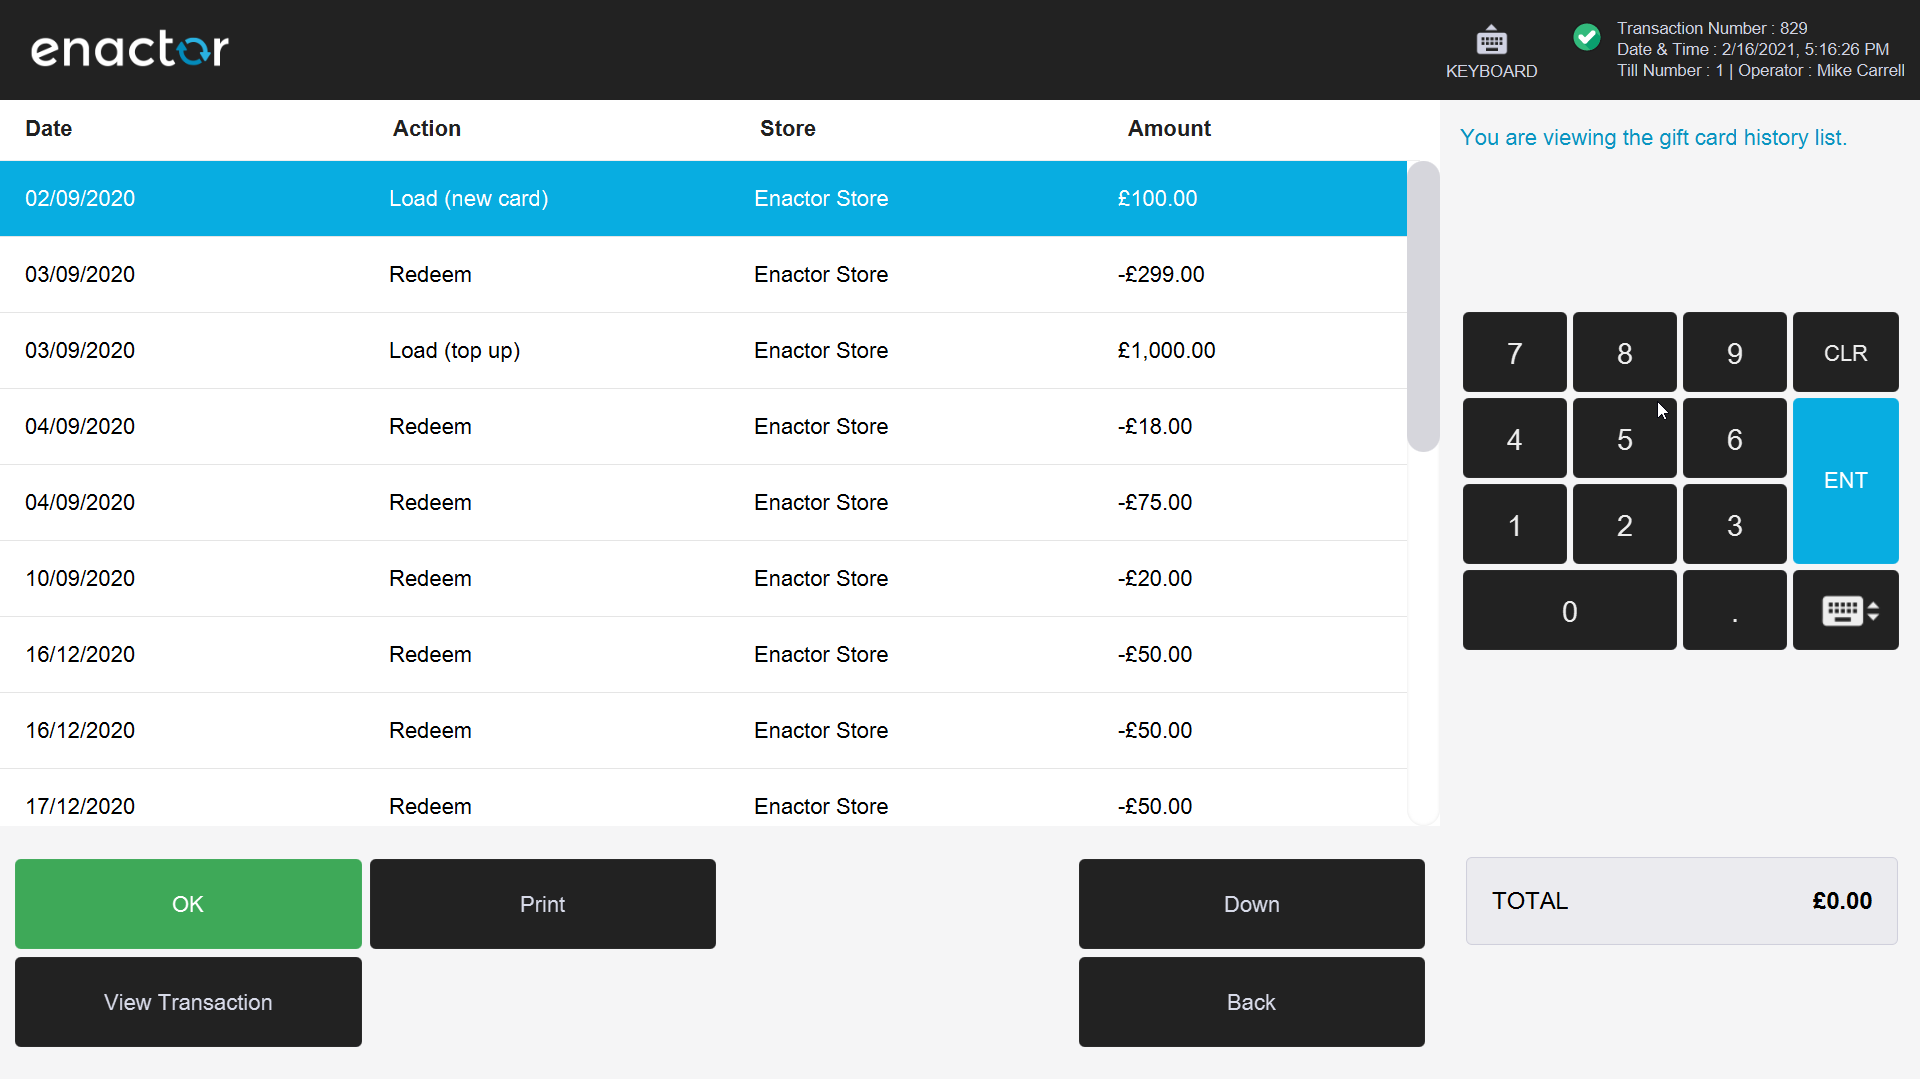
Gift Card History
Select the Gift Card History function from the POS Sales menu:
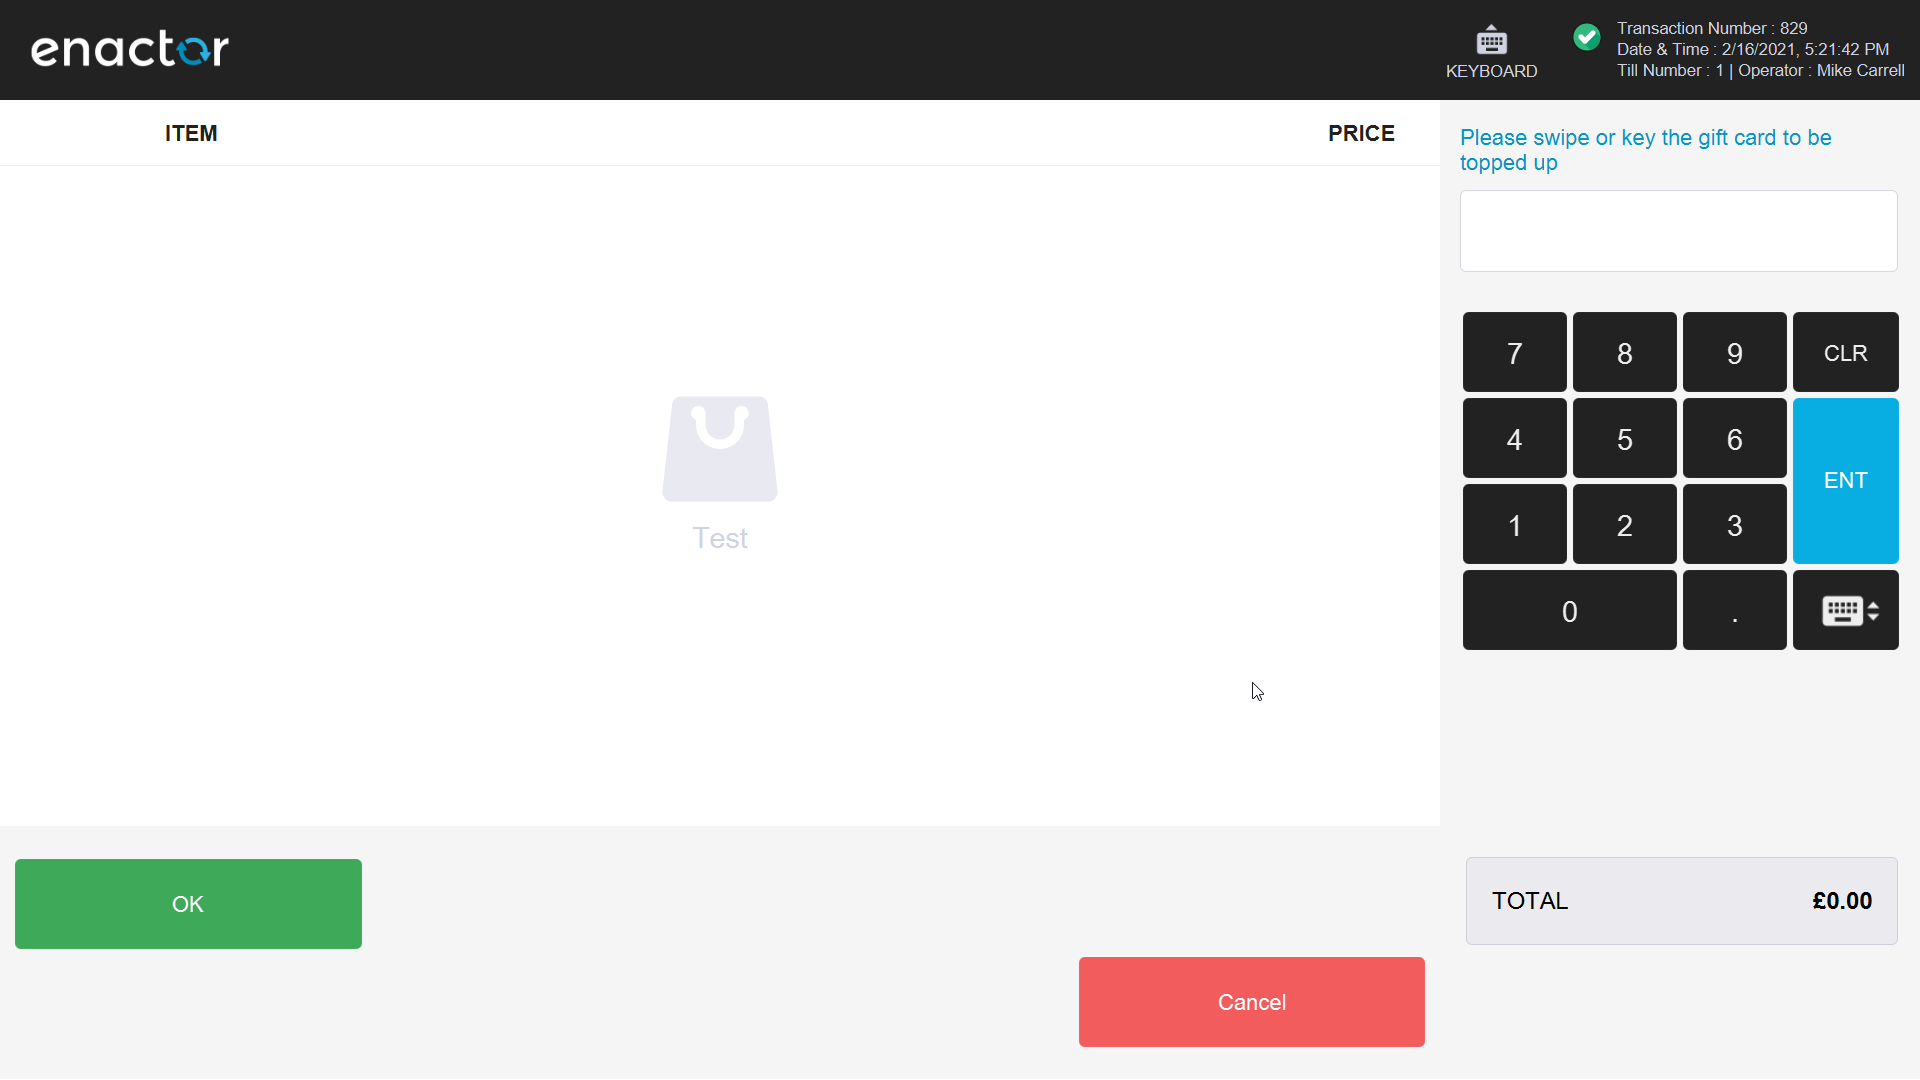
Gift Card Merge
Select the Gift Card Merge function from the POS Sales menu:

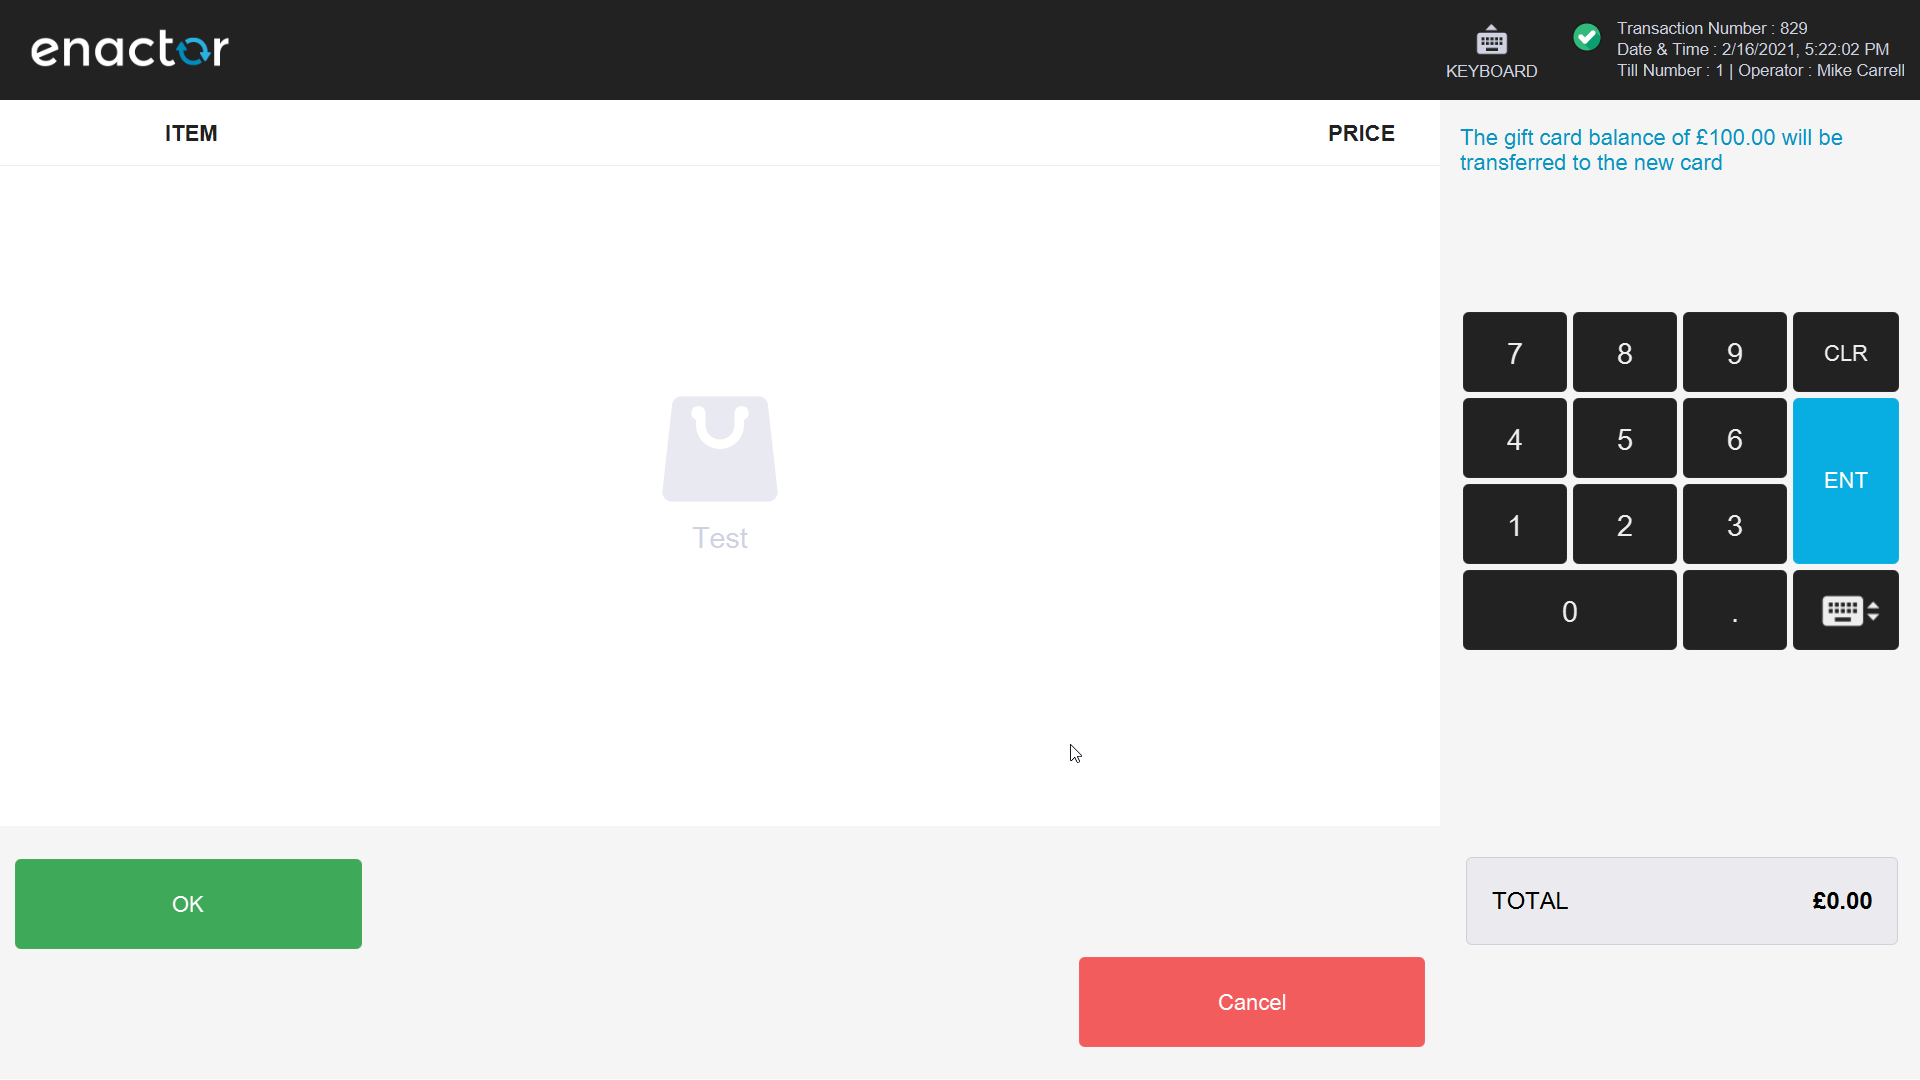

An advice slip is printed confirming the merge:

Gift Card Cancel
Select the Gift Card Cancel function from the POS Sales menu:

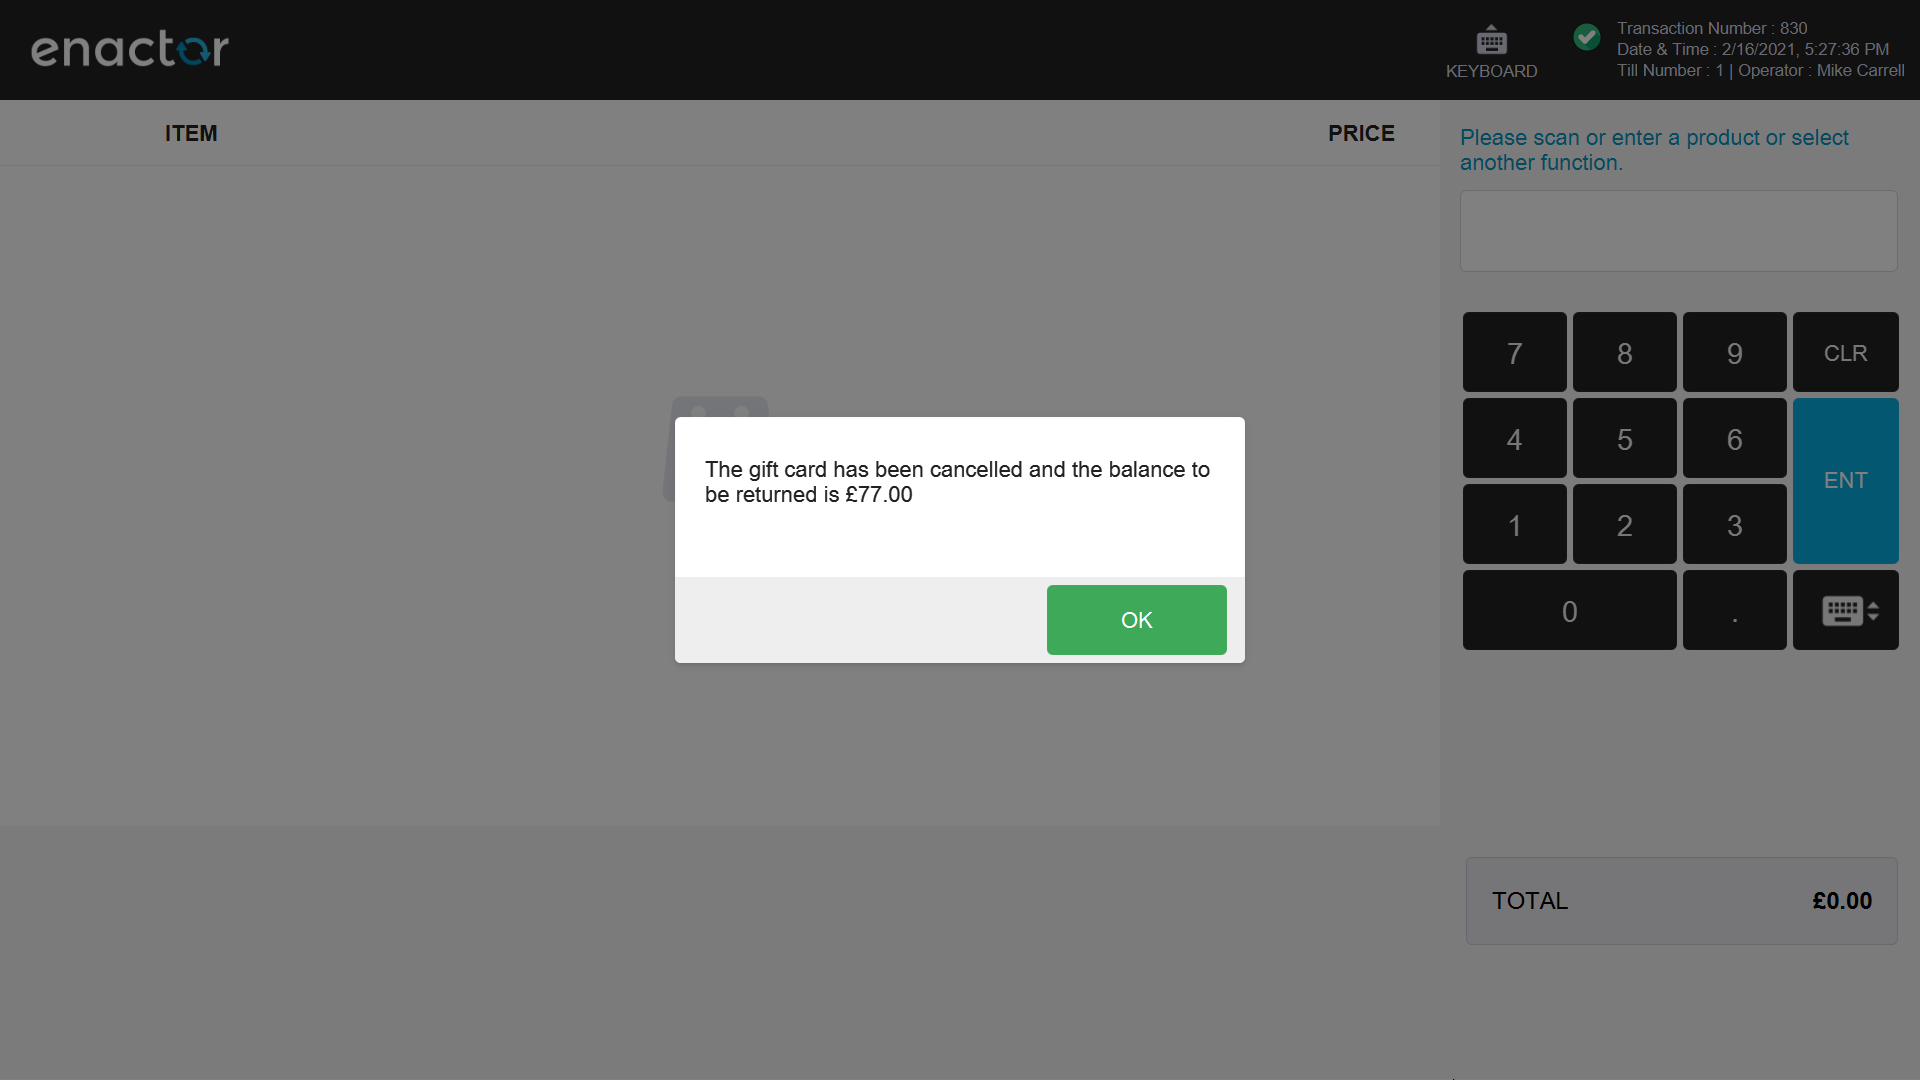
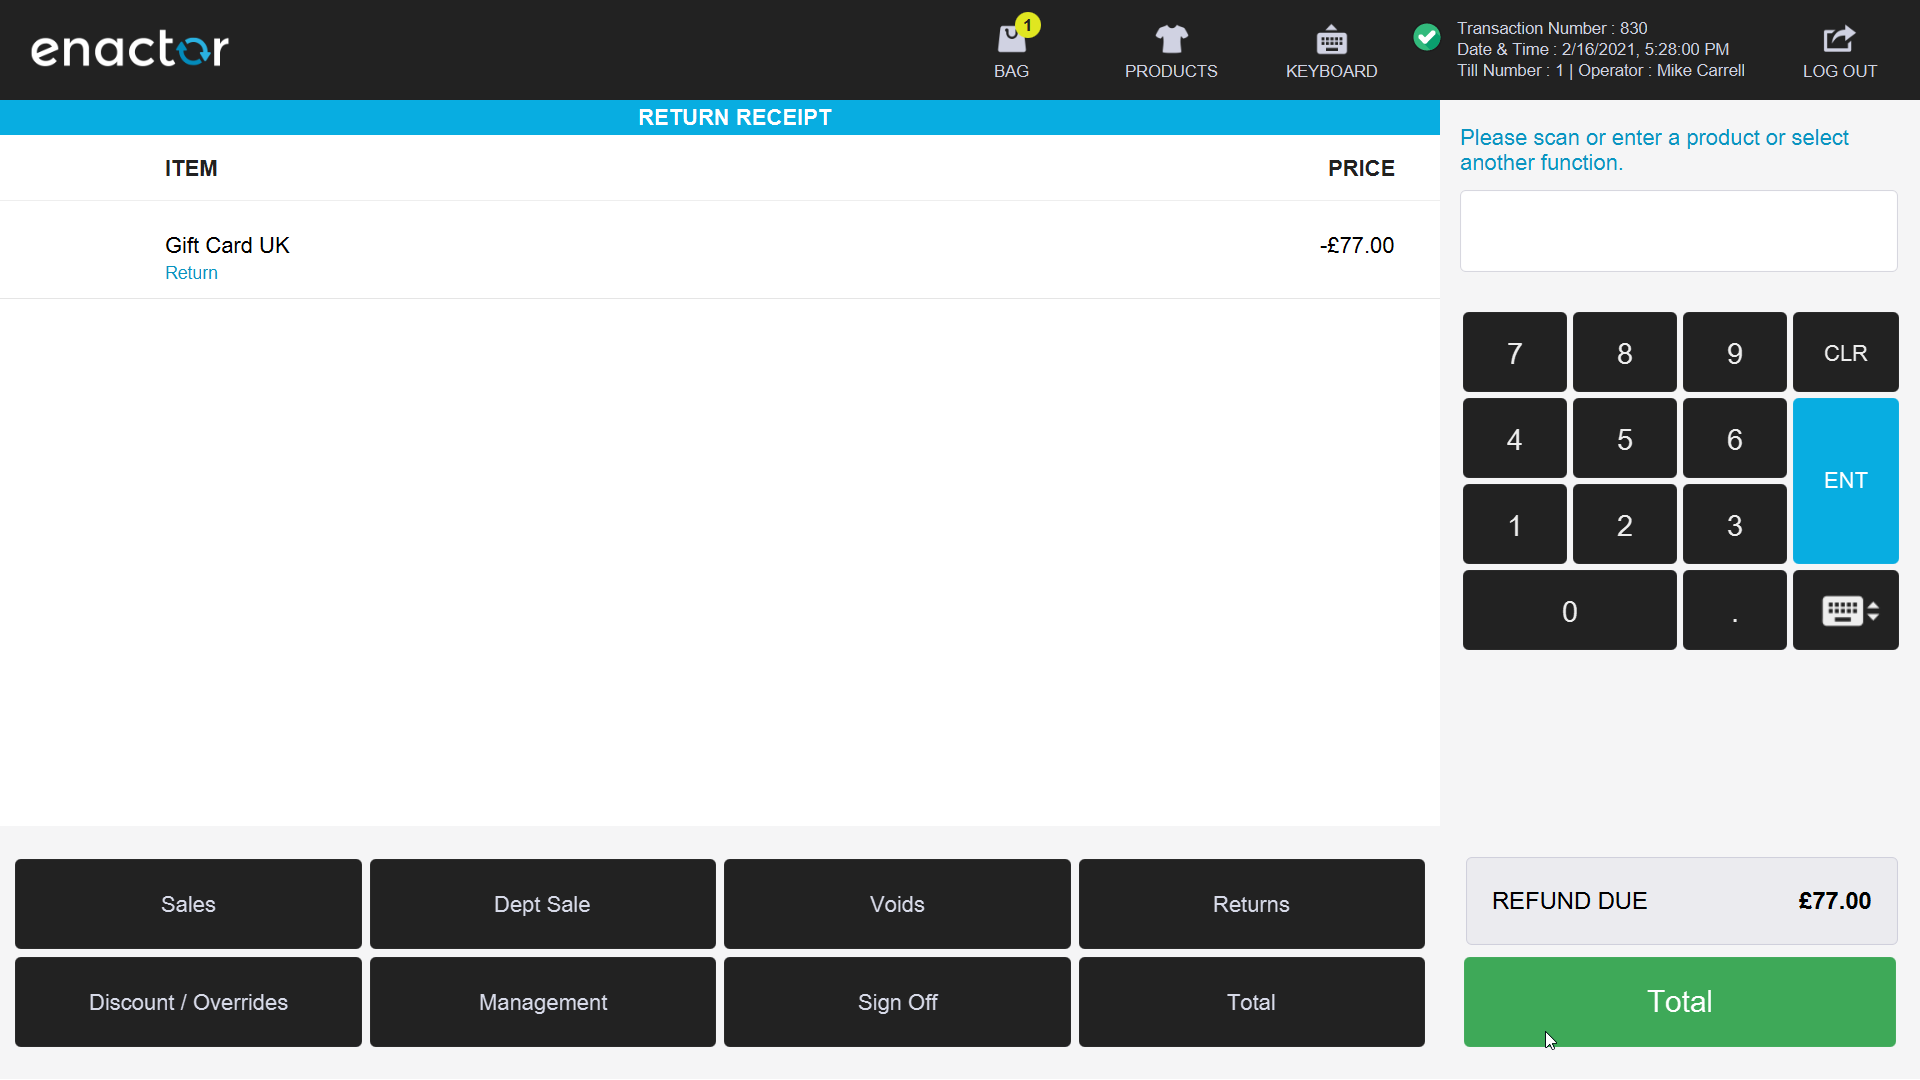
An advice slip is printed confirming the cancellation:

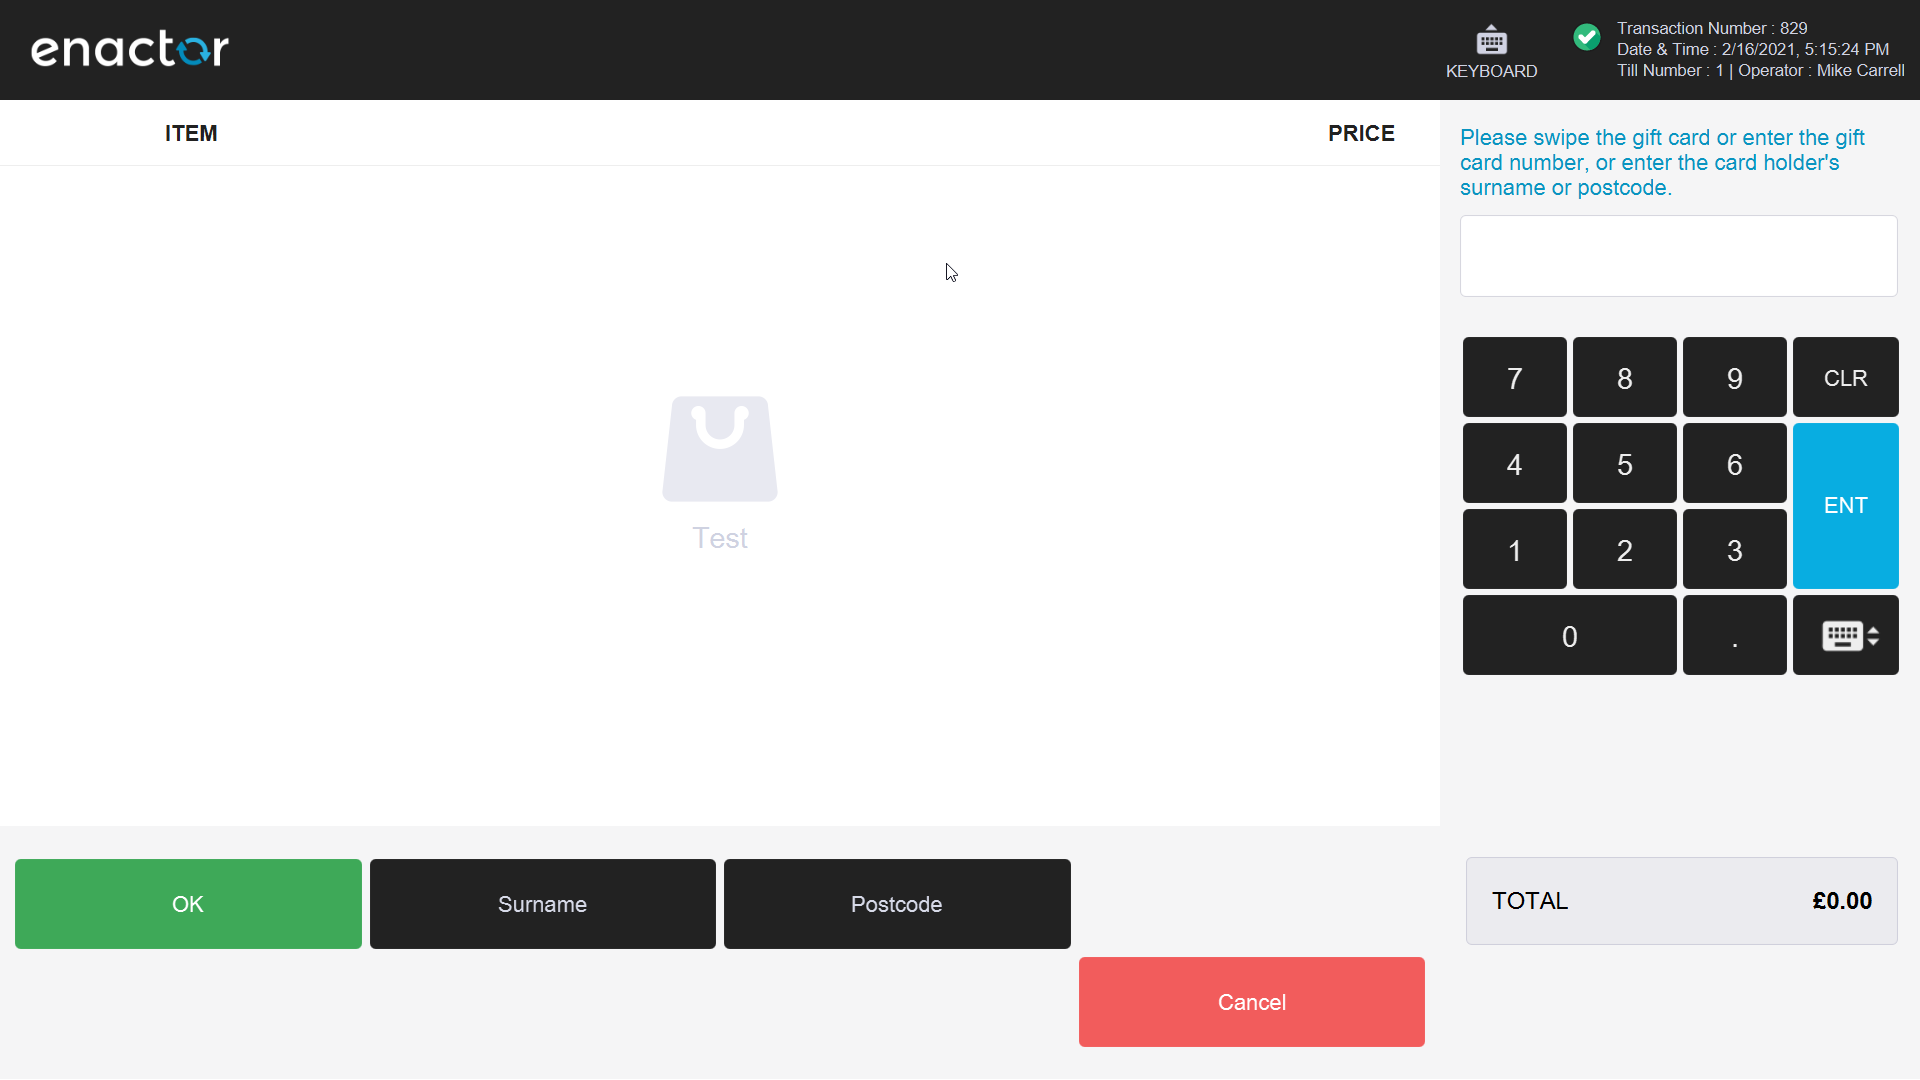
Gift Card Tender
Once gift cards are configured and the Gift Card tender button is in the Tender menu, gift cards can be used for payment.
Add items to the basket and select Total to enter Tender mode:
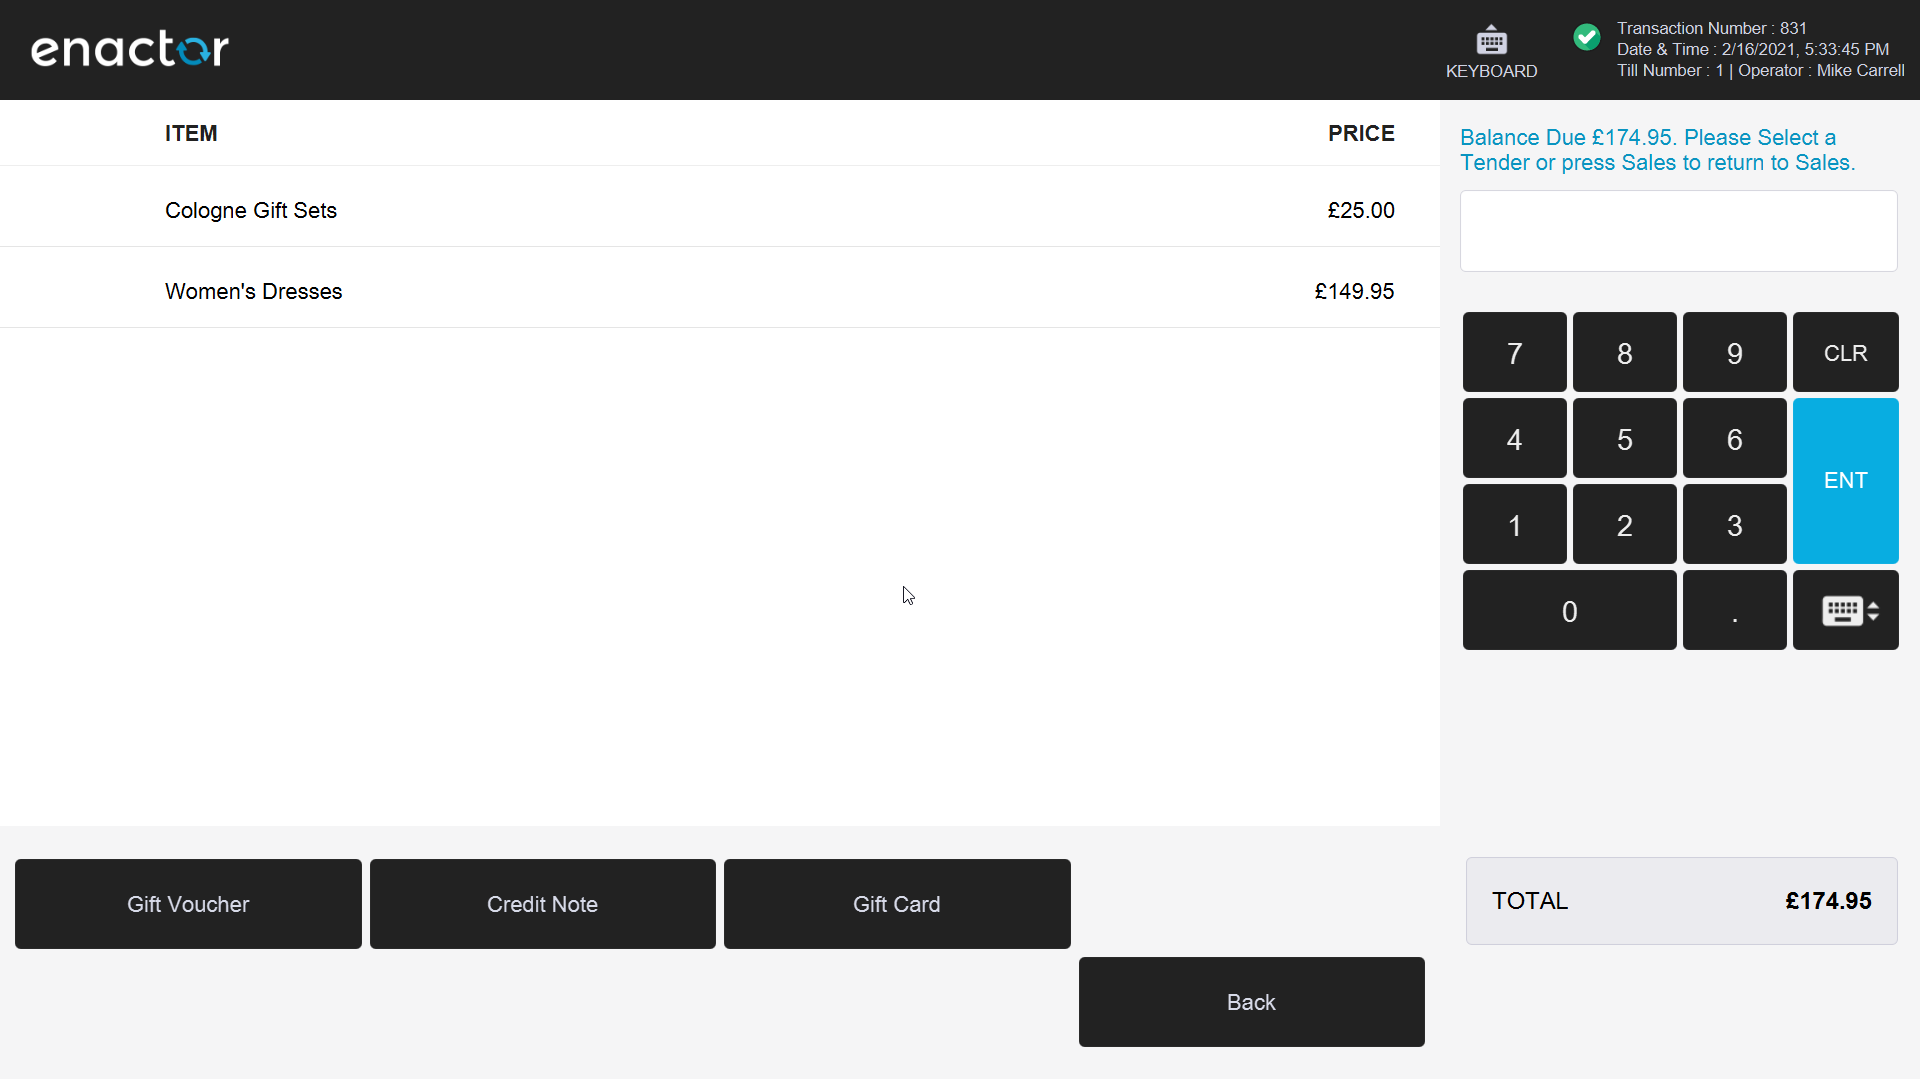
Select the Gift Card tender button:

Enter the gift card number and select OK:
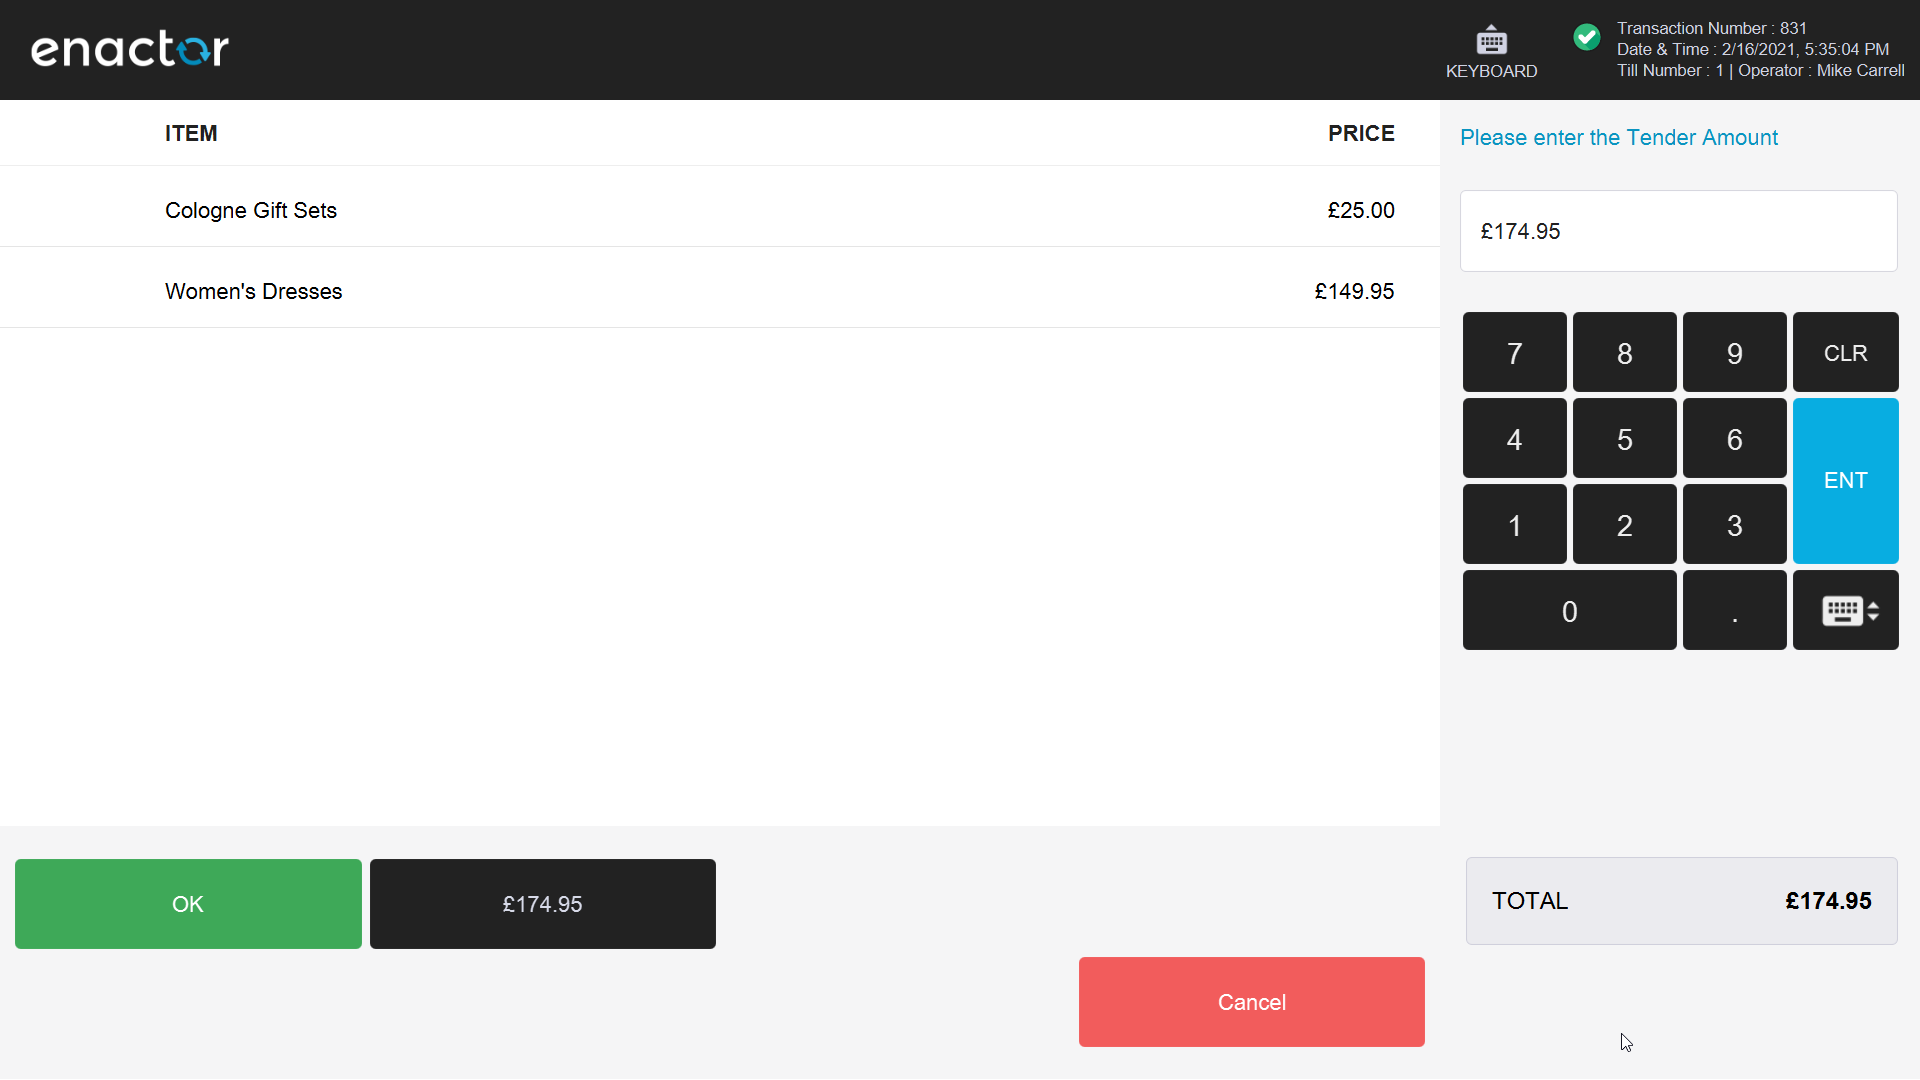
Confirm the tender amount and select OK to complete the redemption. The printed receipt shows the gift card tender and the remaining card balance:

Broadcasting
After configuring Gift Card settings in the Estate Manager, the changes must be broadcast to POS devices for them to take effect.
Broadcast the following entities after creating or modifying Gift Card configuration:
- Gift Card Type
- IIN Range
- Tender (Gift Card tender)
- Menu (if menu buttons were created or modified)
Broadcasts are covered in detail in the Broadcasting How-To Guide.
About This Document
©2026 Enactor Ltd
All documents produced by Enactor Ltd are supplied to Customers subject to Copyright, commercial confidentiality and contractual agreements and must not be copied or transferred without permission.
Document Context
This document is part of the Enactor Product Documentation Series. All Enactor products include a comprehensive documentation set designed to improve understanding of the product and facilitate ease of use.
Document Inquiries
At Enactor we aspire to producing the highest quality documentation to reflect and enhance the quality of our Product. If you find that the document is inaccurate or deficient in any way, please assist us in improving our standard by letting us know.
For matters of document quality or any other enquiries regarding this document, please contact:
By Email: documentation@enactor.co.uk
Document History
The following versions of this document have been produced:
| Version | Status | Issue Date | Author | Reason for Issue |
|---|---|---|---|---|
| 1.0 | Initial Draft | 12 Feb 2021 | John Wood | Initial version. |
| 1.1 | Draft | 15 Feb 2021 | John Wood | Updated with POS functions per review. |
| 2.0 | Updated | 2026-02-28 | Mark Harrison | Reformatted to Docusaurus format; screenshots updated. |