How To Configure Hospitality Menus
Introduction
The purpose of this guide is to provide a foundational understanding of the options and capabilities available when configuring hospitality-specific menus related to product sales and other functions.
This guide covers the configuration for the following hospitality-specific menus:
- Restaurant Course Menu
- Restaurant Bar Menu
- Restaurant Functions Menu
- Restaurant Bar Functions Menu
- Hospitality Modify Item Functions Menu
- Restaurant Bill Split Menu
- Restaurant Manager Functions Menu
- Restaurant Non-Table Sales Functions Menu
- Restaurant Transaction Notes Functions Menu
- Restaurant Item Notes Functions Menu
- Tender Menu
Prior Training and Experience
You should be familiar with the following before proceeding:
- Estate Manager Configuration
- Data Broadcasting
POS Menus
Enactor applications that present user interfaces (UIs) use Menus as the principal means to navigate and access application functionality. Menu configuration provides the first level of control over what application functionality individual users and groups of users may access and how they navigate to the functions they require.
Menus are associated with a Locale, User Role, and Menu Group. Before configuring menus, these related configuration elements must be understood and configured. From the POS user perspective, some POS menu options select other menus or refer to software functions. In most hospitality POS menus, the action behind the menu option is an event, a function, or a process defined within the constraint of the menu set.
Restaurant Menu Configuration
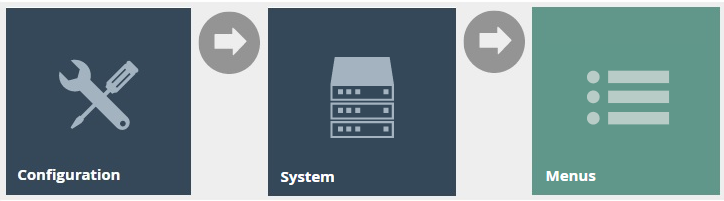
The Menu Maintenance application can be accessed through:
Navigate to menu configuration using the Search or the path: Configuration > System > Menus
Creating a Linked Menu
A linked menu is a series of menus linked to one another to form one large menu. Linked menus can be defined when configuring food menus to be used in the POS application. Before creating the main Restaurant Course menu or Restaurant Bar menu, you should create linked menus for each product category. This enables you to add these linked menus to the main Restaurant Course menu or Restaurant Bar menu which will be configured later.
Create linked menus for each product category before creating the main Restaurant Course or Restaurant Bar menus. The main menus reference these linked menus using the Menu Link event type.
The following is an example of creating a linked menu for the product category Champagne and adding an item to it.
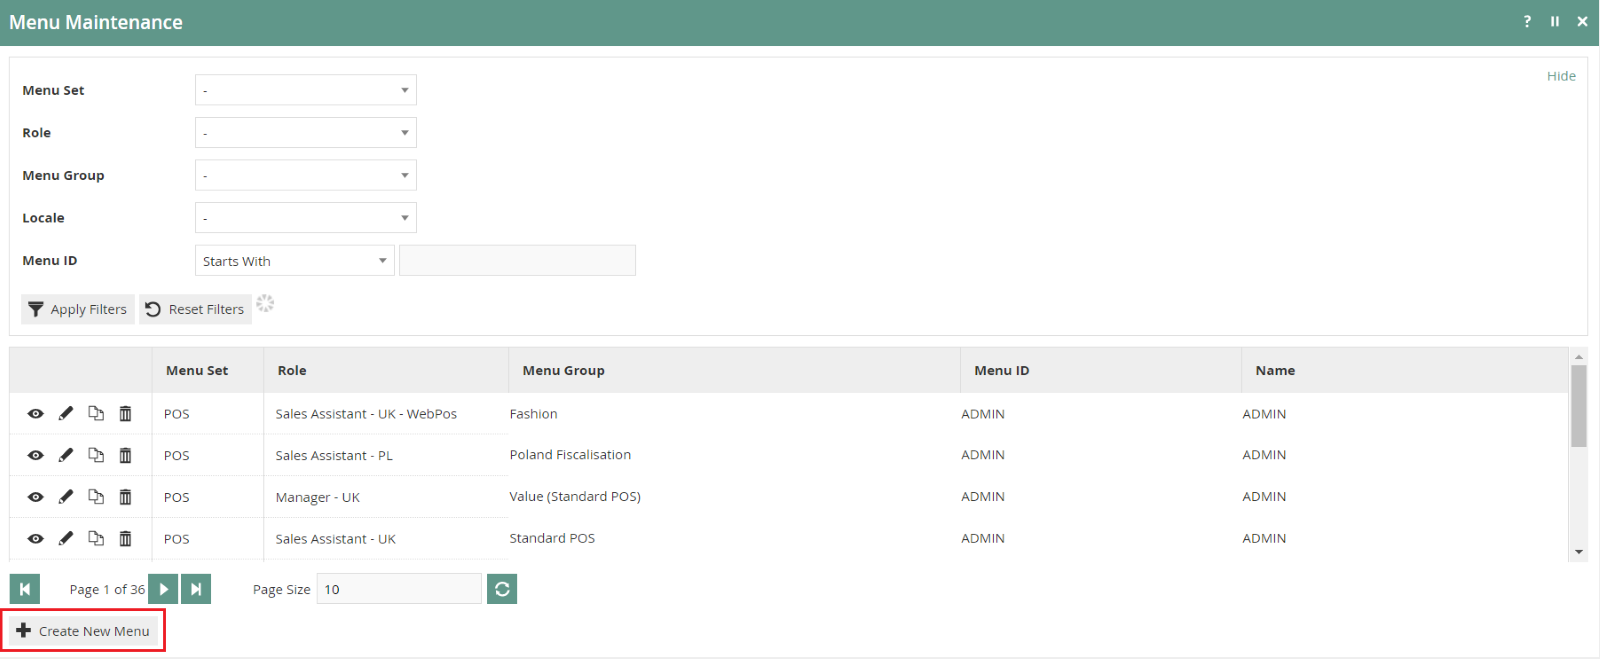
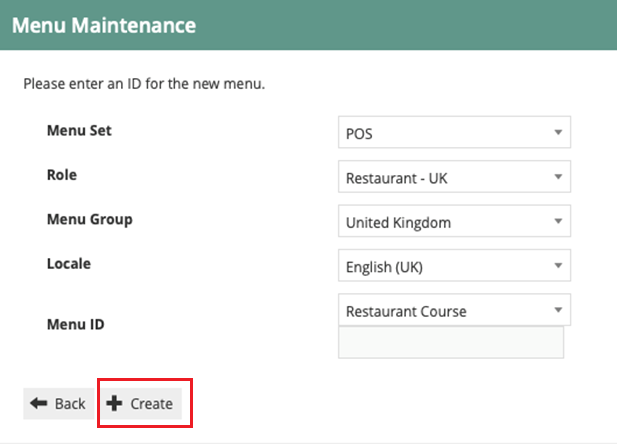
To create a new linked menu, select Create New Menu on the Menu Maintenance page.
You will be presented with the following options:
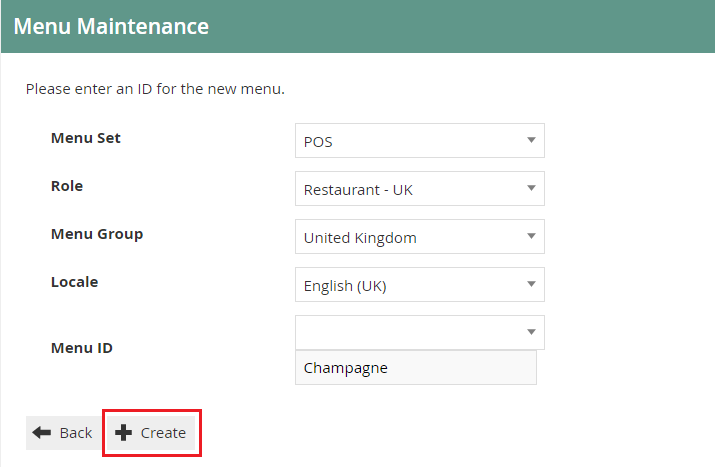
Set the appropriate values on the Menu Maintenance screen as follows:
| Configuration | Description |
|---|---|
| Menu Set | This selection determines the basic elements of functionality offered by the application. Select POS from the drop-down list. |
| Role | Role provides the necessary permissions to access the function options of the menu. Select Restaurant-UK from the drop-down list. |
| Menu Group | This selection identifies a set of menus associated with the location(s) in which its use is enabled. Select United Kingdom from the drop-down list. |
| Locale | Defines the locale in which the menu may be used. Select English (UK) from the drop-down list. |
| Menu ID | Must be a unique ID that identifies an application context in which the menu will be requested. Can contain up to a maximum of 30 alphanumeric characters. |
Select Create.
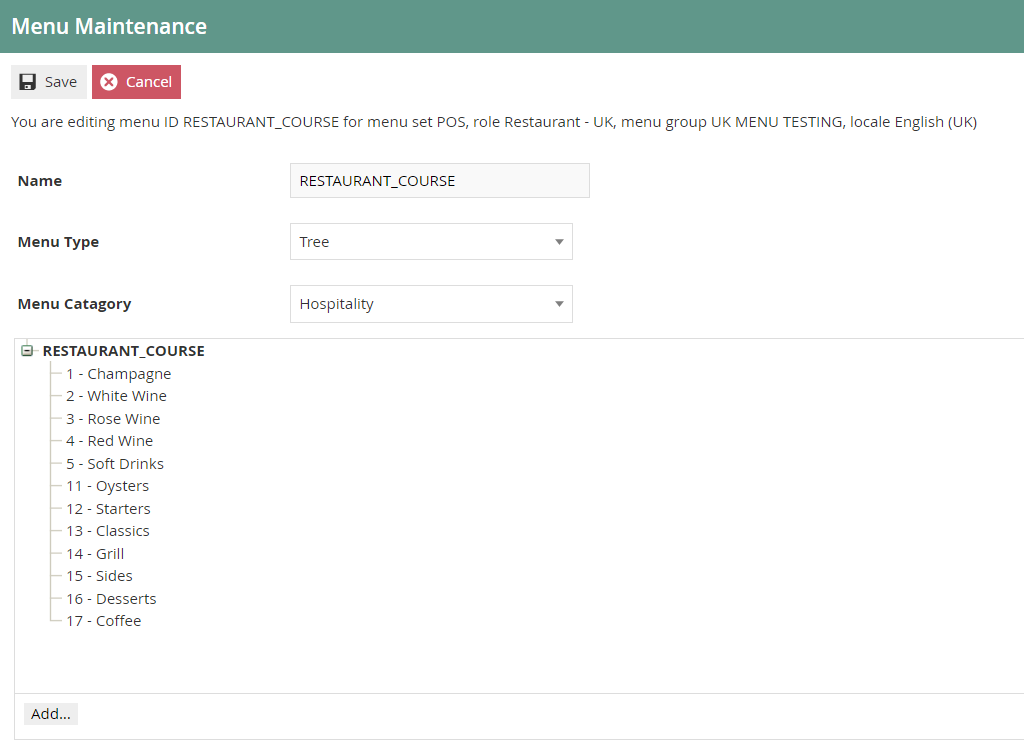
You will be presented with the following options to complete creating the new linked menu:
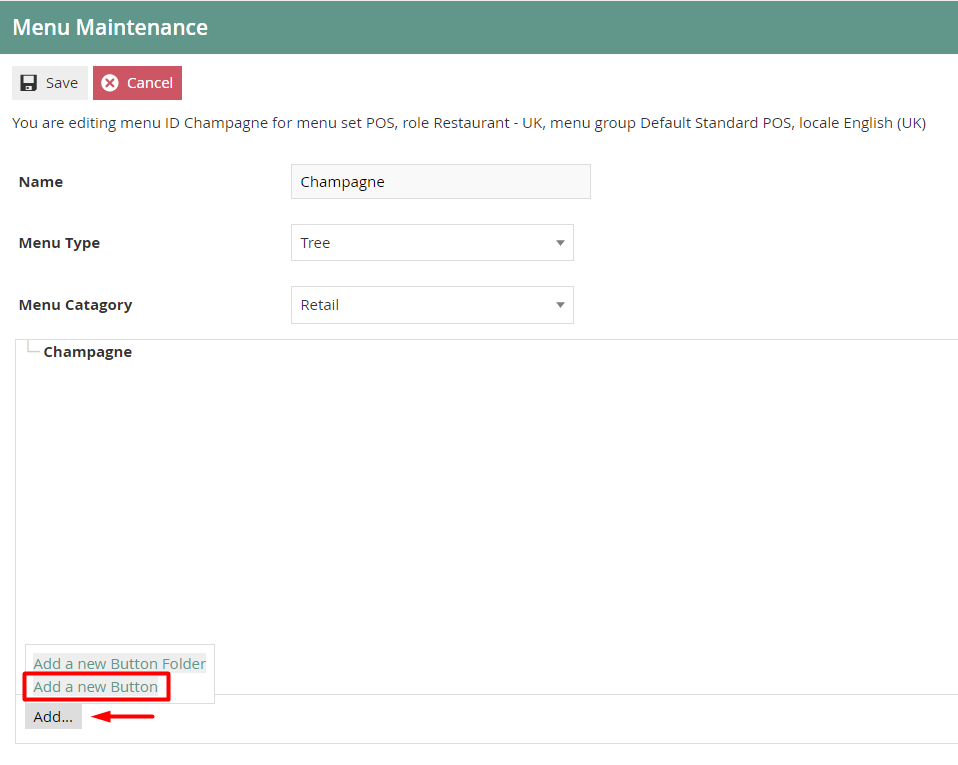
Enter a Name that can contain up to a maximum of 20 alphanumeric characters.
Select Tree from the Menu Type drop-down.
Select Hospitality from the Menu Category drop-down.
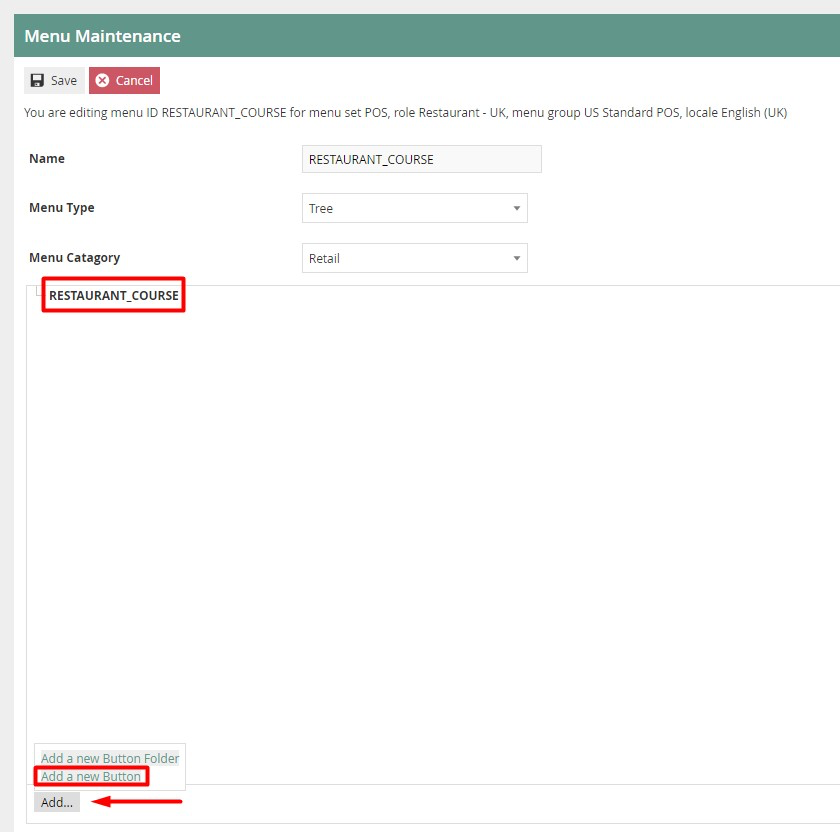
Select the menu root Champagne, and the menu options will appear at the bottom left corner.
Select Add.
From the list select Add a new Button to proceed.
Menu Maintenance - General Tab
On adding a basic menu item, the General tab captures the main data associated with the item.
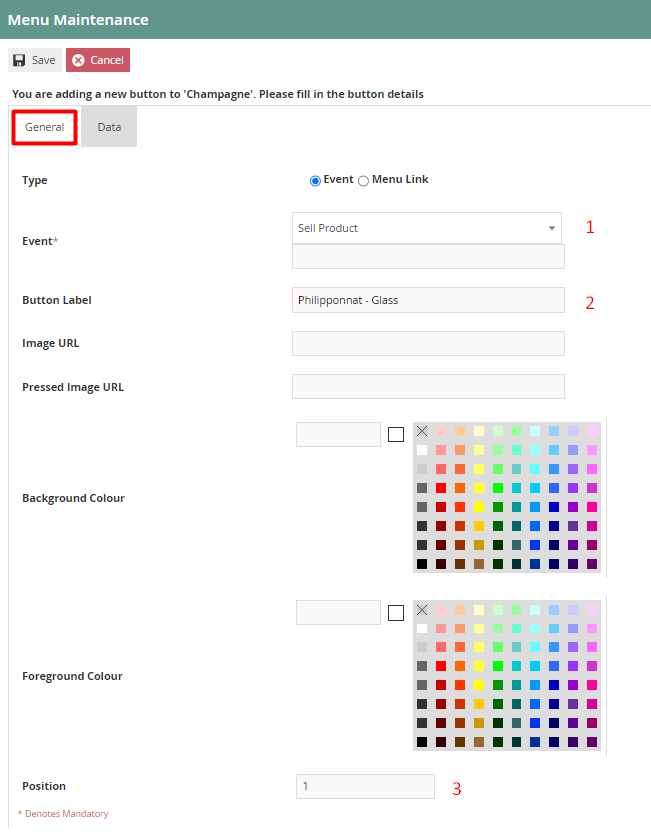
Set the appropriate values on the General tab as follows:
| Configuration | Description |
|---|---|
| Event | Select Sell Product from the drop-down list. |
| Button Label | Enter a value that describes what the product ID button will sell on selection. This will be displayed on the POS application. |
| Position | Enter a numeric value that will indicate where the menu item is to be displayed in the menu order. |
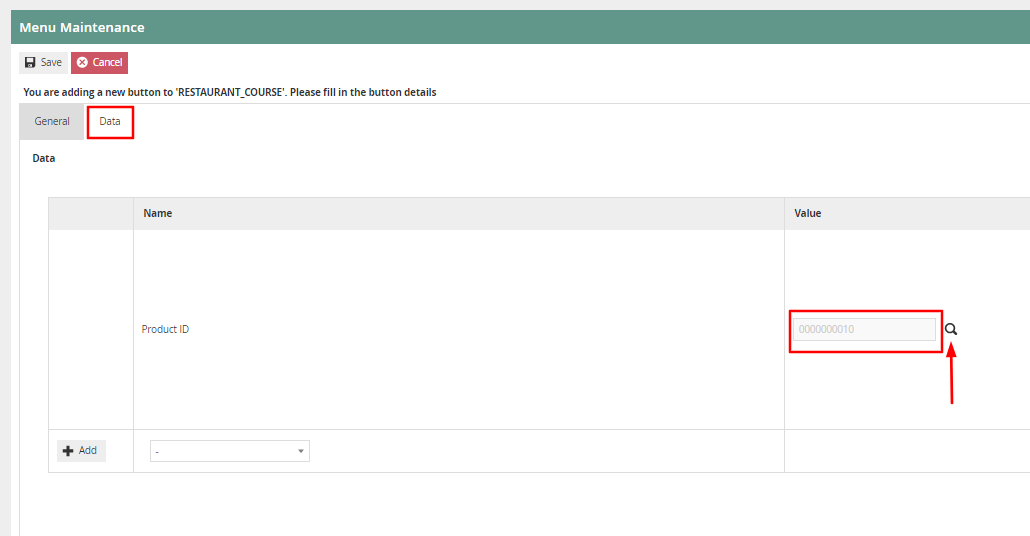
Menu Maintenance - Data Tab
The Data tab allows the user to set a restaurant product for sale in the Restaurant Courses menu. Here the product must be specified in the Data tab. This can be done by clicking on the Product Search icon in the Data tab.
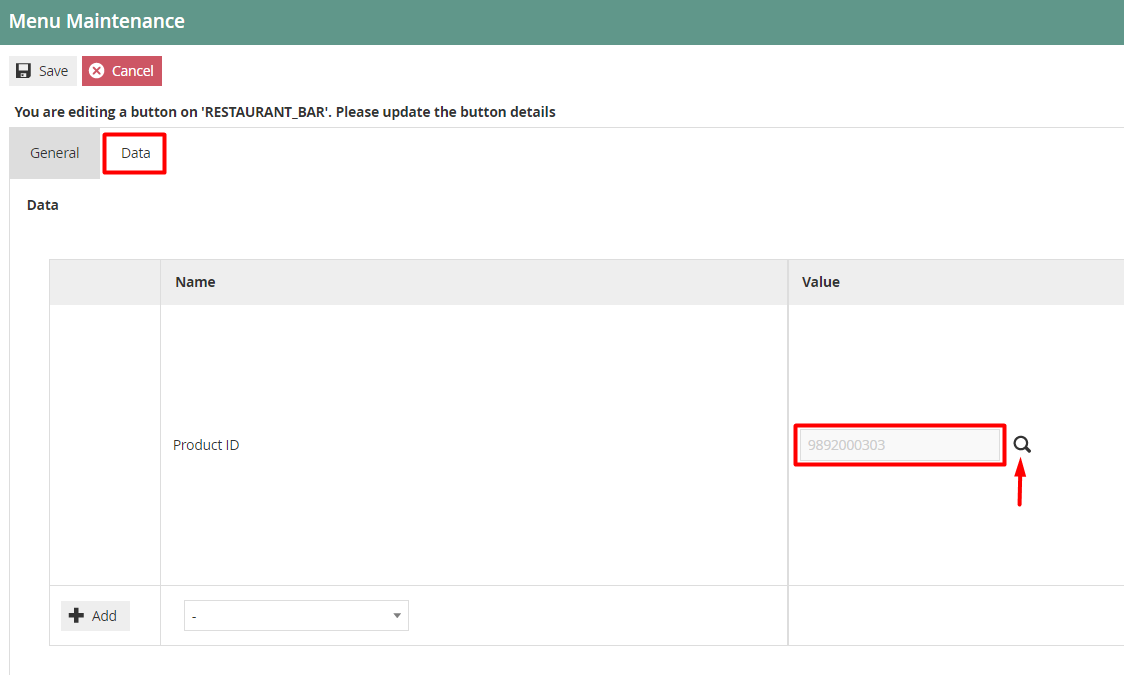
After configuring both tabs, select Save to complete creating the new product in the menu link.
Restaurant Course Menu
This is the main menu which displays all the restaurant products for the restaurant dine-in location. If you have a dine-in location in your restaurant and you want to list your restaurant products to sell, this is the menu that must be created.
The following is a configured Restaurant Course Menu in the Estate Manager:
Creating a Restaurant Course Menu
To create a root Restaurant Course menu with the linked menu created, select Create New Menu on the Menu Maintenance page.
You will be presented with the following options:
Select Restaurant Course from the Menu ID drop-down list.
Select Create.
You will be presented with the following options to complete creating the new restaurant course menu:
Enter a Name that can contain up to a maximum of 20 alphanumeric characters.
Select Tree from the Menu Type drop-down.
Select the menu root RESTAURANT_COURSE, and the menu options will appear at the bottom left corner.
Select Add.
From the list select Add a new Button to proceed.
You will be presented with the following options:
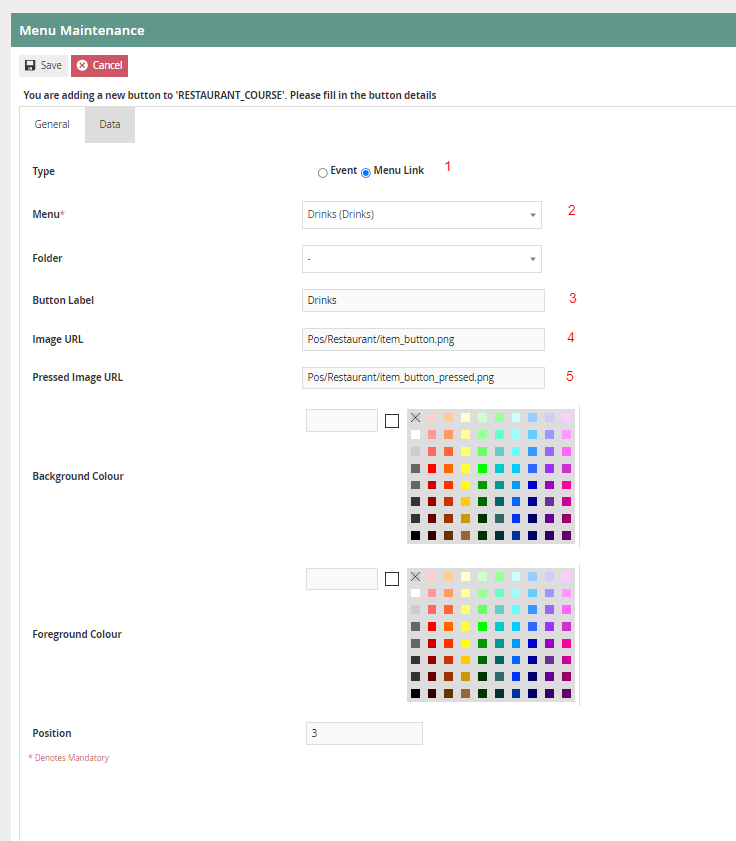
Set the appropriate values on the General tab as follows:
| Configuration | Description |
|---|---|
| Type | Select Menu Link which will provide a reference to the linked menu that was previously defined independently and needs to be added to this course menu. |
| Menu | Select the appropriate menu that needs to be linked to from the drop-down list. |
| Button Label | This is a fixed text which will appear on the tile of the menu tree entry that will select the menu folder. Can be alphanumeric and contain a maximum of 30 characters. Enter an appropriate button label name. |
| Image URL | Captures the URL identifying an image to be displayed on the button. Can be alphanumeric and contain a maximum of 100 characters. Enter Pos/Restaurant/item_button.png. |
| Pressed Image URL | Captures the URL of any image to be displayed on the button when it is pressed. Enter Pos/Restaurant/item_button_pressed.png. |
After configuring both tabs, select Save to complete creating the new Restaurant Course Menu item.
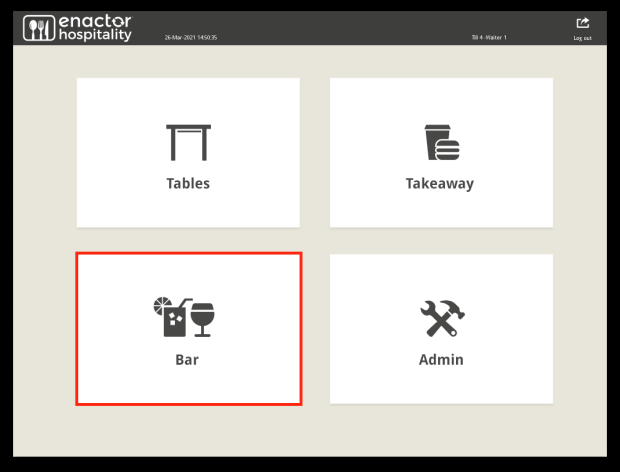
This menu can be accessed in the POS as follows:
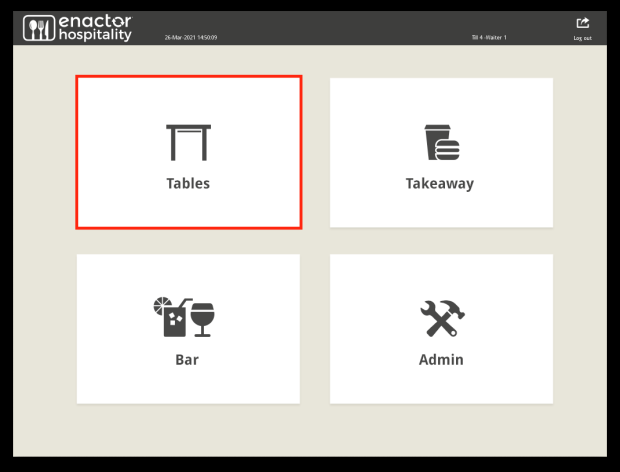
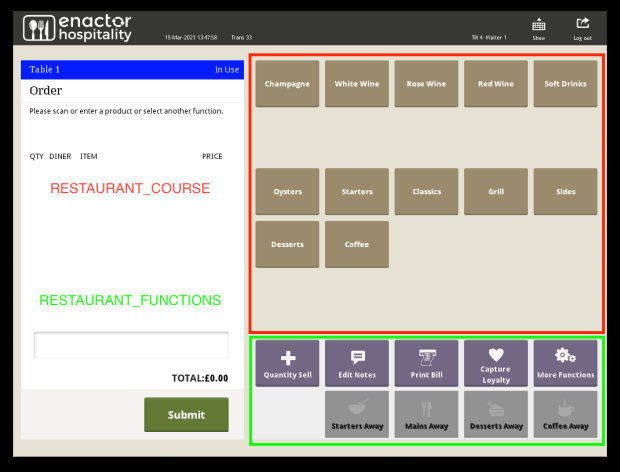
The menu represented by RESTAURANT_COURSE in the above image is the one to be configured.
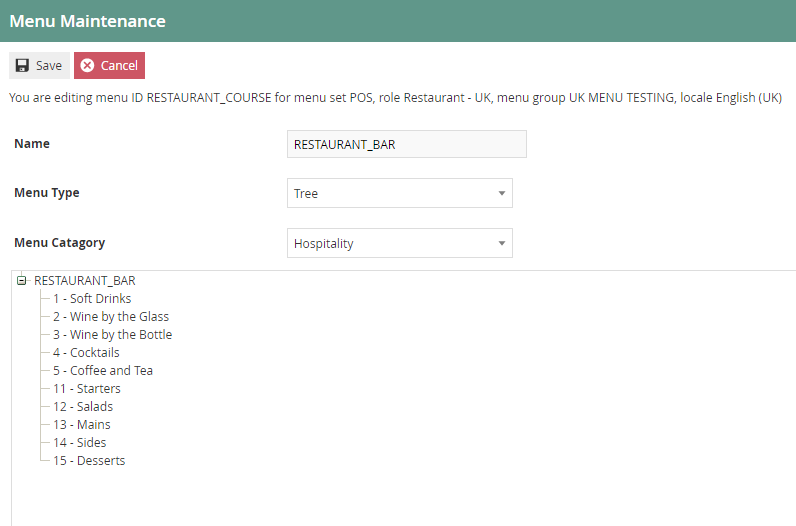
Restaurant Bar Menu
This is the main menu which displays all the restaurant products for the restaurant bar location. If you have a bar location in your restaurant and you want to list your restaurant products to sell, this is the menu that must be created.
When creating this new menu, make sure to select Restaurant Bar from the Menu ID drop-down list.
The following is a configured Restaurant Bar Menu in the Estate Manager:
The following events can be configured for this menu:
| Event Name | Data | Description | Privileges |
|---|---|---|---|
| Sell Product | Product ID | Allows the user to set a restaurant product for sale in this menu. The product must be specified in the Data tab by clicking the Product Search icon. | No privileges are required. |
This menu can be accessed in the POS as follows:

The menu represented by RESTAURANT_BAR in the above image is the one to be configured.
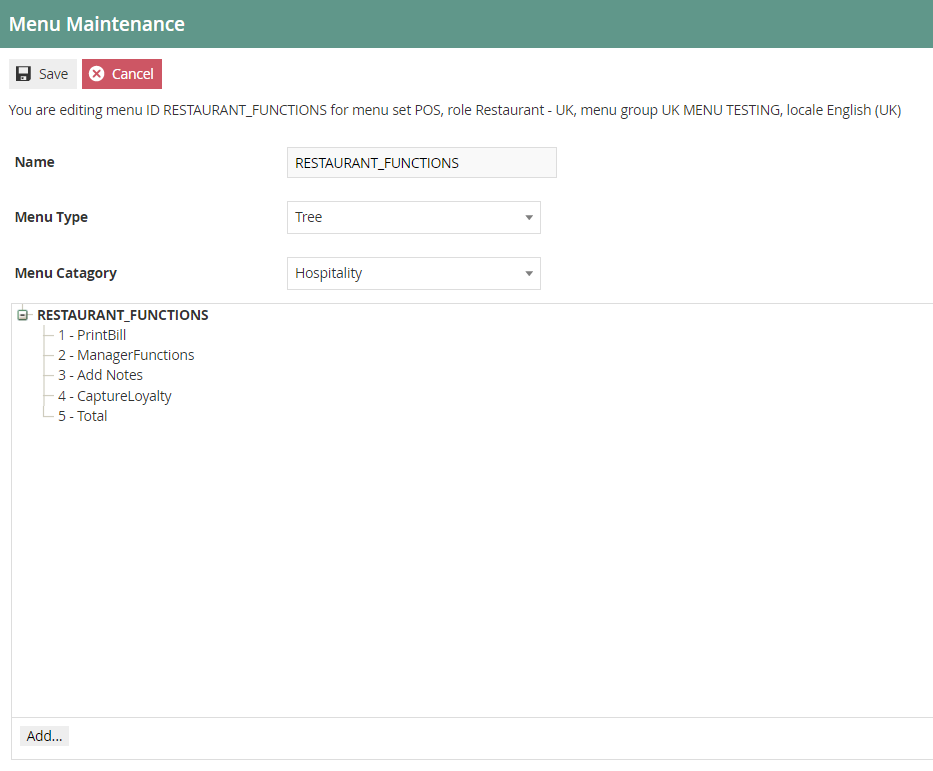
Restaurant Functions Menu
This is the main menu which displays all the restaurant-related functions in the restaurant dine-in location.
When creating this new menu, make sure to select Restaurant Functions from the Menu ID drop-down list.
The following is a configured Restaurant Functions Menu in the Estate Manager:
The following events can be configured for this menu:
| Event Name | Description | Privileges |
|---|---|---|
| Print Bill | Allows the user to print the bill for a table. This is also available from one of the quick launch buttons on each table. | No privileges are required. |
| Manager Functions | Allows the user to access the Restaurant Manager Functions menu. | No privileges are required. |
| Add Notes | Allows the user to access the Restaurant Transaction Notes Functions menu. | No privileges are required. |
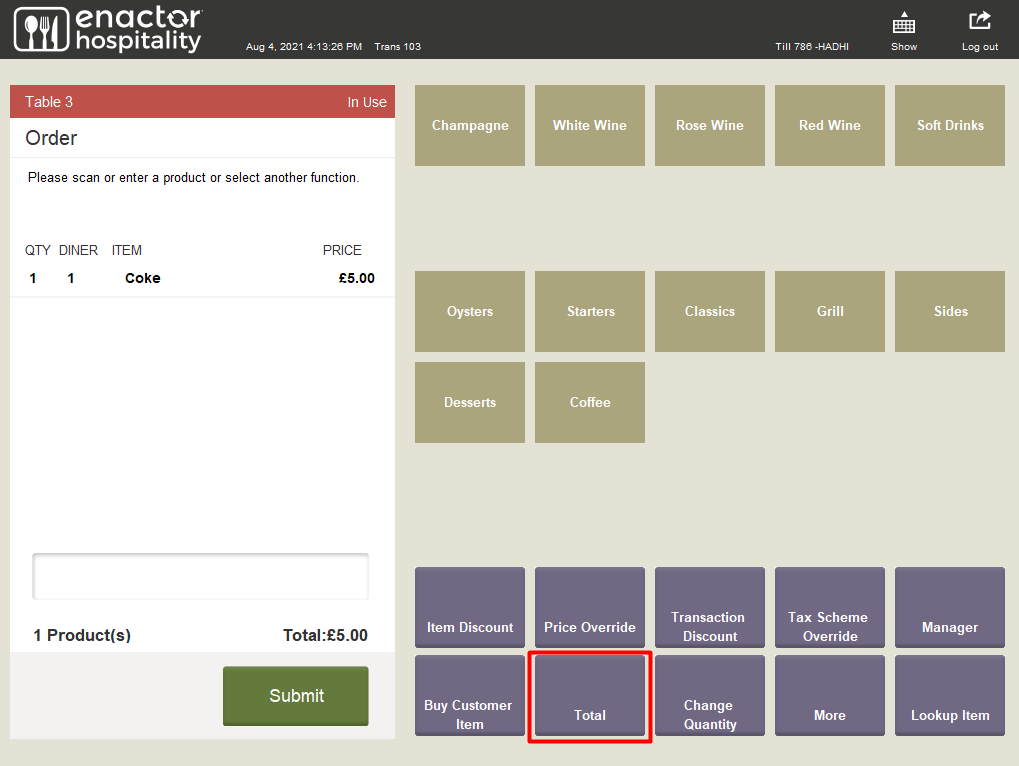
| Total | Enables the start of the tender process by taking the user to the Tender menu. | No privileges are required. |
This menu can be accessed in the POS as follows:
The menu represented by RESTAURANT_FUNCTIONS in the above image is the one to be configured.
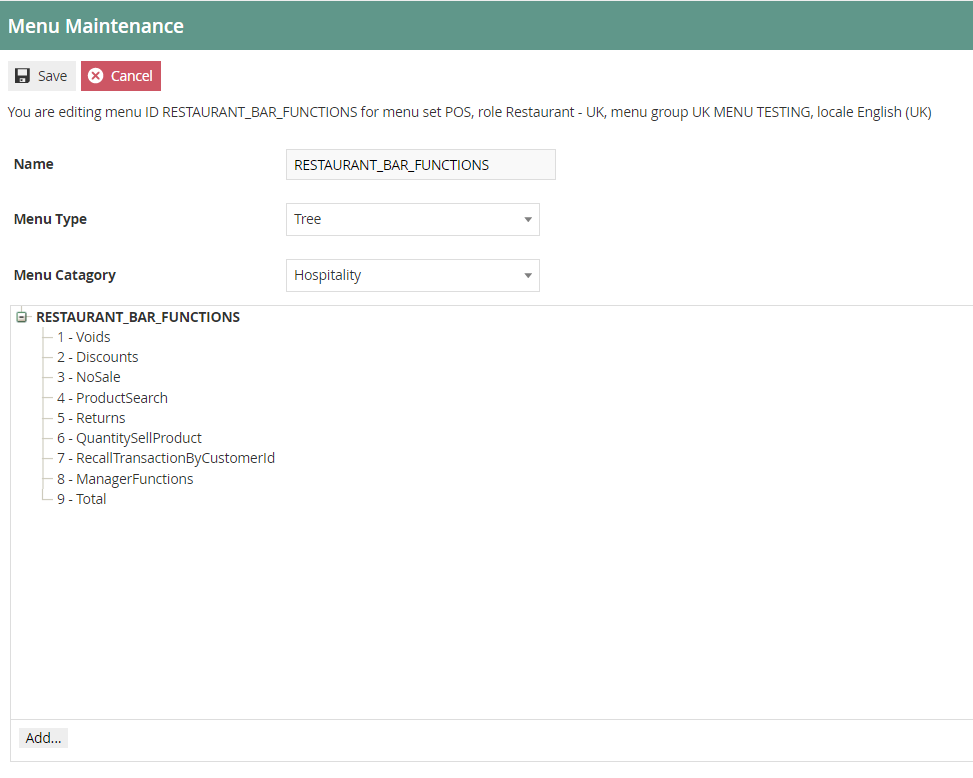
Restaurant Bar Functions Menu
This is the main menu which displays all the restaurant-related functions in the restaurant bar location.
When creating this new menu, make sure to select Restaurant Bar Functions from the Menu ID drop-down list.
The following is a configured Restaurant Bar Functions Menu in the Estate Manager:
The events available for configuration in this menu are the same set of events available for the Restaurant Functions menu described above.
This menu can be accessed in the POS as follows:
The menu represented by RESTAURANT_BAR_FUNCTIONS in the above image is the one to be configured.
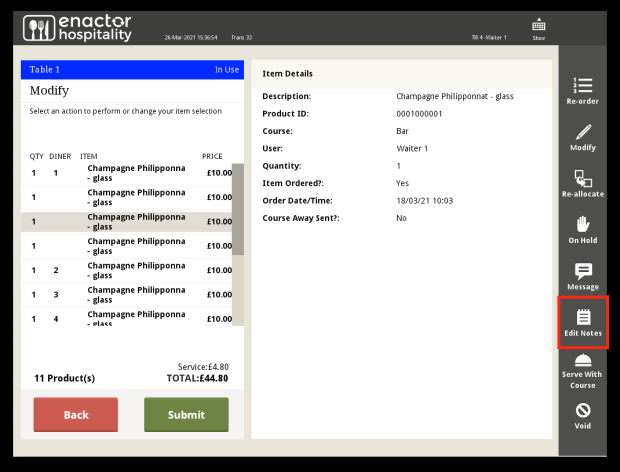
Hospitality Modify Item Functions Menu
This is the menu which allows modifications to the list of items added in the order.
When creating this new menu, make sure to select Hosp Modify Item Functions from the Menu ID drop-down list.
The following is a configured Hospitality Modify Item Functions Menu in the Estate Manager:

The following events can be configured for this menu:
| Event Name | Description | Privileges |
|---|---|---|
| Re Order Item | Allows the operator to select an item already in the virtual basket, then re-order it (including any options selected) with one button press. | No privileges are required. |
| Modify Sales Item | Allows the operator to edit the item, changing options selected or editing the item message. | No privileges are required. |
| Reallocate Item To Diner | Allows an item to be allocated to a different diner. | No privileges are required. |
| On Hold | Adds a text message of "On Hold" to the item when it is submitted to the kitchen. | No privileges are required. |
| Add Message | Allows the operator to add a message to the item that will be submitted to the kitchen. | No privileges are required. |
| Edit Notes | Allows the operator to edit notes already added to the item. | No privileges are required. |
| Serve With Course | Allows the operator to allocate an item to a course other than the one it is configured against (e.g. customer orders a starter as a main course). | No privileges are required. |
| Selected Item Void | Allows the operator to void the selected item. | No privileges are required. |
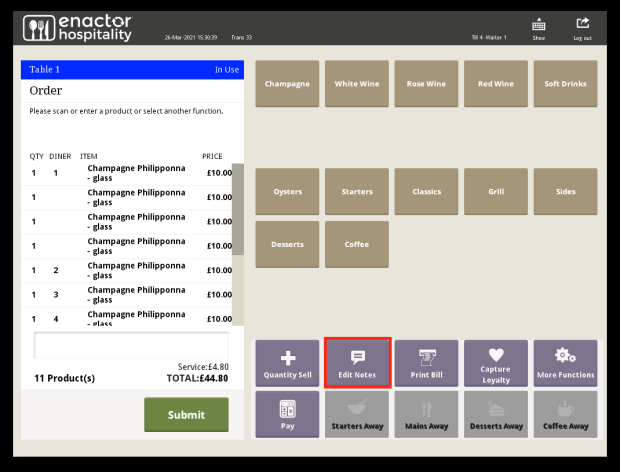
This menu can be accessed in the POS as follows:
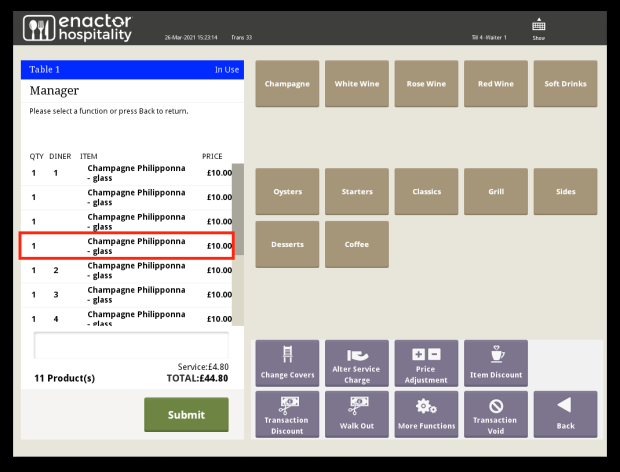
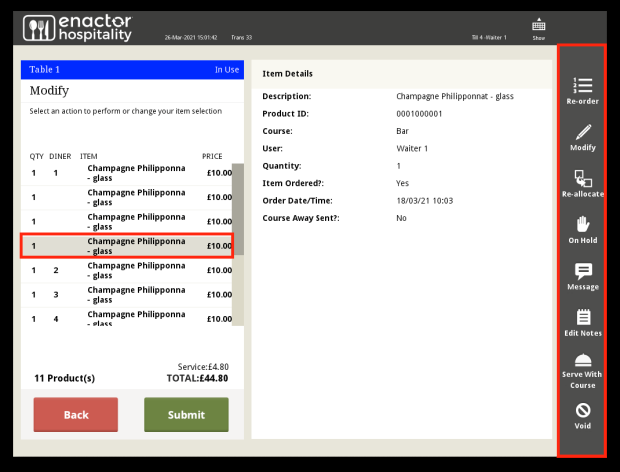
The menu appears on the right when an item is selected.
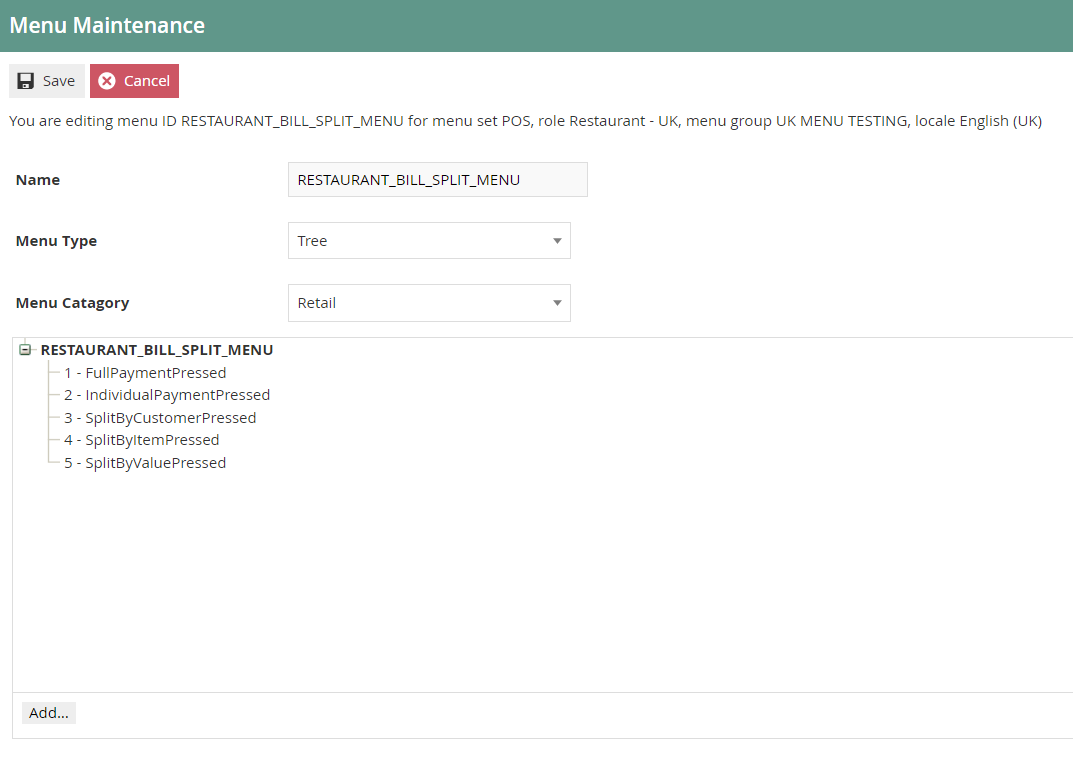
Restaurant Bill Split Menu
This is the menu which allows splitting the total amount of the restaurant bill based on the split requirement.
When creating this new menu, make sure to select Restaurant Bill Split Menu from the Menu ID drop-down list.
The following is a configured Restaurant Bill Split Menu in the Estate Manager:
The following events can be configured for this menu:
| Event Name | Description | Privileges |
|---|---|---|
| Full Payment Pressed | Enables the transaction to be paid in full without any bill splitting. | No privileges are required. |
| Split By Value Pressed | Enables the transaction total to be split by the number entered by the POS operator. | No privileges are required. |
| Split By Item Pressed | Allows the operator to split the bill per item in the transaction. | No privileges are required. |
| Split By Customer Pressed | Once selected, a split is created for each diner on the table and each diner's items are automatically allocated to their split. | No privileges are required. |
| Individual Payment Pressed | Allows an operator-entered cash amount to be paid off the value of the transaction. | No privileges are required. |
This menu can be accessed by clicking on the Total button of another menu, and would appear in the POS as follows:
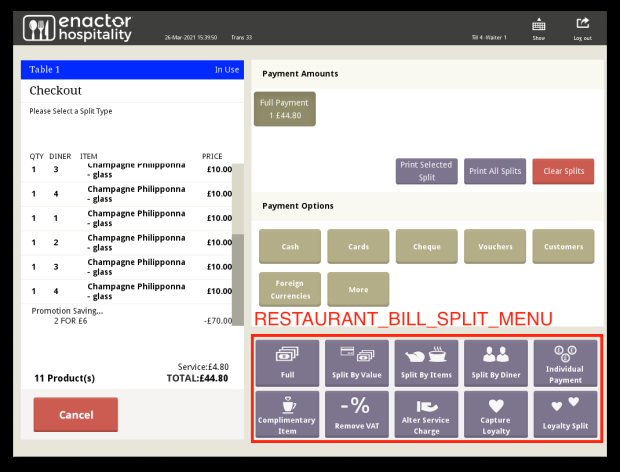
The menu represented by RESTAURANT_BILL_SPLIT_MENU in the above image is the one to be configured.
Restaurant Manager Functions Menu
This is the menu which allows access to and execution of manager-based events and functions for a restaurant.
When creating this new menu, make sure to select Restaurant Manager Functions from the Menu ID drop-down list.
The following is a configured Restaurant Manager Functions Menu in the Estate Manager:
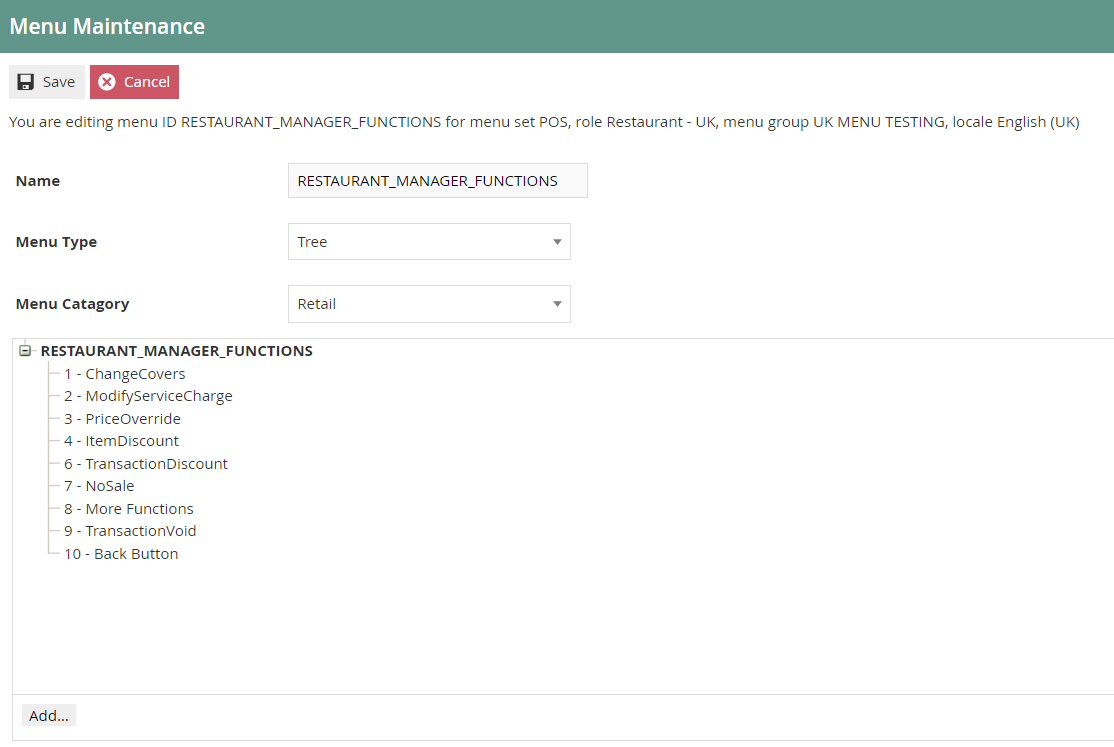
The following events can be configured for this menu:
| Event Name | Description | Privileges |
|---|---|---|
| Modify Service Charge | Enables modification of the service charge on the order. | No privileges are required. |
| Change Covers | Allows the operator to amend the number of diners originally entered on the table. | No privileges are required. |
| Cancel Course Away | Enables the operator to cancel an Away Message that was submitted by mistake. | No privileges are required. |
| Change Table Status | Enables a user to change the status of a table. | No privileges are required. |
| Merge Transaction By Table | Enables the transactions on two tables to be merged into one transaction on one table. | No privileges are required. |
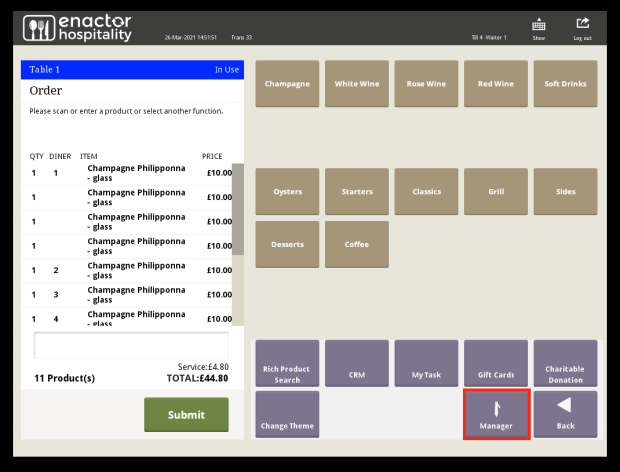
This menu can be accessed by clicking on the Manager button of another menu, and would appear in the POS as follows:
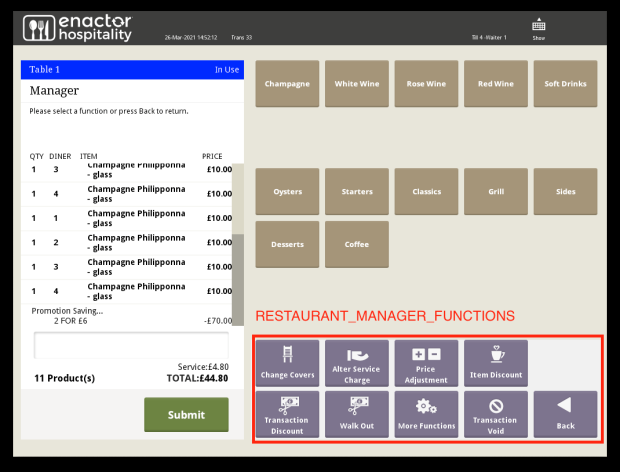
The menu represented by RESTAURANT_MANAGER_FUNCTIONS in the above image is the one to be configured.
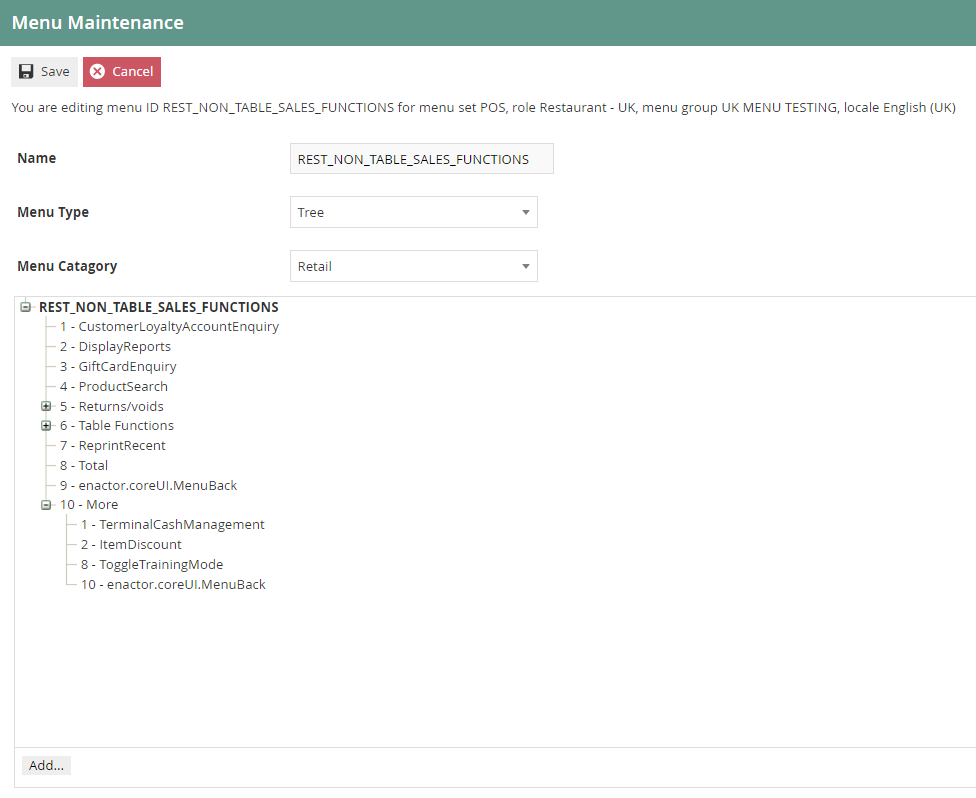
Restaurant Non-Table Sales Functions Menu
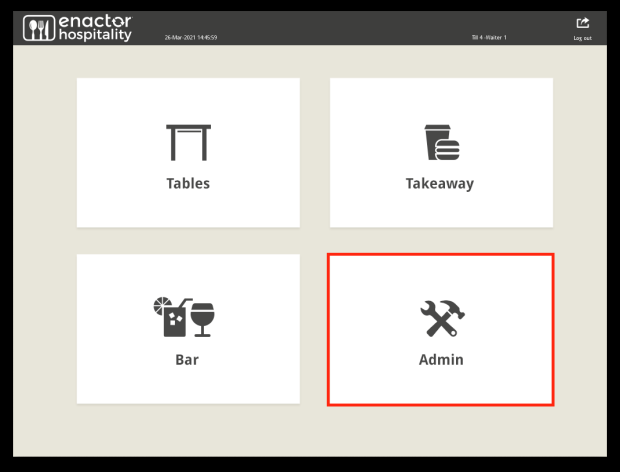
This is the menu which allows access to and execution of admin-related functions of a restaurant.
When creating this new menu, make sure to select Restaurant Non Table Sales Functions from the Menu ID drop-down list.
The following is a configured Restaurant Non-Table Sales Menu in the Estate Manager:
The following events can be configured for this menu:
| Event Name | Description | Privileges |
|---|---|---|
| Set Table Out Of Use | Enables changing the status of the table to "Out of Use". | No privileges are required. |
| Set Table In Use | Enables changing the status of the table to "In Use". | No privileges are required. |
| Set Table Reserved | Enables changing the status of the table to "Reserved". | No privileges are required. |
| Remove Table Reservations | If there are any table reservations, this enables removing them. | No privileges are required. |
| Product Search | Enables searching for a product from the list of products configured. | enactor.pos.AllowProductSearch |
The Product Search event is the only event in this menu that requires a specific privilege: enactor.pos.AllowProductSearch.
This menu can be accessed in the POS as follows:
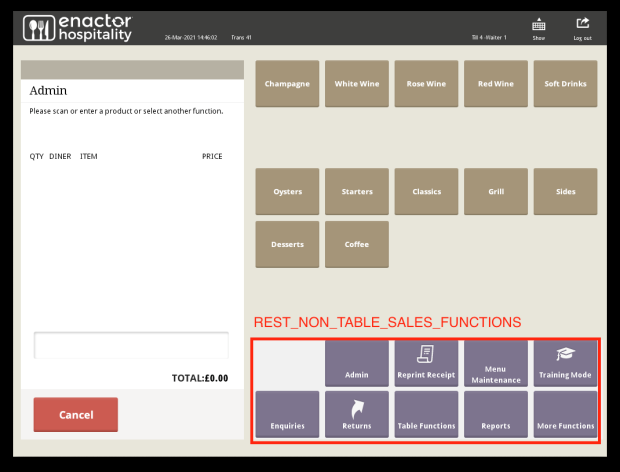
The menu represented by REST_NON_TABLE_SALES_FUNCTIONS in the above image is the one to be configured.
Restaurant Transaction Notes Functions Menu
This is the menu which allows attaching notes to the current transaction of the restaurant.
When creating this new menu, make sure to select Restaurant Transaction Notes from the Menu ID drop-down list.
The following is a configured Restaurant Transaction Notes Functions Menu in the Estate Manager:

The following events can be configured for this menu:
| Event Name | Data | Description | Privileges |
|---|---|---|---|
| Free Text | - | Enables entering any text to attach with the transaction. | No privileges are required. |
| Default Note Selected | Default Note Value | Enables having the default note attached with the transaction. When configuring the Default Note, the value that you want to have as your default note should be specified in the Data tab. | No privileges are required. |
This menu can be accessed by clicking on the Add Notes button of either the Restaurant Functions or Restaurant Bar Functions menu, and would appear in the POS as follows:
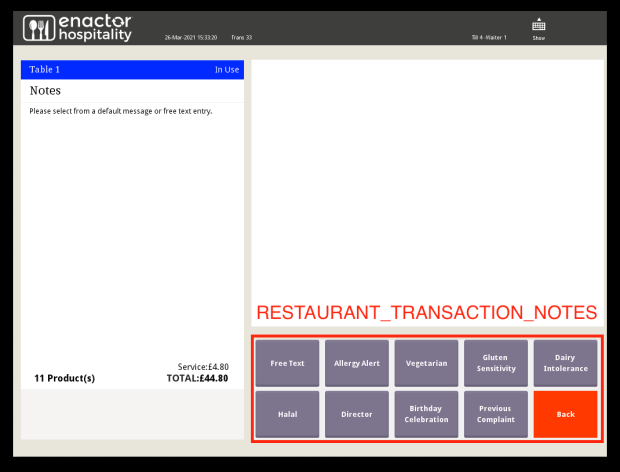
The menu represented by RESTAURANT_TRANSACTION_NOTES in the above image is the one to be configured.
Restaurant Item Notes Functions Menu
This is the menu which allows attaching notes to each item of the current transaction.
When creating this new menu, make sure to select Restaurant Item Notes from the Menu ID drop-down list.
The following is a configured Restaurant Item Notes Menu in the Estate Manager:
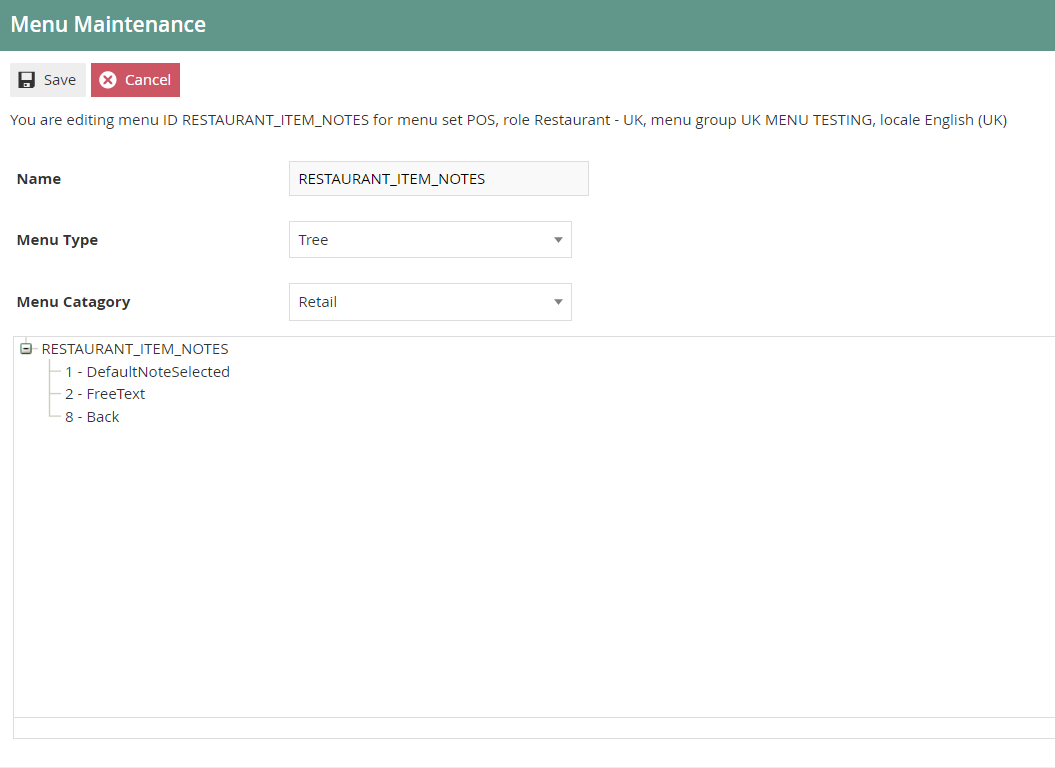
The following events can be configured for this menu:
| Event Name | Data | Description | Privileges |
|---|---|---|---|
| Free Text | - | Enables entering any text to attach with the item. | No privileges are required. |
| Default Note Selected | Default Note Value | Enables having the default note attached with the item. When configuring the Default Note, the value that you want to have as your default note should be specified in the Data tab. | No privileges are required. |
This menu can be accessed by clicking on the Edit Notes button of the Hospitality Modify Item Functions Menu in the POS as follows:
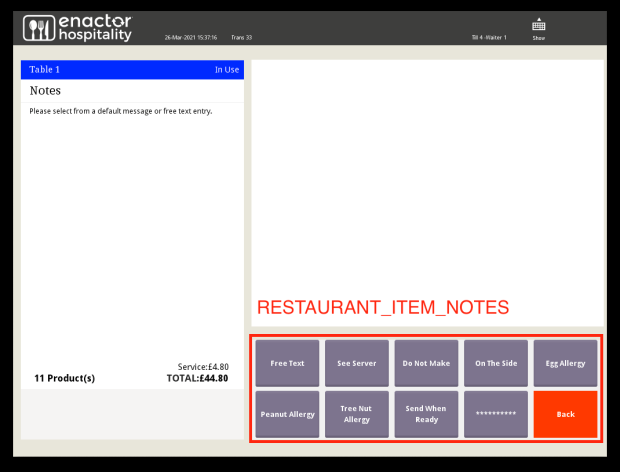
The menu represented by RESTAURANT_ITEM_NOTES in the above image is the one to be configured.
Tender Menu
This is the menu which allows making tender transactions after the products have been added and are ready to be totalled.
When creating this new menu, make sure to select Tender from the Menu ID drop-down list.
The following is a configured Tender Menu in the Estate Manager:
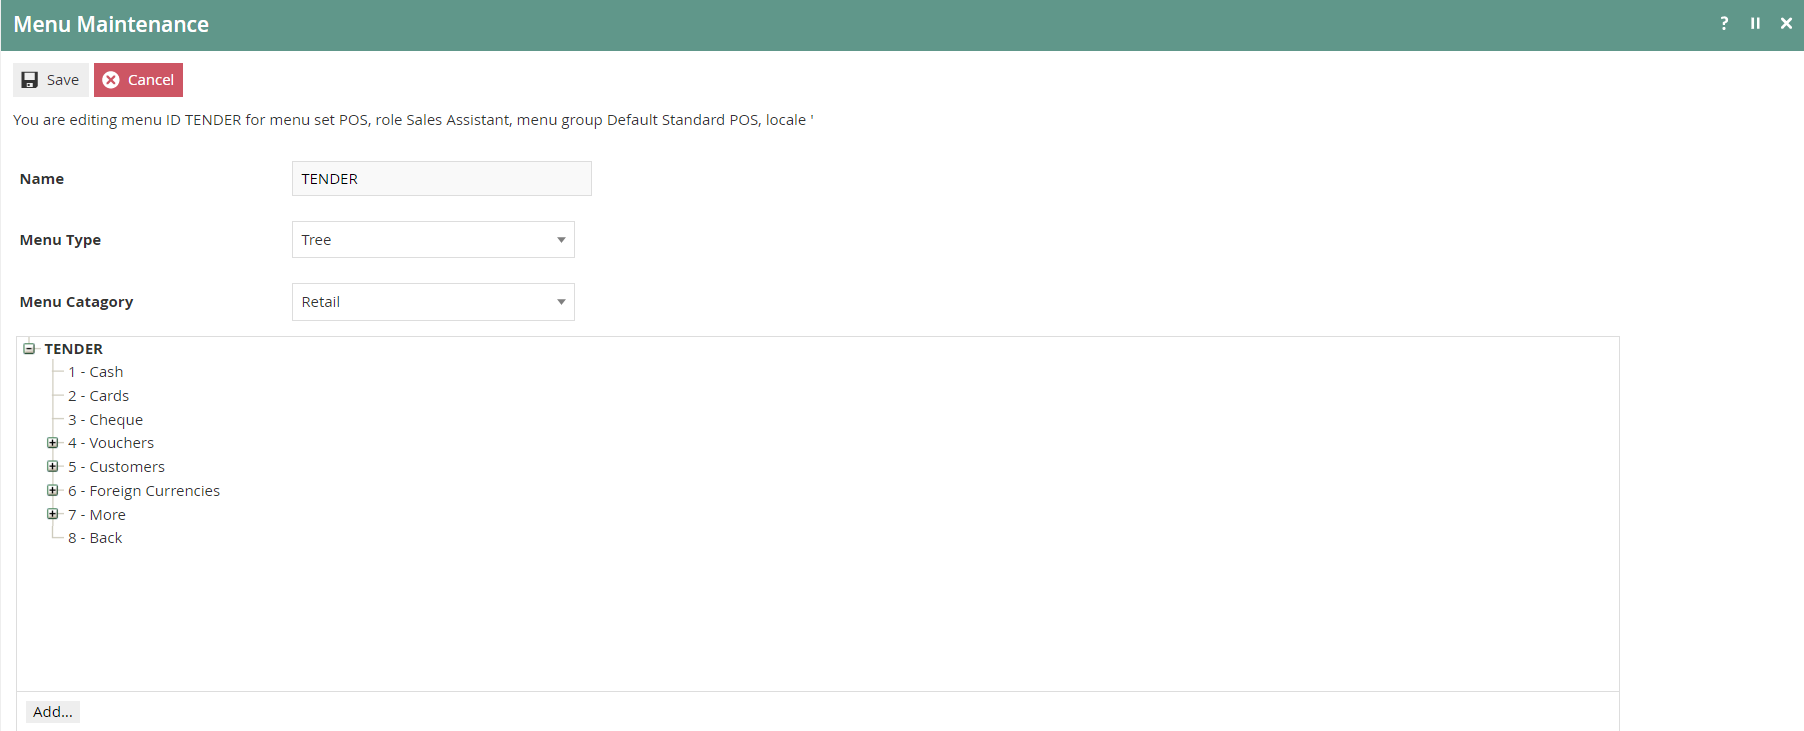
The following events can be configured for this menu:
| Event Name | Data | Description | Privileges |
|---|---|---|---|
| Cash Tender | enactor.mfc.TenderId | Enables making cash-based tender transactions. The Tender ID must be specified in the Data tab with a cash tender that has already been configured. | enactor.pos.CashTenderAllowed |
This menu can be accessed by clicking on the Total button of another menu in the POS as follows:
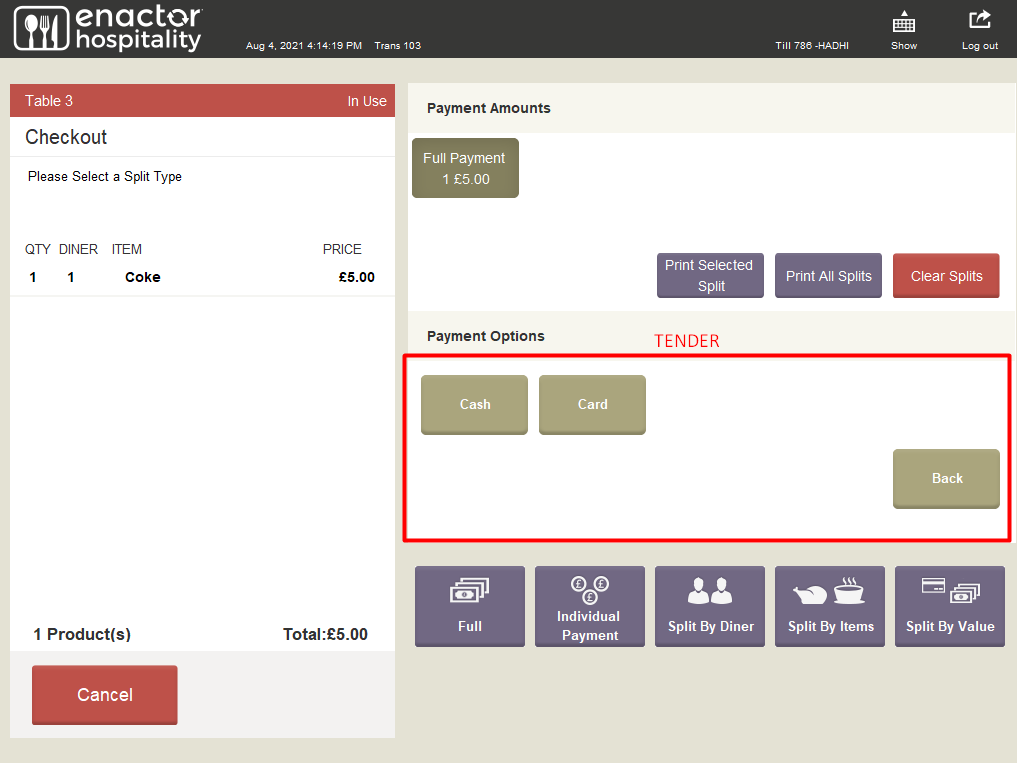
The menu represented by TENDER in the above image is the one to be configured.