How To Configure POS Admin Functions
Introduction
The purpose of this guide is to provide a foundational understanding of the options and capabilities available for using the admin functions within the POS application.
Overview
This guide covers the configuration for the following:
-
Role and Menu Configuration - Defining the privileges and menus that are required to be configured in the Estate Manager to be able to run admin functions in the POS.
-
System Status - Using the POS to run the following functions:
- Application Log
- Background Services
- Scheduled Jobs
- Documents Processing
- Updates Processing
- Queue Status
- Machine Status
-
System Admin - Using the POS to manually run the Update Indexes function.
-
Maintenance - Using the POS to create a new User, new Employee and change their passwords.
Role and Menu Configuration
This section describes all the user privileges and menu configurations associated with different POS Admin Functions that are covered in this document and provides a foundational understanding of configuring and using the POS Admin Menu Functions as required.
Role Configuration
To be able to carry out the Admin Functions in the POS, make sure to enable the appropriate privileges to run the POS Admin Functions as required.
Navigate to User Role Maintenance using the Search or the path: Configuration > HR > User Roles

In the User Role Maintenance, select the Edit icon of the User Role that you wish to enable the privilege for.
Navigate to the Authorised Functions tab of that selected User.
To apply filters, select Enactor POS from the dropdown list against the field Application Package.
The following table lists the privileges that are required to successfully run all the POS Admin functions. Enable each privilege as needed for the user role.
| POS Admin Function | Package | Process | Function ID | Function Name |
|---|---|---|---|---|
| Menu Access | Enactor POS | Admin | enactor.admin.Run | Run |
| Application Log | Enactor POS | Application Log | enactor.applicationLog.Run | Run |
| Application Log | Enactor POS | Application Log | enactor.applicationLog.Remove | Remove |
| Application Log | Enactor POS | Application Log | enactor.applicationLog.Save | Save |
| Background Services | Enactor POS | Services Status | enactor.admin.servicesStatus.Run | Run |
| Scheduled Jobs | Enactor POS | Scheduled Jobs | enactor.scheduledJobMaintenance.Run | Run |
| Scheduled Jobs | Enactor POS | Scheduled Jobs | enactor.scheduledJobMaintenance.View | View |
| Scheduled Jobs | Enactor POS | Scheduled Jobs | enactor.scheduledJobMaintenance.List | List |
| Scheduled Jobs | Enactor POS | Scheduled Jobs | enactor.scheduledJobMaintenance.Resubmit | Resubmit |
| Scheduled Jobs | Enactor POS | Scheduled Jobs | enactor.scheduledJobMaintenance.Remove | Remove |
| Updates Processing | Enactor POS | Update Viewer (POS) | enactor.updateViewer.Run | Run |
| Updates Processing | Enactor POS | Update Viewer (POS) | enactor.updateViewer.View | View |
| Updates Processing | Enactor POS | Update Viewer (POS) | enactor.updateViewer.List | List |
| Updates Processing | Enactor POS | Update Viewer (POS) | enactor.updateViewer.ViewLog | View Application Log |
| Updates Processing | Enactor POS | Update Viewer (POS) | enactor.updateViewer.Activate | Activate |
| Updates Processing | Enactor POS | Update Viewer (POS) | enactor.updateViewer.Resubmit | Resubmit |
| Updates Processing | Enactor POS | Update Viewer (POS) | enactor.updateViewer.Remove | Remove |
| Queue Status | Enactor POS | Queue Status | enactor.queueStatus.Run | Run |
| Queue Status | Enactor POS | Queue Status | enactor.queueStatus.List | View |
| Queue Status | Enactor POS | Queue Status | enactor.queueStatus.Unsubscribe | Unsubscribe |
| Machine Status | Enactor POS | Machine Status (POS) | enactor.machineStatus.Run | Run |
| Update Indexes | Enactor POS | Run Update POS Lucene Indexes | enactor.admin.UpdatePOSLuceneIndexes.Run | Run |
| User Maintenance | Enactor POS | User Maintenance (POS) | enactor.userMaintenance.Run | Run |
| User Maintenance | Enactor POS | User Maintenance (POS) | enactor.userMaintenance.View | View |
| User Maintenance | Enactor POS | User Maintenance (POS) | enactor.userMaintenance.List | List |
| User Maintenance | Enactor POS | User Maintenance (POS) | enactor.userMaintenance.New | New |
| User Maintenance | Enactor POS | User Maintenance (POS) | enactor.userMaintenance.Edit | Edit |
| User Maintenance | Enactor POS | User Maintenance (POS) | enactor.userMaintenance.Remove | Remove |
| User Maintenance | Enactor POS | User Maintenance (POS) | enactor.userMaintenance.ChangeTemplate | Change Template |
| User Maintenance | Enactor POS | User Maintenance (POS) | enactor.userMaintenance.AccessSameAuthorisationLevel | Access User with Same Authorisation Level |
| Employee Maintenance | Enactor POS | Employee Maintenance (POS) | enactor.employeeMaintenance.Run | Run |
| Employee Maintenance | Enactor POS | Employee Maintenance (POS) | enactor.employeeMaintenance.View | View |
| Employee Maintenance | Enactor POS | Employee Maintenance (POS) | enactor.employeeMaintenance.List | List |
| Employee Maintenance | Enactor POS | Employee Maintenance (POS) | enactor.employeeMaintenance.New | New |
| Employee Maintenance | Enactor POS | Employee Maintenance (POS) | enactor.employeeMaintenance.Edit | Edit |
| Employee Maintenance | Enactor POS | Employee Maintenance (POS) | enactor.employeeMaintenance.Remove | Remove |
| Employee Maintenance | Enactor POS | Employee Maintenance (POS) | enactor.employeeMaintenance.ViewOtherLocationEmployees | View Employee from Other Locations |
| Employee Maintenance | Enactor POS | Employee Maintenance (POS) | enactor.employeeMaintenance.EditOtherLocationEmployees | Edit Employee from Other Locations |
| Employee Maintenance | Enactor POS | Employee Maintenance (POS) | enactor.employeeMaintenance.RemoveOtherLocationEmployees | Remove Employee from Other Locations |
| Employee Maintenance | Enactor POS | Employee Maintenance (POS) | enactor.employeeMaintenance.ChangeTemplate | Change Template |
| Employee Maintenance | Enactor POS | Employee Maintenance (POS) | enactor.employeeMaintenance.AccessSameAuthorisationLevel | Access Employee with Same Authorisation Level |
| Change Your Password | Enactor POS | Change User Password (POS) | enactor.changeUserPassword.Run | Change User Password |
| Change User Password | Enactor POS | Change A Users Password (POS) | enactor.changeAUsersPassword.Run | Change A Users Password |
Enabling the above privileges as required will allow the user to run Admin Functions in the POS successfully.
Menu Configuration
To successfully run the Admin Functions in the POS, the menu should be configured with the POS Admin Functions that are required by the user.
Navigate to Menu Maintenance using the Search or the path: Configuration > System > Menus
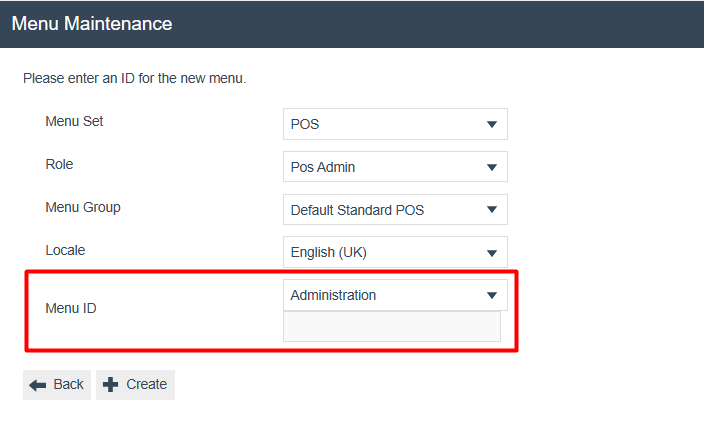
To create a new menu, select Create New Menu option on the Menu Maintenance page.
Select the Menu ID as Administration.
This function contains the main admin menu folders which are Finance, Daily Operations, Maintenance, Inventory, System Status, System Admin and Tasks. However, for this document the focus will only be on the following Admin sections:
- Maintenance
- System Status
- System Admin
These three menu folders can be configured and contain the following menu items:

The following tables describe the menu functions that can be configured in this menu against each of these folders:
Maintenance Menu Functions
| Event Name | Description |
|---|---|
| User Maintenance | Allows carrying out user maintenance functions such as creating and editing users using the POS. |
| Employee Maintenance | Allows carrying out employee maintenance functions such as creating and editing employees using the POS. |
| Change Password | Allows the logged in user to change their own password. |
| Change A User Password | Allows the user to change the password of other users. |
System Status Menu Functions
| Event Name | Description |
|---|---|
| Application Log | Allows running Application Log based functions in the POS. |
| Service Status | Allows running Services based functions in the POS. |
| Scheduled Jobs | Allows running Scheduled Job based functions in the POS. |
| Inbound Document Viewer | Allows viewing Inbound Documents in the POS. |
| Update Viewer | This is shown as Updates Processing in the POS menu and allows running Updates Processing based functions in the POS. |
| Queue Status | Allows viewing the status of the updates and POS transaction queues. |
| Machine Status | Displays the current machine status which includes general information, memory usage and application version of the device that is being used. |
System Admin Menu Functions
| Event Name | Description |
|---|---|
| Update POS Lucene Indexes | Allows running the scheduled job that updates the product search indexes, which enables the search to return data more quickly. |
Broadcasting
To deliver the configuration changes to the POS, broadcast the following entities:
- Role
- Menu
Both the Role and Menu entities must be broadcast to ensure the POS receives the updated admin function configuration.
POS Admin Functions
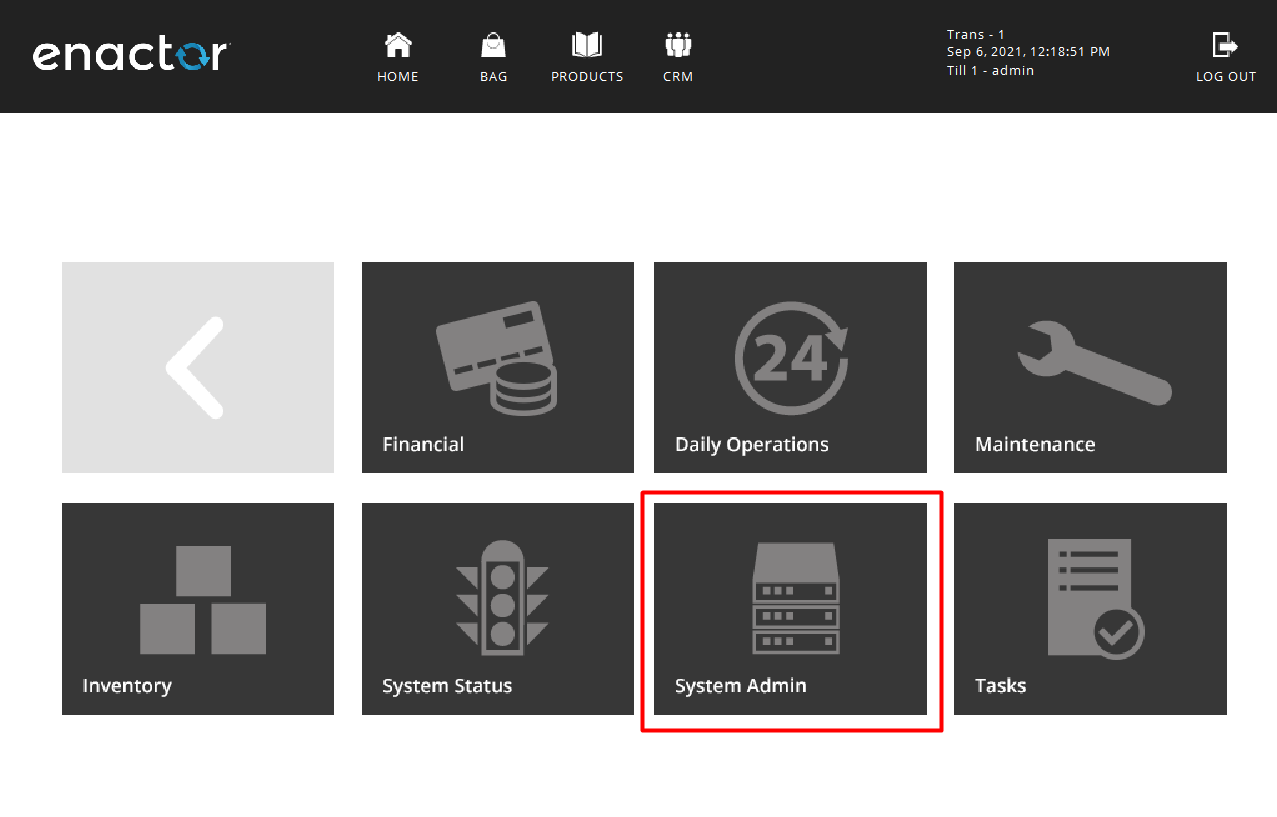
Administration-related functions such as Finance, Daily Operations, Maintenance, Inventory, System Status, System Admin and Tasks can be performed directly on the POS via the POS Admin Functions menu.
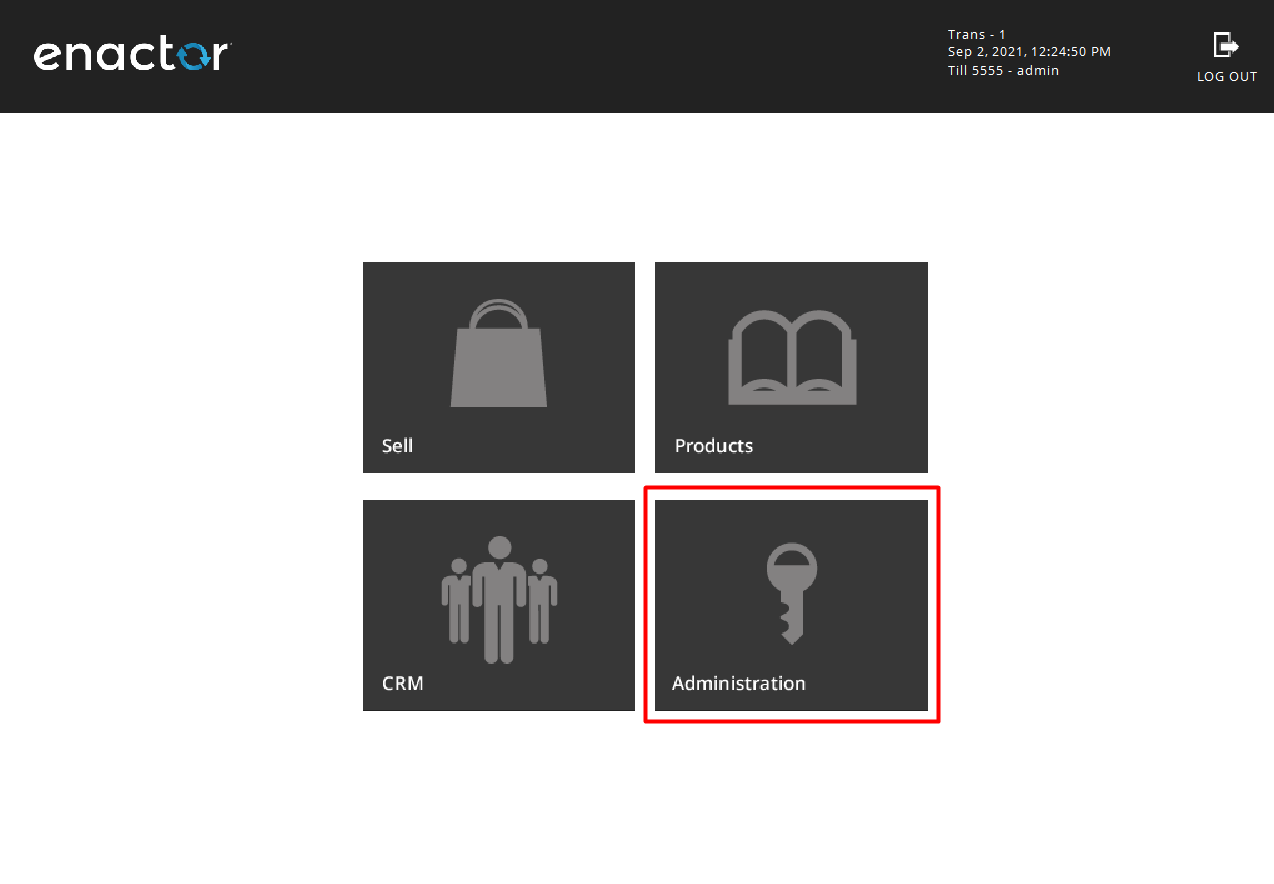
If the privilege is enabled, the user can navigate to the POS Admin functions menu by selecting the Administration button in the launch menu as shown below:
Alternatively, the user can also navigate to the POS Admin Functions menu from the Sales menu by selecting the Sell button in the launch menu shown above and through the following navigation path: Management > Admin.
The POS Admin menu is shown below:
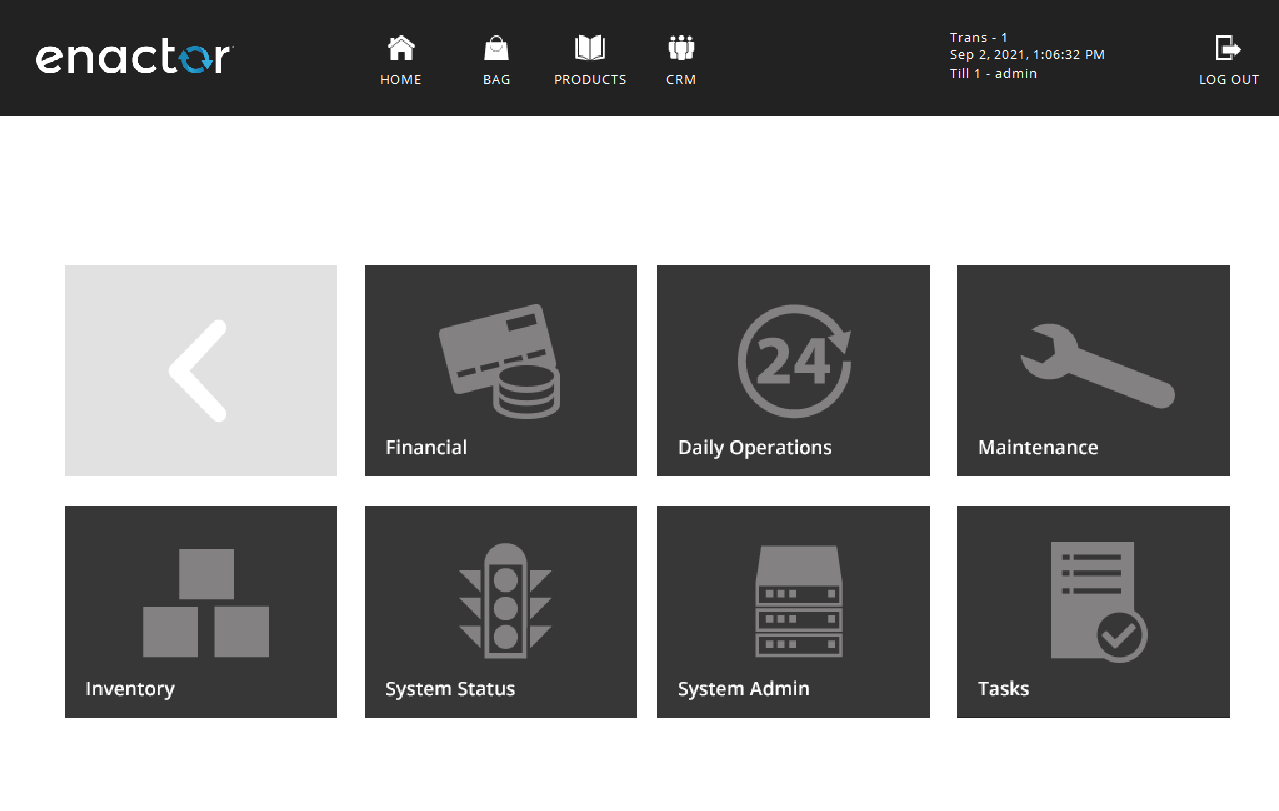
System Status
The System Status menu allows running functions that enable the user to get an understanding of the various processes that are taking place in the system and their current statuses. System Status functions such as Application Log, Background Services, Scheduled Jobs, Documents Processing, Updates Processing, Queue Status, and Machine Status can be run using this menu in the POS.
Select the System Status button in the POS Admin functions menu to navigate to the System Status functions menu as shown below:

The System Status functions menu will be displayed as shown below:
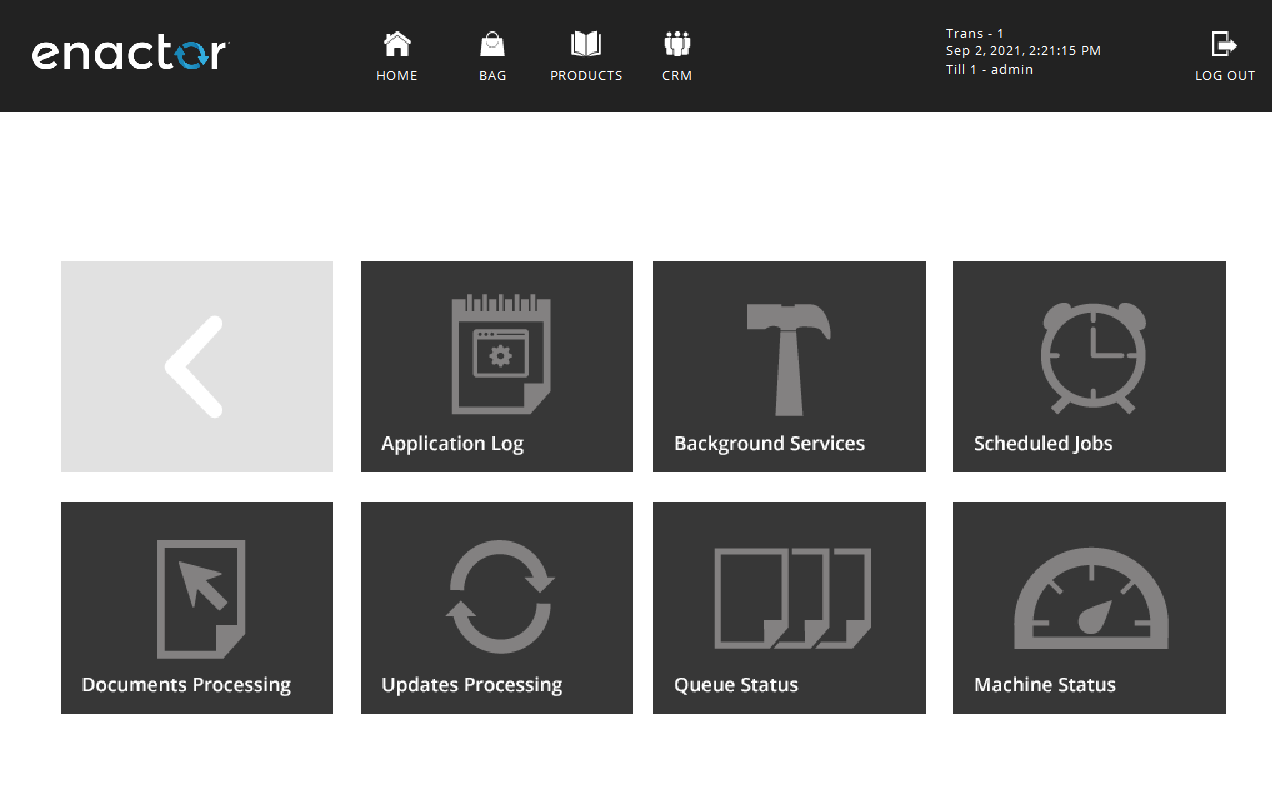
Each function in this menu is discussed in detail below.
Application Log
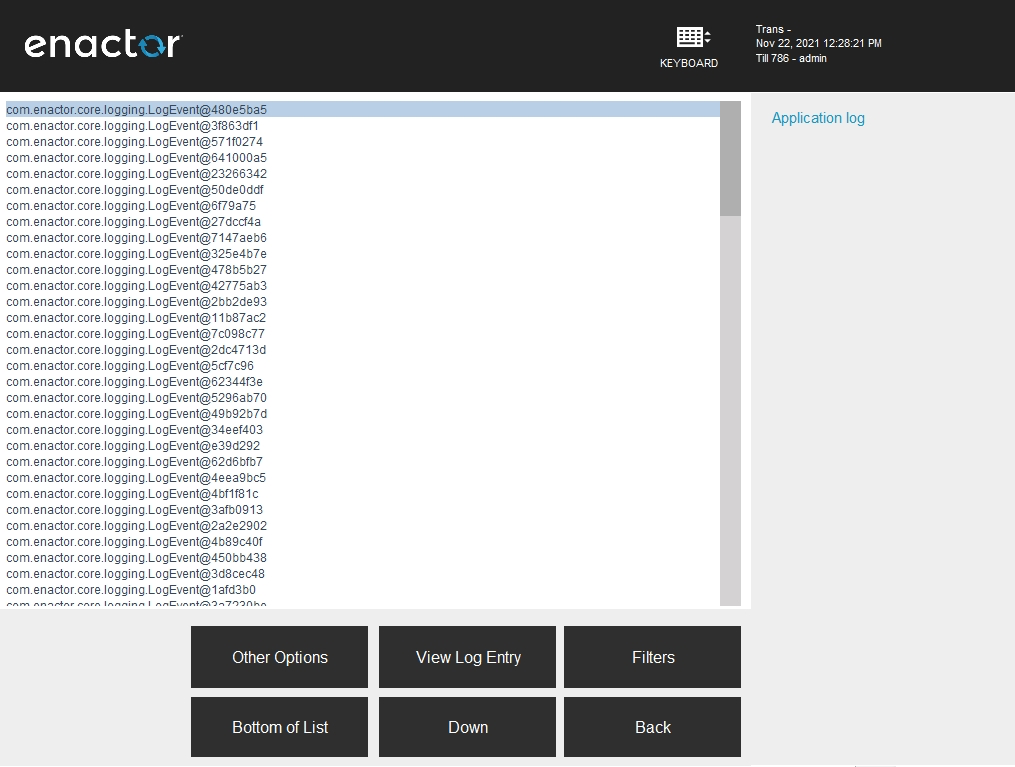
While the POS is running, it constantly updates the Application Log with entries of the processes that the System is running. The Application Log is useful in investigating issues that occur from time to time. Different log properties can be added to investigate specific issues. The Application Log is set by default in the POS to warnings only.
The user can navigate to Application Log Maintenance in the Estate Manager to further investigate the issues. The new log entries are displayed at the bottom of the list in the POS.
If the privileges are enabled, the user can navigate to the Application Log function by selecting the Application Log button in the System Status menu, and the following screen is displayed:
Background Services
The POS requires several background services to be running for it to be able to receive updates, run scheduled jobs and connect to queues. The services are run as part of a Windows service called Enactor POS Services and are set to run even if the POS is closed. The Enactor POS service also auto-starts when the machine is rebooted.
The Service Name, Status, and Current Activity for each service are shown in the POS using this function. If any of the services are not running, this may impact the ability of the POS to run the functions correctly.
If the privileges are enabled, the user can navigate to the Background Services function by selecting the Background Services button in the System Status menu, and the following screen is displayed:
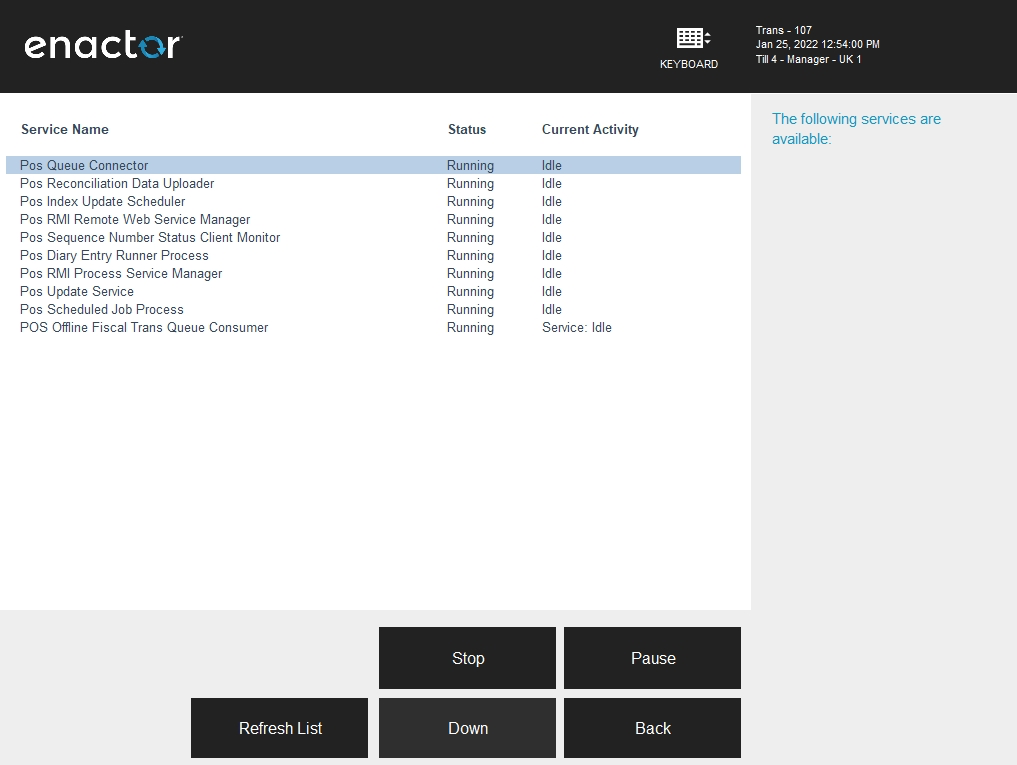
The following table lists and describes the services:
| Service Name | Description |
|---|---|
| POS Queue Connector | Connects POS messaging queues and allows messages to flow from one queue to the next. |
| POS Reconciliation Data Uploader | Collects sales figures from this POS and uploads them to the Estate Manager so they can be compared and reconciled against the EM's sales figures. |
| POS Index Update Scheduler | A scheduled task which re-indexes product catalogues and product prices to update search results to reflect product and product price updates. |
| POS RMI Remote Web Service Manager | This service is used to control the ability for this POS to accept remote invocations from other devices in the Estate. |
| POS Sequence Number Status Client Monitor | Detects gaps in received messages and uploads the status of any gaps to the Estate Manager so they can be centrally viewed. |
| POS Diary Entry Runner Process | A service which invokes jobs that are scheduled on the Diary. This can run a specific job at a specific time once or recursively. |
| POS RMI Process Service Manager | This service is used to control the ability for this POS to accept remote invocations from other devices in the Estate. |
| POS Update Service | Monitors application updates from the EM and Store Servers and applies updates at the correct time. |
| POS Scheduled Job Process | A service which runs scheduled tasks. This will pick up any scheduled task that is due to run on a specific date and time and execute it. |
| POS Offline Fiscal Trans Queue Consumer | This service is used in some fiscal countries when the transaction could not be sent to the tax authorities at the POS (due to offline connectivity). This adds it to a queue and processes it again at the Estate Manager until it succeeds. |
Scheduled Jobs
The Scheduled Jobs option in the POS displays a historic list of the Scheduled Jobs that have been run and the status of each Scheduled Job in the list. For example, by default, a scheduled job runs which updates the product search indexes, enabling product search to return data more quickly.
Additional scheduled jobs may be set up to run depending on specific customer requirements. This may include purging data from the local POS. Through this function, the executed process, the device it was run on, the date and time it was run, and the status of each Scheduled Job is shown in the POS.
If the privileges are enabled, the user can navigate to the Scheduled Jobs function by selecting the Scheduled Jobs button in the System Status menu, and the following screen is displayed:

Updates Processing
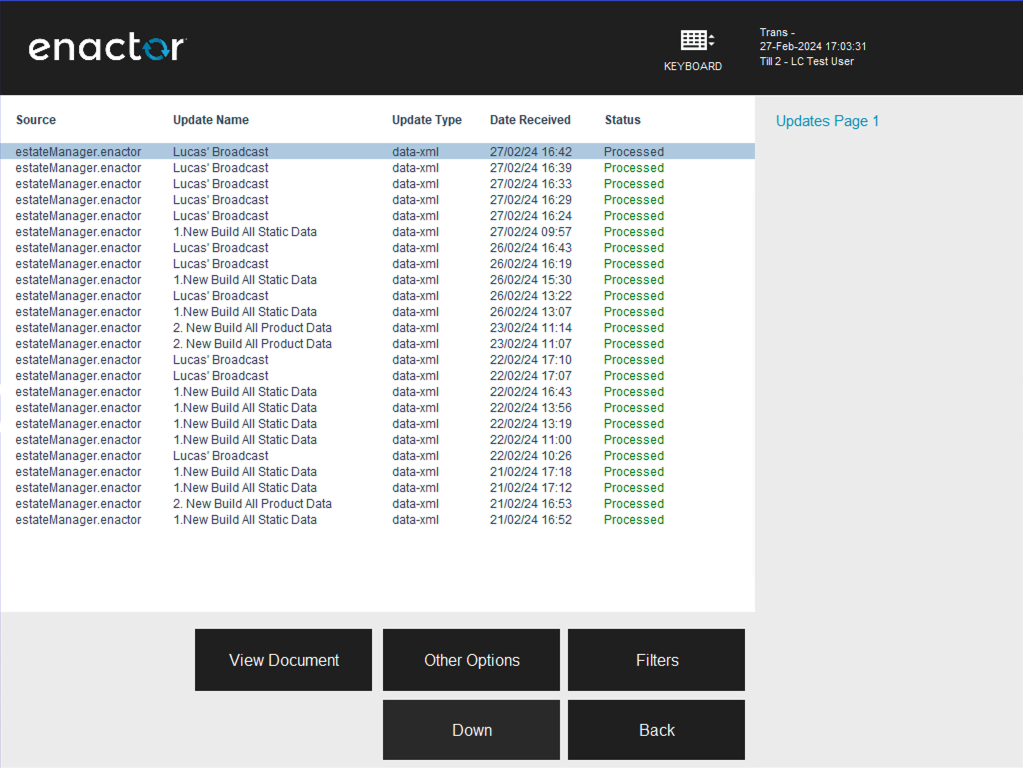
All updates sent to POS can be viewed within the POS using the Updates Processing function. This will allow the user to investigate issues whenever updates fail. The view will display the source, update name, update type, date received, and status of each update. Various functions can be carried out for each of these updates by using the menu functions that become available when each update is selected.
If the privileges are enabled, the user can navigate to the Updates Processing function by selecting the Updates Processing button in the System Status menu, and the following screen is displayed:
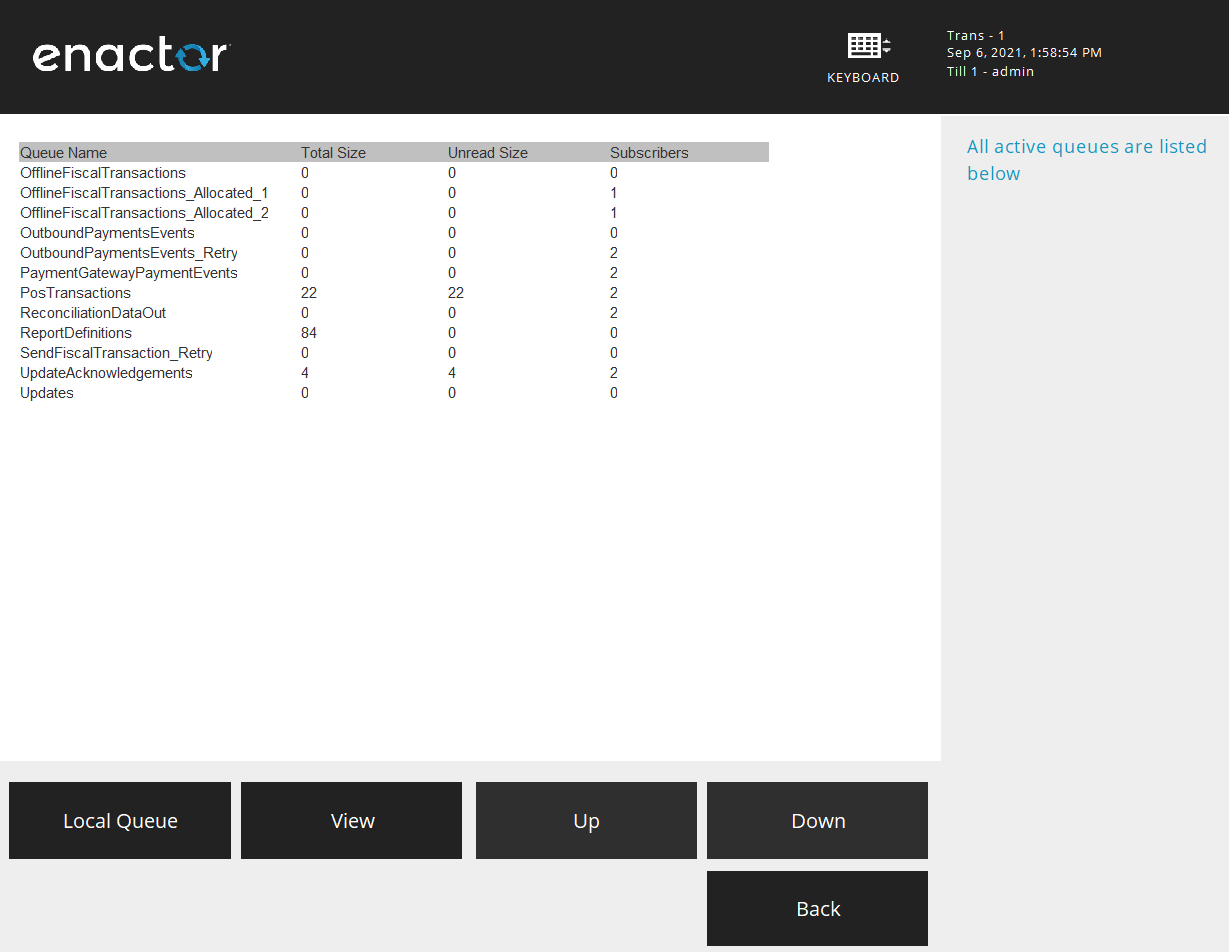
Queue Status
Queue Status displays the status of the Updates and POS transaction queues. Each queue will display the current total size, unread size, and subscribers of that queue. This is useful when investigating transactions that are not going to the store back office or updates not applying to the POS.
If the privileges are enabled, the user can navigate to the Queue Status function by selecting the Queue Status button in the System Status menu, and the following screen is displayed:
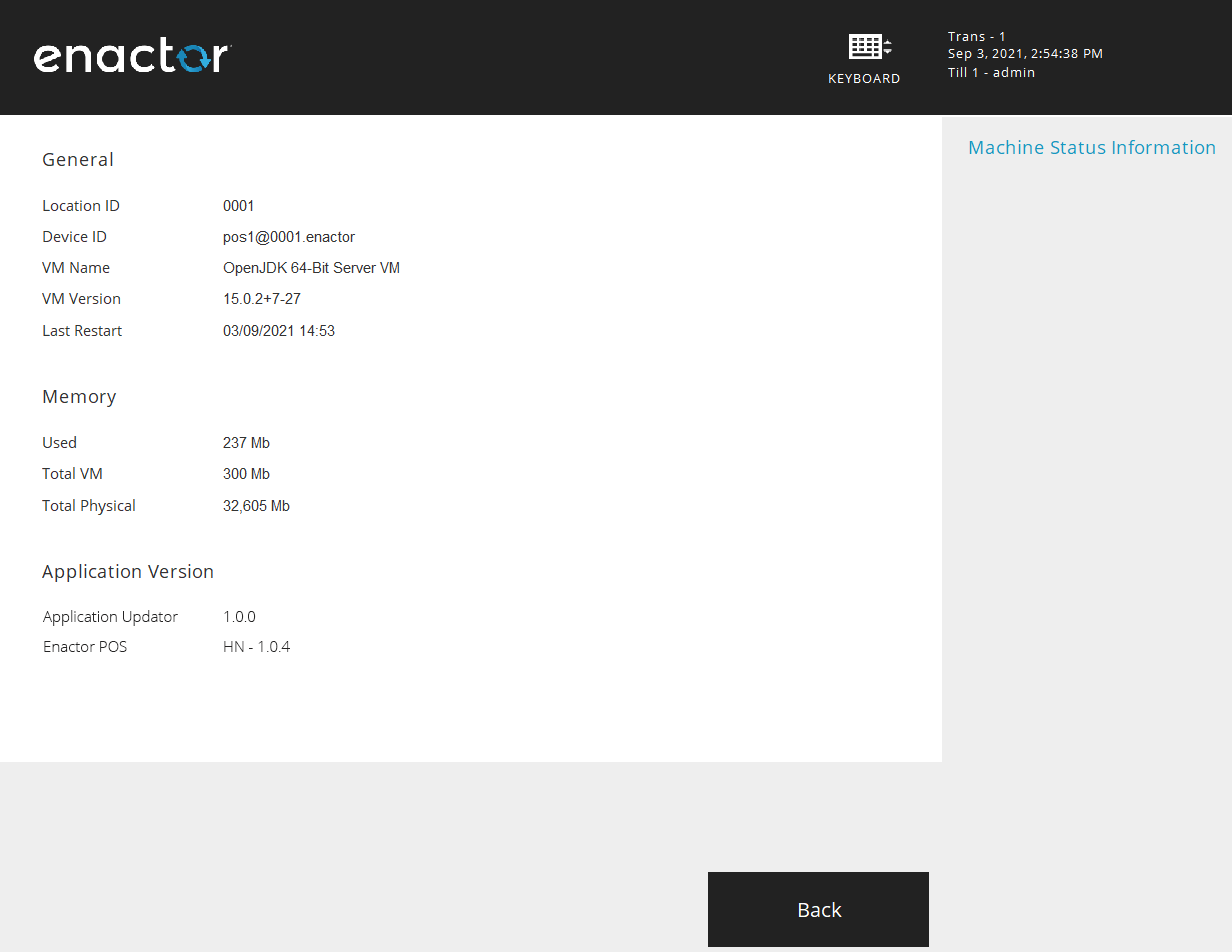
Machine Status
Machine Status displays general information, memory usage and the application version of the device.
If the privilege is enabled, the user can navigate to the Machine Status function by selecting the Machine Status button in the System Status menu, and the following screen is displayed:
System Admin
The System Admin functions menu allows running admin functions such as updating of indexes.
To run this function, navigate to the System Admin functions menu by selecting the System Admin button in the POS Admin functions menu as shown below:
The System Admin functions menu will be displayed as shown below:
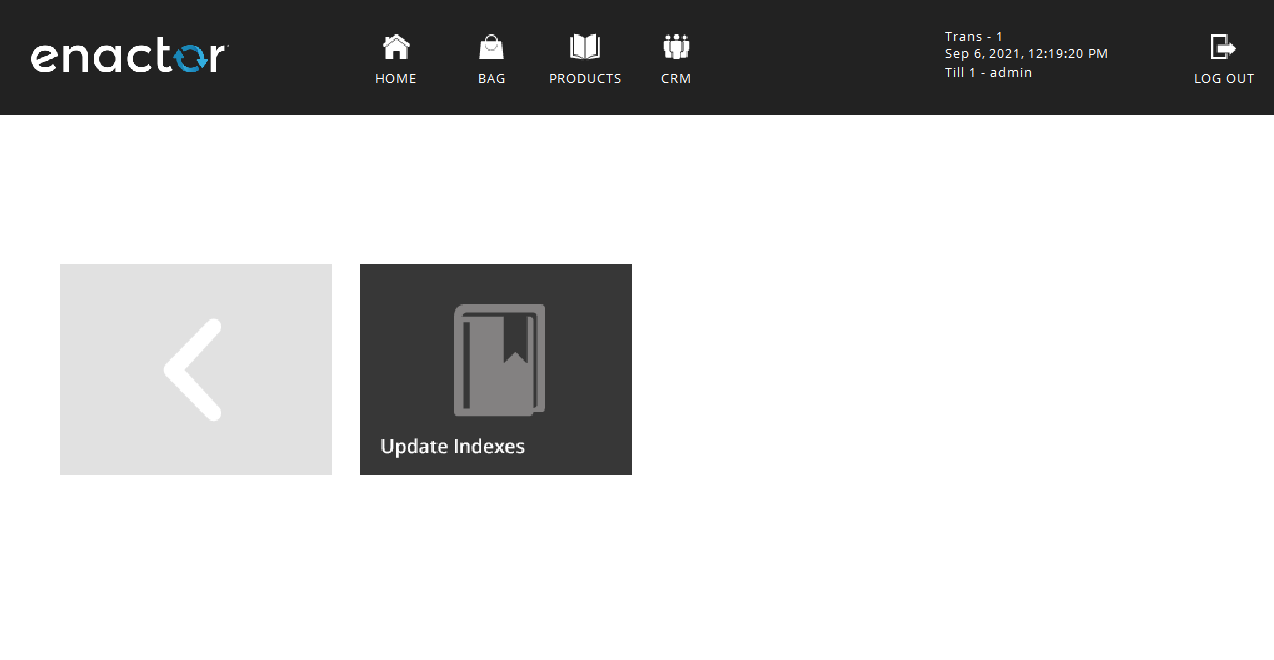
Update Indexes
Update Indexes is a scheduled job that will run, by default, each morning to update the product search indexes which enables the search to return data more quickly. However, if the jobs fail for some reason, the job can be run manually in the POS using the Update Indexes function. A failure to update indexes may affect the product data returned when running product search or rich product search functions.
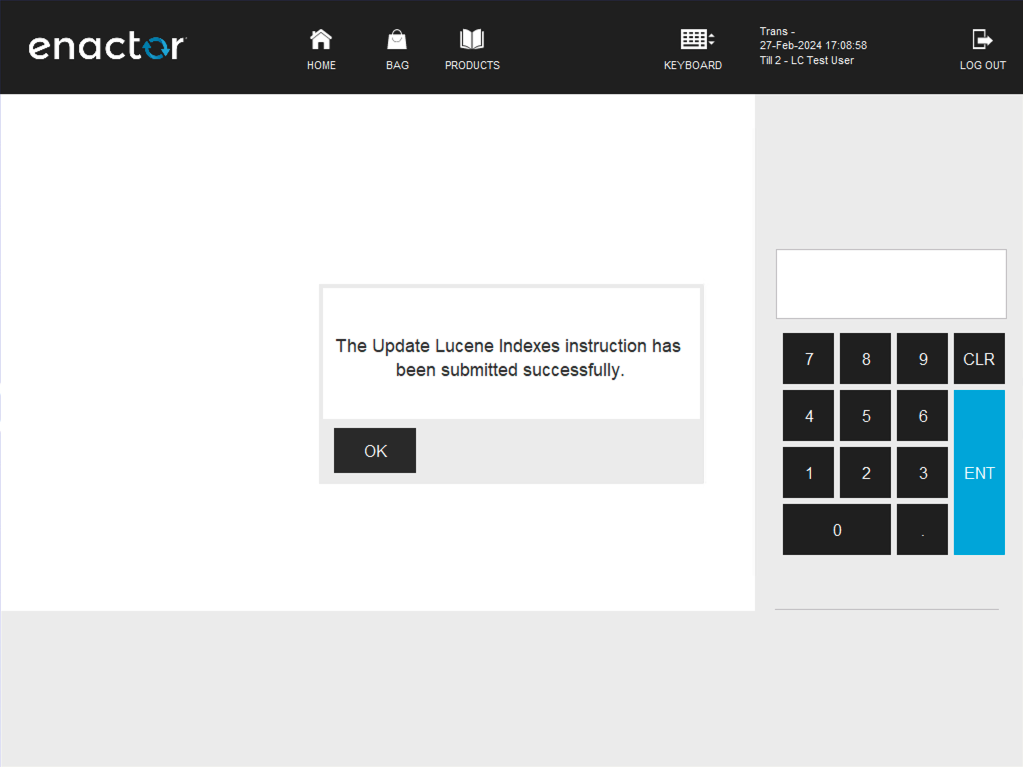
If the privilege is enabled, the user can run the Update Indexes function by selecting the Update Indexes button in the System Admin menu.
This will make sure that the product search indexes are updated.
Maintenance
The Maintenance functions menu allows running maintenance functions of users and employees using the POS. Creating and editing of both users, employees and changing of passwords can be done using this menu.
To run these functions, navigate to the Maintenance functions menu by selecting the Maintenance button in the POS Admin functions menu as shown below:
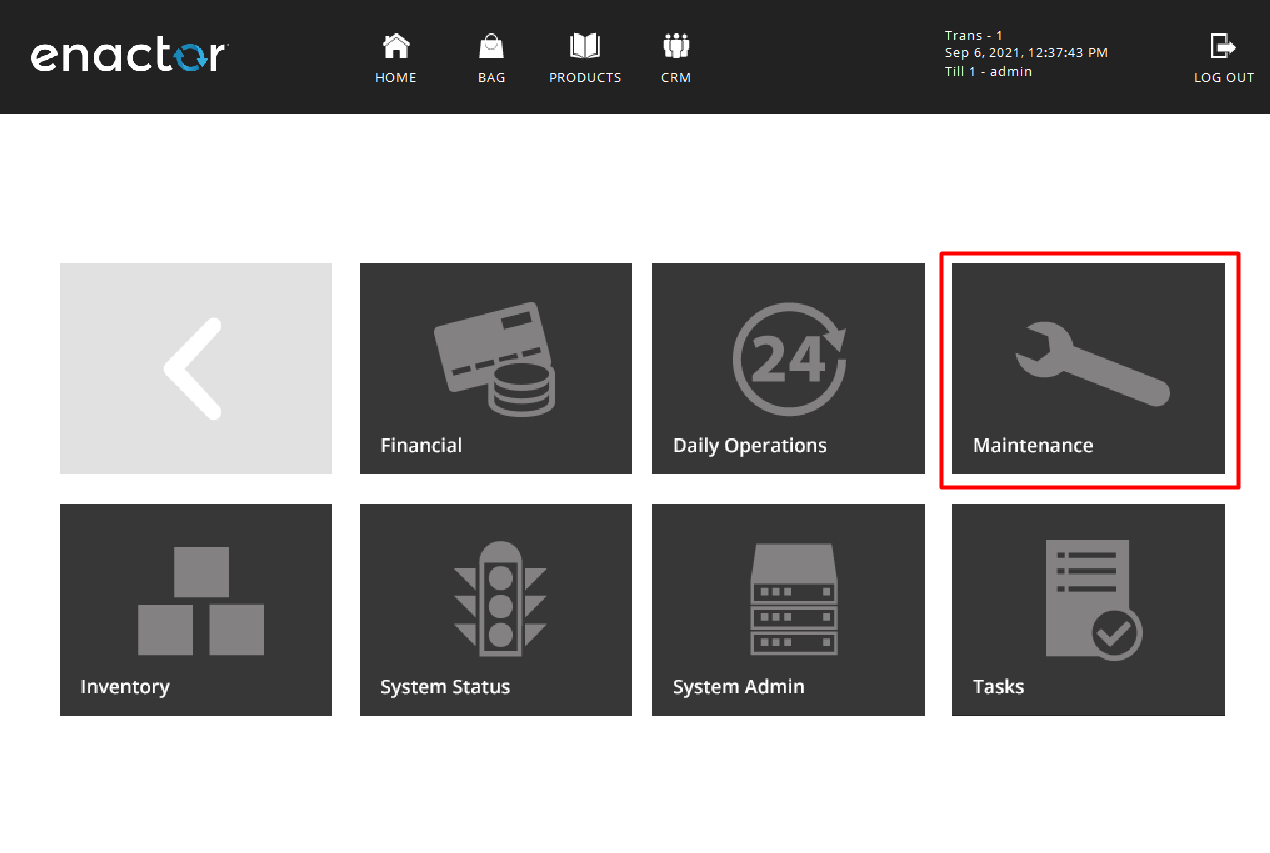
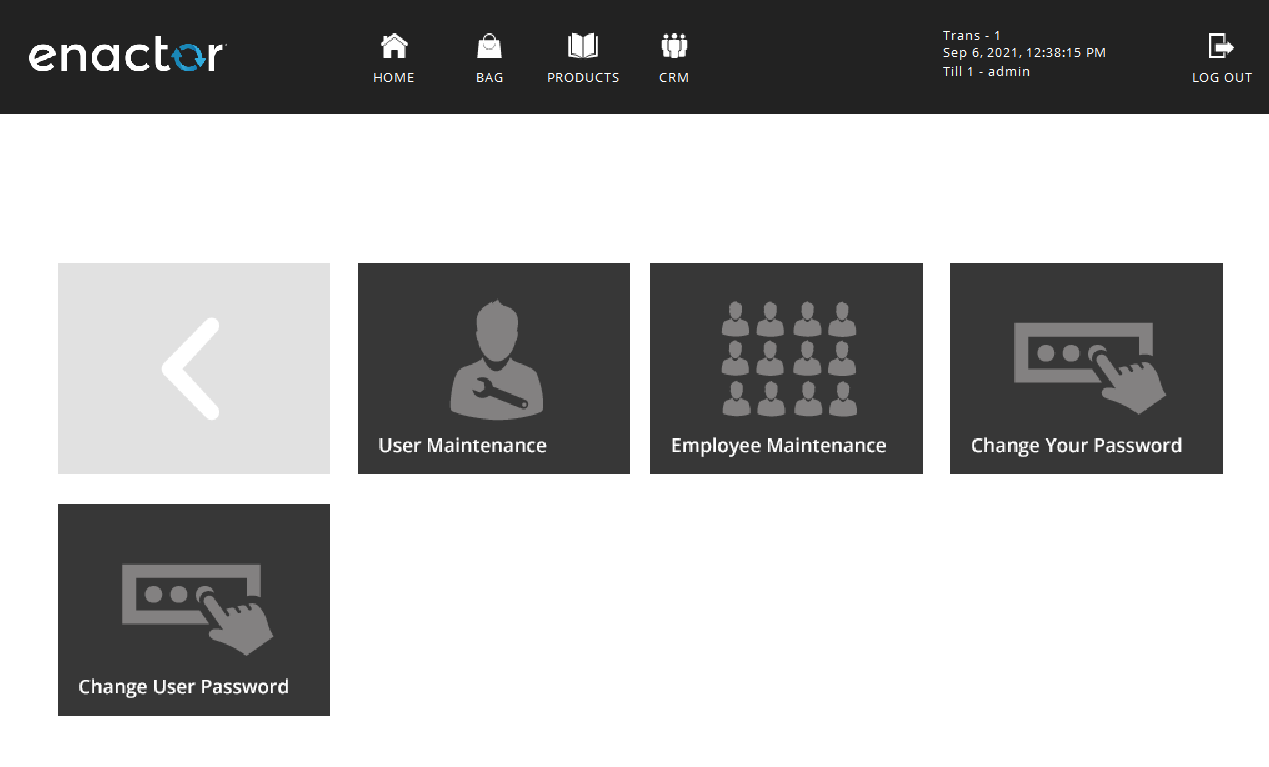
The Maintenance functions menu will be displayed as shown below:
User Maintenance
Users can be created and edited in the POS using the User Maintenance function. New or edited user updates are sent to the store, back office, and the Estate Manager from the POS that this function is being run on.
If the privilege is enabled, the user can navigate to the User Maintenance function by selecting the User Maintenance button in the Maintenance menu, and the following screen is displayed:
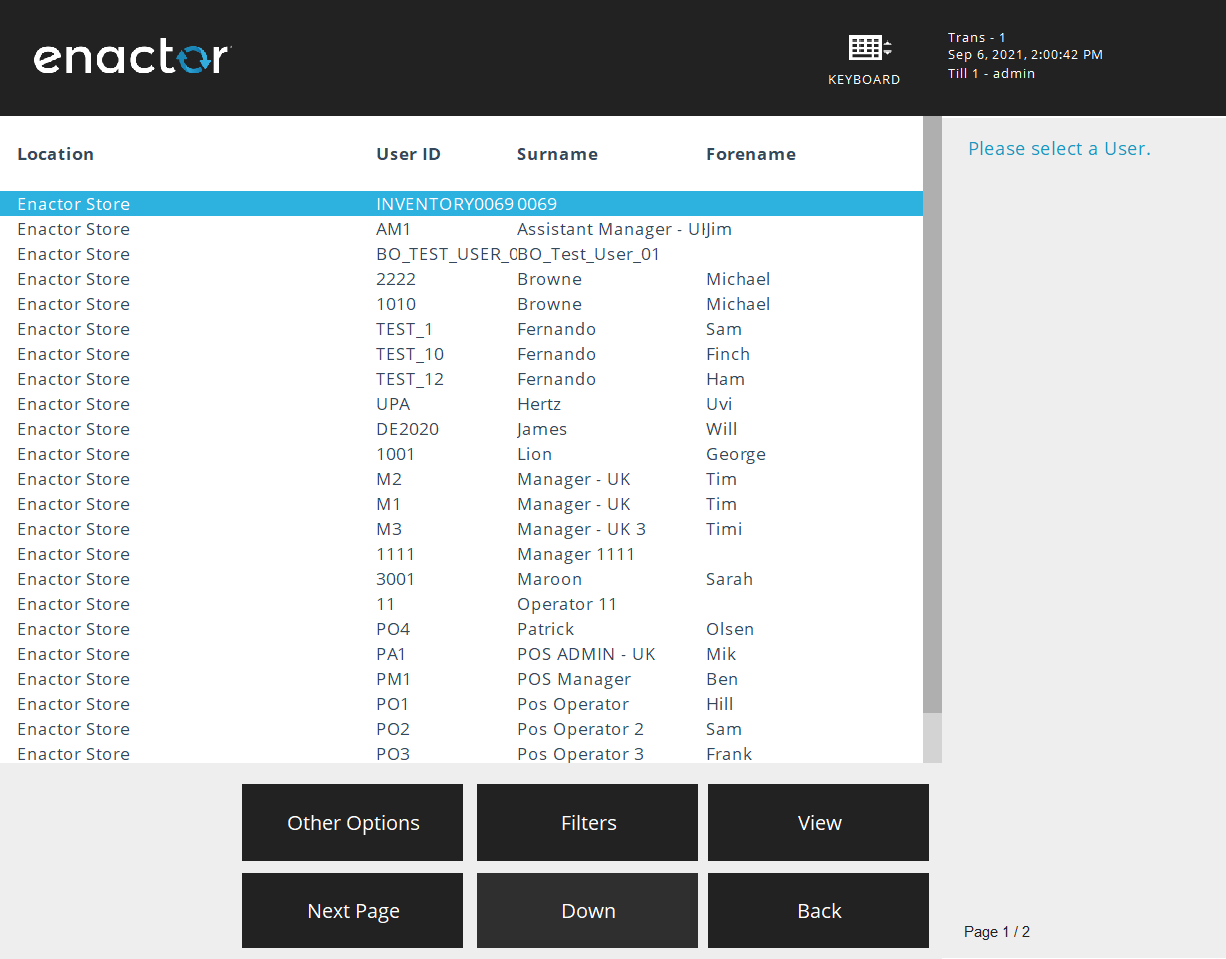
By default, the current users of the local store are listed here.
Creating a New User
In the User Maintenance functions menu of the POS, select Other Options followed by the New button to create a new User.
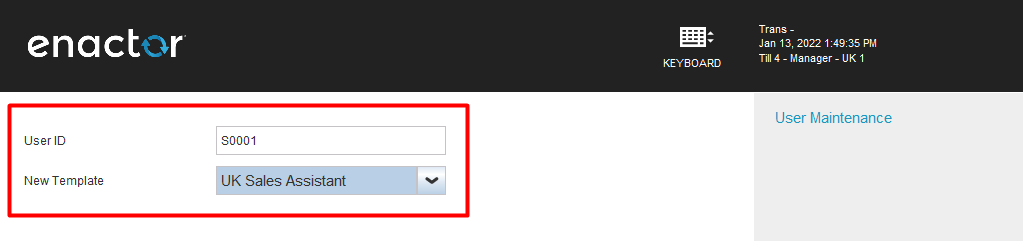
Enter the new User ID and the template if required and select OK.
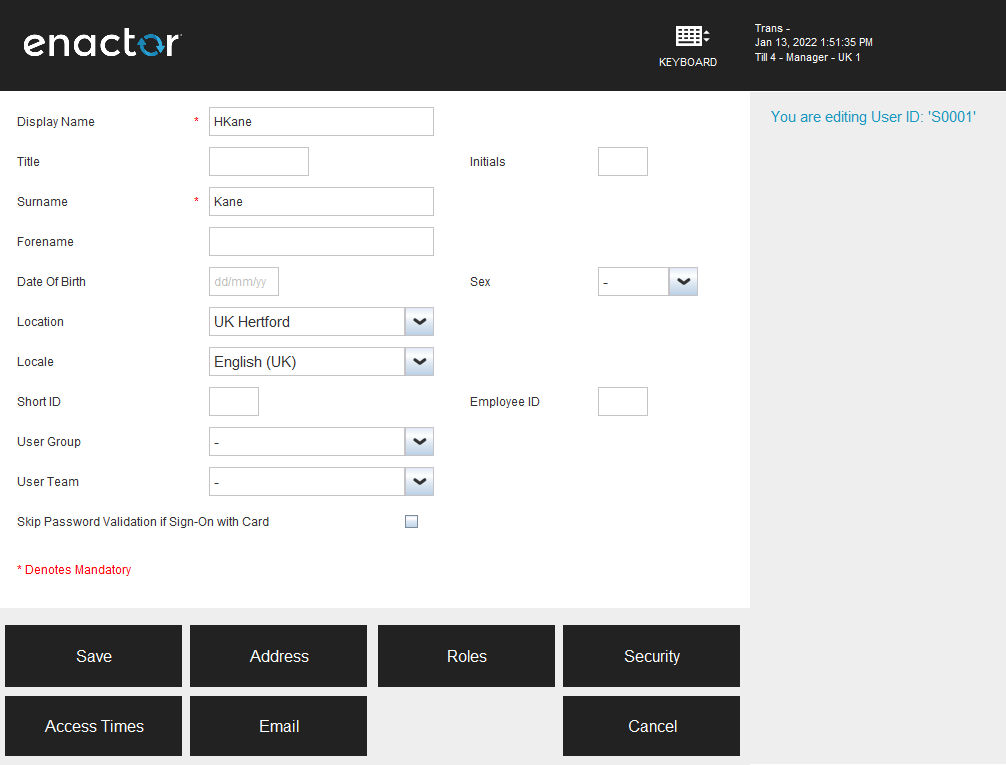
Enter the new User's personal information. Display Name and Surname are mandatory fields. When adding employee details, the Employee ID must be entered for the employee to be able to receive employee discounts as this links to the employee record.
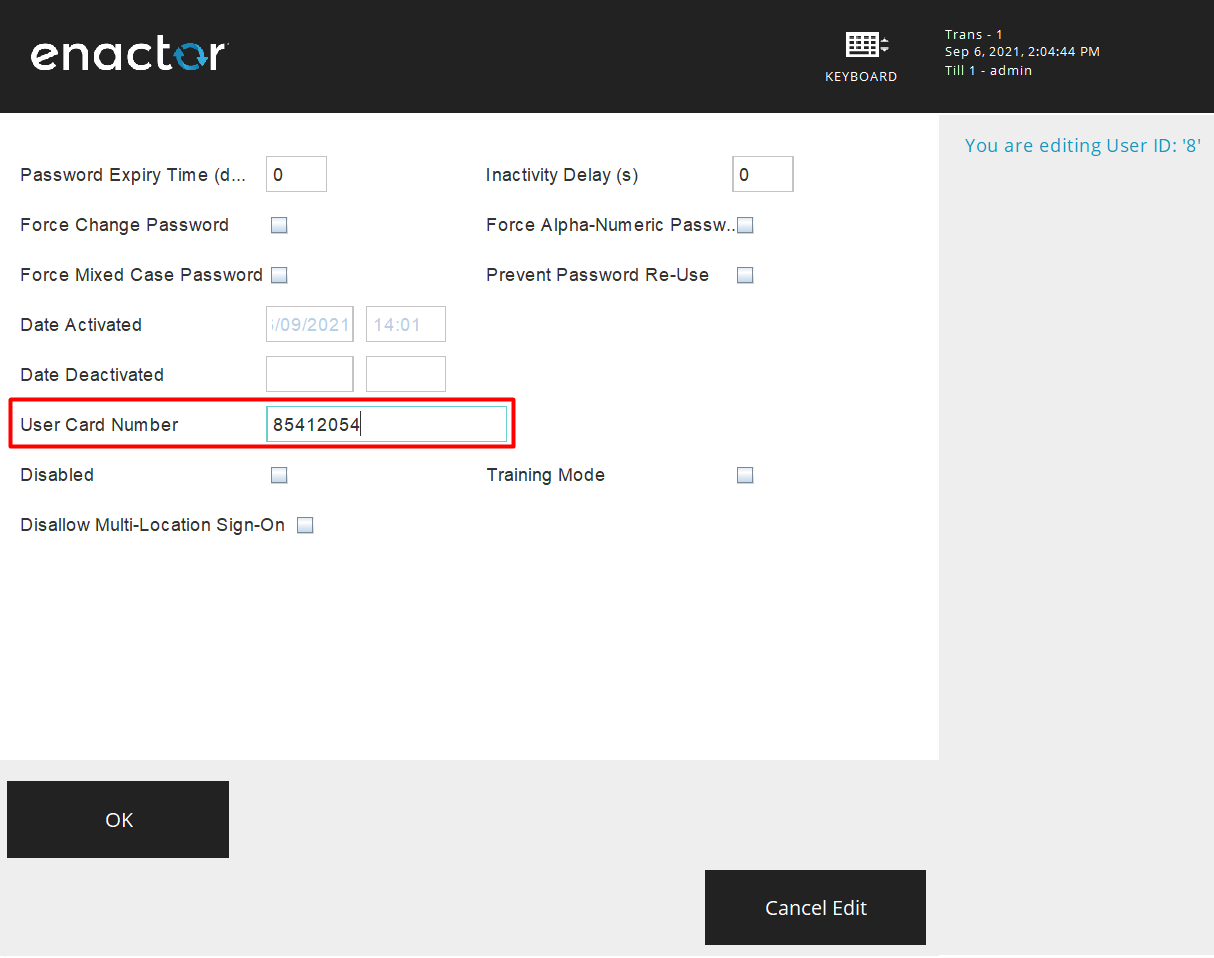
To add an employee sign-on card, which enables the user to sign on by scanning their employee card, select Security and enter the applicable details in the User Card Number field and select OK.
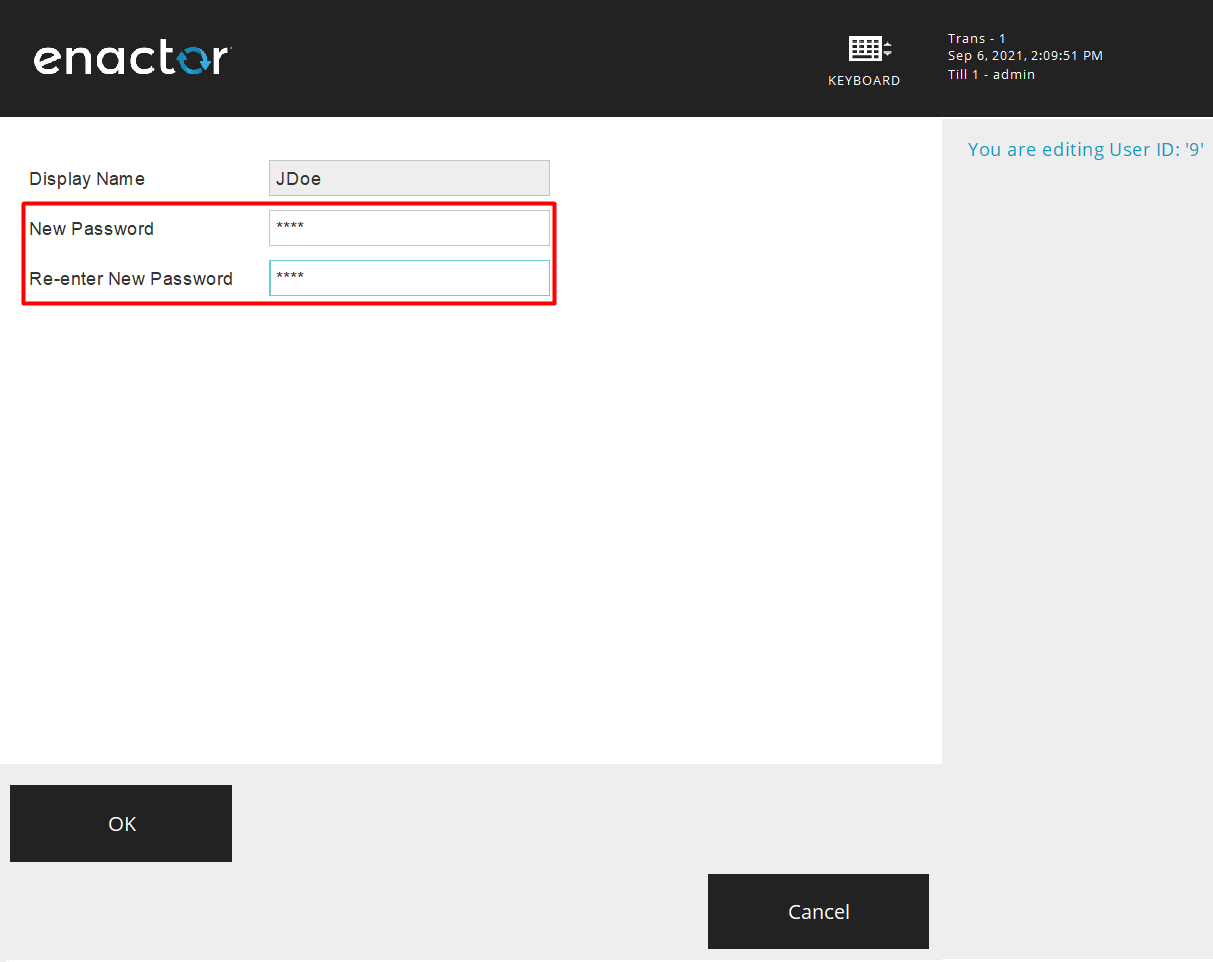
When all details have been entered, select Save. This will prompt to create a new password. Enter a New Password in both fields and select OK to complete creating the new User.
This will successfully create a new User.
The same procedure can be followed to create new Employees using the Employee Maintenance function in the Maintenance menu.
Employee Maintenance
Employees can be created and edited in the POS using the Employee Maintenance function. New or edited employee updates are sent to the store, back office, and the Estate Manager from the POS that this function is being run on.
If the privilege is enabled, the user can navigate to the Employee Maintenance function by selecting the Employee Maintenance button in the Maintenance menu.
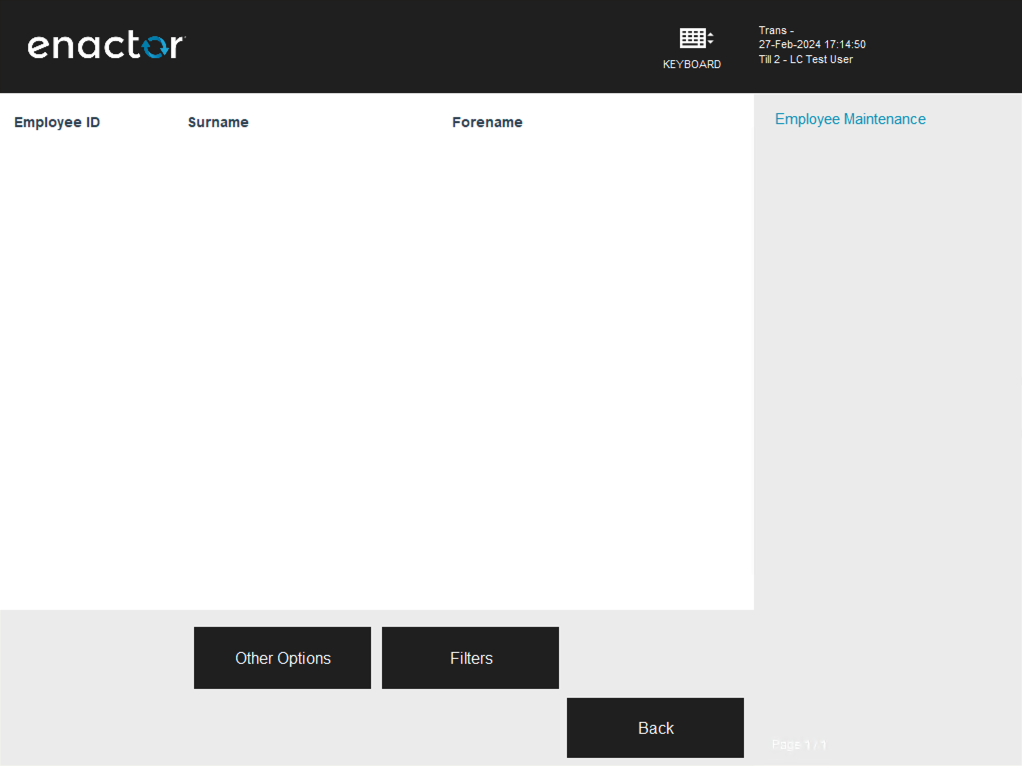
Creating a New Employee
In the Employee Maintenance functions menu of the POS, select Other Options followed by the New button to create a new Employee.
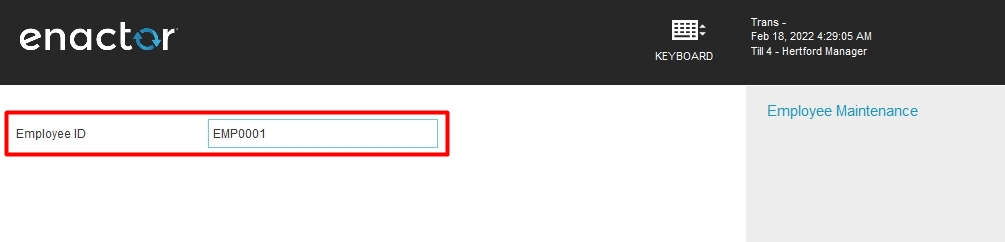
Enter the new Employee ID and select OK.
The Employee ID is what allows an employee to be able to receive employee discounts as this links to the employee record.
Enter the new Employee's personal information. Only the Surname here is a mandatory field.
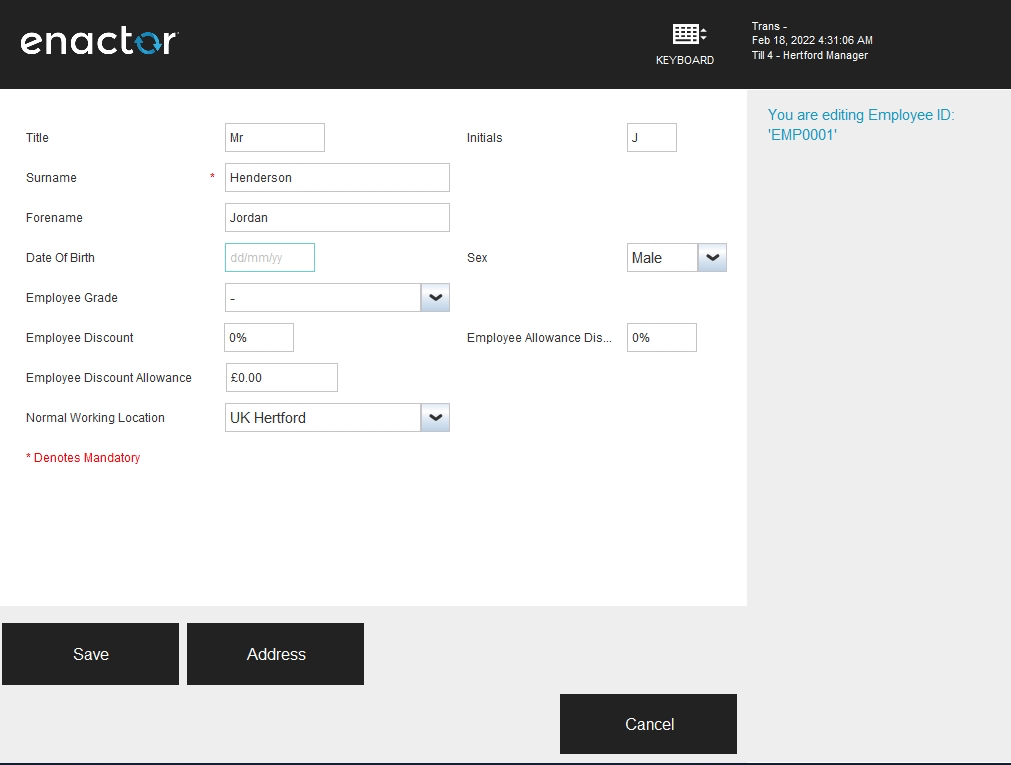
Select Address to add the Employee Address details and when everything has been completed, select OK and then Save.
This will successfully create a new Employee.
Change Your Password
This Maintenance function allows the logged in user to change their own password.
If the privilege is enabled, the user can run the Change Your Password function by selecting Change Your Password in the Maintenance menu.
The User is prompted to enter a new password and confirm the password.
This will successfully change the password.
Change User Password
This Maintenance function allows the user to change the password of other Users in the system.
If the privilege is enabled, the user can navigate to the Change User Password function by selecting Change User Password in the Maintenance menu, and the following screen is displayed:
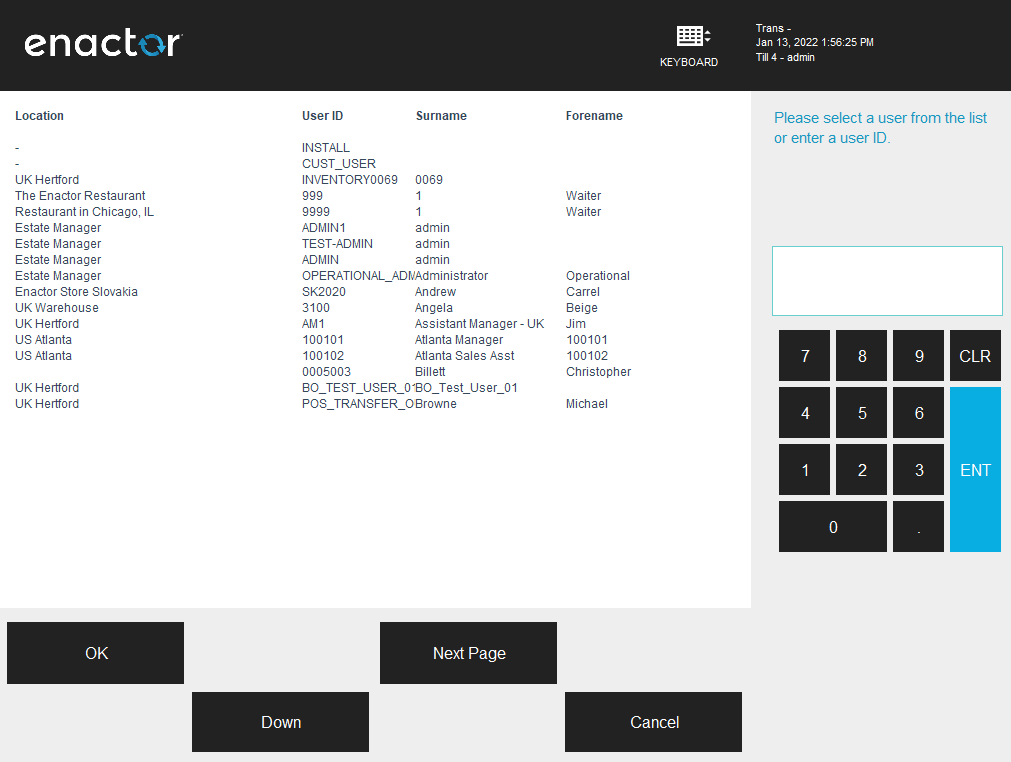
Select a User from the list of Users that are displayed and select OK.
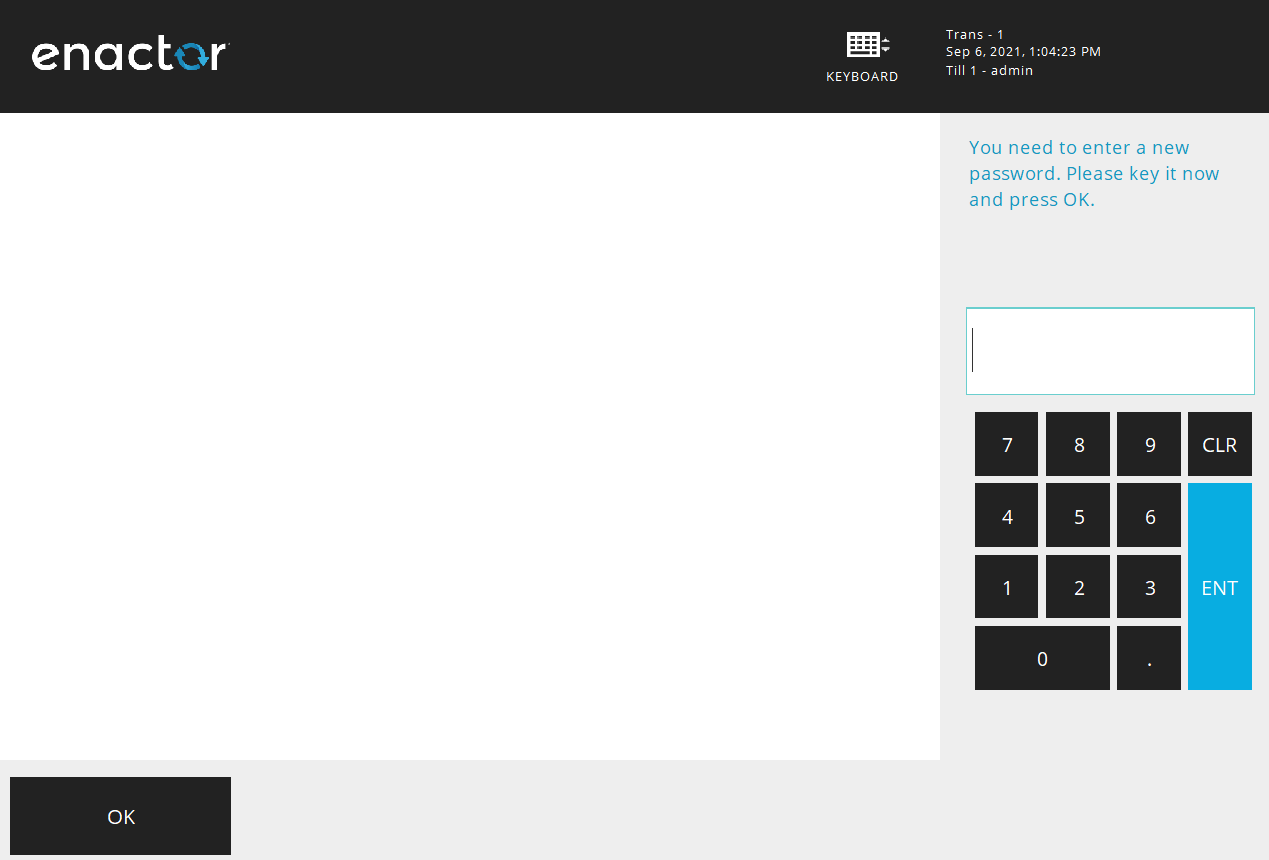
This will prompt to create a new password.

Enter a new password and re-enter the password when prompted again.
This will successfully change the password of the selected user.