How-to Guide - Configuring Returns
Introduction
This guide provides a foundational understanding of the options and capabilities available when configuring return functionality in the Enactor Retail System. Return functionality encompasses the full end-to-end setup required to enable returns at the POS -- from defining the types of return operations available to operators, through to exposing those functions in the Sale menu and granting the appropriate user role privileges.
Enactor supports five types of return operation at the POS, each covering a distinct customer scenario:
- Item Return - The customer returns an individual item and receives a refund. The inventory effect, allowed tenders, and witness requirements are all configurable per return type.
- Receipt Return - The customer returns items against an original receipt. Items are selected directly from the original transaction record.
- Item Exchange - The customer exchanges an item for a different variant. No monetary refund is issued.
- MMG Return - The customer returns a merchandise group item at a specified price, without requiring the original barcode to be scanned.
- Non-Merchandise Return - The customer returns a non-stock item such as a service charge or deposit.
The purpose of this guide is to demonstrate the steps required to configure return functionality in the Enactor Estate Manager: setting up the return types available at the POS, configuring the Sale menu to expose return functions to operators, setting up user role privileges, applying tender restrictions for return operations, and broadcasting the configuration to the POS.
Overview
The following steps are required to enable return functionality at the POS:
- Item Returns - Configure item return operations, including return price, applicable tenders, transaction types, and witness settings
- Receipt Returns - Configure return operations against an original receipt
- Item Exchanges - Configure item exchange operations
- MMG Returns - Configure merchandise group return operations
- Non-Merchandise Returns - Configure return operations for non-stock items
- Menus - Configure the Sale menu to expose return functions to POS operators
- User Roles - Set return operation privileges on the appropriate user roles
- Tenders - Configure tender restrictions to control which tenders are available for refunds
- Broadcasting - Deliver the configuration to the POS
Prerequisites
Before starting, you should have the following resources in place:
- Enactor Estate Manager
- Enactor POS (configured within the appropriate region, connected to the Estate Manager)
- Standard Configuration, including base configuration and regionally appropriate data
You should be familiar with the following:
- Estate Manager configuration
- Organisation and Region configuration
- Tender configuration
- Data broadcasting
Configuration Steps
Item Return Reasons
Item Return reasons are used when a customer returns an individual item and receives a refund. Each reason defines the effect on inventory, the tenders available for the refund, and whether a witness is required.
Navigate to Reason Maintenance using the Search or the path: Main Menu > Configuration > Organisation > Reasons

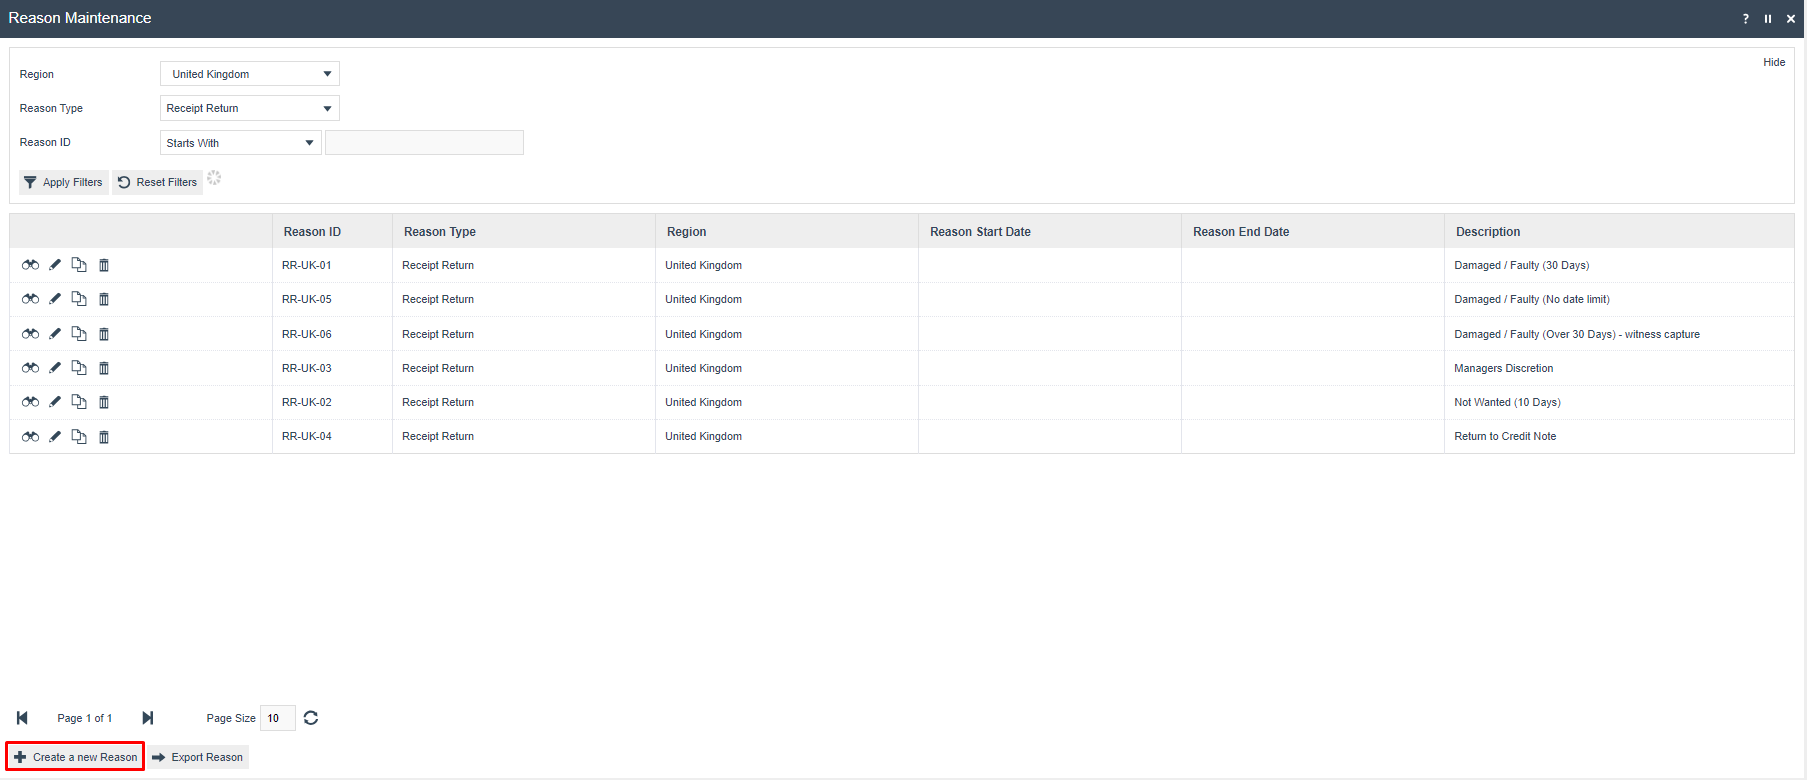
The Reason Maintenance list is displayed, showing all configured reasons.
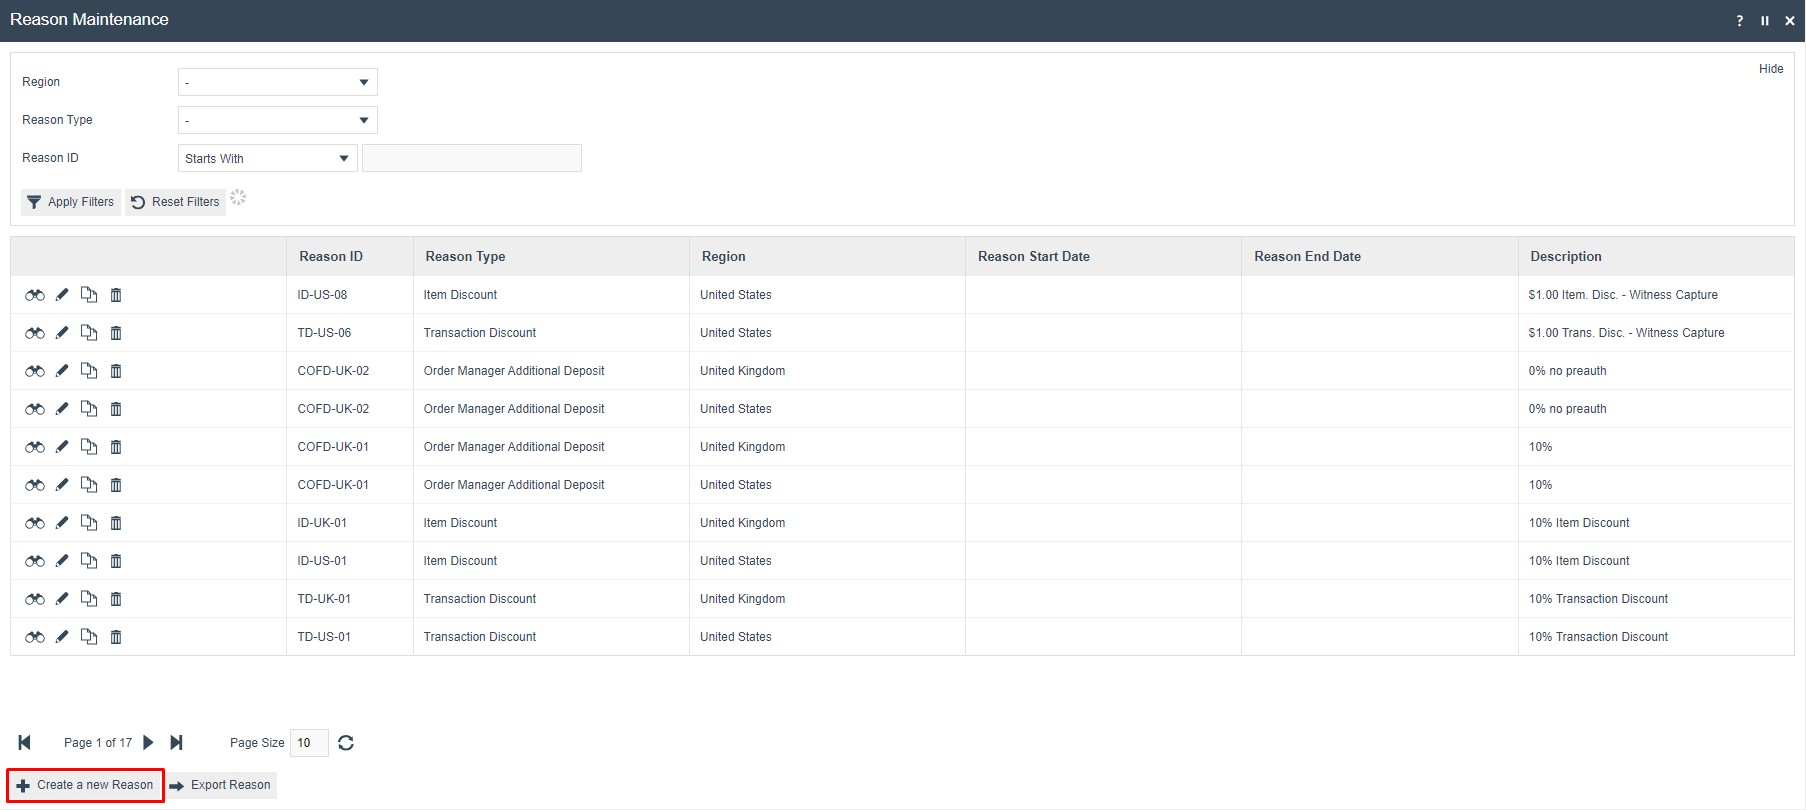
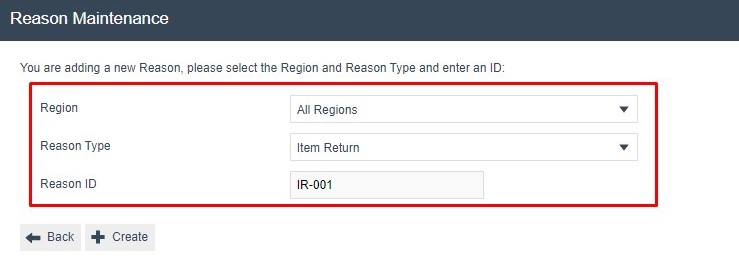
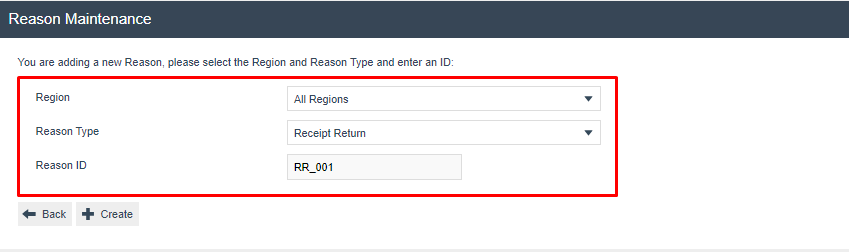
Select Create a New Reason. Set the Region, Reason Type, and Reason ID on the header screen:
| Configuration | Description |
|---|---|
| Region | The region in which this reason is available. Use All Regions to make the reason available across all regions. |
| Reason Type | Set to Item Return to configure this as an individual item return reason. |
| Reason ID | A unique identifier for the reason. Used internally and in transaction records. |
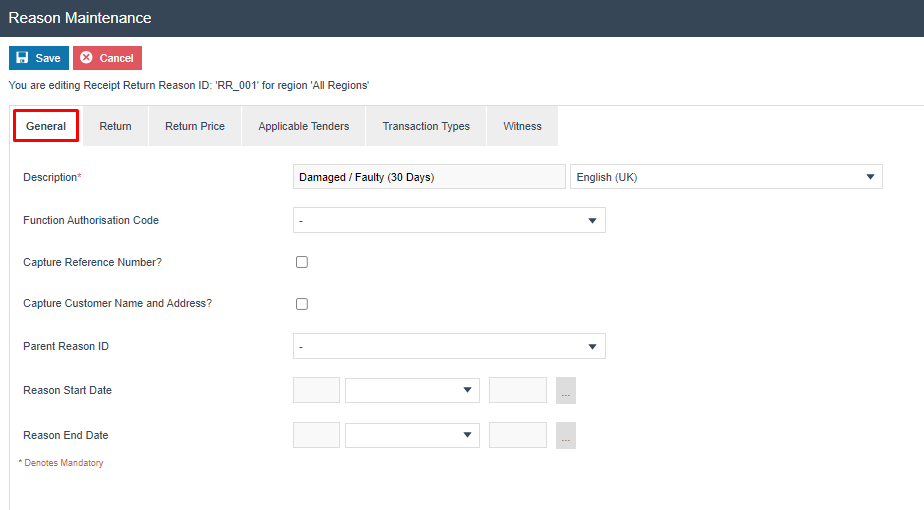
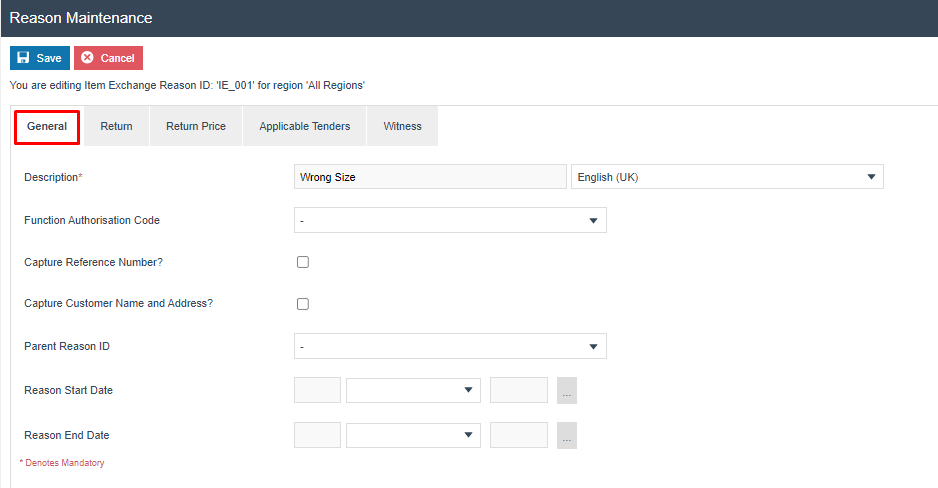
General Tab
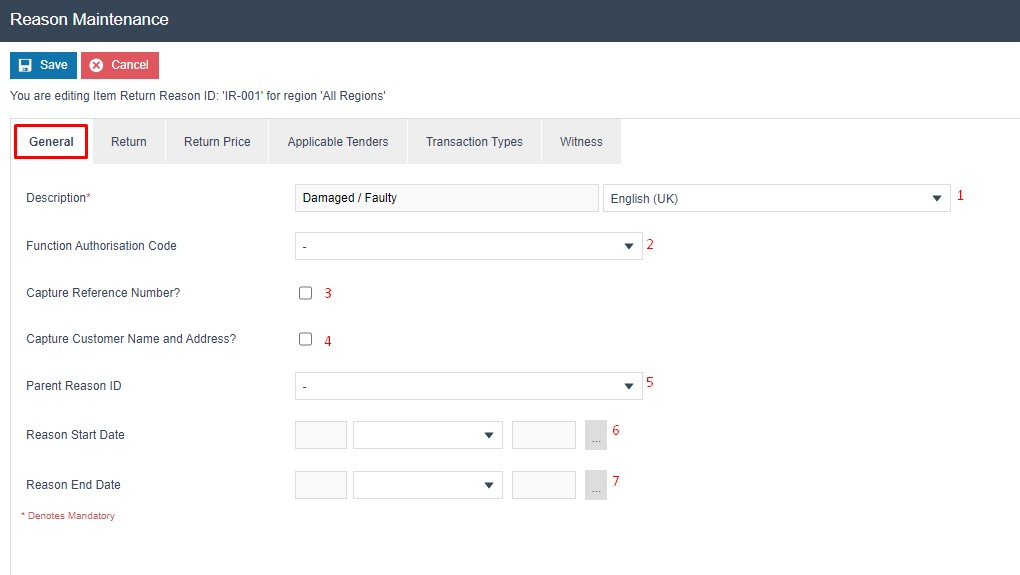
On the General tab, enter the reason description:
| Configuration | Description |
|---|---|
| Description | The reason text displayed to the POS operator. Can be alphanumeric with a maximum of 50 characters. |
| Function Authorisation Code | Select the applicable authorisation code if reason selection requires manager authorisation. These are configured in Role Maintenance. |
| Capture Reference Number | Tick to prompt the operator to enter a reference number when using this reason. |
| Capture Customer Name and Address | Tick to prompt the operator to capture the customer name and address when using this reason. |
| Parent Reason ID | If this reason requires a parent reason, select the relevant parent from the list of configured reasons of the same type. |
| Reason Start Date | Optional date from which this reason becomes active. Leave blank for no start restriction. |
| Reason End Date | Optional date after which this reason is no longer available. Leave blank for no end restriction. |
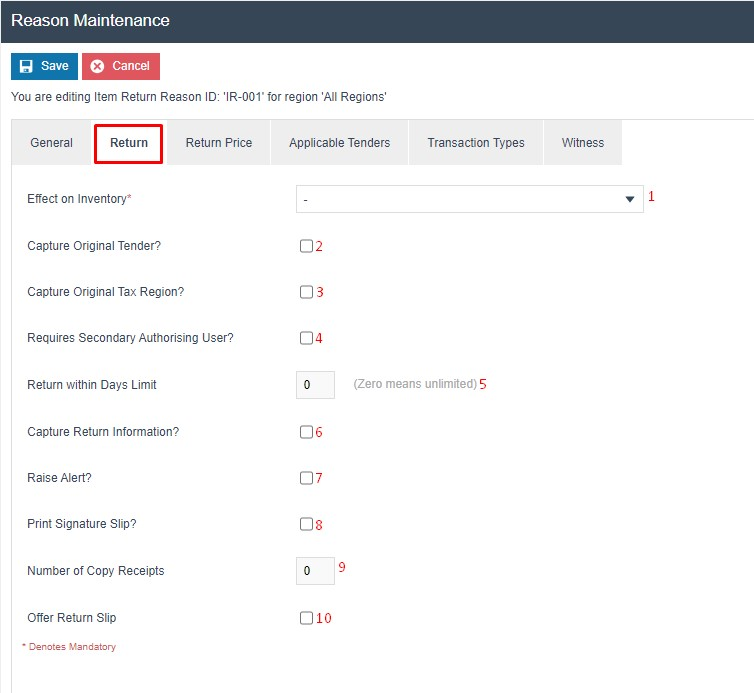
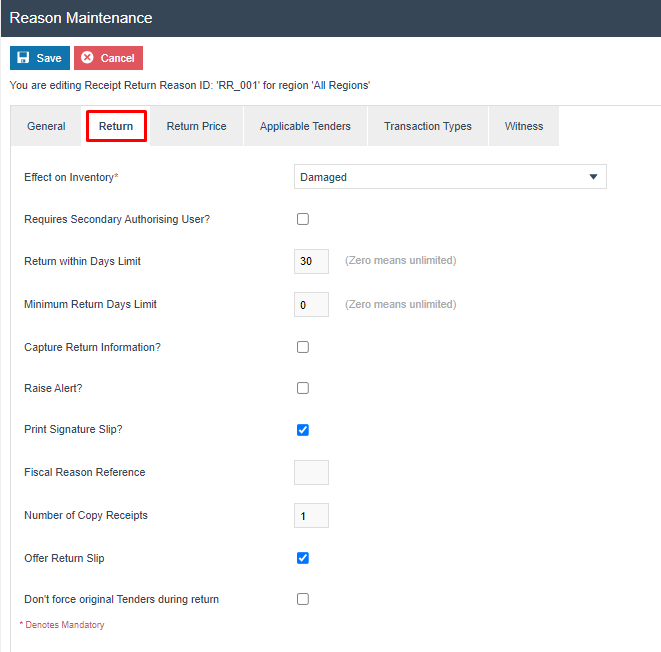
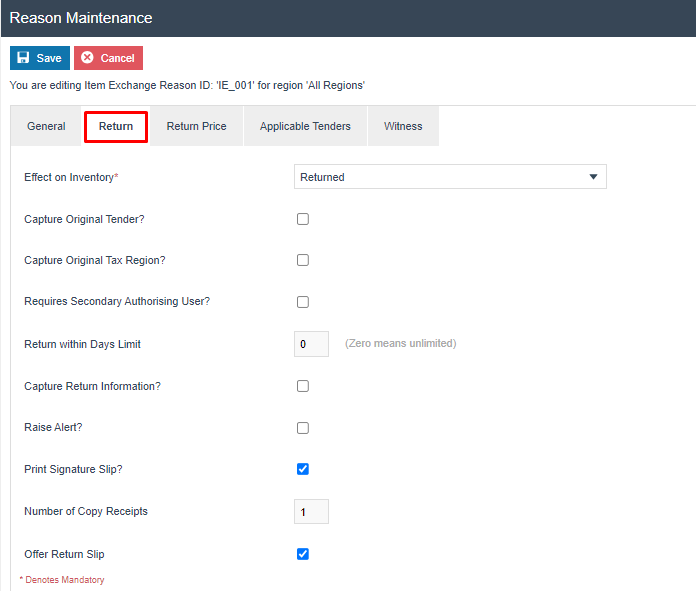
Return Tab
On the Return tab, configure the inventory and return behaviour for this reason:
| Configuration | Description |
|---|---|
| Effect on Inventory | Determines how the returned item affects stock levels: Returned (back to sellable stock), Damaged (moved to damaged stock), or Destroyed (removed from inventory). |
| Capture Original Tender | Tick to prompt the operator to capture the original tender used in the original transaction. |
| Capture Original Tax Region | Tick to prompt the operator to capture the original tax region of the transaction. |
| Requires Witness | Tick to indicate that a witness is required when using this reason. Further witness settings are configurable on the Witness tab. |
| Return within Days Limit | Enter a value from 0 to 365 defining the period within which a return may be made using this reason. Set to 0 for no restriction. |
| Capture Return Information | Tick to prompt the operator to capture additional return information when using this reason. |
| Raise Alert | Tick to raise a system alert when this reason is used. |
| Print Signature Slip | Tick to print a customer signature slip during the return. |
| Number of Copy Receipts | Enter a value from 0 to 5 for the number of extra receipts to print when this reason is used. |
| Offer Return Slip | Tick to prompt the operator to offer a product return slip to the customer. |
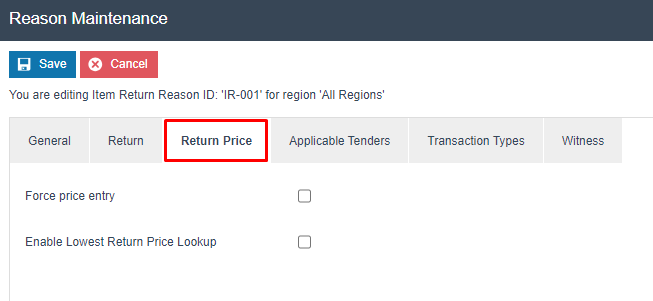
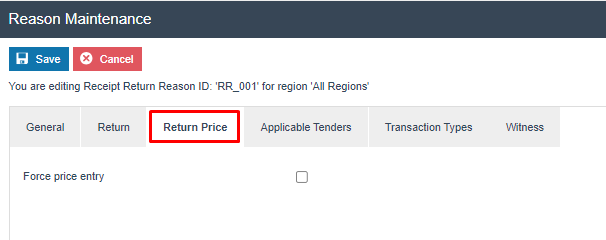
Return Price Tab
On the Return Price tab, configure price entry behaviour for this reason:
| Configuration | Description |
|---|---|
| Force Price Entry | When ticked, the operator must manually enter the refund price rather than using the original selling price. |
| Enable Lowest Return Price Lookup | When ticked, allows the operator to look up the lowest recorded return price for the product. |
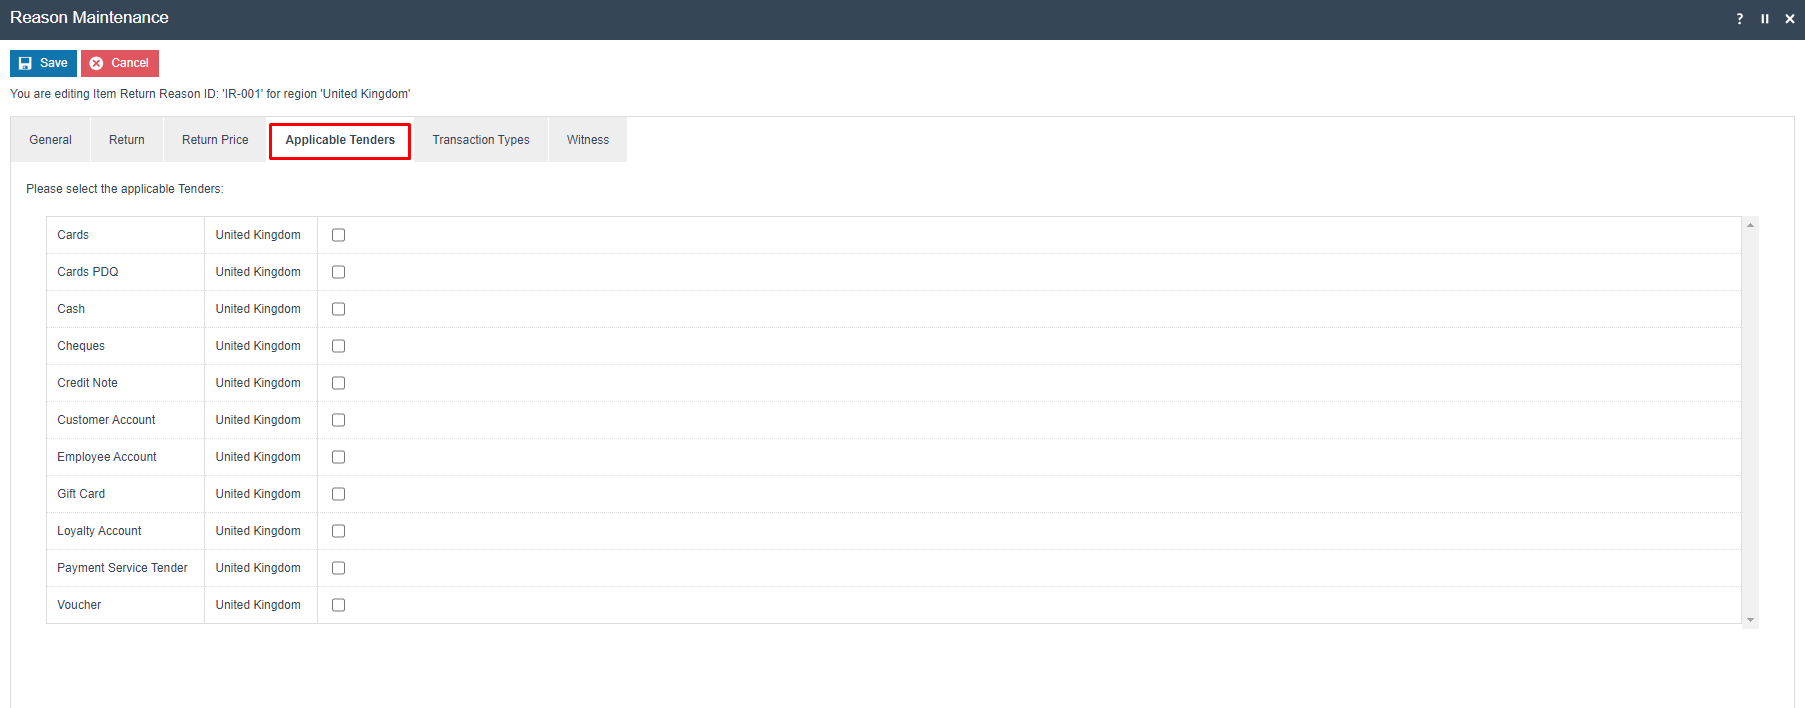
Applicable Tenders Tab
On the Applicable Tenders tab, select the tenders available for refunds using this reason:
| Configuration | Description |
|---|---|
| Region | The region for which these tender restrictions apply. |
| Tender checkboxes | Tick each tender type permitted as a refund method for this reason. Unticked tenders will not appear in the refund tender selection at the POS. |
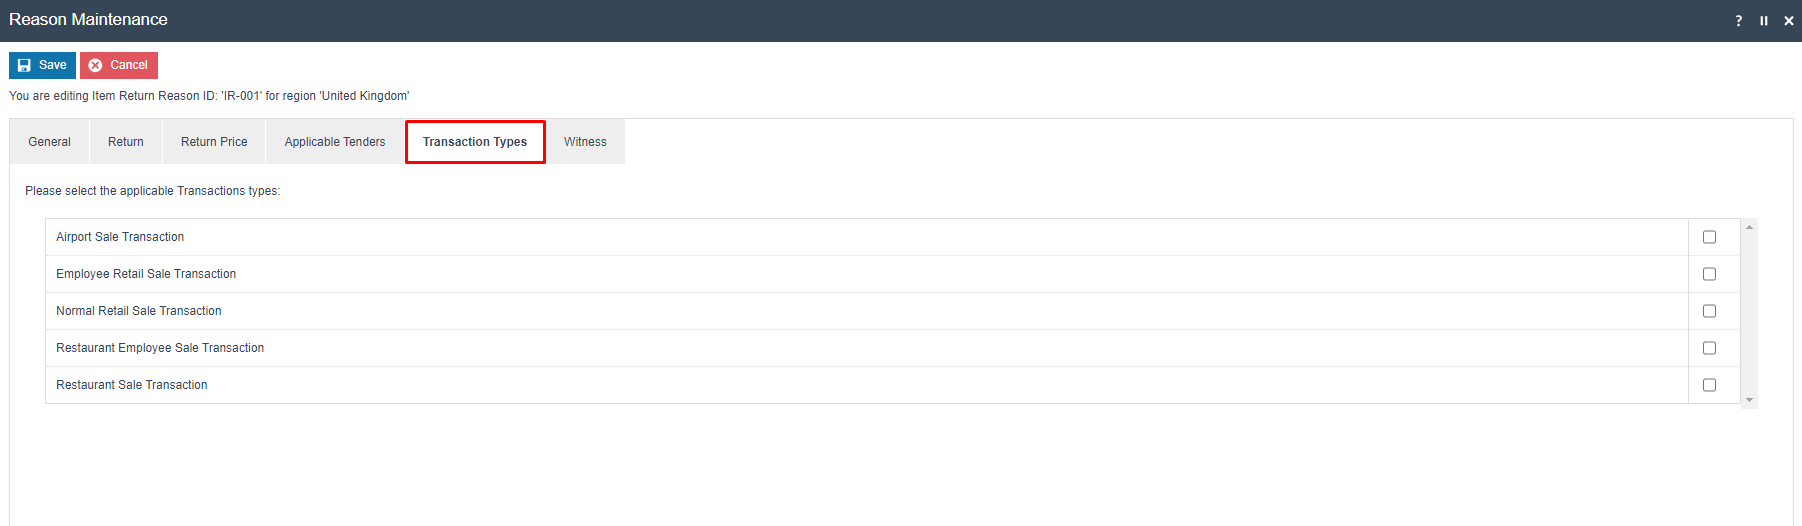
Transaction Types Tab
On the Transaction Types tab, select the transaction types to which this reason applies:
| Configuration | Description |
|---|---|
| Region | The region for which these transaction type restrictions apply. |
| Transaction type checkboxes | Tick each transaction type for which this return reason is available at the POS. |
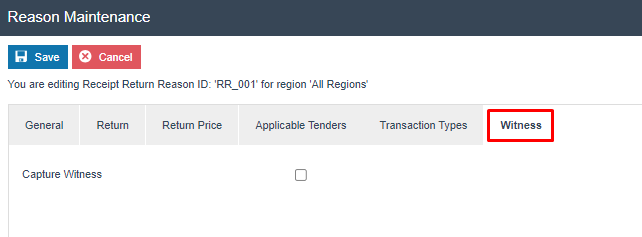
Witness Tab
On the Witness tab, configure whether a witness is required when this reason is used:
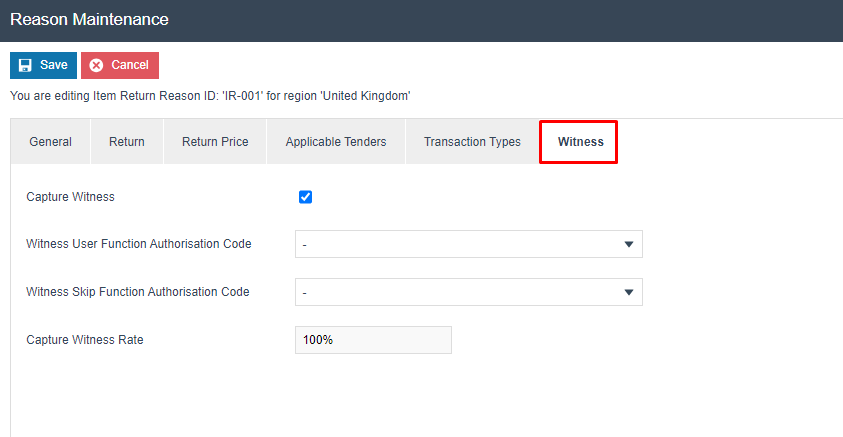
| Configuration | Description |
|---|---|
| Capture Witness | When ticked, the POS prompts for a witness during the return operation. |
| Rate | The percentage of return transactions that require a witness. Set to 100% to require a witness on every return using this reason. |
Select Save to save the Item Return reason.
Multiple reasons can be created for the Item Return Reason Type as required. All configured Item Return reasons are presented to the operator to select from when performing an Item Return at the POS.
This completes the Item Return Reasons configuration.
Receipt Return Reasons
Receipt Return reasons are used when a customer returns items from an original receipt. The return is processed by locating the original transaction and selecting the items to be returned from it.
Navigate back to Reason Maintenance. The list can be filtered by reason type to show only Receipt Return reasons:
Select Create a New Reason. Set the Region, Reason Type to Receipt Return, and enter the Reason ID:
General Tab
| Configuration | Description |
|---|---|
| Description | The reason text displayed to the POS operator. |
Applicable Tenders Tab

| Configuration | Description |
|---|---|
| Tender checkboxes | Tick each tender type permitted as a refund method. |
Transaction Types Tab

| Configuration | Description |
|---|---|
| Transaction type checkboxes | Tick each transaction type for which this reason is available. |
Witness Tab
| Configuration | Description |
|---|---|
| Capture Witness | When ticked, the POS prompts for a witness. Leave unticked if no witness is required for this reason. |
Return Tab
| Configuration | Description |
|---|---|
| Effect on Inventory | How the returned item affects stock levels: Returned, Damaged, or Destroyed. |
| Days | The number of days within which this reason can be used. Set to 0 for no restriction. |
| Print Signature Slip | Tick to print a signature slip during the return. |
| Offer Return Slip | Tick to prompt the operator to offer a return slip to the customer. |
Return Price Tab
| Configuration | Description |
|---|---|
| Force Price Entry | When ticked, requires the operator to manually enter the refund price rather than using the original price. |
Select Save to save the Receipt Return reason.
This completes the Receipt Return Reasons configuration.
Item Exchange Reasons
Item Exchange reasons are used when a customer exchanges an item for a different variant, such as a different size or colour. No monetary refund is issued during an item exchange.
Select Create a New Reason. Set the Reason Type to Item Exchange and enter the Reason ID:

General Tab
| Configuration | Description |
|---|---|
| Description | The reason text displayed at the POS. |
Return Tab
| Configuration | Description |
|---|---|
| Effect on Inventory | How the exchanged item affects stock. Typically set to Returned for exchanges. |
| Print Signature Slip | Tick to print a signature slip during the exchange. |
Select Save to save the Item Exchange reason.
This completes the Item Exchange Reasons configuration.
MMG Return Reasons
MMG (Merchandise Group) Return reasons are used when a customer returns a merchandise group item at a specified price, without requiring the original barcode. This is used for high-value items or when the original item cannot be scanned.
Select Create a New Reason. Set the Reason Type to MMG Return and enter the Reason ID:

General Tab
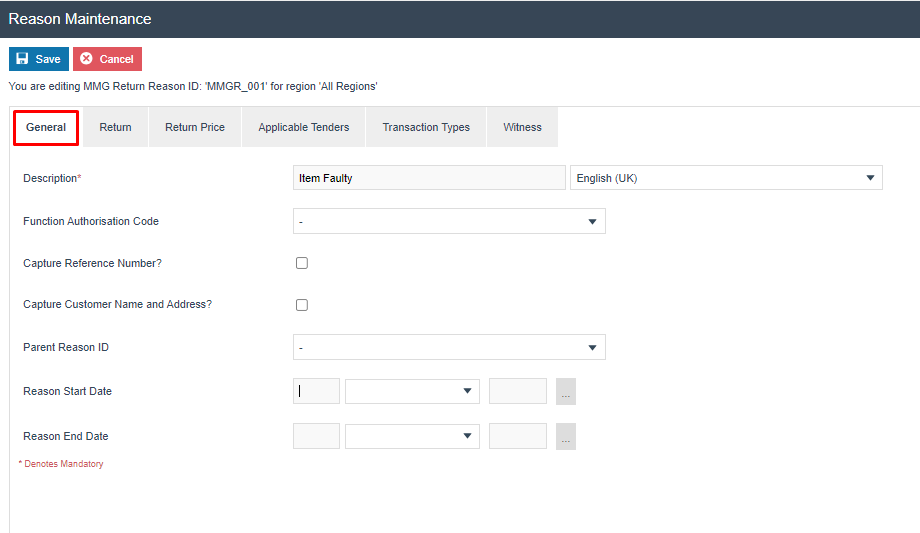
| Configuration | Description |
|---|---|
| Description | The reason text displayed at the POS. |
Select Save to save the MMG Return reason.
This completes the MMG Return Reasons configuration.
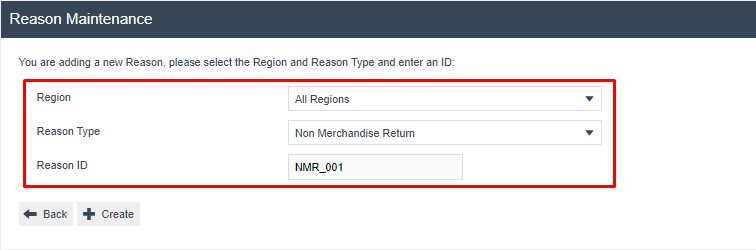
Non-Merchandise Return Reasons
Non-Merchandise Return reasons are used to process returns for non-stock items such as service charges or deposits. These reasons have a simplified configuration with General and Transaction Types tabs only.
Select Create a New Reason. Set the Reason Type to Non Merchandise Return and enter the Reason ID:
General Tab
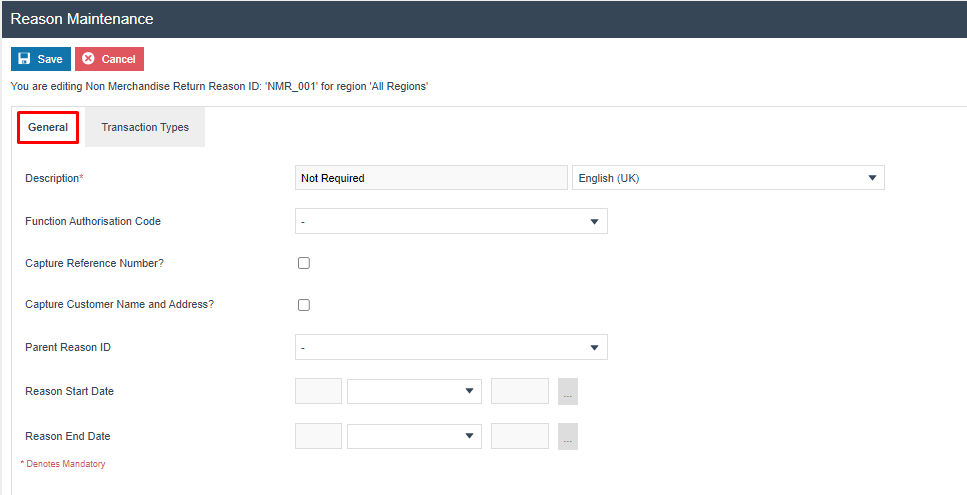
| Configuration | Description |
|---|---|
| Description | The reason text displayed at the POS. |
Transaction Types Tab
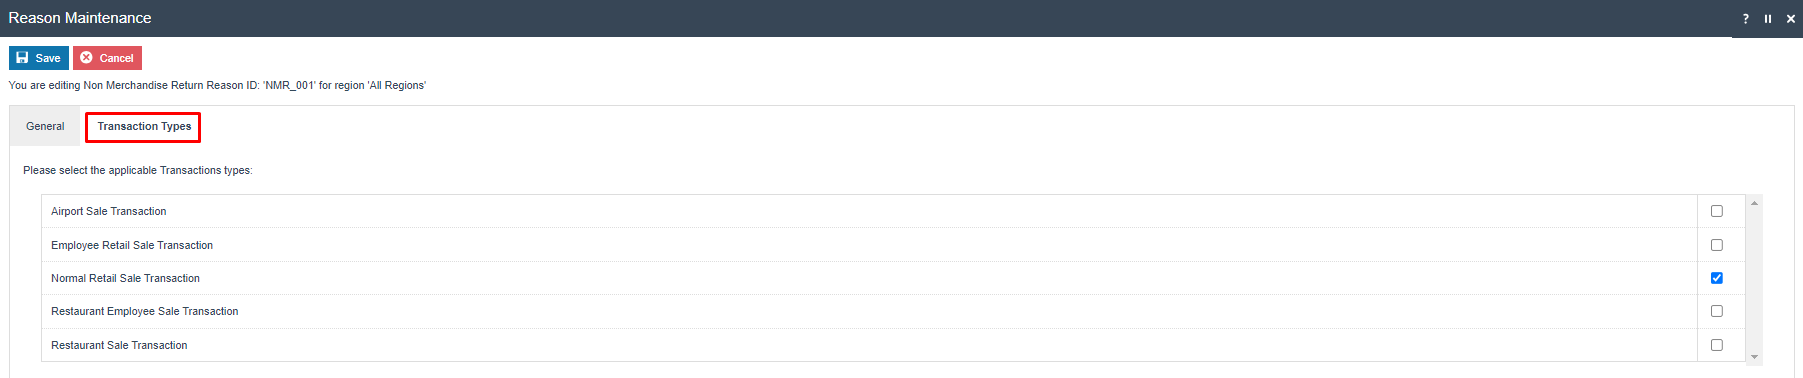
| Configuration | Description |
|---|---|
| Transaction type checkboxes | Tick each transaction type for which this reason is available at the POS. |
Select Save to save the Non-Merchandise Return reason.
This completes the Non-Merchandise Return Reasons configuration.
Menus
The Sale menu must be configured to include the return operation buttons. Return functions are grouped within a Returns folder inside the Sale menu.
Navigate to Menu Maintenance using the Search or the path: Main Menu > Configuration > System > Menus
Select the SALE menu to edit it. Navigate to the Returns folder within the menu structure:
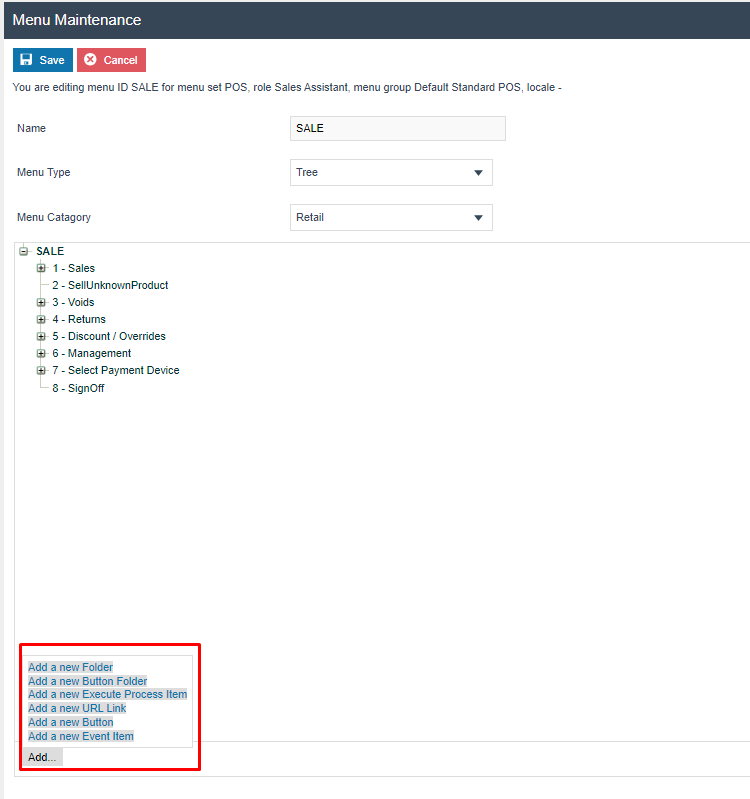
The following events are available for configuration in the Returns folder:
| Reason Type | Event Name | Event ID |
|---|---|---|
| Item Return | Item Return | ItemReturn |
| Receipt Return | Return From Receipt | ReturnFromReceipt |
| Item Exchange | Item Exchange | ItemExchange |
| MMG Return | Return Unknown Product | ReturnUnknownProduct |
Configuring Menus is described in detail in a separate How-to Guide.
This completes the Menus configuration.
User Roles
User Role privileges control which operators are permitted to perform return operations at the POS. The ReturnItemAllowed privilege must be assigned to each role that needs to carry out returns.
Navigate to User Role Maintenance using the Search or the path: Main Menu > Configuration > HR > User Roles

Select the user role to edit (for example, SALES_ASSISTANT). Select the Enactor POS package and configure the return privileges as required:
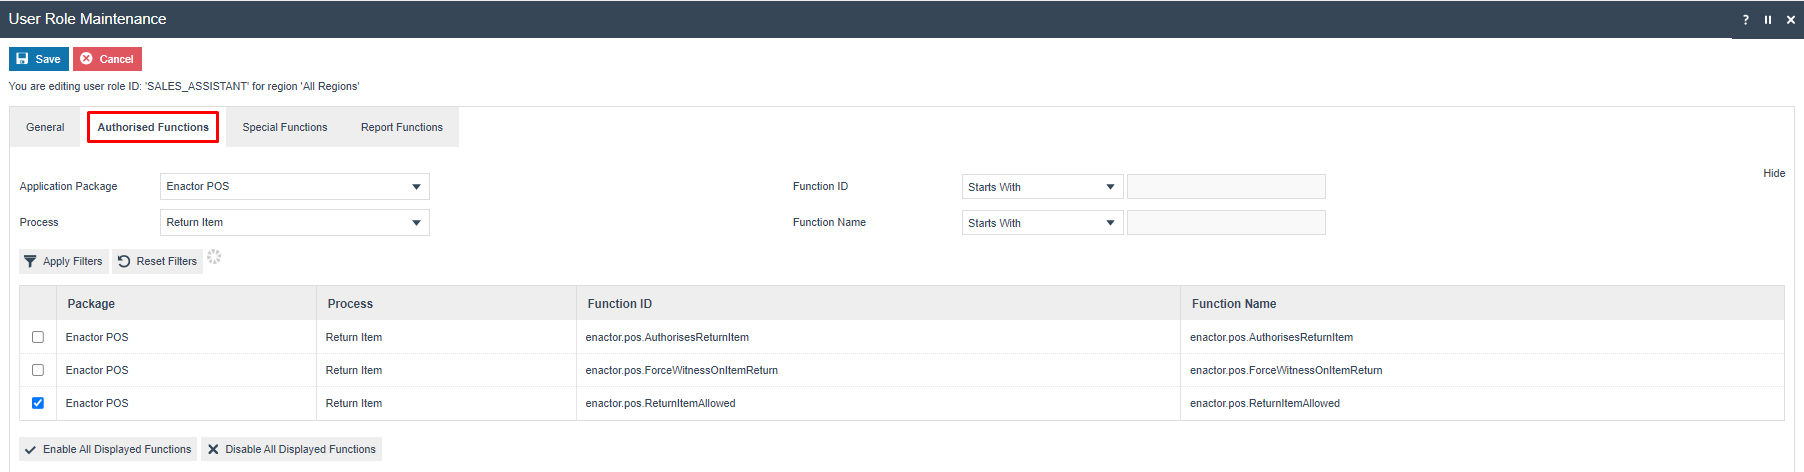
The following privileges are available for return operations in the Enactor POS package:
| Reason Type | Privilege | Description |
|---|---|---|
| Item Return | enactor.pos.ReturnItemAllowed | Allows the role to perform Item Return operations. |
| Item Return | enactor.pos.AuthorisesReturnItem | Allows the role to authorise Item Return operations performed by other users. |
| Receipt Return | enactor.pos.ReturnFromReceiptAllowed | Allows the role to perform Return From Receipt operations. |
| Receipt Return | enactor.pos.AuthorisesReturnFromReceipt | Allows the role to authorise Return From Receipt operations. |
| Item Exchange | enactor.pos.ExchangeItemAllowed | Allows the role to perform Item Exchange operations. |
| Item Exchange | enactor.pos.AuthorisesExchangeItem | Allows the role to authorise Item Exchange operations. |
| MMG Return | enactor.pos.AllowUnknownProductReturn | Allows the role to perform MMG Return operations. |
Configuring User Roles is described in detail in a separate How-to Guide.
This completes the User Roles configuration.
Tenders
Tender configuration controls which tenders are available as refund methods and the restrictions that apply to return transactions. Two settings in Tender Maintenance are relevant: Credits Allowed controls whether the tender can be used as a refund method, and Return Tenders defines which tenders are offered during a return when the customer originally paid with this tender.
Navigate to Tender Maintenance using the Search or the path: Main Menu > Configuration > Financial > Tenders
Select the CASH tender to edit it. Navigate to the Restrictions 1 tab and locate the Credits Allowed section:
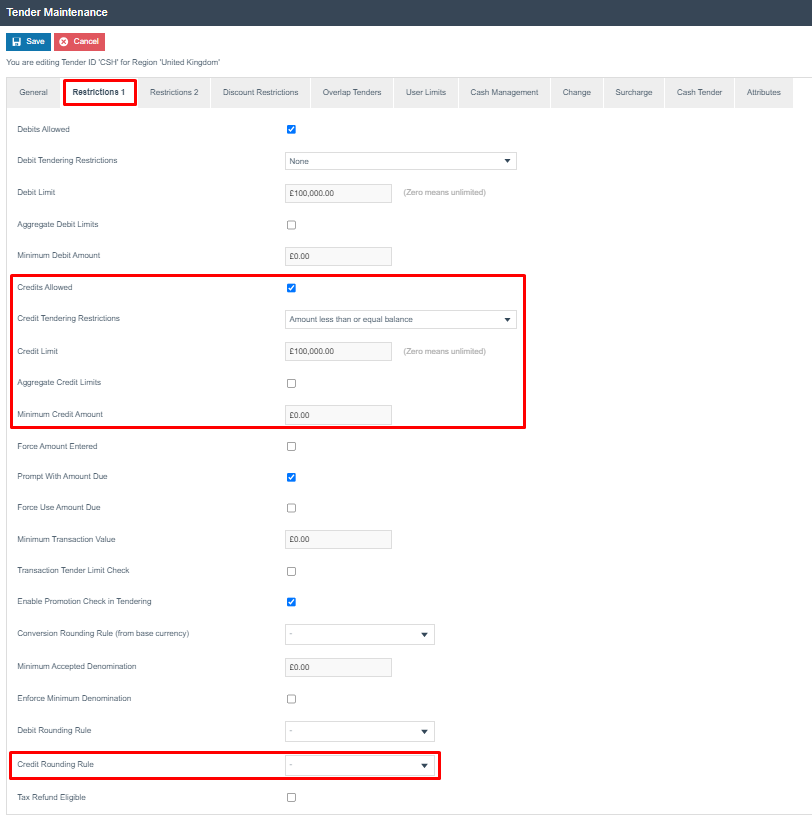
| Configuration | Description |
|---|---|
| Credits Allowed | When ticked, allows the tender to be used as a refund (credit) method during return operations. |
| Credits Tendering Restrictions | Sets constraints on the amount that may be refunded using this tender. Amount less than or equal to balance is the standard setting. |
| Credit Limit | The maximum amount that can be refunded using this tender in a single transaction. Set to 0.00 for unlimited. |
| Aggregate Credit Limits | When ticked, accumulates amounts across multiple tenders of this type to apply the Credit Limit restriction. |
| Minimum Credit Amount | The minimum amount below which this tender cannot be used for a full or partial refund. |
| Credit Rounding Rule | Determines the minimum accepted denomination for credits issued with this tender. |
Navigate to the Restrictions 2 tab and locate the Return Tenders section:
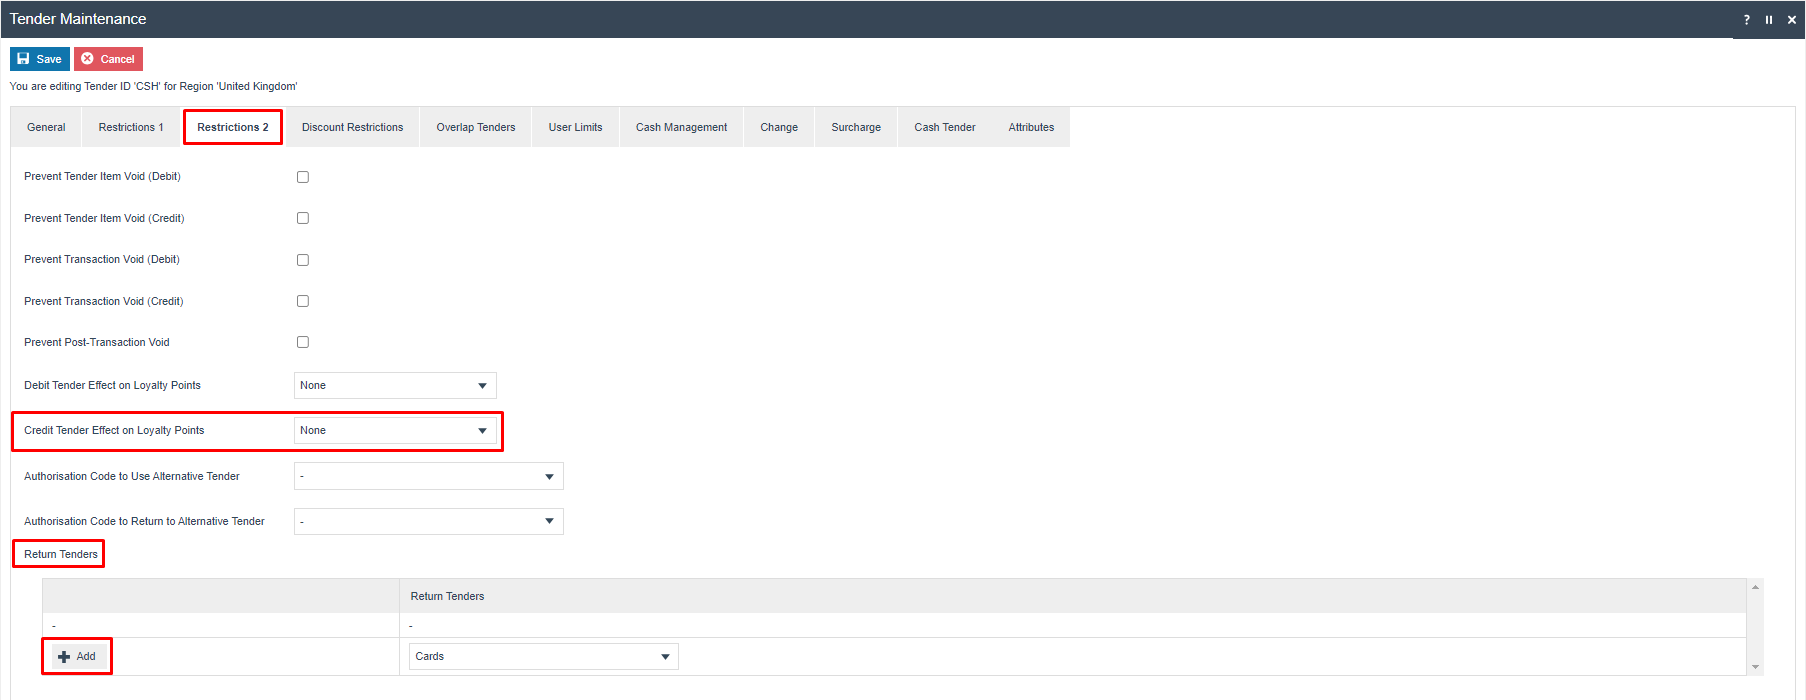
| Configuration | Description |
|---|---|
| Credit Tender Effect on Loyalty Points | Defines the effect a return or refund has on the customer's loyalty points. Options: None or Deduct Loyalty Points. |
| Return Tenders | Defines which tenders are offered as refund methods when the customer originally paid with this tender. Multiple options may be configured. |
Select Save to save the tender configuration.
This completes the Tenders configuration.
Broadcasting
To deliver the configuration changes to the POS, broadcast the following entities:
- Reason - The return reasons created in the previous steps
- Menu - The updated Sale menu with return operation buttons
- Roles - The updated user roles with return privileges
- Tenders - The updated tender configurations with return restrictions
Broadcast all four entities to ensure that return operations function correctly at the POS. If any entity is not broadcast, the POS may not display the correct reasons, menus, or refund tender options.
This completes the Broadcasting configuration.
POS Functionality
Once the configuration has been broadcast, the following return operations are available at the POS from the Returns sub-menu.
Item Return
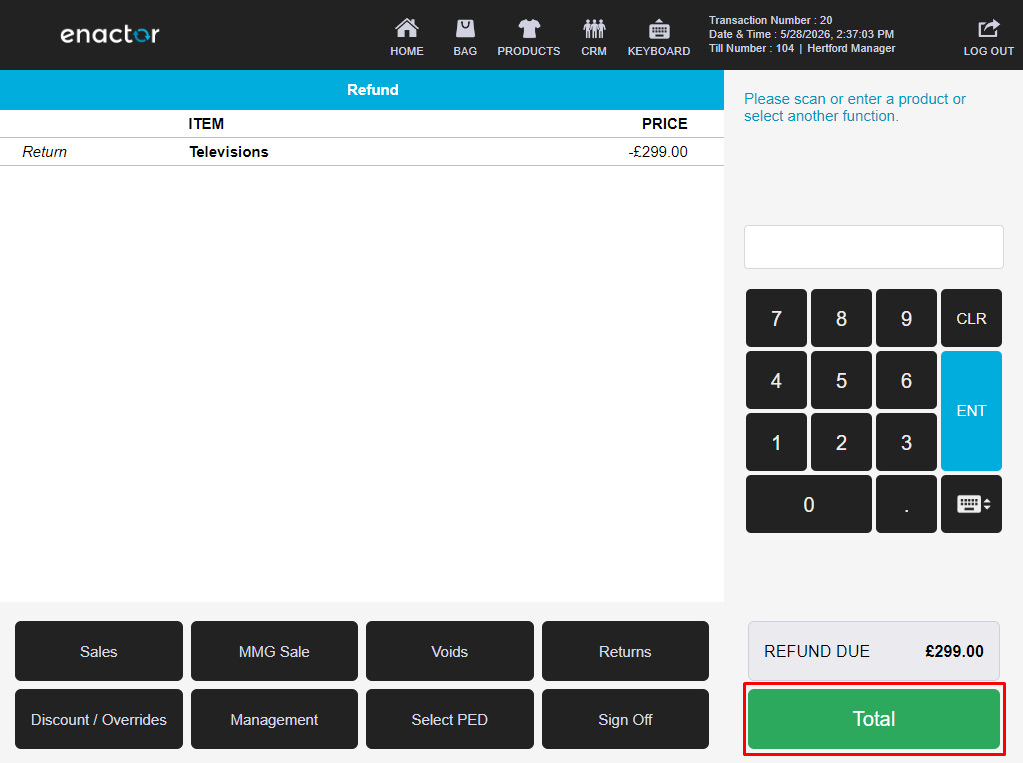
An Item Return allows the operator to return a particular item in a transaction. This governs how manual returns (also referred to as non-receipt returns) are handled at the POS.
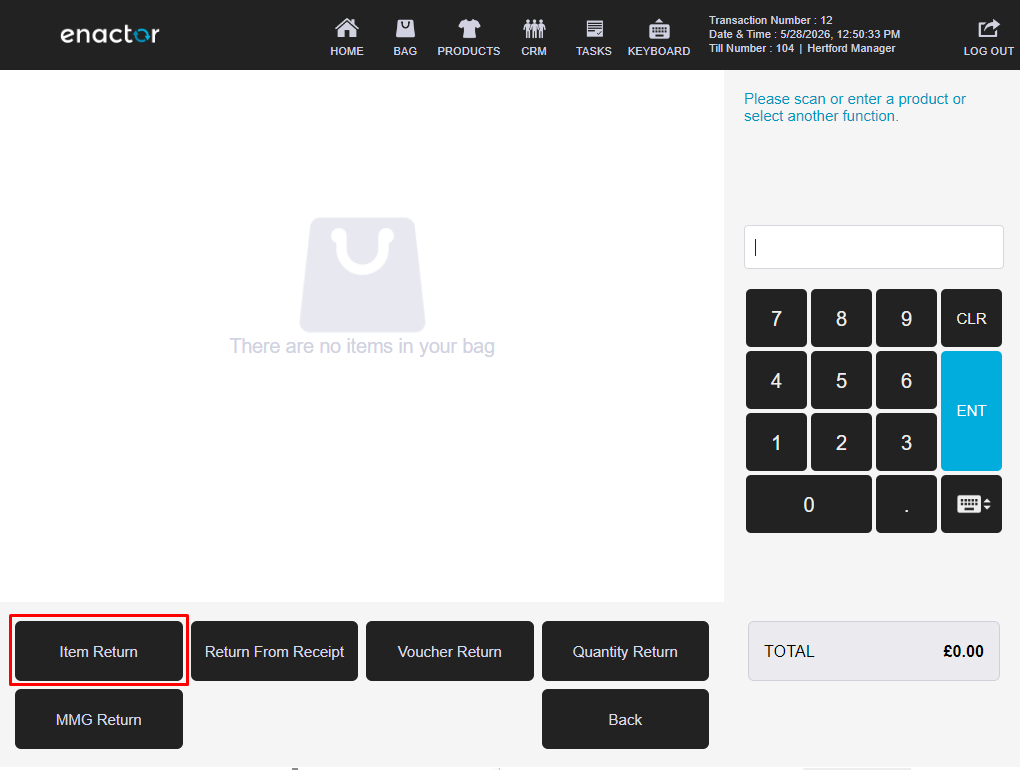
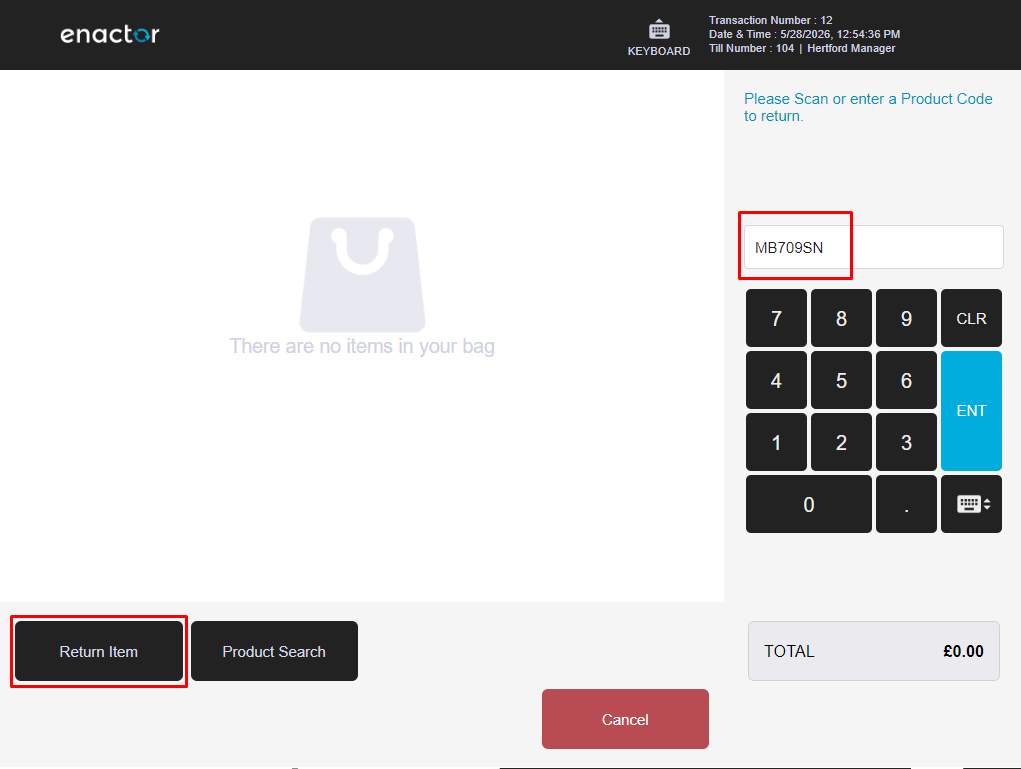
Select Return option as shown on screen.

Select Item Return from the Returns sub-menu. The operator may either scan the barcode if available, enter the product code, or use product search to identify the product that requires returning.
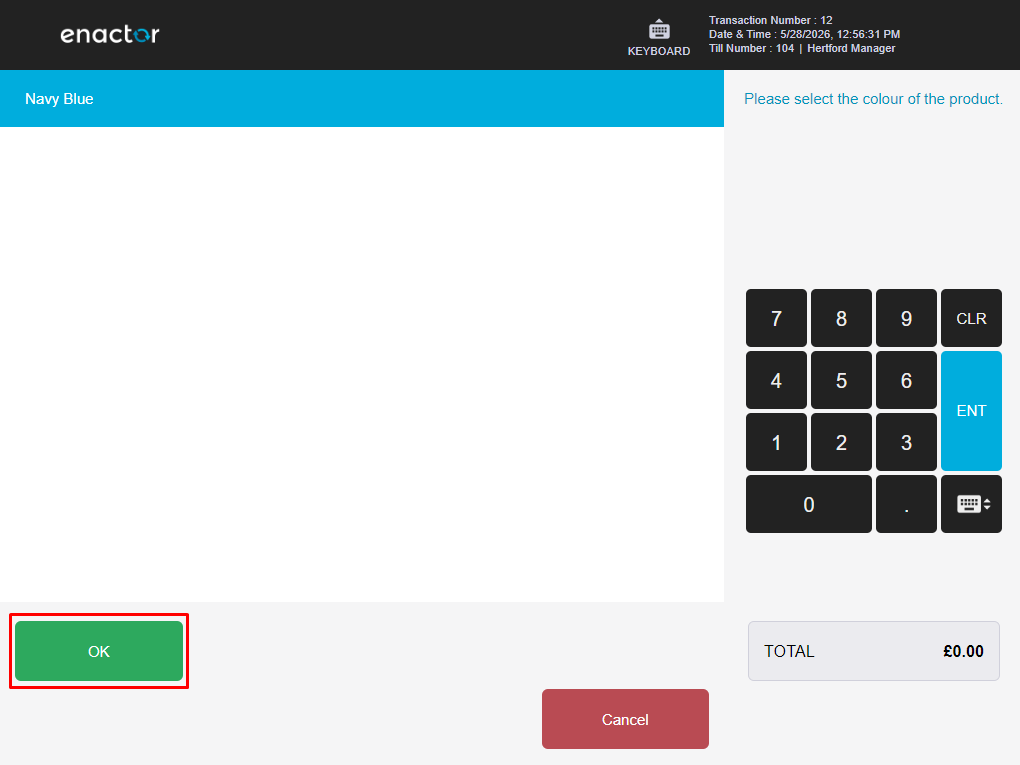
The operator will be prompted to select product details such as Colour and Size. On selecting the accurate details, press OK to proceed.

The operator can then select the applicable return reason and press OK to apply the Item Return to the selected product.

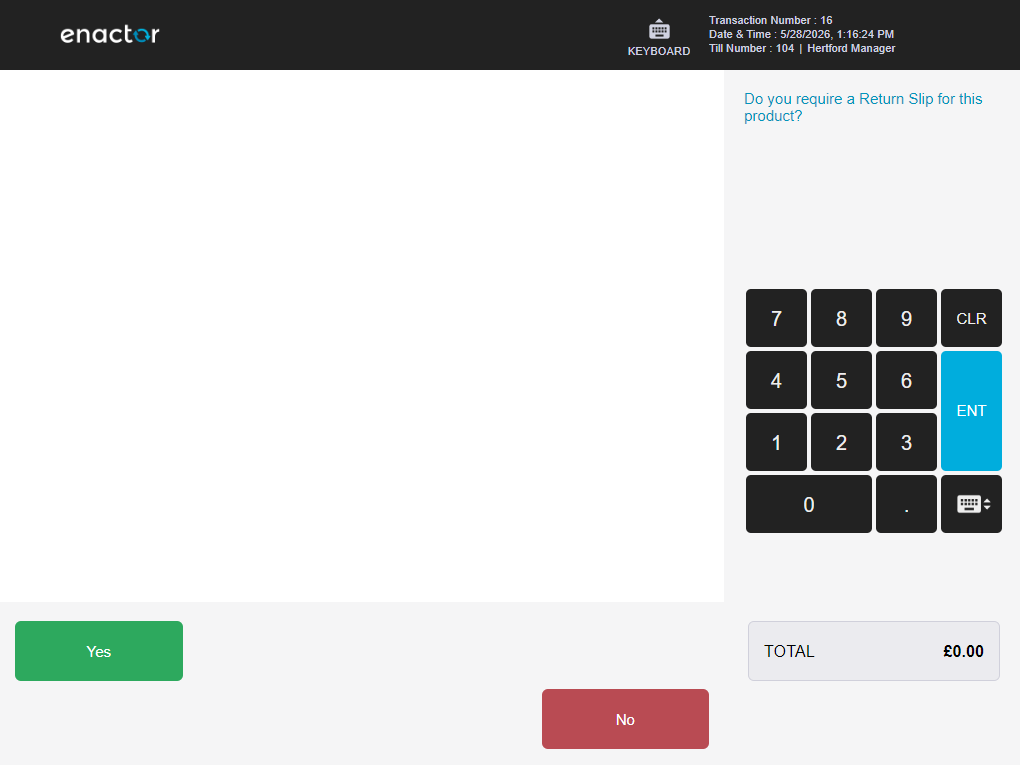
If the return reason is configured to offer a return slip, the operator will be prompted to confirm whether to print one.
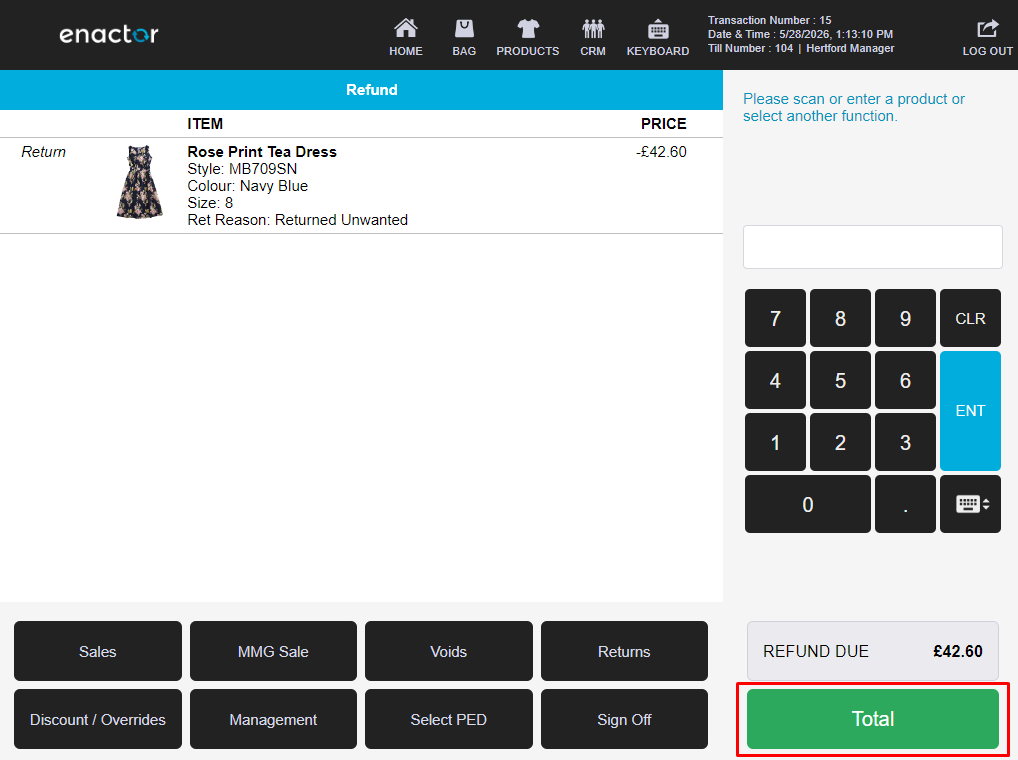
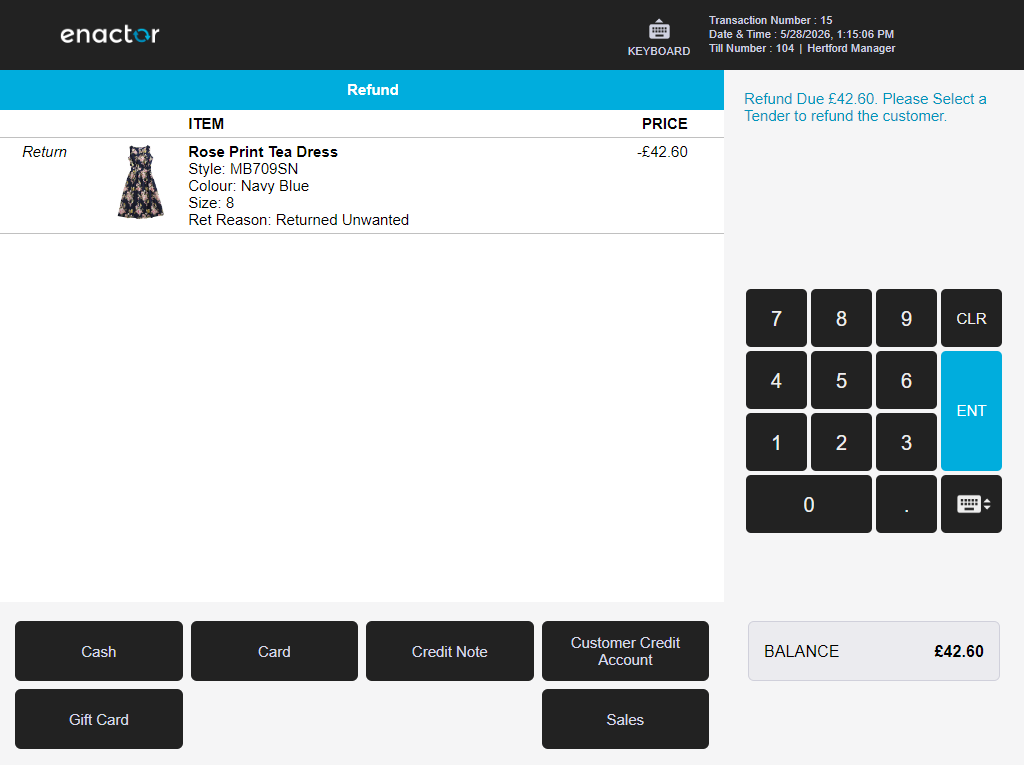
On confirmation of the balance due, select the applicable tender to refund the customer and complete the Item Return.
Return From Receipt
A Return From Receipt allows the operator to return one or more items from an original receipt. The return is processed by locating the original transaction and selecting items from it.
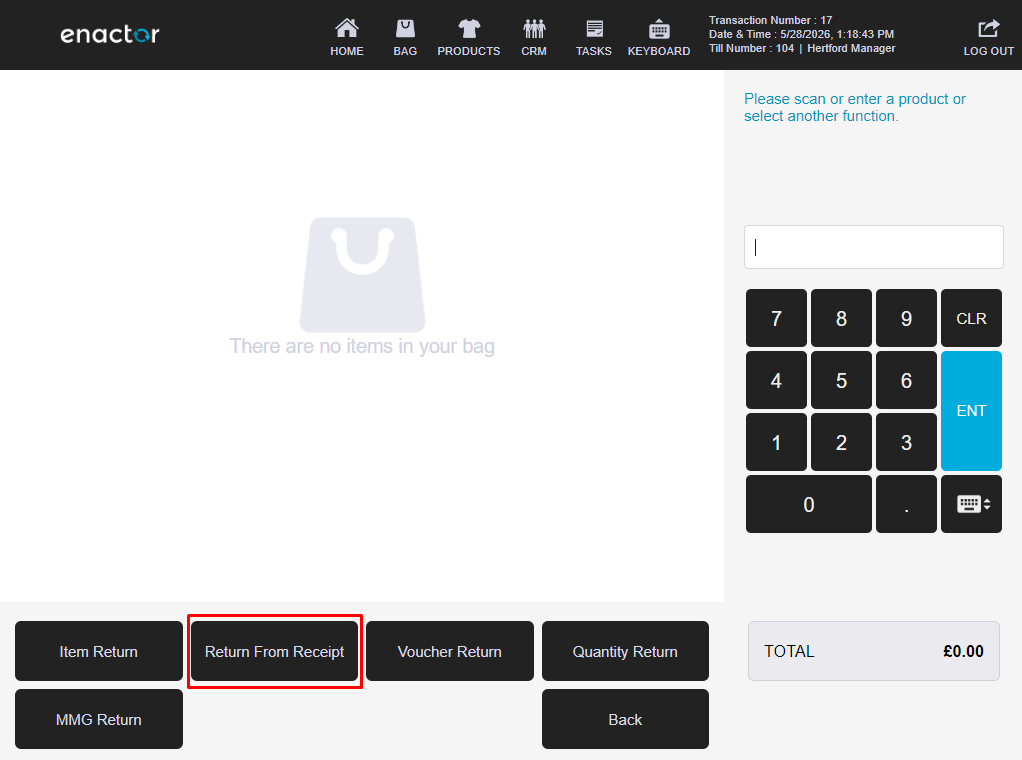
Select Return From Receipt from the Returns sub-menu.
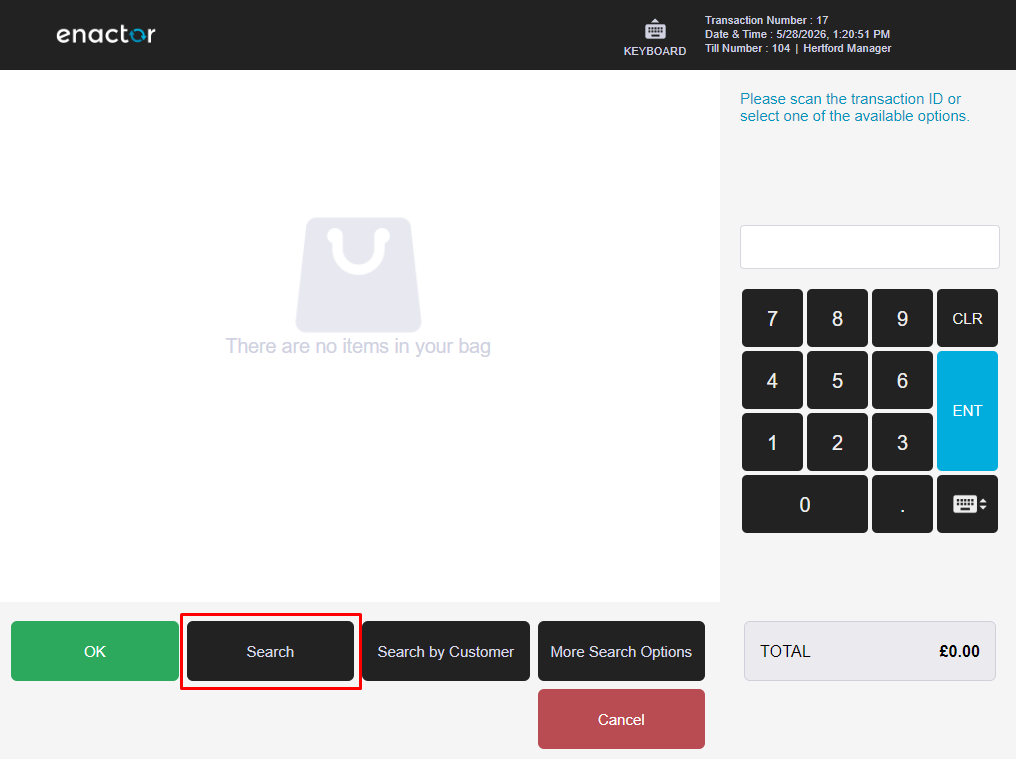
The operator may either scan the receipt barcode, enter the transaction details, or select Search to locate the original transaction manually.
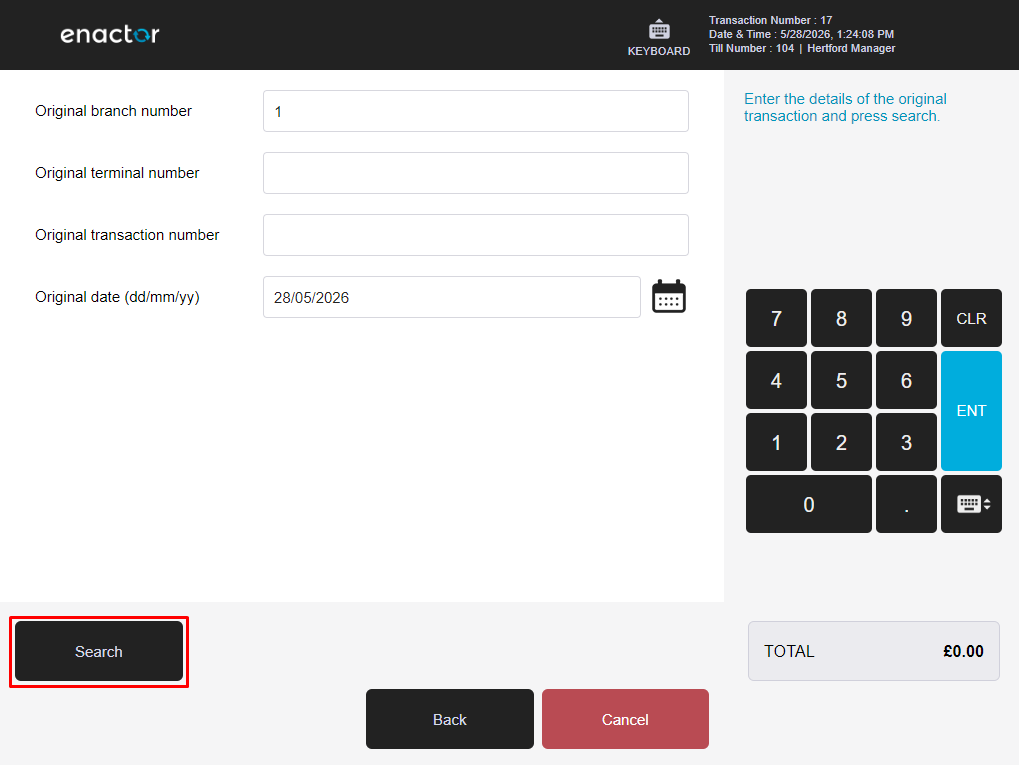
Enter the transaction details and select Search.
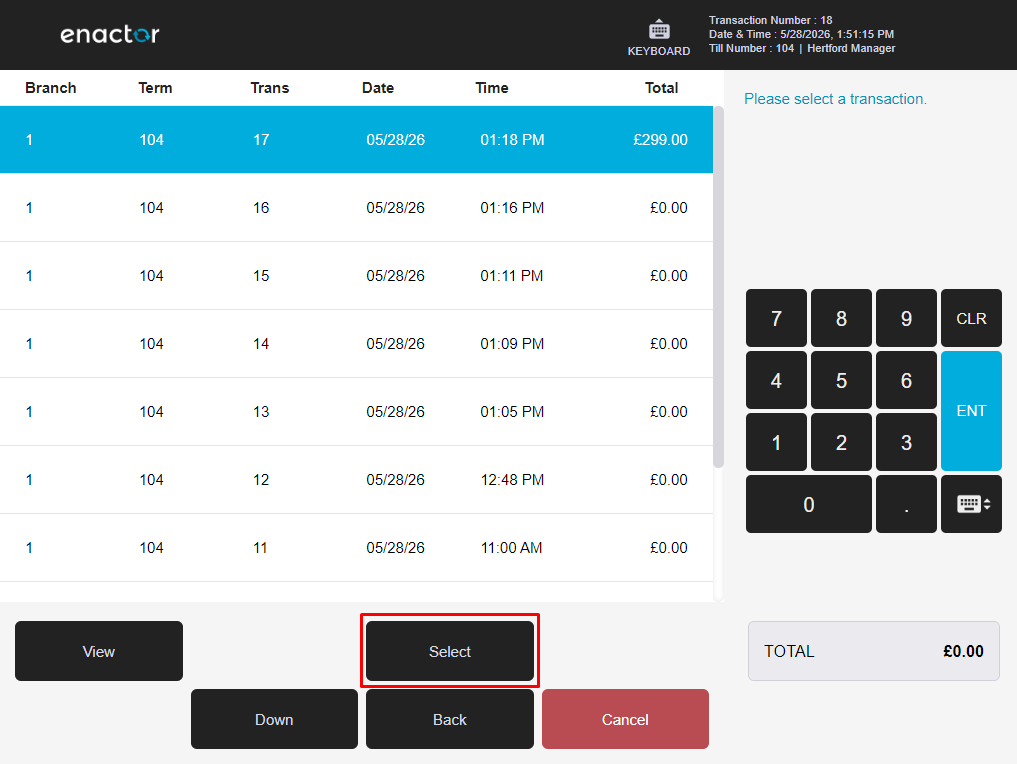
Select the transaction from the list using the Select button.
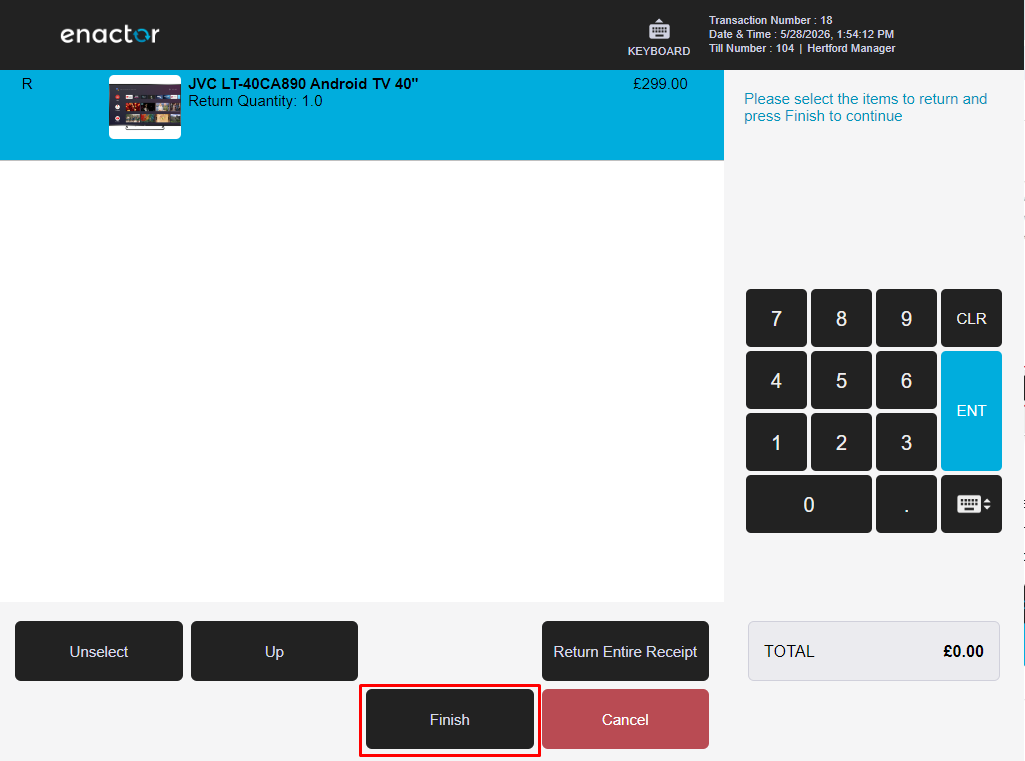
All items from the original transaction are displayed. Select the item or items to return - selected items will be highlighted. To return the entire transaction, press Return Entire Receipt. Press Finish to proceed.
Select the applicable return reason and press OK to apply the Receipt Return.

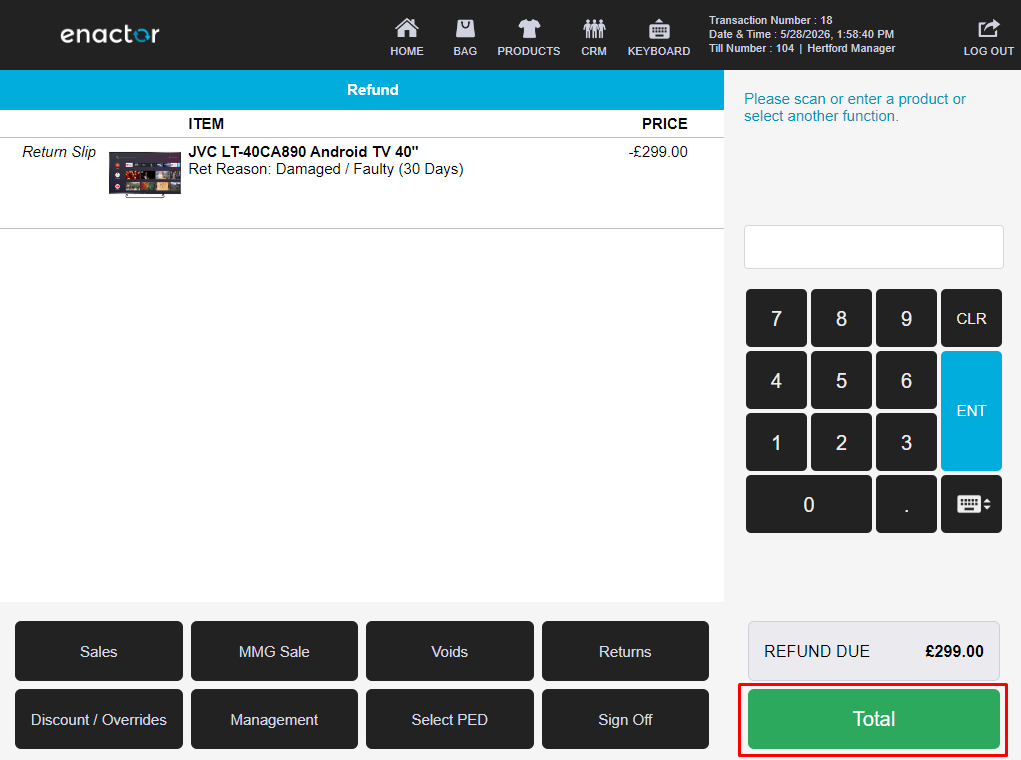
Press Total to confirm the total refund amount due.
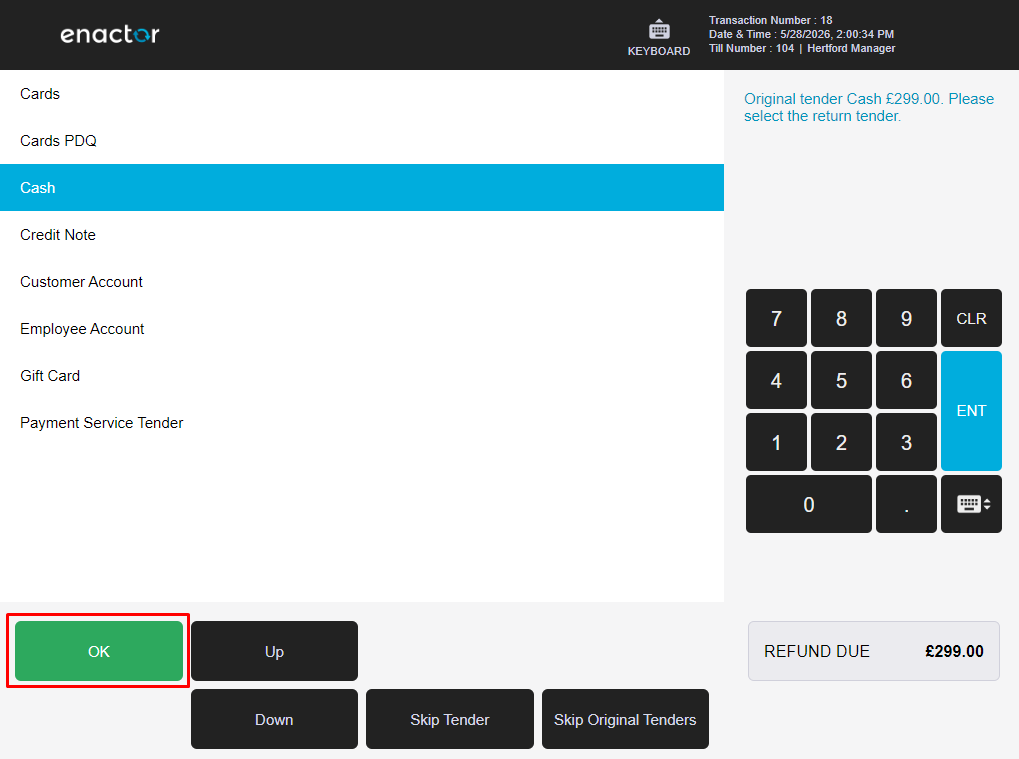
Select the applicable tender type and press OK to proceed. Based on the tender chosen, the operator will be prompted to complete the receipt return.
MMG Return
An MMG Return allows the operator to return a merchandise group item without scanning the original barcode. The operator selects the merchandise group and enters the refund price.
Only operators with the enactor.pos.AllowUnknownProductReturn privilege can perform MMG Returns.
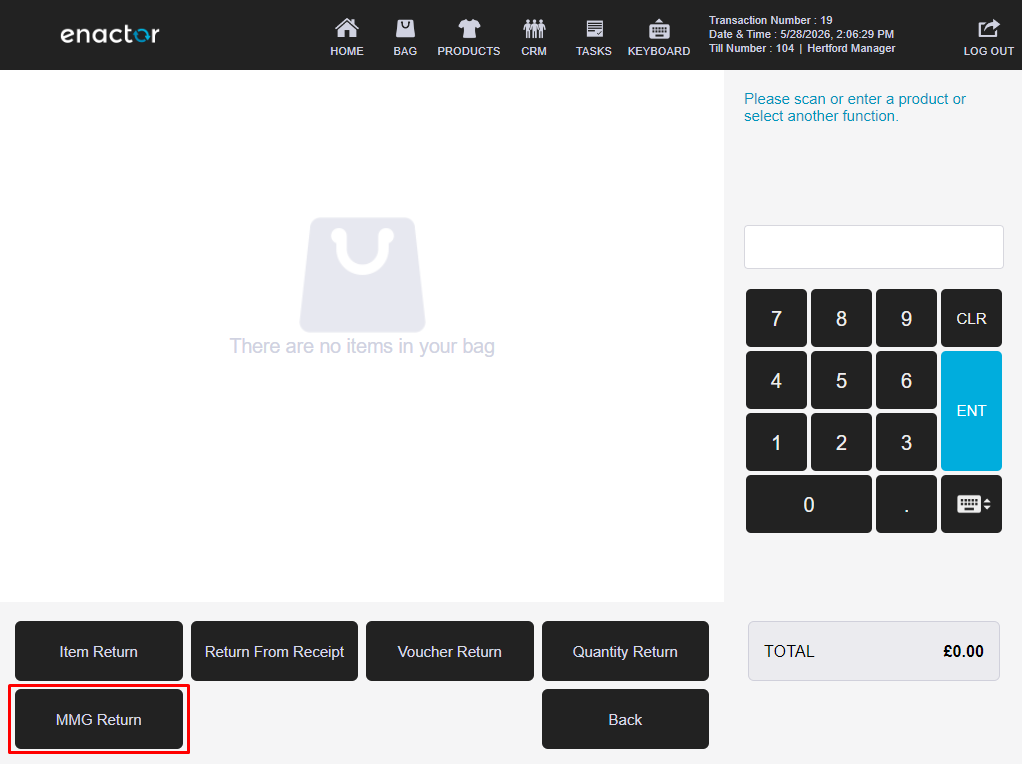
Select MMG Return from the Returns sub-menu.
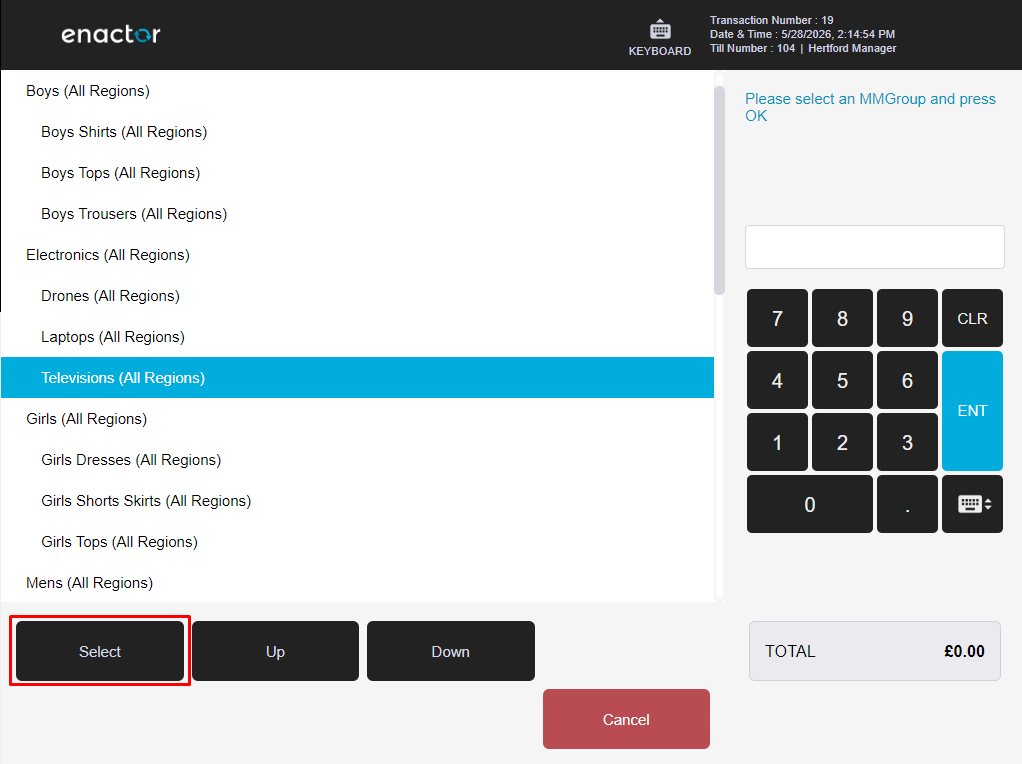
Select the merchandise group that the returned item belongs to and press OK.
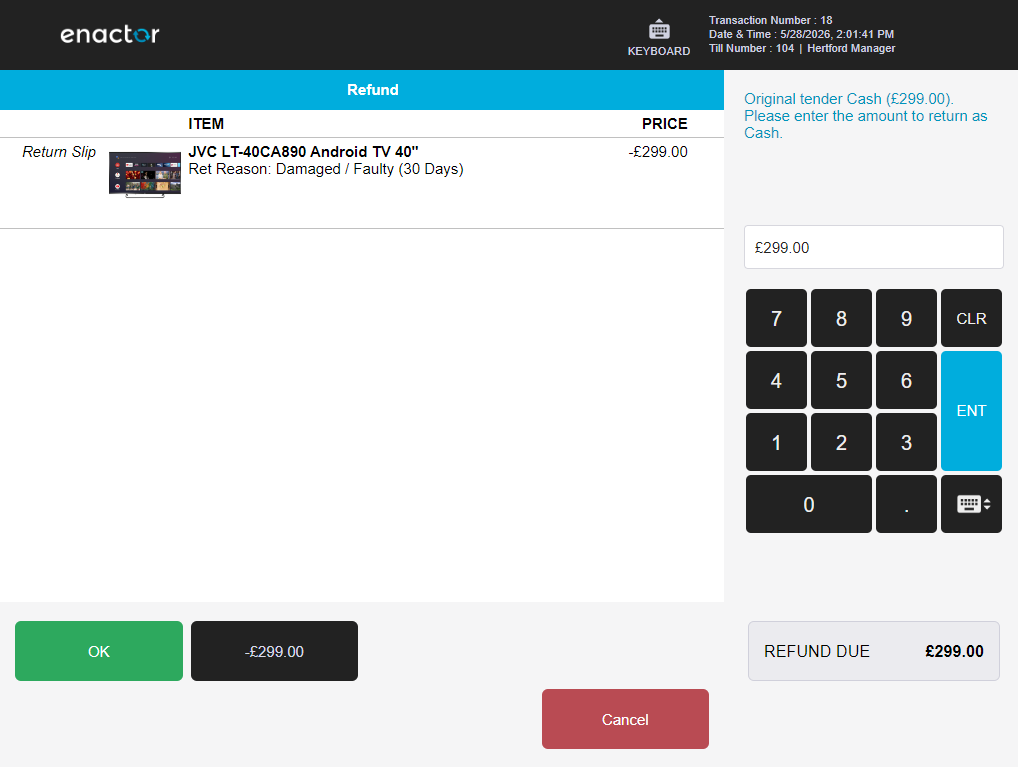
Enter the price of the item being returned and press OK to proceed.

Complete the MMG Return by confirming the refund amount due and selecting the applicable tender type.