How-to Guide - Configuring Tax - US
Introduction
The purpose of this guide is to show how to configure the Enactor Estate Manager and POS to calculate tax correctly. This guide uses US sales tax as the model, but other tax regimes can equally be supported with the appropriate configuration.
The Enactor Retail Application includes a configurable Tax Engine that is fully capable of supporting global estates. The native tax configuration accommodates regional taxation rules by defining Tax Schemes in which different Tax Rates may apply alternatively or in combination.
To support US tax, the following elements must be defined:
- Tax Regions - hierarchical groups representing tax jurisdictions
- Tax Schemes - containers for all configuration settings related to a jurisdiction
- Tax Rates - the individual percentage (or table-based) rates of tax
- Tax Groups - categories of product that attract different levels of tax
- Tax Group Tax Methods - mappings that bring Tax Groups, Tax Schemes, and Tax Rates together
- Location tax settings - applying the Tax Region and Tax Scheme to each store
- POS Terminal settings - optional print configuration for tax breakdowns on receipts
Overview
The following steps are required to configure US tax:
- Tax Region Configuration
- Tax Scheme Configuration
- Tax Rate Configuration
- Tax Group Configuration
- Product Configuration
- Tax Group Tax Method Configuration
- Location / POS Terminal Configuration
Prerequisites
Before starting, ensure the following resources are in place:
- Enactor Estate Manager
- Enactor POS (configured within the US region, connected to the Estate Manager)
- Standard configuration including Base Configuration and US Retail (due to the complexity of US sales tax, additional configuration will almost always be required even when using the US Retail configuration set)
- Example product data to use as models
Resources
The following resources are required:
- Enactor Estate Manager
- Enactor POS terminal configured in the US region
Prior Training / Experience
You should be familiar with the following before attempting this configuration:
- Estate Manager configuration
- Enactor configuration concepts, including Locations, POS Terminals, and Products
- Data broadcasting
- Standard POS sales processes
Configuration Steps - Tax Region Configuration
Tax Regions are hierarchical groups of type Tax Region, closely integrated with the Regions hierarchy. Each Tax Region Hierarchy is associated with a Region. Regions are also Groups.
To create or modify groups of type Tax Region, access the Group Hierarchy Maintenance page and select the Tax Region Group Type. To create a new hierarchy, select Create New Tax Region Hierarchy. On the initial create page, specify the Hierarchy ID, select a Region from the Regions dropdown to associate it with, then select Create.
Tax Regions allow management of tax rate and law changes in different jurisdictions. When dealing with US sales tax, there is typically a 1:1 relationship between Tax Regions and Tax Schemes.
Navigate to Group Hierarchy Maintenance using the Search or the path:
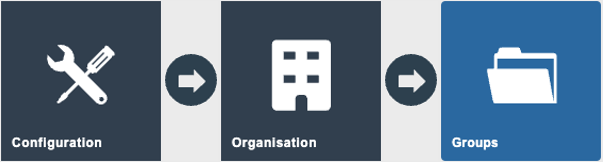
Main Menu > Configuration > Organisation > Groups
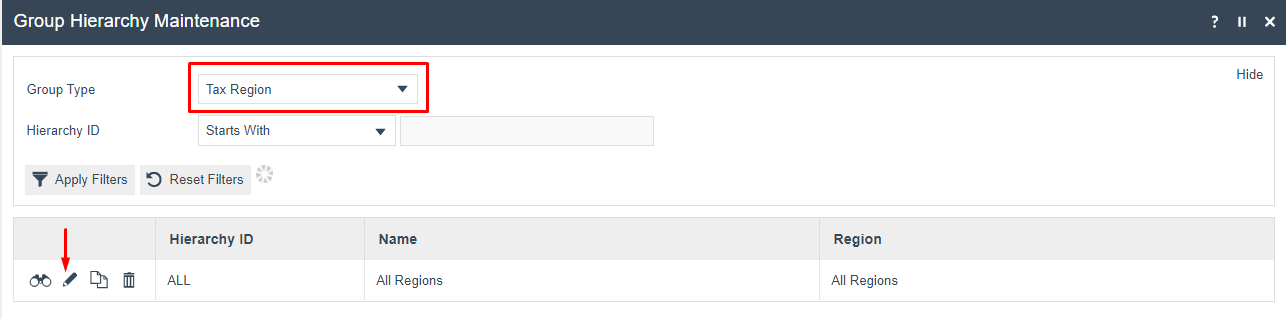
Select the Group Type of Tax Region from the drop-down. A single Tax Region hierarchy is usually used for all regions. Click the Edit icon next to the existing ALL hierarchy.
This displays the regions within the hierarchy. Select ALL (so it appears bold) and click Add Tax Region.

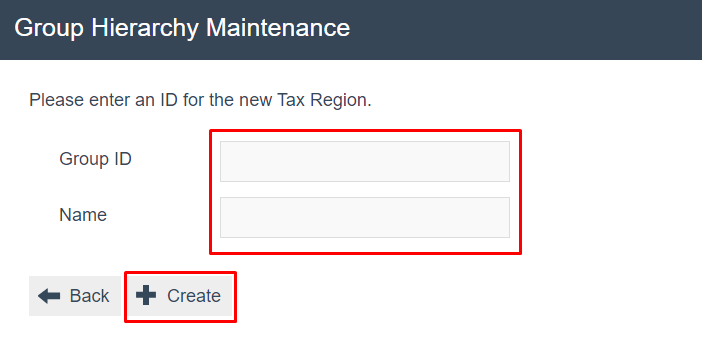
Set the Group ID to US and the Name to United States, then click Create.
The hierarchy then shows the new US group in the list.

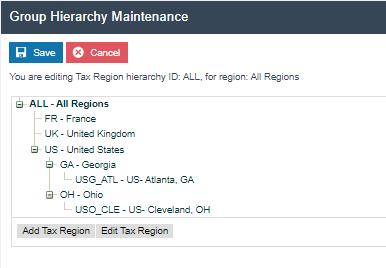
Repeat these steps until the region is fully built down to the jurisdiction level. For example, a hierarchy for US states and local jurisdictions would appear as follows:
This completes the Tax Region configuration.
Configuration Steps - Tax Scheme Configuration
The Tax Scheme is an independent entity specifically associated with a set of Tax Rates. A Tax Scheme will be created for each tax jurisdiction / Tax Region.
A Tax Rate should not be associated with multiple Tax Schemes unless it is intended that any change to the rate should apply to all associated Tax Schemes.
Navigate to Tax Schemes Maintenance using the Search or the path:
Main Menu > Configuration > Financial > Tax Schemes
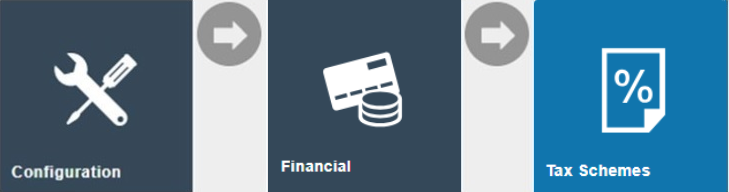
The set of existing Tax Schemes is shown.
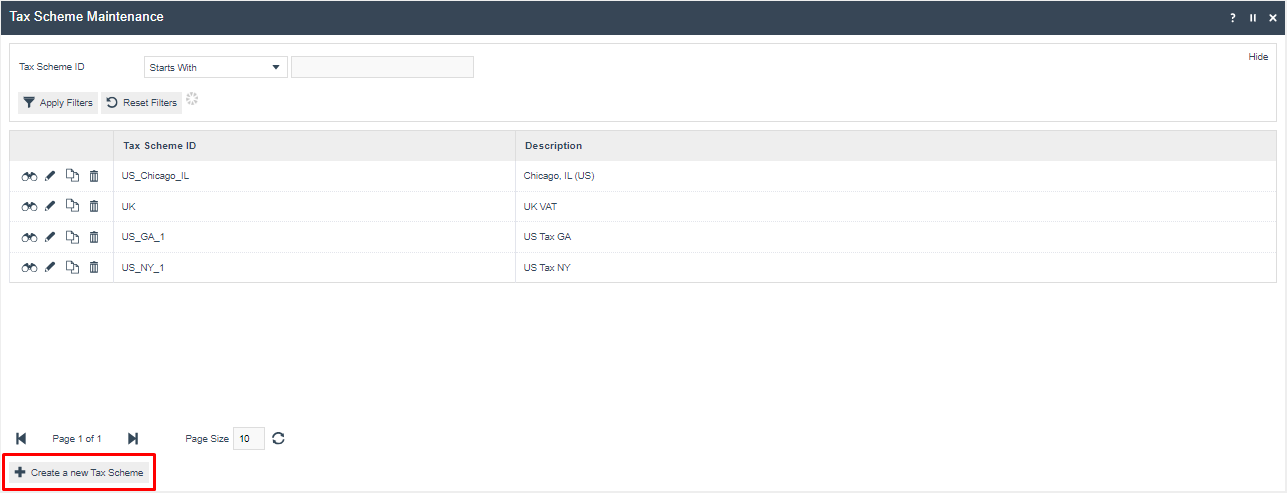
Click Create a New Tax Scheme. Enter a scheme ID that can be easily recognised. For this example, a Tax Scheme for the Atlanta, GA Tax Region is being created using the ID USG_ATL.
You are then presented with the Tax Scheme details page. Set the appropriate values on the General tab as follows:
| Configuration | Description |
|---|---|
| Description | Alphanumeric; maximum 30 characters. A user-friendly, meaningful description by which users will identify the Tax Scheme. The locale is selected from a dropdown list of all configured Locales. |
| Multiple Tax Rates Allowed | Checkbox. If checked, indicates that multiple tax rates may be applied from this Tax Scheme. When defining the Tax Group Tax Method elements used to apply tax, only one of the Tax Rates applicable to the Tax Scheme may be specified unless this option is checked, allowing the Tax Scheme to apply multiple Tax Rates. |
| Prices Include Tax | Checkbox. If checked, indicates that prices normally include tax. Otherwise, tax is shown as a separate identified item on receipts. |
| Remove Tax On Sale | Checkbox. If checked, indicates that the tax portion of the price will be removed when the item is sold. This property is now redundant but has been used in tax regimes where a standard Sales Tax is overridden if the applicable Tax Scheme is found not to apply. |
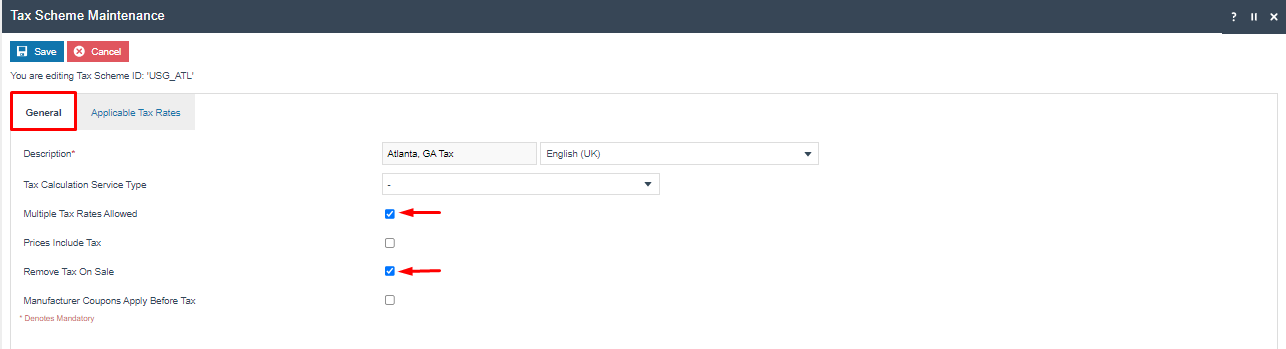
Click Save to apply the changes.
After the Tax Rates have been created (see the Tax Rate Configuration section below), return to Tax Scheme Maintenance and open USG_ATL. Select the Applicable Tax Rates tab.
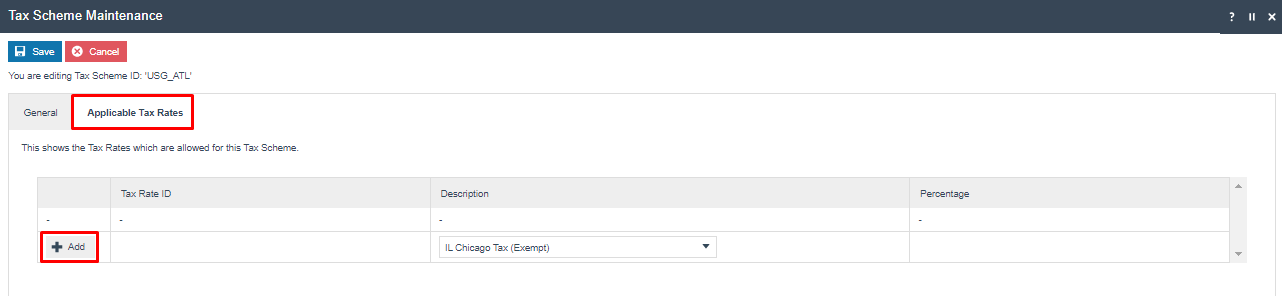
Select each rate from the dropdown and click Add. Repeat until all eight Atlanta, GA rates are added to the scheme.
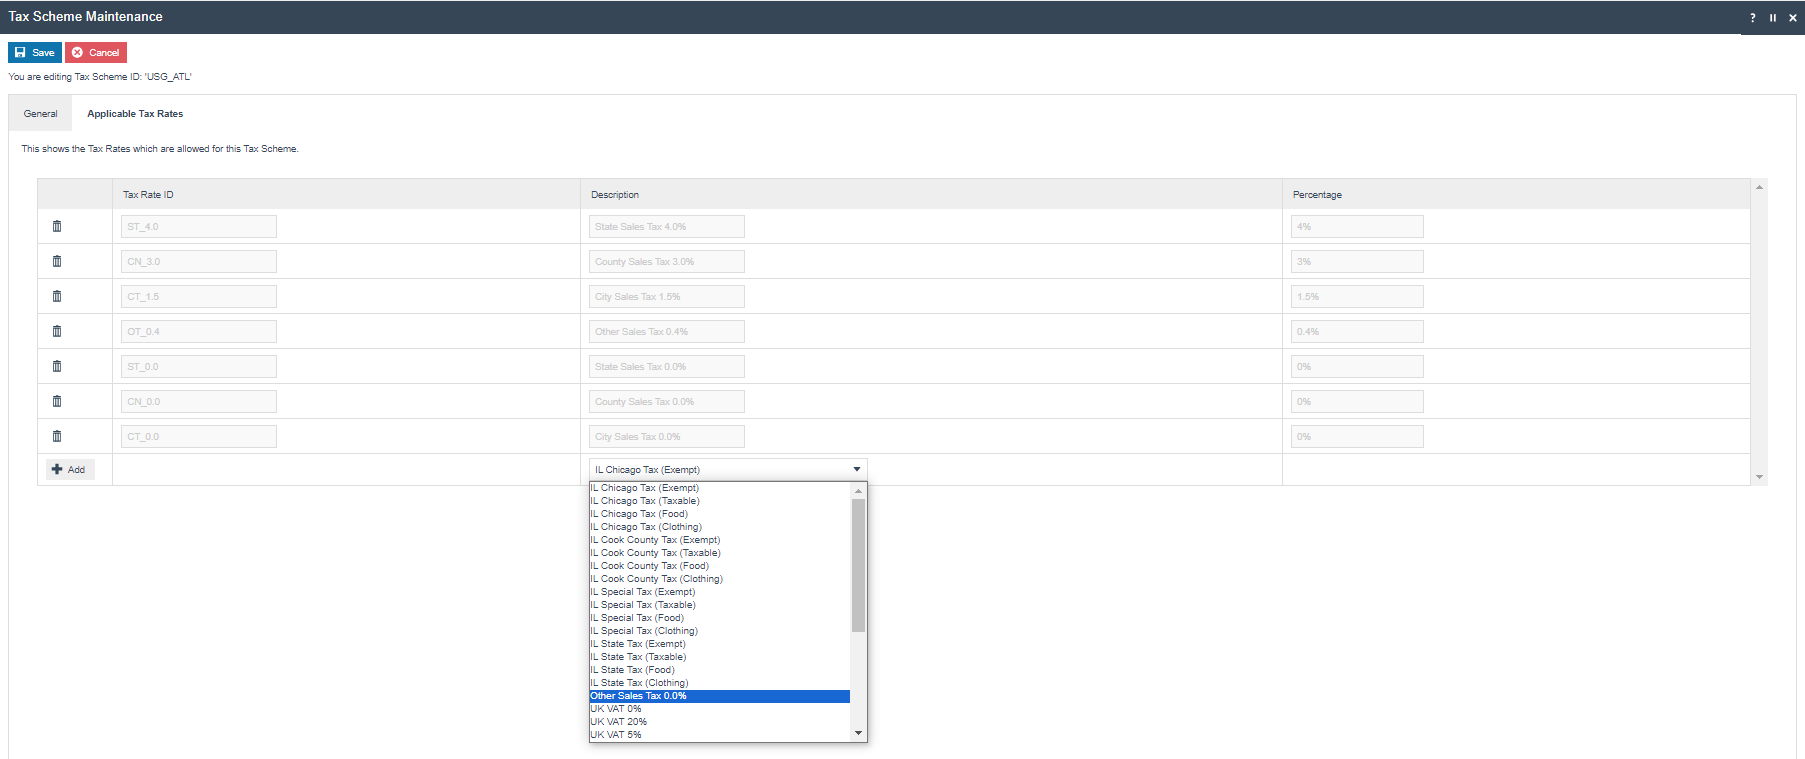
Click Save to apply the changes.
This completes the Tax Scheme configuration.
Configuration Steps - Tax Rate Configuration Approach
When configuring tax rates for US retailers, there are two approaches:
Generic Tax Rates (e.g. "4.0% State Sales Tax") minimise the number of rates that need to be created. For example, five US states share Georgia's 4.0% state sales tax rate. The benefit increases at the county level. Generic rates also streamline new location setup, as the appropriate rate may already exist.
Jurisdiction-specific Tax Rates (e.g. "4.0% State Sales Tax - Georgia") increase the number of rate entries but reduce ongoing maintenance effort. For example, if Georgia increased its state rate to 4.5%, only a single change is needed - rather than updating every jurisdiction individually. The effective date feature on Tax Rates also simplifies coordination of updates and management of tax-free holidays.
The best approach depends on the retailer's number of locations, number of jurisdictions, and any tax rate integration capabilities. Some integrations provide jurisdiction-specific rates; others provide generic rates.
The examples in this guide use the generic approach. The general concepts apply equally to both methods.
This completes the Tax Rate Configuration Approach overview.
Configuration Steps - Tax Rate Configuration
Tax Rates are the individual percentage rates of tax eligible to be applied within a Tax Scheme. The full set of possible rates must be defined - including all reduced-rate and zero-rate variants - for all products sold within a jurisdiction.
For example, the Atlanta, GA location requires State, County, City, and Other tax rates for fully taxed, reduced-tax, and tax-exempt merchandise.
Navigate to Tax Rate Maintenance using the Search or the path:
Main Menu > Configuration > Financial > Tax Rates
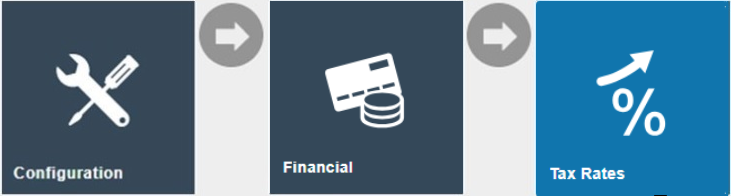
The list of currently configured Tax Rates is shown. Each rate has an effective date. It is possible to define multiple rates with the same ID but different effective dates; the application uses the applicable rate with the most recent past effective date.
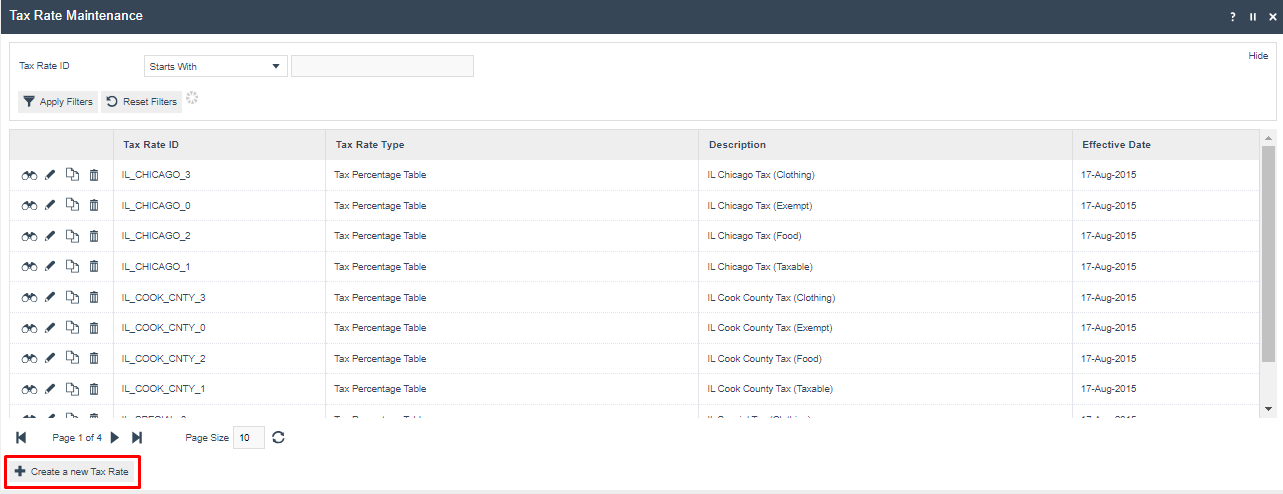
Click Create a New Tax Rate. The initial Tax Rate Maintenance screen is shown.
| Configuration | Description |
|---|---|
| Tax Rate Type | Defines how the tax is calculated. Use VAT for most jurisdictions where tax is a simple percentage of the selling price. Use Tax Value Table or Tax Percentage Table for jurisdictions with complex rules where the rate depends on the value of the transaction. Composite rates are used when multiple rates apply to each item. See Appendix A for details on the alternative Tax Rate types. |
| Tax Rate ID | Any unique string identifying the rate. |
| Effective Date | The date from which this rate applies. For generic rates, an effective date is not required. |
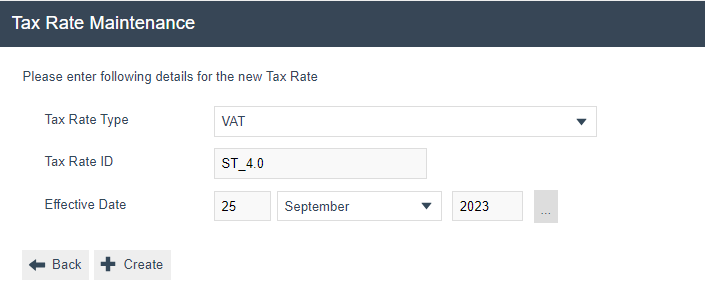
After clicking Create, the Tax Rate details page is shown. Set the following values on the General tab:
- Description: a meaningful description, e.g. "State Sales Tax 4.0%"
- Display Tax Code: displayed on the POS receipt. For US retailers, displaying the tax type and percentage is common, e.g. "4.0% State"
- Percentage: set to the applicable percentage, e.g. 4%
- Currency: US Dollars
- Tax Authority and Fiscal Tax Rate Reference: not required for US tax
Click Save, then repeat for the remaining Atlanta, GA rates. Eight rates are required to support the Atlanta, GA location:
| Rate ID | Rate Name | Percentage | Applies To |
|---|---|---|---|
| ST_4.0 | State Sales Tax 4.0% | 4% | Most products |
| CN_3.0 | County Sales Tax 3.0% | 3% | Most products |
| CT_1.5 | City Sales Tax 1.5% | 1.5% | Most products |
| OT_0.4 | Other Sales Tax 0.4% | 0.4% | Most products |
| ST_0.0 | State Sales Tax 0.0% | 0% | Grocery and state-exempt items |
| CN_0.0 | County Sales Tax 0.0% | 0% | County-exempt items |
| CT_0.0 | City Sales Tax 0.0% | 0% | City-exempt items |
| OT_0.0 | Other Sales Tax 0.0% | 0% | Other exempt items |
After all eight rates are created, return to the Tax Scheme Maintenance (see Tax Scheme Configuration above) to add these rates to the USG_ATL scheme using the Applicable Tax Rates tab.
This completes the Tax Rate configuration.
Configuration Steps - Tax Group Configuration
Tax Groups identify the categories of product that may attract different levels of tax. In the US, qualification and tax treatment can vary significantly by jurisdiction.
Tax Groups are defined using a specific Tax Group maintenance utility. They are not the same as the Groups maintenance utility used for Tax Regions.
For example:
- In Ohio, all grocery items are tax-exempt at all levels.
- In Georgia, grocery items are tax-exempt at the state level but may still be taxed at county and city level.
For this example, the following Tax Groups are used, covering categories commonly affected by tax rate variations:
| Tax Group ID | Tax Group Name | Atlanta, GA Tax Rate |
|---|---|---|
| C | Clothing | 8.9% (ST, CN, CT, OT) |
| G | Grocery | 4.9% (CN, CT, OT only) |
| M | General Merchandise | 8.9% (ST, CN, CT, OT) |
| S | Services | 8.9% (ST, CN, CT, OT) |
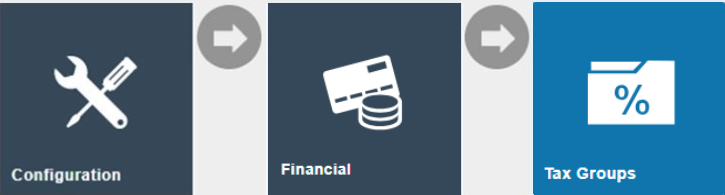
Navigate to Tax Group Maintenance using the Search or the path:
Main Menu > Configuration > Financial > Tax Groups
The list of existing Tax Groups is shown.
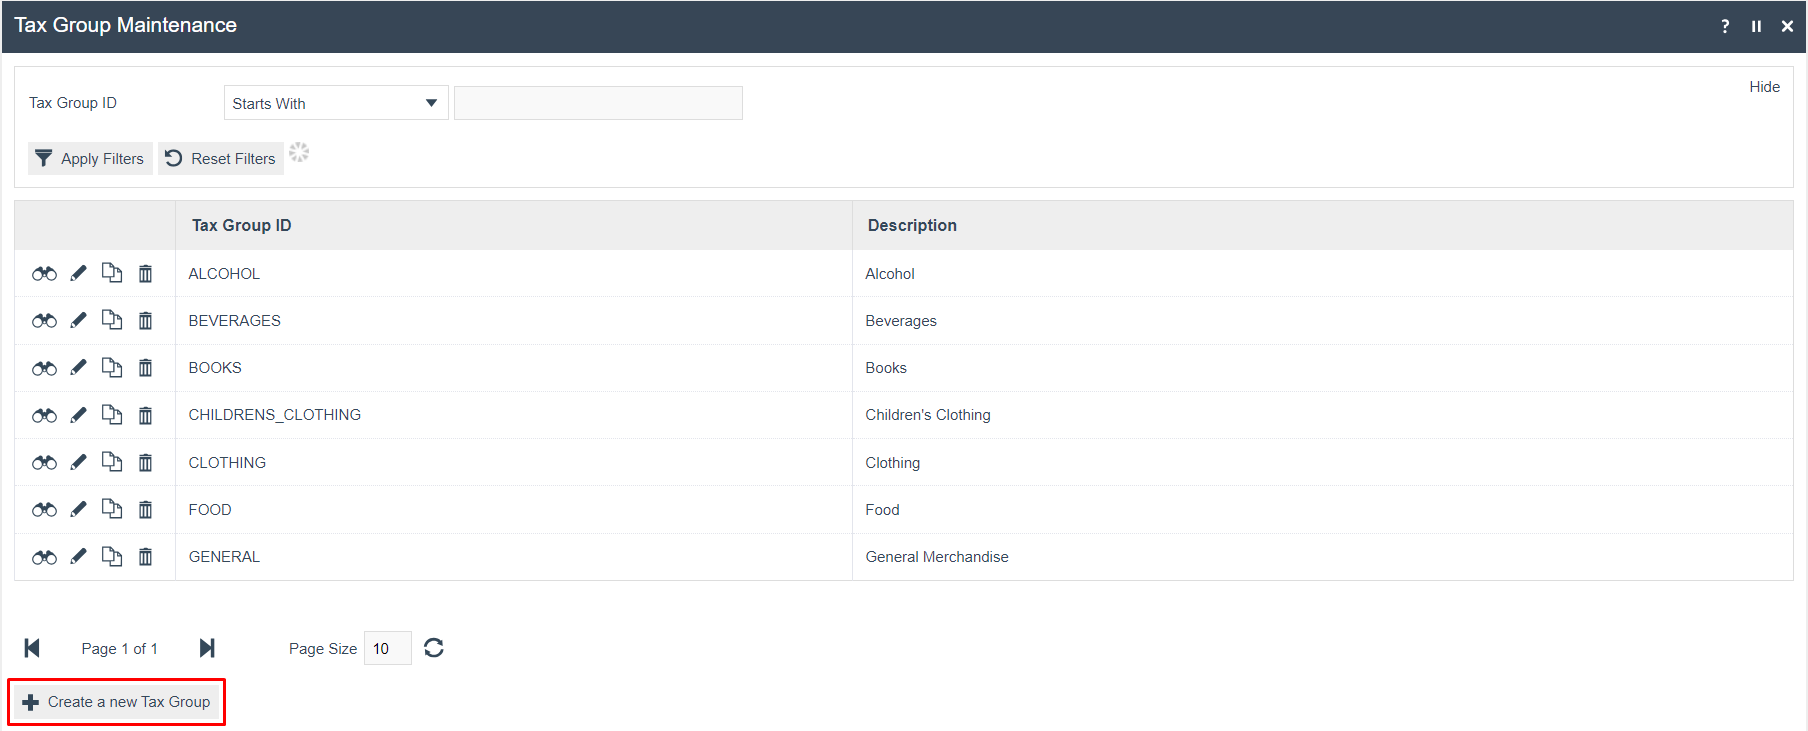
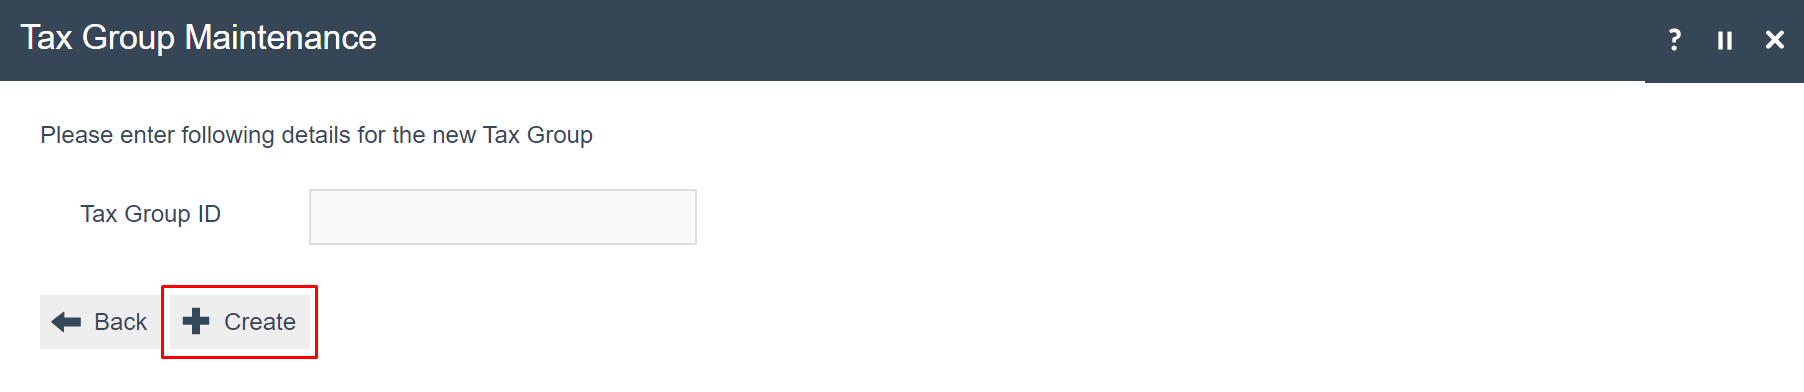
For each group required, click Create a New Tax Group, enter the ID, then click Create.
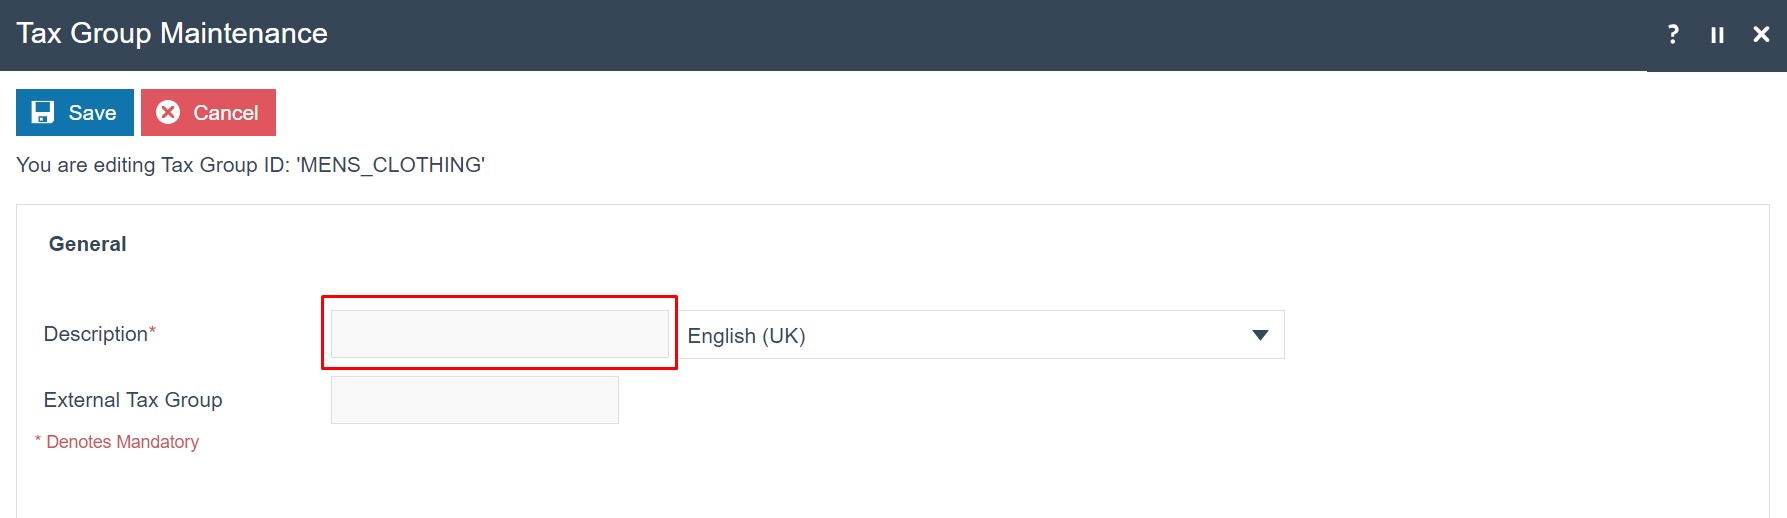
The only required data for the group is the Description. The External Tax Group field is for mapping to a third-party system if required. Enter the description and click Save.
Repeat for all required Tax Groups.
This completes the Tax Group configuration.
Configuration Steps - Product Configuration
Now that Tax Groups have been created, they must be assigned to the relevant products.
In a typical implementation, product Tax Group assignments are managed externally to Enactor - using the system of record for product data (usually an ERP or PIM) - and imported via an integration process.
Navigate to Products Maintenance using the Search or the path:
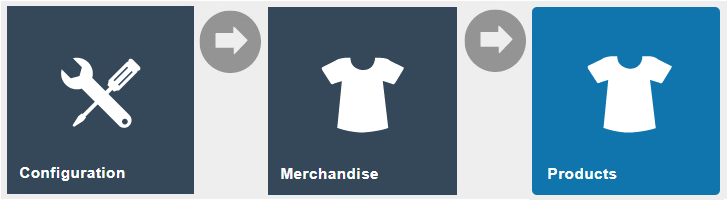
Main Menu > Configuration > Merchandise > Products
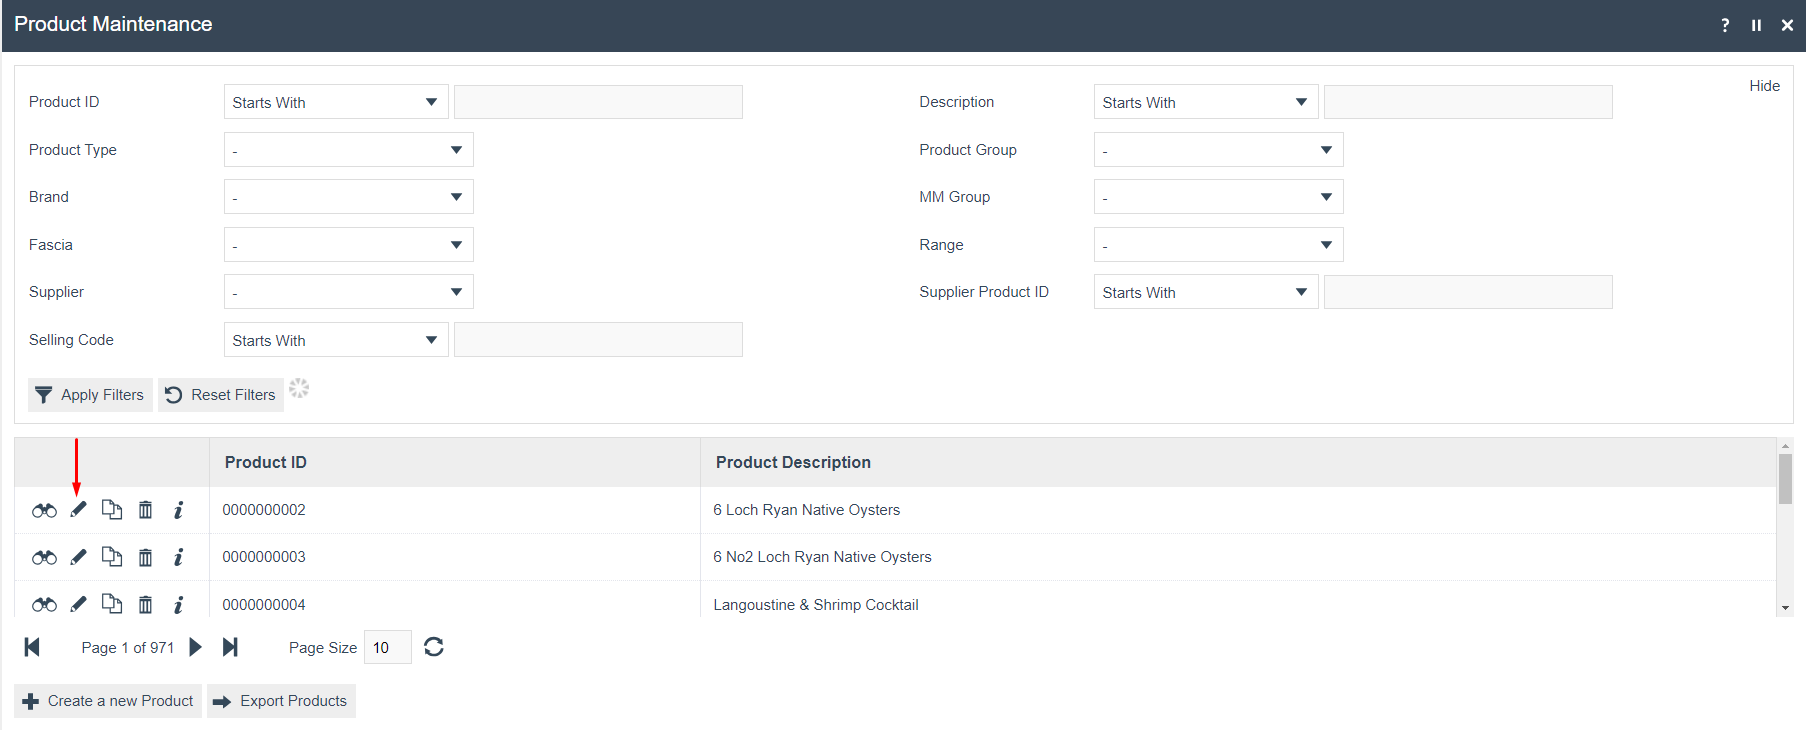
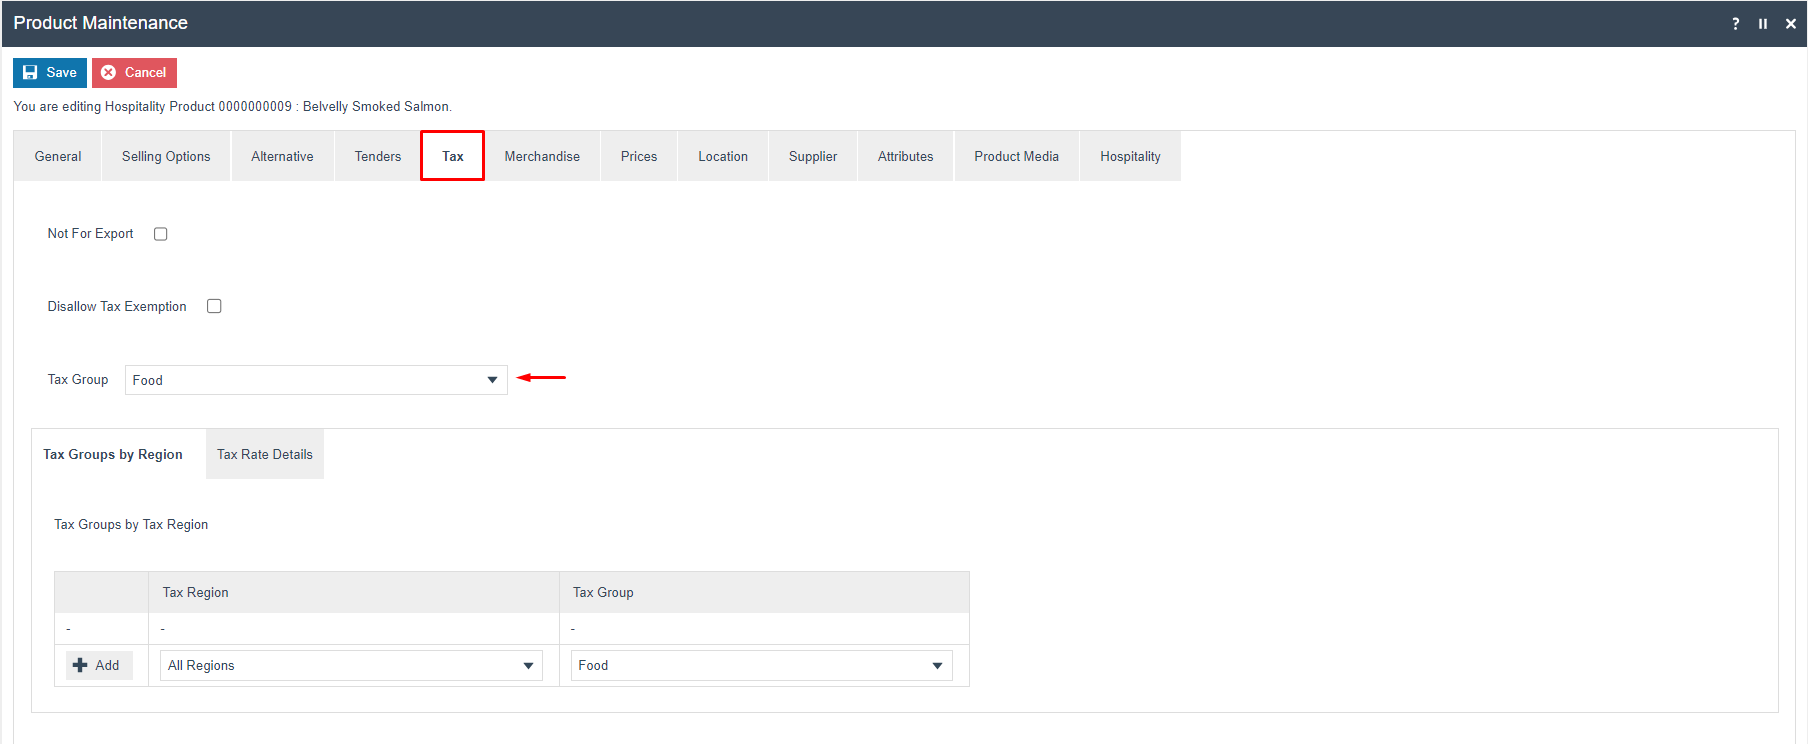
Select a product and click the Edit icon, then select the Tax tab.
| Configuration | Description |
|---|---|
| Tax Group | Selected from a dropdown of all configured Tax Groups. If defined, identifies the Tax Group with which the product is associated globally (in all Tax Regions, unless overridden in a specific Tax Region). |
Set the appropriate Tax Group and click Save. Amend additional products as required.
This completes the Product Configuration.
Configuration Steps - Tax Group Tax Method Configuration
Tax Group Tax Methods associate a Tax Group, a Tax Scheme, and a Tax Region with a specific set of Tax Rates derived from the Tax Scheme. They are defined after all required Tax Regions, Schemes, Rates, and Groups are in place.
Navigate to Tax Group Tax Methods Maintenance using the Search or the path:
Main Menu > Configuration > Financial > Tax Group Tax Methods
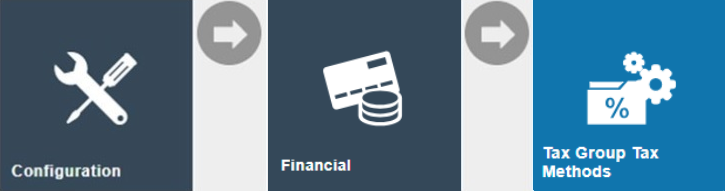
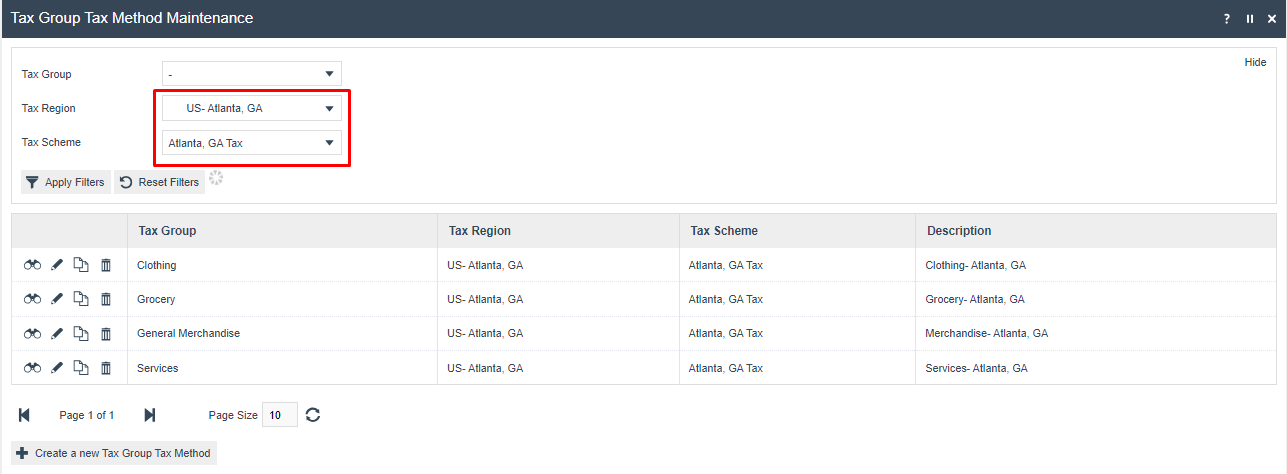
The list of all Tax Group Tax Methods is shown. Use the Tax Region filter to narrow results to a specific jurisdiction.
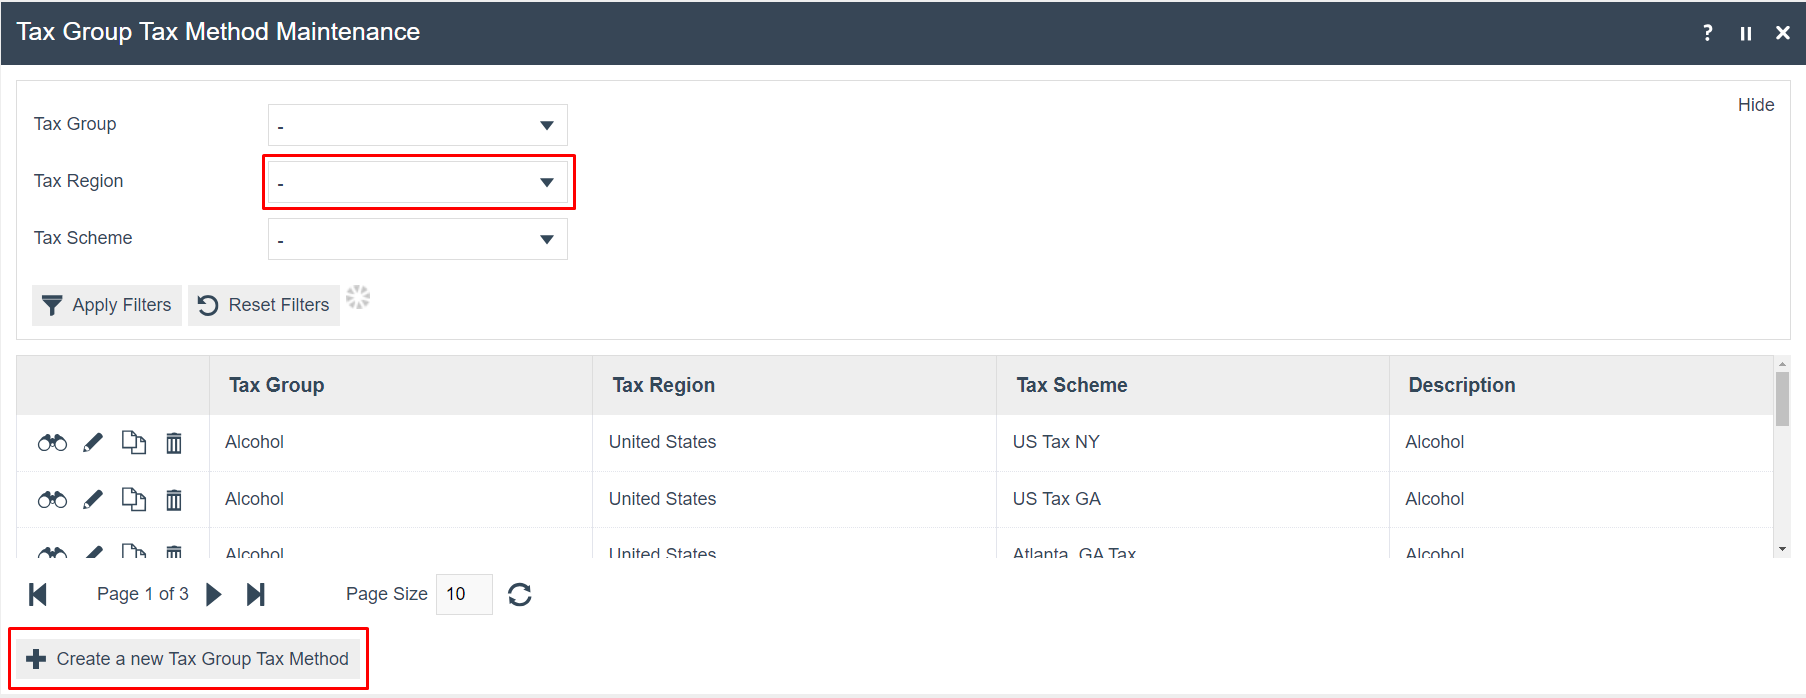
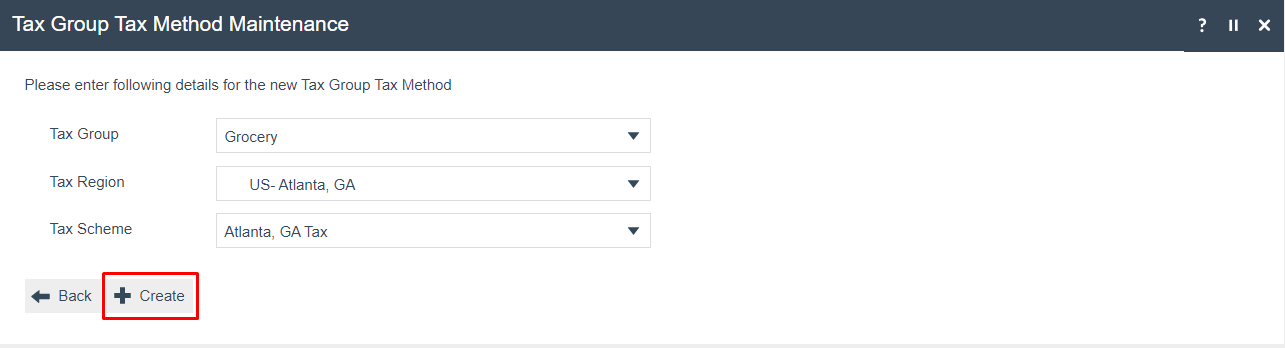
Click Create a New Tax Group Tax Method. Select the appropriate values from the three dropdowns:
- Tax Group: the product category (e.g. Grocery)
- Tax Region: e.g. US-Atlanta GA
- Tax Scheme: e.g. Atlanta GA Tax
Then click Create.
Enter a description (e.g. "Grocery - Atlanta, GA"). Then select and add the appropriate Tax Rates for the Tax Group. For Grocery products in Atlanta, GA, select the 0.0% State Tax Rate (refer to the rate table in the Tax Rate Configuration section above).
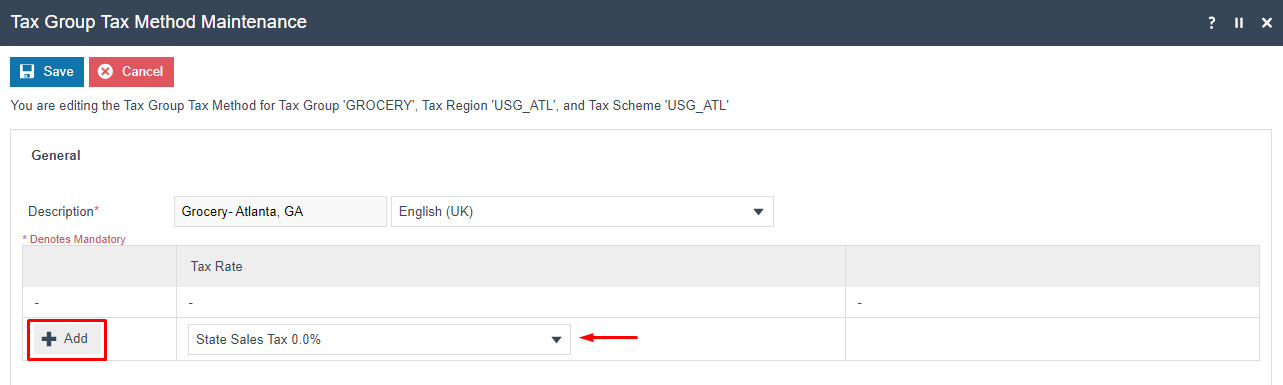
Click Add after selecting each rate. Repeat until all applicable rates for the Tax Group are added.
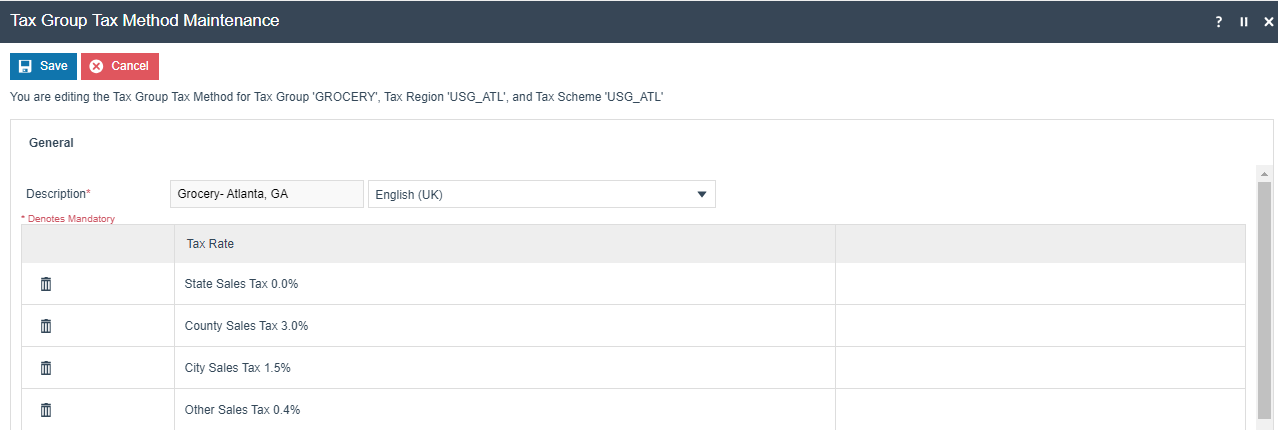
Click Save to apply the changes. Repeat for each Tax Group in the region, applying the appropriate rates for each group.
This completes the Tax Group Tax Method configuration.
Configuration Steps - Location Configuration
The final configuration step is to apply the Tax Region and Tax Scheme to each applicable location. This tells the application which tax rules to apply at each store.
Navigate to Location Maintenance using the Search or the path:
Main Menu > Configuration > Organisation > Locations
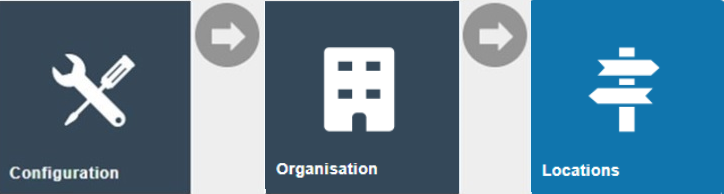
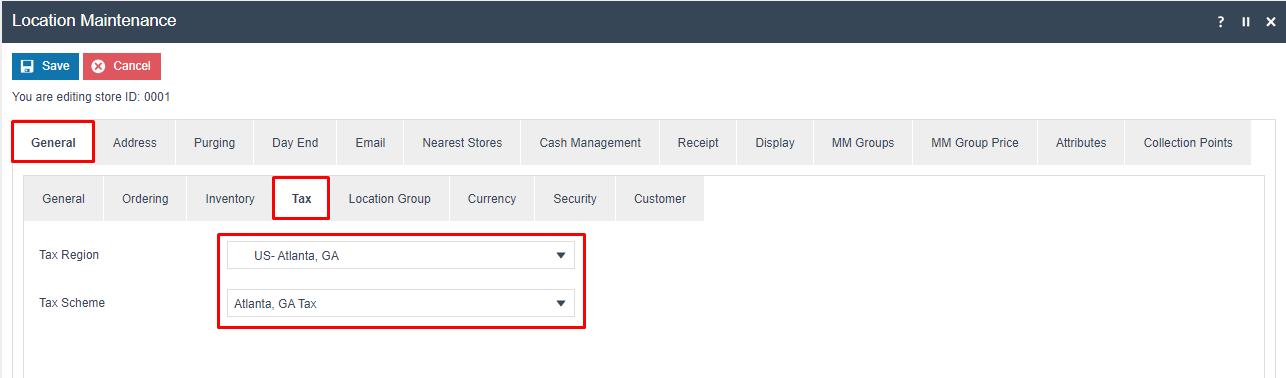
Edit the Atlanta, GA location and choose the General > Tax tab.
| Configuration | Description |
|---|---|
| Tax Region | The Tax Region for this location. Determines which Tax Group Tax Methods apply. |
| Tax Scheme | The Tax Scheme for this location. Defines the set of Tax Rates available at this store. |
Set the Tax Region to US-Atlanta GA and the Tax Scheme to Atlanta GA Tax, then click Save.
This completes the Location Configuration for tax.
Configuration Steps - POS Terminal Configuration
It is common in the US for retailers to print a breakdown of taxes collected on the receipt. This is configured in POS Terminal Maintenance.
Navigate to POS Terminal Maintenance using the Search or the path:
Main Menu > Configuration > Organisation > POS Terminals
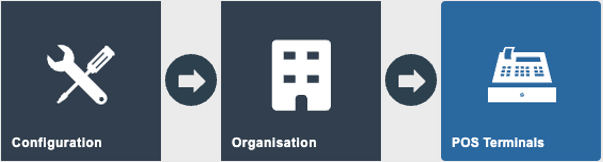
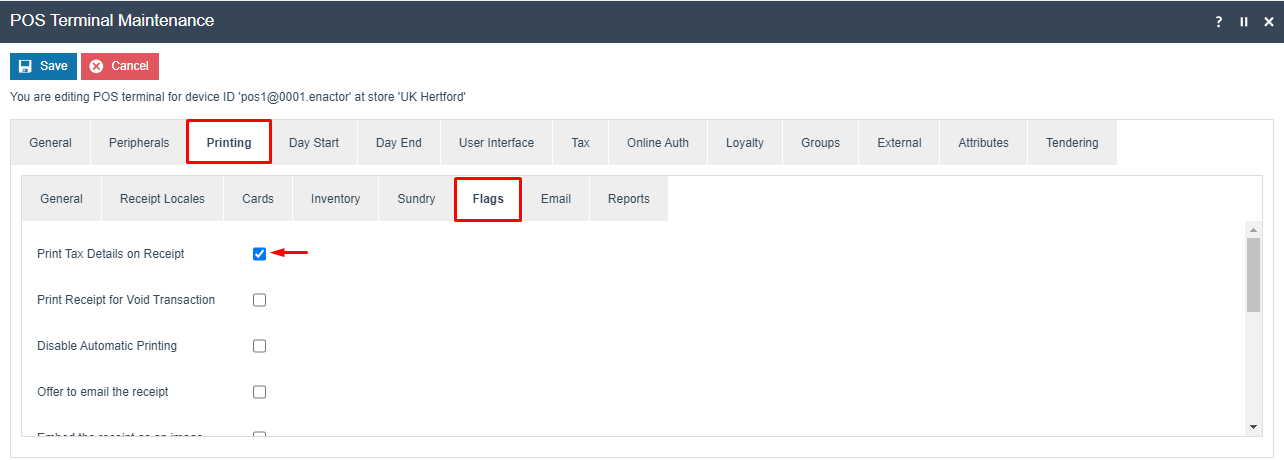
Go to the relevant POS Terminal and click on the edit icon and select the Printing tab, then the Flags sub-tab.
| Configuration | Description |
|---|---|
| Print Tax Details on Receipt | Checkbox. If checked, a full breakdown of taxes collected is printed on the POS receipt. |
It is also possible to configure tax rules at POS Terminal level. This is normally only used where a specific terminal within a store has non-standard tax rules, or a terminal is taken off-site to sell in a different jurisdiction. In general, the tax settings on a POS Terminal are left blank, causing the POS to fall back to the store location-level settings.
This completes the POS Terminal Configuration for tax.
Configuration Steps - Broadcasting and Testing
At this stage, all tax rules that have been configured should be broadcast to the applicable stores and devices. The Retail Static Data predefined broadcast configuration can be used for this purpose.
Once all rules have been broadcast:
- Restart the till to ensure it has applied the latest settings to all applicable entities.
- Process test transactions to confirm the configuration is working as expected.
- If the POS is configured to display the tax breakdown on the receipt (via the POS Terminal Printing > Flags configuration), this can be checked immediately on the printed receipt.
- If the tax breakdown is not required on the receipt, review the XML Transaction basket to check the tax calculation details.
This completes the Broadcasting and Testing configuration.
Appendix A - Alternative Tax Rate Configuration
While most US taxing authorities now rely on simple percentage calculations, some jurisdictions use tax tables to enforce special rounding rules or implement variable rates that change based on purchase amount.
Florida - Tax Value Table
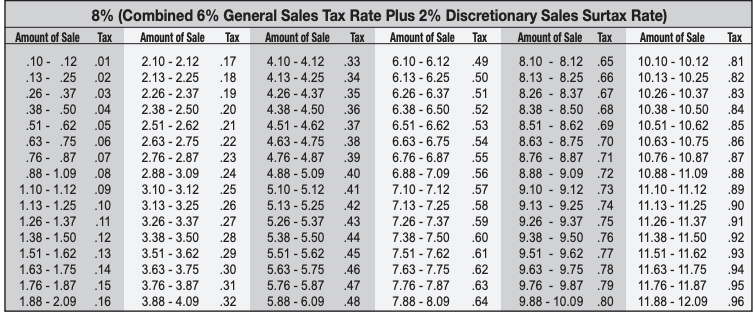
The state of Florida uses a bracket system for calculating sales tax when transactions fall below or between whole dollar amounts. The state sales tax rate is 6% and allows an additional county tax of 0-2.5%.
The following tax table applies for an 8% effective rate:
To configure this Tax Rate, create a new Tax Rate of type Tax Value Table:
Main Menu > Configuration > Financial > Tax Rates
Click Create a New Tax Rate, select Tax Value Table as the Tax Rate Type, and enter the Tax Rate ID FL_8.0 with an Effective Date of 26 September 2023.
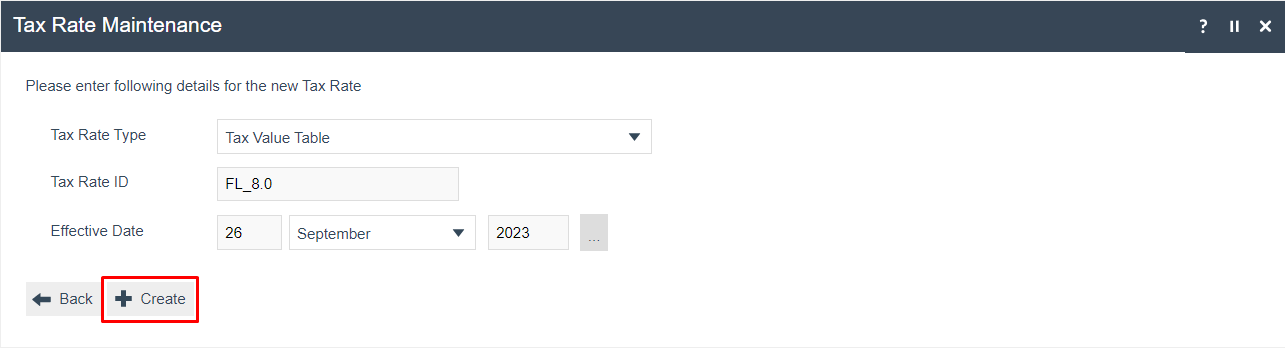
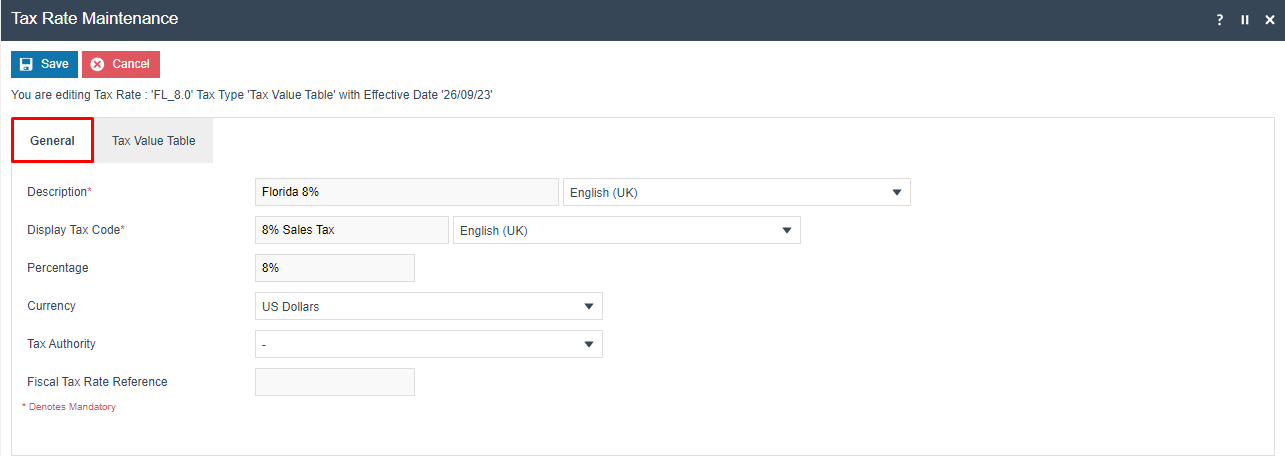
After clicking Create, enter the basic information on the General tab:
| Configuration | Description |
|---|---|
| Description | A user-friendly description, e.g. "Florida 8%". |
| Display Tax Code | The code shown on the POS receipt, e.g. "8% Sales Tax". |
| Percentage | The effective tax percentage, e.g. 8%. |
| Currency | US Dollars. |
Then select the Tax Value Table tab and begin replicating the bracket table.
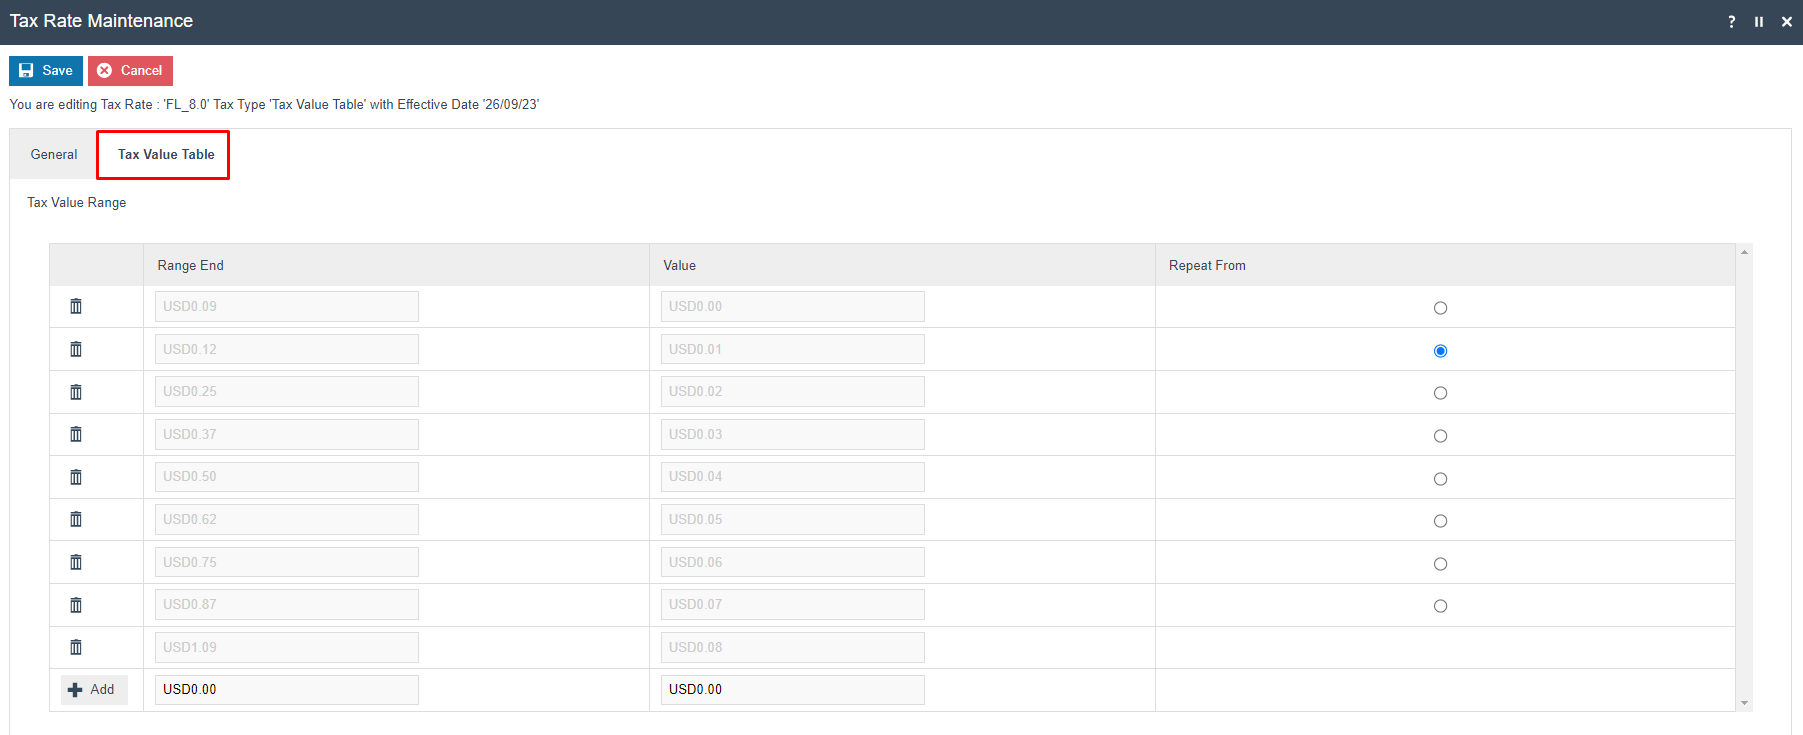
Notice that the bracket table repeats after $1.09. To avoid entering the entire table, stop entering ranges at $1.09 and use the Repeat From feature on the $0.10-$0.12 bracket. This causes the system to repeat the pattern automatically.
Click Save to apply the changes.
Rhode Island - Tax Percentage Table
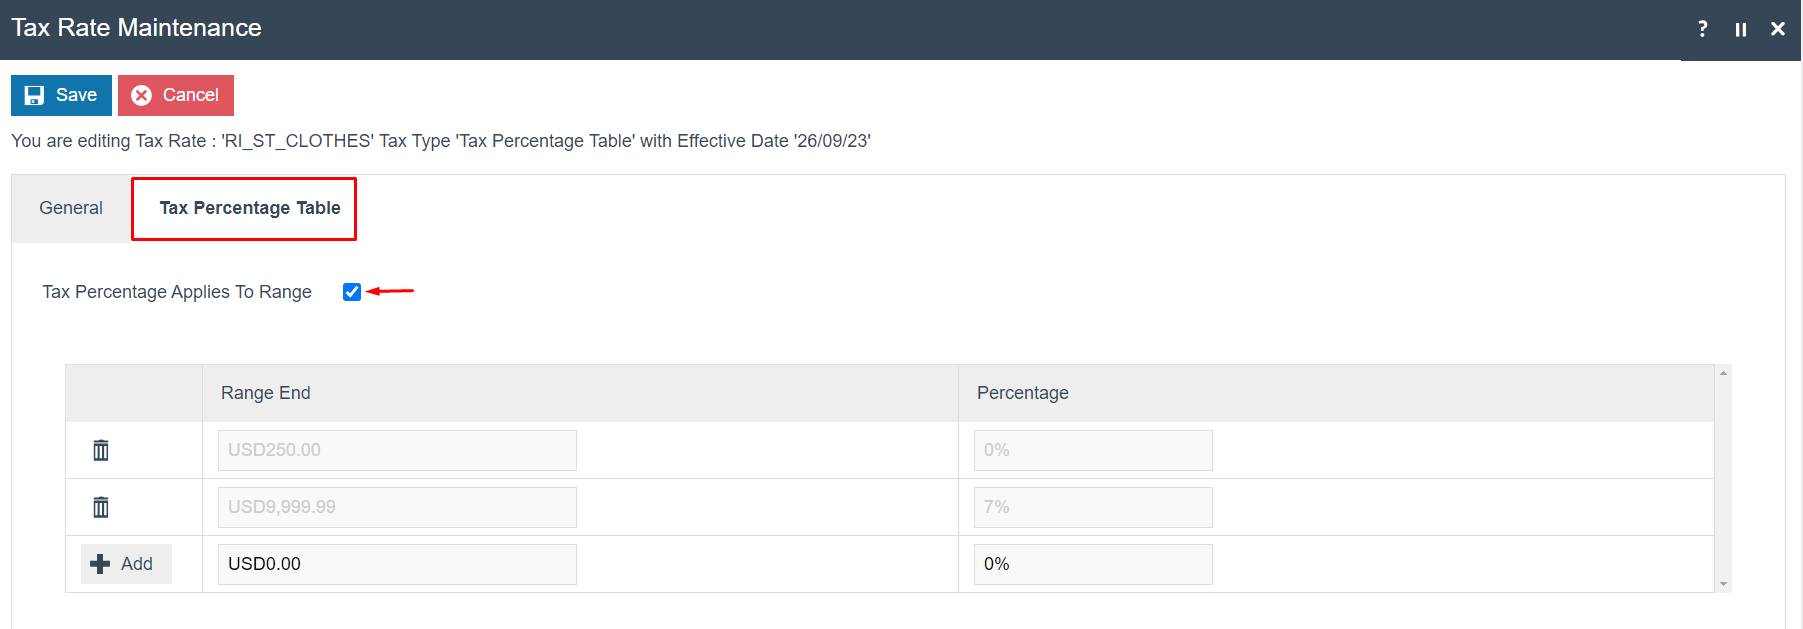
In Rhode Island, no state sales tax is charged on the first $250.00 of clothing purchases. Purchases beyond $250.00 are subject to the standard 7% state tax rate.
This is configured using the Tax Percentage Table Tax Rate Type. By selecting Tax Percentage Applies To Range, only the purchase amount exceeding $250.00 is taxed at 7% (for example, on a $265 purchase, $250 is taxed at 0% and $15 is taxed at 7%).
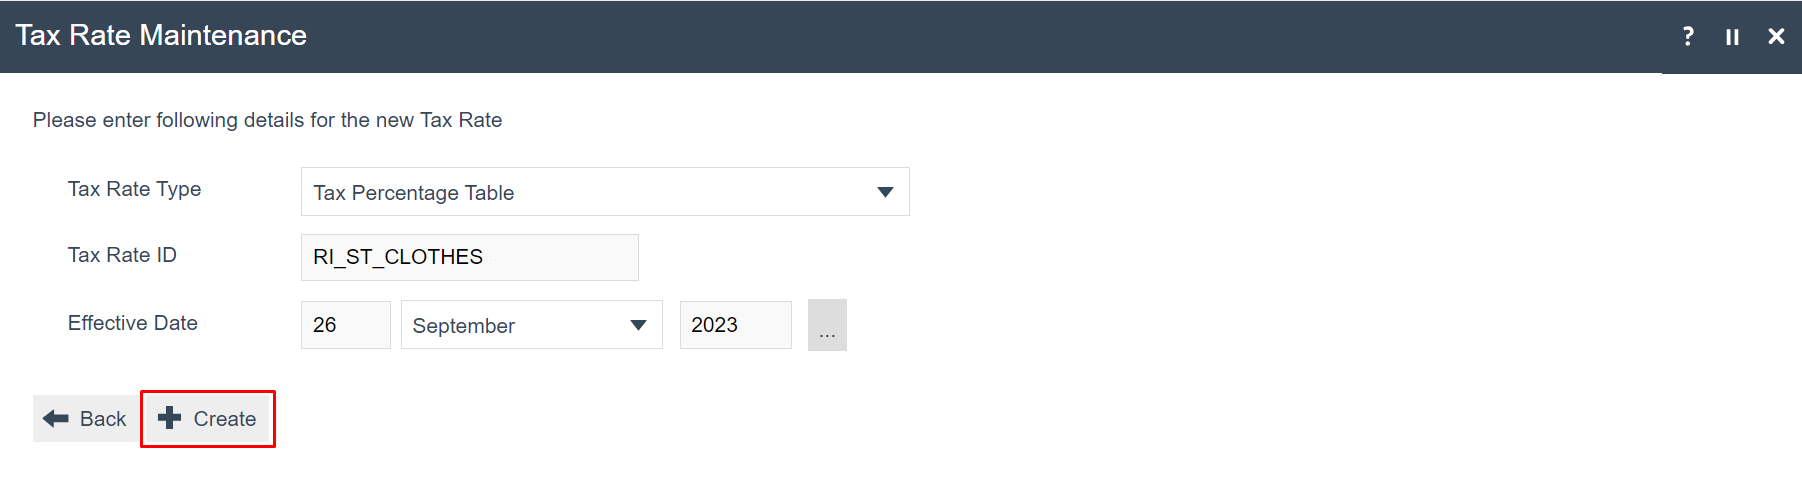
Create a new Tax Rate with Tax Rate Type Tax Percentage Table, Tax Rate ID RI_ST_CLOTHES, and Effective Date 26 September 2023.
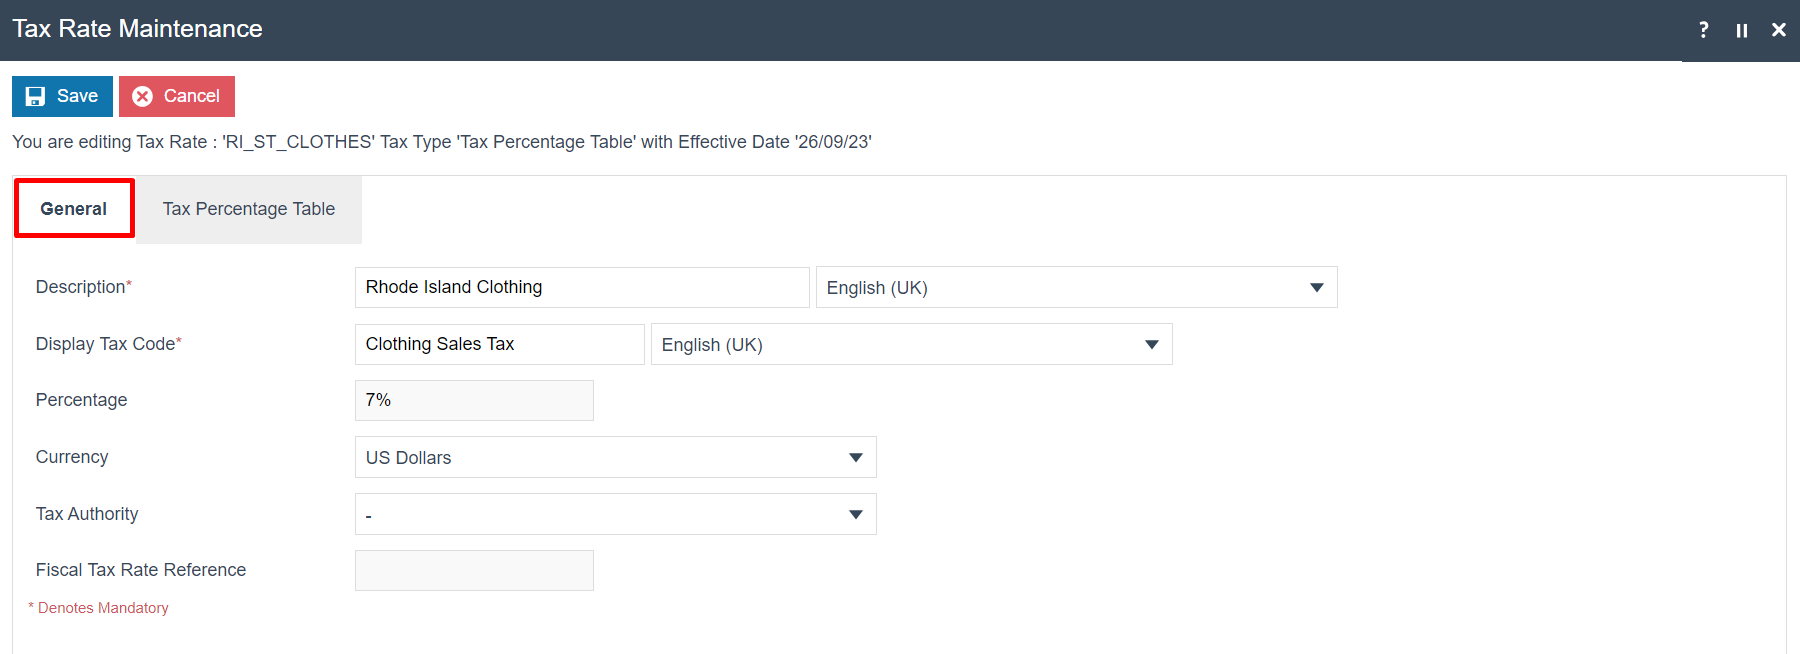
Enter the general Tax Rate information on the General tab:
Then select the Tax Percentage Table tab and enter the value ranges and associated tax percentages.
| Configuration | Description |
|---|---|
| Tax Percentage Applies To Range | Checkbox. If checked, the tax amount is calculated based on the range when the purchase amount spans multiple ranges. In this example, only the amount exceeding $250.00 is taxed at 7%. |
| Range End | The upper boundary of each tax range in the purchase amount. |
| Percentage | The tax percentage applicable to this range. |
Click Save to apply the changes.
After special Tax Rates have been created as described above, they can be included in Tax Schemes and Tax Group Tax Methods in exactly the same way as the standard VAT-type taxes described earlier in this guide.