How-to Guide - Configuring Users, User Roles and User Templates
Introduction
In the Enactor Retail System, access to application functions is controlled through User Roles, User Templates and Users. A User Role groups together a set of Privileges that grant access to specific functions such as returns, loyalty operations, or ordering. A User Template applies common behaviour - including roles and security settings - to a set of users, making it efficient to manage large numbers of staff. A User is the individual account through which staff sign on and access the system.
Access control ensures that each user can perform only the functions appropriate to their position. For example, a Sales Assistant might be able to sell items but not process returns, while a Manager can do both. Different groups may also have tendering limits or restrictions on specific reason codes.
The purpose of this guide is to demonstrate the steps required to configure User Roles with specific privileges, create User Templates for common user types, set up individual User accounts, configure User Groups and User Teams, and set Functional Authorisation Codes for tender limits and reason code restrictions.
Overview
This guide covers the configuration for the following:
- User Role Configuration - Set up and assign privileges to define what functions a User can access
- User Template Configuration - Template a set of users with common behaviour using User Templates
- User Configuration - Set user information, passwords and individual user settings
- User Group Configuration - Set up a hierarchical structure to group users for group selection such as task allocation
- User Team Configuration - Set up a team of users associated with a location and cost centre, including a team manager, team members and affiliated customers
- Functional Authorisation Codes - Limit users' tender limits and reason code access
- Broadcasting - Deliver the configuration changes to the POS
Prerequisites
Before starting, you should have the following resources in place:
- Enactor Estate Manager
- Enactor POS (configured within the appropriate region, connected to the Estate Manager)
- Standard Configuration, including base configuration and regionally appropriate data
You should be familiar with the following:
- Estate Manager configuration
- Organisation structure (Regions, Locations)
- Data broadcasting
Configuration Steps - User Role Configuration
The User Role provides a convenient method of grouping together privileges, which may then be associated with one or more Users who require them. This allows certain users to access only certain functions such as Returns, Loyalty, or Ordering.
The most basic elements of application functionality in Enactor Retail are Functions and these are typically associated with Privileges which are a requirement for access to the Function. Each function requires that a privilege is available in at least one of the User Roles associated with the User's account. All functions and their privileges are grouped into Processes and these Processes are grouped into Packages.
Accessing User Role Maintenance
Navigate to User Role Maintenance using the Search or the path:
Configuration > HR > User Roles
The User Role Maintenance list is displayed, showing all configured User Roles with their ID, Description and Authorisation Level.
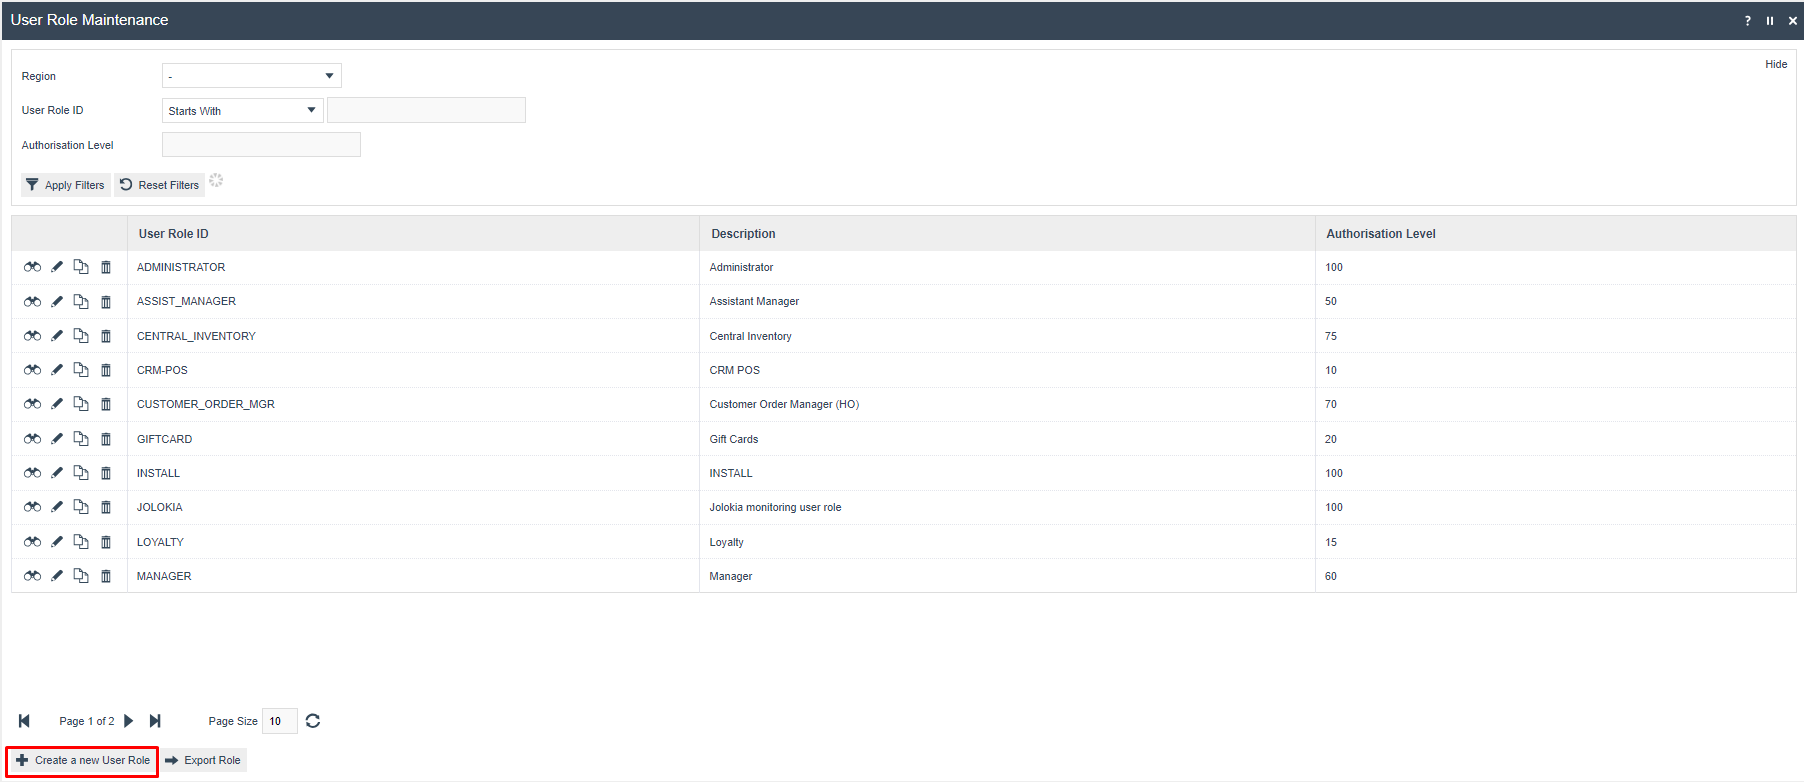
Creating a New User Role
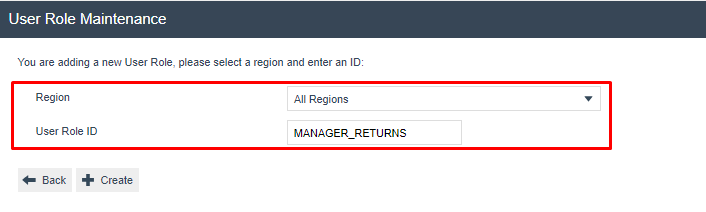
Select Create a new User Role on the User Role Maintenance page.
- Select the Region from the Region drop-down.
- Enter a unique User Role ID for the new User Role. The ID can be alphanumeric and contain a maximum of 20 characters. Use of a systematic and business-specific naming convention is recommended.
The User Role Maintenance screen for the newly created User Role is presented with 4 key tabs: General, Authorised Functions, Special Functions and Report Functions.
User Role - General Tab
The General Tab has the basic information that captures the identity of the new User Role and the Authorisation Level for it.
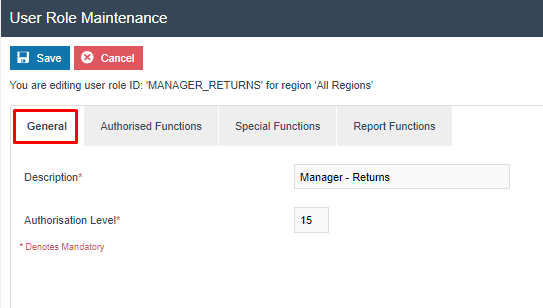
Set the appropriate values on the General tab as follows:
| Configuration | Description |
|---|---|
| Description | Enter a user-friendly, meaningful name by which Users will identify and select the Role in other locations of the Estate Manager. The use of systematic and business-specific naming convention is recommended. Maximum 30 alphanumeric characters. |
| Authorisation Level | This field allows this role to be ranked against other roles with the same privileges. A numeric value which ranges from 0-100. A newly created Manager Role should rank higher than a Sales Assistant Role. When both a Manager and Sales Assistant use the same function, the Manager is given higher priority. |
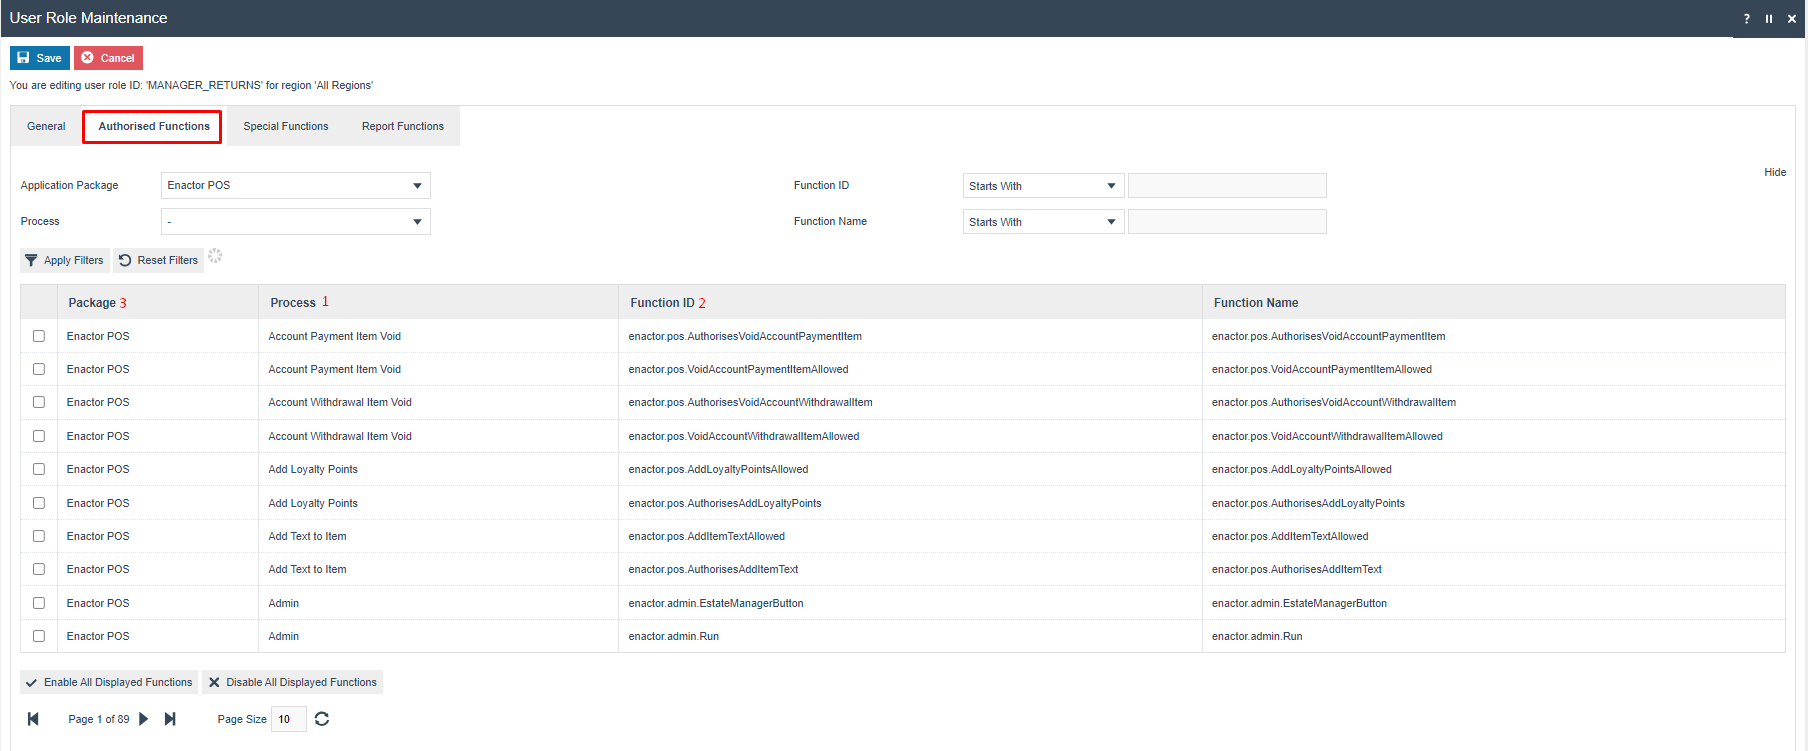
User Role - Authorised Functions Tab
The Authorised Functions tab is used to assign Privileges for User Roles in relation to the Functions. Each Function is associated with a Process and a Process is associated with an Application Package. These are available as dropdown lists so that the privileges for this User Role can be easily filtered and enabled as required.
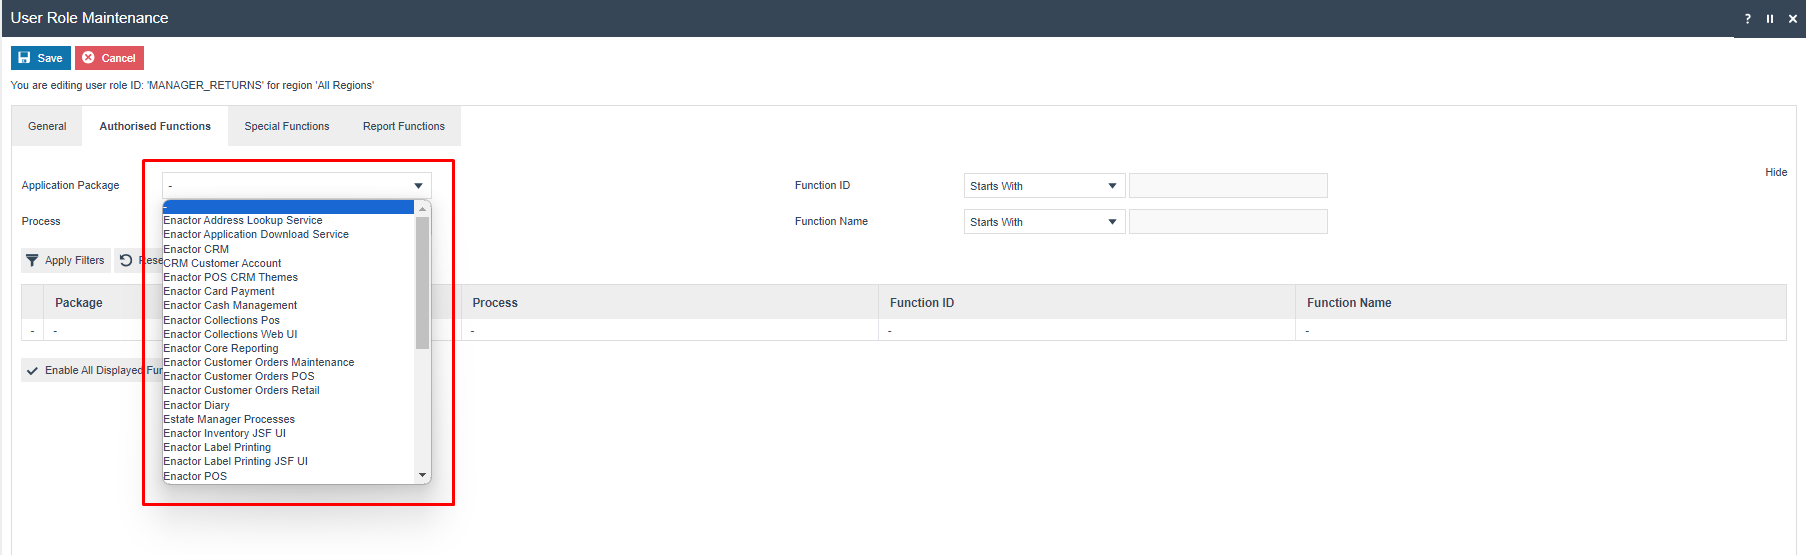
The details of the most commonly used Application Packages are as follows:
| Application Package | Description |
|---|---|
| Enactor Cash Management | Contains all cash management related functions and privileges for Estate Manager and Back Office. |
| Enactor POS | Contains all POS related functionalities and privileges accessed when using the Enactor POS. |
| Enactor Web Maintenance | Contains all UI related functionalities and privileges accessed when using the Enactor Web Maintenance. |
The details of the occasionally used Application Packages are as follows:
| Application Package | Description |
|---|---|
| Enactor Address Lookup Service | Contains functionalities and privileges required when accessing AFD, PA, Postcode, QAS and Internal Services. |
| Enactor Application Download Service | Contains functionalities and privileges required when accessing Application Download Services. |
| Enactor CRM | Contains all CRM functionalities and privileges such as Customer Activity Flow Service Access. |
| Enactor Card Payment | Contains ICC Reader related functionalities and privileges for Enactor Card Payment. |
| Enactor Card Payment Services | Contains all Card Payment functionalities and privileges required when accessing Card Payment Services such as authorising and refunding card payments. |
| Enactor Core Reporting | Contains all Reporting functionalities and privileges required when accessing Report functions such as viewing saved reports and charts. |
| Enactor Customer Orders Maintenance | Contains all Customer Order functionalities and privileges for Estate Manager and Order Manager. |
| Enactor Customer Orders Retail | Contains functionalities and privileges required for Retail Customer Orders. |
| Enactor Customer Orders Processing | Contains all Customer Order Processing functionalities and privileges for running Customer Orders. |
| Enactor Diary | Contains all Diary Entry functionalities and privileges required for viewing, editing, running, and removing in the Diary Entry Maintenance. |
| Payment Gateway - Card Services | Contains Payment Gateway Card Service functionalities and privileges for generating card tokens and bulk tokenisation. |
| Receipt Maintenance | Contains all Receipt functionalities and privileges required when accessing Receipt based functions. |
| Enactor Repairs Manager | Contains all Repairs Management related functionalities and privileges. |
| Restaurant Maintenance | Contains all Restaurant Management related functionalities and privileges. |
| Enactor Web Maintenance - CRM | Contains all UI related CRM functionalities and privileges accessed when using CRM related Maintenance. |
| Enactor Web Maintenance - Inventory | Contains all Inventory Management related functionalities and privileges accessed when using Inventory related Maintenance. |
Each package has a dropdown to select from a list of all available Processes relevant to a functional area. For example: Discount Item, Receipt Return, Return Item.
| Configuration | Description |
|---|---|
| Packages | Select from a drop list of available packages. The various Processes and Functions of the Enactor Retail System are organised into Packages. |
| Processes | Dropdown selection from a list of all available Processes defined for the selected Application Package. |
| Enable/Disable Privileges | A fixed set of Functions and their checkboxes is presented for the selected Process. Checkboxes, when checked, indicate the Function is enabled for this Role. Convenience options are available below the table to Enable or Disable all Function checkboxes at once. |
It is common for a function to have both an allowed privilege and an authorised privilege. The allowed privilege lets the User start the function, but to complete it the user also requires the authorised privilege. This is illustrated in the example below for Item Returns.
Example - Enabling Item Return Privileges
To enable the Item Return function for the Manager - Returns Role:
- Set Application Package to Enactor POS
- Set Function ID filter to Contains: returnitem
- The
enactor.pos.ReturnItemAllowedprivilege (allows starting the Item Return) andenactor.pos.AuthorisesReturnItemprivilege (allows completing the Item Return) are displayed.
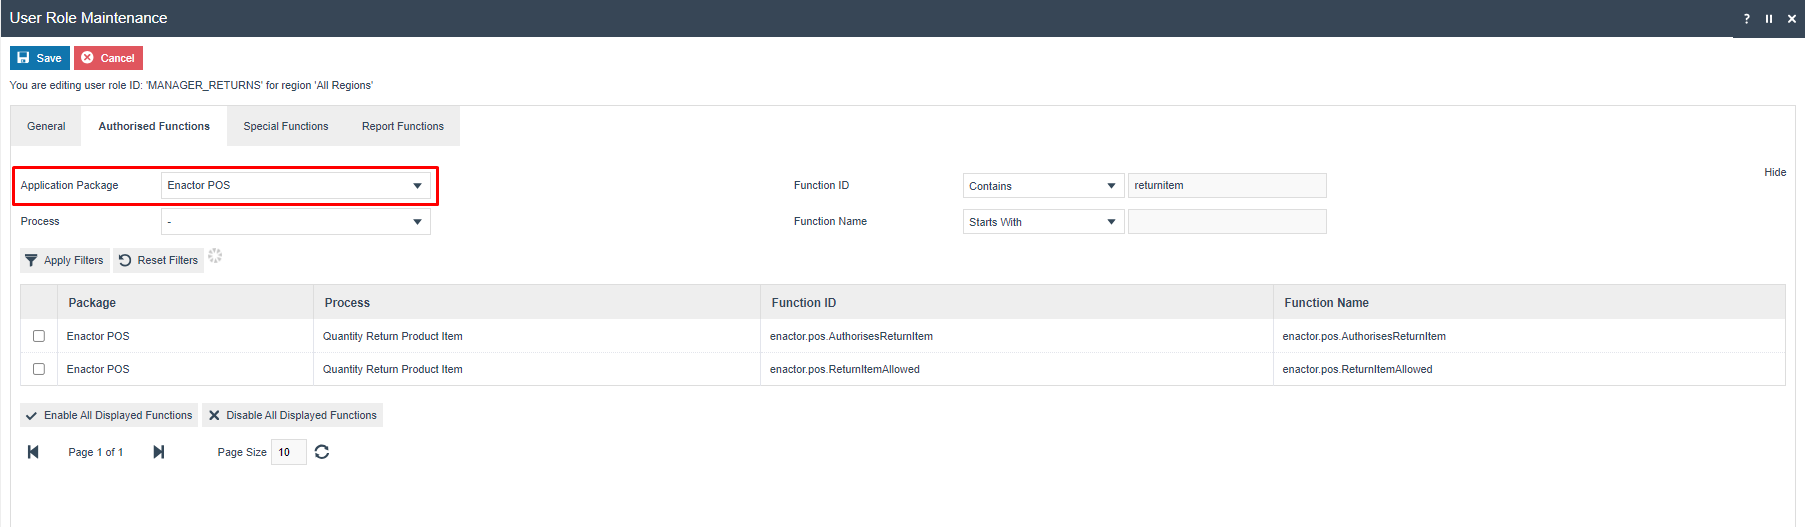
- Tick both checkboxes and click Save.

The example above assigns only the Item Return privileges to the Manager - Returns Role. In a more realistic scenario, other return privileges such as tender rules and receipt returns should also be assigned to this user role.
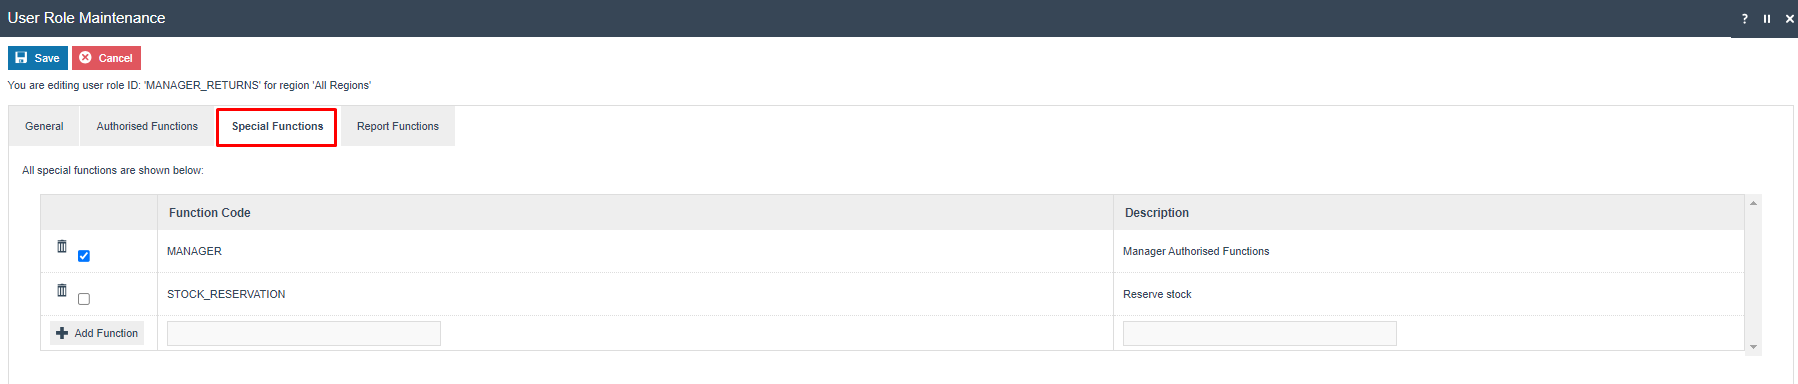
User Role - Special Functions Tab
The Special Functions tab is used to create and remove user-defined Function Codes. These are further explained in the Functional Authorisation Codes section of this guide.
User Role - Report Functions Tab
The Report Functions tab is used to select a User-Defined Report Category and configure permissions for the Role to enable or disable individual Reporting-specific functions. The Report Categories are configured using the Report Categories Maintenance and are not covered in this guide.

After configuring all 4 tabs, select Save to complete creating the new User Role.
This completes the User Role configuration.
Configuration Steps - User Template Configuration
User Templates can be set up and assigned to a user so that common behaviour can be applied to many Users. This makes it convenient to create new Users since all the functional roles configured in the User Template apply to the new User automatically. A User Template can be set up for a specific type of user, for example: Store Operator or Store Manager.
This also allows users with the same roles to benefit when a new privilege is added to a role - all users with that template will get the change automatically without editing each user individually.
Accessing User Template Maintenance
Navigate to User Template Maintenance using the Search or the path:
Configuration > HR > User Templates
The User Template Maintenance list is displayed, showing all configured User Templates.
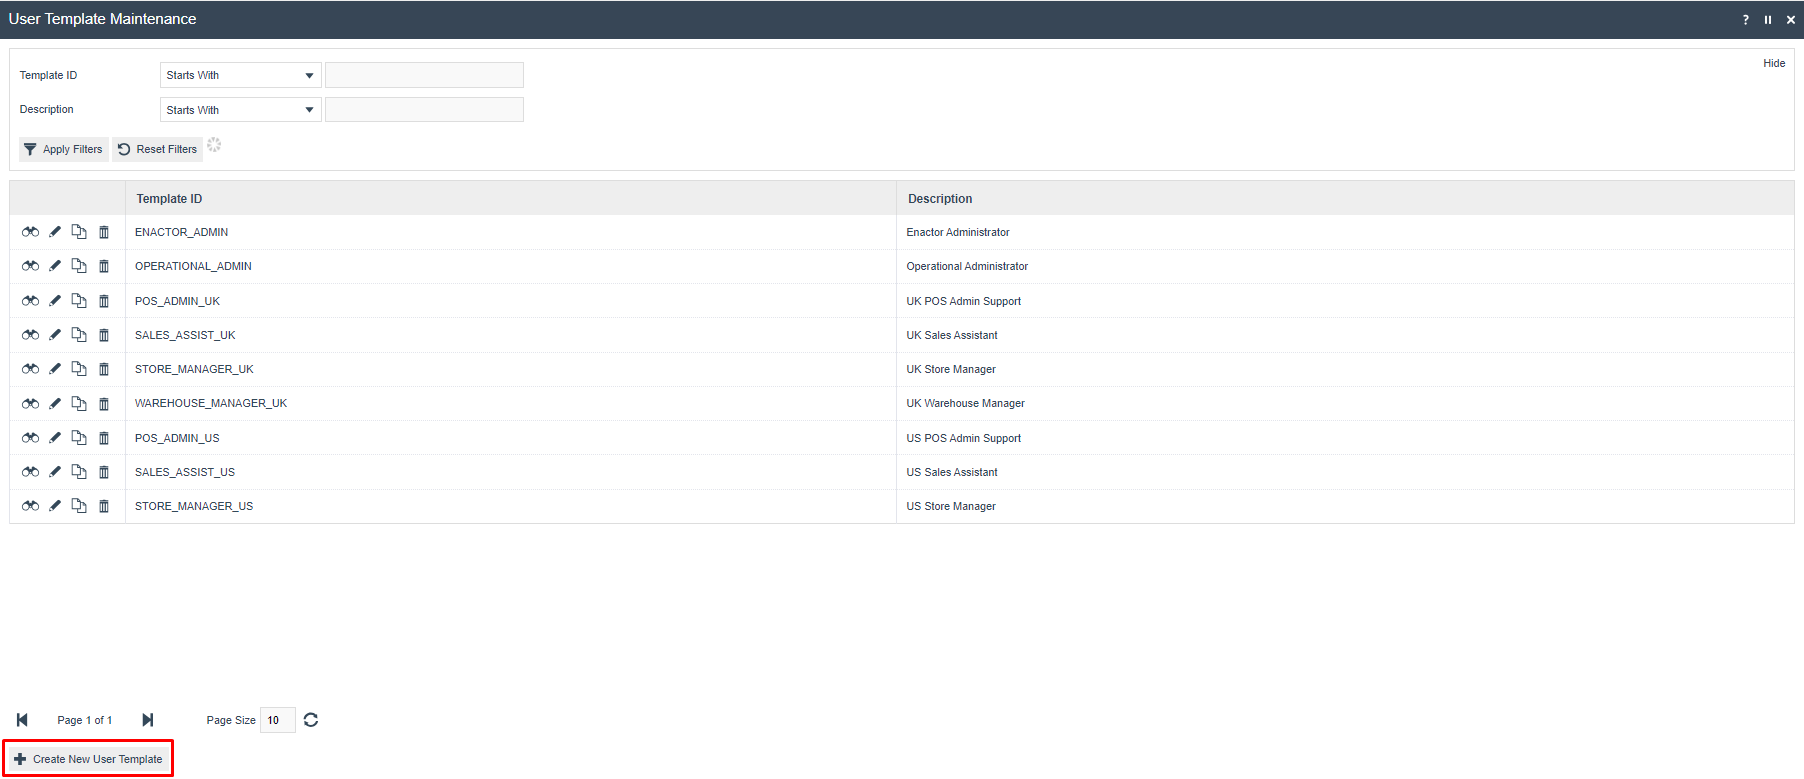
Creating a New User Template
Select Create New User Template on the User Template Maintenance page.
Enter a unique Template ID for the new User Template. The ID can be alphanumeric and contain a maximum of 20 characters. Use of a systematic and business-specific naming convention is recommended.

The User Template Maintenance screen for the newly created User Template is presented with 5 key tabs: General, Roles, Security, Access Times and Associated Locations.
User Template - General Tab
The General tab captures the basic information of the new User Template.
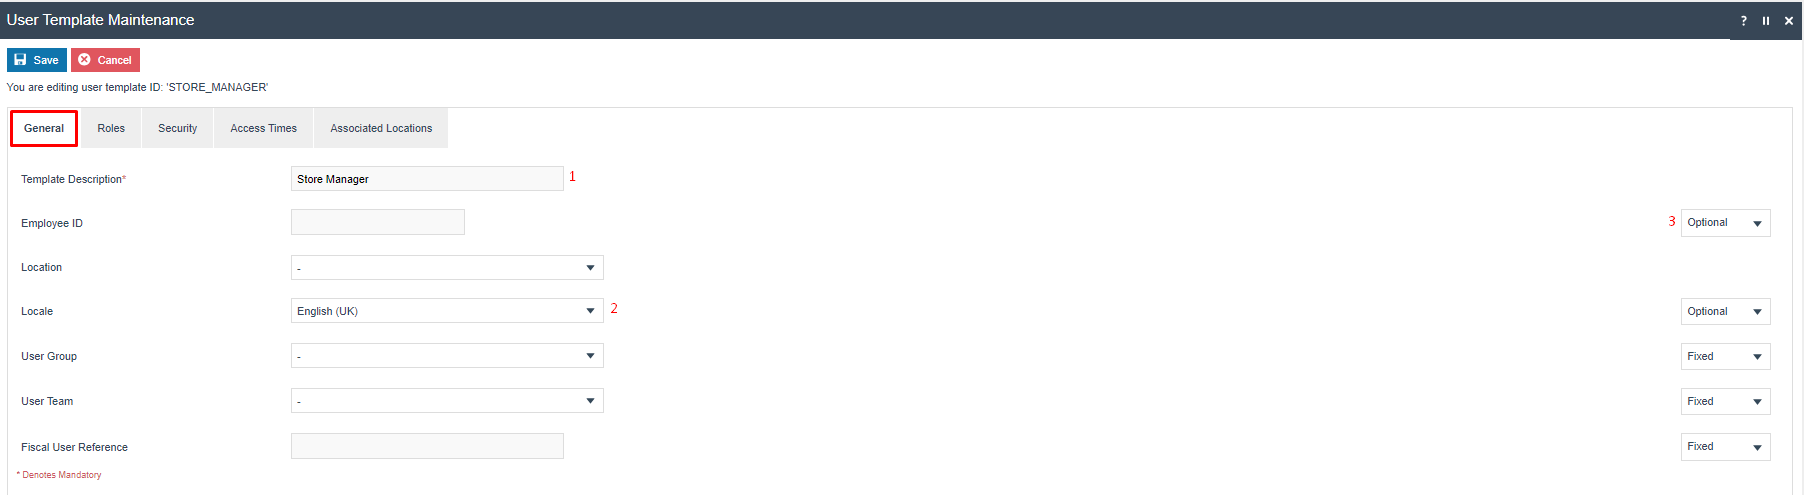
Set the appropriate values on the General tab as follows:
| Configuration | Description |
|---|---|
| Template Description | Enter a user-friendly, meaningful name by which Users will identify and select the Template in other locations of the Estate Manager. Maximum 30 alphanumeric characters. |
| Locale | Select from a dropdown list of all configured Locales. |
| Rules for specific fields | When creating a user from a template, the rules on the fields are inherited from the user template: Optional - the field will be optional; Fixed - the field will be pre-filled and cannot be changed; Mandatory - the field must be entered. |
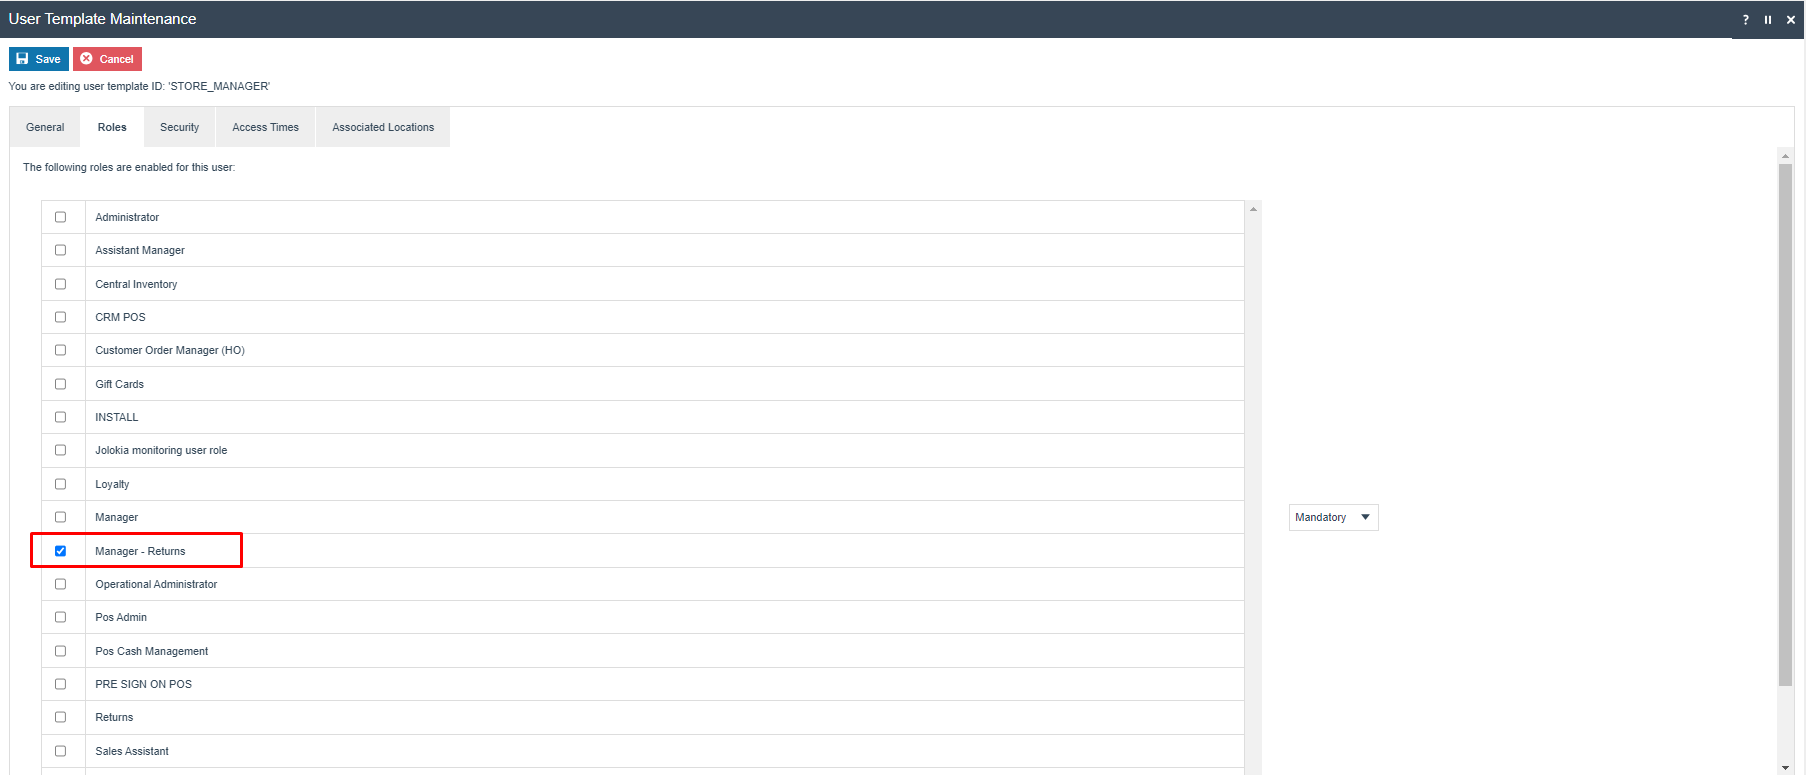
User Template - Roles Tab
The Roles tab allows you to specify the roles for this User Template. In the User Roles section, we created a User Role called "Manager - Returns" to provide privileges for manager-based functions. Here we can assign the Manager - Returns Role to our Store Manager User Template by ticking the corresponding checkbox.
User Template - Security Tab
The Security tab consists of security related configurations. Setting values in this User Template saves time when setting up new users. The security tab settings can also be set as Optional, Fixed or Mandatory.
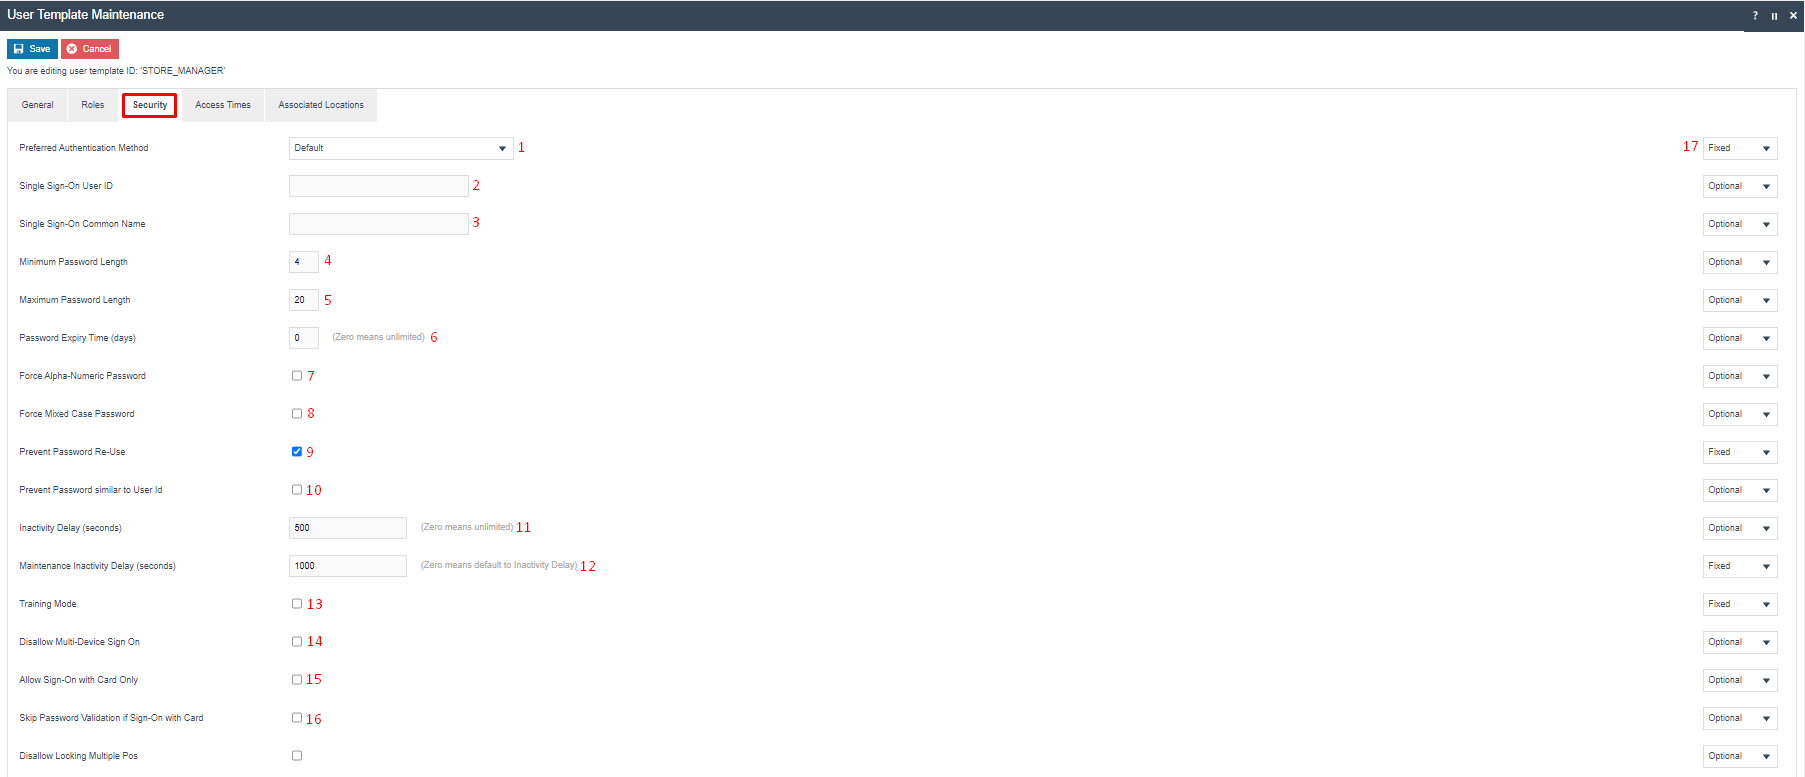
Set the appropriate values on the Security tab as follows:
| Configuration | Description |
|---|---|
| Preferred Authentication Method | Selected from a fixed drop list, e.g. Default Enactor Internal or Active Directory. The integration setup is not included in this document. |
| Single Sign-On User ID | A user ID (alphanumeric; maximum 20 characters) used for linking to single sign-on directory services such as Active Directory. |
| Single Sign-On Common Name | Common name for single sign-on use. |
| Minimum Password Length | The minimum length of the password. Integer value, minimum 1. |
| Maximum Password Length | The maximum length of the password. Integer value, maximum 20. |
| Password Expiry Time (days) | Number of days until password expires. Integer value maximum 999 and 0 means unlimited. |
| Force Alpha-Numeric Password | Checkbox. If checked, the User will be forced to use alpha and numeric characters when changing their password. |
| Force Mixed Case Password | Checkbox. If checked, the User will be forced to use mixed case characters when changing their password. |
| Prevent Password Re-Use | Checkbox. If checked, the User will be prevented from using a previously used password. |
| Prevent Password similar to User Id | Checkbox. If checked, the User will be prevented from using a password that bears similarity to the User ID. |
| Inactivity Delay (seconds) | The delay in seconds after which this User is automatically logged off the POS system. Integer value where 86400 is the maximum and 0 means unlimited. |
| Maintenance Inactivity Delay (seconds) | The delay in seconds after which this User is automatically logged off the Web Maintenance. Integer value where 86400 is the maximum and 0 takes the value of the Inactivity Delay field. |
| Training Mode | Checkbox. If checked, this User is operating in training mode and will have reduced privileges. |
| Disallow Multi-Device Sign On | Checkbox. If checked, this User is prevented from signing on at more than one location at any one time. |
| Allow Sign-On with Card Only | Checkbox. If checked, this User can only sign on with a card. |
| Skip Password Validation if Sign-On with Card | Checkbox. If checked, password validation will be skipped if this User logs on using a card. |
After configuring all the above tabs, select Save to complete creating the new User Template.
This completes the User Template configuration.
Configuration Steps - User Configuration
User configuration defines the User Accounts via which staff who have access to the Software Applications may sign on and are assigned permissions to the application functions they need to use. User configuration also captures information about the staff member required by the system.
The maintenance of User configuration is typically a responsibility of the System Administrator. Each person requiring access to the Enactor Retail System must be identified based on a User Account, which provides for authentication at sign-on time and, through enabled Role configuration, defines their access to application functionality.
Accessing User Maintenance
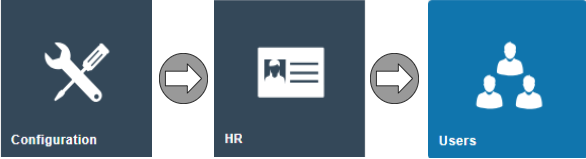
Navigate to User Maintenance using the Search or the path:
Configuration > HR > Users
The User Maintenance list is displayed, showing all configured Users.
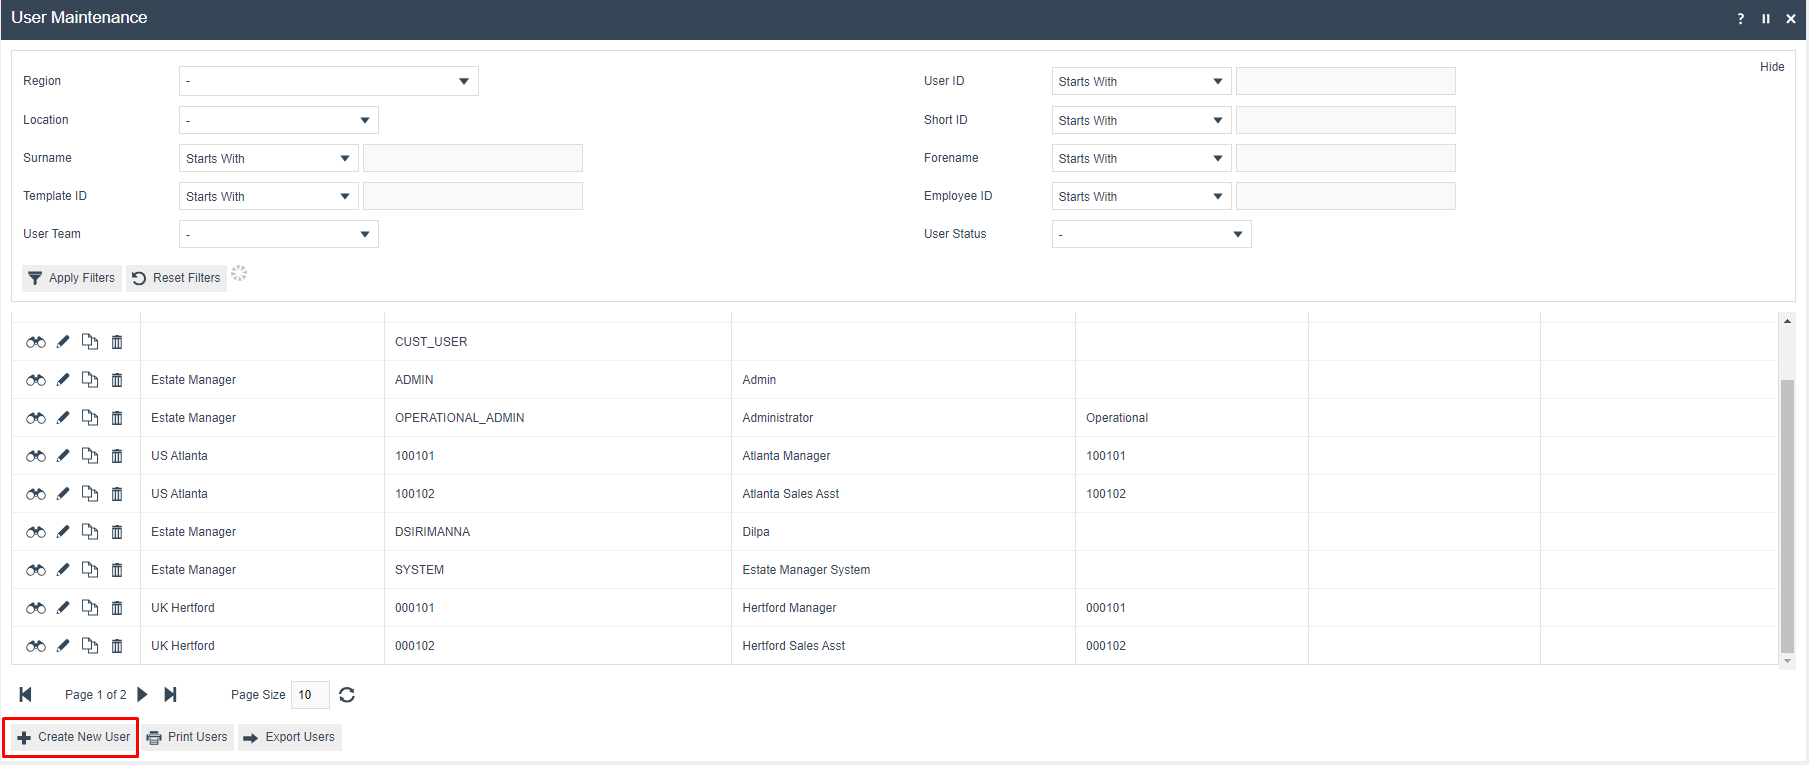
Creating a New User
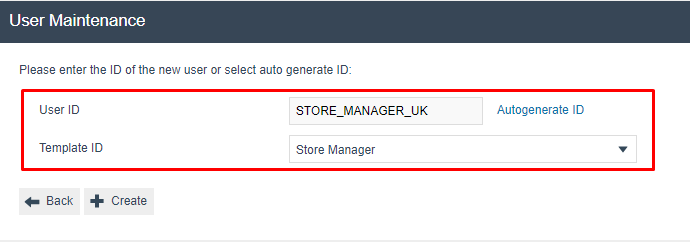
Select Create New User on the User Maintenance page.
- Enter a unique User ID for the new User. The ID can be alphanumeric and contain a maximum of 20 characters.
- If you wish to apply a User Template, select it from the Template ID drop-down.
The User Maintenance screen for the newly created User is presented with 8 key tabs: General, Address, Roles, Security, Access Times, E-mail, Biometrics and Associated Locations.
Only a few fields in the General and Address tabs need to be configured since most of the remaining fields are managed by the selected User Template.
User - General Tab
The General tab captures the basic information of the new User. Only the Display Name and Surname are mandatory fields.
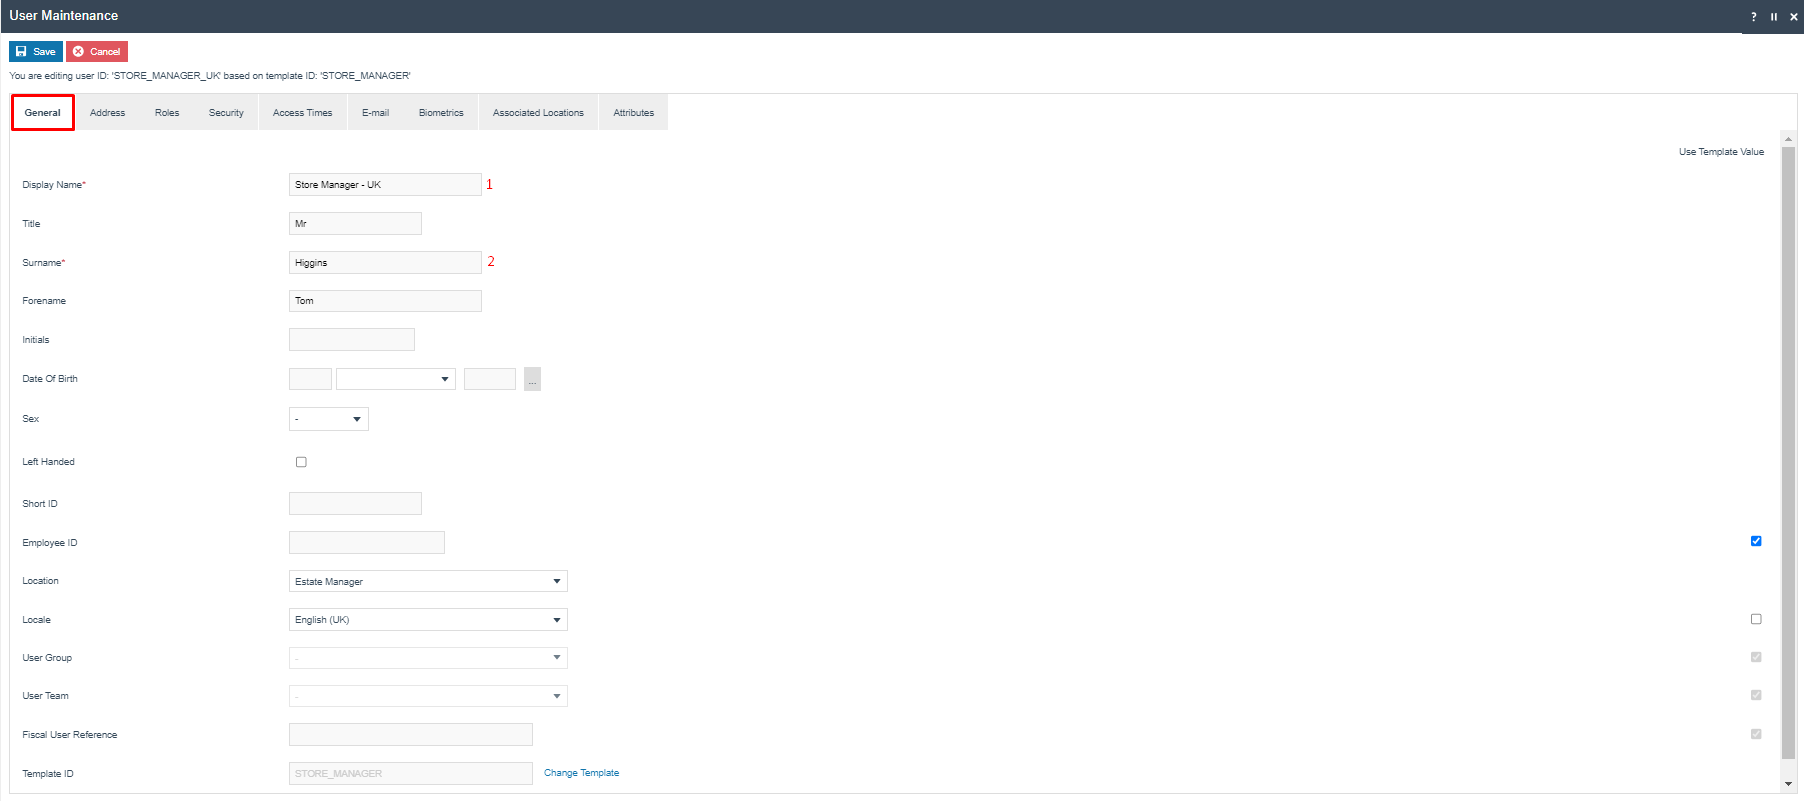
Set the appropriate values on the General tab as follows:
| Configuration | Description |
|---|---|
| Display Name | Alphanumeric; maximum 30 characters. Enter a value that meaningfully associates with the User. This name will be displayed on screens and on receipts. |
| Surname | Alphanumeric; maximum 100 characters. Enter the User's Surname. |
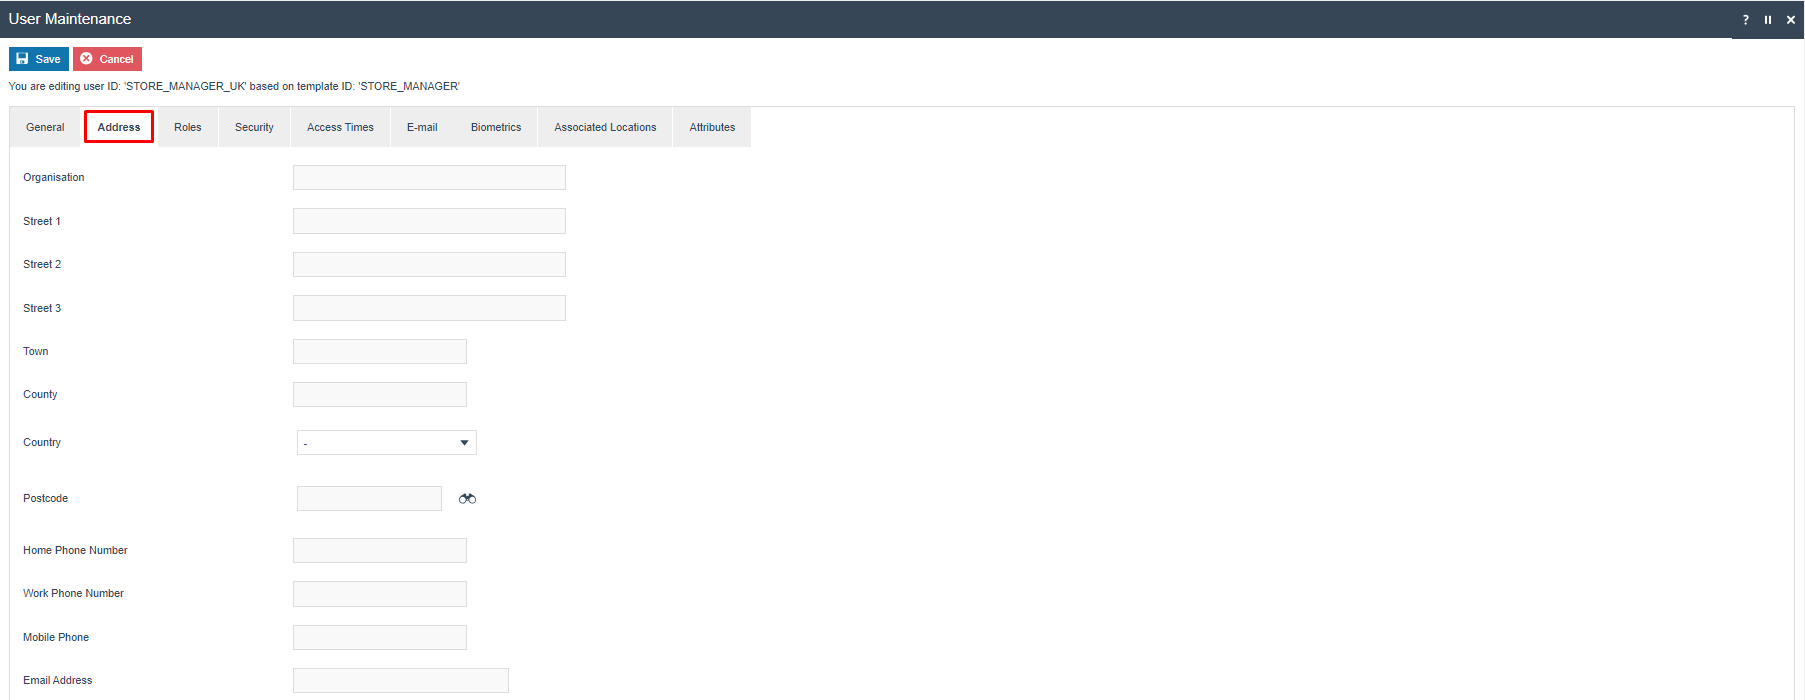
User - Address Tab
The Address tab captures the standard address information related to the User.
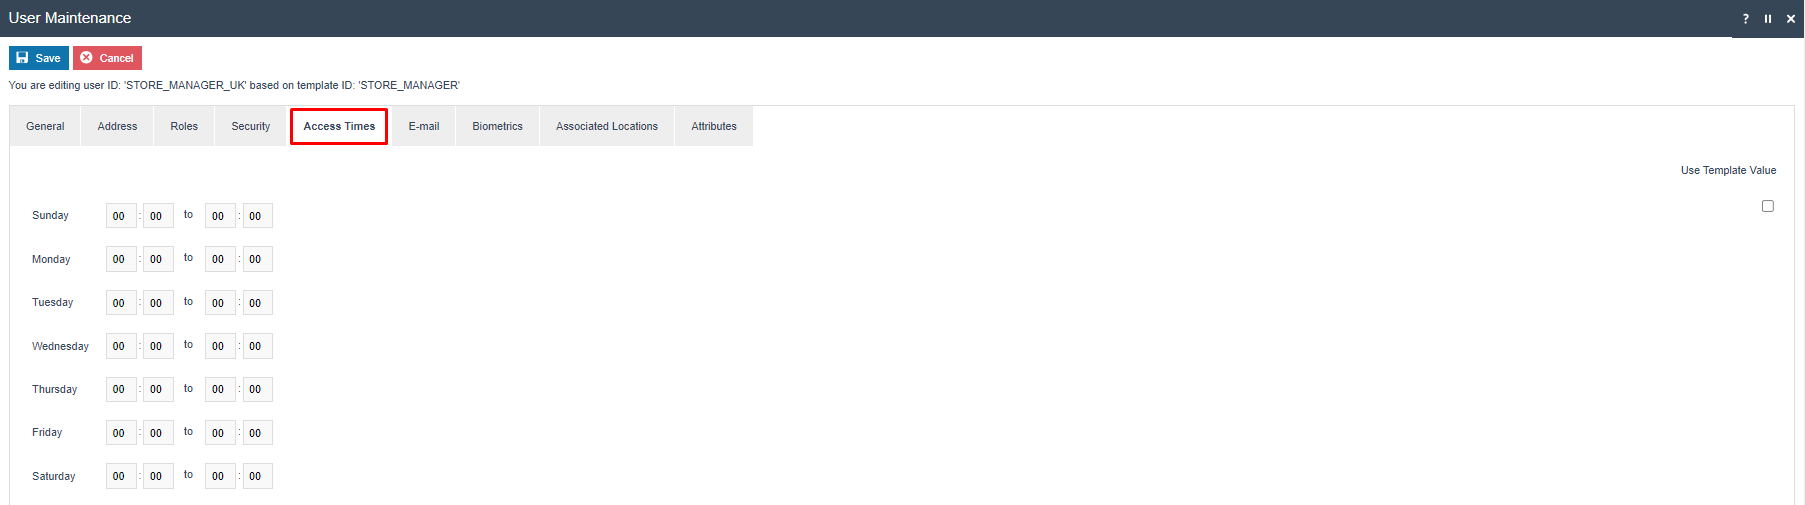
User - Access Times Tab
The Access Times tab allows you to set times that a user can access the Enactor system.
User - Biometrics Tab
The Biometrics tab allows you to enable fingerprint scanning for the User. This feature is not covered in this guide.

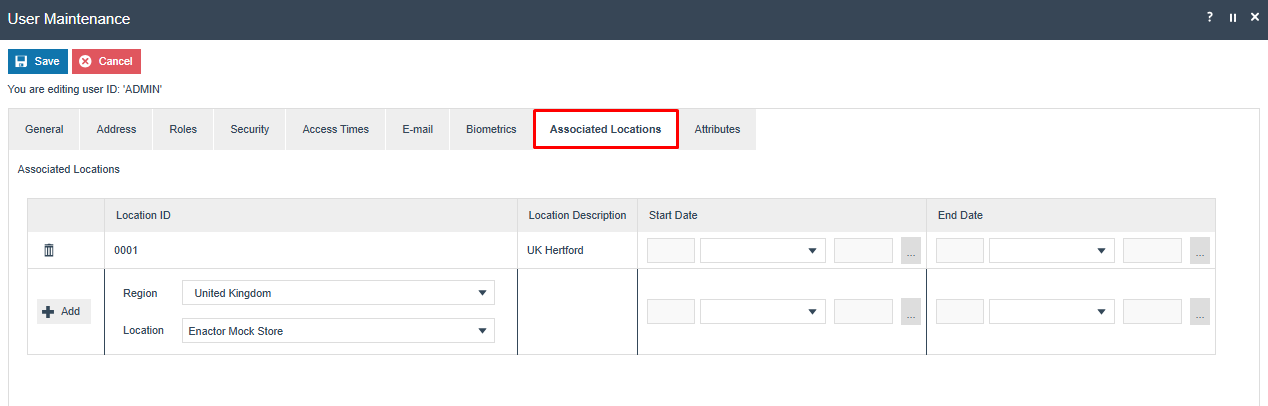
User - Associated Locations Tab
The Associated Locations tab allows you to add any other location that a user is to be given access to.
The User configurations for Roles and Security are inherited from the User Template as discussed in the User Template Configuration section of this guide.
After configuring all the above tabs, select Save to complete creating the new User.
This completes the User configuration.
Configuration Steps - User Group Configuration
The User Group Type is a hierarchical structure that can be defined with up to 10 levels, which is used to group Users for group selection such as task allocation.
Accessing Groups Maintenance
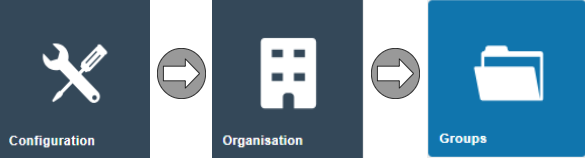
Navigate to Groups Maintenance using the Search or the path:
Configuration > Organisation > Groups
Creating a New User Group
- Filter Group Type as User Group from the dropdown.
- Select Create New User Group Hierarchy on the Group Hierarchy Maintenance page.
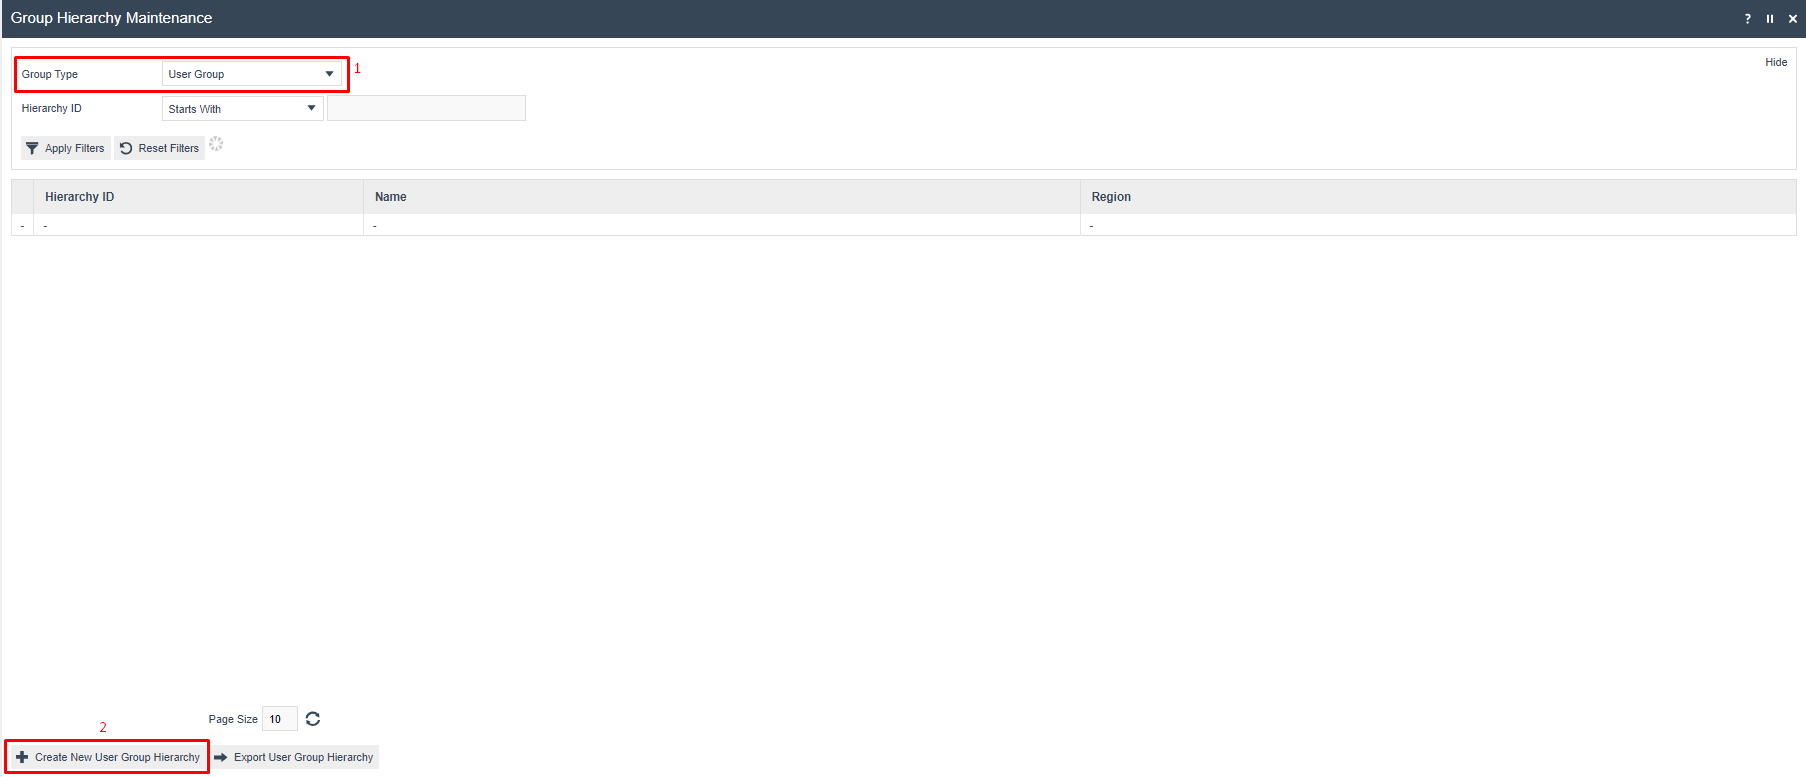
- Enter a unique Hierarchy ID for the new User Group. The ID can be alphanumeric and contain a maximum of 20 characters.
- Select the Region from the Region drop-down.

Once the Group Hierarchy has been created, the User Group Hierarchy Edit page is available to Add, Edit or Remove Group nodes in the hierarchy.
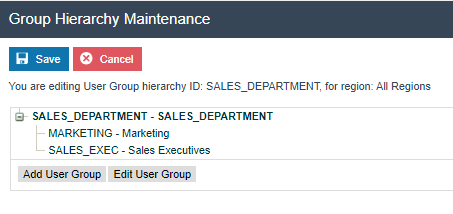
After creating the User Group Hierarchy, click Save. These User Groups can be assigned when creating a new User or User Template.
This completes the User Group configuration.
Configuration Steps - User Team Configuration
User Teams are created to associate a team with a Name, Location and Cost Centre, specify a Team Manager, identify the Users who belong to the Team and the Customers that the Team supports.
Accessing Team Maintenance
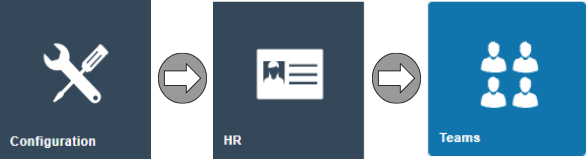
Navigate to Team Maintenance using the Search or the path:
Configuration > HR > Teams
The Team Maintenance list is displayed, showing all configured Teams.
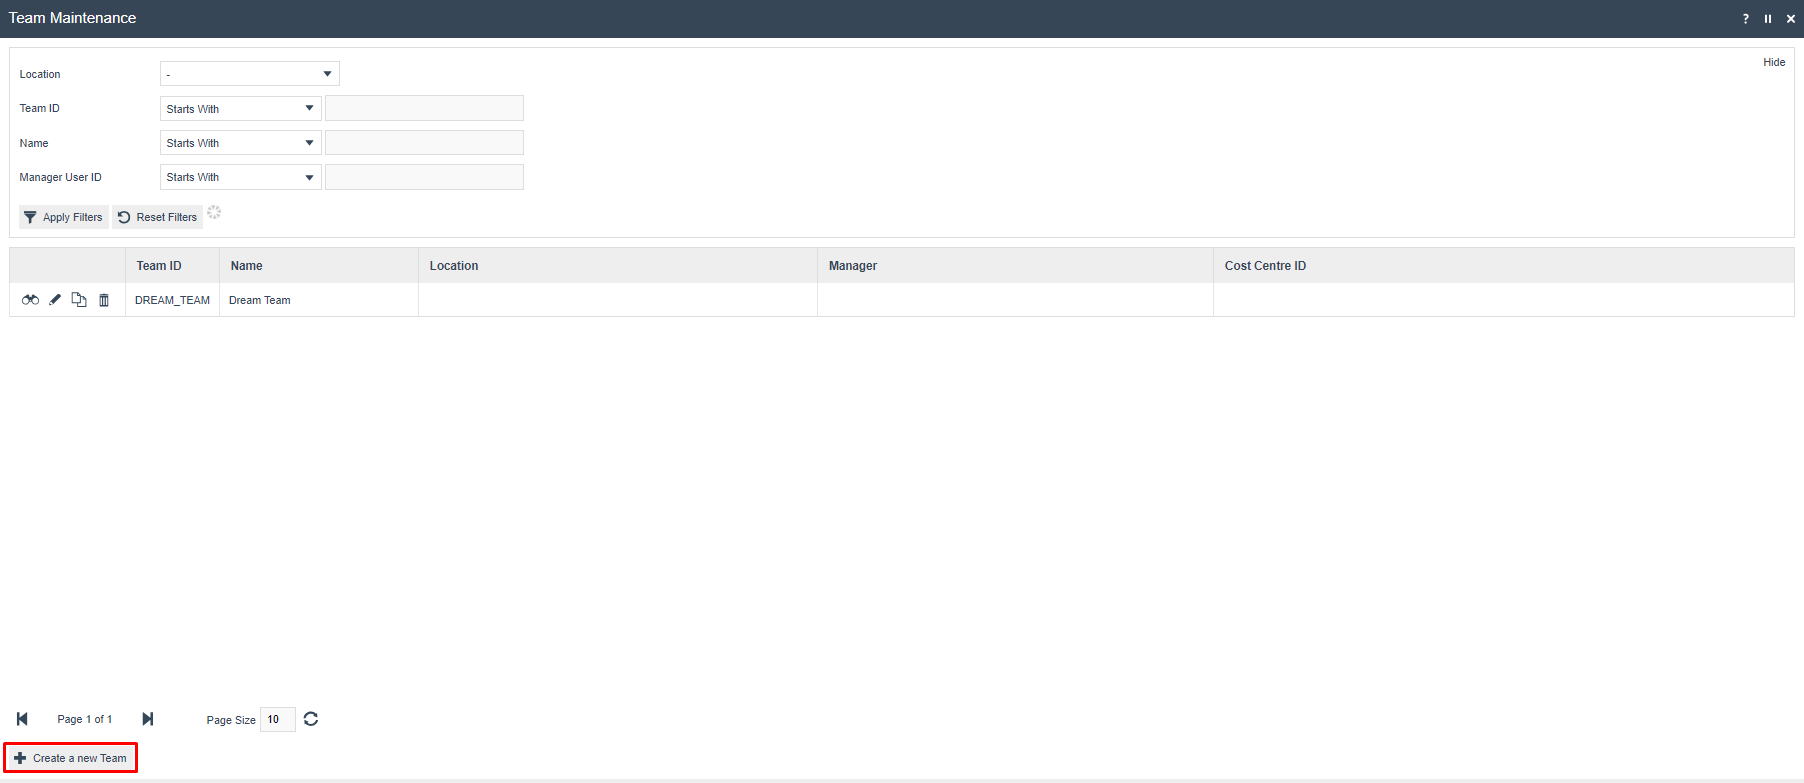
Creating a New User Team
Select Create a new Team on the Team Maintenance page.
Enter a unique Team ID for the new User Team. The ID can be alphanumeric and contain a maximum of 20 characters.

The Team Maintenance screen for the newly created User Team is presented with 3 key tabs: General, Team Customers and Team Users.
User Team - General Tab
The General tab captures the basic information of the new User Team.
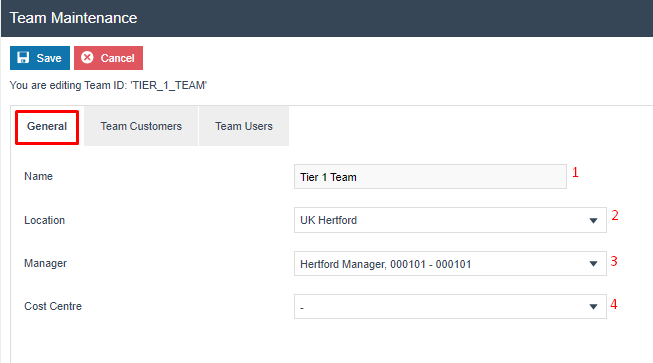
Set the appropriate values on the General tab as follows:
| Configuration | Description |
|---|---|
| Name | Enter a user-defined, meaningful name for the Team by which Users may recognise and select it. Alphanumeric; maximum 40 characters. |
| Location | Select from a dropdown list of all configured Locations. |
| Manager | Select from a dropdown list of all configured Users. |
| Cost Centre | Select from a dropdown list of all configured Cost Centres. |
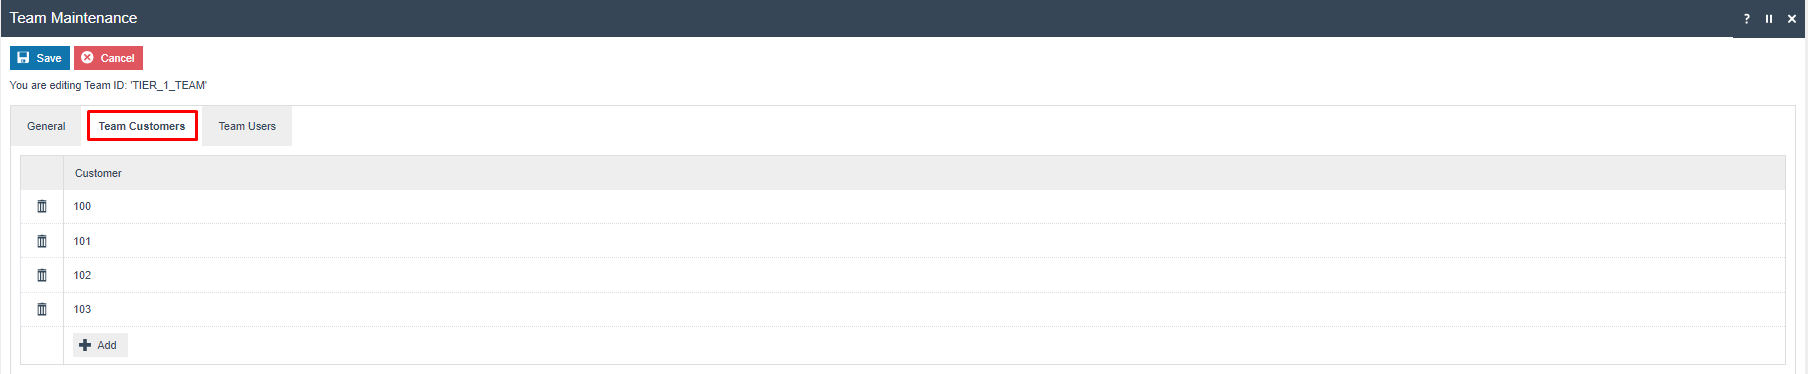
User Team - Team Customers Tab
The Team Customers tab captures a list of Customers affiliated with this Team. The list is created by selecting the Add option. Customers appear in the list with a Delete icon for removal.
User Team - Team Users Tab
The Team Users tab captures a list of Users belonging to the Team. The list is created by selecting the Add option.

| Configuration | Description |
|---|---|
| User | The user added to the team. |
| Relationship Name | The Relationship of the User to the Team. Enter a meaningful name. Alphanumeric; maximum 40 characters. |
| Relationship ID | Uniquely identifies the Relationship of the User to the Team. Enter a unique ID. Alphanumeric; maximum 20 characters. |
After creating the User Team, click Save. These User Teams can be assigned when creating a new User or User Template.
This completes the User Team configuration.
Configuration Steps - Functional Authorisation Codes
Functional Authorisation Codes can be created in the Role Maintenance page while editing any Role. Once created, they are available for association with any other Role. Various configurations provide for qualifying access to an option based on a Functional Authorisation Code. The same code may be used in more than one configuration.
The main uses are to set Tender debit limits and to limit specific Reason codes to certain users.
Setting Functional Codes in User Roles
In User Role Maintenance, edit a role and go to the Special Functions tab.
To create a new Function Code, enter a Function Code and Description and click Add Function.
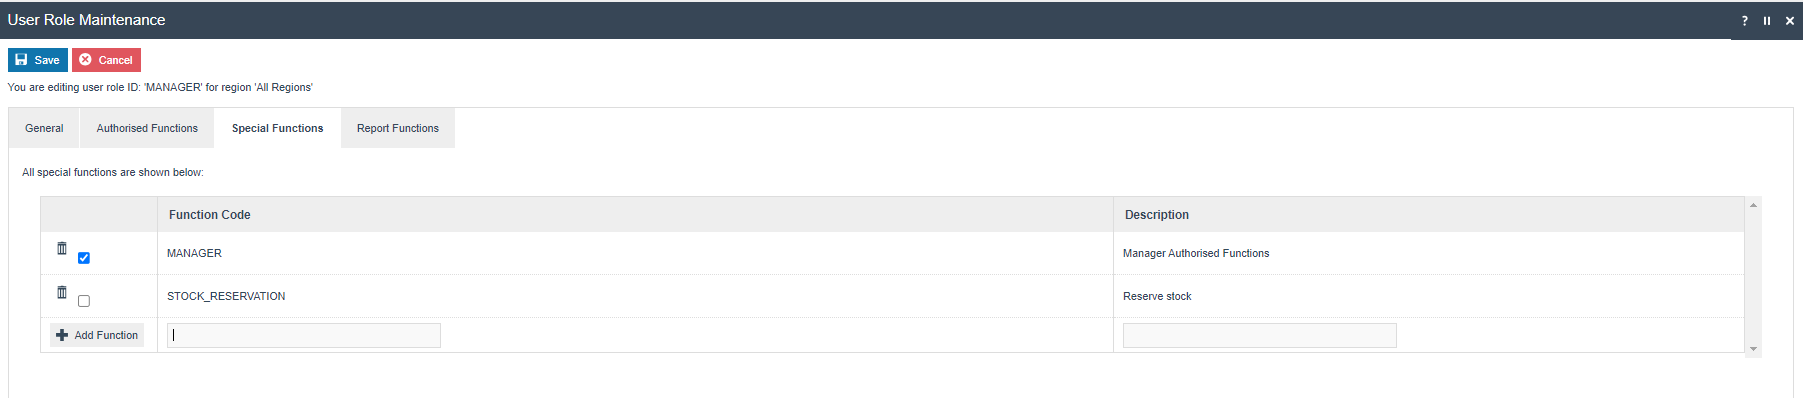
| Configuration | Description |
|---|---|
| Function Code | Maximum 20 alphanumeric characters. Enter a user-defined, unique value. |
| Description | Maximum 30 alphanumeric characters. Enter a user-friendly, meaningful value by which Users will identify and select the Function Code. |
To set the special function for the role, ensure the tick box is selected and click Save.
Configuring Tender Limits using Functional Codes
Tender Limits can be set on each tender for a functional code. A sales assistant may be able to tender with a different amount to a manager. Configuring the tender limit using the Functional Code will limit the user if they try to tender over this limit and ask for authorisation from a manager.
To configure Tender Limits:
- Sign on to Estate Manager
- Navigate to Configuration > Financial > Tender
- Edit the tender and go to the User Limits tab
- Add the Authorisation Code and set the user limit
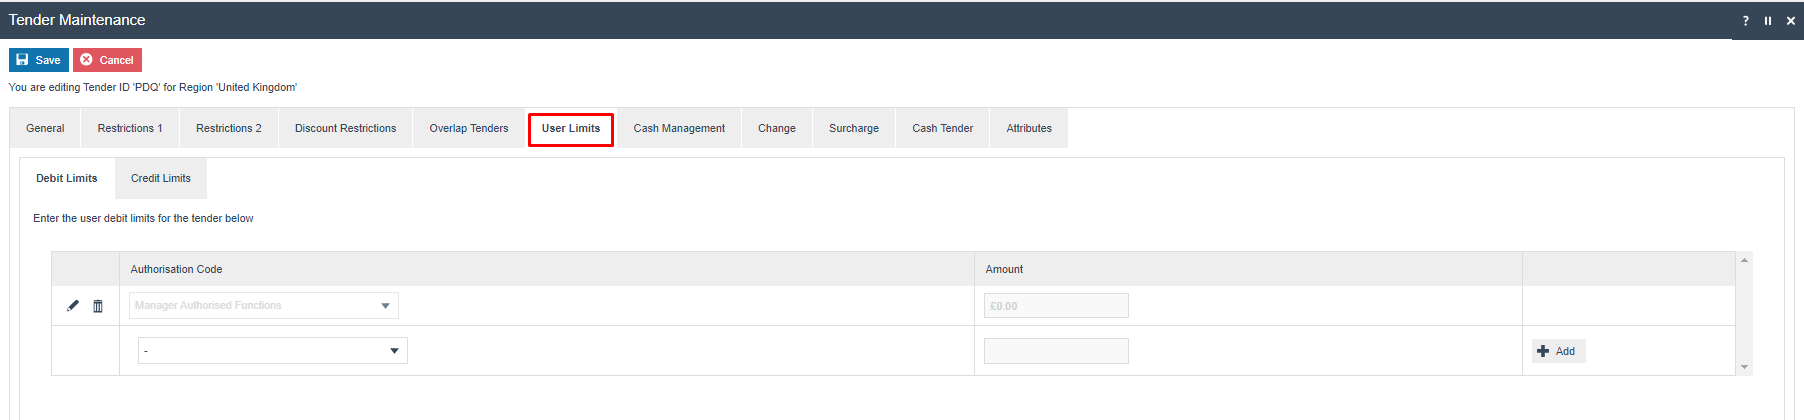
For changes to take effect, the Tender entity will need to be broadcast to the POS.
Configuring Reasons for Specific Functional Codes
It is possible to limit the use of specific reason codes to users with the correct Functional Code. For example, a transaction discount reason can be restricted so that when a user tries to use this reason, they will be required to get authorisation from a user who has the correct Functional Code.
To configure Reason restrictions:
- Sign on to Estate Manager
- Navigate to Configuration > Organisation > Reasons
- Edit the reason to set the Functional Authorisation Code

For changes to take effect, the Reasons entity will need to be broadcast to the POS.
This completes the Functional Authorisation Codes configuration.
Configuration Steps - Broadcasting
To deliver all the configuration changes to the POS, broadcast the following entities:
- Role
- User
- User Template
- Group
- Team
- Tender (if tender limits were configured)
- Reasons (if reason codes were configured)
All entities must be broadcast to the POS terminals and any store server devices for the configuration to take effect.
This completes the Broadcasting configuration.
POS Screens
The following screens demonstrate the configured user access in action on the POS.
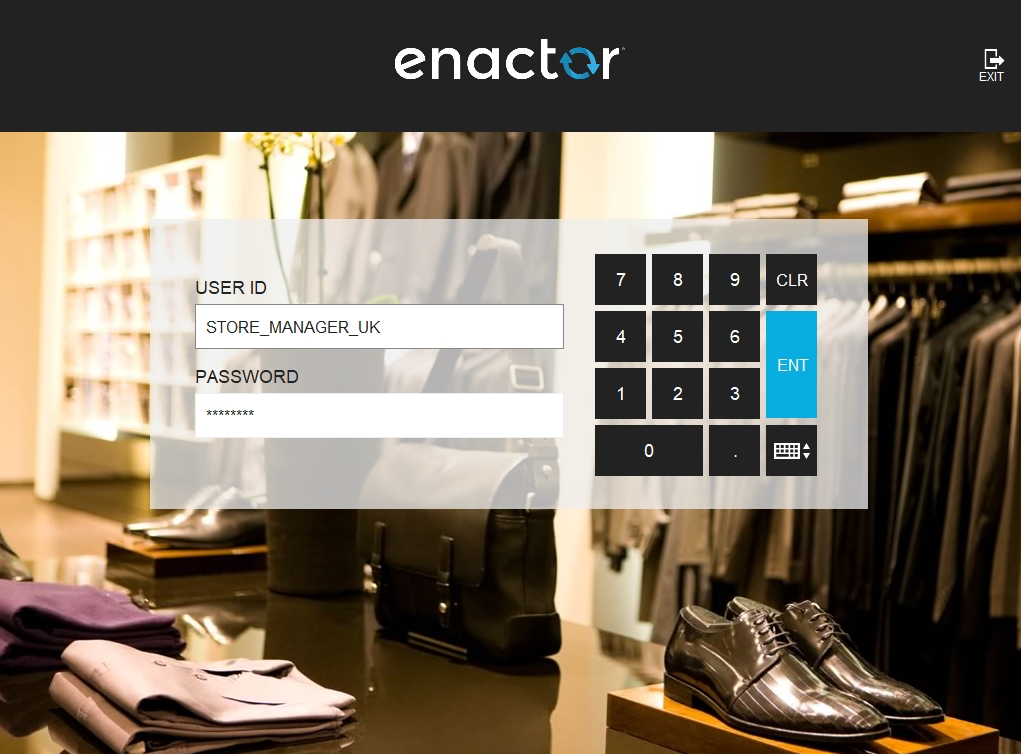
Signing On as Store Manager
The following screen shows signing on using the STORE_MANAGER_UK user that was created.
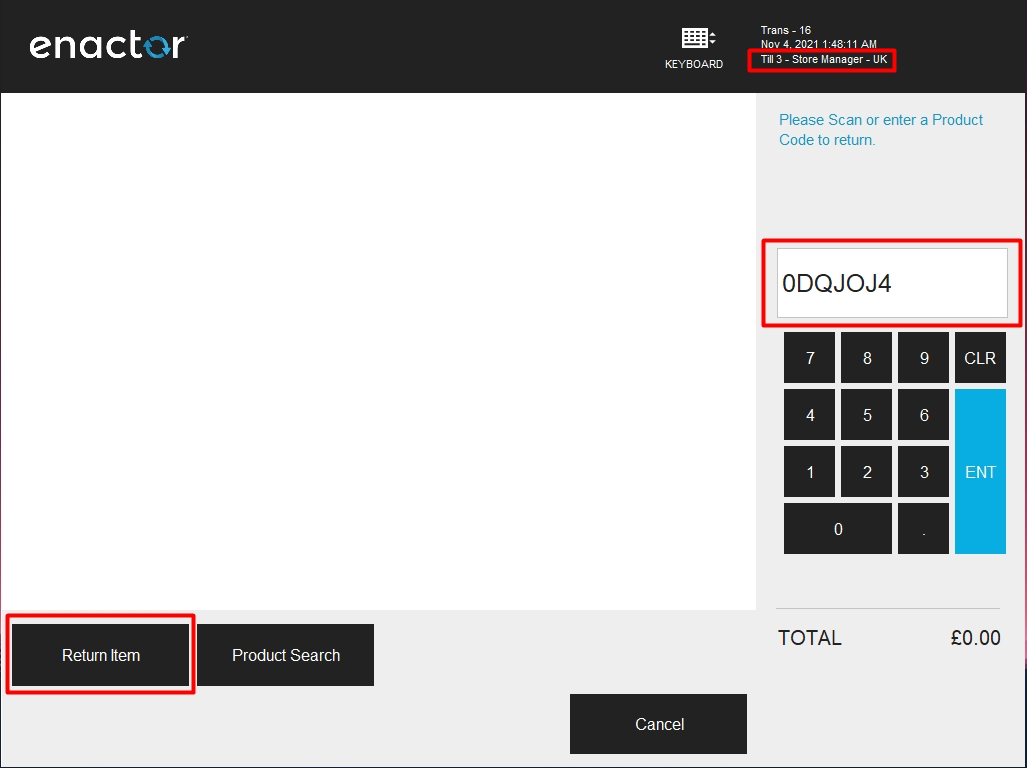
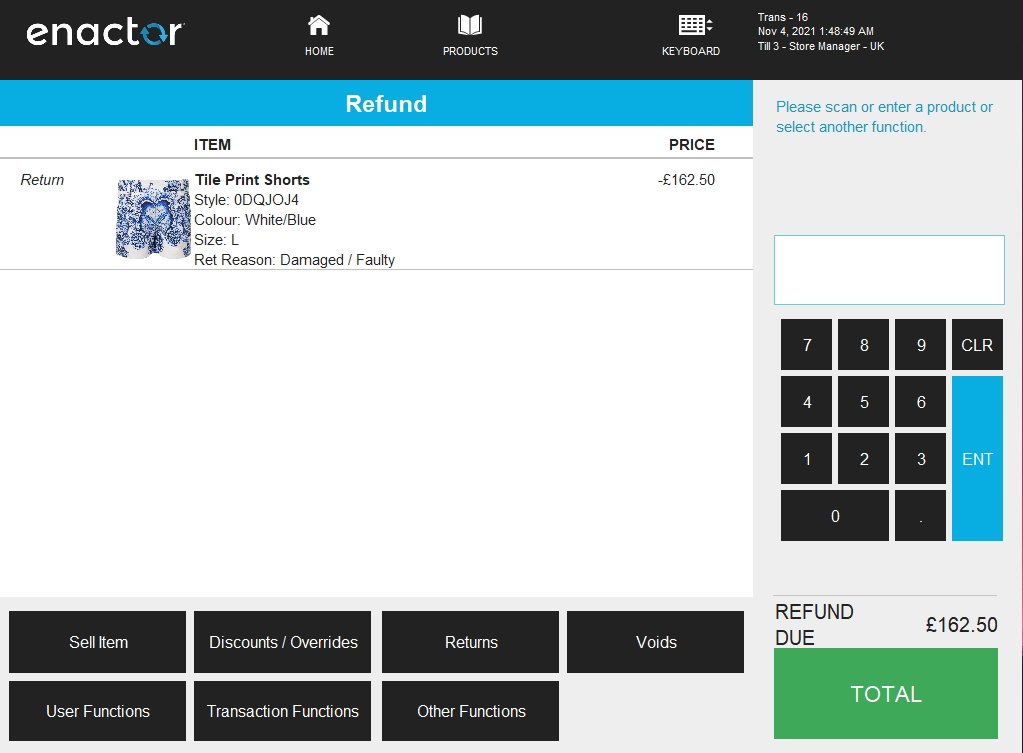
Item Return with Manager Privileges
The following screens show how an Item Return is performed using this User, demonstrating that the privileges added to the Manager - Returns role allow the Item Return function to operate successfully.
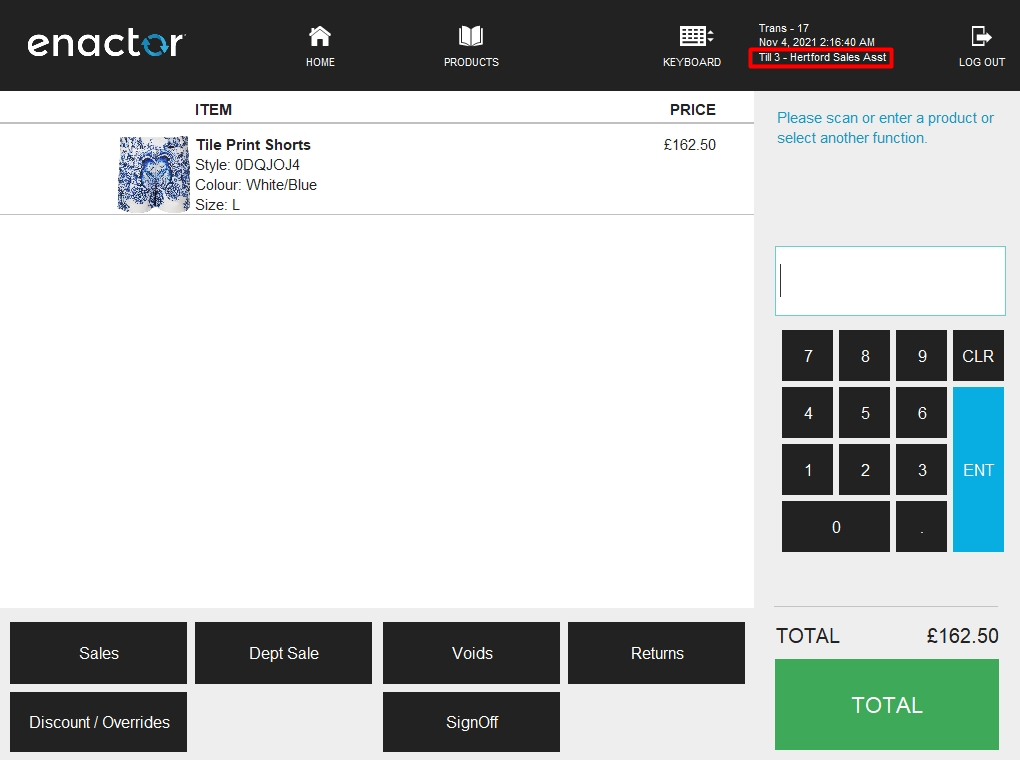
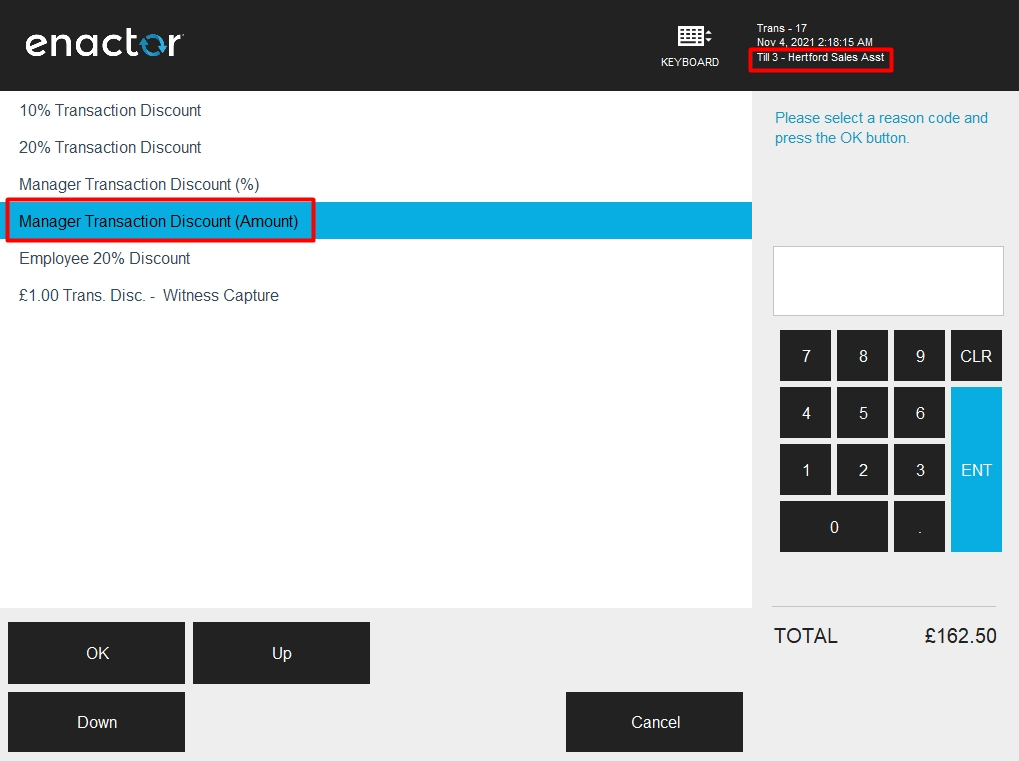
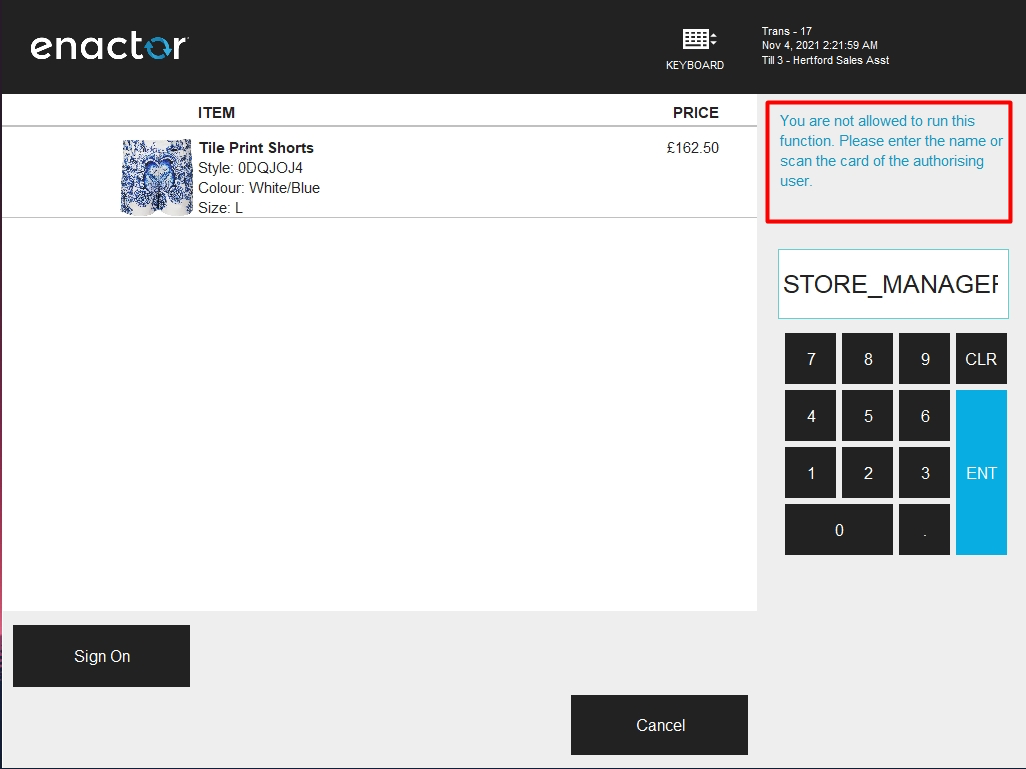
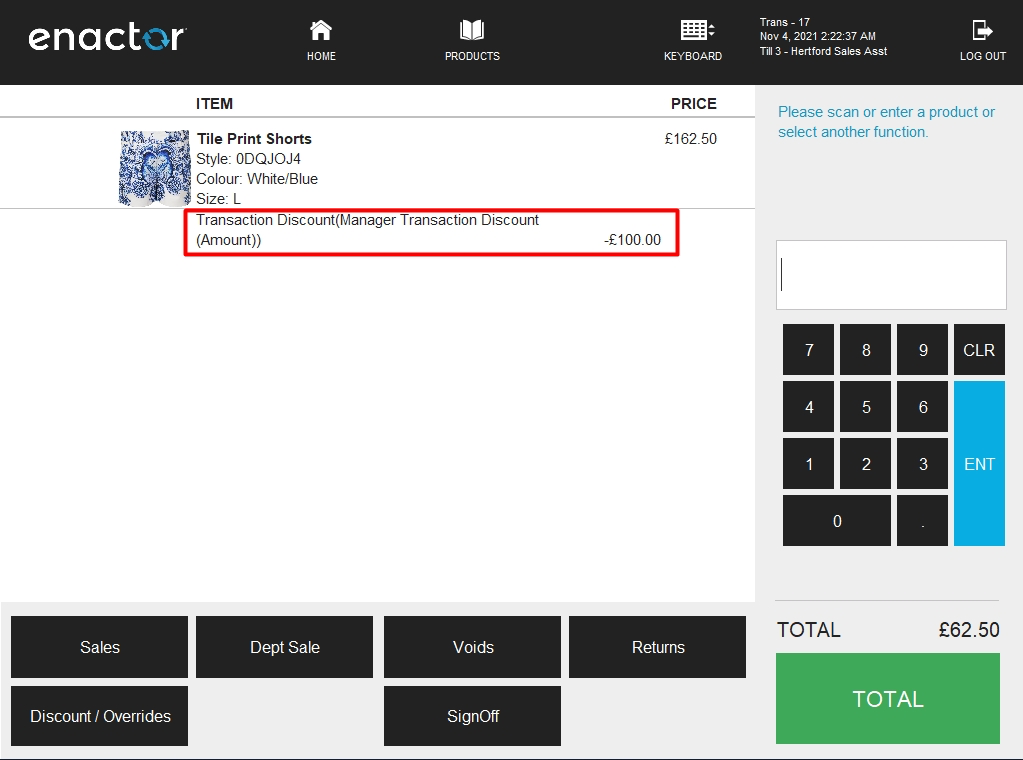
Functional Authorisation Code in Action
The following screens show how a Sales Assistant User tries to apply a Manager Transaction Discount which has a functional authorisation code configured against this reason.
About This Document
(c) 2026 Enactor Ltd
All documents produced by Enactor Ltd are supplied to customers subject to Copyright, commercial confidentiality, and contractual agreements and must not be copied or transferred without permission.
Document Context
This document is part of the Enactor Product Documentation Series. All Enactor products include a comprehensive documentation set designed to improve understanding of the product and facilitate ease of use.
Document Inquiries
If you find that a document is inaccurate or deficient in any way, please contact:
Email: documentation@enactor.co.uk
Document History
| Version | Status | Issue Date | Author | Reason for Issue | Software Version |
|---|---|---|---|---|---|
| 1.0 | Initial Draft | 19 October 2020 | Kevin Charlesworth | Initial Version | - |
| 1.1 | Reviewed | 22 September 2023 | Dilpa Sirimanna | Conducted theme changes | - |
| 2.0 | Revised | 31 March 2026 | Shenol Silva | Reformatted to documentation standard | 2.7.1724 |