How To Configure Void Reasons
Introduction
The purpose of this guide is to provide a foundational understanding of the options and capabilities available when configuring Void Reasons. Void Reasons are Reasons for which either a particular item or an entire transaction may be deemed to be void and not taken into consideration, due to reasons such as the item being faulty, a customer leaving the store, or operator error.
Overview
This guide covers the configuration of the following:
- Item Void Reason - Allows setting a particular item in a transaction as a void item.
- Transaction Void Reason - Allows setting an entire transaction as a void transaction.
- Post Transaction Void Reason - Allows setting an entire completed transaction as a void transaction.
- Item Tender Void - Allows setting a tender function applied on a transaction as void.
Item Void Reason
There are instances when a customer requires eliminating a selected item before proceeding with the transaction. Item Void Reason allows setting a particular item in a transaction as a void item.
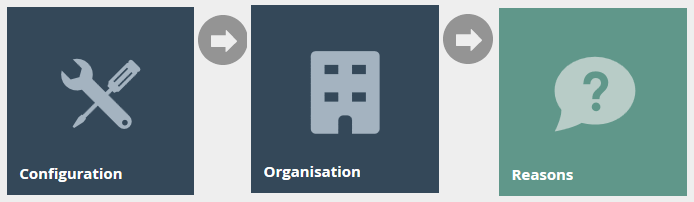
Navigate to Reason configuration using the Search or the path:
Main Menu > Configuration > Organisation > Reasons
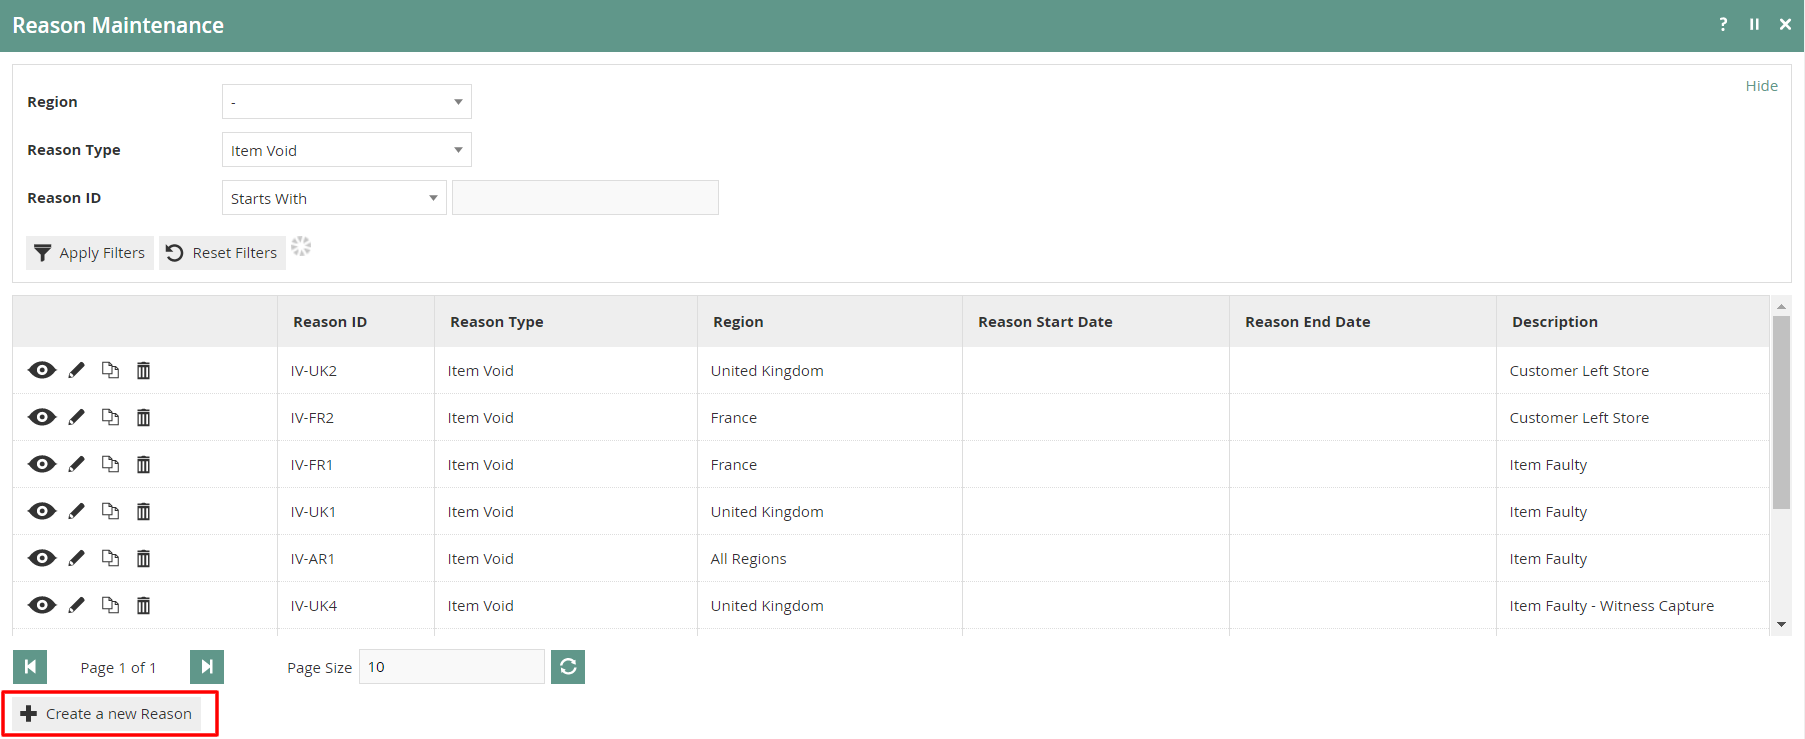
To create a new Reason, select Create a New Reason on the Reason Maintenance page.
Select the appropriate Region from the Region drop-down. Select Item Void from the Reason Type drop-down. Enter a unique Reason ID for the new Item Void Reason. The ID can be alphanumeric and contain a maximum of 20 characters.
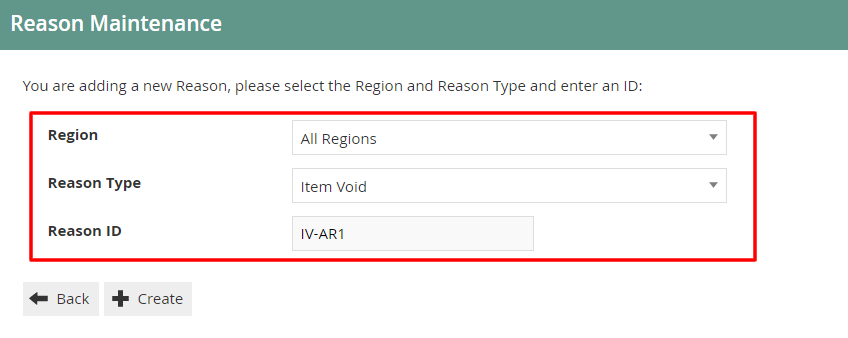
Select Create.
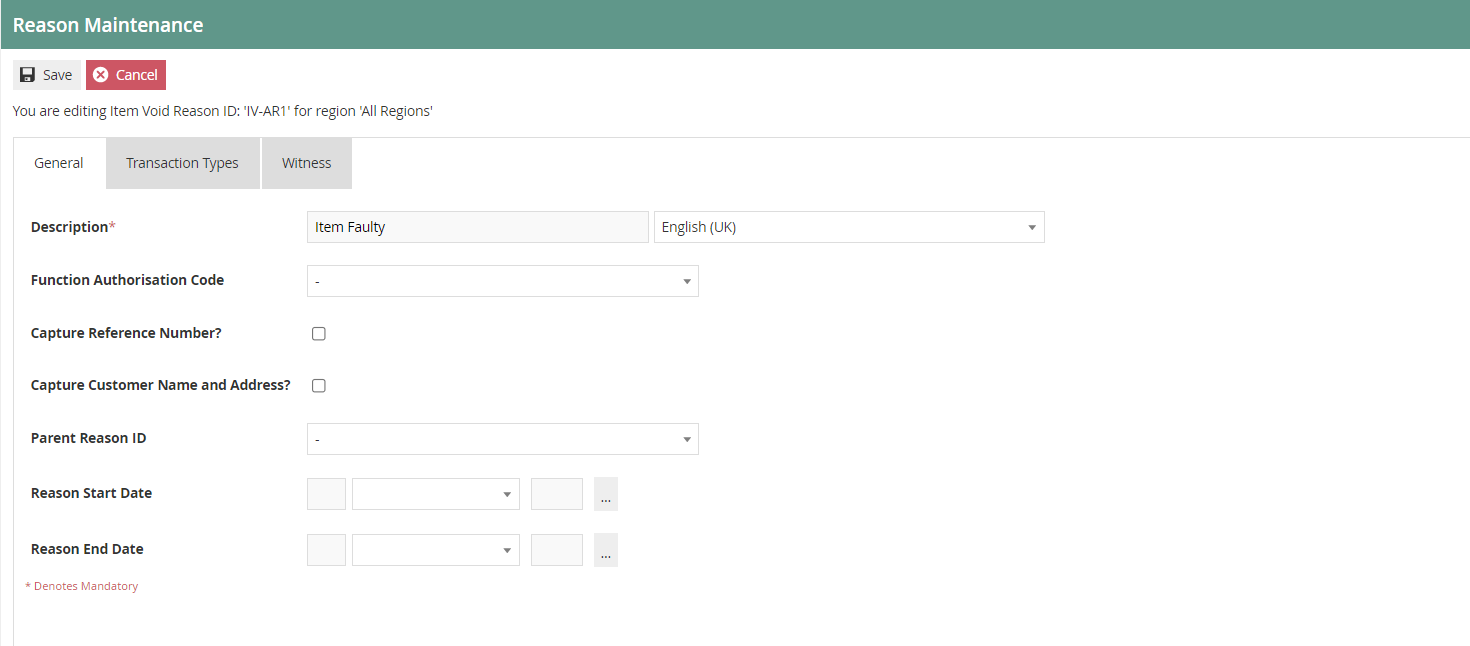
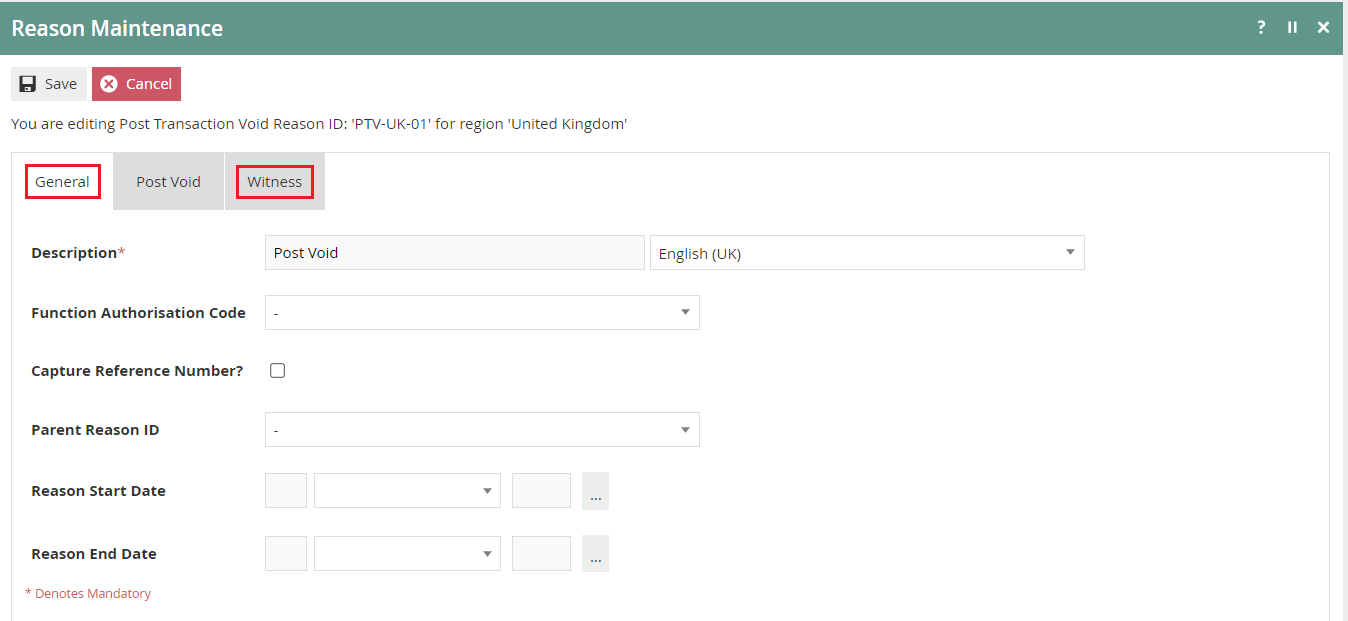
Reason - General Tab
The General tab has all the basic information that captures the identity of the Item Void Reason.
| Configuration | Description |
|---|---|
| Description | Enter a user-friendly, meaningful description for the Reason (alphanumeric, maximum 50 characters). Select the locale from the drop-down list of all configured Locales. |
| Function Authorisation Code | Select the applicable Function Authorisation Code from the drop-down list. Applicable only if the reason selection requires authorisation. |
| Capture Reference Number | If checked, the User will be prompted to enter a reference number when using this Reason. |
| Capture Customer Name and Address | If checked, the User must be prompted to capture the Customer's Name and Address when using this Reason. |
| Parent Reason ID | If the reason requires a parent reason, select the relevant parent reason from the drop-down list. |
| Reason Start Date | Enter a Reason Start Date. |
| Reason End Date | Enter a Reason End Date. |
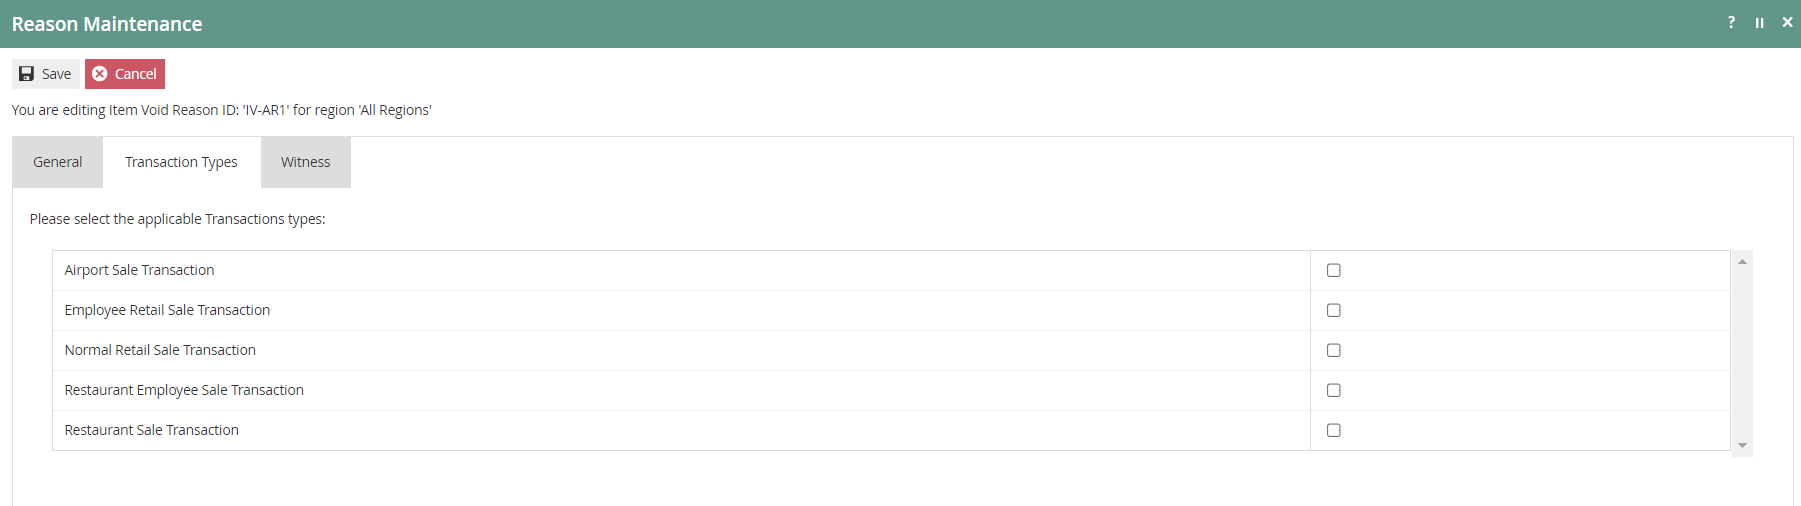
Reason - Transaction Types Tab
The Transaction Types tab is available for Reasons which are only valid for certain transaction types. If no transaction types are selected, it is assumed that the Reason is valid for all.
Reason - Witness Tab
The Witness tab is available for Reasons which require the User to obtain a witness. If checked, the user will be prompted for a witness whenever the Reason is selected.
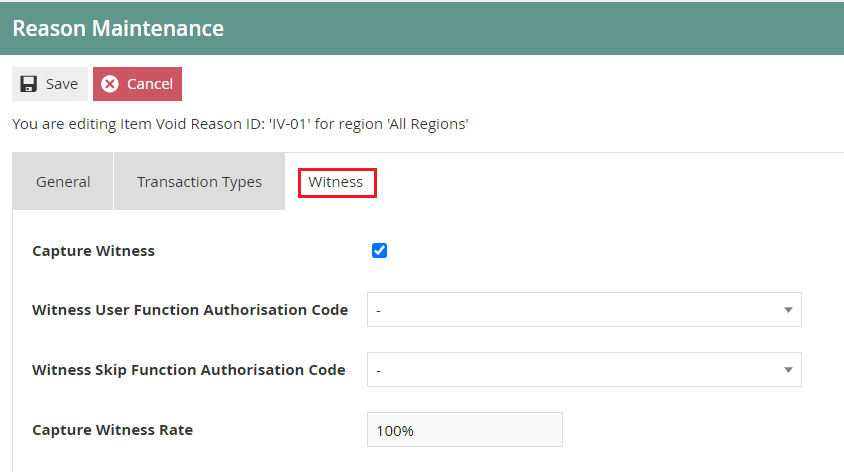
If checked, additional configuration options will appear:
| Configuration | Description |
|---|---|
| Witness User Function Authorisation Code | Select from the drop-down list to determine this as a Manager Authorised Function. |
| Witness Skip Function Authorisation Code | Select from the drop-down list to determine this as a Manager Authorised Function. |
| Capture Witness Rate | Enter a numeric value to define a percentage for the capture witness rate (the percentage of times the user will be prompted to capture a witness). |
Select Save to complete creating the Item Void Reason.
Multiple Reasons can be created for the Item Void Reason Type as required. These Reasons will be presented to the operator to select from when performing an Item Void.
This completes the Item Void Reason configuration.
Transaction Void Reason
Unlike eliminating a single purchased item, there are instances when a complete transaction might require eliminating. Transaction Void Reason allows setting an entire transaction as a void transaction.
To create a new Reason, select Create a New Reason on the Reason Maintenance page.
Select the appropriate Region from the Region drop-down. Select Transaction Void from the Reason Type drop-down. Enter a unique Reason ID for the new Transaction Void Reason.
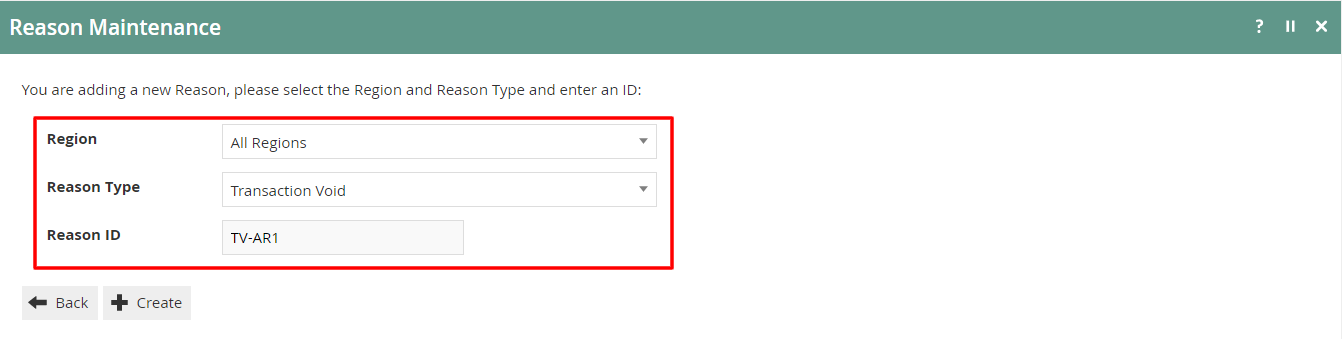
Select Create.
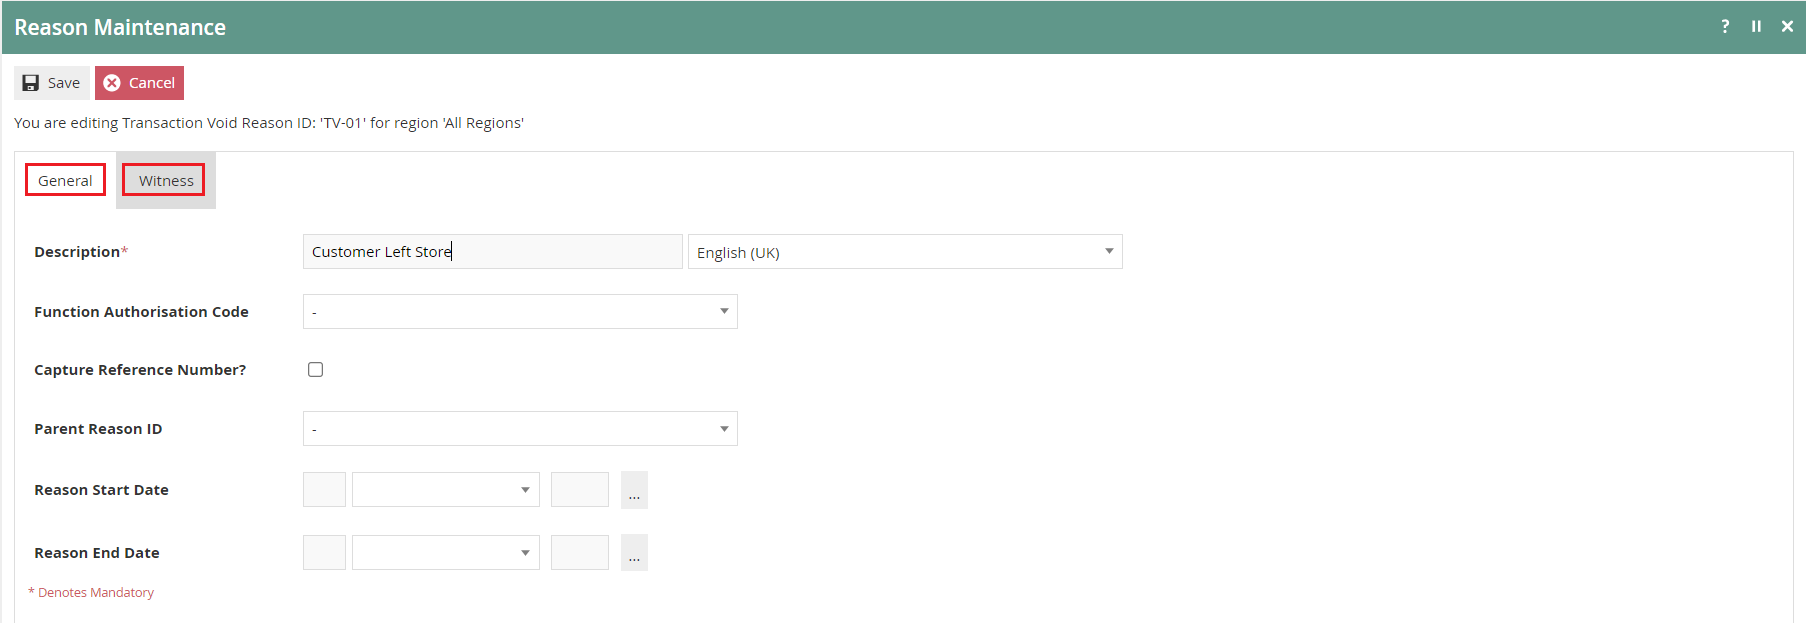
Reason - General Tab
Set the appropriate values on the General Tab as per the sample on configuring Item Void Reason.
Reason - Witness Tab
The Witness tab is available for Reasons which require the User to obtain a witness. If checked, this option is made active for this Reason.
Set the appropriate values on the Witness Tab as per the sample on configuring Item Void Reason.
Select Save to complete creating the Transaction Void Reason.
Multiple Reasons can be created for the Transaction Void Reason Type as required.
This completes the Transaction Void Reason configuration.
Post Transaction Void Reason
Post Transaction Void Reason allows setting an entire transaction that has been completed as a void transaction.
To create a new Reason, select Create a New Reason on the Reason Maintenance page.
Select the appropriate Region from the Region drop-down. Select Post Transaction Void from the Reason Type drop-down. Enter a unique Reason ID for the new Post Transaction Void Reason.

Select Create.
Reason - General Tab
Set the appropriate values on the General Tab as per the sample on configuring Item Void Reason.
Reason - Witness Tab
The Witness tab is available for Reasons which require the User to obtain a witness. If checked, this option is made active for this Reason.
Set the appropriate values on the Witness Tab as per the sample on configuring Item Void Reason.
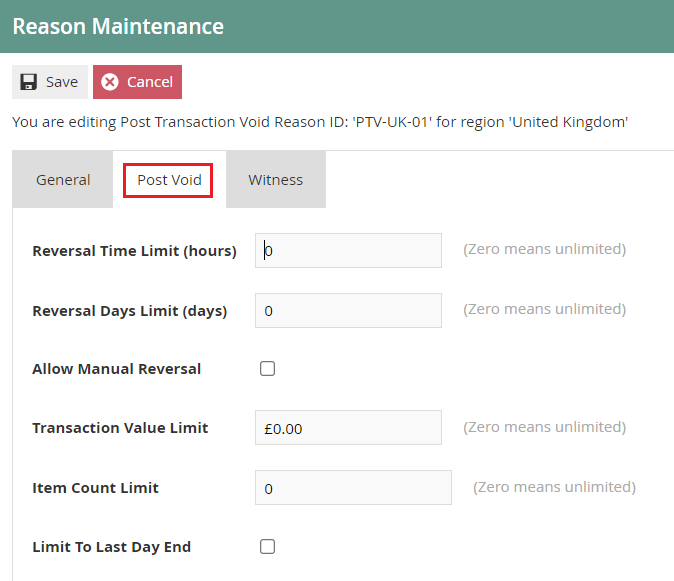
Reason - Post Void Tab
| Configuration | Description |
|---|---|
| Reversal Time Limit (hours) | Enter a numeric value to indicate the limit for reversal in hours. If set to zero, the hours will be unlimited. |
| Reversal Days Limit (days) | Enter a numeric value to indicate the limit for reversal in days. If set to zero, the days will be unlimited. |
| Allow Manual Reversal | Select checkbox to enable the user to perform a manual reversal through the POS. |
| Transaction Value Limit | Set a Transaction Value Limit for the post transaction void reason. If set to zero, the transaction value will be unlimited. |
| Item Count Limit | Enter a numeric value to indicate a limit for items for this void reason. If set to zero, the item count will be unlimited. |
| Limit To Last Day End | Select checkbox to indicate that the reason is limited to the Last Day End. |
Select Save to complete creating the Post Transaction Void Reason.
Multiple Reasons can be created for the Post Transaction Void Reason Type as required.
This completes the Post Transaction Void Reason configuration.
Item Tender Void Reason
When adding various tenders to an order, there may be instances where the customer will need to change the mode of payment. Item Tender Void Reason allows setting a selected tender function (Cash or Card) of a transaction as void.
To create a new Reason, select Create a New Reason on the Reason Maintenance page.
Select the appropriate Region from the Region drop-down. Select Item Tender Void from the Reason Type drop-down. Enter a unique Reason ID for the new Item Tender Void Reason.
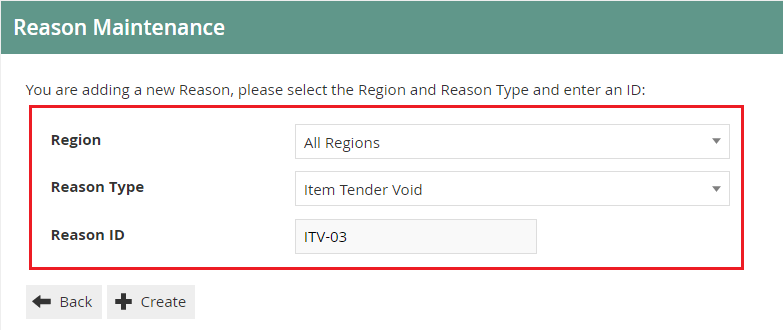
Select Create.

Reason - General Tab
Set the appropriate values on the General Tab as per the sample on configuring Item Void Reason.
Reason - Transaction Types Tab
All Transaction Types for this Reason can be selected here. If no transaction types are selected, it is assumed that the Reason is valid for all.
Set the appropriate values on the Transaction Types Tab as per the sample on configuring Item Void Reason.
Reason - Witness Tab
The Witness tab is available for Reasons which require the User to obtain a witness. If checked, this option is made active for this Reason.
Set the appropriate values on the Witness Tab as per the sample on configuring Item Void Reason.
Select Save to complete creating the Item Tender Void Reason.
Multiple Reasons can be created for the Item Tender Void Reason Type as required.
This completes the Item Tender Void Reason configuration.
Menus
To enable the use of the above reasons, appropriate Menu and Role privileges should be configured separately.
Navigate to Menu configuration using the Search or the path:
Main Menu > Configuration > System > Menus

The Sale Menu contains most of the functions that will be required by a retailer.
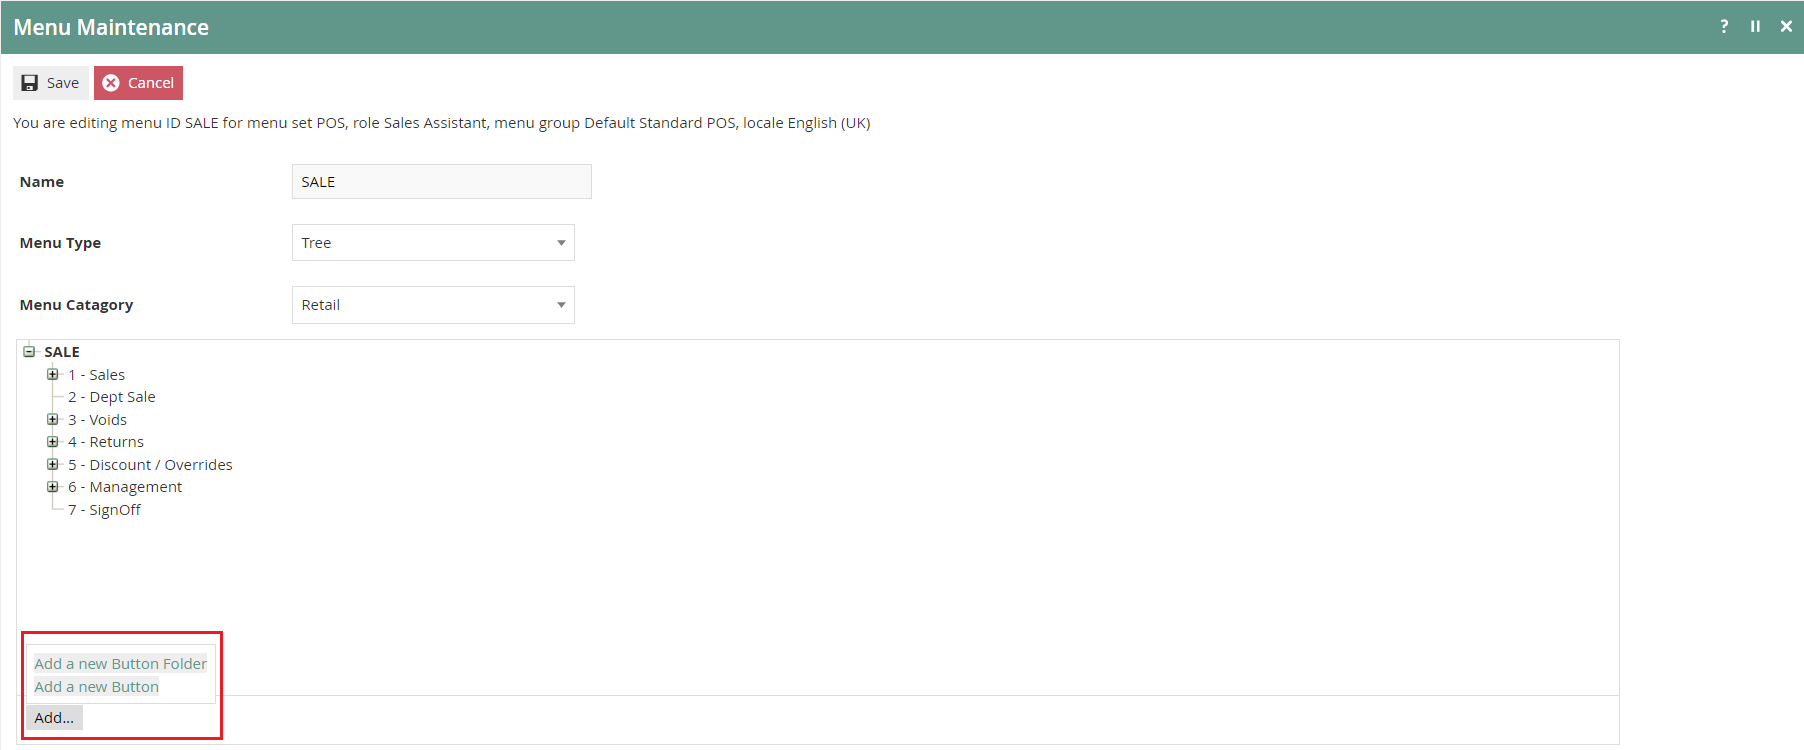
The following events can be configured in the Sale Menu for Void Reasons:
| Reason Type | Event Name | Event ID |
|---|---|---|
| Item Void | Item Void | ItemVoid |
| Transaction Void | Transaction Void | TransactionVoid |
| Post Transaction Void | Post Void | PostVoid |
This completes the Menu configuration.
User Roles
Navigate to Role configuration using the Search or the path:
Main Menu > Configuration > HR > User Roles

Authorisation to run the specific functionality documented here is controlled with privileges maintained in Roles.
Select an appropriate Role to edit - the example here uses SALES_ASSISTANT.
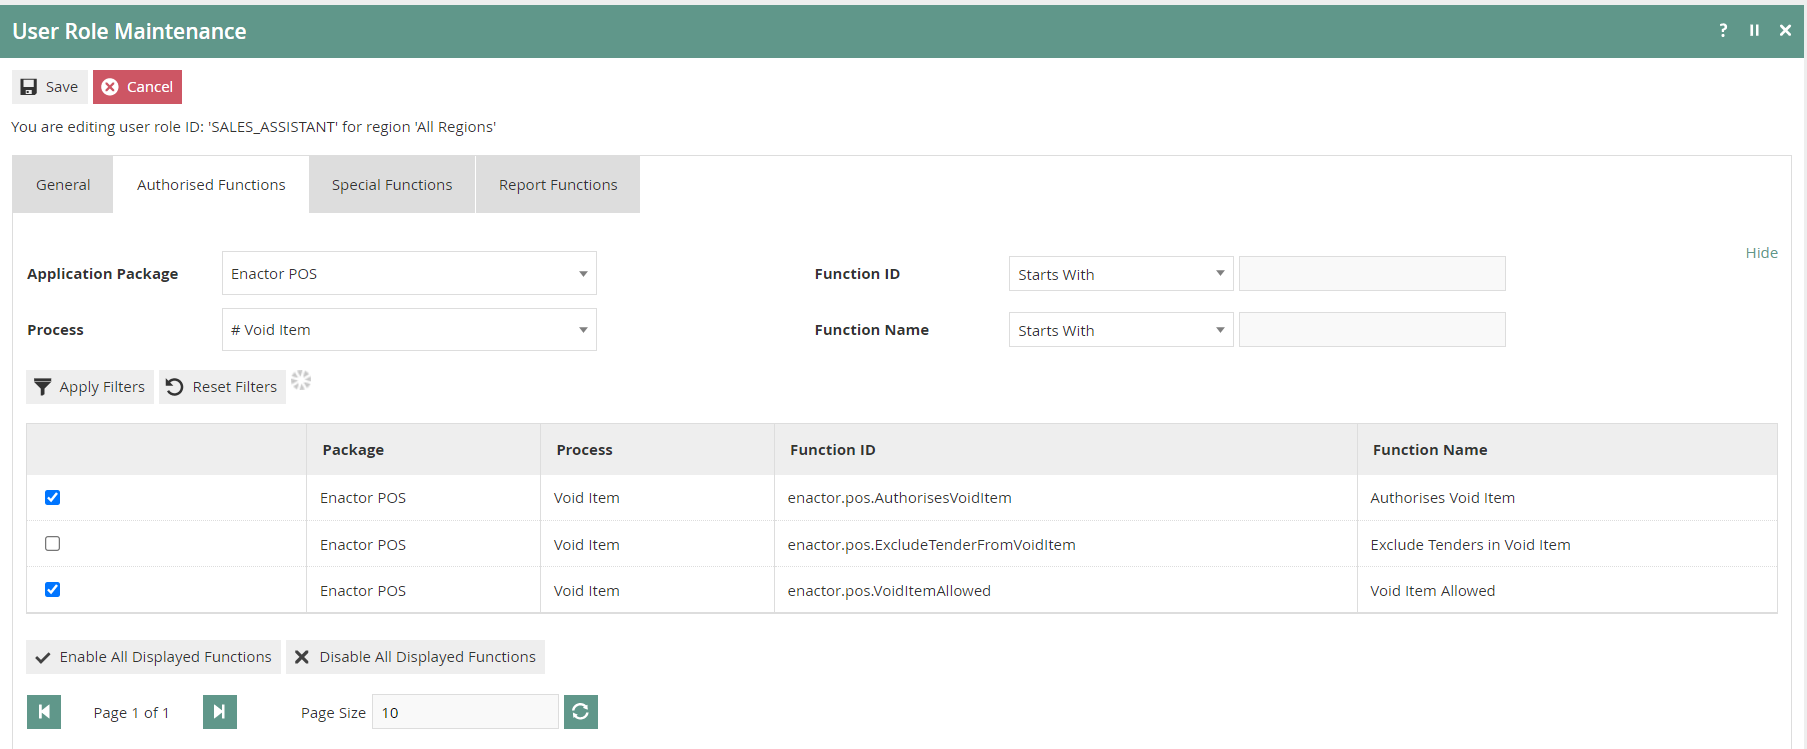
Select the Enactor POS package and configure the following privileges as required:
| Reason Type | Package | Function ID |
|---|---|---|
| Item Void | Enactor POS | enactor.pos.AuthorisesVoidItem |
| Item Void | Enactor POS | enactor.pos.VoidItemAllowed |
| Transaction Void | Enactor POS | enactor.pos.AuthorisesVoidTransaction |
| Transaction Void | Enactor POS | enactor.pos.VoidTransactionAllowed |
| Post Transaction Void | Enactor POS | enactor.pos.AuthorisesPostTransactionVoid |
| Post Transaction Void | Enactor POS | enactor.pos.PostTransactionVoidAllowed |
| Item Tender Void | Enactor POS | enactor.pos.AuthorisesVoidTenderItem |
| Item Tender Void | Enactor POS | enactor.pos.VoidTenderItemAllowed |
This completes the User Roles configuration.
Broadcasting
To deliver the configuration changes to the POS, broadcast the following entities: Reasons, Menus, Roles.
This completes the Broadcasting configuration.
POS Functionality
Item Void
On adding products to the bag, the operator will be presented with screen 1.
Select a product as shown on screen 2 to view all applicable functions for the product in the bottom pane.
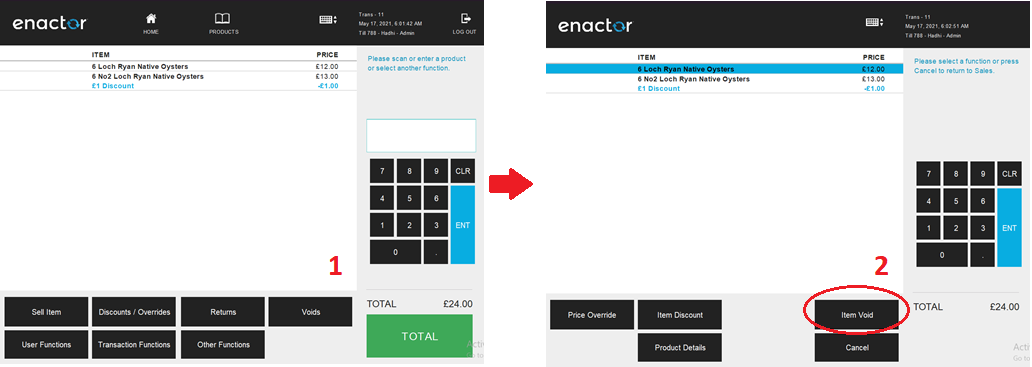
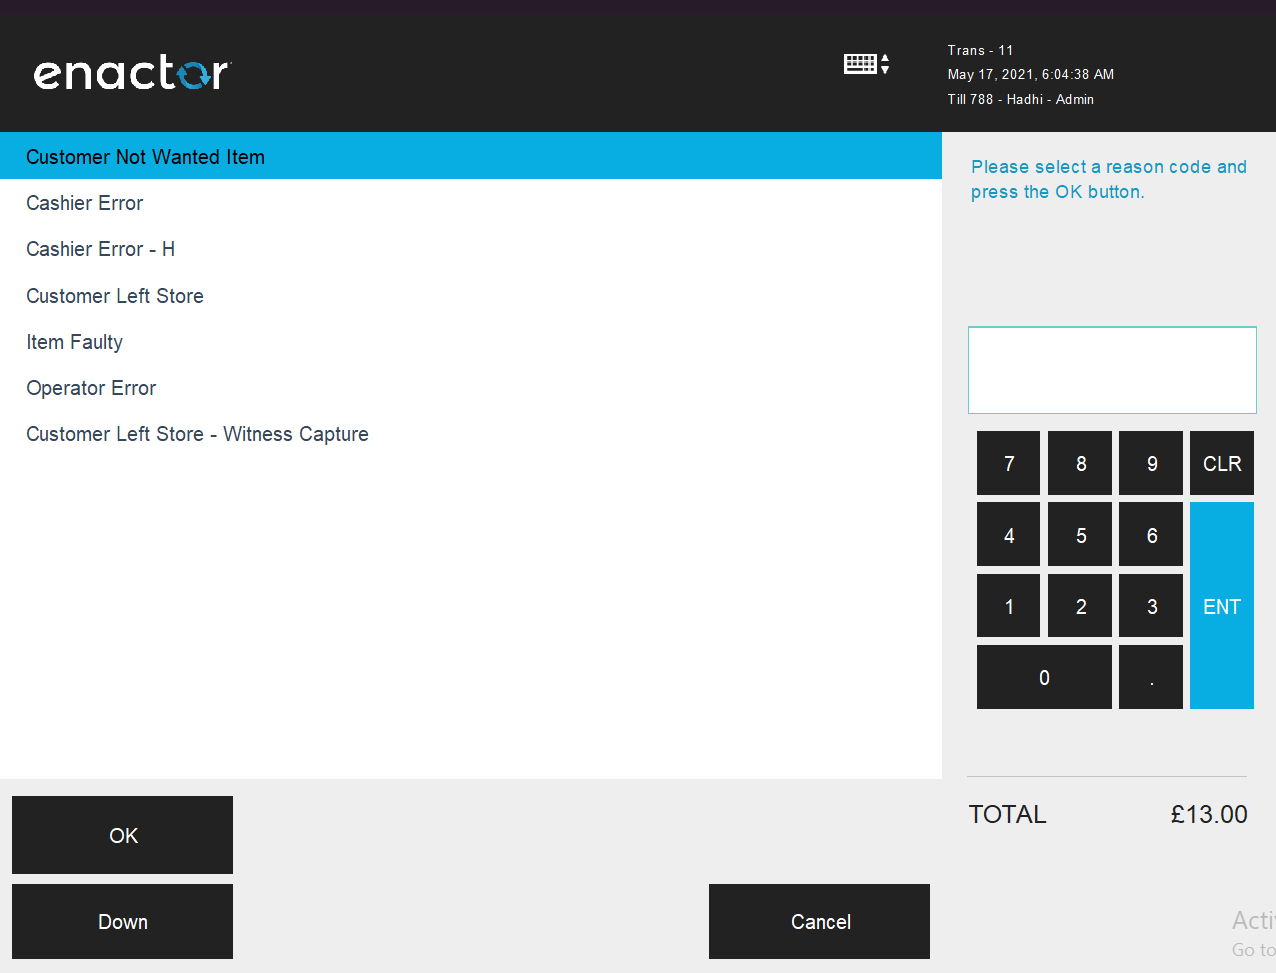
Select Item Void and a set of configured Item Void Reasons are displayed to the operator.

The operator can then select the applicable Reason and click OK to apply the Item Void reason to the selected product.
Transaction Void
On adding products to the bag, the operator will be presented with screen 1.
All applicable functions for the transaction are displayed in the bottom pane. Select Voids and the option of Transaction Void will be displayed to the operator as shown on screen 2.

Select Transaction Void and a set of configured Transaction Void Reasons are displayed to the operator.
The operator can then select the applicable Reason and click OK to apply the Transaction Void function to the selected transaction.
Post Transaction Void
After completing a transaction, the operator can use the Post Transaction Void function by clicking on the Post Void button as shown on screen 1. Once Post Void is selected, click on the Search button as shown on screen 2 to pick the transaction to void.
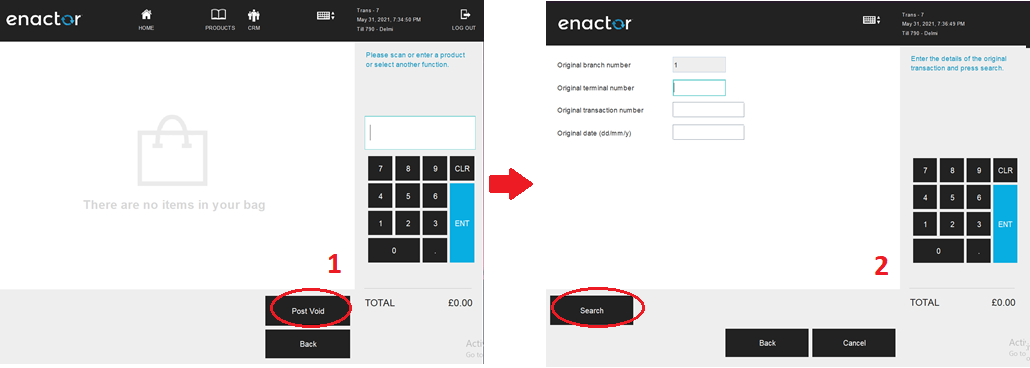
Enter search criteria and select the Search button again as shown on screen 3. Search results of the transactions will be displayed as shown on screen 4.
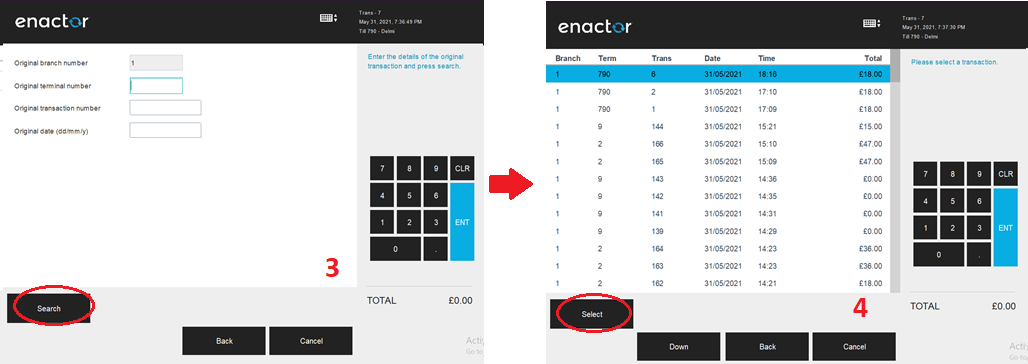
Select the transaction from the list and select the Confirm button, which will result in a Post Transaction Void.
Item Tender Void
After completing a transaction, the operator can use the Item Tender Void function. Selecting the tender applied and clicking on the Void Tender button as shown on screen 1.
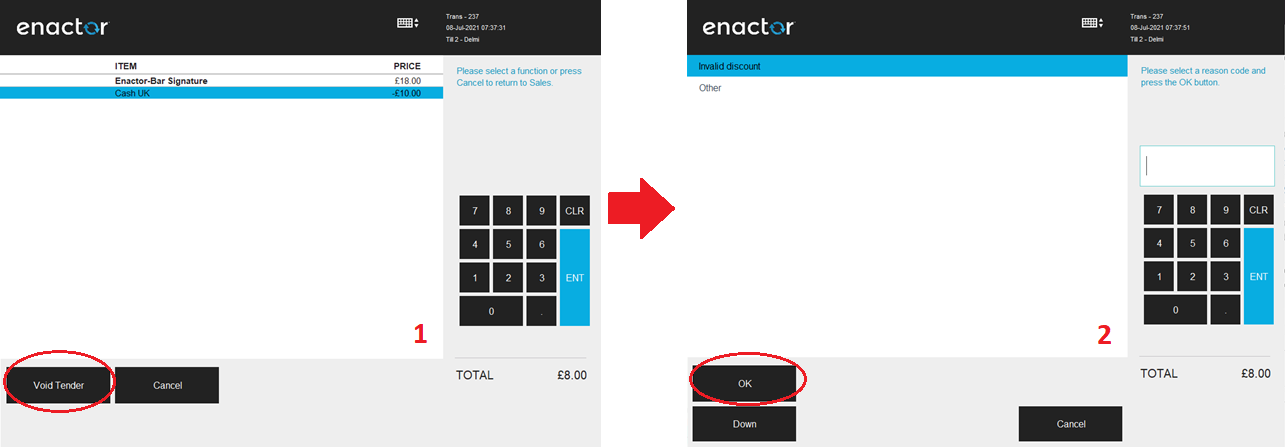
A set of configured Item Tender Void Reasons are displayed to the operator as shown on screen 2.
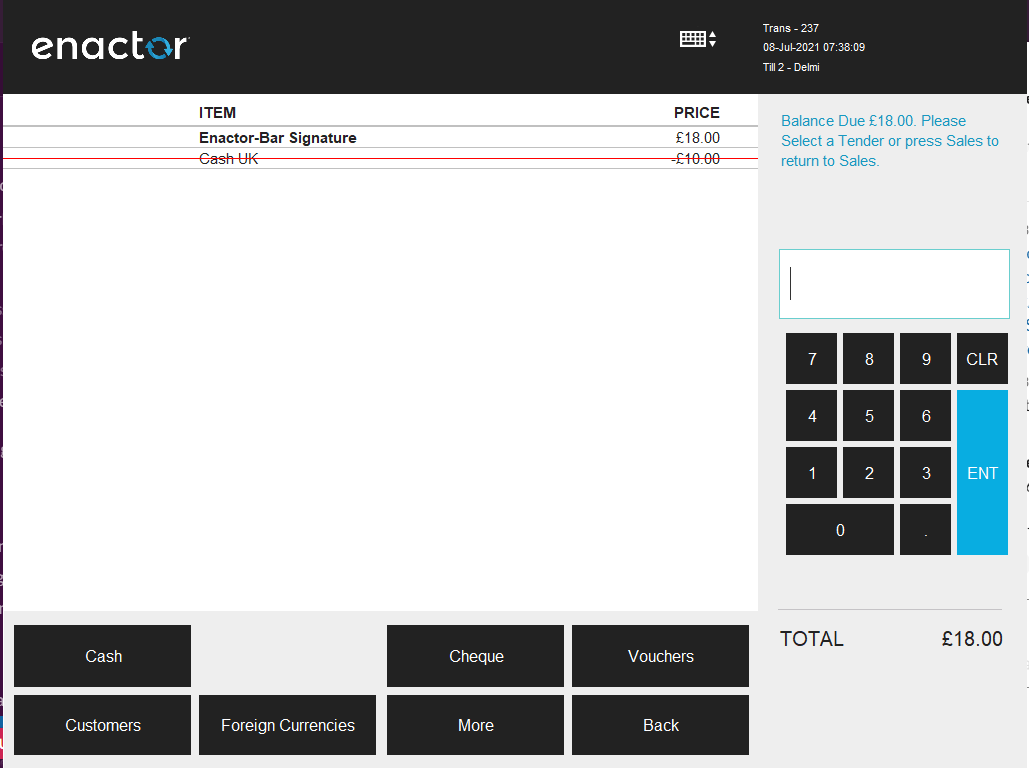
The operator can then select the applicable Reason and click OK to apply the Item Tender Void function to the selected transaction.