How-to Guide - Configuring Voids
Introduction
This guide provides a foundational understanding of the options and capabilities available when configuring void functionality in the Enactor Retail System. Void functionality encompasses the full end-to-end setup required to enable void operations at the POS -- from defining the void types operators can perform, through to exposing those functions in the Sale menu and granting the appropriate user role privileges.
Void operations allow operators to cancel or remove items, transactions, or tenders from consideration. Common scenarios include a faulty item, a customer leaving the store, or an operator error.
Enactor supports four types of void operation at the POS:
- Item Void - Allows an operator to mark a selected basket item as void, removing it from the active transaction.
- Transaction Void - Allows an operator to void an entire active transaction before it is completed.
- Post Transaction Void - Allows an operator to void a transaction that has already been completed, with optional time and value limits.
- Item Tender Void - Allows an operator to void a tender (such as cash or card) that has been applied to a transaction.
The purpose of this guide is to demonstrate the steps required to configure void functionality in the Enactor Estate Manager: setting up the void types available at the POS, configuring the Sale menu to expose void functions to operators, setting up user role privileges, and broadcasting the configuration to the POS.
Overview
The following steps are required to enable void functionality at the POS:
- Item Voids - Configure item void operations to allow operators to remove individual items from an active transaction.
- Transaction Voids - Configure transaction void operations to allow operators to cancel an entire active transaction.
- Post Transaction Voids - Configure post transaction void operations, with optional time, value, and item count limits.
- Item Tender Voids - Configure tender void operations to allow operators to reverse an applied tender.
- Menus - Configure the Sale menu to expose void functions to POS operators.
- User Roles - Assign privileges for void operations to the appropriate user roles.
- Broadcasting - Deliver the configuration to the POS.
Prerequisites
Before starting, you should have the following resources in place:
- Enactor Estate Manager
- Enactor POS (configured within the appropriate region, connected to the Estate Manager)
- Standard Configuration, including base configuration and regionally appropriate data
You should be familiar with the following:
- Estate Manager configuration
- Data broadcasting
Configuration Steps
Reasons are created based on a pre-defined Reason Type and associated with a Region in which they are applicable. Each Reason Type is known to a specific function of the POS application that is required to capture reasons of that type.
Item Void Reason
There are instances when a customer requires an item to be removed from the basket before proceeding with the transaction. The Item Void Reason allows marking a selected basket item as void.
Navigate to Reason Maintenance using Search or the path:
Configuration > Organisation > Reasons

The Reason Maintenance list is displayed, showing all configured reasons across all reason types. Use the Region and Reason Type filters to narrow the list.

To create a new Item Void Reason, click Create a new Reason and complete the following fields:
- Select the appropriate Region from the Region drop-down.
- Select Item Void from the Reason Type drop-down.
- Enter a unique Reason ID for the new Item Void Reason. The ID can be alphanumeric and contain a maximum of 20 characters.
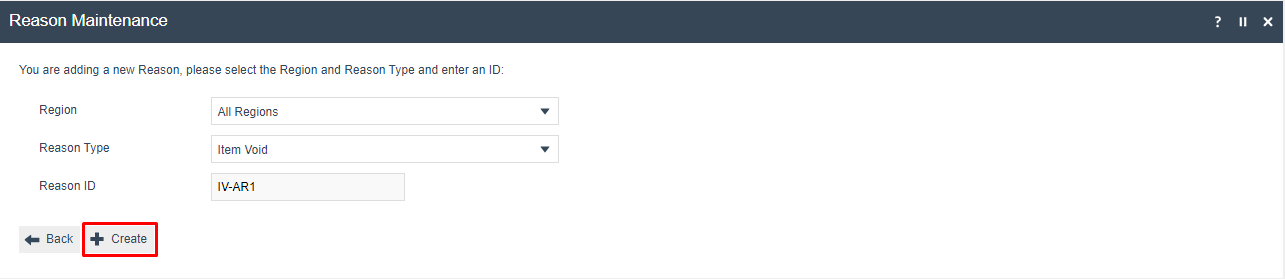
Click Create. The Reason detail screen is displayed with the following tabs: General, Transaction Types, and Witness.
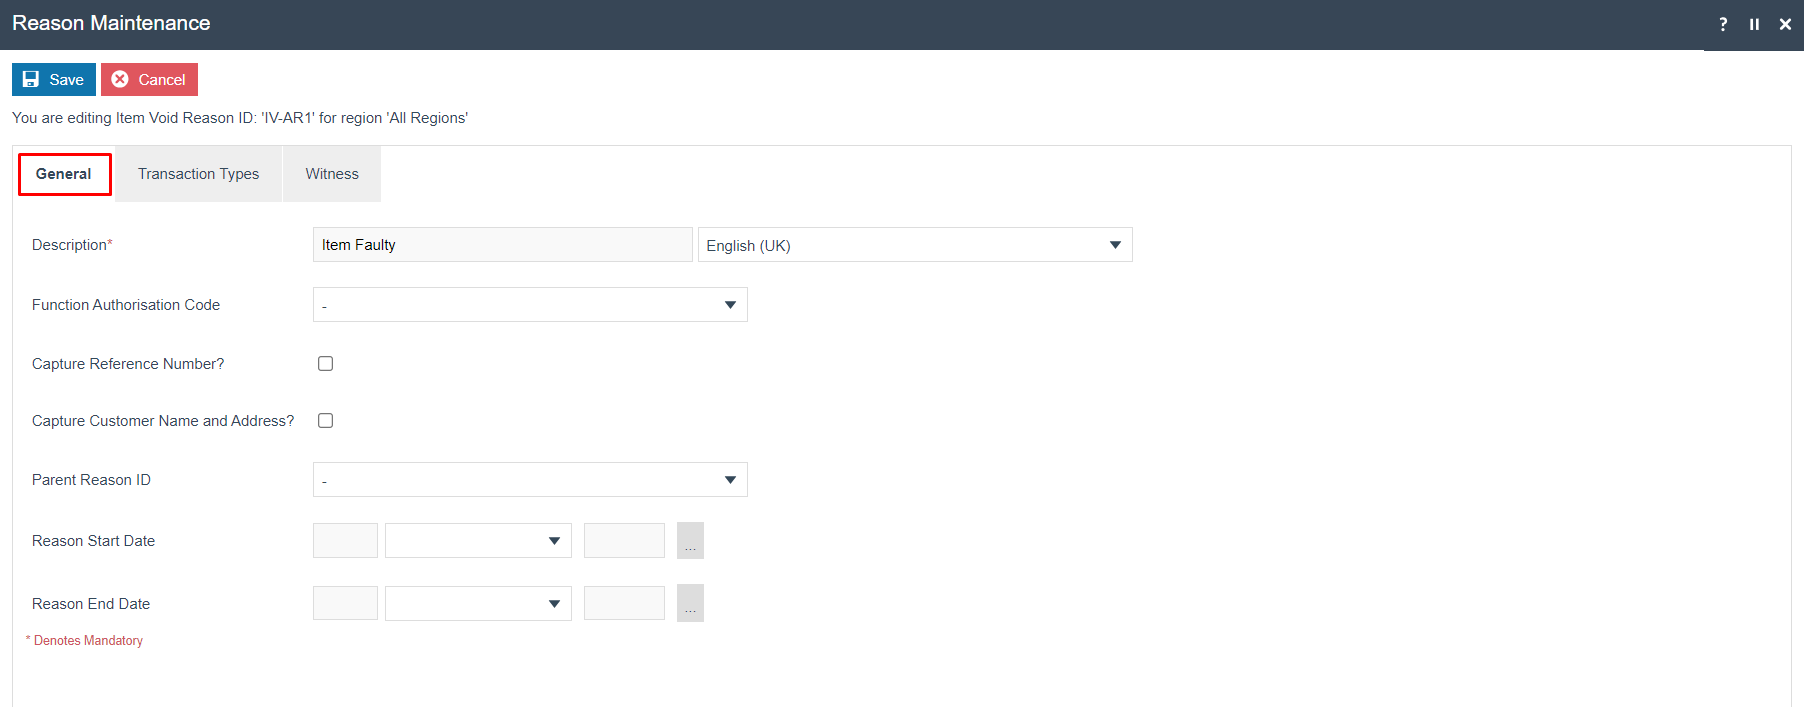
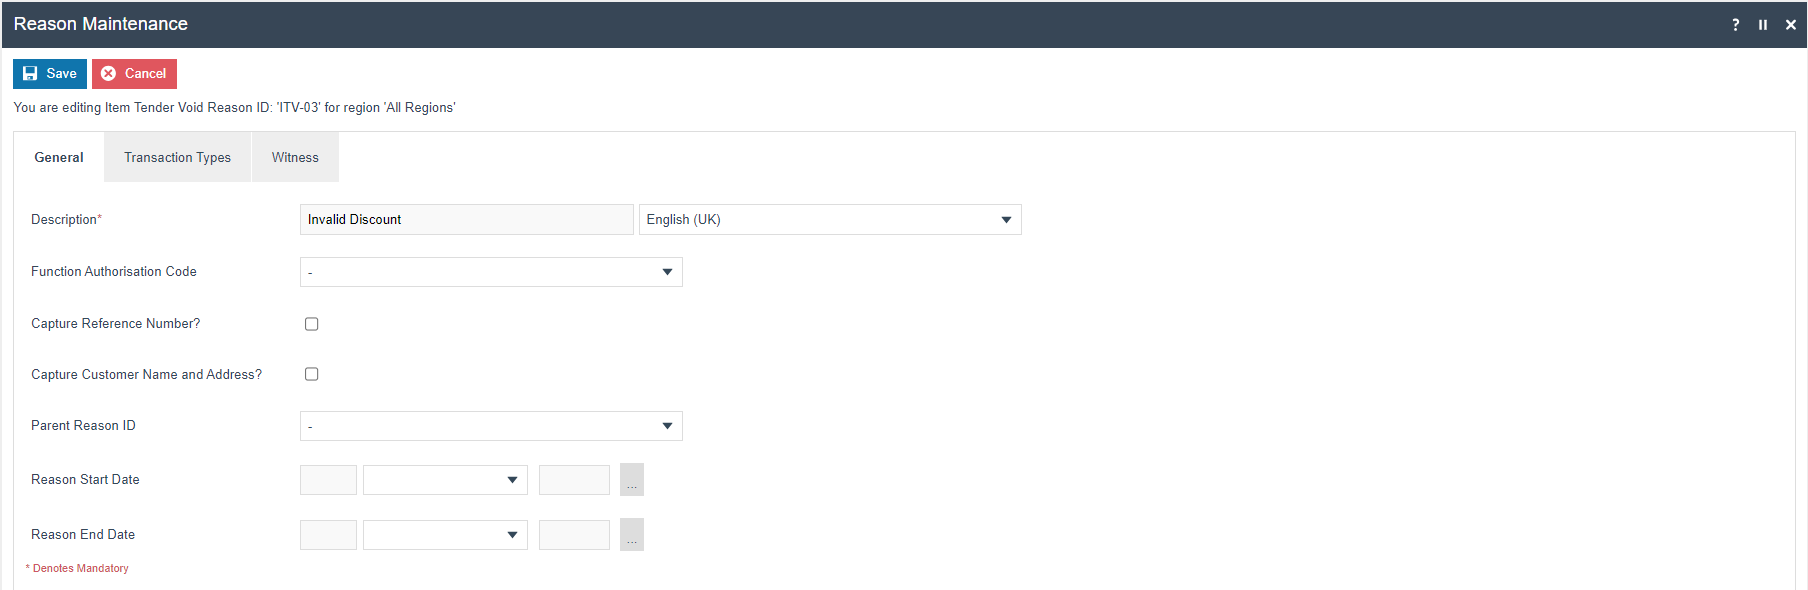
Reason - General Tab
The General tab contains the basic identifying information for the Item Void Reason.
| Configuration | Description |
|---|---|
| Description | A user-friendly description for the reason. Can be alphanumeric, maximum 50 characters. Select the display locale from the dropdown. |
| Function Authorisation Code | Select an authorisation code from the dropdown if this reason requires manager approval when selected. Codes are defined in Role Maintenance. |
| Capture Reference Number | If checked, the operator is prompted to enter a reference number when using this reason. |
| Capture Customer Name and Address | If checked, the operator is prompted to capture the customer name and address when using this reason. |
| Parent Reason ID | If a parent reason hierarchy is required, select the parent reason from the dropdown. The list shows all reasons of the same Reason Type. |
| Reason Start Date | Optional. The date from which this reason becomes active. |
| Reason End Date | Optional. The date after which this reason is no longer active. |
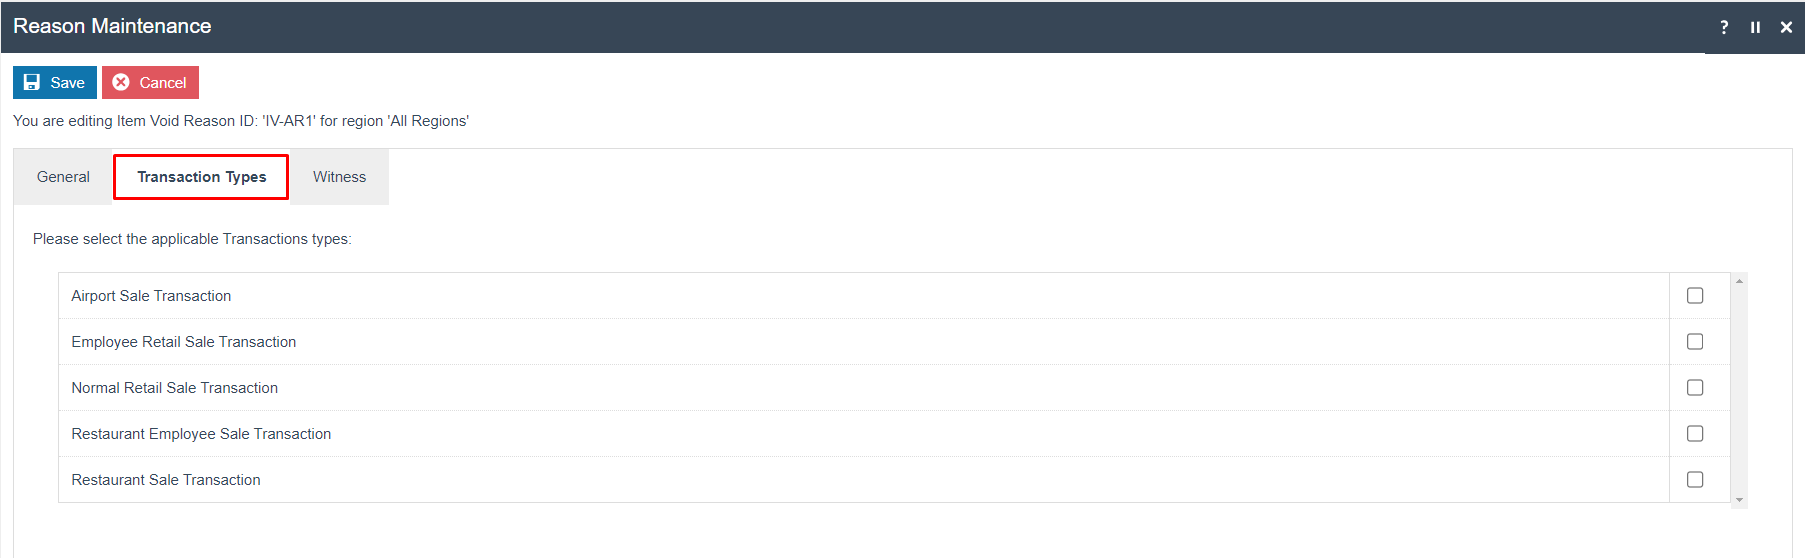
Reason - Transaction Types Tab
The Transaction Types tab allows restricting this reason to specific transaction types. If no transaction types are selected, the reason is valid for all transaction types.
Reason - Witness Tab
The Witness tab is available for reasons that require the operator to obtain a witness when using this reason. If Capture Witness is checked, the operator is prompted for a witness whenever this reason is selected.
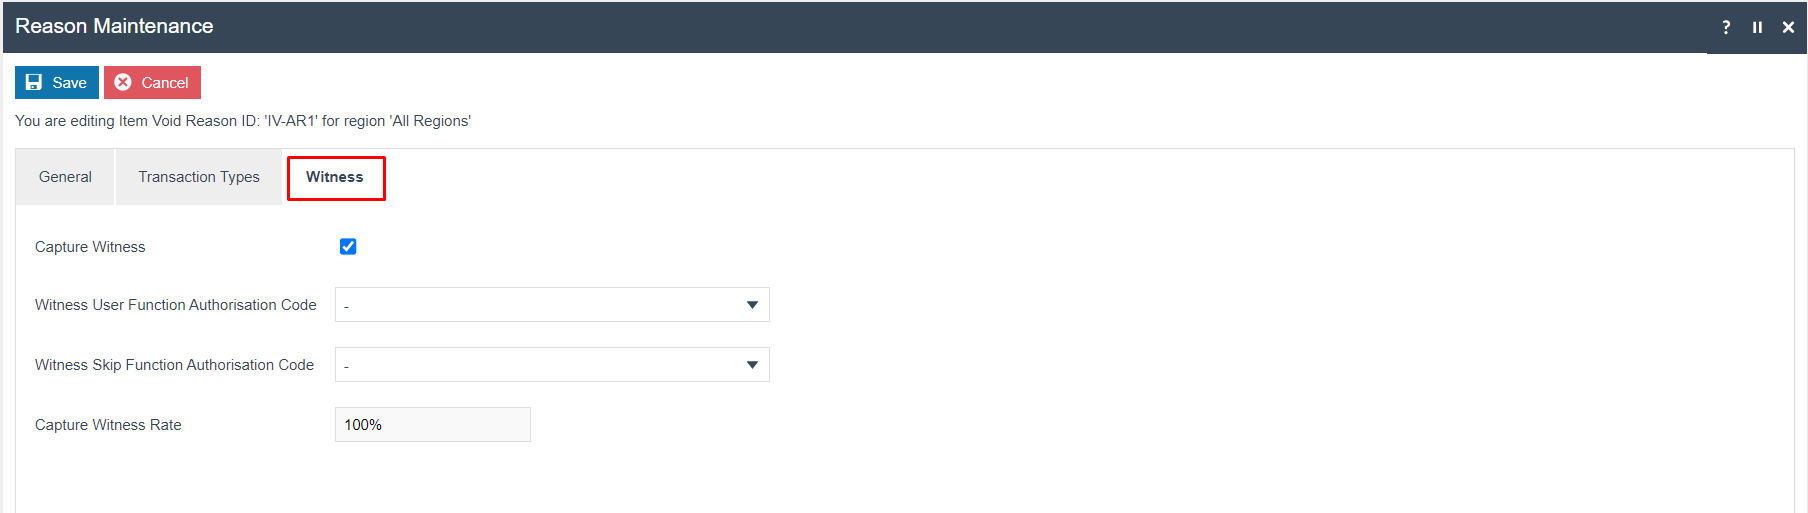
| Configuration | Description |
|---|---|
| Capture Witness | If checked, the operator is prompted to obtain a witness when this reason is selected. Additional fields become visible when checked. |
| Witness User Function Authorisation Code | Select from the dropdown to require the witness to have a specific authorisation code (e.g. Manager Authorised). |
| Witness Skip Function Authorisation Code | Select from the dropdown to allow the witness requirement to be skipped if the operator has a specific authorisation code. |
| Capture Witness Rate | A percentage value defining how often the witness prompt appears. Enter 100 to require a witness every time this reason is used. |
Click Save to complete the Item Void Reason.
Multiple reasons can be created for the Item Void reason type as required. All configured Item Void reasons are presented to the operator when performing an Item Void at the POS.
This completes the Item Void Reason configuration.
Transaction Void Reason
The Transaction Void Reason allows voiding an entire active transaction. This is used when a complete transaction needs to be cancelled - for example, when a customer changes their mind before tender is applied.
To create a new Transaction Void Reason, click Create a new Reason on the Reason Maintenance page and complete the following:
- Select the appropriate Region from the Region drop-down.
- Select Transaction Void from the Reason Type drop-down.
- Enter a unique Reason ID. The ID can be alphanumeric, maximum 20 characters.
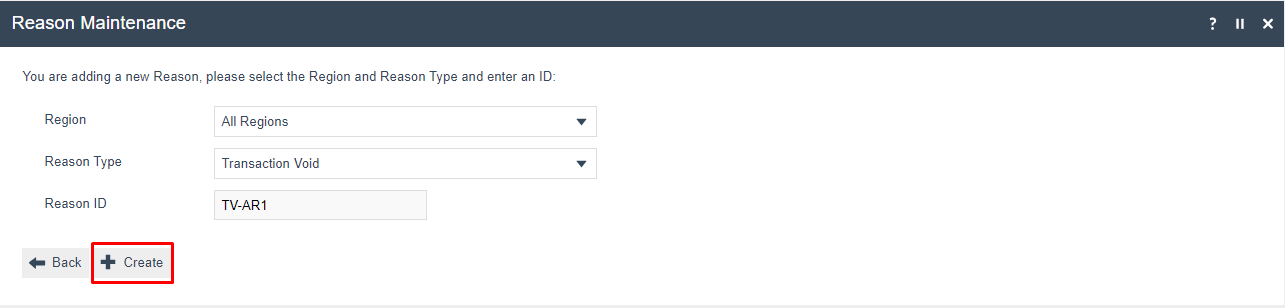
Click Create. The Reason detail screen is displayed with the General and Witness tabs.
Reason - General Tab

Set the appropriate values on the General tab. Field definitions are the same as described in the Item Void Reason - General Tab section above.
Reason - Witness Tab
The Witness tab is available for reasons that require a witness. Set the appropriate values as described in the Item Void Reason - Witness Tab section above.
Click Save to complete the Transaction Void Reason.
Multiple reasons can be created for the Transaction Void reason type as required. All configured Transaction Void reasons are presented to the operator when performing a Transaction Void at the POS.
This completes the Transaction Void Reason configuration.
Post Transaction Void Reason
The Post Transaction Void Reason allows voiding a transaction that has already been completed. This is used when a customer or manager needs to reverse a transaction after it has been tendered - for example, if the wrong items were sold or the transaction needs to be reversed for another reason.
To create a new Post Transaction Void Reason, click Create a new Reason and complete the following:
- Select the appropriate Region from the Region drop-down.
- Select Post Transaction Void from the Reason Type drop-down.
- Enter a unique Reason ID. The ID can be alphanumeric, maximum 20 characters.
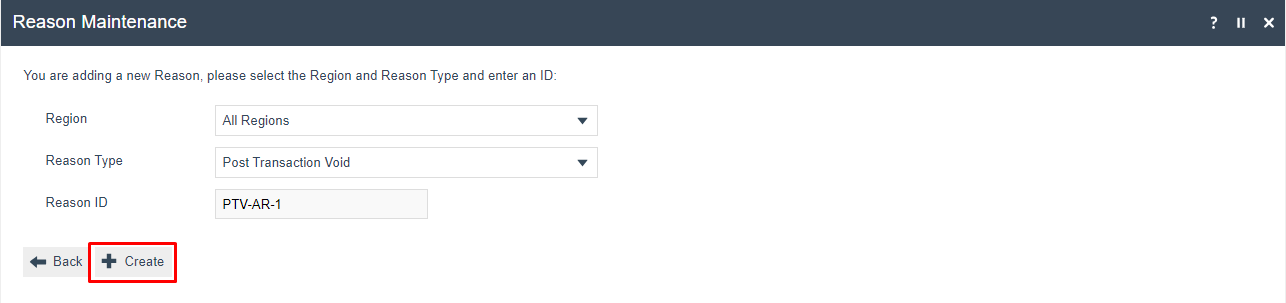
Click Create. The Reason detail screen is displayed with the General, Post Void, and Witness tabs.
Reason - General Tab
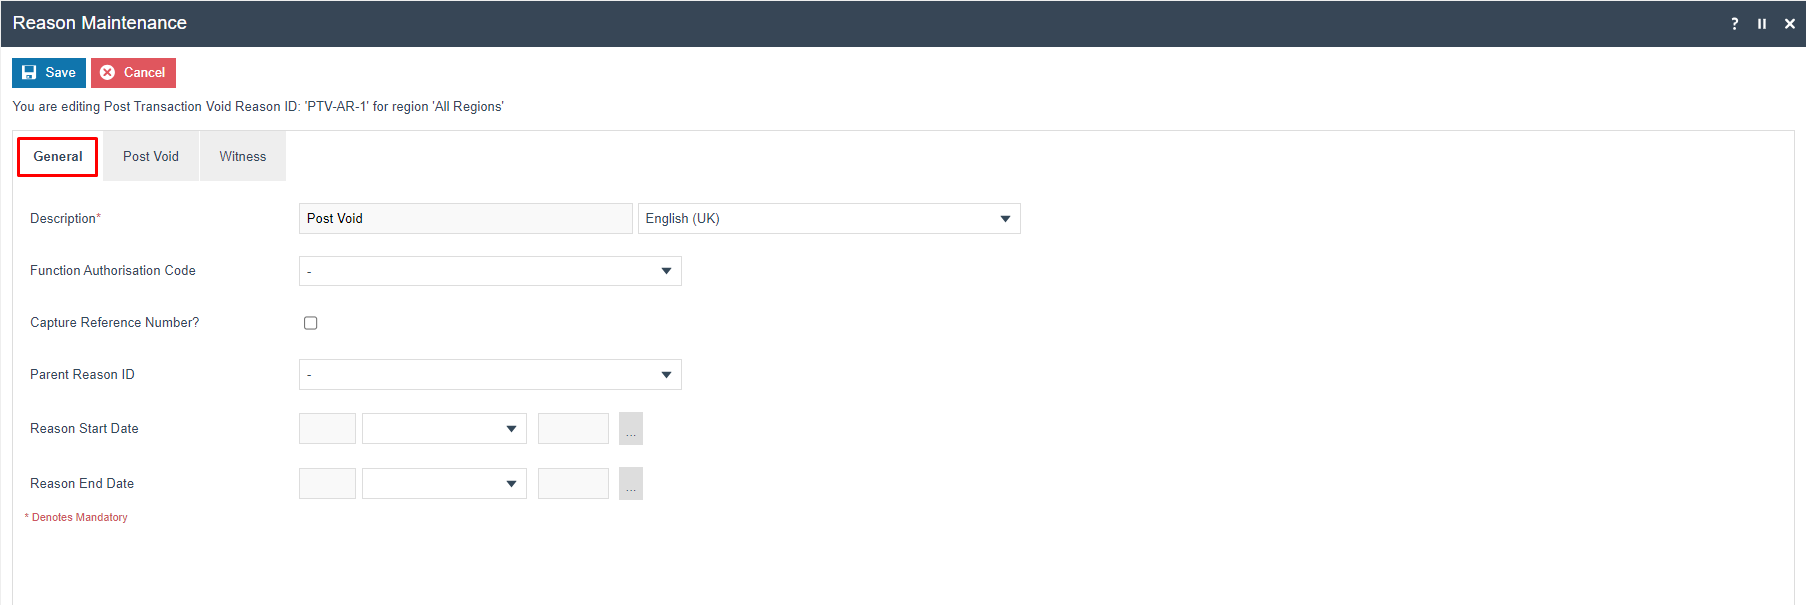
Set the appropriate values on the General tab. Field definitions are the same as described in the Item Void Reason - General Tab section above.
Reason - Witness Tab
The Witness tab is available for reasons that require a witness. Set the appropriate values as described in the Item Void Reason - Witness Tab section above.
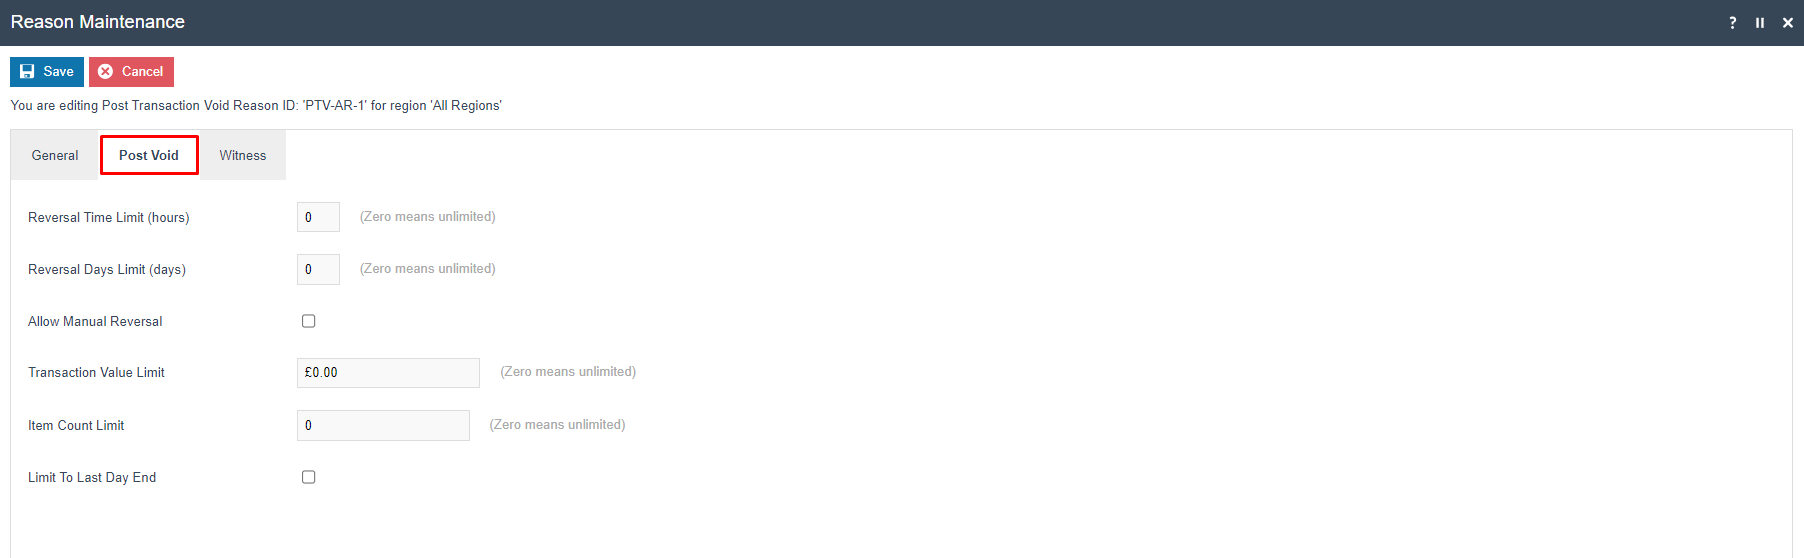
Reason - Post Void Tab
The Post Void tab is specific to Post Transaction Void reasons and controls the limits and conditions under which a completed transaction may be reversed.
| Configuration | Description |
|---|---|
| Reversal Time Limit (hours) | The maximum number of hours after a transaction was completed within which a post void is permitted. Enter 0 for no time limit. |
| Reversal Days Limit (days) | The maximum number of days after a transaction was completed within which a post void is permitted. Enter 0 for no day limit. |
| Allow Manual Reversal | If checked, the operator can perform a manual reversal of the transaction through the POS. |
| Transaction Value Limit | The maximum transaction value that may be post-voided using this reason. Enter 0.00 for no value limit. |
| Item Count Limit | The maximum number of items in a transaction that may be post-voided using this reason. Enter 0 for no item count limit. |
| Limit To Last Day End | If checked, only transactions from the current trading day (since the last Day End) can be post-voided using this reason. |
Click Save to complete the Post Transaction Void Reason.
Multiple reasons can be created for the Post Transaction Void reason type as required. All configured Post Transaction Void reasons are presented to the operator when performing a Post Transaction Void at the POS.
This completes the Post Transaction Void Reason configuration.
Item Tender Void Reason
The Item Tender Void Reason allows voiding a tender that has been applied to a transaction. This is used when a customer needs to change the payment method - for example, switching from cash to card after a cash tender has already been entered.
To create a new Item Tender Void Reason, click Create a new Reason and complete the following:
- Select the appropriate Region from the Region drop-down.
- Select Item Tender Void from the Reason Type drop-down.
- Enter a unique Reason ID. The ID can be alphanumeric, maximum 20 characters.

Click Create. The Reason detail screen is displayed with the General, Transaction Types, and Witness tabs.
Reason - General Tab
Set the appropriate values on the General tab. Field definitions are the same as described in the Item Void Reason - General Tab section above.
Reason - Transaction Types Tab
The Transaction Types tab restricts this reason to specific transaction types. Set the appropriate values as described in the Item Void Reason - Transaction Types Tab section above.
Reason - Witness Tab
The Witness tab is available for reasons that require a witness. Set the appropriate values as described in the Item Void Reason - Witness Tab section above.
Click Save to complete the Item Tender Void Reason.
Multiple reasons can be created for the Item Tender Void reason type as required. All configured Item Tender Void reasons are presented to the operator when performing an Item Tender Void at the POS.
This completes the Item Tender Void Reason configuration.
Menus
To enable the void functions at the POS, the appropriate menu events must be configured in Menu Maintenance.
Navigate to Menu Maintenance using Search or the path:
Configuration > System > Menus

The Sale Menu contains most of the functions required for a standard retail POS. Void functions are typically found under the Voids folder within the Sale Menu.
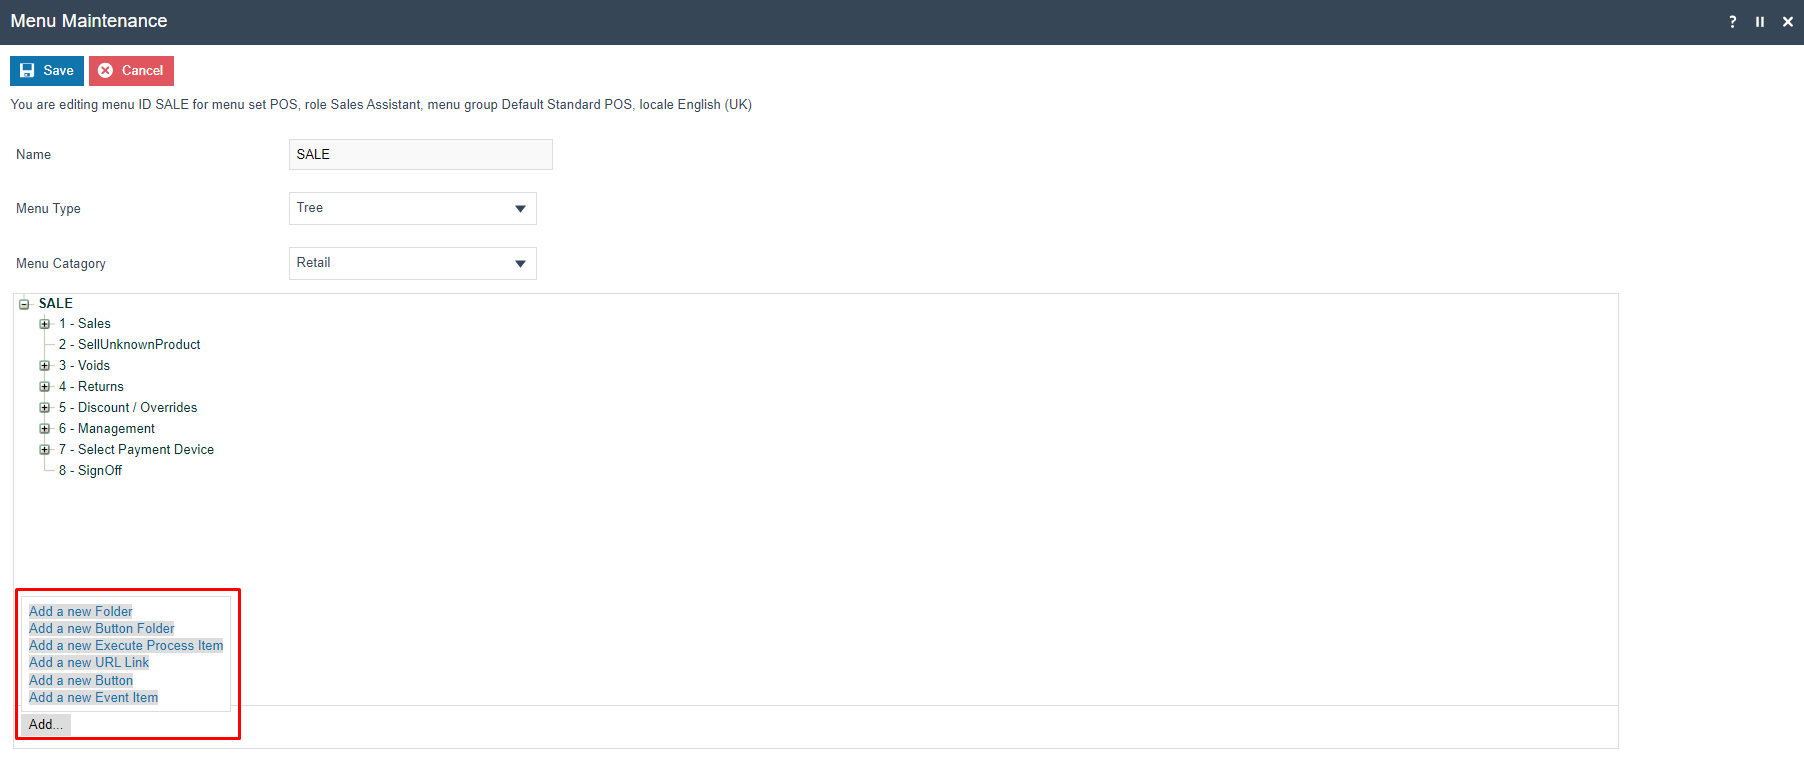
The following events can be added to the menu for each void reason type:
| Reason Type | Event Name | Event ID |
|---|---|---|
| Item Void | Item Void | ItemVoid |
| Transaction Void | Transaction Void | TransactionVoid |
| Post Transaction Void | Post Void | PostVoid |
Configuring Menus in detail is described in a separate how-to guide. Refer to the POS Menus guide for full menu configuration instructions.
This completes the Menus configuration.
User Roles
To allow operators to perform void operations, the appropriate privileges must be assigned to their user roles.
Navigate to User Role Maintenance using Search or the path:
Configuration > HR > User Roles

Select the role you wish to edit and navigate to the Authorised Functions tab. Set the Application Package to Enactor POS and the Process to the relevant void process to view and configure the void privileges.
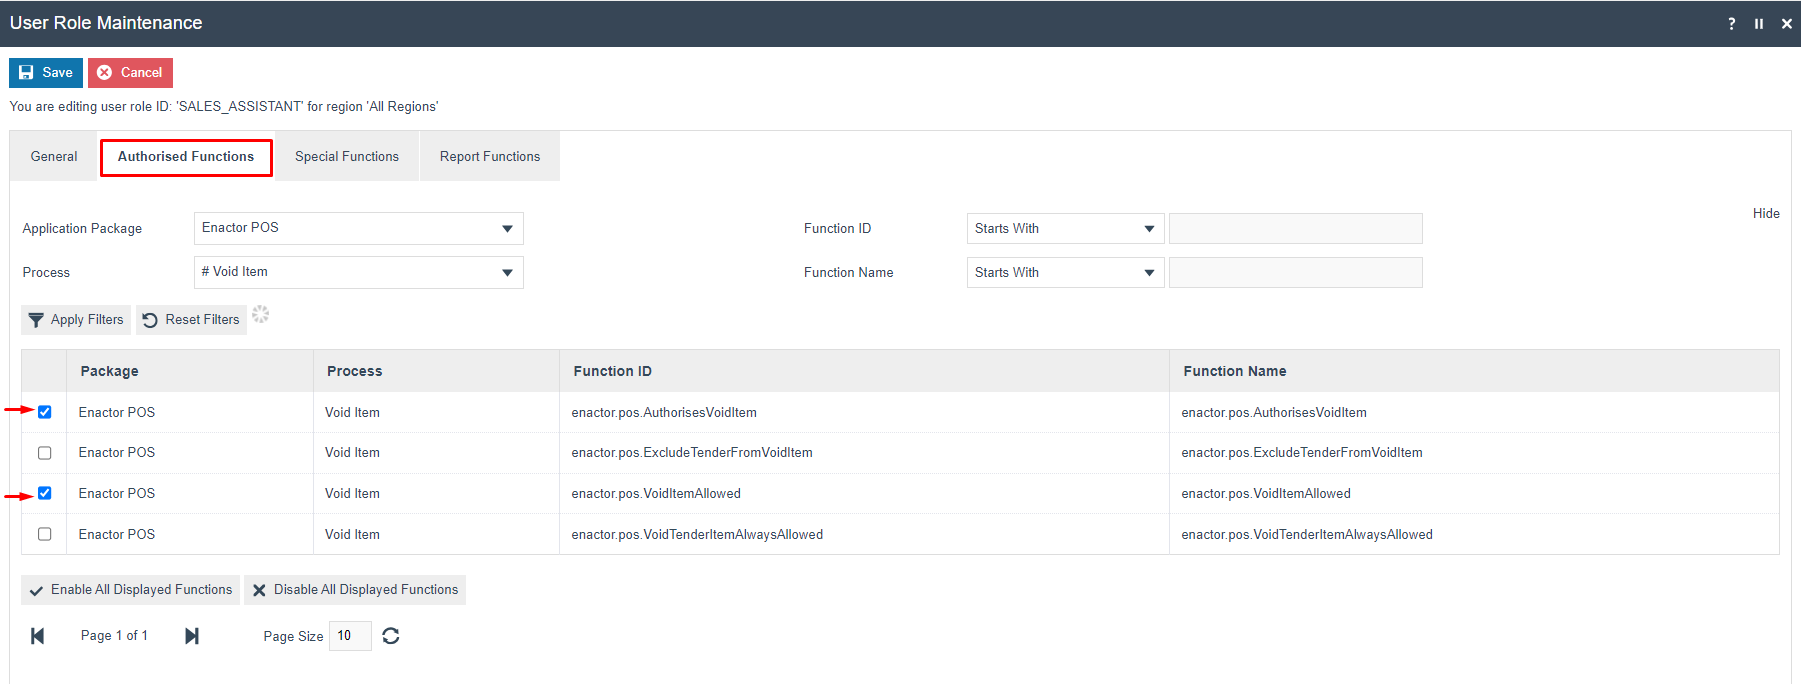
The following privileges can be configured for void operations:
| Application Package | Process | Function ID |
|---|---|---|
| Enactor POS | Void Item | enactor.pos.AuthorisesVoidItem |
| Enactor POS | Void Item | enactor.pos.VoidItemAllowed |
| Enactor POS | Void Transaction | enactor.pos.AuthorisesVoidTransaction |
| Enactor POS | Void Transaction | enactor.pos.VoidTransactionAllowed |
| Enactor POS | Post Transaction Void | enactor.pos.AuthorisesPostTransactionVoid |
| Enactor POS | Post Transaction Void | enactor.pos.PostTransactionVoidAllowed |
| Enactor POS | Void Tender Item | enactor.pos.AuthorisesVoidTenderItem |
| Enactor POS | Void Tender Item | enactor.pos.VoidTenderItemAllowed |
Configuring User Roles in detail is described in a separate how-to guide. Refer to the User Roles guide for full privilege configuration instructions.
This completes the User Roles configuration.
Broadcasting
To deliver the configuration changes to the POS, broadcast the following:
- Reason
- Menu
- Roles
All three entities must be broadcast to the POS before the void reason configuration will take effect. Restart the POS application after the broadcast has been received to apply the changes.
This completes the Broadcasting configuration.
POS Functionality
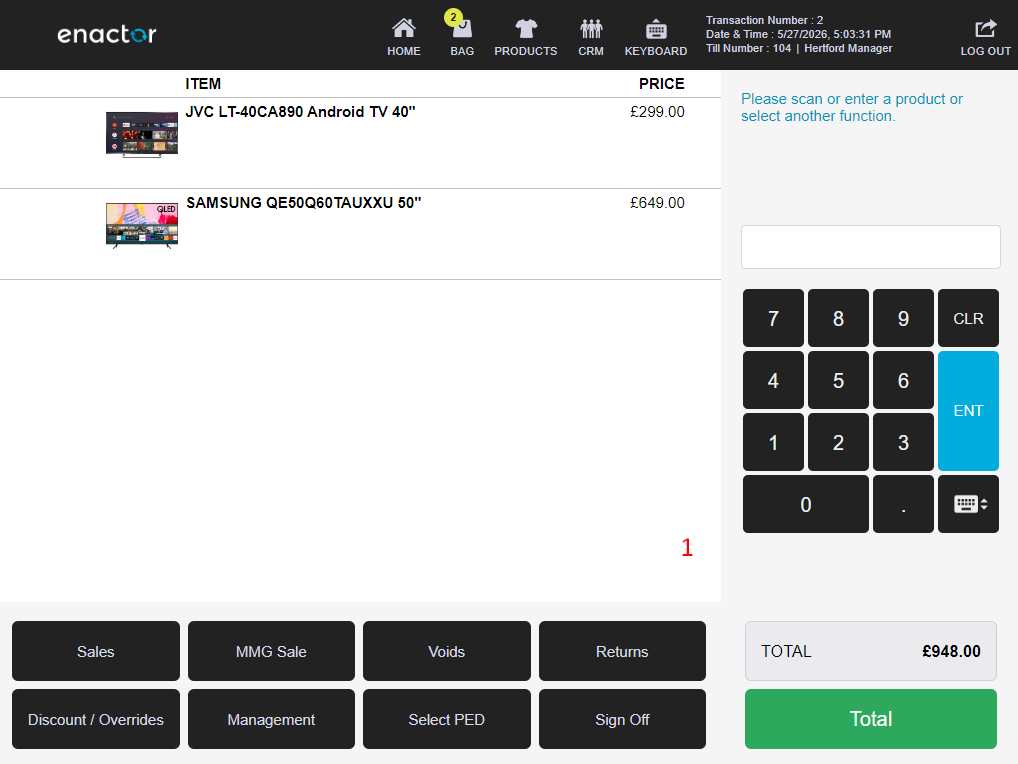
Item Void Reason Functionality
With items added to the basket, the operator selects the item to be voided. The item-specific function buttons are displayed at the bottom of the screen.
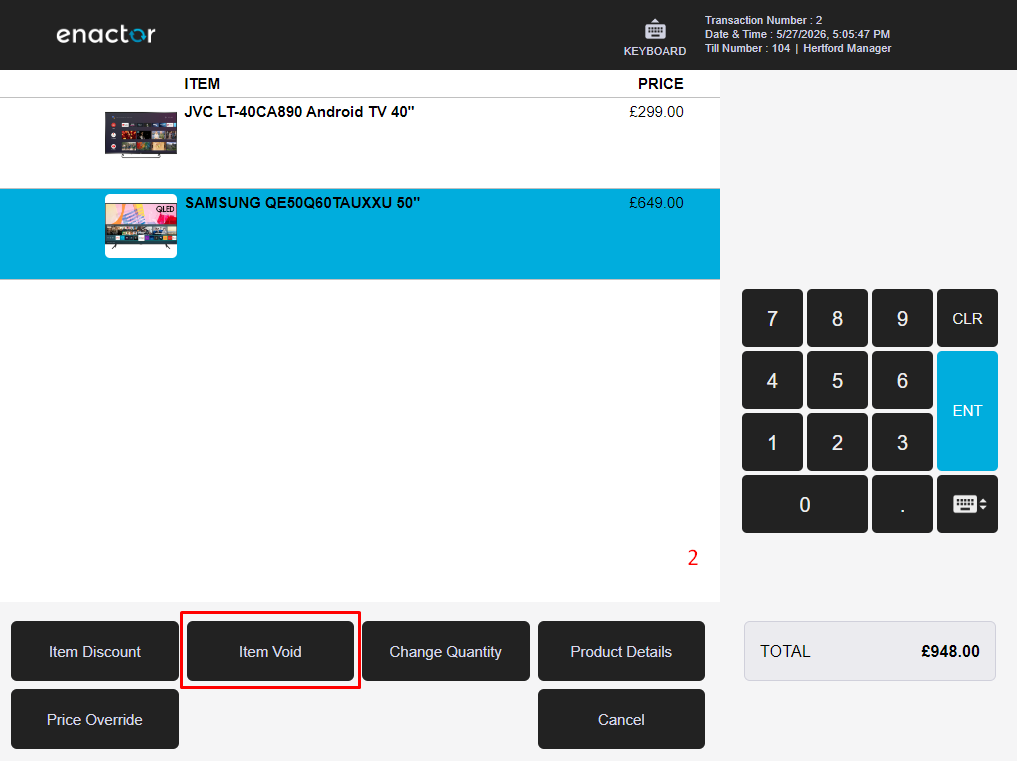
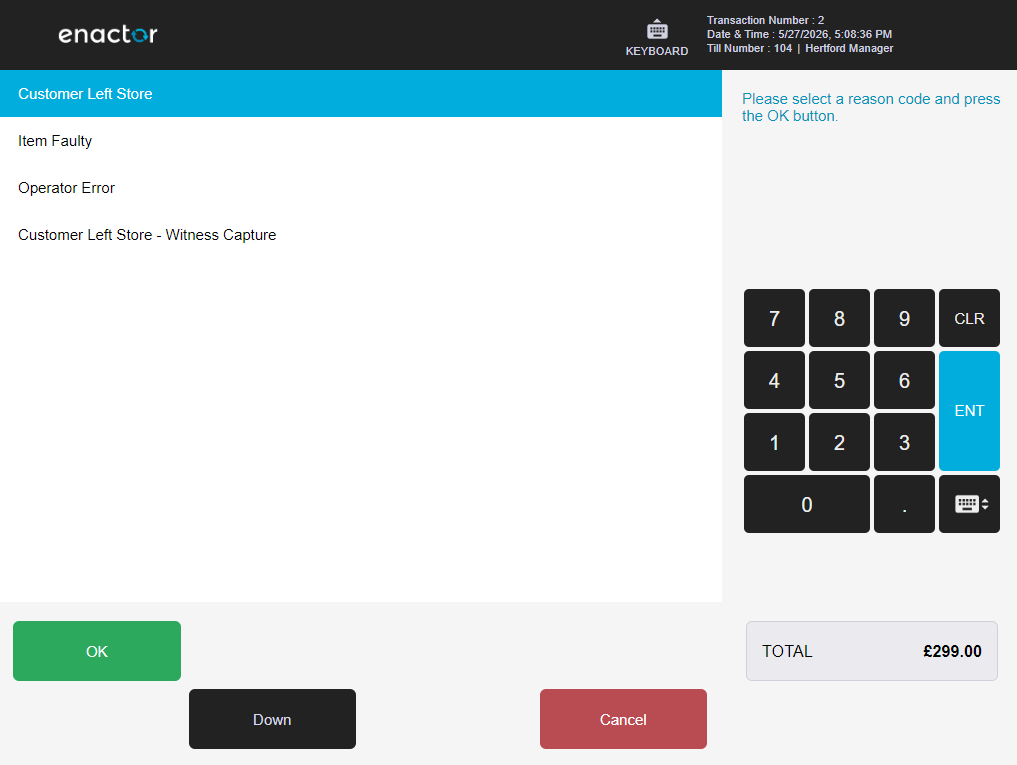
The configured Item Void reasons are displayed. The operator selects the applicable reason and clicks OK to apply the Item Void to the selected item.
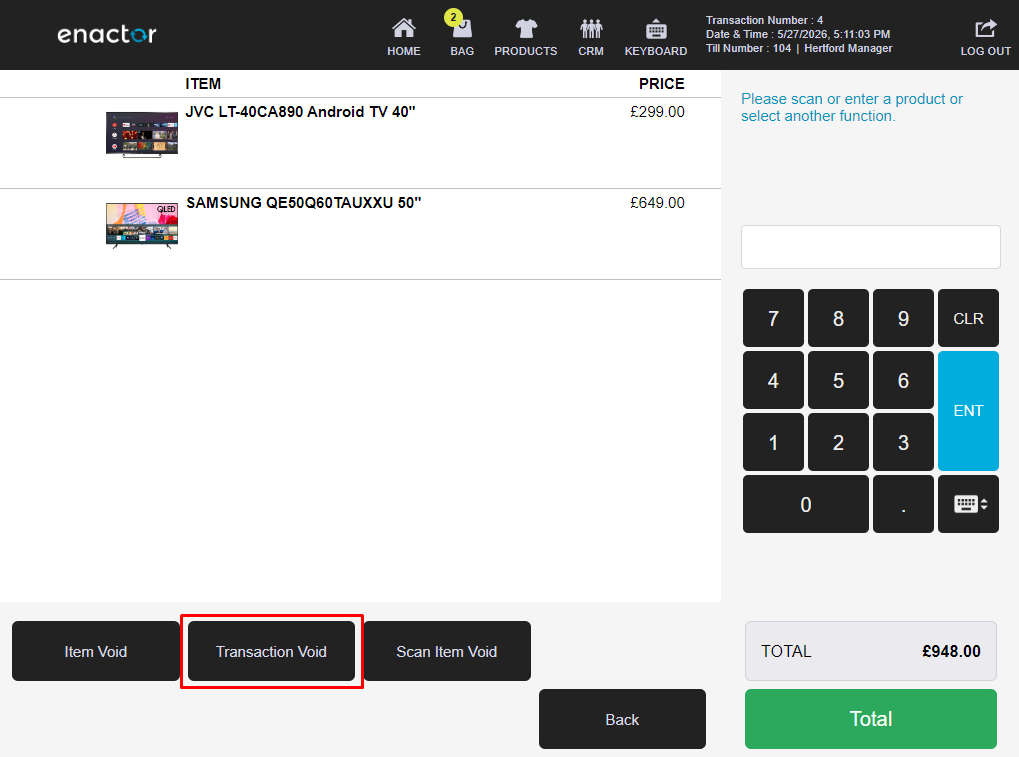
Transaction Void Reason Functionality
With items in the basket, the operator selects the Voids function from the main menu to display the Transaction Void option.
After selecting Transaction Void, the configured Transaction Void reasons are displayed. The operator selects the applicable reason and clicks OK to void the entire transaction.
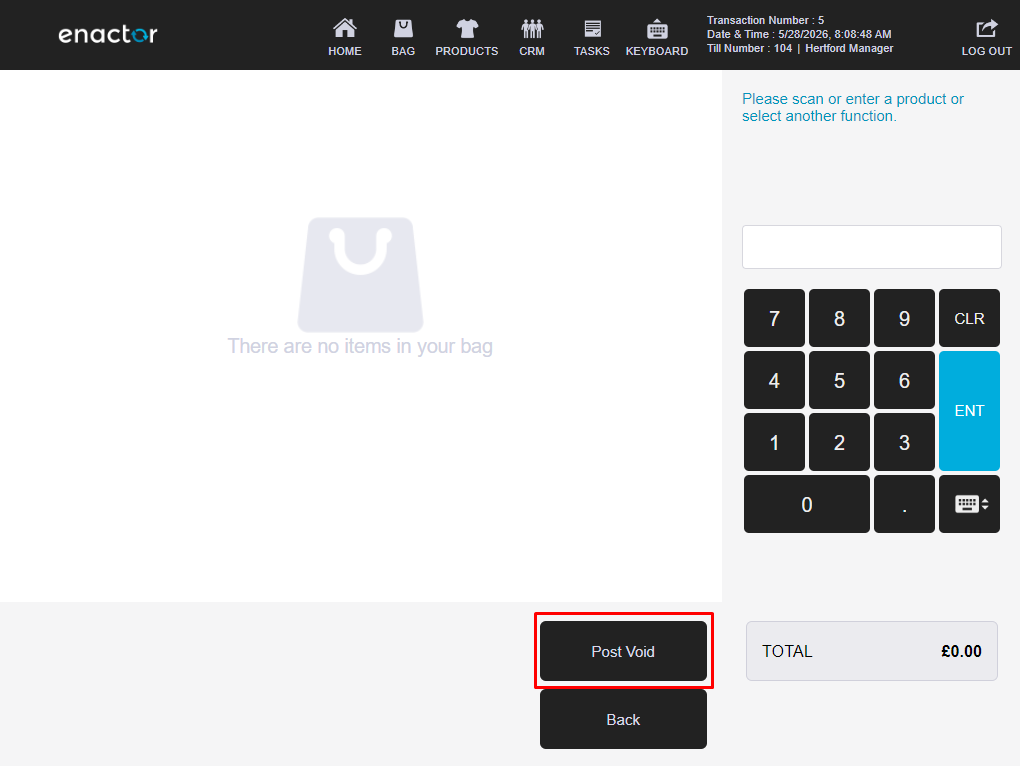
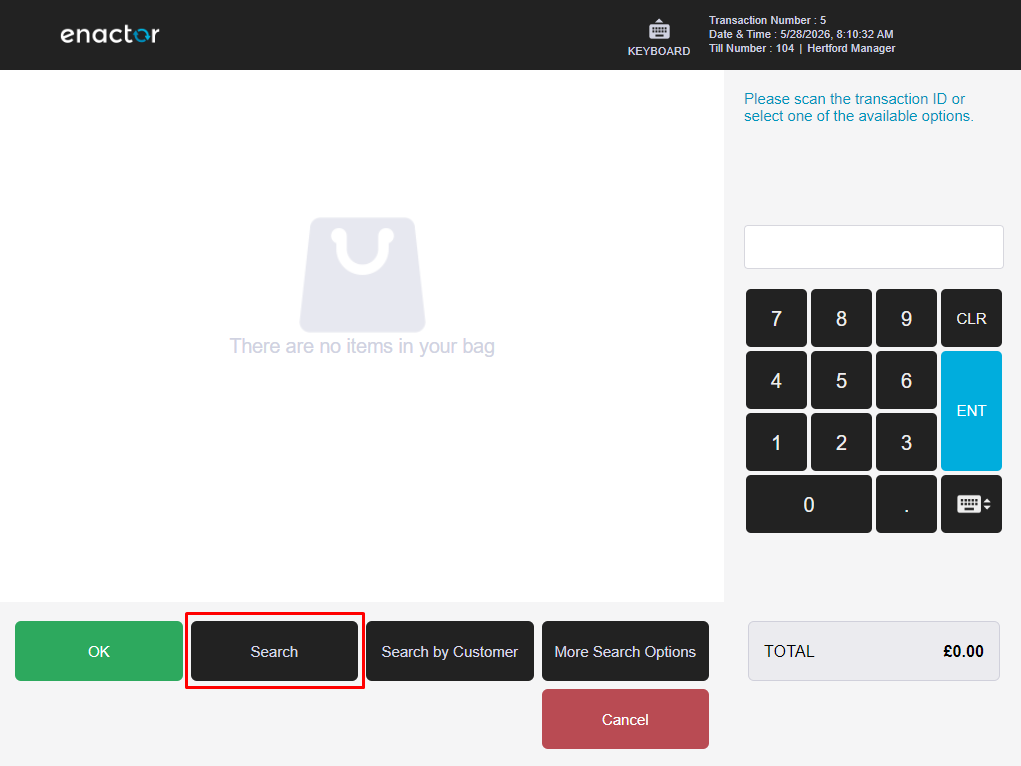
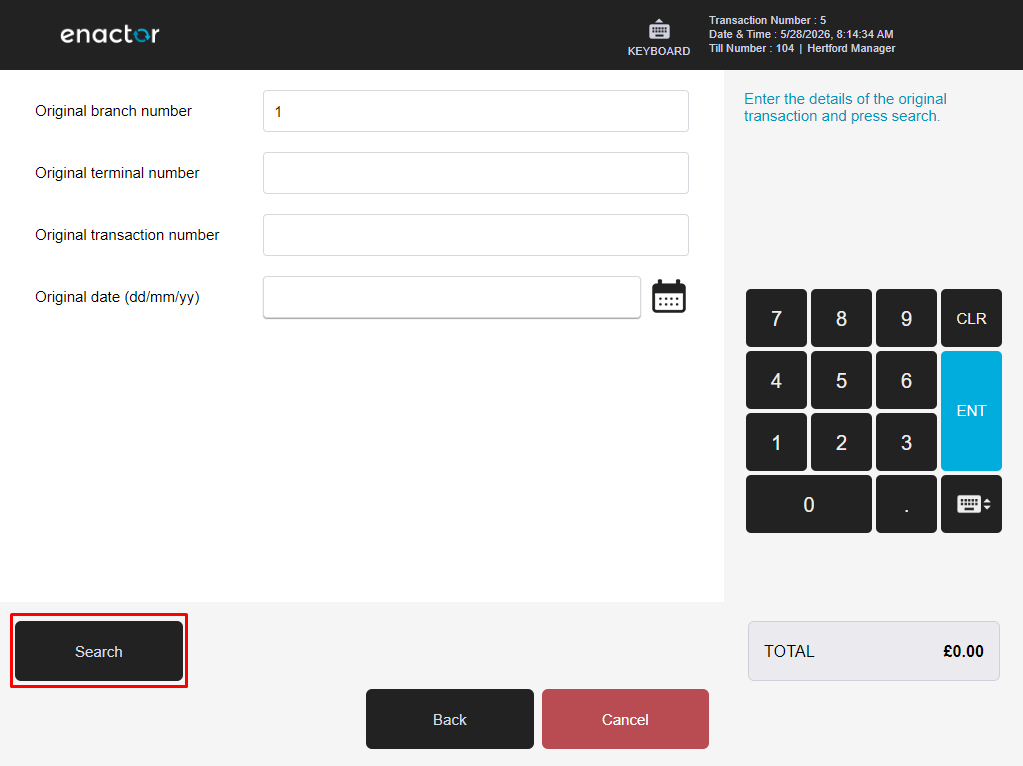
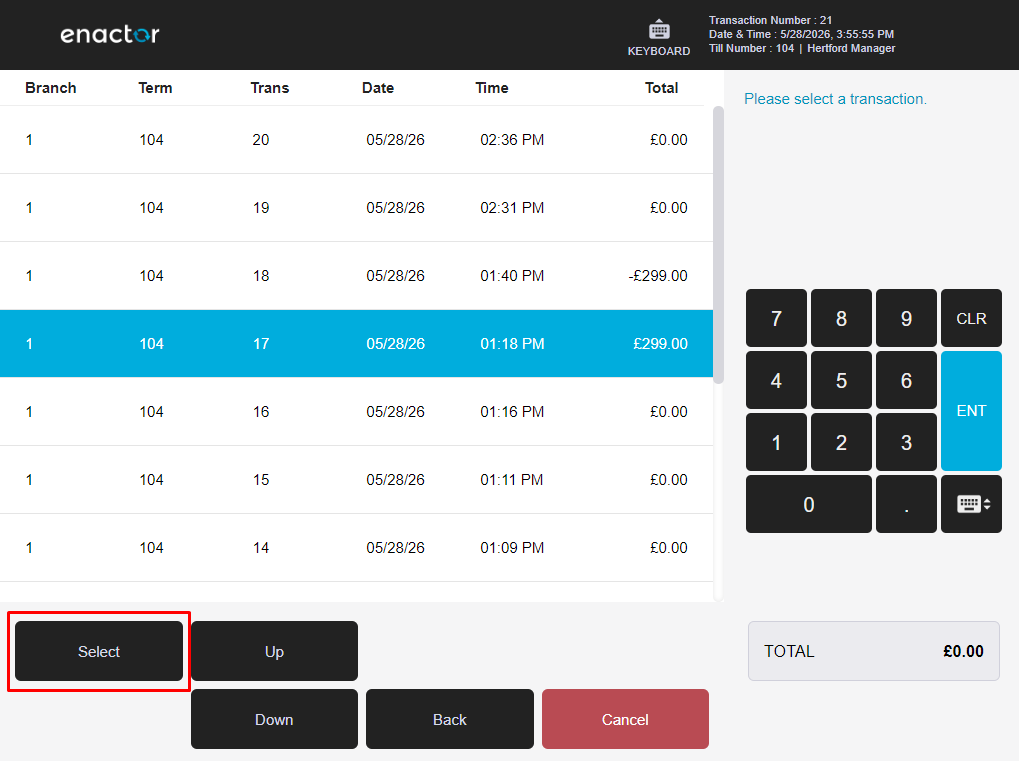
Post Transaction Void Reason Functionality
The operator accesses the Post Transaction Void function from the management functions area of the POS when the basket is empty.
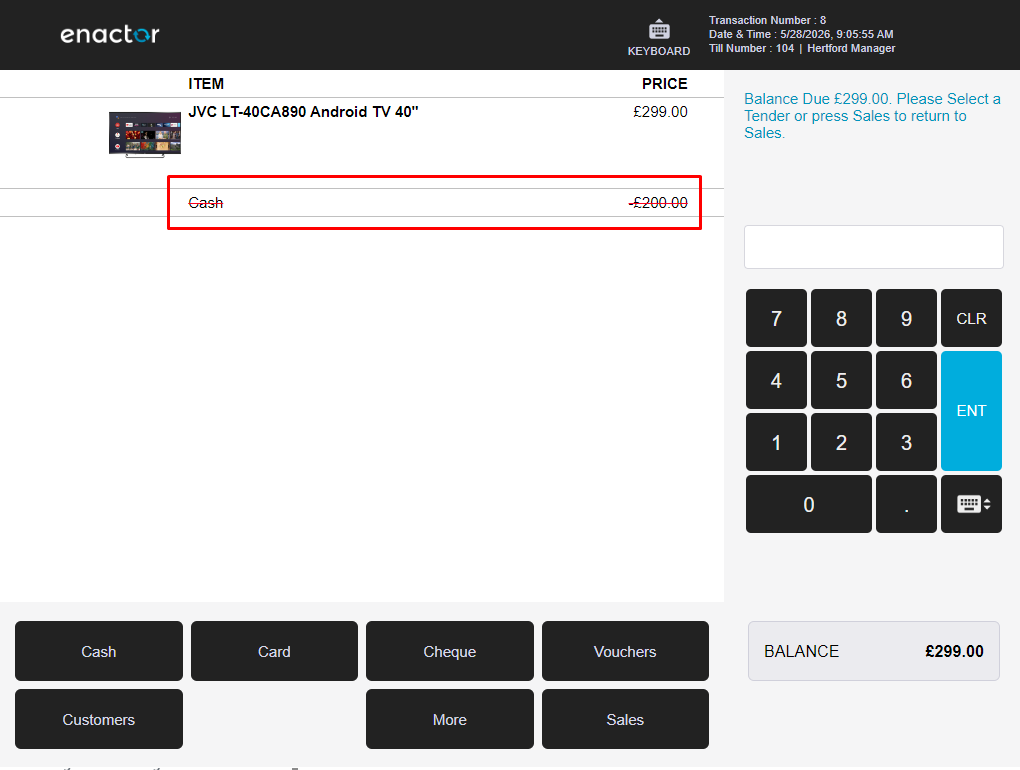
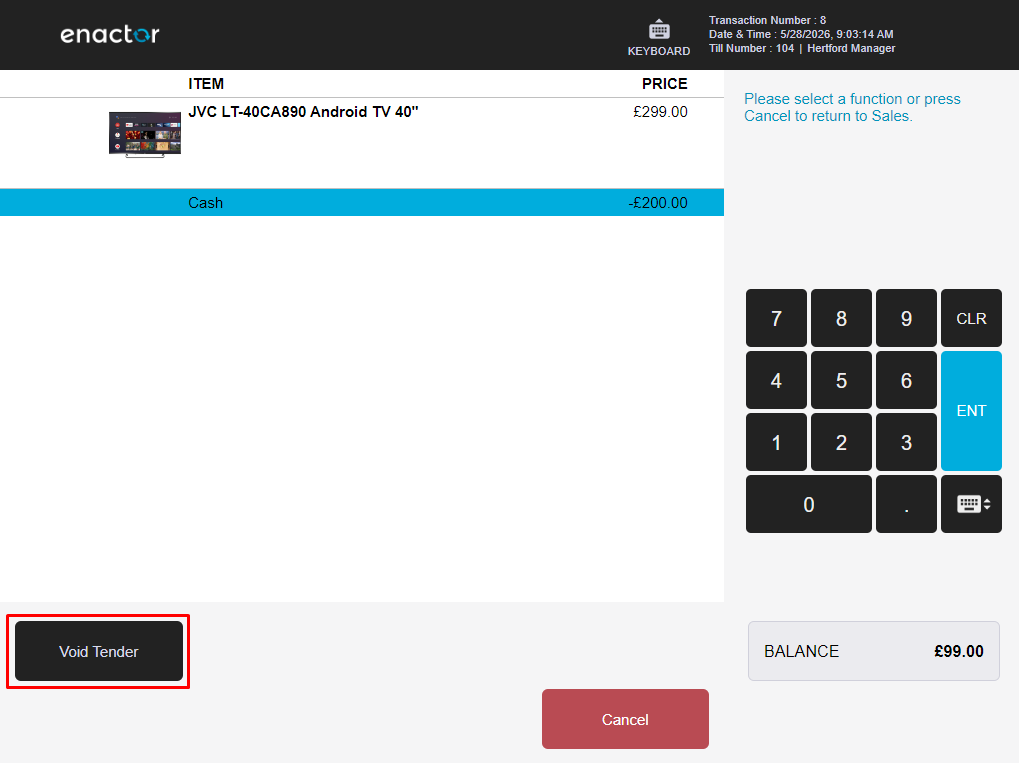
Item Tender Void Reason Functionality
When a tender has been applied to a transaction, the operator can select the tender line and use the Void Tender function to remove it.
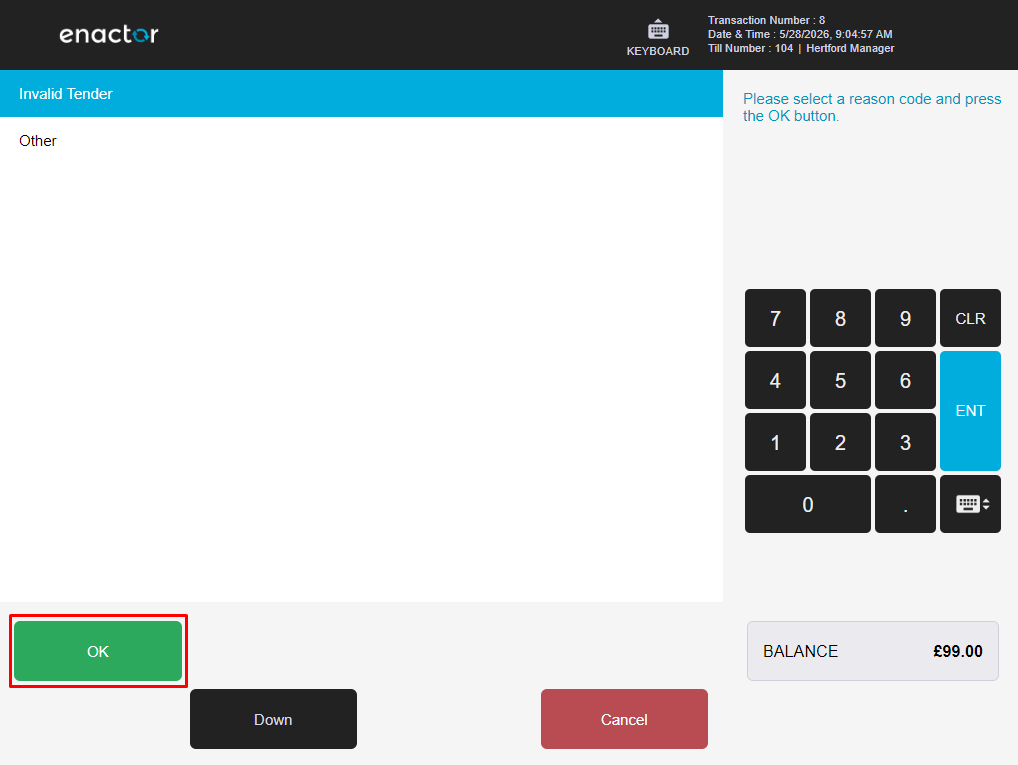
After the tender void is confirmed, the tender line is removed from the transaction and the balance is recalculated.