How To Configure a Base Organisation Structure
Introduction
This guide covers setting up the core Organisation Structure on which key configuration components will be based. The base level of the structure begins with the basic Company information and default trading currency. With company information in place, a regional structure that reflects the retailer's business organisation - including stores, warehouses and other locations - is added.
The regional structure also provides the underpinnings for other components such as Menu Groups, Price Groups and Fascias.
The intent of this guide is to provide basic guidance covering required and the most common configuration options. Refer to the full Enactor solution documentation for a detailed explanation of all available settings.
Overview
This guide covers the configuration for the following:
- Company Configuration - set up the company name, default trading currency and address.
- Region Group Configuration - create the regional hierarchy representing the geographical structure of the business.
- Menu Group Configuration - set up menu groups to assign menu sets to locations and roles.
- Price Group Configuration - set up price groups to differentiate product prices across the estate.
- Fascia Group Configuration - set up fascia groups for store identity and product presentation.
Company Configuration
Basic company information is made available to applications in a Company configuration element. For example, the company address may be used in receipts, and the company name is used for licensing.
At least one Company element is required. The mandatory entry must have a Company ID of 1 and the Company Name must match exactly the string provided for the software licence. Incorrect Company Name values will cause licensing failures.
A built-in Company element with Company ID of 1 is typically provided with installed default data, with a default Company Name of Enactor. This entry should be edited to provide the correct Company Name (as per licence) and other details rather than deleted and recreated.
Company
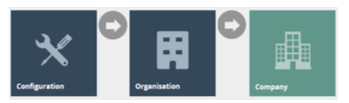
To access Company configuration, navigate to Company Maintenance using the Search or the path: Main Menu > Configuration > Organisation > Company
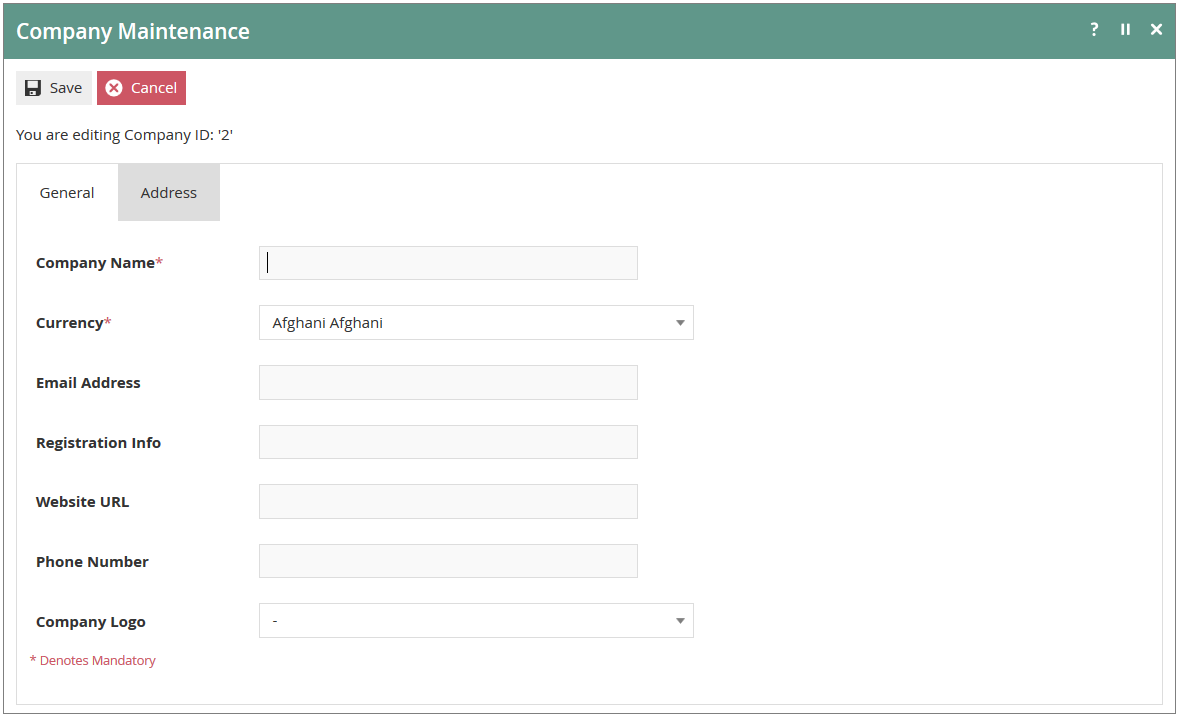
The Company Maintenance page lists all configured Company entries. Use the Edit ![]() icon to access an existing entry, or select Create a new Company to add a new one.
icon to access an existing entry, or select Create a new Company to add a new one.

When creating a new Company, enter a unique Company ID on the initial screen and select Create.

The Company Maintenance edit page presents two tabs: General and Address.
General Tab
The General Tab captures the core identity of the Company and its default trading currency.
| Field | Description |
|---|---|
| Company Name | Mandatory. Enter the company name exactly as provided in the software licence. Maximum 60 alphanumeric characters. |
| Currency | Select the default trading currency for this Company from the drop-list of all configured Currencies. |
| Email Address | The company email address. Used in receipts and system-generated documents. |
| Registration Info | Company registration number or equivalent identifier. |
| Website URL | The company website address. |
| Phone Number | The company telephone number. |
| Company Logo | Select a logo image from the drop-list of configured media assets. |
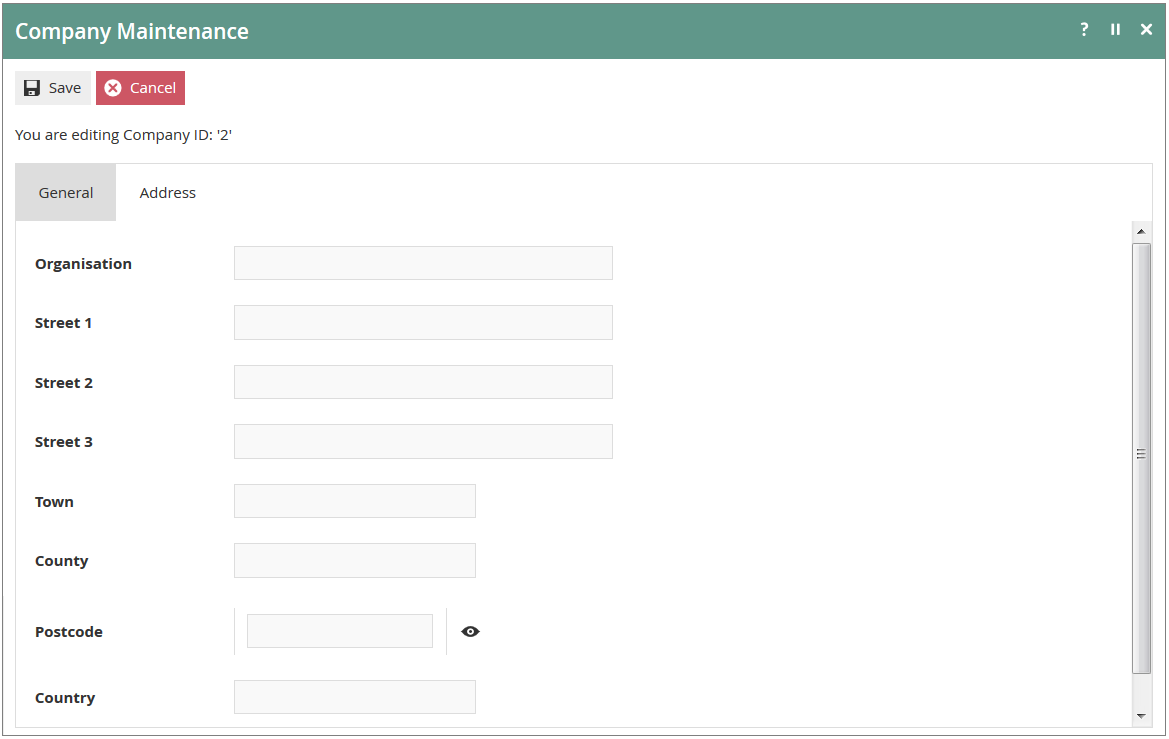
Address Tab
The Address Tab captures the company postal address and contact details, which may be used in receipts and reports.
| Field | Description |
|---|---|
| Organisation | Organisation name as used in correspondence and printed documents. |
| Street 1 | First line of the street address. |
| Street 2 | Second line of the street address. |
| Street 3 | Third line of the street address. |
| Town | Town or city. |
| County | County, state or province. |
| Postcode | Postcode or zip code. |
| Country | Country. |
After configuring both tabs, click Save to complete the Company configuration.
This completes the Company configuration.
Groups Configuration
The Groups architecture provides a variety of predefined Group Types, all managed in the Group Hierarchy Maintenance application of Estate Manager Web Maintenance.
Groups configuration is foundational to the Enactor estate. The Region Group in particular underpins many other configuration areas including Locations, Tenders, Menus, Prices and Roles. It should be configured before any of these dependent elements.
All Group Types are accessed from the same screen. Navigate to Group Hierarchy Maintenance using the Search or the path: Main Menu > Configuration > Organisation > Groups

Use the Group Type filter to select the type of Group Hierarchy to work with, then use Create New [Group Type] Hierarchy to create a new hierarchy or the Edit icon to modify an existing one.
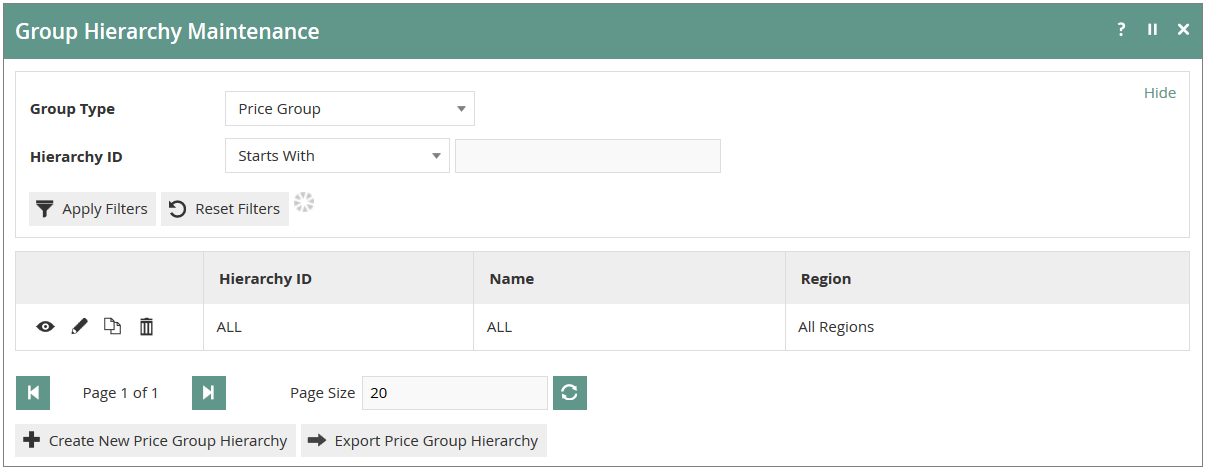
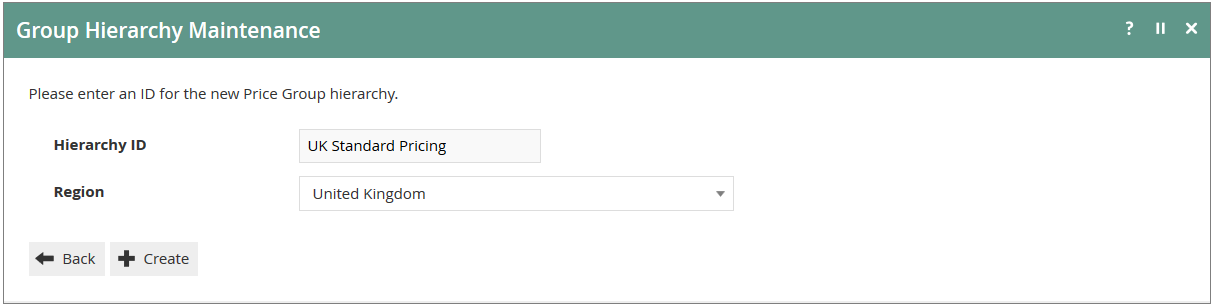
When creating a new hierarchy, enter a Hierarchy ID and select a Region, then click Create.
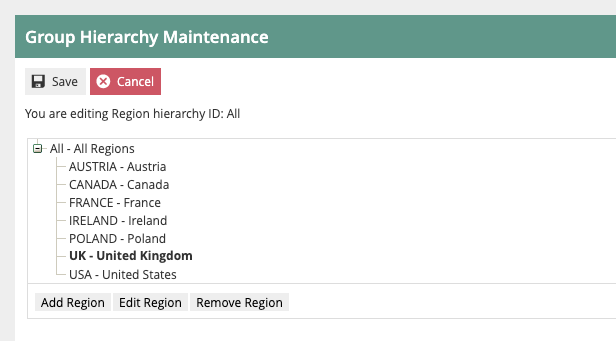
Region Group
The Region Group type is used to represent geographical areas of the business - for example, a UK-based company may have a regional hierarchy based on geographic subdivisions of the UK, while a Europe-wide company may base it on countries.
The Region Group type permits only one Region Hierarchy (All Regions). This single hierarchy contains all geographic nodes for the estate and cannot be replaced with multiple separate hierarchies.
Once the Region Hierarchy has been created, use the Group Hierarchy Edit page to add, edit or remove region nodes.
This completes the Region Group configuration.
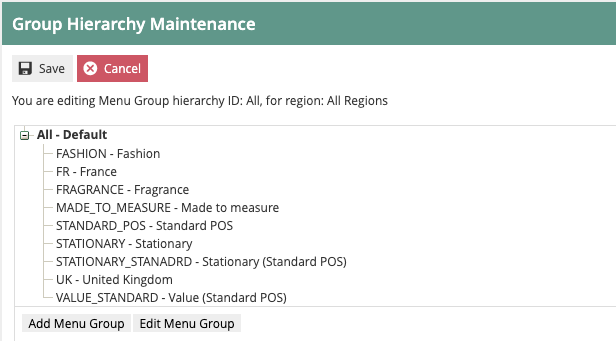
Menu Group
The Menu Group type allows two levels and is used to identify a set of menus applicable to a Location or POS Terminal context. It is also used in Role Maintenance to identify a Menu Group applicable to a given Role.
Once the Menu Group Hierarchy has been created, use the Group Hierarchy Edit page to add, edit or remove menu group nodes.
This completes the Menu Group configuration.
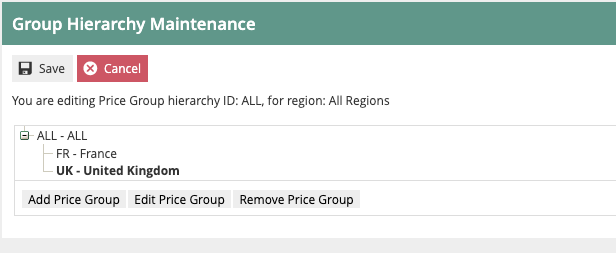
Price Group
The Price Group type is used to identify groups of product prices in a hierarchical structure of up to 10 levels. In Product Price Maintenance, Price Groups differentiate product prices and may be used to assign prices by Price Group to a POS Terminal.
Once the Price Group Hierarchy has been created, use the Group Hierarchy Edit page to add, edit or remove price group nodes.
This completes the Price Group configuration.
Fascia Group
Fascia Groups allow two levels and are used to identify different store identities within the estate. They are associated with Products to support product-related presentation (for example, receipt logo images) and reporting.
Fascia Groups are particularly useful for retailers that operate multiple store brands or formats from the same Enactor estate, allowing product presentation to vary by fascia.
Once the Fascia Group Hierarchy has been created, use the Group Hierarchy Edit page to add, edit or remove fascia group nodes in the same way as other Group types.
This completes the Fascia Group configuration.
Broadcasting
To deliver all configuration changes to the POS, broadcast the following entities:
- Company
- Group (covers all Group types: Region, Menu, Price, Fascia)