How-to Guide - Configuring an Organisation Structure
Introduction
In the Enactor Retail System, the Organisation Structure is the foundational configuration on which all other key components are based. It begins with the basic Company information and default trading currency. With the company information in place, a regional structure that reflects the retailer's business organisation - including stores, warehouses, and other locations - is added through Group Hierarchies.
The Groups architecture provides predefined Group Types including Region Groups, Menu Groups, Price Groups, and Fascia Groups, all managed through the Group Hierarchy Maintenance application in the Estate Manager. These groups underpin location assignment, menu configuration, product pricing, and store branding throughout the system.
The purpose of this guide is to demonstrate the steps required to configure the base organisation structure, including company setup, group hierarchy creation, and the configuration of region, menu, price, and fascia groups.
This guide provides basic guidance on configuration including required and the most common options. Please refer to the full solution documentation for a detailed explanation of all available settings.
Overview
The following steps are required to configure the base Organisation Structure:
- Company Configuration - Create or edit the company record with name, currency, address, and logo
- Group Hierarchy Configuration - Access Group Hierarchy Maintenance and create group hierarchies
- Region Group - Configure the regional hierarchy representing geographical areas
- Menu Group - Configure menu groups for location or POS terminal context
- Price Group - Configure price groups for product price hierarchies
- Fascias - Configure fascia groups for store branding and reporting
- Broadcasting - Deliver the configuration to POS and store server devices
Prerequisites
Before starting, you should have the following resources in place:
- Enactor Estate Manager
- Enactor POS (configured within the appropriate region, connected to the Estate Manager)
- Standard Configuration, including base configuration and regionally appropriate data
You should be familiar with the following:
- Estate Manager navigation
- Data broadcasting
Configuration Steps - Company Configuration
Basic Company information is made available to applications in a Company configuration element. For example, the Company Address may be used in receipts. At least one Company element is required.
The mandatory Company entry must have a Company ID value of 1 and the Company Name value must correspond exactly to the string provided for the software Licence. A built-in Company element with Company ID of 1 is typically provided with installed default data and has a default Company Name value of Enactor. This entry, if present, should be modified to provide the correct Company Name (as per licence) and other details.
Accessing Company Maintenance
Navigate to Company Maintenance using the Search or the path:
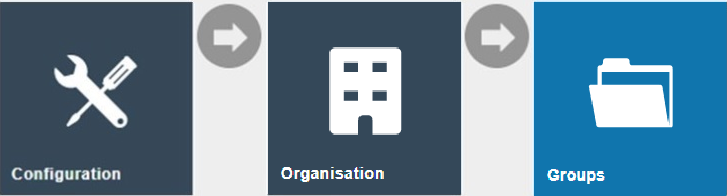
Main Menu > Configuration > Organisation > Company

The Company Maintenance list is displayed, showing all configured companies. Use the edit icon on an existing entry to modify it.
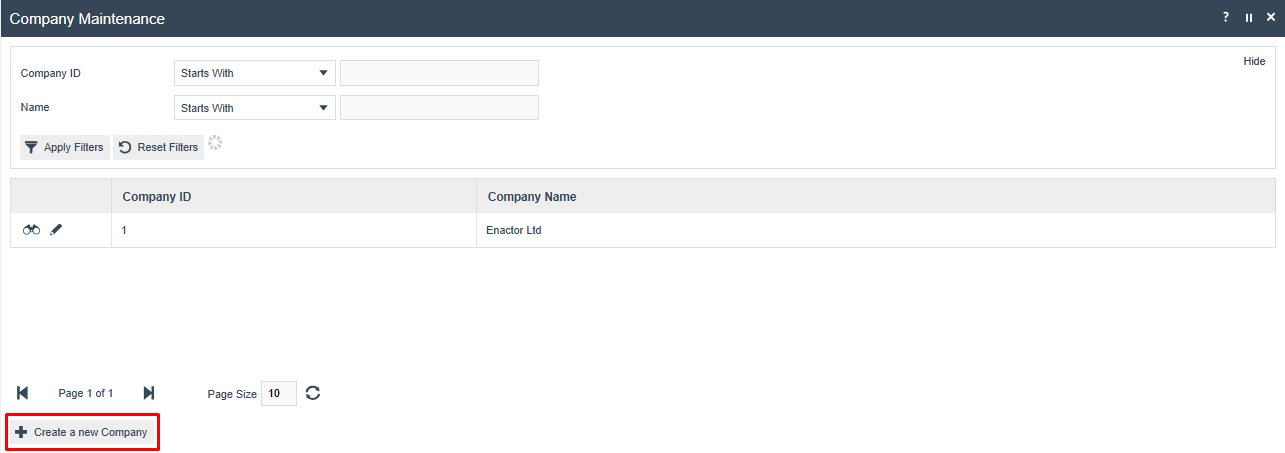
Creating a New Company
In the Company Maintenance list, select Create a new Company. In the initial screen, a Company ID is required:

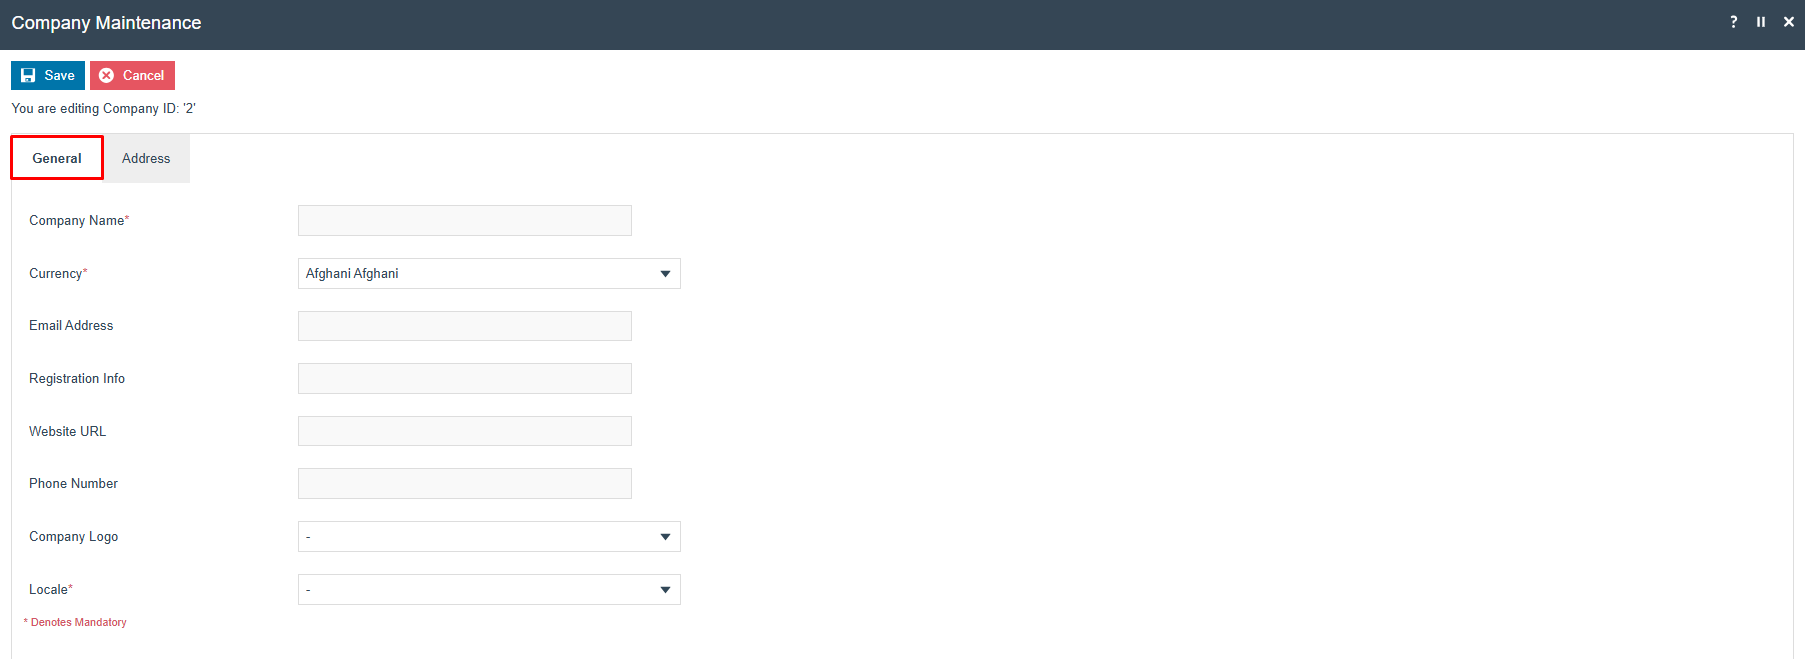
General Tab
The General tab captures the core company properties. Set the appropriate values as follows:
| Configuration | Description |
|---|---|
| Company Name | Specify the Company name: alphanumeric and maximum 40 characters. Must match the licence string for Company ID 1. |
| Currency | Dropdown list selection from configured currencies. Specifies the base currency in which the Company trades. |
| Email Address | Email address for the company: maximum 255 alphanumeric characters. |
| Registration Info | Any registration information associated with the company: alphanumeric; maximum 100 characters. |
| Website URL | The URL of the company website: alphanumeric; maximum 50 characters. |
| Phone Number | The phone number of the company: maximum 20 numeric characters. |
| Company Logo | Dropdown list selection of defined images of Image Category type OTHER. |
| Locale | Dropdown list selection from configured Locales. |
Address Tab
In the Address tab, specify the Company Address and other contact details:

| Configuration | Description |
|---|---|
| Organisation | User-defined name of the Organisation: alphanumeric; maximum 40 characters. |
| Street 1 | Alphanumeric; maximum 40 characters. |
| Street 2 | Alphanumeric; maximum 40 characters. |
| Street 3 | Alphanumeric; maximum 40 characters. |
| Town | Alphanumeric; maximum 40 characters. |
| County | Alphanumeric; maximum 40 characters. |
| Postcode | Alphanumeric; maximum 10 characters. Use the postcode lookup button to locate the address from the postcode. |
| Country | Alphanumeric; maximum 25 characters. |
Select Save to save the company record.
This completes the Company configuration.
Configuration Steps - Group Hierarchy Configuration
The Groups architecture provides a variety of predefined Group Types, all of which are managed in the Group Hierarchy Maintenance application of Estate Manager Web Maintenance. Groups configuration is foundational, especially the Region Group type.
Accessing Group Hierarchy Maintenance
Navigate to Group Hierarchy Maintenance using the Search or the path:
Main Menu > Configuration > Organisation > Groups
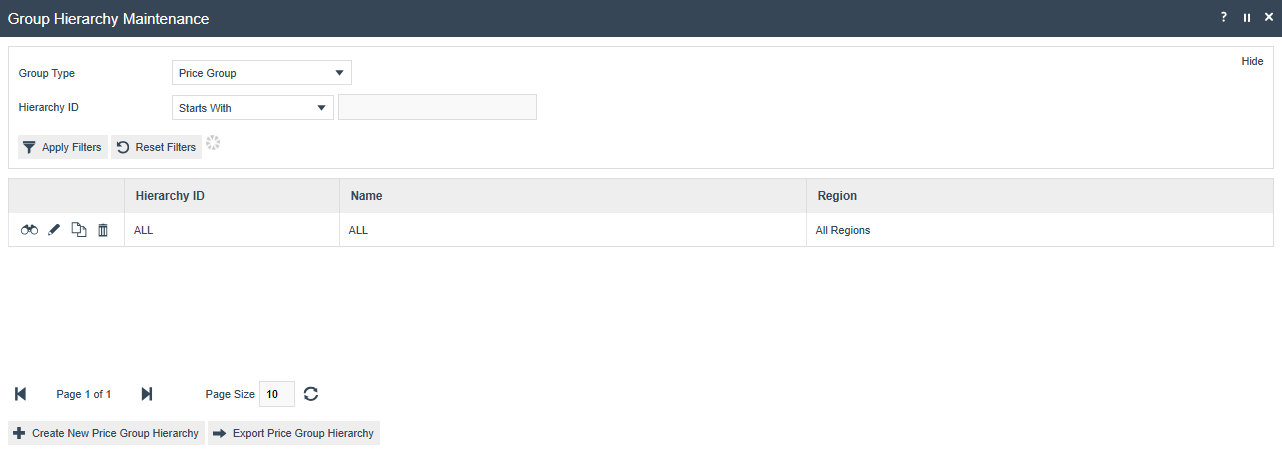
The Group Hierarchy Maintenance page is displayed. Use the Group Type filter to select the type of group hierarchy to manage:

Creating a New Group Hierarchy
After selecting a Group Type, use the Create new [Group Type] Hierarchy option to create a new Group Hierarchy. A Hierarchy ID value is required and in most cases a Region must also be specified:

Group Hierarchy Maintenance
Use the Group Hierarchy Maintenance page to manage Groups of a selected Type. Having selected a Group Type, the user is able to View, Edit, Copy or Delete Group Hierarchies and manage the Groups within them:
This completes the Group Hierarchy configuration.
Configuration Steps - Region Group
The Region Group type permits only one Region Hierarchy (All Regions), which is used to represent geographical areas. For example, a UK-based company may have a regional hierarchy based on geographic subdivisions of the UK, whereas a Europe-wide company may have a regional hierarchy based on countries.
Region Maintenance
Once the Group Hierarchy has been created, the Group Hierarchy Edit page is available to Add, Edit, or Remove group nodes in the hierarchy:
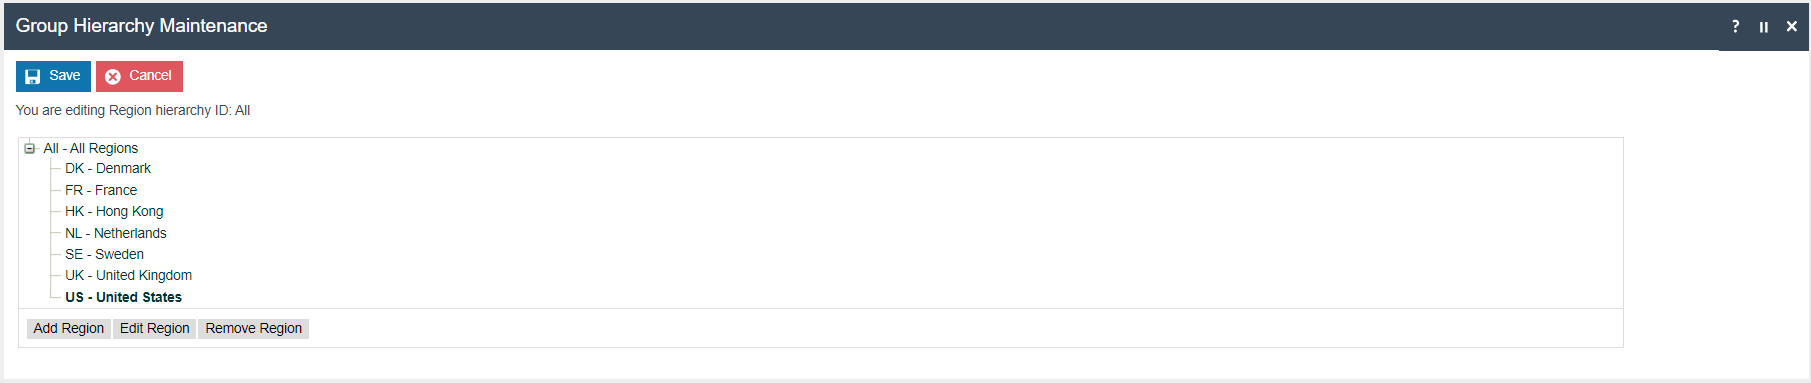
Select Save to save the region hierarchy.
This completes the Region Group configuration.
Configuration Steps - Menu Group
The Menu Group type allows two levels and is used to identify a given set of menus applicable to Location or POS Terminal context. Menu Groups are also used in Role maintenance to identify a Menu Group applicable to a given Role.
Menu Group Maintenance
Once the Group Hierarchy has been created, the Group Hierarchy Edit page is available to Add, Edit, or Remove group nodes in the hierarchy:

Select Save to save the menu group hierarchy.
This completes the Menu Group configuration.
Configuration Steps - Price Group
The Price Group type is used to identify groups of Product Prices in a hierarchical structure of up to ten levels. In Product Price Maintenance, Price Groups differentiate Product Prices and may be used to assign Product Prices by Price Group for use at a POS in POS Terminal configuration.
Price Group Maintenance
Once the Group Hierarchy has been created, the Group Hierarchy Edit page is available to Add, Edit, or Remove group nodes in the hierarchy:
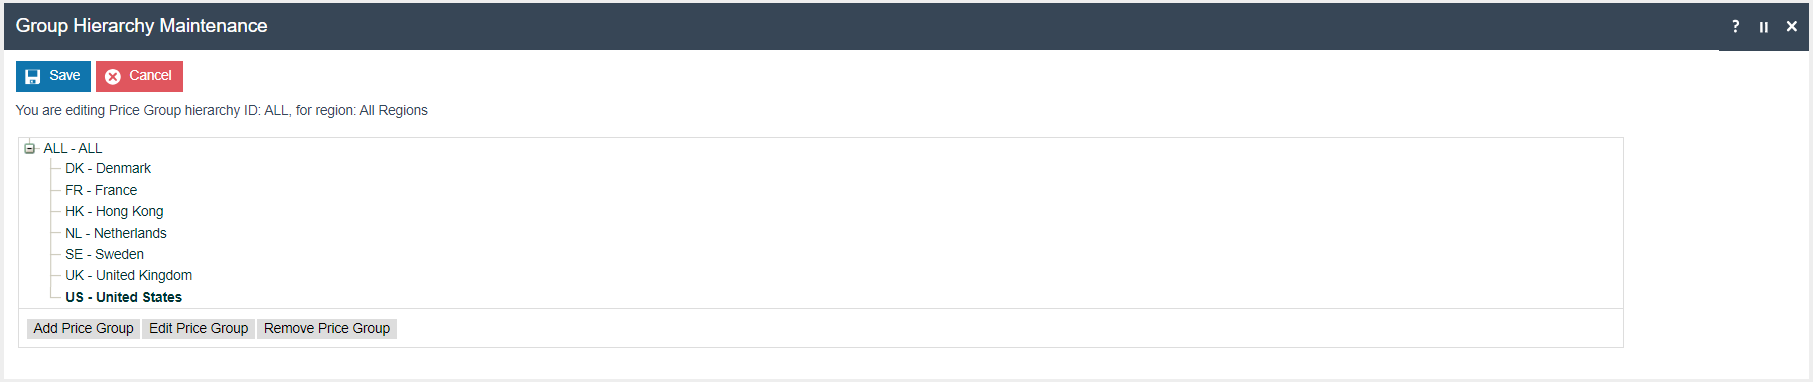
Select Save to save the price group hierarchy.
This completes the Price Group configuration.
Configuration Steps - Fascias
Fascia Groups allow two levels and are used to identify different store brands within a retail estate. Products are associated with a Fascia Group for product-related presentation (e.g. receipt logo images) and reporting.
Fascia Group Maintenance
Once the Group Hierarchy has been created, the Group Hierarchy Edit page is available to Add, Edit, or Remove group nodes in the hierarchy:

Select Save to save the fascia hierarchy.
This completes the Fascia Group configuration.
Configuration Steps - Broadcasting
To deliver the configuration changes to the POS and store server, broadcast the following entities:
- Company
- Group Hierarchies (Region, Menu, Price, Fascia)
Organisation structure configuration must be broadcast to both the POS terminals and the store server. Ensure the broadcast targets all relevant devices in the estate.
This completes the Broadcasting configuration.
About This Document
(c) 2026 Enactor Ltd
All documents produced by Enactor Ltd are supplied to customers subject to Copyright, commercial confidentiality, and contractual agreements and must not be copied or transferred without permission.
Document Context
This document is part of the Enactor Product Documentation Series. All Enactor products include a comprehensive documentation set designed to improve understanding of the product and facilitate ease of use.
Document Inquiries
If you find that a document is inaccurate or deficient in any way, please contact:
Email: documentation@enactor.co.uk
Document History
| Version | Status | Issue Date | Author | Reason for Issue | Software Version |
|---|---|---|---|---|---|
| 1.0 | Initial Draft | 22 July 2020 | Michael Tolson | Initial Version | |
| 2.0 | Revised | 12 September 2023 | Michael Tolson | Re-review | |
| 3.0 | Revised | 31 March 2026 | Shenol Silva | Standards conversion | 2.7.1724 |