How To Guide - Configuring a New Store
This guide explains the process of setting up all the configuration data required for a new store, including the store configuration itself and the devices (including fixed and mobile POS Terminals) that will be used within the store.
This guide covers the essential elements of Location, Device, and POS Terminal configuration for a new store.
Notes
This guide does not cover all tabs, sub-tabs, and fields. Please refer to the Enactor Books for detailed information.
Introduction
The purpose of this guide is to show the typical steps involved when setting up a new store. Often, a retailer will leverage the Template capabilities within Enactor to set up and manage existing locations. The use of Templates is covered in a separate guide. This document focuses on completing the core configuration steps manually.
Overview
The following steps are required to configure a new store:
- Region Configuration
- Location Configuration
- Device Configuration
- POS Terminal Configuration
Region configuration is covered in the How to configure a base Organisation Structure guide. This guide covers Location, Device, and POS Terminal configuration.
Prerequisites
Resources
Before starting, you should have the following resources in place:
- Enactor Estate Manager
- Enactor POS (configured within the UK Region, connected to the Estate Manager)
- Standard Configuration, including:
- Base Configuration
- UK Retail (or other regional configuration pack as appropriate)
- Regionally appropriate data including Product, Localisation, Tenders, etc.
Prior Training/Experience
You should be familiar with the following:
- Estate Manager configuration
- Enactor configuration concepts, including Locations, POS Terminals, Products, etc.
- Data broadcasting
- Standard POS Sales processes
Location Configuration
Enactor supports multiple Location types including Store, Office, Warehouse, and Restaurant. This guide focuses on setting up a new store. Examples of other location types can be found in other configuration guides.
Before setting up the new store, validate that the necessary regional hierarchy exists to support the location. Refer to the How to configure a base Organisational Structure guide for assistance if necessary.
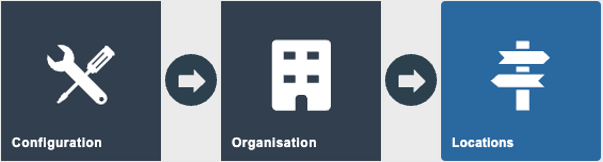
Navigate to the Locations option using the path:
Main Menu > Configuration > Organisation > Locations
Creating a New Location
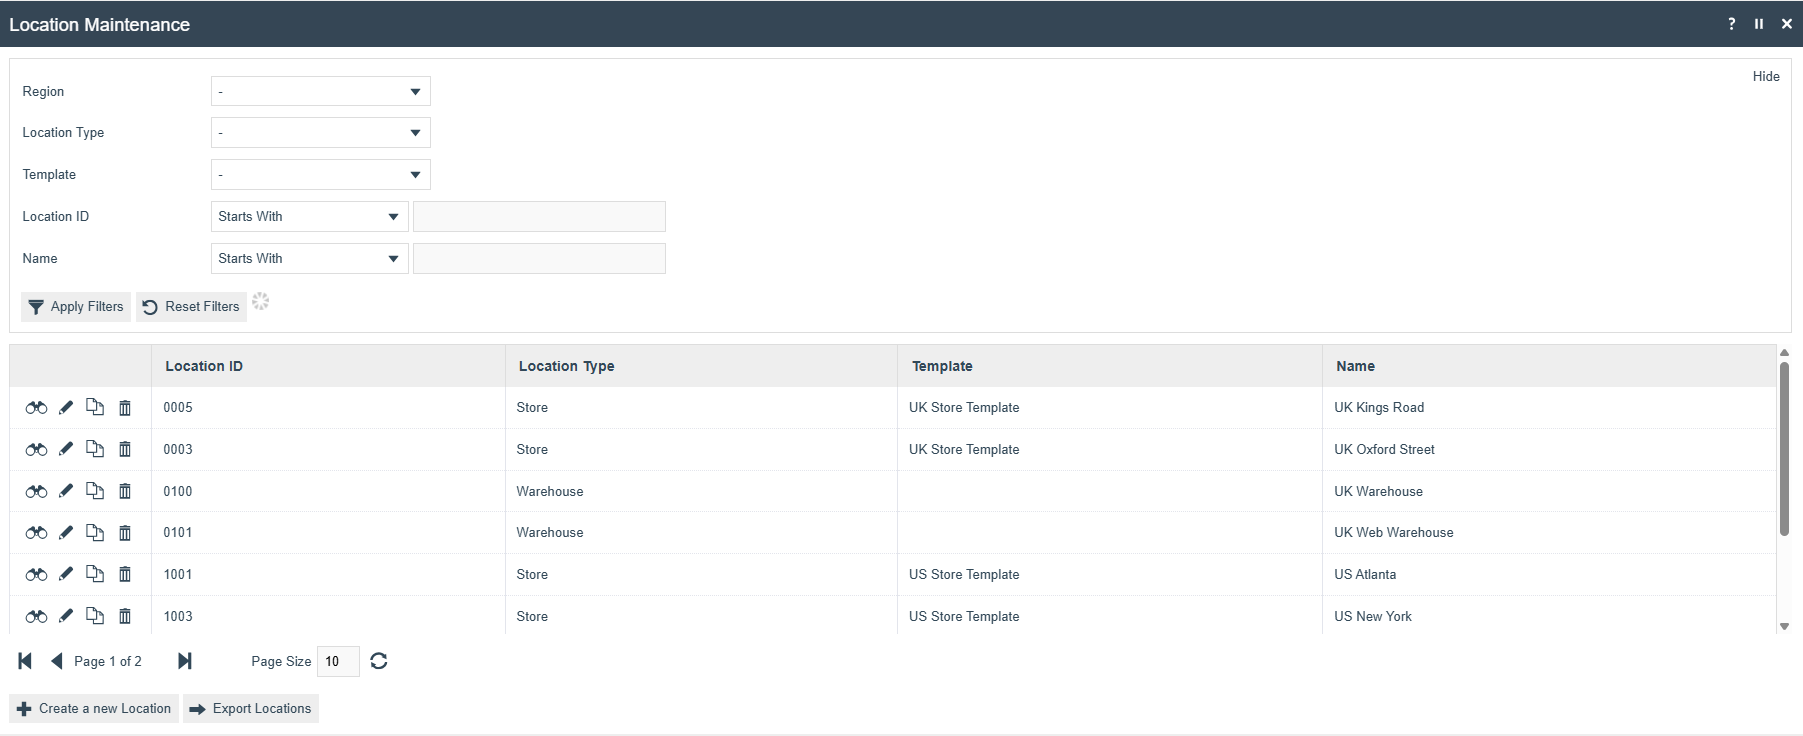
On the Location Maintenance page, a list of existing locations is displayed. Select Create a new Location to begin.
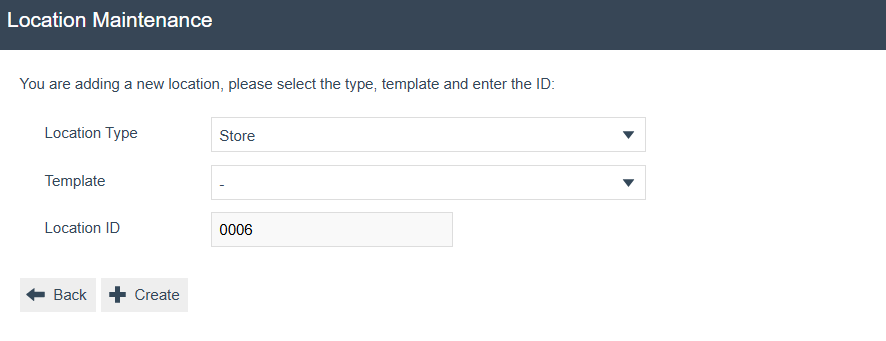
Select Store from the Location Type dropdown. Enter a unique Location ID for this location. Note that the Location ID cannot be changed once the Location has been created. Select Create.
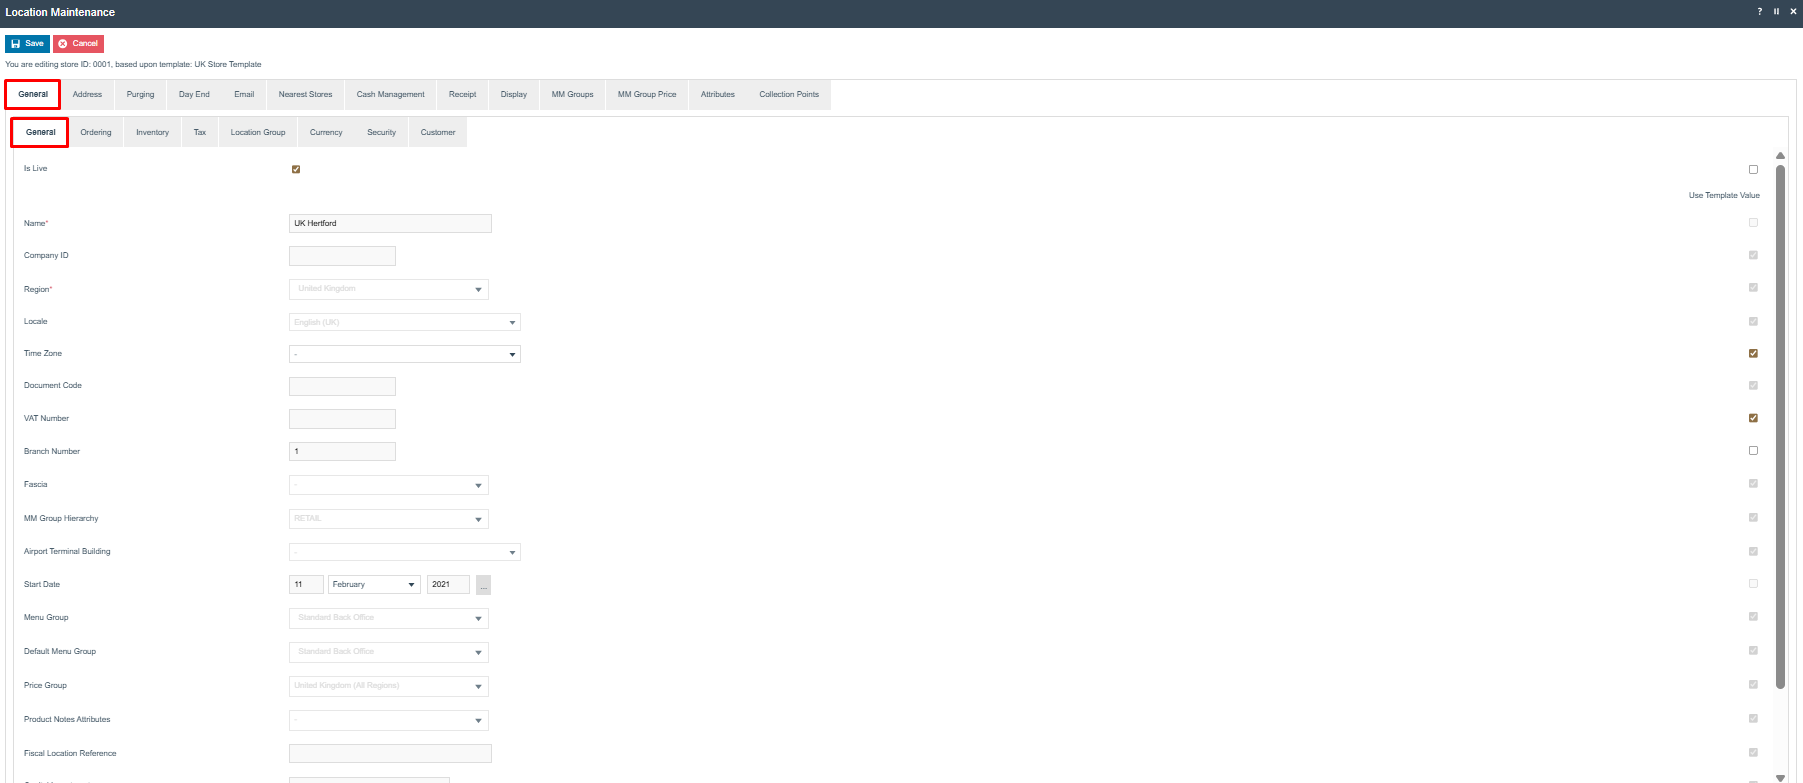
Numerous tabs and sub-tabs are presented as part of Location configuration. This guide covers the following core tabs: General, Address, Purging, Day End, Email, Nearest Stores, Receipt, and Display.
This completes the new Location creation.
General Tab
The General tab contains the basic information that controls the store behaviour and identity. The General sub-tab is shown below.
| Field | Description |
|---|---|
| Is Live | Specifies the location status. When checked, the location is live, available for trading, or active. This should be checked if the store is transacting (sales or inventory). |
| Name | Enter a name for the location. This could match the Location ID or reflect the store's name. This name appears on other configuration pages and must be recognisable. |
| Region | Select the appropriate Region from the Region groups. If the appropriate Region does not appear, it must be created - refer to the How to configure a base Organisation Structure guide. |
| Locale | Select the Locale for this location. Locale affects locale-dependent operation in language, time zone, etc. |
| VAT Number | If applicable, enter the VAT Number. The VAT Number is typically printed on receipts and included with transaction data. Leave blank if not applicable. |
| Branch Number | Set to the Location ID. |
| MM Group Hierarchy | Select the appropriate Merchandise Management Group. This sets the POS Rich Product Search starting MM Group. |
| Start Date | Enter the date the location will go live. |
| Menu Group | If this location uses a specific menu, select the appropriate Menu Group. Otherwise, select Default. Select the default menu group for the organisation from the Default Menu Group dropdown. |
| Price Group | Select the appropriate Price Group from the dropdown. Price Group is used for the valuation of purchase orders, stock transfers, and orders. If the appropriate Price Group does not exist, it must be created - refer to the How to configure a base Organisation Structure guide. |
The Ordering sub-tab handles configuration for the customer orders functionality.
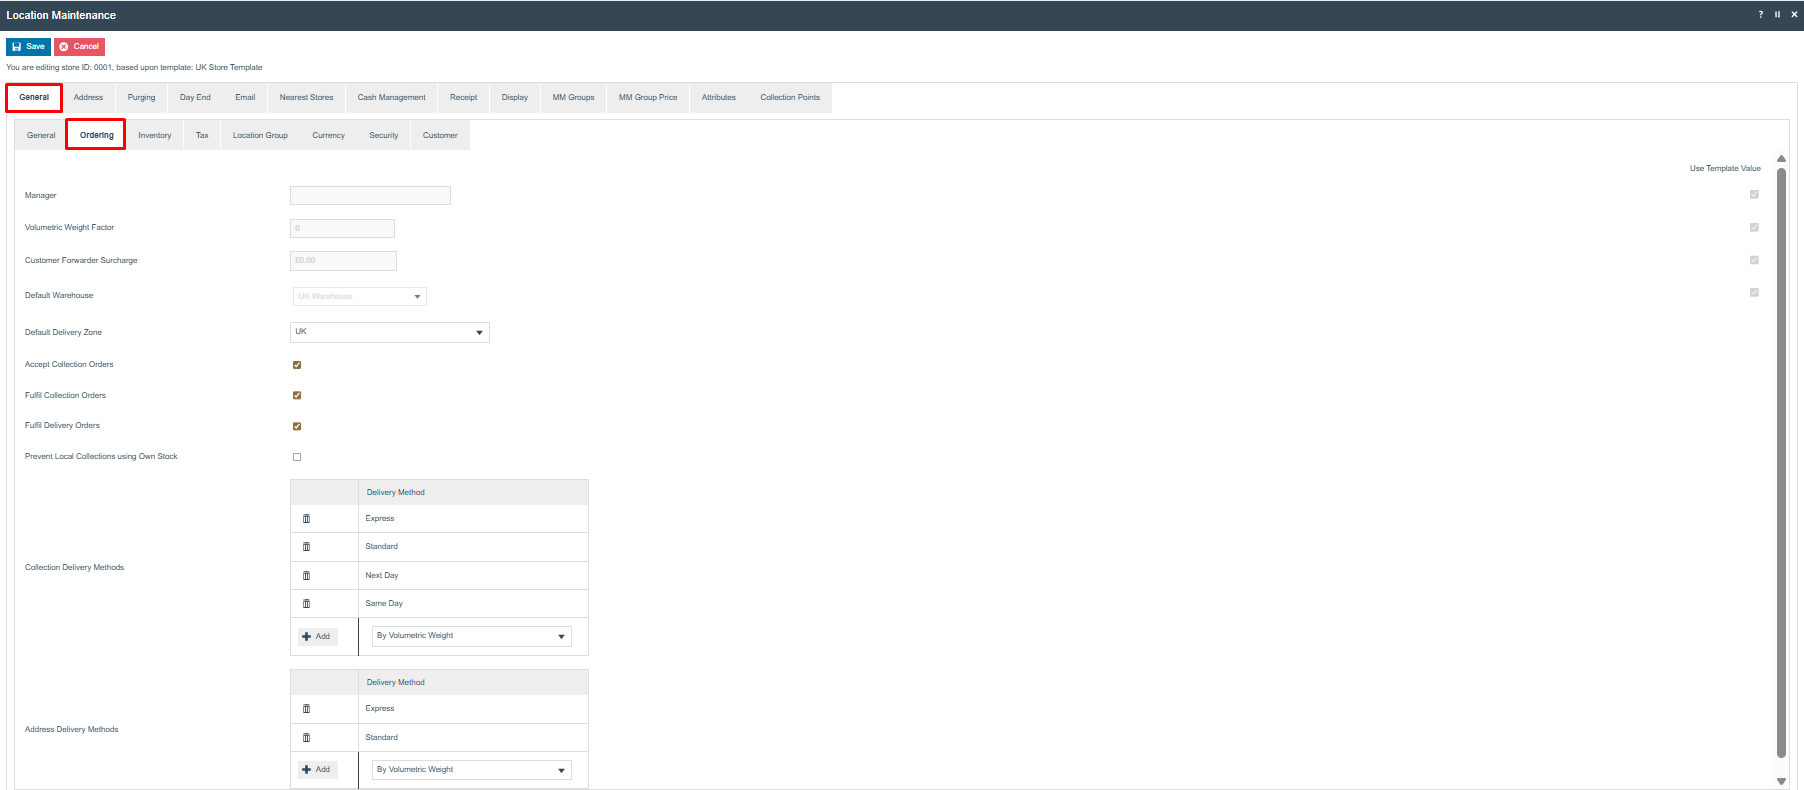
- Accepts Collection Orders / Accepts Reservation Orders: the location provides stock for the order. Normally done at a warehouse.
- Fulfills Delivery Orders: the location handles the carrier or courier handoff for delivery to the customer. This can be done at a warehouse or store.
- Fulfills Collection Orders: the location handles the final step in the order process with the customer. Normally done at a store.
- Default Warehouse: select the appropriate warehouse to route orders from this location.
- Prevent Location Collections using Own Stock: check this if the location should not use its own stock to fulfil orders, requiring fulfilment from another location. Often used when store stocking levels do not account for sales from other channels.
The Tax sub-tab captures Tax parameters applicable at the Location. Tax configuration is handled in a separate guide. The General - Currency sub-tab is only used when there are multiple locations with different base currencies; if all stores share the same base currency, this sub-tab does not need to be set.
This completes the Location General tab configuration.
Address Tab
The Address tab provides two sub-tabs to capture the address and contact details of the location. These fields are used in receipt printing, supplying store locations in web enquiry, and more.
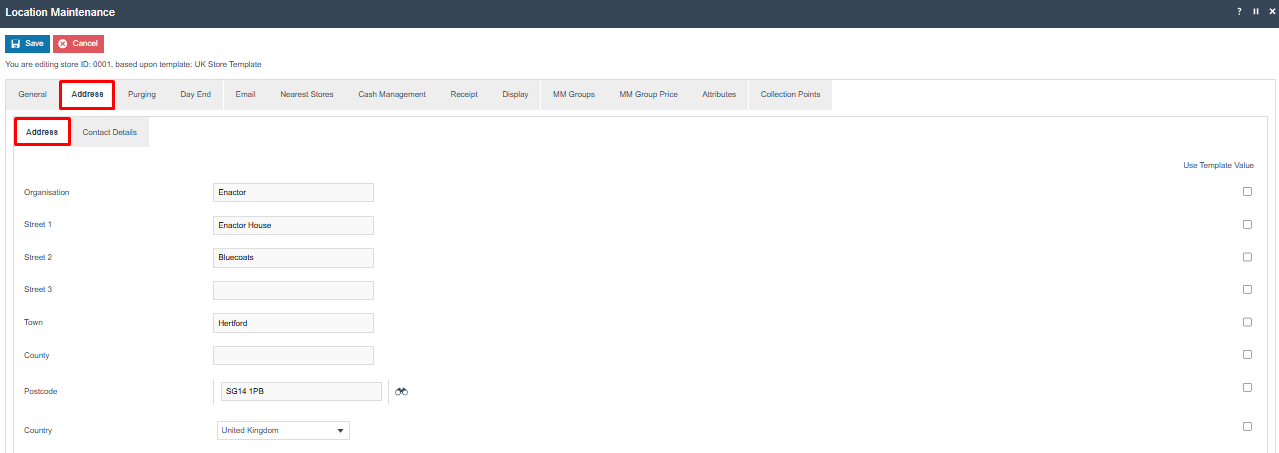
The Location Address properties include Organisation, Street Address, Town, County, Postcode, and Country. The Contact Details sub-tab captures Phone Numbers, a Fax Number, and an Email Address.
This completes the Location Address tab configuration.
Purging Tab
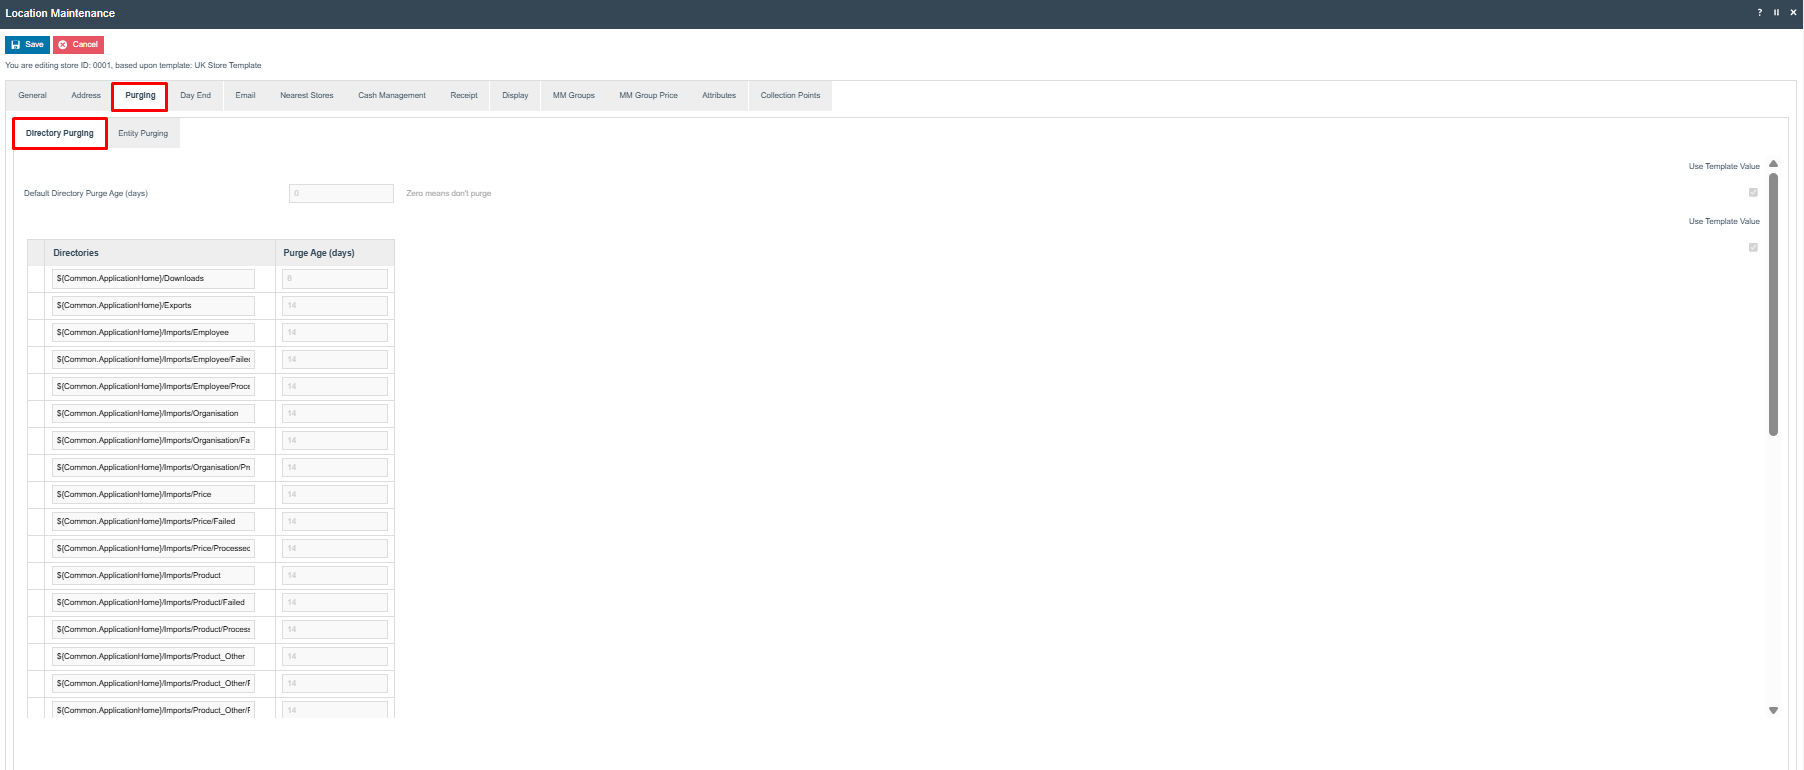
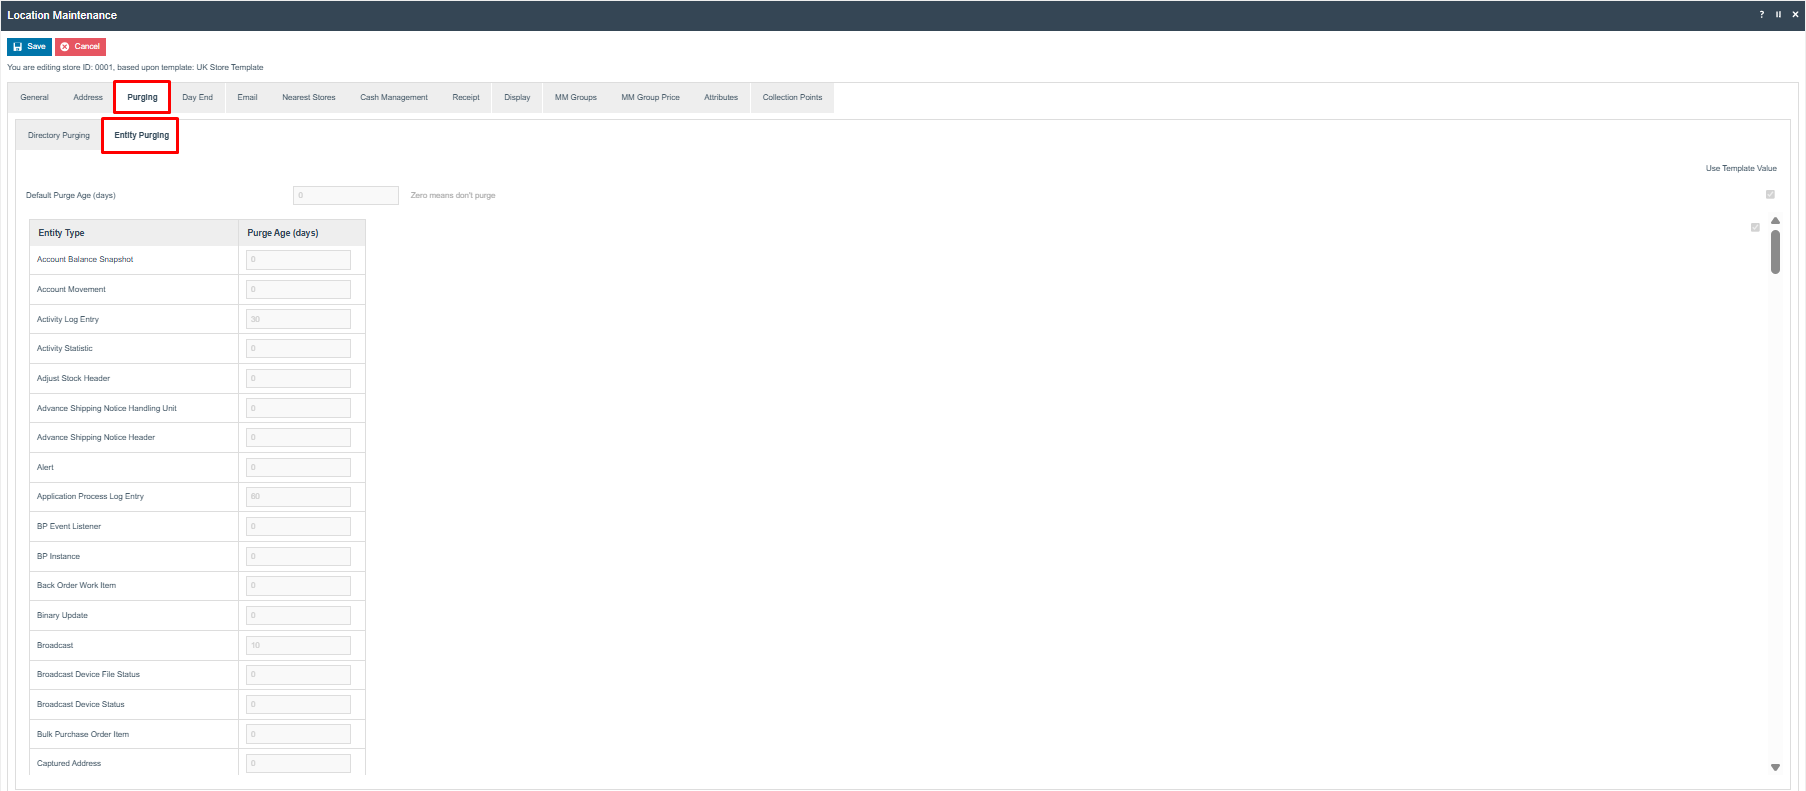
The Purging tab contains the rules for removing old data from the system that is no longer needed. Purging can remove two different types of data: directories in the filesystem and data entities in the local database.
Directory Purging is based on age in days since the file was last modified. Directories can be absolute or relative, based on the ENACTOR_HOME environment variable. A common setting for the Default Directory Purge Age (days) is 90 days.
The logs and updates directories can generate a large volume of data, so it is recommended to apply more aggressive purging guidelines. These directories are commonly set to a 45-day Purge Age.
Entity Purging removes entities in the database based on age. A Default Purge Age (days) of 365 days keeps entity data in the database for one year. This is a common setting but may vary with the retailer's business requirements. Specific tables can be set to different values if needed.
This completes the Location Purging tab configuration.
Day End Tab
The Day End tab allows configuration of normal Day Start and Day End processing. These processes can be manual or automated. Users who will manually initiate Day Start or Day End will require the appropriate user role permission.
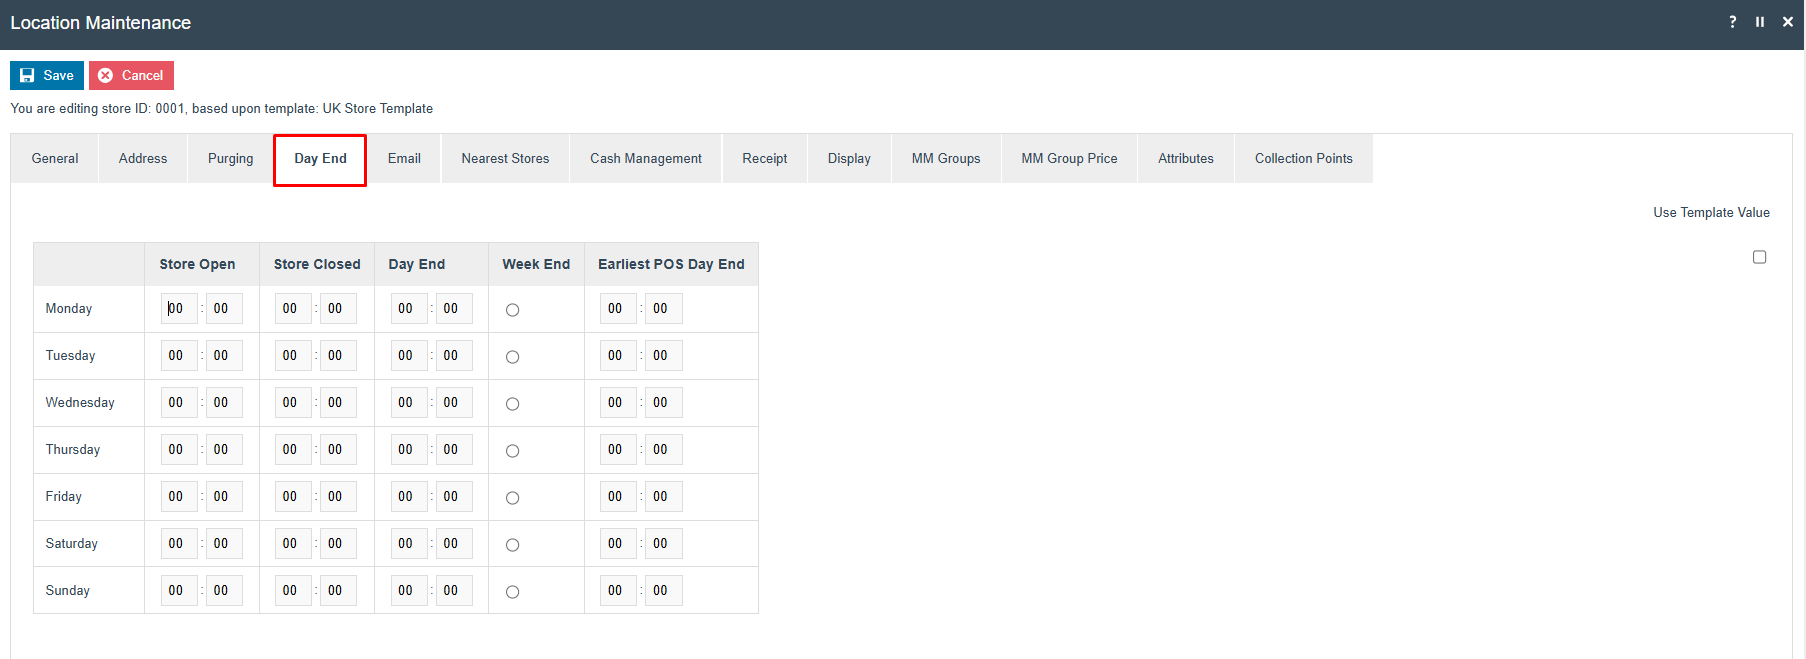
The Store Open and Store Closed times should be entered for each day of the week. The time that a normal Day End should occur should also be specified for each day. The day of the week representing the last day of the retailer's business week is selected in the Week End column.
This completes the Location Day End tab configuration.
Email Tab
The Email tab captures information about the location's email server. Applications that send email use this information to connect to the email server. The required settings are typically provided by the retailer's IT organisation.
If the support team has an email address for collecting alerts, enter it in the Support Email Address field.
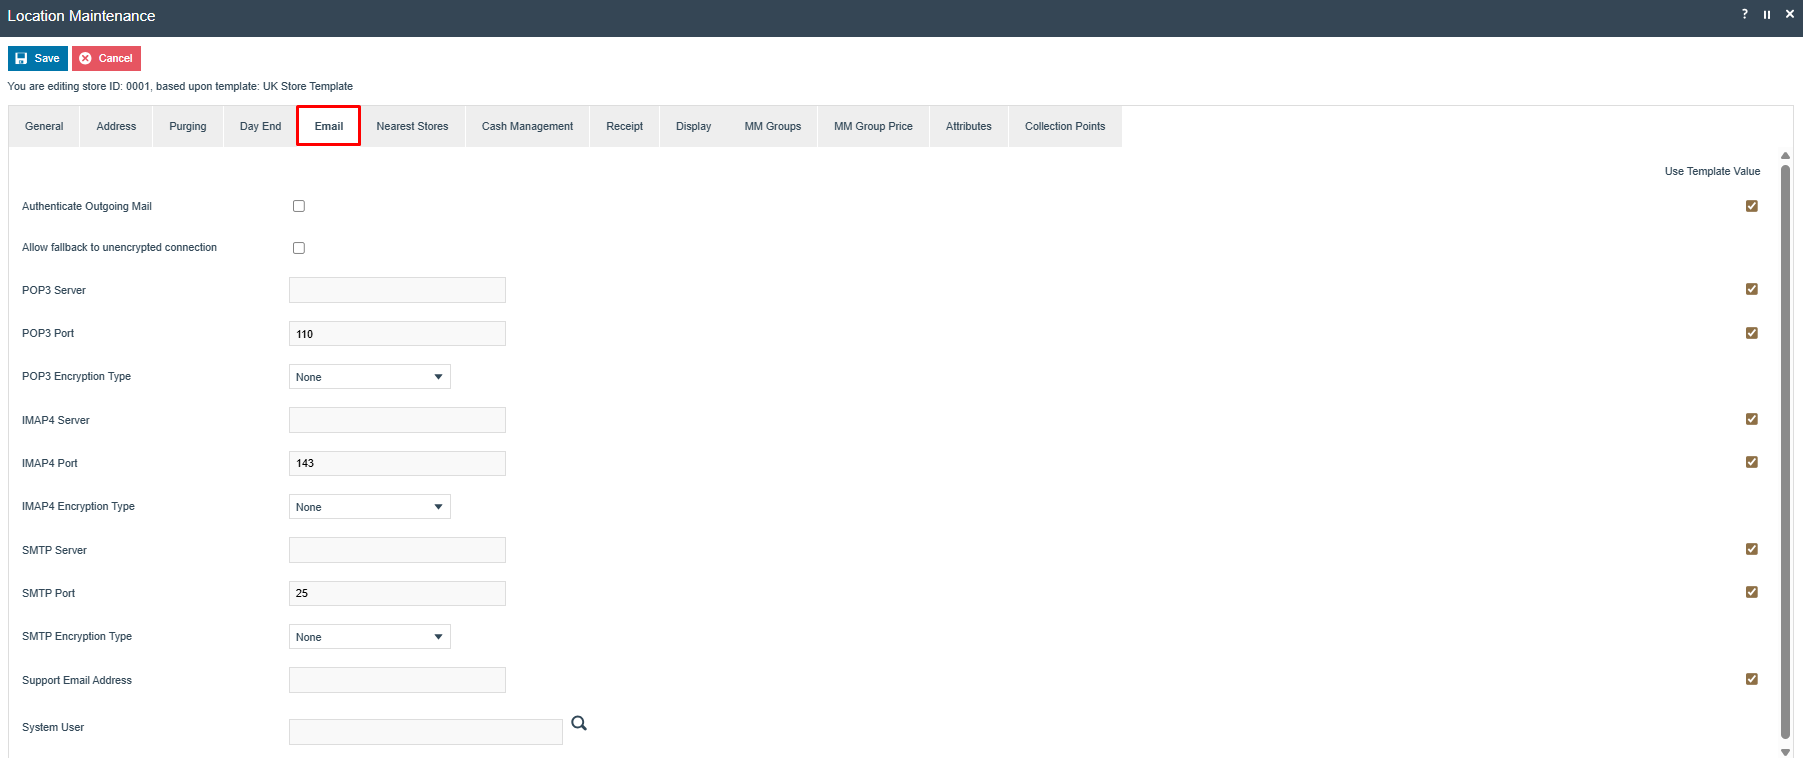
This completes the Location Email tab configuration.
Nearest Stores Tab
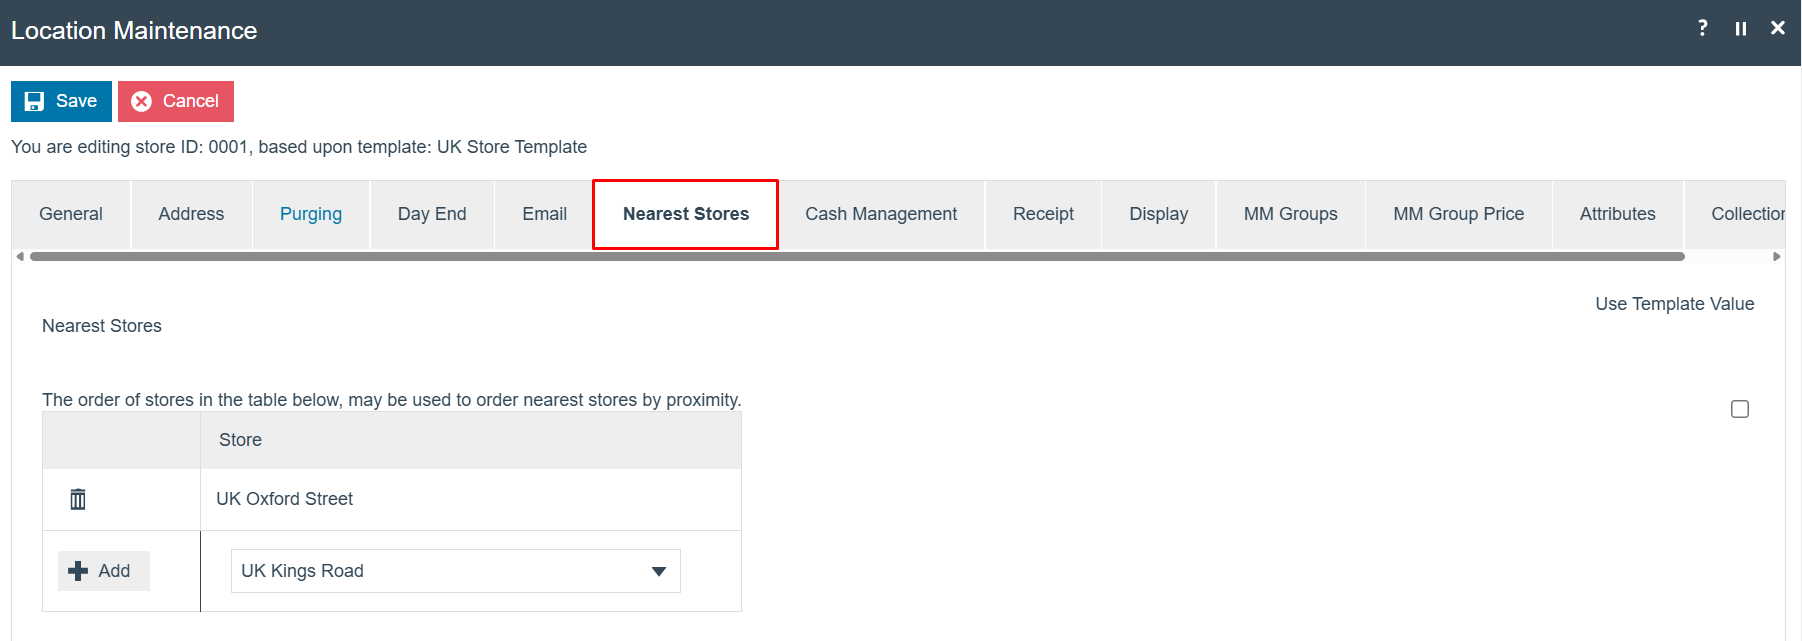
The Nearest Stores tab permits the pre-selection of locations that the POS will use in the Rich Product Search and other functionality to identify nearby locations that may be helpful during a customer transaction.
Use the Store dropdown to select the appropriate locations and select Add. Repeat as necessary. The arrows can be used to reorder the list into a meaningful priority.
The Cash Management tab provides the necessary settings to configure Cash Management for the location. Configuration of Cash Management is covered in a separate How-to Guide.
This completes the Location Nearest Stores tab configuration.
Receipt and Display Tabs
The Receipt tab allows location-specific information to be added to receipts. Use this tab to specify the Receipt Header Lines, Receipt Trailer Lines, the Receipt Header Logo, and/or a Receipt Trailer Logo.
After entering the receipt header and trailer lines, the text can be formatted further by selecting Header Lines Centered or Trailer Lines Centered.
If a Receipt Header or Receipt Trailer Logo has been uploaded, it can be selected here. A preview of the logo is provided as confirmation. For more information on uploading Receipt Logos, refer to the How-to Guide covering Media Management.
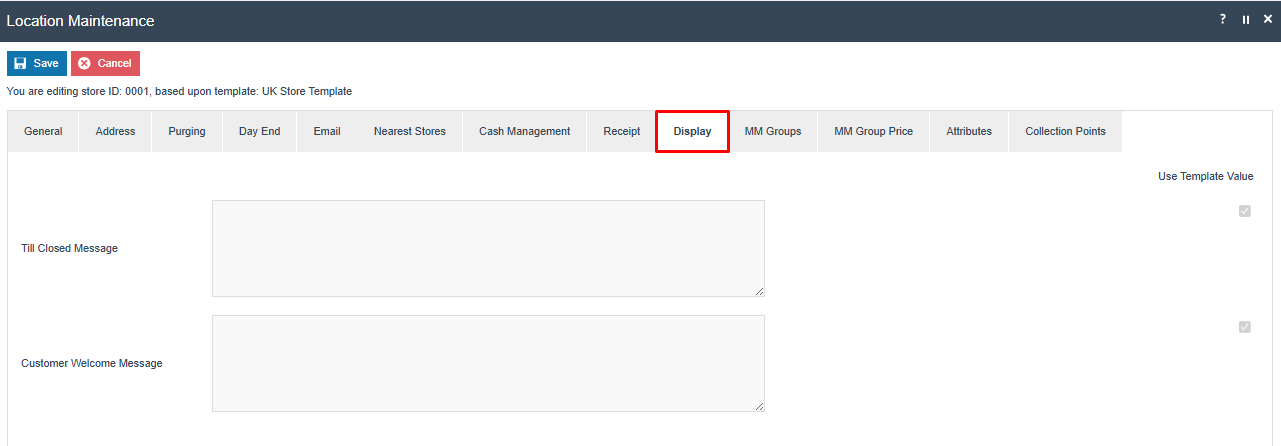
The Display tab is used only if customer-facing line displays are in use. If the location has deployed terminals with line displays, the Till Closed Message and Customer Welcome Message are defined here.
The information on the preceding sections represents the common Location configuration items when setting up a new store. The Location can now be saved, and Device configuration can begin.
This completes the Location Receipt and Display tabs configuration.
Device Configuration
All endpoints are of a specific type and need a unique Device ID. Examples include point-of-sale devices, mobile devices, inventory handheld terminals, and servers. Any device that will connect to the Enactor system requires a device type and a unique Device ID.
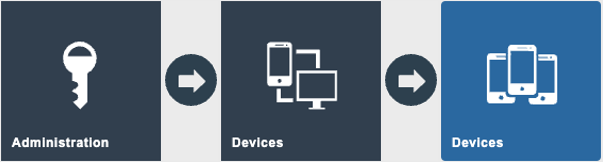
Navigate to the Devices option using the path:
Main Menu > Administration > Devices > Devices
Creating a New Device
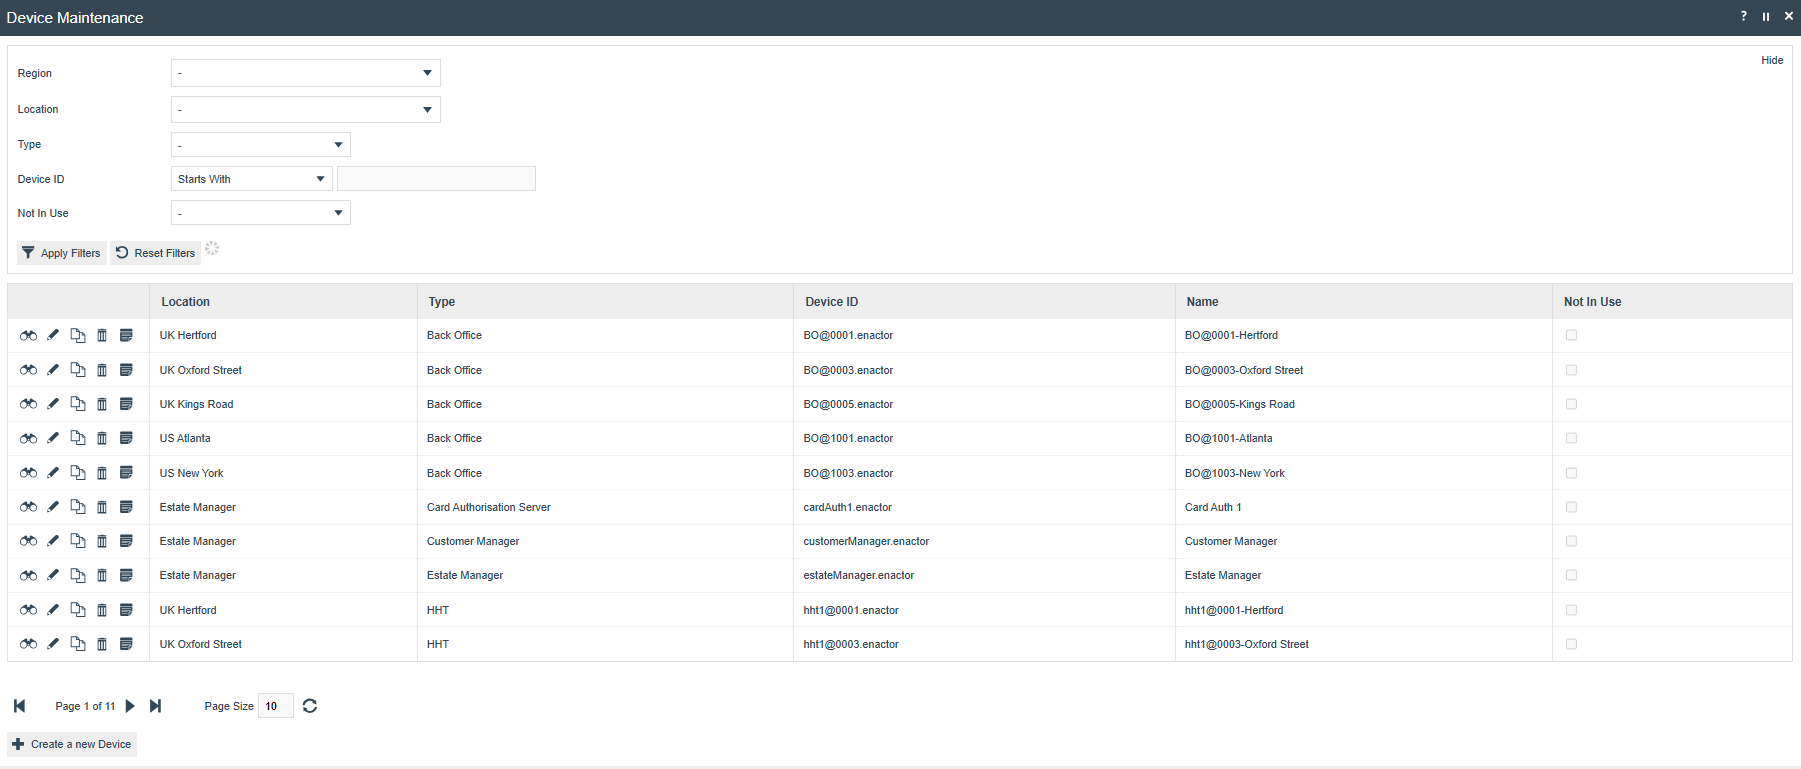
On the Device Maintenance page, a list of existing devices is displayed. Select Create a new Device to begin.
Each device must be assigned a unique Device ID. It is recommended to work with the retailer to establish a naming convention that can be replicated consistently across the estate. The Device ID should convey what the device is, how it is used, and where it is deployed.
As an example, a Device ID of pos1@0006.enactor indicates a POS terminal identified as terminal 1, deployed to location 0006 within the Enactor company/fascia. The convention used in this example is:
<device type><device number>@<location>.<company/fascia>
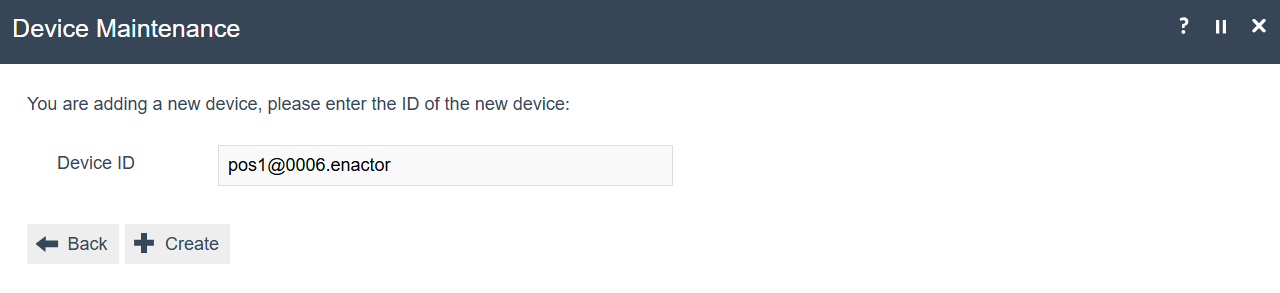
Select Create once the Device ID has been entered. Note that the Device ID cannot be changed once the device has been created.
This completes the new Device creation.
General Tab
On the Device Maintenance page, only the General sub-tab is covered in this guide.
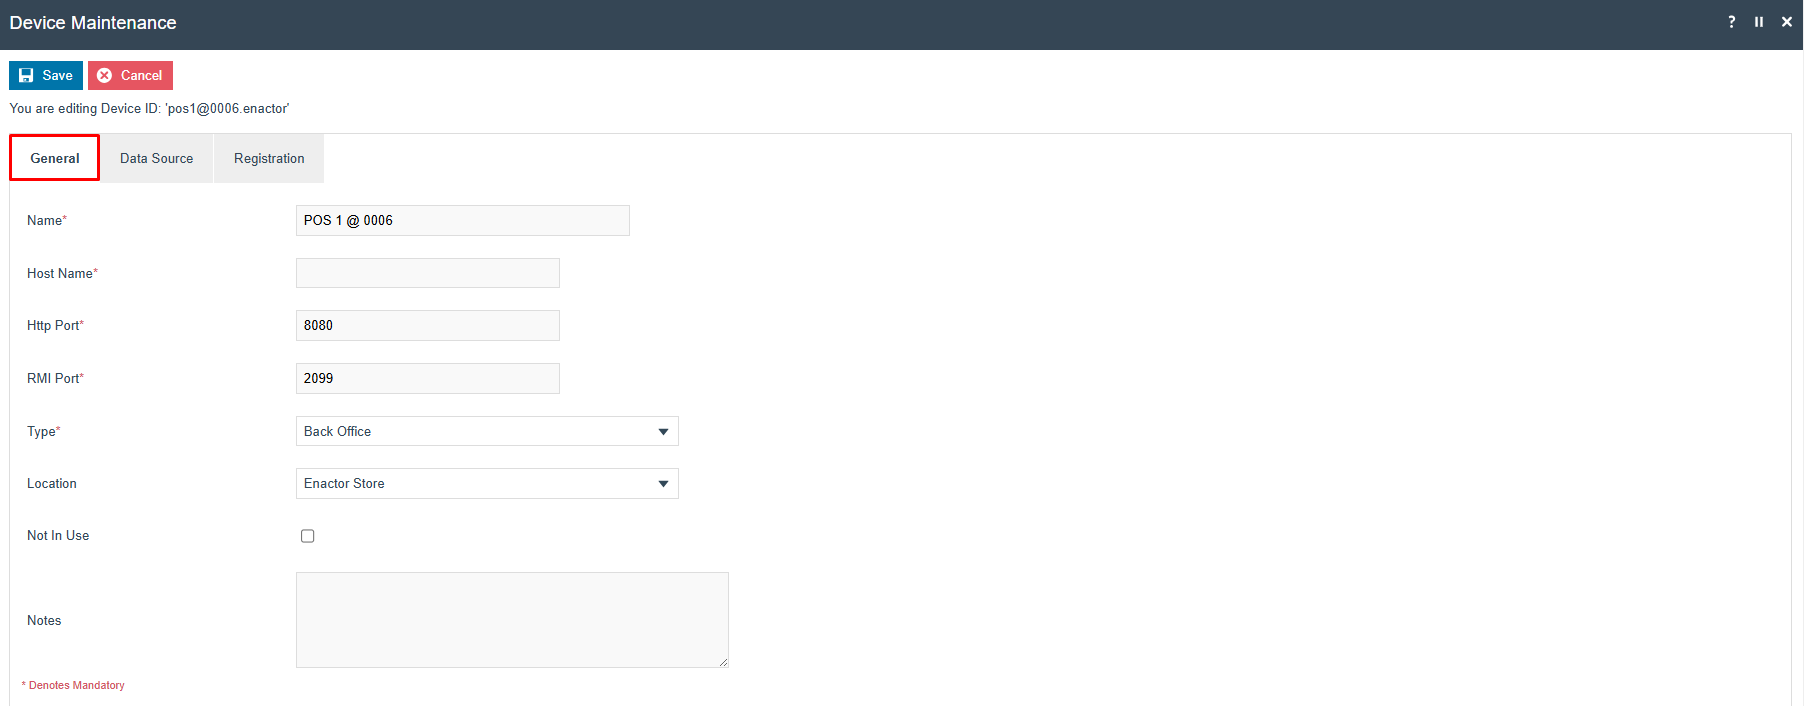
In the Name field, specify a Device Name. As with the Device ID, the Name should follow a consistent convention across the estate that conveys the device type, terminal number or other identifier, and deployed location. Often the Name is a derivative of the Device ID.
Enter localhost in the Host Name field for remote connections to the device.
Select the appropriate Device Type from the dropdown.
In the Location field, select the location where this device will be deployed.
Select Save to complete the Device configuration.
This completes the Device General tab configuration.
POS Terminal Configuration
POS Terminals are the workhorse of the commerce environment. Each POS Terminal can have unique configuration to support the specific task that the terminal will perform.
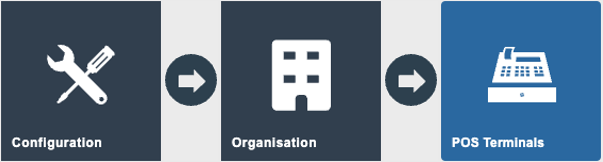
Navigate to the POS Terminals option using the path:
Main Menu > Configuration > Organisation > POS Terminals
Creating a New POS Terminal
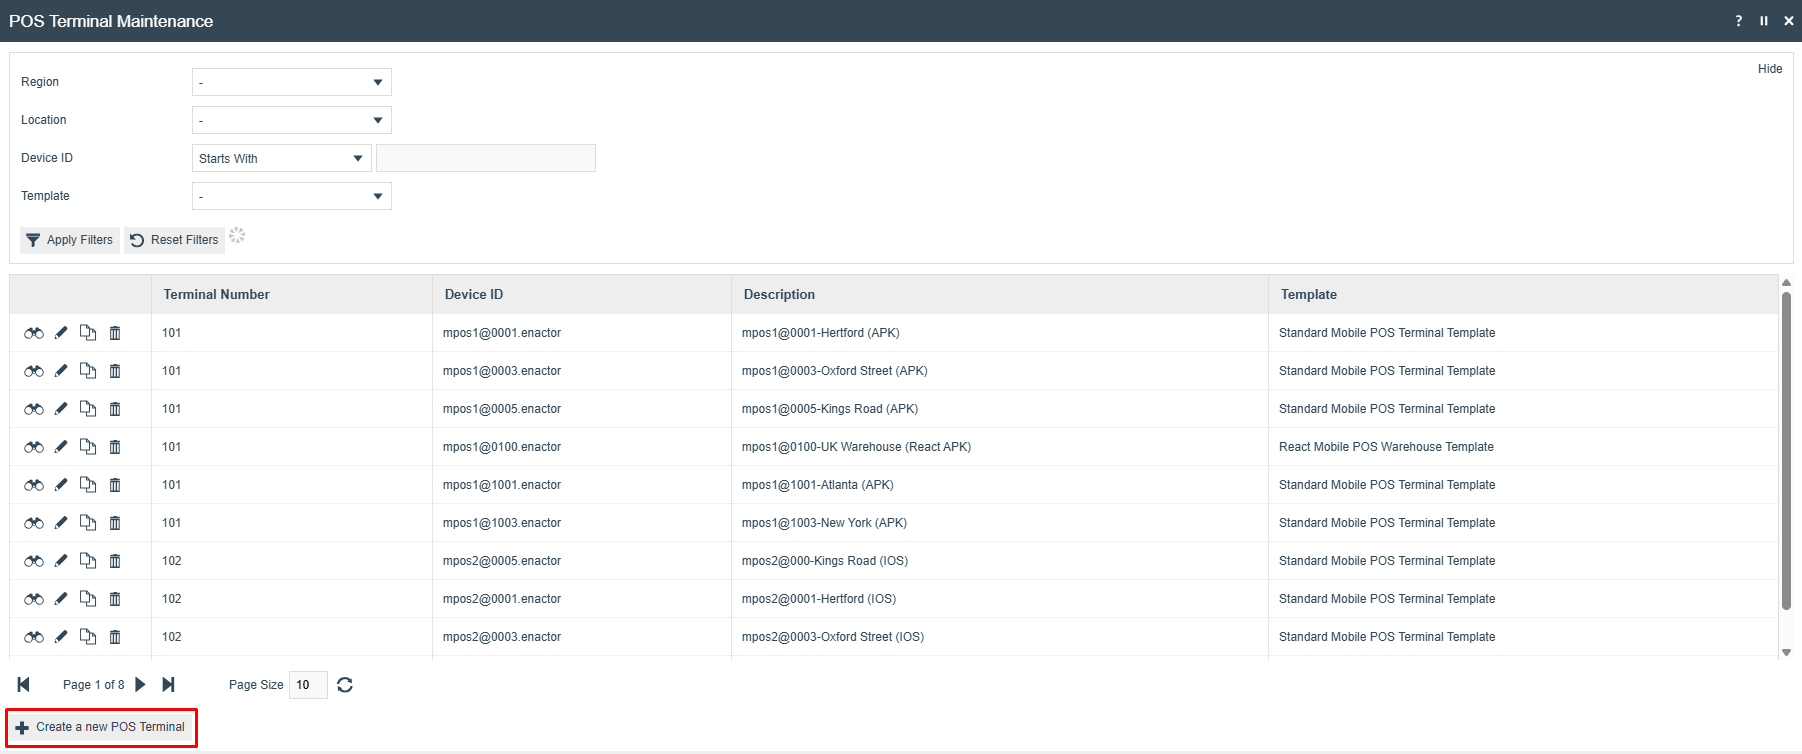
On the POS Terminal Maintenance page, a list of existing POS Terminals is displayed. Select Create a new POS Terminal to begin.
Only one Device ID can be associated with one POS Terminal. Only Device IDs that have not already been associated with a POS Terminal are presented. Select the Device ID for the new POS Terminal.
The creation and use of Templates for POS Terminal configuration is covered in a separate How-to Guide. This guide covers how to configure required and common settings manually. No selection should be made for Template.
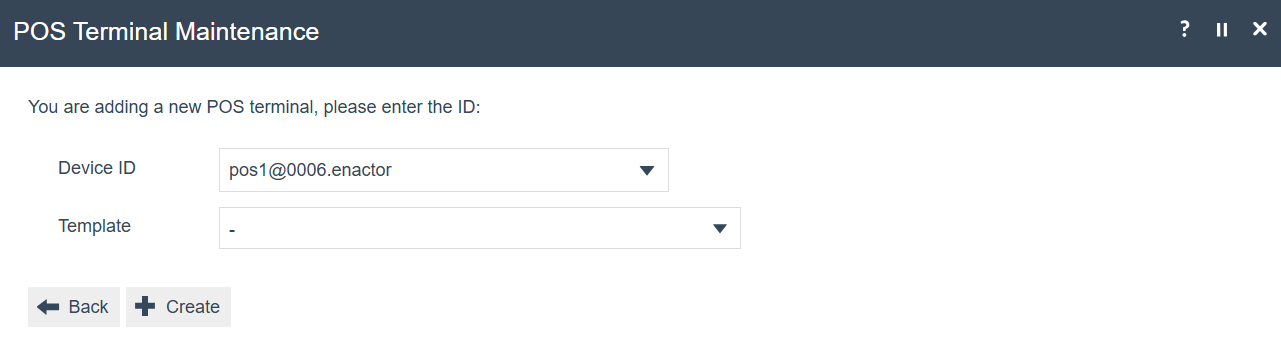
Select Create.
This completes the new POS Terminal creation.
General Tab
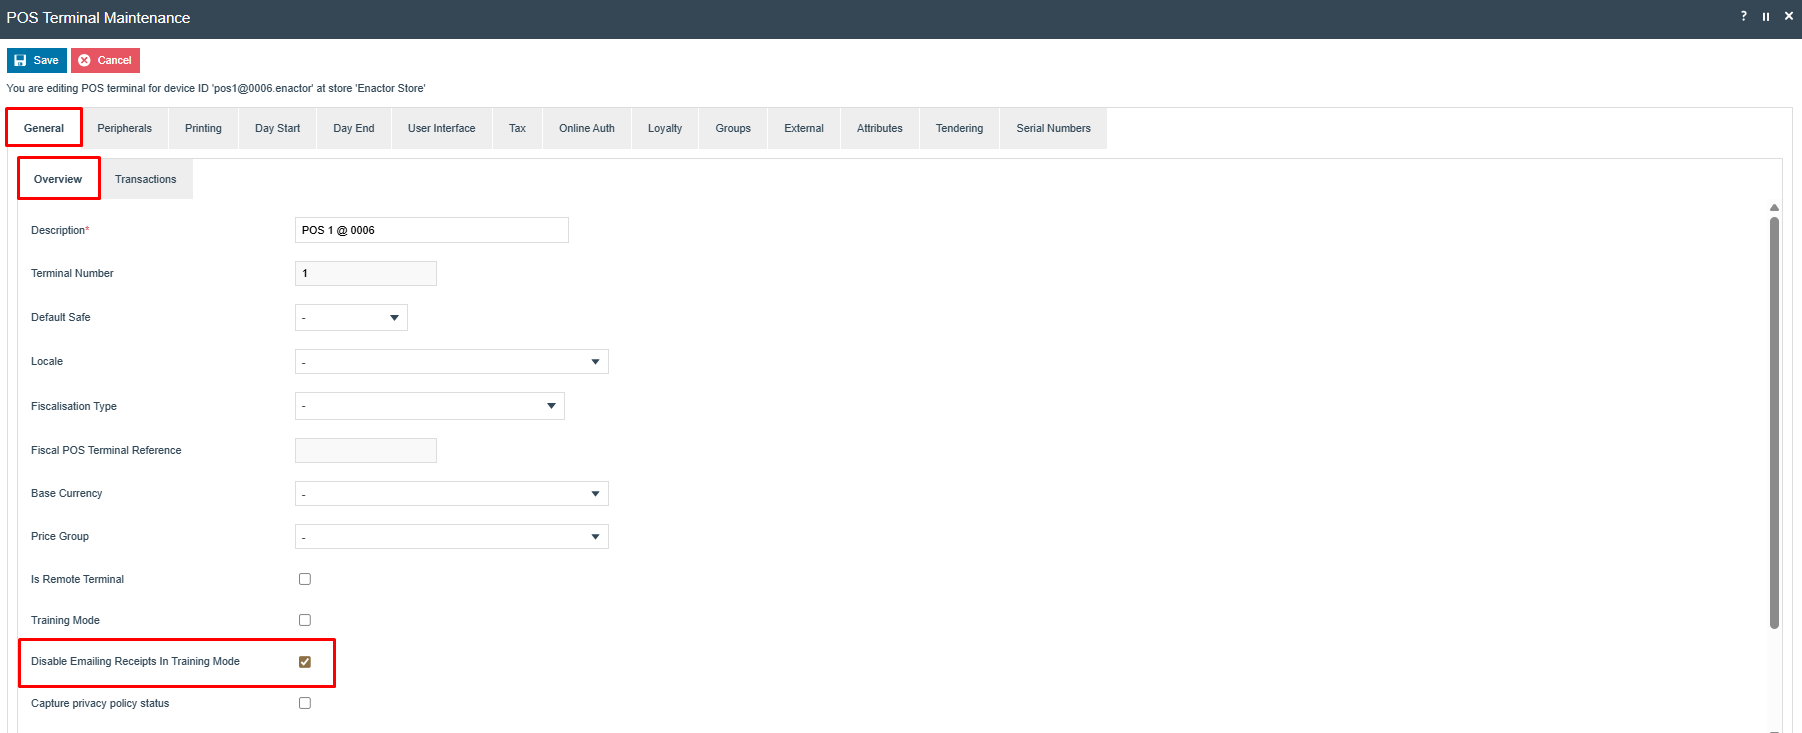
On the POS Terminal Maintenance page, the General tab contains core identity and behaviour settings for the terminal.
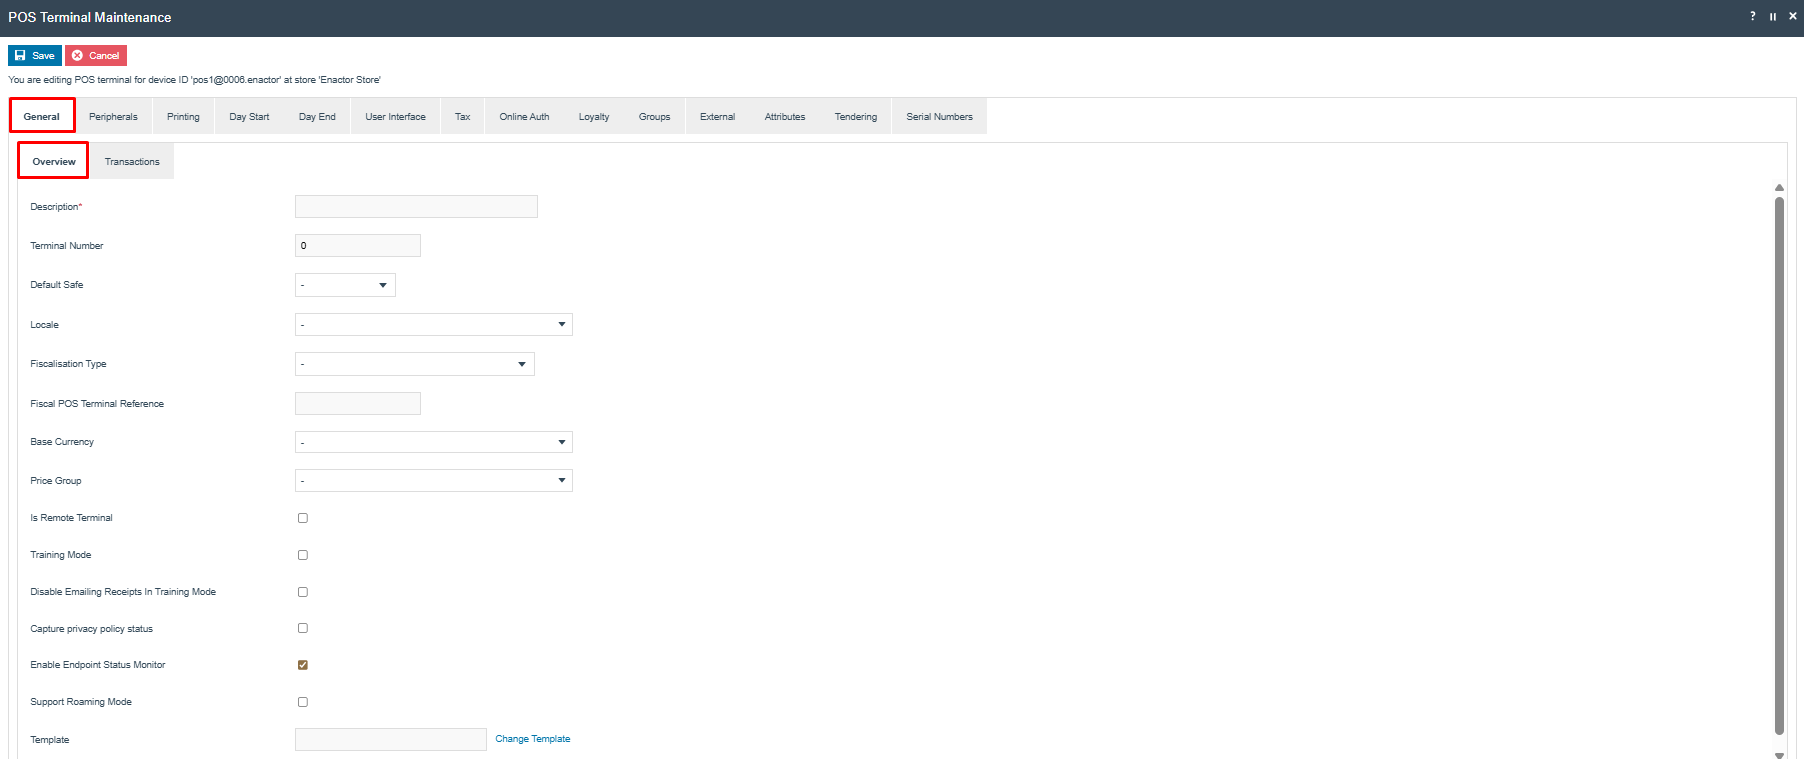
In the Description field, specify a description for the POS Terminal. As with Device ID and Device Name, POS Terminals are typically identified using a naming convention. The recommended convention is:
<device type> <device number> @ <location>
Each POS Terminal must have a Terminal Number assigned. The Terminal Number must be unique for the assigned location.
Many POS Terminal configuration settings can also be, and are more commonly, made at the Location level. This includes settings for Locale, Fiscalisation Type, Base Currency, Price Group, and others. If settings have been made at the Location level, they will automatically be inherited at the POS Terminal level. It is only necessary to make these settings at the POS Terminal level if the Location setting needs to be overridden for a particular terminal.
While only applicable if email receipts are active, it is recommended to enable Disable Emailing Receipts in Training Mode.
On the General - Transactions sub-tab, select Retail Sale from the Default Transaction Type dropdown.
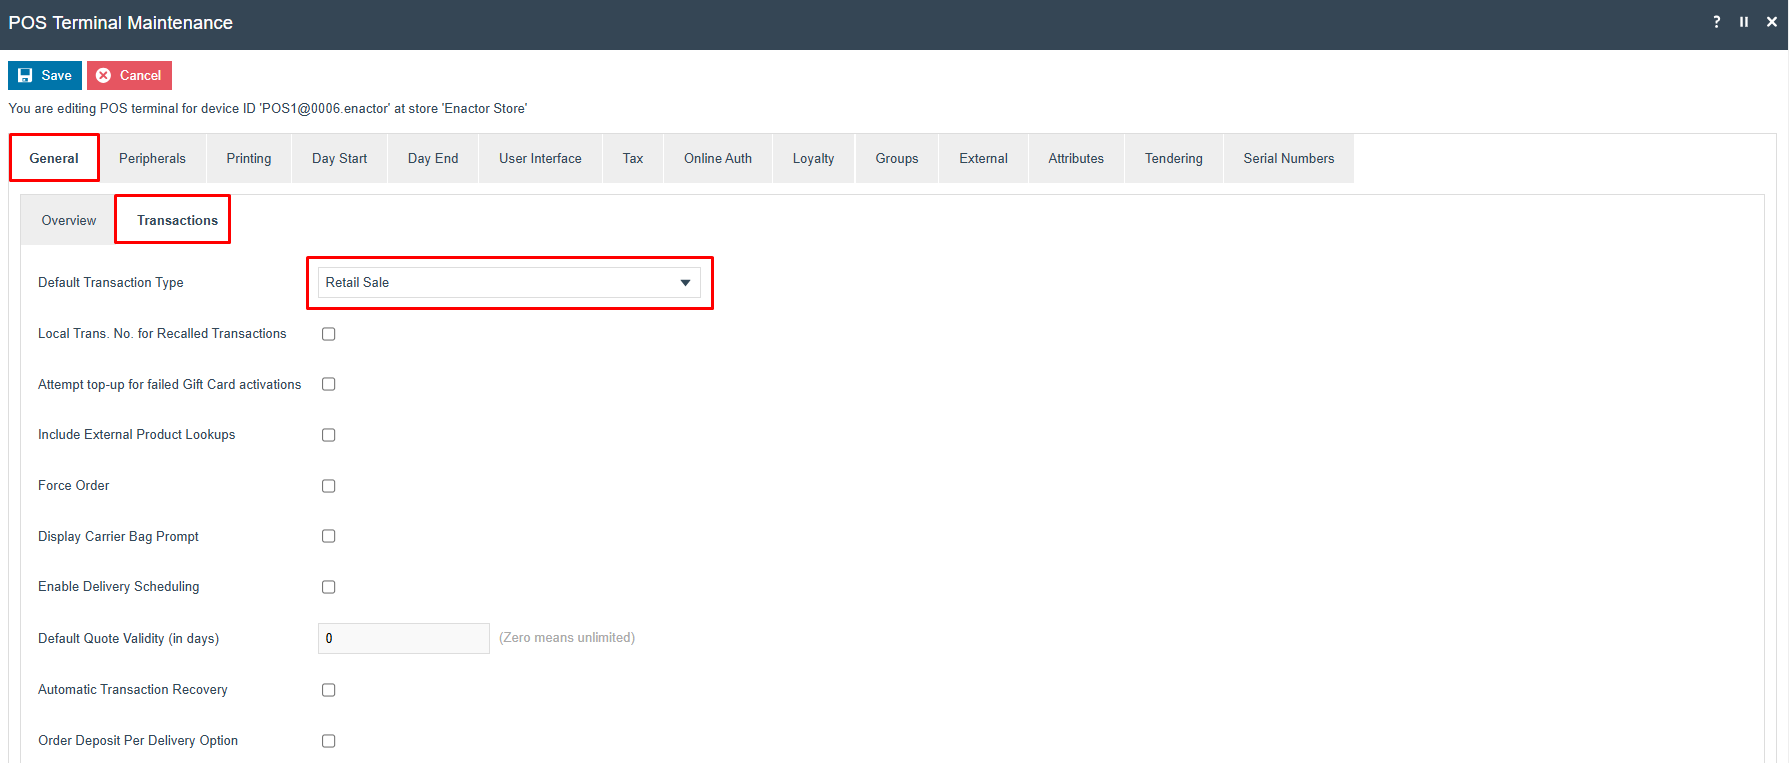
This completes the POS Terminal General tab configuration.
Peripherals Tab
The Peripherals tab specifies the input and output devices for the POS Terminal. The settings on this tab are specific to the retailer's hardware environment and may differ from terminal to terminal. For a basic test environment without physical peripherals attached, a number of simulated peripherals can be used.
The Peripherals - Inputs sub-tab covers all input devices.
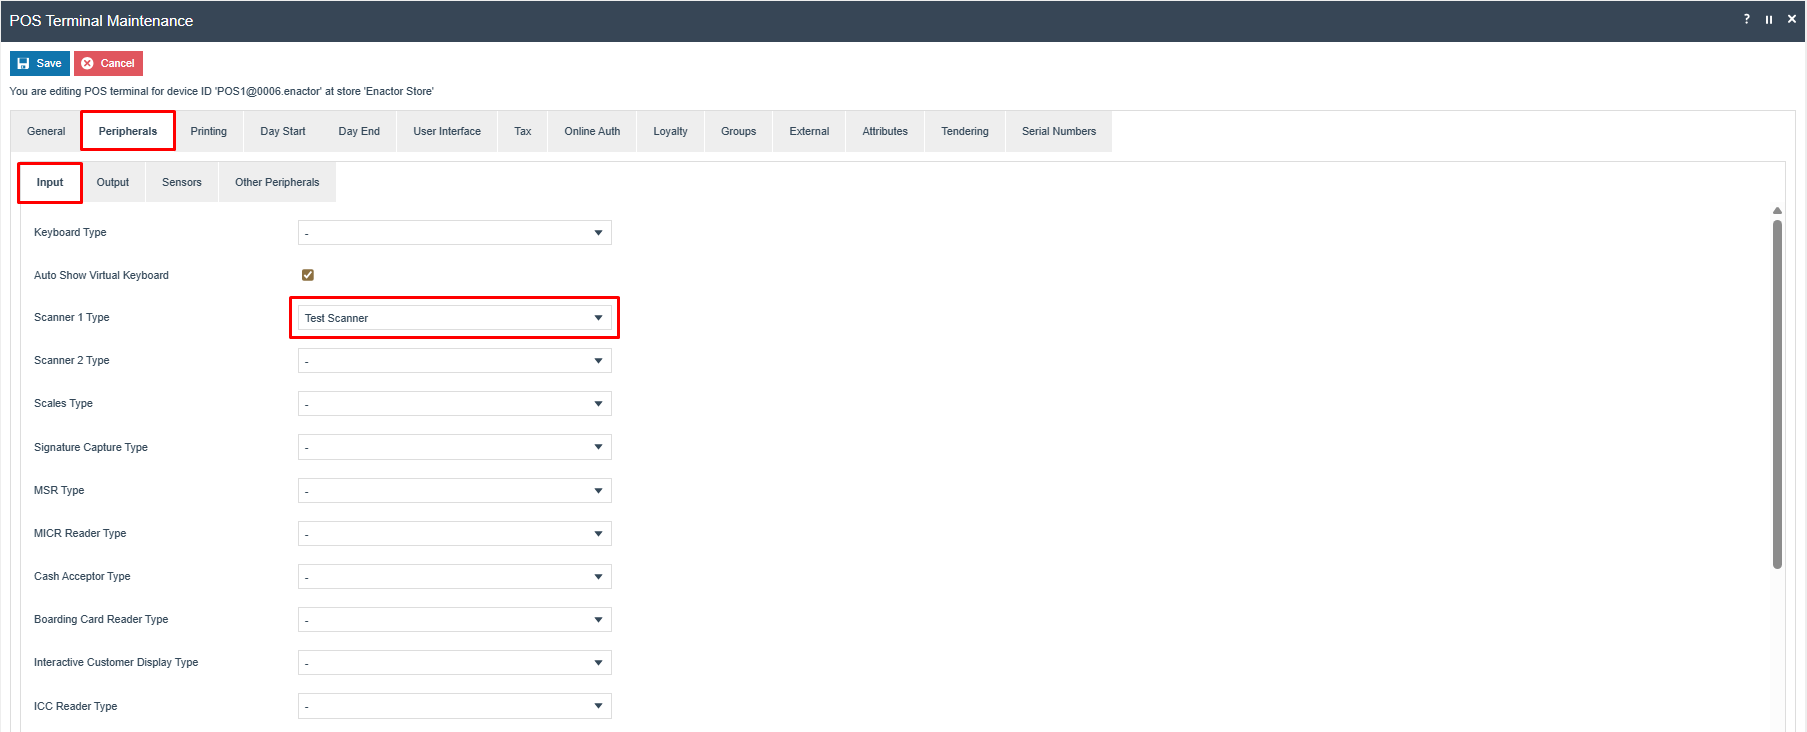
Select Test Scanner for Scanner 1 Type.
The Peripherals - Outputs sub-tab covers all output devices.
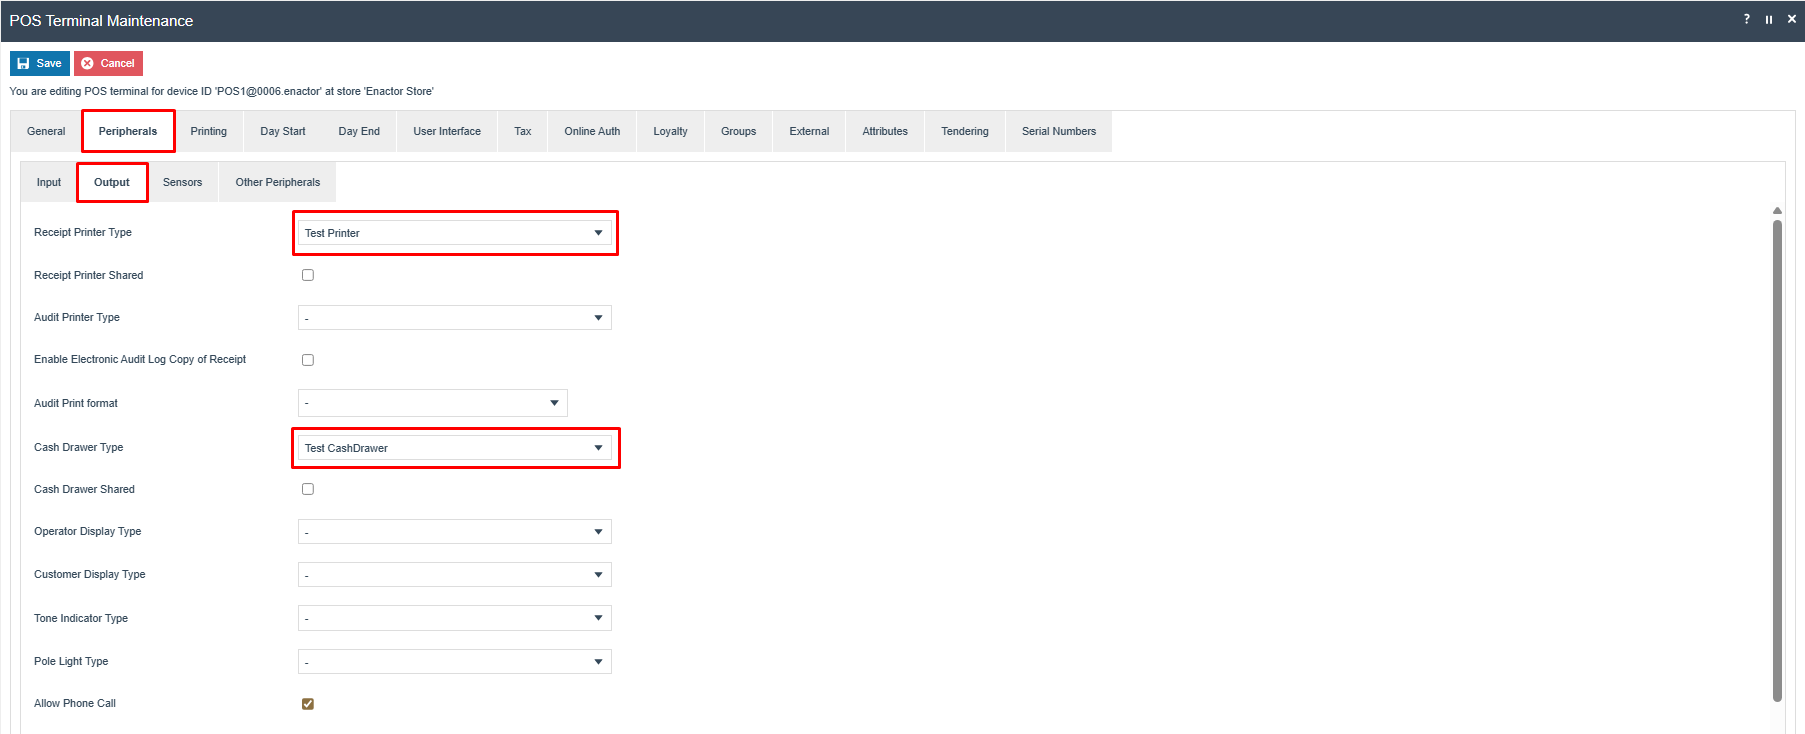
Select Test Printer for Receipt Printer Type.
Select Test CashDrawer for Cash Drawer Type.
This completes the POS Terminal Peripherals tab configuration.
Printing Tab
The Printing tab covers receipt selections for printed and email receipts and reports. Receipts are defined with a name and either a paper size or a column width. Paper sizes are standard laser printer sizes such as A4. Retail receipt printers have a defined number of columns.
This guide covers the basic printed customer receipt, receipt flags, and reports receipts.
On the Printing - General sub-tab, receipt formats are specified for most transaction types. The settings shown assume the default receipt formats are being used on a standard 48-column receipt printer.
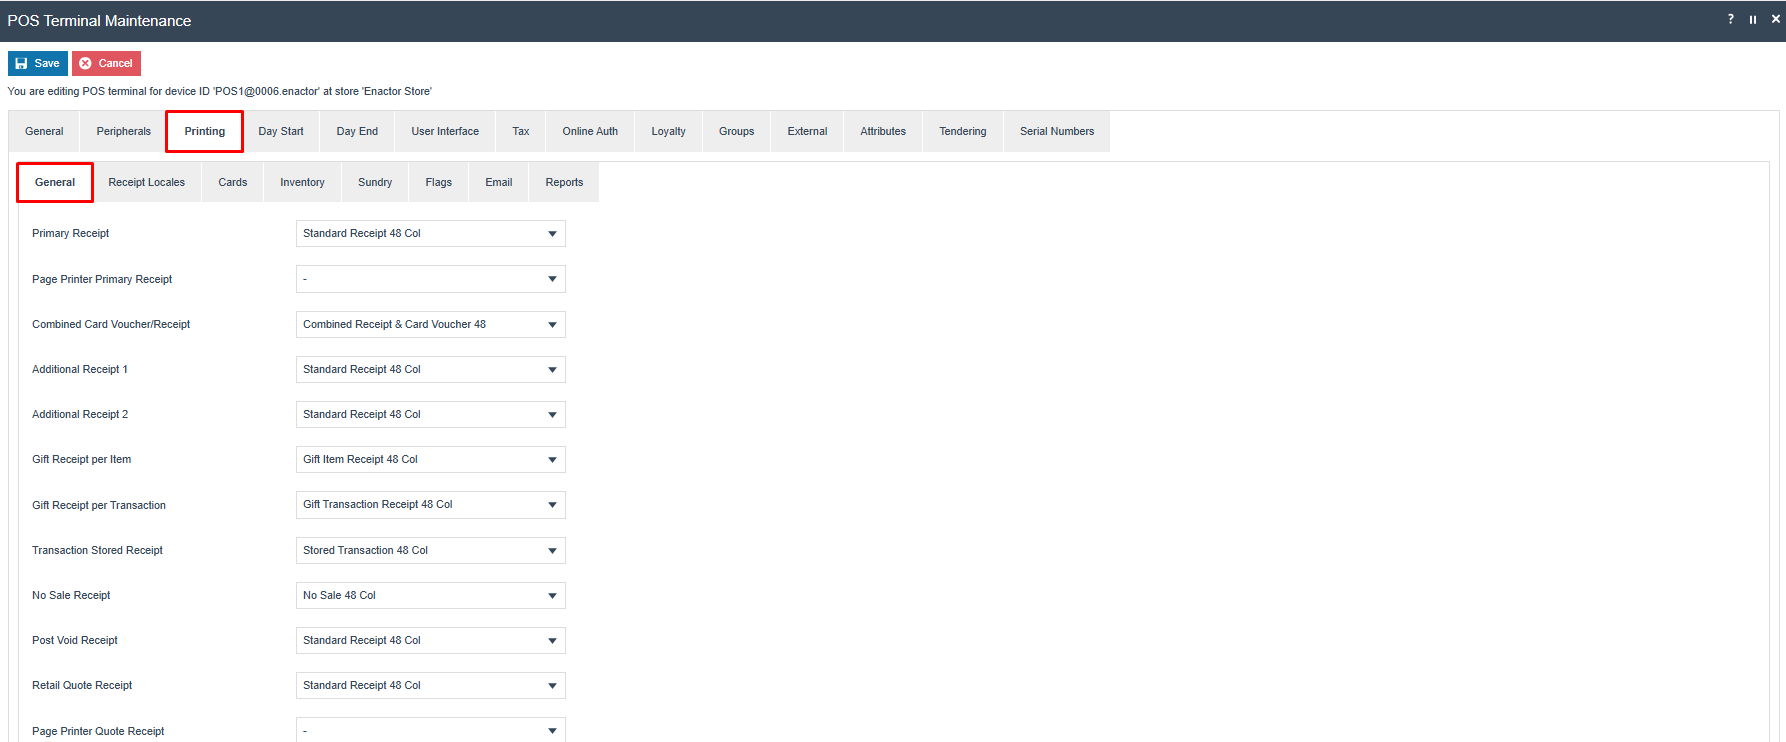
| Field | Value |
|---|---|
| Primary Receipt | Standard Receipt 48 Col |
| Combined Card Voucher/Receipt | Combined Receipt & Card Voucher 48 |
| Additional Receipt 1 | Standard Receipt 48 Col |
| Additional Receipt 2 | Standard Receipt 48 Col |
| Gift Receipt per Item | Gift Item Receipt 48 Col |
| Gift Receipt per Transaction | Gift Transaction Receipt 48 Col |
| Transaction Store Receipt | Stored Transaction 48 Col |
| No Sale Receipt | No Sale 48 Col |
| Post Void Receipt | Standard Receipt 48 Col |
| Retail Quote Receipt | Standard Receipt 48 Col |
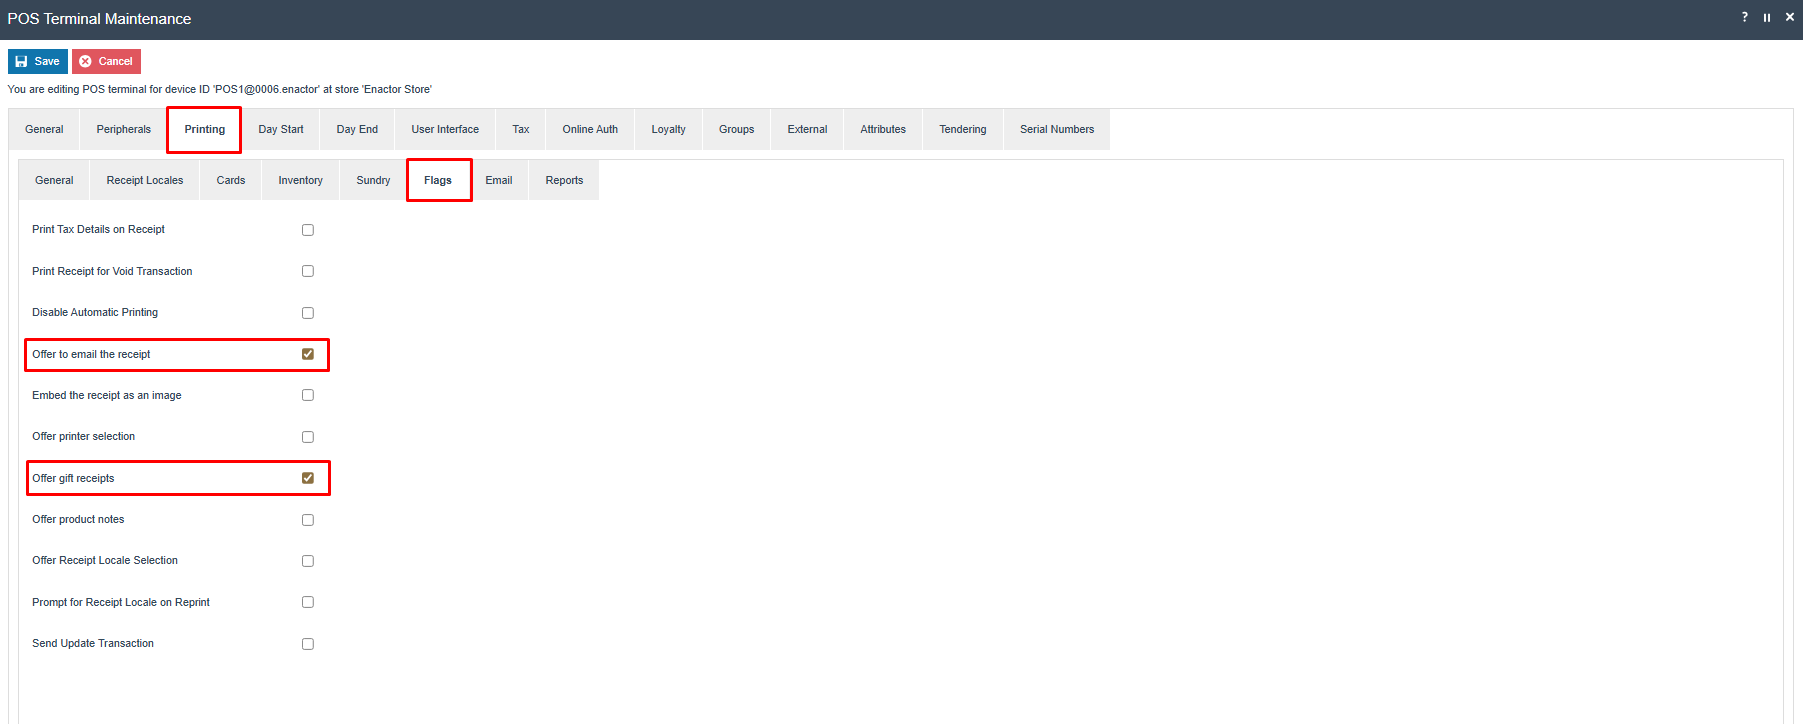
On the Printing - Flags sub-tab, additional printing parameters are available. The most common options configured here include Print Tax Details on Receipt, Offer to email the receipt, and Offer gift receipts.
On the Printing - Reports sub-tab, receipt formats are specified for reports. The settings shown assume the default report formats are being used on a standard 48-column receipt printer.
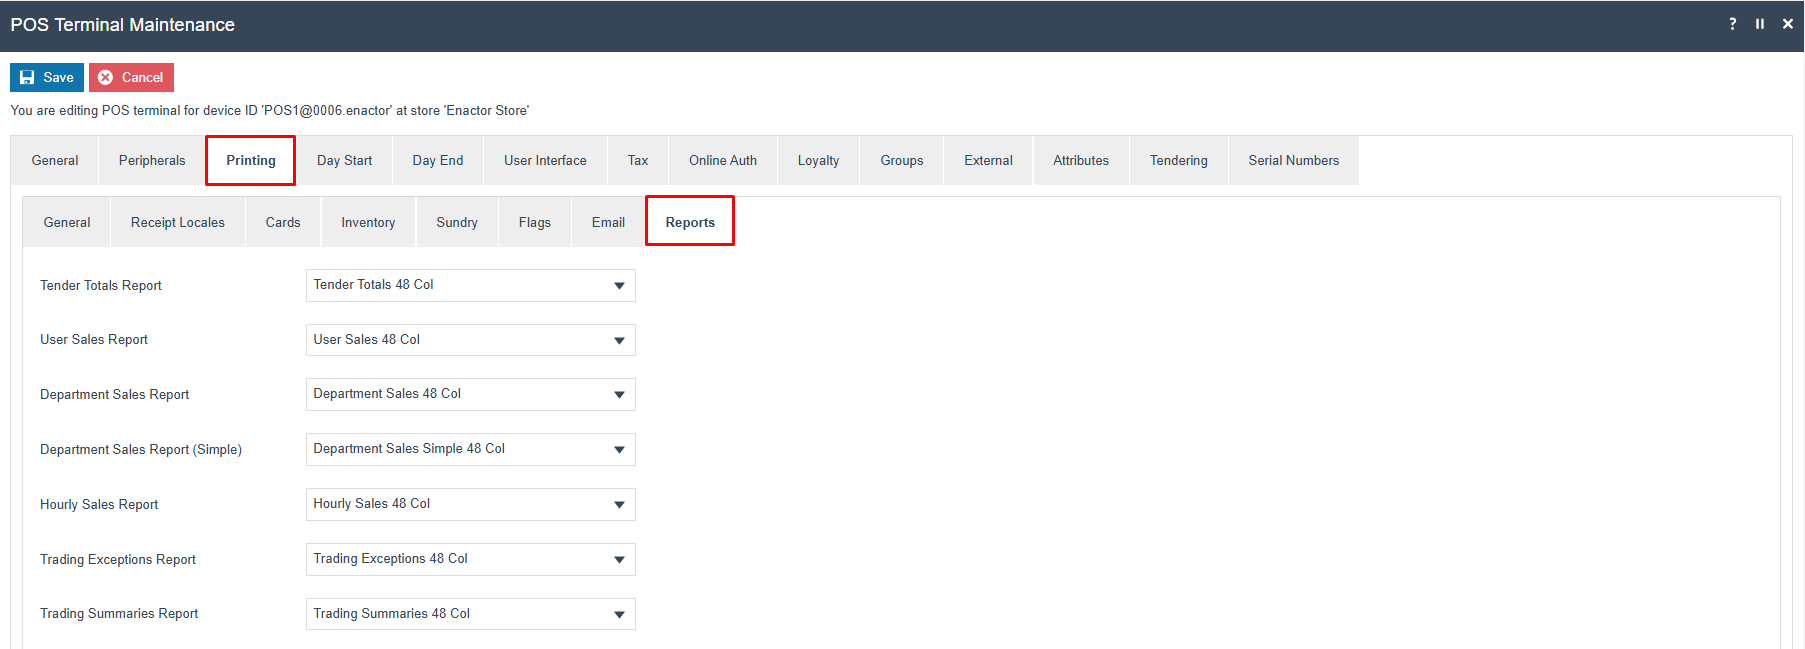
| Field | Value |
|---|---|
| Tender Totals Report | Tender Totals 48 Col |
| User Sales Report | User Sales 48 Col |
| Department Sales Report | Department Sales 48 Col |
| Hourly Sales Report | Hourly Sales 48 Col |
| Trading Exceptions Report | Trading Exceptions 48 Col |
| Trading Summaries Report | Trading Summaries 48 Col |
This completes the POS Terminal Printing tab configuration.
Day Start and Day End Tabs
The Day Start and Day End tabs are covered in detail as part of the Cash Management How-to Guide. The settings described below represent a minimal, traditional Cash Management process. These settings will likely be reviewed and adjusted once the desired business process has been confirmed with the retailer.
On the Day Start tab, select the Allow Sales option.
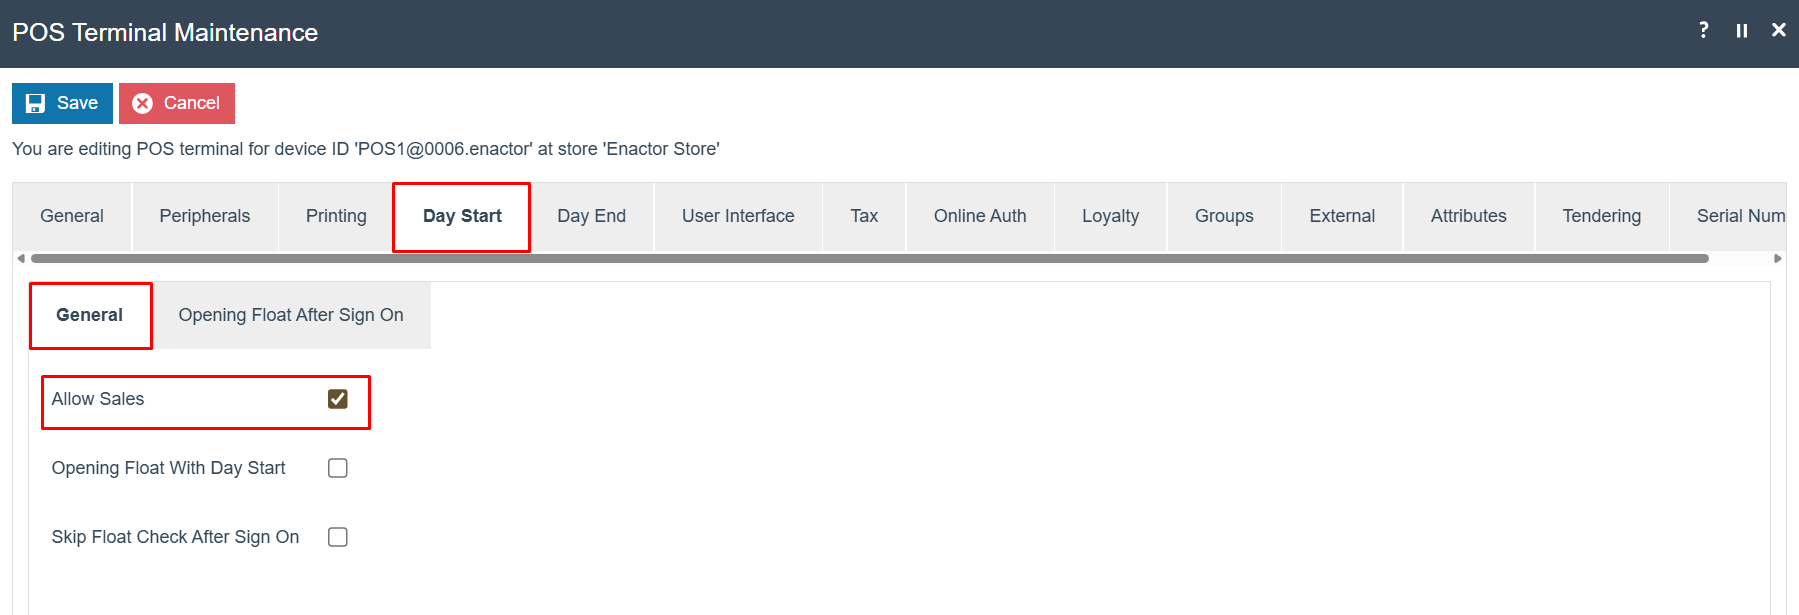
On the Day End tab, select the following options:
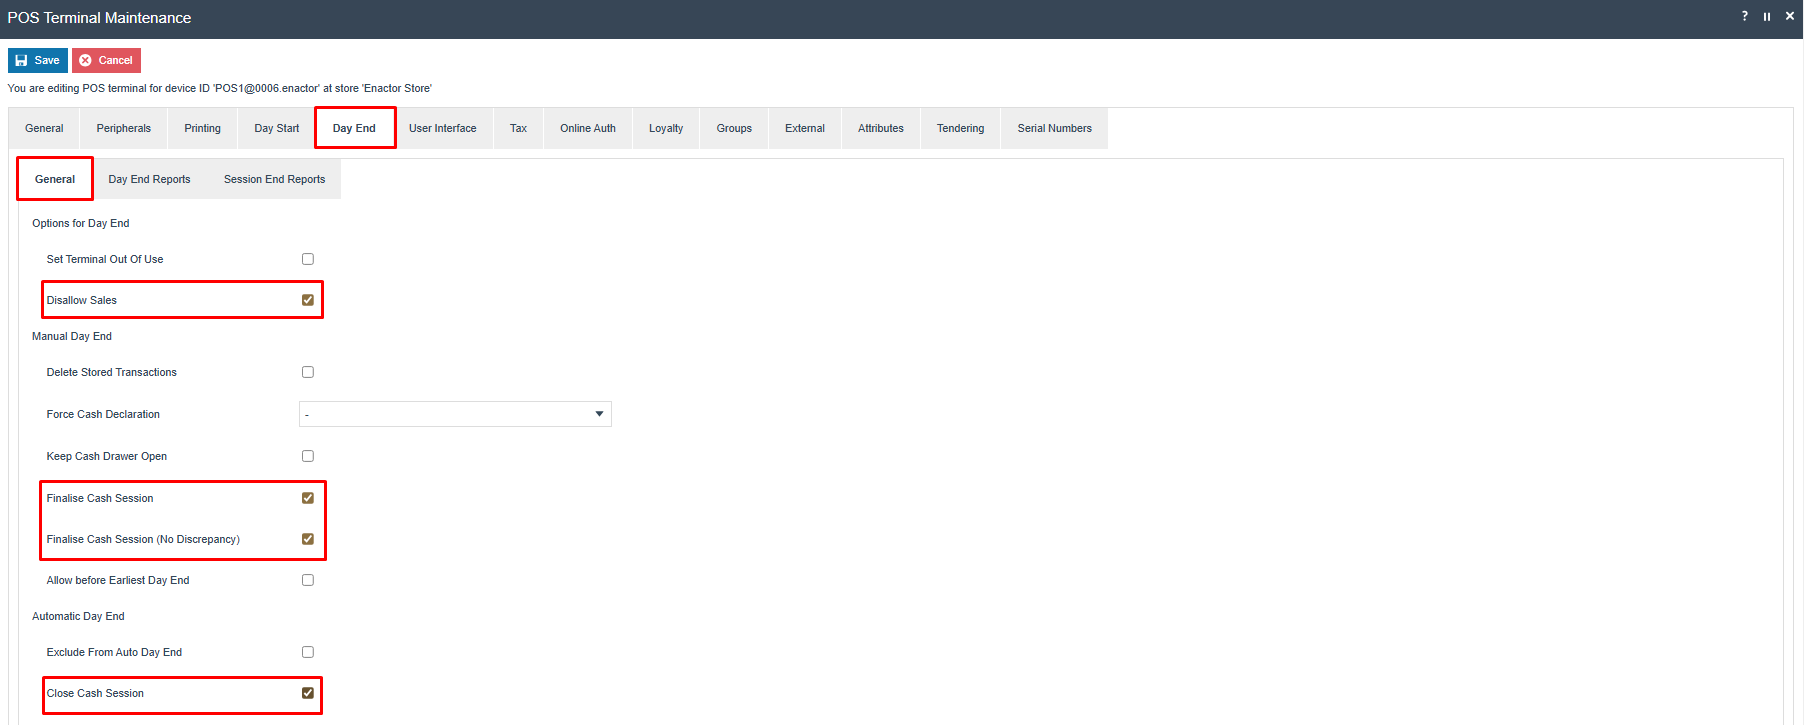
- Disallow Sales
- Finalise Cash Session
- Finalise Cash Session (No Discrepancy)
- Close Cash Session
Details on these settings, how they impact business processes, and other available settings can be found in the Cash Management How-to Guide.
This completes the POS Terminal Day Start and Day End tabs configuration.
User Interface Tab
The User Interface settings specify the look and feel, colour schemes, branding, and screen layouts. Applying retailer branding to the default UI is covered in the How-to Guide on POS Themes and Styles. This guide covers only how to select the relevant items within POS Terminal configuration.
The User Interface - General sub-tab contains core settings about the information being displayed.
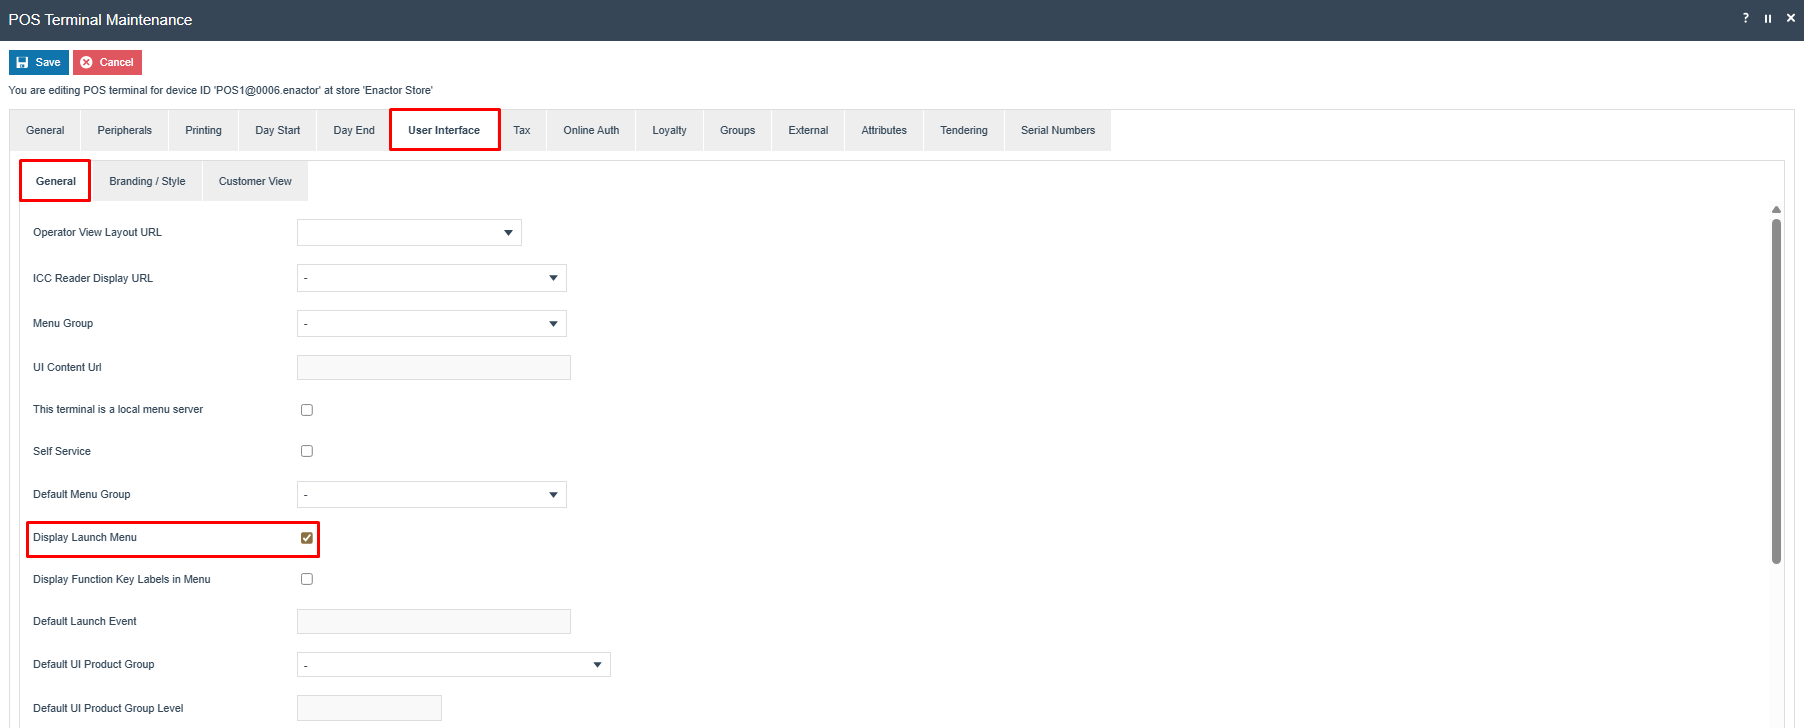
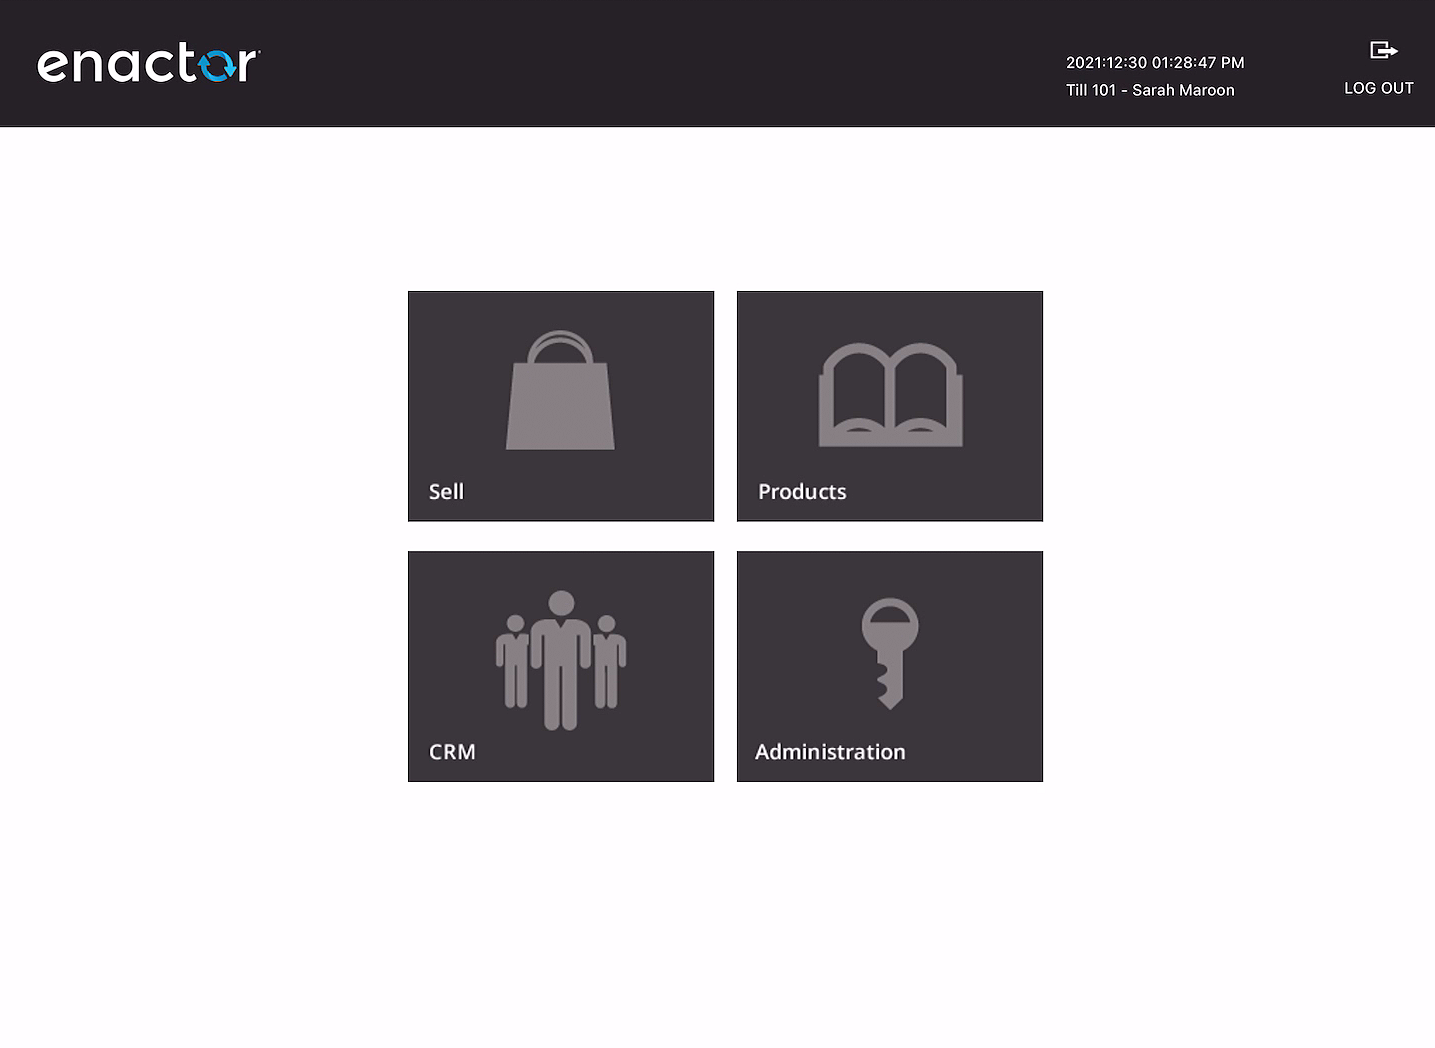
When using the default UI, few selections are needed on the General sub-tab. The most common settings include overriding the Menu Group specified at the location level and enabling the Display Launch Menu option. If the Launch Menu is active, the user is presented with a choice of applications after signing into POS.
On the Branding/Style sub-tab, the components required to present the user with a branded experience are selected.
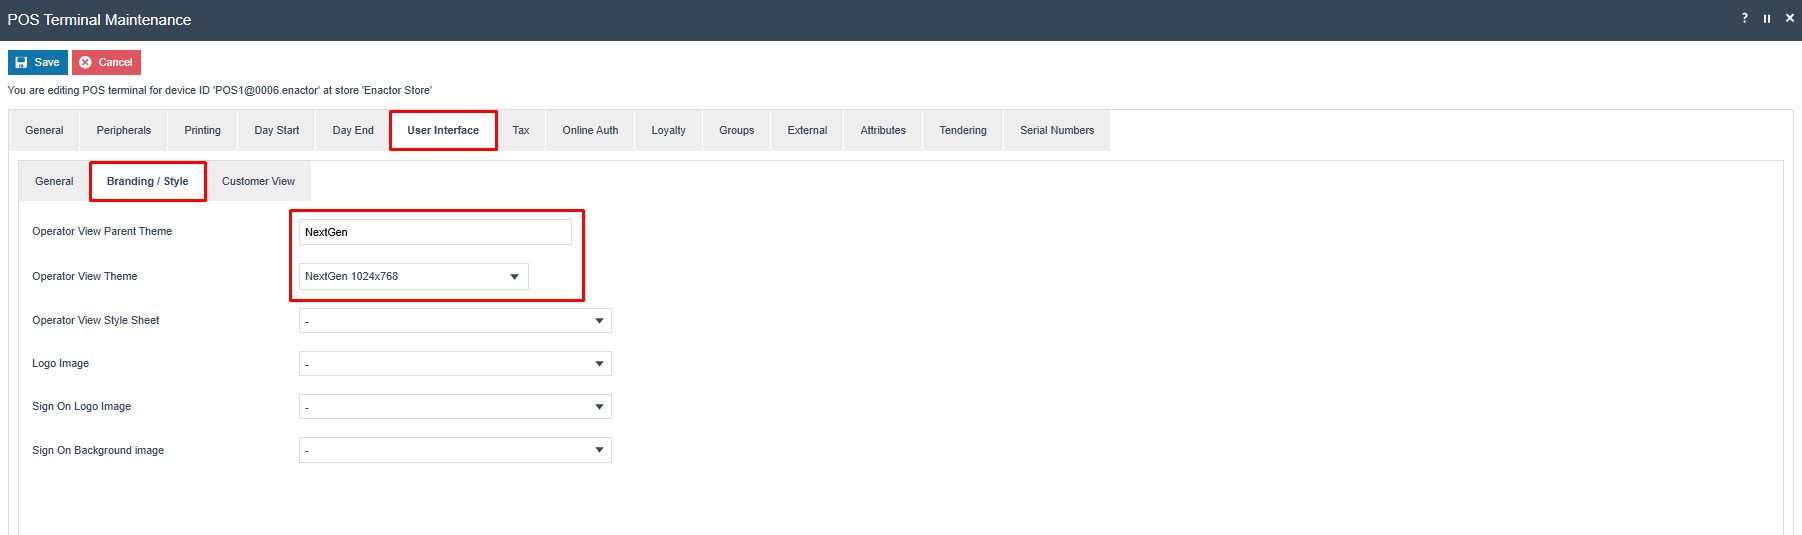
The settings shown represent the out-of-the-box Enactor retail theme. Customised themes for retailers may be selected as an Operator View Theme or by specifying Operator View Style Sheets in conjunction with additional logos and images. Additional information on creating themes and styles can be found in the How-to Guide on POS Themes and Styles.
On the User Interface - Customer View sub-tab, settings are available to configure a customer-facing monitor.
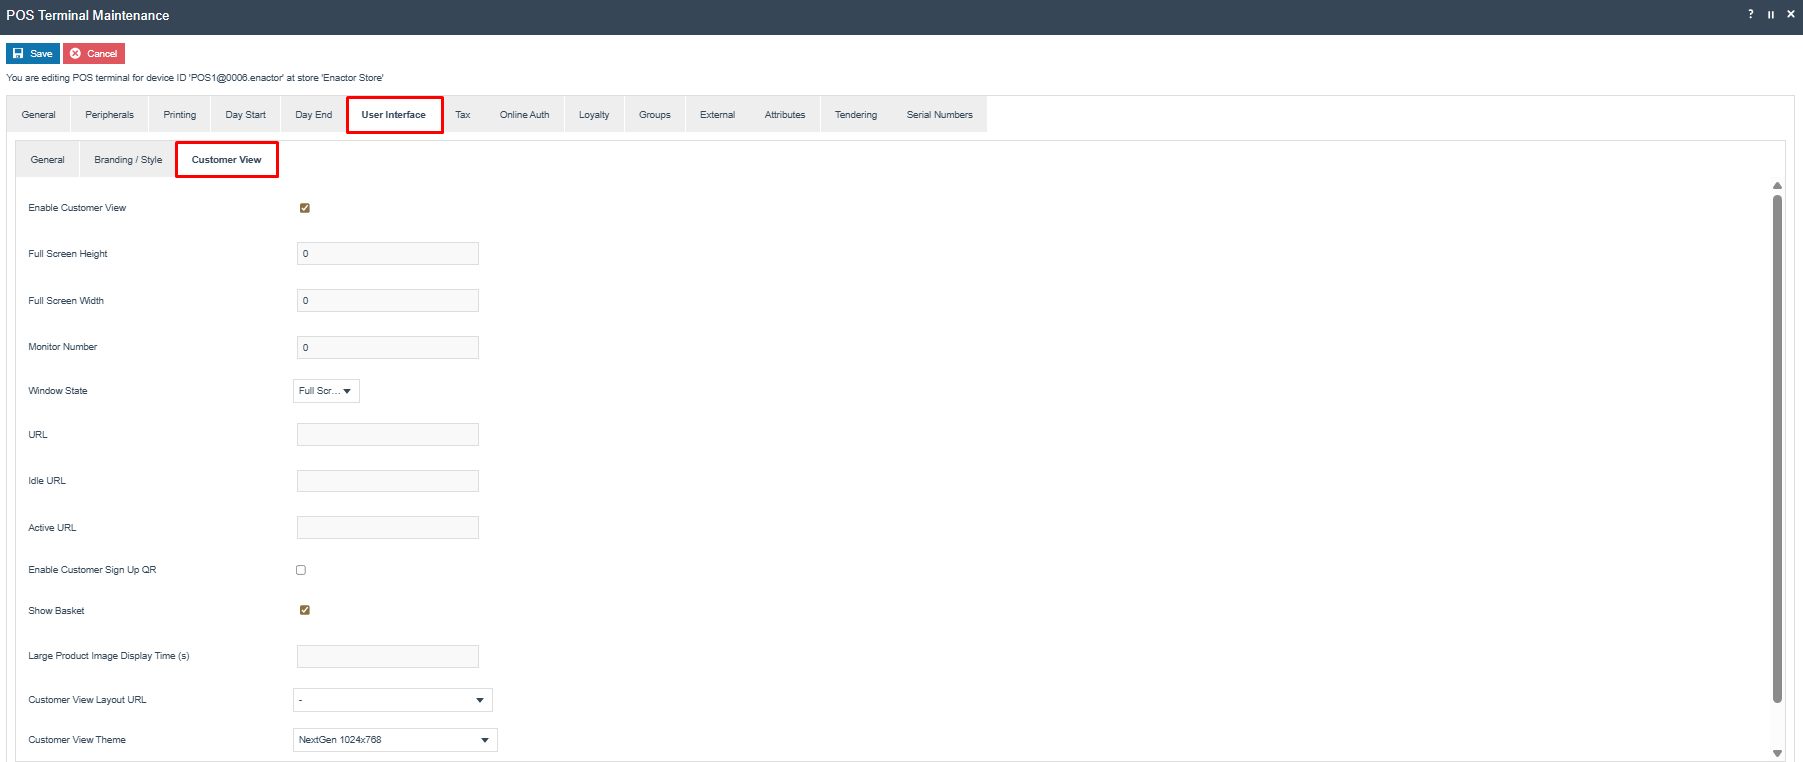
The Customer View sub-tab is used when the retailer deploys a separate customer-facing display. As with the Operator View, the Customer View will also have a theme and/or Style Sheet applied to present information in the context of the retailer's branding.
This completes the POS Terminal User Interface tab configuration.
Loyalty Tab
The following information only applies if the retailer offers a Loyalty programme. Configuration of Loyalty Schemes and Loyalty Tiers is covered in a separate How-to Guide. Once a Loyalty programme has been configured, additional configuration at the terminal is not required; however, there are settings on the Loyalty - Loyalty sub-tab that are often adjusted.
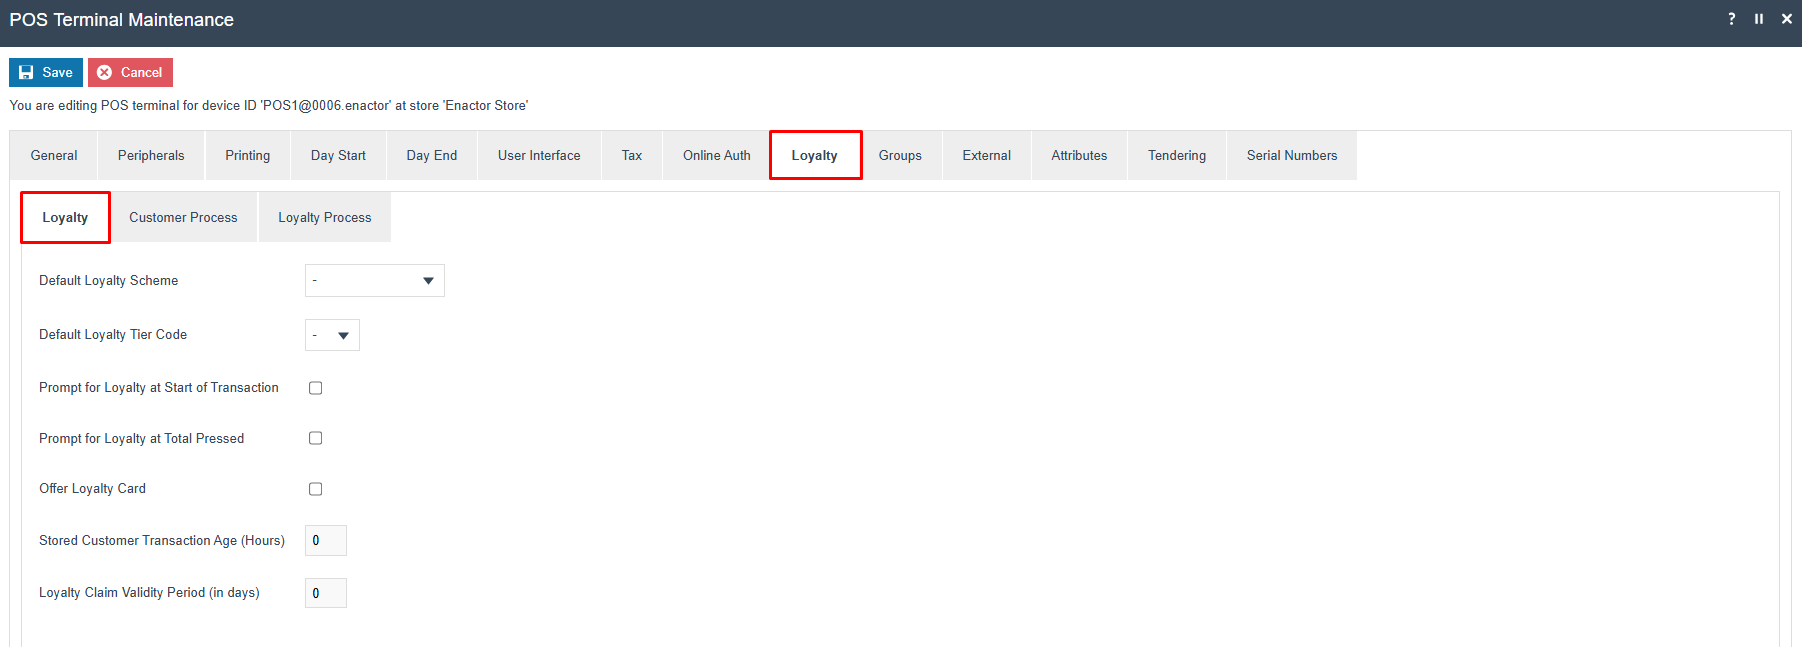
By selecting Prompt for Loyalty at Start of Transaction or Prompt for Loyalty at Total Pressed, the user is prompted to ask the customer for their loyalty information at the appropriate point in the transaction. If both options are selected, the prompt triggers at the beginning of the transaction and again at the end if no customer information was captured on the first prompt.
Selecting Offer Loyalty Card prompts the user to sign the customer up for a Loyalty programme upon pressing Total if no loyalty information has been collected during the transaction.
Loyalty information can be captured at any point during the transaction regardless of the settings for these options.
Select Save to complete the POS Terminal configuration.
This completes the POS Terminal Loyalty tab configuration.
This completes the configuration of a new store. With a base understanding of how Location and POS Terminal configuration is completed, please review the How-to Guides on Templates for a better understanding of how Location and POS Terminal configuration can be managed more easily and efficiently across a large and complex estate.
Refer to the How-to Guide - Configuring Data and Regional Broadcasting to distribute the changes to the estate.