How To Configure POS Extensions
Introduction
The purpose of this document is to describe the steps on how to customise the Standard Enactor POS using POS Extensions.
Overview
This guide will cover the configuration for the following:
- Creating a POS Extension
- Deploying a POS Extension
Pre-requisites
Ensure the Training Workspace is set up to Create a POS Extension (Refer Training Workspace Setup).
If you need to Deploy POS Extension on a:
- Development POS
- Ensure Training POS is up and Operational.
- MSI POS
- Ensure MSI POS is up and Operational.
- Ensure you have knowledge on Custom Upgrades.
- Native POS
- Ensure Native POS is up and Operational.
- Ensure you have Knowledge on Application Upgrades and Custom Upgrades.
Creating a POS Extension
Details to create a POS Extension can be found in the How to Create a POS Extension document.
Deploying a POS Extension
Deploying on a Development POS
Details to deploy a POS Extension on a Development POS can be found in the How to Deploy a POS Extension document.
Deploying on an MSI POS/PDP
To deploy, we need to send the POS Extension as a Custom Upgrade using Application Upgrades.
-
Unzip the sample Custom Upgrade from the following location: POSExtensionCustomUpgrade.zip
-
Update Version Numbers
Replace below with the version number matching to the POS and increment the last segment when you send consecutive upgrades in UpdatePackage.xml (We can start with 1000).
core:updateDescription
   <core:updateDescription>Patch Upgrade to Apply a POS Extension- 2.7.X.X.1000
   </core:updateDescription>
   <core:updateId>patch-upgrade-2.7.X.X.1000</core:updateId>
   <core:version>trunk.2.7.X.X.1000</core:version>
-
Update POS Extension JAR
Copy your generated POS Extension JAR to the unzipped folder.
noteAn Extension JAR that is generated by default during POS Extension Generation is provided for your reference.
Replace below with the name of the JAR.
core:value
   <core:value name="enactor.applicationUpdater.SourceFiles">pos-extension-1.0-SNAPSHOT.jar</core:value>
   <core:value name="enactor.applicationUpdater.DestinationFiles">custom-lib\pos\extension-1.0-SNAPSHOT.jar</core:value>
-
Broadcast the POS Extension
Create a zip file of the above upgrade-related files.
Go to Application Update Detail Maintenance in EM and upload the zip file.
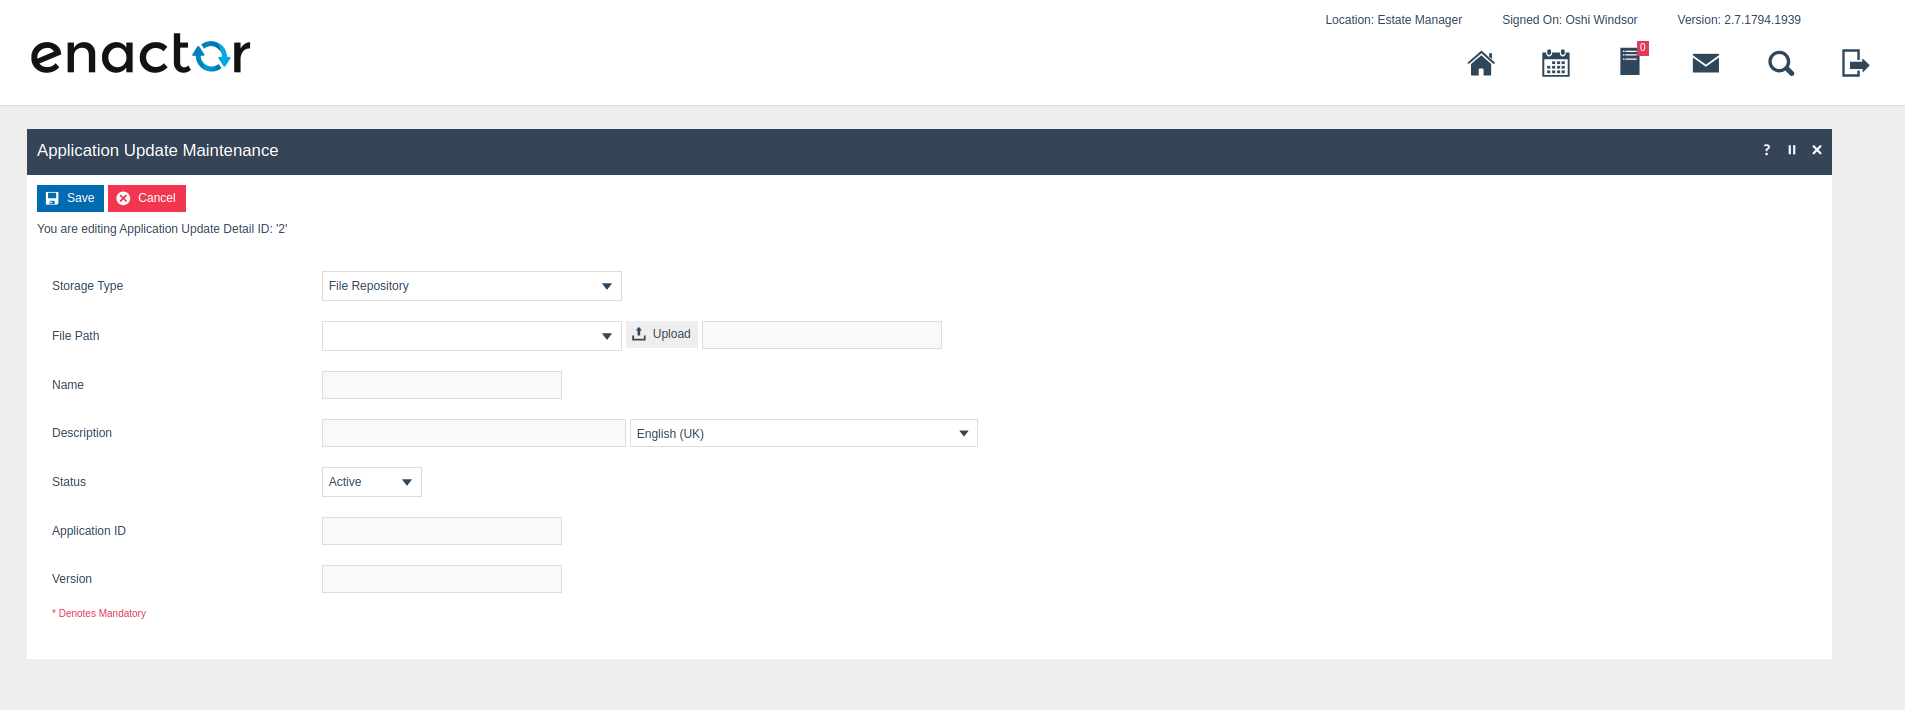
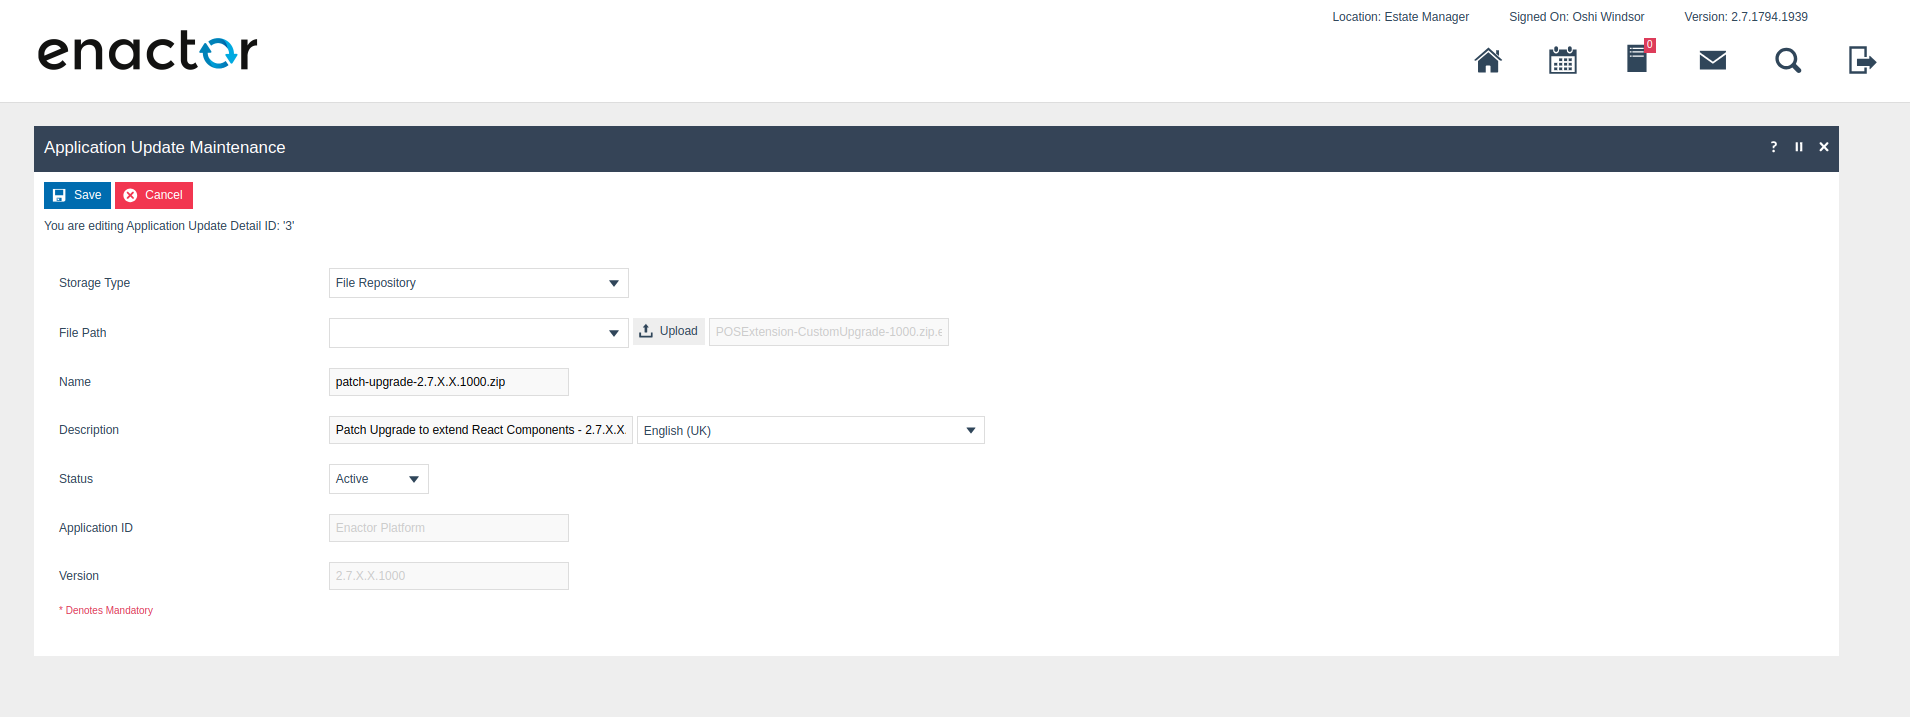
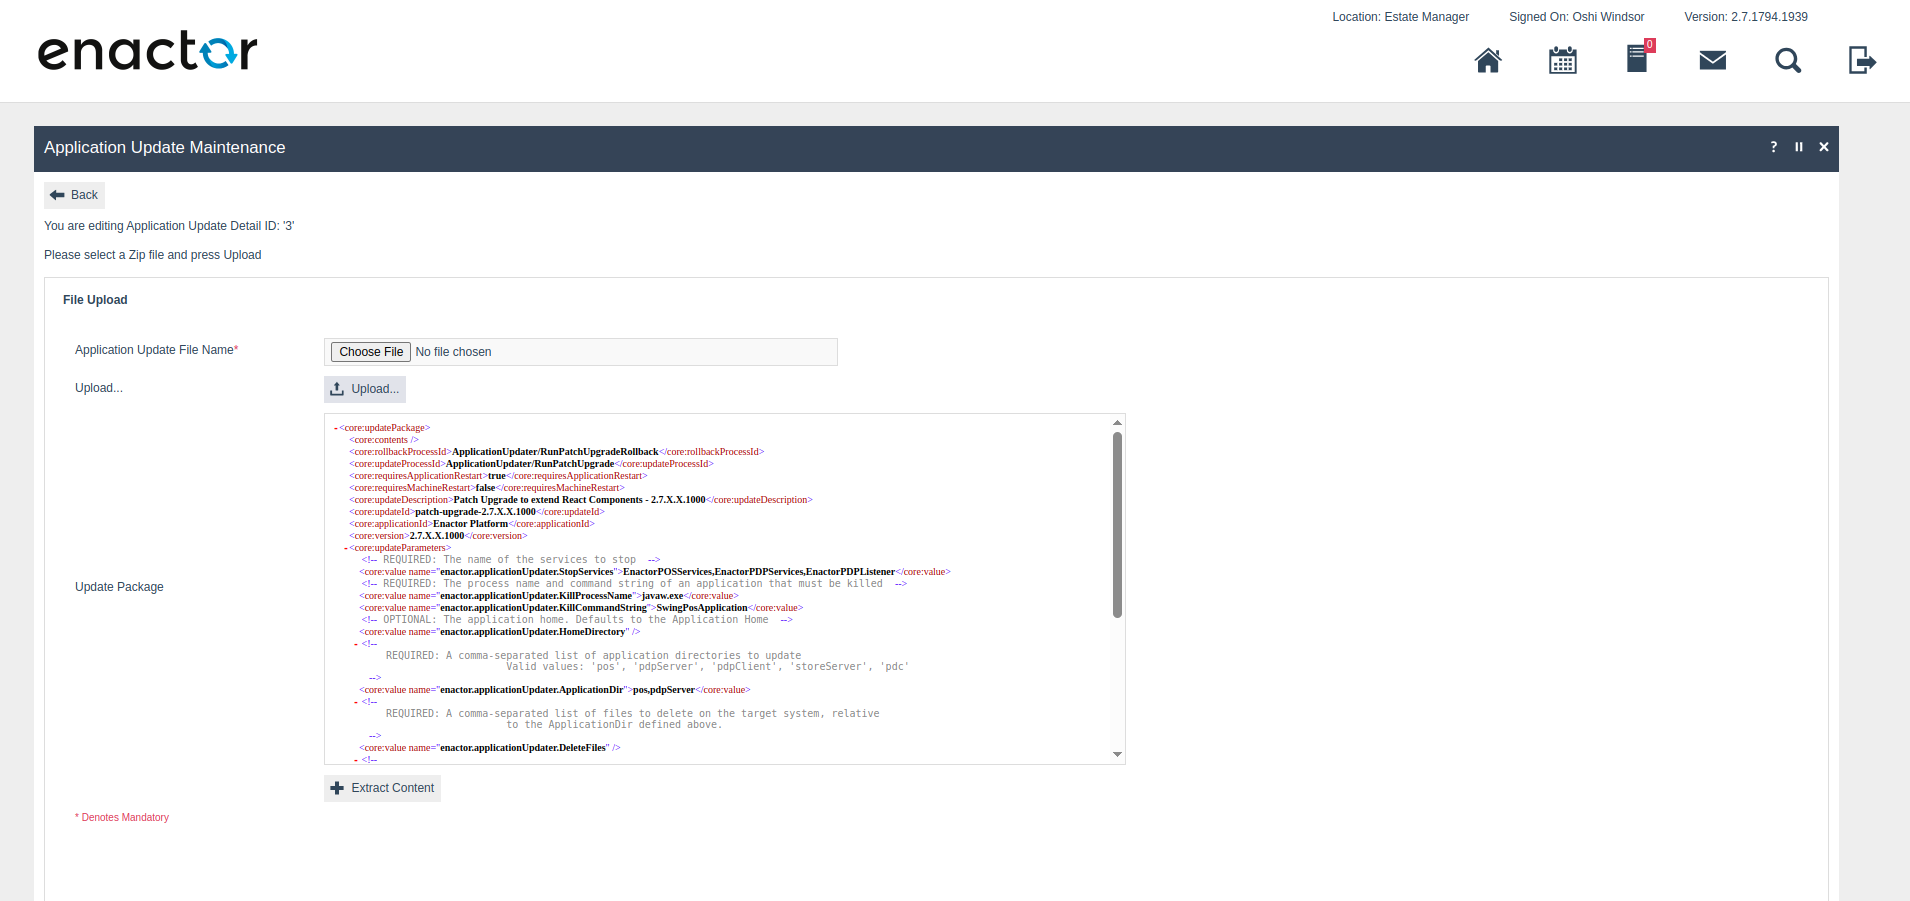
Click Save.
Go to Application Update Broadcast Maintenance and Select the above update and broadcast to your device.

Once the POS is restarted after the upgrade, perform a Sale transaction. When you click Total (before the tender page), the following extended PreTenderingPrompt will appear with the default POS Extension that was created.

Deploying on a Native POS
To deploy, we need to send the POS Extension as an Application Extension Upgrade using Application Upgrades.
-
Unzip the sample Extension Upgrade from the following location: POSExtensionUpgrade.zip
-
Update Version Numbers
Replace below with the version number matching to the POS and Increment the last segment when you send consecutive upgrades in UpdatePackage.xml (We can start with 1000).
core:updateDescription
   <core:updateDescription>Update to
   3.0.gamma.2.X.1000</core:updateDescription>
   <core:updateId>3.0.gamma.2.X.1000</core:updateId>
   <core:version>3.0.gamma.2.X.1000</core:version>
-
Copy your generated Extension JAR to the unzipped folder.
noteAn Extension JAR that is generated by default during POS Extension Generation is provided for your reference.
-
Broadcast the POS Extension
Create a zip file of the above upgrade-related files.
Upload the upgrade and broadcast using the same steps as described in the MSI POS/PDP's "Broadcast the POS Extension" section.
Once the Application Update Broadcast is received and processed correctly, the Native POS user can see the following message prompt in the Sign On screen.
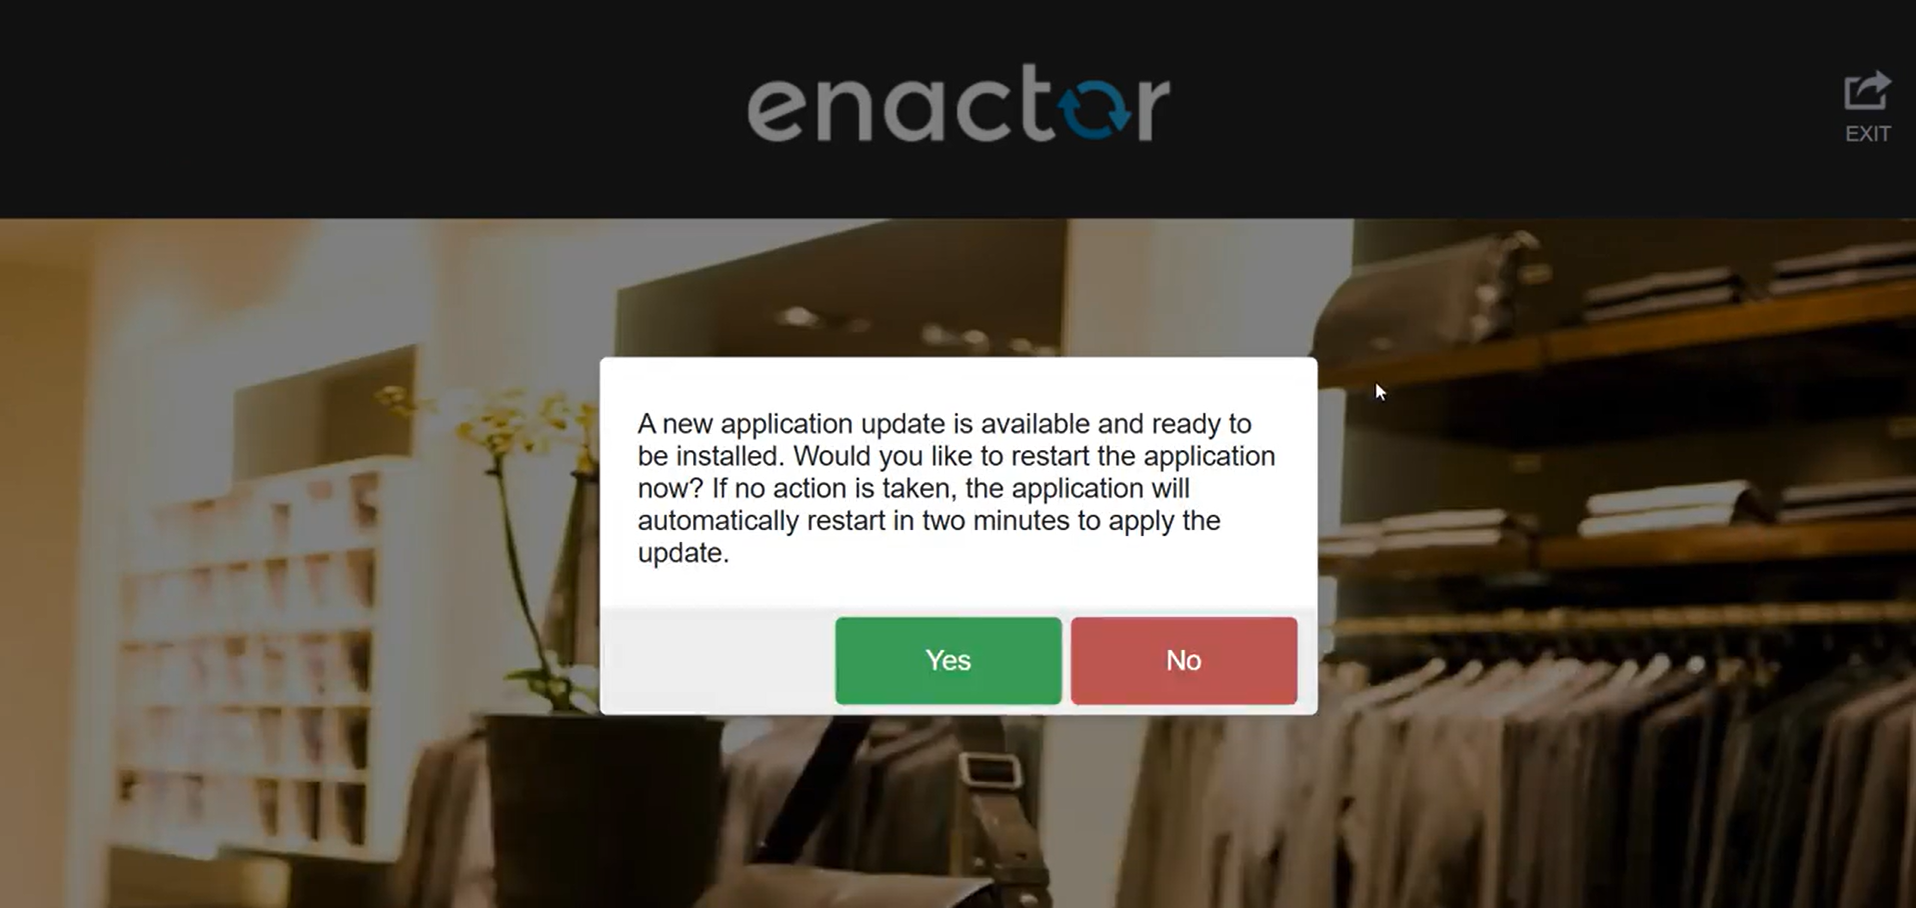
There are two options: press Yes and the user can manually restart the Native POS application or press No and continue the normal POS flow without applying the update changes. If the user does not respond to this message prompt, the POS will automatically restart after two minutes.
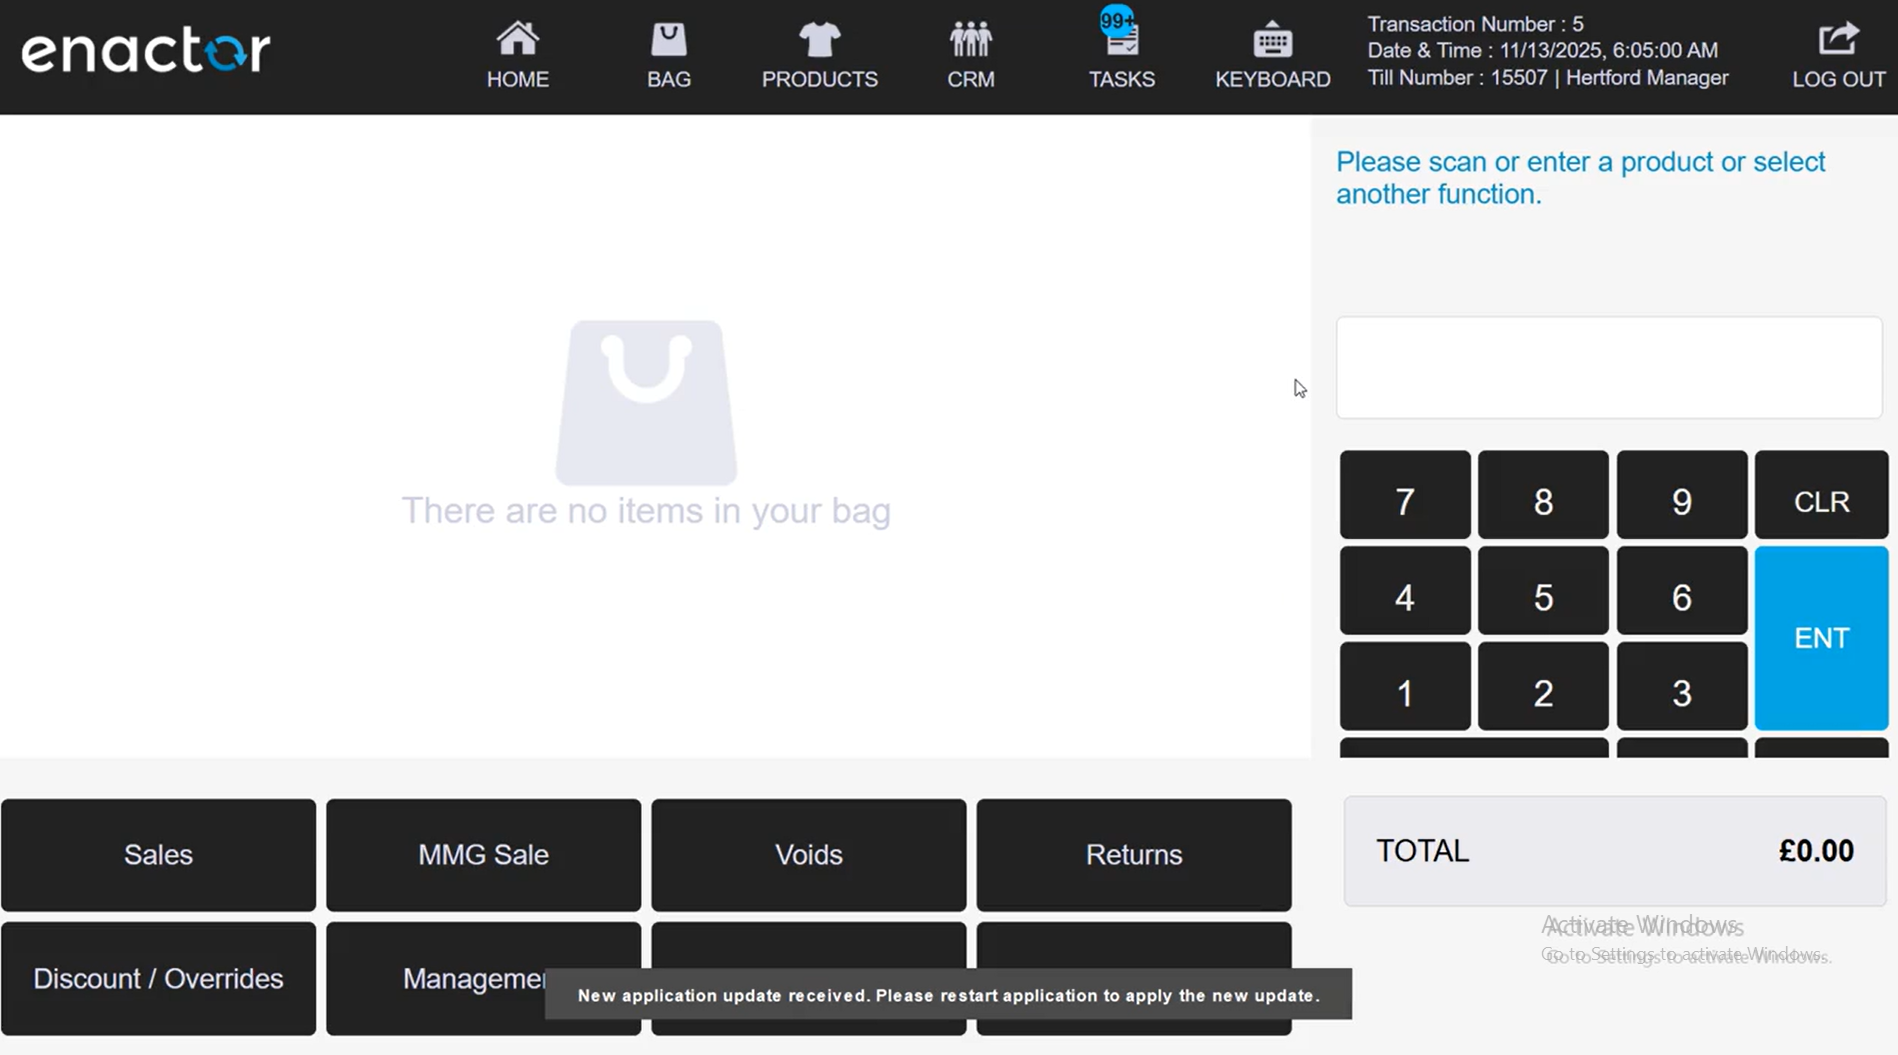
After the application update is processed, and if the user is busy on another screen, a toast message is shown indicating that a new update has been received as follows:
If the user wants to apply the update, they can log out, after which the above message prompt is displayed for them to choose how to proceed.
Once the POS is restarted after the upgrade, perform a Sale transaction. When you click Total (before the tender page), the following extended PreTenderingPrompt will appear with the default POS Extension that was created.