How To Guide Fiscal German Epson
Fiscal Overview
For shared background, see Fiscal Overview.
German Introduction
The fiscal approach in Germany is based around the use of a hardware device called a Technische Sicherheitseinrichtung (TSE), or in English a Technical Security Device. These devices can either be USB, network attached, or service based but in essence all perform the same function which is to sign and store each transaction in an inalterable form. Receipts for transaction must be offered to customers but the format of the receipt is not mandated. However, there are some mandatory fields that must be included, one of which is the signature produced by the TSE.
In event of a TSE being broken or offline it is possible for the POS to continue trading. Receipts must show that the TSE is offline, and the transactions must be fiscalised once the TSE is back online. However, given that our customers tend to run multiple POS in a store Enactor recommend that an alternate POS is used where possible until the TSE can be brought back online, to avoid this complication.
Certification of the POS software is not required; only the TSE device itself requires certification.
Notes
Currently the Enactor solution supports Epson USB TSE devices. However, the interface for the TSE is specified by the authorities and therefore common so Enactor do not foresee huge complexity in adding new devices or types of devices.
Work is ongoing at Enactor to support the Diebold Nixdorf network attached TSE which is capable of supporting up to 14 TSEs and therefore multiple POS and stores.
Configuration Overview
The following configuration changes are required and should be broadcast to all German devices in preparation for go live.
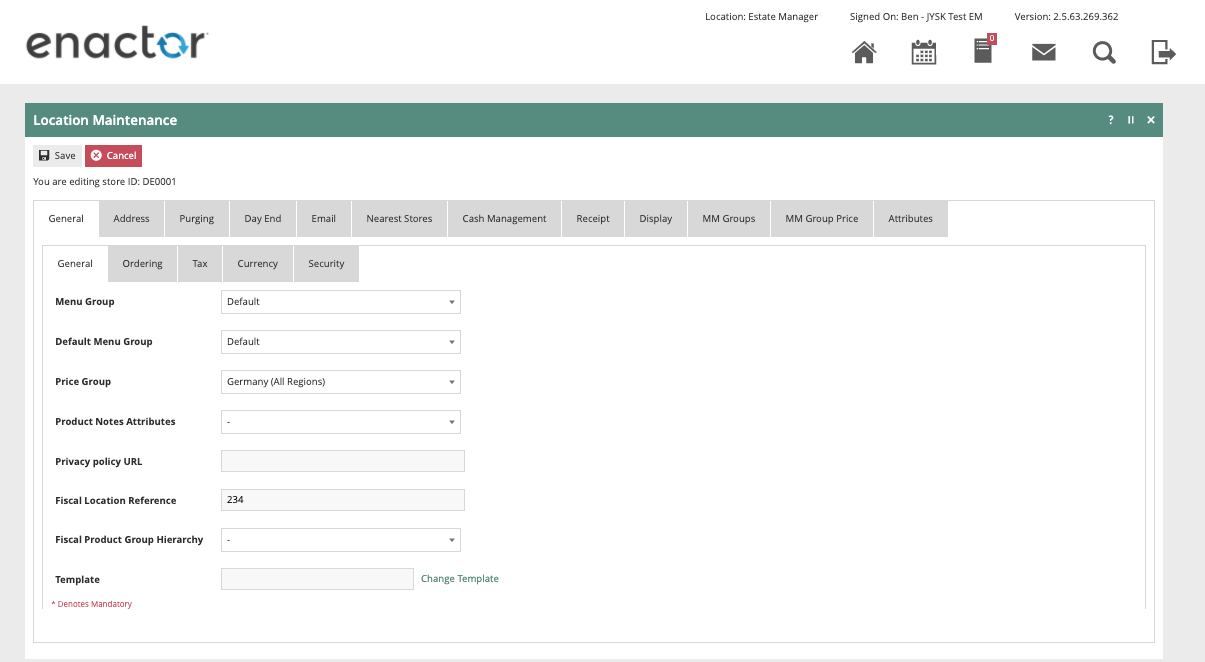
Location
Each location in Germany should have its Fiscal Location Reference configured within the EM and broadcast to the appropriate German devices.
Tax Groups
The following tax groups should be configured and broadcast to the appropriate German devices.
| Tax Group ID | Description |
|---|---|
| DE1 | DE Tax Group A |
| DE2 | DE Tax Group B |
| DE3 | DE Tax Group C |
Tax Scheme
The following tax scheme should be configured and broadcast to the appropriate German devices.
| Tax Scheme ID | Description | Price Include Tax |
|---|---|---|
| DE | DE VAT | TRUE |
Tax Rates
The following tax rates should be configured and broadcast to the appropriate German devices.
| Tax Rate ID | Description | Display Code | Percentage | Fiscal Tax Rate Reference | |
|---|---|---|---|---|---|
| DE_R1 | DE Standard 19% | DE Standard 19% | 19% | A | |
| DE_R2 | DE Reduced 7% | DE Reduced 7% | 7% | B | |
| DE_R3 | DE Other | DE Other | 0% | C |
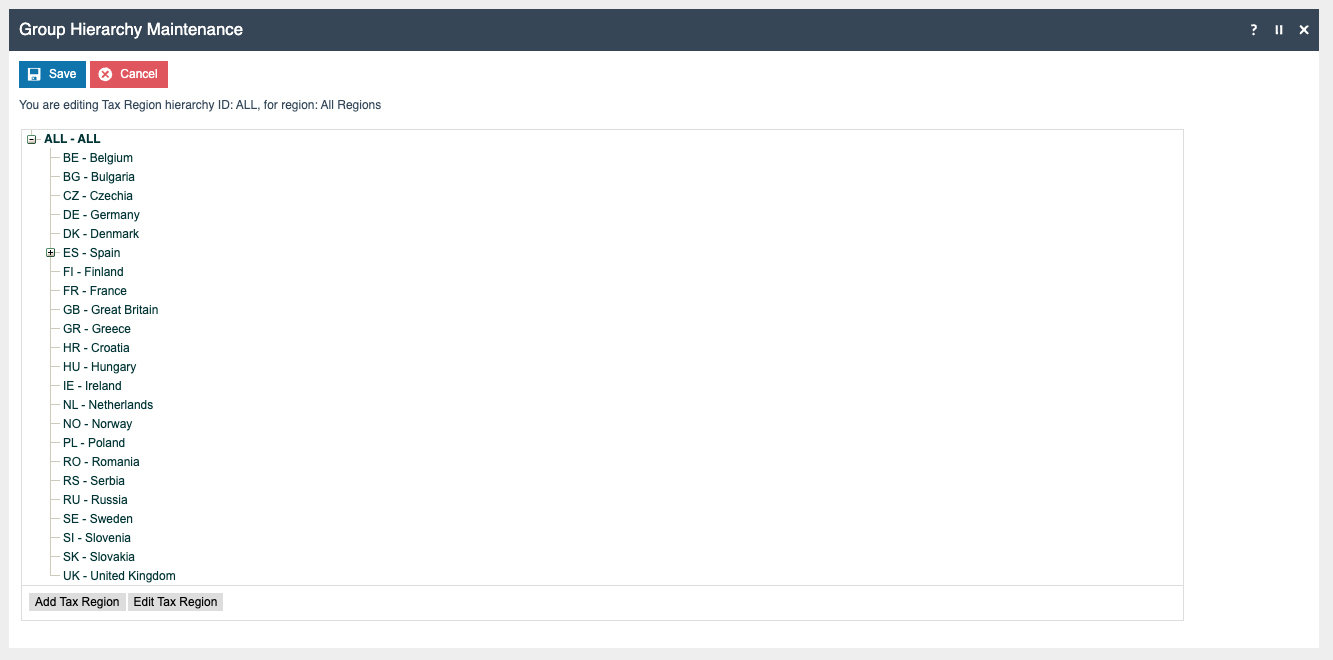
Tax Region
If it does not already exist, a Tax Region for Germany should be created within the Tax Region Group Hierarchy. It should have the ID: “DE” and the Name: “Germany”, it is not necessary to configure an External Reference ID.
Tax Group Tax Methods
The following tax group tax methods should be configured and broadcast to the appropriate German devices.
| Tax Group ID | Tax Scheme ID | Description | Tax Rate |
|---|---|---|---|
| DE_1 | DE | DE Standard 19% | DE Standard 19% |
| DE_2 | DE | DE Reduced 7% | DE Reduced 7% |
| DE_3 | DE | DE Other | DE Other |
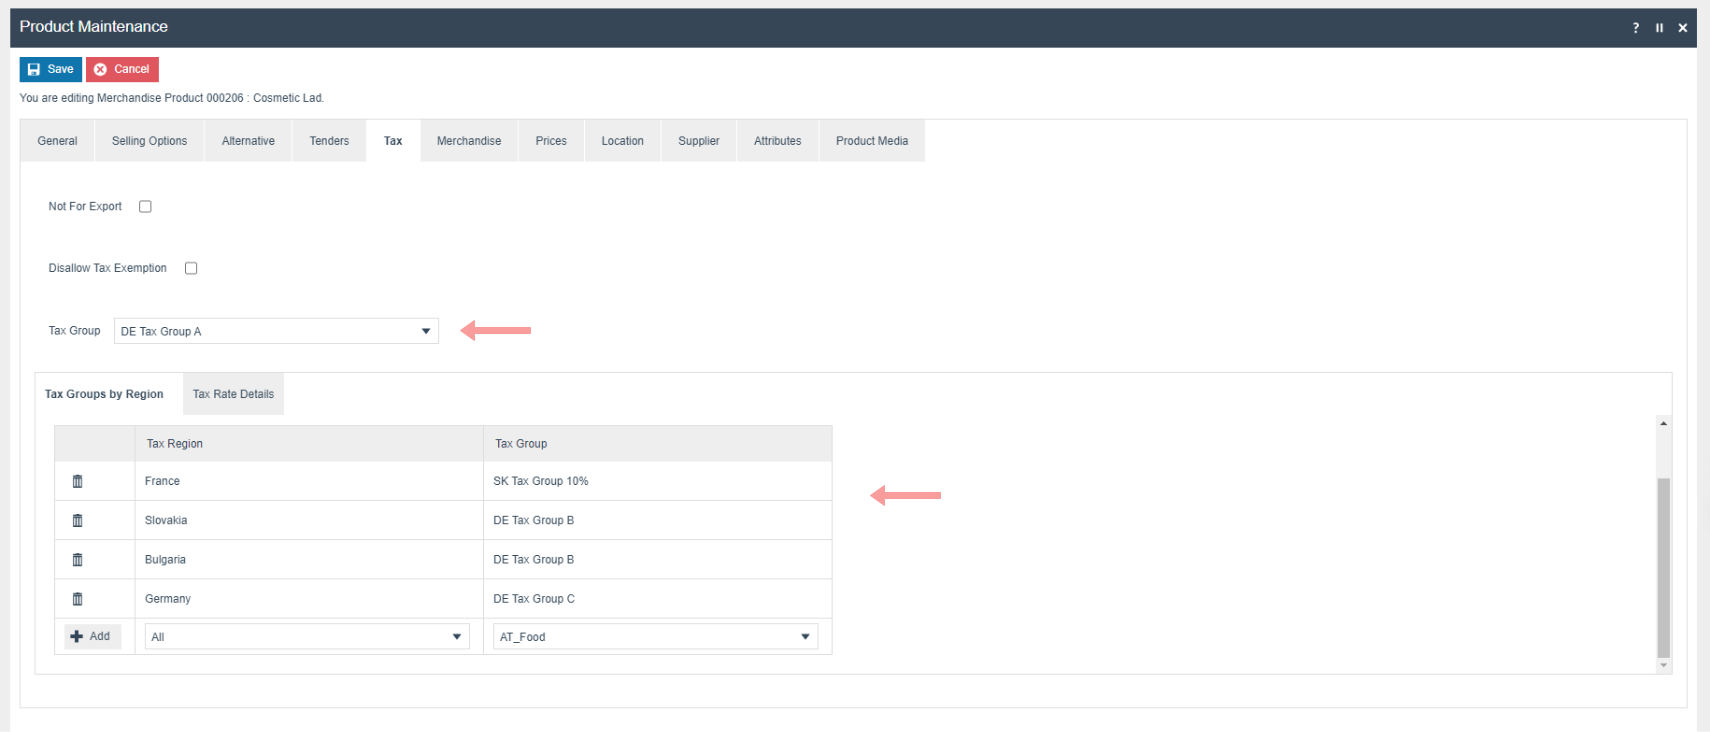
Product Tax
The following tax configurations should be configured againts the products and broadcast to the appropriate German devices.Tax group can be defined to either configure the tax group or have a tax group by tax region.
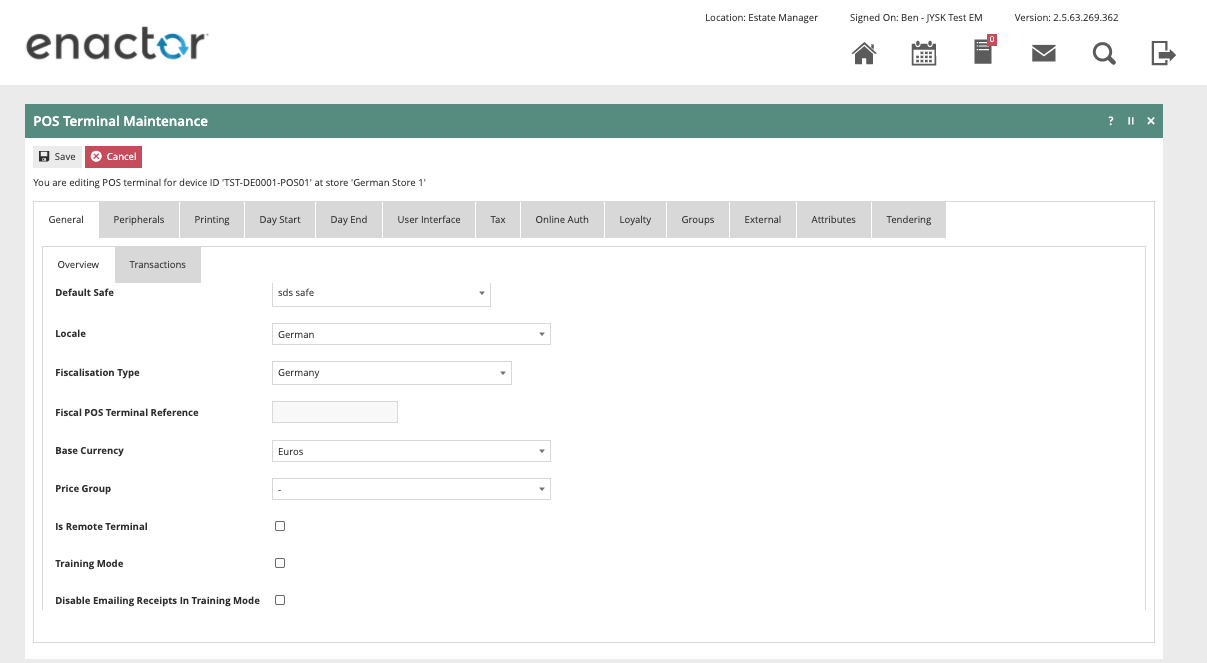
POS Terminal Template
The POS Terminal Template used by all devices in Germany must be configured to have the fiscalisation Type set to Germany. Currency should be set to Euros and Locale to German.
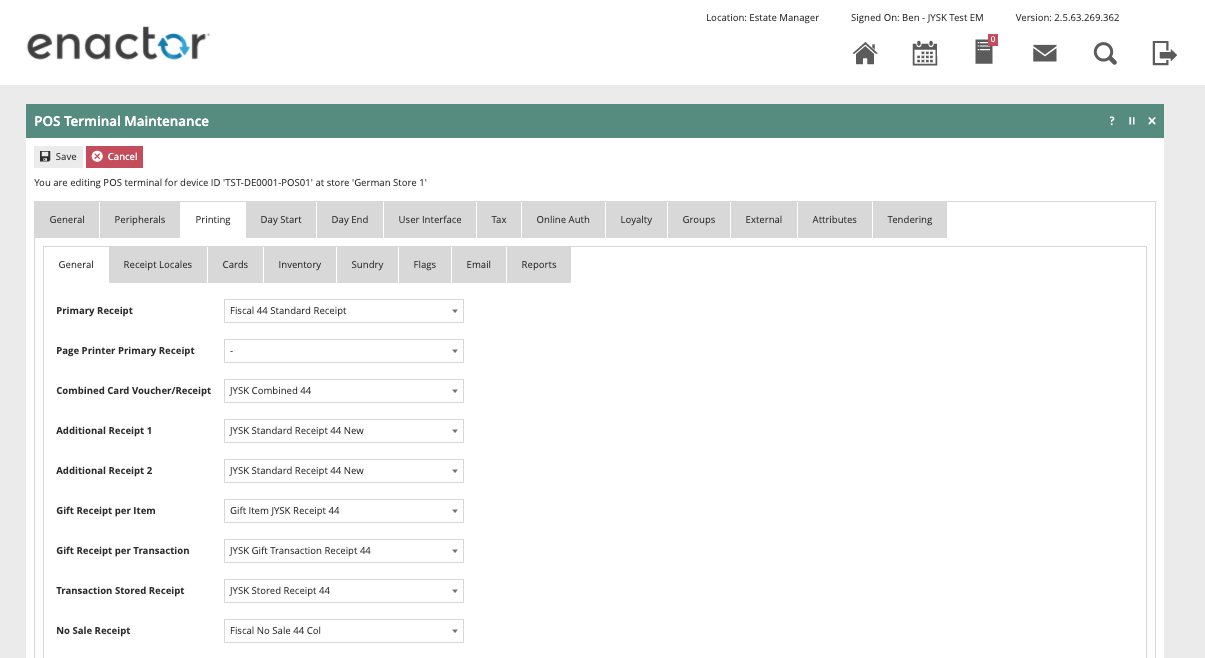
The primary Receipt should be set to Fiscal 44 Standard Receipt and no sale receipt should be set to Fiscal No Sale 44 Col.
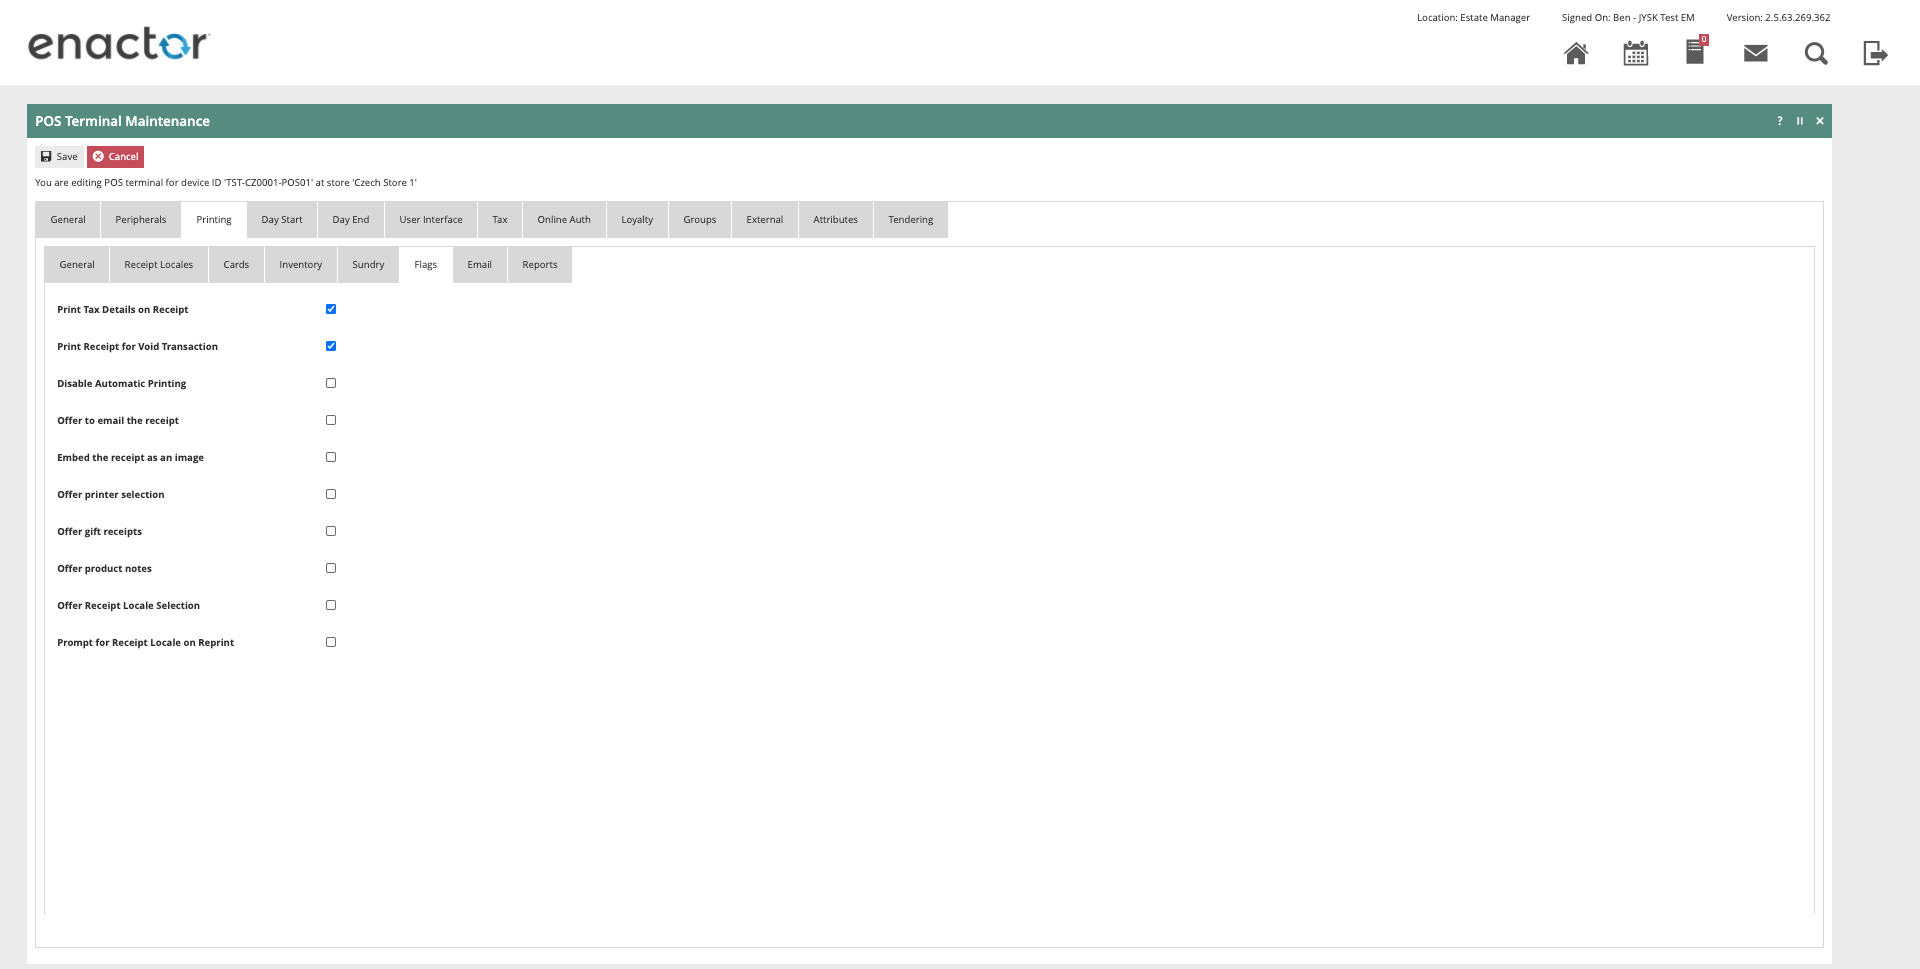
The ‘Print Tax Details on Receipt’ flag withing the printing > flags tab should be ticked.
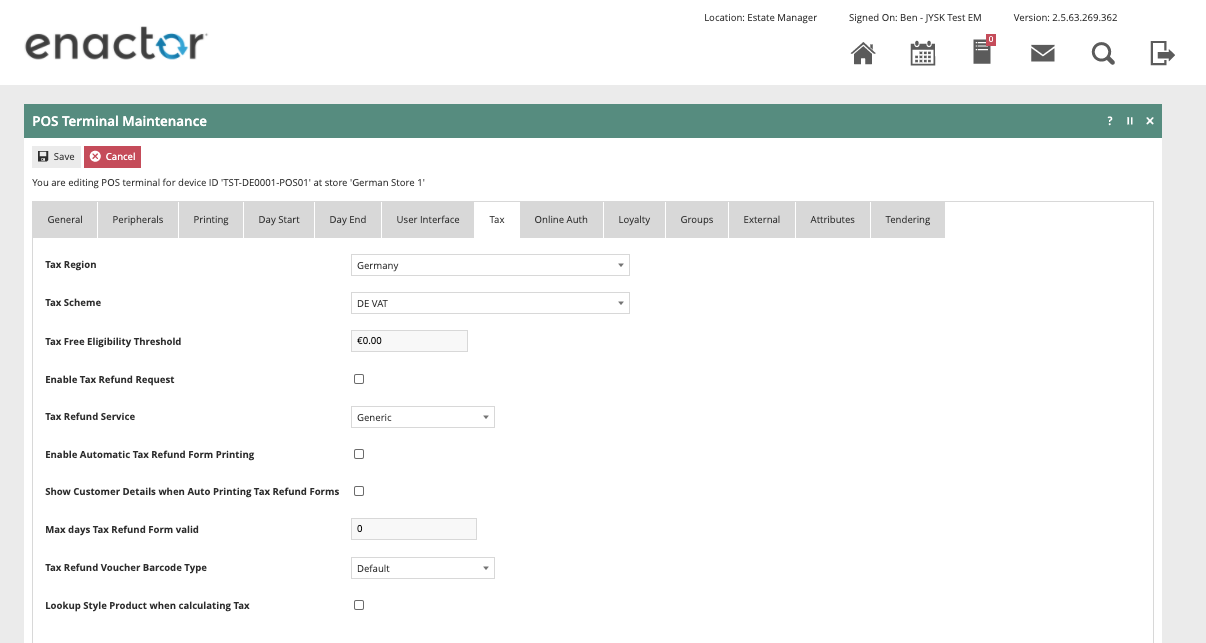
Within the Tax section the Tax region should be set to Germany and the tax scheme to the German tax scheme configured in the previous section.
Account Credentials
The following Account Credentials should be configured and broadcast to the appropriate German devices.
Download the latest TSE driver from https://www.fiscal-community.com/downloads and install it. At the time of writing: EpsonTSEDriver_1.0.5.0-4415.
-
Plug the TSE into the POS.
-
Run the driver setup file contained within the Zip file obtained
from the Epson website.
-
Start the driver if it does not automatically start.
-
A small padlock will appear in the task bar (the padlock may be
yellow at this point which is not an issue).
alt="Graphical user interface, text, application, chat or text message Description automatically generated" />
- Double click the padlock which will bring up the following screen.
alt="Graphical user interface Description automatically generated" />
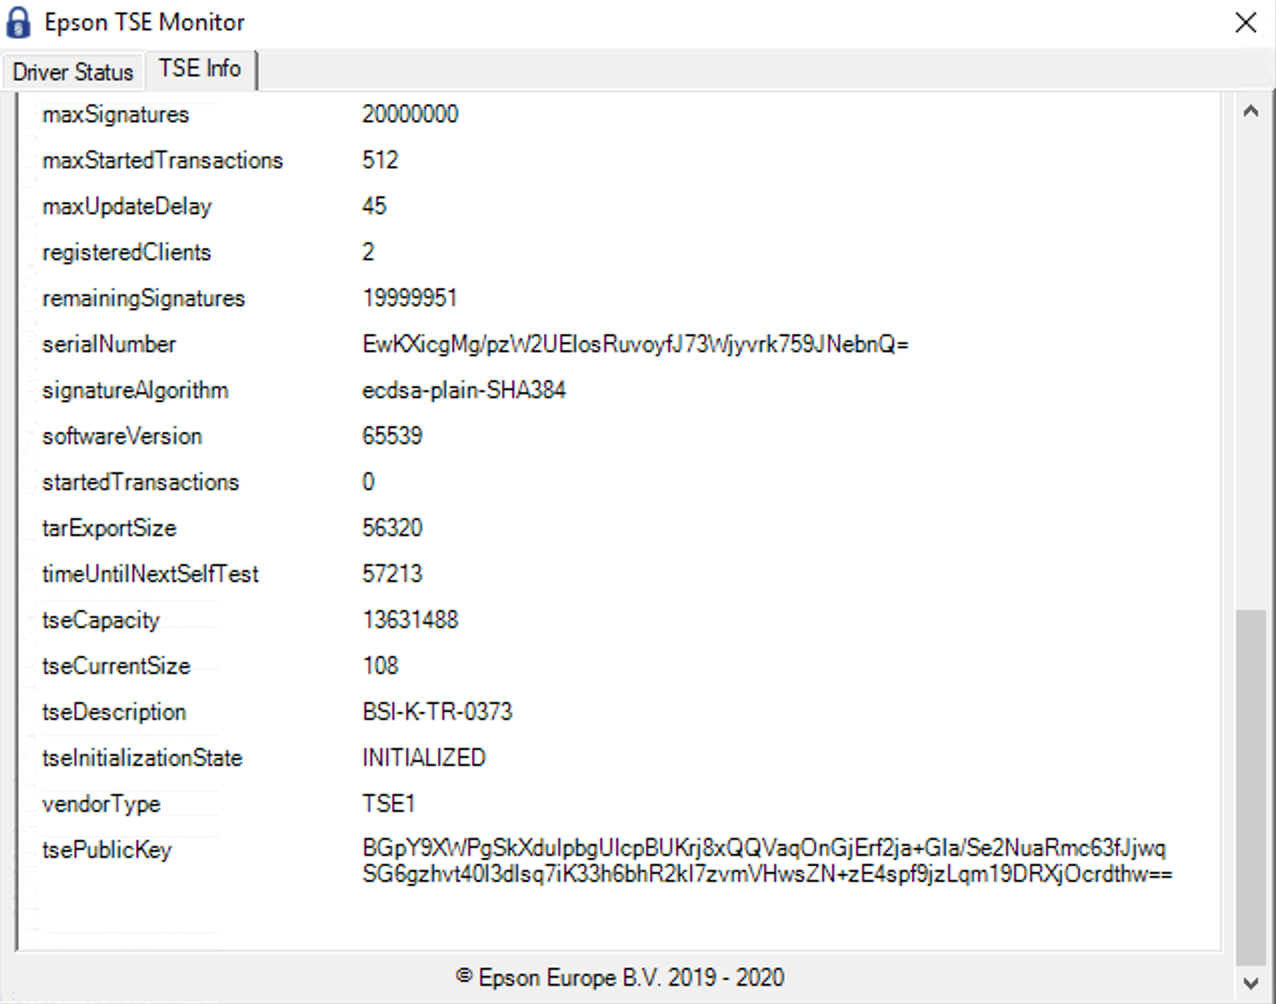
- From this screen click the TSE Info tab to bring up the following:
alt="Graphical user interface, text, application Description automatically generated" />
- From this screen click export which will bring up notepad containing
the necessary values. We need to capture the value for tsePublicKey in the authors case this was:
BGpY9XWPgSkXduIpbgUIcpBUKrj8xQQVaqOnGjErf2ja+Gla/Se2NuaRmc63fJjwqSG6gzhvt40l3dlsq7iK33h6bhR2kI7zvmVHwsZN+zE4spf9jzLqm19DRXjOcrdthw==
General Tab
| Account Credential ID | Name | Use System Key |
|---|---|---|
| FISCAL_GERMANY | Fiscal Key Store | TRUE |
Other Properties
| Property Name | Type | Value |
|---|---|---|
| PUBLIC_KEY | String | Value from TSE |
| SIG ALGORITHM | String | SHA256 |
| ADMIN_PIN | String | A 5-digit PIN of your choosing |
| HOST_IP | String | 127.0.0.1 |
| PORT | String | 8009 |
| PUK | String | A 6-character alphanumeric password of your choosing |
| SECRET_KEY | String | EPSONKEY |
| USER_PIN | String | A 5-digit PIN of your choosing |
It is important that these values are not changed once the TSE is initialised (described in a later step) to do so could result in the TSE becoming blocked. In the case of the PUK changing the block could be permeant on a production device.
Process Connection
Within the POS Process Connection Diagram Locate the GermanyFiscalService Connected Process as shown below:
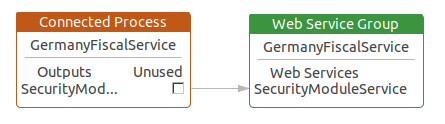
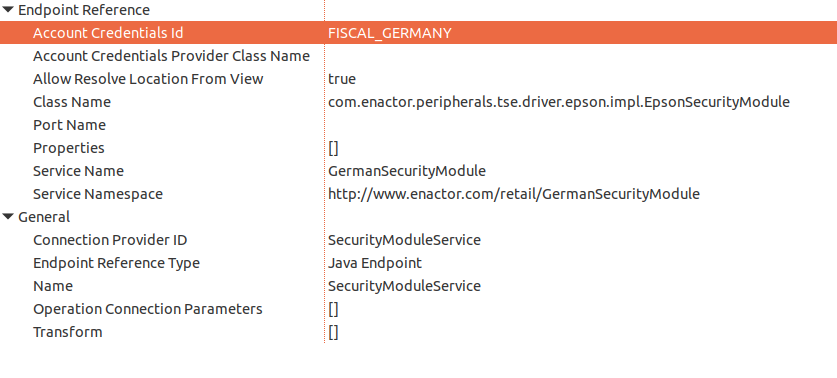
Update the class name and the account credentials id in the SecurityModuleService as shown below:
-
Class Name:
com.enactor.peripherals.tse.driver.epson.impl.EpsonSecurityModule
-
Account credentials id: FISCAL_GERMANY
This change will need to be broadcast or copied to the relevant German POS devices.
Privileges
The following privileges will need to be configured and broadcast to the appropriate German devices. It’s recommended that a store manager be the only role with these privileges since for the most part they permit the configuration and set up of a new TSE. Perhaps the exception to this may be LoginAsTimeAdminAllowed and AuthorisesLoginAsTimeAdmin, which may be required in the general operation of the POS as the TSE may require the time to be set if it is powered off for a prolonged period.
| Privilege IDs | Package |
|---|---|
| enactor.pos.InitialiseDeviceAllowed<br>enactor.pos.AuthorisesInitialiseDevice | PosFiscalisation |
| enactor.pos.LoginAsAdminAllowed<br>enactor.pos.AuthorisesLoginAsAdmin | PosFiscalisation |
| enactor.pos.LoginAsTimeAdminAllowed<br>enactor.pos.AuthorisesLoginAsTimeAdmin | PosFiscalisation |
| enactor.pos.RegisterPosAllowed<br>enactor.pos.AuthorisesRegisterPos | PosFiscalisation |
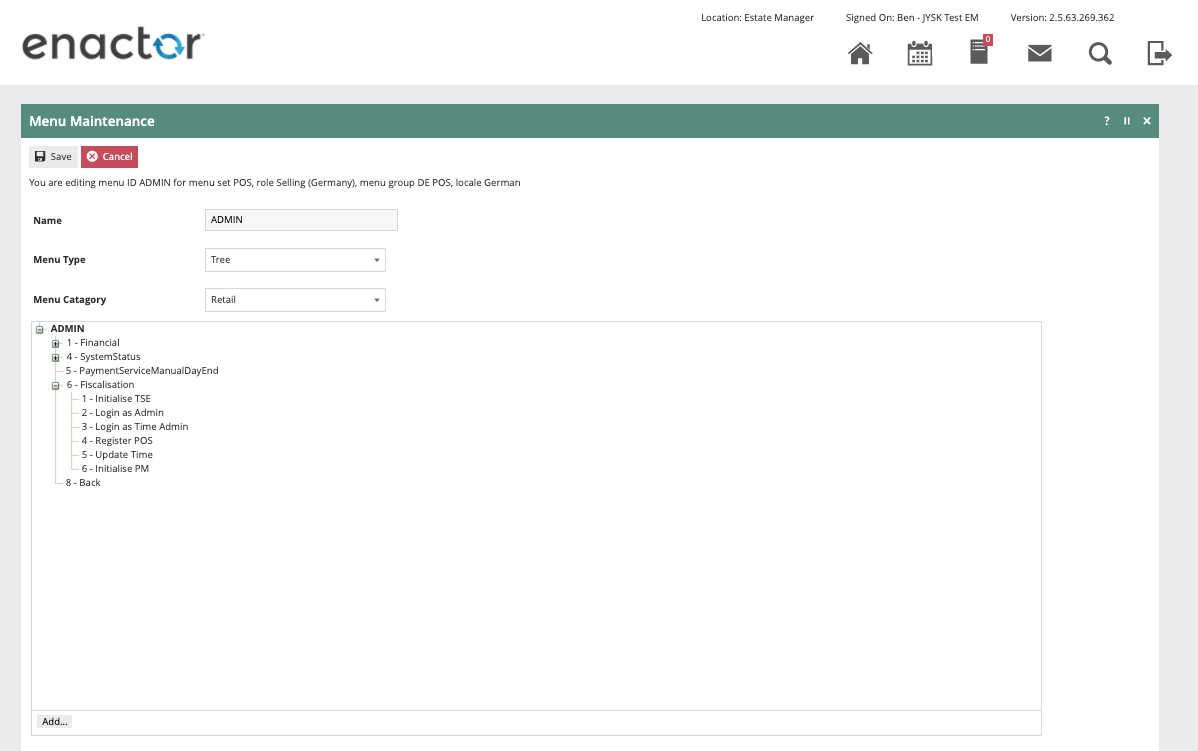
Menus
At an appropriate point within your German POS menu structure, suggested on the Admin menu, a fiscalisation menu with the following 5 items will need to be configured and broadcast the German POS devices. This menu will be used to facilitate initialising the TSE and setting the time on the device.
| Event | ID | Button Label |
|---|---|---|
| Fiscal_TSE_Initialise | Fiscal_TSE_Initialise | Initialise TSE |
| Fiscal_TSE_Login_Admin | Fiscal_TSE_Login_Admin | Login as Admin |
| Fiscal_TSE_Login_TimeAdmin | Fiscal_TSE_Login_TimeAdmin | Login as Time Admin |
| Fiscal_TSE_Register_POS | Fiscal_TSE_Register_POS | Register Pos |
| Fiscal_TSE_UpdateTime | Fiscal_TSE_UpdateTime | Update Time |
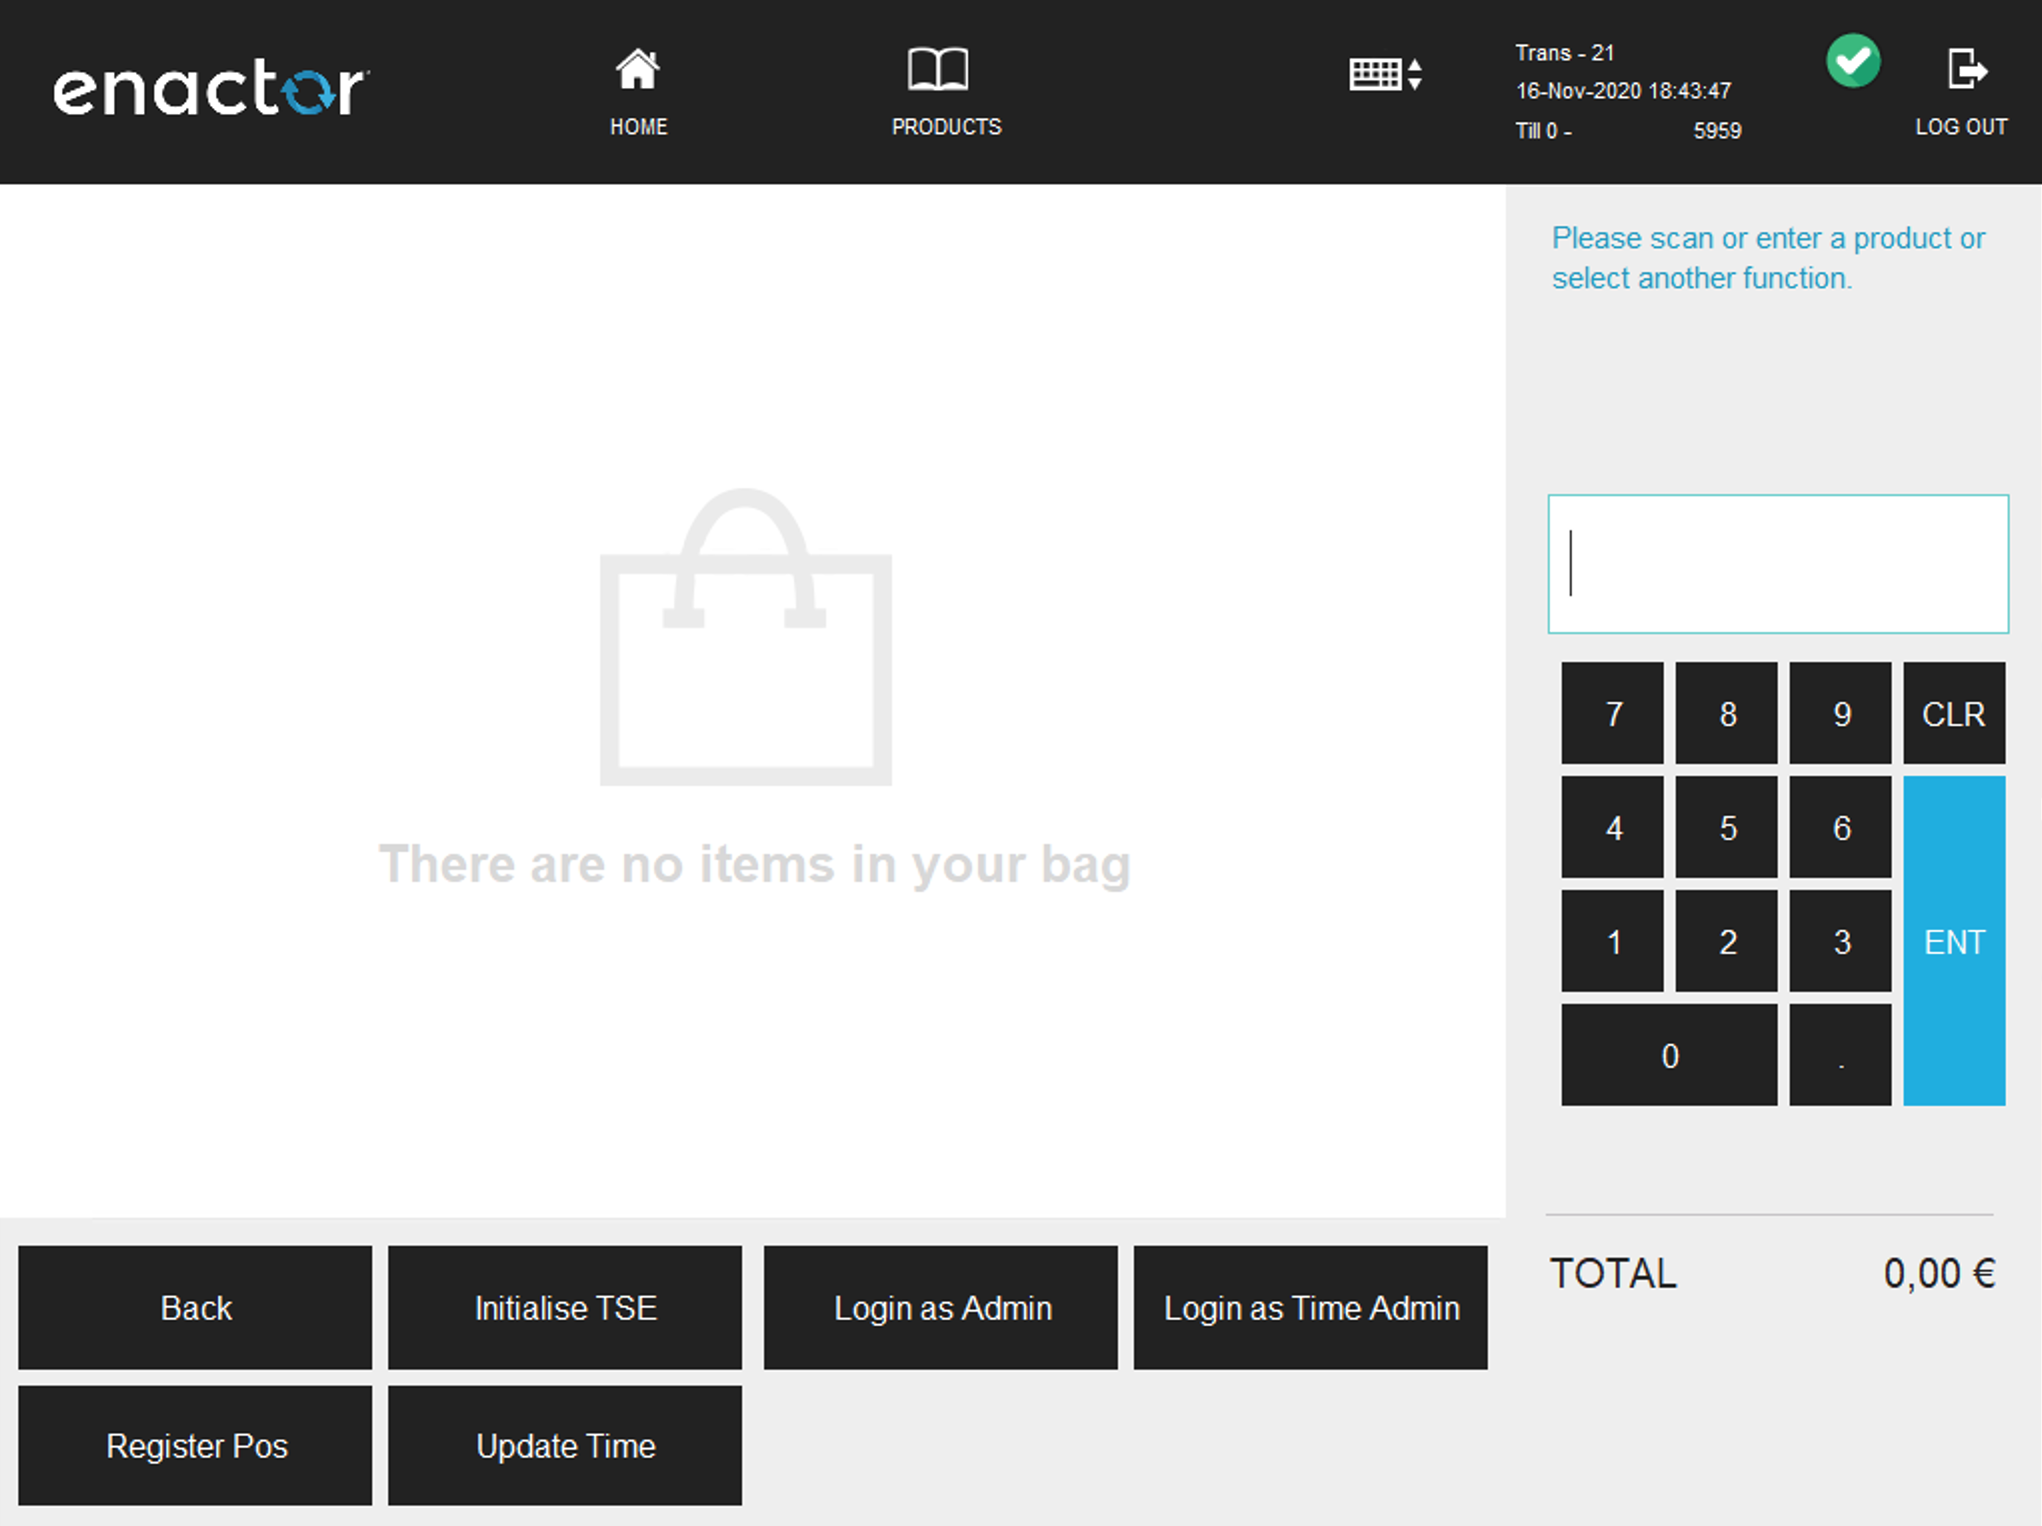
Initial TSE Setup
-
On the POS navigate to the fiscalisation menu created in the
previous step.
-
Click the Initialise TSE button on the fiscalisation menu.
- The POS will prompt ‘Operation Completed Successfully’ click OK.
Click the Login as Admin button on the fiscalisation menu.
- The POS will prompt ‘Operation Completed Successfully’ click OK.
Click the Register POS button on the fiscalisation menu.
- The POS will prompt ‘Operation Completed Successfully’ click OK.
Click the Login as Time Admin button on the fiscalisation menu.
- The POS will prompt ‘Operation Completed Successfully’ click OK.
Click the Update Time button on the fiscalisation menu.
- The POS will prompt ‘Operation Completed Successfully’ click OK.
On occasion it is possible that the POS will prompt for the time to be updated on the TSE, if this should happen repeat steps 1, 5 and 6.
At this point it should be possible to complete fiscal transactions on the POS. Also, when observing the details in the Epson TSE Monitor tool it should show the device as Initialised, as shown below.
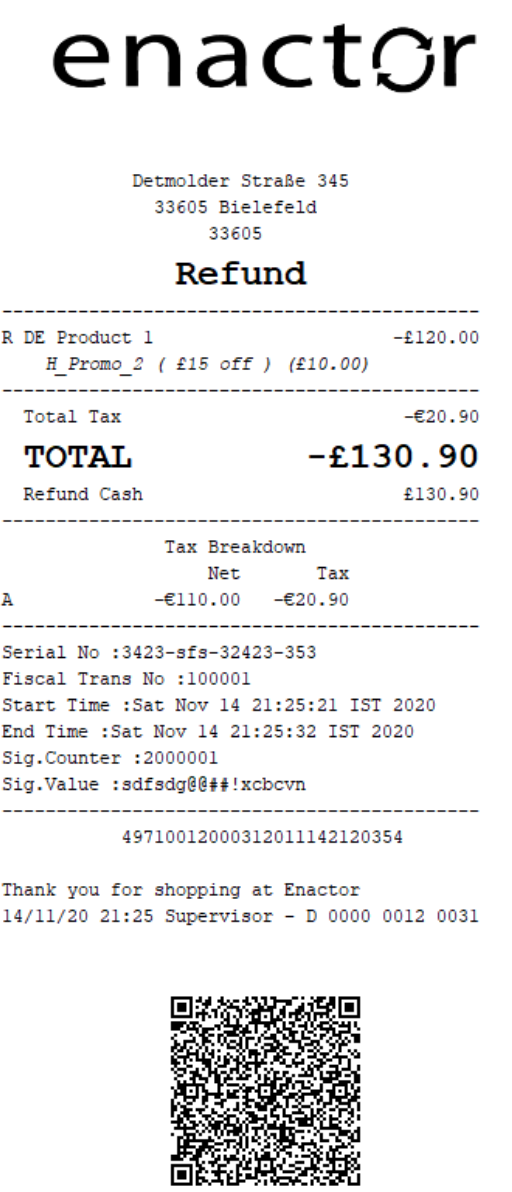
Receipt
The format of the receipt is not prescribed by the German authorities although receipts should be provided to customers and there are some requirements that must be met.
The following are required to be shown on the receipt:
| Required Receipt Details | Additional Requirements |
|---|---|
| Company name and address<br>Date the receipt was issued<br>Transaction start and end time<br>Item names<br>Quantities<br>Total price<br>Item prices | Tax totals per VAT rate<br>TSE transaction number<br>Amount per payment method<br>Signature counter<br>Signature value<br>Serial number of the TSE |
Optionally a QR code with the above details can also be included and Enactor support this where it is also supported by the printer.
Within the POS Terminal Template there is a receipt available named ‘Fiscal 44 Standard Receipt’ which meets all of the above requirements. Although a retailer can choose to customise the receipt to meet their needs, this should form a good starting point that contains all of the mandatory information. An example of this receipt is shown below.
Digital interface
As well as the above requirements the German legislation has a requirement to be able to export data from the POS of sale system. This is in addition to the export function provided by the TSE itself.
“Digital interface of the financial administration for cash register systems (DSFinV-K) The provision of the secured application and log data is for the purposes of Carrying out external tax audits or cash register checks alone is not sufficient, since not all the necessary data is included in the logging by the TSE.”
This export function is provided within the Estate Manager and will produce an export in the defined CSV format along with the XML schema document that defines the CSV export file structure. It should be noted that this report is dependent on day ends having been run at the POS as the day end action is used to group transaction data into trading days within the report. Transactions which have been recorded but for which a day end has not been run will not appear in the report output. Transactions spread over multiple days but with only a single day end will be grouped into a single trading day that is longer than 24 hours.
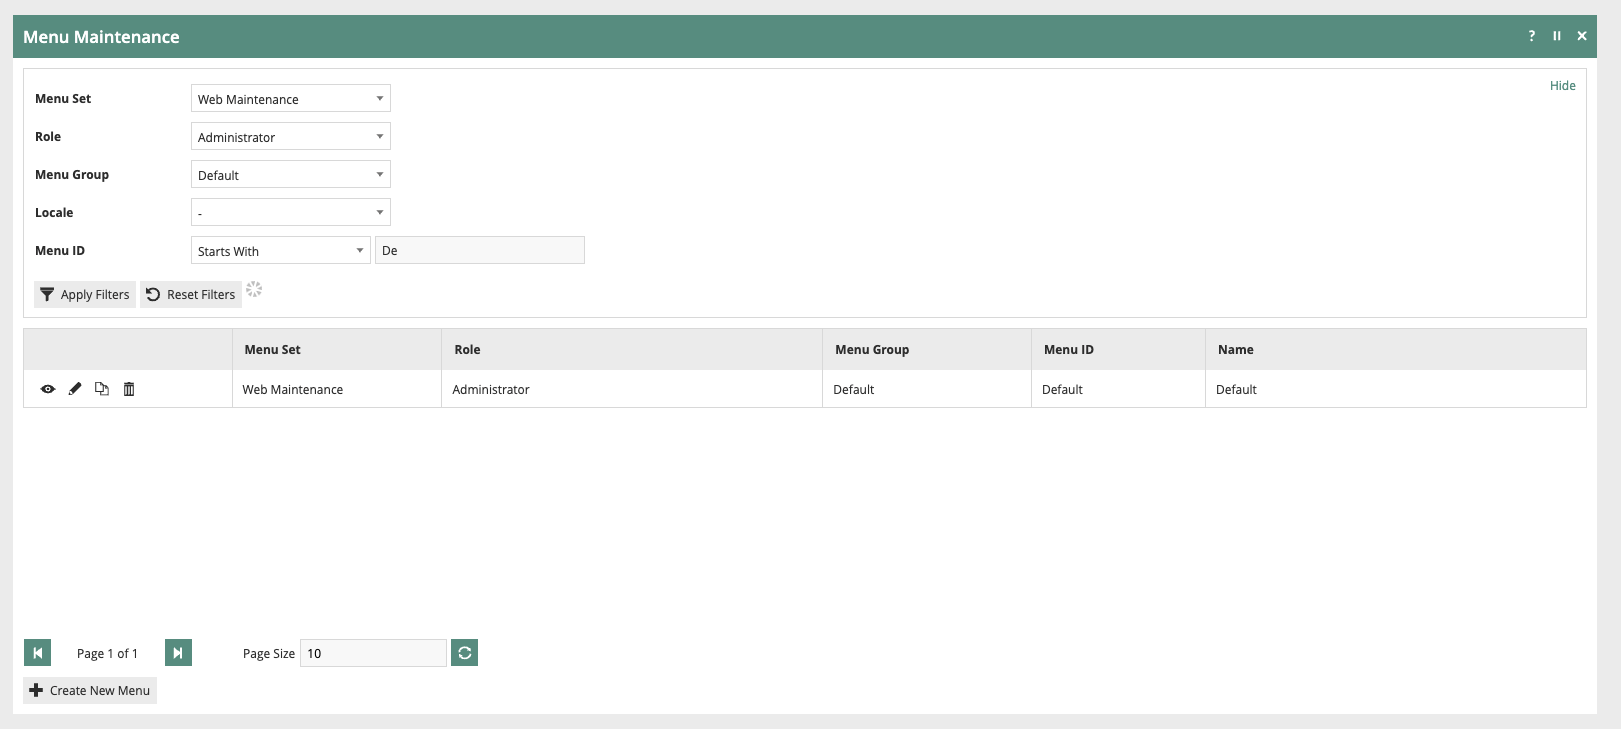
Configuring the EM
The functionality to produce this report is not enabled in the estate manager by default but can be enabled with the following steps.
Login to the EM as a user with the Administrator Role and navigate to Menu Maintenance. Filter the list of Menus as shown below then edit the Default Menu for the Web Maintenance Menu Set for the Administrator Role.
Expand the operations folder.
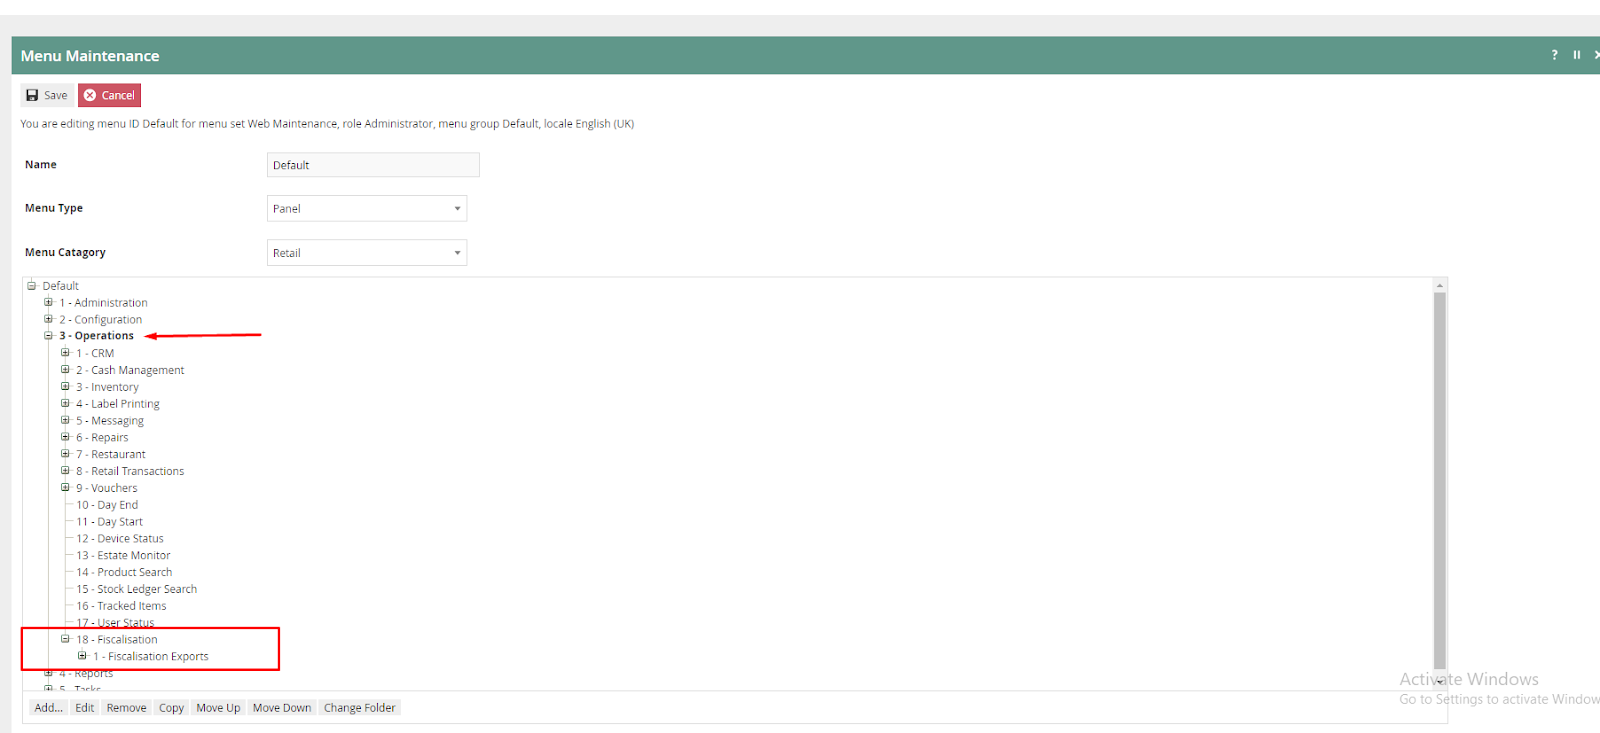
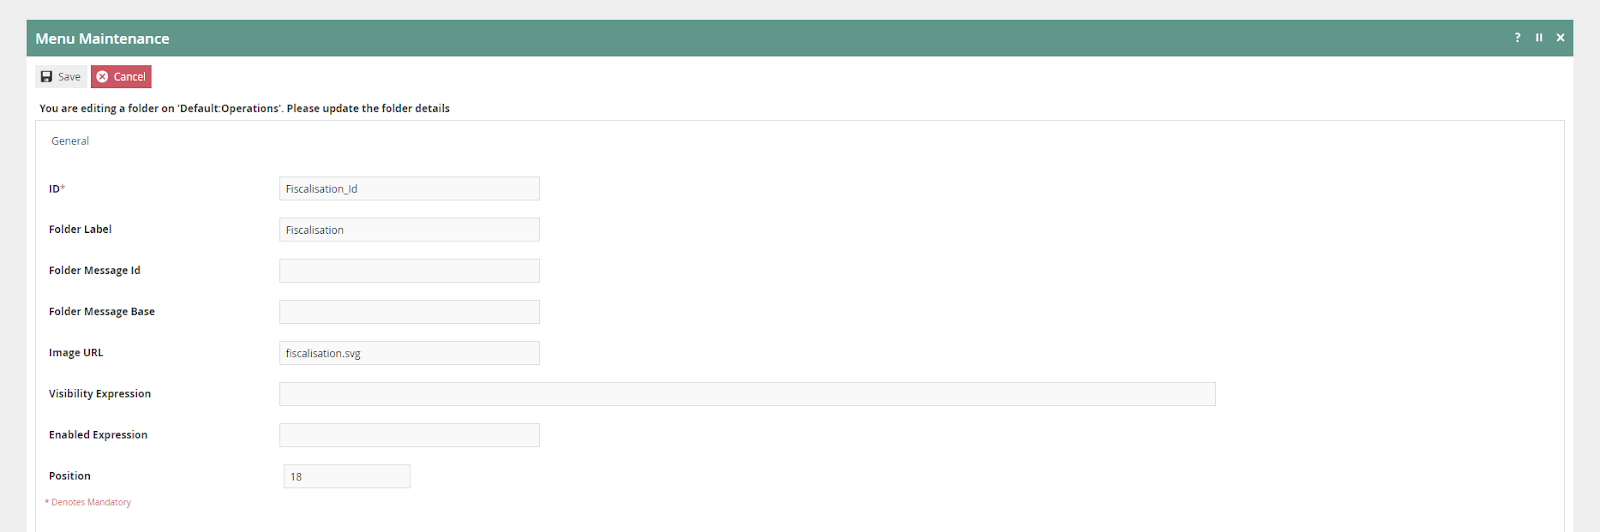
If it does not exist create a new fiscalisation folder under operations with the following configuration:
-
ID - Fiscalisation_Id
-
Folder label - Fiscalisation
-
Image URL - fiscalisation.svg
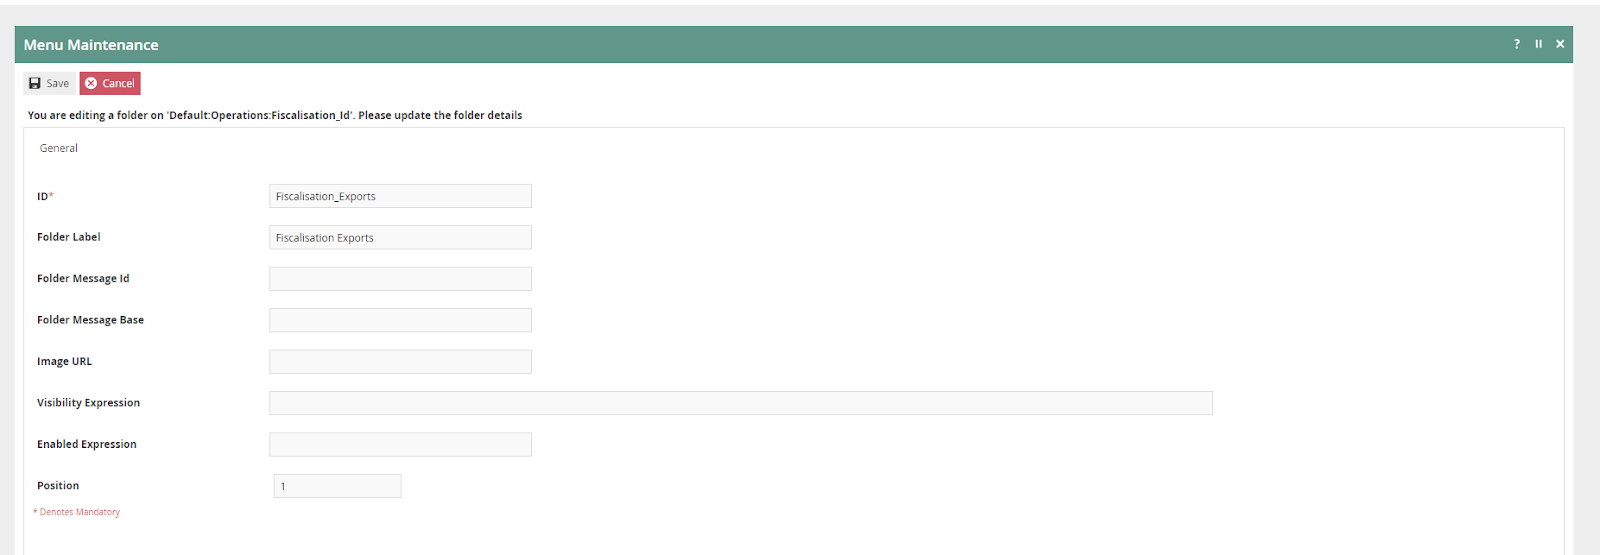
Add a new folder to fiscalisation folder with the following configuration:
-
ID - Fiscalisation_Exports
-
Folder label - Fiscalisation Exports
Add a new Execute Process Item into the Fiscalisation Exports Folder with the following configuration:
-
Application Process to Run - CSV Data Exporter
-
ID - Maintenance/CSVDataExporter
-
Item label - CSV Data Exporter
-
Item message ID - CSV_DATA_EXPORTER
-
Item Message Base - CSVDataExports/CSVDataExportMessages
-
Image URL - reports.svg
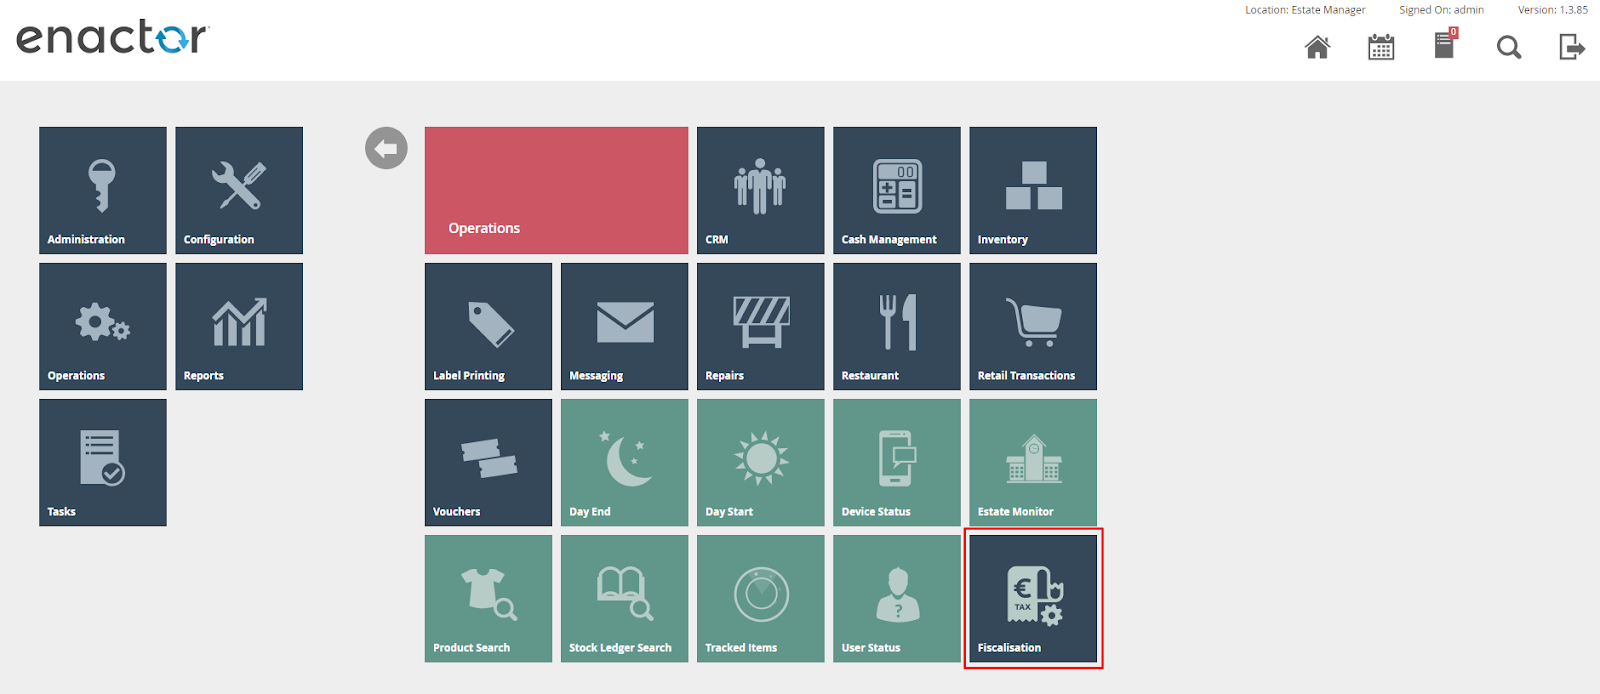
Save the menu changes and verify the menu item in the Operations Menu on the EM
Exporting Data
From the new menu in the EM click the Fiscal CSV Data Exporter button

Provide the required Start and End date as well as the location and devices the export is required for, Fiscalisation Type should be set to Germany. Then click Export.
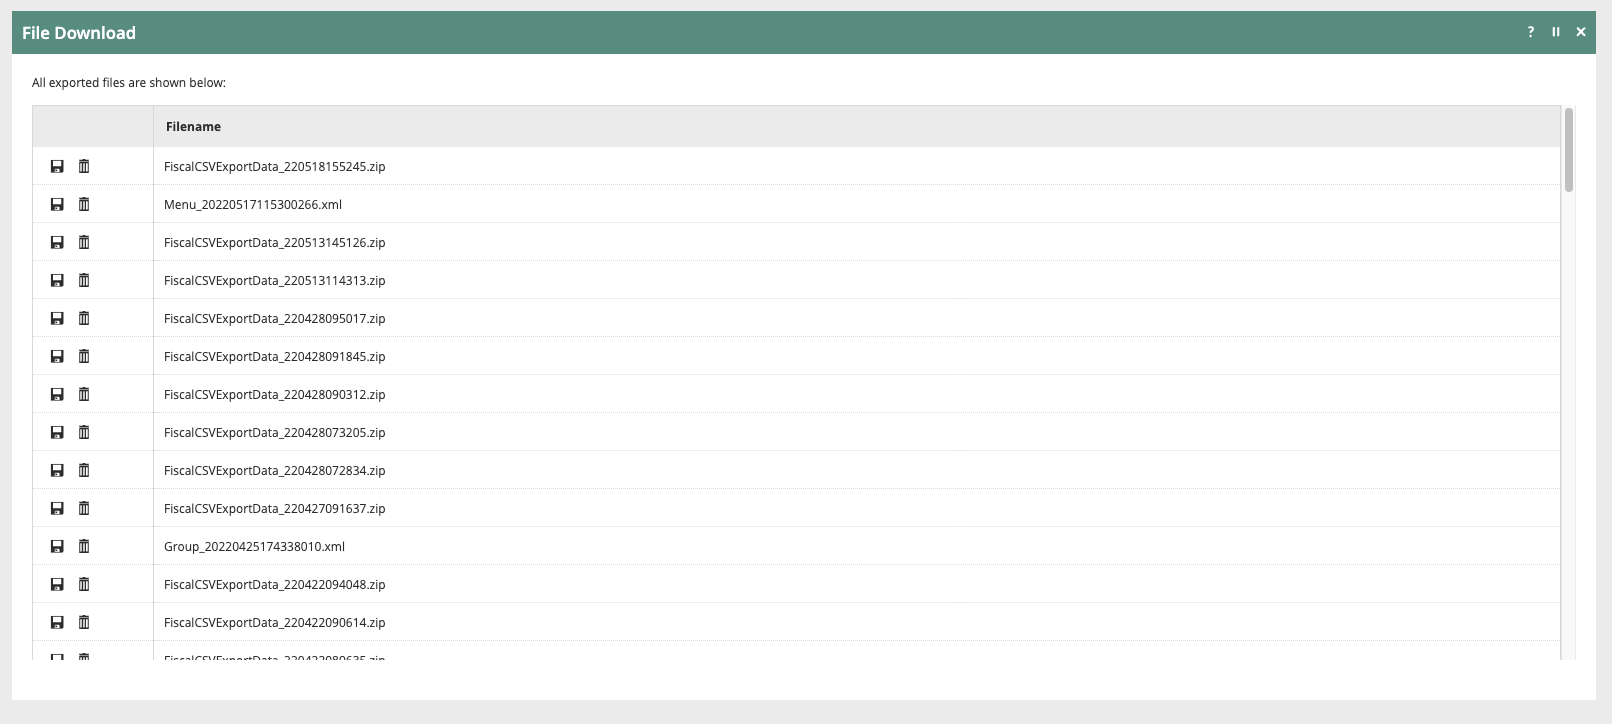
This will create a scheduled job which will produce the export data in the defined format. Once this scheduled job has completed the CSV export will be available for download as a Zip file from the File Download application within the EM.