How To Guide Fiscal German Fisklay
Fiscal Overview
For shared background, see Fiscal Overview.
German Introduction
The fiscal approach in Germany can either use a physical TSE on premises or using a cloud-based service. This implementation is for Fiskaly which serves as a Technical Security Device (TSE) in compliance with German fiscal regulations. Unlike hardware-based TSE devices, Fiskaly is a service-based solution that securely signs and stores each transaction in an immutable format.
Receipts generated for transactions must be offered to customers, and while the format of the receipt is flexible, there are certain mandatory fields that must be included. One of these is the signature provided by the Fiskaly service.
In the event that the Fiskaly service is temporarily unavailable or encounters issues, the POS system can continue to operate. Receipts during this period must clearly indicate that the Fiskaly service is offline, and all transactions must be fiscalized once the service is restored. To minimise disruption, Enactor recommends switching to an alternate POS that has a functioning connection to the Fiskaly service until the issue is resolved.
Certification of the POS software is not required; only the Fiskaly service itself requires certification to meet legal requirements.
Notes
Currently, the Enactor solution is fully integrated with the Fiskaly cloud-based TSE service. As Fiskaly is a service-based solution, there is no physical hardware to manage, simplifying the deployment and maintenance process.
The interface for the Fiskaly service is standardised according to the requirements set by the authorities. This ensures that any future enhancements or additional features related to Fiskaly integration can be implemented with minimal complexity.
Enactor is committed to ongoing development and is exploring further enhancements to the Fiskaly integration, such as supporting multiple store locations and POS systems through a single Fiskaly account. This approach would streamline the fiscalization process across various touchpoints in a retail environment, ensuring compliance and operational efficiency.
Configuration Overview
The following configuration changes are required and should be broadcast to all German devices in preparation for go live.
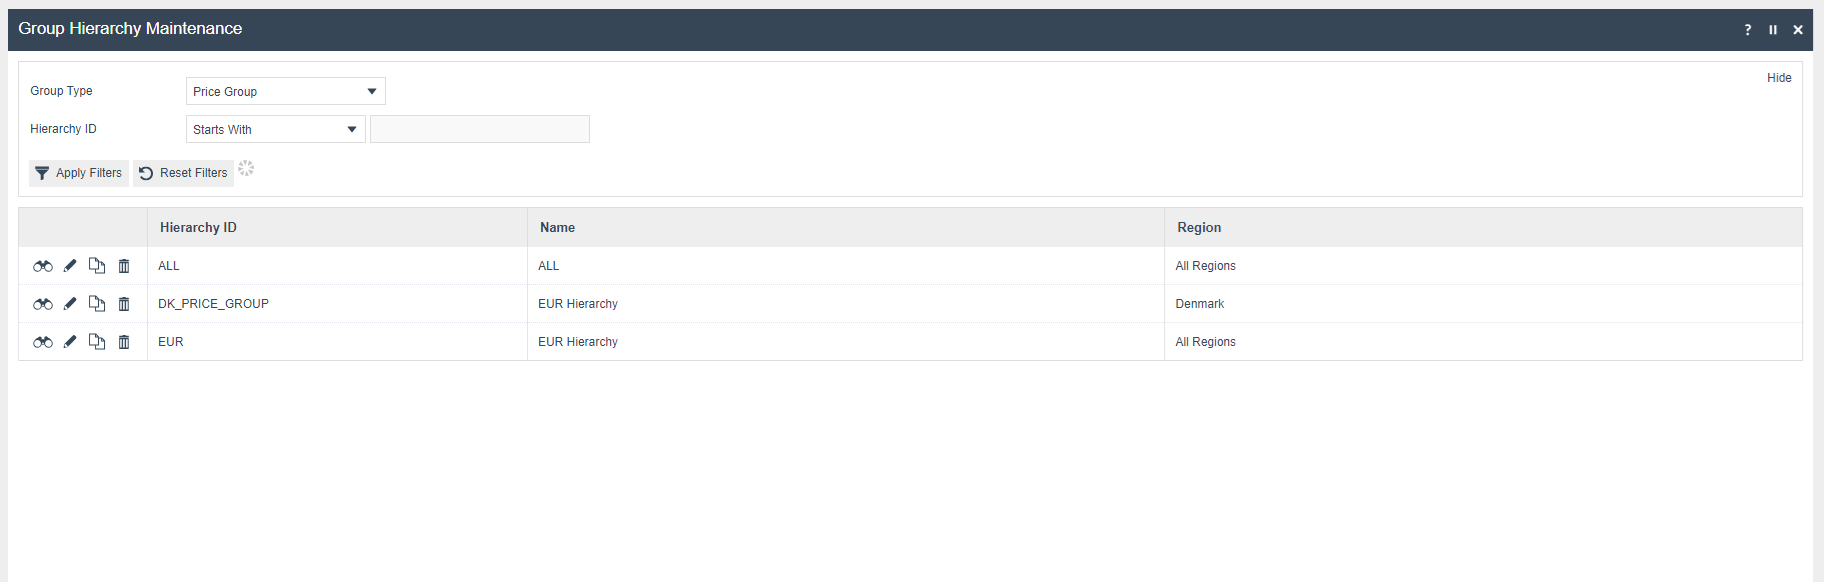
Group
Create a new Region group, Tax Region and Price group for Germany as below.
| Group Type | Group ID | Group Name |
|---|---|---|
| Region | DE | Germany |
| Tax Region | DE | Germany |
| Price | DE | Germany |
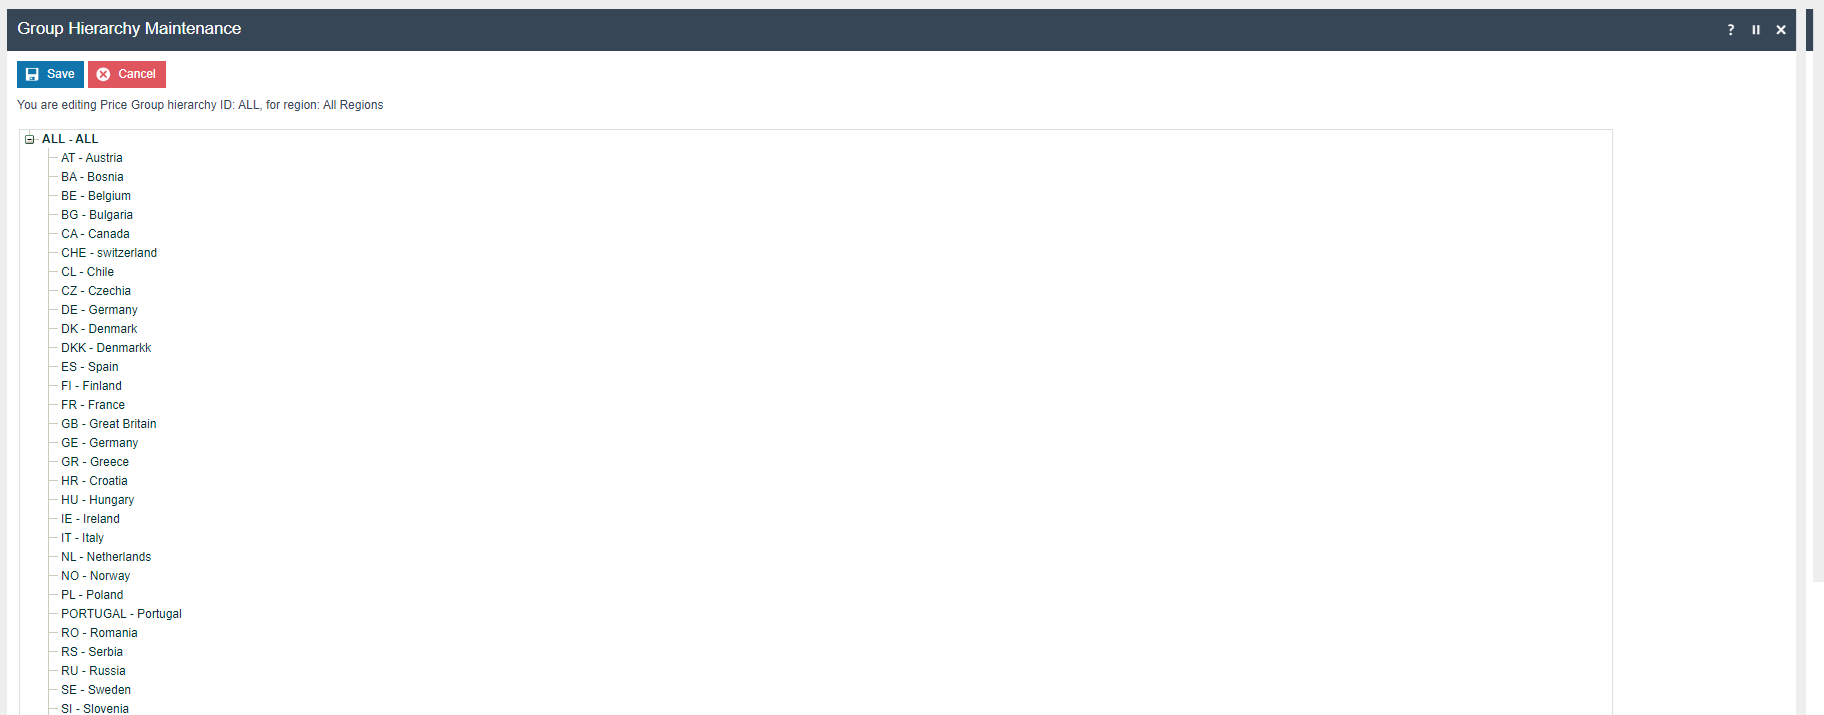
Region Group

Tax Region Group
Price Group
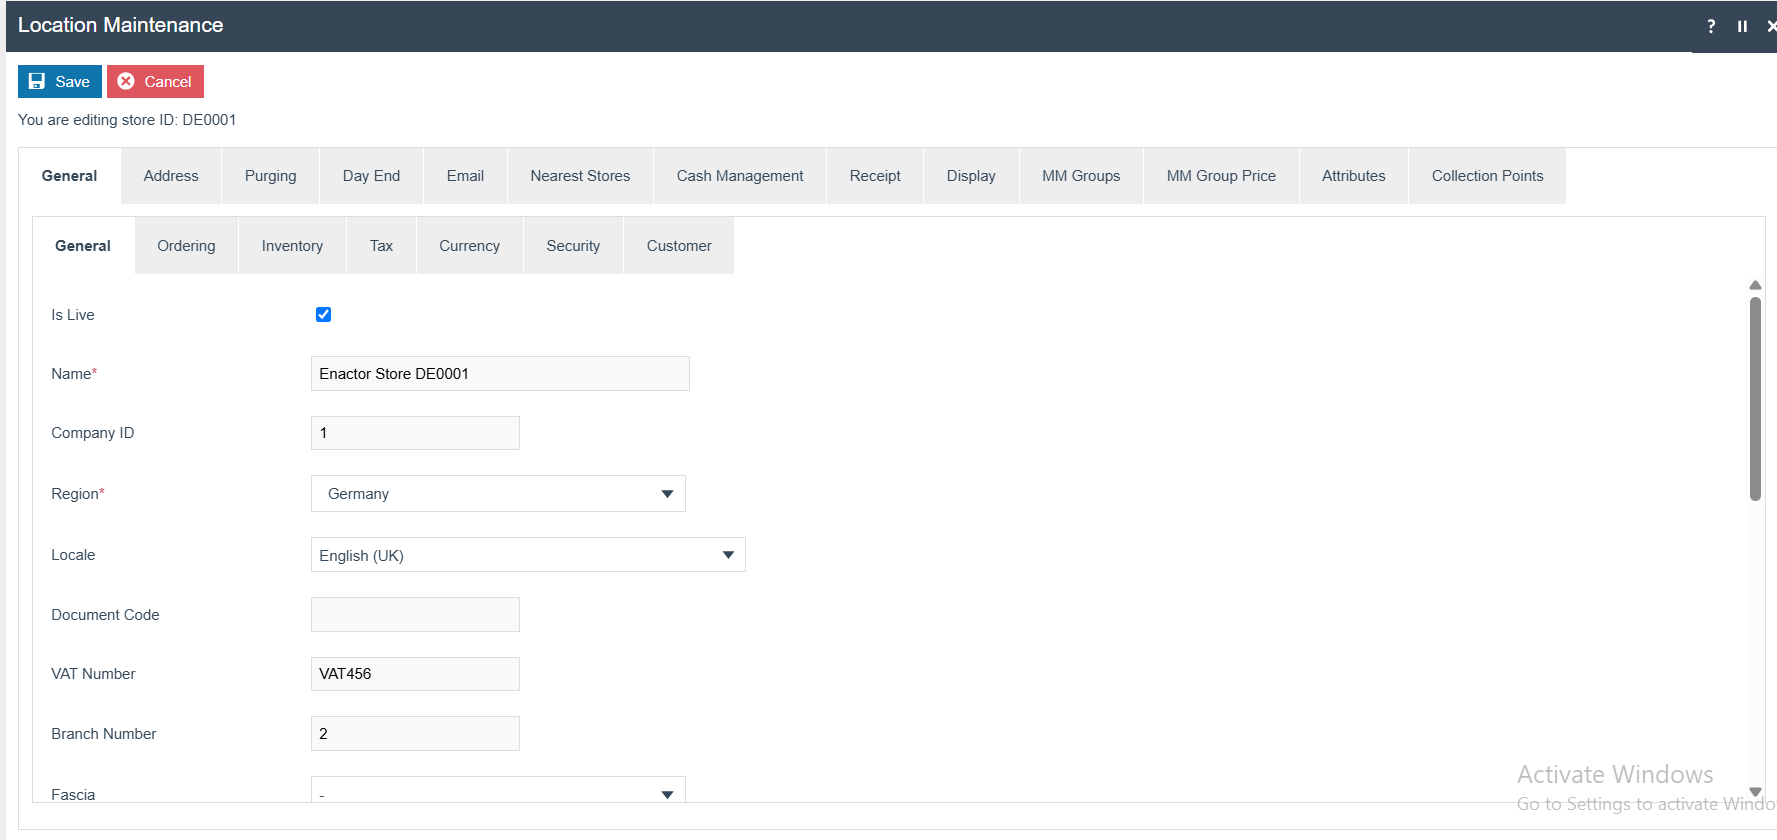
Location
Each location in Germany should be created from Location maintenance within the EM and broadcast to the appropriate German devices.
Important: Please create a Company using the Company Maintenance and include that Company ID in the Location -> General -> General -> Company ID Field. (This config is important to generate the CSV files without any issue.)
Tax Groups
The following tax groups should be configured and broadcast to the appropriate German devices.
| Tax Group ID | Description |
|---|---|
| DE1 | DE Tax Group A |
| DE2 | DE Tax Group B |
| DE3 | DE Tax Group C |
Tax Scheme
The following tax scheme should be configured and broadcast to the appropriate Germany devices.
| Tax Scheme ID | Description | Price Include Tax |
|---|---|---|
| DE | DE VAT | TRUE |
Tax Rates
The following tax rates should be configured and broadcast to the appropriate Germany devices.
| Tax Rate ID | Description | Display Code | Percentage | Fiscal Tax Rate Reference | |
|---|---|---|---|---|---|
| DE_R1 | DE Standard 19% | DE Standard 19% | 19% | 1 | |
| DE_R2 | DE Reduced 7% | DE Reduced 7% | 7% | 2 | |
| DE_R3 | DE Other | DE Other | 0% | 6 |
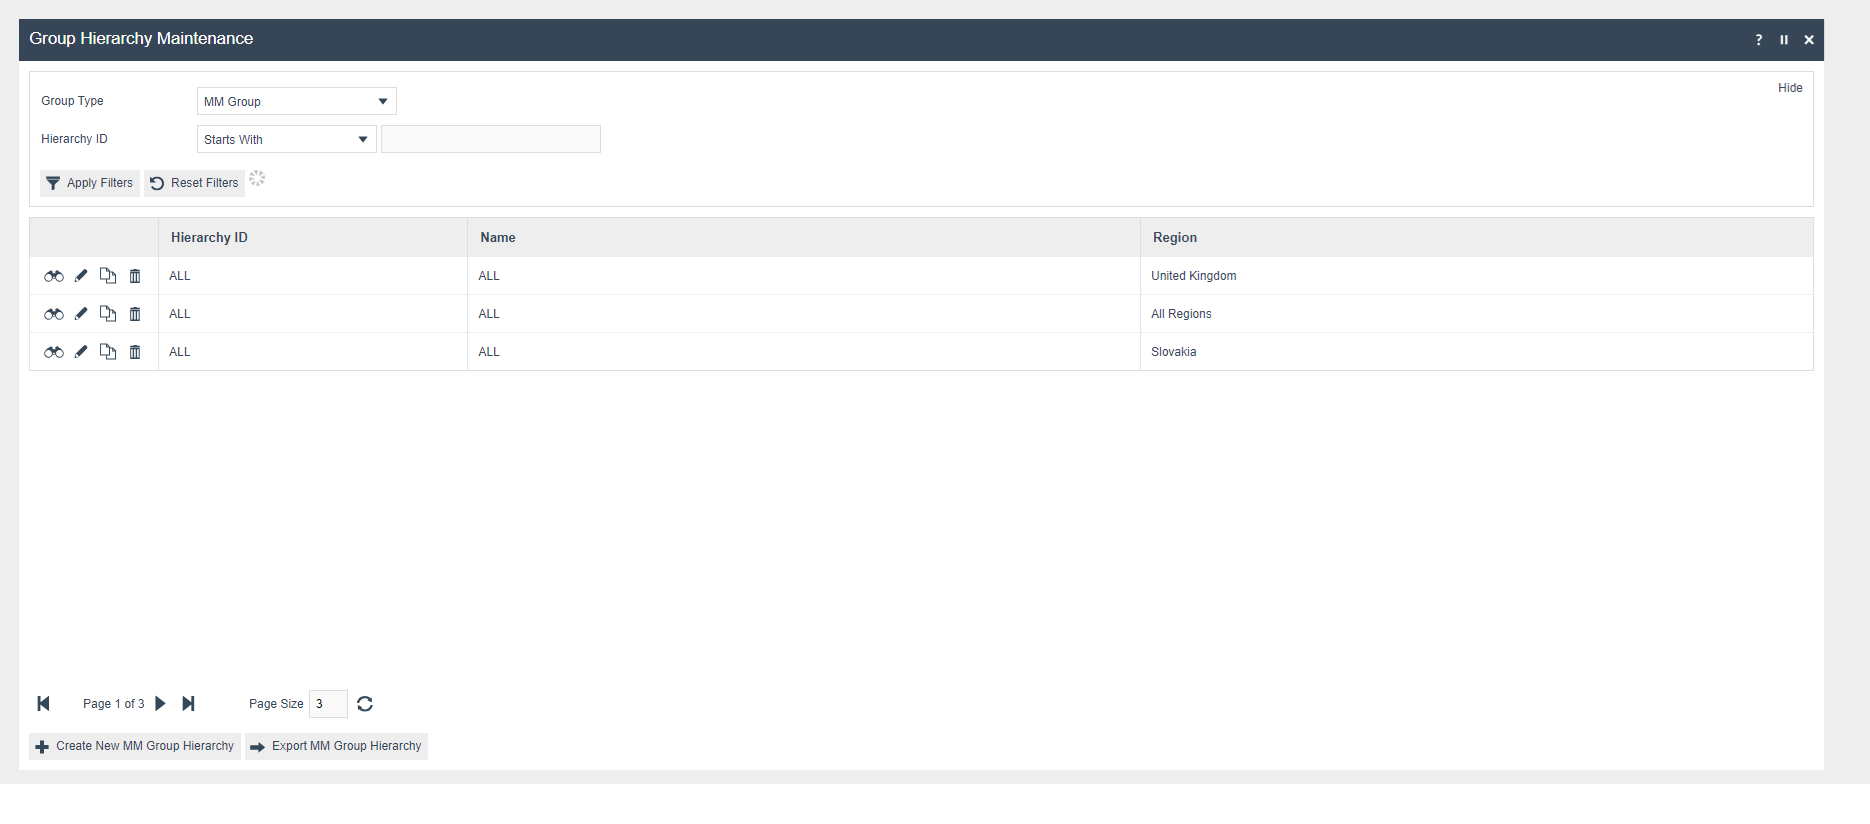
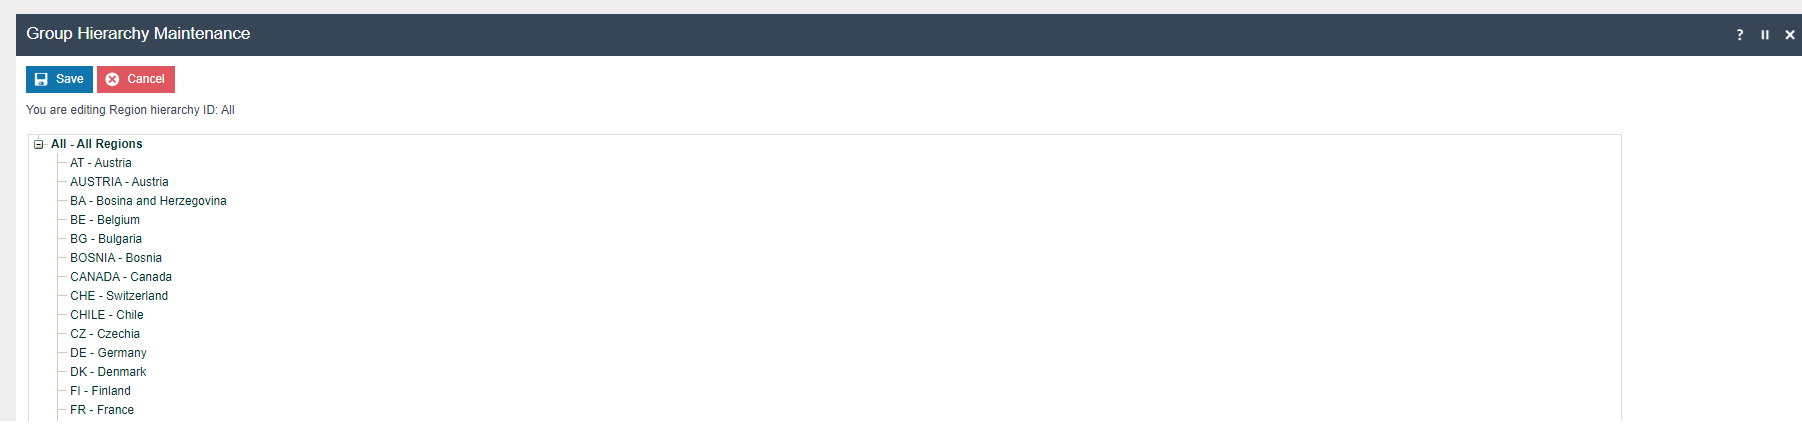
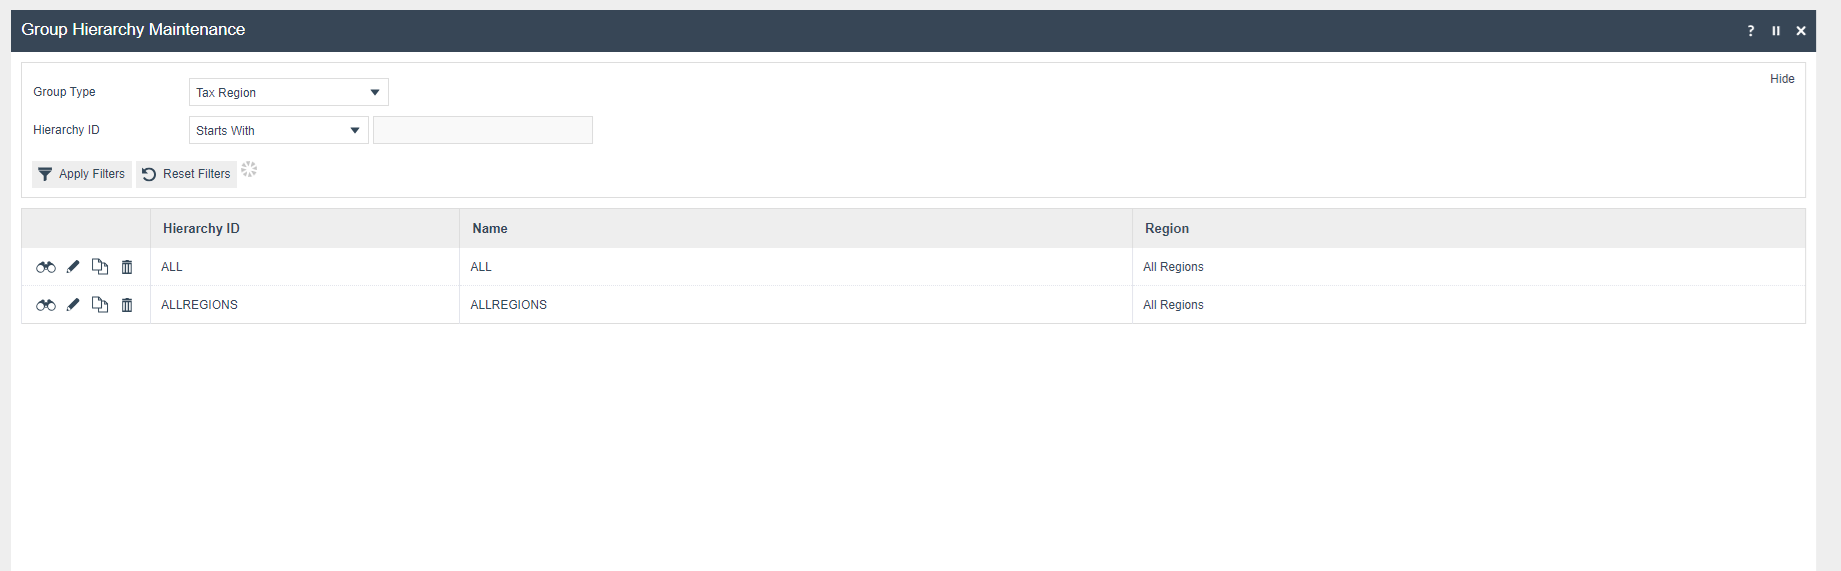
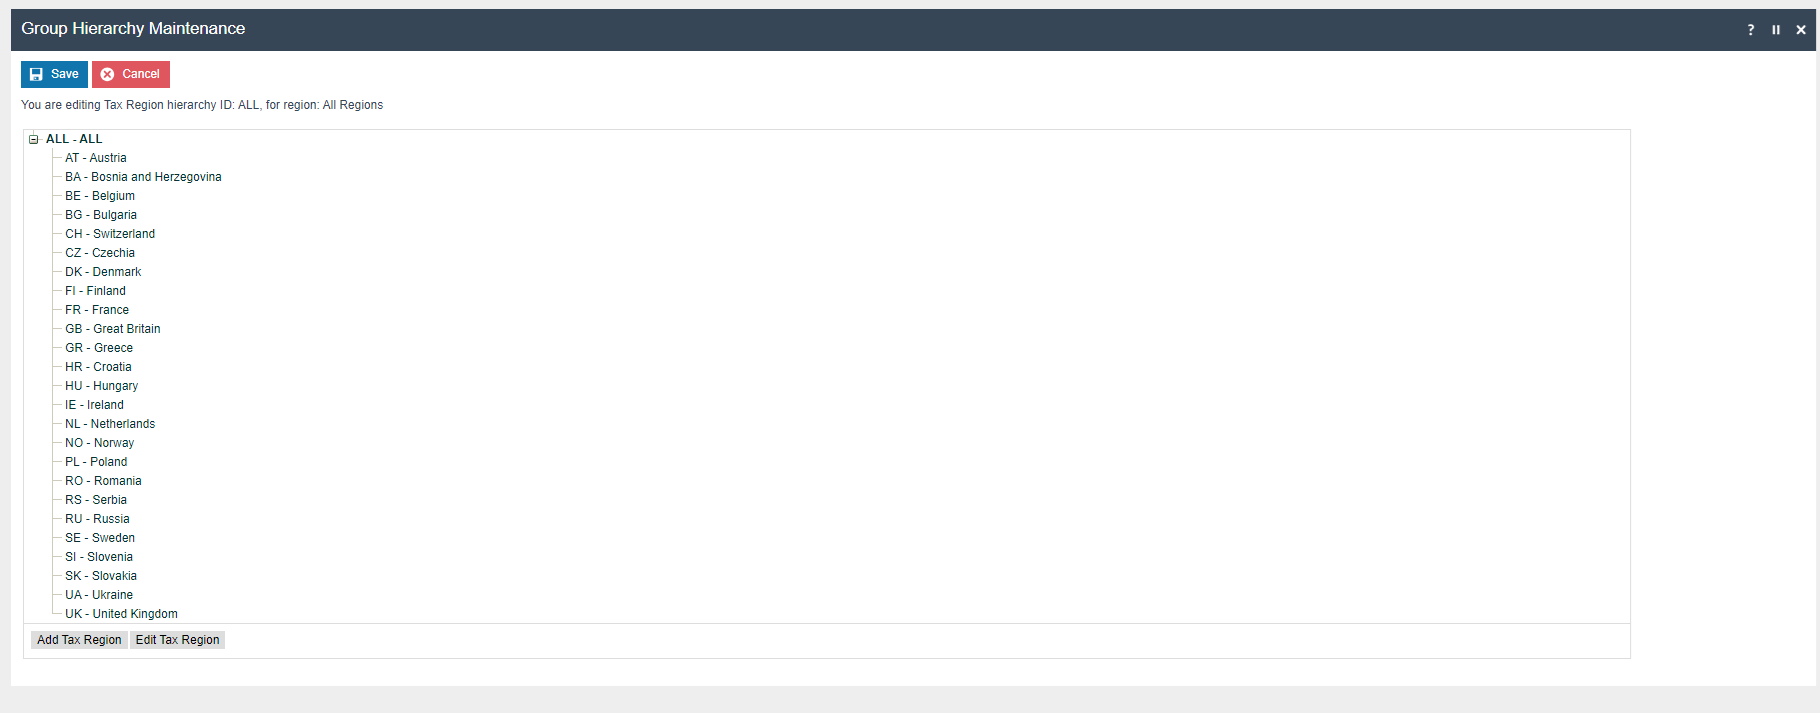
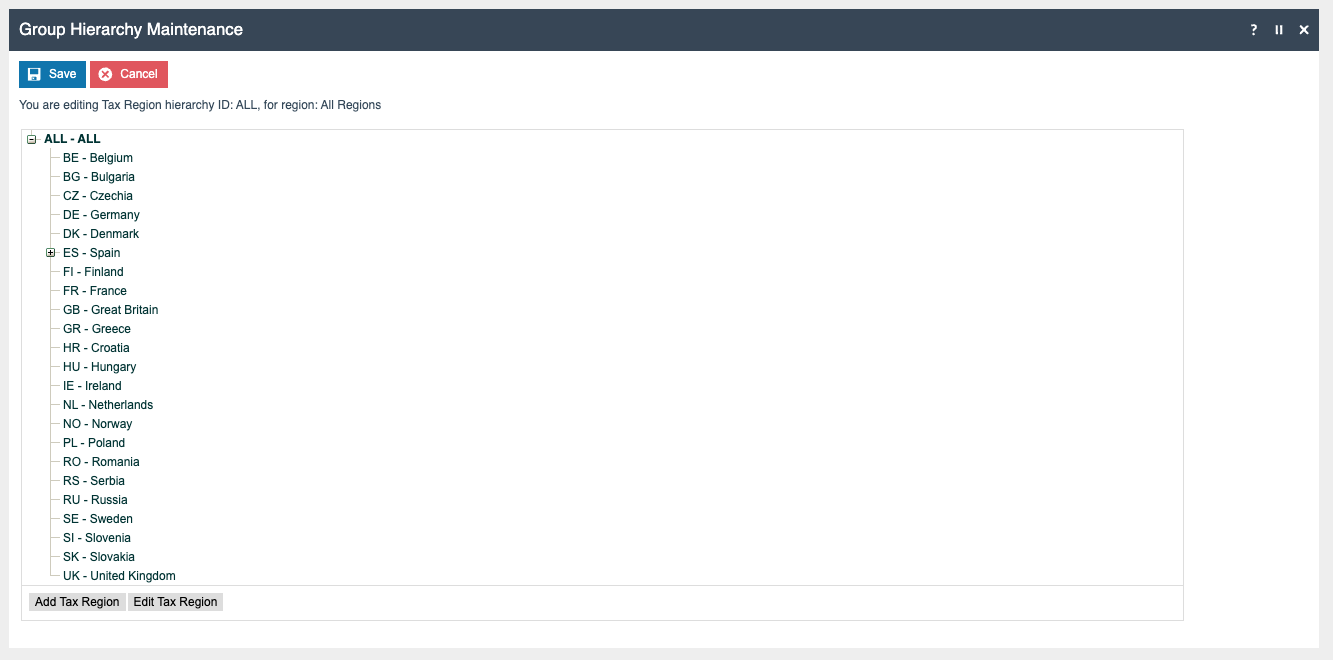
Tax Region
If it does not already exist, a Tax Region for Germany should be created within the Tax Region Group Hierarchy. It should have the ID: “DE” and the Name: “Germany”, it is not necessary to configure an External Reference ID.
Tax Group Tax Methods
The following tax group tax methods should be configured and broadcast to the appropriate German devices.
| Tax Group ID | Tax Scheme ID | Description | Tax Rate |
|---|---|---|---|
| DE_1 | DE | DE Standard 19% | DE Standard 19% |
| DE_2 | DE | DE Reduced 7% | DE Reduced 7% |
| DE_3 | DE | DE Other | DE Other |
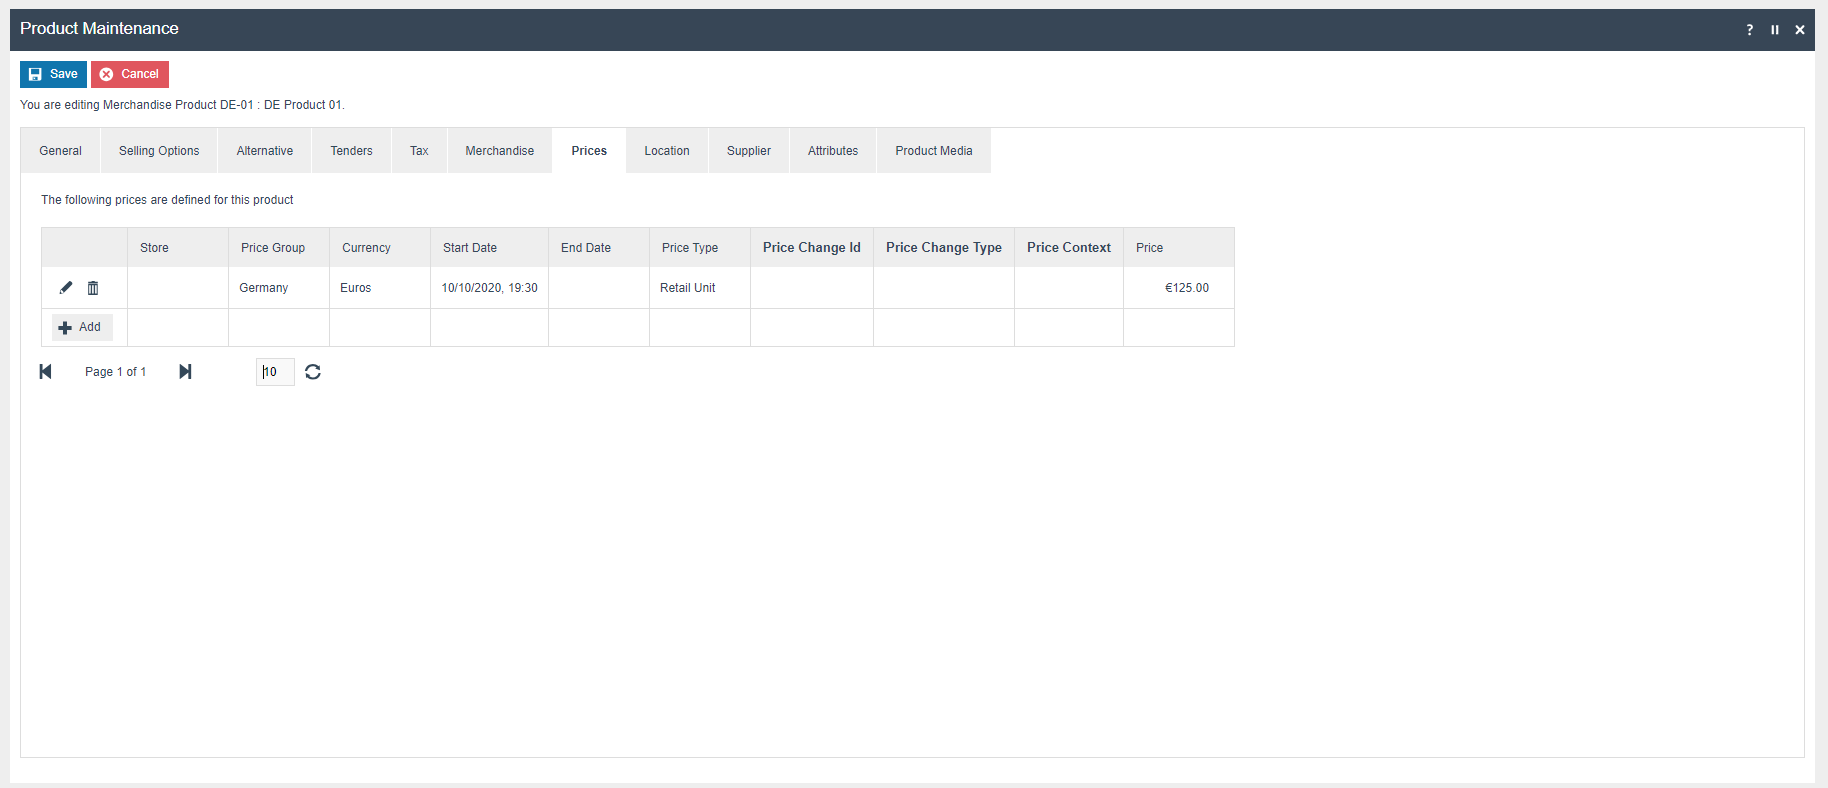
Products
Products should have been created from the product maintenance and broadcast to the appropriate German devices.
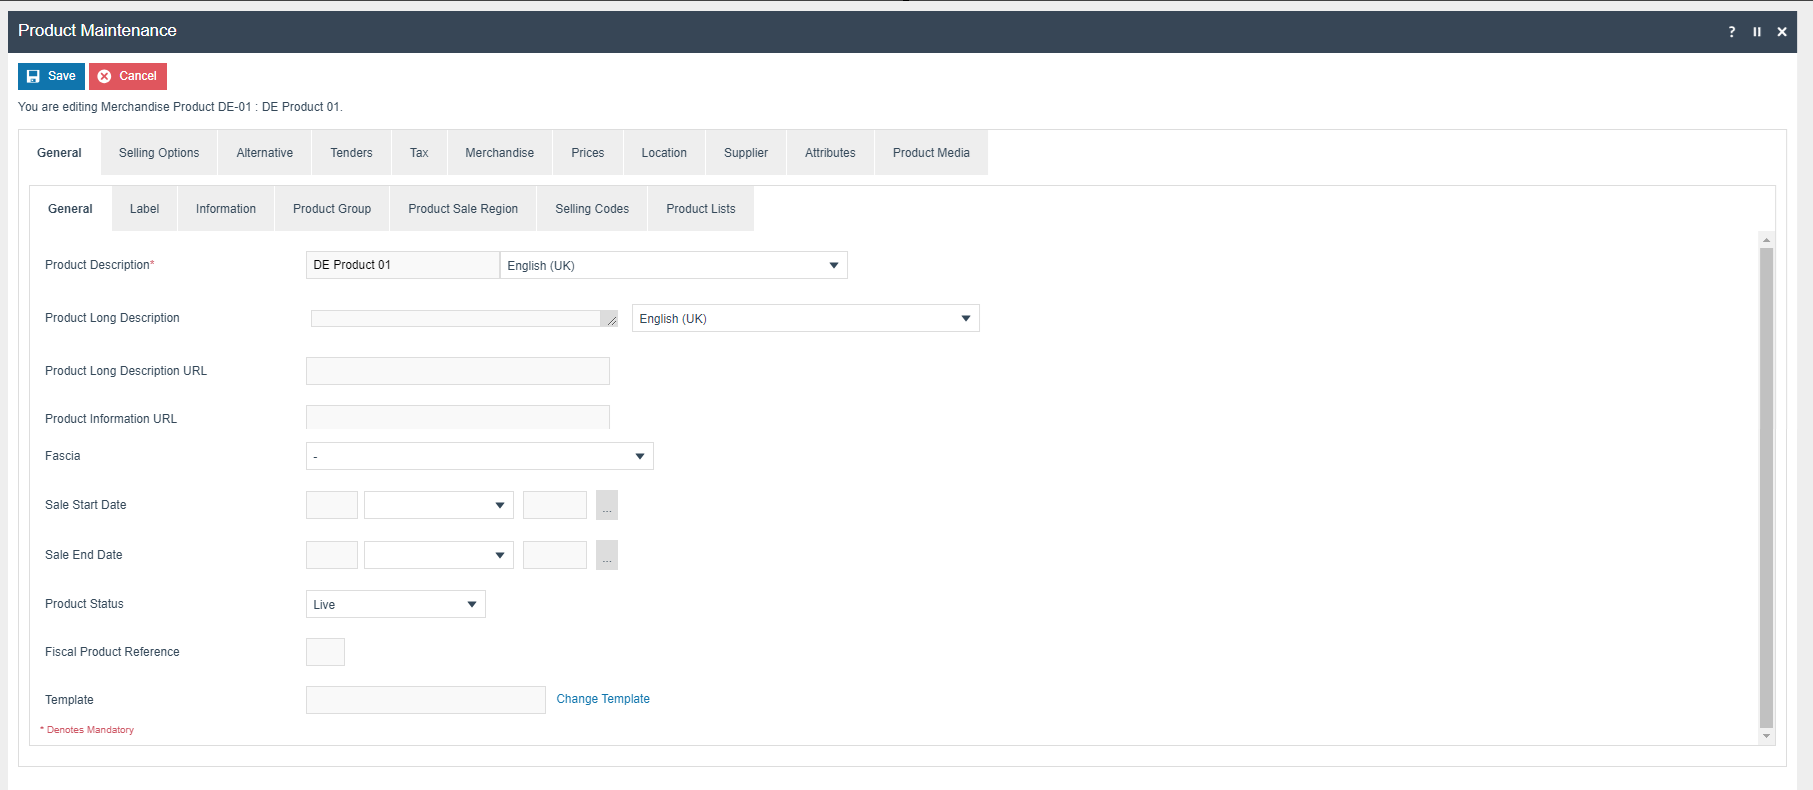
Product Tax group can be defined to either configure the tax group or have a tax group by tax region.
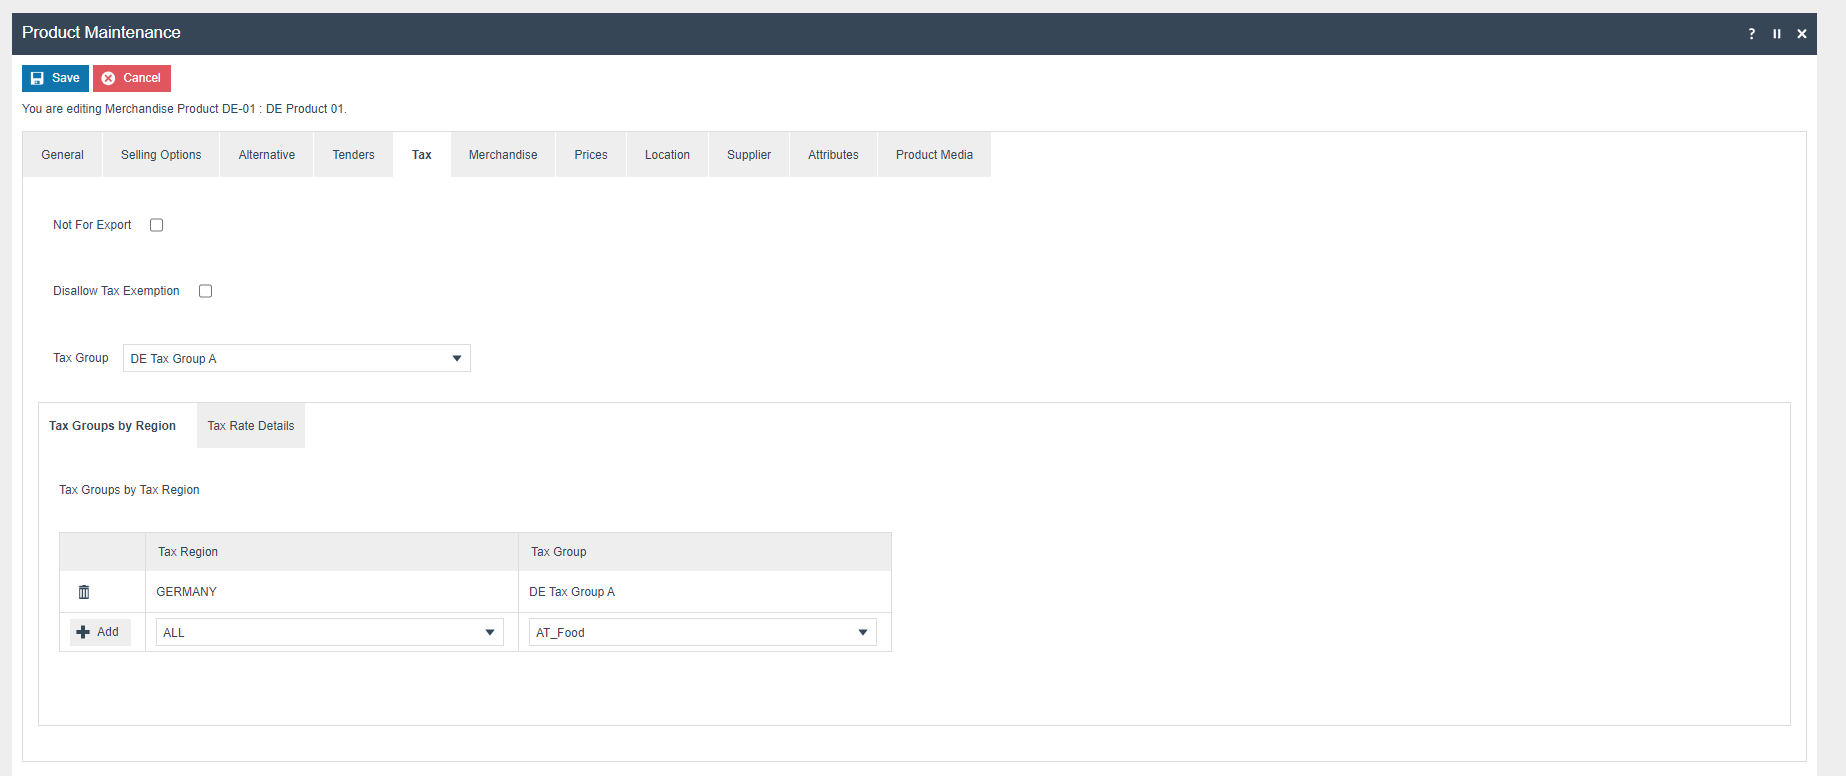
 In Tax Rates by Region and
Scheme Section appropriate Tax Rate should be defined.
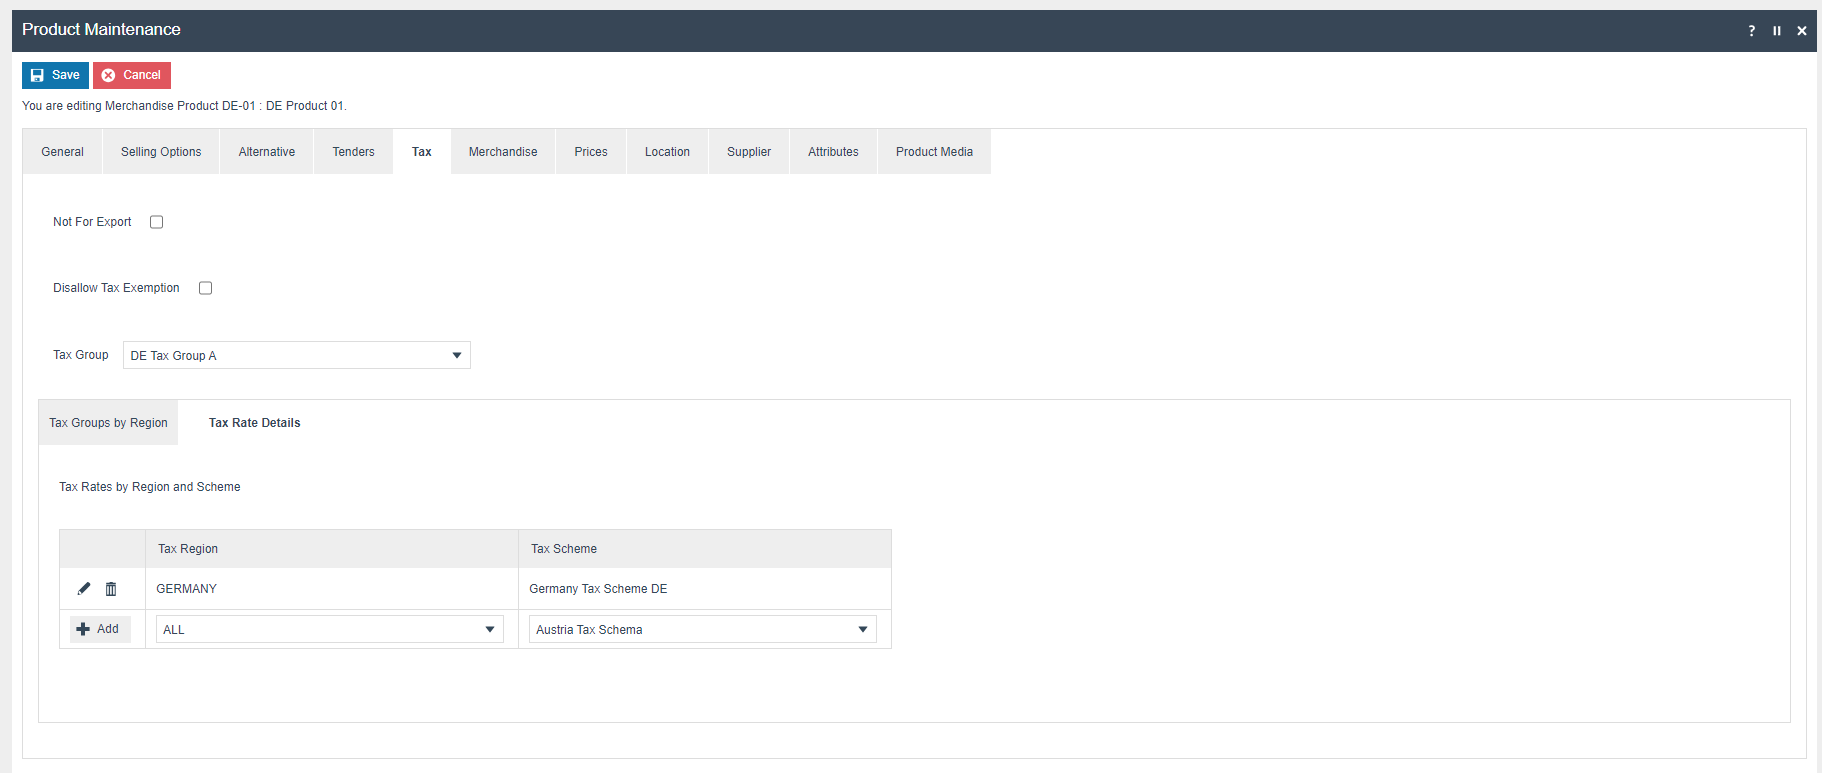
In Tax Rates by Region and
Scheme Section appropriate Tax Rate should be defined.
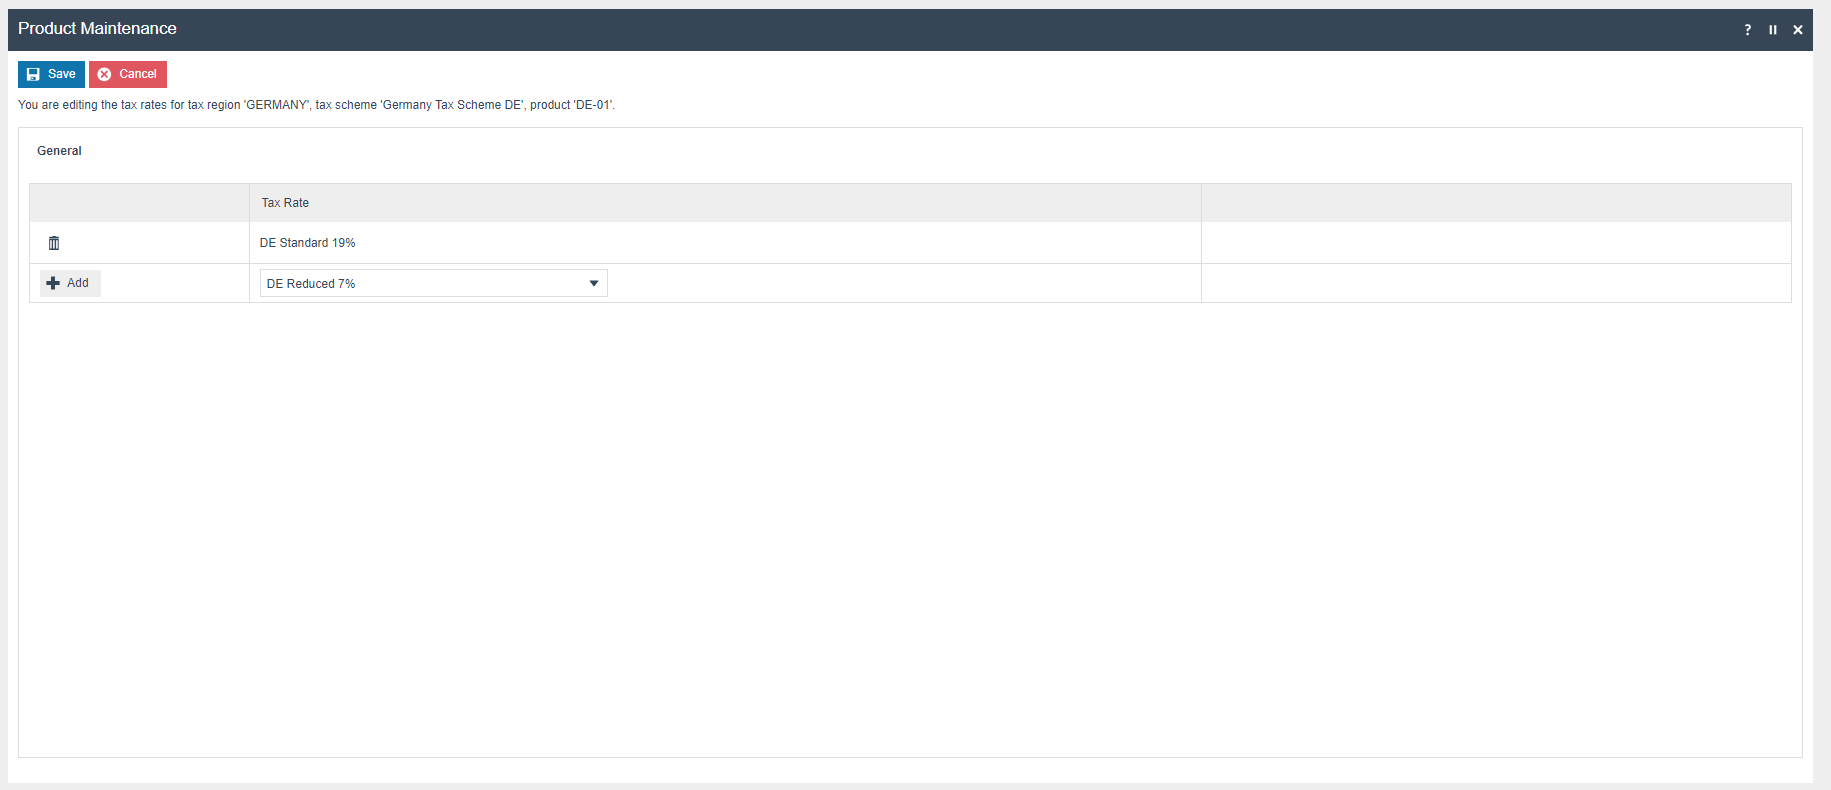
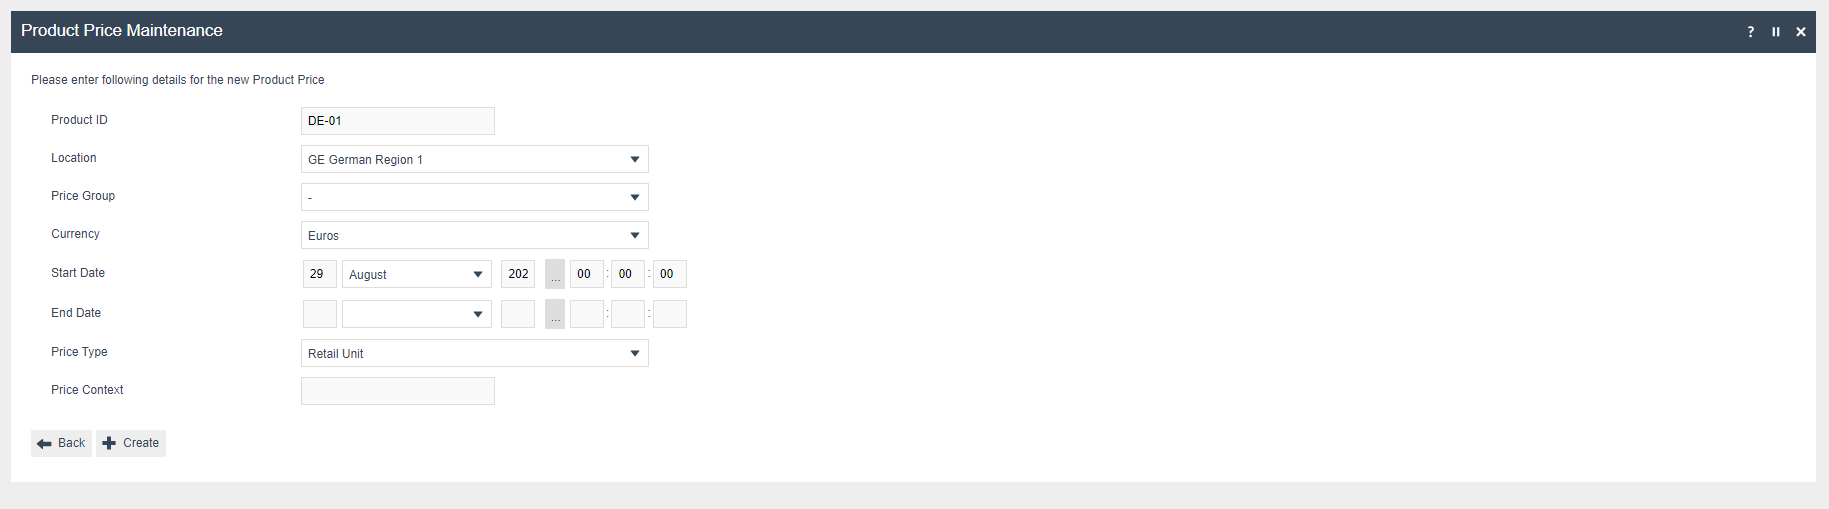
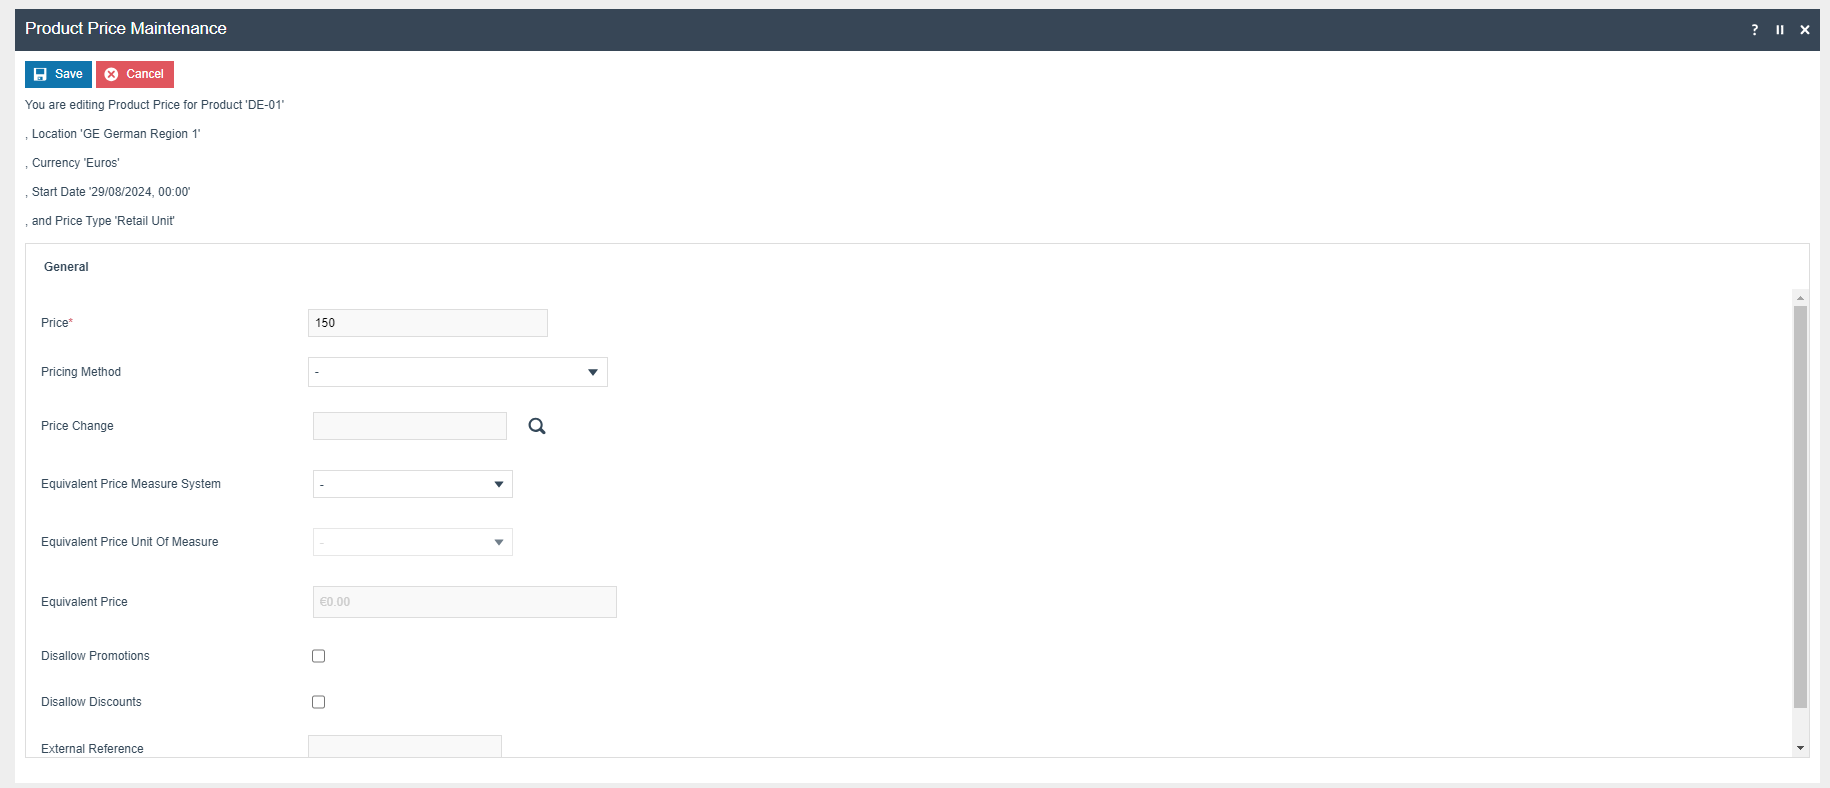
In the Price Section below price information should be configured for each product.
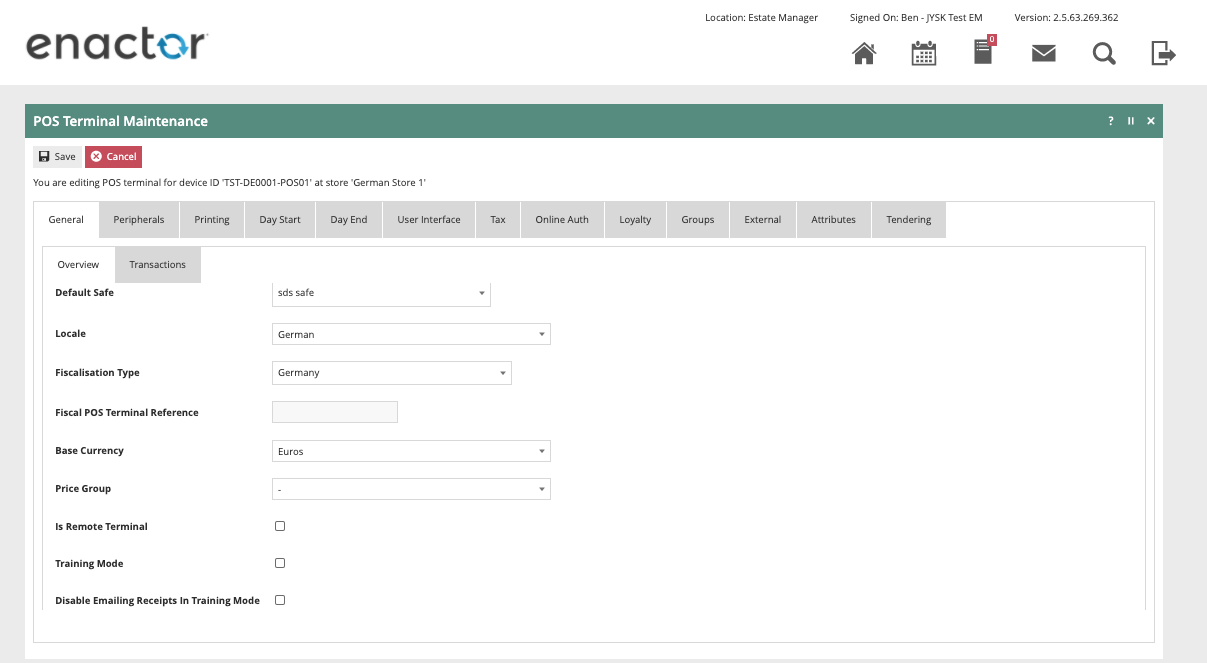
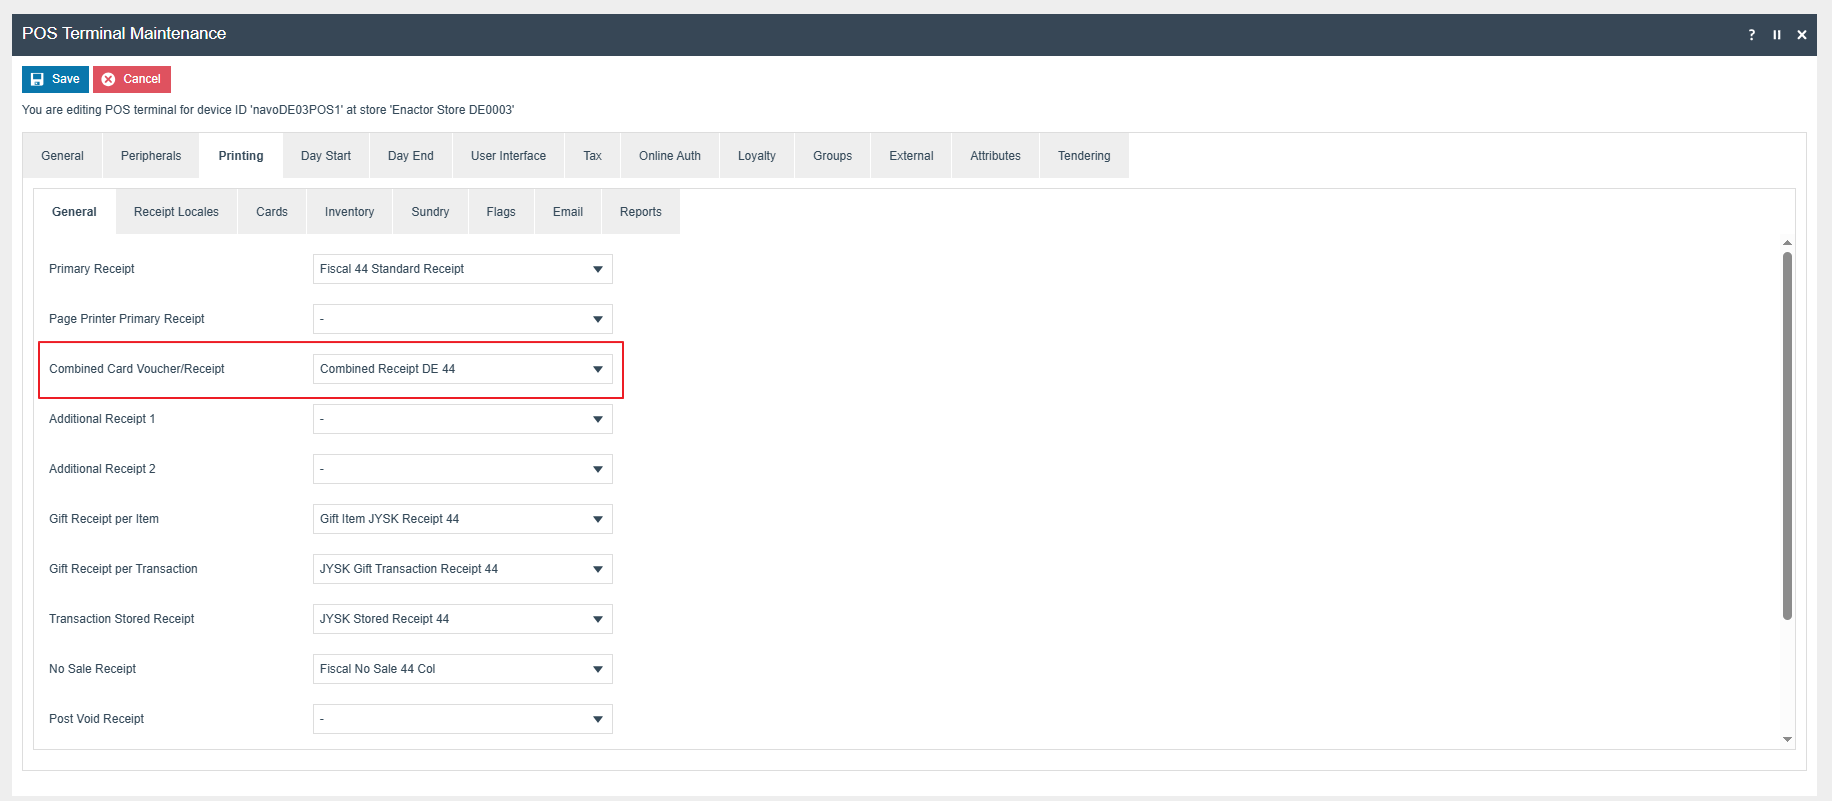
POS Terminal Template
The POS Terminal Template used by all devices in Germany must be configured to have the fiscalisation Type set to Germany. Currency should be set to Euros and Locale to German.
The primary Receipt should be set to Fiscal 44 Standard Receipt and no sale receipt should be set to Fiscal No Sale 44 Col.
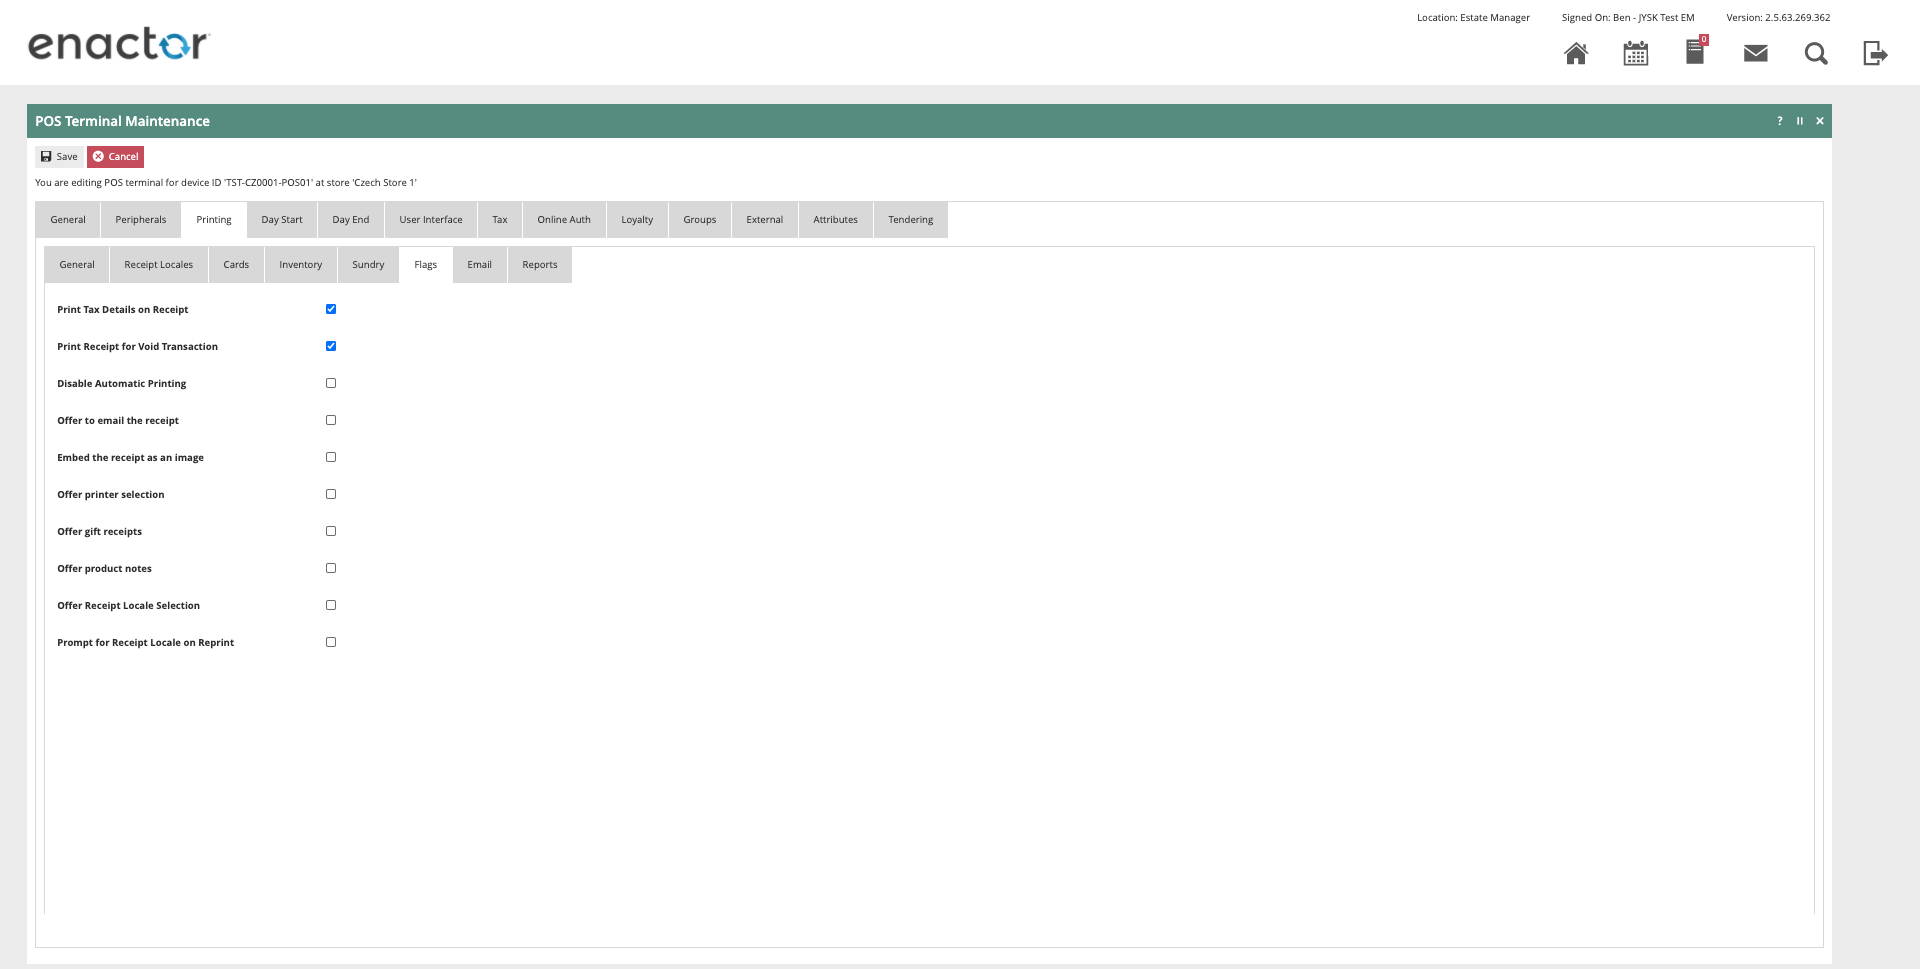
The ‘Print Tax Details on Receipt’ flag withing the printing > flags tab should be ticked.
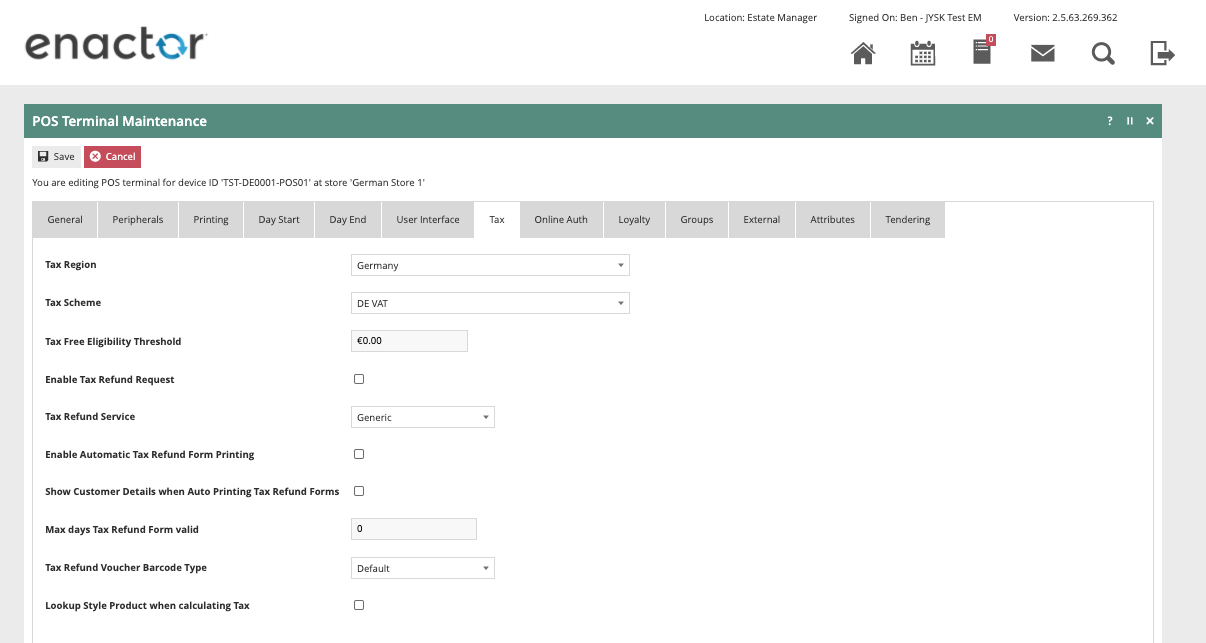
Within the Tax section the Tax region should be set to Germany and the tax scheme to the German tax scheme configured in the previous section.
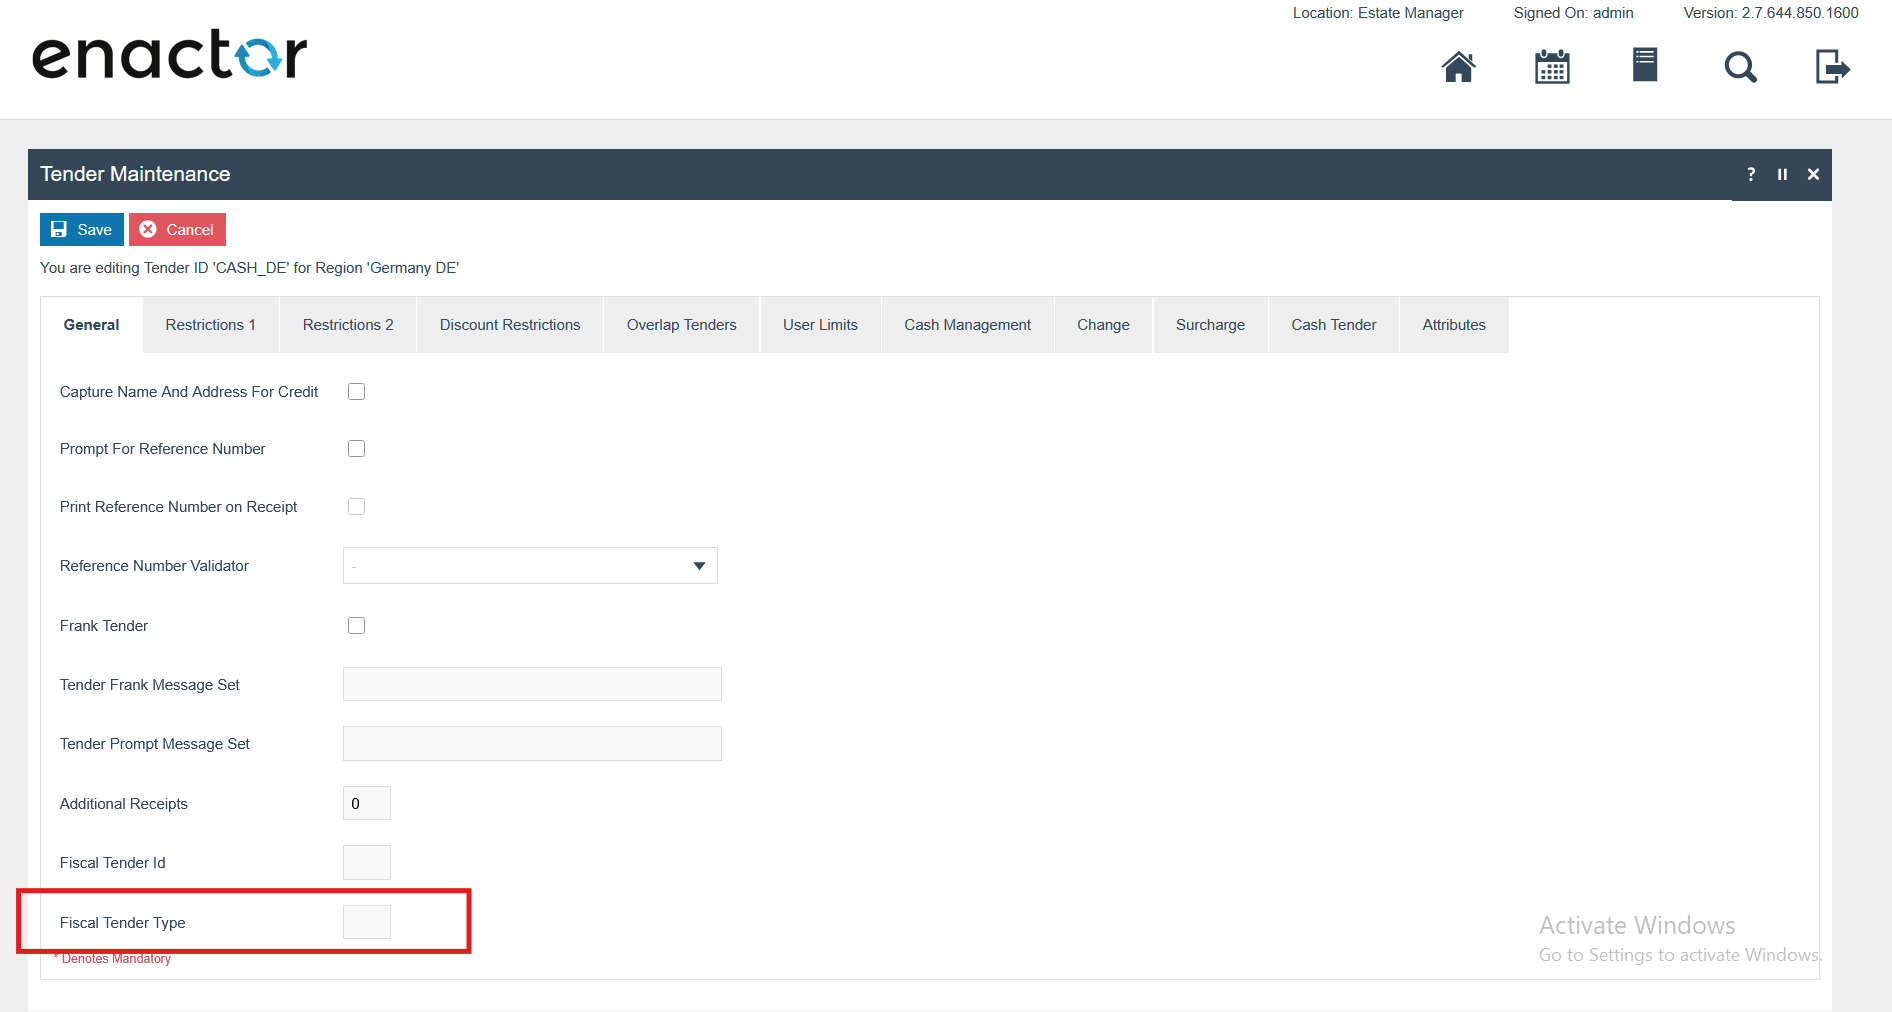
Tenders
Do not put any value to the Fiscal Tender Type Field. (This will cause missing data in some of the CSV files)
Fiskaly Configuration
Ensure the following fiscal configuration changes are applied to all German devices in preparation for the upcoming go-live.
Fiskaly Portal Changes
Login to the Fiskaly Portal via the url below.
fiskaly Dashboard - KassenSichV and RKSV Management
Studio
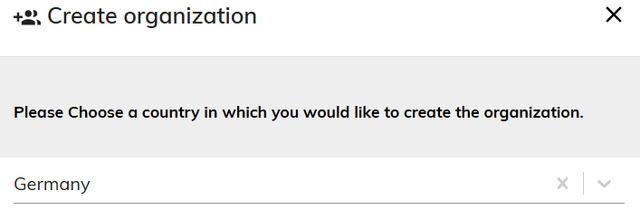
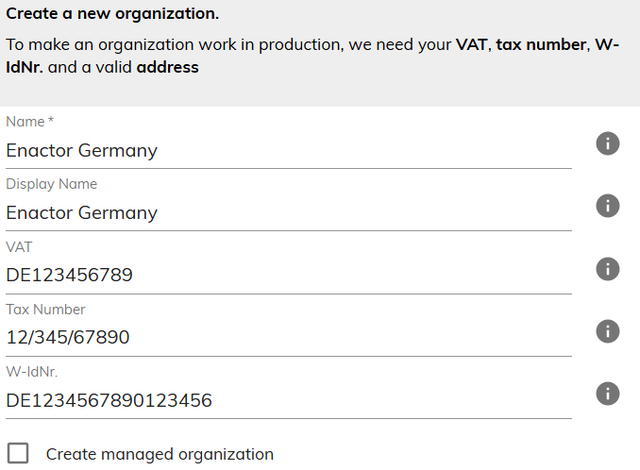
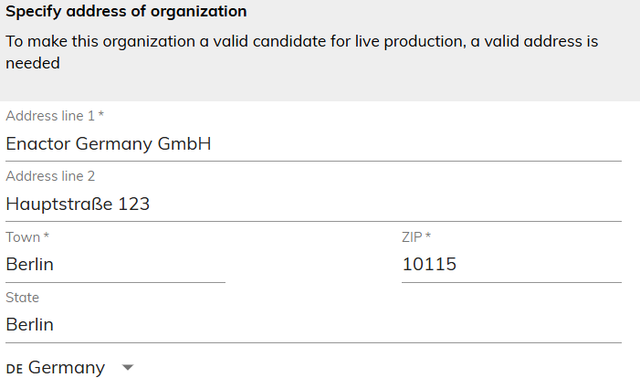
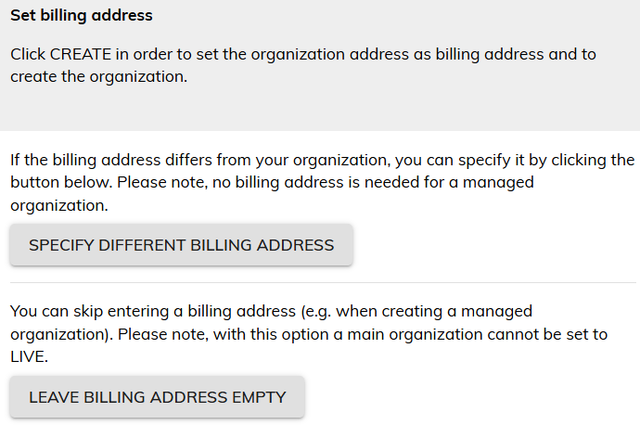
Navigate to Settings → Organization Management → Create New Organization
The details in the Organization section below should be filled in. (Refer to the example below)
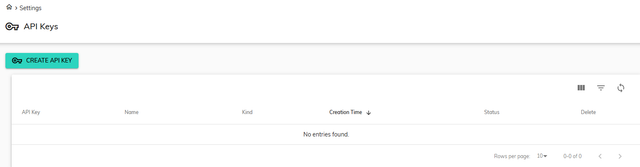
Navigate to Settings → API Keys → Create API Key
Create a New API Key
The new API Key and API Secret should be saved before closing this window, as the API Secret is only visible immediately after creating a new API Key.
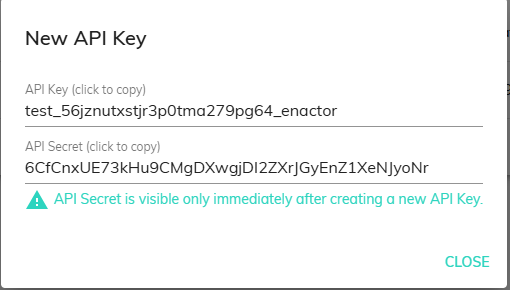
The API Key and API Secret values should be added within Account Credentials as described below.
Account Credentials for TSEModule
A new account credential “GERMAN_FISKALY_TSE” should be created in the Account Credential Maintenance.
Within the “General” tab, the following properties should be added.
| Name | Account Type | Is Live |
|---|---|---|
| Fiskaly Account Credentials | Fiskaly | true |
Within the “Other Properties” tab, add the following properties.
| Property Key | Type | Value | Comments |
|---|---|---|---|
| ADMIN_PWD | String | Eg: 123456 (Should be > = 6 characters) | Used to run “Authenticate Admin” Tse Operation Type while registering the fiscal locations. |
| API_KEY | String | The API Key of the TSE. | Default to TSE Module |
| API_SECRET | String | The API Secret of the TSE. | Default to TSE Module |
| url | String | https://kassensichv-middleware.fiskaly.com/api/v2 | Fiskaly End Point URL |
| Proxy.Enabled | String | true | Enable proxy settings |
| OBLIGATION_URL | String | https://kassensichv.fiskaly.com/submission-api/v1 | Fiskaly End Point URL for reporting Obligations (This is needed for the obligation solution only) |
Option Set Maintenance Changes
Related to the Type: Fiscal Type Attributes
Navigate to Attribute / Option Set Maintenance.
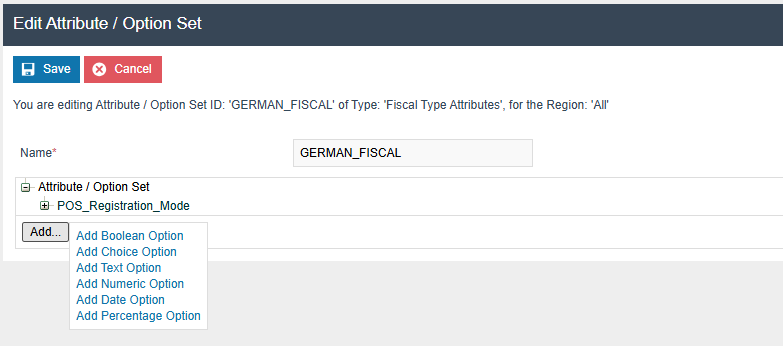
A new Option Set should be created with the following properties for the Fiscal Type Maintenance Type. Although users have the flexibility of exporting the Option Set through the File export maintenance and uploading via File import maintenance in Estate Manager.
| Attribute / Option Set ID | Type | Region |
|---|---|---|
| GERMAN_FISCAL | Fiscal Type Attributes | All |
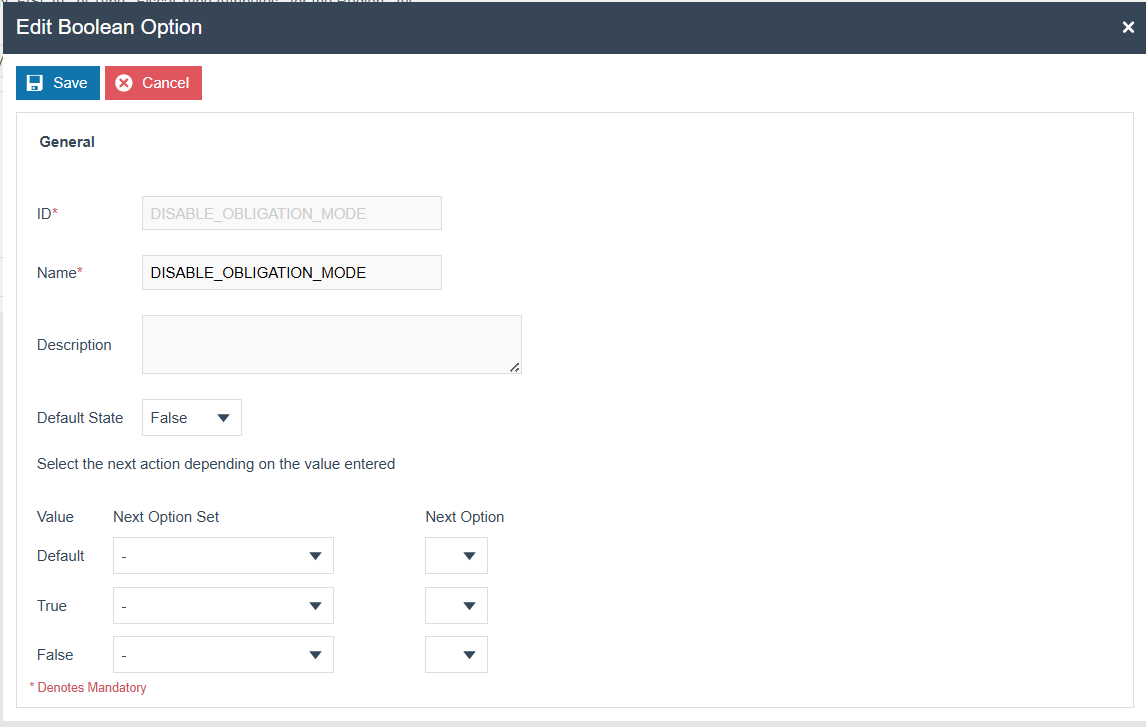
Add a Boolean option using the “Add” button.
Set the option name and ID as “DISABLE_OBLIGATION_MODE”. (Mandatory configuration to turn off obligation mode: It will work in obligation mode if it is not set or unticked. This flag should be ticked to turn off the obligation mode.
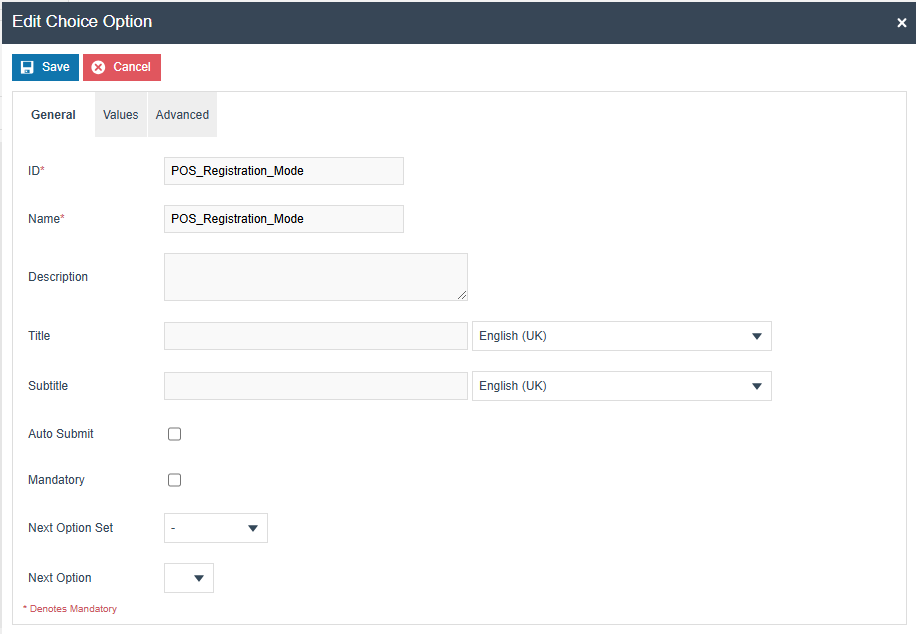
Add a choice option using the “Add” button.
Add a choice option using the “Add” button.
Set the option name and ID as “POS_Registration_Mode”. (Optional
configuration: It will work as automatic if it is not set)
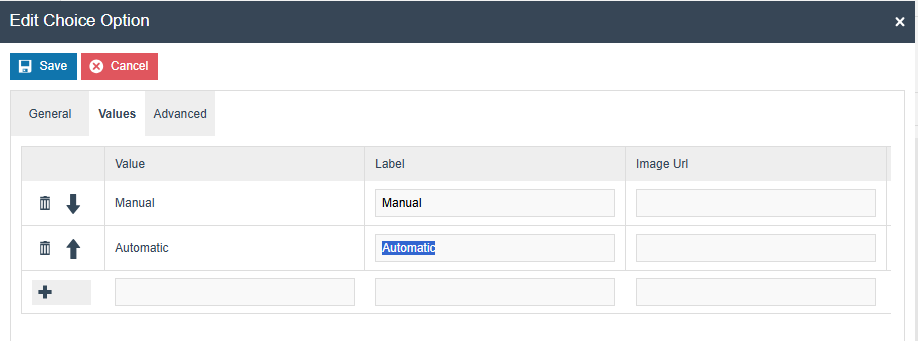
Enter below Value and Label (Manual and Automatic) and pairs add them using the “+” button.
Add a Boolean option using the “Add” button.
Set the option name and ID as
“DISABLE_OBLIGATION_MODE”. (This flag will disable the obligation
mode operations in both Estate Manager and POS). This should be
broadcast to
POS.
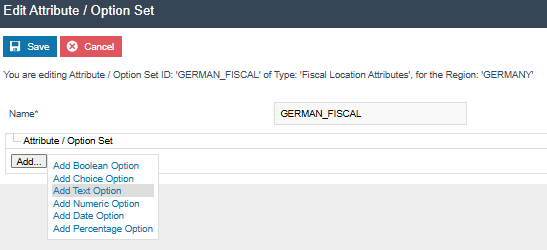
Related to the Type: Fiscal Location Attributes
Navigate to Attribute / Option Set Maintenance.
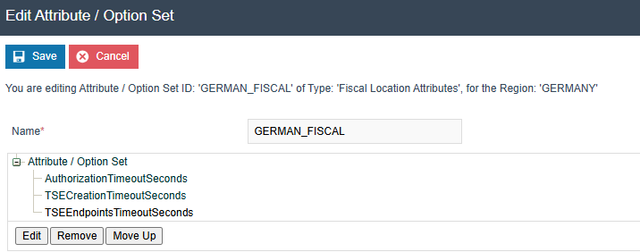
A new Option Set should be created with the following properties for the Fiscal location Maintenance Type.
| Attribute / Option Set ID | Type | Region |
|---|---|---|
| GERMAN_FISCAL | Fiscal Location Attributes | Region of your POS Location |
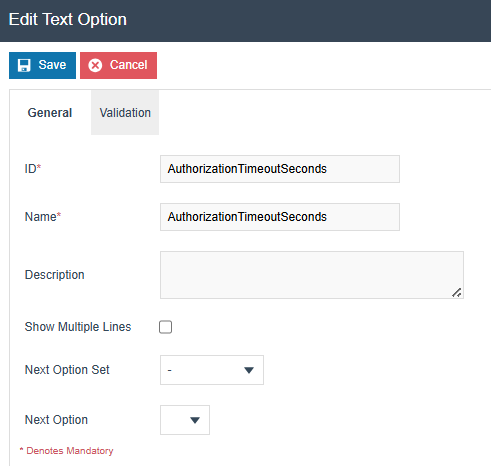
A text option should be added using the “Add” button, and the following 3 text options should be added. The same text should be used for both ID and name of each option.
-
AuthorizationTimeoutSeconds(Optional : default value is 30)
-
TSECreationTimeoutSeconds(Optional : default value is 30)
-
TSEEndpointsTimeoutSeconds(Optional : default value is 30)
Add a text option using the “Add” button.Then set the ID and Name as “STATUS”.

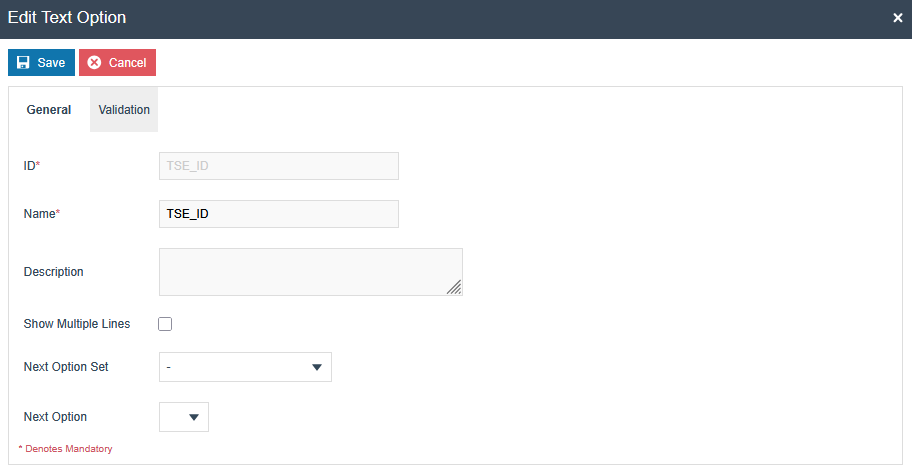
Add a text option using the “Add” button.Then set the ID and Name as “TSE_ID”.
Add a text option using the “Add” button.Then set the ID and Name as “ADMIN_PUK”.

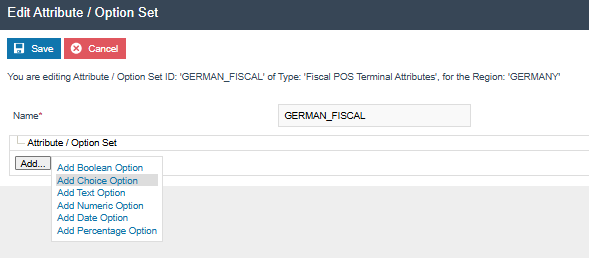
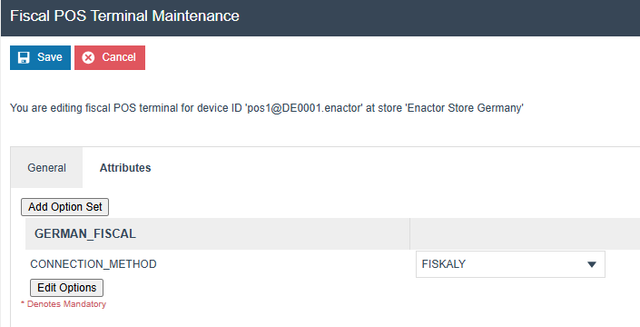
Related to the Type: Fiscal POS Terminal Attributes
Navigate to Attribute / Option Set Maintenance.
A new Option Set should be created with the following properties for the Fiscal POS Terminal Maintenance Type. Although users have the flexibility of exporting the Option Set through the File export maintenance and uploading via File import maintenance in Estate Manager.
| Attribute / Option Set ID | Type | Region |
|---|---|---|
| GERMAN_FISCAL | Fiscal POS Terminal Attributes | Region of your POS Location |
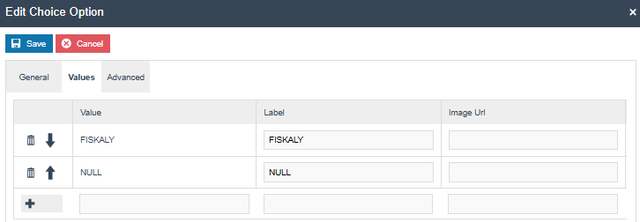
Add a choice option using the “Add” button.
Set the option name and ID as “CONNECTION_METHOD”.
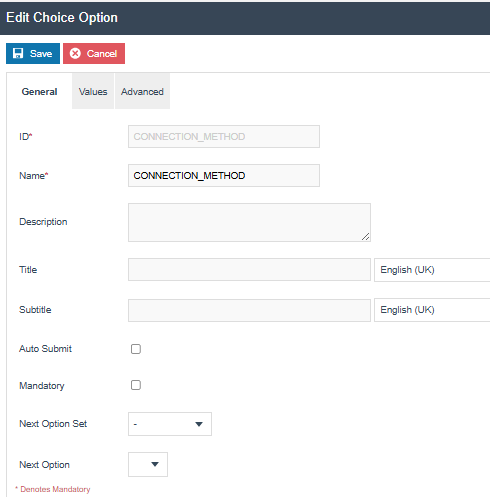
Enter below Value and Label pairs (FISKALY and NULL) and add them using the “+” button.
Add a choice option using the “Add” button.
Set the option name and ID as “POS_Registration_Mode”. (Optional configuration: It will work as automatic if it is not set)
If the TSE is registered but the client is not, the POS checks the POS_Registration_Mode configuration—first precedence will be given to the Fiscal POS Terminal attributes, then to the Fiscal Type attributes. If set to Manual, the user is prompted to register; selecting YES proceeds with registration, while NO starts the POS without it. If set to Automatic or not specified, the POS registers the client automatically via the EM.
Enter below Value and Label (Manual and Automatic) and pairs add them using the “+” button.
Add a text option using the “Add” button.Then set the ID and Name as “STATUS”.

Add a text option using the “Add” button.Then set the ID and Name as “CLIENT_ID”.

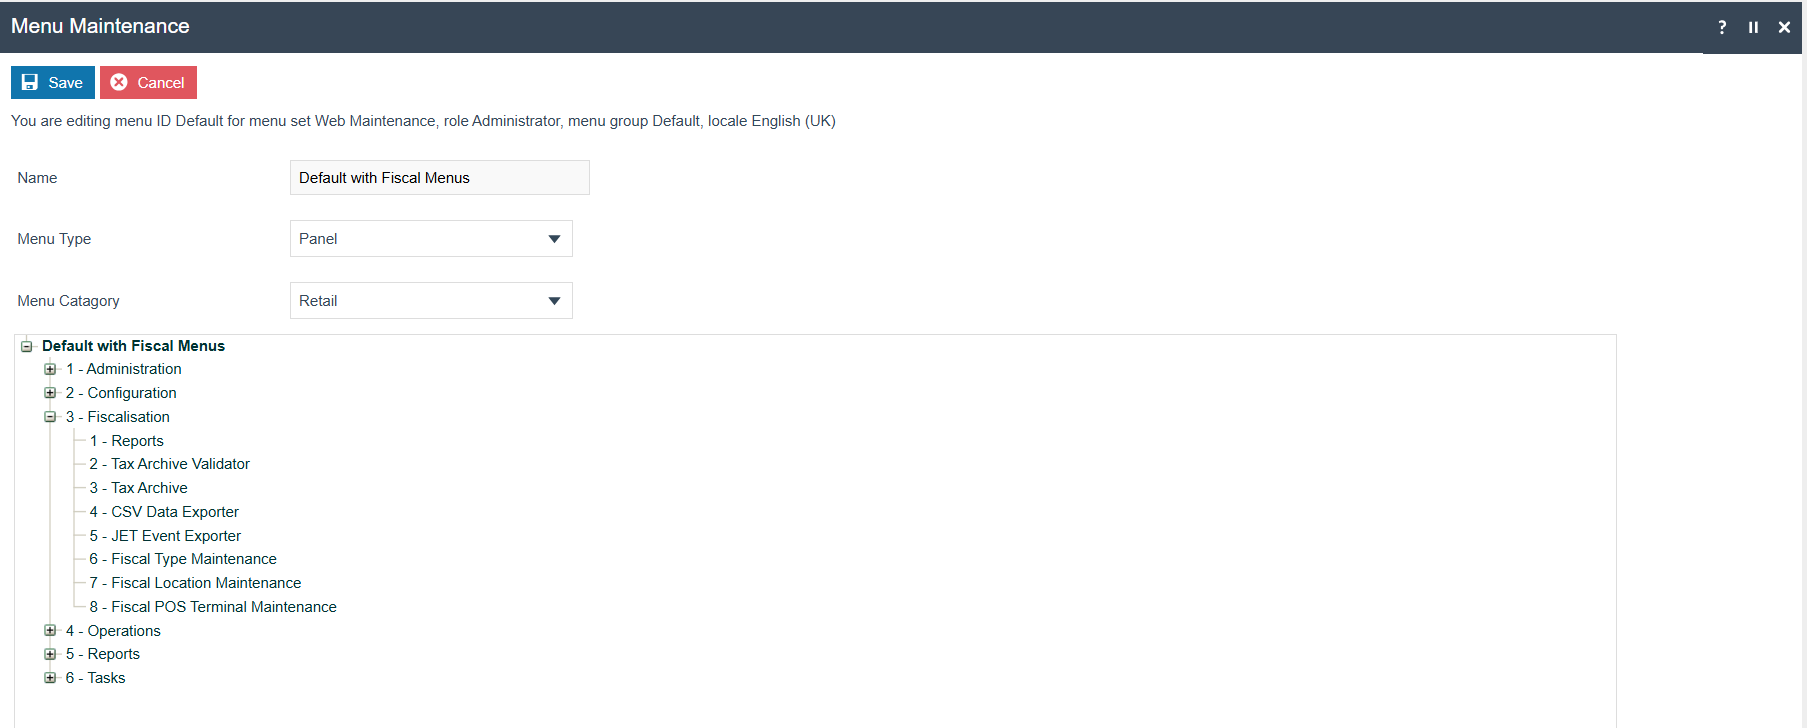
Menu Changes
The following Menus should be configured within the Fiscalisation Folder via Estate Manager.
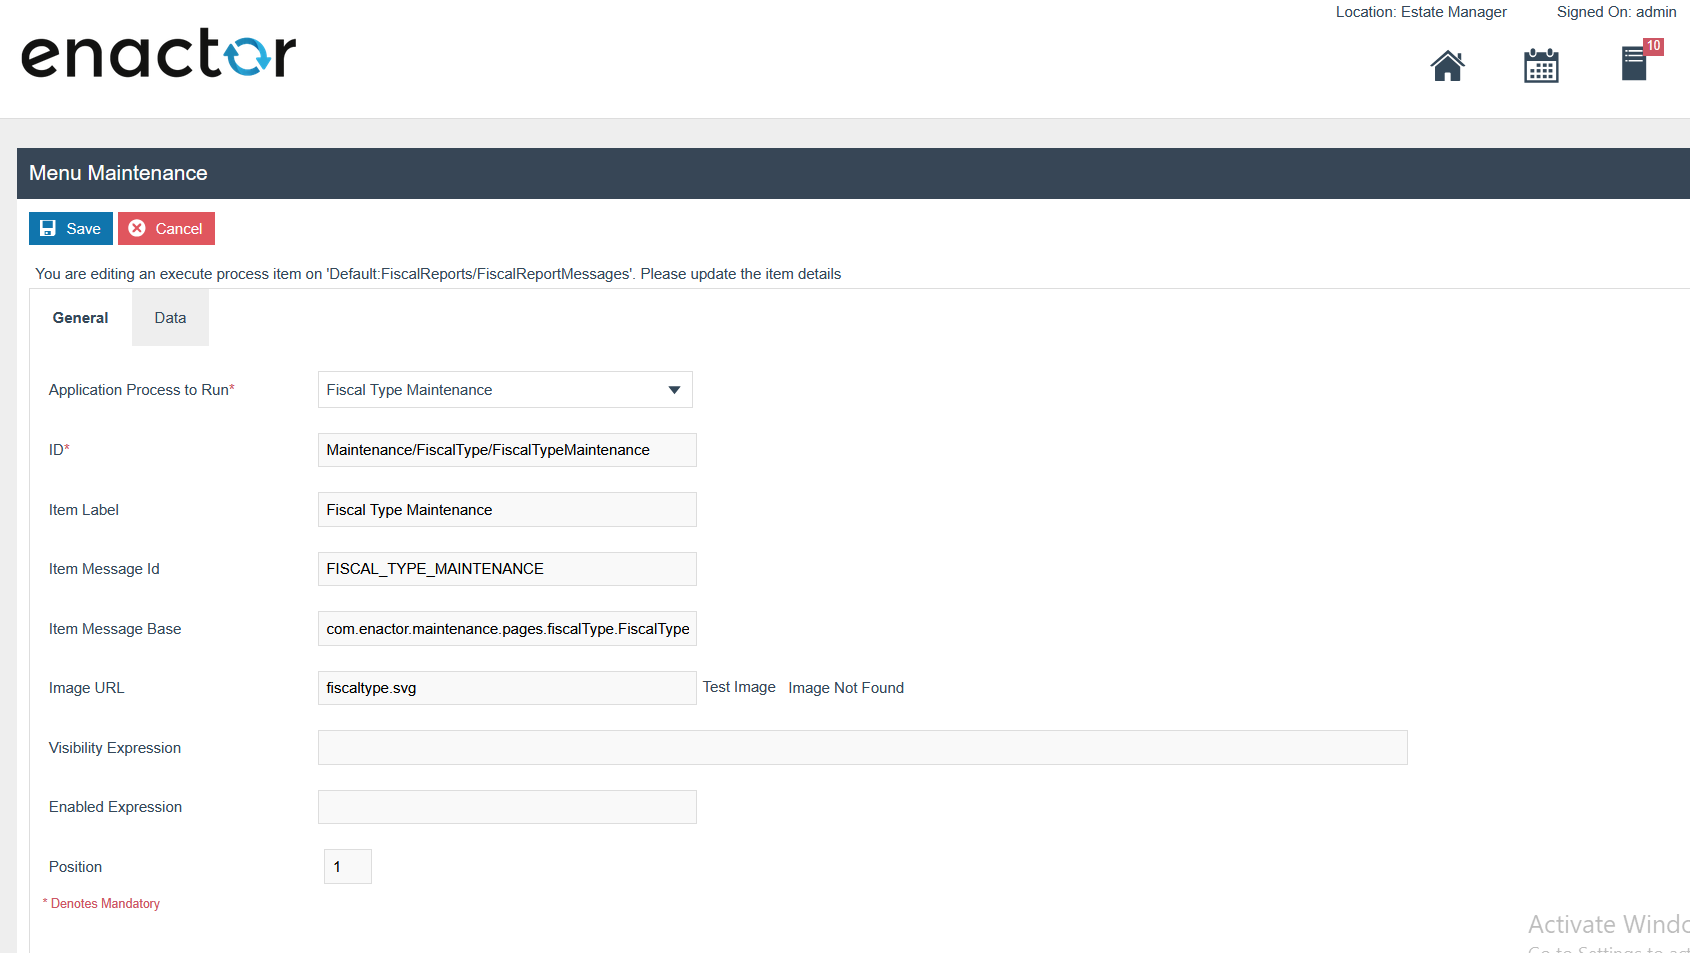
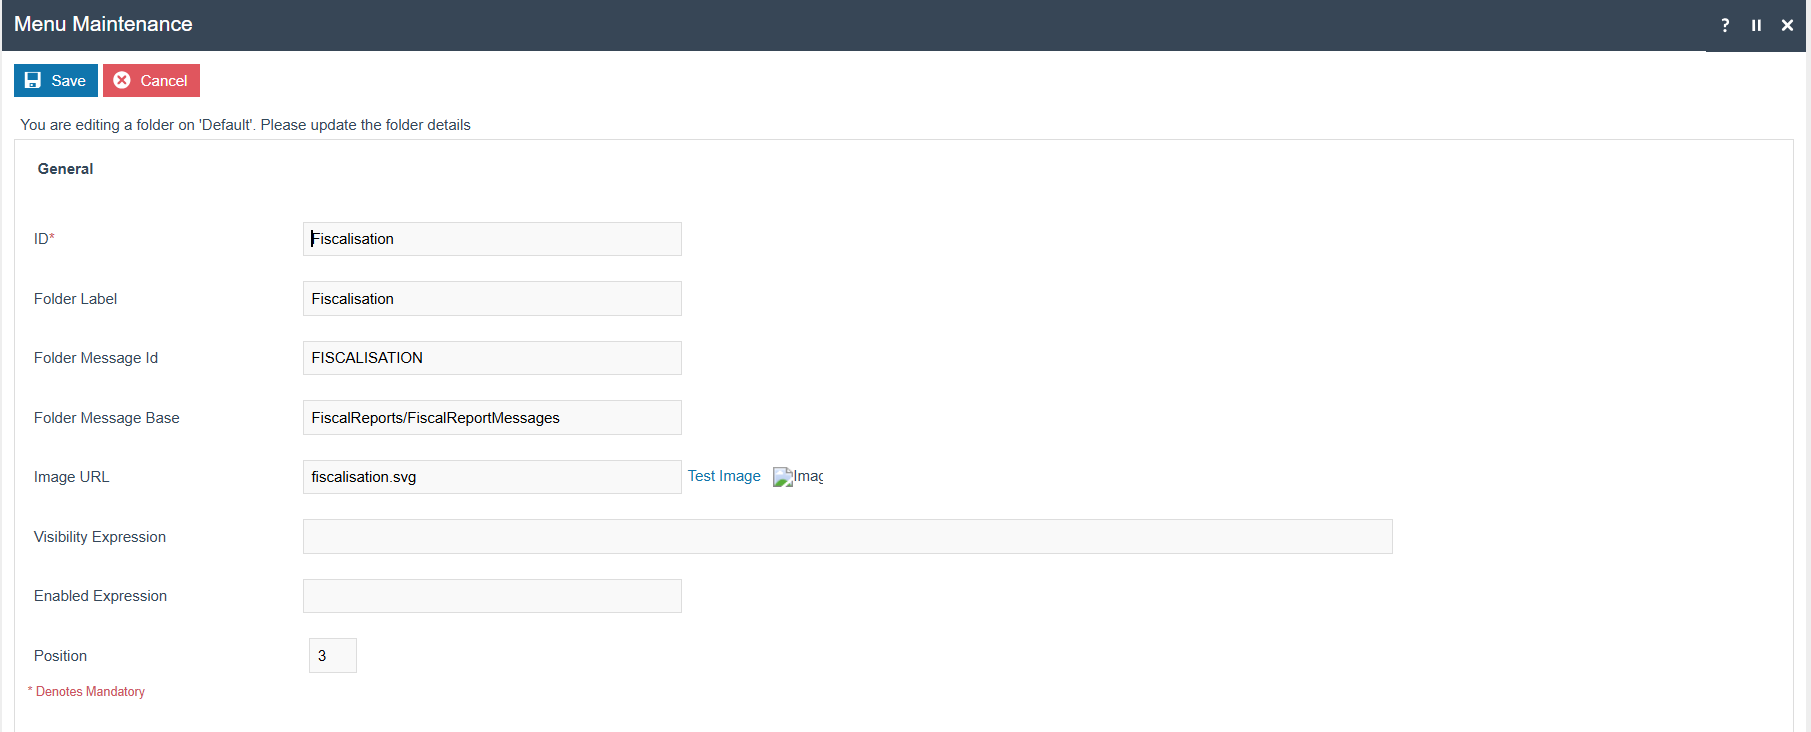
Fiscal Type Maintenance Menu
Within the Fiscalisation folder, the “Add a new Execute Process Item”
option should be selected, and the following configurations should be
added.

Within the General Tab,
-
Application Process to Run - Fiscal Type Maintenance
-
ID -
Maintenance/FiscalType/FiscalTypeMaintenance
-
Item label - Fiscal Type Maintenance
-
Item message ID - FISCAL_TYPE_MAINTENANCE
-
Item Message Base -
com.enactor.maintenance.pages.fiscalType.FiscalTypeMaintenanceMessages
-
Image URL - fiscaltype.svg
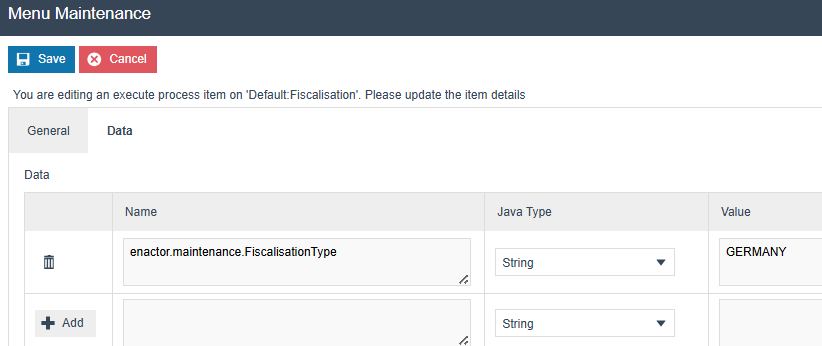
Within the Data tab, the name and value should be entered.
-
Name - enactor.maintenance.FiscalisationType
-
Value - GERMANY (This should be your Fiscalisation Type)
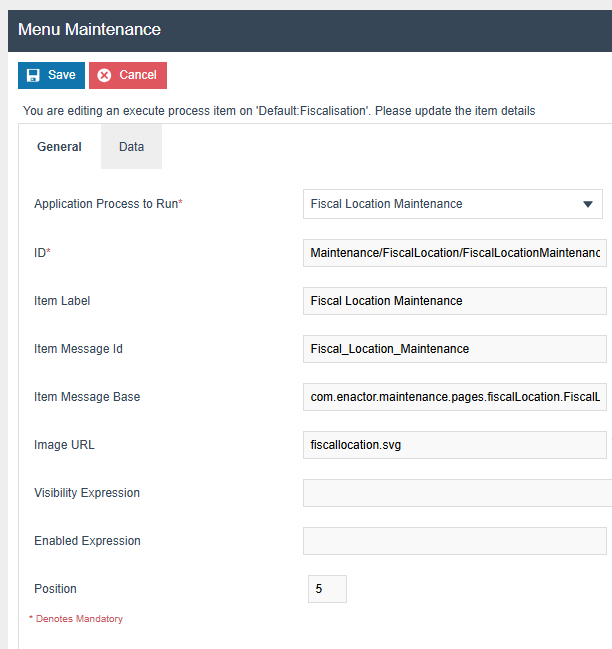
Fiscal Location Maintenance Menu
Within the Fiscalisation folder, the “Add a new Execute Process Item” option should be selected, and the following configurations should be added.
-
Application Process to Run - Fiscal Location Maintenance
-
ID -
Maintenance/FiscalLocation/FiscalLocationMaintenance
-
Item label - Fiscal Location Maintenance
-
Item message ID - FISCAL_LOCATION_MAINTENANCE
-
Item Message Base -
com.enactor.maintenance.pages.fiscalLocation.FiscalLocationMaintenanceMessages
-
Image URL - fiscallocation.svg
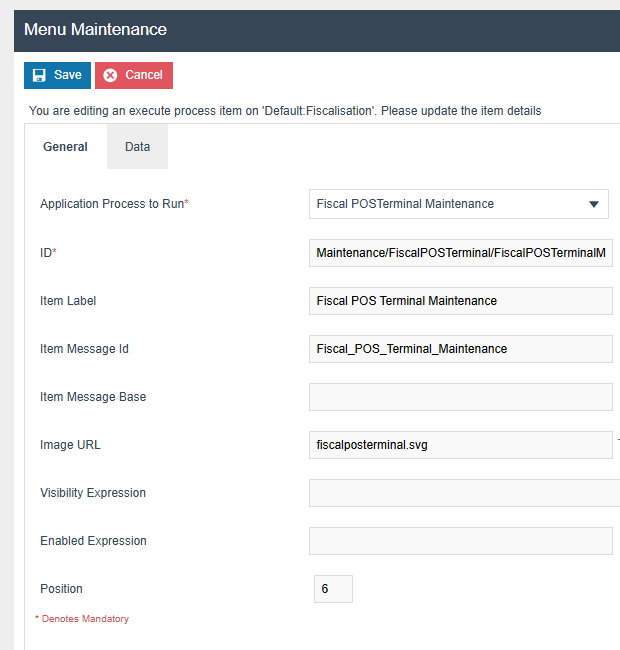
Fiscal POS Terminal Maintenance Menu
Within the Fiscalisation folder, the “Add a new Execute Process Item” option should be selected, and the following configurations should be added.
-
Application Process to Run - Fiscal POS Terminal Maintenance
-
ID -
Maintenance/FiscalPOSTerminal/FiscalPOSTerminalMaintenance
-
Item label - Fiscal POS Terminal Maintenance
-
Item message ID - FISCAL_POS_TERMINAL_MAINTENANCE
-
Image URL - fiscalposterminal.svg
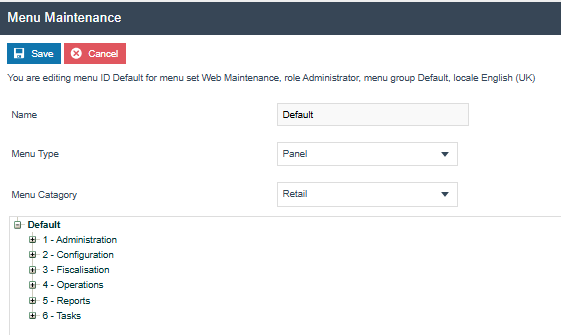
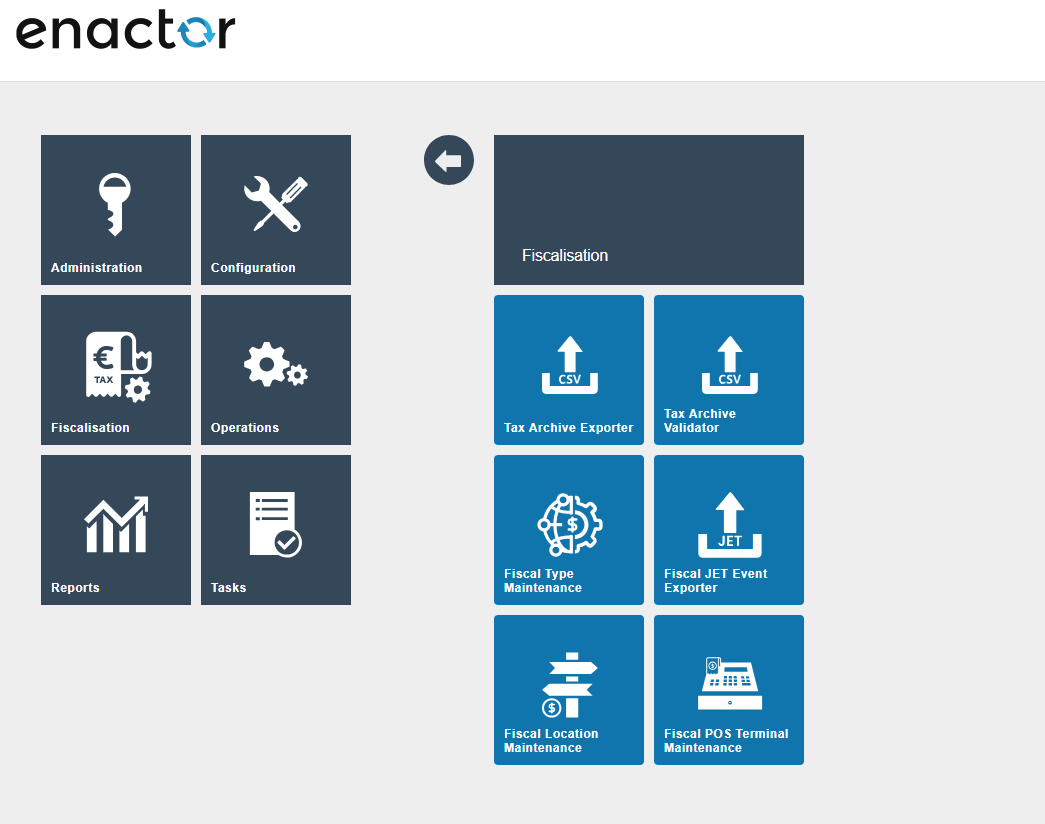
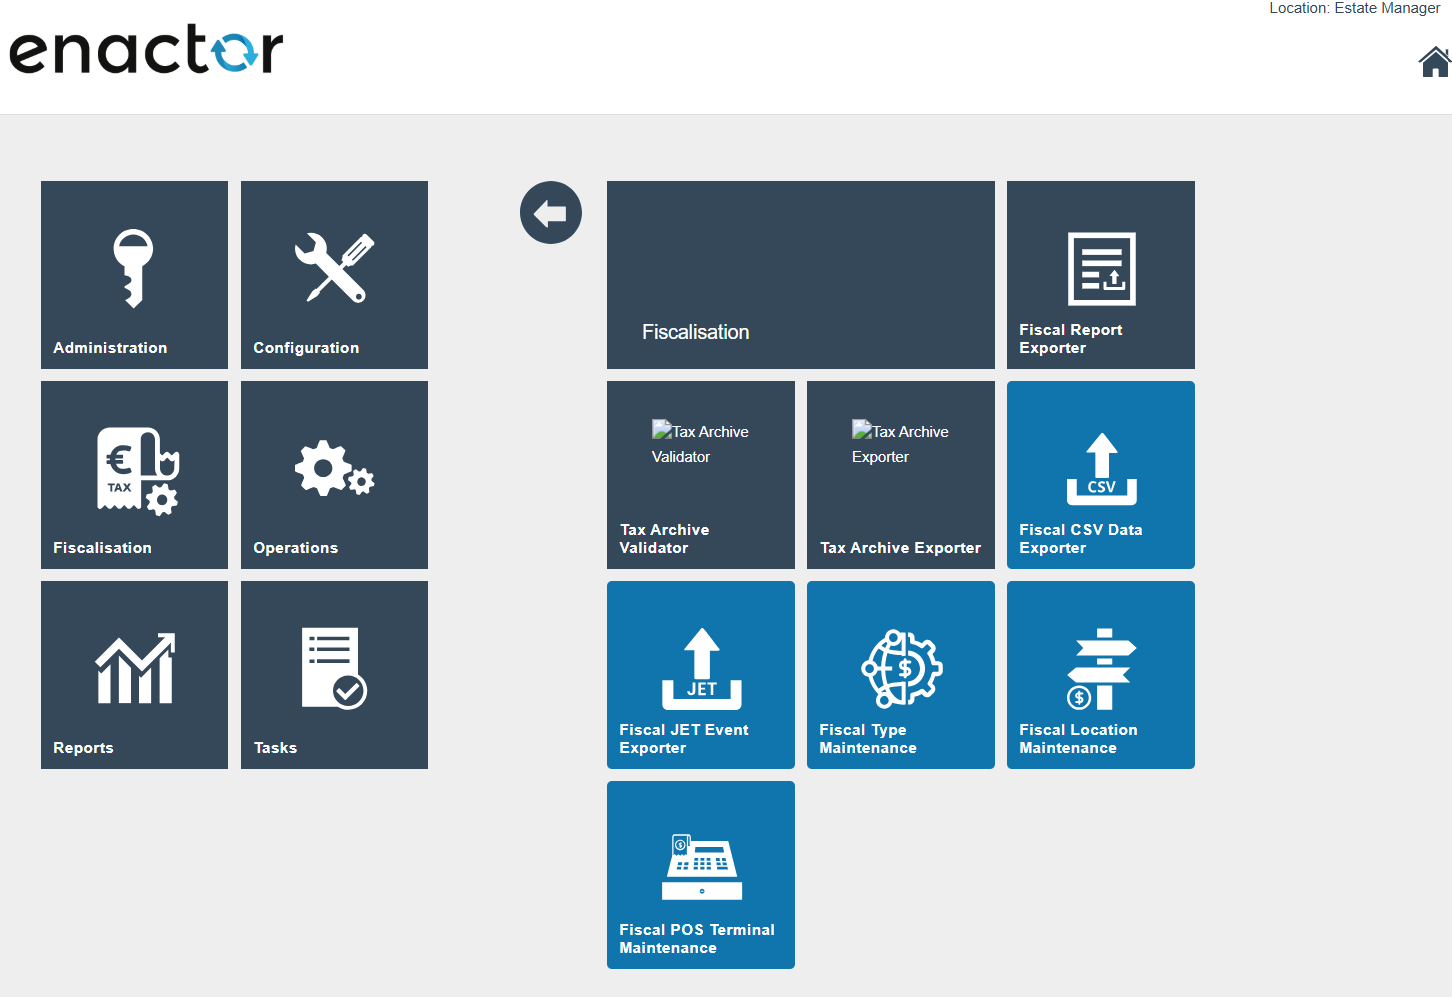
After setting the Menu configurations, the Fiscalisation folder should be displayed as shown below.
New Privileges
The following privileges will need to be configured against the appropriate roles and broadcast to the German devices. Consideration should be given to whether it is desirable for all operators to have all of these privileges or if some should only be granted to managers. For more detail on Privileges and roles refer to the How-To Guide Configuring User, User Roles and User Templates
| Privilege ID | Application Package | Process | Remarks |
|---|---|---|---|
| enactor.fiscalLocationMaintenance.Edit | Fiscal Maintenance | Fiscal Location Maintenance | Mandatory |
| enactor.fiscalLocationMaintenance.List | Fiscal Maintenance | Fiscal Location Maintenance | Mandatory |
| enactor.fiscalLocationMaintenance.New | Fiscal Maintenance | Fiscal Location Maintenance | Mandatory |
| enactor.fiscalLocationMaintenance.Remove | Fiscal Maintenance | Fiscal Location Maintenance | Mandatory |
| enactor.fiscalLocationMaintenance.View | Fiscal Maintenance | Fiscal Location Maintenance | Mandatory |
| enactor.fiscal.fiskaly.RegisterAllUnregisteredLocations | Fiscal Maintenance | Fiscal Location Maintenance | This is required for Register all the unregistered locations only |
| enactor.fiscal.fiskaly.RegisterAllUnregisteredLocationsAndDevices | Fiscal Maintenance | Fiscal Location Maintenance | This is required to register all unregistered locations with the internal devices |
| enactor.fiscal.fiskaly.RegisterLocation | Fiscal Maintenance | Fiscal Location Maintenance | This is required to register the selected location only |
| enactor.fiscal.fiskaly.RegisterLocationAndDevices | Fiscal Maintenance | Fiscal Location Maintenance | This is required to register the selected location with internal devices |
| enactor.fiscalLocationMaintenance.DisableTSEAllowed | Fiscal Maintenance | Handle Fiscal Location Operations | Mandatory - This is required only for the users who are allowed to disable the TSE |
| enactor.fiscal.fiskaly.ClientDeregistrationAllowed | Fiscal Maintenance | Handle FiscalPOSTerminal Operations | Mandatory - This is required only for the users who are allowed to deregister the client |
| enactor.fiscalPOSTerminalMaintenance.Edit | Fiscal Maintenance | Fiscal POSTerminal Maintenance | Mandatory |
| enactor.fiscalPOSTerminalMaintenance.List | Fiscal Maintenance | Fiscal POSTerminal Maintenance | Mandatory |
| enactor.fiscalPOSTerminalMaintenance.New | Fiscal Maintenance | Fiscal POSTerminal Maintenance | Mandatory |
| enactor.fiscalPOSTerminalMaintenance.Remove | Fiscal Maintenance | Fiscal POSTerminal Maintenance | Mandatory |
| enactor.fiscalPOSTerminalMaintenance.View | Fiscal Maintenance | Fiscal POSTerminal Maintenance | Mandatory |
| enactor.fiscal.fiskaly.DeregisterEstablishmentAllowed | Fiscal Maintenance | Edit Fiscal Location | Mandatory |
Set Attribute Values
The values below should be configured within the Fiscal Location Maintenance, Attributes tab.
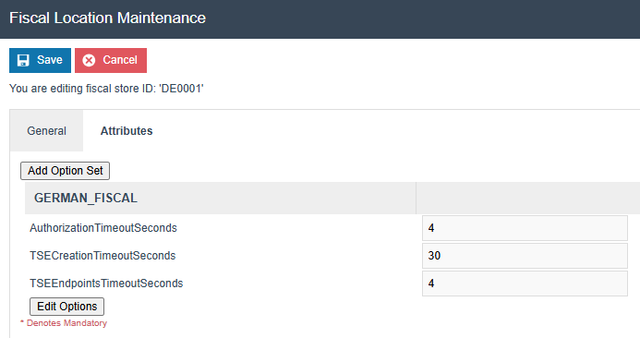
* 30 seconds will be considered as the default timeout if this configuration is not set for all the 3 Timeouts.
The values below should be set within the Fiscal POS Terminal Maintenance, Attributes tab.
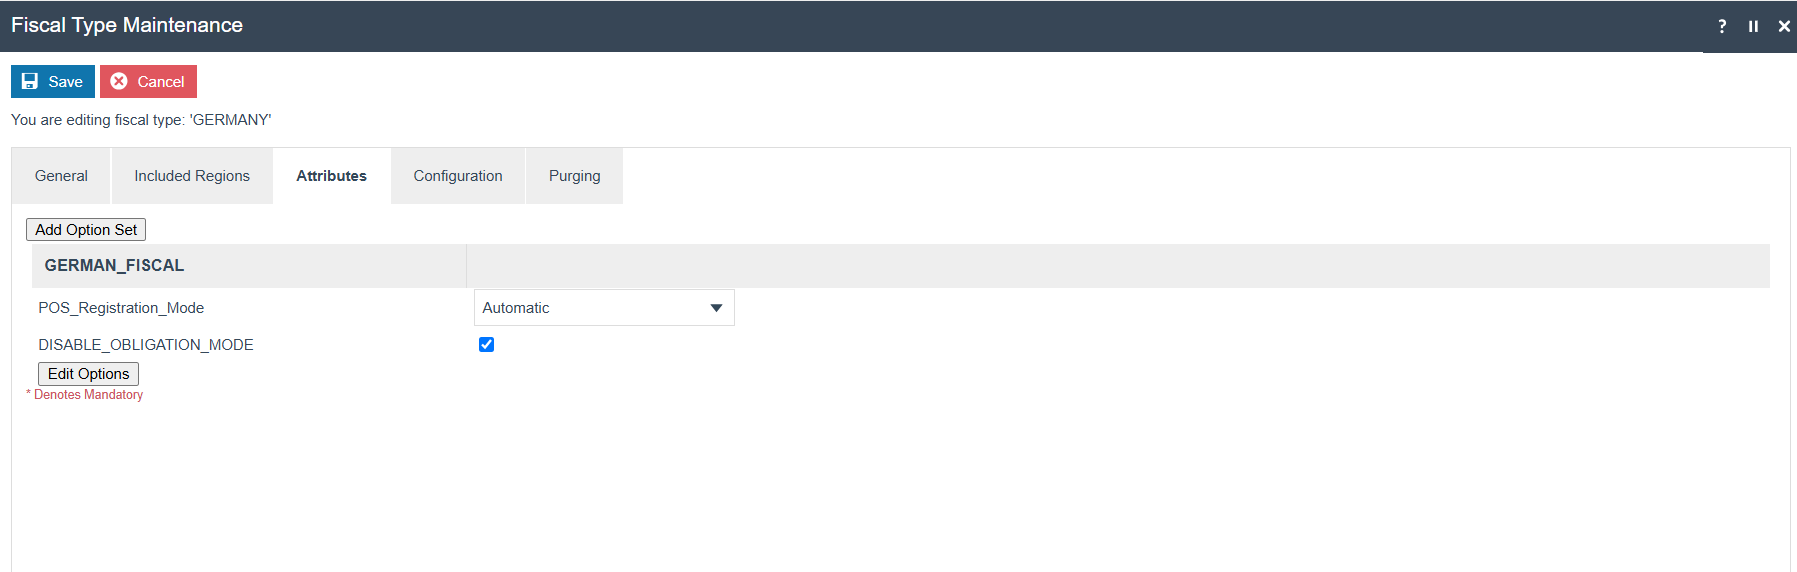
Do the following configuration changes within the the “GERMAN_FISCAL” attribute set and broadcast the FiscalTypeAttribute to the POS.
-
Pos Registration Mode : Add manual mode if you want to pop up a
message asking whether you want to register the POS in Fiskaly, when the POS startup. Or else keep it blank or add automatic mode.
-
DISABLE_OBLIGATION_MODE : This flag will turn off
the obligation-related operations from Estate Manager and POS.
Fiskaly Estate Manager Maintenance Process Flow
The Fiskaly solution has some new entities for managing the fiscal devices and locations registered with Fiskaly. This section details how to set the Estate Manager up to enable the management of these entities as well as send them to the Fiskaly API.
While configuring the below maintenance users should follow the same order mentioned in the document below. Although users have the flexibility of exporting the Fiscal Location , Fiscal POS Terminal through the File export maintenance and uploading via File import maintenance in Estate Manager. And these changes should broadcast to the appropriate German devices.
Fiscal Type Maintenance
You will be directed to the Fiscal Type Maintenance, based on the fiscalisation type provided within the Fiscal Type Maintenance Menu.
In the General tab, enter a description for your fiscal type.

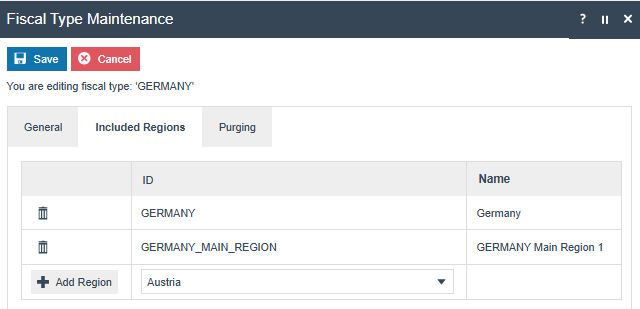
Then, in the Included Region tab, you can add regions to the fiscal type. Be sure to save your changes before exiting.
Do the following configuration changes within the the “GERMAN_FISCAL” attribute set.
-
Pos Registration Mode : Add manual mode if you want to pop up a
message asking whether you want to register the POS in Fiskaly, when the POS startup. Or else keep it blank or add automatic mode.
-
DISABLE_OBLIGATION_MODE : This flag will turn off the obligation
related operations from Estate Manager and POS.
Fiscal Location Maintenance
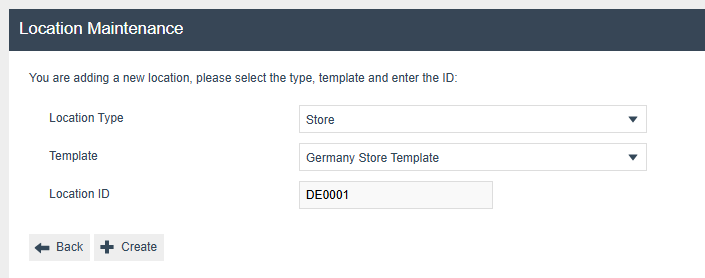
To create a new fiscal location, First you need to create a location from the Location Maintenance.
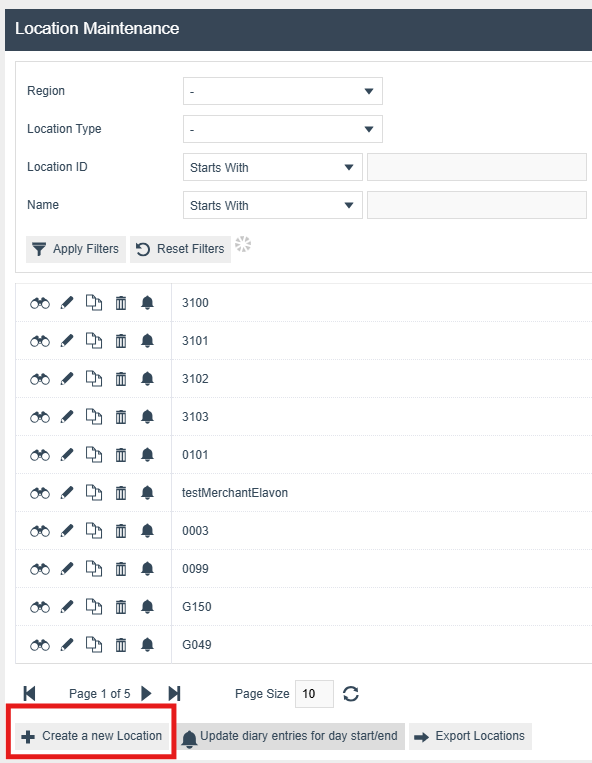
Then, set the Location Type, Template, and Location ID, and click the Create button.
Then Add Details for the Location and Save.
After creating a Location, navigate to Fiscal Location Maintenance and click the "Create a New Fiscal Location" button, then select the created location from the dropdown. After making your selection, press the "Create" button.
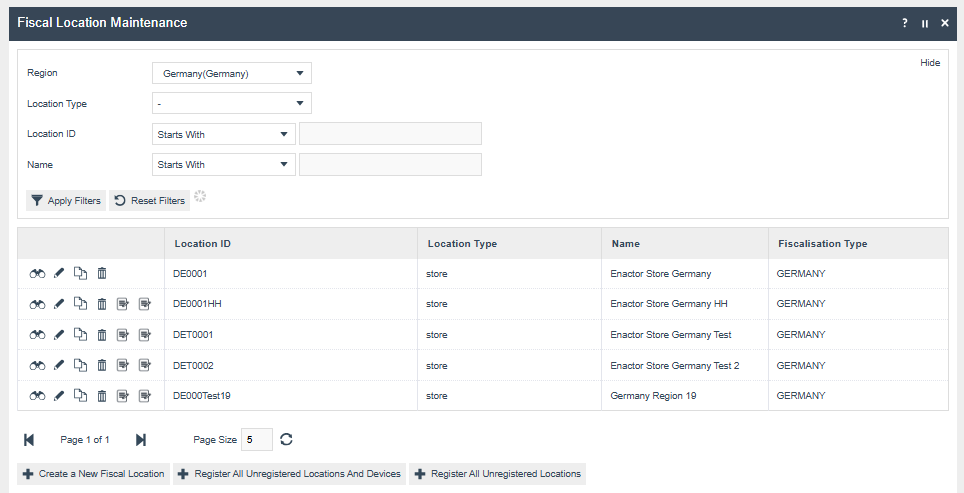

If you add your location's region to a fiscal type from the Fiscal Type Maintenance, that fiscalisation type will be displayed in the "Fiscalisation Type" column.
Click the Edit Button for the Location
![]()
Location level buttons in the Fiscal Location Maintenance entry

“Remove”: This button deletes the fiscal location. This operation is possible only for the locations that do not have a TSE(If it is in non-obligation mode). All registered locations will have a TSE, and to remove it, the TSE must first be disabled using the Disable TSE button in the Configurations tab. It will deregister all the internal clients and disable the TSE, and the Remove operation is possible after that.
“Register Location” : This button registers the selected fiscal location with Fiskaly, ensuring that only the TSE (Technische Sicherheitseinrichtung) for that location is registered, without registering the POS devices. This icon will be visible only for unregistered live fiscal locations and to users with the "enactor.fiscal.fiskaly.RegisterLocation" privilege. TSE details will be saved within the Fiscal Location attributes with the status as “REGISTERED” after the registration.
“Register Location And Devices” : This button registers the TSE for the selected fiscal location and all associated clients as part of the location registration with Fiskaly. It will only be visible for unregistered live fiscal locations and to users with the "enactor.fiscal.fiskaly.RegisterLocationAndDevices" privilege. TSE details will be saved within the Fiscal Location attributes and client details will be saved within the Fiscal POS Terminal attributes with the status as “REGISTERED” after the registration.
Bottom buttons in the Fiscal Location Maintenance
![]()
"Register All Unregistered Locations" : This button registers the unregistered fiscal locations with Fiskaly, ensuring that only the TSE for these locations is registered, without including the POS devices. It checks the isLive status of the locations before proceeding and will only be visible to users with the "enactor.fiscal.fiskaly.RegisterAllUnregisteredLocations" privilege. TSE details will be saved within the Fiscal Location attributes with the status as “REGISTERED” after the registration.
![]()
“Register All Unregistered Locations and Devices” : This button registers the fiscal locations and all associated clients as part of the location registration with Fiskaly. It will only be visible to users with the "enactor.fiscal.fiskaly.RegisterAllUnregisteredLocationsAndDevices" privilege. TSE details will be saved within the Fiscal Location attributes and client details will be saved within the Fiscal POS Terminal attributes with the status as “REGISTERED” after the registration.
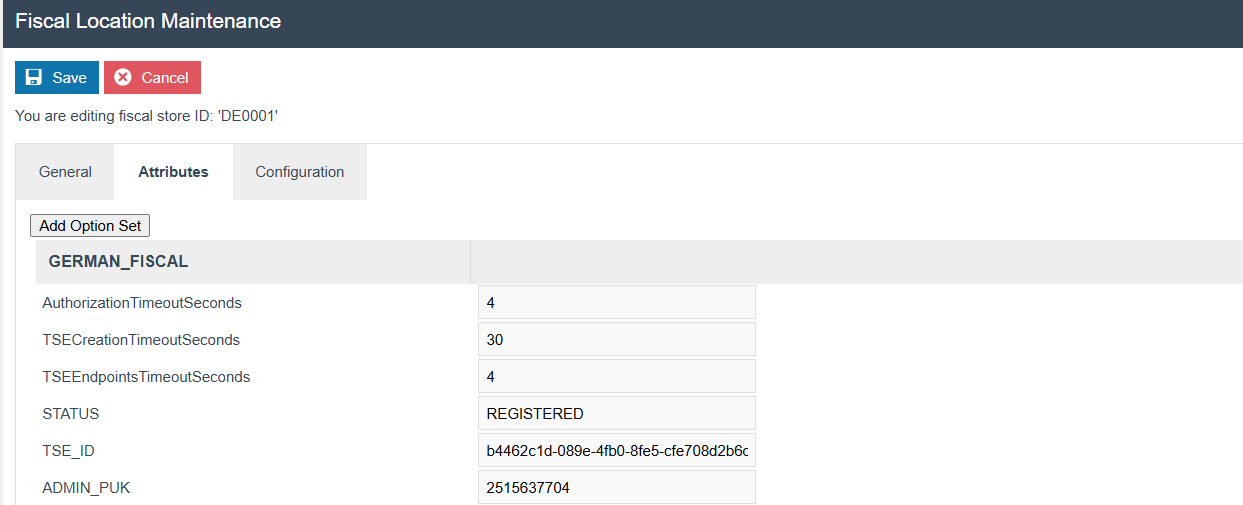
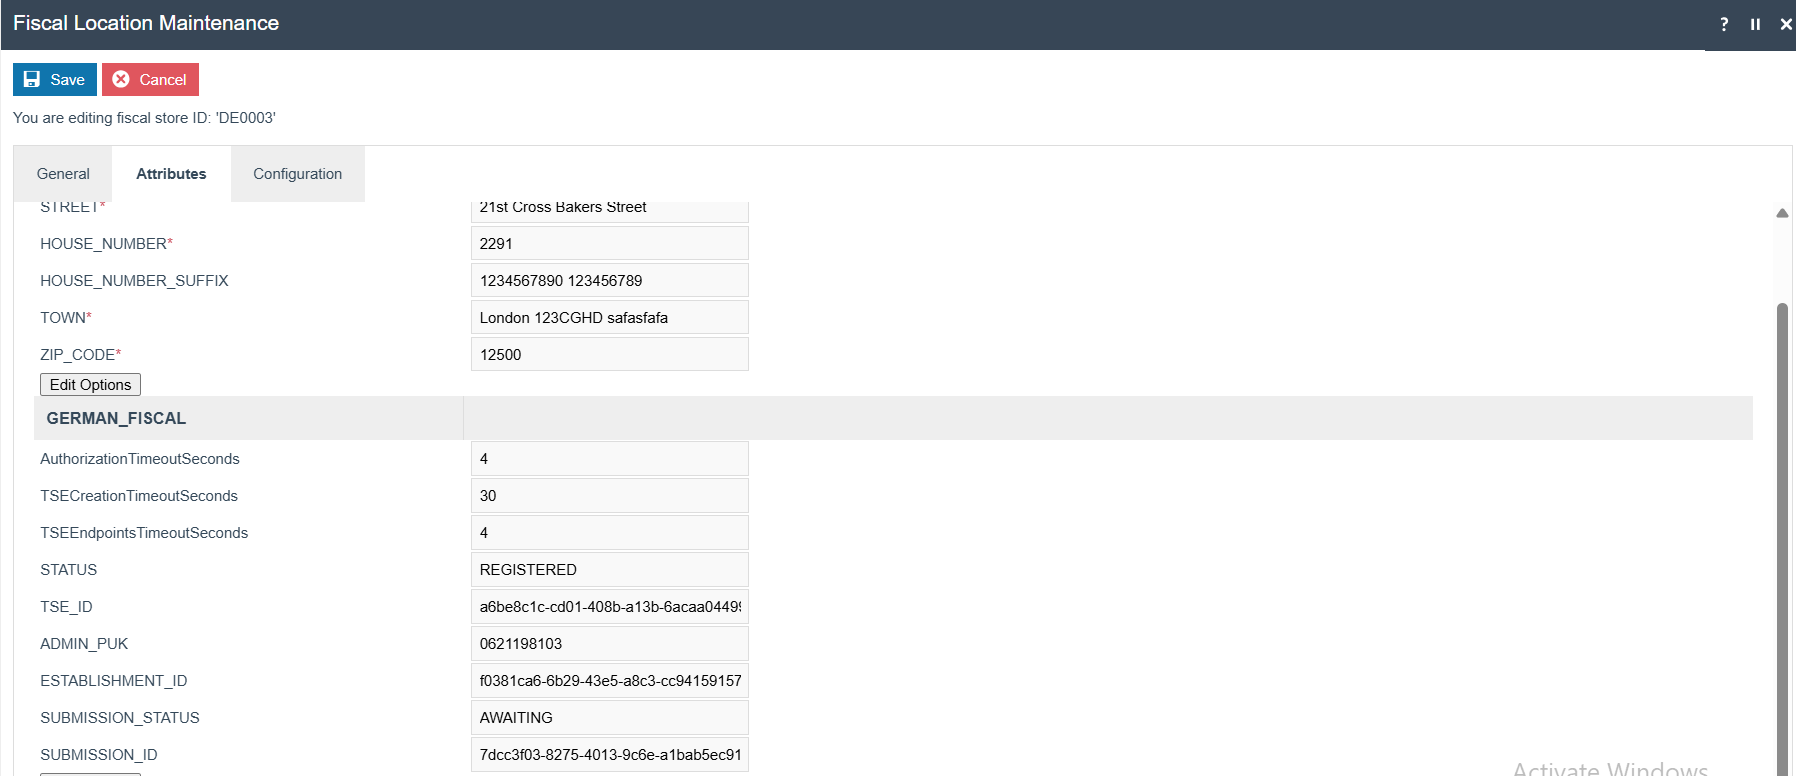
After registration, the Fiskaly TSE details for that fiscal location will be displayed in the Attribute Tab. To access this tab, click the edit icon of the registered fiscal location.
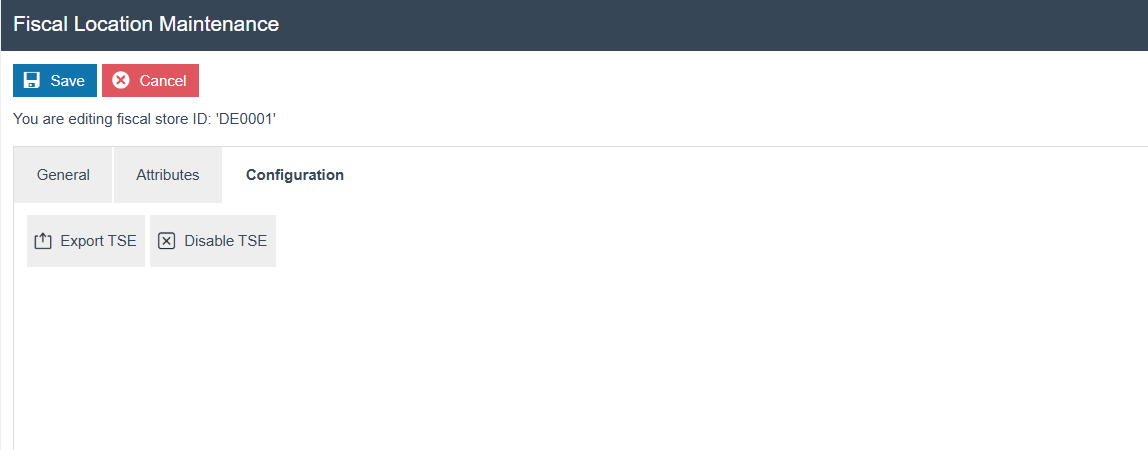
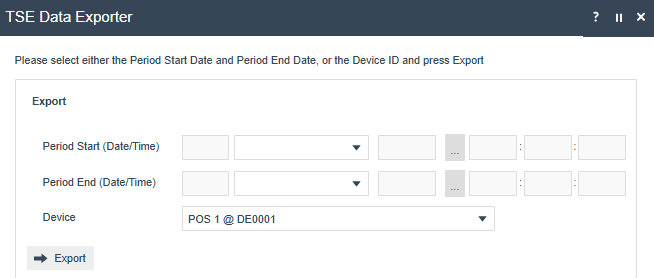
The "Export TSE" button allows you to export the TSE details. After clicking the icon, you'll need to select the Period Start Date and Period End Date, or the Device ID, and then press "Export." The exported file will be available in the File Download maintenance.
The "Disable TSE" button allows de-register all the internal clients, then to disable the TSE from Fiskaly and update the status as "DEREGISTERED” within the fiscal location attributes/ Fiscal pos terminal attributes.
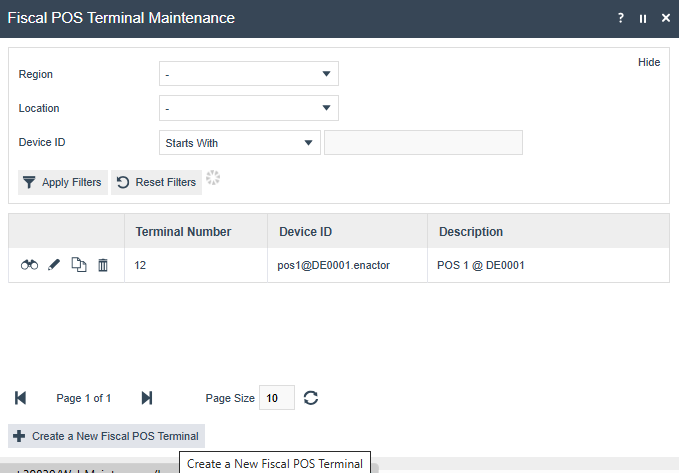
Fiscal POS Terminal Maintenance
To create a new fiscal POS Terminal, click the "Create a New Fiscal POS Terminal" button, then select the desired device ID from the dropdown. After making your selection, press the "Create" button.

Client Registration
-
When the POS starts up, it checks if the client is registered. If not,
it sends a registration request to the Estate Manager using a REST API. The re-registration of clients with the status "DEREGISTERED" will also occur similarly as part of the POS startup.
-
The Estate Manager processes the request and communicates with Fiskaly
to register the client in the Fiskaly cloud.
-
Once registered, the Estate Manager saves the TSE details within the
Fiscal POSTerminal attributes.
-
The Estate Manager returns the registration status to the POS,
allowing it to proceed with normal operations if successful.
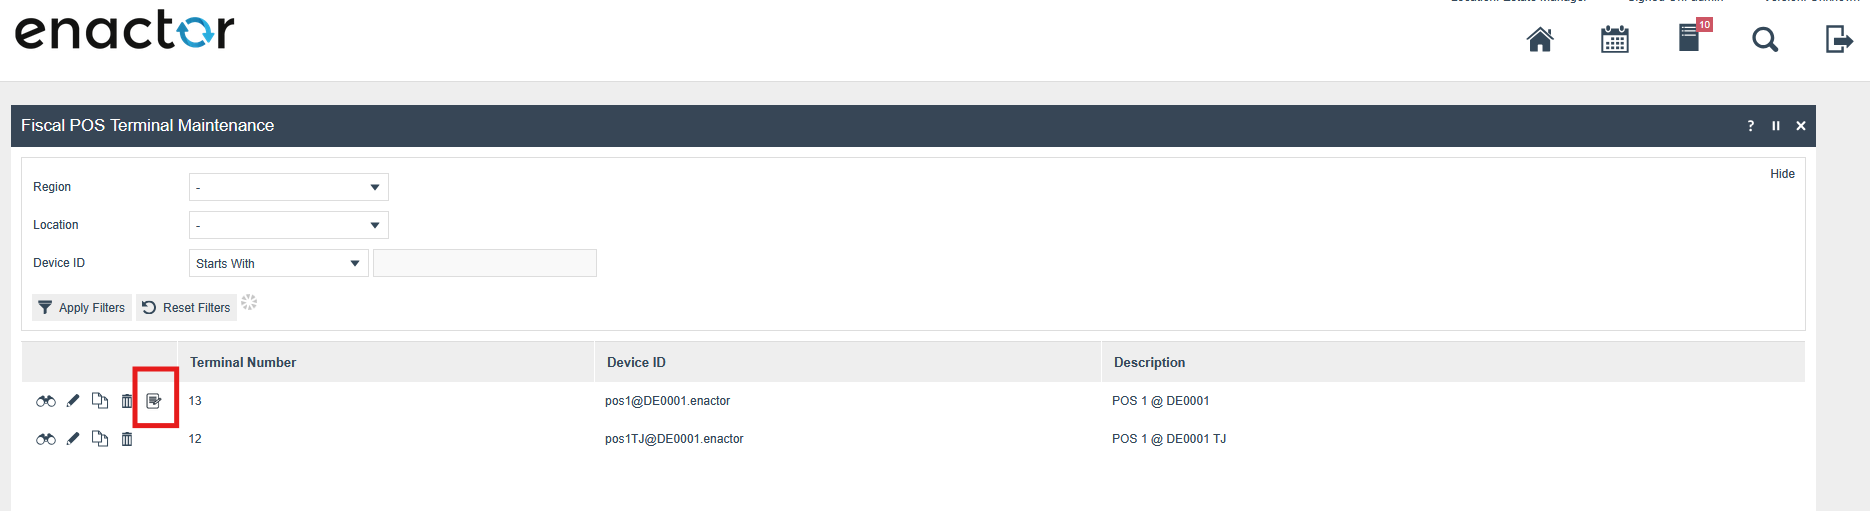
Client Registration through the Fiscal POS Terminal Maintenance
If there is an unregistered device in the Fiscal POS Terminal Maintenance, we can see the “Register Device” button along with the device. Once we click that button, it will register that single device with the Fiskaly.
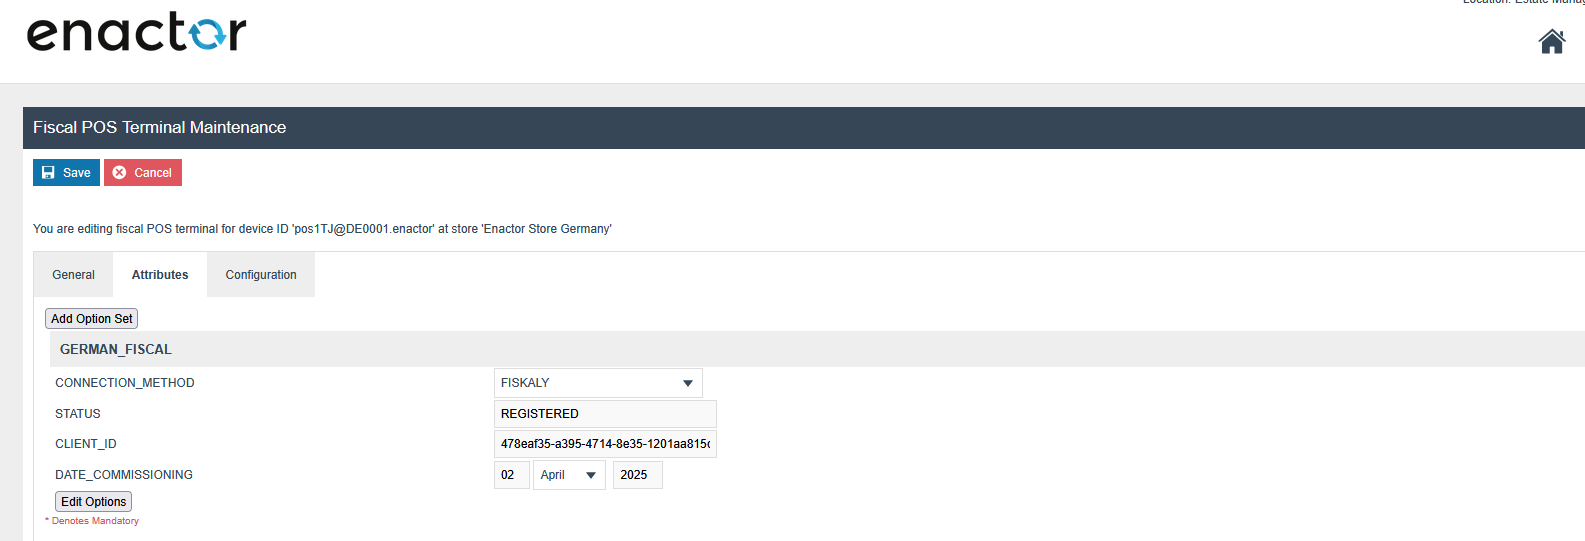
After registering a device during a POS Startup or using the button in Fiscal Pos Terminal, the Fiskaly client details will be displayed in the Attribute tab of the registered fiscal POS terminal. You can access this tab by clicking the edit icon of the fiscal POS terminal.
“Deregister Client” : This is allowed to Deregister clients from Fiskaly and it will update the status as “DEREGISTERED” within the Fiscal POS Terminal Maintenance Attributes.

“Remove”: This button deletes the fiscal POS terminal. This operation is possible only for the Fiscal POSTerminals that do not have a Client status as REGISTERED. First, the CLIENT must be deregistered using the Deregister Client button in the Configurations tab. It will deregister the client, and the Remove operation will be possible after that.
Client deregistration through the POS admin operation
Create the admin menu for client deregistration as shown below and broadcast it to the POS.
To trigger the client deregistration from the POS, navigate to:
Management → Admin → Fiscal TSE Deregister POS
This action will connect to Fiskaly via the Estate Manager and
deregister the client. The updated status will be saved in the Fiscal
POSTerminal attributes and sent to the POS.
Once deregistration is complete, the POS will automatically shut down.

Schedule Diary Entry
If a POS has not been used for a considerable period of time, i.e. no transactions within X days, these Fiscal POS Terminals/Clients will be deactivated from Fiskaly and details will be updated within the attributes (STATUS as “DEREGISTERED”). In order to do that, a diary entry needs to be scheduled as below.
Create a Diary Entry to deactivate Fiscal POS Terminals/Clients
Follow the step 1 - 4 in the below image to create the diary entry
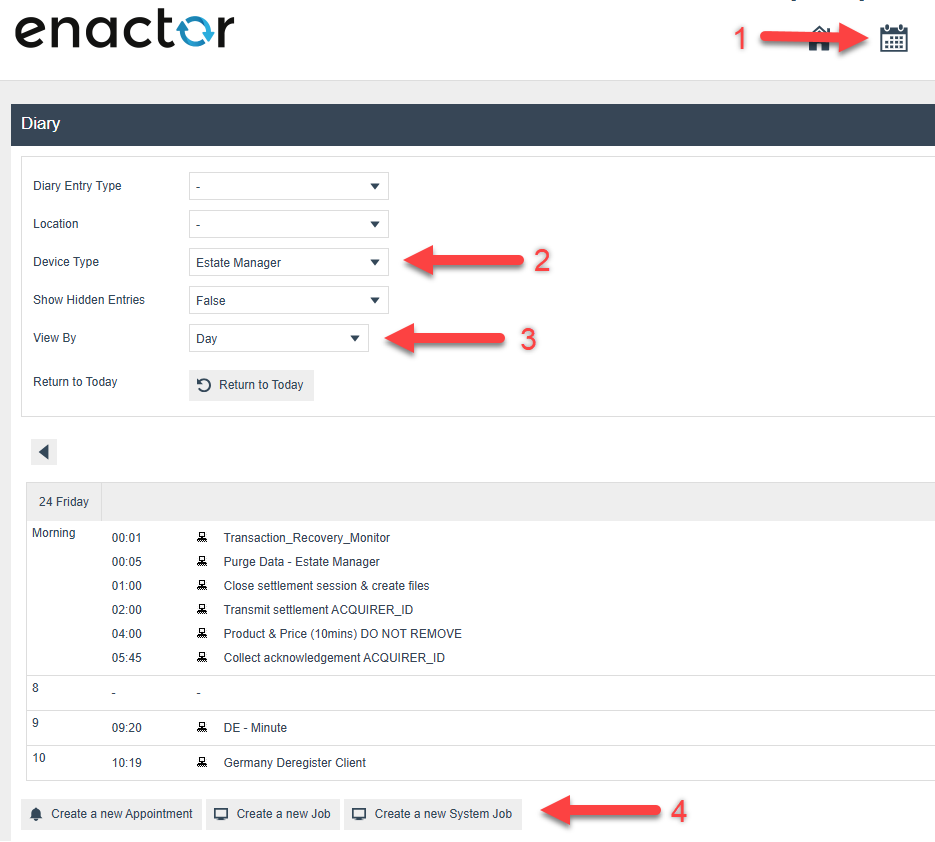
Click create on the below view
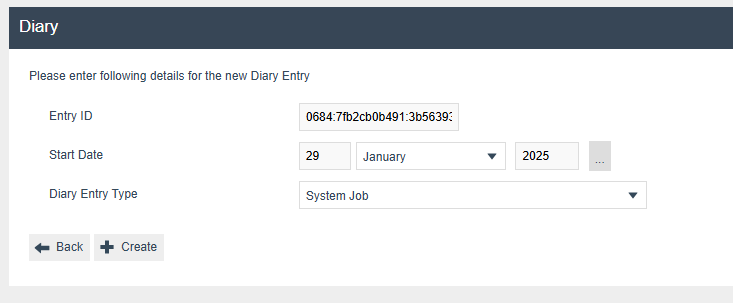
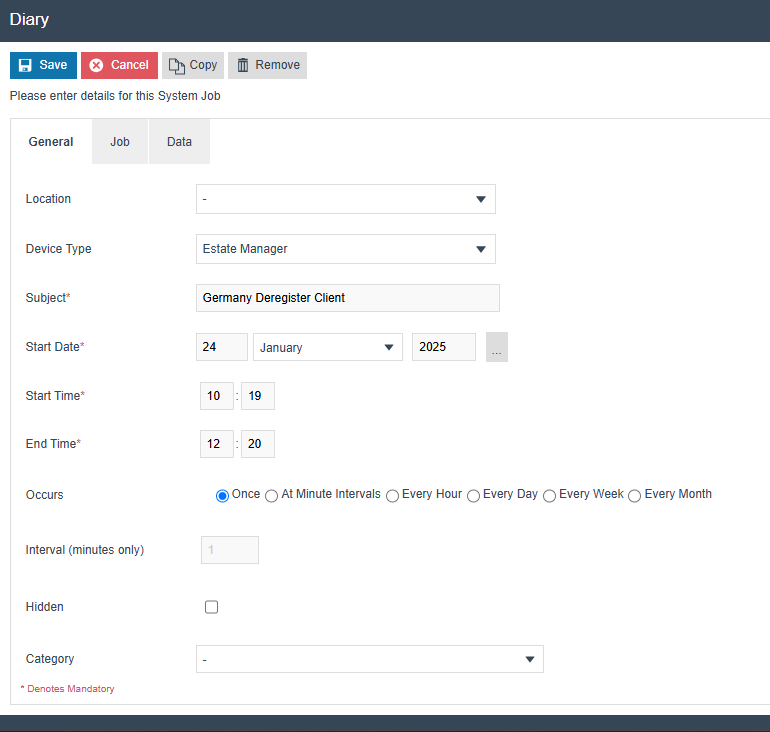
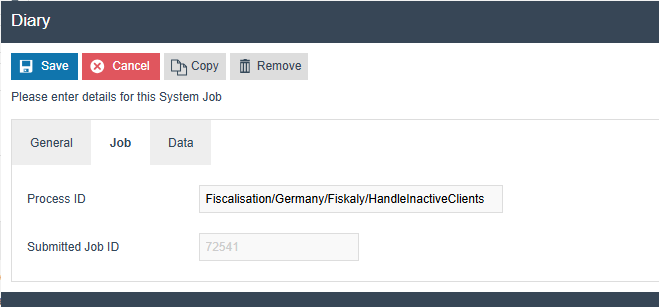
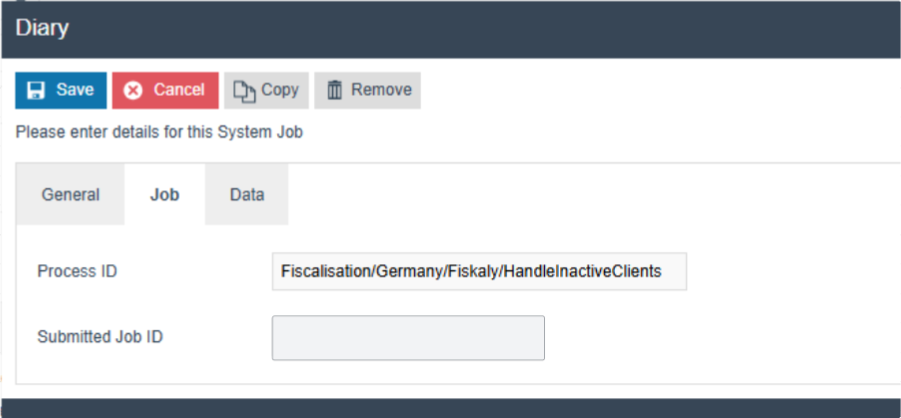
Within the Diary Entry under General/Job/Data Tabs fill with the below information.
Process ID - Fiscalisation/Germany/Fiskaly/HandleInactiveClients
If the difference between the last Updated date of the Fiscal transaction from the current date is greater than enactor.pos.NoOfDays, then that client will be considered for Deregistration. enactor.pos.NoOfDays will be configured from the data tab of the diary entry, with a default value of 30 days if it is not set
Name - enactor.pos.NoOfDays
Java Type - Integer

Click Save to save the created diary entry
Create a Diary Entry to Run The Day End from the POS
To export the Fiscal CSV files from EM, it is essential to first run the Day End Diary task. Begin by creating the appropriate diary entry in EM and broadcasting it to the POS. Once the diary task has been executed from the POS, you will be able to successfully generate the CSV files via EM.
- Click on Create a New Appointment.
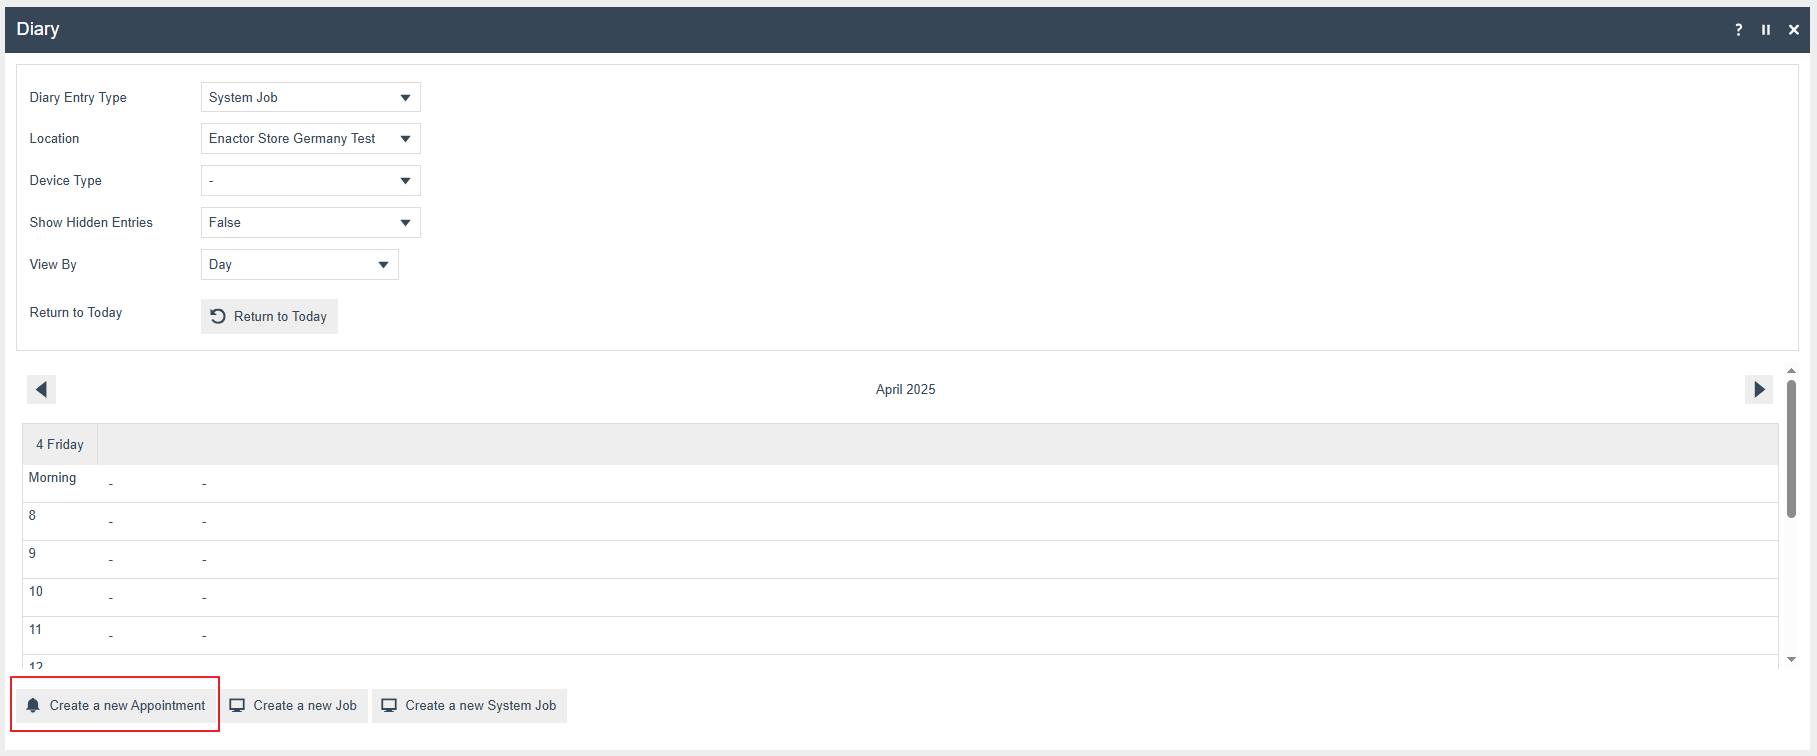
- Select system job from the Diary Entry Type

-
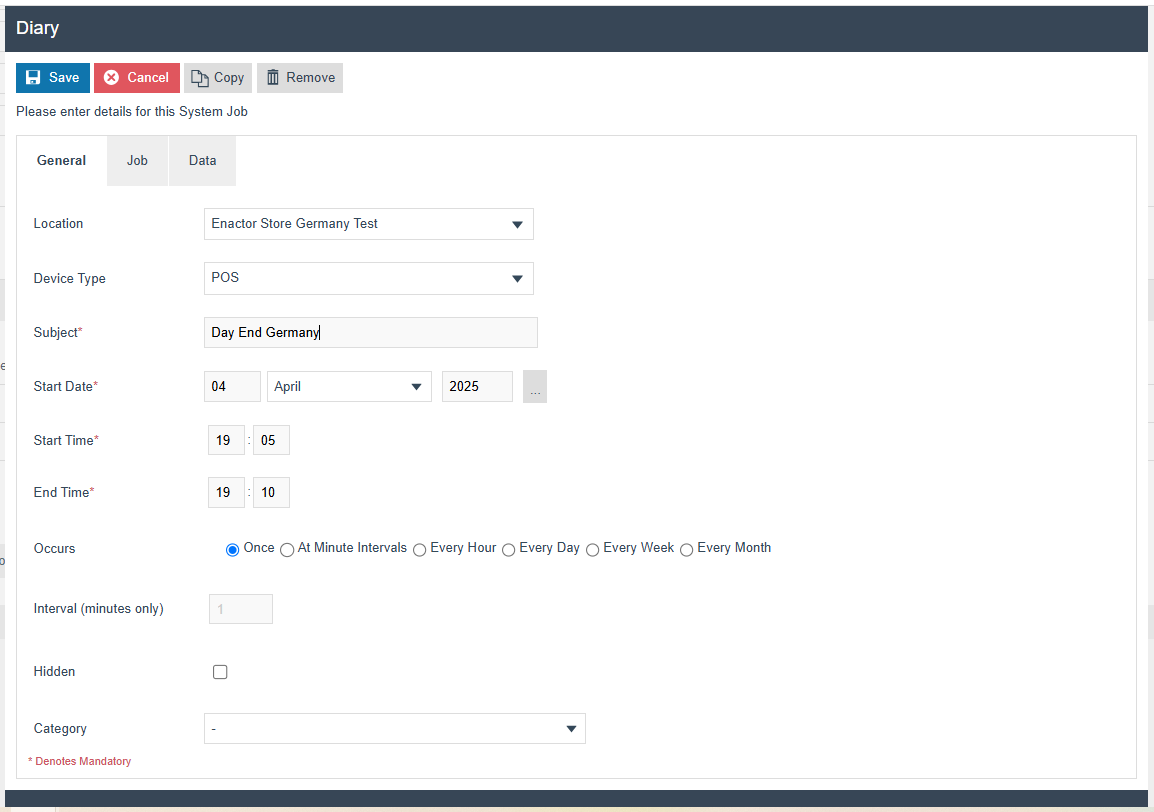
Enter data into the General Tab
-
Select respective location from the dropdown
-
Device Type = POS (For mobile POS, select Mobile Server as the
device type)*
-
Any suitable name for Subject
-
Any suitable date Start Date
-
Start Time and End Time
-
Select preferred occurrence to run this on the POS/PDP Server
-
*If both POS and mobile POS are in the current location, select “-” as the device type. This will execute for both POS and mobile servers.
Enter Job Tab Process ID - Pos/Event/Germany/LogDayEndSystemEvent
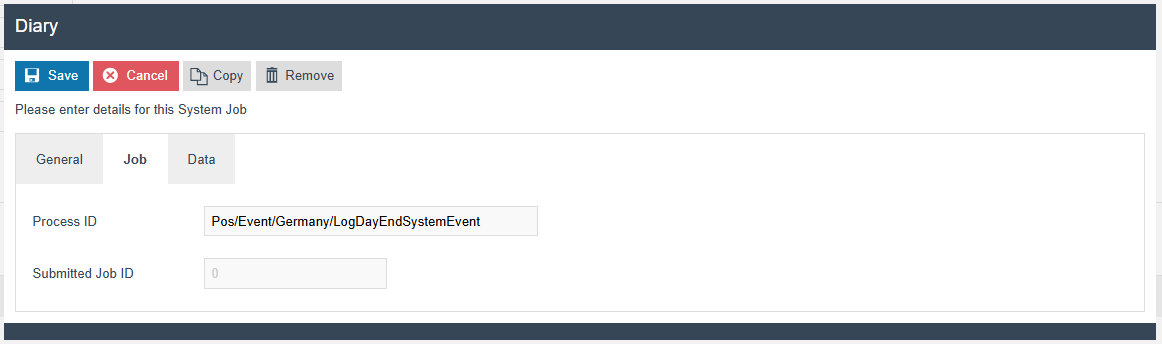
-
Click SAVE
-
Broadcast Diary Entry to the POS and PDP Server
Note: The CSV export will include data for a given day only after the day-end operation has been completed for that day via the diary entry.
CSV Exporter related configurations
- Log into the EM and Navigate to the respective Menu under Web
maintenance
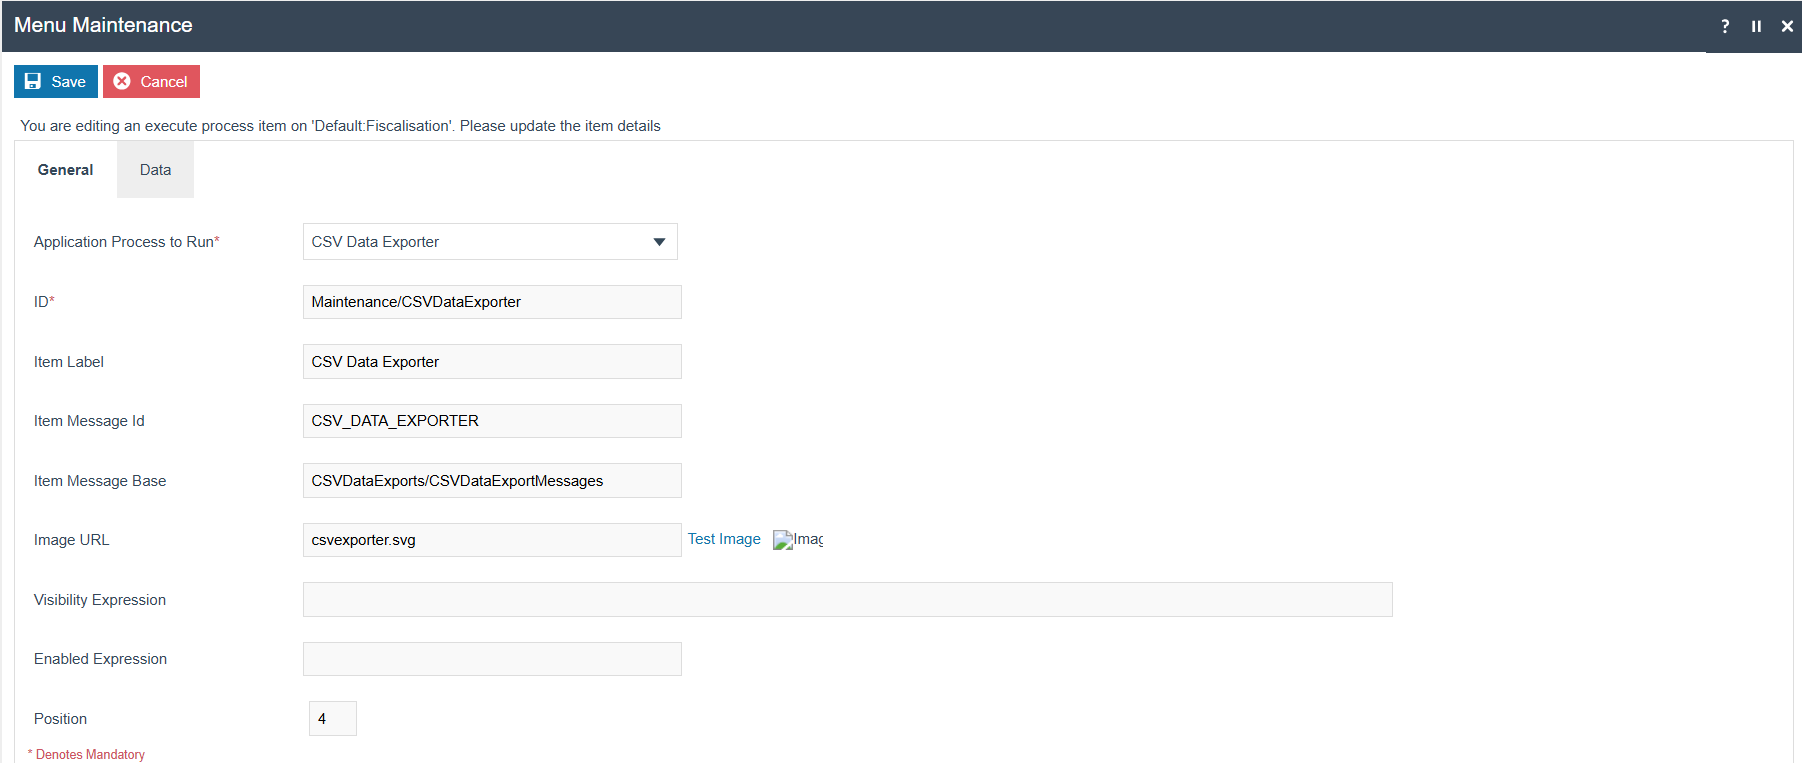
Add a new Execute Process Item into the Fiscalisation Folder with the following configurations
-
Application Process to Run - CSV Data Exporter
-
ID - Maintenance/CSVDataExporter
-
Item label - CSV Data Exporter
-
Item message ID - CSV_DATA_EXPORTER
-
Item Message Base - CSVDataExports/CSVDataExportMessages
-
Image URL - reports.svg
- Save the menu changes and verify the menu item in the Operations
Then select the filter criteria and proceed with the export and the csv export will be available within the File Downloads Maintenance.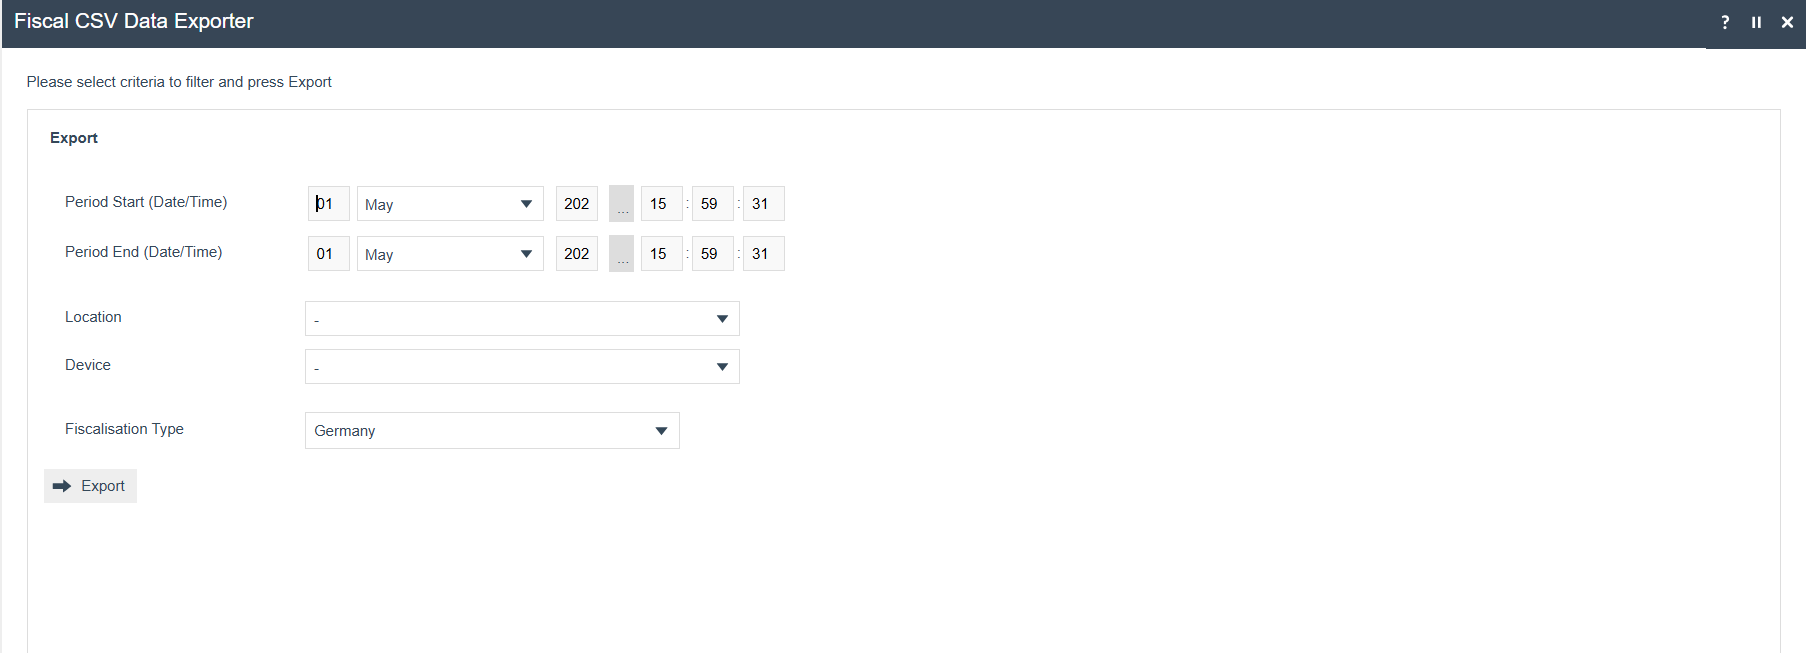
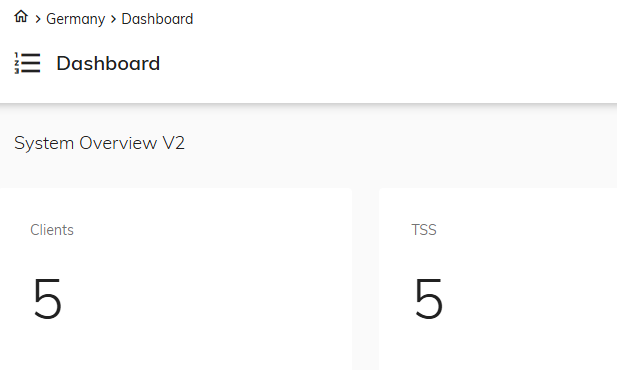
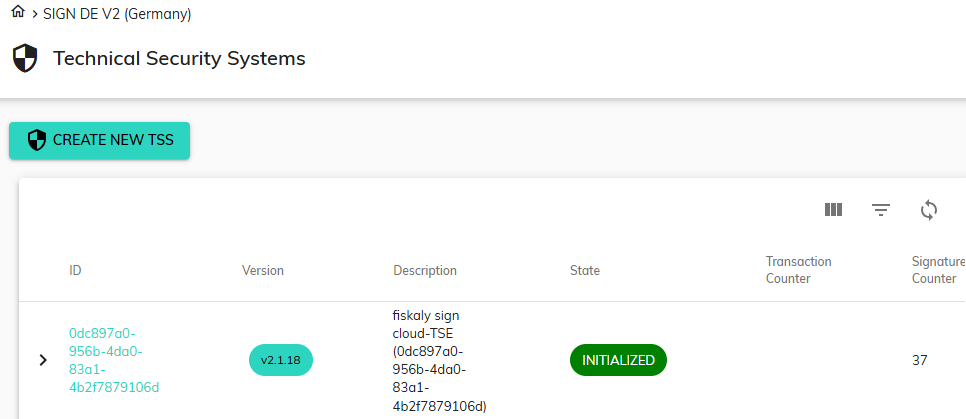
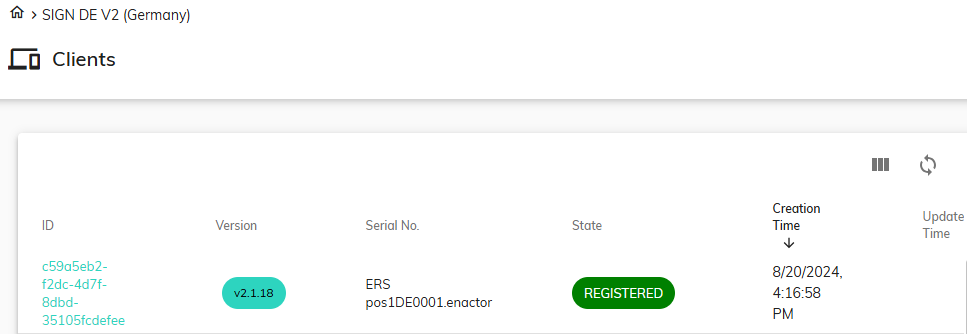
Fiskaly Portal Dashboard Overview
After registering a fiscal location and the associated devices, their TSE and CLIENT details should be displayed on the Fiskaly Portal Dashboard.
Pre Condition for the Implementation
Fiskaly https://kassensichv-middleware.fiskaly.com/api/v2 require third party URL to be whitelisted for both EM/POS
Fiskaly https://kassensichv-middleware.fiskaly.com/api/v2 require network clearance for the POS or EM to work with other applications
New Reporting Obligation related additional Configurations.
Rollout Procedure - Switching from non-obligation mode to obligation mode
The following steps have to be followed while switching from non-obligation mode to obligation mode
-
Schedule a diary entry to deregister all clients that were registered
with Fiskaly(This is needed when you switch back from non-obligation mode to obligation mode as well).
-
Manually create the establishment using Fiscal Location Maintenance
for locations registered during non-obligation mode.
Schedule a diary entry to deregister all clients that were registered with Fiskaly.
Create a Diary Entry to deactivate all the REGISTERED Fiscal POS Terminals/Clients
Follow the step 1 - 4 in the below image to create the diary entry
Click create on the below view
Within the Diary Entry under General/Job/Data Tabs fill in the below information.
Process ID - Fiscalisation/Germany/Fiskaly/HandleInactiveClients
Name - enactor.pos.NoOfDays
Set the value of enactor.pos.NoOfDays as -1 to deregister all the active clients from the Fiskaly
Java Type - Integer
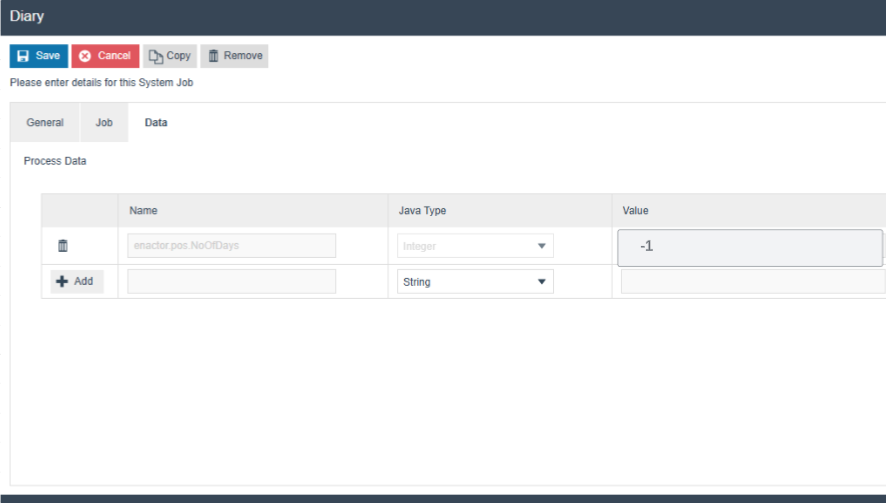
Click Save to save the created diary entry
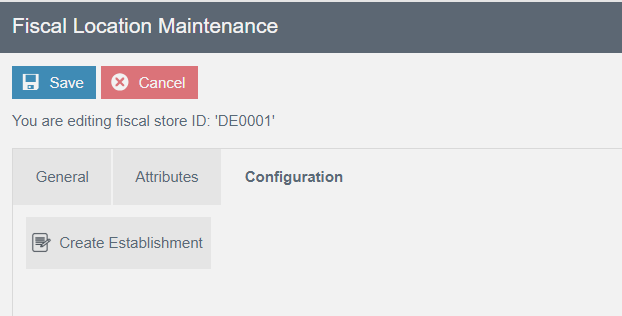
Manually create the establishment using Fiscal Location Maintenance for locations that were registered during non-obligation mode.
-
Navigate to the Configuration tab of the Fiscal Location Maintenance
-
Create the Establishment for the location by clicking on the button
“Create Establishment.”
-
This will create the establishment for that location in the Fiskaly
and save the ESTABLISHMENT_ID within the Fiscal Location attributes.
Configurations related to the obligation mode
Note: The buttons’ visibility and functionalities related to Obligation Mode will be available in the Estate Manager and the POS only when the configuration is set to Obligation Mode in the Fiscal Type attributes (i.e., when DISABLE_OBLIGATION_MODE is not configured or not checked).
Please make sure to broadcast the Fiscal Type attribute to the POS when there is any change in the flag DISABLE_OBLIGATION_MODE within the Attributes tab of the Fiscal Type Maintenance.
Also, please note that only the additional configurations required for Obligation Mode—beyond those needed for Normal Mode—are listed in this section.
Account Credentials for obligation
Within the account credential “GERMAN_FISKALY_TSE”, add the following property within the “Other Properties” tab.
| Property Key | Type | Value | Comments |
|---|---|---|---|
| OBLIGATION_URL | String | https://kassensichv.fiskaly.com/submission-api/v1 | Fiskaly End Point URL for reporting Obligations |
New Privileges
| Privilege ID | Application Package | Process | Remarks |
|---|---|---|---|
| enactor.fiscal.fiskaly.DeregisterEstablishmentAllowed | Fiscal Maintenance | Edit Fiscal Location | Mandatory - This is required only for the users who are allowed to delete the establishment |
Option Set Maintenance Changes
Related to the Type: Fiscal Type Attributes
Navigate to Attribute / Option Set Maintenance.
A new Option Set should be created with the following properties for the Fiscal Type Attributes Type. Although users have the flexibility of exporting the Option Set through the File export maintenance and uploading via File import maintenance in Estate Manager.
| Attribute / Option Set ID | Type | Region |
|---|---|---|
| GERMAN_FISCAL | Fiscal Type Attributes | All |
Add a Boolean option using the “Add” button.
Set the option name and ID as “DISABLE_OBLIGATION_MODE”. (Optional configuration during obligation mode: It will work in obligation mode if it is not set)
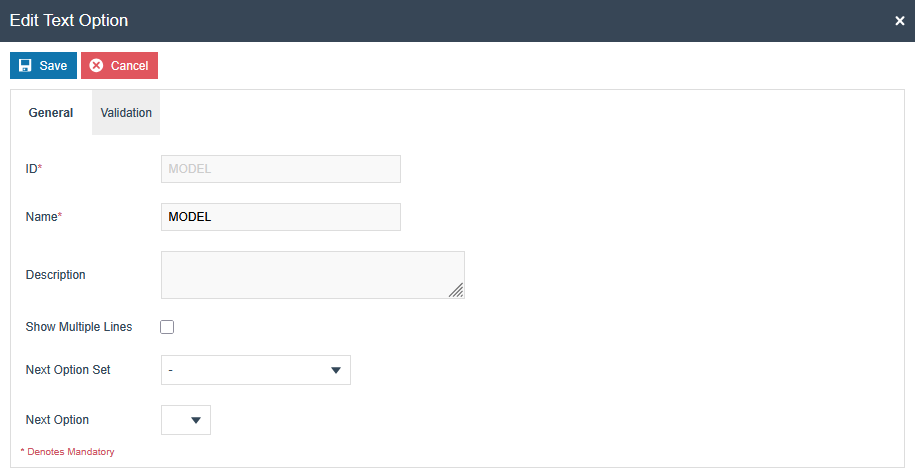
Then add a text option using the “Add” button. Then set the ID and Name as “MODEL”. This data corresponds to the cash register (Client) used.
Add a text option using the “Add” button. Then set the ID and Name as “MANUFACTURER”. This data corresponds to the cash register (Client) used.

Add a text option using the “Add” button. Then set the ID and Name as “SOFTWARE”. This data corresponds to the cash register (Client) used.


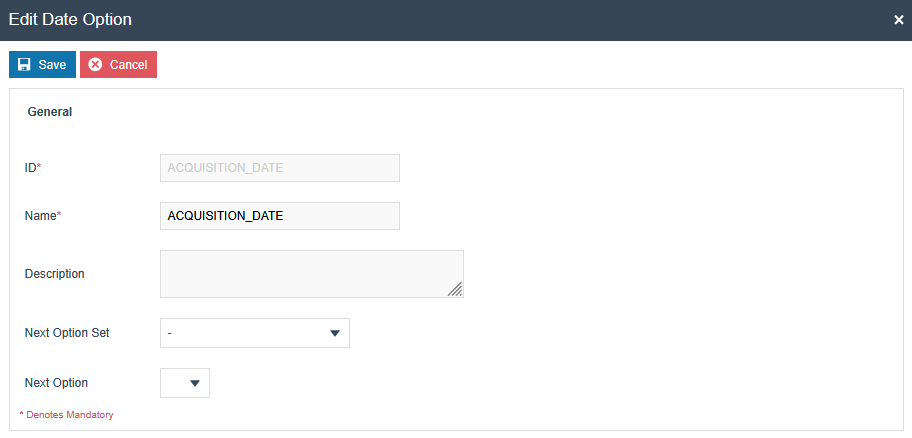
Add a date option using the “Add” button. Then set the ID and Name as “ACQUISITION_DATE”. The date when JYSK made the contract with Enactor. The date of acquisition can be found on the invoice or delivery note of the electronic recording system or the accounting system(registration date with Fiskaly)
A new Option Set should be created with the following properties for the Fiscal Type Maintenance Type to support tax payer details. Although users have the flexibility of exporting the Option Set through the File export maintenance and uploading via File import maintenance in Estate Manager.
| Attribute / Option Set ID | Type | Region |
|---|---|---|
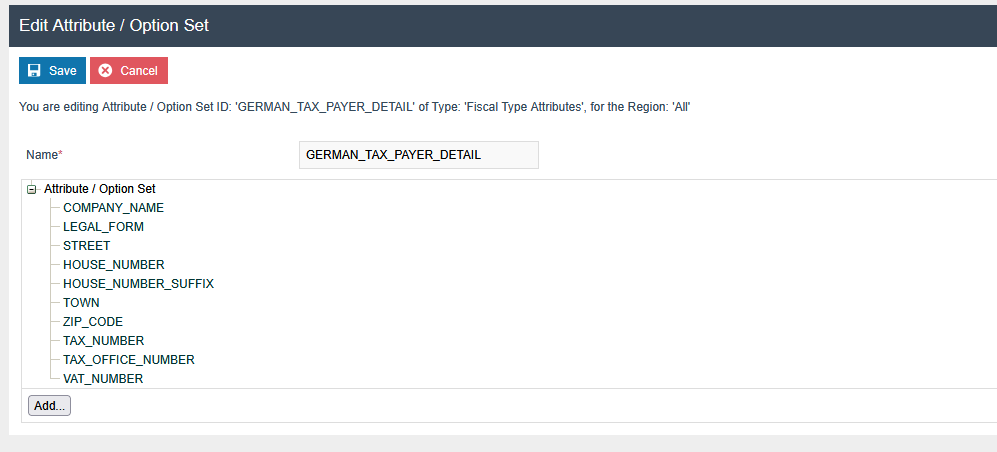
| GERMAN_TAX_PAYER_DETAIL | Fiscal Type Attributes | All |
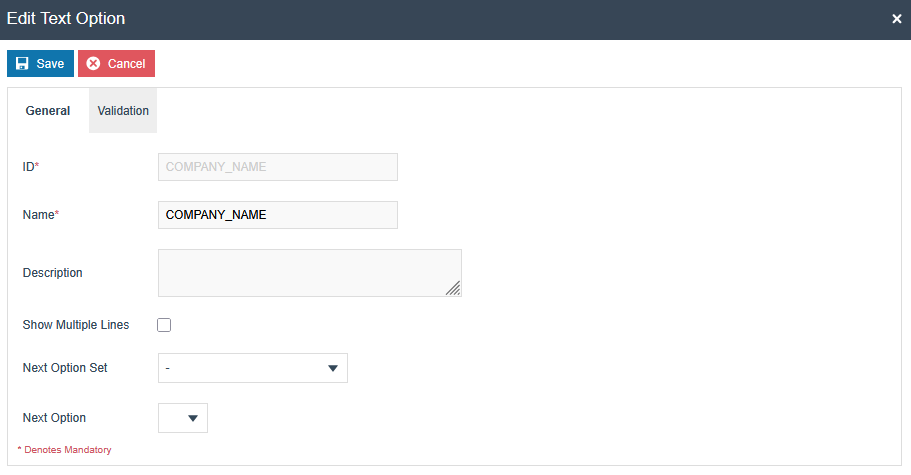
Add a text option using the “Add” button. Then set the ID and Name as “COMPANY_NAME”.
Likewise, create text options for the following IDs (Name field should have the same Name given for ID)
-
LEGAL_FORM
-
STREET
-
HOUSE_NUMBER
-
HOUSE_NUMBER_SUFFIX
-
TOWN
-
ZIP_CODE
-
TAX_NUMBER
-
TAX_OFFICE_NUMBER
-
VAT_NUMBER
Also have the following conditions in the text option.
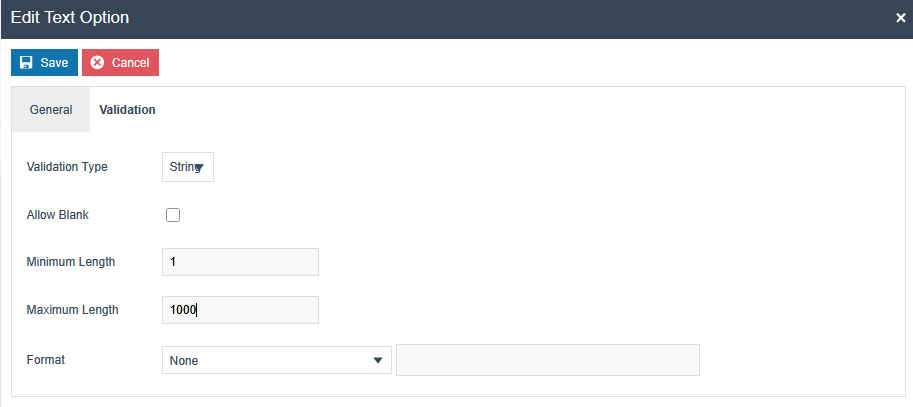
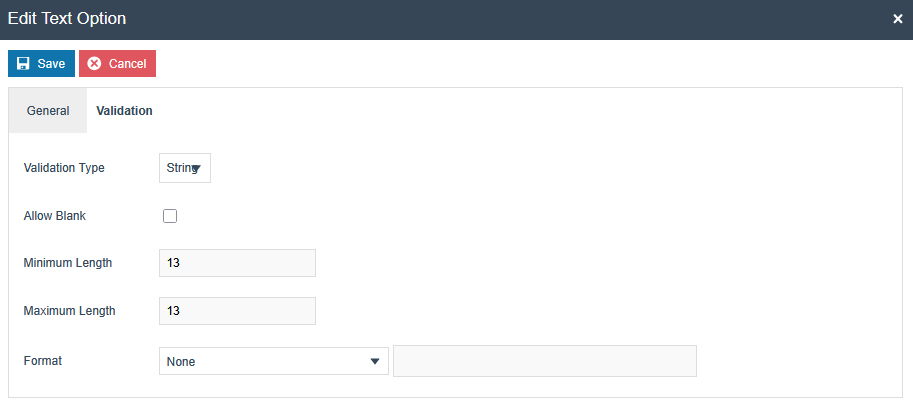
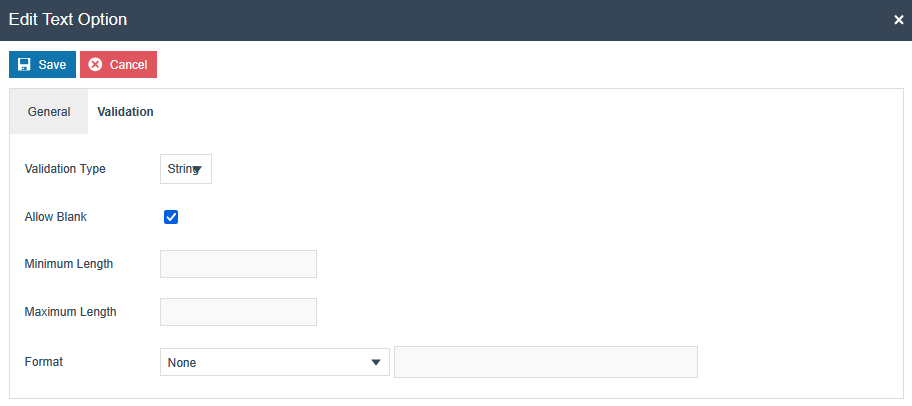
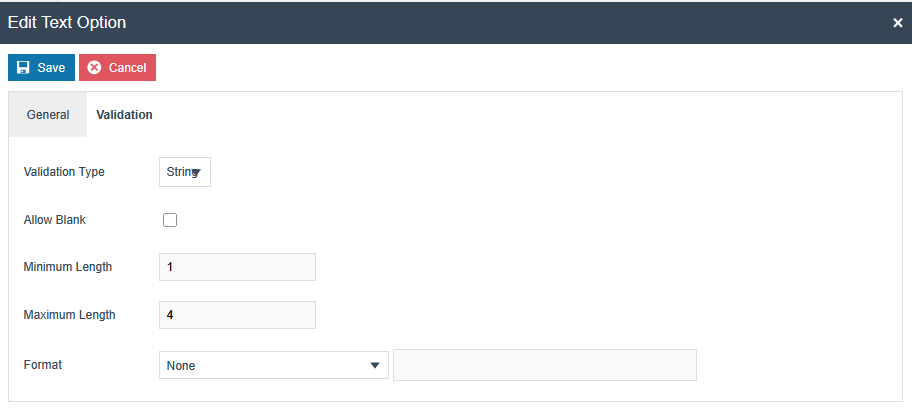
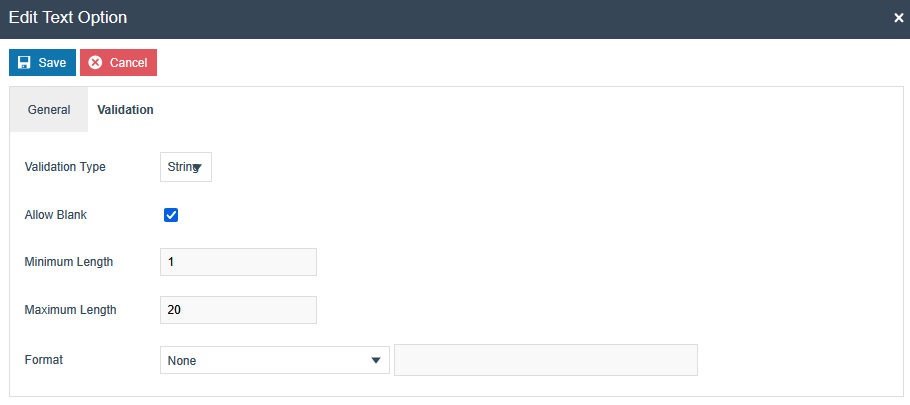
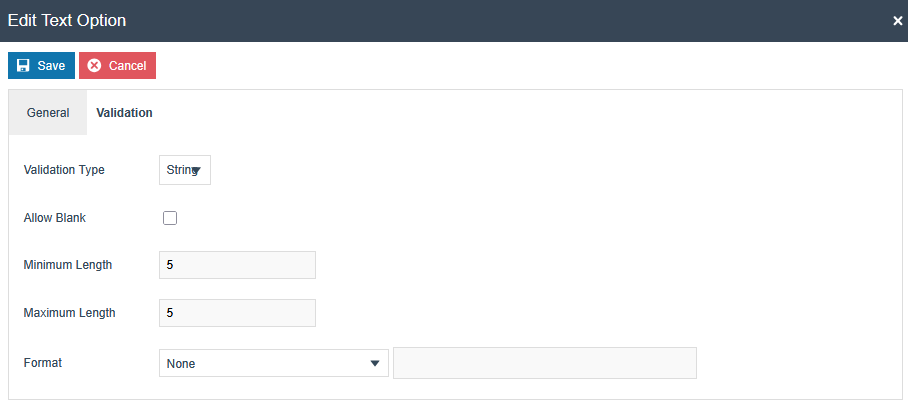
In the Validation tab of every text option select “String” validation type and add the following values.
- Company Name : [ 1 .. 120 ] characters, Mandatory

- Legal Form : Mandatory

- Street: 1 to 72 characters, Mandatory

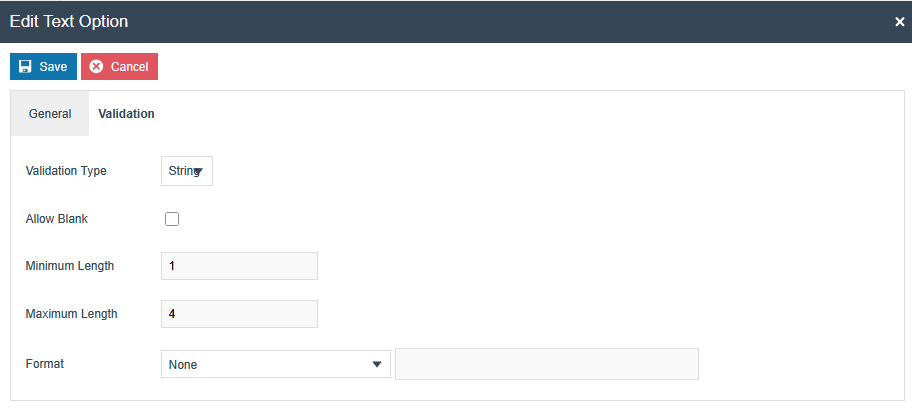
- House Number: 1 to 4 numeric characters, Mandatory
- House Number Suffix - Optional - [ 1 .. 20 ] characters
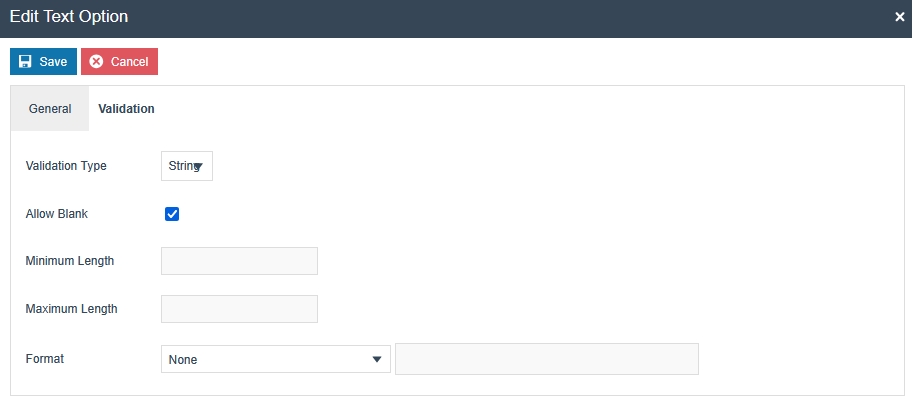
- Town: 1 to 72 characters, Mandatory

- Zip Code: Exactly 5 characters, Mandatory

- Tax Number: 13 characters, Mandatory
- Tax Office Number: 4 characters, Optional (Fiskaly will use the first
four characters from the Tax Number as the default value if it is not set)

- VAT Number - Optional - 11 characters
The option set will look like this after creating all the text options.
Related to the Type: Fiscal Location Attributes
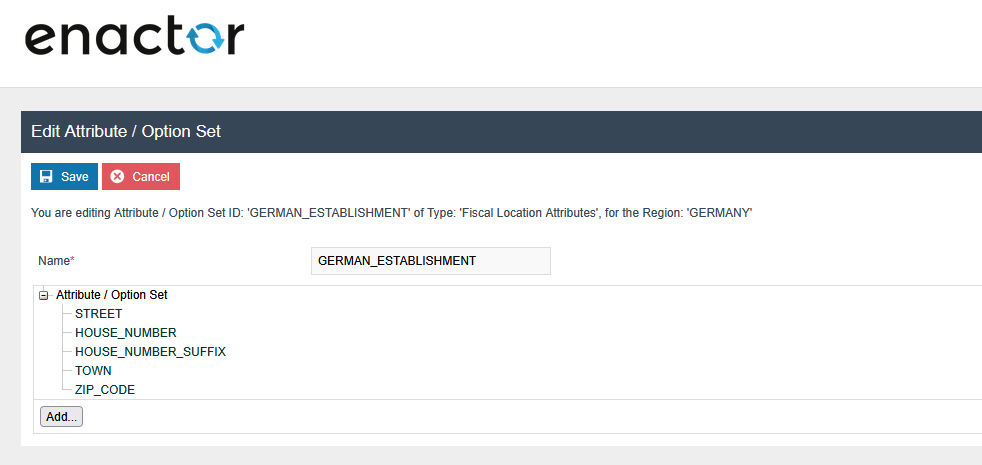
A new Option Set should be created with the following properties for the Fiscal Location Maintenance Type.
| Attribute / Option Set ID | Type | Region |
|---|---|---|
| GERMAN_ESTABLISHMENT | Fiscal Location Attributes | Region of your POS Location |
Add a text option using the “Add” button. Then set the ID and Name as “STREET”.

Likewise, do the same for the below fields.
-
HOUSE_NUMBER
-
HOUSE_NUMBER_SUFFIX
-
TOWN
-
ZIP_CODE
Also, have the following conditions in the text option.
In the Validation tab of every text option, select “String” validation type and add the following values.
- Street: 1 to 72 characters, Mandatory

- House Number: 1 to 4 numeric characters, Mandatory
- House Number Suffix - Optional - 1 to 20 characters
- Town: 1 to 72 characters, Mandatory

- Zip Code: Exactly 5 characters, Mandatory
The option set will look like this after creating all the text options.
Related to the Type: Fiscal POS Terminal Attributes
A new Option Set should be created with the following properties for the Fiscal POS Terminal Maintenance Type. Although users have the flexibility of exporting the Option Set through the File export maintenance and uploading via File import maintenance in Estate Manager.
| Attribute / Option Set ID | Type | Region |
|---|---|---|
| GERMAN_FISCAL | Fiscal POS Terminal Attributes | Region of your POS Location |
Add a choice option using the “Add” button.
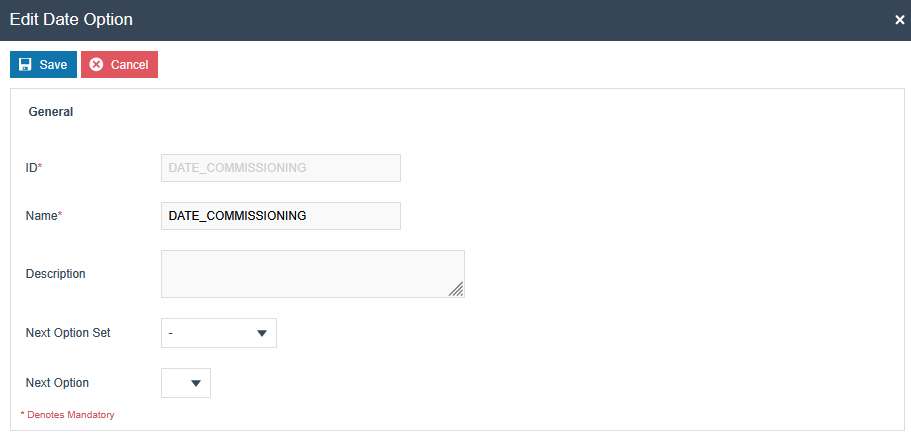
Add a date option using the “Add” button. Then set the ID and Name as “DATE_COMMISSIONING”.
A new Option Set should be created with the following properties for the Fiscal Location Attributes Type.
| Attribute / Option Set ID | Type | Region |
|---|---|---|
| GERMAN_FISCAL | Fiscal Location Attributes | Region of your POS Location |
A text option should be added using the “Add” button, and the following 3 text options should be added. The same text should be used for both ID and name of each option.
Add a text option using the “Add” button.Then set the ID and Name as “ESTABLISHMENT_ID”.

Add a text option using the “Add” button. Then set the ID and Name as “SUBMISSION_STATUS”.

Fiskaly Estate Manager Maintenance Process Flow
In addition to the general configuration, make the following changes to continue with the obligation mode-related operations
Fiscal Type Maintenance
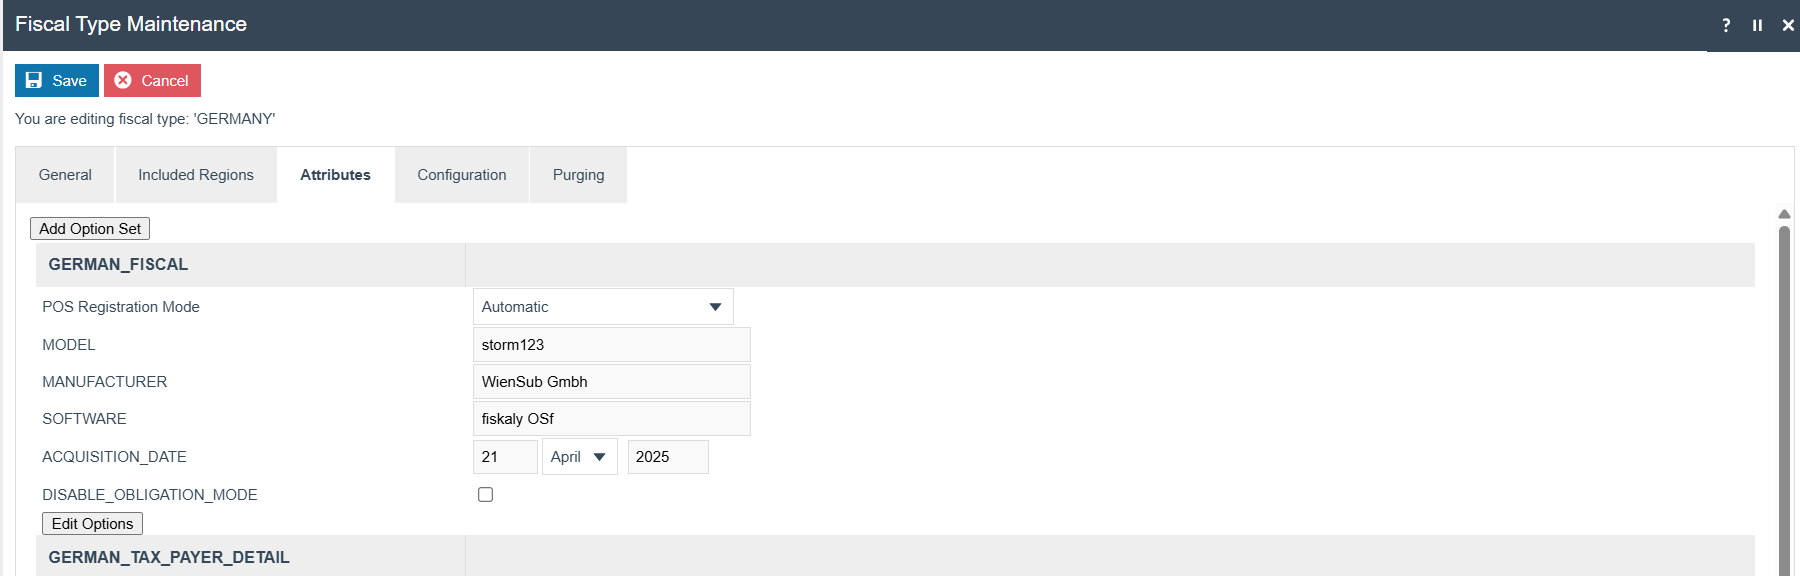
Navigate to the Attributes tab. Do the following configuration changes within the “GERMAN_FISCAL” attribute set.
-
Pos Registration Mode : Add manual mode if you want to pop up a
message asking whether you want to register the POS in Fiskaly, when the POS starts. Or else keep it blank or add automatic mode.
-
DISABLE_OBLIGATION_MODE : Untick this flag to switch to obligation
mode.
-
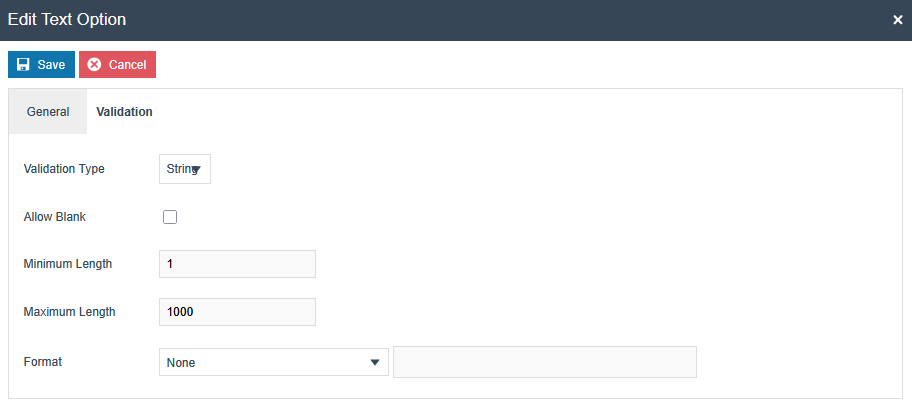
MODEL : A string of [ 1 .. 1000 ] characters
-
MANUFACTURER : A string of [ 1 .. 1000 ] characters
-
SOFTWARE : A string of [ 1 .. 1000 ] characters.
These data correspond to the cash register (Client) used.
-
ACQUISITION_DATE - The date when JYSK made the
contract with Enactor. The date of acquisition can be found on the invoice or delivery note of the electronic recording system or the accounting system(registration date with Fiskaly)
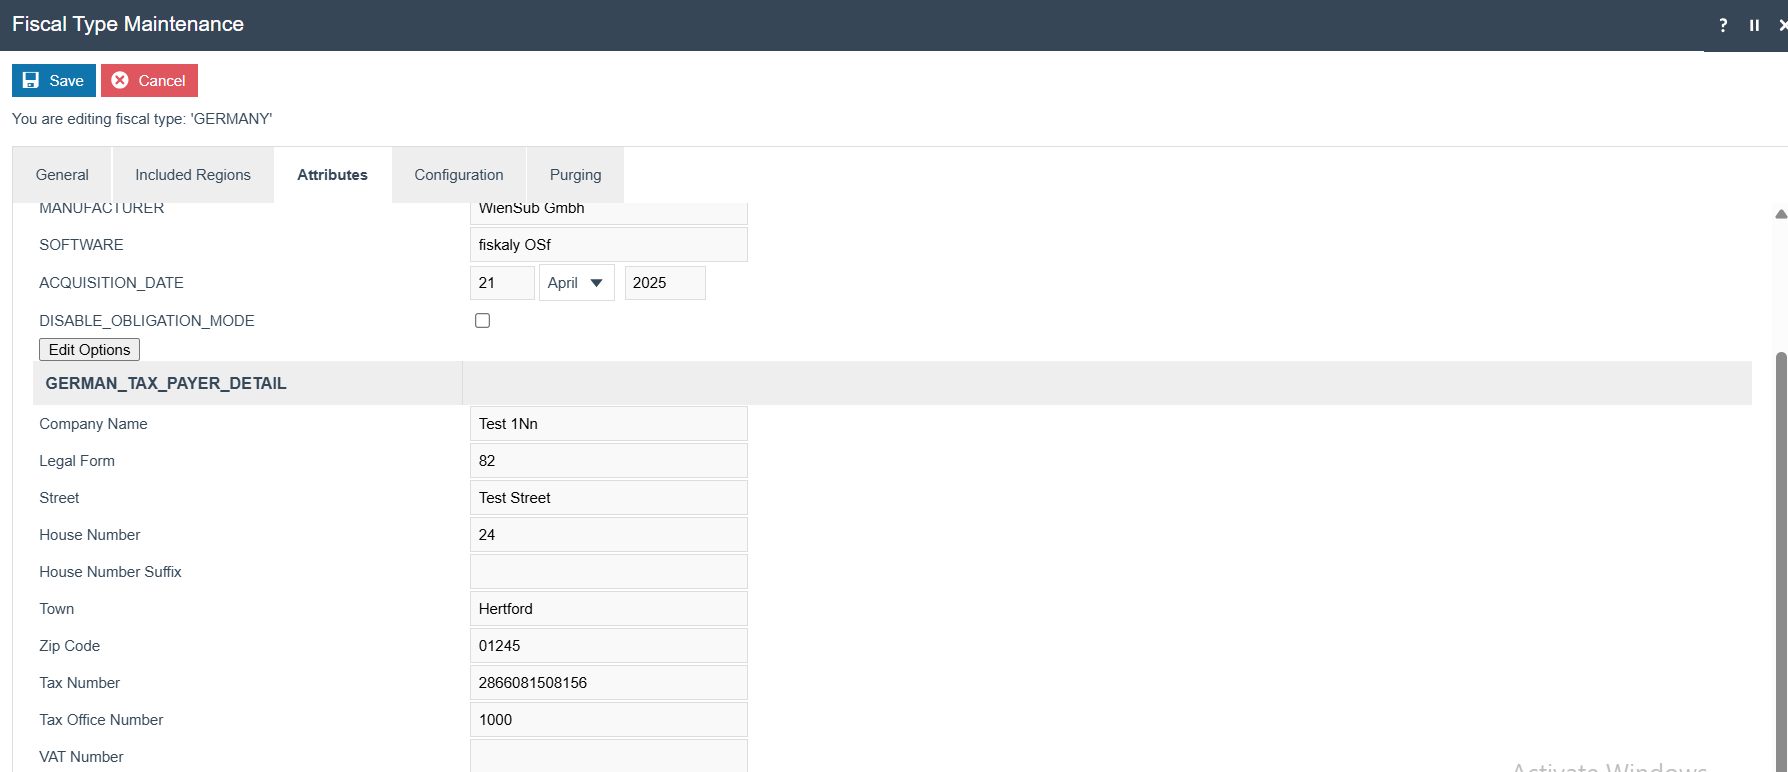
Under the field GERMAN_TAX_PAYER_DETAIL, enter the taxpayer details.
Note: The data must follow the required format as specified.
-
Company Name - [1 .. 120 ] characters
-
Legal Form (Valid Enums : "31" "25" "26" "49" "20" "91" "92" "34" "36"
"28" "81" "27" "35" "23" "24" "33" "22" "32" "41" "43" "61" "21" "72" "82" "74" "16" "44" "45" "99" "59" "83" "39" "73" "29" "79" "71" "37" "51" "42")
-
Street: 1 to 72 characters
-
House Number: 1 to 4 numeric characters
Pattern: A number that is between 1 and 4 digits long, using only numbers (0-9). No letters, symbols, or spaces allowed.
-
House Number Suffix - Optional - [ 1 .. 20 ] characters
-
Town: 1 to 72 characters
-
Zip Code: Exactly 5 characters, following one of the specified
formats
Pattern: Enter a 5-digit number that follows one of these rules: Must follow a specific pattern, with values allowed only within:
-
01000 to 09999 (if it starts with 0)
-
10000 to 99999 (if it starts with any non-zero digit). Any value
outside this range will be considered invalid.
-
Tax Number: Must be 13 characters and strictly
numeric, following the pattern of 4 digits, a 0**,** and then 8 more digits. Any deviation from this structure will not be accepted.
-
Tax Office Number: 4 characters, matching specific regional codes
(Fiskaly will use the first four characters from the Tax Number as the default value if it is not set)
Pattern: Enter a four-digit number where the first two digits must be one of these: 10, 11, 21, 22, 23, 24, 26, 27, 28, 30, 31, 32, 40, 41, 51, 52, 53, 54, 55, 56, 91, or 92. The last two digits can be any number from 00 to 99. -
VAT Number - Optional - 11 characters, starting with "DE" followed by
9 digits
Pattern: A code that starts with 'DE', followed by exactly 9 digits (0-9), making it 11 characters in total.
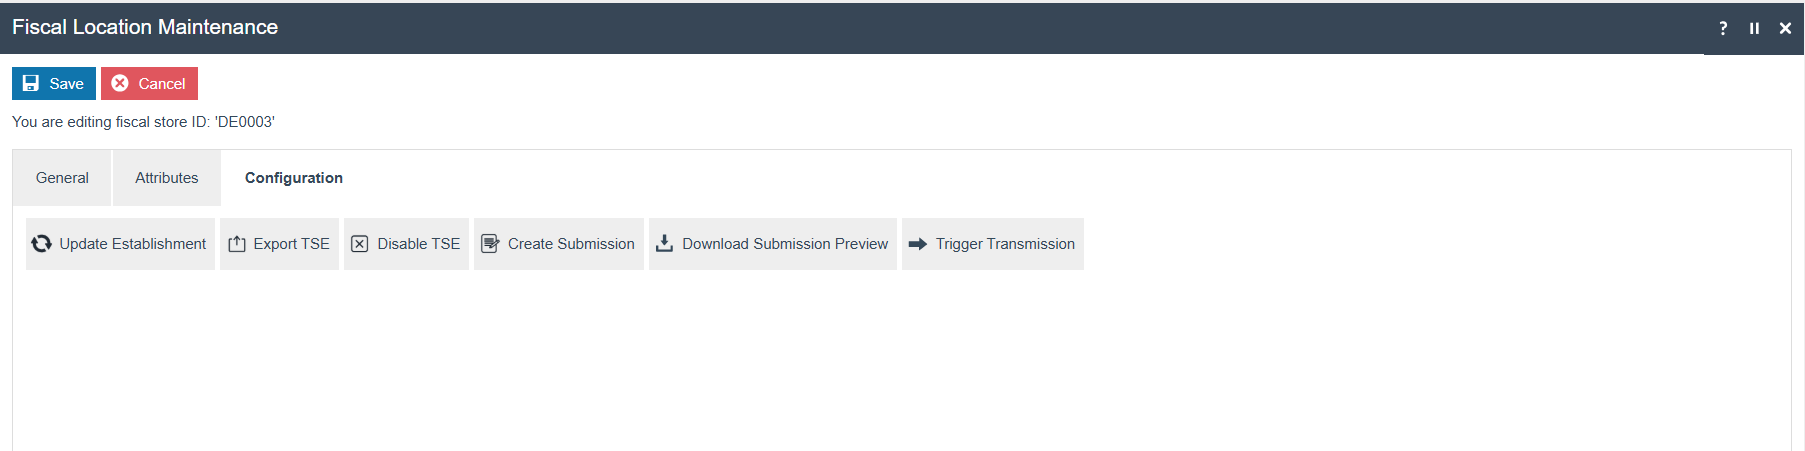
 Then go to the Configuration
tab
Then go to the Configuration
tab
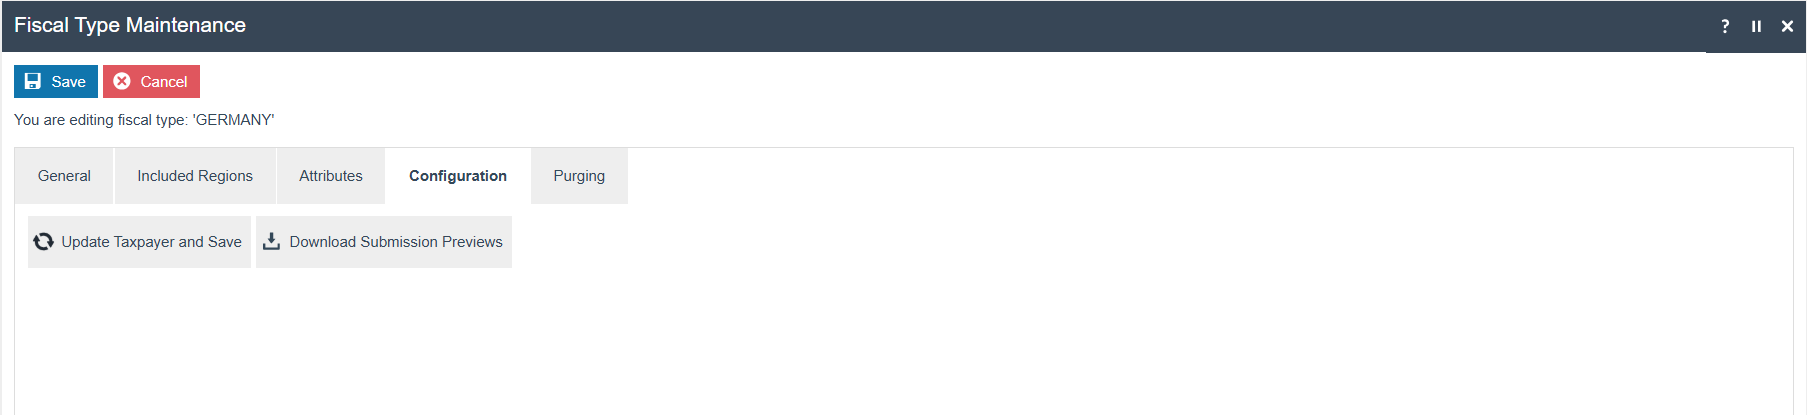
Register Taxpayer and Save: This button will register the taxpayer details with fiskaly and save within the Fiscal Type attributes of the Estate Manager. And, this button will be converted to “Update Taxpayer and Save”
Update Taxpayer and Save: This button will update the taxpayer details with the fiskaly and save within the Fiscal Type attributes of the Estate Manager.
Download Submission Previews: This button will retrieve all the latest preview PDFs downloaded from the file repository via the diary entry scheduled for submission, package them into a ZIP file, and make them available through the File Downloads Maintenance.
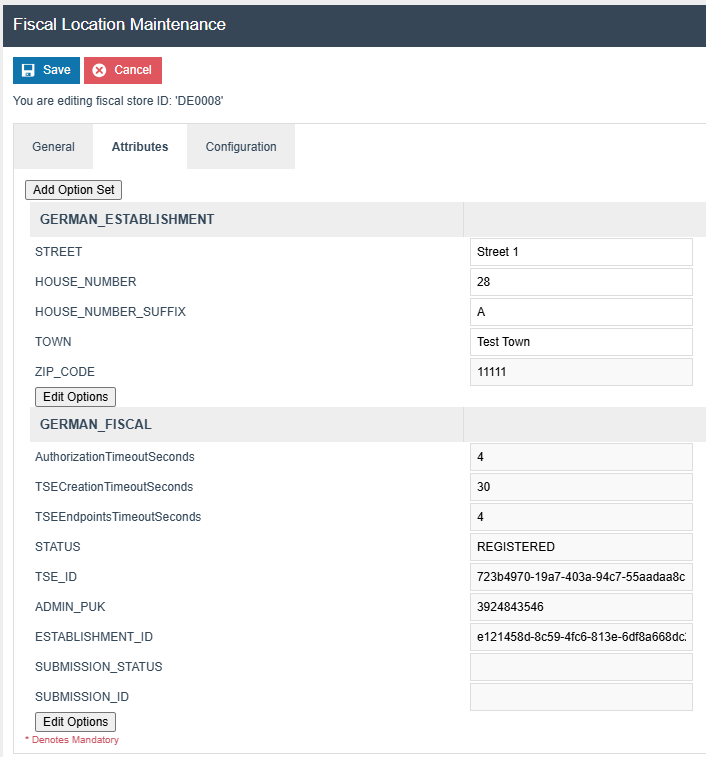
Fiscal Location Maintenance
Navigate to the Attributes tab. Do the following configuration changes within the “GERMAN_ESTABLISHMENT ” attribute set. The data should follow the following format.
-
STREET : Required - [ 1 to 72 ] characters
-
HOUSE_NUMBER : Required - [1 to 4] numeric
characters
-
HOUSE_NUMBER_SUFFIX : Optional - [ 1 to 20
] characters
-
TOWN : Required -
[1 to 72] characters
-
ZIP_CODE: Required - Exactly 5 characters,
following one of the specified formats
Pattern: Enter a 5-digit number that follows one of these rules:-
It starts with '0', followed by a non-zero digit, then any three
digits. (e.g., 01234, 04567)
-
It starts with a digit between 1-9, followed by any four digits.
(e.g., 12345, 98765)
-
Then click Save, and you will get a pop-up as
“Establishment details changed. Press OK to update
the establishment.”
If you click Ok, the establishment will be updated, data will be
saved within the Fiscal Location attributes and a pop-up will be
displayed as “Establishment has been successfully updated.”

A pop-up message stating 'Invalid input fields in Establishment Details.' will be displayed when the entered details do not match the expected configuration behavior. The establishment will not be created, and the complete error log can be viewed in the application process logs.

Note: At first time an Establishment will be created and details will be updated to that Establishment.
Location level buttons in the Fiscal Location Maintenance entry
“Remove”: This button deletes the fiscal location. This operation is possible only for the locations that do not have an Establishment ID(if it is in obligation mode) or does not have a TSE_ID. All registered locations will have an Establishment ID, and to remove it, the establishment must first be deleted using the Delete Establishment button in the Configurations tab. Once the establishment is deleted, the Establishment ID will be removed, and the Remove operation will become available for that location.
“Register Location” : This button creates an establishment and registers the selected fiscal location with Fiskaly, ensuring that only the TSE (Technische Sicherheitseinrichtung) for that location is registered, without registering the POS devices. This icon will be visible only for unregistered live fiscal locations and to users with the "enactor.fiscal.fiskaly.RegisterLocation" privilege. Establishment details and the TSE details will be saved within the Fiscal Location attributes with the status as “REGISTERED” after the registration.
“Register Location And Devices” : This button creates an establishment and registers the TSE for the selected fiscal location and all associated clients as part of the location registration with Fiskaly. It will only be visible for unregistered live fiscal locations and to users with the "enactor.fiscal.fiskaly.RegisterLocationAndDevices" privilege. Establishment and TSE details will be saved within the Fiscal Location attributes and client details within the Fiscal POS Terminal attributes with the status as “REGISTERED” after the registration.
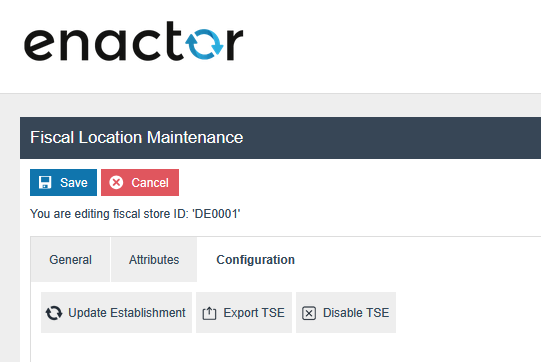
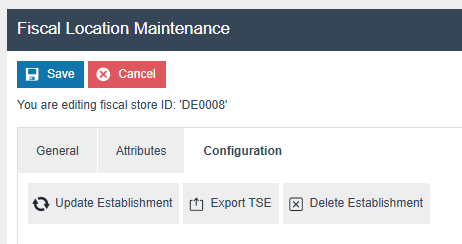
Once you have created an establishment and registered a fiscal location, it cannot be registered again to Fiskaly. So, the "Register Location" icon will be removed, and new icons named “Update Establishment”, "Export TSE" and "Disable TSE" buttons will appear within the Configuration tab.
“Update Establishment”: This button allows you to update establishment details in the Fiskaly and save within the fiscal location attributes.
For Unregistered locations, the Configuration tab appears as shown below, and the “Create Establishment” button is displayed within the tab.
Note: Please make sure to manually edit the establishment details from the Fiscal Location attributes when there is a change, and do not use the file import. This is necessary to properly track the changes and trigger the submission for the updated establishment details for that month.
"Delete Establishment": This button allows you to delete the created establishment for the location. “Delete Establishment” button will be visible only for the users with the “enactor.fiscal.fiskaly.DeregisterEstablishmentAllowed” privilege and once the establishment is created for that location.
Submission-related workflow from the Estate Manager
The Enactor solution supports the following submission methods from the Estate Manager:
-
Diary Entry: Scheduled monthly to submit locations with changes in
commissioned clients, decommissioned clients, or establishment details.
-
Manual Submission: Allows previewing the PDF and transmitting data
from the Fiscal Location maintenance screen for each location.
Diary Entry submission from the Estate Manager
Configure the following Diary entry from the Diary Entry Maintenance, which will create a separate schedule job for each location that is identified with the change for that month
Process ID: Fiscalisation/Germany/Fiskaly/Obligation/HandleScheduledSubmissions

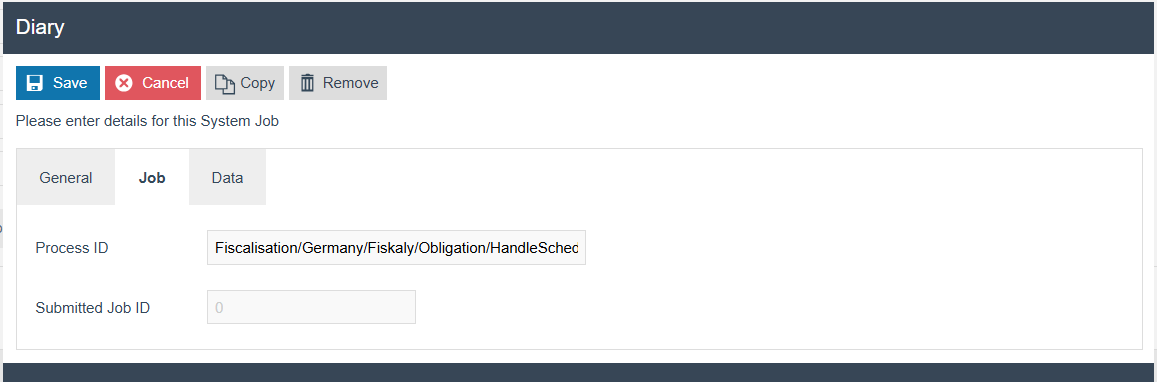
This diary entry will create a separate scheduled job for each selected location for that month's submission (i.e., locations with changes in commissioned clients, decommissioned clients, or establishment details).
Fiscal locations with a SUBMISSION_STATUS of AWAITING will be considered for that month’s submission. (This SUBMISSION_STATUS is set to AWAITING when a change is detected for that location, as described above.)
The scheduled job will perform the following internal operations:
-
Create the submission in Fiskaly.
- SUBMISSION_ID will be saved within the Fiscal Location attributes
-
Download the preview PDF to the internal **File Repository ->
${Common.ApplicationHome}/FiscalData/Germany/Fiskaly** -
Trigger the transmission to the tax authority.
-
The SUBMISSION_STATUS will be updated to SUBMITTED after a
successful transmission, and the SUBMISSION_ID will be removed from the fiscal location attributes, indicating that the process is complete.
-
.
-
In case of submission or transmission failure:
-
The user will see the error message in the application log of the
Estate Manager.
-
The user can reschedule the submission from the diary entry, and it
will pick only the unsubmitted locations for that month OR
-
The user must retry the relevant scheduled jobs for the failed
locations using the Schedule Job Maintenance screen to reinitiate the submission process OR
-
The user can manually create the submission and trigger the
transmission for the failed locations from the Fiscal Location Maintenance screen.
- The user can trigger the transmission again from the Fiscal Location
Maintenance(using the Trigger Transmission button) if the scheduled job failed after creating the submission.
- The user can trigger the transmission again from the Fiscal Location
Download Submission Previews

This will retrieve the latest preview PDF files for all fiscal locations from the file repository and move them to File Download Maintenance.
The ZIP file will contain the preview PDFs named using the following
format:
<locationId>_<first 8 characters of the submission ID>_<current
time>
Users can identify the submissions made during the current scheduling by checking the date included in each PDF file name.
Manual submission from the Fiscal Location Maintenance of the Estate Manager
Create Submission: Visibility - This button will be visible once the establishment is registered in fiskaly for that location (i.e., when the ESTABLISHMENT_ID is available in the fiscal location attributes).
-
This button will create the submission in Fiskaly.
-
SUBMISSION_ID will be saved within the Fiscal Location attributes
-
Download the preview PDF to the internal **File Repository:
${Common.ApplicationHome}/FiscalData/Germany/Fiskaly**
-
Download Submission Preview: Visibility - This button will be visible once the establishment is registered in fiskaly for that location (i.e., when the ESTABLISHMENT_ID is available in the fiscal location attributes).
-
This will retrieve the latest preview PDF file for the selected fiscal
location from the file repository and move it to File Download Maintenance.
- Preview PDF is named using the following format:
<locationId>_<first 8 characters of the submissionID>_<current time>
- Preview PDF is named using the following format:
Trigger Transmission: Visibility - This button will be visible once the submission is created in fiskaly for that location (i.e., when the SUBMISSION_ID is available in the fiscal location attributes).
-
This button will trigger the transmission to the tax authority.
- The SUBMISSION_STATUS will be updated to SUBMITTED after a
successful transmission, and the SUBMISSION_ID will be removed from the fiscal location attributes, indicating that the process is complete.
- The SUBMISSION_STATUS will be updated to SUBMITTED after a
Purging the Fiskaly file repository
Import the following xml from the EM File Import Maintenance
<?xml version="1.0" encoding="UTF-8" standalone="yes"?>
<Batch>
<retail:purgeDirectory xmlns:core="http://www.enactor.com/core"
    xmlns:hta="http://docs.oasis-open.org/ns/bpel4people/ws-humantask/api/200803"
    xmlns:htd="http://docs.oasis-open.org/ns/bpel4people/ws-humantask/200803"
    xmlns:htt="http://docs.oasis-open.org/ns/bpel4people/ws-humantask/types/200803"
    xmlns:ns10="http://www.enactor.com/retail/storedRestaurantSaleTransaction/service"
    xmlns:ns12="http://www.enactor.com/addressLookup/service"
    xmlns:ns13="http://www.enactor.com/crm/customerLoyalty/service"
    xmlns:ns4="http://www.enactor.com/crm"
    xmlns:ns7="http://www.enactor.com/retail/storedRetailTransaction/service"
    xmlns:ns9="http://www.enactor.com/retail/restaurantTableStatus/service"
    xmlns:retail="http://www.enactor.com/retail"
    xmlns:sref="http://docs.oasis-open.org/wsbpel/2.0/serviceref"
    xmlns:tools="http://www.enactor.com/tools"
    xmlns:xsi="http://www.w3.org/2001/XMLSchema-instance">
  <retail:directoryId>GERMAN_FISKALY_PREVIEW_DOWNLOAD</retail:directoryId>
  <retail:directoryPath>${Common.ApplicationHome}/FiscalData/Germany/Fiskaly</retail:directoryPath>
  <retail:description>Directory Path for Fiskaly preview pdf downloads</retail:description>
</retail:purgeDirectory>
</Batch>
Then, select the purge details within the Estate Manager location in the Location Maintenance
Create the diary entry to purge that location as same as the standard enactor purging configuration.