How To Configure Customer Registration Through QR Code
Introduction
The purpose of this guide is to configure the Enactor POS to allow customers to register via a QR code shown on the Customer Display.
When correctly set up, the POS will present a dedicated Customer Sign Up QR code that the customer can scan (e.g. with a mobile device) to open the online registration page. This removes the need for staff to capture full customer details at the till, speeds up the registration process, and helps ensure that customer data is captured accurately and consistently.
Overview
The following steps are required to configure Customer Registration through QR Code:
- POS Terminal Configuration - Enable the QR code display on the Customer View.
- Account Credentials Configuration - Create the credential record with the registration URL.
- Option Sets Configuration - Create the loyalty IIN option set.
- Menu Configuration - Add the QR registration button to the SALE menu.
- Broadcasting - Distribute all configuration changes to the POS.
Configuration Steps
Prerequisites
- The user should have installed and set up Enactor POS successfully.
- The user should have a successfully configured Customer View Display.
For Customer View Display configuration, refer to the HowToGuide-ConfigureCustomerDisplay guide.
POS Terminal Configuration
This section contains the configurations required to enable QR code display in the POS Terminal.
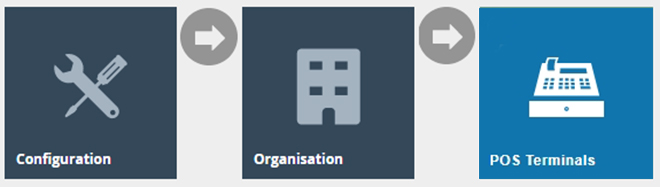
The POS Terminal Maintenance application can be accessed through:
Configuration > Organisation > POS Terminals
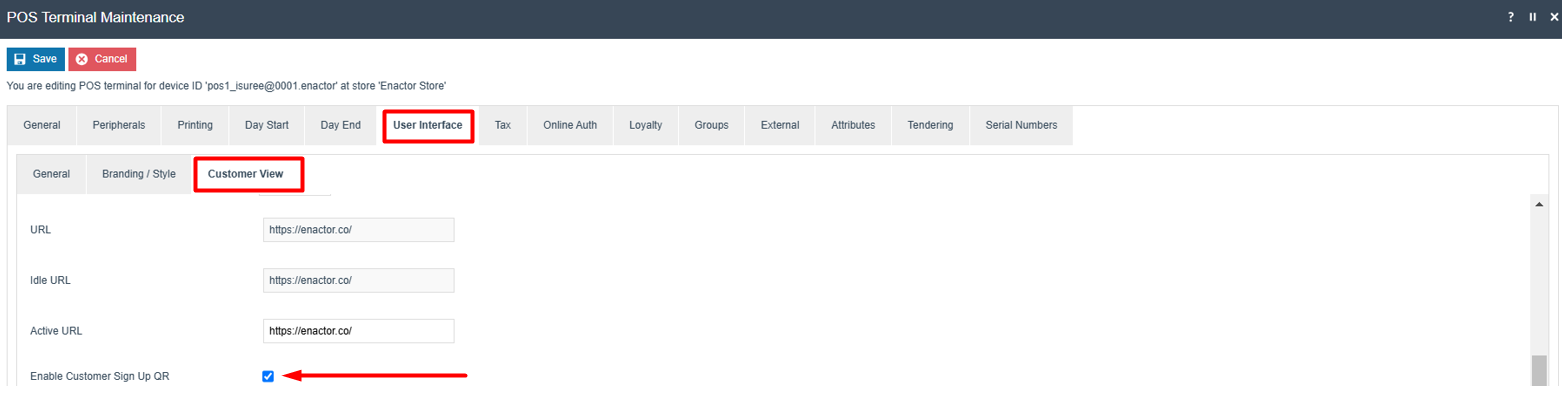
Select your POS Terminal and navigate to User Interface > Customer View and enable the checkbox for Enable Customer Sign Up QR as shown below:
Account Credentials Configuration
This section contains the Account Credentials that need to be added to enable Customer Registration through QR Code.
The Account Credentials Maintenance application can be accessed through:
Configuration > Financial > Account Credentials

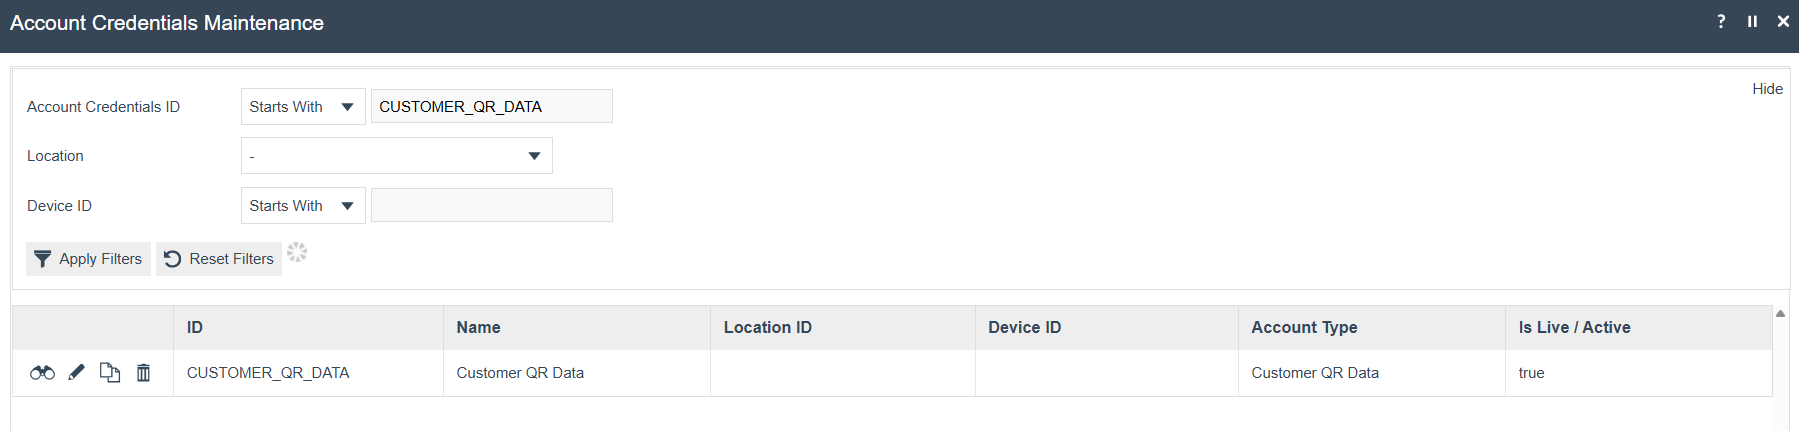
Create a new Account Credentials record with the ID of CUSTOMER_QR_DATA and enter the following:
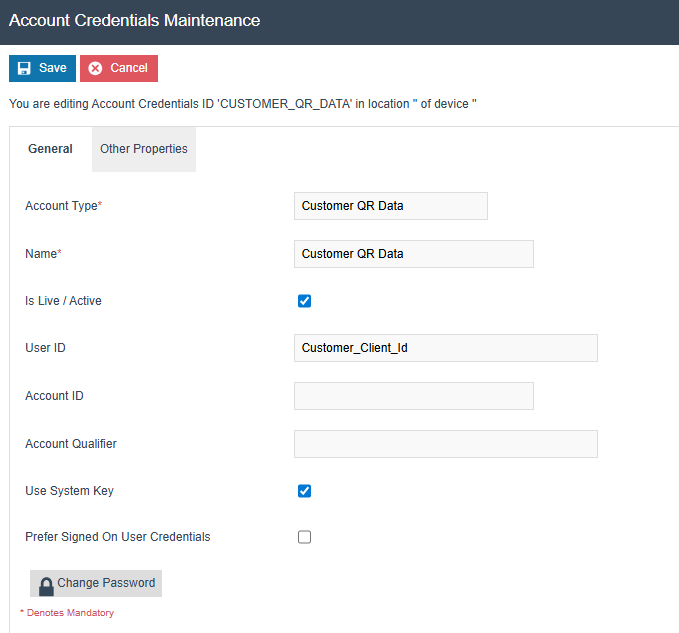
| Field | Description |
|---|---|
| Account Type | Category of the credential; set to Customer QR Data. |
| Name | Display name for the credential. |
| Is Live / Active | Enables the credential for use. |
| User ID | Client ID used by the credential; set to Customer_Client_Id. |
| Account ID | Optional account identifier; not required for this credential. |
| Account Qualifier | Optional qualifier for the account; not required for this credential. |
| Use System Key | Encrypts the credential using the system key. |
| Prefer Signed On User Credentials | Uses the signed-on user's own credentials in preference to this record. |
For testing, the retailer_url should be configured as follows:
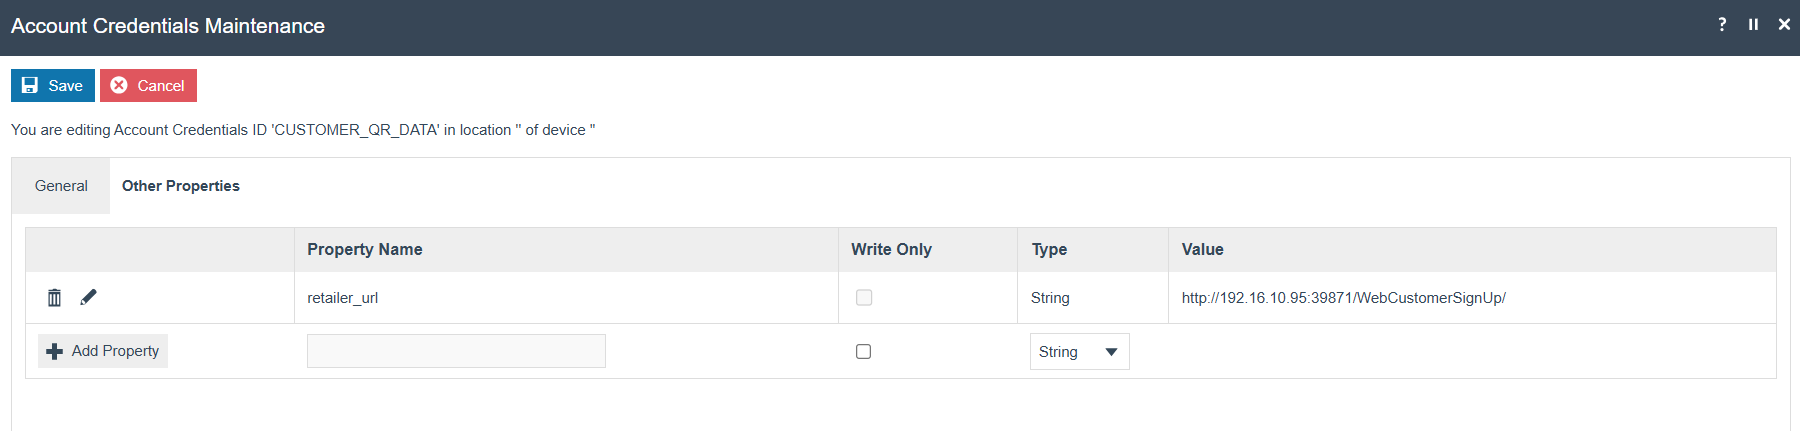
| Property Name | Type | Value |
|---|---|---|
| retailer_url | String | URL of the retailer's customer registration endpoint, e.g. http://192.16.10.95:39871/WebCustomerSignUp/. |
Click Save which should now display the created Account Credentials record as follows:
Option Sets Configuration
This section contains the Option Set that needs to be added to enable Customer Registration through QR Code.
The Option Sets Maintenance application can be accessed through:
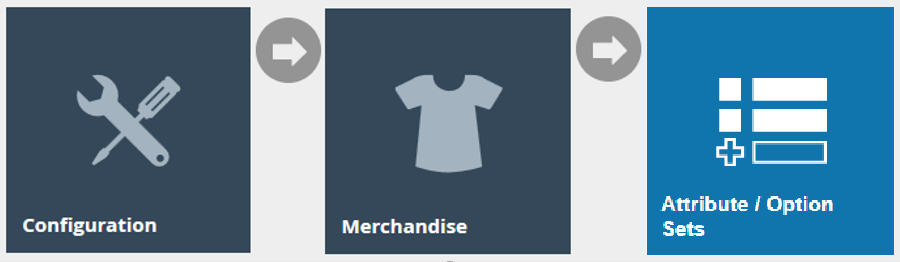
Configuration > Merchandise > Attribute / Option Sets
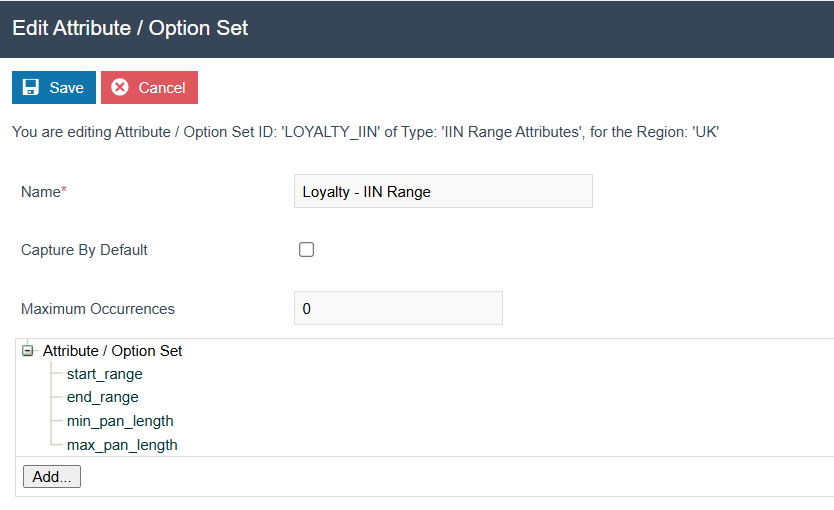
Create a new Option Set with the ID of LOYALTY_IIN and add the following text options:
| Field | Description |
|---|---|
| Name | Display name for the Option Set; set to Loyalty - IIN Range. |
| Capture By Default | Whether this option set is captured automatically by default; leave unchecked. |
| Maximum Occurrences | Maximum number of times the option set can be captured; set to 0 (unlimited). |
| start_range / end_range | Text options defining the IIN range boundaries. |
| min_pan_length / max_pan_length | Text options defining the allowed PAN length range. |
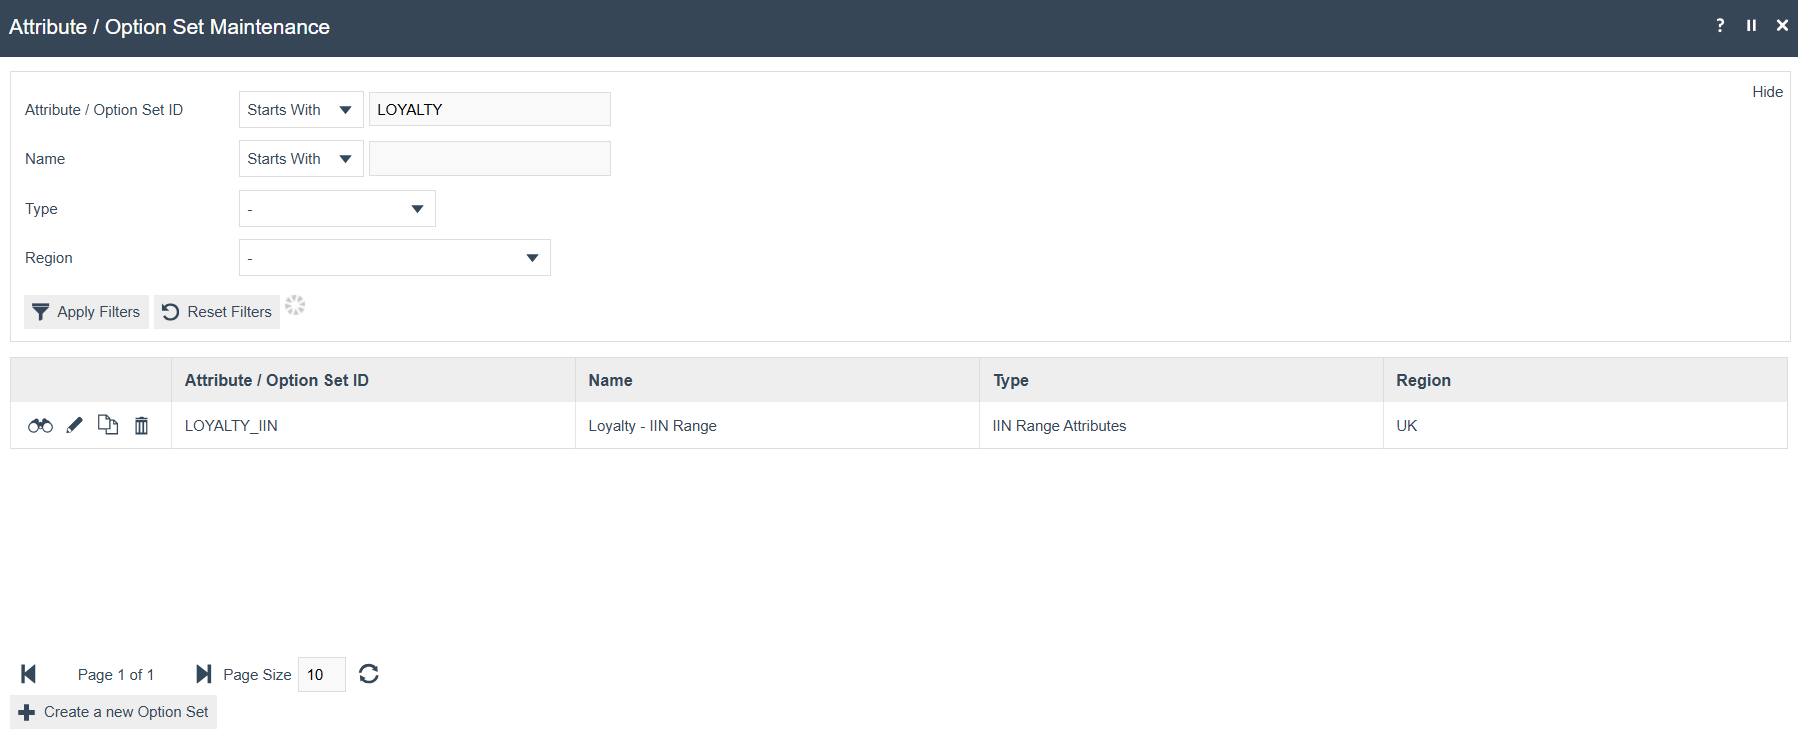
Click Save which should now display the created Option Sets record as follows:
Menu Configuration
This section contains the Menu button that needs to be added to enable Customer Registration through QR Code.
The Menu Maintenance application can be accessed through:
Configuration > System > Menus
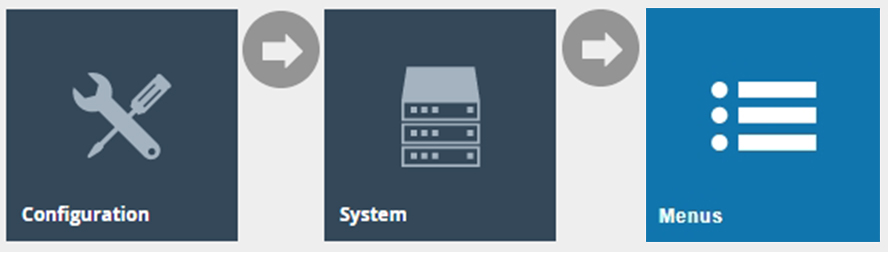
Navigate into your SALE menu and add the following button:
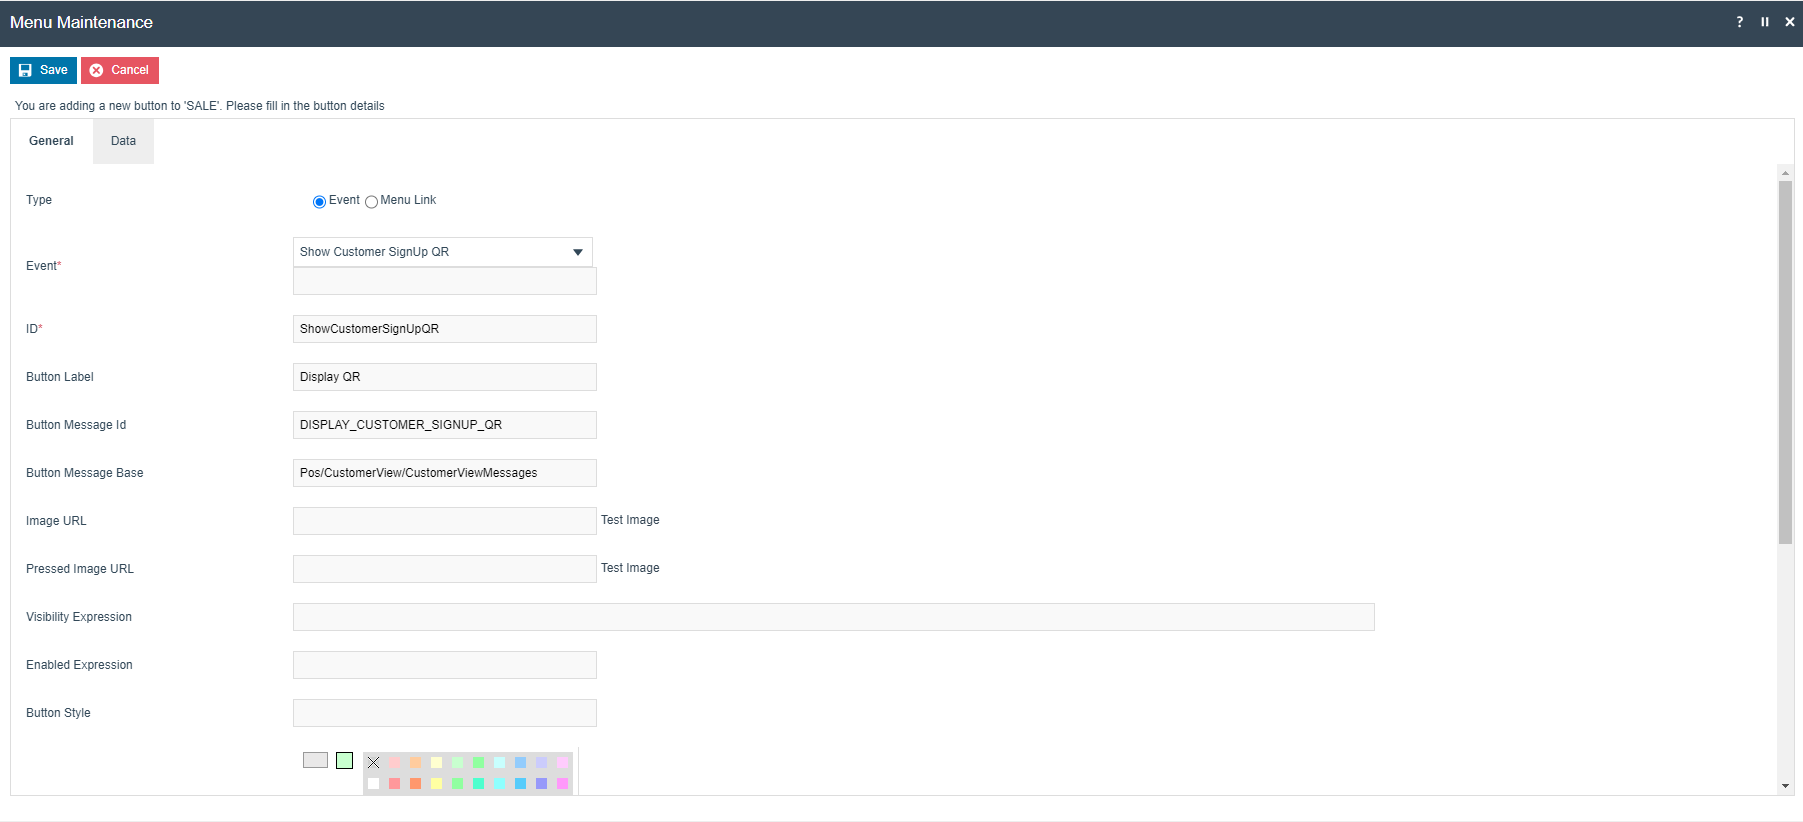
| Field | Description |
|---|---|
| Type | Whether the button triggers an Event or a Menu Link; set to Event. |
| Event | POS event triggered by the button; set to Show Customer SignUp QR. |
| ID | Unique button identifier; set to ShowCustomerSignUpQR. |
| Button Label | Text displayed on the button; set to Display QR. |
| Button Message Id | Message resource key for the button label. |
| Button Message Base | Message resource bundle path used to resolve the label. |
| Image URL / Pressed Image URL | Optional button icon images; not required for this button. |
Click Save to add the above button into your SALE menu.
This button can now be used to successfully register customers through QR codes in your POS.
Broadcasting
To deliver the configuration changes to the POS, broadcast the following entities:
- POS Terminal
- Account Credentials
- Option Sets
- Menu
All four entities must be broadcast to the POS for the QR code customer registration feature to function correctly.