How To Configure Application Extensions in Estate Manager
Introduction
A Local Application Extension allows you to upload custom JAR files (containing business logic or packages) through the Estate Manager UI, store them in the database, and dynamically deploy them into the running Enactor platform at startup - without modifying the core codebase or redeploying the entire application.
The purpose of this guide is to demonstrate how to upload an application extension package, package an entity extension, and create, deploy, activate, and deactivate a Local Application Extension in Estate Manager.
Overview
The following steps are required to configure an application extension:
- Uploading an Application Extension - Upload the extension package through Application Update Detail Maintenance and verify its
updatePackage.xmlproperties - Entity Extensions (optional) - Package entity deployment resources into the same application JAR
- Creating a Local Application Extension - Register the uploaded update as a Local Application Extension
- Deploying a Local Application Extension - Mark the extension for deployment to its applicable runtime contexts
- Activating a Local Application Extension - Restart the servlet so the extension content is extracted and applied
- Deactivating a Local Application Extension - Remove an active extension's content on the next restart
Prerequisites
Before starting, you should have the following resources in place:
- Enactor Estate Manager
- A packaged application extension JAR and an accompanying
updatePackage.xml - An Estate Manager user with the relevant Local Application Extension privileges (see User Role Configuration below)
Local Application Extension Maintenance is only available where the device type is Estate Manager, and is restricted to Enactor Admin users.
User Role Configuration
The following privileges should be enabled for the User:
| Application Package | Function ID | Description |
|---|---|---|
| Enactor Web Maintenance | enactor.localApplicationExtensionMaintenance.Run.Name | Allows the EM User to run Local Application Extension Maintenance Application. |
| Enactor Web Maintenance | enactor.localApplicationExtensionMaintenance.List.Name | Allows the EM User to list entries in Local Application Extension Maintenance Application. |
| Enactor Web Maintenance | enactor.localApplicationExtensionMaintenance.View.Name | Allows the EM User to view records in Local Application Extension Maintenance Application. |
| Enactor Web Maintenance | enactor.localApplicationExtensionMaintenance.New.Name | Allows the EM User to add a new record to Local Application Extension Maintenance Application. |
| Enactor Web Maintenance | enactor.localApplicationExtensionMaintenance.Remove.Name | Allows the EM User to remove a record from Local Application Extension Maintenance Application. |
| Enactor Web Maintenance | enactor.localApplicationExtensionMaintenance.Deploy.Name | Allows the EM User to deploy a Local Application Extension record. |
| Enactor Web Maintenance | enactor.localApplicationExtensionMaintenance.Deactivate.Name | Allows the EM User to deactivate a Local Application Extension record. |
This completes the User Role configuration.
Uploading an Application Extension
Navigate to Application Update Detail Maintenance using the Search or the path:
Administration > Data Management > Broadcasts > Application Update Detail

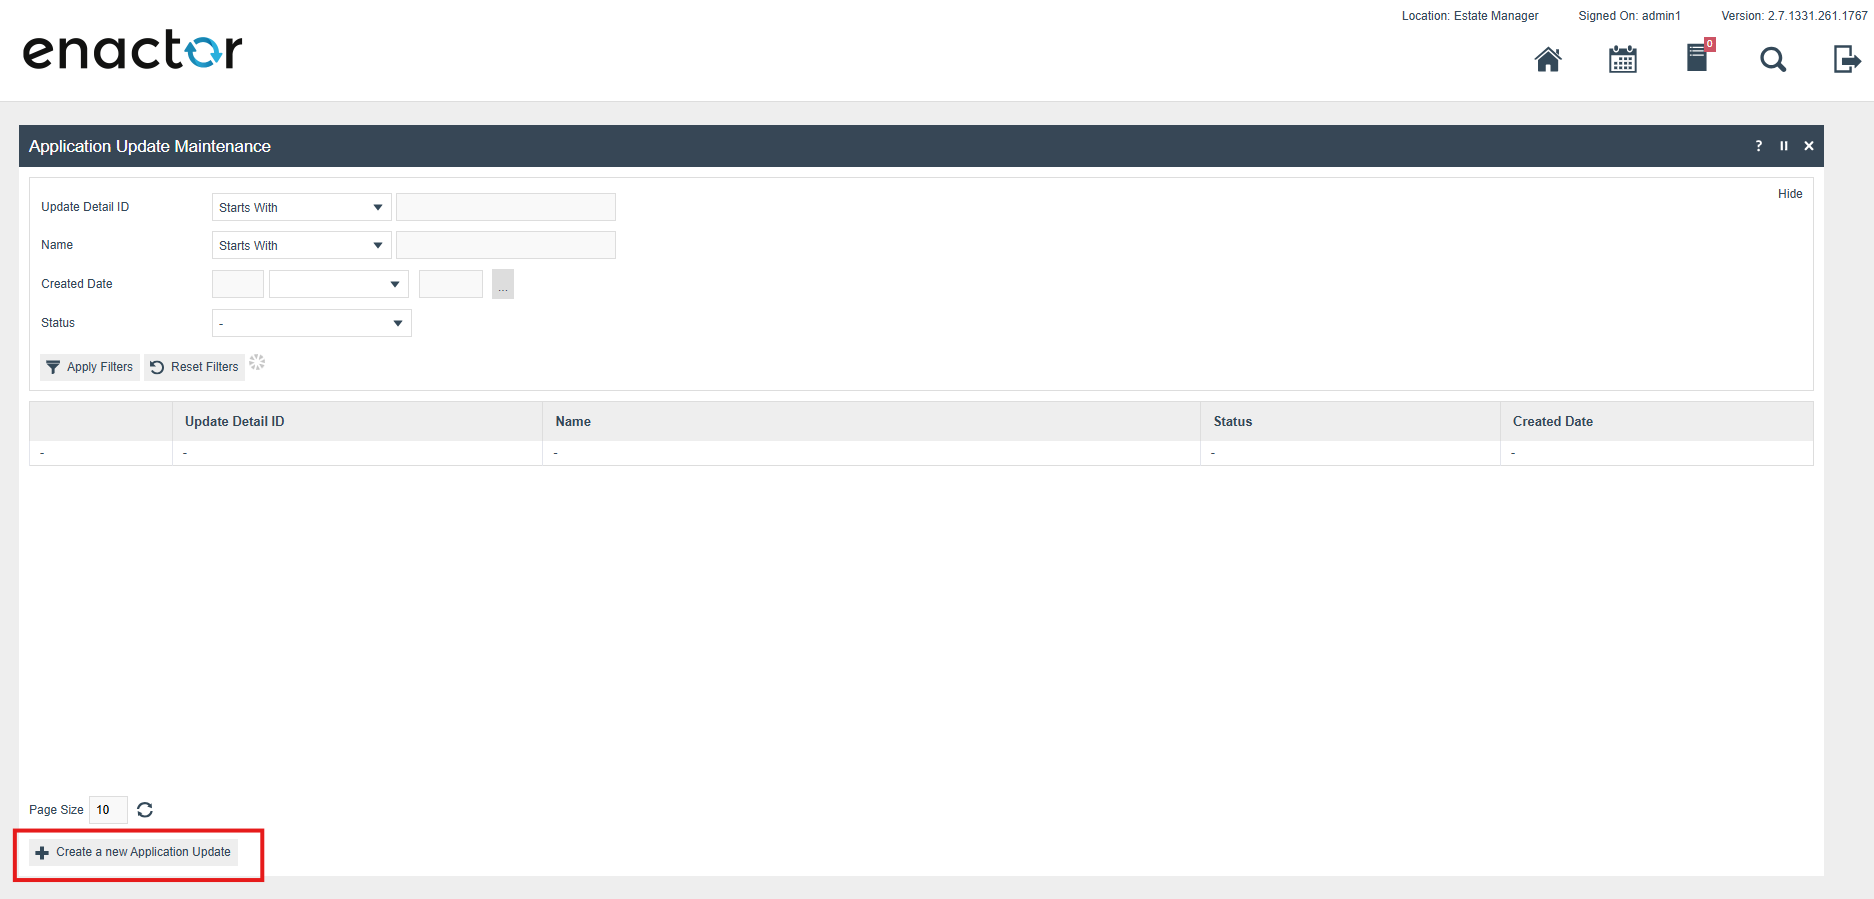
Click Create a New Application Update at the bottom of the page.
Select the File Repository storage type and upload the zip file. The zip file must contain the JARs related to the update and an updatePackage.xml.
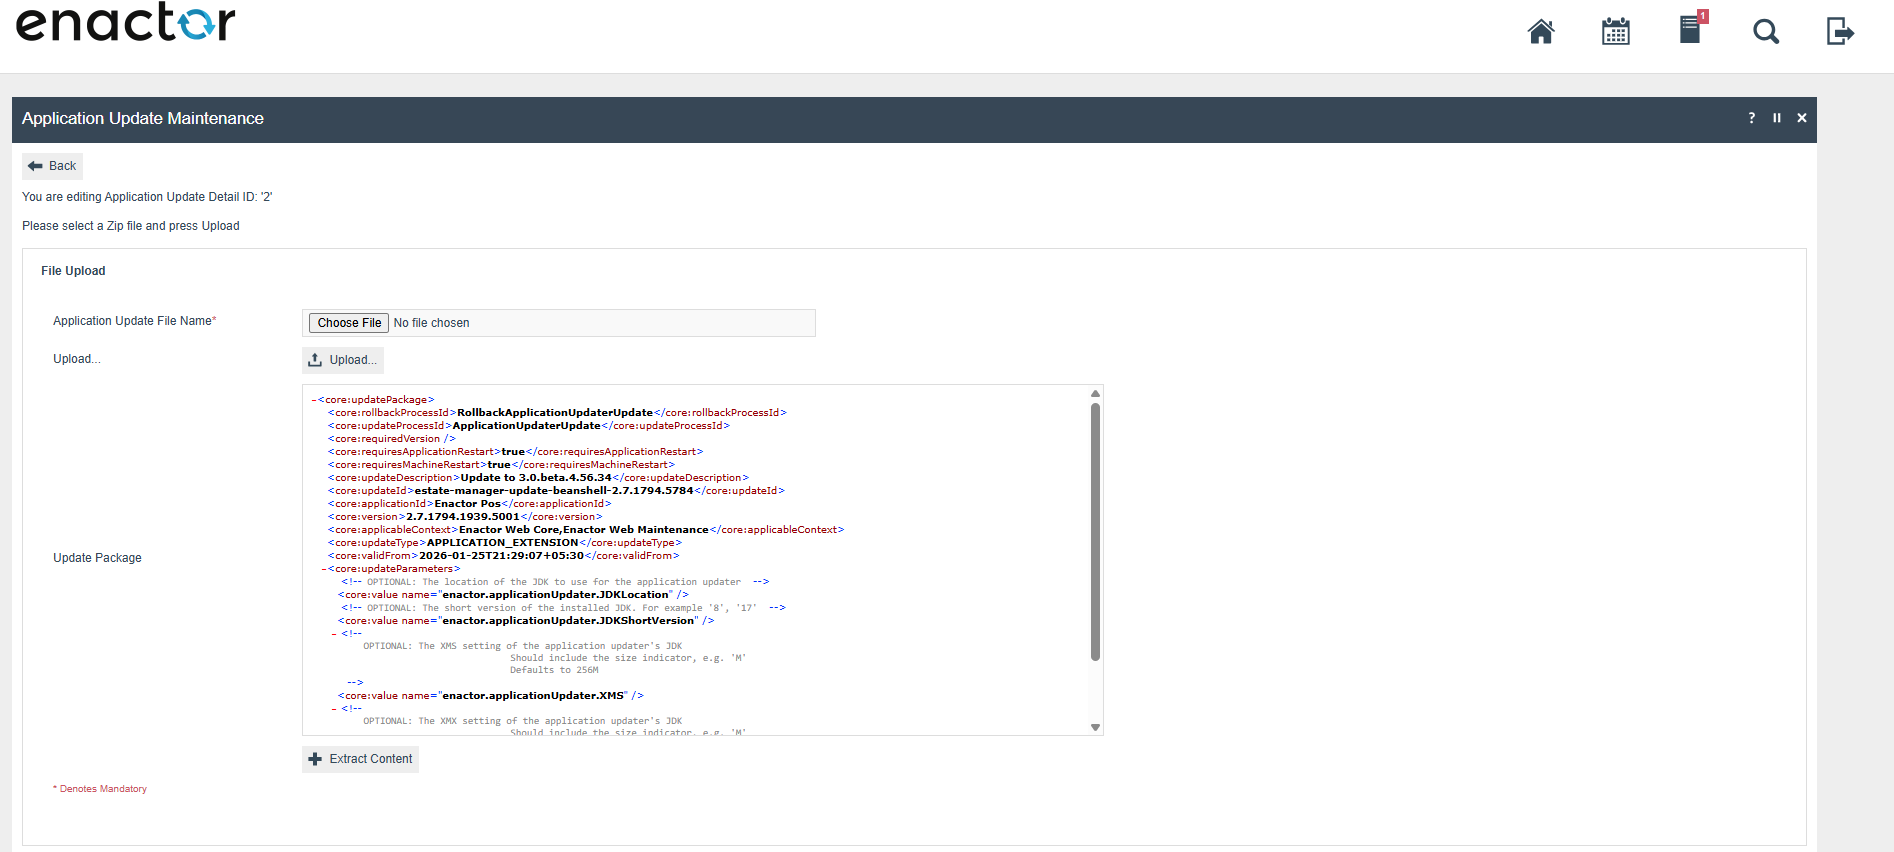
updatePackage.xml content. Review the properties described below, then select Extract Content.
In the updatePackage.xml, verify that the following properties are included with the correct values:
| Property | Description |
|---|---|
<core:updateId> | Uniquely identifies the application extension. Used as the Application Extension ID in Local Application Extension Maintenance. |
<core:applicationId> | The target application ID. Both POS and Estate Manager compare versions based on the application ID and version value. |
<core:version> | The version of the update. Duplicate versions and lower versions are not permitted; validation occurs when the update is selected. |
<core:applicableContext> | The runtime contexts, as comma-separated values. During development, all listed contexts should be considered active deployment contexts. |
<core:updateType> | The update type shown when selecting the update in Local Application Extension Maintenance. Must be APPLICATION_EXTENSION or JAVA_EXTENSION. |
<core:validFrom> | (Optional) If not provided, the extension is always active. If specified, the extension becomes active only after the given date and time. |
<core:updateId>estate-manager-update-beanshell-2.7.1794.5784</core:updateId>
<core:applicationId>Enactor Pos</core:applicationId>
<core:version>2.7.1794.1939.5001</core:version>
<core:applicableContext>Enactor Web Core,Enactor Web Maintenance</core:applicableContext>
<core:updateType>APPLICATION_EXTENSION</core:updateType>
<core:validFrom>2026-01-25T21:29:07+05:30</core:validFrom>
Click Extract Content, then click Save. The new application update is now visible as an entry in the table.
This completes the Uploading an Application Extension configuration.
Entity Extensions
Entity extensions are packaged and deployed using the same Local Application Extension mechanism described above. The deployment process is identical to other application extensions; the difference is that the application JAR contains the entity deployment resources.
The application update zip must contain the application JAR and an updatePackage.xml:
<EntityExtension>.zip
  - <EntityExtension>.jar
  - UpdatePackage.xml
The updatePackage.xml is configured as described in Uploading an Application Extension above. Entity extensions use the APPLICATION_EXTENSION update type.
The application JAR must include the entity deployment resources under the META-INF/deployments directory. These resources may include entity mappings, server definitions, default data, processes, message resources, transforms, and other deployment artifacts required by the extension:
META-INF/
  deployments/
    - DefaultData/
    - EntityMapping/
    - Process/
    - ServerDefinition/
    - MessageResource/
    - Transforms/
    - ...
Once the application update has been uploaded, the entity extension is managed through Local Application Extension Maintenance. Creation, deployment, activation, deactivation, version validation, and restart requirements are identical to those described in the Local Application Extension sections below.
This completes the Entity Extensions configuration.
Creating a Local Application Extension
Navigate to Local Application Extension Maintenance using the Search or the path:
Administration > Data Management > Broadcasts > Local Application Extension

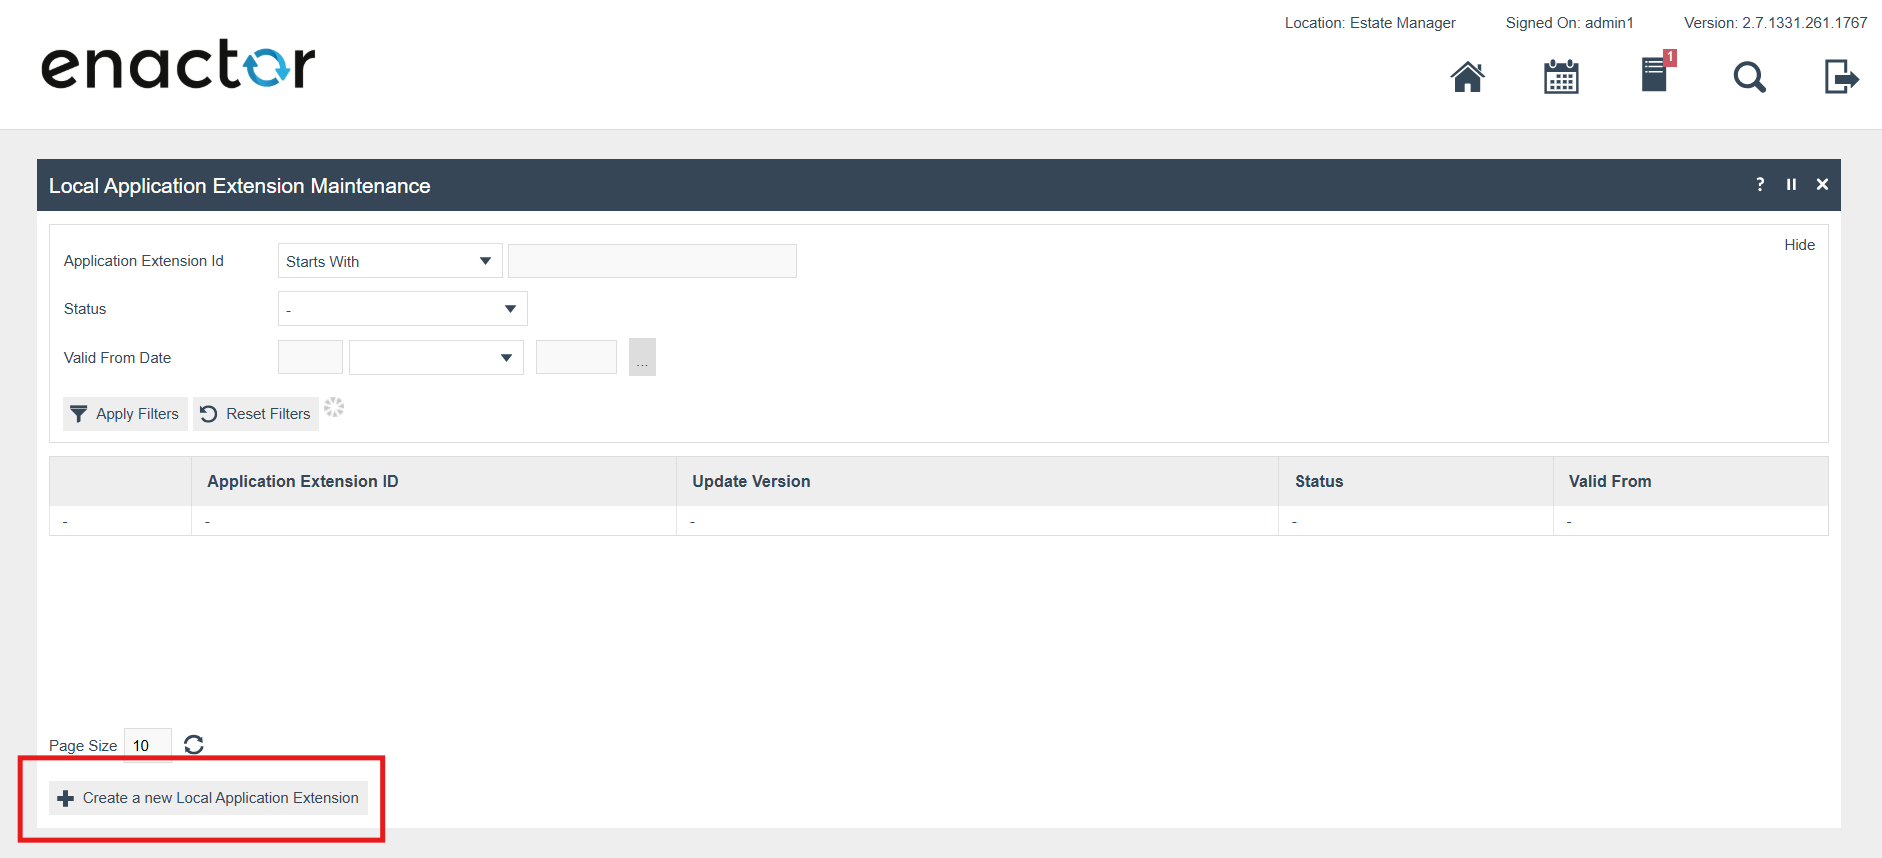
Click Create a new Local Application Extension at the bottom of the page.
Select a previously uploaded Application Update from the dropdown list. The list only shows Application Update records where the update type is APPLICATION_EXTENSION or JAVA_EXTENSION.
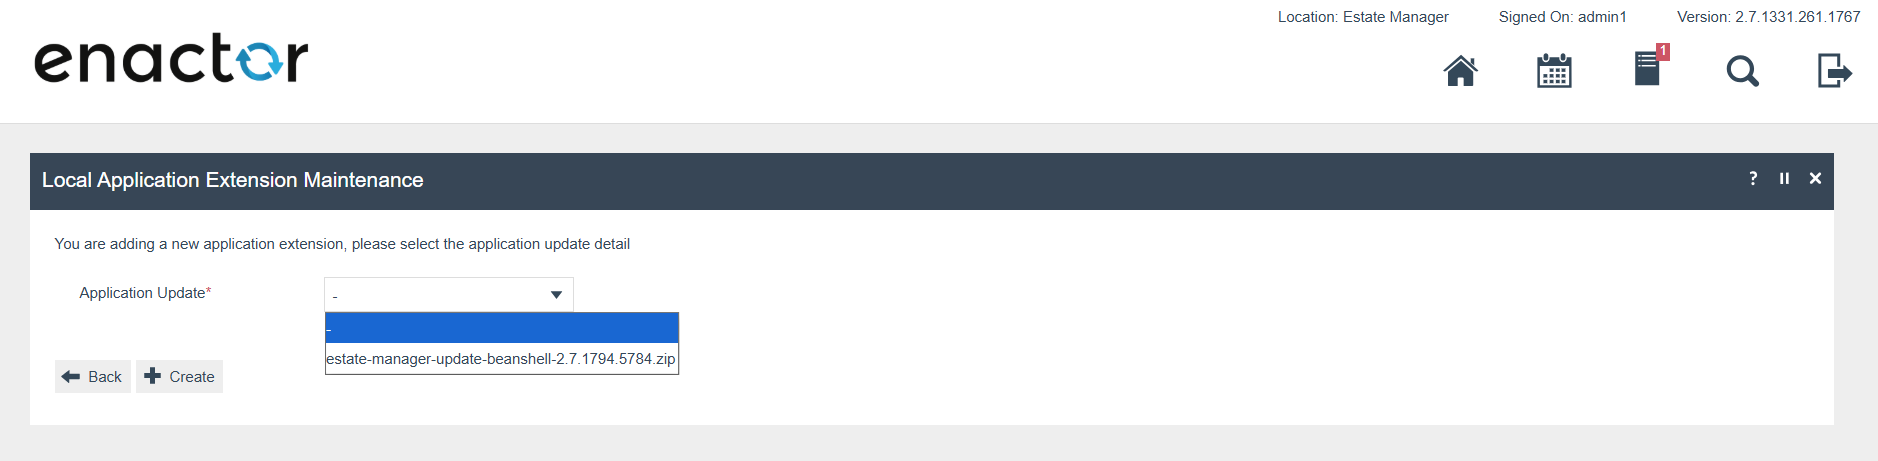
Selecting Create auto-populates the following fields from the corresponding updatePackage.xml:
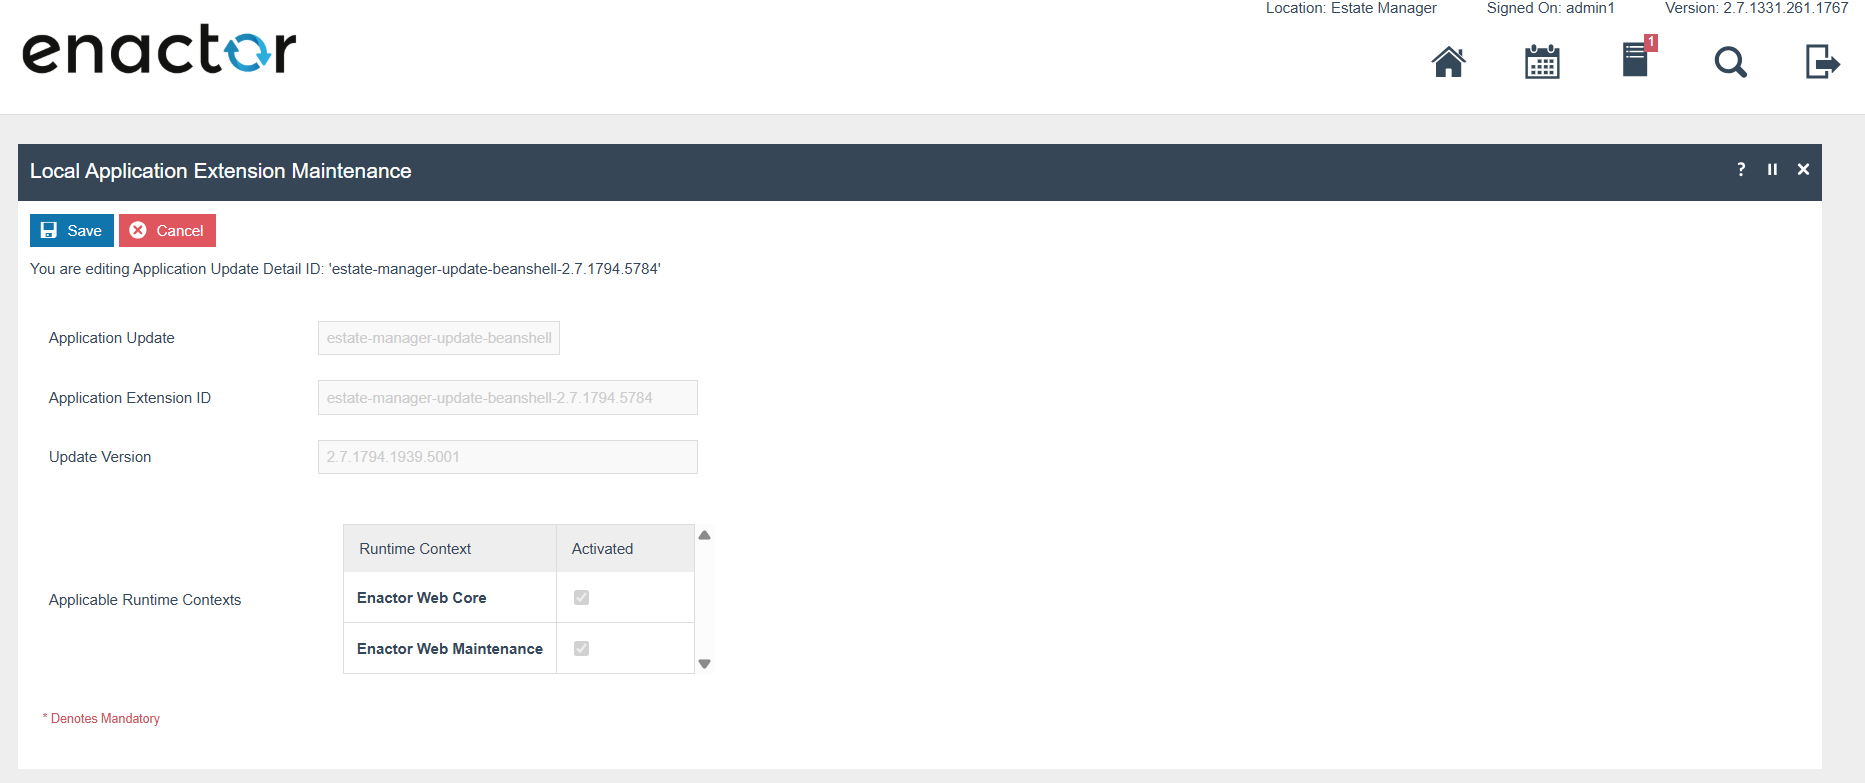
updatePackage.xml, then select Save.
| Field | Description |
|---|---|
| Application Update | The uploaded update package this extension is created from. Populated automatically. |
| Application Extension ID | Taken from <core:updateId> in updatePackage.xml. |
| Update Version | Taken from <core:version> in updatePackage.xml. |
| Applicable Runtime Contexts | Taken from <core:applicableContext> in updatePackage.xml. |
After reviewing the populated fields, select Save. The new Local Application Extension is now visible as an entry in the table with:
- Status:
RECEIVED - Row Operation: a Deploy button is visible for the record
After saving, the ApplicationExtensionDetails and ApplicationExtensionData database tables should each contain a new record, sharing the same Application Extension ID and Version values.
This completes the Creating a Local Application Extension configuration.
Deploying a Local Application Extension
Only Application Extension records with a status of RECEIVED are eligible for deployment.
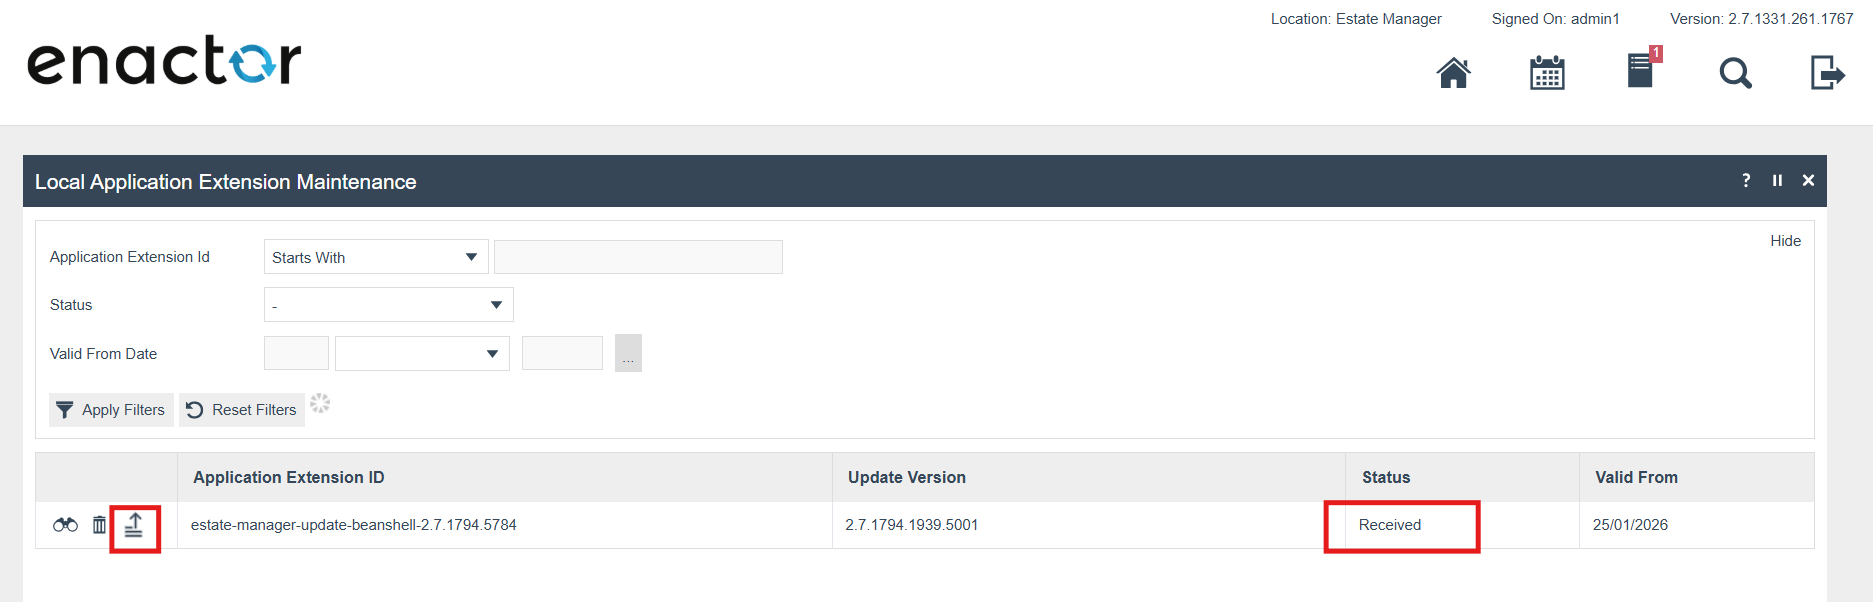
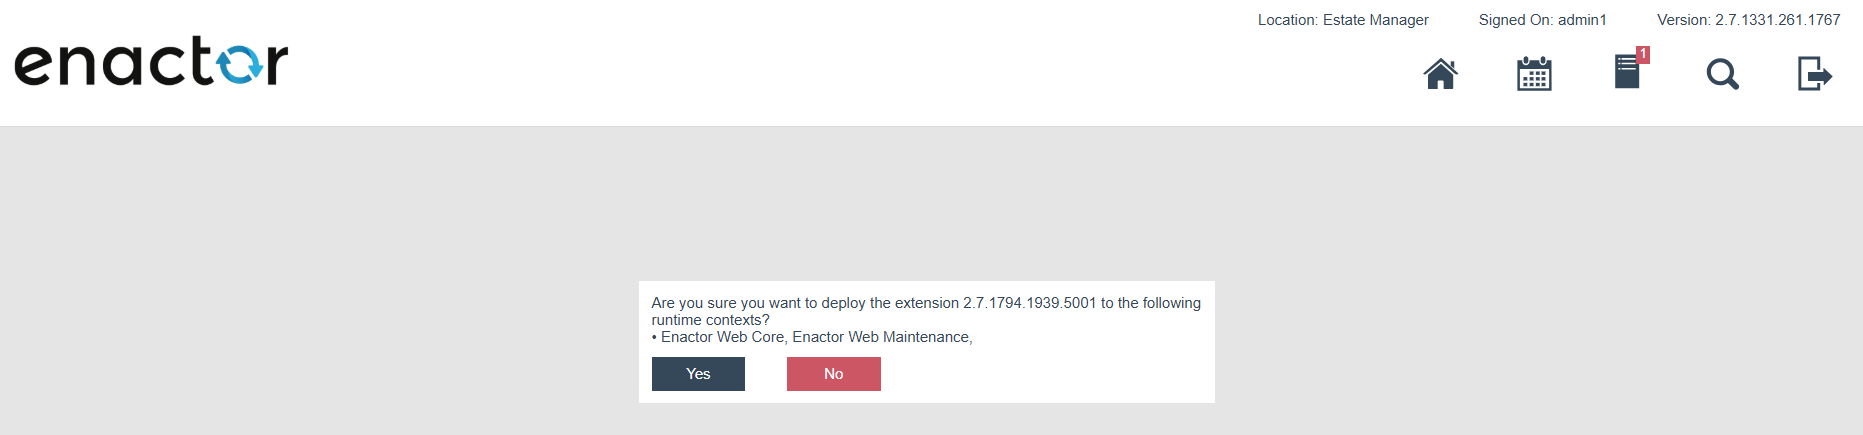
A confirmation dialog displays the applicable contexts defined in updatePackage.xml under <core:applicableContext>. Review the contexts and select Yes to proceed.
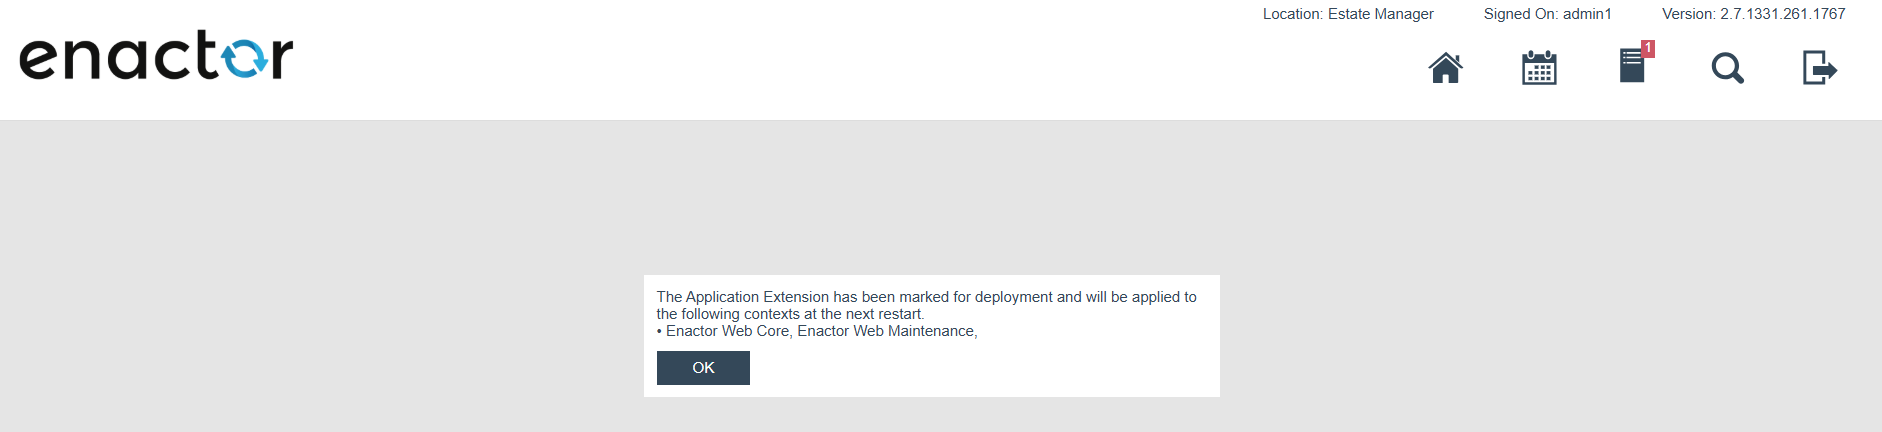
Upon successful deployment, a success message is displayed. Select OK to dismiss the message and return to the list page.
After deployment, the status of the Application Extension record updates as follows: RECEIVED -> STAGED.
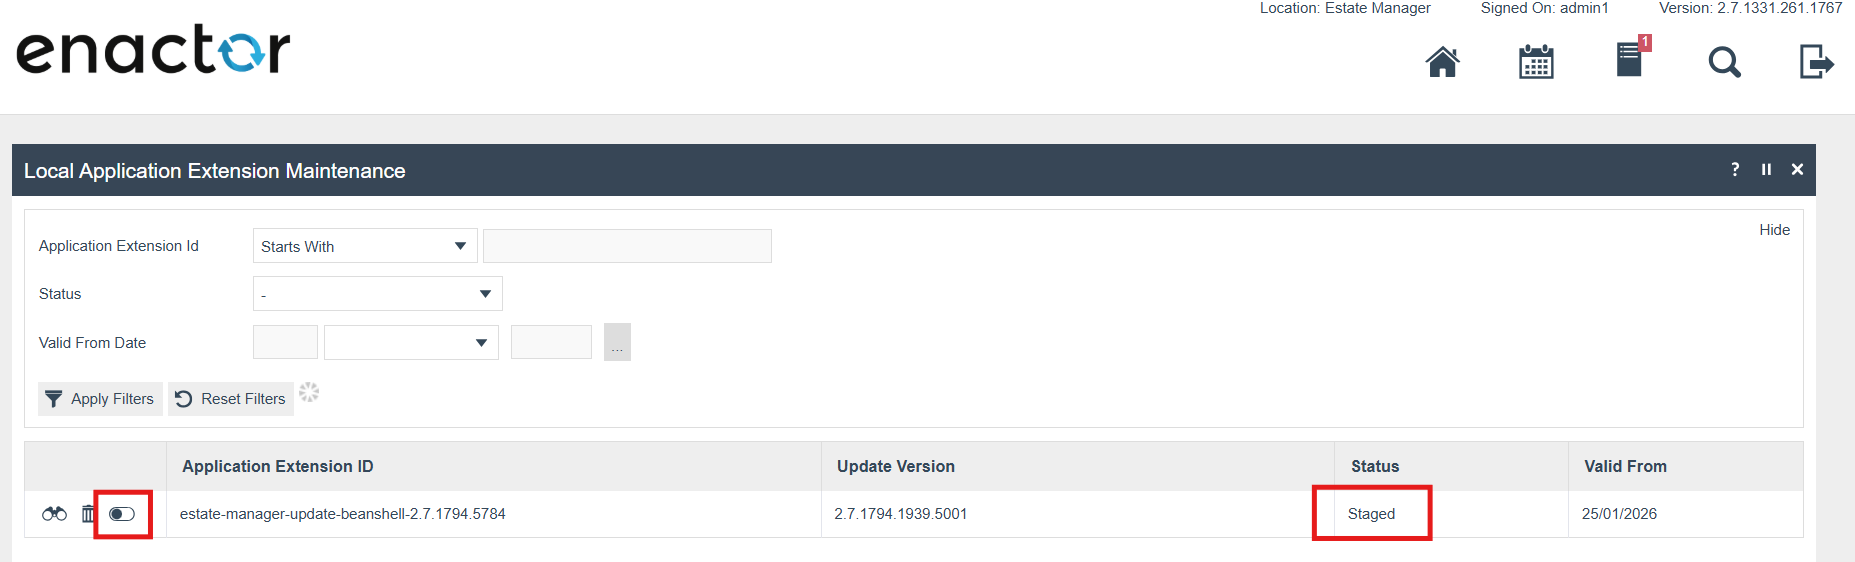
This completes the Deploying a Local Application Extension configuration.
Activating a Local Application Extension
After deployment, a manual restart of the servlet is required.
On restart, the server reads the database records and picks up all STAGED records, then performs the following validations:
- Runtime Context - verifies that the applicable contexts match the current runtime environment
- ValidFrom Date - verifies that the date and time condition is satisfied
If both validations pass, the extension content is extracted and stored under the Application Data Home directory in the following layout:
{AppHome}/Data/{contextName}/LocalApplicationExtension/
  {applicationExtensionId}/
    {version}/
      {fileName}.zip        (written from DB blob)
      extracted/            (ZIP extracted here on every startup)
        - *.jar
        - (subdirectories recursively scanned)
After logging in to Estate Manager, the Application Extension record status updates as follows: STAGED -> ACTIVE.
Both the Runtime Context and ValidFrom validations must pass on every startup for the extension to remain active. A mismatch on either leaves the record staged rather than active.
This completes the Activating a Local Application Extension configuration.
Deactivating a Local Application Extension
Once an Application Extension record has an ACTIVE status, a Deactivate button is available in the row options.
To deactivate, select Deactivate. A confirmation dialog appears; select Yes to proceed. Upon confirmation, the status updates immediately as follows: ACTIVE -> DEACTIVATION REQUESTED.
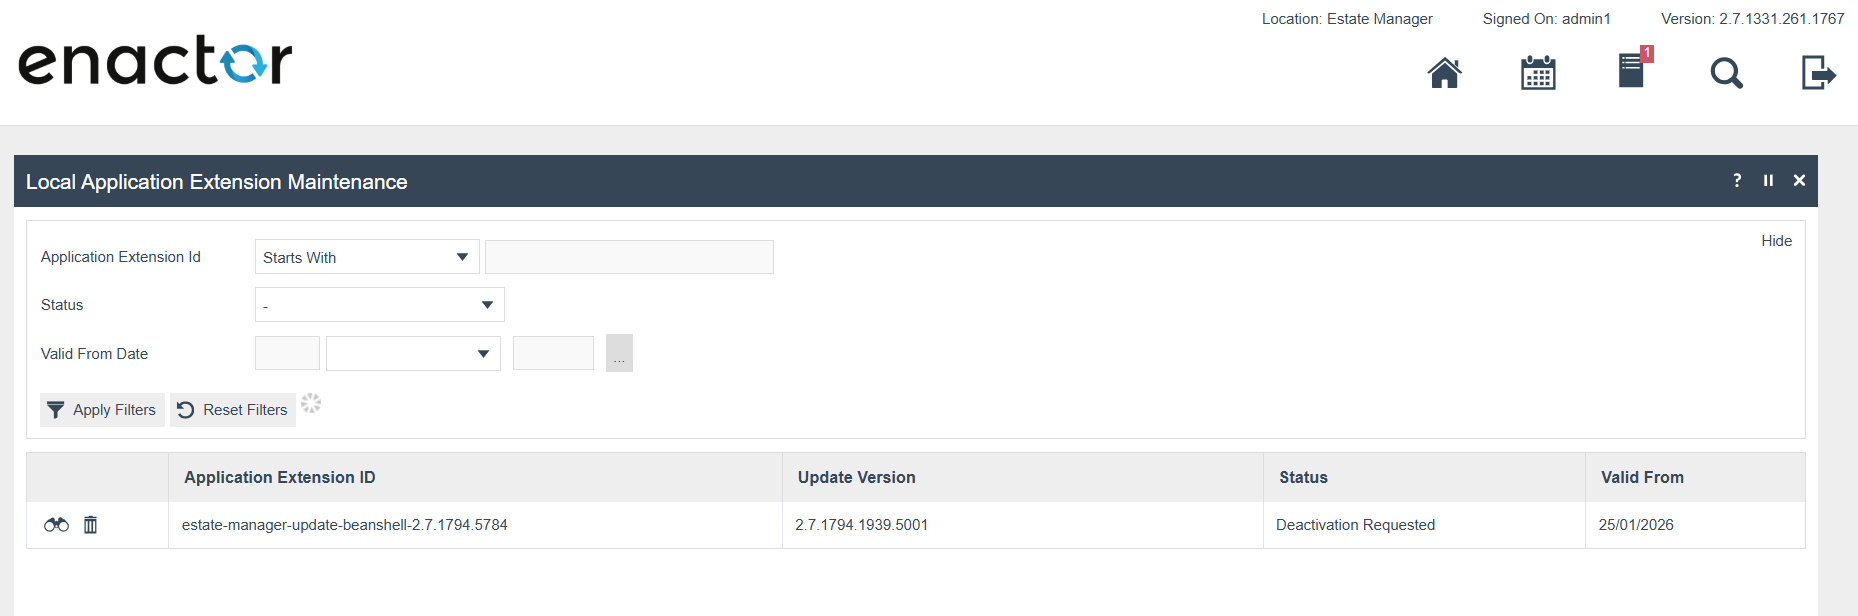
On the next servlet restart, all records with a DEACTIVATION REQUESTED status are filtered out and their corresponding content is deleted from the Application Data Home directory.
After logging in to Estate Manager following the restart, the status updates as follows: DEACTIVATION_REQUESTED -> DEACTIVATED.
This completes the Deactivating a Local Application Extension configuration.