How To Guide MariaDB Setup and Configuration using Amazon RDS
Introduction
This guide provides information on setting up and configuring a MariaDB database required for Enactor Central Applications. Database will be provisioned using Amazon RDS (Relational Database Service).
Overview
This guide will cover the following:
-
Prerequisites - Describes the conditions and criteria that should be met before provisioning a MariaDB database.
-
Database parameters - Describes the custom values that need to be set for certain database parameters.
-
Database provision - Describes the steps to provision the database.
Prerequisites
-
An account should be created on AWS (Amazon Web Services).
-
A payment method should be configured for services that will be used on AWS.
-
User should have sufficient knowledge on using AWS management console.
-
User should have sufficient knowledge on databases.
Note:
This guide will not cover provisioning a database within the free tier. Provisioning a database using this guide will incur a cost. The database specifications used in this guide are for reference purposes only. Appropriate database specifications must be selected based on the requirements.
Database Parameters
A parameter group needs to be created, and certain values need to be customized. Login to the AWS account and switch into the region of preference. Choosing a region closer to the infrastructure where the applications are deployed will result in low latency.
Creating a custom parameter group
-
Go to RDS in AWS management console.
-
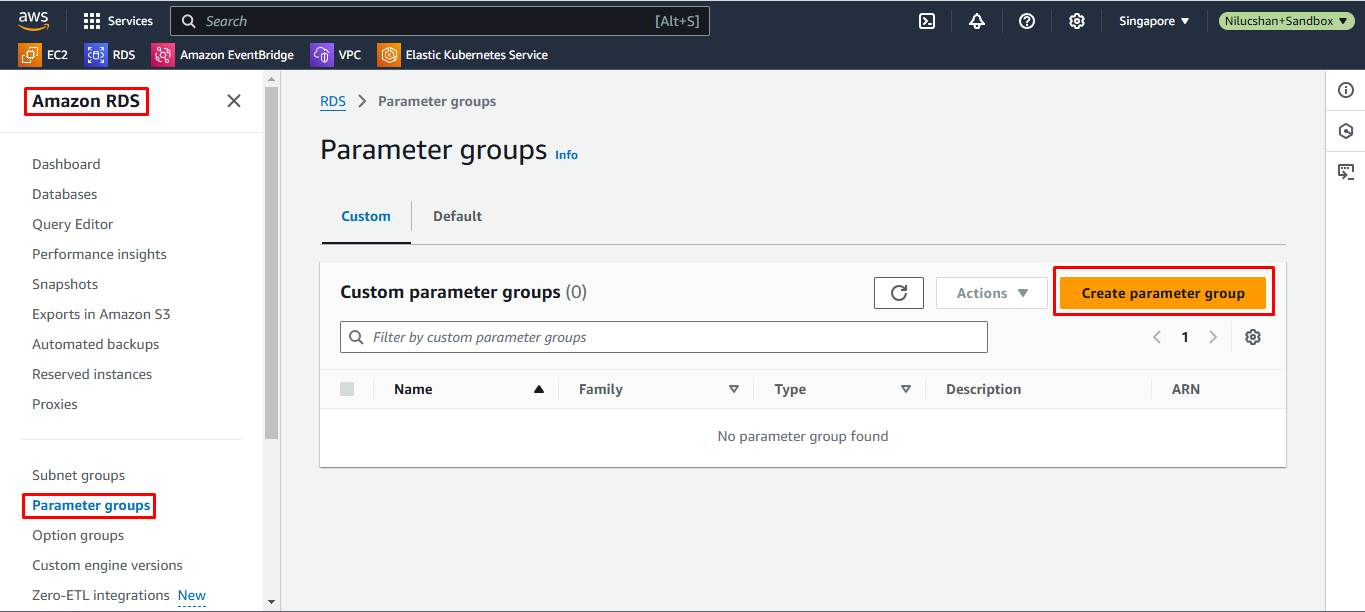
Select Parameter groups from the panel on the left.
-
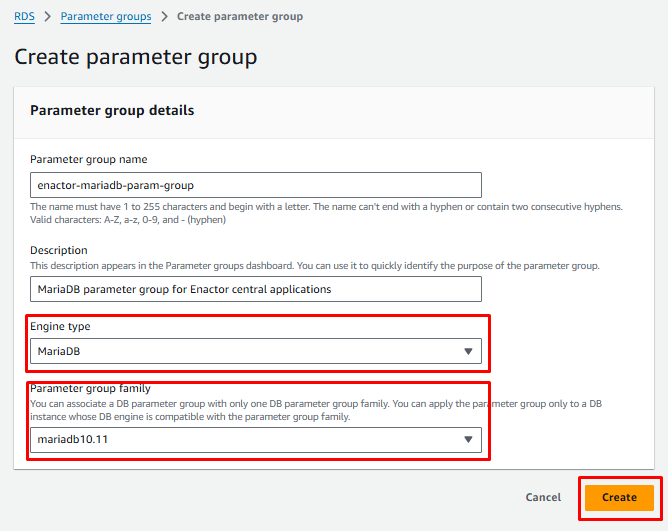
Click Create parameter group
-
Provide a meaningful name for the parameter group.
-
Provide a meaningful description for the parameter group.
-
Select MariaDB from the Engine type dropdown menu.
-
Select mariadb10.11 from the Parameter group family dropdown menu.
-
Click Create.
Customizing parameters
-
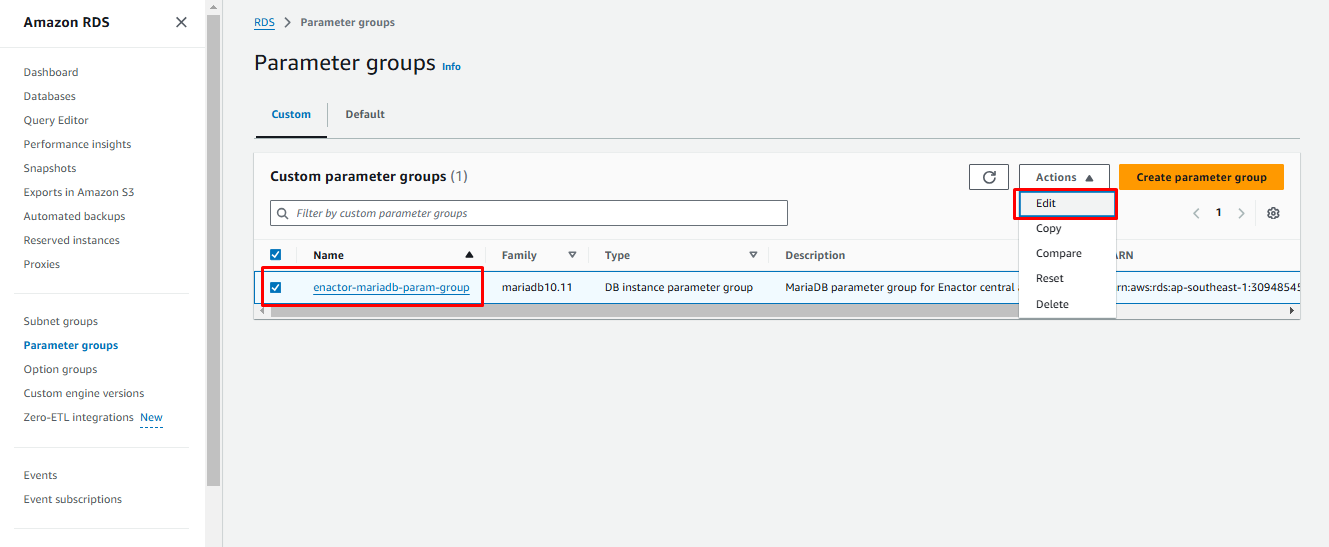
Select the parameter group created and select Edit from the Action dropdown menu.
-
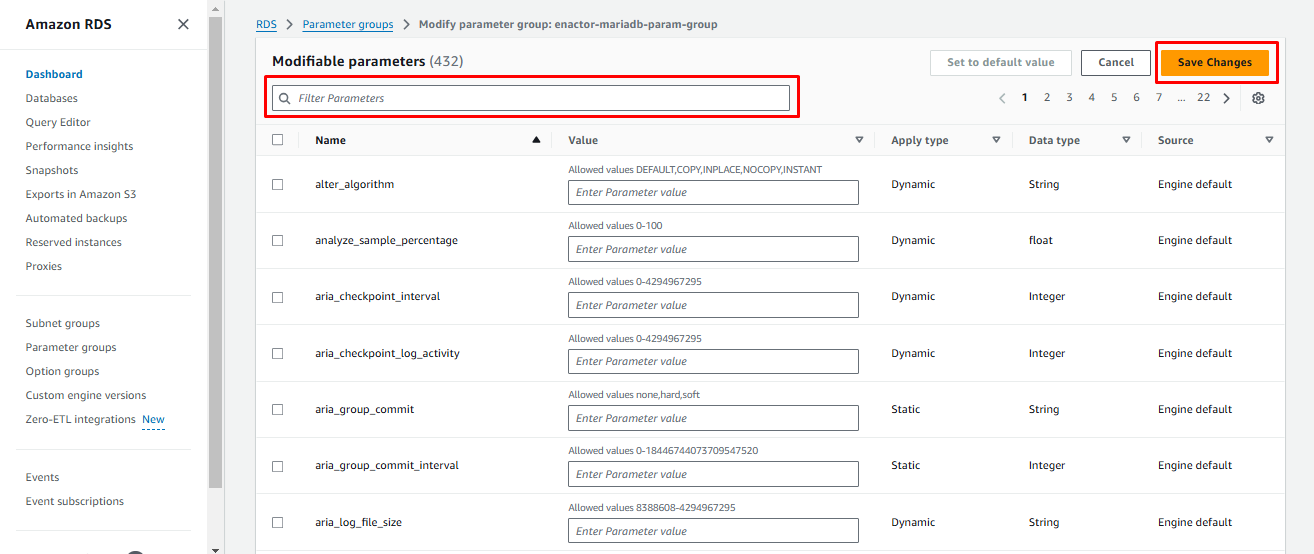
Search for parameters mentioned in the below table and modify the values accordingly and click Save Changes
| Parameter name | Parameter value |
|---|---|
| innodb_file_per_table | 1 |
| innodb_log_buffer_size | 268435456 |
| innodb_log_file_size | 268435456 |
| innodb_write_io_threads | 16 |
| lower_case_table_names | 1 |
| collation_connection | utf8mb4_unicode_ci |
| collation_server | utf8mb4_unicode_ci |
| character_set_client | utf8mb4 |
| character_set_connection | utf8mb4 |
| character_set_database | utf8mb4 |
| character_set_filesystem | utf8mb4 |
| character_set_results | utf8mb4 |
| character_set_server | utf8mb4 |
| tx_isolation | READ-COMMITTED |
Database Provision
A RDS instance needs to be provisioned. This RDS will be backed by the MariaDB database engine.
-
Go to RDS in AWS management console.
-
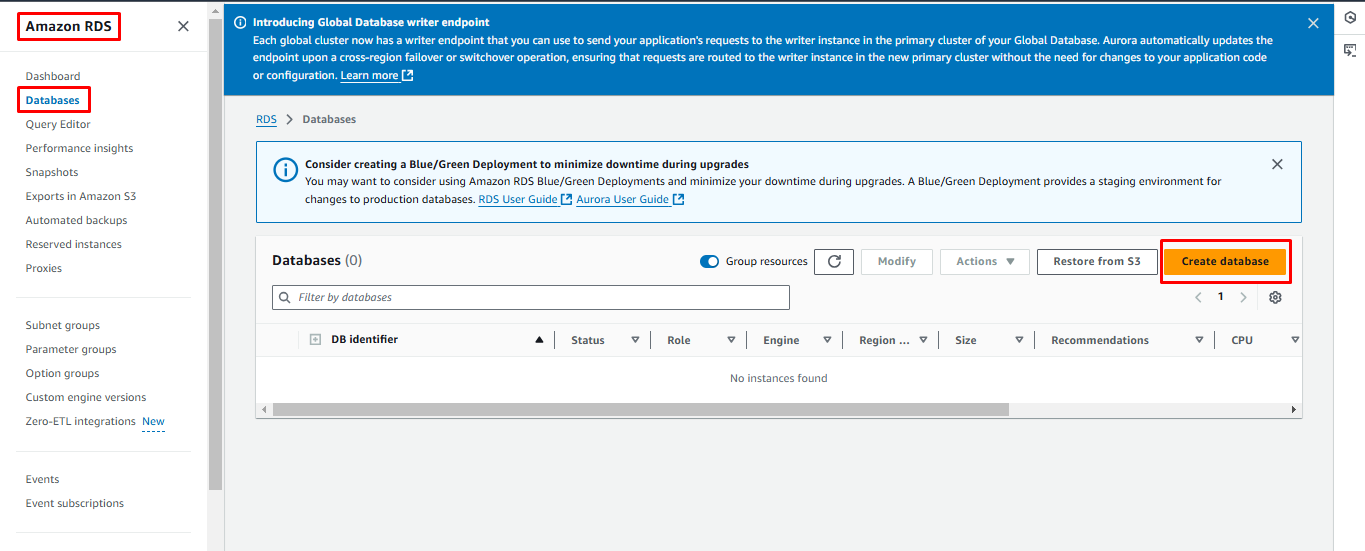
Select Databases from the panel on the left.
-
Click Create database.
-
Select Standard create option from the Choose a database option method.
-
Select MariaDB from the Engine options.
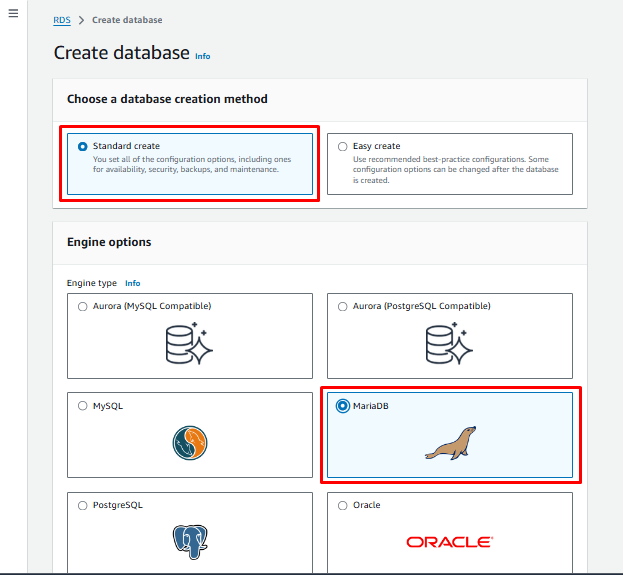
- Select the preferred MariaDB version from the Engine version dropdown menu.
-
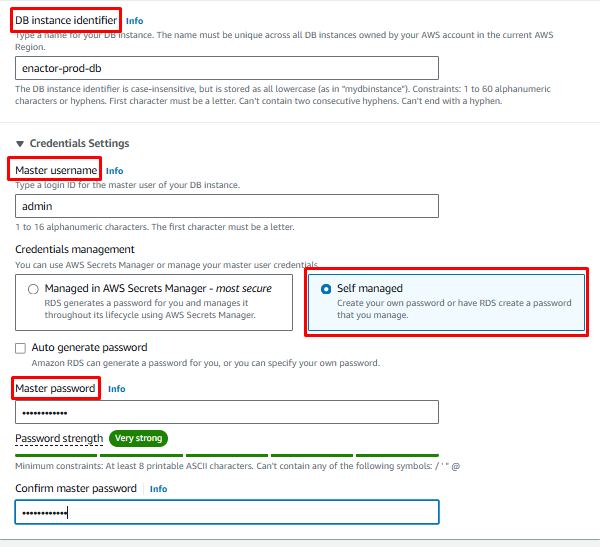
Under Settings,
-
Provide a meaningful name for DB instance identifier.
-
Provide the master username.
-
Provide the master password.
-
Note: AWS secret manager can be used for password generation. However, for simplicity, the Self managed option will be used under credential management. Passwords can be based on choice or auto-generated. Ensure to make a note of the username and password provided in this step.
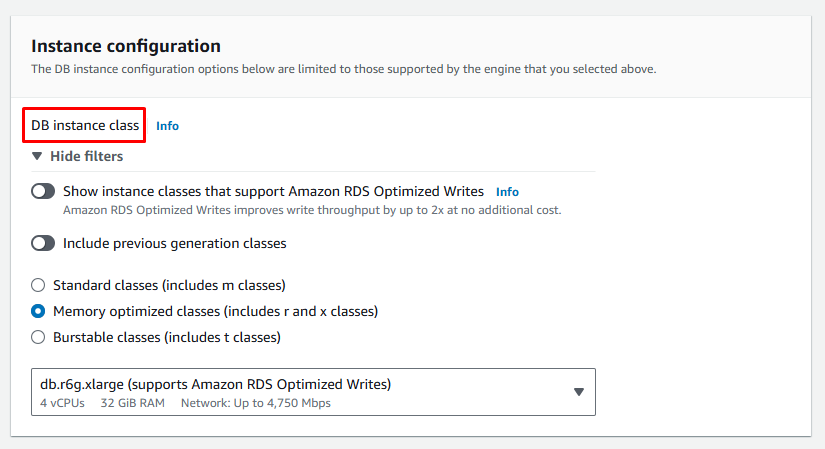
- Select the preferred instance class from the DB instance class dropdown menu.
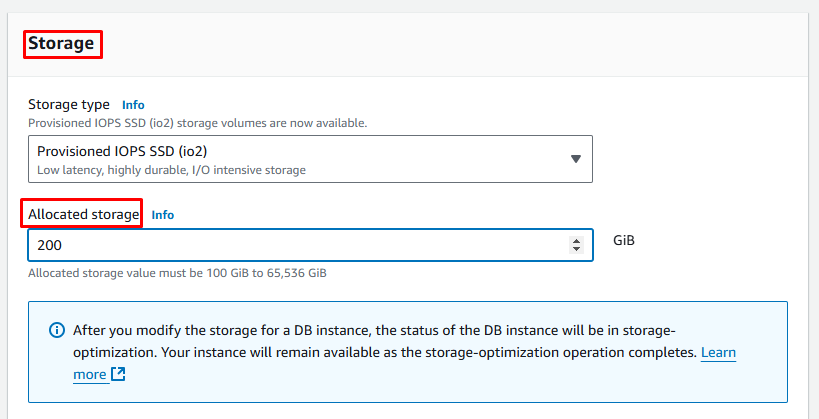
- Provide a reasonable value for Allocated storage based on requirements.
-
Configure availability and connectivity settings based on requirements and infrastructure needs.
-
Under Additional configuration,
-
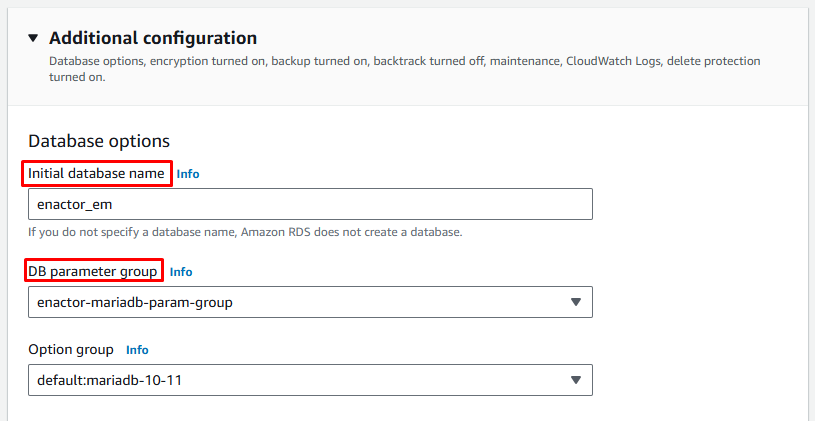
Provide the required database name for Initial database name.
-
Select the parameter group created in the previous section from the DB parameter group dropdown menu.
-
Configure backup, encryption and maintenance setting based on requirements.
-
Enabling database deletion protection is the recommended practice.
-
-
Click Create database. Database creation will take some time.
-
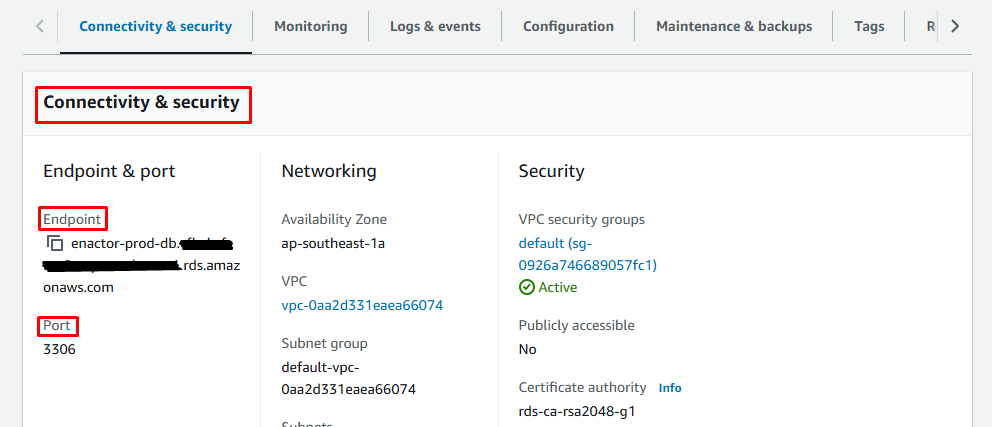
Once the database creation is complete (status will be marked as Available), make a note of the endpoint and the port under Connectivity & security tab.
-
Configure the application to use the provisioned RDS.
