How To Deploy Central Application Using Docker Containers
Introduction
This guide provides the basic step-by-step configurations required to configure and manually deploy Enactor Central Applications. Provided that the infrastructure is already in place, this guide describes how the specific enactor services can be specifically deployed to each of the 8 nodes while making all necessary changes to the stack and env files as required.
Overview
This guide will cover the configuration for the following:
-
Deployment Environment - Describes the basic concepts regarding the deployment of an Environment.
-
Prerequisites - Describes the steps that should be completed before starting the manual deployment of enactor modules in docker swarms.
-
Configuration Steps - Describes the steps to be followed to manually deploy the Enactor Modules in a standard deployment successfully.
Deployment Environment
Docker Swarm is based on the "manager" and "worker" concepts. A single Docker Swarm can contain multiple managers and multiple workers.
The example we provide in this document is for reference purpose only and consists of 3 managers and 5 workers machines running on an Ubuntu operating system. Services are deployed to each node as described below, Applications can be distributed across the nodes in any order.
| Manager - Leader | Leader - Follower (1) | Leader - Follower (2) | Worker (1) | Worker (2) | Worker (3) | Worker (4) | Worker (5) |
|---|---|---|---|---|---|---|---|
| - | - | - | EMA EMP EMP-SFTP EMS (1) Zookeeper (1) SOLR | EMS (2) CMA CMP CMS (1) Zookeeper (2) | CMS (2) OMA OMP OMS (1) WPN (OM) | OMS (2) EMC SS PDP WebPOS Zookeeper (3) WPN (EM) | EMR |
By default, the managers too can run containers unless managers are specifically created with '--availability drain' option.
Also, make sure that each of the above manager and worker nodes have sufficient processing and memory capacity to run the applications that are deployed to them.
Manager Nodes - 2 Cores CPU, 4GB Memory Worker Nodes - 8 Cores CPU, 16GB Memory
This is only an example and not a recommendation. Based on the above example, a decision can be made on how much of processing and memory capacity would be required to run the applications.
Prerequisites
Sufficient knowledge of containerization, docker, docker services, docker swarm, and docker stack is required to follow this guide. Below link contains a guide for a beginner to docker and docker swarms:
Configuration for Swarm Nodes and configuration of Linux Nodes needs to be done and this is all described in the Enactor document titled "How to configure Manual Deployment of Enactor Modules in Docker Swarm".
Docker
This section covers the steps to install docker and configure the docker swarm.
Installing Docker
After configuring for Swarm Nodes, a Linux Node can be configured. Docker needs to be installed successfully to the Linux machine to do this.
Uninstall old versions.
sudo apt-get remove docker docker-engine docker.io containerd runc
Allow APT to use repository over HTTPS
sudo apt-get update
sudo apt-get install apt-transport-https ca-certificates curl gnupg software-properties-common
Add Docker's official GPG key.
sudo install -m 0755 -d /etc/apt/keyrings
curl -fsSL https://download.docker.com/linux/ubuntu/gpg | sudo gpg --dearmor -o /etc/apt/keyrings/docker.gpg
sudo chmod a+r /etc/apt/keyrings/docker.gpg
Setting up the Docker repository
echo \
"deb [arch="$(dpkg --print-architecture)"
signed-by=/etc/apt/keyrings/docker.gpg]
https://download.docker.com/linux/ubuntu \
"$(. /etc/os-release && echo "$VERSION_CODENAME")" stable" | \
sudo tee /etc/apt/sources.list.d/docker.list /dev/null
Install Docker-CE
sudo apt-get update
sudo apt-get install docker-ce
Add user to the docker group.
sudo usermod -aG docker <your-user>
Log out and login for this to take effect.
Add the following Docker daemon config JSON file in the directory
/etc/docker. The file name should be daemon.json.
{

"labels": ["private_ip=REPLACE_WITH_PRIVATE_IP"],

"data-root": "PATH_TO_DOCKER_DOCKER_DATA_DIRECTORY"

}
Restart the Docker daemon.
systemctl restart docker
Protocols and Ports Between the Hosts
Since Docker swarm is a cluster which connects multiple hosts, we need to make sure that certain protocols and ports are allowed between the hosts.
Port 2377 TCP for communication between nodes
Port 7946 TCP/UDP for overlay network node discovery
Port 4789 UDP for overlay network traffic
Configuring the Docker Swarm
In this example deployment the docker swarm consists of 3 Manager Nodes and 5 Worker Nodes. The reason why the number of manager nodes is preferred to be odd is due to the Raft Consensus Algorithm which is used to elect a leader among the managers. It is not a necessity for the number of managers to be 3. More details about this can be found in the following link:
Docker - Raft Consensus in Swarm Mode
In order to start the Docker Swarm, log into the node that you want to make the manager (leader) first and execute the following command to initialize the swarm
docker swarm init --listen-addr "<private_ip>:2377"
--advertise-addr "<private_ip>:2377" --availability <active or
drain>

Once you initiate the swarm you will be given instructions on how to join workers and managers to the swarm. Make sure to copy it since it will contain the join token for connecting workers. Follow the instructions to connect managers and workers successfully.
If you require to get the join tokens for managers and workers at a later time, you can use the following commands accordingly in the Leader Node.
docker swarm join-token manager
docker swarm join-token worker
Setting up the Manager Nodes
Configuring the 3 Manager Nodes that need to be set up in this Docker Swarm. There is already one Manager Node that has been added when initialising the Docker Swarm. To add the remaining 2 Managers, enter the following command as instructed in order to get the command with the join tokens to add the remaining 2 Managers.
docker swarm join-token manager

Copy the resulting command, log into each of the other 2 Manager Nodes and then enter the join command to each of them. This will successfully add the remaining 2 Manager Nodes to this Docker Swarm.
Setting up the Worker Nodes
Configuring the 5 Worker Nodes that need to be set up in this Docker Swarm, each of them will have to join the Swarm Cluster. This will finally result in all 8 nodes connecting and forming a single Cluster.
Log into the Worker Node that you want to add to this swarm and then enter the command, which was obtained at the time of docker swarm initialisation, as shown below in the worker node.
docker swarm join --token <join-token for workers> <private_ip>:2377

Continue to add the remaining 4 Worker Nodes as well to this Docker Swarm using the above step.
Configuring the Docker Stack Files and Enactor Env Files
Use the Docker Swarm stack file and env files that will be provided by Enactor through SharePoint. Edit the .env config files as required.
There are certain values that need to be replaced. E.g.: Database endpoints and credentials. Search for any placeholders starting with "<REPLACE>" and update with the correct values.
Custom Docker-Registry and Custom Docker Image Tags.
The stack files need to be edited to set the Custom Docker-Registry and Custom Docker Image Tags.
The docker image and its tag should be specified against the image
property in the stack file. Replace the {ImageRepository} with the
Image Repository URL that is provided by Enactor and replace the
{Version} with the version that is provided in the release notes.
image:
{ImageRepository}/enactorstandard/lin/cma:{Version}
The digits 2.7.804.868 in the below example references the docker version number of the application that is being installed.

Make sure to update all stack files that will be used for deployment. The list of the stack files can be found in "Updating Constraints in the Appropriate Stack Files" in the next section of this document.
Configuring Central Enactor Applications
In Docker Swarm, it is the responsibility of the manager (leader) to distribute the docker containers among the docker cluster. But there can be cases where a particular service must be restricted to run on a particular node. A reason to do this would be hardware requirements. This can be achieved through Docker Swarm Service Constraints. For more details on the concept, refer Docker - Add Labels to Cluster Nodes.
Finding the Node IDs to Add Labels.
Before adding labels to the Swarm nodes, we need to find out the Node ID of the Swarm nodes. From the Leader Node itself, using the following command will list out all the nodes and their details:
docker node ls
There are 3 manager nodes and 5 worker nodes with their relevant Node IDs.
Labels will be added to these based on which services are to be deployed to each of these nodes.
After identifying the Node IDs, the labels can be added to the appropriate Swarm nodes using the following command.
docker node update --label-add <key>=<value> <node-id>
Adding Labels to Nodes
There are 5 Worker Nodes and the services that are to be deployed to each of these are different. Hence, we should add the appropriate labels to the appropriate workers to successfully deploy only what is assigned.
Worker Node 1 should have the following five services:
EMA, EMP-SFTP, EMS (1), Zookeeper (1), SOLR
Following is how labels have been added to Worker Node 1 for the EMA, EMP-SFTP, EMS, ZooKeeper and SOLR services.
docker node update --label-add ema=true --label-add emp-sftp=true --
label-add ems=true --label-add zookeeper1=true --label-add solr=true <worker1-node-id>
Using the above method, labels need to be added for the remaining 4 Worker Nodes with their respective services to be deployed.
Following contains the details of all 5 Worker Nodes and their respective services:
| Worker | Services to be deployed | Command |
|---|---|---|
| 1 | EMA, EMP-SFTP, EMS (1), Zookeeper (1), SOLR | docker node update --label-add ema=true --label-add emp-sftp=true --label-add ems=true --label-add zookeeper1=true --label-add solr=true <worker1-node-id> |
| 2 | EMS (2), CMA, CMP, CMS (1), Zookeeper (2) | docker node update --label-add ems=true --label-add cma=true --label-add cmp=true --label-add cms=true --label-add zookeeper2=true <worker2-node-id> |
| 3 | CMS (2), OMA, OMP, OMS (1), WPN (OM) | docker node update --label-add cms=true --label-add oma=true --label-add omp=true --label-add oms=true --label-add wpn-om=true <worker3-node-id> |
| 4 | OMS (2), EMC, SS, PDP, WebPOS, Zookeeper (3), WPN (EM) | docker node update --label-add oms=true --label-add emc=true --label-add ss=true --label-add pdp=true --label-add webpos=true --label-add zookeeper3=true --label-add wpn-em=true <worker4-node-id> |
| 5 | EMR | docker node update --label-add emr=true <worker5-node-id> |
SS and PDP server in the Worker 4 node are optional modules which allows to run the Store Server and PDP Server services.
Updating Constraints in the Appropriate Stack Files
The Stack Files of each service that we are going to deploy will now have to added in the constraint's property of each stack file. This will make sure that the above labels we added for each node, will link to the appropriate services.
services > placement > constraints
Following is an example of updating the stack file for the ema module.
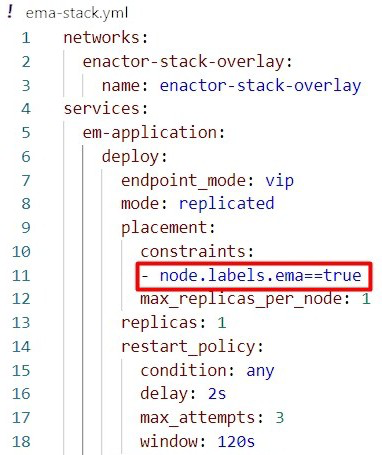
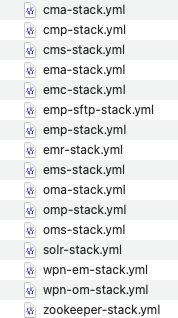
Following contains the details of all the services, stack file names and the constraint that is to be added in the central application deployment:
| Service | Stack File | Constraint |
|---|---|---|
| EMA | ema-stack | - node.labels.ema==true |
| EMP-SFTP | emp-sftp-stack | - node.labels.emp==true |
| EMS | ems-stack | - node.labels.ems==true |
| EMC | emc-stack | - node.labels.emc==true |
| EMR | emr-stack | - node.labels.emr==true |
| Zookeeper | zookeeper-stack | There are 3 Zookeeper services defined in the same file. Make sure to add the following within each of the services appropriately:
|
| SOLR | solr-stack | - node.labels.solr==true |
| CMA | cma-stack | - node.labels.cma==true |
| CMP | cmp-stack | - node.labels.cmp==true |
| CMS | cms-stack | - node.labels.cms==true |
| OMA | oma-stack | - node.labels.oma==true |
| OMP | omp-stack | - node.labels.omp==true |
| OMS | oms-stack | - node.labels.oms==true |
| SS | ss-stack | - node.labels.ss==true |
| PDP | pdp-stack | - node.labels.pdp==true |
| WebPOS | webpos-stack | - node.labels.webpos==true |
| WPN (EM) | wpn-em-stack | - node.labels.wpn-em==true |
| WPN (OM) | wpn-om-stack | - node.labels.wpn-om==true |
This way, the labels can be added to both the swarm nodes and stack files to make sure that docker services are constrained to be run only at particular nodes.
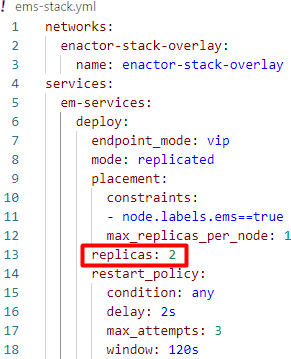
Adding Replications in the Appropriate Stack Files
There are certain services that are used in more than one Worker Node and would require replication of these services. EMS, OMS and CMS require load balancing but do not need to be session-aware and hence can be replicated., however EMA, OMA, and CMA can be deployed as separate containers with different ports configured in the stack file BUT not replicated in the stack file, it will require a session aware load balancer.
| Application | Replications | Session-Aware Load Balancer |
|---|---|---|
| EMA | 1 | Can run multiple instances but requires unique ports for each docker instance and a session-aware load balancer to distribute traffic. Should not be replicated in the stack file. |
| EMP | 1 | Can run only 1 instance and cannot be Replicated. |
| EMS | 1+ | Can run multiple instances and does not require a session-aware load balancer. |
| EMC | 1 | Can run only 1 instance and cannot be Replicated. |
| EMR | 1 | Can run only 1 instance and cannot be Replicated. |
| OMA | 1 | Can run multiple instances but requires unique ports for each docker instance and a session-aware load balancer to distribute traffic. |
| OMP | 1 | Can run only 1 instance and cannot be Replicated. |
| OMS | 1+ | Can run multiple instances and does not require a session-aware load balancer. |
| CMA | 1 | Can run multiple instances but requires unique ports for each docker instance and a session-aware load balancer to distribute traffic. Should not be replicated in the stack file. |
| CMP | 1 | Can run only 1 instance and cannot be Replicated. |
| CMS | 1+ | Can run multiple instances and does not require a session-aware load balancer. |
In the example deployment, the following services which require replication:
EMS x2, OMS x2, CMS x2
The above services can all be replicated more than twice and scaled horizontally.
To replicate the Enactor modules, the value (number of replicas) needs to be added in the replicas property of the appropriate stack file. Following is an example of adding the 2 replicas to the EMS module:
Updating of appropriate values in the env files
This section describes the various values that is to be replaced in the env files such as the values for memory allocation, database details, process connection, process set and other changes. Properties that need updating will contain the value <REPLACE> in them.
Memory Allocation
The Java XMS and XMX memories can be allocated for each service to ensure efficient use of memory. The memory allocation for each service is to be defined in the env file of that service. Following is an example of the ems.env file and how the memory allocation has been
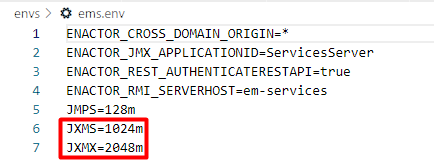
Following contains an example set of java memory allocation configured for the specific applications, that we are using for the purpose of this guide.
| Service | Constraint |
|---|---|
| CMA | JXMS=1024m JXMX=2048m |
| CMP | JXMS=2048m JXMX=4096m |
| CMS | JXMS=1024m JXMX=2048m |
| EMA | JXMS=1024m JXMX=2048m |
| EMP | JXMS=2048m JXMX=4096m |
| EMS | JXMS=1024m JXMX=2048m |
| EMC | JXMS=512m JXMX=1024m |
| EMR | JXMS=4096m JXMX=10GB |
| WPN (EM) | JXMS=1024m JXMX=2048m |
| OMA | JXMS=1024m JXMX=2048m |
| OMP | JXMS=2048m JXMX=4096m |
| OMS | JXMS=1024m JXMX=2048m |
| WPN (OM) | JXMS=1024m JXMX=2048m |
| Zookeeper | JXMS=512m JXMX=768m |
| SOLR | JXMS=1024m JXMX=2048m |
Specifying the Number of Database Threads for each service is to be defined in the env file of that particular service. Following is an example of the ems.env file and how the Number of Database Threads allocation has been set:
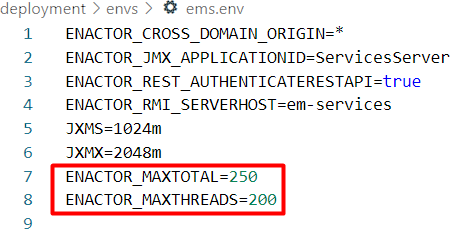
ENACTOR_MAXTOTAL property defines the maximum number of database connections in pool.
ENACTOR_MAXTHREADS property defines the number of HTTP connections that are allowed to run at a given time.
Following contains the details of the application type and the example values for the purpose of this guide:
| Application Type | ENACTOR_MAXTOTAL | ENACTOR_MAXTHREADS |
|---|---|---|
| Application | 175 | 150 |
| Processing | 250 | 200 |
| Services | 250 | 200 |
| Report | 300 | 200 |
Database Details
The database type and its credential details are defined in the common.env file as follows:
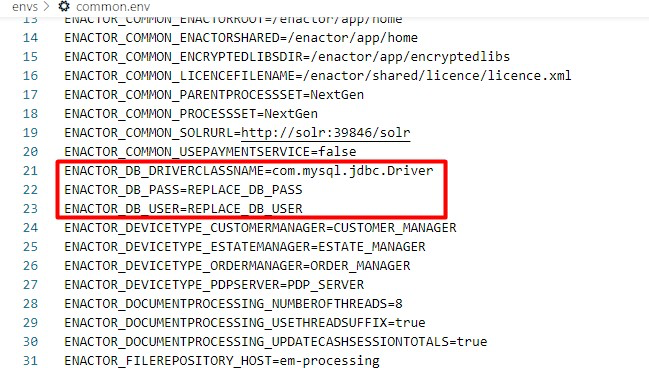
The template given is for MySQL database type and if it is a different database that is needed, then replace the value of the ENACTOR_DB_DRIVERCLASSNAME property accordingly.
Also, the Database Username and Password should be changed by replacing the values for the ENACTOR_DB_USER and ENACTOR_DB_PASS properties respectively.
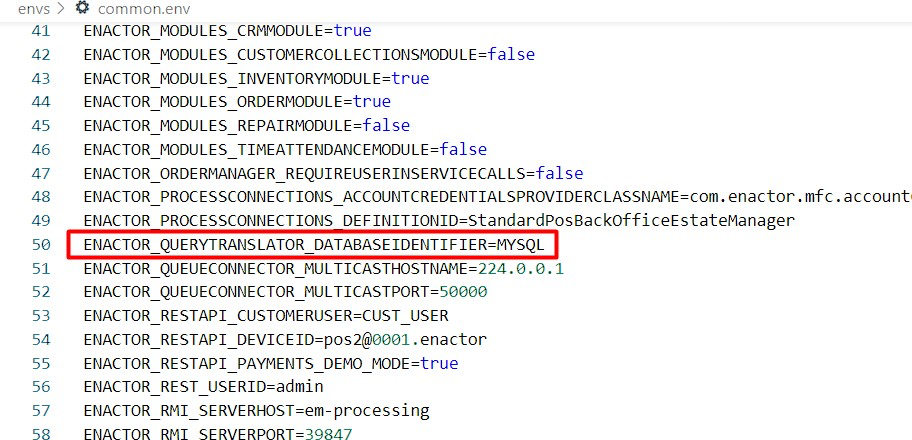
The ENACTOR_QUERYTRANSLATOR_DATABASEIDENTIFIER property should also updated based on the database that is used as follows:
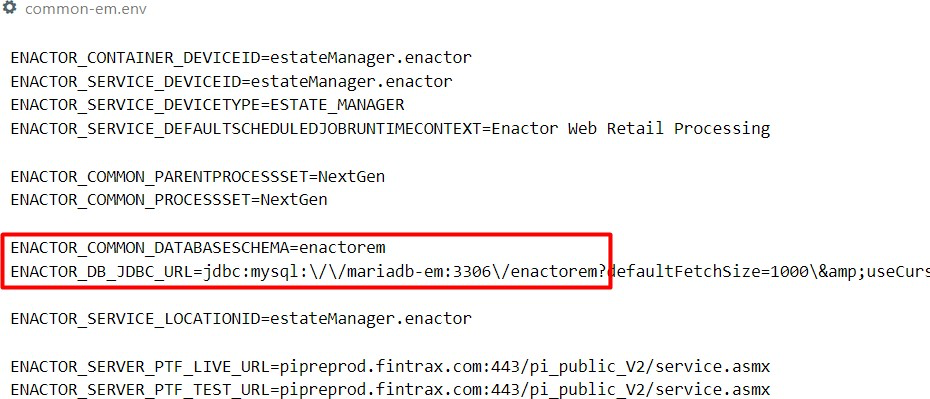
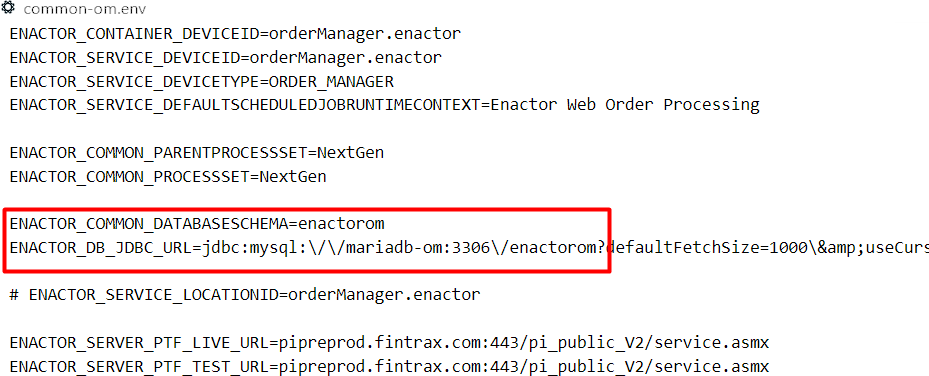
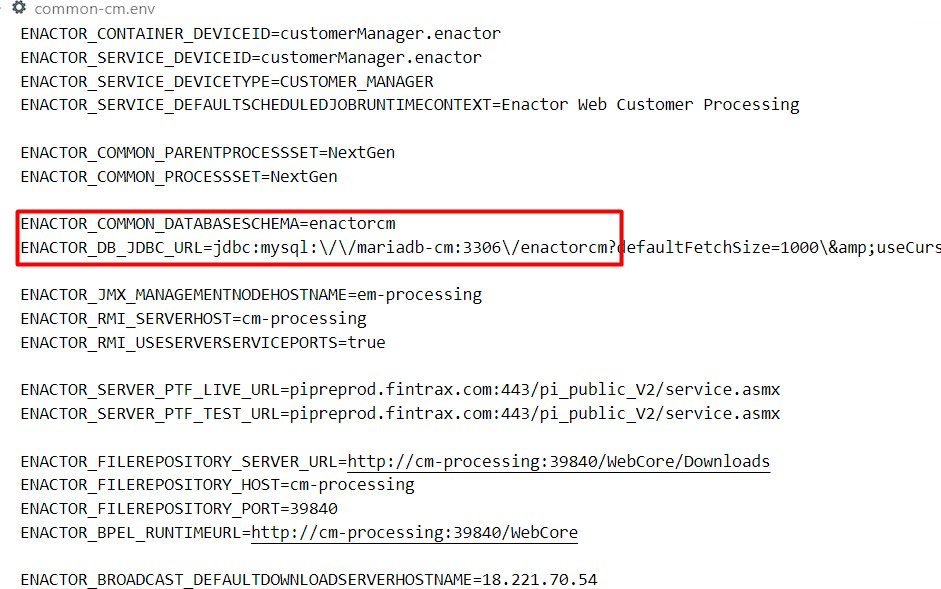
Individual database details can be found in the common-em.env, common-om.env and common-cm.env files and these can be edited as required:
Similarly, if MSSQL is used, then following changes and ports can be set:
-
common.env file - ENACTOR_DB_DRIVERCLASSNAME=com.microsoft.sqlserver.jdbc.SQLServer Drive ENACTOR_QUERYTRANSLATOR_DATABASEIDENTIFIER=MSSQL
-
common-em.env - ENACTOR_DB_JDBC_URL=jdbc:sqlserver:mssql:1433;SelectMethod=cursor;DatabaseName=enactorem
-
common-om.env - ENACTOR_DB_JDBC_URL=jdbc:sqlserver:mssql:1433;SelectMethod=cursor;DatabaseName=enactorom
-
common-cm.env - ENACTOR_DB_JDBC_URL=jdbc:sqlserver:mssql:1433;SelectMethod=cursor;DatabaseName=enactorcm
Database strings should be checked with a database administrator
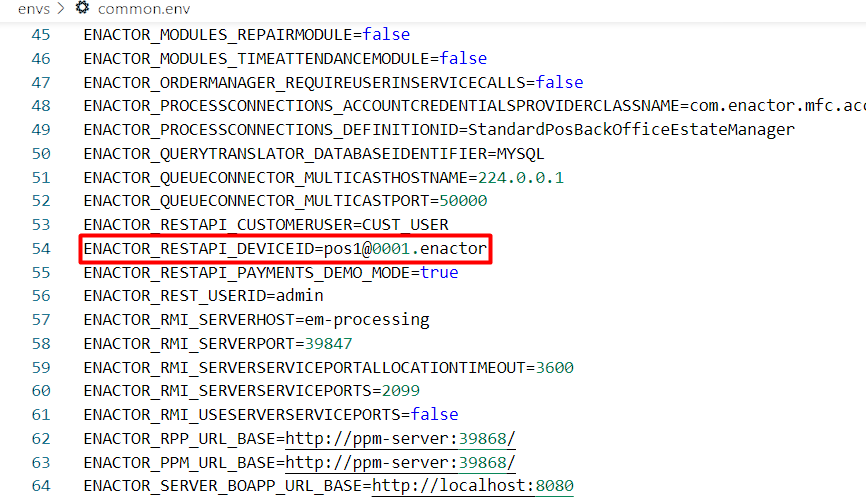
Other changes to be made in the common.env file
Update the value of the ENACTOR_RESTAPI_DEVICEID property with the POS Device ID that is used for the rest api.
Following is an example:
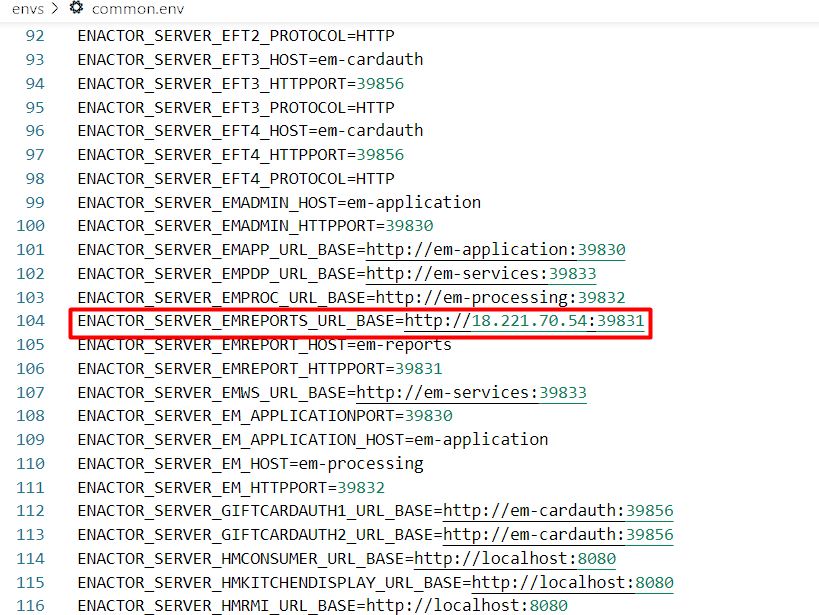
Update the value of the ENACTOR_SERVER_EMREPORTS_URL_BASE property with your Application URL (Leader Node IP or Domain Name) and port as 39831.
Following is an example:
Changes to be made in the emp.env file
Update the ENACTOR_BROADCAST_DEFAULTDOWNLOADSERVERHOSTNAME and
ENACTOR_BROADCAST_DEFAULTDOWNLOADURL properties by adding the Application URL (Leader Node IP or Domain Name) to the value and update the ENACTOR_BROADCAST_DEFAULTDOWNLOADSERVERPORT
property with the value 39832. Following is an example:

Advanced ENV Changes
The following changes are only applied if overrides are required to standard Enactor processes, this is not common and will only change if development requires it.
Updating Process Connection and Process Set
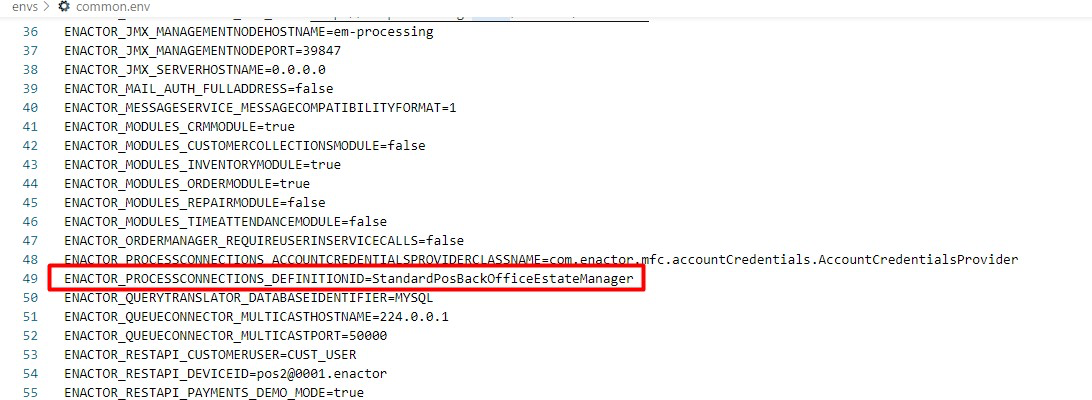
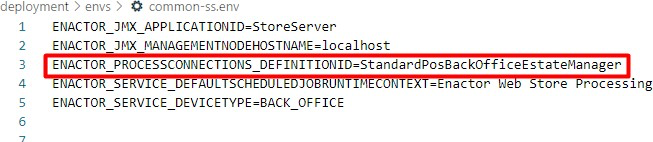
If your own Process connection is used, then replace the following value of the ENACTOR_PROCESSCONNECTIONS_DEFINITIONID property in the common.env file to match with the name of your Process Connection:
Any changes to Process Sets should also be changed as required. This can be commonly set by changing the value of the following properties in the common.env file:
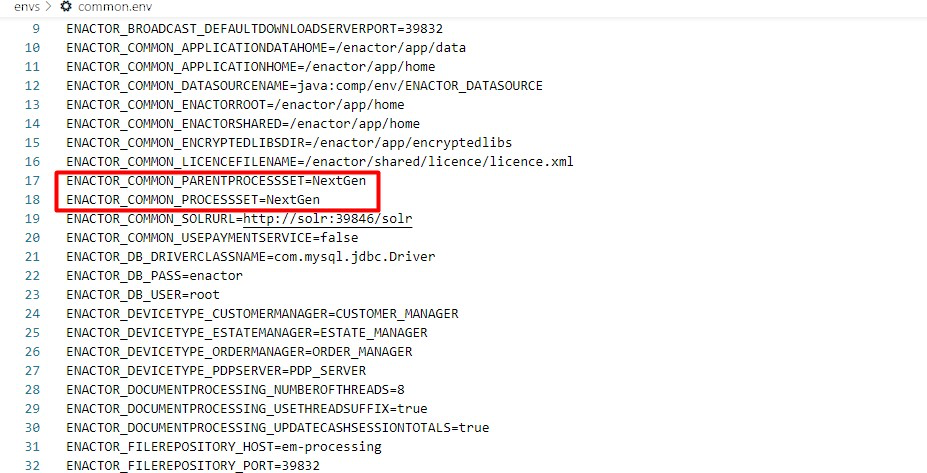
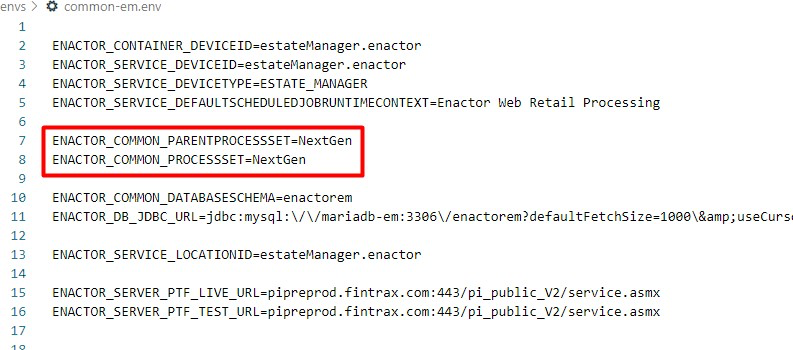
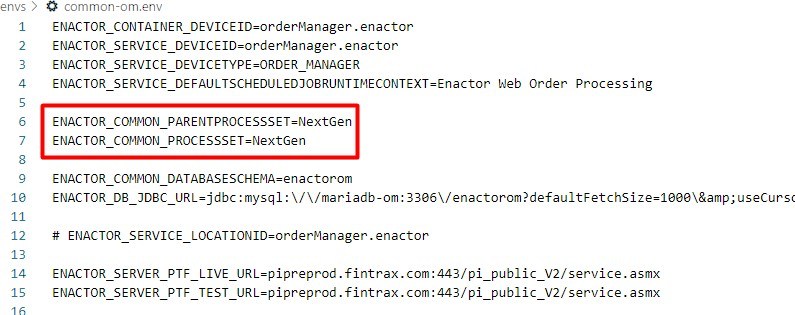
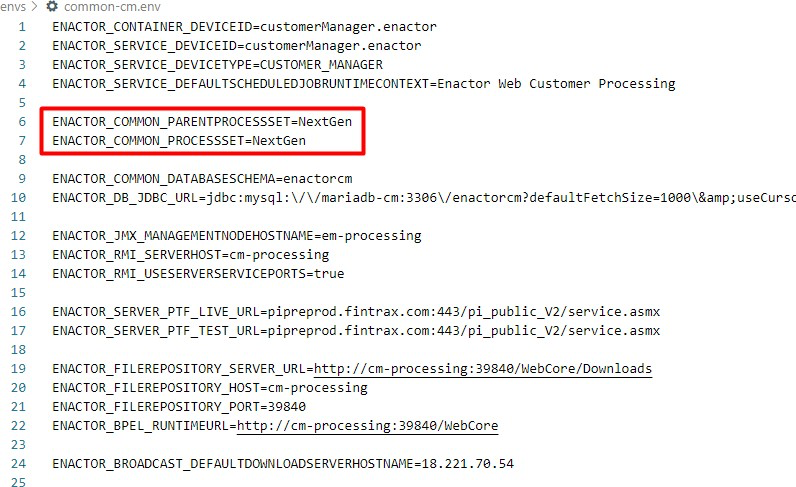
Process Sets can also be set individually in the common-em.env, common-om.env and common-cm.env files as follows:
Mock Store (Optional)
In order to deploy a Mock Store with a Store Server, PDP Server and a WebPOS , the env files for the services of Store Server (common-ss.env, ss1.env), PDP Server (common-pdp.env, pdp1.env) and WebPOS (webpos.env) are to be taken into consideration.
Updating the Memory Allocation:
The memory allocation for the services of ss1.env, pdp1.env and webpos.env can be changed and following are the recommended memory allocations for each of the services:
| Service | Constraint |
|---|---|
| SS1 | JXMS=512m JXMX=1024m |
| PDP1 | JXMS=512m JXMX=1024m |
| WebPOS | JXMS=256m JXMX=512m |
The Process Connection for the Store Server can be changed in the common-ss.env file as follows:
Similarly, all changes that were made in the previous sections for the main deployment can also be made for Store Server, PDP Server and WebPOS in the common-ss.env, ss1.env, common-pdp.env, pdp1.env, and webpos.env files as required.
After making all the required changes, the folder with the files has to be zipped as swarm-stack-bundle.zip and this would be used to deploy the services in a swarm cluster.
Deploy the Enactor Modules as Docker Services
Login to the MANAGER_LEADER node and copy the stacks and env files to this node. This location will be referred to as ENACTOR_STACKS_HOME.
Following will be the folder structure in ENACTOR_STACKS_HOME.
Open a terminal and change directory into ENACTOR_STACKS_HOME.
cd [ENACTOR_STORE_HOME]
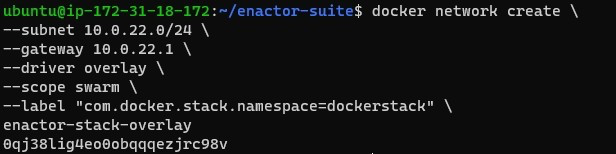
Create the required docker network.
Make sure that the subnet and docker swarm's overlay network CIDR does not overlap with the host's network.
docker network create \
--subnet 10.0.22.0/24 \
--gateway 10.0.22.1 \
--driver overlay \
--scope swarm \
--label "com.docker.stack.namespace=dockerstack" \
enactor-stack-overlay
Log into the Docker registry and authenticate.
docker login -u [username] enactordev-on.azurecr.io
Deploy the desired stacks. Here, you can deploy as many services as possible by specifying the stack file against the "-c" option <stack file name>.
Further information on the list of services that can be deployed are available in the Glossary section of this guide. Also, make sure that the database is already created separately.
First deploy the em-processing service
docker stack deploy -c emp-sftp-stack.yml dockerstack --with- registry-auth

Then, the remaining services should be deployed as groups in the following order:
docker stack deploy -c zookeeper-stack.yml -c solr-stack.yml dockerstack --with-registry-auth
docker stack deploy -c ems-stack.yml dockerstack --with- registry-auth
docker stack deploy -c wpn-em-stack.yml -c wpn-om-stack.yml dockerstack --with-registry-auth
docker stack deploy -c ema-stack.yml -c emc-stack.yml -c emr- stack.yml dockerstack --with-registry-auth
docker stack deploy -c cmp-stack.yml -c cms-stack.yml -c cma- stack.yml dockerstack --with-registry-auth
docker stack deploy -c omp-stack.yml -c oms-stack.yml -c oma- stack.yml dockerstack --with-registry-auth
Once the deployment is done, there are a few commands that you can use to make sure the services are up and running as required.
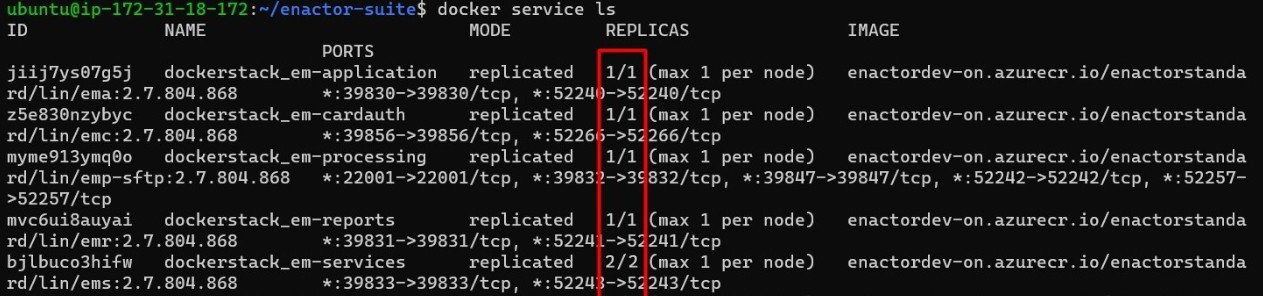
List docker services
docker service ls
See docker service status
docker service ps dockerstack_em-application
![]()
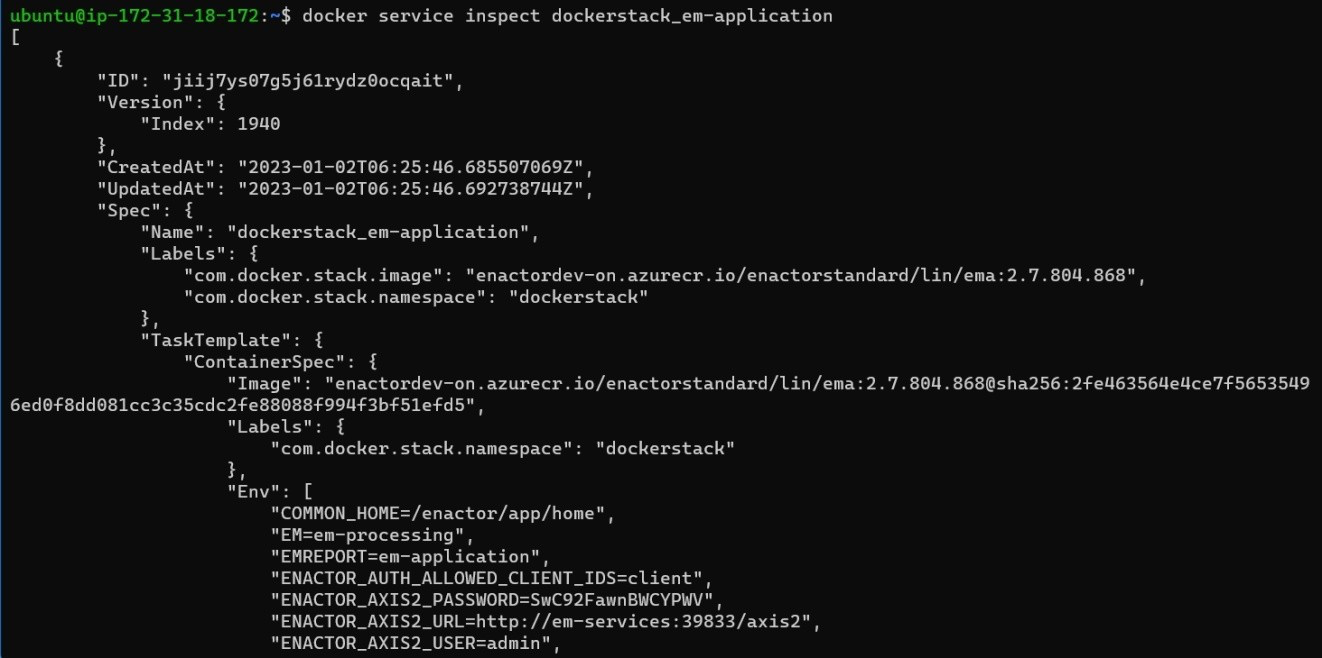
Inspect docker service
docker service inspect dockerstack_em-application
See docker service logs
docker service logs dockerstack_em-application
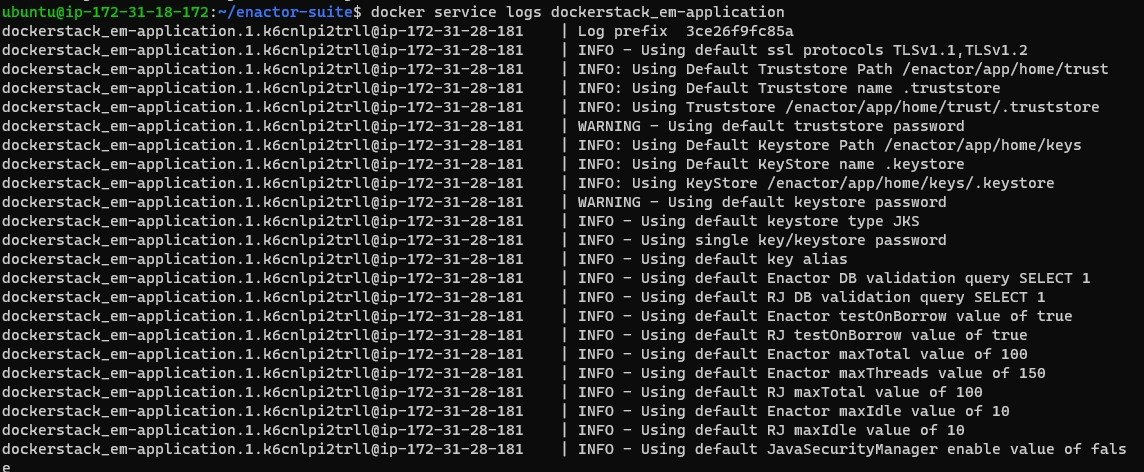
If there are any misconfigurations or if the containers do not start, the particular logs of that service should be checked.
The following command can be used to kill the services if needed:
docker service rm <service-name>
Eg: docker service rm dockerstack_em-application
A redeployment of the service that was removed should be done if needed.
Eg: docker stack deploy -c ema-stack.yml dockerstack -with- registry-auth
Docker Service Start and Shutdown Sequence
It's our recommendation you start and shutdown the central applications in a specific order, all services should be shut down cleanly and not forced, this will allow the processing application to finish their current activity before the shutdown commences.
Start Sequence
| Application Type | Sequence |
|---|---|
| Processing & SOLR (EMP, OMP, CMP, SOLR,) | 1 |
| Other Processing (Zookeeper) | 2 |
| Other Processing (WPN-EM, WPN-OM) | 3 |
| Services (EMS, OMS, CMS) | 4 |
| Application (EMA, OMA, CMA) | 5 |
| All Other Services (EMR, EMC) | 6 |
Shutdown Sequence
| Application Type | Sequence |
|---|---|
| All Other Services (EMR, EMC) | 1 |
| Application (EMA, OMA, CMA) | 2 |
| Services (EMS, OMS, CMS) | 3 |
| Other Processing (WPN-EM, WPN-OM) | 4 |
| Other Processing (Zookeeper) | 5 |
| Processing & SOLR (EMP, OMP, CMP, SOLR,) | 6 |
Following checks can be made after deploying the Enactor Modules successfully:
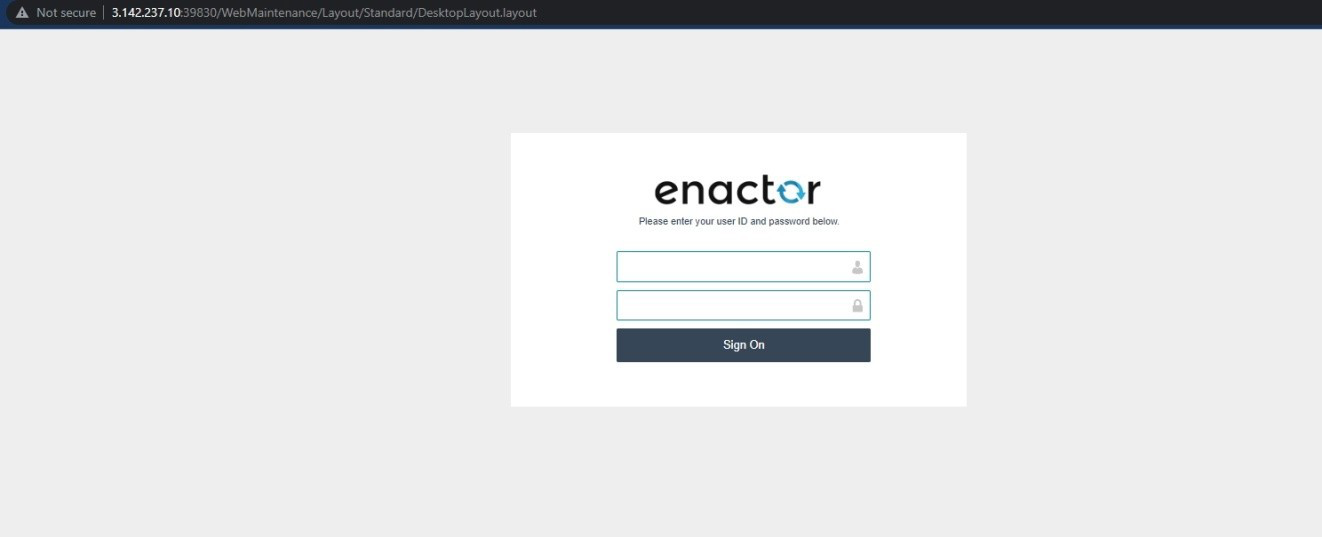
Estate Manager -
http://{LEADER_NODE_IP}:39830/WebMaintenance/Layout/Standard/Deskt opLayout.layout
Web Core - http://{LEADER_NODE_IP}:39832/WebCore

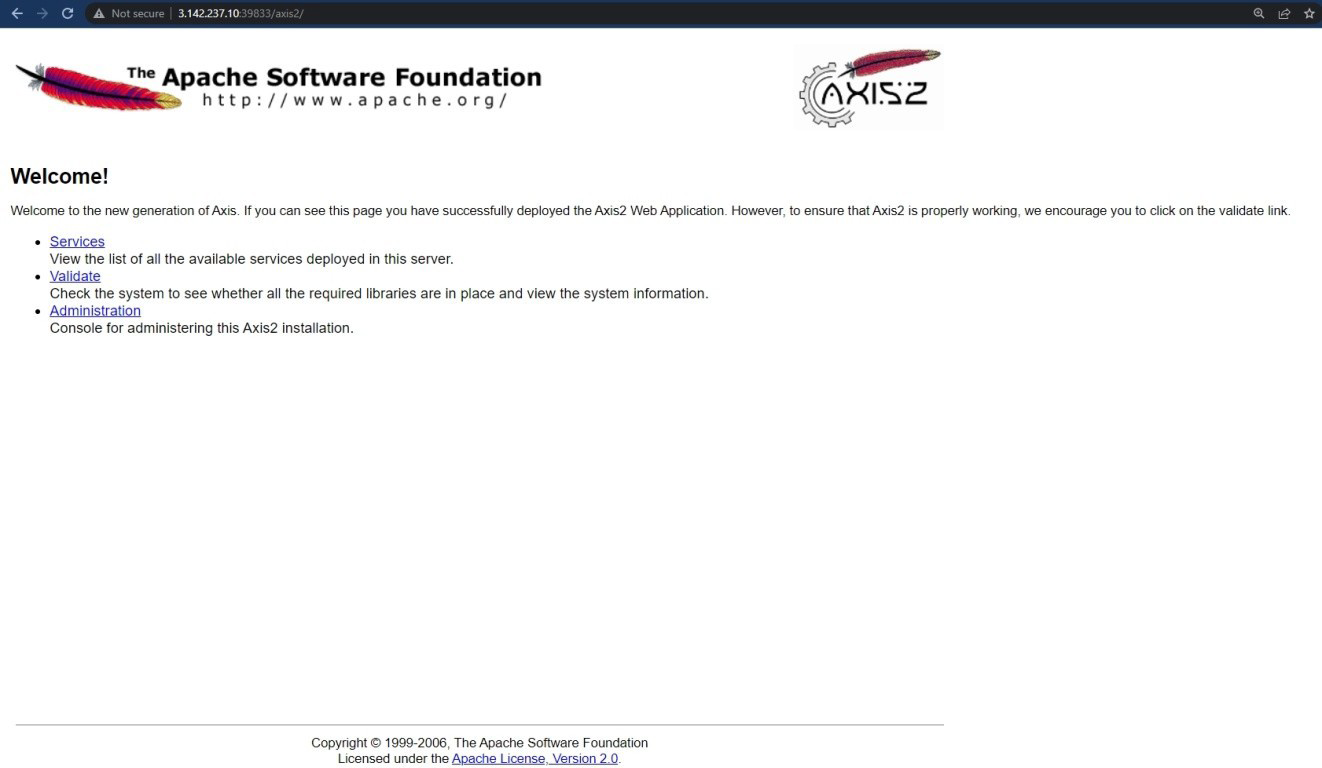
Axis2 - http://{LEADER_NODE_IP}:39833/axis2
Order Manager - http://{LEADER_NODE_IP}:39834/WebMaintenance
Customer Manager - http://{LEADER_NODE_IP}:39838/WebCustomerManagement
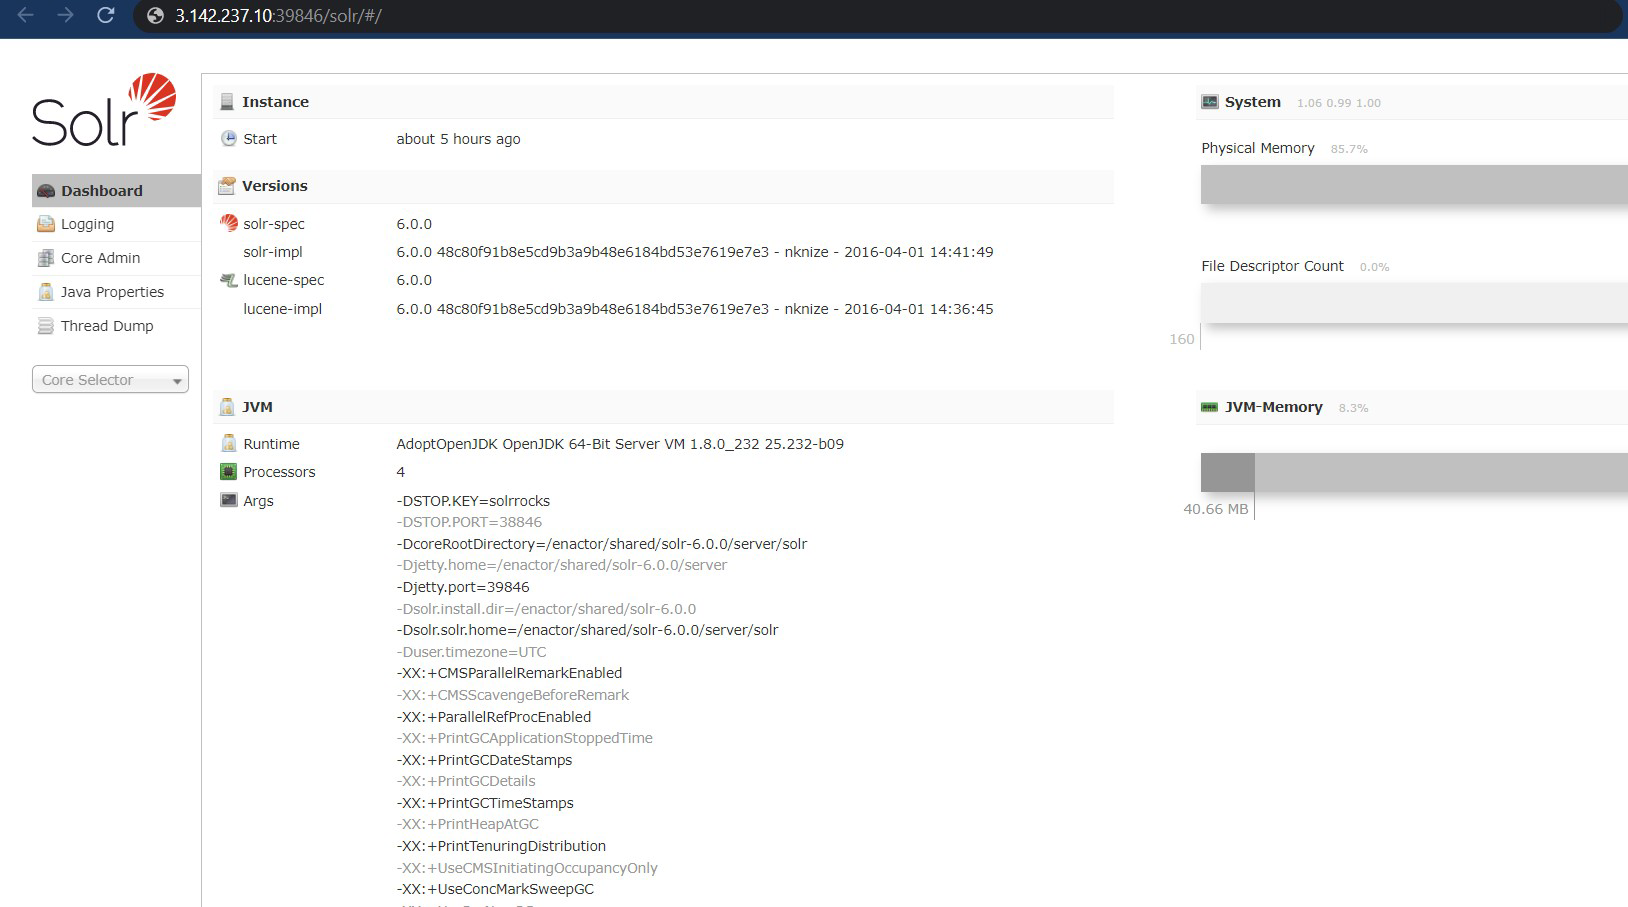
Solr - http://{LEADER_NODE_IP}:39846/solr/#/
Appendix
Application Components and its Ports
General
The port under this category should be open irrespective of the selected Enactor application components to be deployed in the Swarm.
| Port Name | Ports |
|---|---|
| JMX management node port or RMI server server port | 39847 |
| RMI server service port | 2099 |
Component Specific
The ports under this category should be open only depending on the Enactor application components that have been selected for deployment in the Swarm.
| Application/ Docker Description | Stack File Name | HTTP/Non-SSL Ports | HTTPS/SSL Ports |
|---|---|---|---|
| Customer Manager Application | cma-stack.yml | 39838 | 52248 |
| Customer Manager Processing | cmp-stack.yml | 39840 | 52250 |
| Customer Manager Service | cms-stack.yml | 39841 | 52251 |
| Estate Manager Application | ema-stack.yml | 39830 | 52240 |
| Estate Manager Card Auth | emc-stack.yml | 39856 | 52266 |
| Estate Manager Processing | emp-stack.yml | 39832 39847 | 52242 52257 |
| Estate Manager Report | emr-stack.yml | 39831 | 52241 |
| Estate Manager Service | ems-stack.yml | 39833 | 52243 |
| Order Manager Application | oma-stack.yml | 39834 | 52244 |
| Order Manager Processing | omp-stack.yml | 39836 | 52246 |
| Order Manager Service | oms-stack.yml | 39837 | 52247 |
| SOLR Service | solr-stack.yml | 39846 | 52256 |
| Web Processing Node (EM) | wpn-em-stack.yml | 39892 | 52302 |
| Web Processing Node (OM) | wpn-om-stack.yml | 39892 | 52302 |
| PDP-Server | pdp-stack.yml | 39901 | 53311 |
| Store Server | ss-stack.yml | 39848 | 52258 |
| Web POS | Webpos-stack.yml | 39870 | 52280 |