How To Deploy Central Application on Kubernetes
Introduction
This guide provides the basic step-by-step configurations required to configure and manually deploy Enactor Central Applications in a Kubernetes cluster. This guide describes how the specific Enactor services can be specifically deployed to underlying nodes while making all necessary changes to the ConfigMaps as required.
This guide does not cover Kubernetes concepts nor configurations to set up a Kubernetes cluster.
This guide assumes:
- There is an existing Kubernetes cluster and it is up and running
- There is a database setup and it is up and running
Overview
This guide will cover the configuration for the following:
-
Deployment Environment - Describes the basic concepts regarding the deployment of an environment.
-
Prerequisites - Describes the steps that should be completed before starting the manual deployment of Enactor modules in Kubernetes.
-
Configuration Steps - Describes the steps to be followed to manually deploy the Enactor Modules in a standard deployment successfully.
Deployment Environment
Kubernetes cluster is based on the "master" and "worker" concepts. A single Kubernetes cluster can contain multiple managers and multiple workers.
The example we provide in this document is for reference purpose only. Kubernetes cluster was created using Amazon Elastic Kubernetes Service (EKS). Amazon EKS ensures the control plane positions at least two API server instances and three etcd instances across three AWS Availability Zones within an AWS Region.
Regardless of the underlying Kubernetes service provider, deploying Enactor modules will be the same. However configuring load balancers, persistent volumes and ingress may differ based on your setup.
| Worker (1) | Worker (2) | Worker (3) | Worker (4) | Worker (5) |
|---|---|---|---|---|
| EMA EMP-SFTP EMS (1) Zookeeper (1) SOLR | EMS (2) EMC CMA CMP Zookeeper (2) | EMR | CMS (2) OMA OMP OMS (1) WPN-OM | OMS (2) CMS (1) SS PDP WebPOS Zookeeper (3) WPN-EM |
Greyed out components in the table above are not supported at the moment. They will be delivered in a future release.
Test environment was created using 3 worker nodes running on Ubuntu. Make sure that each of the worker nodes have sufficient processing and memory capacity to run the applications that are deployed to them. Worker node specification for this test environment is as below.
Worker Nodes - 8 Cores CPU, 16GB Memory
This is only an example and not a recommendation. Customer can make the decision on how much processing and memory capacity would be required to run the applications based on their traffic and infrastructure needs.
Prerequisites
Sufficient knowledge on containerisation, Docker, Kubernetes, persistent volumes, ingress, and Helm charts:
-
Kubernetes - https://kubernetes.io/
-
Helm charts - https://helm.sh/docs/
An existing Kubernetes cluster.
An existing database (MySQL and MariaDB are supported at the moment. MSSQL Server support will be delivered in a future release).
kubectl should be configured in your local workstation/cloud to communicate with your Kubernetes cluster.
Helm should be installed in your local workstation/cloud shell to manage the deployments - https://helm.sh/docs/intro/install/
Helm Charts
Enactor modules will be deployed using Helm charts. Enactor will provide them through Microsoft Sharepoint. Environment variables and configurations are kept in a file called values.yaml. There will be a parent values.yaml file and each Enactor component will have its own values.yaml file. For example em-application component will have its own values.yaml file in the location ./em-application/values.yaml. Parent values.yaml file will have precedence over child values.yaml file.
Kubernetes Secrets
Kubernetes secrets can be used to store sensitive data such as passwords and keys. You will be creating several secrets in this section which will be used during the Kubernetes deployment.
Provided Helm charts assume that there will be Kubernetes secrets with the name and type mentioned in this guide. If you have created a secret with a different name or type, your deployment will fail and you need to change the attributes in corresponding chart files.
Docker Registry Secret
This secret will be used to pull Docker images from the container registry. If you are using Enactor provided container registry, the Enactor team will give you the credentials. If you are using your own container registry, you should set required parameters accordingly.
kubectl create secret docker-registry <credential_name> \
  --docker-username=<username> \
  --docker-password=<password> \
  --docker-server=<docker_registry_server> \
  --docker-email=<email>
Reference to this secret can be found in the enactor.image.pullSecrets.name attribute of the parent values.yaml file.
TLS Secret
Provided Helm charts contain ingress controller with a TLS configuration. You can find this in charts/em-application/values.yaml file. As shown below, TLS configuration refers to a secret named tlscred.
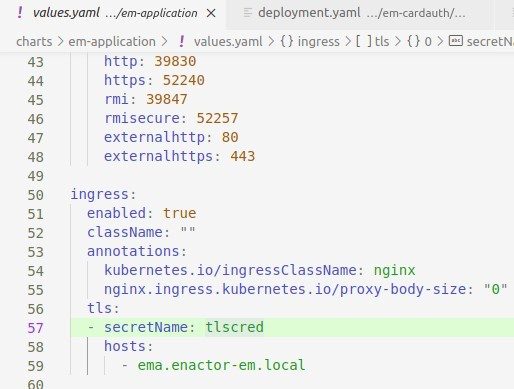
You may use a self signed TLS certificate for a development/test environment. However, you should consider using a certificate issued by an official certificate authority when doing production deployment. In both cases, you will need a certificate file (.crt) and a private key file (.key). Copy them to a single folder of your choice, open a terminal and execute the below command.
kubectl create secret tls self-signed-tls --key server.key --cert server.crt
Application Secret
Enactor application will require some sensitive data like database username and password. These values can be passed as Kubernetes secrets. Execute below command with appropriate values.
kubectl create secret generic appcred \
  --from-literal=ENACTOR_DB_PASS=p4ssw0rd \
  --from-literal=ENACTOR_DB_USER=enactor_app \
  --from-literal=ENACTOR_AXIS2_PASSWORD=pass \
  --from-literal=ENACTOR_AXIS2_USER=admin \
  --from-literal=ENACTOR_TASK_SYSTEMPASSWORD=pass \
  --from-literal=ENACTOR_TASK_SYSTEMUSER=taskadmin
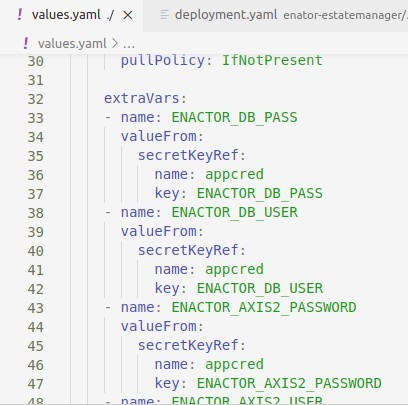
ENACTOR_DB_USER refers to database username and ENACTOR_DB_PASS refers to database password. You can leave other parameters as they are unless provided by Enactor team.
As shown below, you can find the reference to this secret under extraVars section of the parent values.yaml file.
Application Configuration
This section explains few configuration changes that you need to do
before deploying the application. There will be certain values that need
to be replaced. For example you need to change database endpoints and
credentials. Search for any placeholders starting with <REPLACE_>
and update with the appropriate values.
Configuring the Docker Registry Info
Parent values.yaml file needs to be edited to set the customer Docker registry and application's release version. The docker image and its tag should be specified under attributes enactor.image.registry and enactor.image.tag. Replace these values with the details provided by Enactor. The values customer.registry.io and 1.0.0 in the below example reference to the docker registry name and the release version of the application that is being installed.
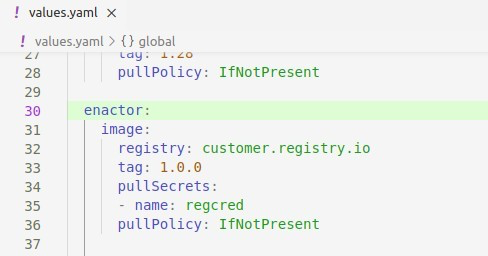
Helm charts provided by Enactor are configured to use a docker registry secret in the name of regcred. If you have created a secret with a different name than above, you need to change the attribute in the parent values.yaml file.
Configuring Replicas
There are certain services that are used in more than one worker node and would require replication of these services. EMS, OMS and CMS require load balancing but do not need to be session-aware and hence can be replicated. However EMA, OMA, and CMA can be deployed as separate containers with different ports configured BUT cannot be configured through replicas in the same pod definition file. This design will require a session aware load balancer.
| Application | Replications | Session-Aware Load Balancer |
|---|---|---|
| EMA | 1 | Can run multiple instances but requires unique ports for each docker instance and a session-aware load balancer to distribute traffic. Should not be replicated in the pod definition file. |
| EMP | 1 | Can run only 1 instance and cannot be replicated. |
| EMS | 1+ | Can run multiple instances and does not require a session-aware load balancer. |
| EMC | 1 | Can run only 1 instance and cannot be replicated. |
| EMR | 1 | Can run only 1 instance and cannot be replicated. |
| OMA | 1 | Can run multiple instances but requires unique ports for each docker instance and a session-aware load balancer to distribute traffic. Should not be replicated in the pod definition file. |
| OMP | 1 | Can run only 1 instance and cannot be replicated. |
| OMS | 1+ | Can run multiple instances and does not require a session-aware load balancer. |
| CMA | 1 | Can run multiple instances but requires unique ports for each docker instance and a session-aware load balancer to distribute traffic. Should not be replicated in the pod definition file. |
| CMP | 1 | Can run only 1 instance and cannot be replicated. |
| CMS | 1+ | Can run multiple instances and does not require a session-aware load balancer. |
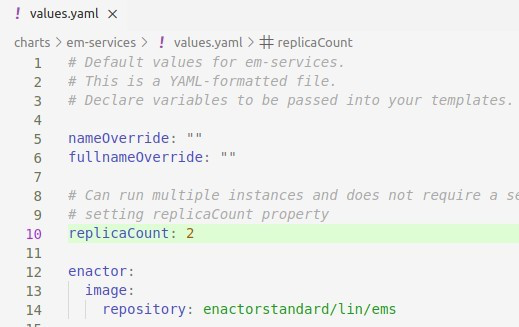
Greyed out components in the table above are not supported at the moment. They will be delivered in a future release. The services marked as 1+ can be replicated more than once and scaled horizontally.
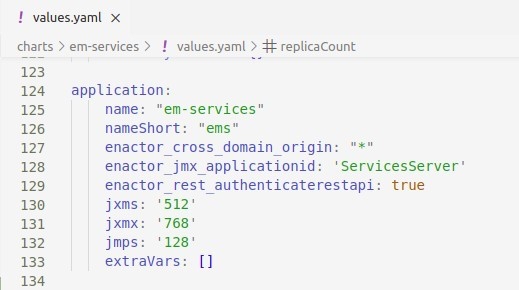
To replicate Enactor modules marked as 1+ in the table above, the attribute replicaCount needs to be configured in the values.yaml file of the corresponding application component. Following is an example of configuring 2 replicas to the em-services component.
Configuring Memory Allocation
The Java XMS and XMX memories can be allocated for each service to ensure efficient use of memory. This can be set using the application.jxms and application.jxmx attributes in each component's values.yaml file. Following is an example of the values.yaml file of em-services component and how the memory allocation has been set.
Following contains an example set of Java memory allocation configured for the specific applications, that we are using for the purpose of this guide.
| Service | Constraint |
|---|---|
| EMA | JXMS=1024m JXMX=2048m |
| EMP | JXMS=2048m JXMX=4096m |
| EMS | JXMS=1024m JXMX=2048m |
| EMC | JXMS=512m JXMX=1024m |
| EMR | JXMS=4096m JXMX=10GB |
| CMA | JXMS=1024m JXMX=2048m |
| CMP | JXMS=2048m JXMX=4096m |
| CMS | JXMS=1024m JXMX=2048m |
| OMA | JXMS=1024m JXMX=2048m |
| OMP | JXMS=2048m JXMX=4096m |
| OMS | JXMS=1024m JXMX=2048m |
| WPN - EM | JXMS=1024m JXMX=2048m |
| WPN - OM | JXMS=1024m JXMX=2048m |
| Zookeeper | JXMS=512m JXMX=768m |
| SOLR | JXMS=1024m JXMX=2048m |
Above is only a recommendation. Customer should make a decision on how much minimum and maximum memory to be allocated based on their traffic and infrastructure. Greyed out components in the table above are not supported at the moment. They will be delivered in a future release.
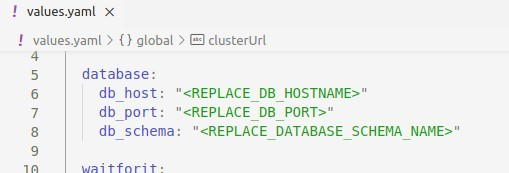
Configuring Database
Database related details can be specified using the database.db_host, database.db_port, database_db_schema attributes in the parent values.yaml file.
Specifying the number of database threads for each service can be defined in the values.yaml file of that particular service. Following is an example on how the number of database threads allocation has been set.
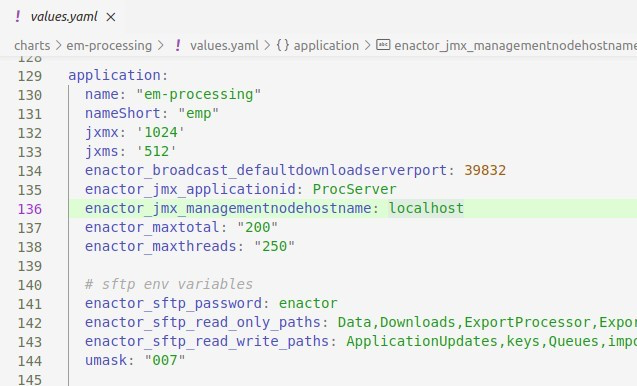
application.enactor_maxtotal attribute defines the maximum number of database connections in pool.
application.enactor_maxthreads attribute defines the number of HTTP connections that are allowed to run at a given time.
Following contains the details of the application type and the example values for the purpose of this guide.
| Application Type | ENACTOR_MAXTOTAL | ENACTOR_MAXTHREADS |
|---|---|---|
| Application | 175 | 150 |
| Processing | 250 | 200 |
| Services | 250 | 200 |
| Report | 300 | 200 |
Other Configuration Changes
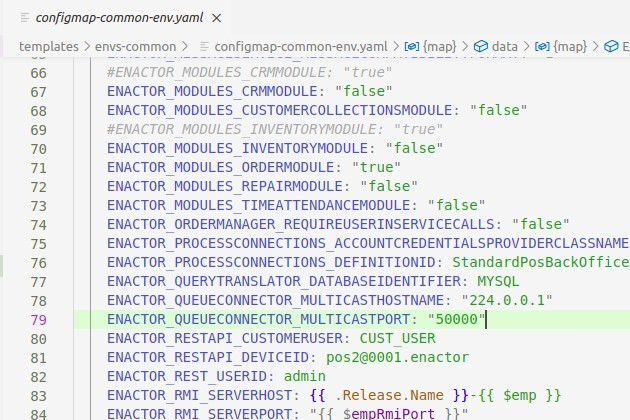
Update the value of the ENACTOR_RESTAPI_DEVICEID attribute in the ./templates/envs-common/configmap-common-env.yaml file with the POS Device ID that is used for the REST API. Following is an example.
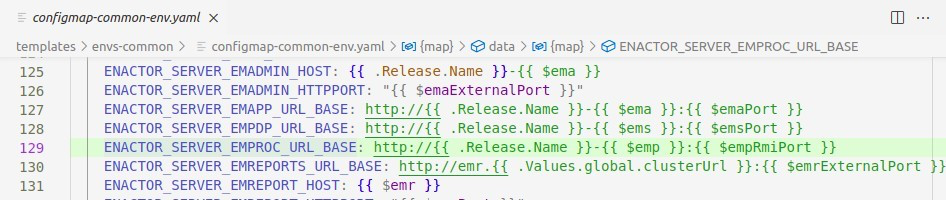
Update the value of the ENACTOR_SERVER_EMREPORTS_URL_BASE attribute in the ./templates/envs-common/configmap-common-env.yaml file with your cluster URL. Following is an example.
Advanced Configuration Changes
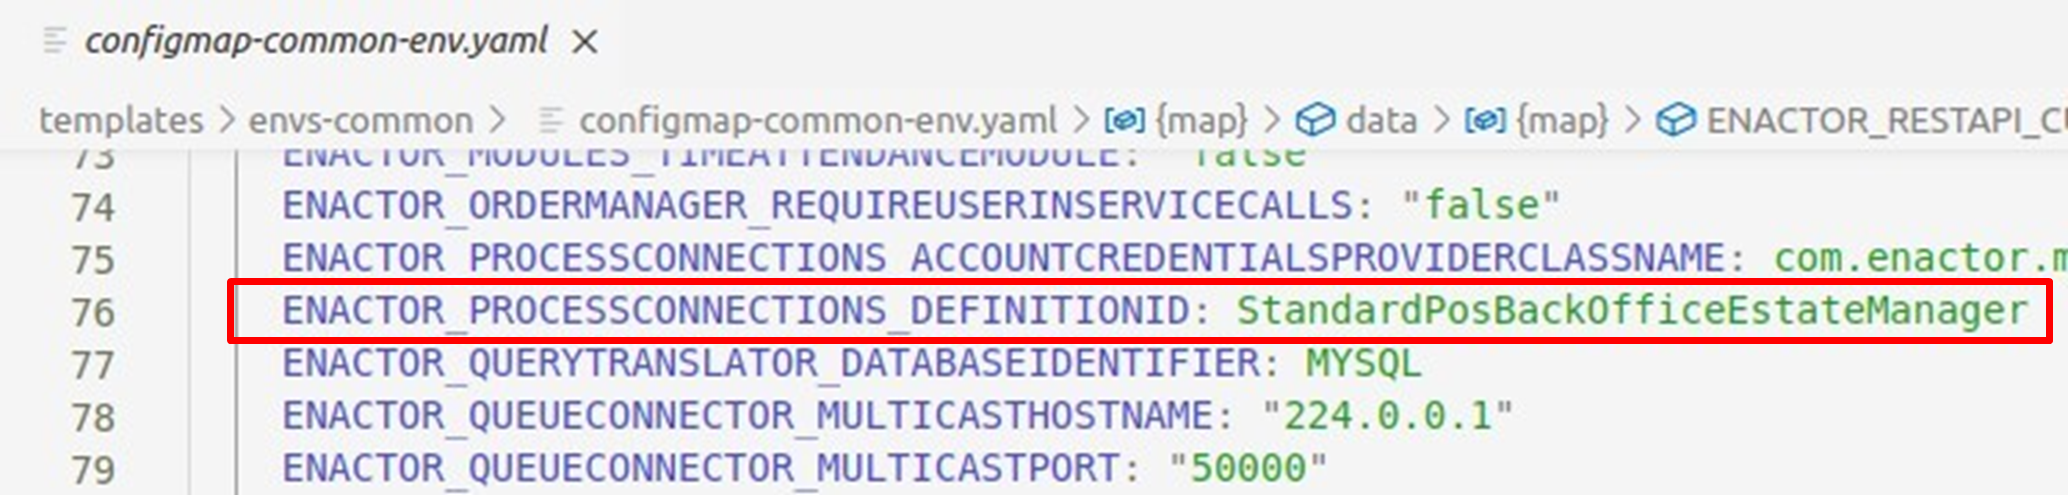
The following changes are only applied if you want to override standard Enactor processes. This is not common and will only change if required. If your own Process Connection is used, then replace the attribute ENACTOR_PROCESSCONNECTIONS_DEFINITIONID in the ./templates/envs-common/configmap-common-env.yaml file to match with the name of your Process Connection.
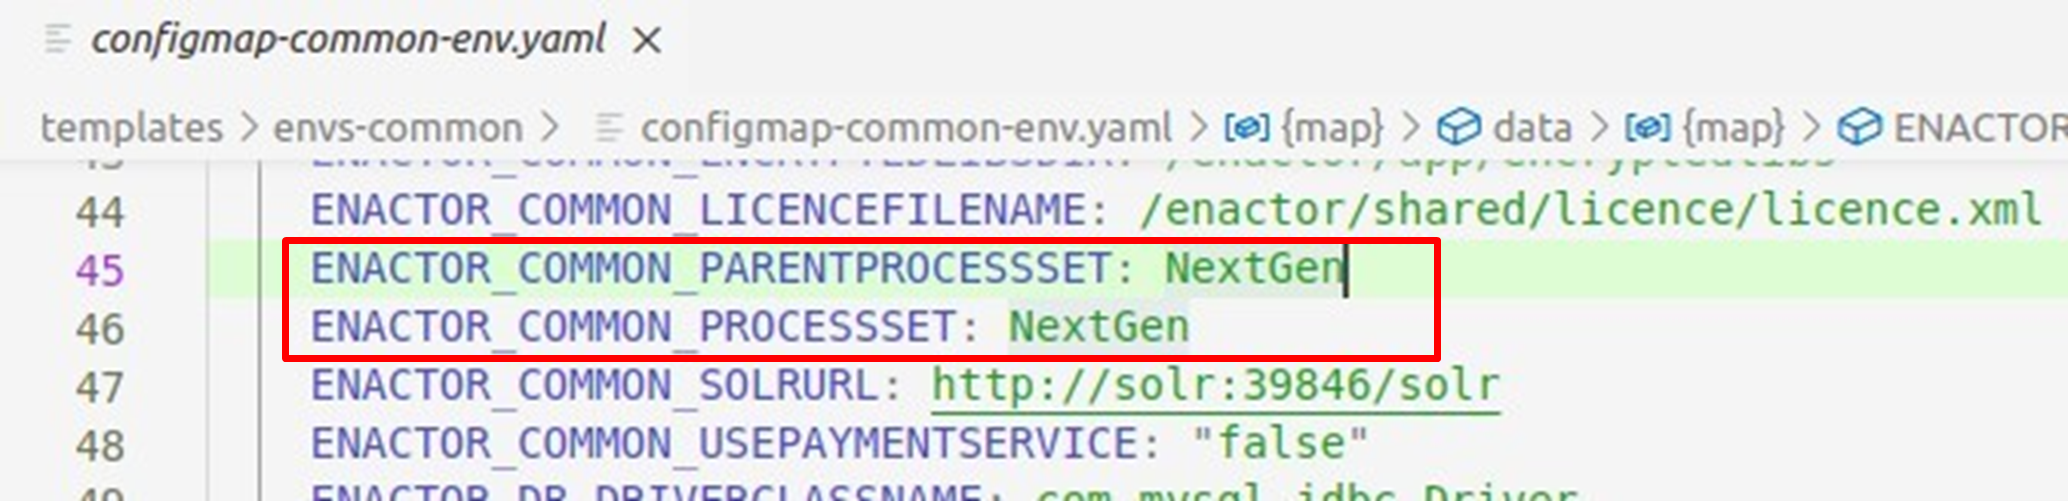
Any changes to Process Sets should also be changed as required. This can be commonly set by changing the ENACTOR_COMMON_PARENTPROCESSSET and ENACTOR_COMMON_PROCESSSET attributes in the ./templates/envs-common/configmap-common-env.yaml file.
Deploy the Enactor Modules on Kubernetes
Open a terminal and change directory into Helm charts root directory.
cd [ENACTOR_HELM_CHARTS]
Execute the below command to deploy Helm charts.
helm dependency build
helm install <release-name> .
Above command will deploy applications to default namespace. If you want to deploy the applications to a different namespace, execute the helm install command as below.
helm install <release-name> . --namespace <namespace>
Set the context to current namespace:
kubectl config set-context --current --namespace=<namespace>
Once the deployment is done, there are a few commands that you can use to make sure the services are up and running as required.
List the Kubernetes pods:
kubectl get pods
View the Kubernetes service status:
kubectl get svc
Inspect a pod:
kubectl describe pod <podname>
View events:
kubectl get events
View pod logs:
kubectl logs -f <podname>
View the persistent volume claims:
kubectl get pvc
View the volumes:
kubectl get pv
If the pods are not marked as running or applications are not working as expected, you should check pod logs, describe and events output.
To login to a pod:
kubectl exec -it <pod-name> -- bin/bash
Above command will log you into the location /enactor/shared. If you move one directory up, and switch into app directory, you can view the home directory of the application.

Enactor XML and log properties files - /enactor/app/config
Enactor home - /enactor/app/home
Logs - /enactor/app/home/logs
Based on your Kubernetes cluster setup, these locations will be accessible from underlying host machine's storage disk as well. This is achieved via persistent volume claims.
To remove the deployment:
helm uninstall <release-name>
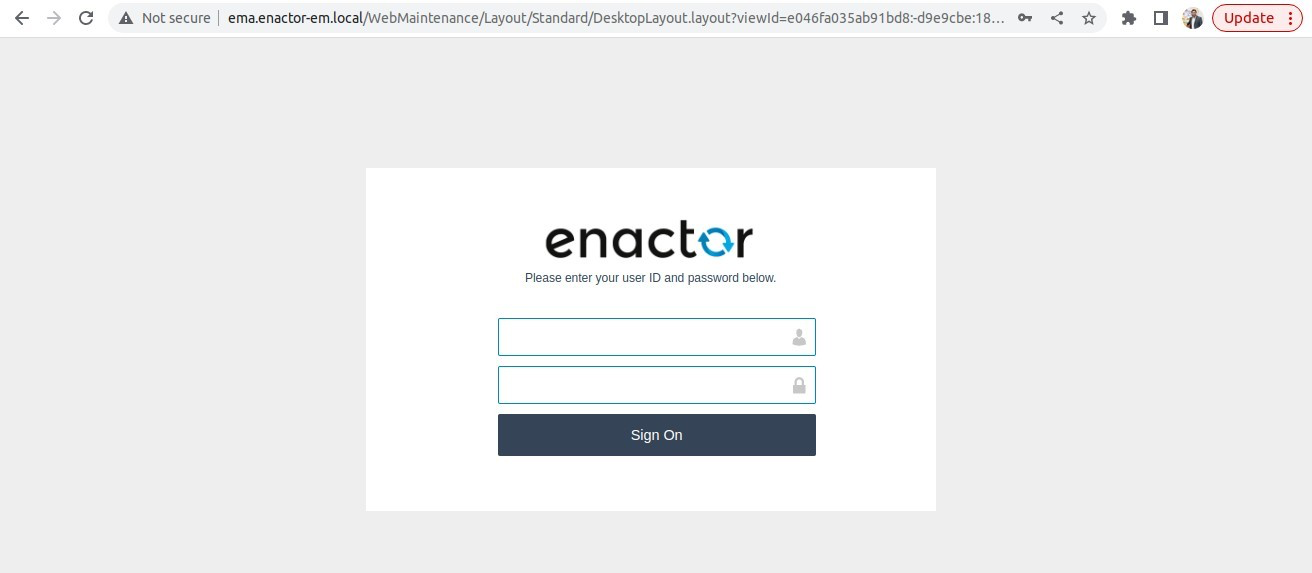
Verification
Following checks can be made after deploying the Enactor Modules successfully:
Estate Manager:
http://{ingress endpoint}/WebMaintenance/Layout/Standard/DesktopLayout.layout
Web Core:
http://{ingress endpoint}/WebCore
Axis2:
http://{ingress endpoint}/axis2
What's Next?
Congratulations! Now you are done with setting up the infrastructure and the applications. Your next step will be configuring and start using the applications. A document will be shared by Enactor team to proceed further.