How To Configure Fiscal Austria
Introduction
Austrian fiscal regulations require that all POS transactions are digitally signed using a certified security device. The signing process uses an external device holding a purchased certificate. Two approaches are supported by Enactor:
- Card reader with certificate card - the retailer purchases a physical card reader and a card containing the certificate.
- Third-party signing service - the retailer uses a cloud-based service that holds the certificate on a Hardware Security Module (HSM) and signs transactions via a REST web service.
Once the certificate is purchased and configured to work with the POS, an initial signed transaction must be performed. This initial transaction, along with the certificate details and an encryption key, must be submitted to the Austrian Tax Authority. After this registration, individual sales transactions do not need to be submitted. However, each customer receipt includes a QR code containing encrypted sales and tax totals that the tax authority can verify through unannounced test purchases.
The purpose of this guide is to demonstrate the complete configuration required to enable Austrian fiscal compliance on Enactor POS, including tax setup, account credentials, device registration with FinanzOnline, and the fiscal receipt lifecycle.
For shared background on fiscal concepts, see Fiscal Overview.
Overview
The following steps are required to configure Austrian fiscal compliance:
- POS Terminal Template - Set the fiscalisation type to Austria, configure currency, locale, and no-sale receipt
- Location - Set the tax region and tax scheme for each Austrian location
- Tax Groups - Configure the five Austrian tax groups (AT1 through AT5)
- Tax Schema - Create the AT VAT tax schema with price-inclusive tax
- Tax Rates - Define the Austrian tax rates (Normal 20%, Reduced 10%, Zero 0%, Special 10%)
- Tax Group Tax Methods - Link tax groups to the AT schema and rates
- Product Tax - Assign tax groups to products for Austrian locations
- Account Credentials - Create three sets of credentials for certificate retrieval, transaction signing, and receipt encryption
- Privileges - Grant fiscal operation privileges to appropriate user roles
- Option Set Maintenance - Create the AUSTRIA_FISCAL option set for Fiscal POS Terminal Attributes
- Menus - Add the Fiscalisation menu folder with receipt and DEP export buttons
- Reasons - Create the fiscal no-sale reason type and individual reasons
- Initial Setup - Register the security device and POS devices with FinanzOnline
- Receipts - Produce initial, monthly, annual, and final receipts as required
- Estate Manager Maintenance - Configure Fiscal Type and Fiscal POS Terminal maintenance
Configuration Steps
POS Terminal Template
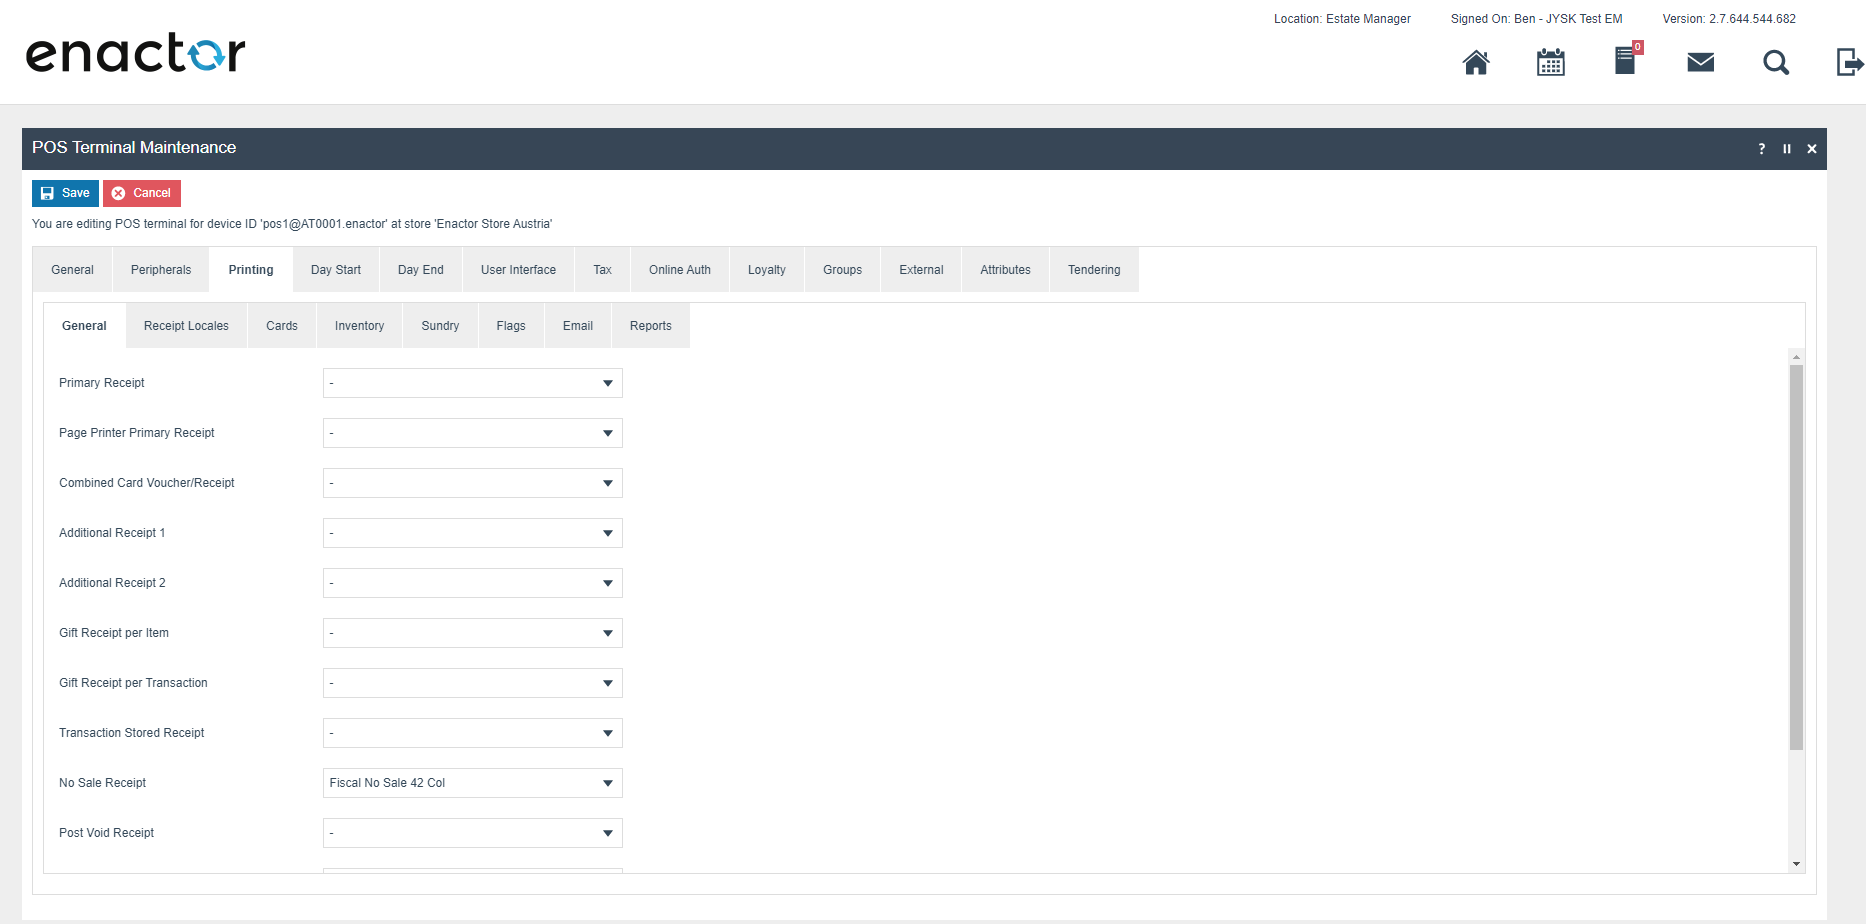
The POS Terminal Template used by all devices in Austria must be configured with the fiscalisation type set to Austria. Set Currency to Euros and Locale to Austrian.

Set No Sale Receipt to Fiscal No Sale 4XX Col, where XX is the correct printer column width for your receipt printer.
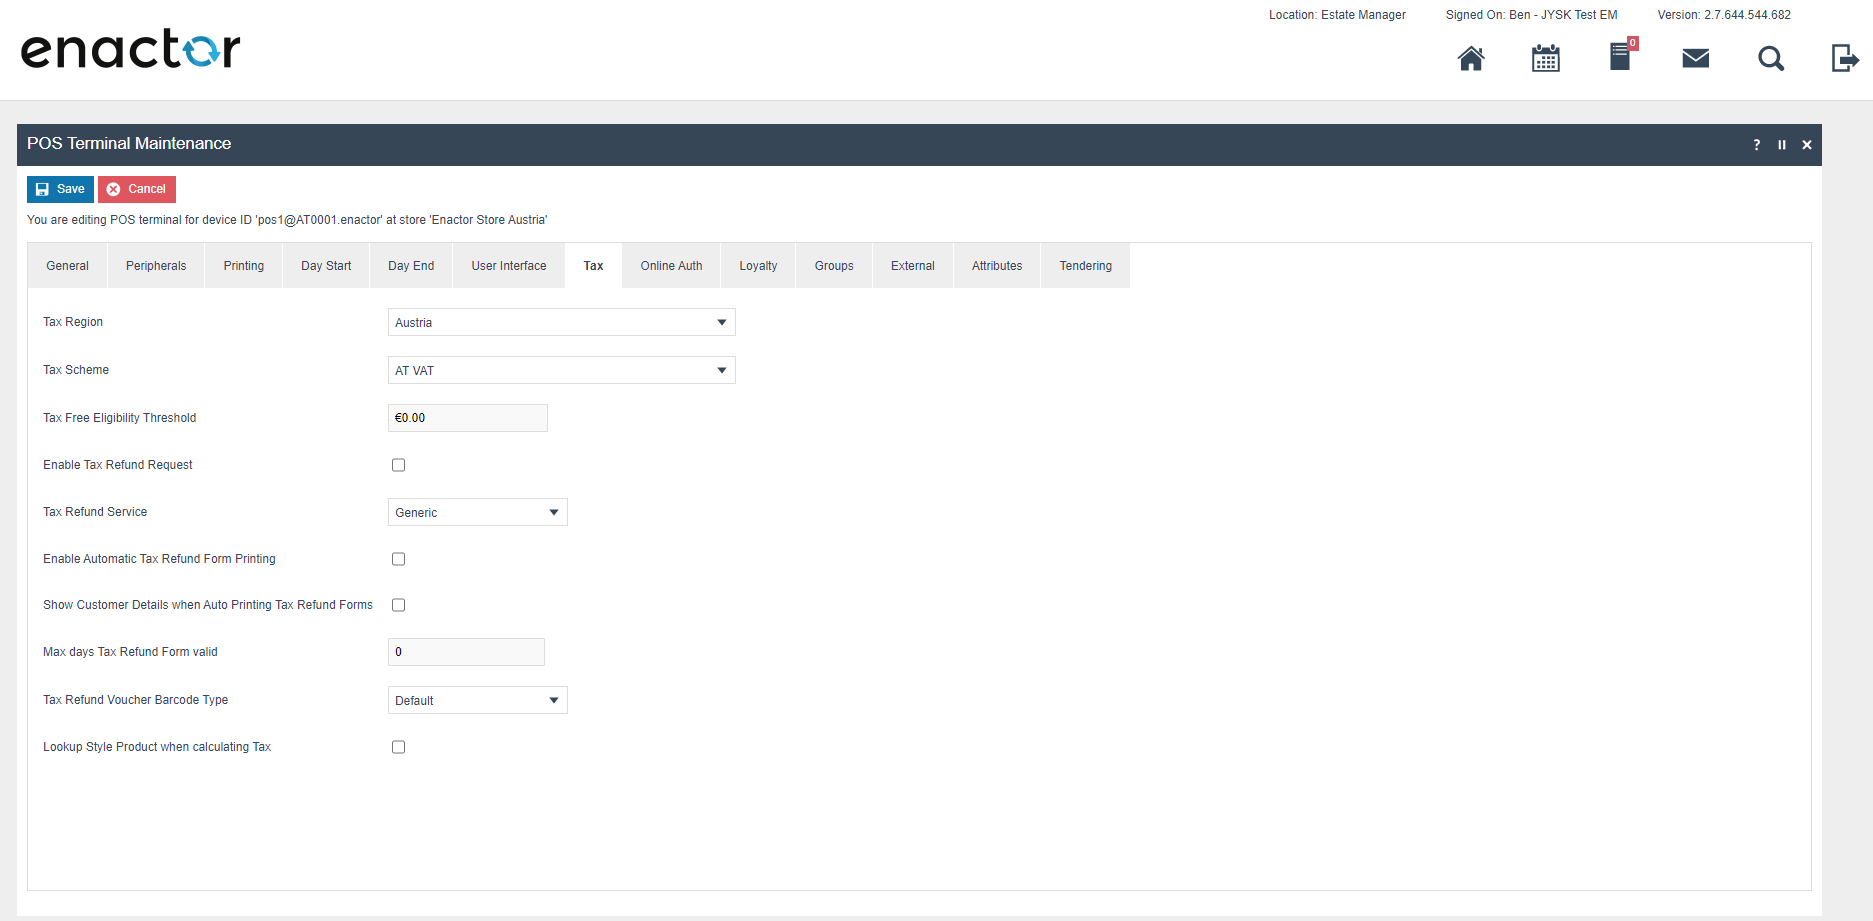
Within the Tax section, set Tax Region to Austria and Tax Scheme to AT VAT.
Location
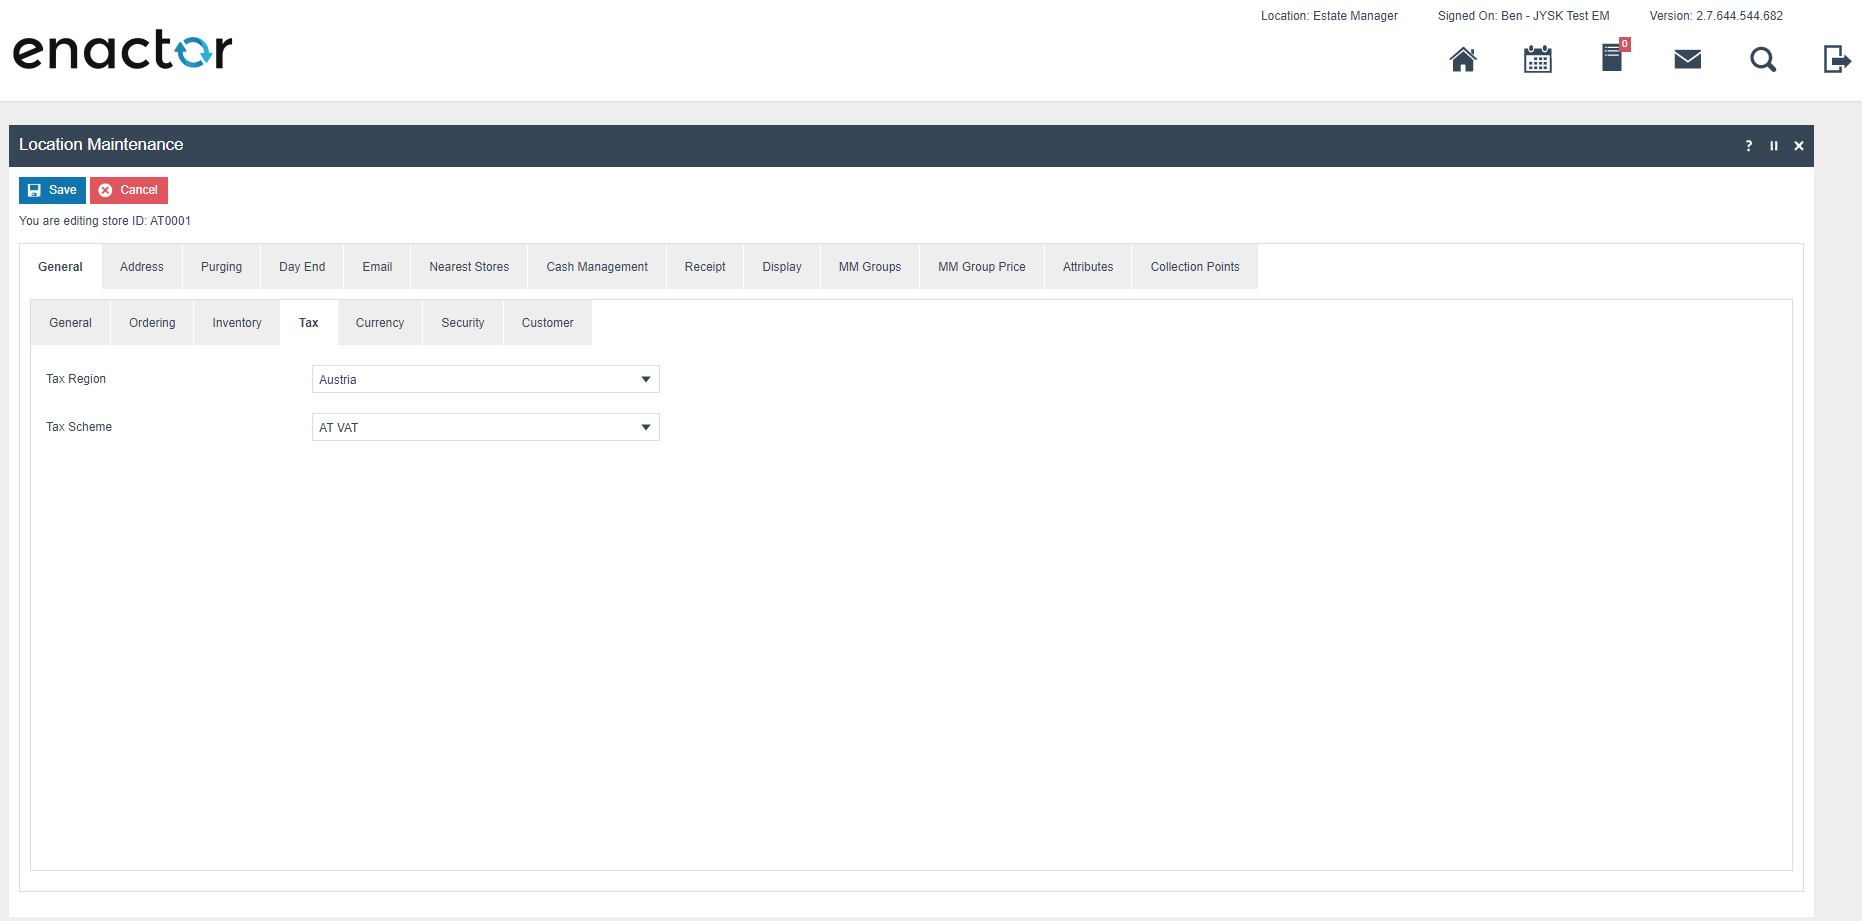
Each location in Austria should have its Tax Region set to Austria and Tax Scheme set to AT VAT.
Tax Groups
The following tax groups should be configured and broadcast to all Austrian devices.
| Tax Group ID | Description |
|---|---|
AT1 | AT Normal Tax Group |
AT2 | AT Reduced 1 Tax Group |
AT3 | AT Reduced 2 Tax Group |
AT4 | AT Zero 2 Tax Group |
AT5 | AT Special 2 Tax Group |
Tax Schema
The following tax schema should be configured and broadcast to all Austrian devices.
| Tax Schema ID | Description | Price Include Tax |
|---|---|---|
AT | AT VAT | TRUE |
Tax Rates
The following tax rates should be configured and broadcast to all Austrian devices.
| Tax Rate ID | Description | Display Code | Percentage |
|---|---|---|---|
AT_R1 | AT Normal | T | 20% |
AT_R2 | AT Reduced 1 | R | 10% |
AT_R3 | AT Reduced 1 | r | 10% |
AT_R4 | AT Zero | Z | 0% |
AT_R5 | AT Special | s | 10% |
Tax Group Tax Methods
The following tax group tax methods should be configured and broadcast to all Austrian devices.
| Tax Group ID | Tax Scheme ID | Description | Tax Rate |
|---|---|---|---|
AT_1 | AT | AT Normal | AT Normal |
AT_2 | AT | AT Reduced 1 | AT Reduced 1 |
AT_3 | AT | AT Reduced 1 | AT Reduced 1 |
AT_4 | AT | AT Zero | AT Zero |
AT_5 | AT | AT Special | AT Special |
Product Tax
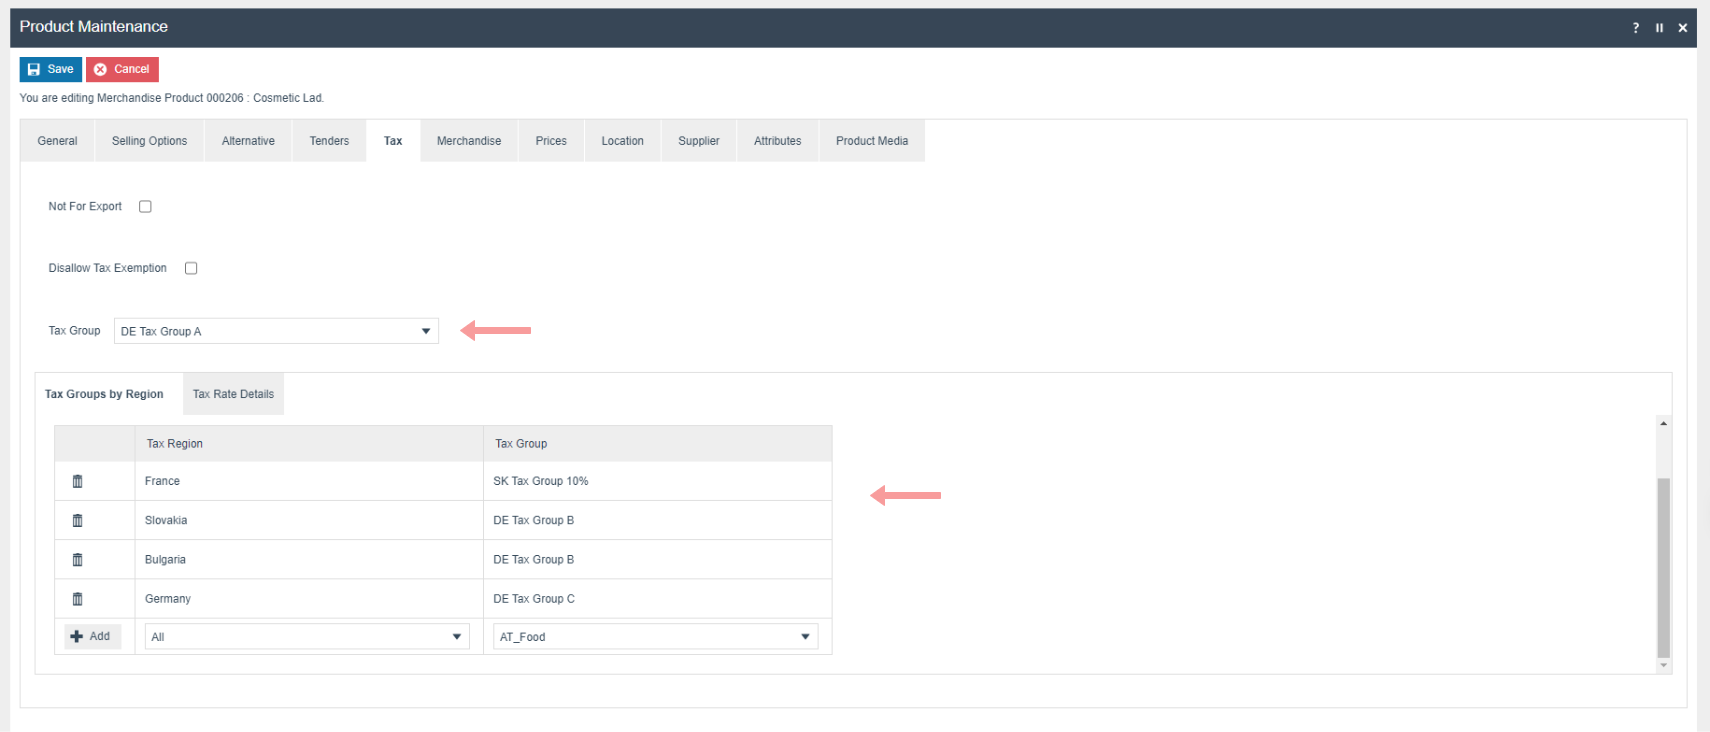
The following tax configurations should be assigned to products and broadcast to the appropriate Austrian devices. Tax group can be defined either as a direct tax group assignment or as a tax group by tax region.
Account Credentials
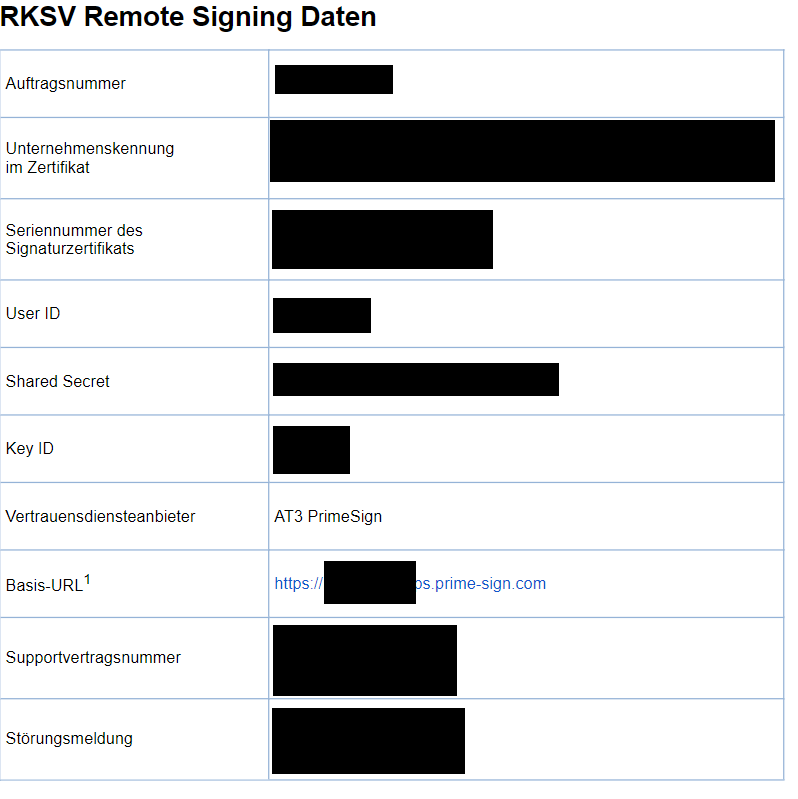
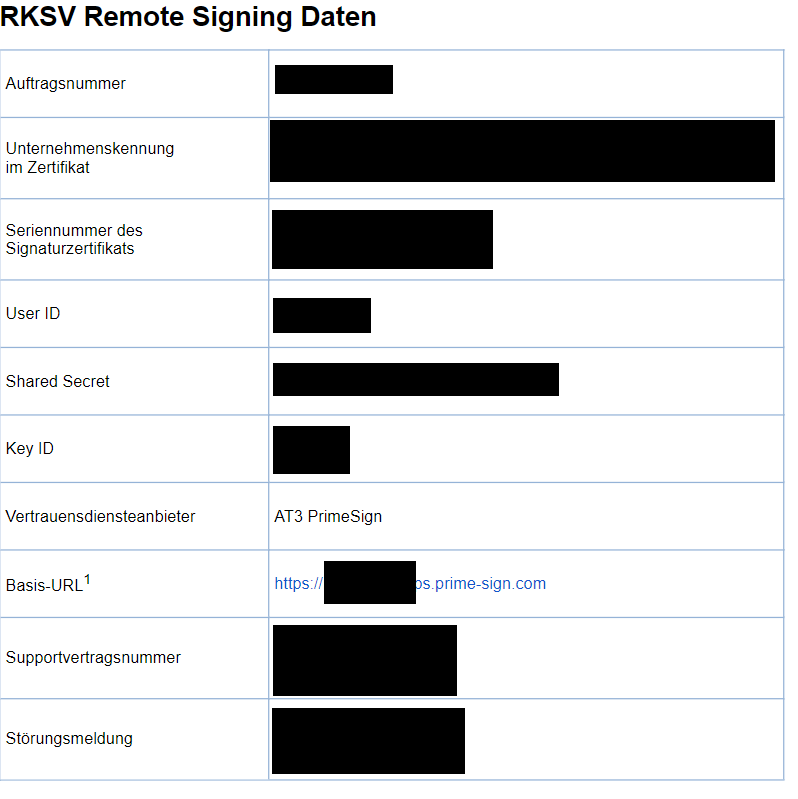
Account credentials must be set up with the details of the service used to sign transactions. These details are included in the correspondence from the supplier at the time of purchasing the service. Three sets of account credentials are required:
- GET_CERTIFICATE - retrieves the certificate from the API
- SIGN_TRANSACTION - signs transactions with the API
- FISCAL_AUSTRIA - encrypts the grand totals on the receipt using an AES 256 key
GET_CERTIFICATE
This set of account credentials is used to obtain the certificate from the API. From the supplier document you will need the User ID, Shared Secret (password), Basis-URL, and Key ID.
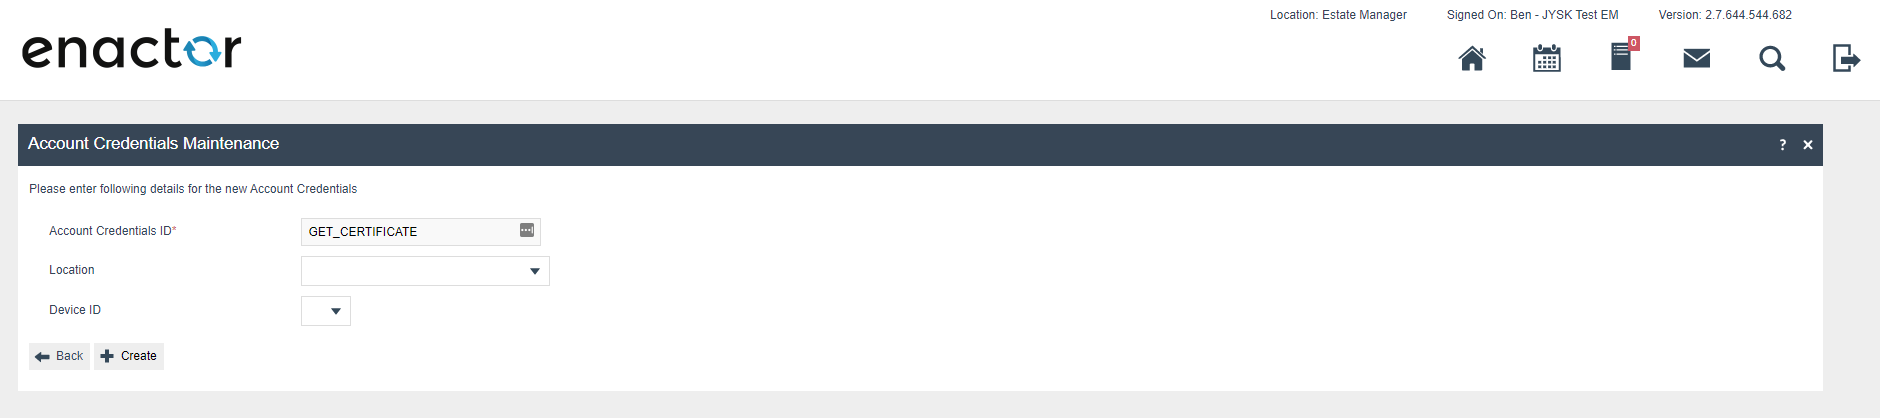
Create a new account credential called GET_CERTIFICATE.
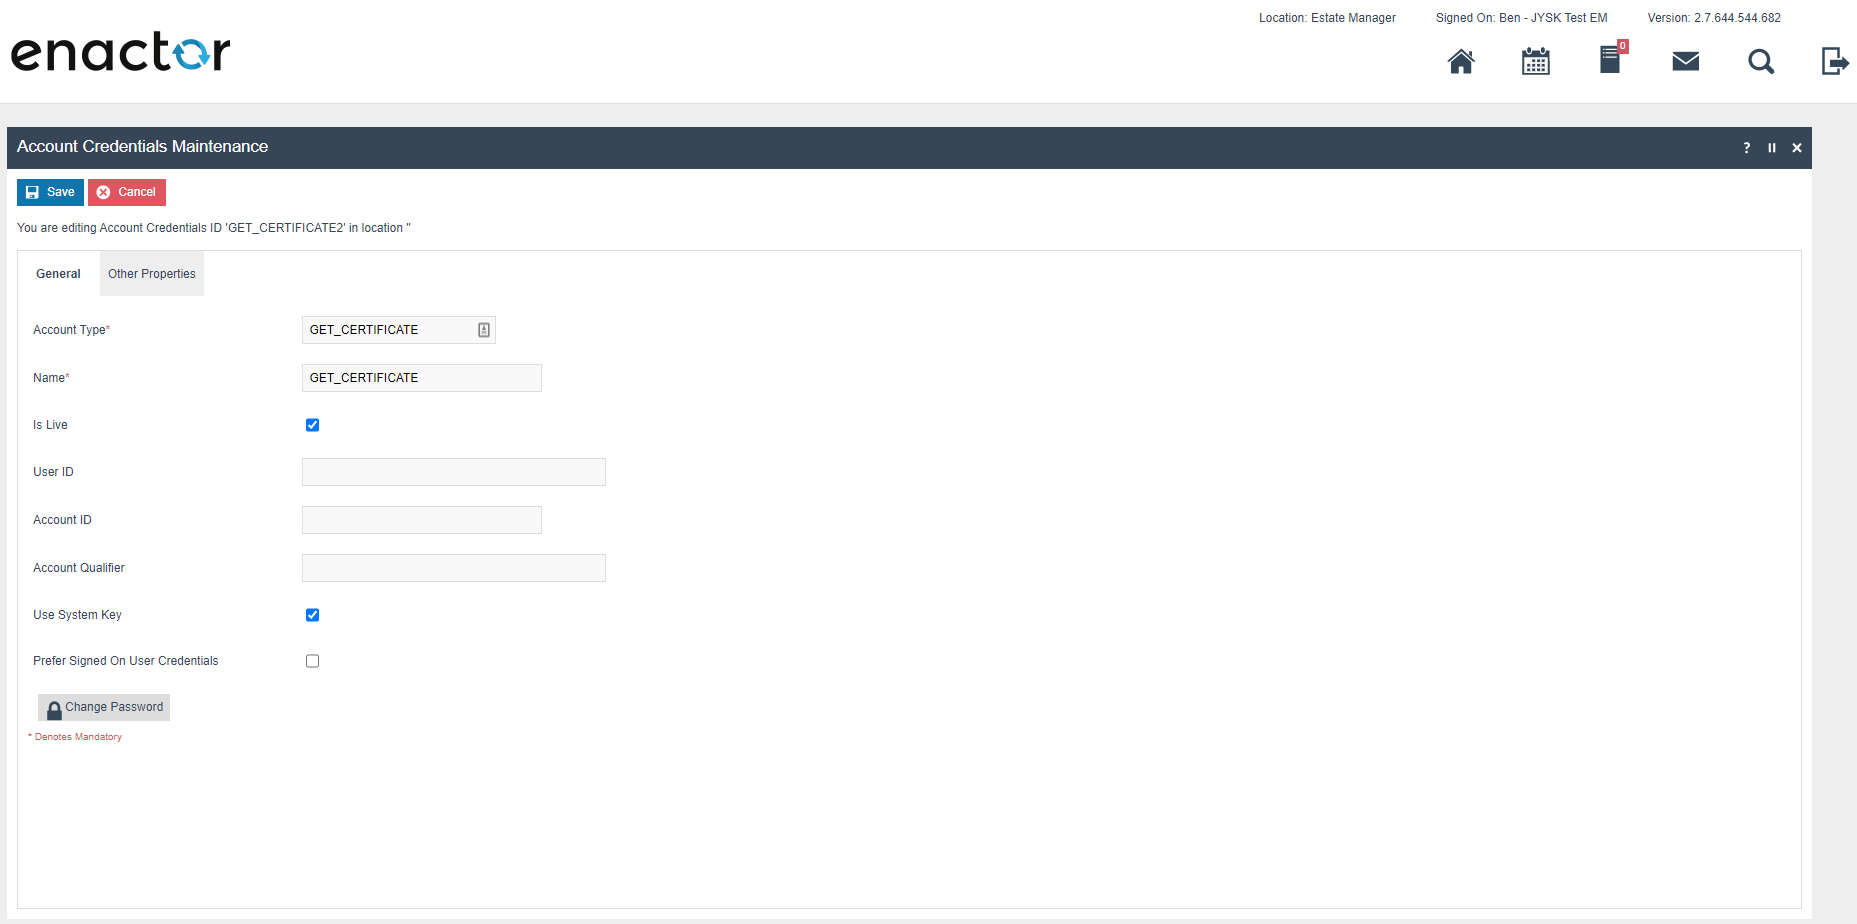
Configure the credential with the following settings:
| Configuration | Value |
|---|---|
| Account Type | GET_CERTIFICATE |
| Name | GET_CERTIFICATE |
| User ID | User ID from the supplier document |
| Is Live | Checked |
| Use System Key | Checked |
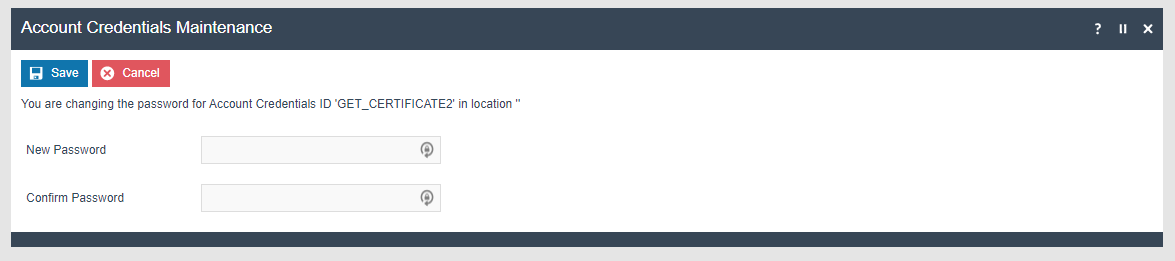
Click Change Password and enter the Shared Secret from the supplier document as the password.
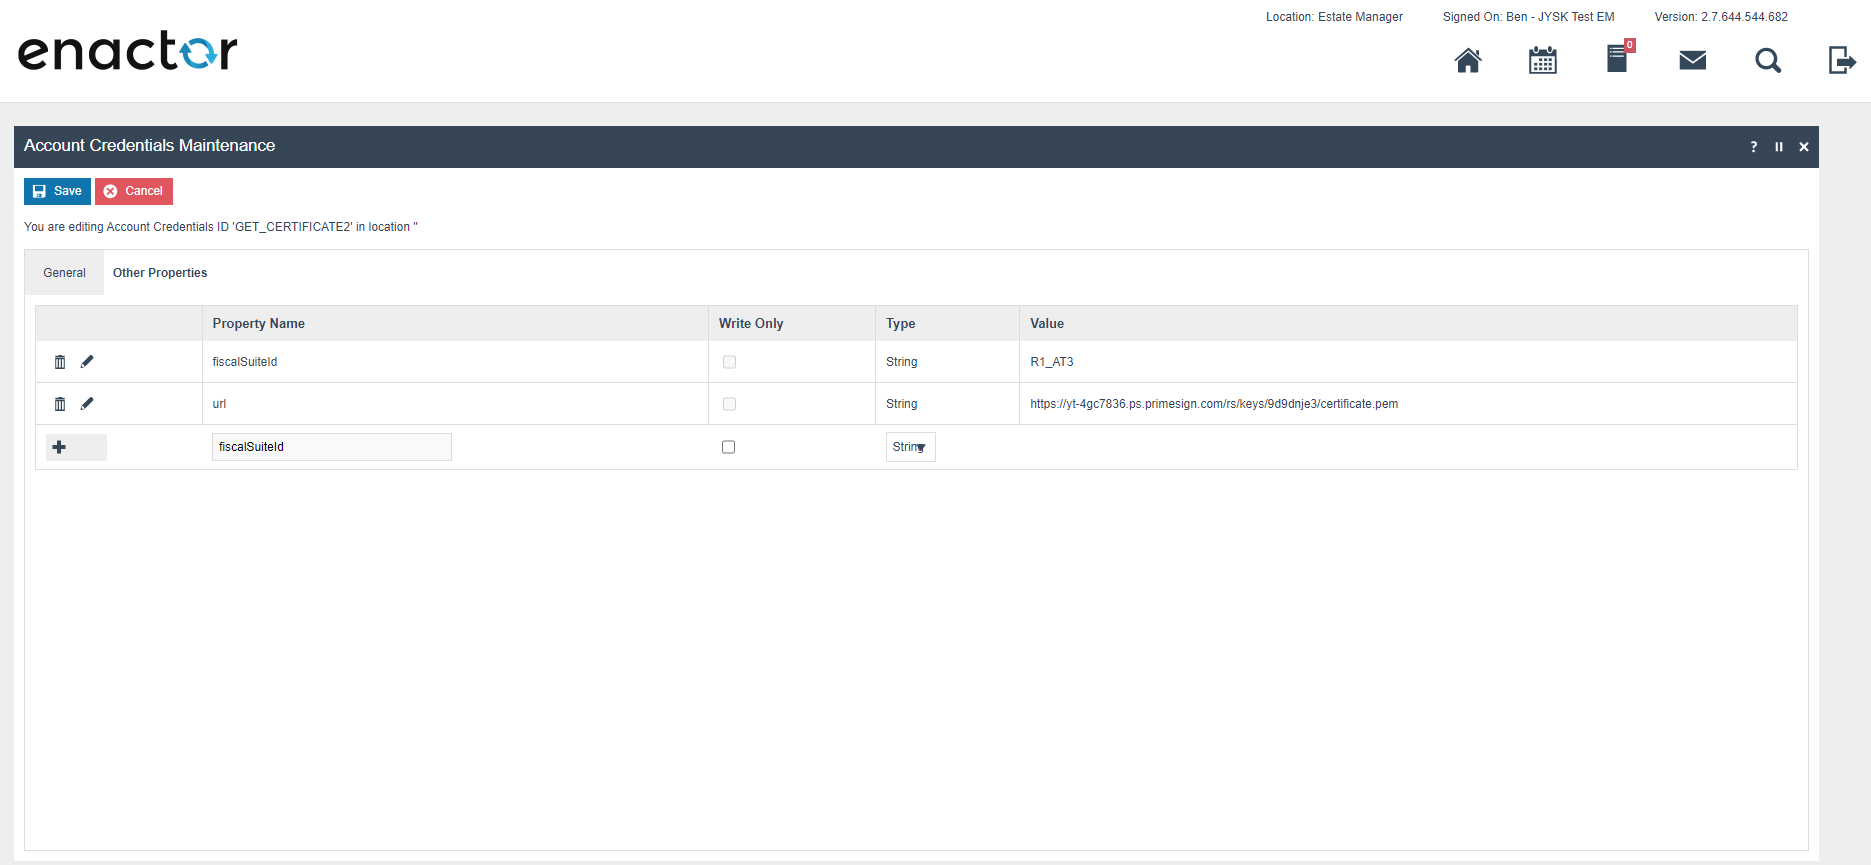
On the Other Properties tab, create two properties:
| Property Key | Type | Value |
|---|---|---|
fiscalSuiteId | String | R1_AT3 |
url | String | Built from supplier values (see format below) |
URL format: [BASIS-URL]/rs/keys/[Key ID]/certificate.pem
Example: https://yt-4gc7836.ps.primesign.com/rs/keys/9d9dnje3/certificate.pem
SIGN_TRANSACTION
This set of account credentials is used to sign transactions with the API. From the supplier document you will need the User ID, Shared Secret (password), Basis-URL, and Key ID.
Create a new account credential called SIGN_TRANSACTION.

Configure the credential with the following settings:
| Configuration | Value |
|---|---|
| Account Type | SIGN_TRANSACTION |
| Name | SIGN_TRANSACTION |
| User ID | User ID from the supplier document |
| Is Live | Checked |
| Use System Key | Checked |
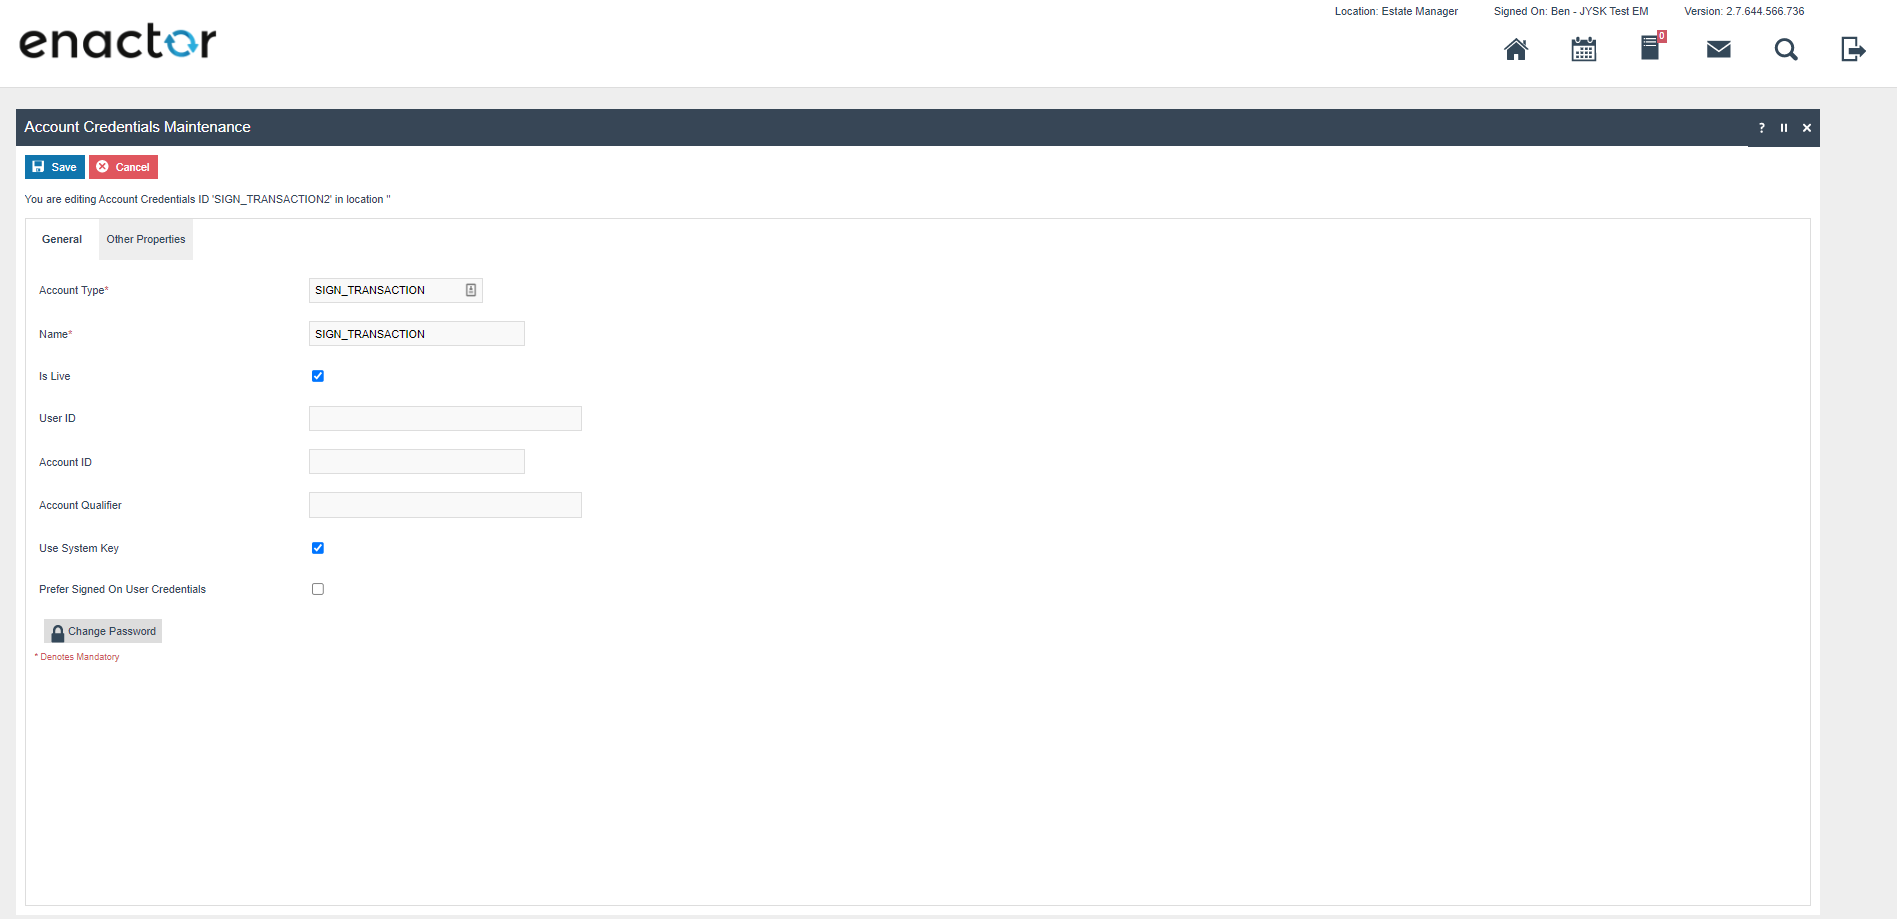
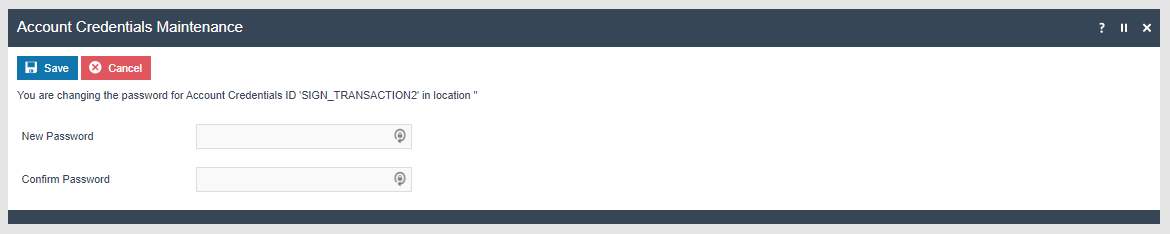
Click Change Password and enter the Shared Secret from the supplier document as the password.
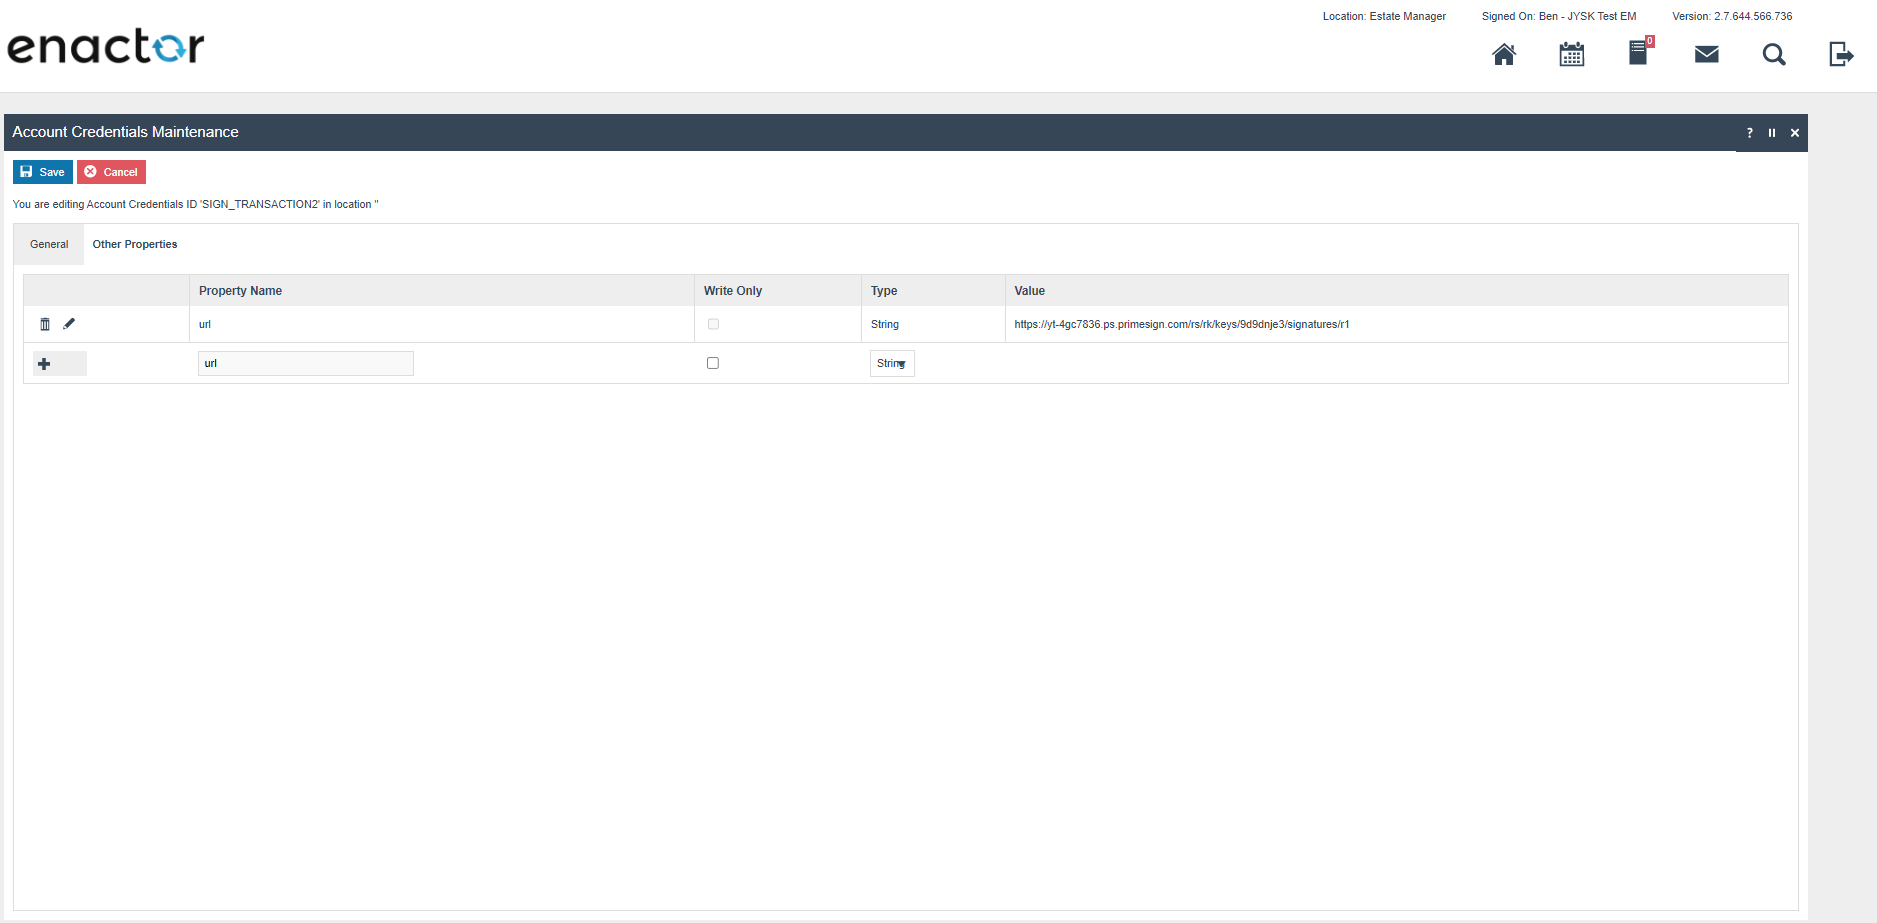
On the Other Properties tab, create a single property:
| Property Key | Type | Value |
|---|---|---|
url | String | Built from supplier values (see format below) |
URL format: [BASIS-URL]/rs/rk/keys/[Key ID]/signatures/r1
Example: https://yt-4gc7836.ps.primesign.com/rs/rk/keys/9d9dnje3/signatures/r1
FISCAL_AUSTRIA
This set of account credentials is used to encrypt the grand totals on the receipt using an AES 256 key.
Generate the key using the following command:
openssl rand -base64 32
Create a new account credential called FISCAL_AUSTRIA.

Configure the credential with the following settings:
| Configuration | Value |
|---|---|
| Account Type | FISCAL_AUSTRIA |
| Name | FISCAL_AUSTRIA |
| User ID | User ID from the supplier document |
| Is Live | Checked |
| Use System Key | Checked |
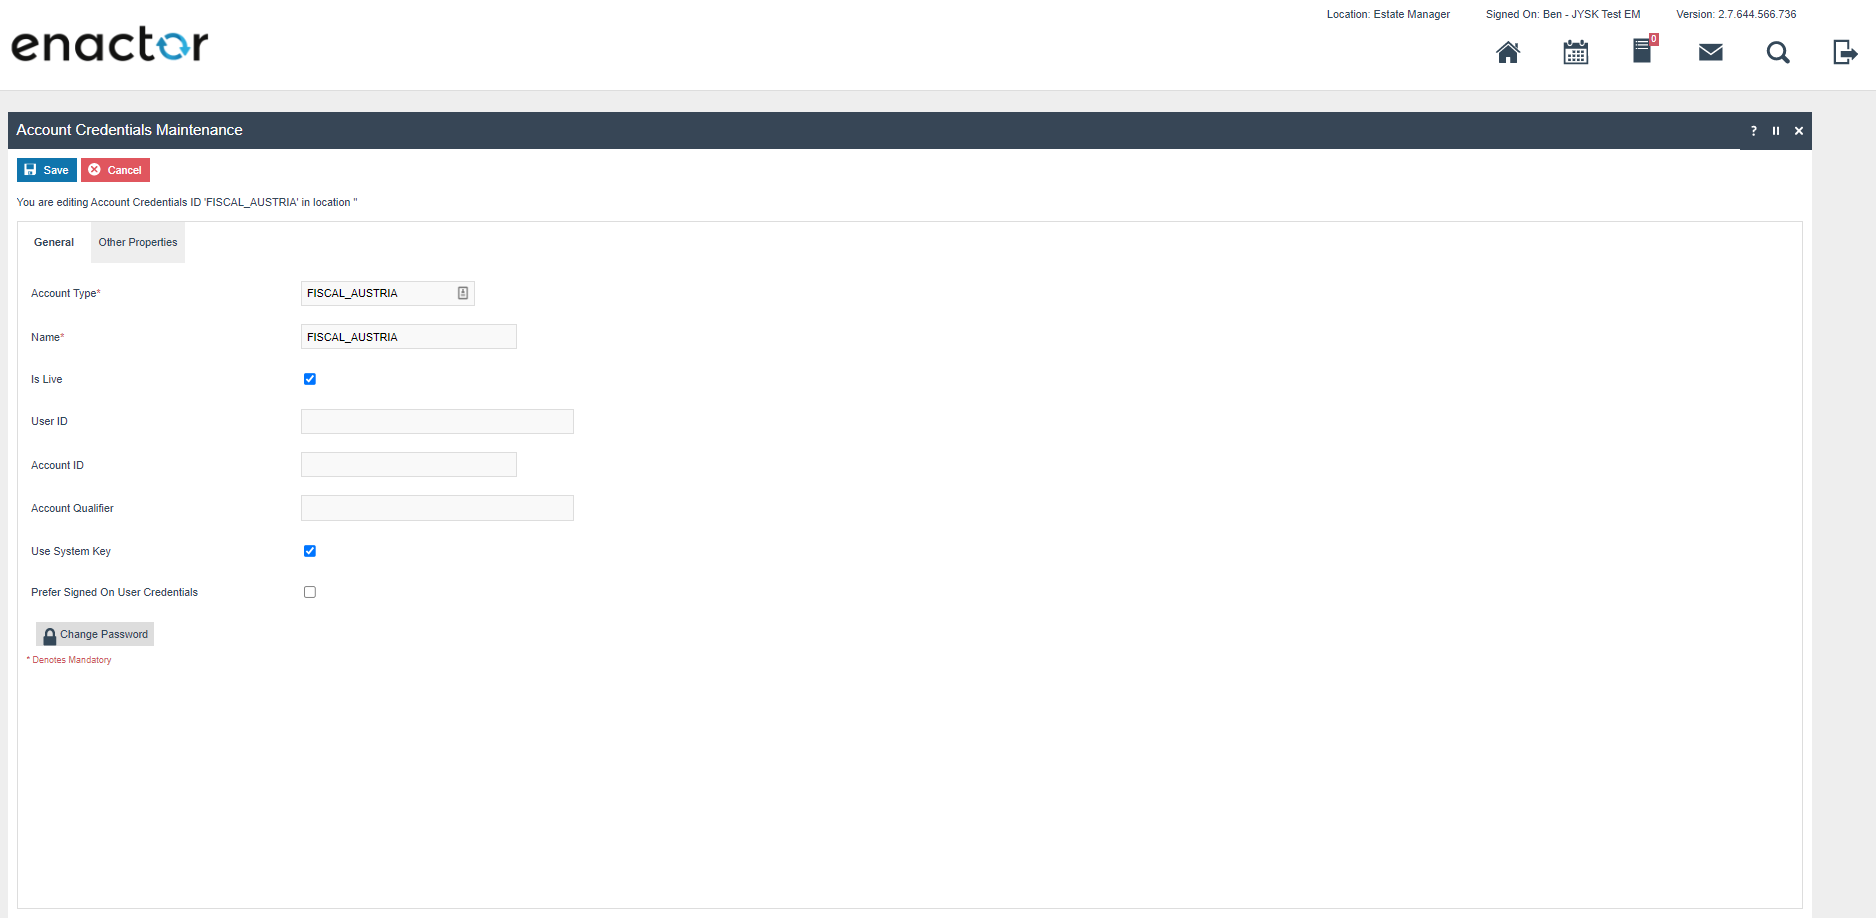
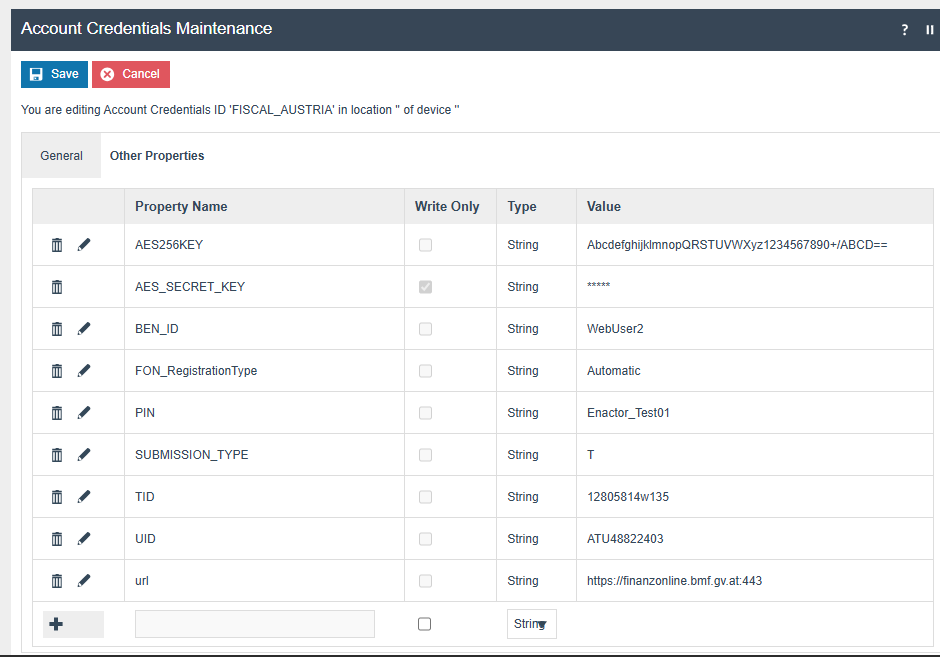
On the Other Properties tab, create the following properties:
| Property Key | Type | Value | Description |
|---|---|---|---|
AES_SECRET_KEY | String | Base64 key from openssl command | Set this property to be write-only |
FON_RegistrationType | String | Automatic | Registration type with FinanzOnline (Automatic or Manual) |
TID | String | e.g. 12805814w135 (8 to 12 characters) | Identification number of participants in a service |
UID | String | e.g. ATU48822403 (10 to 24 characters) | VAT identification number of the software supplier |
url | String | https://finanzonline.bmf.gv.at:443 | FinanzOnline service endpoint URL |
SUBMISSION_TYPE | String | e.g. T | P for production submission or T for test submission |
PIN | String | e.g. Enactor_Test01 (5 to 128 characters) | User password/PIN |
BEN_ID | String | e.g. WebUser2 (5 to 12 characters) | User ID |
Privileges
Users who are authorised to perform fiscal operations should have the following privileges: AuthorisesDEPExport, DEPExportAllowed, AuthorisesFiscalControlReceipt, FiscalControlReceiptAllowed.
For Fiscal POS Terminal Maintenance, the following privileges must be configured against the appropriate roles and broadcast to the Austrian devices. Consider whether all operators should have these privileges or if some should only be granted to managers.
For more detail on configuring privileges and roles, refer to How To Configure Users, User Roles and User Templates.
| Privilege ID | Application Package | Process | Remarks |
|---|---|---|---|
enactor.fiscalPOSTerminalMaintenance.Edit | Fiscal Maintenance | Fiscal POS Terminal Maintenance | Mandatory |
enactor.fiscalPOSTerminalMaintenance.List | Fiscal Maintenance | Fiscal POS Terminal Maintenance | Mandatory |
enactor.fiscalPOSTerminalMaintenance.New | Fiscal Maintenance | Fiscal POS Terminal Maintenance | Mandatory |
enactor.fiscalPOSTerminalMaintenance.Remove | Fiscal Maintenance | Fiscal POS Terminal Maintenance | Mandatory |
enactor.fiscalPOSTerminalMaintenance.View | Fiscal Maintenance | Fiscal POS Terminal Maintenance | Mandatory |
Option Set Maintenance
Navigate to Attribute / Option Set Maintenance.
Create a new Option Set with the following properties for the Fiscal POS Terminal Attributes type.
Users also have the option of exporting the Option Set through File Export Maintenance and uploading via File Import Maintenance in Estate Manager.
| Attribute / Option Set ID | Type | Region |
|---|---|---|
AUSTRIA_FISCAL | Fiscal POS Terminal Attributes | AUSTRIA |
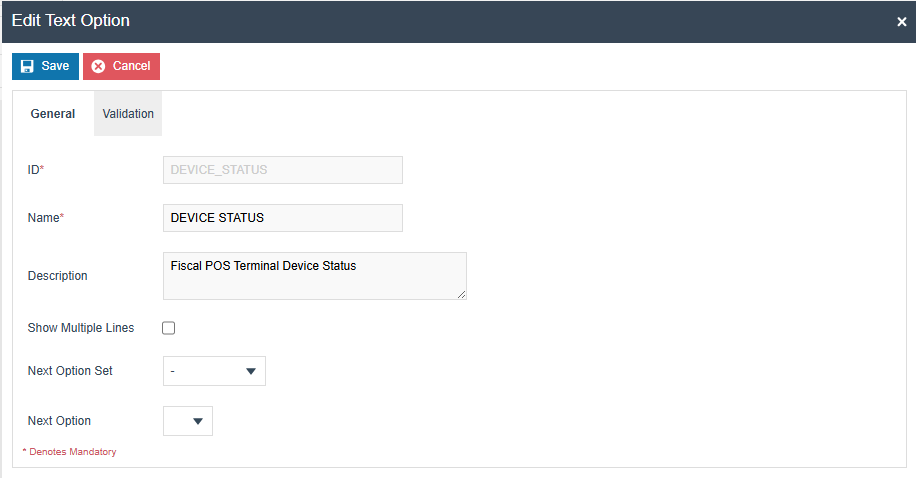
Add a Text option using the Add button. Set the option name and ID to DEVICE_STATUS.
Menus
The POS menu structure should be modified to add a Fiscalisation folder for operators that should be able to perform fiscal operations. The suggested menu location is:
Sales > More > Fiscalisation
The following items should be added to the new Fiscalisation folder:
| Event | Label | ID | Data Name | Data Java Type | Data Value |
|---|---|---|---|---|---|
Fiscal_PrintControlReceipt | Initial Receipt | InitialReceipt | enactor.pos.ControlReceiptType | String | initial |
Fiscal_PrintControlReceipt | Monthly Receipt | MonthlyReceipt | enactor.pos.ControlReceiptType | String | monthly |
Fiscal_PrintControlReceipt | Yearly Receipt | YearlyReceipt | enactor.pos.ControlReceiptType | String | yearly |
Fiscal_PrintControlReceipt | Final Receipt | FinalReceipt | enactor.pos.ControlReceiptType | String | final |
Fiscal_PrintControlReceipt | Cumulated Receipt | CumulatedReceipt | enactor.pos.ControlReceiptType | String | cumulatedCtx |
Fiscal_ExportDEP | Export DEP | exportDEP | N/A | N/A | N/A |
enactor.coreUI.MenuBack | Back | back | N/A | N/A | N/A |
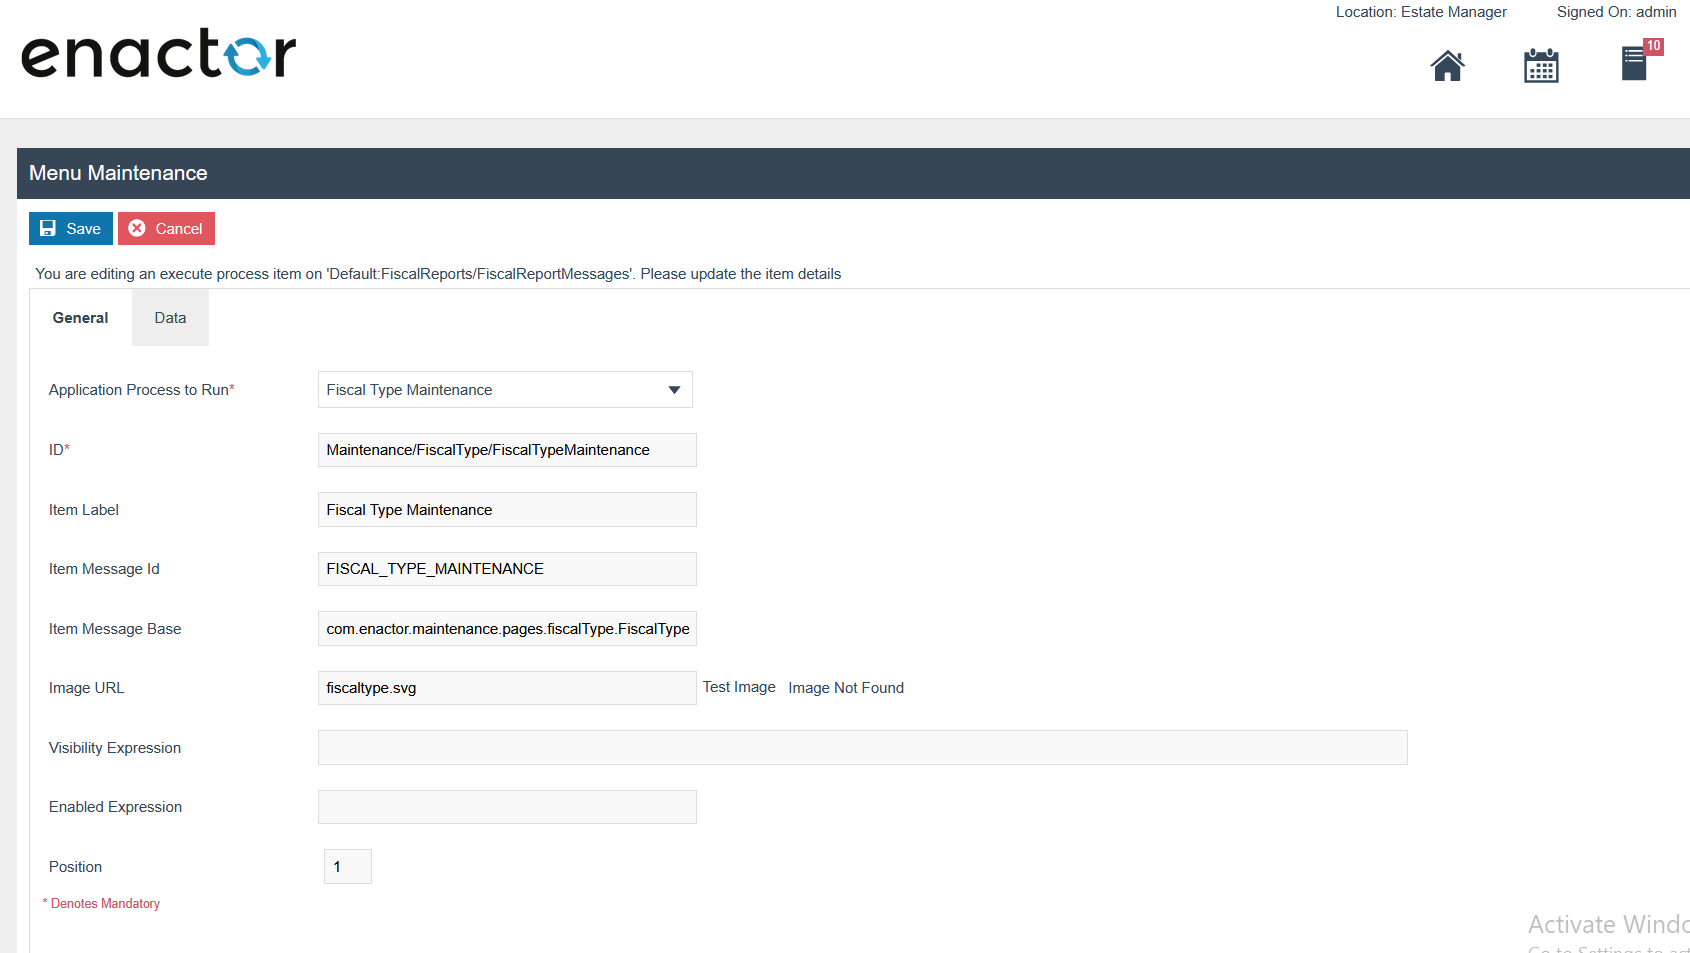
Fiscal Type Maintenance Menu
Within the Fiscalisation folder, select Add a new Execute Process Item and configure the following settings.

On the General tab, configure the following:
| Configuration | Value |
|---|---|
| Application Process to Run | Fiscal Type Maintenance |
| ID | Maintenance/FiscalType/FiscalTypeMaintenance |
| Item Label | Fiscal Type Maintenance |
| Item Message ID | FISCAL_TYPE_MAINTENANCE |
| Item Message Base | com.enactor.maintenance.pages.fiscalType.FiscalTypeMaintenanceMessages |
| Image URL | fiscaltype.svg |
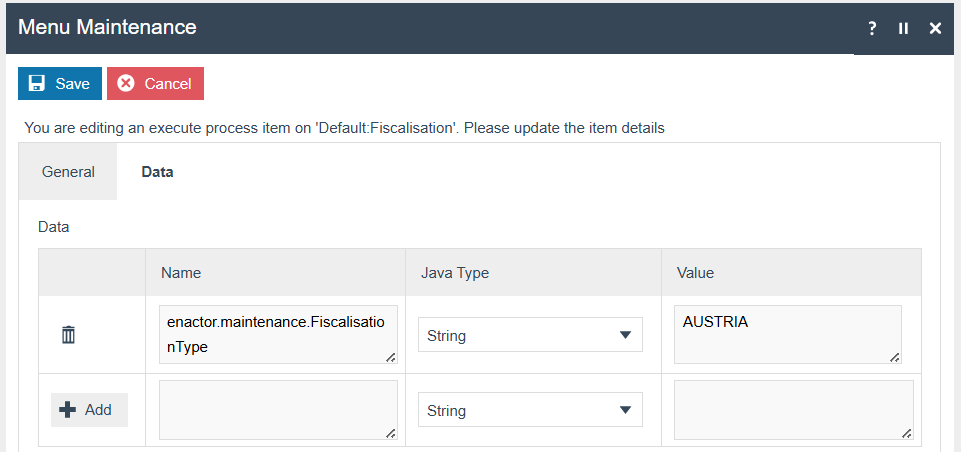
On the Data tab, enter the following:
| Configuration | Value |
|---|---|
| Name | enactor.maintenance.FiscalisationType |
| Value | AUSTRIA (this should match your fiscalisation type) |
Fiscal POS Terminal Maintenance Menu
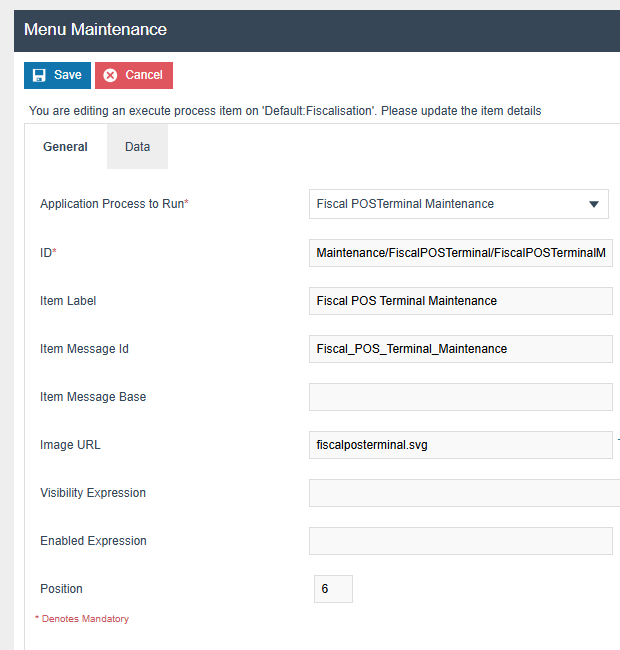
Within the Fiscalisation folder, select Add a new Execute Process Item and configure the following settings:
| Configuration | Value |
|---|---|
| Application Process to Run | Fiscal POS Terminal Maintenance |
| ID | Maintenance/FiscalPOSTerminal/FiscalPOSTerminalMaintenance |
| Item Label | Fiscal POS Terminal Maintenance |
| Item Message ID | FISCAL_POS_TERMINAL_MAINTENANCE |
| Image URL | fiscalposterminal.svg |
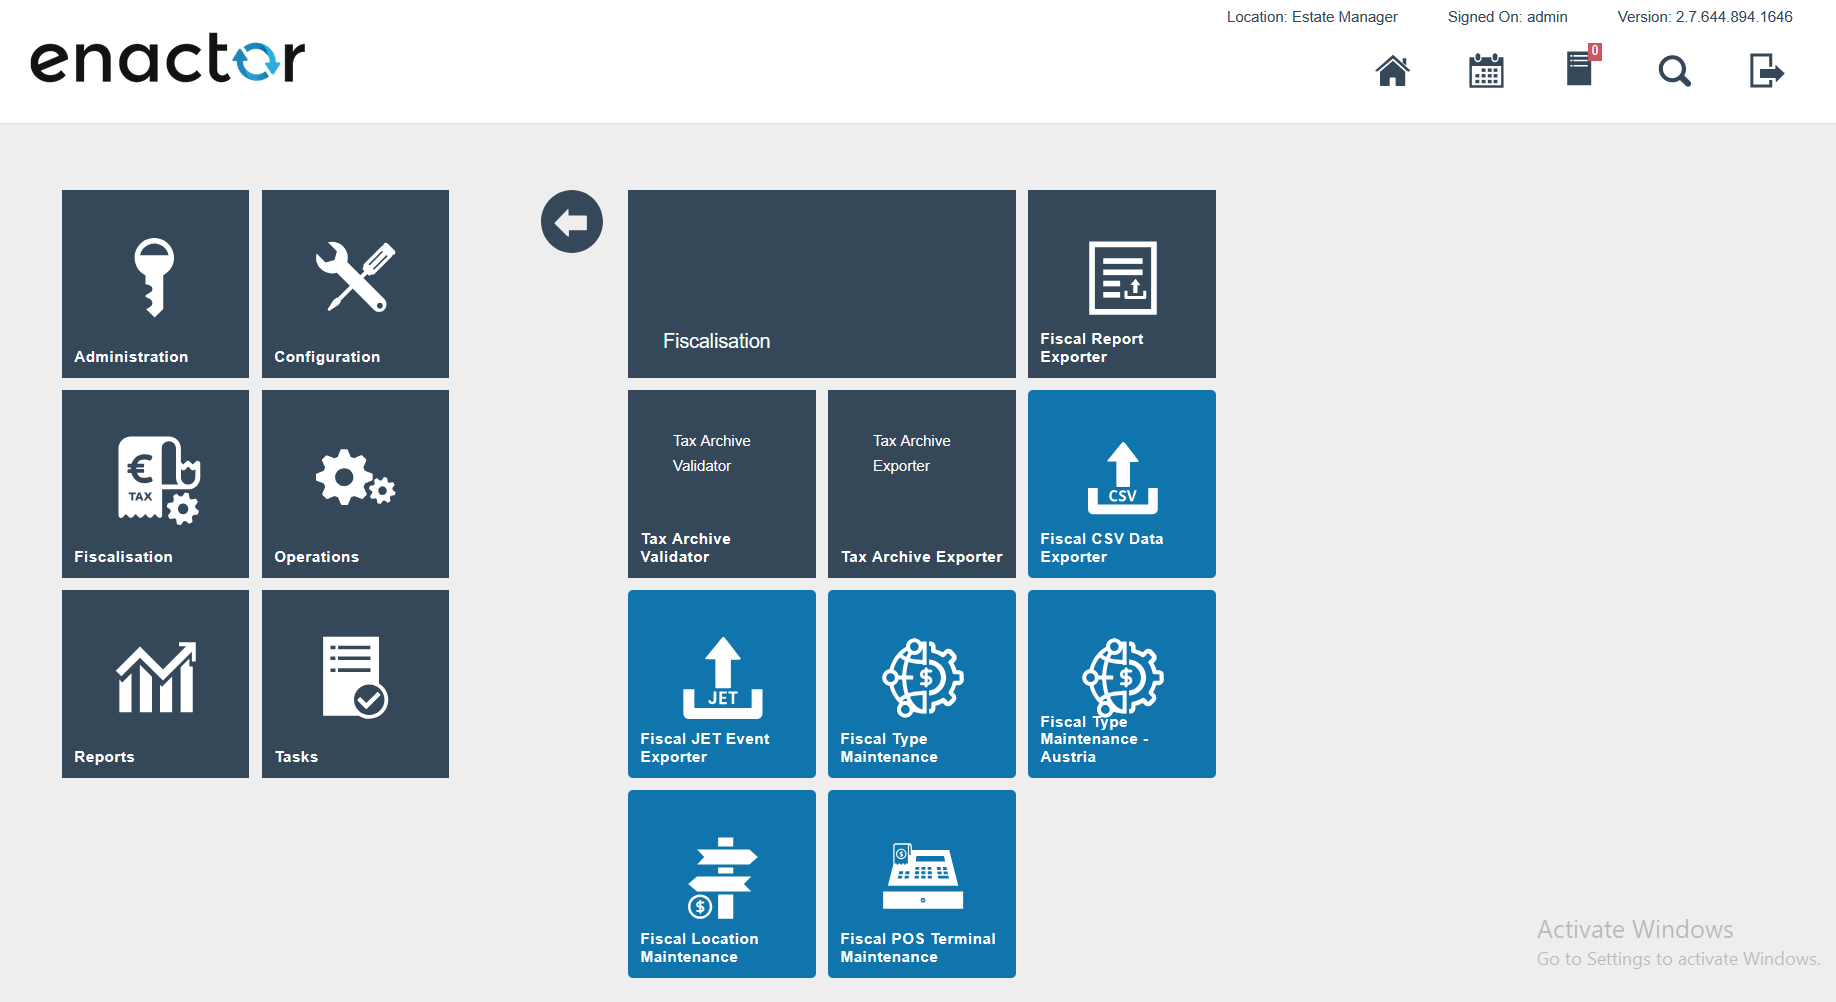
After setting the menu configurations, the Fiscalisation folder should display as shown below.
Reasons
A new reason type needs to be created with the following details:
| Type ID | Description | Namespace URI | Prefix | Local Part |
|---|---|---|---|---|
FISCAL_NO_SALE | Fiscal no sale | http://www.enactor.com/retail | retail | noSaleReason |
The following reasons then need to be created:
| Reason ID | Reason Type | Region | Description |
|---|---|---|---|
CUMULATED_CTX | FISCAL_NO_SALE | AUSTRIA | Cumulated Fiscal Receipt |
FINAL_FIS_CTRL_RPT | FISCAL_NO_SALE | AUSTRIA | Final fiscal control receipt |
INITIAL_FIS_CTRL_RPT | FISCAL_NO_SALE | AUSTRIA | Initial fiscal control receipt |
MONTHLY_FIS_CTRL_RPT | FISCAL_NO_SALE | AUSTRIA | Monthly fiscal control receipt |
YEARLY_FIS_CTRL_RPT | FISCAL_NO_SALE | AUSTRIA | Yearly fiscal control receipt |
Initial Setup
Once the above configuration steps have been completed, you must log in to the FinanzOnline portal and register both the security device and the POS devices that will use it.
The FinanzOnline portal uses the term "security device". In this solution, this is the HSM hosted by PrimeSign. In other solutions it could be a physical card or another type of HSM device. The portal credentials are different from the credentials used in the Account Credentials setup above.
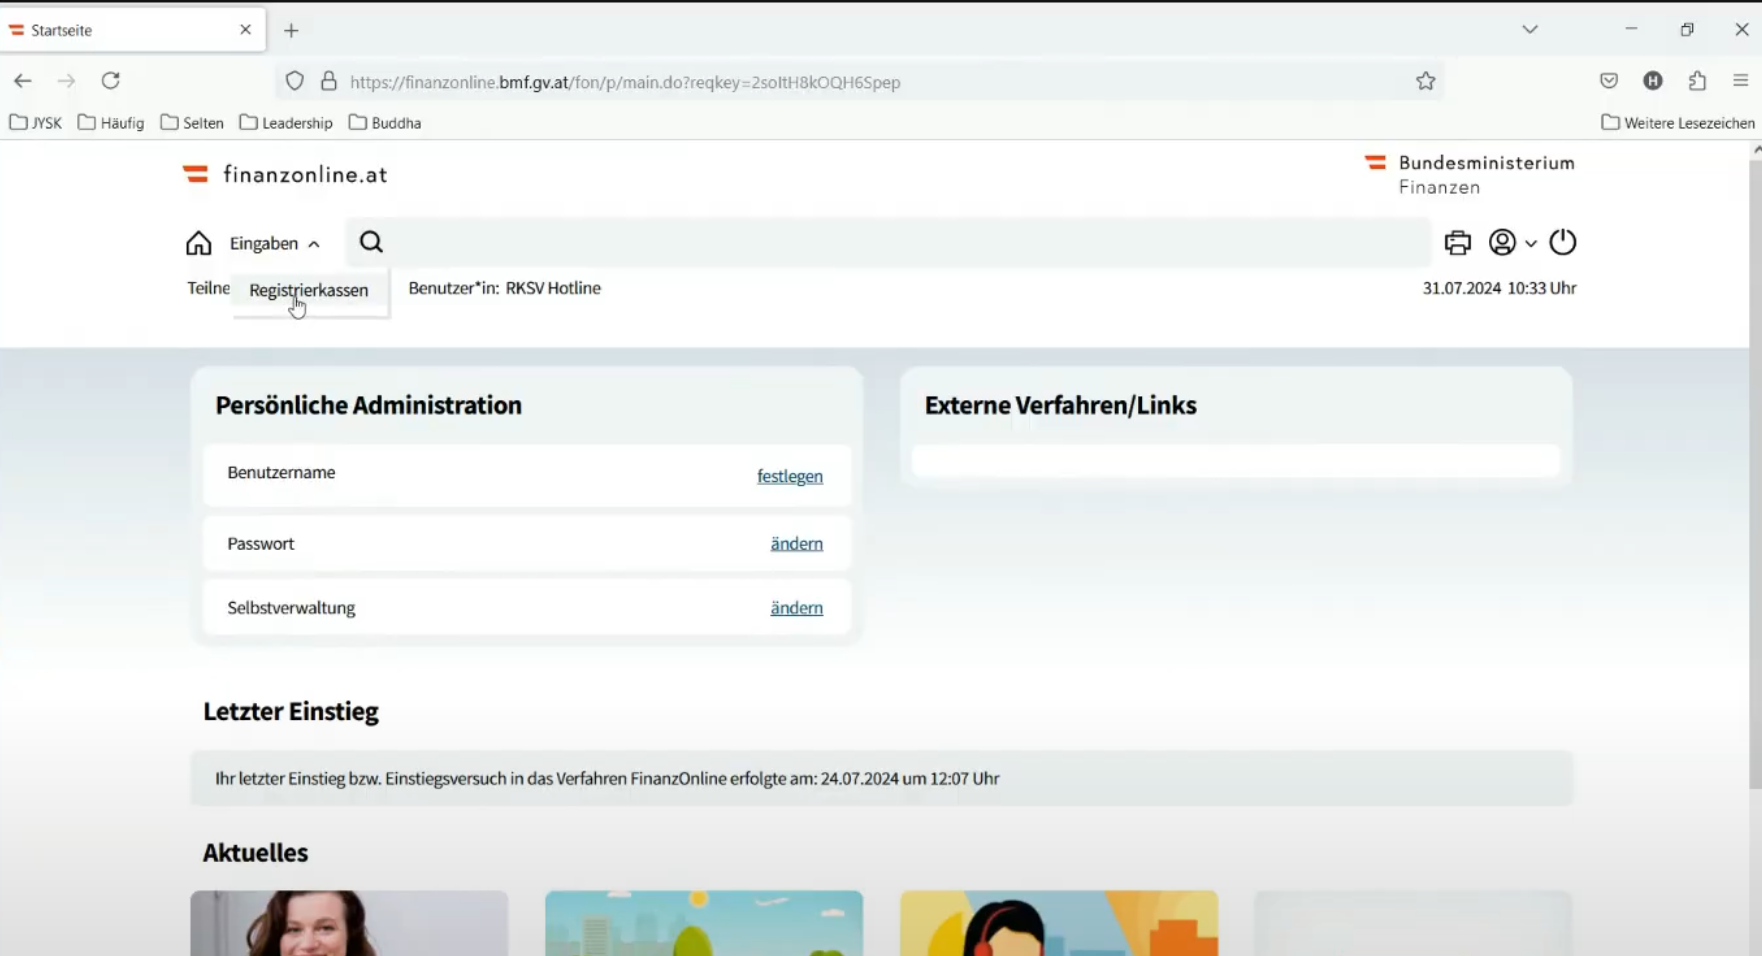
This links to the registration page from which both the security device and the POS can be registered.
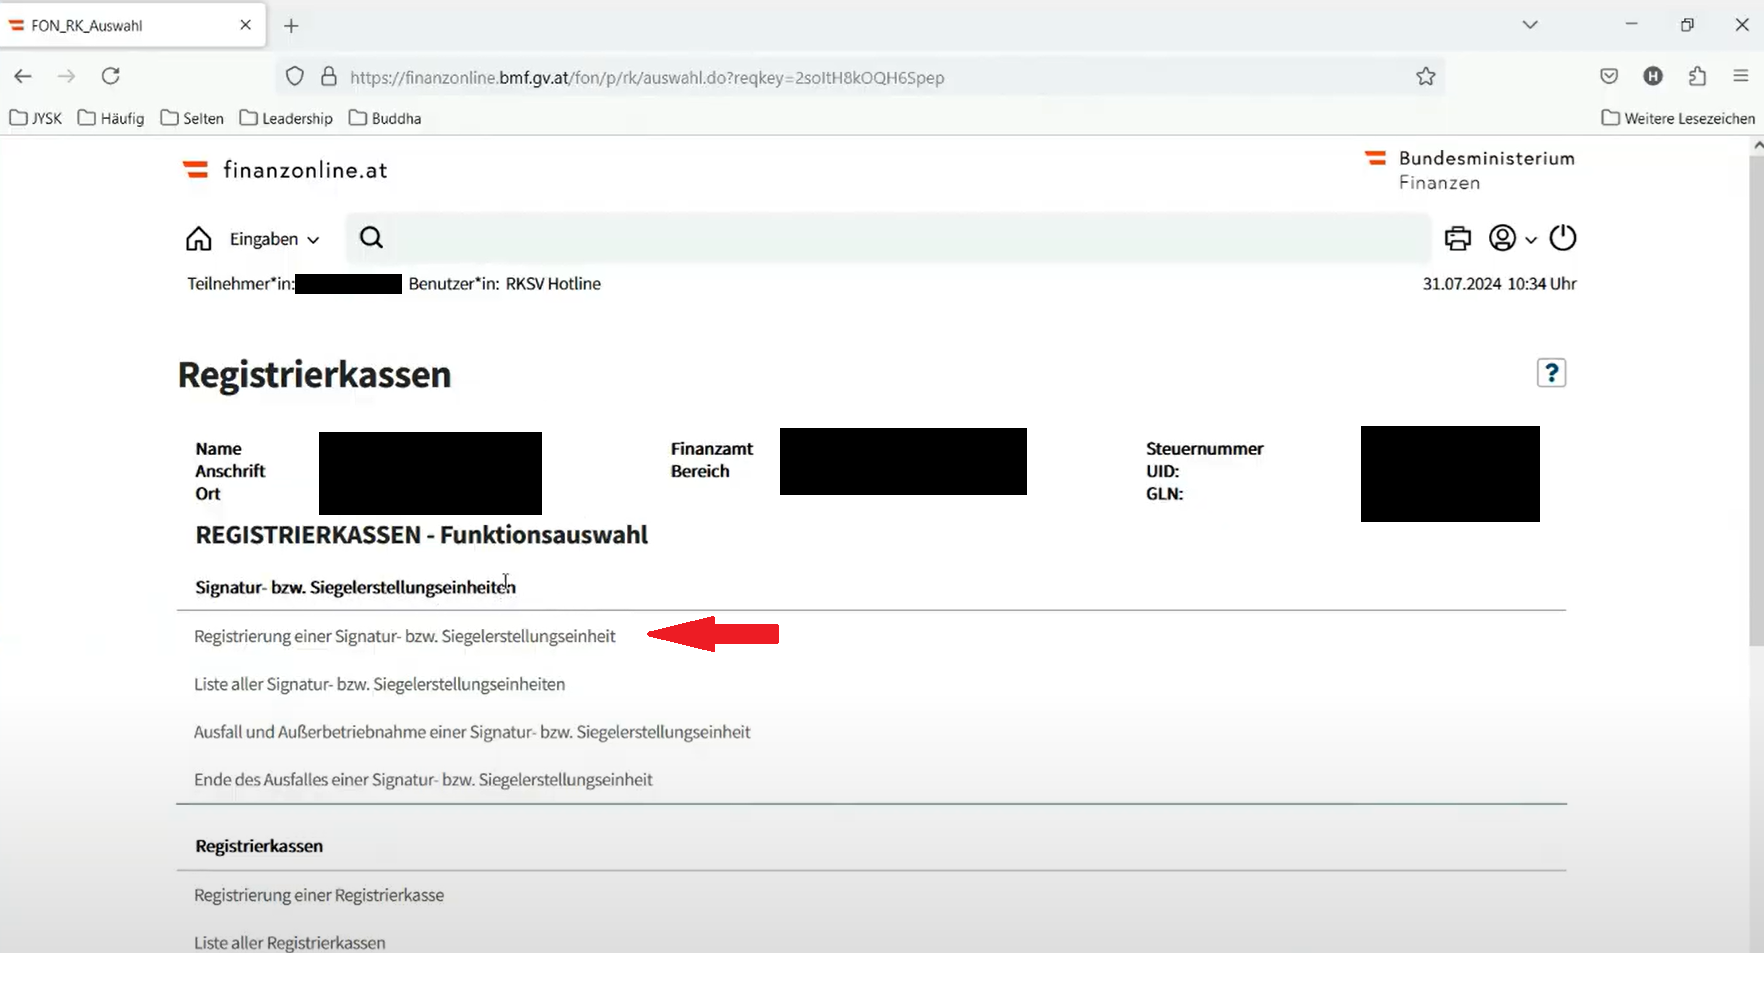
Registering the Security Device
Select the security device registration link. Set the dropdown values as shown and enter the serial number of the device provided by PrimeSign in the final text box.
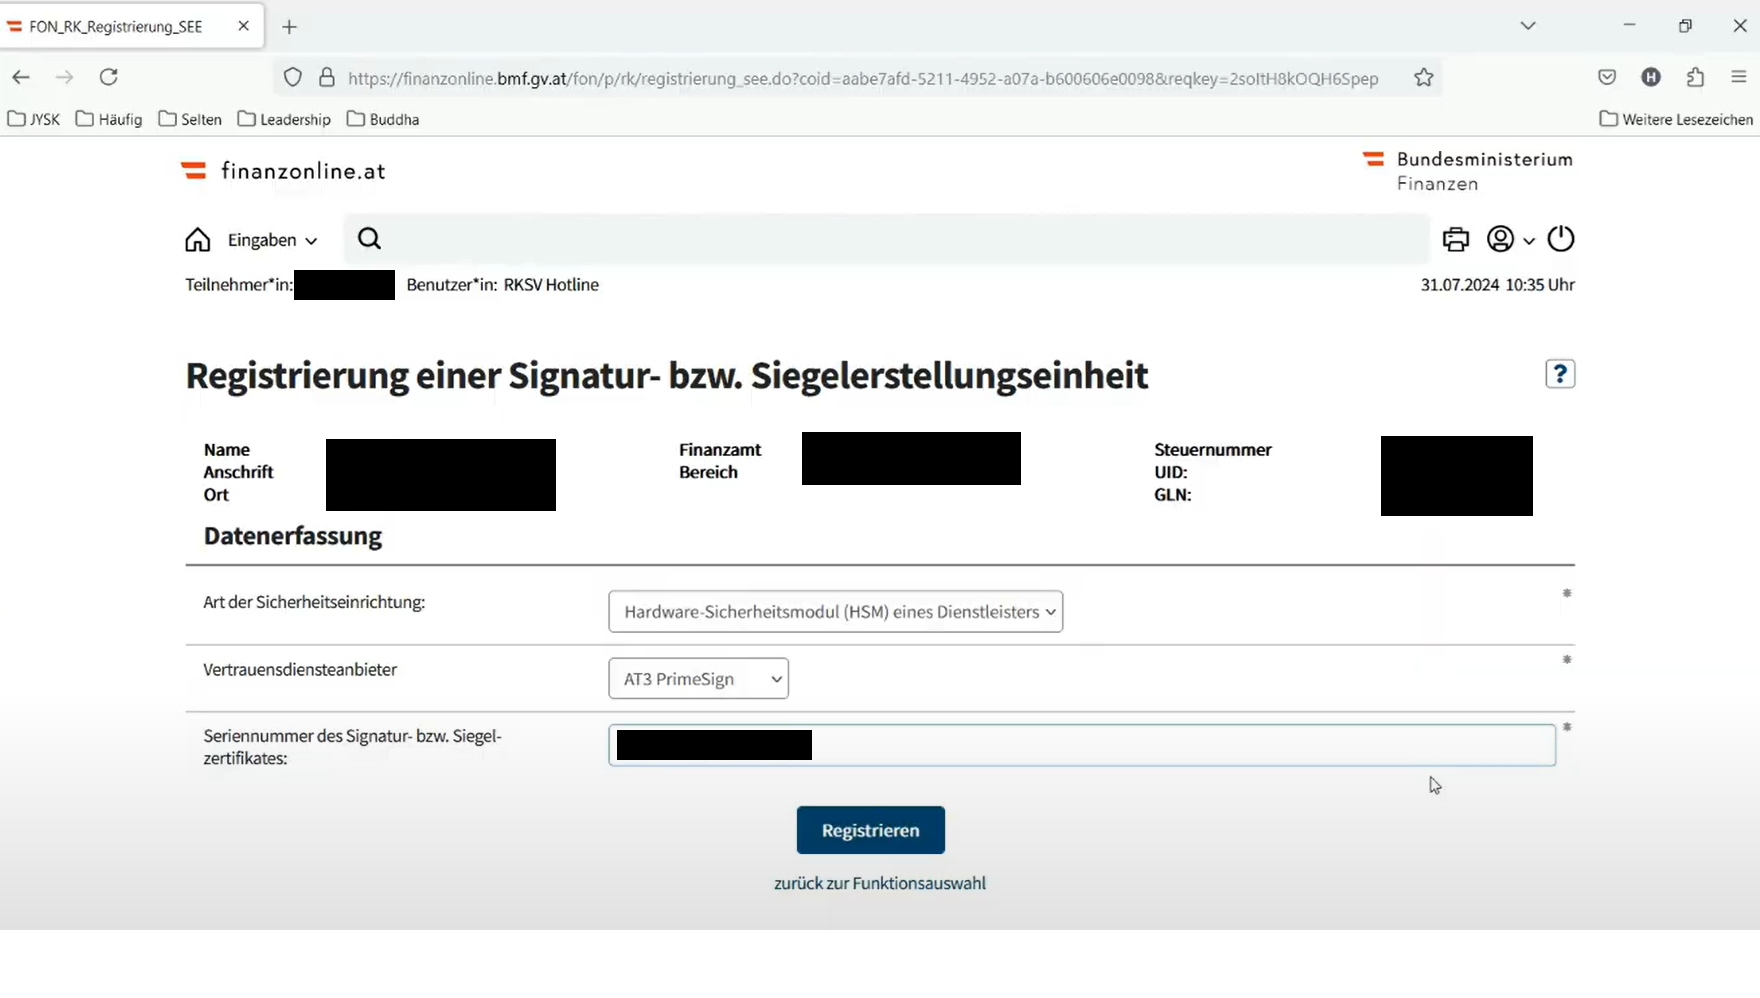
The serial number is provided in the PrimeSign documentation in the Seriennummer des Signaturzertifikats section.
After providing these details and clicking the Register button, a success confirmation message should appear.
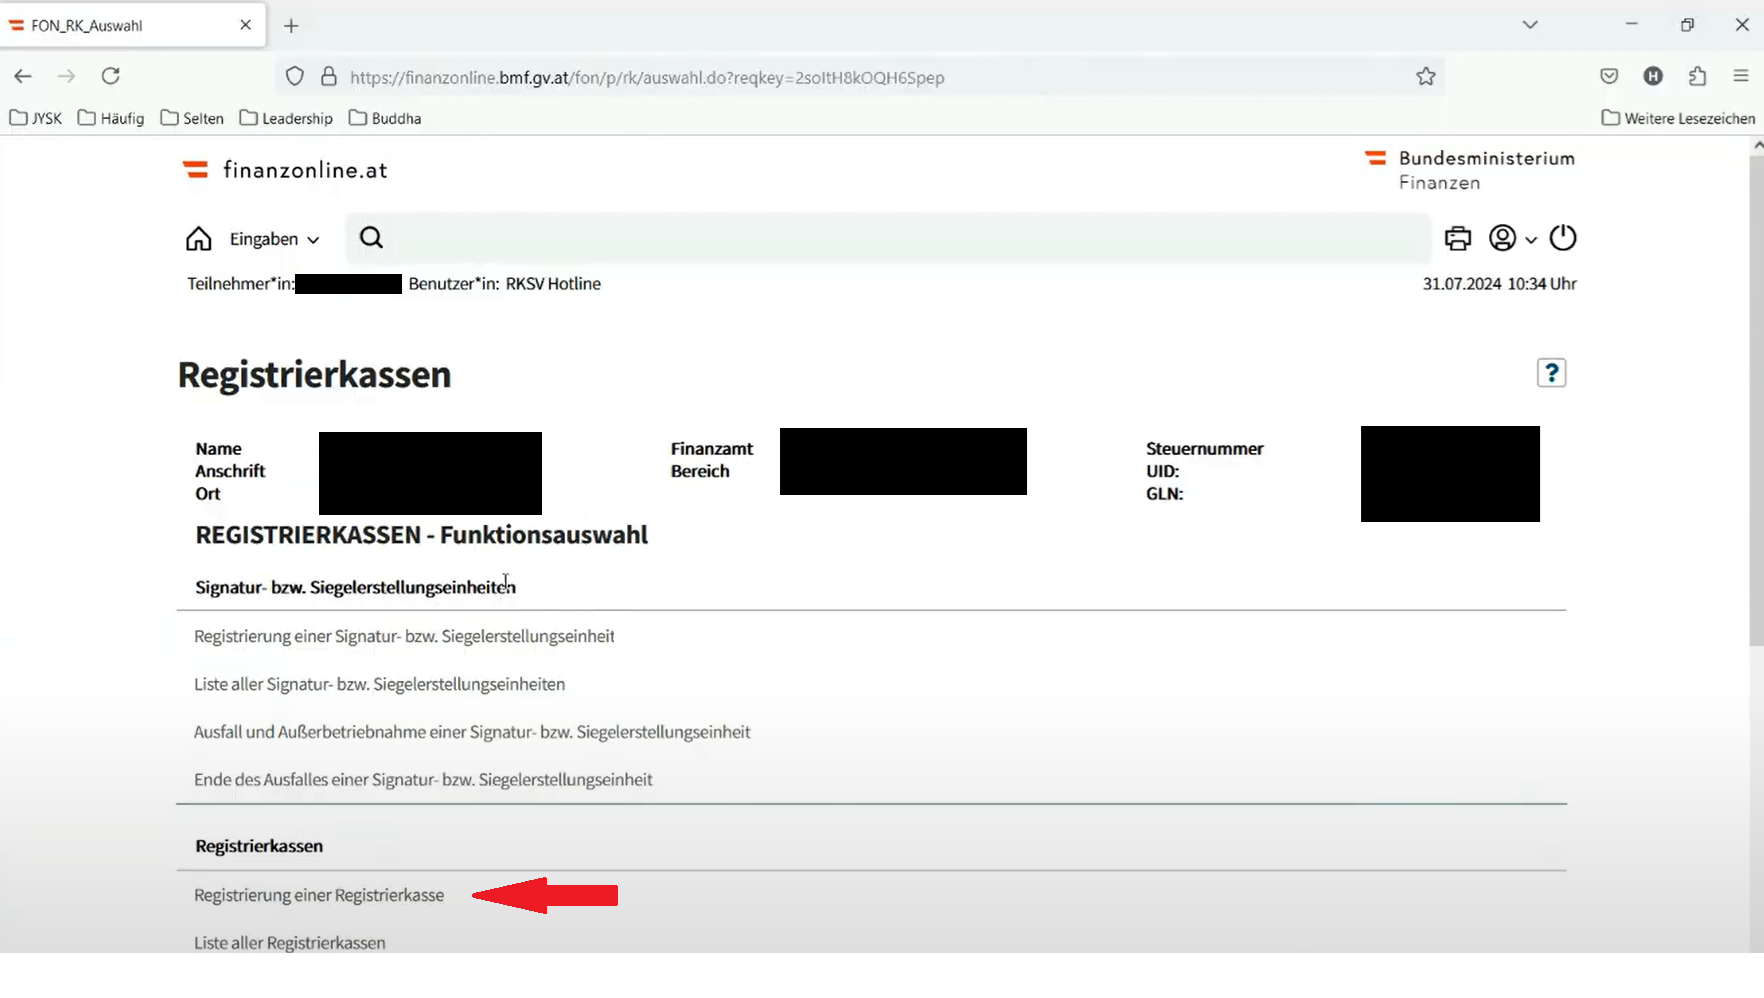
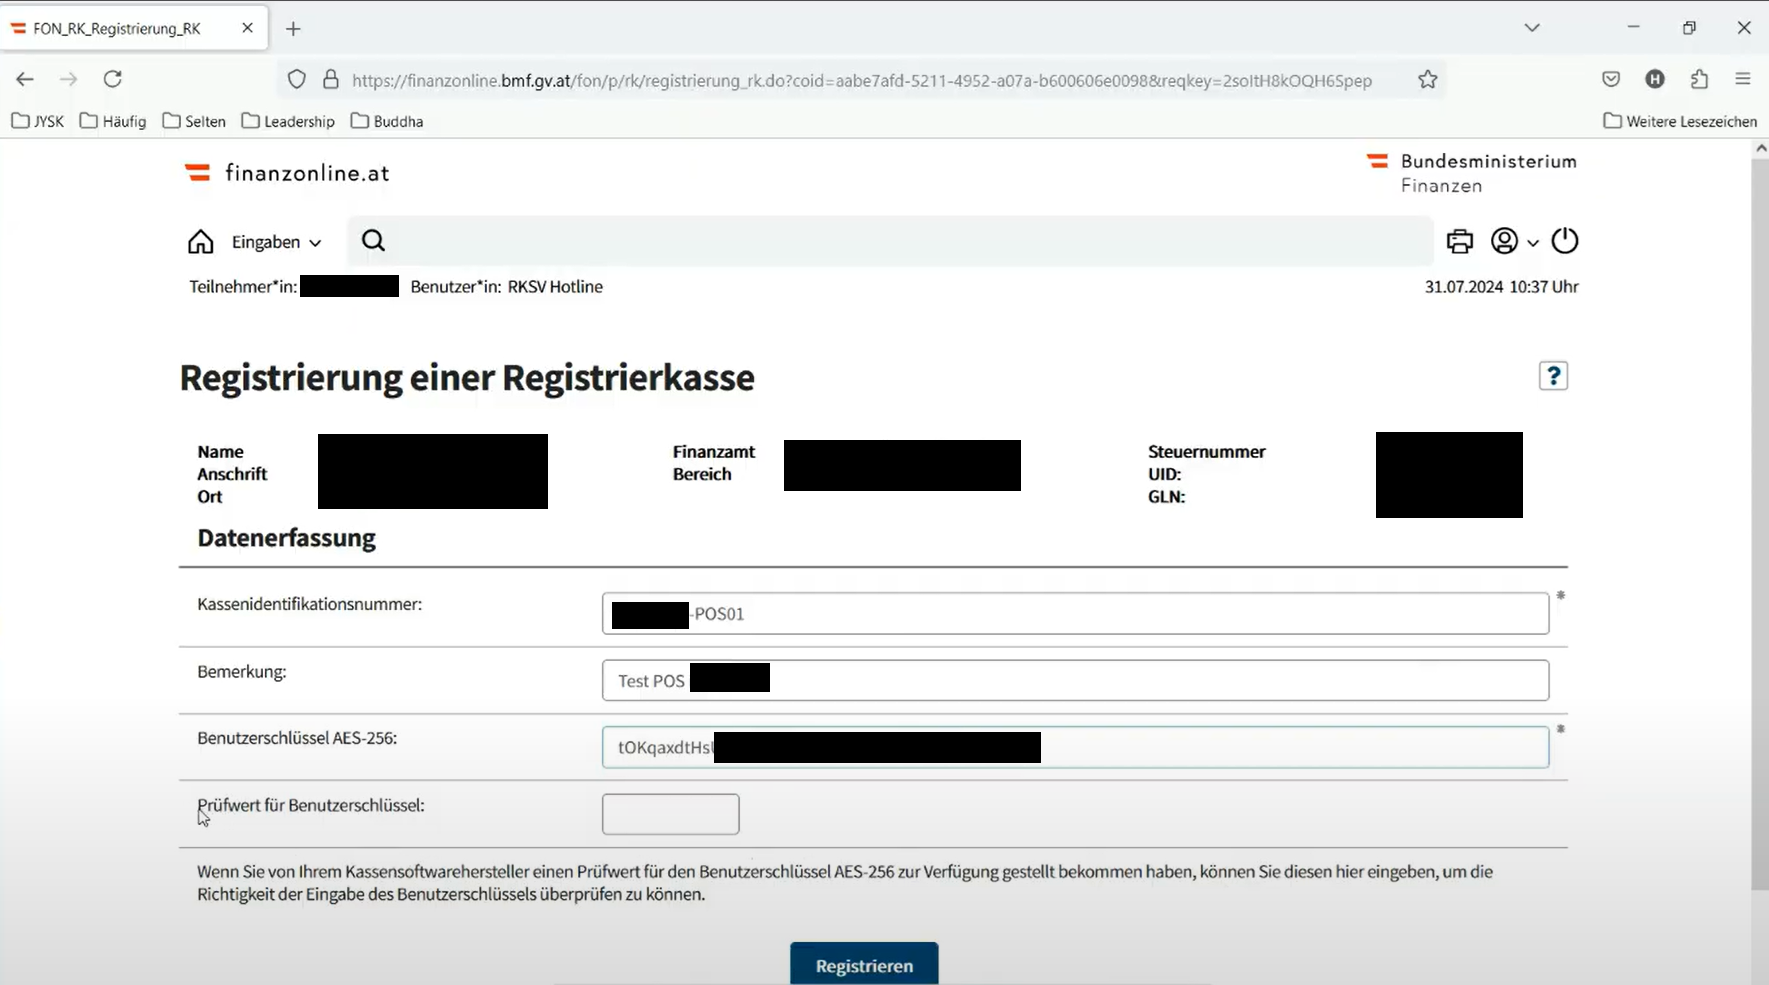
Registering the POS
Return to the registration page and select the POS registration link.
On the POS registration screen, provide the following:
| Field | Value |
|---|---|
| Device ID | The device ID of the POS being registered |
| Description | A description of the POS |
| AES 256 Key | The AES key from the FISCAL_AUSTRIA account credential |
The last field is for a checksum used when typing the AES key from paper. Since the key is expected to be copied and pasted from the Account Credential Maintenance page in Estate Manager, this value is not required.
Click the Register button. A confirmation message should appear, completing the registration process.
This process must be repeated for every production POS.
Receipts
While some of the following receipts appear to contain little information, they are important. The detail is contained within the QR code and recorded in the DEP records.
Initial Receipt
Once all setup has been completed and broadcast to a POS, it is necessary to produce an initial receipt.
If FON_RegistrationType is set to Automatic in the FISCAL_AUSTRIA account credentials and the DEVICE_STATUS is REGISTERED, the initial receipt will be printed automatically upon the first login to the POS.
Otherwise, it should be printed manually using the Initial Receipt menu button on the POS, configured in the Menus section of this document.

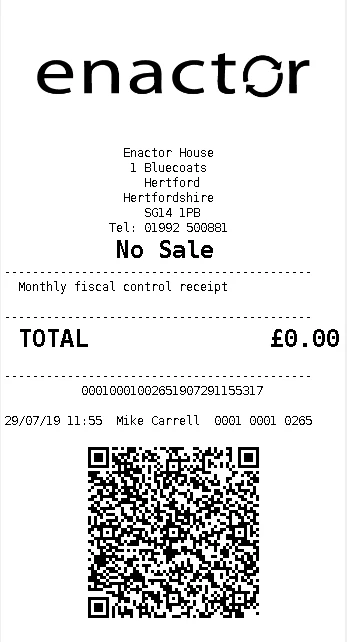
Monthly Receipt
At the end of each month, produce and retain a monthly receipt using the Monthly Receipt button configured in the Menus section.
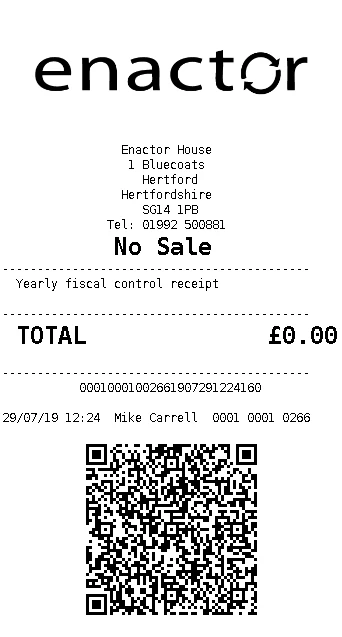
Annual Receipt
At the end of each year, produce and retain an annual receipt using the Yearly Receipt button configured in the Menus section.
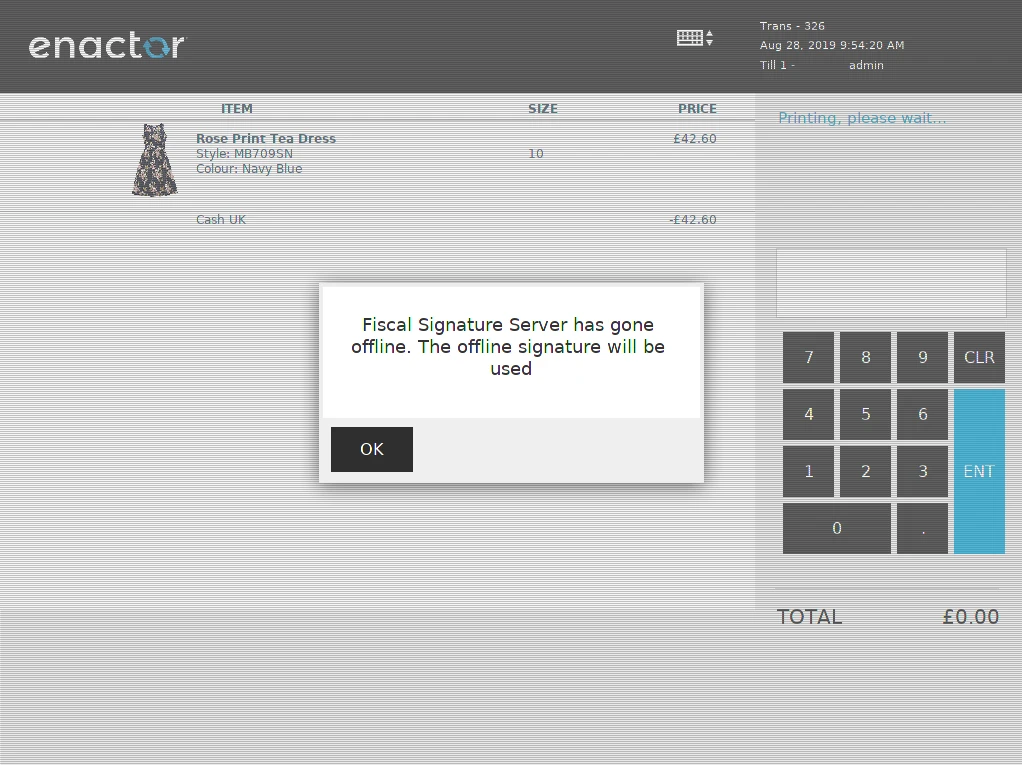
Offline Mode
If communication with PrimeSign fails and the POS is unable to sign transactions, the POS will not be prevented from completing transactions. A default offline signature will be used and the following message will be displayed.
Communication will be attempted for each following transaction. When communication is re-established, the following message is displayed.
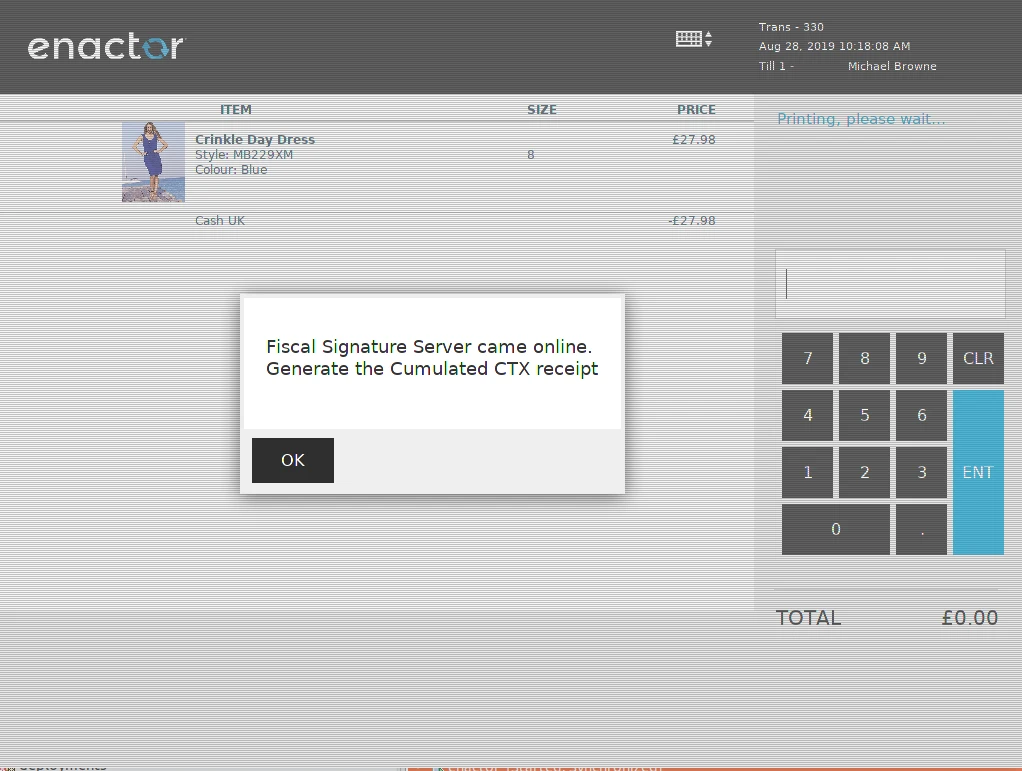
At this point it is necessary to use the Cumulated Receipt button to produce and retain a cumulated receipt.

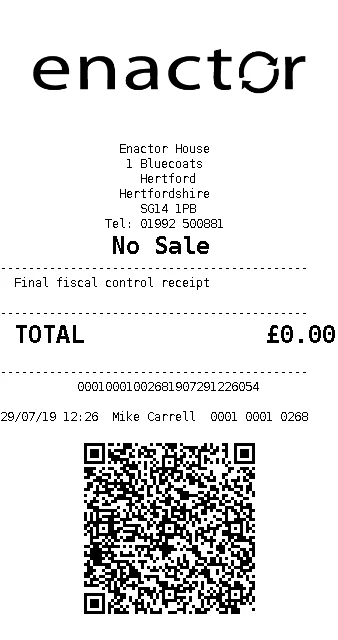
Final Receipt
When a POS is removed from service, use the Final Receipt menu button to produce and retain a final receipt.
DEP Export
If a store is audited by the Tax Authority, the store manager may be asked to produce a DEP report for a POS. Use the Export DEP button configured in the Menus section.
The following screen allows the operator to select a fiscal period for the DEP export.
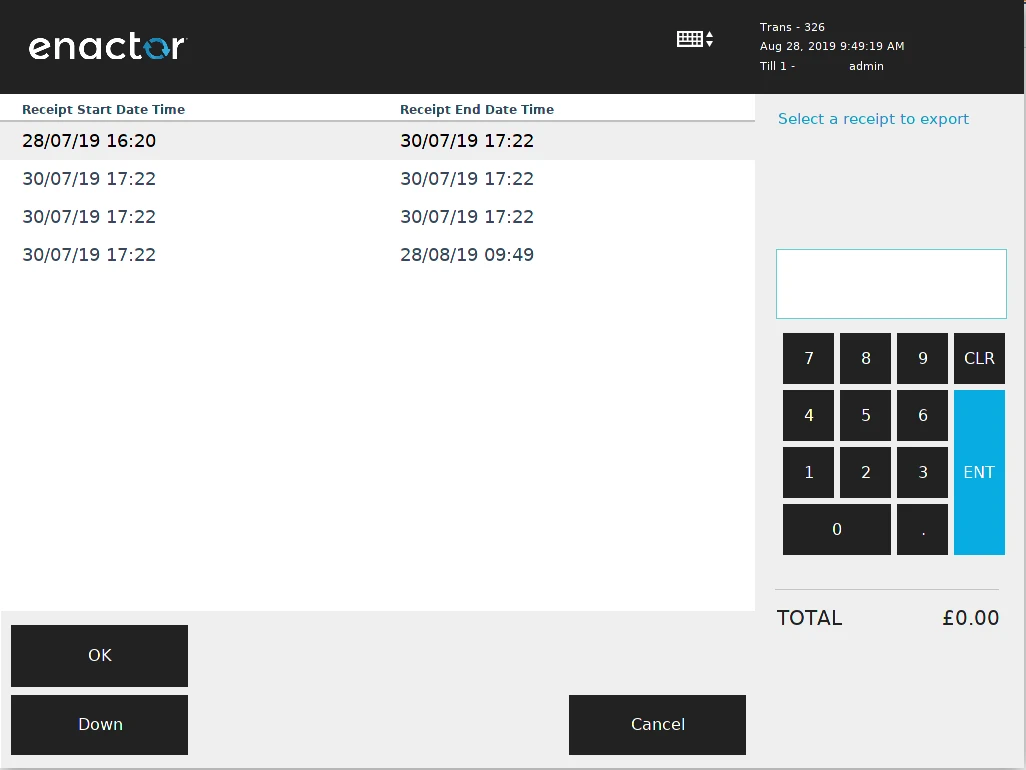
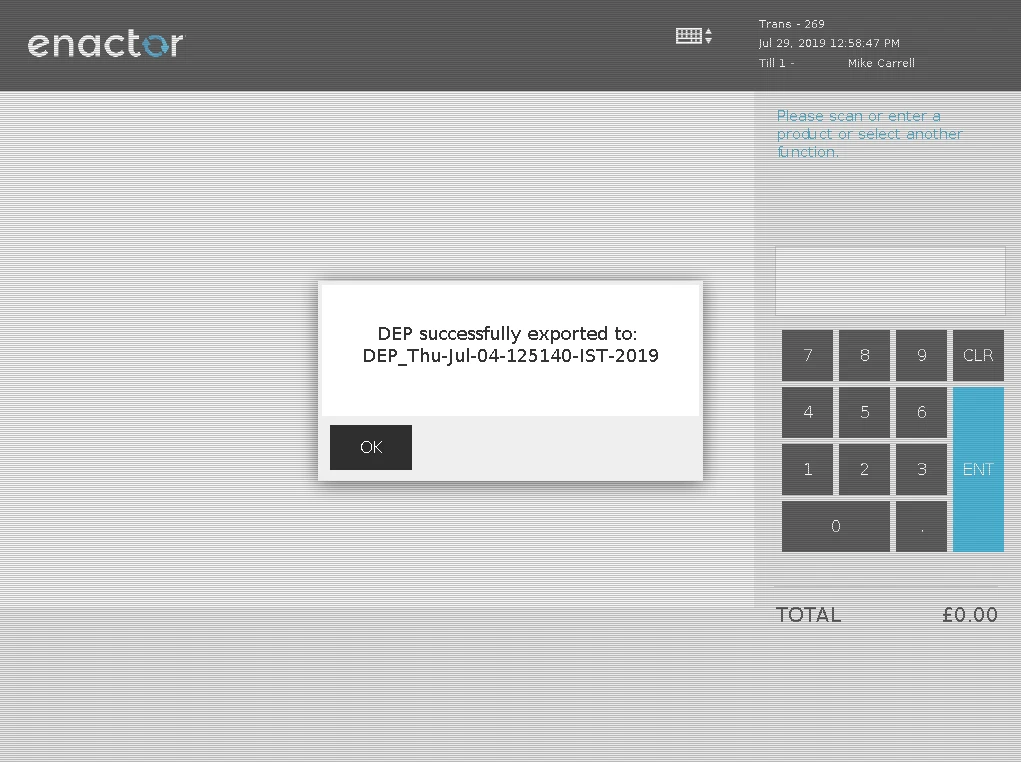
After selecting the required period and clicking OK, a confirmation message is displayed and the export file is written to the POS file system.
Estate Manager Maintenance Process Flow
In addition to the general configuration, the following maintenance steps must be completed in the order listed below.
Users also have the option of exporting the Fiscal POS Terminal through File Export Maintenance and uploading via File Import Maintenance in Estate Manager. These changes should be broadcast to the appropriate Austrian devices.
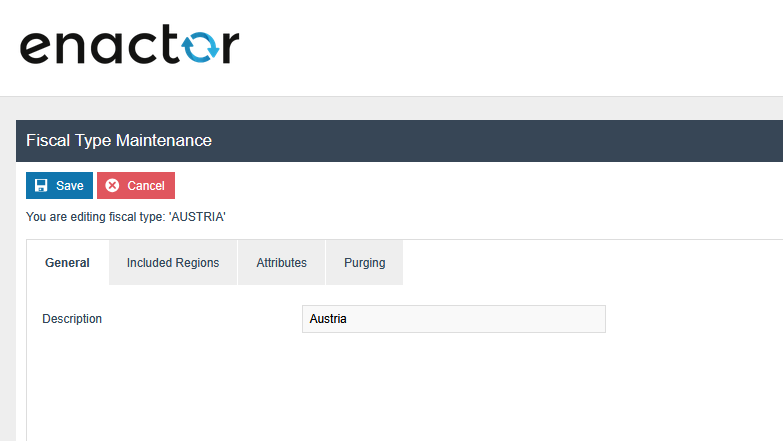
Fiscal Type Maintenance
You will be directed to the Fiscal Type Maintenance screen based on the fiscalisation type provided within the Fiscal Type Maintenance Menu.
On the General tab, enter a description for your fiscal type.
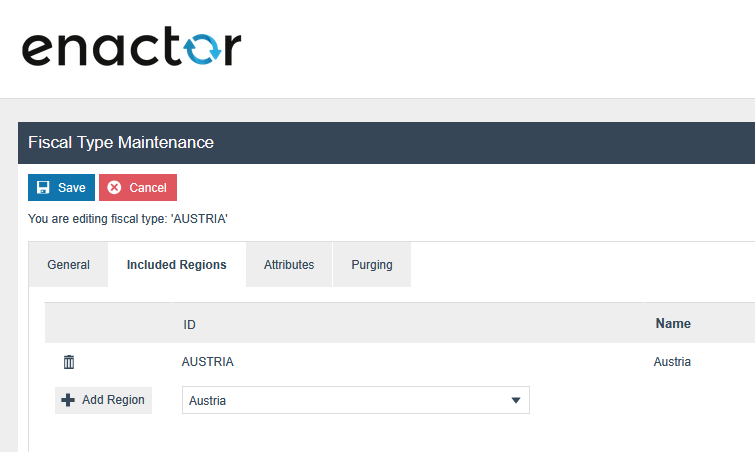
On the Included Region tab, add regions to the fiscal type. Save your changes before exiting.
Fiscal POS Terminal Maintenance
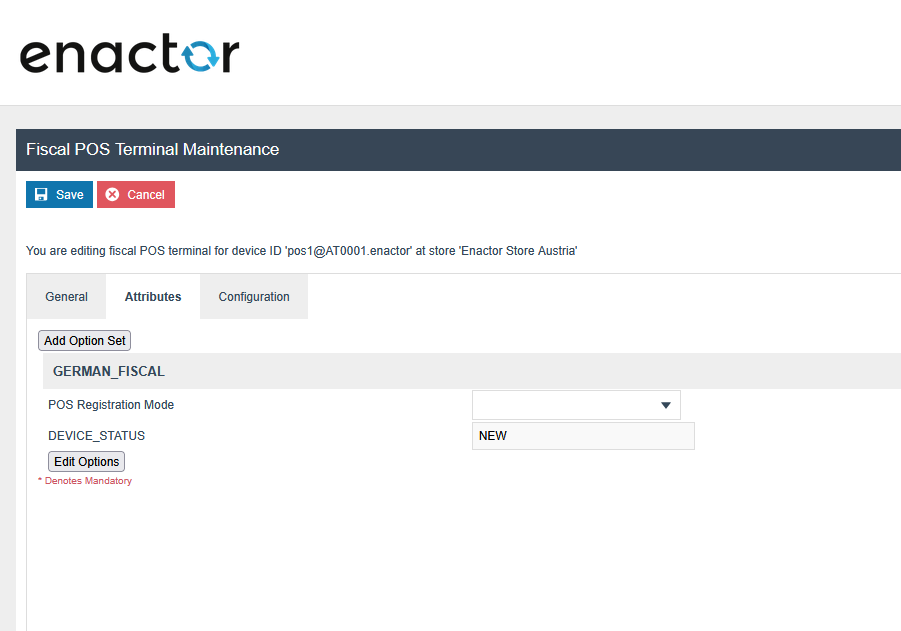
Navigate to Fiscal POS Terminal Maintenance and click the Create Fiscal POS Terminal button at the bottom left of the page.

Select the relevant Device ID from the dropdown menu and click Create.

Navigate to the Attributes tab. Within the AUSTRIA_FISCAL attribute set, set DEVICE_STATUS to NEW.
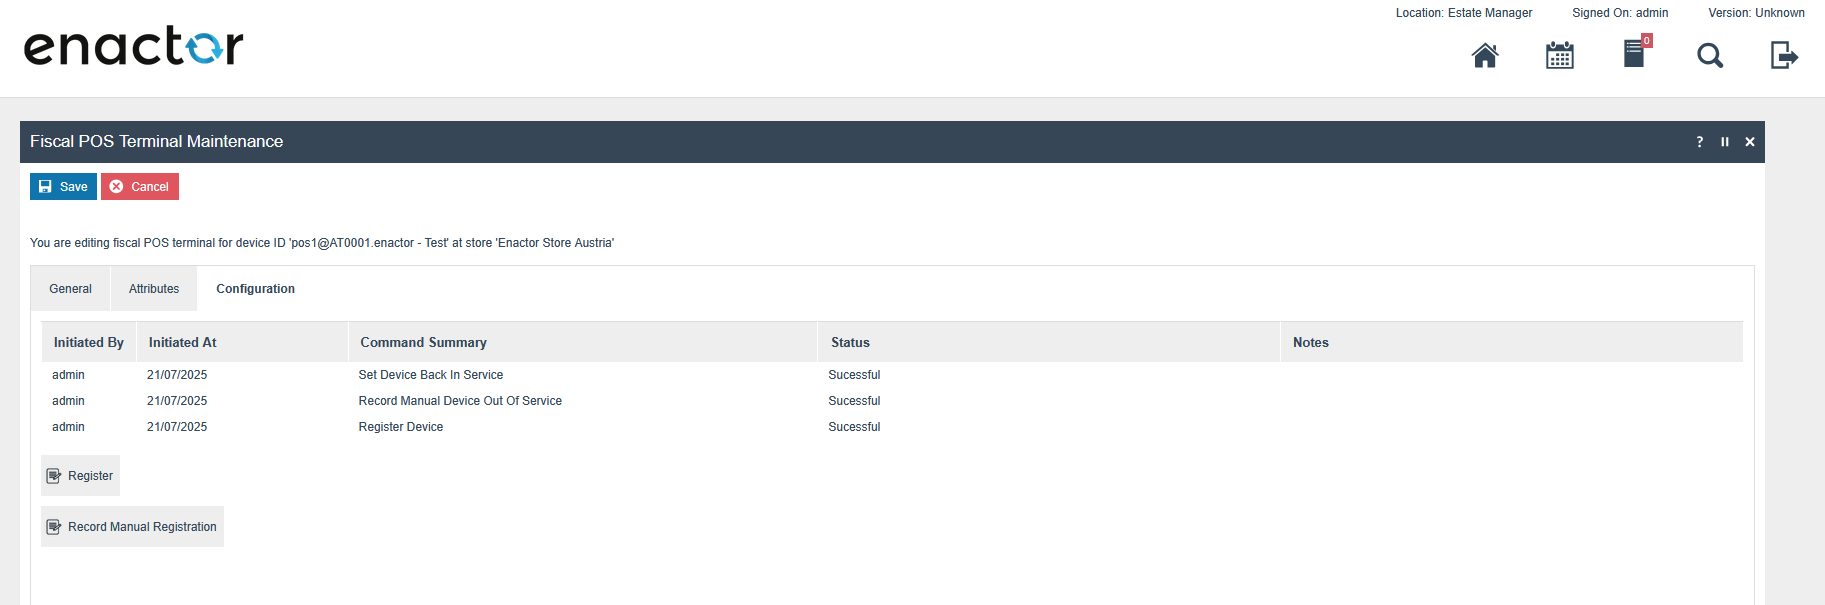
After saving the Fiscal POS Terminal, you can register the device in the FinanzOnline service using the Configuration tab. Access this tab by clicking the edit icon of the fiscal POS terminal.
Device Registration Actions
The following actions are available on the Configuration tab, depending on the current device status:
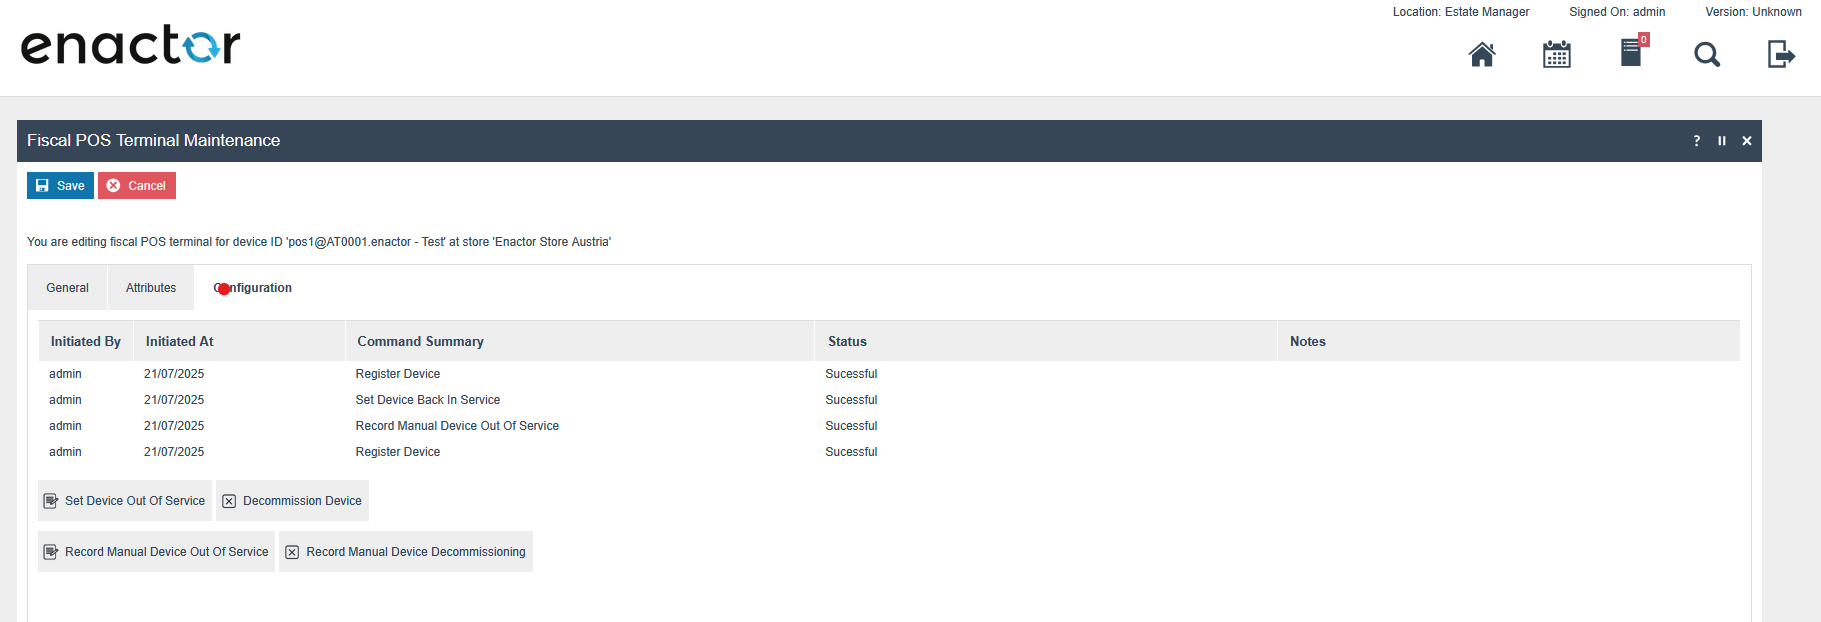
When device status is NEW:
- Register - Registers the client with the FinanzOnline service and updates the device status to REGISTERED within the Fiscal POS Terminal Maintenance Attributes.
- Register Manual Registration - Updates the device status to REGISTERED when client registration has been done directly on the FinanzOnline portal.
When device status is REGISTERED:
- Set Device Out Of Service - Sets the device out of service in the FinanzOnline service and updates the device status to INACTIVE.
- Record Manual Device Out Of Service - Updates the device status to INACTIVE when the device has been set out of service directly on the FinanzOnline portal.

When device status is INACTIVE:
- Set Device Back In Service - Sets the device back in service in the FinanzOnline service and updates the device status to ACTIVE.
- Record Manual Device Back In Service - Updates the device status to ACTIVE when the device has been set back in service directly on the FinanzOnline portal.
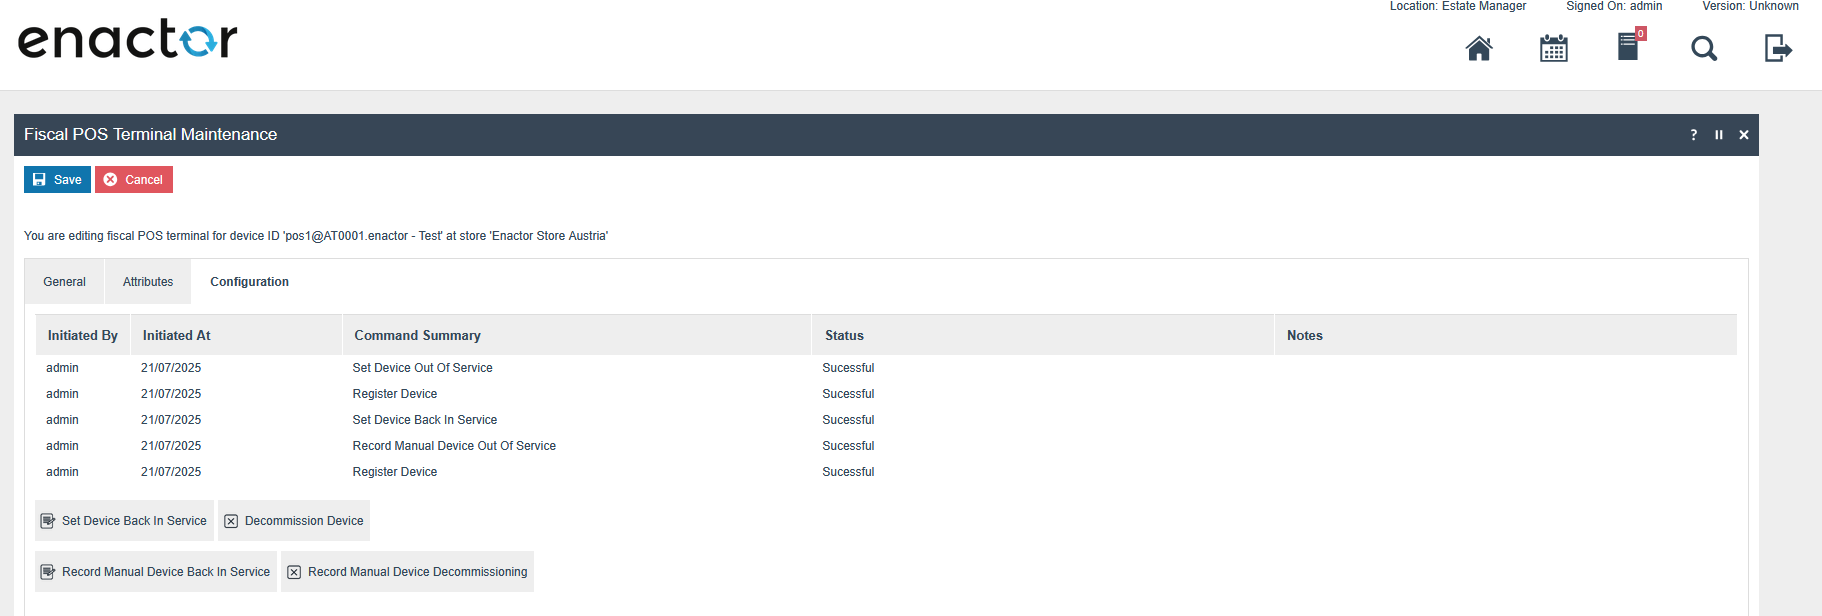
When device status is REGISTERED, INACTIVE, or ACTIVE:
- Decommission Device - Decommissions the client in the FinanzOnline service and updates the device status to DECOMMISSIONED.
- Record Manual Device Decommissioning - Updates the device status to DECOMMISSIONED when decommissioning has been done directly on the FinanzOnline portal.
Before decommissioning a POS, print the final receipt. Once the receipt is printed, the device can be decommissioned in Estate Manager.
Filtering by Fiscalisation Type
In the Fiscal POS Terminal Maintenance list, a filter is available for Fiscalisation Type. Select Austria to view all Austrian fiscal POS terminals and their device statuses.
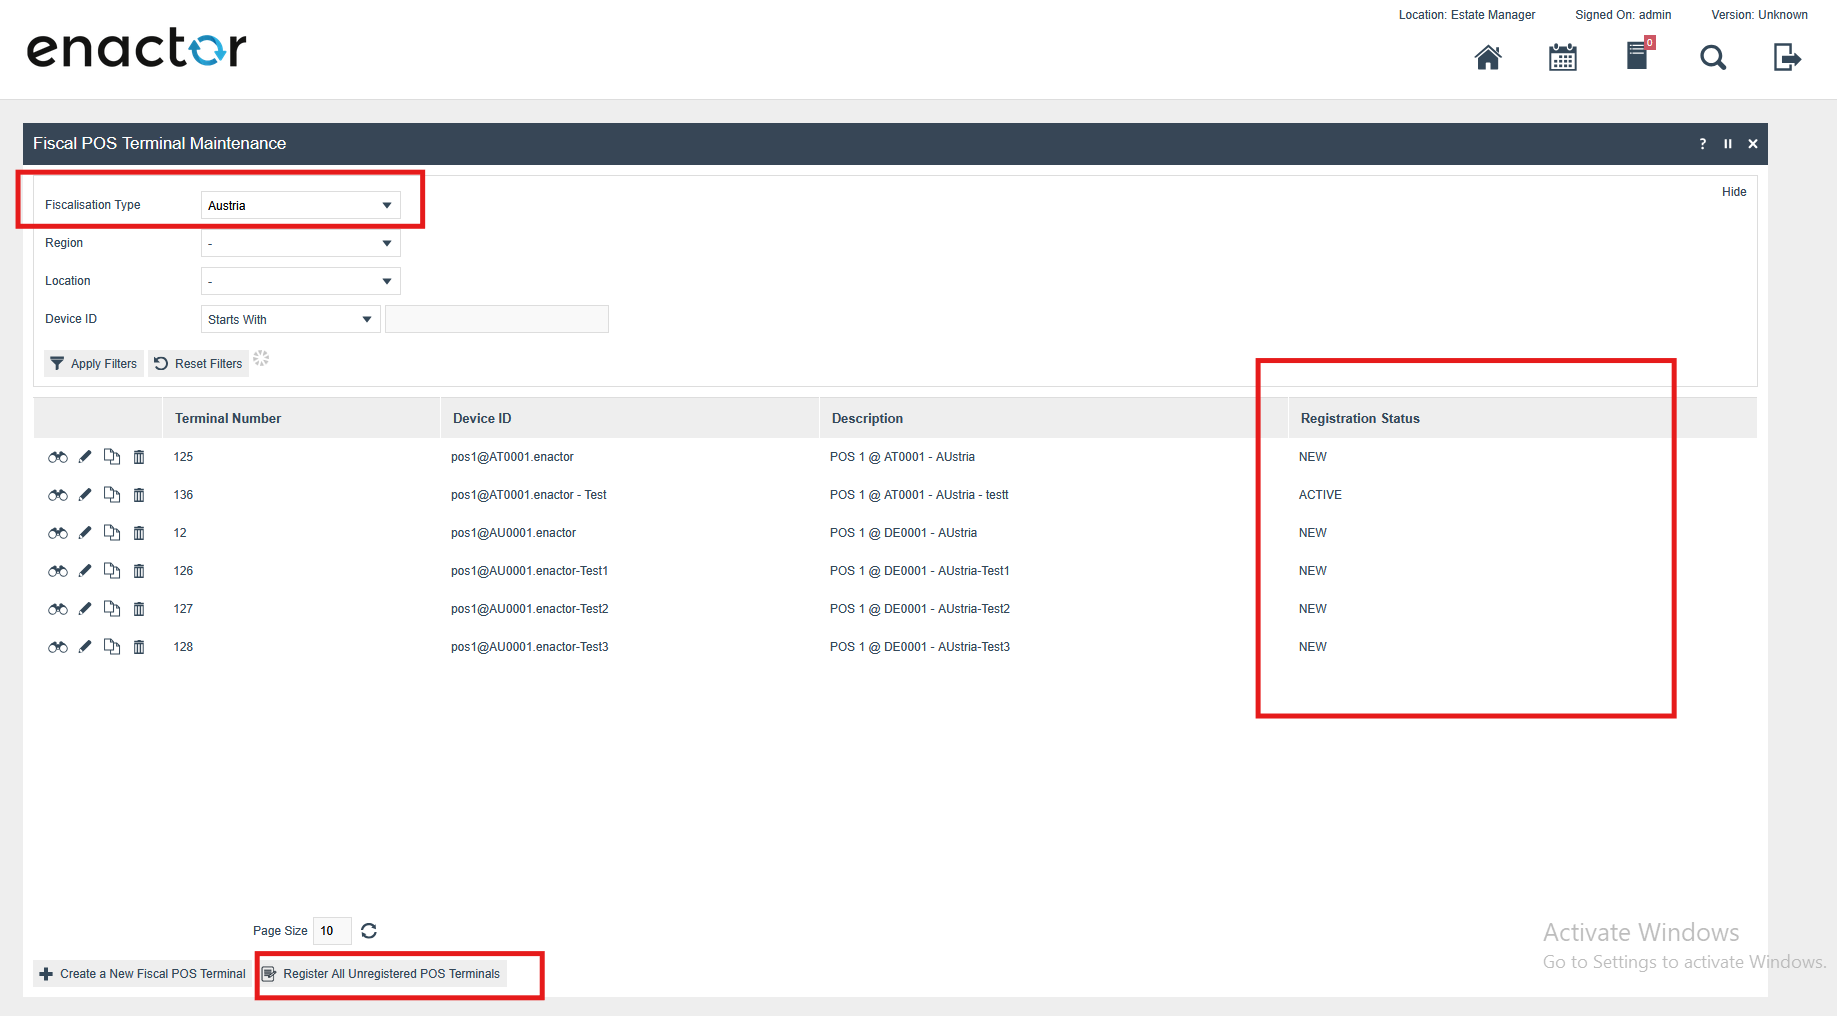
Bulk Registration Actions
The following bulk actions are available at the bottom of the Fiscal POS Terminal Maintenance list:
- Register All Unregistered POS Terminals - Registers all unregistered fiscal POS terminals with the FinanzOnline service.
Submissions to the FinanzOnline web services and validation of the Fiscal Device Status occur only when FON_RegistrationType is set to Automatic in the FISCAL_AUSTRIA account credentials.
Notes
Although Enactor supports the key card approach, all customers to date have chosen the service-based approach. Since final testing requires an account with the Tax Authority (only available to retailers), the first customer to use the key card approach will need to conduct joint testing with Enactor prior to rollout.