How To Integrate and Set Up Adyen at the PDC
Introduction
The Adyen payment service enables Enactor POS terminals to process card payments via Adyen-integrated Pin Entry Devices (PEDs). The integration uses the Enactor Payment Device Controller (PDC) - a middleware component that manages communication between the POS and the Adyen payment terminals.
The PDC runs on the same host machine as the POS application and handles all payment device communication. An Adyen-integrated PED must be present on the same network as the PDC host. Settlement notifications from Adyen are received via the Adyen Integration Services (AIS) container, which acts as a proxy between Adyen's webhook system and the Enactor Estate Manager processing server.
The purpose of this guide is to demonstrate the steps required to integrate and set up the Adyen payment service with the Enactor PDC, covering configuration in the Adyen Customer Area, the Enactor Estate Manager, and the PDC installer.
The jar files used in this integration are part of an alpha build of the Enactor Adyen project. The necessary files can be downloaded from the Enactor Adyen releases page.
This guide covers PED-based Adyen integration (hardware terminals). If you are setting up the Adyen MPOC (Mobile Point of Care - tap-to-pay on Android), see How-to Guide - Setup Adyen MPOC App with PDC.
Overview
The following steps are required to integrate and set up Adyen at the PDC:
- Adyen Portal Configuration - Configure the Adyen Customer Area: AIS settlement notifications, terminal API URLs, HMAC keys, and delayed capture settings
- Account Credentials Maintenance - Create Adyen payment service credentials in Estate Manager with API key, certificate, and encryption properties
- Tender Maintenance - Create a Payment Service tender record
- Menu Set Maintenance - Add the PaymentServiceTender event to the Tender menu set
- Menu Maintenance - Add Payment Service and Refund buttons to the POS menus
- Payment Device Maintenance - Register each Adyen PED as a payment device
- Device Maintenance - Create a device record for the Adyen payment service
- Payment Device Host Maintenance - Configure the payment device host that manages the PED
- POS Terminal Maintenance - Connect the POS terminal to the payment service host
- User Role Maintenance - Grant payment service privileges to POS Operator and TMS Login User roles
- PDC Configuration - Configure the PDC installer.ini and install the PDC
- Broadcasting the App Update - Deploy the Adyen application update to the target devices
Prerequisites
Before starting, you should have the following components properly set up:
- Enactor POS
- Payment Device Host (PDC)
- Enactor Estate Manager (EM)
- Payment Device Management Service (PDMS)
- Adyen Web Configuration Dashboard with valid login credentials
- Adyen-integrated PED
The Payment Device Host and the POS application must share the same host machine. Ensure this is in place before proceeding with this guide.
Configuration Steps - Adyen Portal Configuration
Before configuring Estate Manager, several settings must be prepared in the Adyen Customer Area. These steps involve deploying the AIS container, configuring webhook URLs, generating API and HMAC keys, and optionally enabling delayed capture.
AIS for Settlement Notification Support
In order to support settlement notifications sent by Adyen, an endpoint supporting their webhook format must be accessible to Adyen over the internet.
The Enactor AIS Docker Container must be deployed to the same server running the Enactor EMP Docker Container. The AIS is a proxy that accepts HTTP POST requests from Adyen and inserts them into the message queue of the EM processing server. It shares the same database as the EMP container and requires no additional environment variables beyond those already required for the EMP container.
The port(s) 39895 for HTTP and/or 52305 for HTTPS need to be exposed to Adyen's
servers via the internet.
Adyen portal only allows the following port numbers:
| Environment | Protocol | Port(s) |
|---|---|---|
| Test | HTTP | 80, 8080, 8888 |
| Test and Live | HTTPS | 443, 8443, 8843 |
To verify the AIS is correctly deployed, navigate to
[host]/AdyenServices/rest/notifications/status (replace [host] with your server address).
A correctly deployed service returns the text AdyenNotificationService: Online.
The following tasks must be completed in the Adyen Web Configuration Dashboard (test environment: ca-test.adyen.com):
- Generate an API Key - See the "Step 4: Get API credentials" under the "Set up your test account" section of Get started in the Adyen Documentation for details of how to do this.
- Configure settlement notifications - Configure the webhook URL to end in
/AdyenServices/rest/notifications. This must point to the public address of the deployed AIS Docker container. The URL prefix is the same as the Estate Manager URL, since both the EMP and AIS containers are deployed on the same host. For example:https://dev.enactor.co.uk:8888/AdyenServices/rest/notifications - Generate a HMAC Key for notifications - See the "Enable HMAC signatures" section of Verify HMAC signatures in the Adyen Documentation for details of how to do this.
- Configure a key for the PEDs - See the "Set up a shared key" section of Protect local communications in the Adyen Documentation for details of how to do this. If the key is configured at the store level, the key must be passed down to the terminal.
Navigate to Point of sale > Terminal settings in the Adyen Customer Area to configure device communication settings. These settings can be applied at the Account, Terminal, All Terminals, or Store level, with each level inheriting settings from a higher level.
In the Integrations sub-menu, configure the following settings:
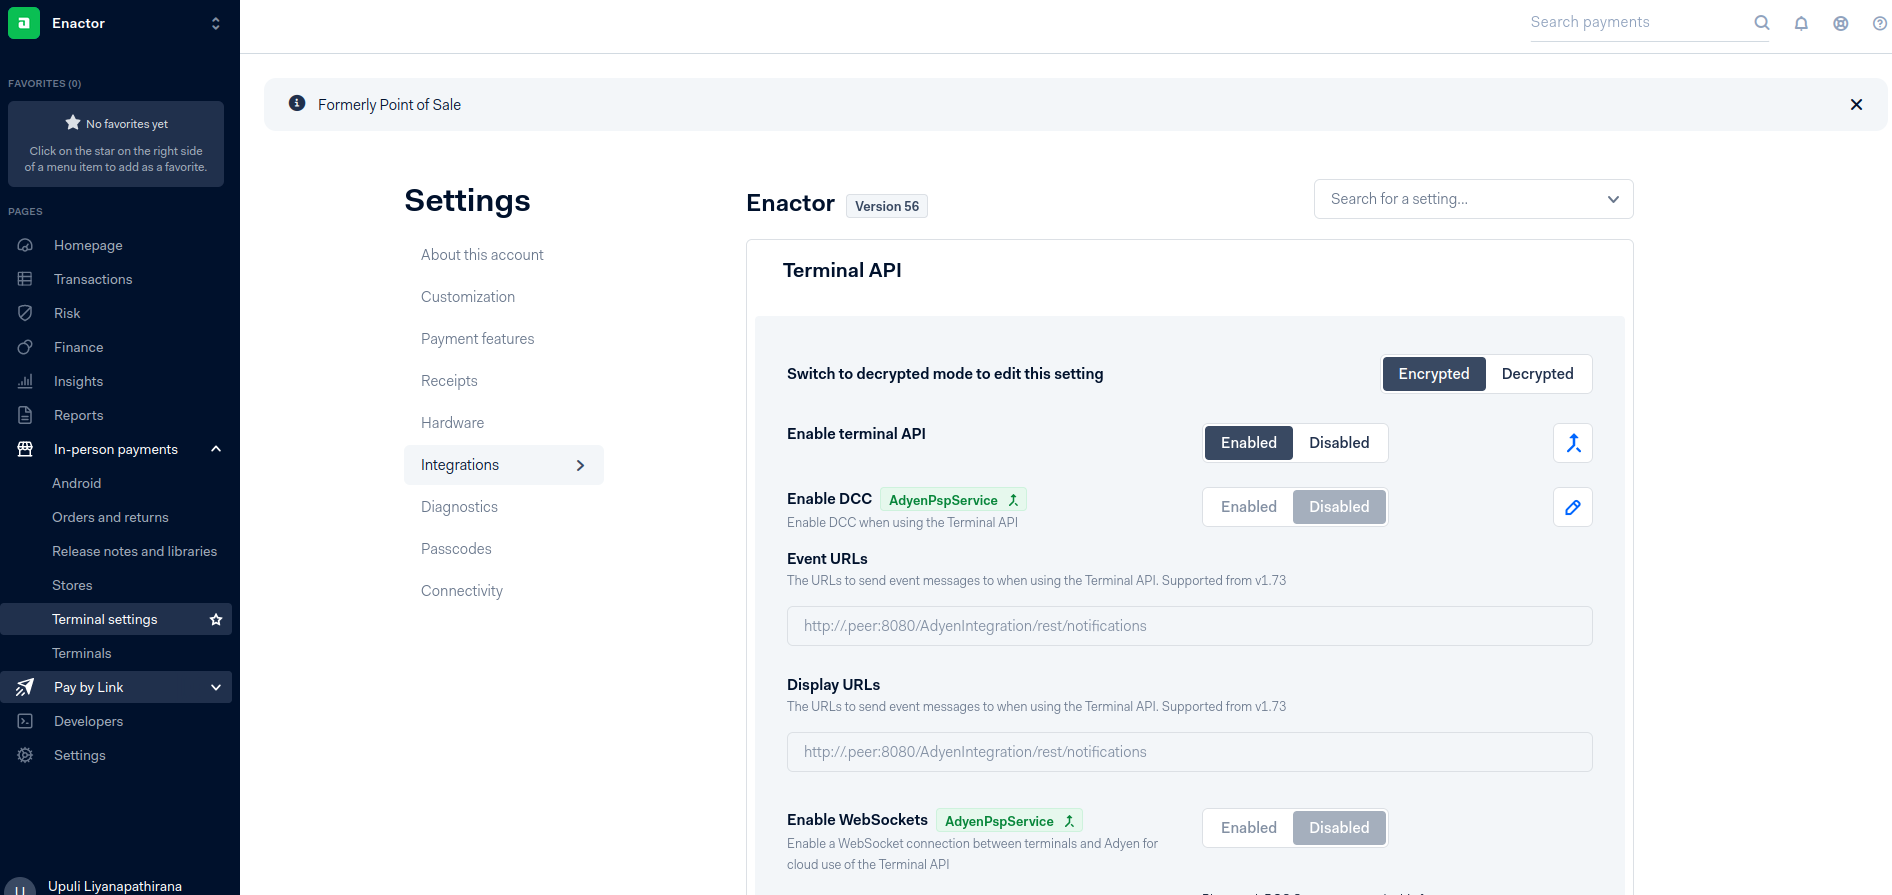
| Setting | Value |
|---|---|
| Enable terminal API | Enabled |
| Event URLs | https://[pdc-host].peer:8843/AdyenIntegration/rest/notifications |
| Display URLs | https://[pdc-host].peer:8843/AdyenIntegration/rest/notifications |
This completes the AIS for Settlement Notification Support configuration.
Setting Delayed Automatic Capture
By default, payments are captured immediately after authorisation. Setting a capture delay gives you time to cancel the authorisation before funds are collected. This is useful when:
- A shopper changes their mind shortly after purchase
- Store staff identify a mistake after a payment is approved
- The shopper must provide a signature that staff need time to verify
To modify capture settings, the Merchant Admin role is required in the Adyen portal. This role is not configured through the Enactor Estate Manager.
To set up a capture delay:
- Log in to your Adyen Portal.
- Switch to your merchant account.
- Go to Settings > Account settings.
- In the General settings section, next to POS capture delay, select the edit icon.
- From the dropdown, select a capture delay of minutes, hours, or days before point-of-sale payments are automatically captured.
- Select Save.
Adyen recommends selecting a delay of 2 hours. To revert to immediate capture, select Immediate from the dropdown before saving.
This completes the Adyen Portal configuration.
Configuration Steps - Account Credentials Maintenance
Account Credentials store the authentication and encryption keys required for the Enactor Adyen integration to communicate with the Adyen payment service.
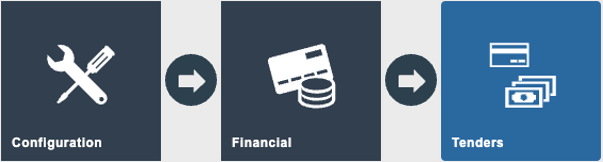
Sign in to Estate Manager and navigate to Account Credentials Maintenance using the Search or the path:
Main Menu > Configuration > Financial > Account Credentials

The Account Credentials Maintenance screen lists all configured credential records.
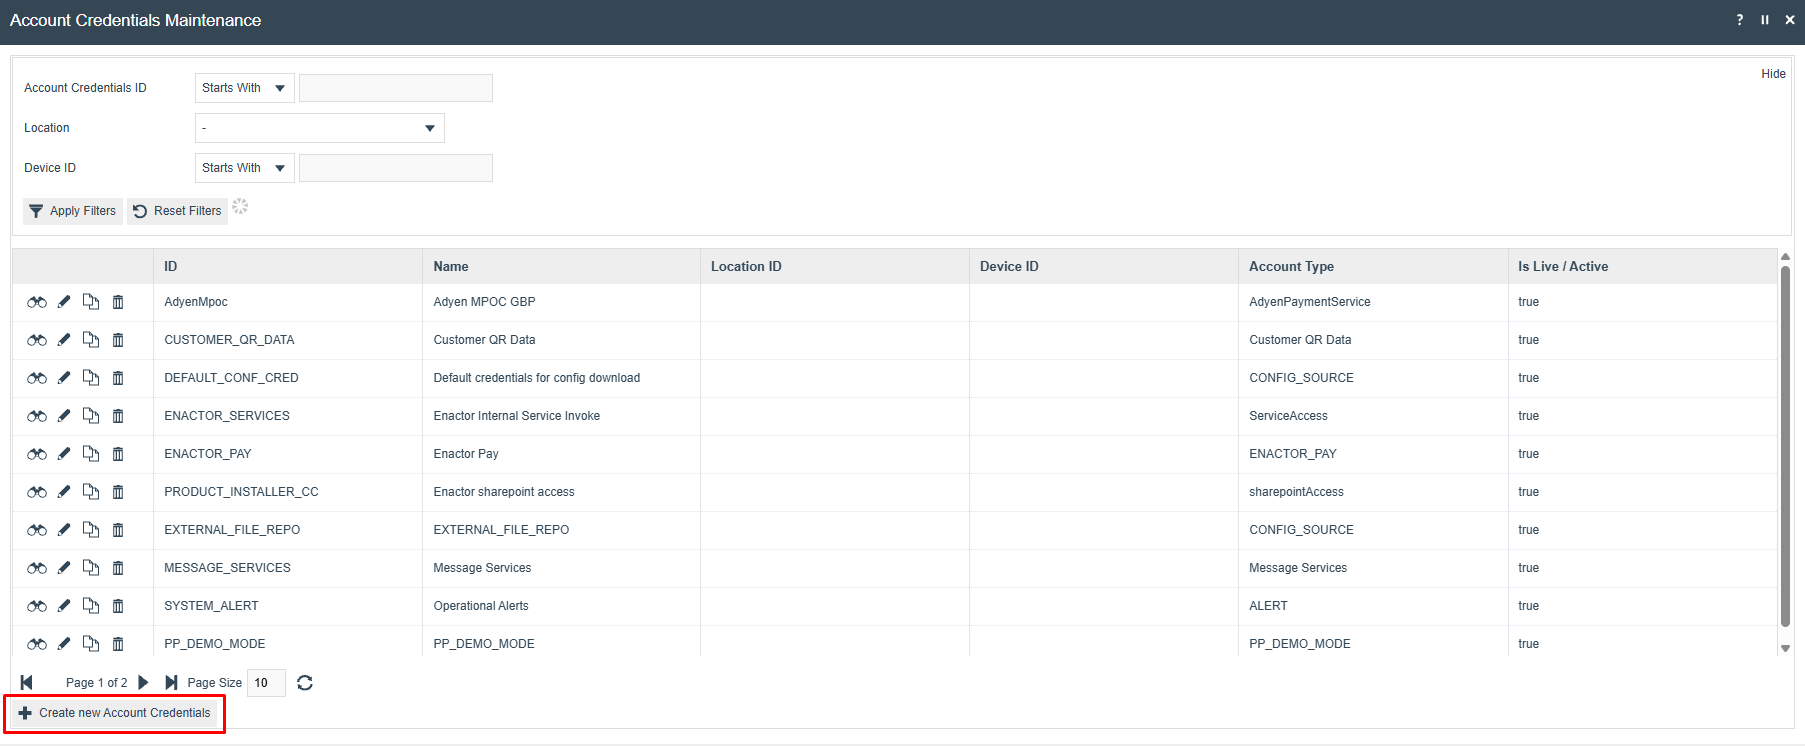
Select Create new Account Credentials and enter an appropriate Account Credential ID.
In the General tab, configure the following fields:
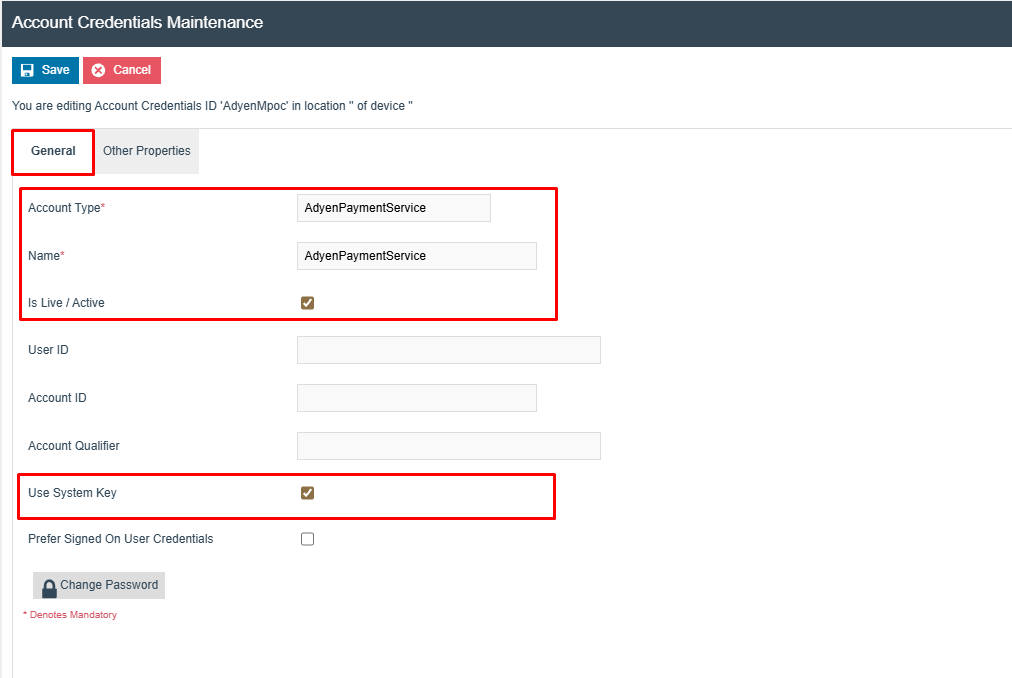
| Field | Value |
|---|---|
| Account Type | AdyenPaymentService |
| Name | AdyenPaymentService (or an appropriate description) |
| Is Live / Active | Checked |
| Use System Key | Checked |
In the Other Properties tab, select Add Property and add each of the following properties:

| Property Name | Write Only | Type | Value |
|---|---|---|---|
| APIKey | Yes | String | The API Key obtained from the Adyen Web Configuration Dashboard |
| Certificate | No | File | Download the Adyen public root certificates from the Adyen root certificate documentation and upload the PEM file |
| ConnectionTimeoutMillis | No | String | (Optional) Connection timeout in milliseconds between Enactor and Adyen. Not normally required. |
| EnableAutomaticCapture | No | String | (Optional) Enter false to disable automatic capture. When omitted, Adyen performs the capture automatically on authorisation. |
| Environment | No | String | Enter LIVE or TEST depending on the Adyen environment in use |
| HMACKey | Yes | String | The HMAC Key generated via the Adyen Web Configuration Dashboard |
| KeyIdentifier | No | String | The Key Identifier from the Adyen Web Configuration Dashboard encryption section |
| KeyPassphrase | Yes | String | The Key Passphrase from the Adyen Web Configuration Dashboard encryption section |
| KeyVersion | No | String | The Key Version from the Adyen Web Configuration Dashboard encryption section |
| MerchantAccount | No | String | The name of the Merchant Account from the Adyen Web Configuration Dashboard |
| TransactionTimeoutMillis | No | String | (Optional) Maximum time in milliseconds for commands sent to Adyen or the PED before they time out and recovery is allowed |
The KeyIdentifier, KeyPassphrase, and KeyVersion values must match the values configured in the Adyen portal under In-person payments > Terminals > [Terminal] > Integrations > Terminal API > Encryption. Use identical values in both locations.
Select Save to save the account credential record.
This completes the Account Credentials Maintenance configuration.
Configuration Steps - Tender Maintenance
A Payment Service tender must be created to represent the Adyen payment method in the Enactor POS.
Sign in to Estate Manager and navigate to Tender Maintenance using the Search or the path:
Main Menu > Configuration > Financial > Tender
The Tender Maintenance screen lists all configured tenders across all regions.
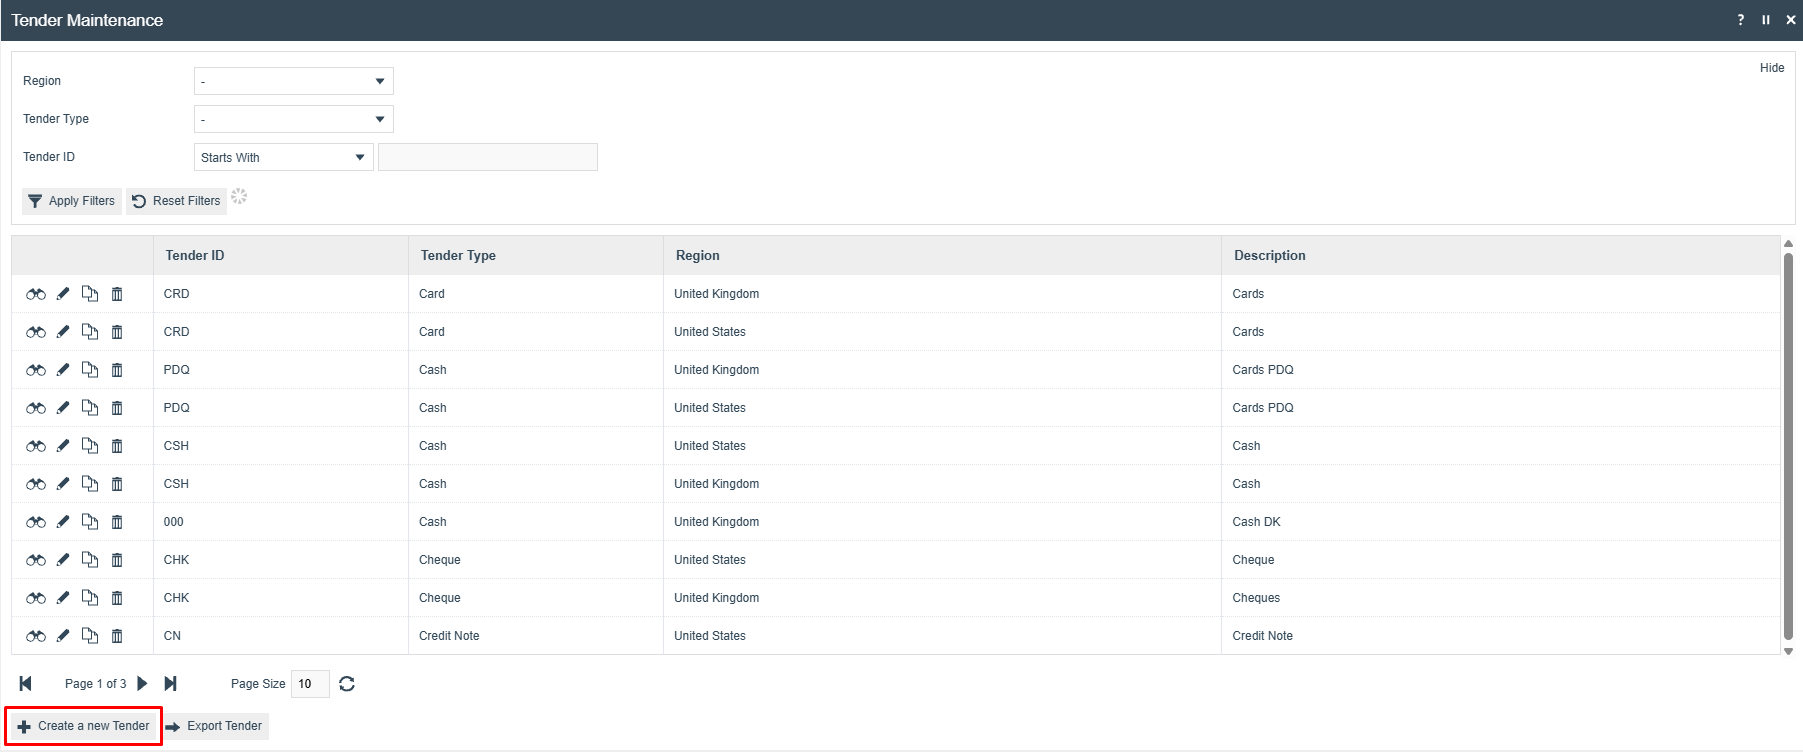
Select Create a new Tender. On the creation screen, set:
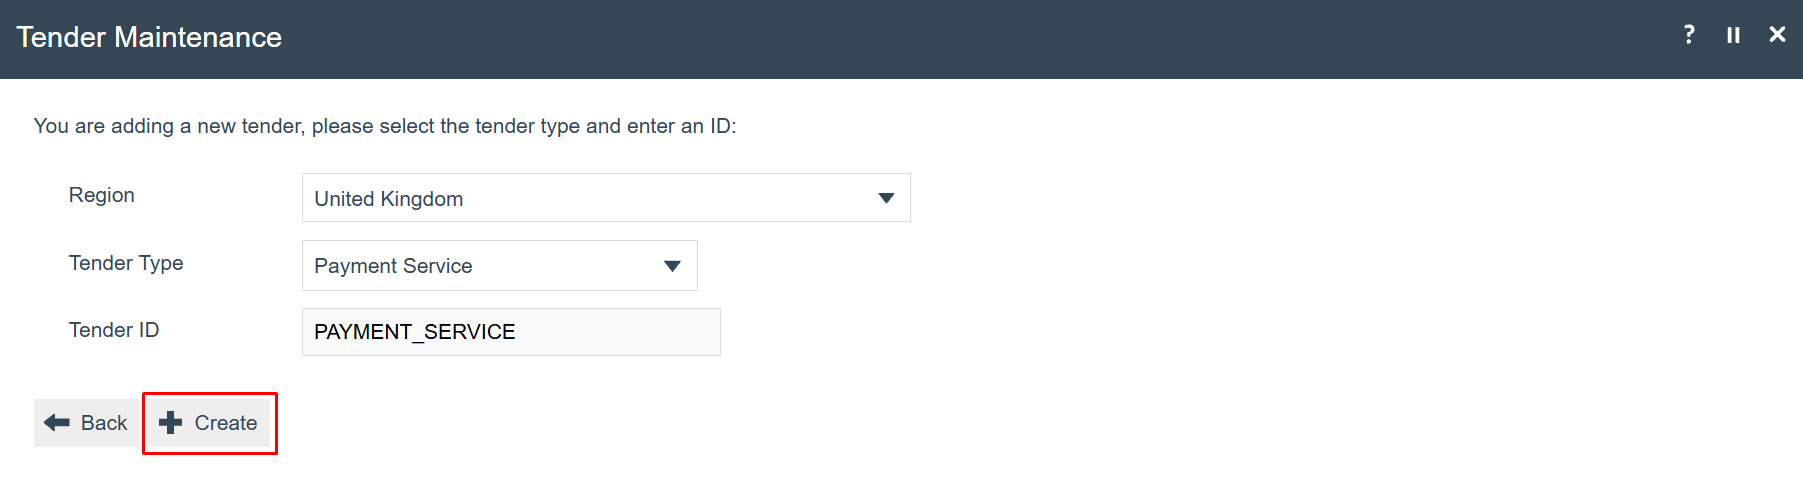
| Field | Value |
|---|---|
| Region | The applicable region (for example, United Kingdom) |
| Tender Type | Payment Service |
| Tender ID | PAYMENT_SERVICE |
Select Create, then configure the tabs as follows.
General Tab:
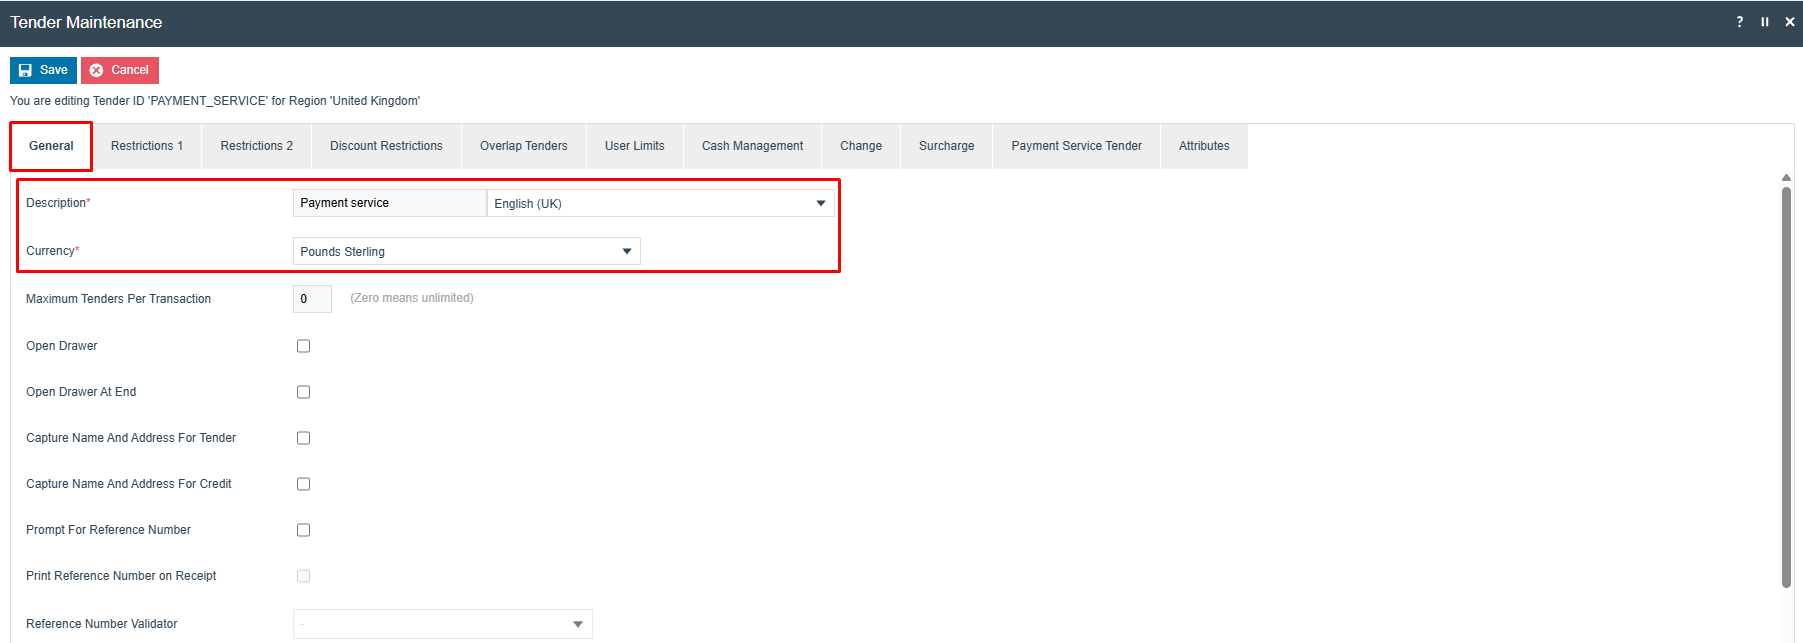
| Field | Value |
|---|---|
| Description | Payment service (enter an appropriate description) |
| Currency | Select the appropriate currency (for example, Pounds Sterling) |
Restrictions 1 Tab:
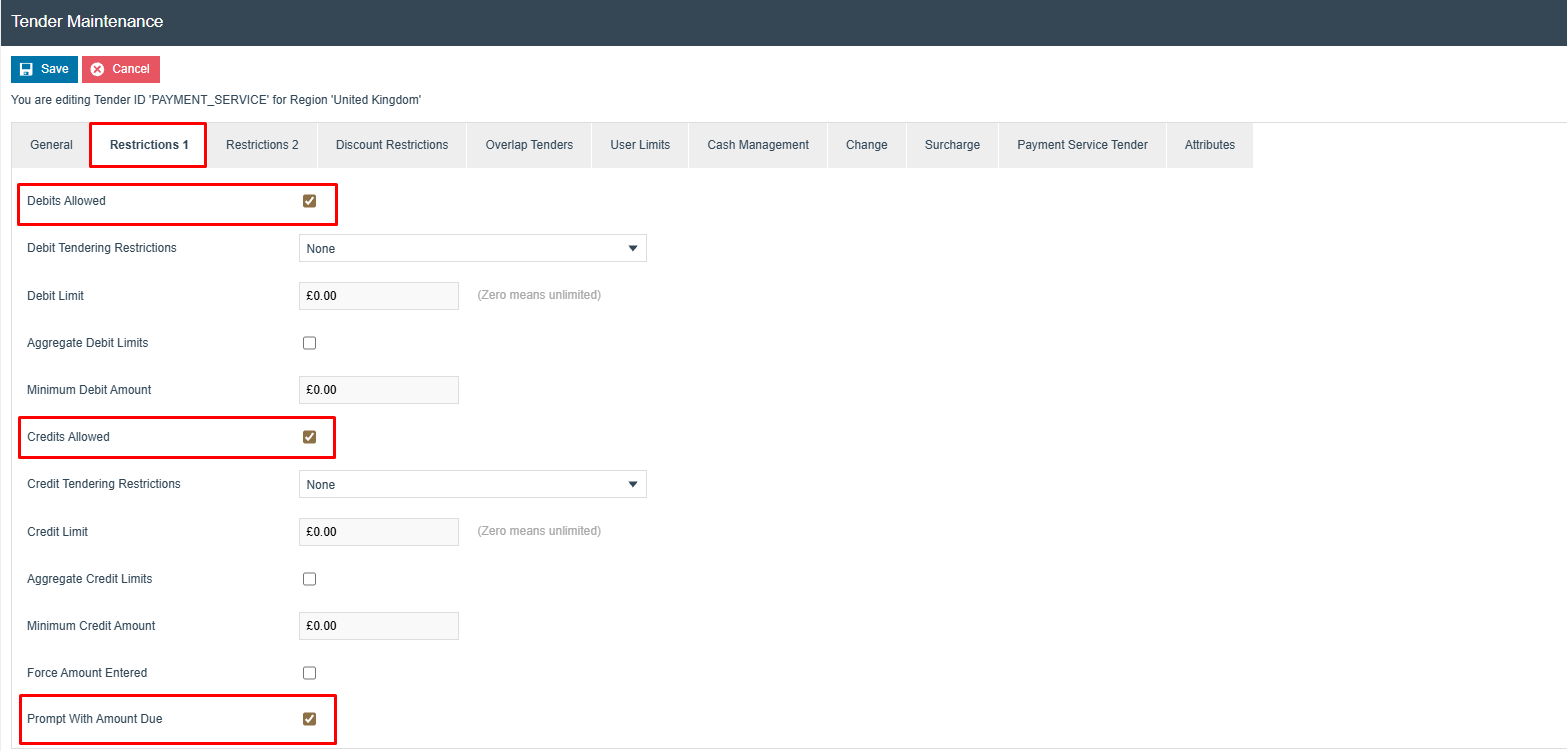
| Field | Value |
|---|---|
| Debits Allowed | Checked |
| Credits Allowed | Checked |
| Prompt With Amount Due | Checked |
Restrictions 2 Tab:
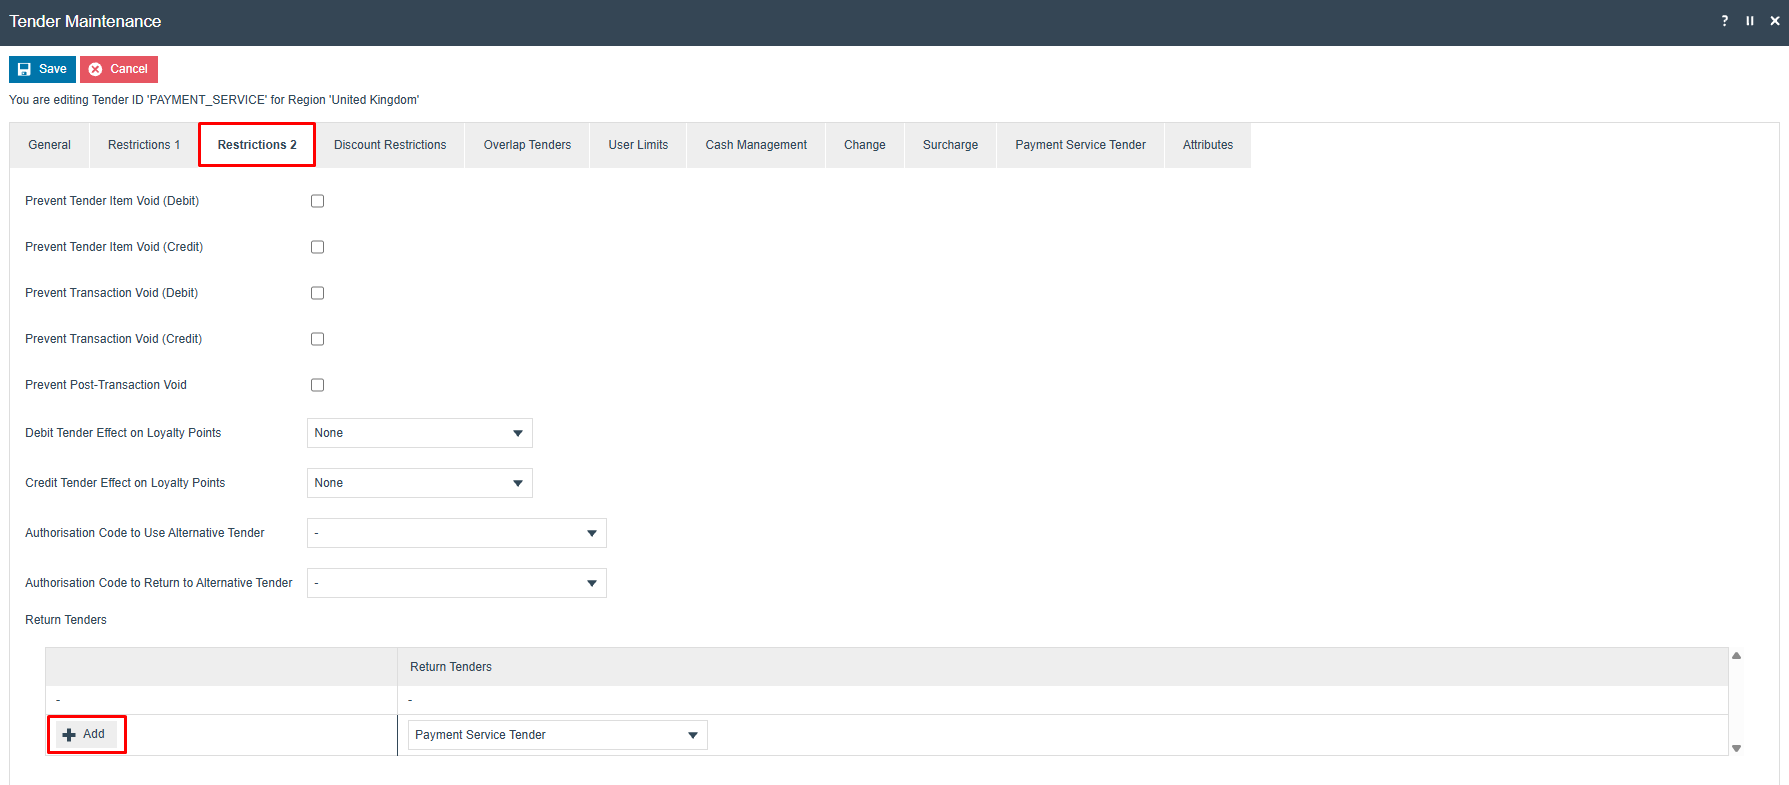
In the Return Tenders section:
- Select Add.
- In the Return Tenders column, select Payment Service Tender from the dropdown.
- Select Add to confirm.
Select Save and broadcast the Tender using the Data Broadcaster.
This completes the Tender Maintenance configuration.
Configuration Steps - Menu Set Maintenance
The Menu Set must be updated to include the PaymentServiceTender event so that the Tender menu can display the Payment Service button.
Sign in to Estate Manager and navigate to Menu Set Maintenance using the Search or the path:
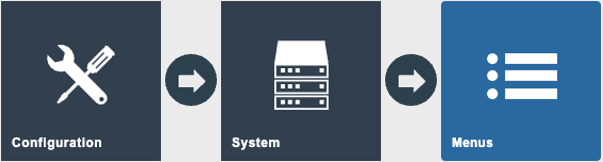
Main Menu > Configuration > System > Menu Sets

The Menu Set Maintenance screen lists all configured menu sets.
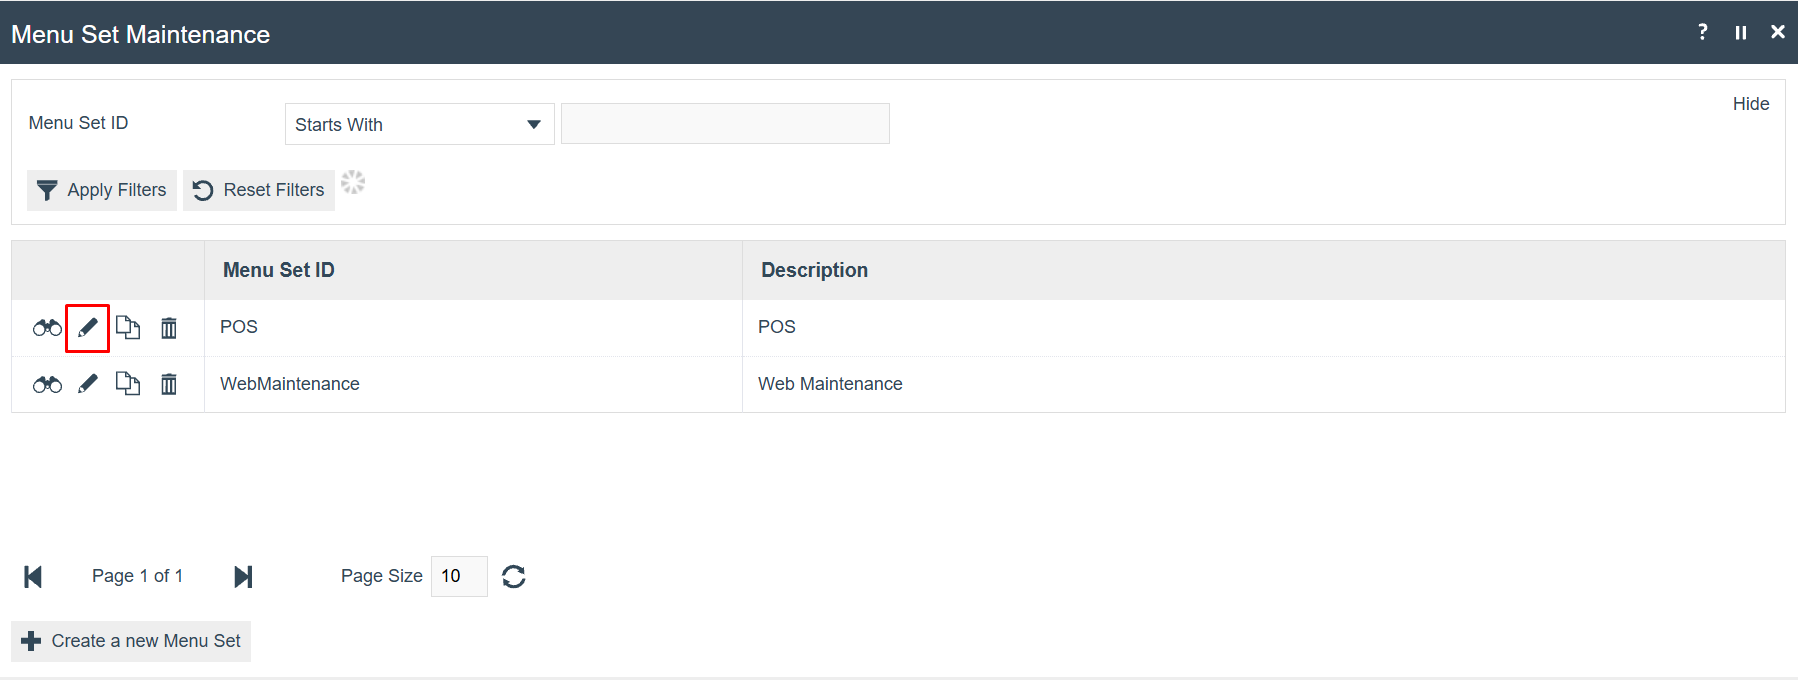
Select the edit icon on the POS menu set. Go to the Options tab and select the Tender menu from the Menu dropdown.
Add a new Event with the name PaymentServiceTender and configure the event parameters
as shown:
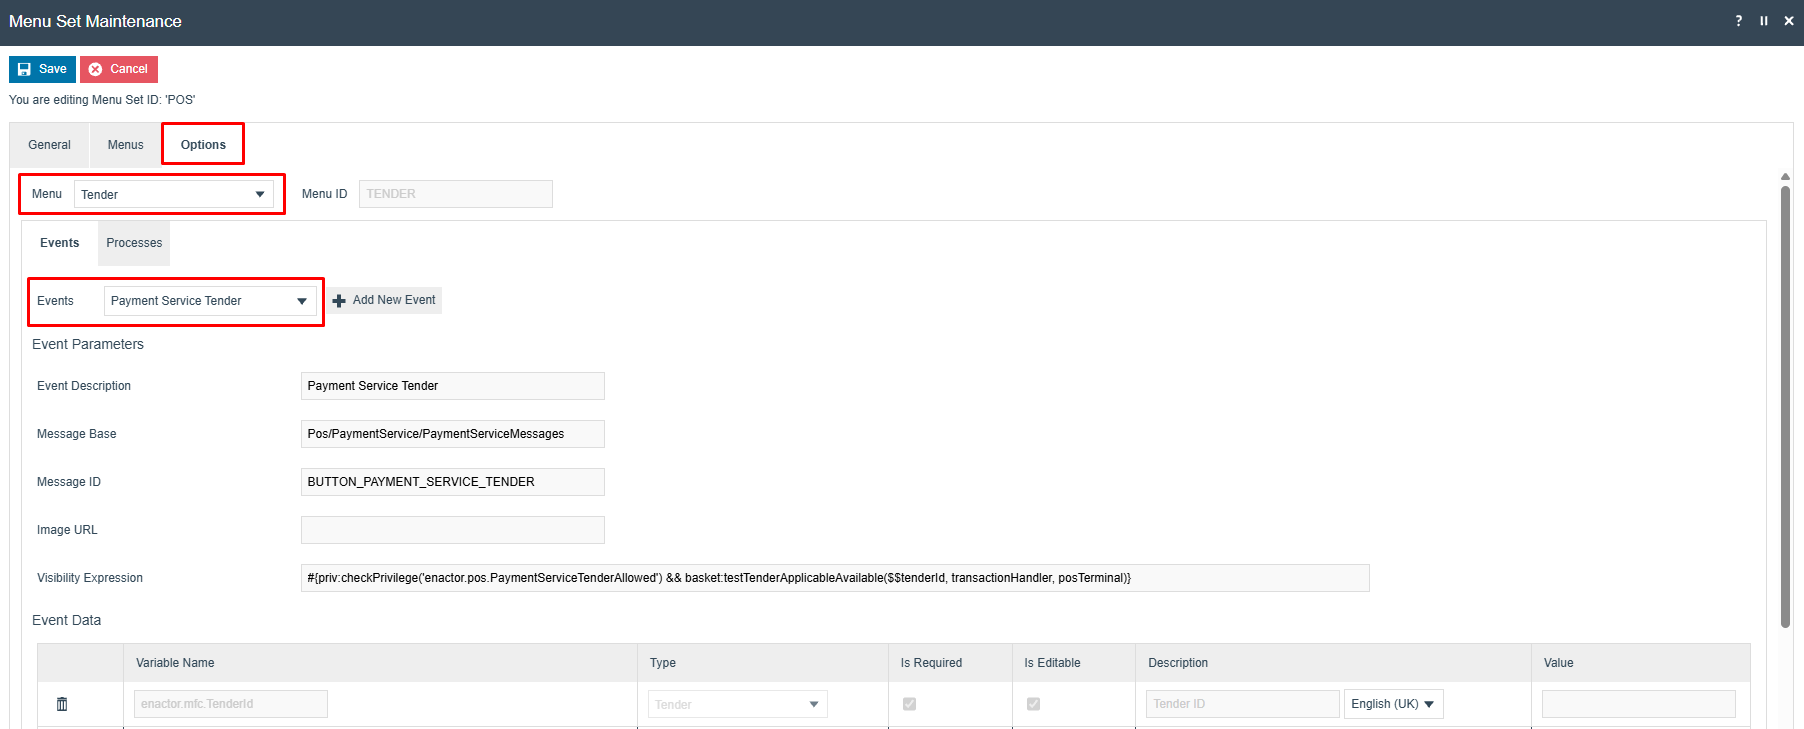
| Field | Value |
|---|---|
| Menu | Tender |
| Events | Payment Service Tender |
| Event Description | Payment Service Tender |
| Message Base | Pos/PaymentService/PaymentServiceMessages |
| Message ID | BUTTON_PAYMENT_SERVICE_TENDER |
Select Save.
This completes the Menu Set Maintenance configuration.
Configuration Steps - Menu Maintenance
Two menu buttons must be added to the POS: one for processing a payment and one for processing a refund.
Add a Payment Service Button (in POS)
Sign in to Estate Manager and navigate to Menu Maintenance using the Search or the path:
Main Menu > Configuration > System > Menus
Apply the following filters to locate the Tender menu. Adjust the Role and Menu Group fields to match your deployment:
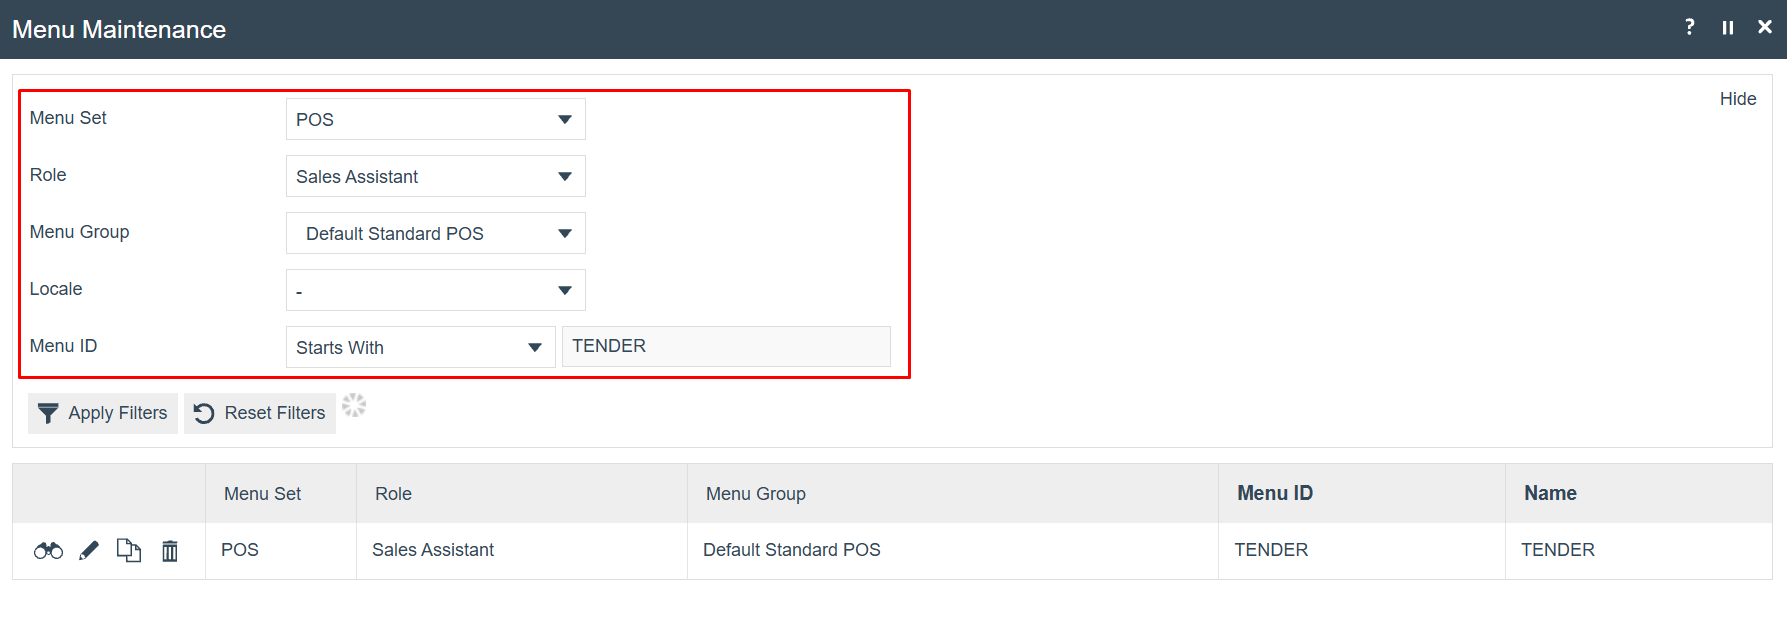
| Filter | Value |
|---|---|
| Menu Set | POS |
| Role | The role used for POS transactions (for example, Sales Assistant) |
| Menu Group | The menu group configured on the POS terminal |
| Menu ID | Starts With TENDER |
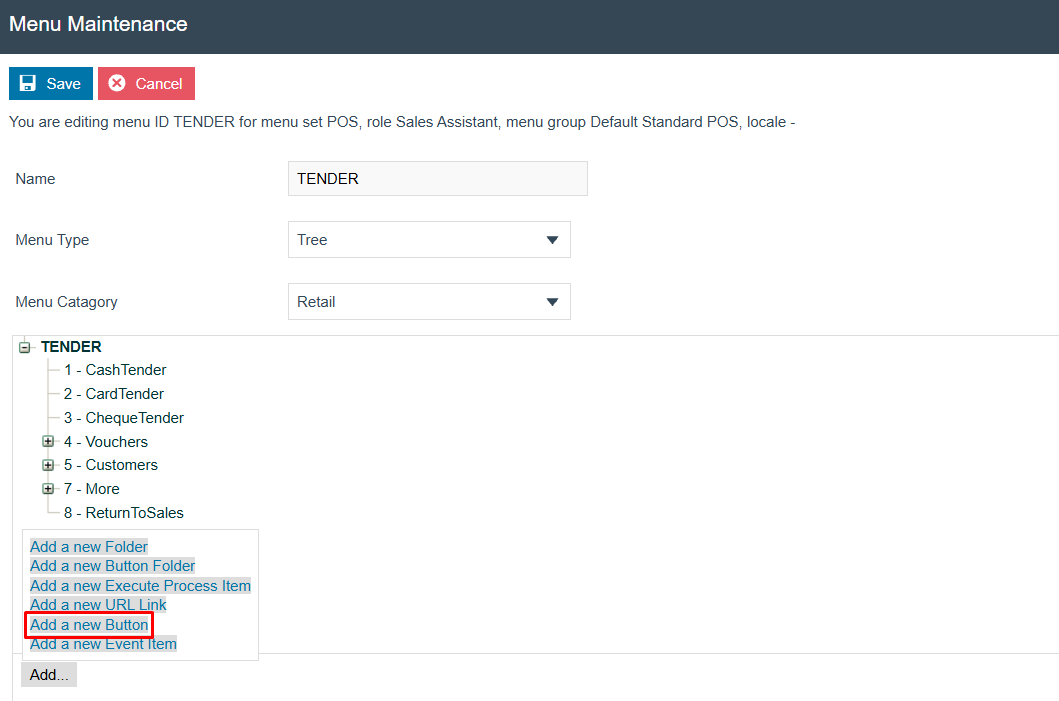
Select the TENDER menu from the results. The menu tree is displayed showing the current buttons. Navigate to the More sub-menu (item 7) and select Add a new Button:
In the General tab, set:
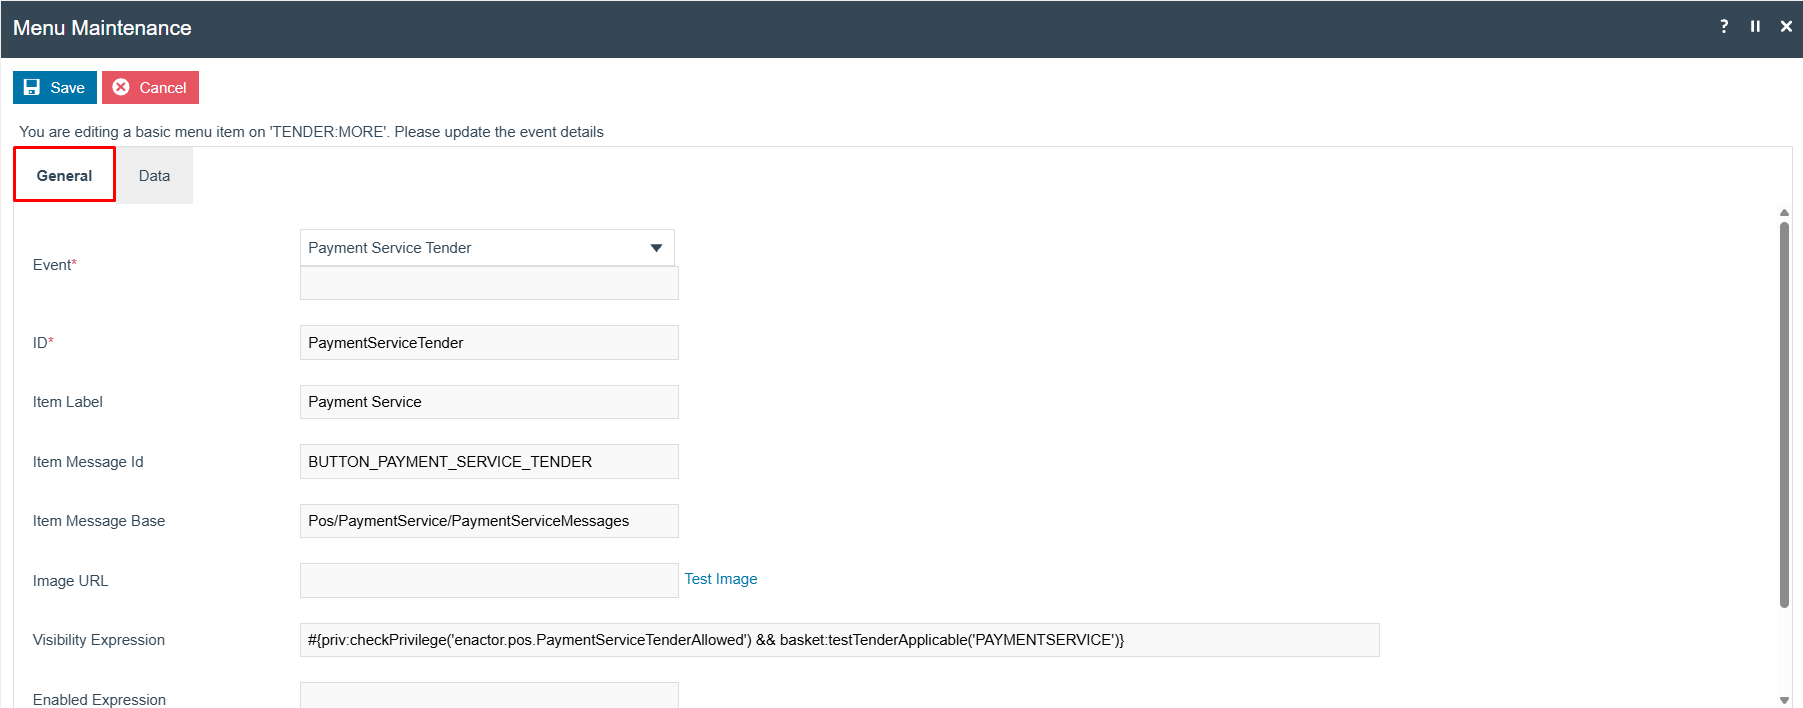
| Field | Value |
|---|---|
| Event | Payment Service Tender |
| ID | PaymentServiceTender |
| Item Label | Payment Service |
| Item Message Id | BUTTON_PAYMENT_SERVICE_TENDER |
| Item Message Base | Pos/PaymentService/PaymentServiceMessages |
| Visibility Expression | #{priv:checkPrivilege('enactor.pos.PaymentServiceTenderAllowed') && basket:testTenderApplicable('PAYMENTSERVICE')} |
In the Data tab, add a new key-value pair:
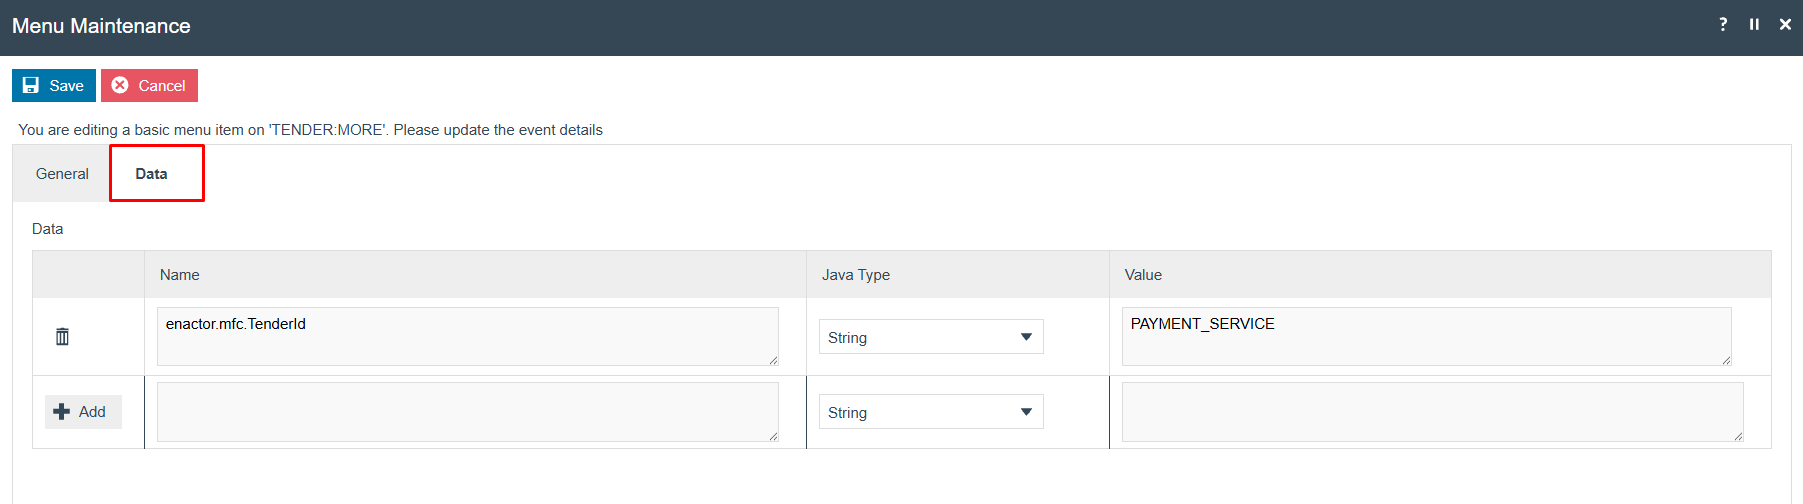
| Name | Java Type | Value |
|---|---|---|
enactor.mfc.TenderId | String | PAYMENT_SERVICE |
Select Save. Broadcast the menu change to the POS.
This completes the Add a Payment Service Button configuration.
Add a Refund Payment Service Tender Button (in POS)
Navigate to Menu Maintenance and apply filters to locate the CREDIT_TENDER menu,
using the same Role and Menu Group as above:
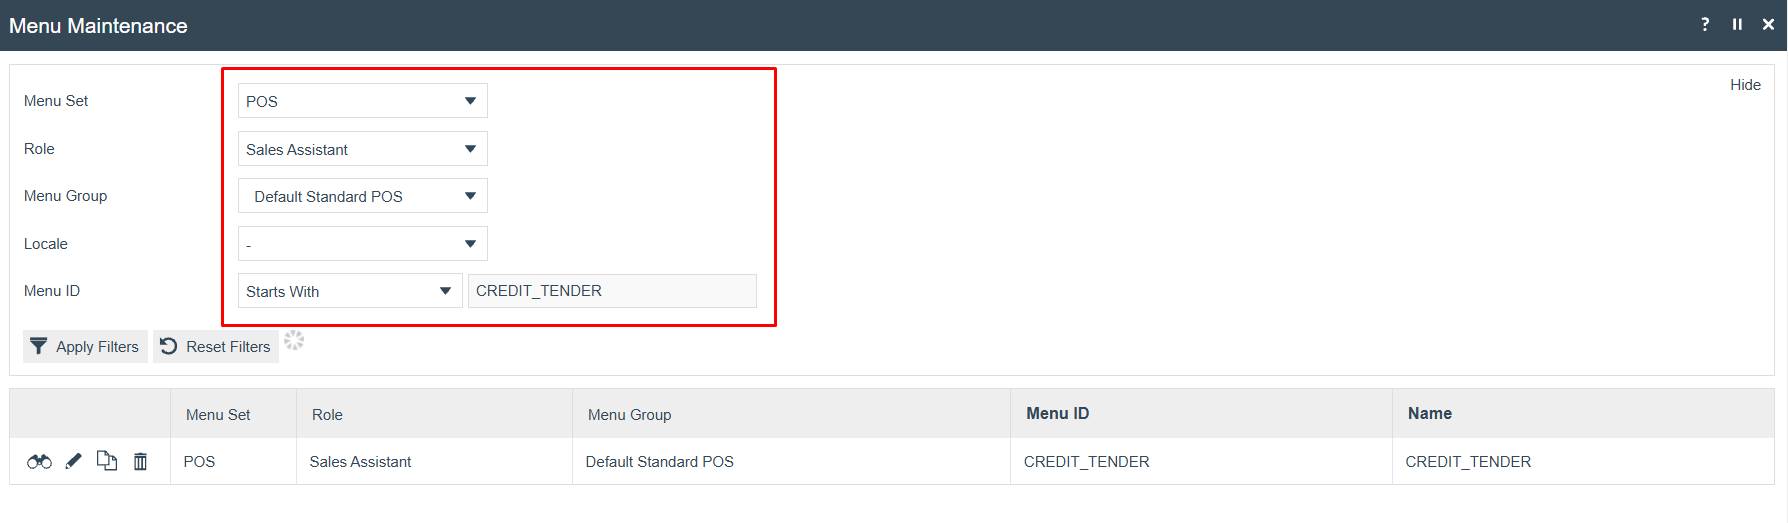
| Filter | Value |
|---|---|
| Menu Set | POS |
| Role | The same role as used above |
| Menu Group | The same menu group as used above |
| Menu ID | Starts With CREDIT_TENDER |
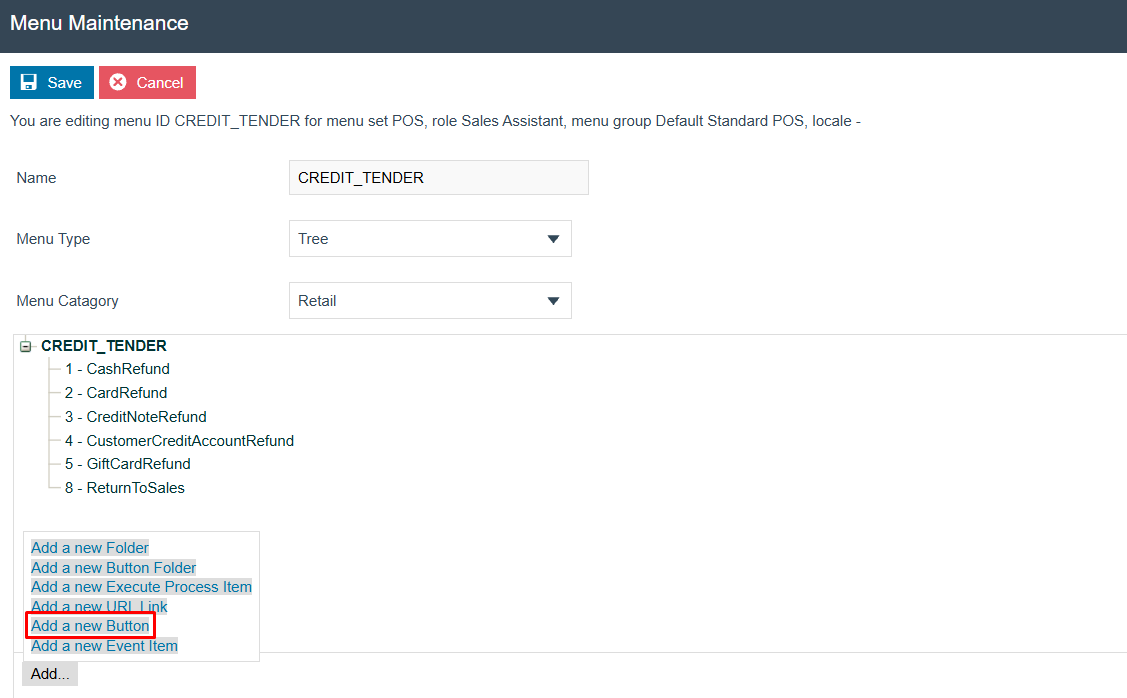
Select the CREDIT_TENDER menu from the results. Select Add a new Button:
In the General tab, set:
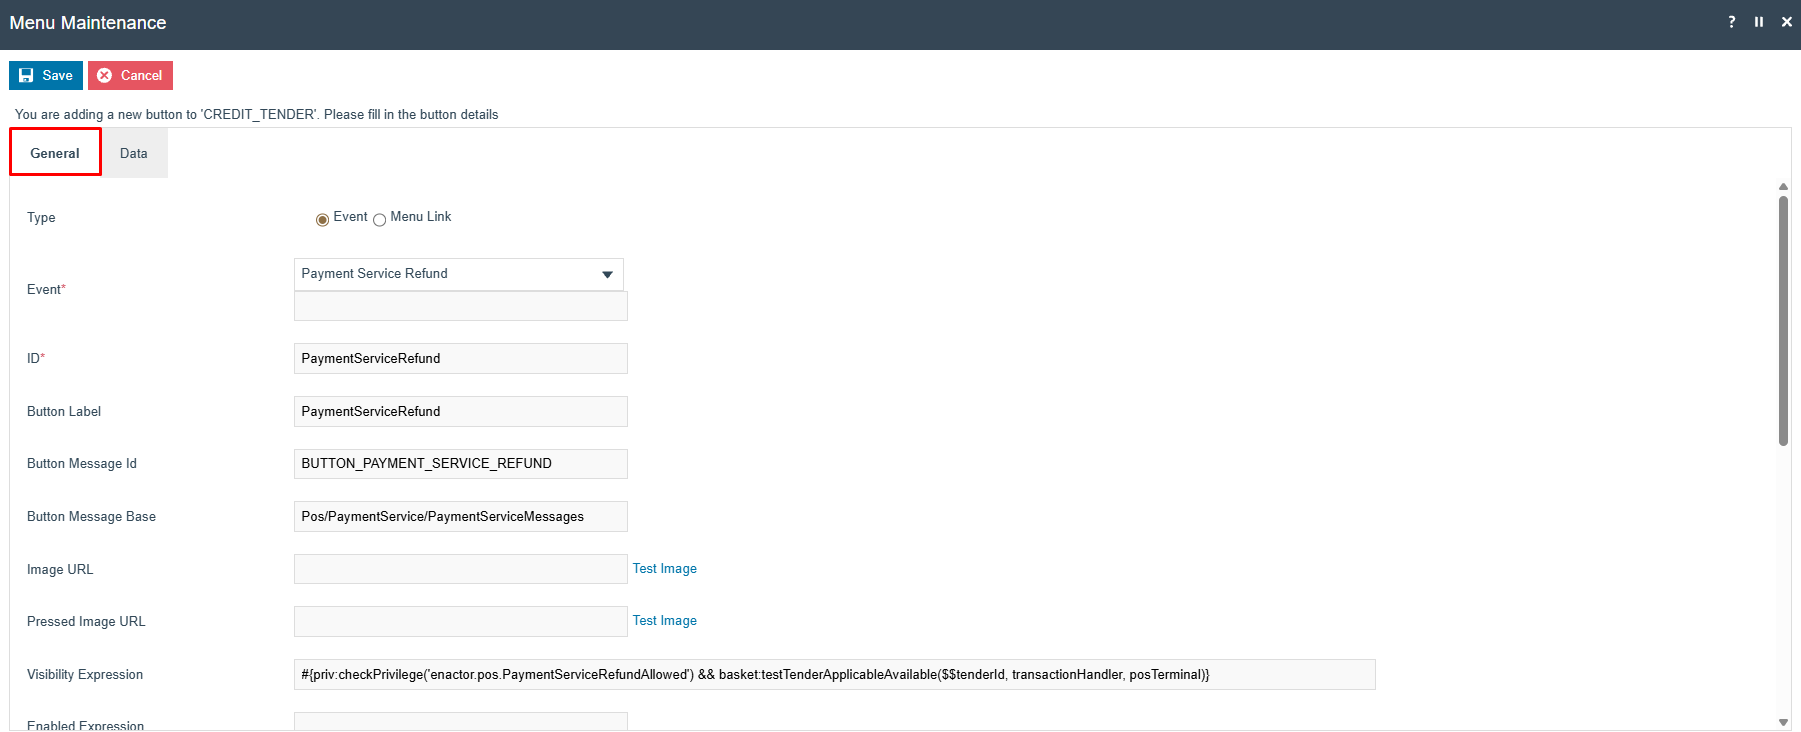
| Field | Value |
|---|---|
| Type | Event |
| Event | Payment Service Refund |
| ID | PaymentServiceRefund |
| Button Label | PaymentServiceRefund |
| Button Message Id | BUTTON_PAYMENT_SERVICE_REFUND |
| Button Message Base | Pos/PaymentService/PaymentServiceMessages |
| Visibility Expression | #{priv:checkPrivilege('enactor.pos.PaymentServiceRefundAllowed') && basket:testTenderApplicableAvailable($$tenderId, transactionHandler, posTerminal)} |
In the Data tab, add a new key-value pair:
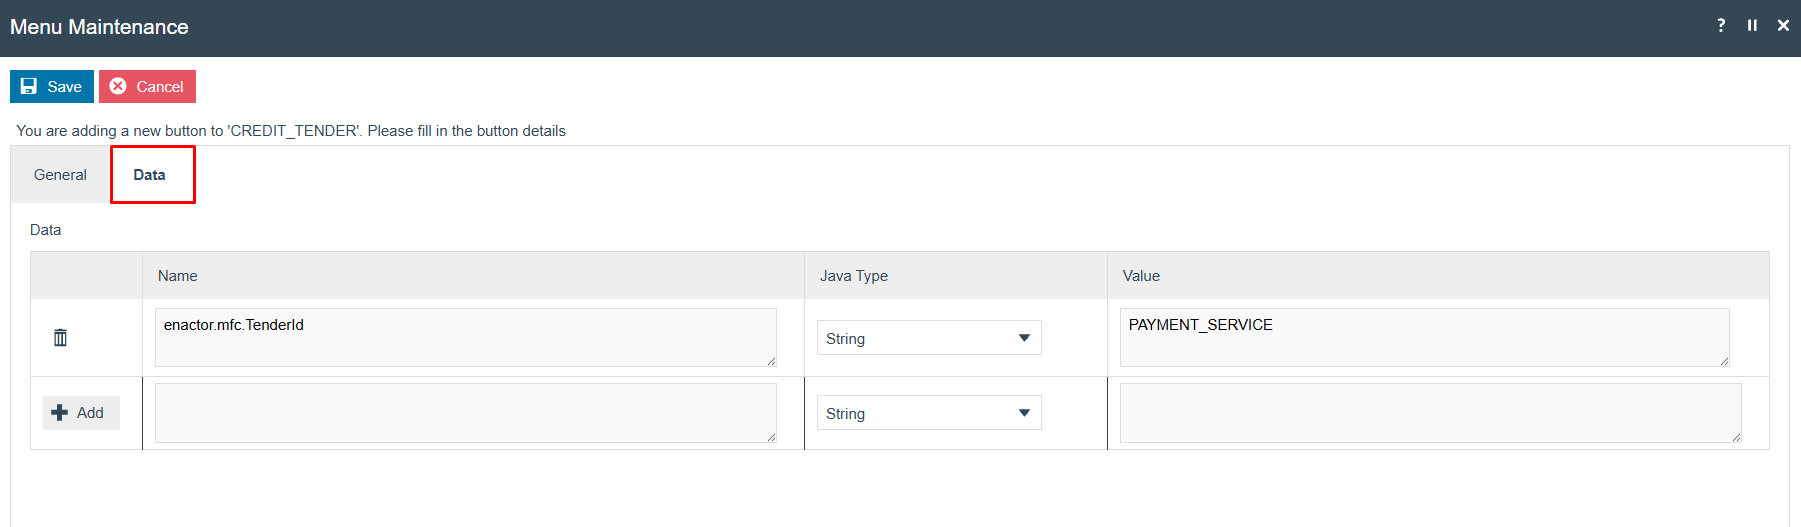
| Name | Java Type | Value |
|---|---|---|
enactor.mfc.TenderId | String | PAYMENT_SERVICE |
Select Save. Broadcast the menu change to the POS.
This completes the Menu Maintenance configuration.
Configuration Steps - Payment Device Maintenance
This step must be repeated for every PED that will use the Adyen payment service.
Sign in to Estate Manager and navigate to Payment Device Maintenance using the Search or the path:
Main Menu > Configuration > Financial > Payment Device
Select Create a new payment device and enter an appropriate Payment Device ID:
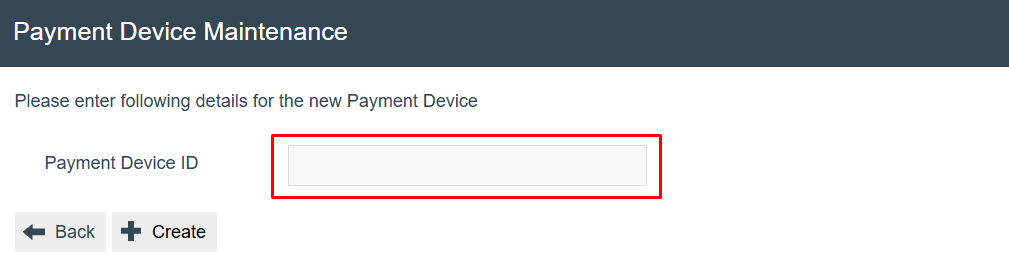
After selecting Create, configure the payment device record:
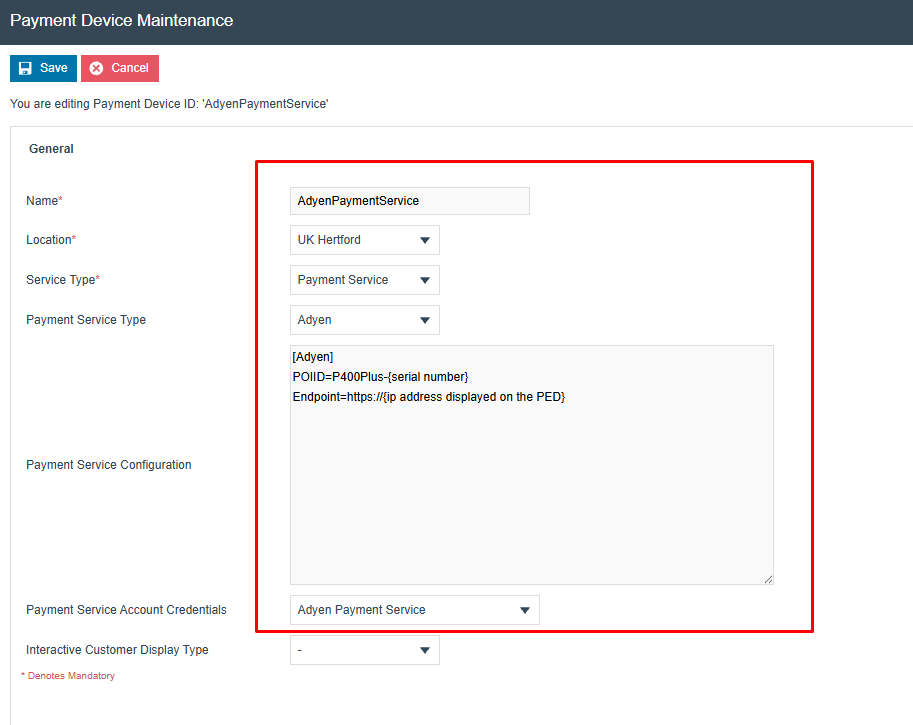
| Field | Value |
|---|---|
| Name | A descriptive name for this payment device |
| Location | The store location (must match the payment device host location) |
| Service Type | Payment Service |
| Payment Service Type | Adyen |
| Payment Service Configuration | See below |
| Payment Service Account Credentials | Select the Account Credentials record created earlier |
In the Payment Service Configuration box, enter:
[Adyen]
POIID=P400Plus-{serial number}
Endpoint=https://{ip address displayed on the PED}
Replace {serial number} with the serial number of the Adyen PED device and
{ip address displayed on the PED} with the IP address shown on the PED screen.
Select Save.
This completes the Payment Device Maintenance configuration.
Configuration Steps - Device Maintenance
Sign in to Estate Manager and navigate to Device Maintenance using the Search or the path:
Main Menu > Administration > Devices > Devices

Select Create a new Device and enter an appropriate Device ID:

After selecting Create, configure the device record on the General tab:
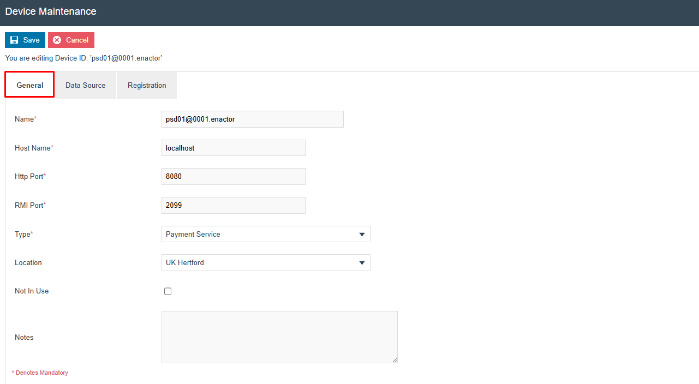
| Field | Value |
|---|---|
| Name | An appropriate device name (for example, matching the device ID) |
| Host Name | localhost |
| Http Port | 8000 |
| RMI Port | 2099 |
| Type | Payment Service |
| Location | The store location. Configure in Location Maintenance if not already defined. |
Select Save.
This completes the Device Maintenance configuration.
Configuration Steps - Payment Device Host Maintenance
Sign in to Estate Manager and navigate to Payment Device Host Maintenance using the Search or the path:
Main Menu > Configuration > Financial > Payment Device Host
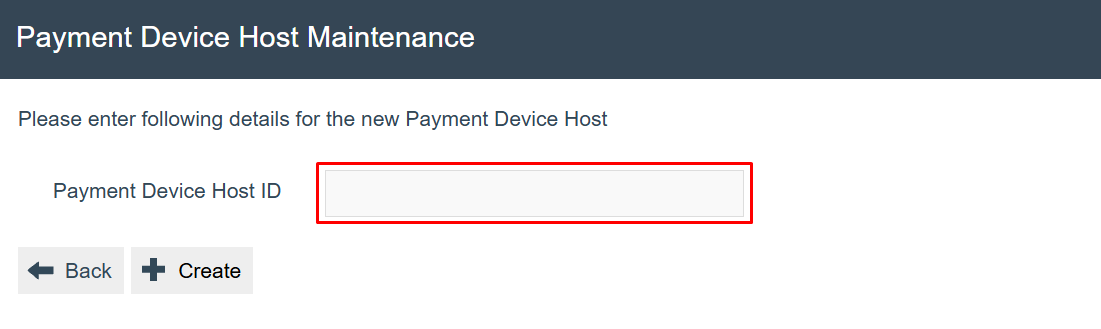
Select Create a new Payment Device Host and enter an appropriate Payment Device Host ID:
After selecting Create, configure the General tab:
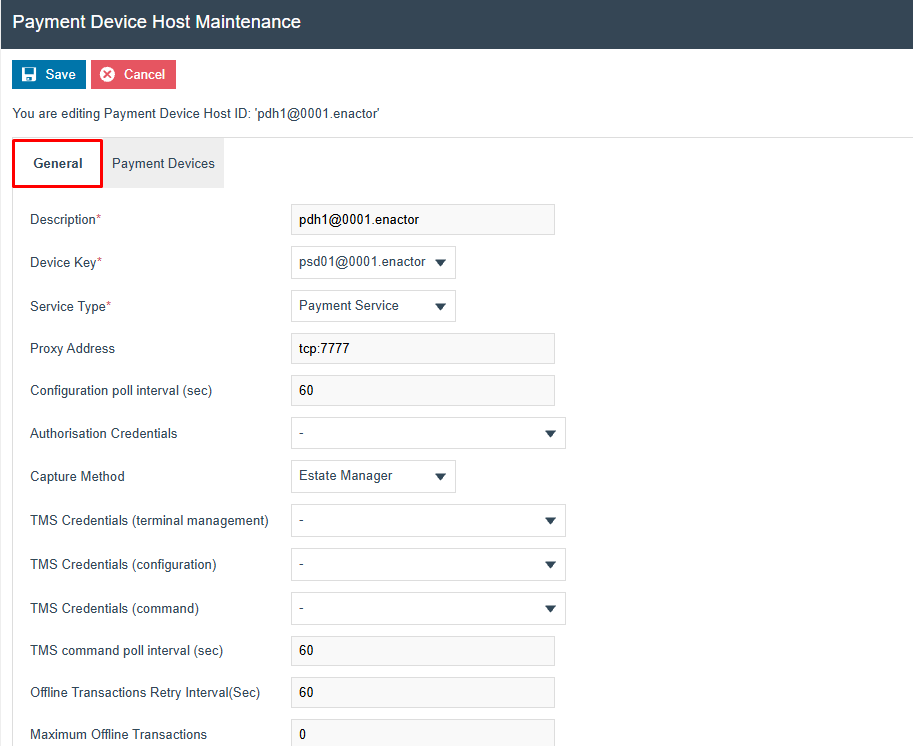
General Tab:
| Field | Value |
|---|---|
| Description | An appropriate description for this payment device host |
| Device Key | Select the device record created in the Device Maintenance step |
| Service Type | Payment Service |
| Proxy Address | tcp:7777 |
| Configuration Poll Interval (sec) | 60 |
| Capture Method | Estate Manager |
| TMS Command Poll Interval (sec) | 60 |
Go to the Payment Devices tab and add the payment device:
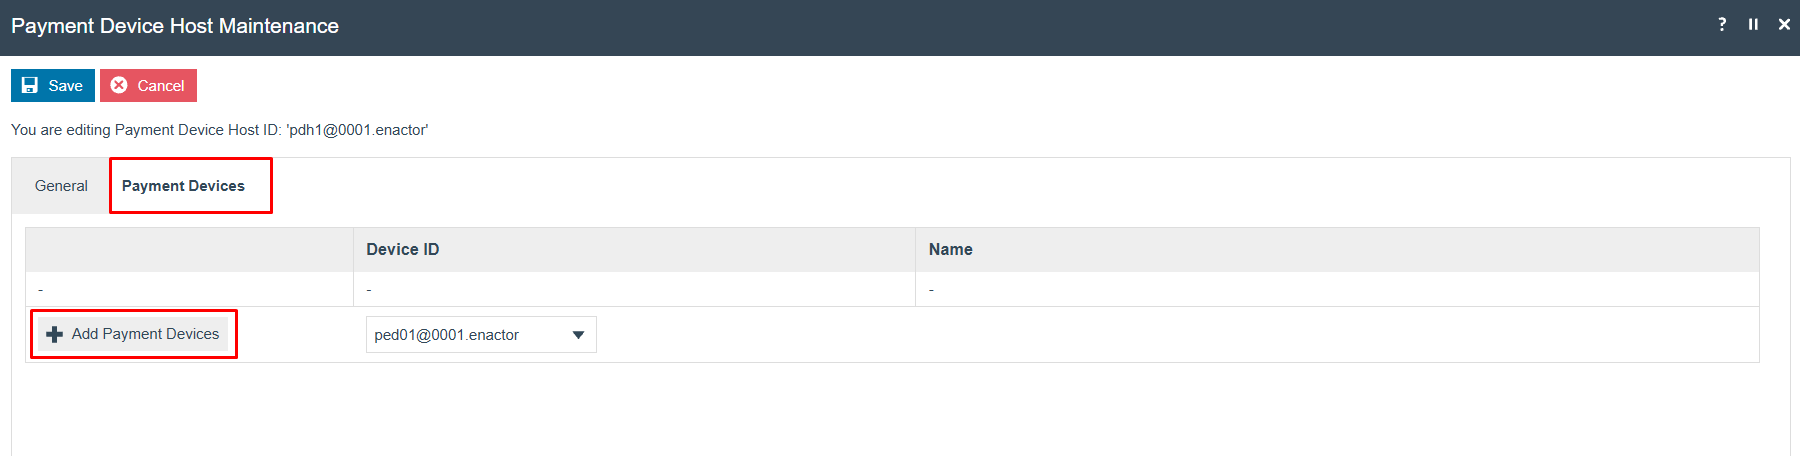
Payment Devices Tab:
Select the payment device ID created in the Payment Device Maintenance step from the dropdown and select Add Payment Devices to add it to the list.
Select Save.
This completes the Payment Device Host Maintenance configuration.
Configuration Steps - POS Terminal Maintenance
Sign in to Estate Manager and navigate to POS Terminal Maintenance using the Search or the path:
Main Menu > Configuration > Organisation > POS Terminals
The POS Terminal Maintenance screen lists all configured POS terminals:
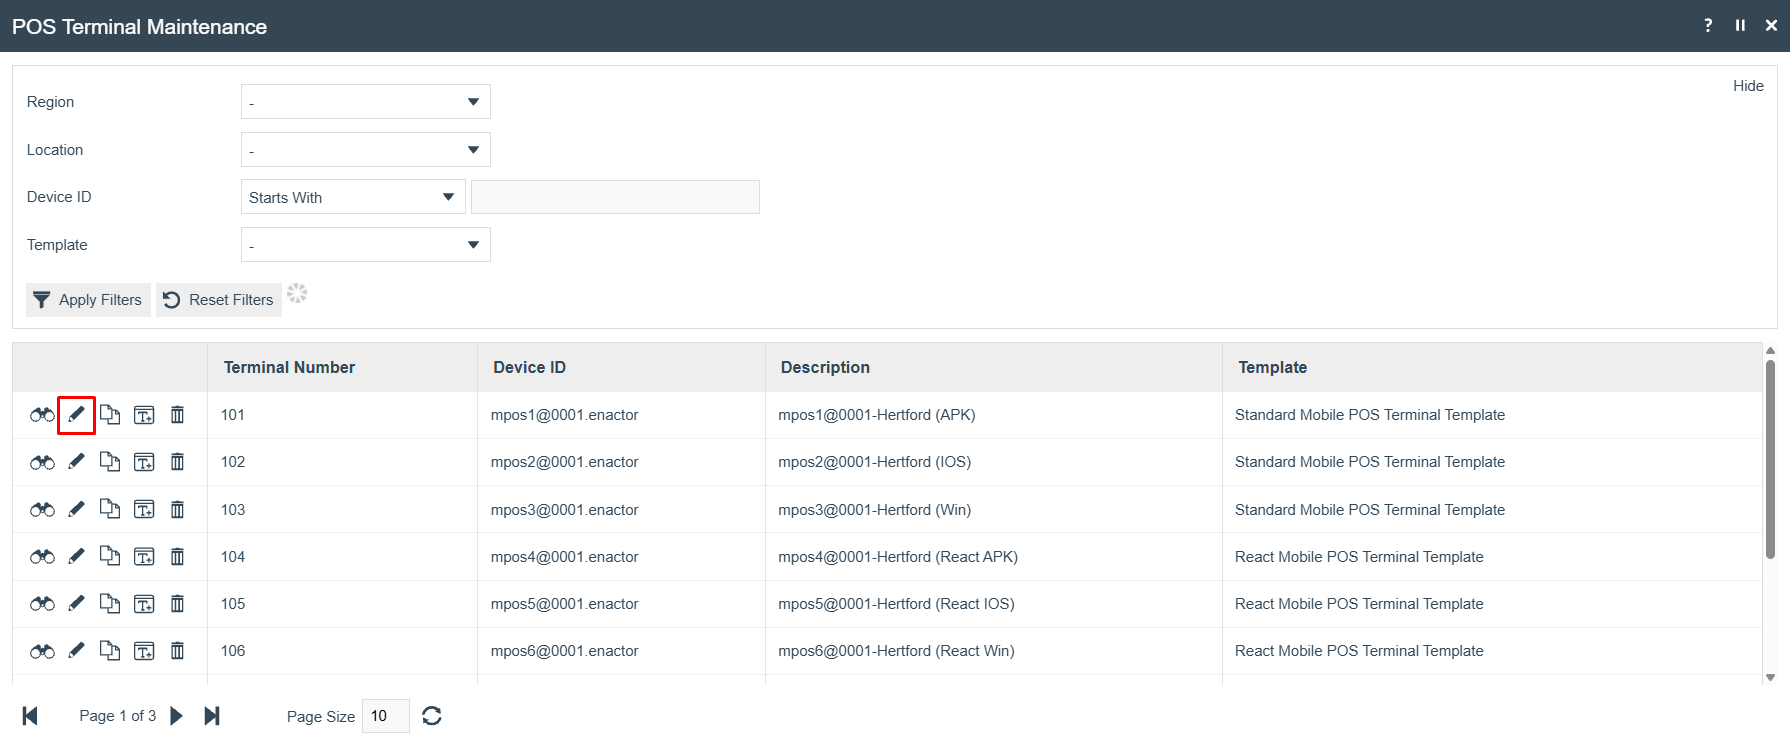
Edit the relevant POS terminal. Navigate to the Peripherals tab and select the Input sub-tab:
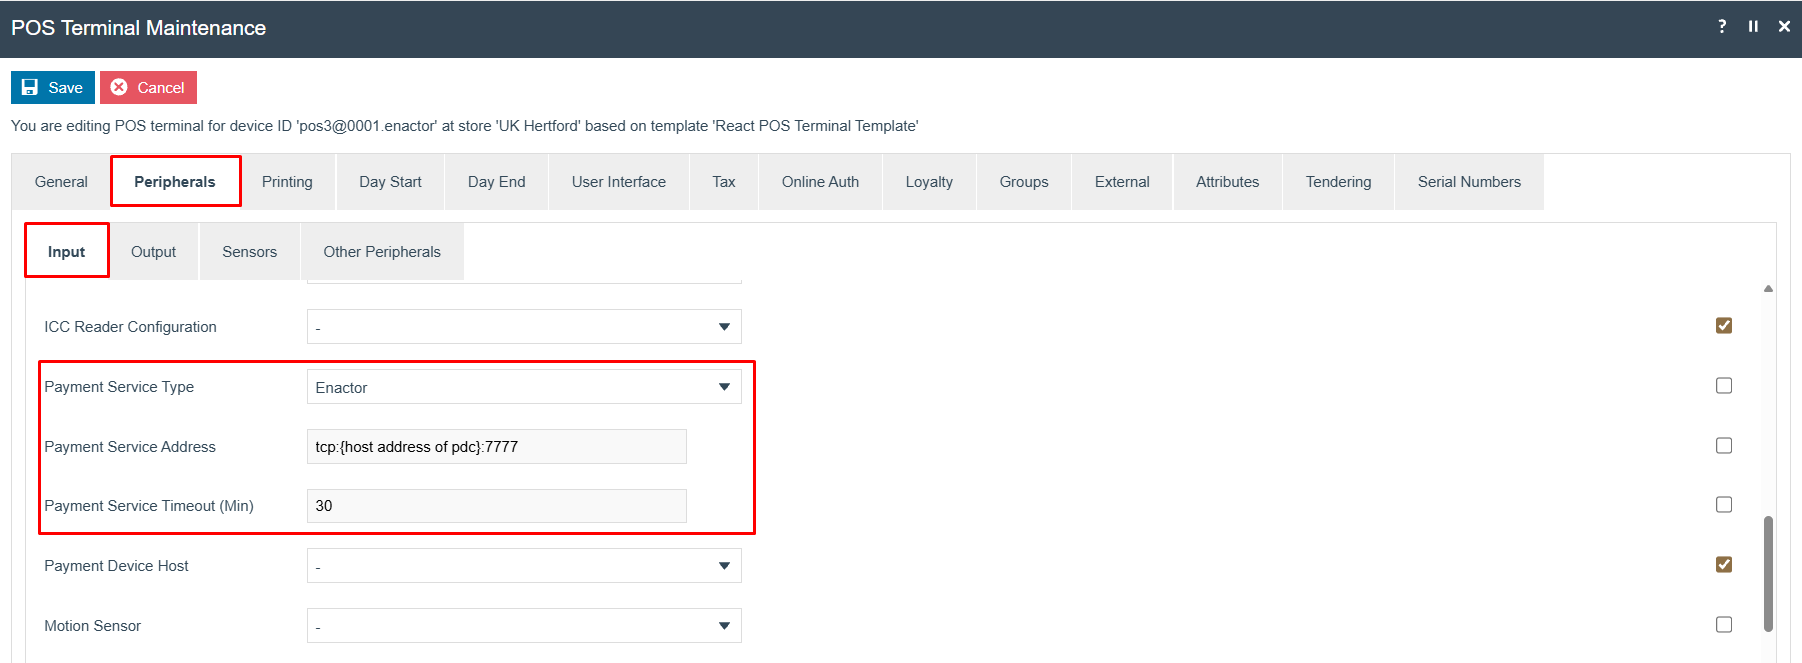
| Field | Value |
|---|---|
| Payment Service Type | Enactor |
| Payment Service Address | tcp:{host address of pdc}:7777 |
| Payment Service Timeout (Min) | 30 |
Replace {host address of pdc} with the IP address or hostname of the machine running
the PDC.
Select Save and broadcast the change to the POS.
This completes the POS Terminal Maintenance configuration.
Configuration Steps - User Role Maintenance
Two user roles require additional privileges: the role used for POS transactions for processing payments, and the TMS Login User role for managing payment devices.
Sign in to Estate Manager and navigate to User Roles Maintenance using the Search or the path:
Main Menu > Configuration > HR > User Roles

The User Role Maintenance screen lists all configured user roles:
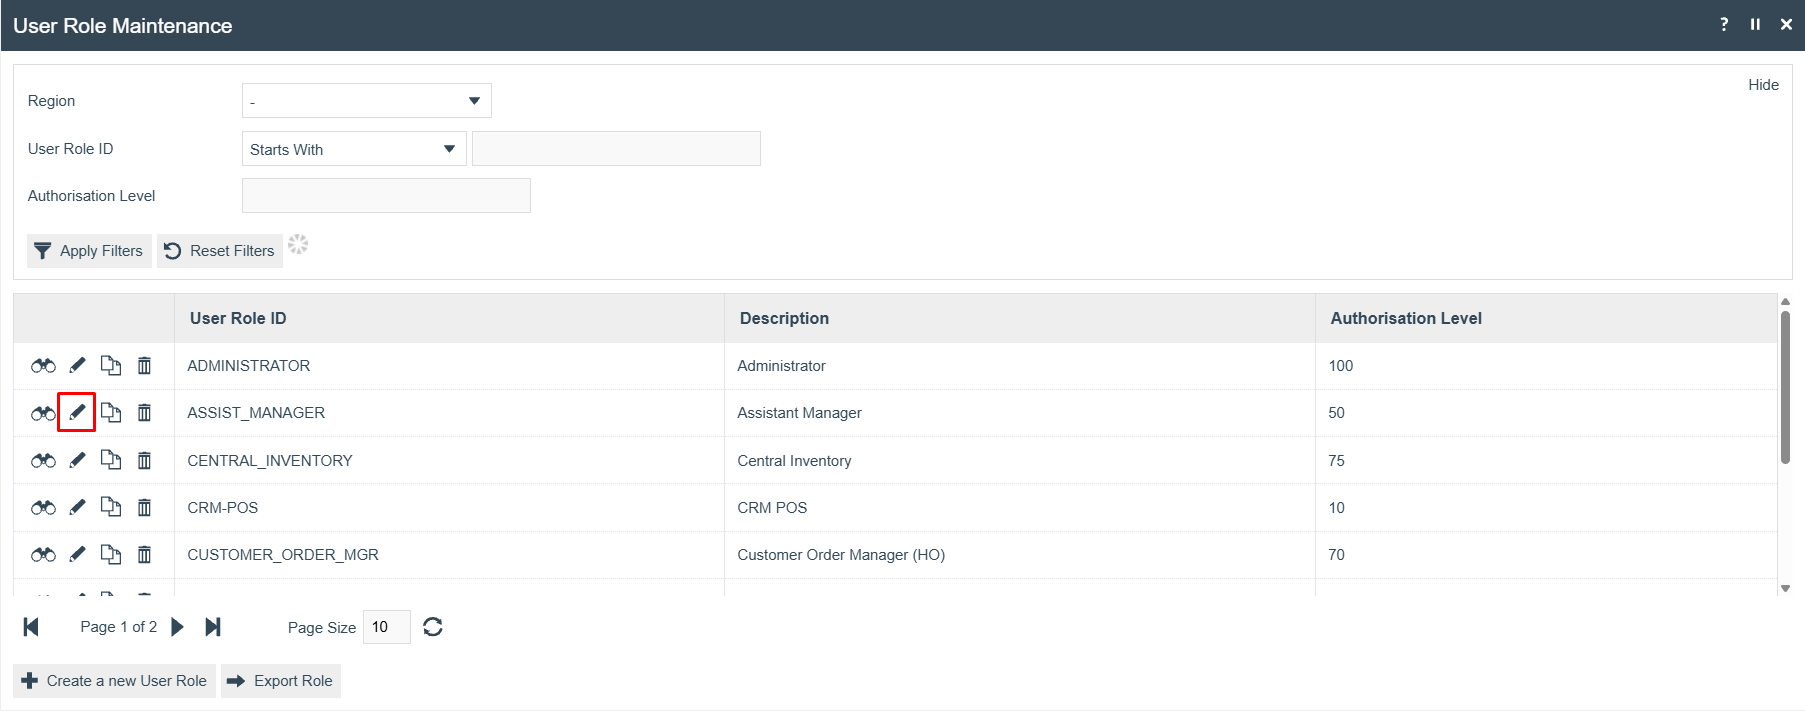
POS Operator
Edit the role used for POS transactions (for example, Sales Assistant or POS Operator). Go to the Authorised Functions tab and add the following privileges. Use the Function ID filter to search for each one:
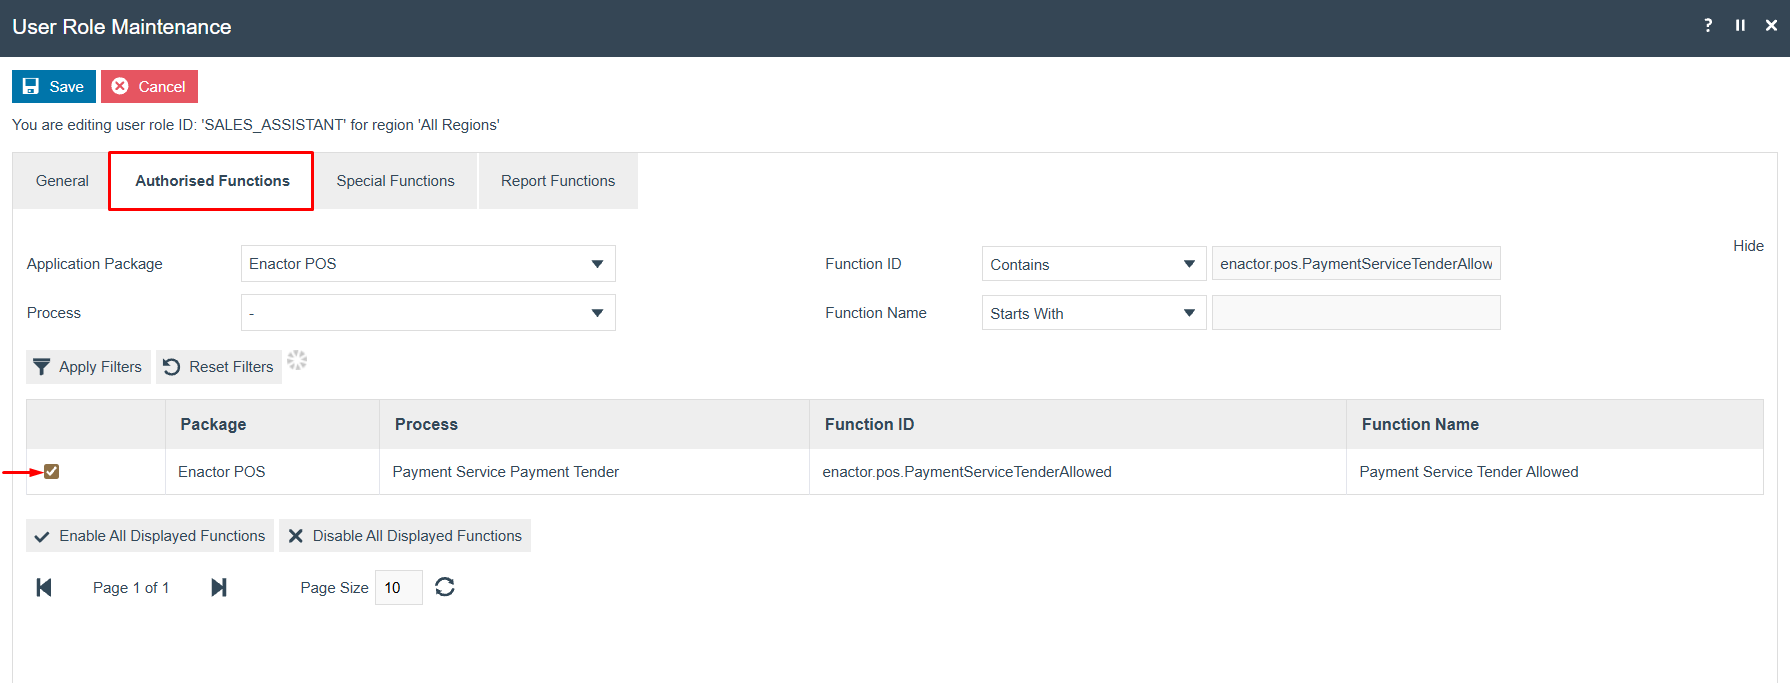
| Package | Function ID |
|---|---|
| Enactor POS | enactor.pos.PaymentServiceTenderAllowed |
| Enactor POS | enactor.pos.PaymentServiceRefundAllowed |
| Enactor POS | enactor.pos.AuthorisesPaymentServiceTender |
| Enactor POS | enactor.pos.AuthorisesPaymentServiceRefund |
Select Save. Broadcast these changes to the POS.
This completes the POS Operator User Role configuration.
TMS Login User
Add the following privileges to allow access to Payment Device Maintenance:
| Package | Function ID | Description |
|---|---|---|
| Enactor Web Maintenance | enactor.paymentDeviceMaintenance.Edit | Edit |
| Enactor Web Maintenance | enactor.paymentDeviceMaintenance.List | List |
| Enactor Web Maintenance | enactor.paymentDeviceMaintenance.New | New |
| Enactor Web Maintenance | enactor.paymentDeviceMaintenance.Remove | Remove |
| Enactor Web Maintenance | enactor.paymentDeviceMaintenance.Run | Run |
| Enactor Web Maintenance | enactor.paymentDeviceMaintenance.View | View |
Add the following privileges to allow access to Payment Device Host Maintenance:
| Package | Function ID | Description |
|---|---|---|
| Enactor Web Maintenance | enactor.paymentDeviceHostMaintenance.Edit | Edit |
| Enactor Web Maintenance | enactor.paymentDeviceHostMaintenance.List | List |
| Enactor Web Maintenance | enactor.paymentDeviceHostMaintenance.New | New |
| Enactor Web Maintenance | enactor.paymentDeviceHostMaintenance.Remove | Remove |
| Enactor Web Maintenance | enactor.paymentDeviceHostMaintenance.Run | Run |
| Enactor Web Maintenance | enactor.paymentDeviceHostMaintenance.View | View |
This completes the TMS Login User Role configuration.
Configuration Steps - PDC Configuration
The PDC must be installed and configured on the same machine as the POS application.
- Copy the provided
EnactorPDC-2.7.x.x.x.x.msiand theinstaller.inifile into a separate folder. - Open
installer.iniand populate the fields as follows:
| Field | Value |
|---|---|
PDC_ID | Replace PDC_ID_HERE with the Payment Device Host ID configured in the Payment Device Host Maintenance step |
JDK_LOCATION | Replace PATH_TO_JDK_BIN_FOLDER with the path to the JDK folder. Do not include the bin subfolder in the path. |
PDC_PRIMARY_TMS_URL | Replace SERVER_IP with the IP address of the server running PDMS and EM. Port must be 39833. |
PDC_SECONDARY_TMS_URL | Replace SERVER_IP with the IP address of the server running PDMS and EM. Port must be 39833. |
ENACTOR_HOME | Best practice is to install the PDC and POS applications to C:\Enactor. |
PDC_DATABASE_LOCATION | Set to a directory inside the PDC install folder, for example C:\Enactor\pdc\DataBase\. |
- Install the PDC to
C:\Enactorusing the MSI installer. - Install a POS or PDP server on the same machine so that it can receive application updates.
- Replace
pdc-payment-controller.jarinpdc/libwith the providedpdc-payment-controller.jarfile.
The PDC_ID value in installer.ini must exactly match the Payment Device Host ID
configured in the Estate Manager Payment Device Host Maintenance step.
This completes the PDC Configuration.
Configuration Steps - Broadcasting the App Update
The Adyen application update must be broadcast from Estate Manager to the target devices to deploy the integration jar files.
Sign in to Estate Manager and navigate to Application Update Broadcaster using the Search or the path:
Main Menu > Administration > Data Management > Broadcasts > Application Update Broadcaster

On the Application Update Broadcaster screen, select New Application Update to upload the Adyen update package:
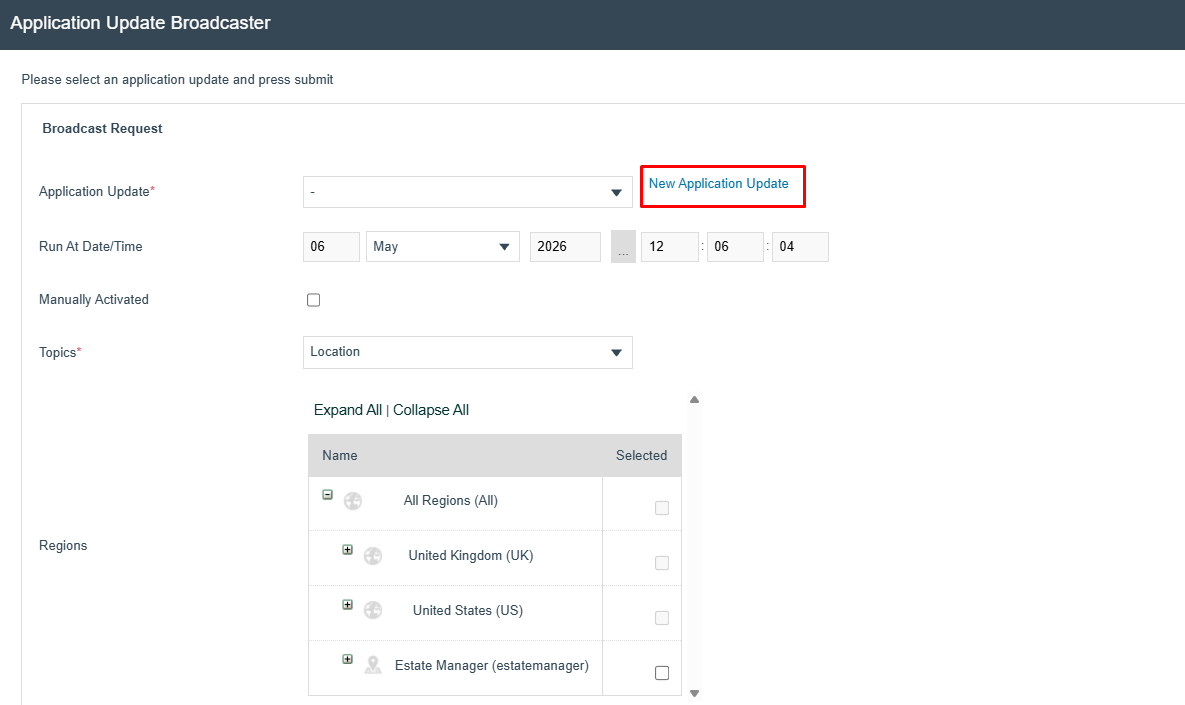
The update package for this release is adyen-x.x.xxx-update.zip.
On the Application Update Maintenance screen, upload the Adyen update package:
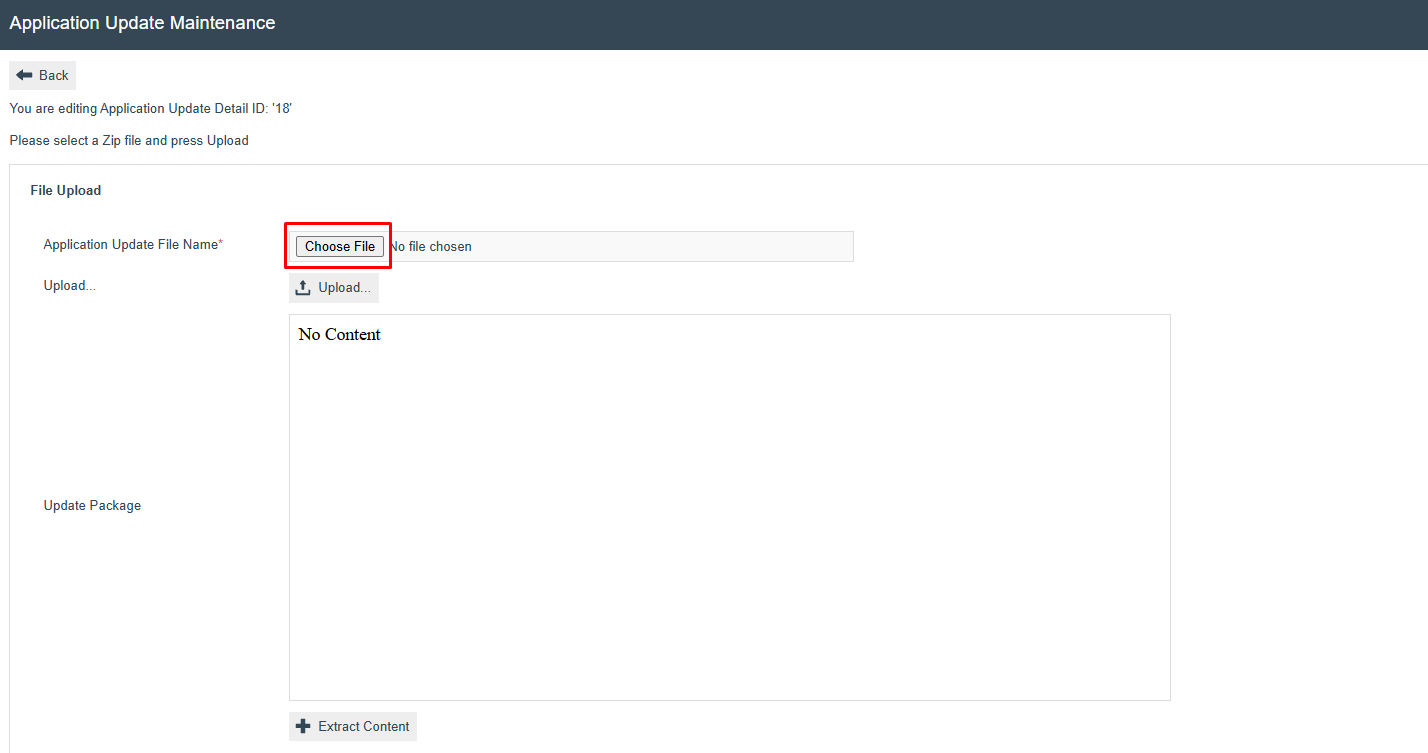
- Select Choose File and browse to the
adyen-x.x.xxx-update.zipfile. - Select Upload.
- Select Extract Content, then Save.
Return to the Application Update Broadcaster screen. Select the uploaded update package from the Application Update dropdown, set Topics to Device, select the target device, and select Submit:

| Field | Value |
|---|---|
| Application Update | Select the uploaded Adyen update package |
| Topics | Device |
| Target | The POS device hosted on the same machine as the payment device host |
The app update will be received by the target devices and will trigger a restart. Once the
PDC has started after the restart, it will automatically copy the Adyen jar files to the
PDC/custom-libs folder.
This completes the Broadcasting the App Update configuration.
About This Document
(c) 2026 Enactor Ltd
All documents produced by Enactor Ltd are supplied to customers subject to Copyright, commercial confidentiality, and contractual agreements and must not be copied or transferred without permission.
Document Context
This document is part of the Enactor Product Documentation Series. All Enactor products include a comprehensive documentation set designed to improve understanding of the product and facilitate ease of use.
Document Inquiries
If you find that a document is inaccurate or deficient in any way, please contact:
Email: documentation@enactor.co.uk
Document History
| Version | Status | Issue Date | Author | Reason for Issue | Software Version |
|---|---|---|---|---|---|
| 1.0 | Initial Draft | 05 May 2026 | Harshana Bandara | Initial Version | 2.7.747.RC2 |
| 1.1 | Updated | 07 May 2026 | Shenol Silva | Added full screenshots for all configuration sections | 2.7.1795.1940 |
| 3.0 | Content Update | 21 May 2026 | Shenol Silva | Updated SharePoint folder links and revised release naming conventions to remove hard-coded release references | 2.7.1795.1940 |