Create a new React Prompt
Overview
This tutorial will guide you how to create a new React Component using the React Prompt Wizard.
What you will learn
How to generate a React Prompt through the React Prompt Wizard to a prompt state.
Pre-requisites
Should follow React Enactor Application and have a working React Enactor Application.
Exercises
Creating a new Prompt
Navigate to the Application process related to already generated React Enactor Application.
eg: If the react application name is TestReactApp, this can be found in src -> META-INF -> deployments -> Process -> TestReactApp -> TestReactAppStartupProcess

A new prompt can be generated using the React Component Wizard and set as a new prompt to the Missing Name Message state in the application process.
For this, first drag and drop a Prompt State from the Palette (Window -> Show View -> Other -> Palette) to the application process.
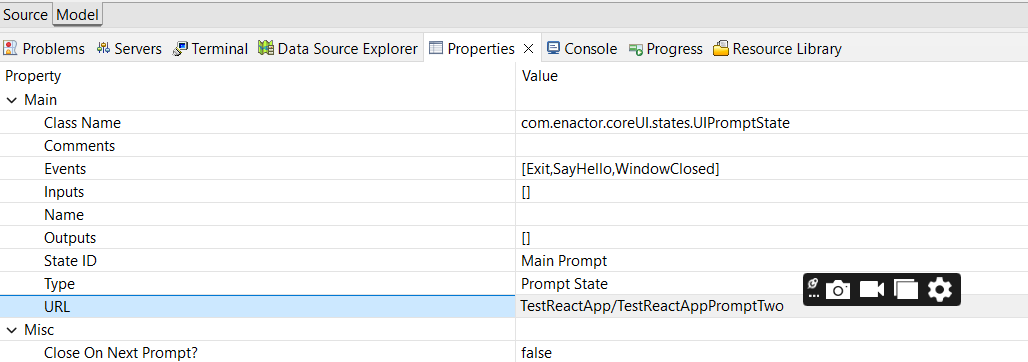
 Then right click the prompt state and go to show properties and give a URL for the new Prompt.
Save the changes.
Now double click on the input section and add TestInput with String type. After adding the input add a value for the input by Shift + double click on the inputs and adding the value.
In the same way add TestOutput with String Type for the Output Section. Also add OKPressed event for the Prompt State.

Save the changes.
Generating the React Component
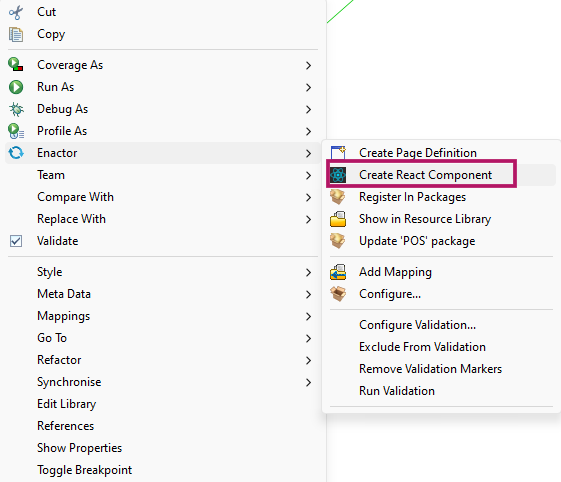
Now to create the new react component, right click the Prompt State and go to Enactor menu and select Create React Component.
On the opened wizard, you will be able to see the populated values for all fields .

Click Finish to generate the React Component.
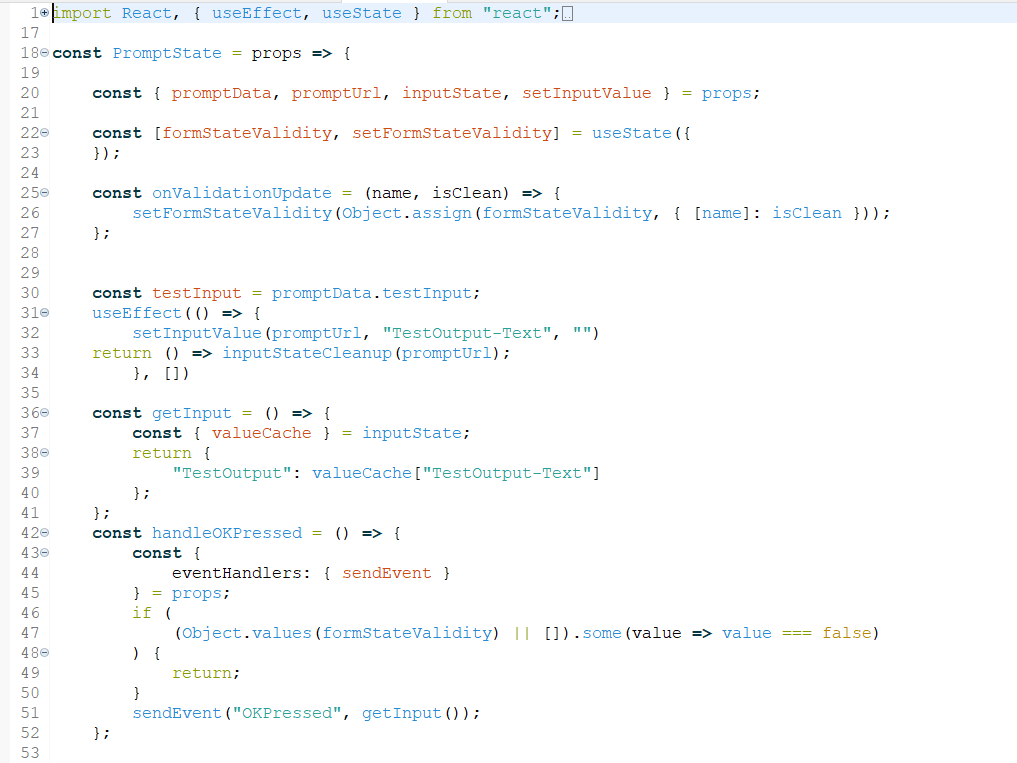
A React Component as below will be generated on the given component directory path.
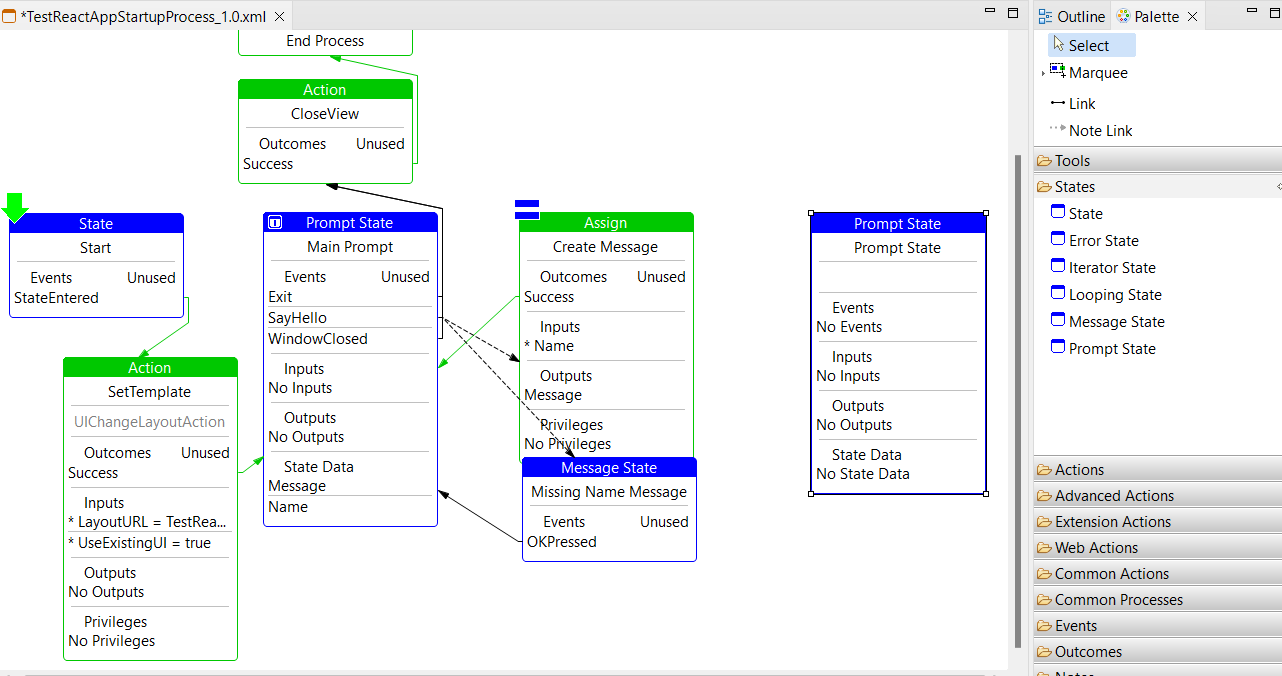
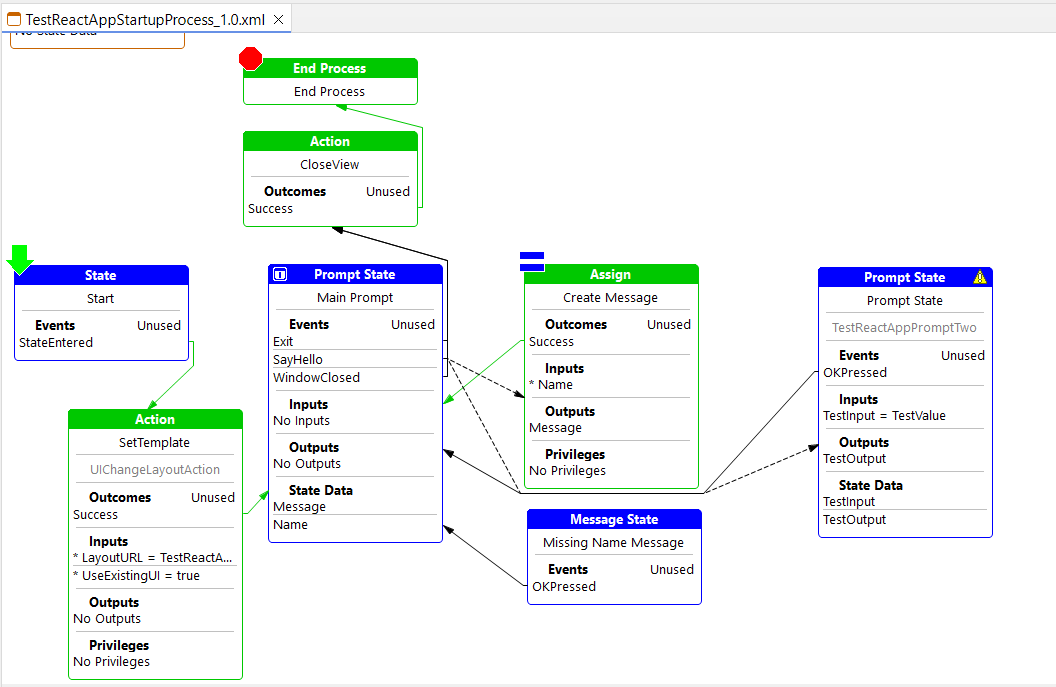
For the correct mappings, click on the arrow on the Missing Name Message State and drag it to the new Prompt State.
Also, double click on the OKPressed event on the new Prompt and draw an arrow back to the main prompt.
After the modifications, your process should display as below.
Run the Application again to see the changes.
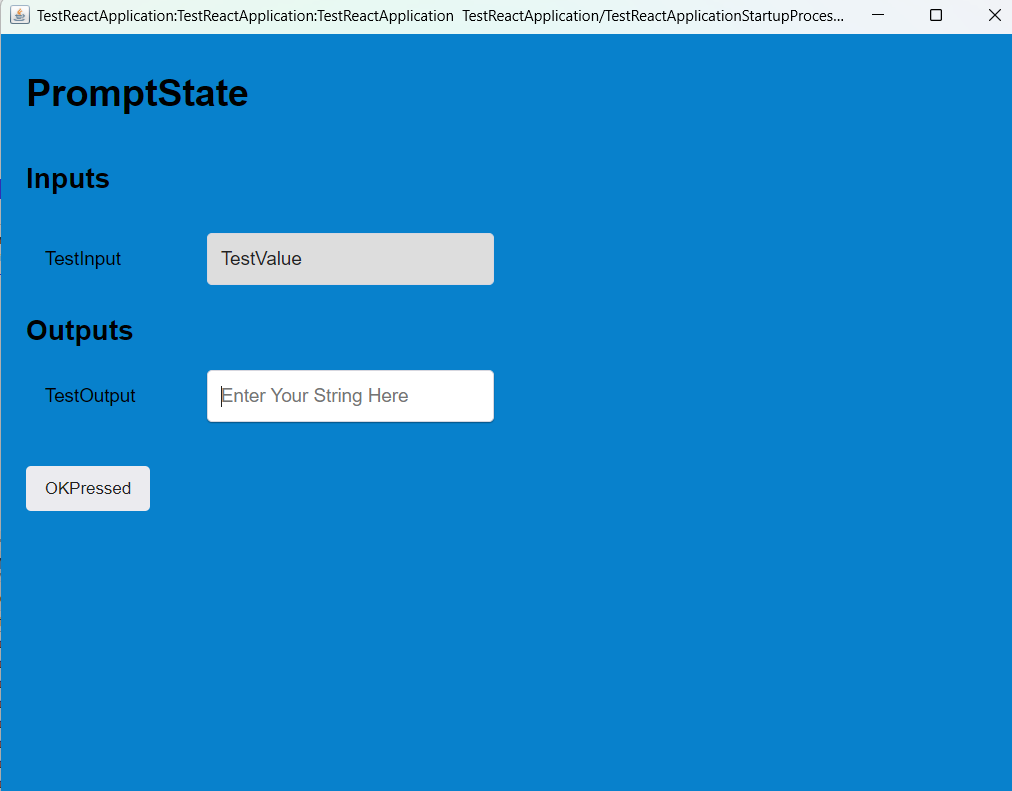
The new prompt will appear as below.