User Access and Authorisation
User Access and Authorisation
Objectives
Configuration Topics
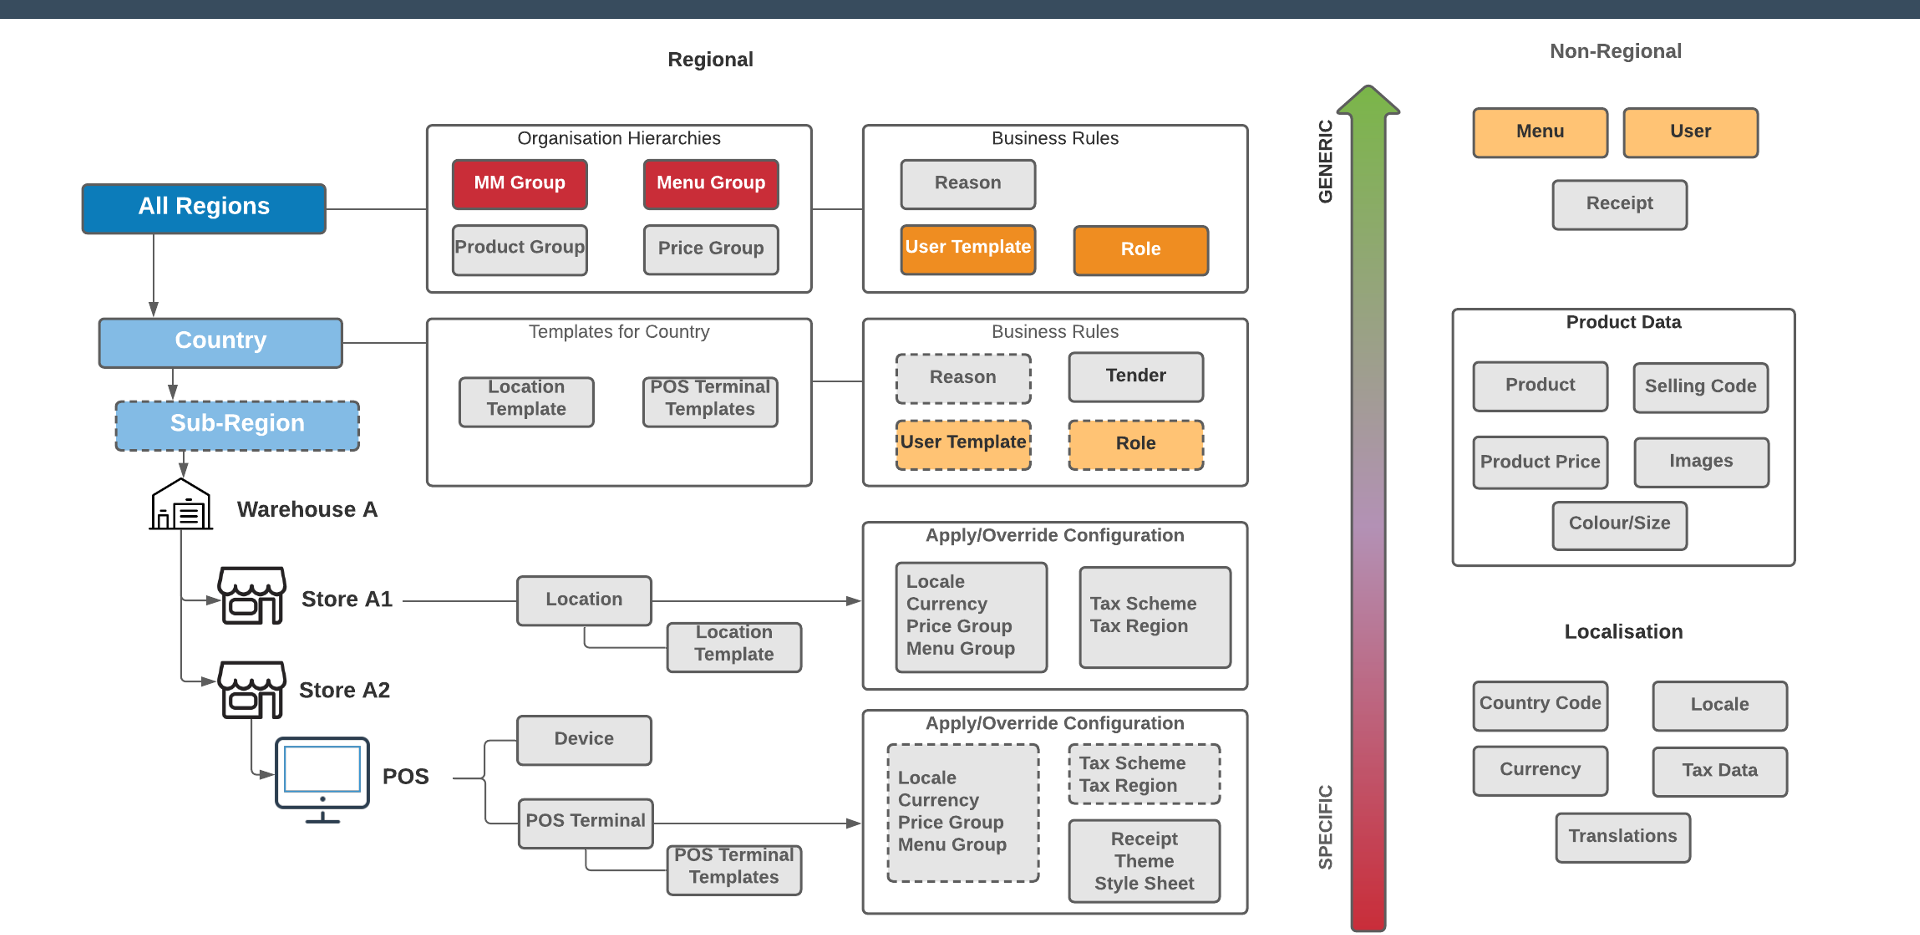
Architecture
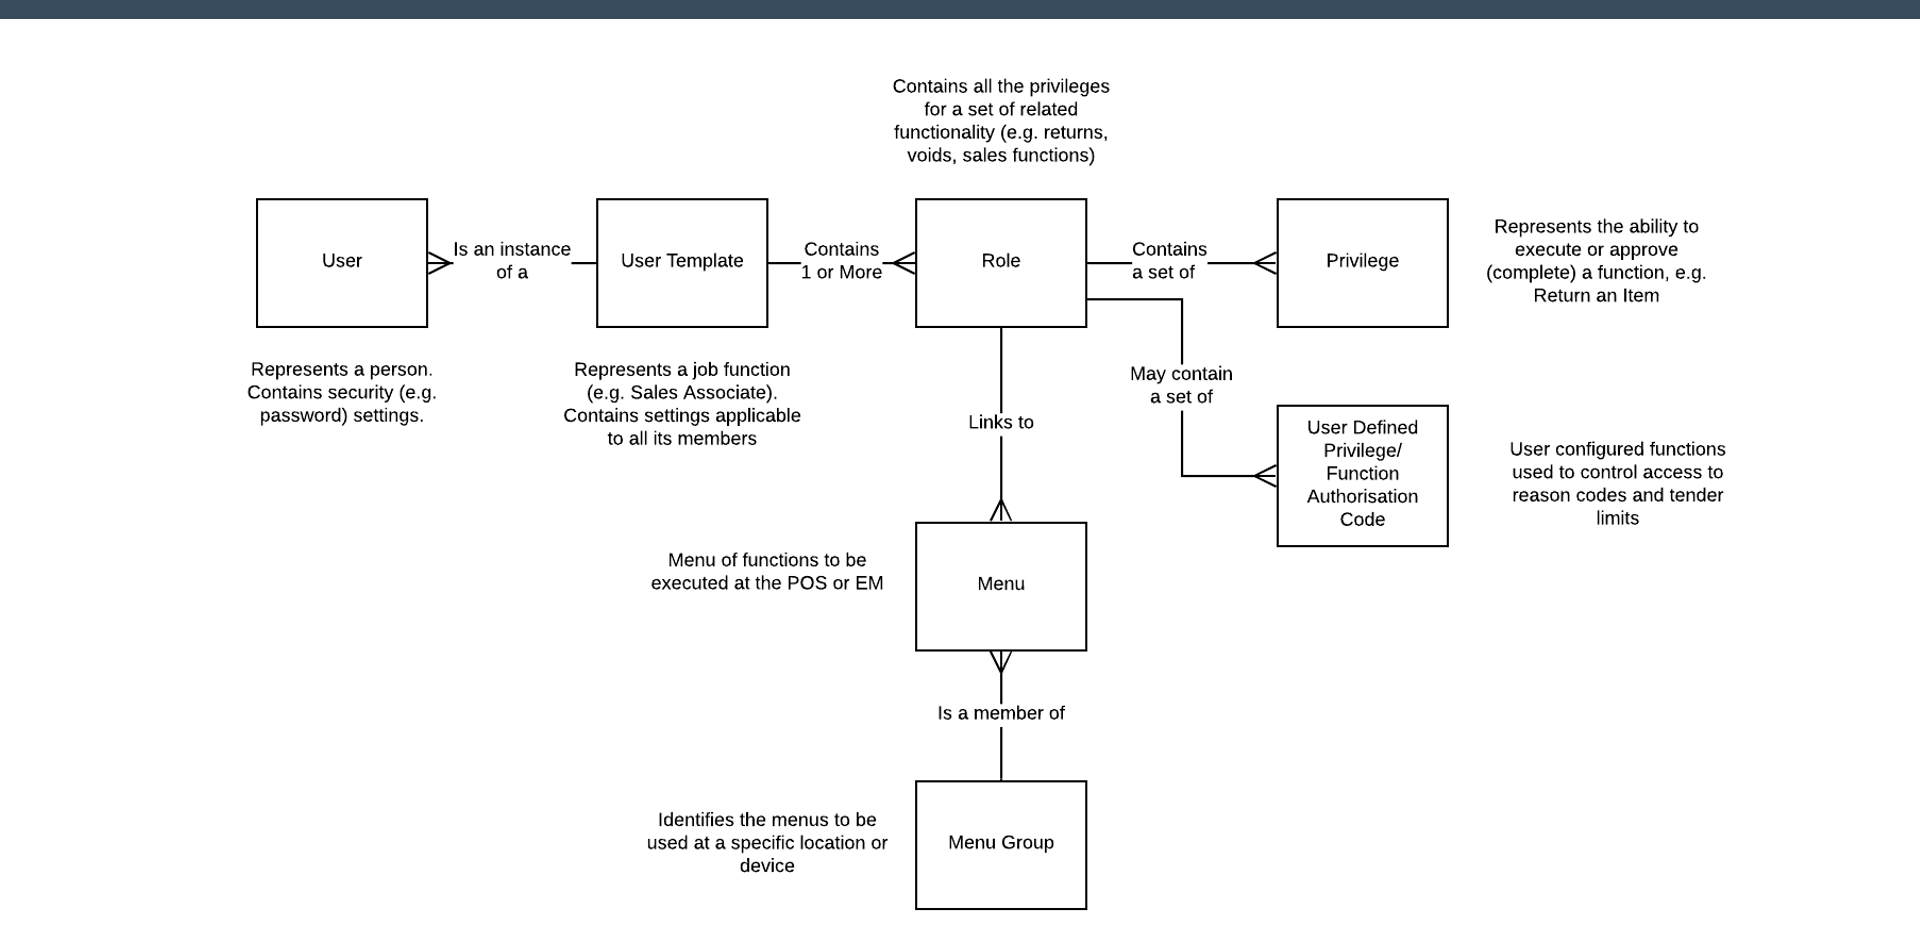
User, Role and Menu Relationships
| Entity | Description |
|---|---|
| User | Represents a person. Contains security settings such as password configuration. Is an instance of a User Template. |
| User Template | Represents a job function (e.g. Sales Associate). Contains settings applicable to all its members. Contains one or more Roles. |
| Role | Contains all the privileges for a set of related functionality (e.g. returns, voids, sales functions). Links to a Menu. |
| Privilege | Represents the ability to execute or approve a function, e.g. Return an Item. |
| User Defined Privilege / Function Authorisation Code | User-configured functions used to control access to reason codes and tender limits. |
| Menu | Menu of functions to be executed at the POS or EM. Is a member of a Menu Group. |
| Menu Group | Identifies the menus to be used at a specific location or device. |
Exercise 1 - Users, Roles and Templates
Exercise 2 - Menus
Further Reading
For additional information and further reading on User Access and Authorisation, please see the following guides:
| Document | Description |
|---|---|
| How to: Configure Users, Roles & Templates | Configuring users, user templates, roles and privileges |
| How to: Configure Menu Groups | Setting up menu groups in the organisation hierarchy |
| How to: POS Menu Layout Guide | Reference guide for POS menu layouts and structure |
| How to: Configure Menus | Configuring POS menus, buttons, and events |