POS Test Automation Training Workspace Setup
Overview
Enactor includes the ability to run automation scripts that can drive the POS behaviour
What You Will Learn
- How to setup Eclipse to support POS Automation
- How to set up the Eclipse workspace to run POS Automation using Maven scripts and MSI POS.
Pre-requisites
- Java
- Eclipse IDE
- Access to Artifactory
- Ensure Enactor POS is set up
Setup an MSI POS in Automation Mode
You will also need an installed Enactor POS (installed using the standard Enactor MSI).
Fresh Installation
Install MSI POS:
- The following installer property should be set in the
.inifile during the installationAUTOMATION_TEST_MODE=true
Existing Installation
If you have installed the Enactor POS without the property above in the .ini file, you can activate the Automation Mode using the following step:
-
Navigate to the POS installation directory (e.g. C:\enactor\pos\scripts), open the setEnv.ps script using a text editor and add the following line:
set AUTOMATION_TEST_MODE=true
The following guide has been written with Microsoft Windows as the base operating system. As a result, some references to application options and screenshots may differ.
Using the Workspace Setup
Download the following zip file WorkspaceSetup.zip and extract it into the C:\Development directory
Launch Eclipse and when prompted for a workspace enter the following path C:\Development
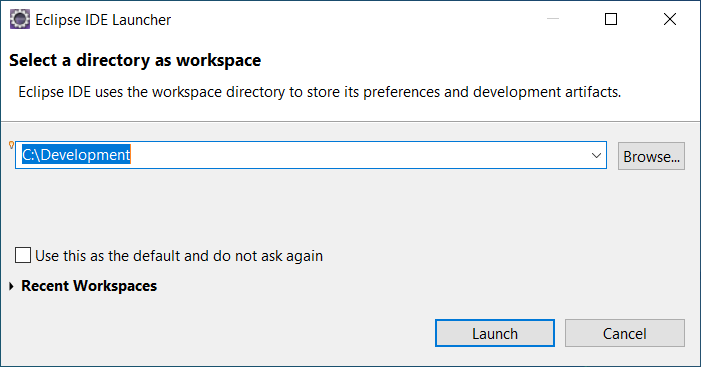
Click Launch... button
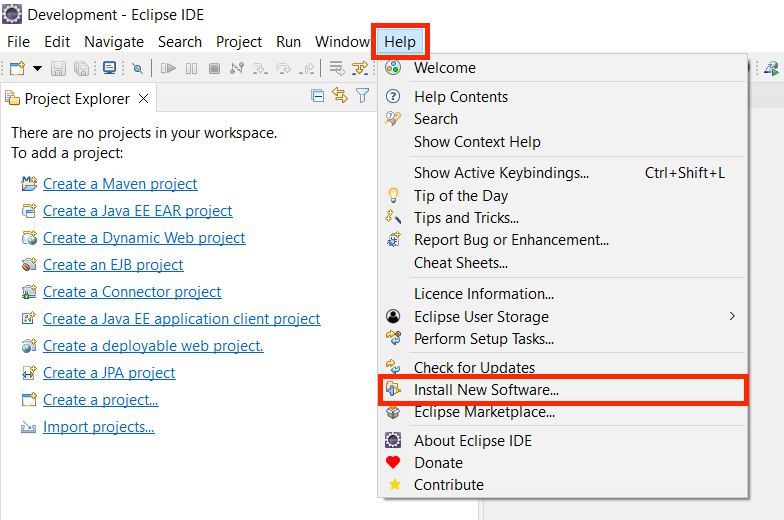
Cucumber Plugin Installation
To install the Cucumber plugin, Open the Install New Software wizard by selecting the Help Menu → Install New Software
Click Add... button.
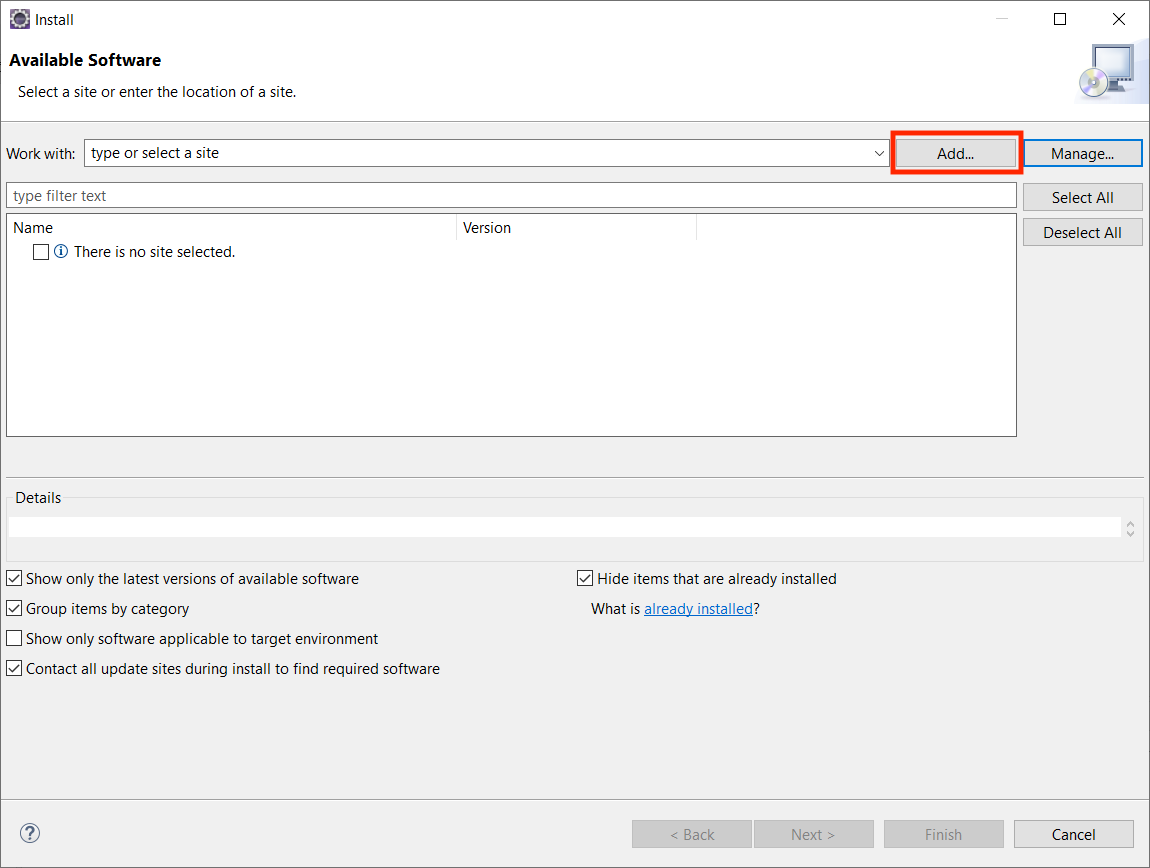
Enter the name Cucumber in the name text box
Enter the URL https://cucumber.github.io/cucumber-eclipse/update-site/main/ in the Location text box

Click Add…button
Click OK…button
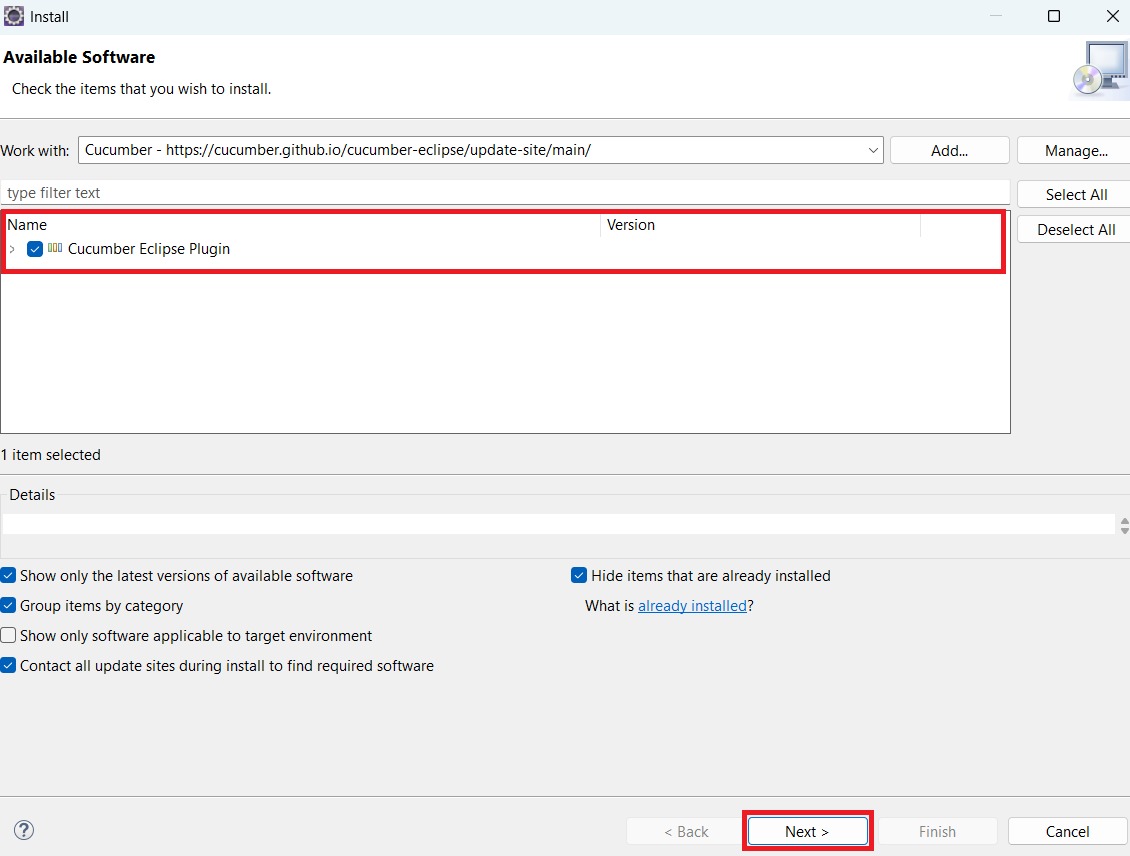
Select available plugin Cucumber Eclispe Plugin plugin and Click Next…button
Complete the installation and allow Eclipse to restart.
Setting up Maven
To use the Maven Dependency manager with Enactor you will first need to set up Maven.
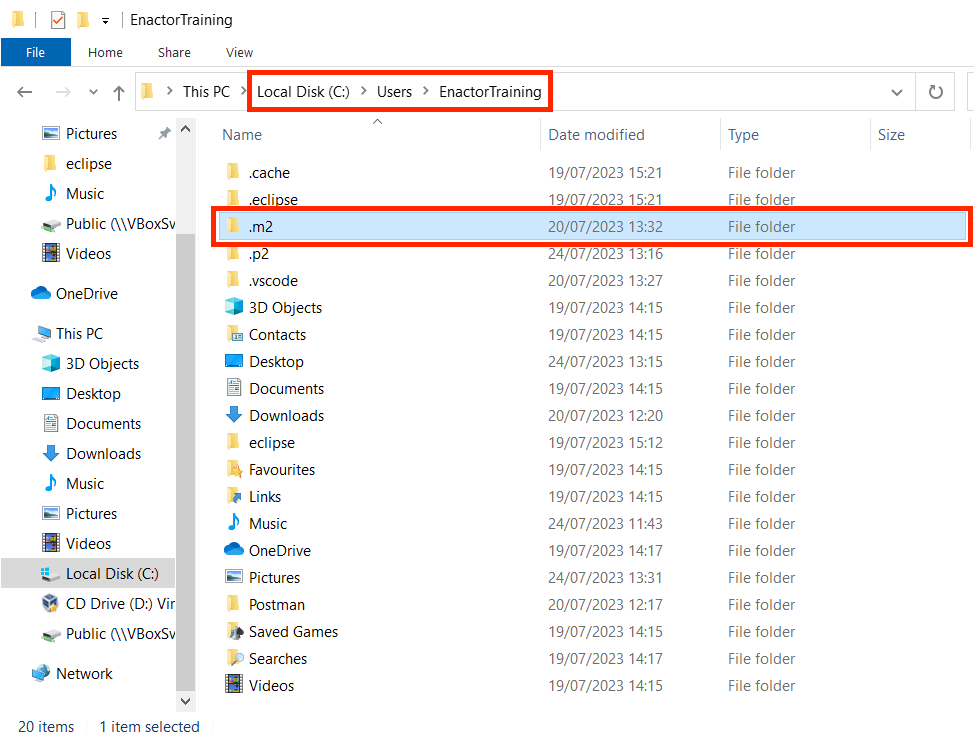
Create a new Maven respository directory named .m2 within you user account directory C:\Users\<USER_NAME>\.m2
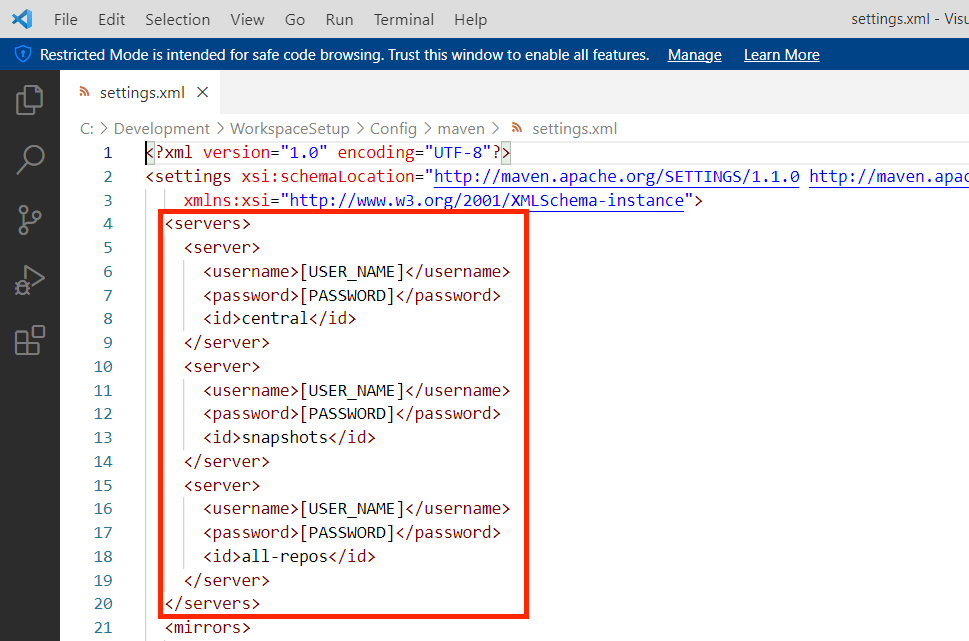
From your OS file system, copy the checkout setting.xml file found within /WorkspaceSetup/Config/maven to the newly created .m2 directory.

Edit the settings.xml file and replace the following placeholders USER_NAME and PASSWORD with your Enactor Active Directory Credentials
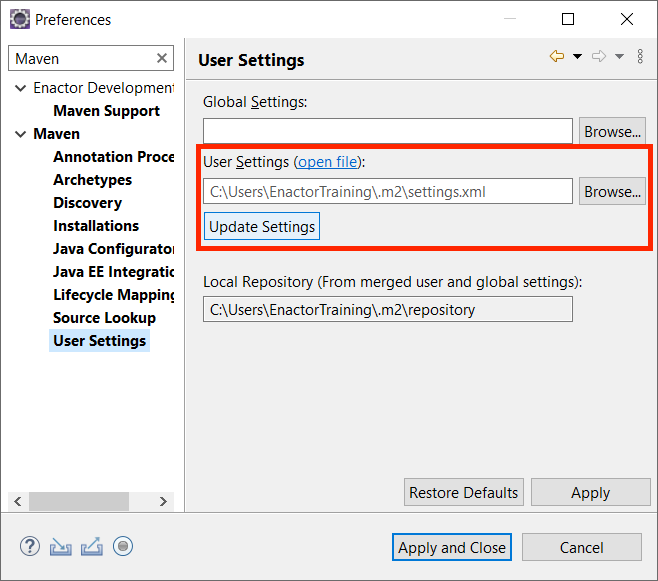
Open the Eclipse Preferences menu and enter Maven in the search bar.
Select the Maven → User Settings

Confirm that your settings.xml appears in the User Settings Field and that the local Repository Field is also populated
Switching to the Automation Workspace
Create a new Directory within the /WorkspaceSetup/ folder named AutomationWorkspace
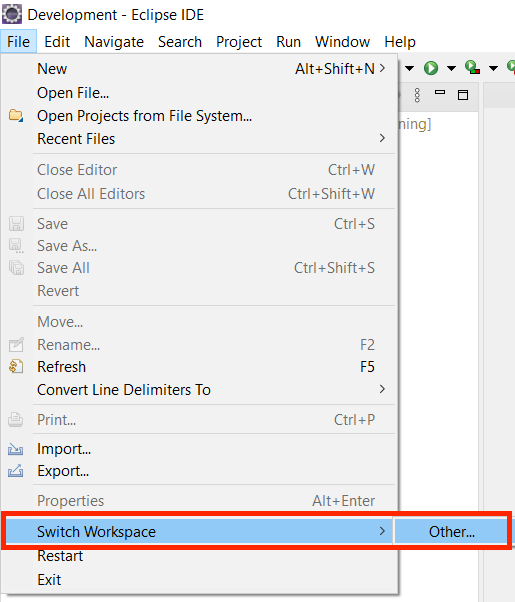
Enactor development using the To switch the Development workspace, select File menu → Switch Workspace → Other
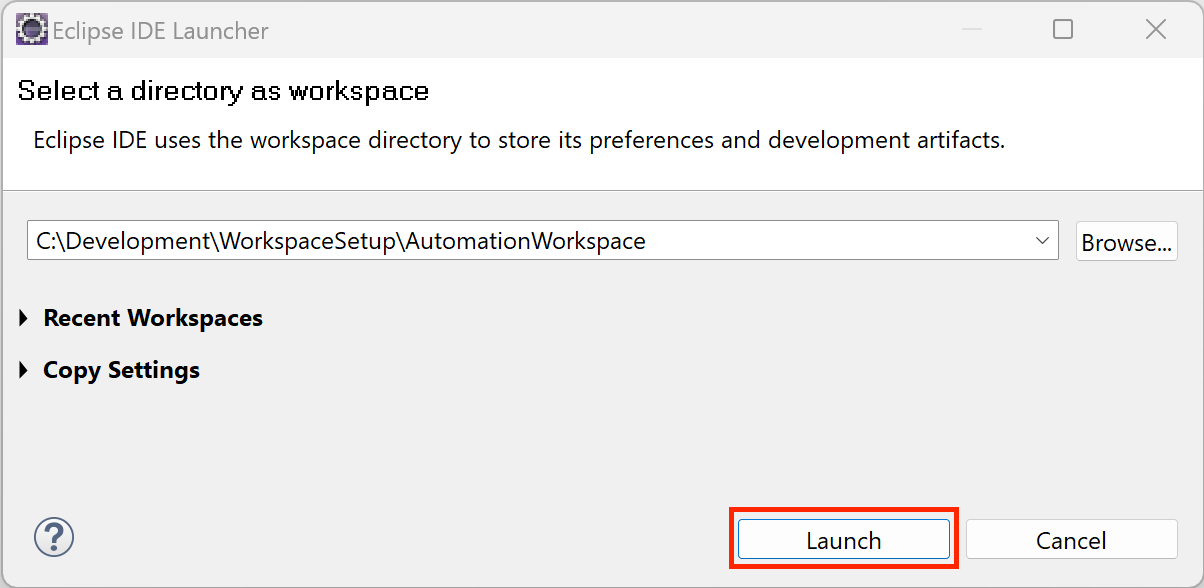
When prompted for a workspace browse to and select the /WorkspaceSetup/AutomationWorkspace directory and click the Select Folder... button
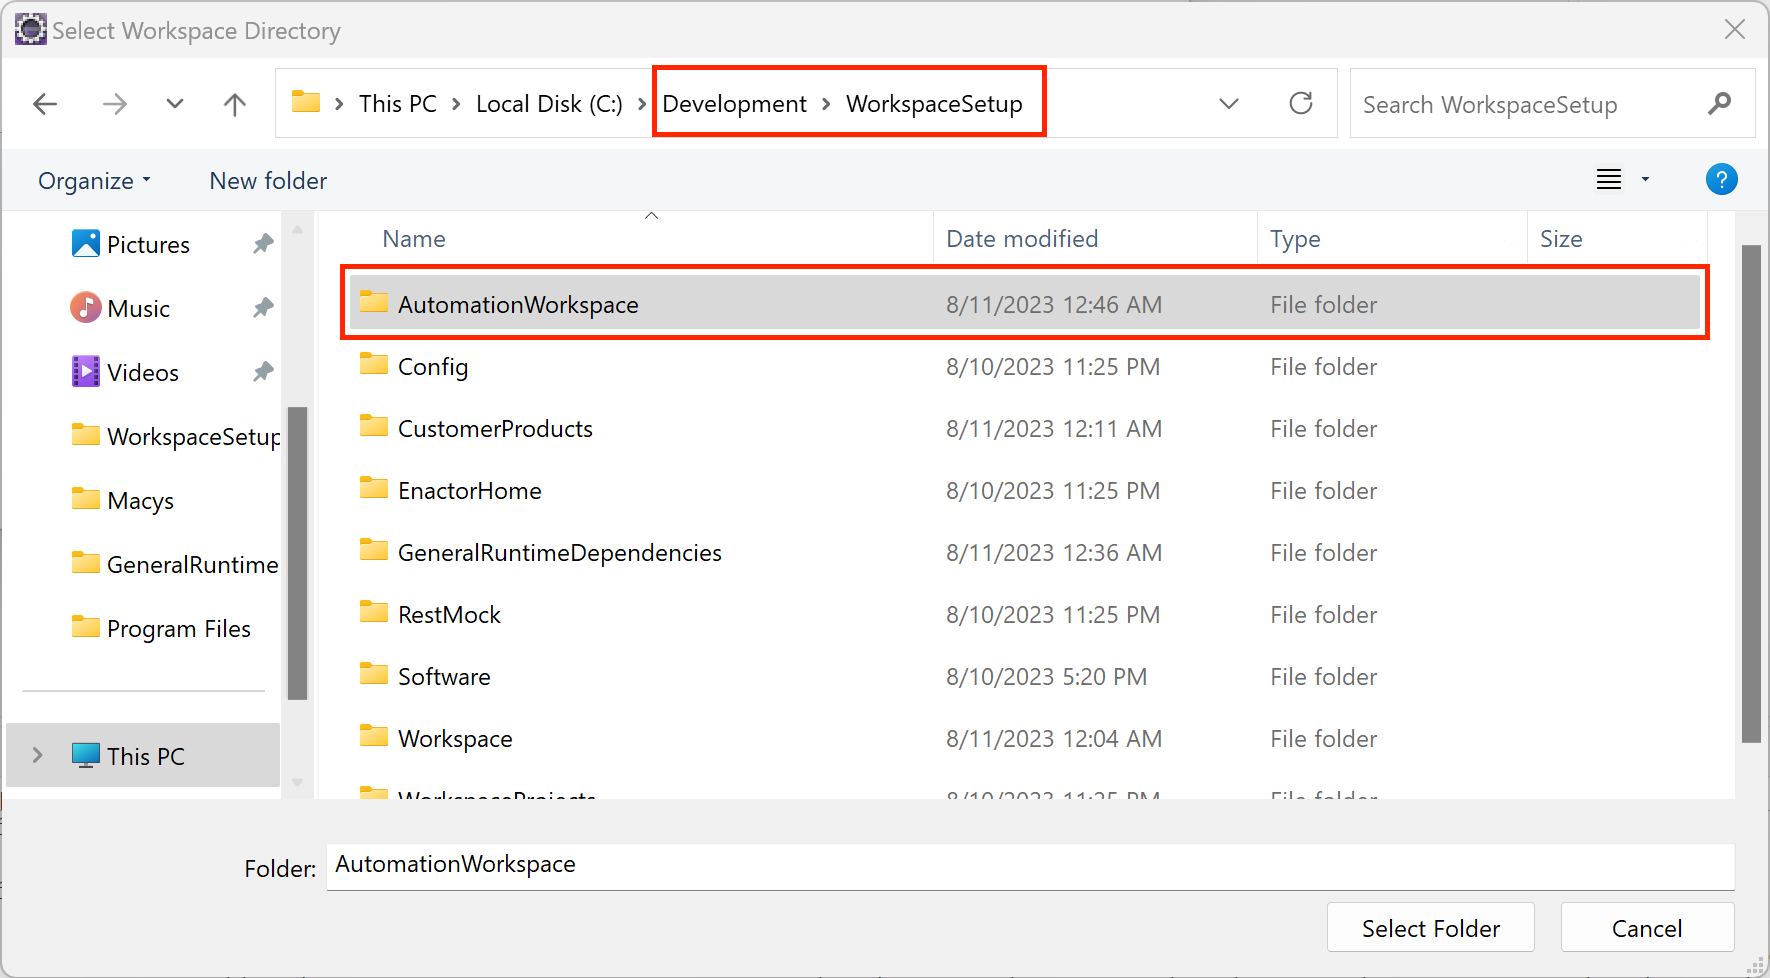
Click Launch... button
Import Config
Select File menu → Import
From the Import dialog, Expand the General collection and select Existing Projects into Workspace
Click Next... button
Update the Select root directory text box by browsing to the location of the /WorkspaceSetup/Config
Select Search for nested projects
Select the Config project
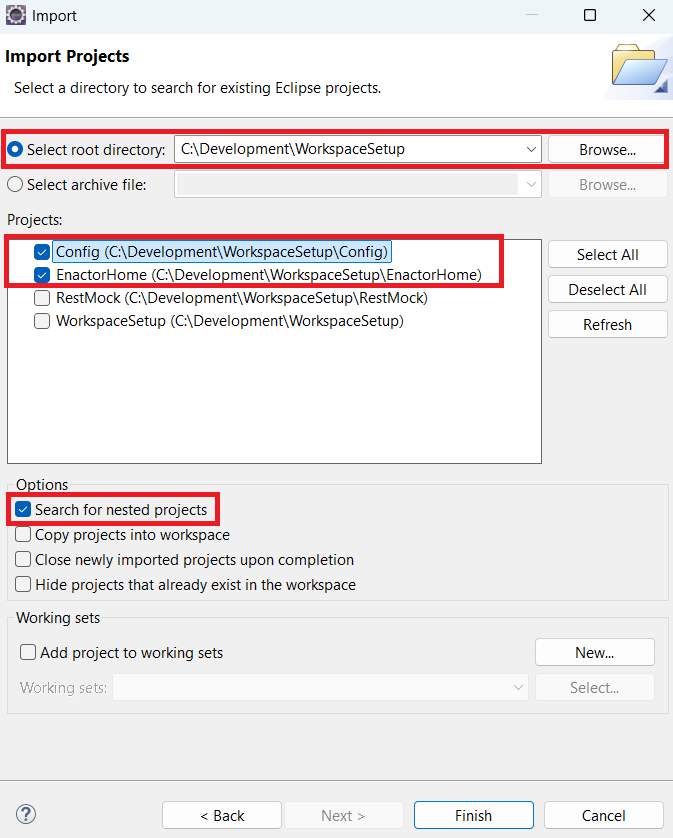
Click Finish
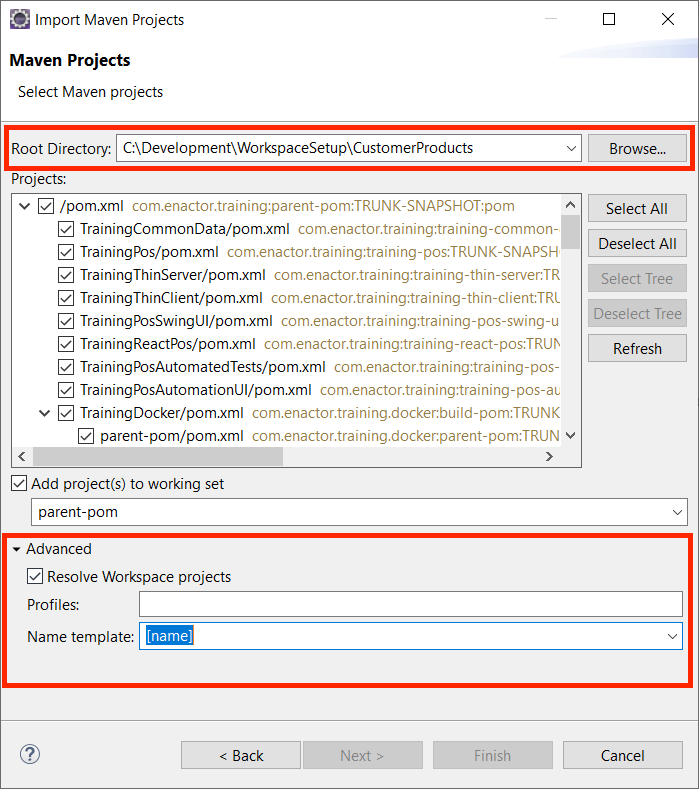
Importing The Working Projects
Select File menu → Import
From the Import dialogue, Expand the Maven collection and select Existing Maven Projects
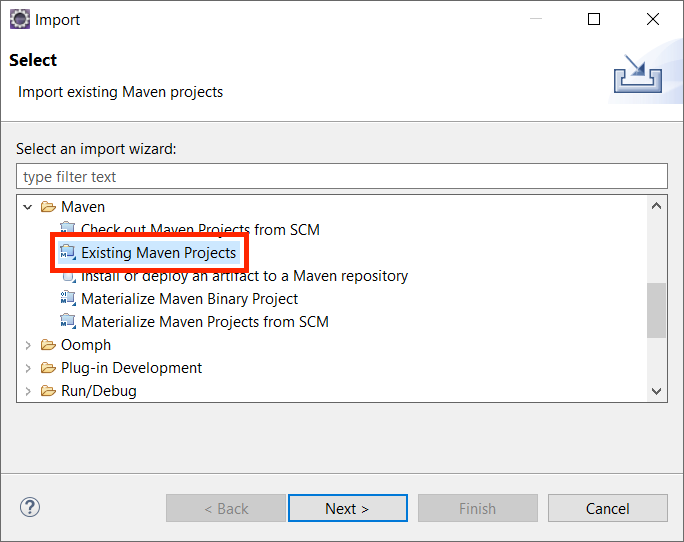
Click Next... button
Update the Root directory text box by browsing to the location of the /WorkspaceSetup/CustomerProducts
Expand Advanced and from the drop-down of Name Template select name
Click Finish... button
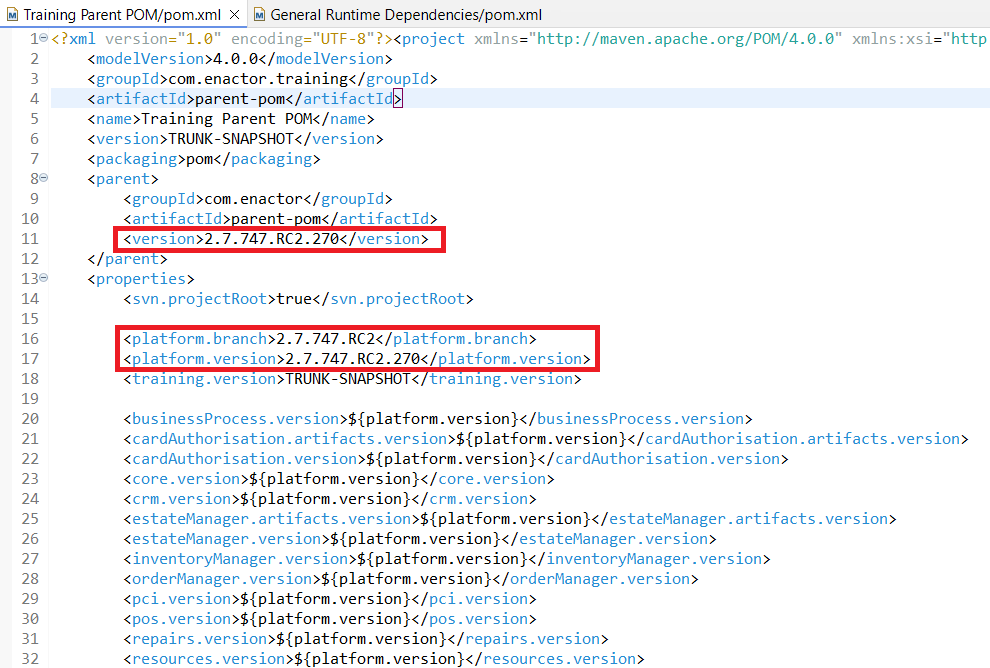
The platform version included in the training workspace setup is for the Standard Enactor Training Version.
If you need to configure the workspace for a different platform, update the platform branch and platform version appropriately.
As the projects are imported they will trigger a build phase. This can take some time.
If the projects do not build successfully or the build phase did not start, you will need to perform a manual maven install on the project Workspace Projects using the supplied MVN Install (Traning Projects).
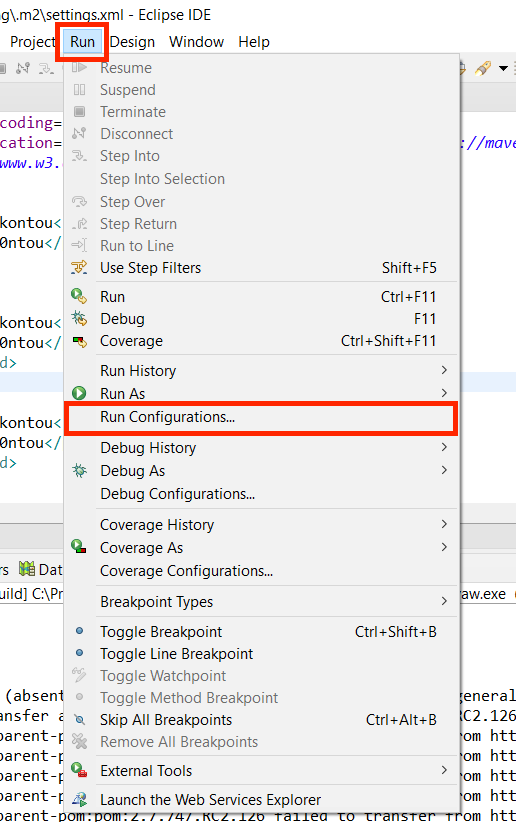
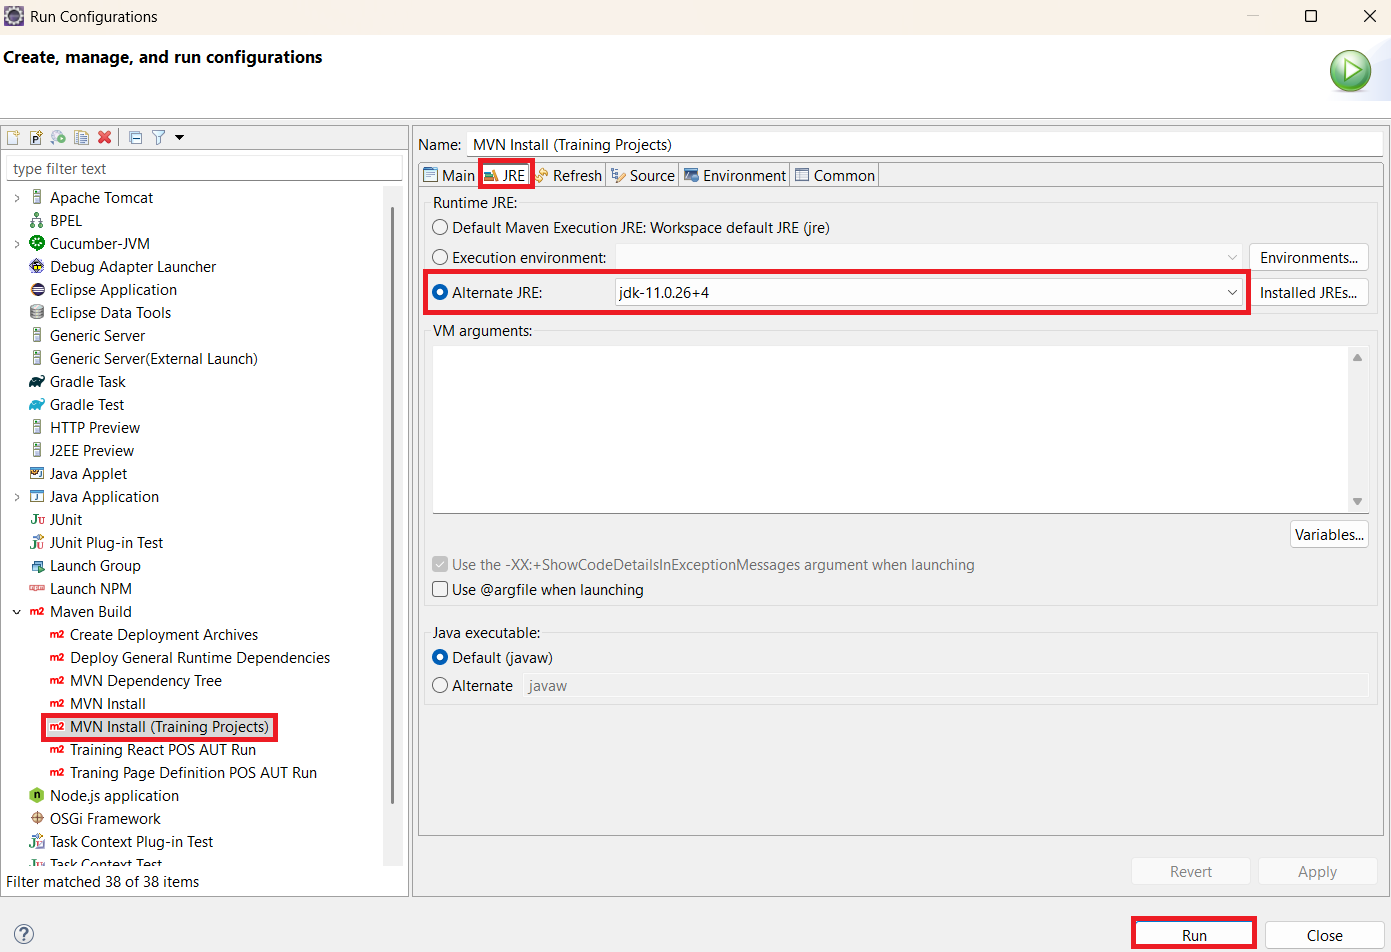
To run MVN Install (Traning Projects), Select Run menu → Run Configurations
Select MVN Install (Training Projetcs)
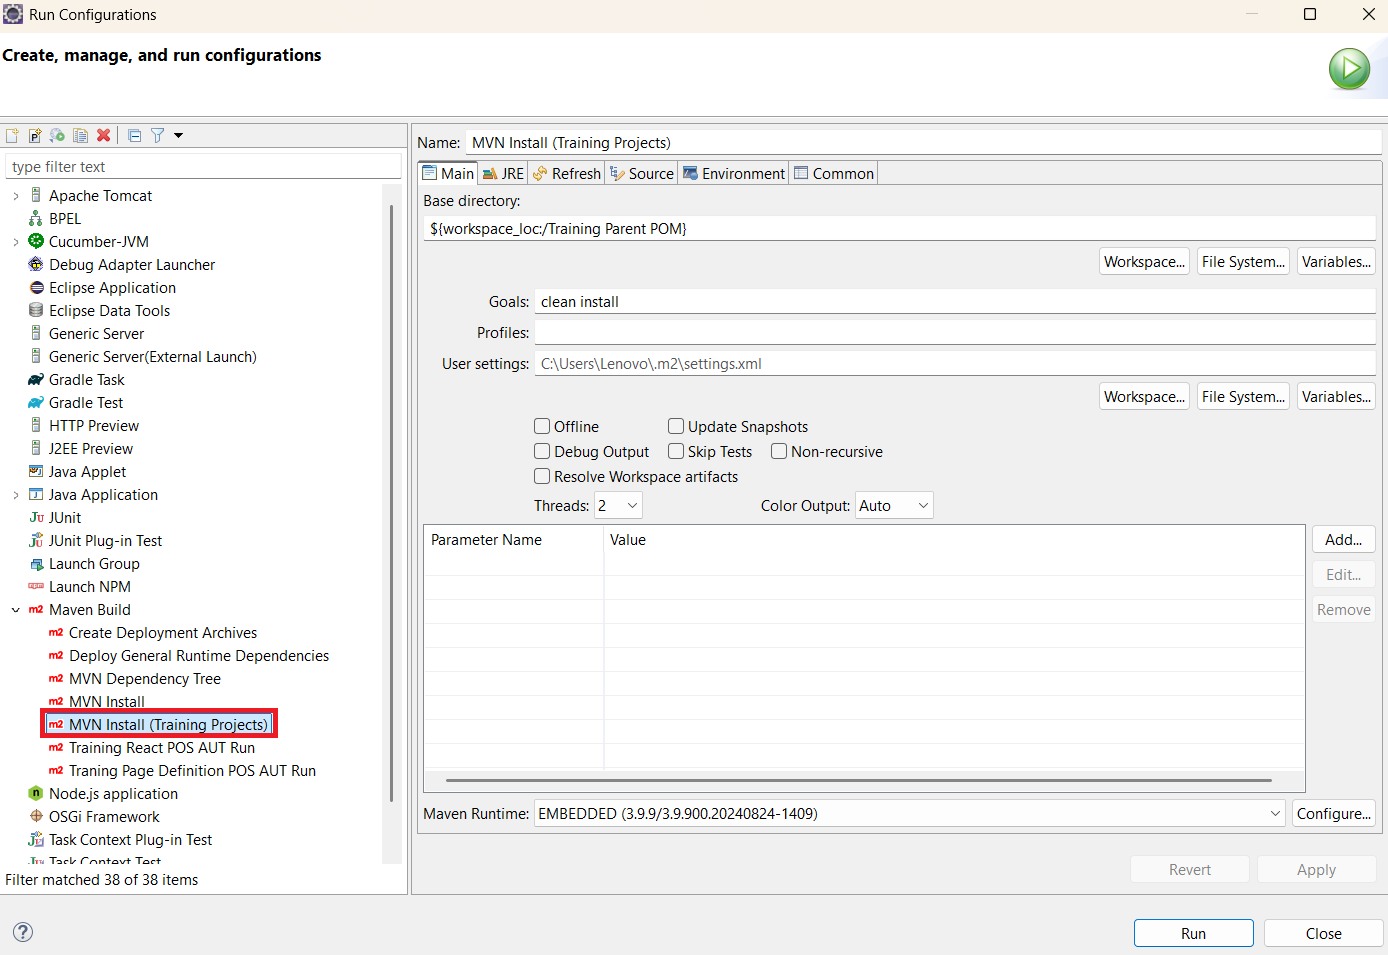
Go to the JRE section, choose Alternate JRE:, select the appropriate Java JDK, and click Run to proceed.
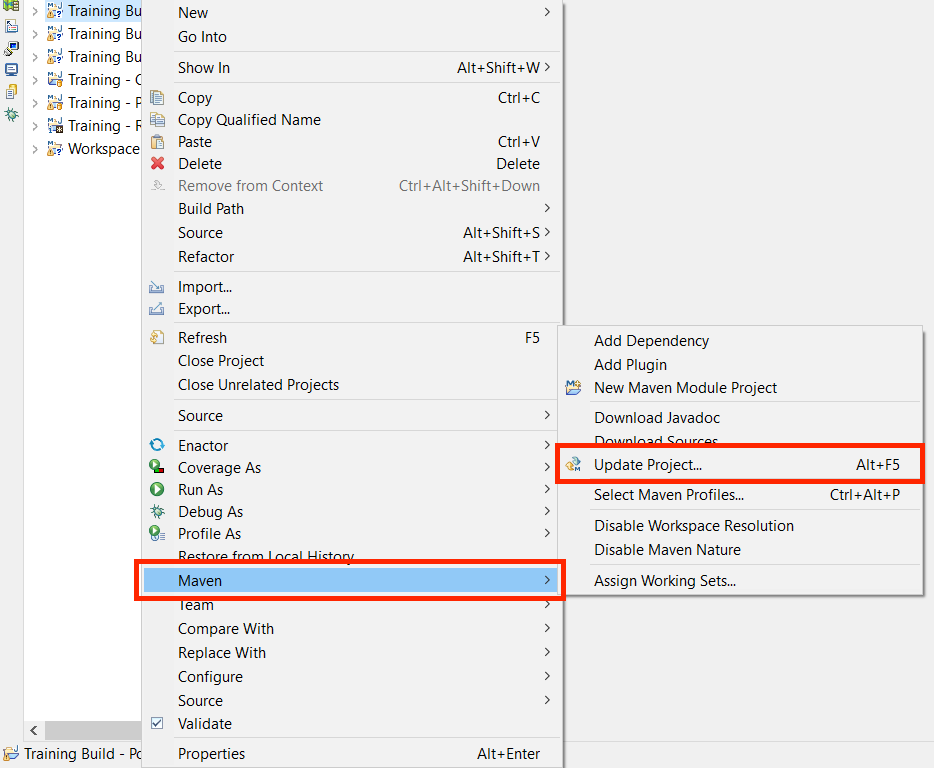
Once the build is completed right click on the WorkspaceProject → Maven → Update Projects...
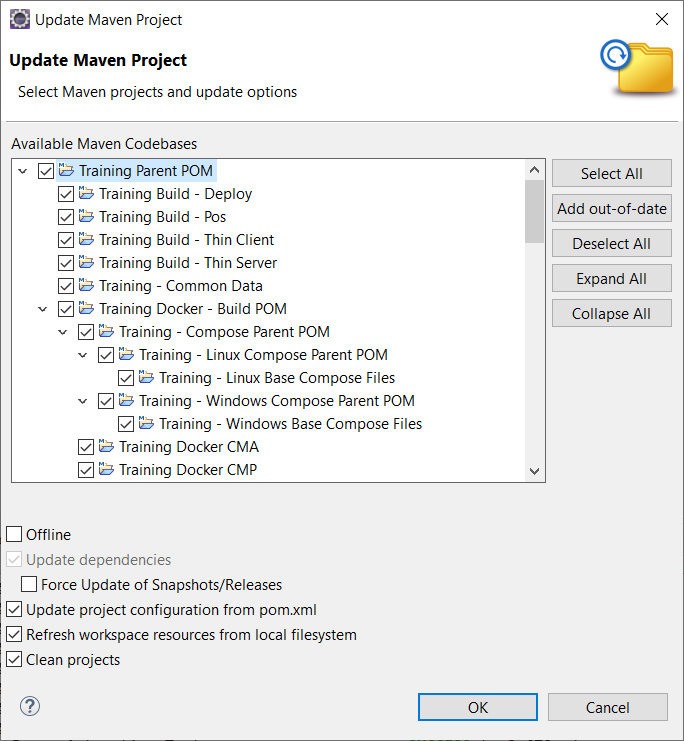
Click Select All... button
Click OK... button
Import General Runtime Dependencies Project
Select File menu → Import
From the Import dialogue, Expand the Maven collection and select Existing Maven Projects
Click Next... button
Update the Root directory text box by browsing to the location of the /WorkspaceSetup/GeneralRuntimeDependencies
Expand Advanced and from the drop-down of Name Template select name
Click Finish... button
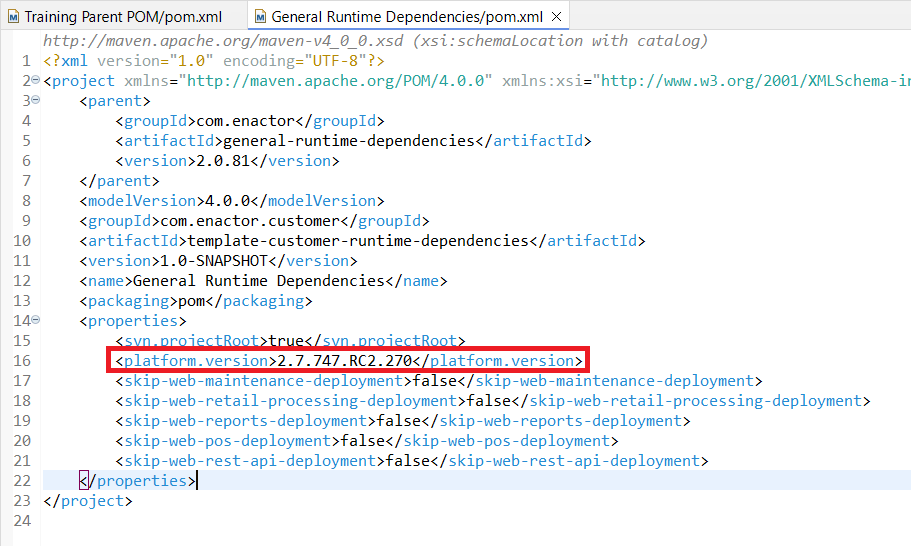
The platform version included in the General Runtime Dependencies project is for the Standard Enactor Training Version.
If you need to configure the workspace for a different platform, update the platform version appropriately.
Deploy General Runtime Dependencies
The runtime Enactor application requires a few additional dependencies to be made available to it such as JDBC connection drivers, licence binaries etc
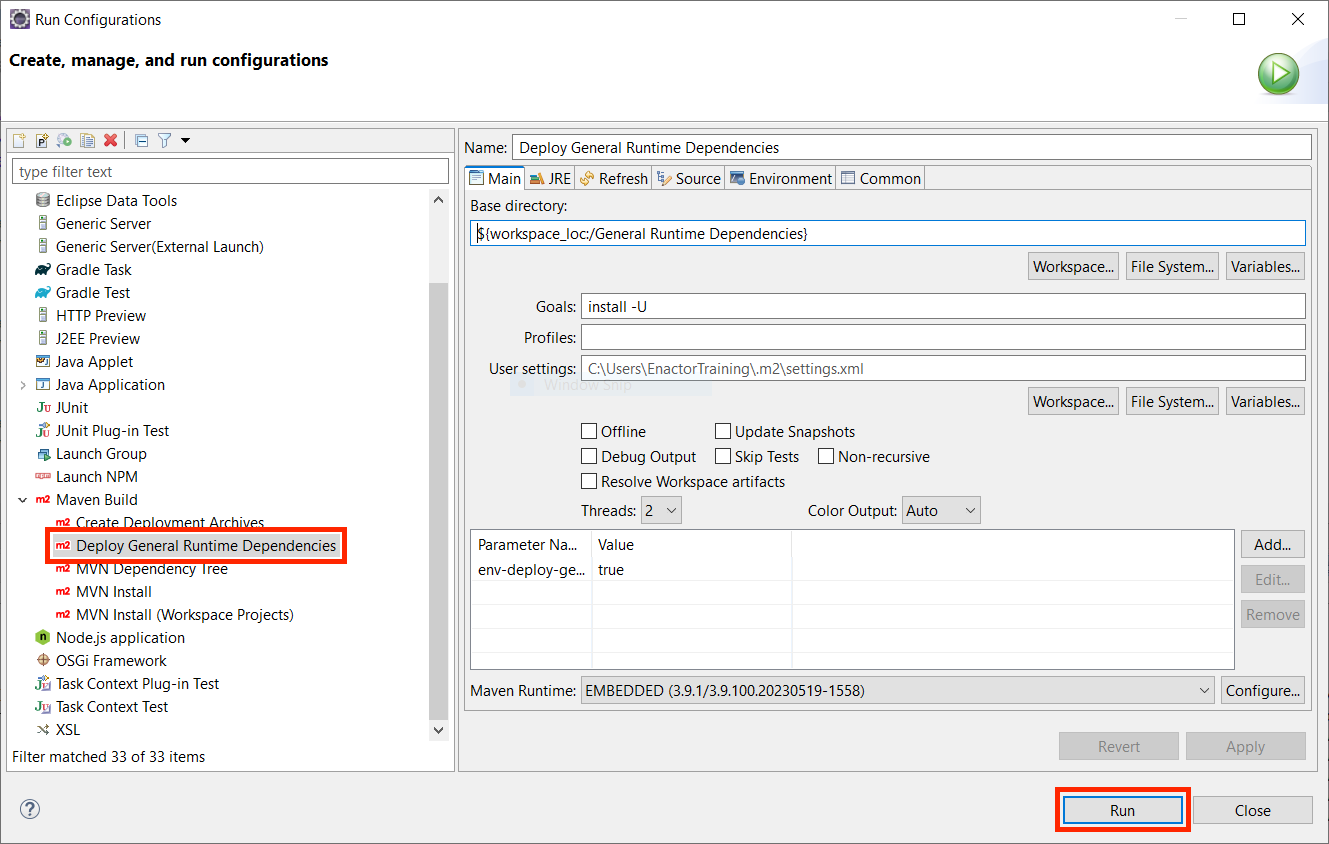
Select Run menu → Run Configurations
From the Run Configurations dialog, expand the Maven Build section and select Deploy General Runtime Dependencies
Go to the JRE section, choose Alternate JRE:, select the appropriate Java JDK.
Click Run... button
When complete you will have a directory structure similar to the following within C:\Developemnt\WorkspaceSetup
."C:\Developemnt"
`-- "WorkspaceSetup"
    |-- "Configuration"
    |-- "EnactorHome"
        |-- "estateManager"
            |-- "BPELProcesses"
                |-- "deploy"
                    activity-flow-compensation.par
                    generic-activity-flow.par
        |-- "licence"
            licenceManager_x64.dll
        |-- "shared"
            licence-helper.jar
            mariadb-java-client-2.7.9.jar
            mysql-connector-java-5.1.49.jar
            mysql-connector-java-8.0.33.jar
    |-- "Software"
        |-- "axis2"
        |-- "coreAutomation"
        |-- "server"
            |-- "WebCore"
            |-- "WebMaintenance"
            |-- "WebPos"
            |-- "WebReports"
            |-- "WebRetailProcessing"
        |-- tomcat
Adding Core Automation Jar to the POS
For the AUT Launcher to successfully run you will need to update the classpath of your POS Application
Copy the Jar file found at Development\WorkspaceSetup\Software\coreAutomation and place it into the custom-lib directory of your POS Application Enactor\pos\custom-lib
Running a feature
We can run Automation Tests using either Cucumber or Maven. In both cases, ensure the automation parameters are populated correctly.
Run Using Cucumber
To run a feture test, a convenient launch has been provided TrainingFunc1.feature.
Refer to Adding Enactor Step Definition Filters to access Enactor behavior-driven development steps within feature files.
To correctly set up the parameters in the launcher.properties file, refer to Update Parameters.
To run the TrainingFunc1.feature feature, Select Run menu → Run Configurations
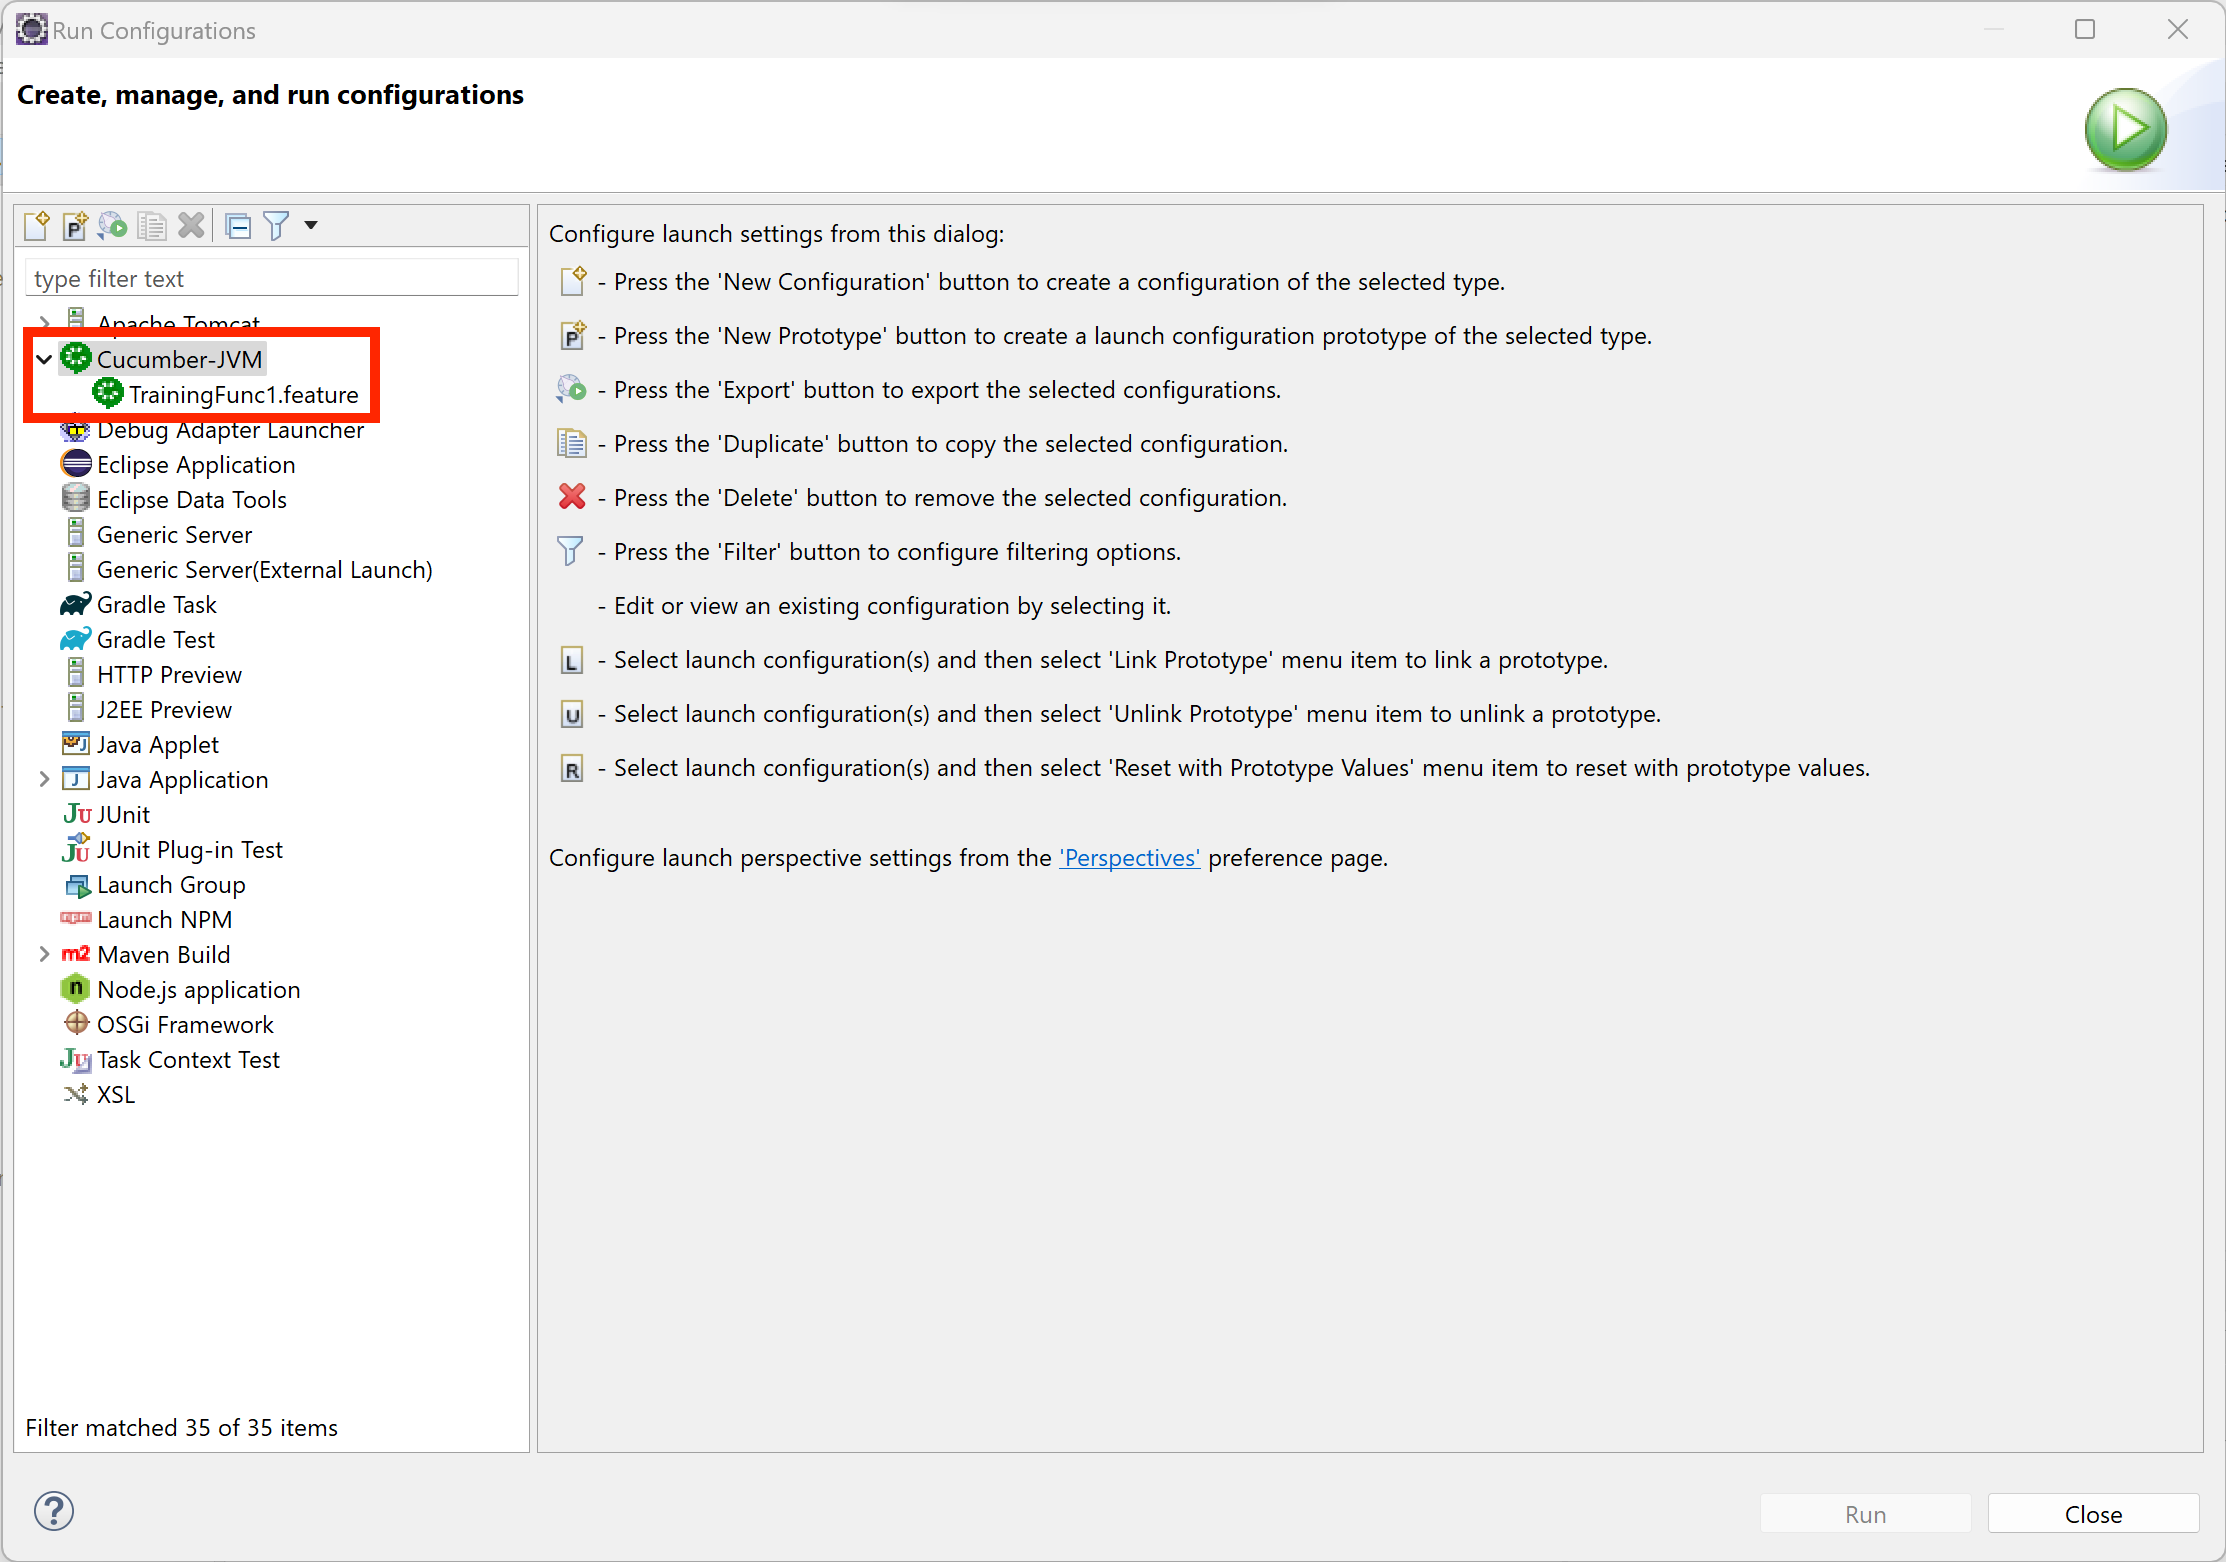
Click Run... button
Run Using Maven
To run a feature you should have a Maven Run Configuration. ( For more details refer How to run tests using Maven)
Parameters should be changed appropriately. You can refer Launch Configurations and update accordingly.

Go to Run menu → Run Configurations → Maven Build and select Training React POS AUT Run
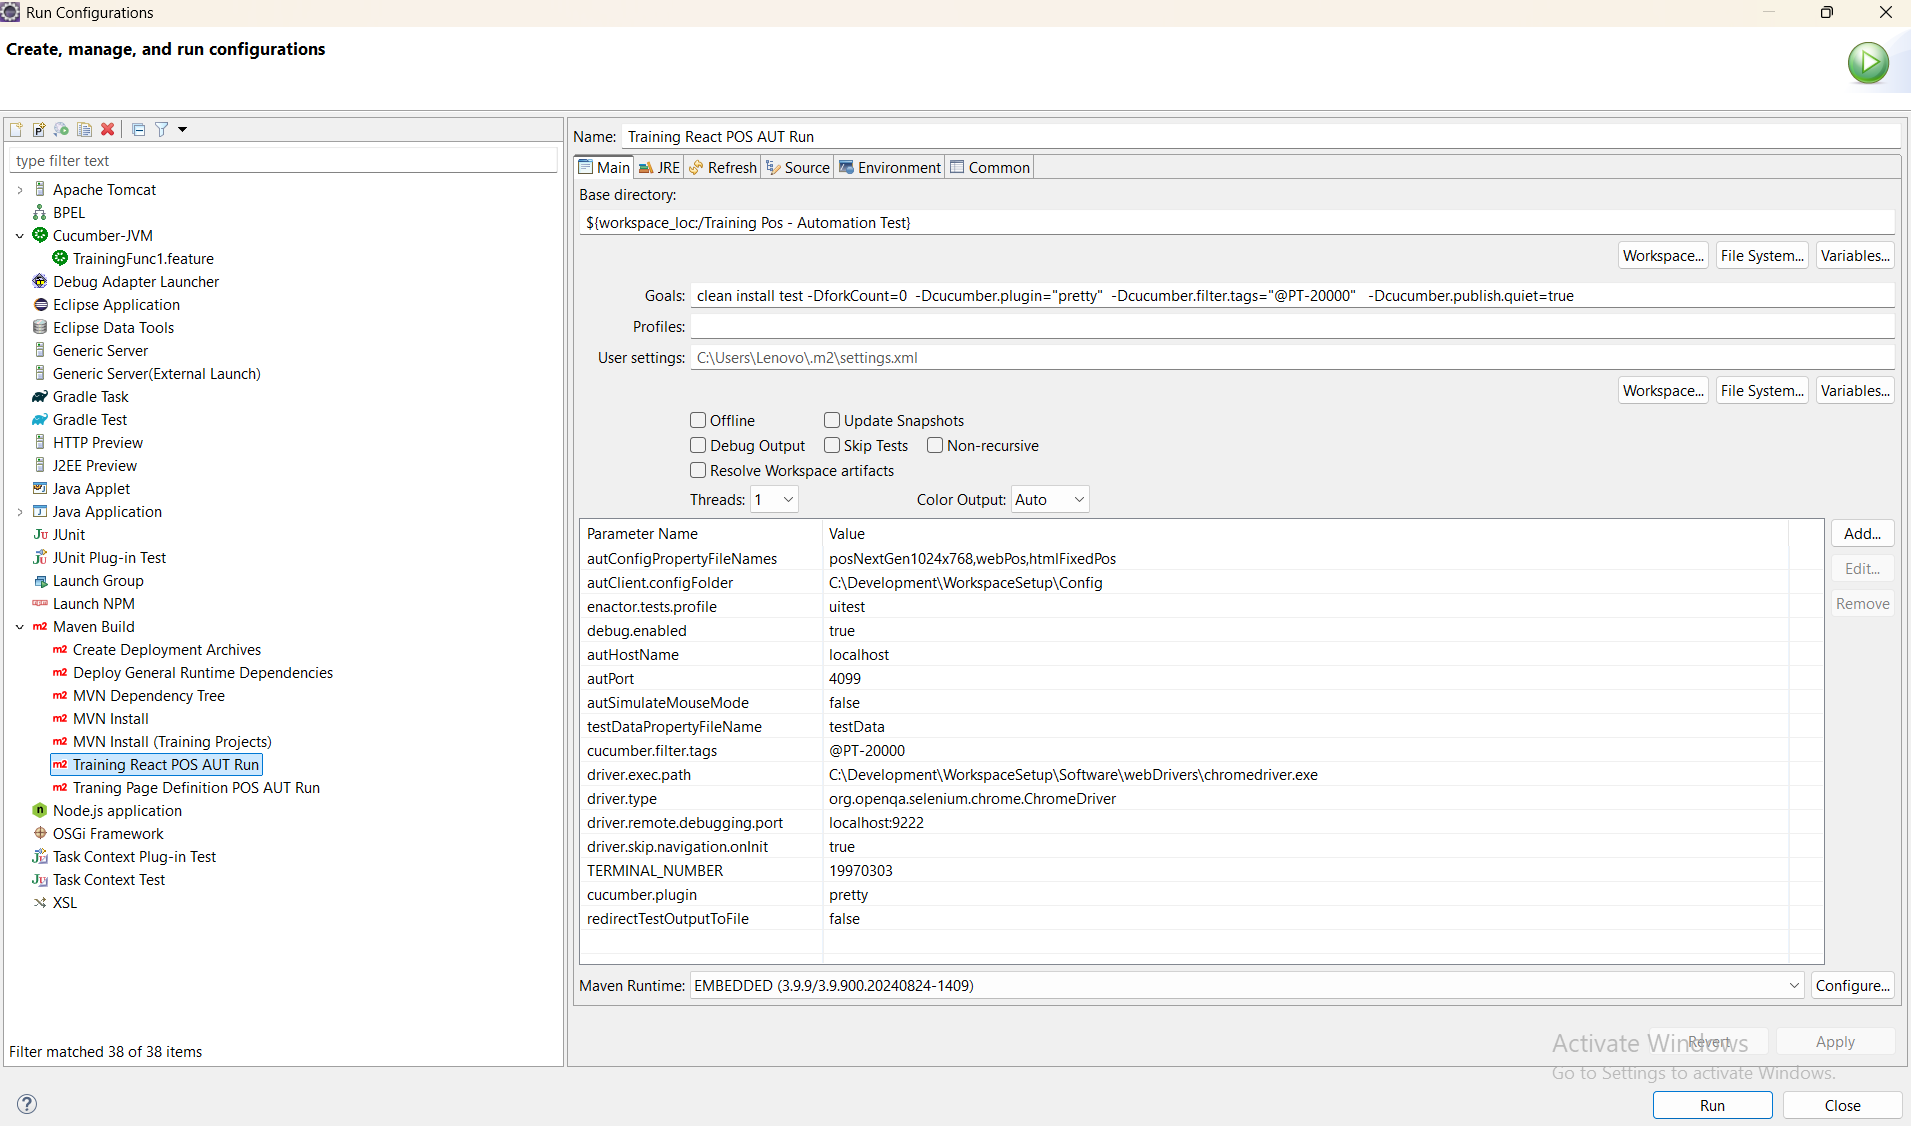
Click Run... button
Property Changes
- If you are running automation tests on React POS using the Maven launcher, ensure that the autConfigPropertyFileNames property includes posNextGen1024x768, webPos, and htmlFixedPos.

- Similarly, when using Cucumber, set autConfigPropertyFileName to posNextGen1024x768,webPos,htmlFixedPos.

- Update username and password (POS login) in testData.properties
Development\WorkspaceSetup\CustomerProducts\TrainingPosAutomationTests\test\testData.properties