GCash Payment Integration
Overview
This document will guide you through integrating GCash a payment service
What You Will Learn
- Configuring Web Service endpoints
- Background Application Process execution
- Calling a resfull service
- Updating a given TenderItem (BasketItem) to then be added to the transaction
Pre-requisites
In order to continue with this document, you need to have completed - Custom Payment Service
Appropriate Keys private and public are required to continue with this document
Configuration
Ensure you have started you Estate Manager
From the WorkspaceSetup\TrainingResources\CustomPaymentService\Configuration directory, import all available configuration files
Keys
Ensure you place both your private and public pem files into the following directory WorkspaceSetup\EnactorHome\pos\keys
The keys directory is referenced from the previously improted Account Credencials
Service Messages
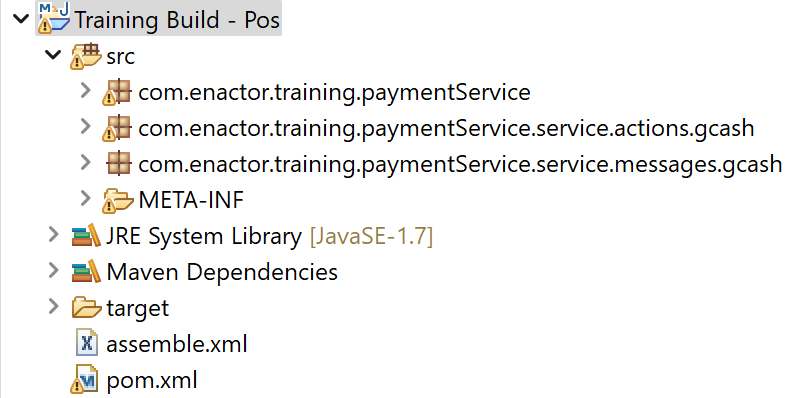
Create a new java package named com.enactor.training
From the WorkspaceSetup\TrainingResources\CustomPaymentService\GCash\PackageInfo directory, copy the PackageInfo.java java class into your newly created package
Create a new java package named com.enactor.training.paymentService.service.messages.gcash
From the WorkspaceSetup\TrainingResources\CustomPaymentService\GCash\Service Messages Classes directory, copy the entire contents your newly created package
Create a new java package named com.enactor.training.paymentService.service.actions.gcash
From the WorkspaceSetup\TrainingResources\CustomPaymentService\GCash\Service Actions directory, copy the entire contents your newly created package
Open the Package.xml file of the Training Pos project
select the Source tab
Copy the following code block in anywhere within the <core:package>
<core:packageEntitiesDef defaultNamespace="http://www.enactor.com/retail">
  <core:packageEntityDef abstract="false" class="com.enactor.training.paymentService.service.messages.gcash.StatusDetail" baseNamespace="http://www.enactor.com/retail" baseName="statusDetail" typeName="StatusDetail" name="statusDetail"/>
  <core:packageEntityDef abstract="false" class="com.enactor.training.paymentService.service.messages.gcash.TimeDetail" baseNamespace="http://www.enactor.com/retail" baseName="timeDetail" typeName="TimeDetail" name="timeDetail"/>
  <core:packageEntityDef abstract="false" class="com.enactor.training.paymentService.service.messages.gcash.ResultInfo" baseNamespace="http://www.enactor.com/retail" baseName="resultInfo" typeName="ResultInfo" name="resultInfo"/>
  <core:packageEntityDef abstract="false" class="com.enactor.training.paymentService.service.messages.gcash.CurrencyAmount" baseNamespace="http://www.enactor.com/retail" baseName="currencyAmount" typeName="CurrencyAmount" name="currencyAmount"/>
  <core:packageEntityDef abstract="false" class="com.enactor.training.paymentService.service.messages.gcash.PayOptionInfo" baseNamespace="http://www.enactor.com/retail" baseName="payOptionInfo" typeName="PayOptionInfo" name="payOptionInfo"/>
  <core:packageEntityDef abstract="false" class="com.enactor.training.paymentService.service.messages.gcash.PaymentView" baseNamespace="http://www.enactor.com/retail" baseName="paymentView" typeName="PaymentView" name="paymentView"/>
  <core:packageEntityDef abstract="false" class="com.enactor.training.paymentService.service.messages.gcash.User" baseNamespace="http://www.enactor.com/retail" baseName="user" typeName="User" name="user"/>
  <core:packageEntityDef abstract="false" class="com.enactor.training.paymentService.service.messages.gcash.AmountDetail" baseNamespace="http://www.enactor.com/retail" baseName="amountDetail" typeName="AmountDetail" name="amountDetail"/>
  <core:packageEntityDef abstract="false" class="com.enactor.training.paymentService.service.messages.gcash.MessageBody" baseNamespace="http://www.enactor.com/retail" baseName="messageBody" typeName="MessageBody" name="messageBody"/>
  <core:packageEntityDef abstract="false" class="com.enactor.training.paymentService.service.messages.gcash.MessageHead" baseNamespace="http://www.enactor.com/retail" baseName="messageHead" typeName="MessageHead" name="messageHead"/>
  <core:packageEntityDef abstract="false" class="com.enactor.training.paymentService.service.messages.gcash.MessageContent" baseNamespace="http://www.enactor.com/retail" baseName="messageContent" typeName="MessageContent" name="messageContent"/>
  <core:packageEntityDef abstract="false" class="com.enactor.training.paymentService.service.messages.gcash.ResponseMessage" baseNamespace="http://www.enactor.com/retail" baseName="responseMessage" typeName="ResponseMessage" name="responseMessage"/>
  <core:packageEntityDef abstract="false" class="com.enactor.training.paymentService.service.messages.gcash.EnvInfo" baseNamespace="http://www.enactor.com/retail" baseName="envInfo" typeName="EnvInfo" name="envInfo"/>
  <core:packageEntityDef abstract="false" class="com.enactor.training.paymentService.service.messages.gcash.Order" baseNamespace="http://www.enactor.com/retail" baseName="order" typeName="Order" name="order"/>
  <core:packageEntityDef abstract="false" class="com.enactor.training.paymentService.service.messages.gcash.ScannerInfo" baseNamespace="http://www.enactor.com/retail" baseName="scannerInfo" typeName="ScannerInfo" name="scannerInfo"/>
  <core:packageEntityDef abstract="false" class="com.enactor.training.paymentService.service.messages.gcash.ShopInfo" baseNamespace="http://www.enactor.com/retail" baseName="shopInfo" typeName="ShopInfo" name="shopInfo"/>
</core:packageEntitiesDef>
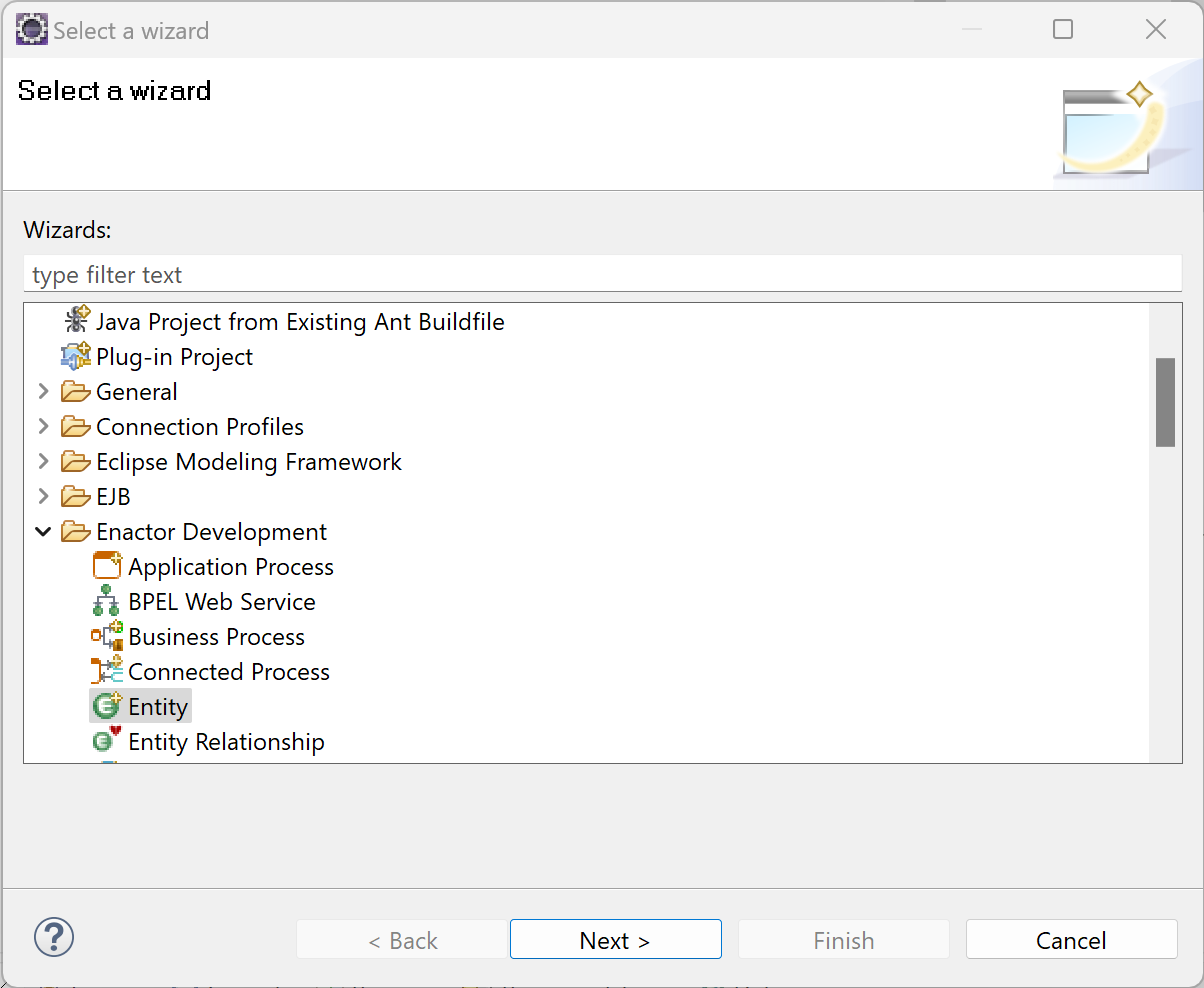
Entity Wizard
Right click on the java package com.enactor.training.paymentService.service.messages.gcash and select New → Other
From the Enactor Development Group, select Entity and click Next
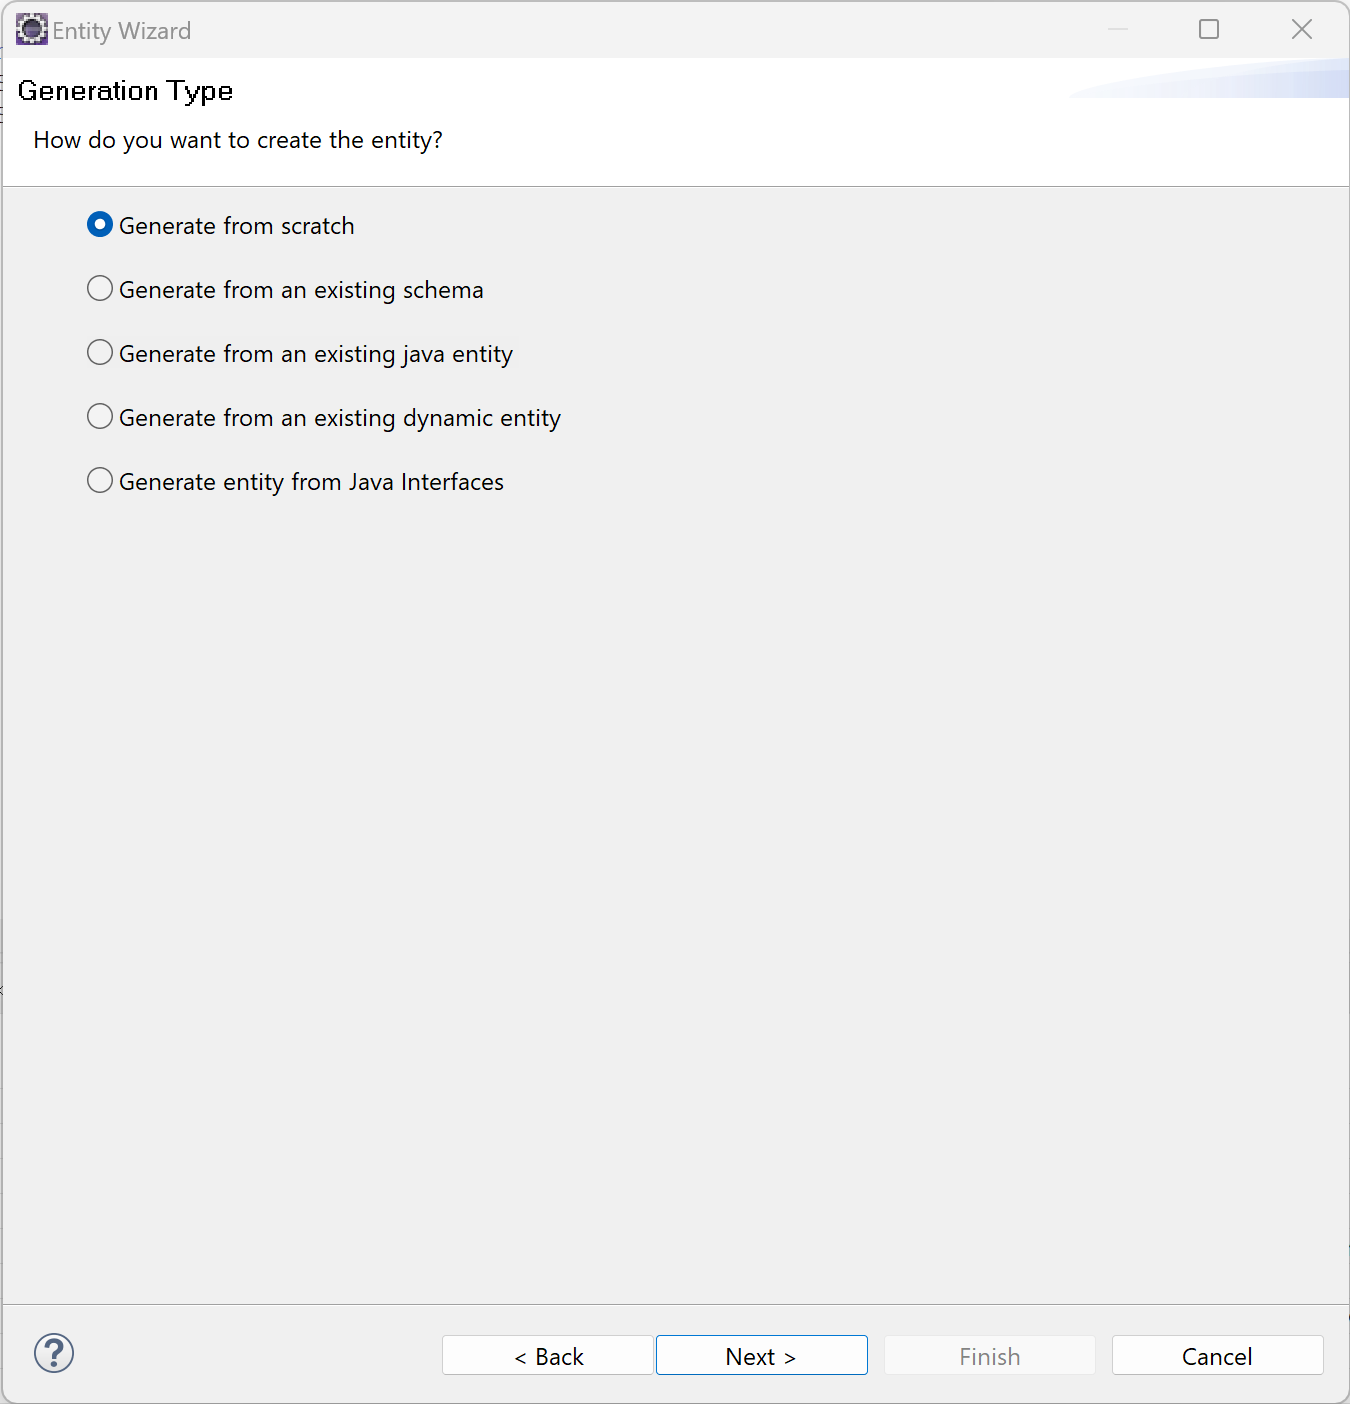
Form the Entity Wizard dialog, ensure Generate from scratch is selected
Click Next
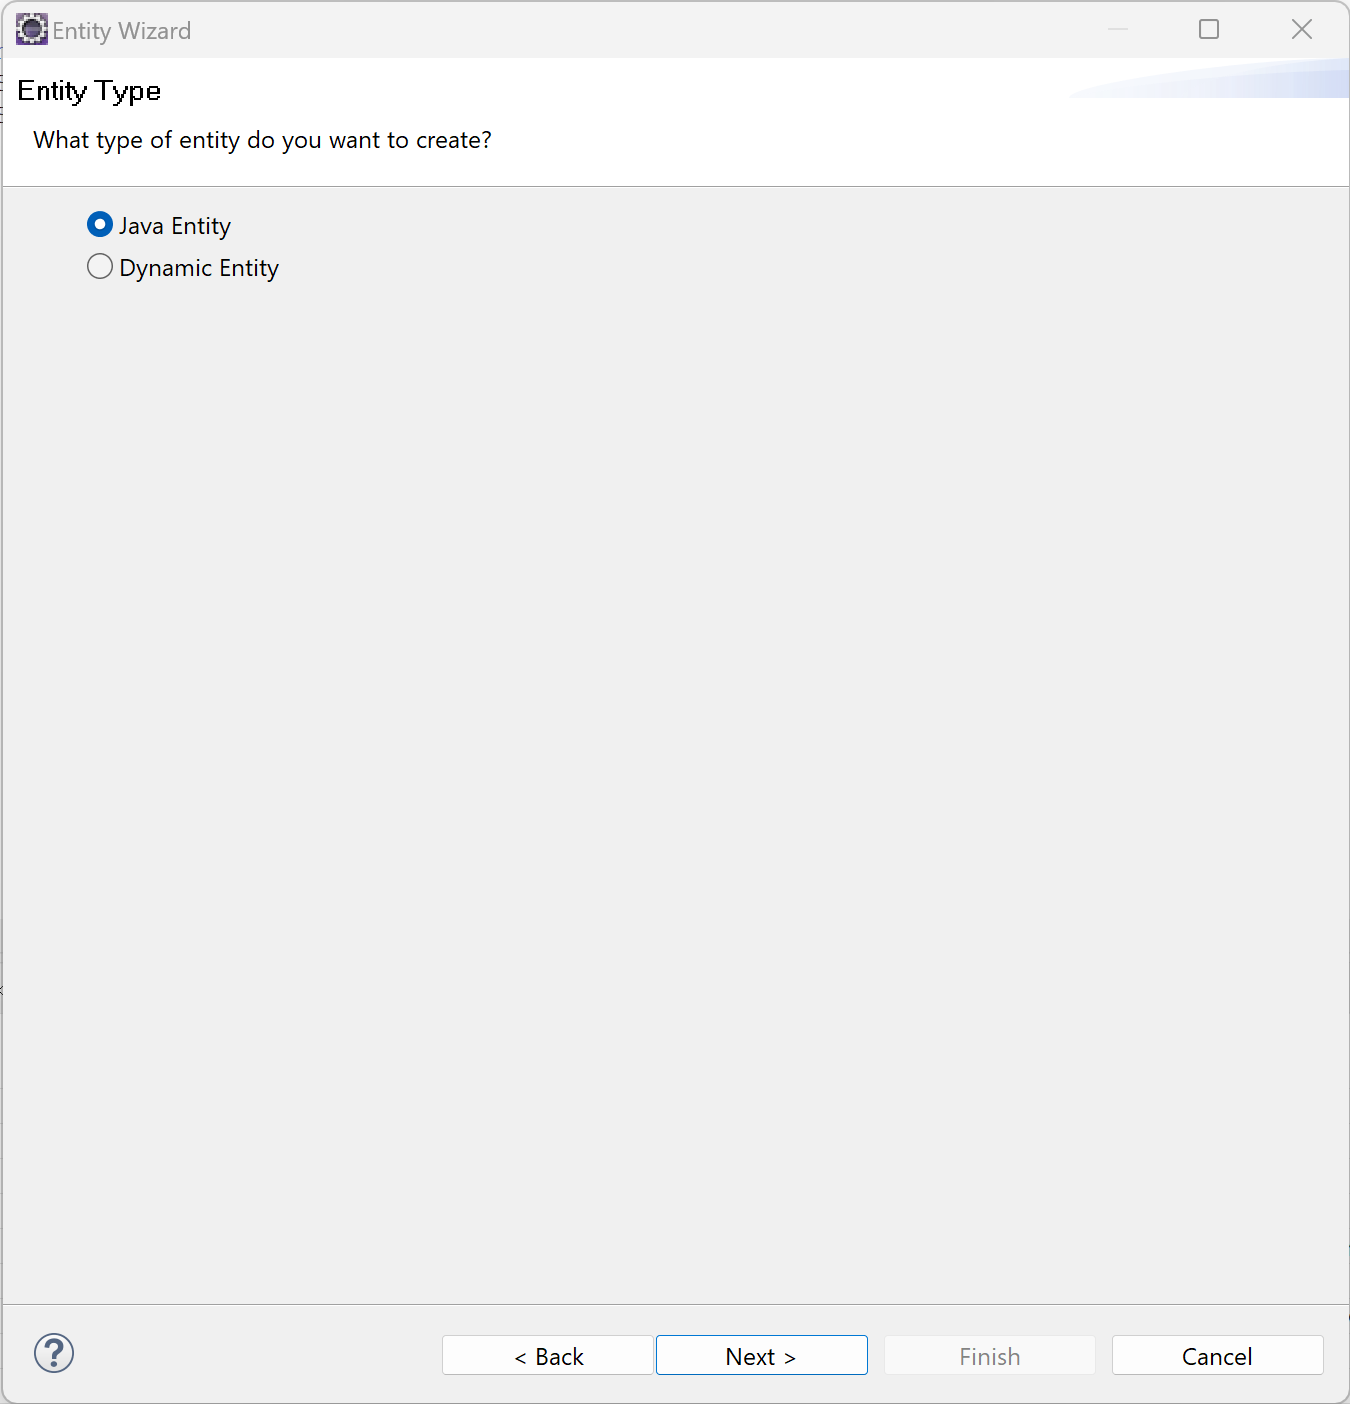
Select Java Entity
Click Next
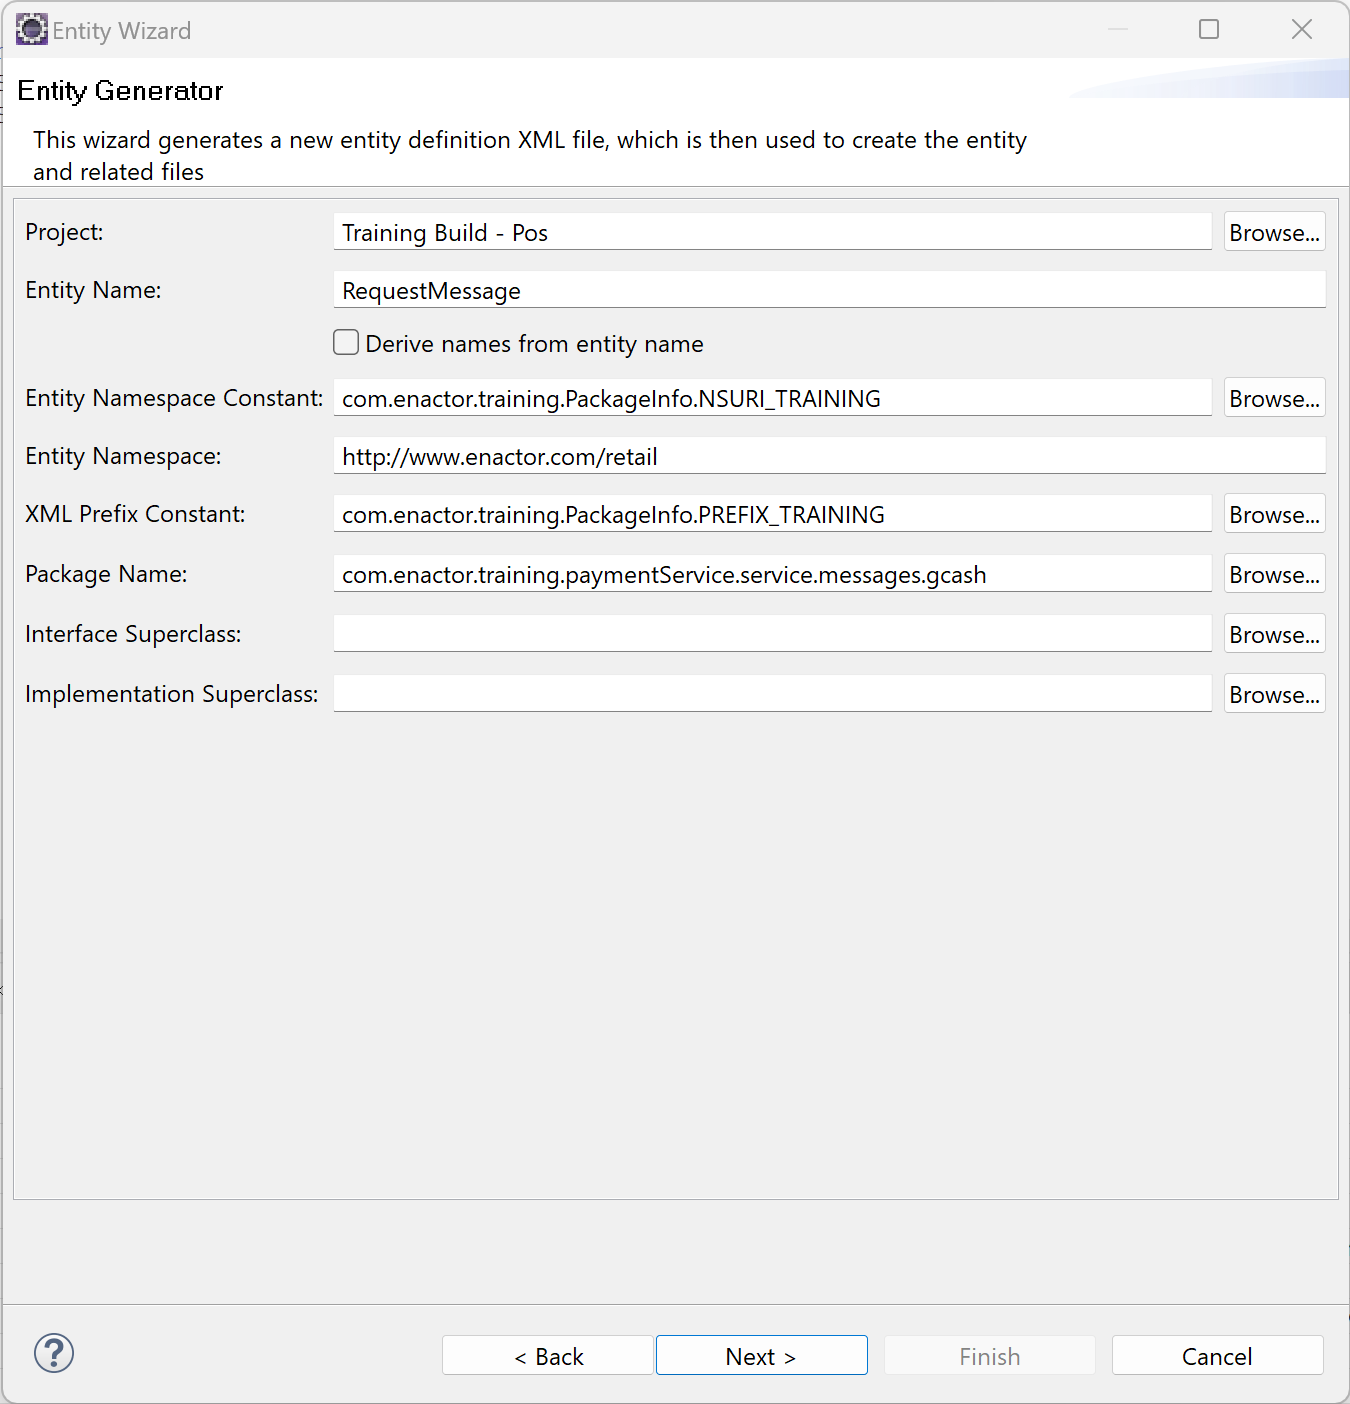
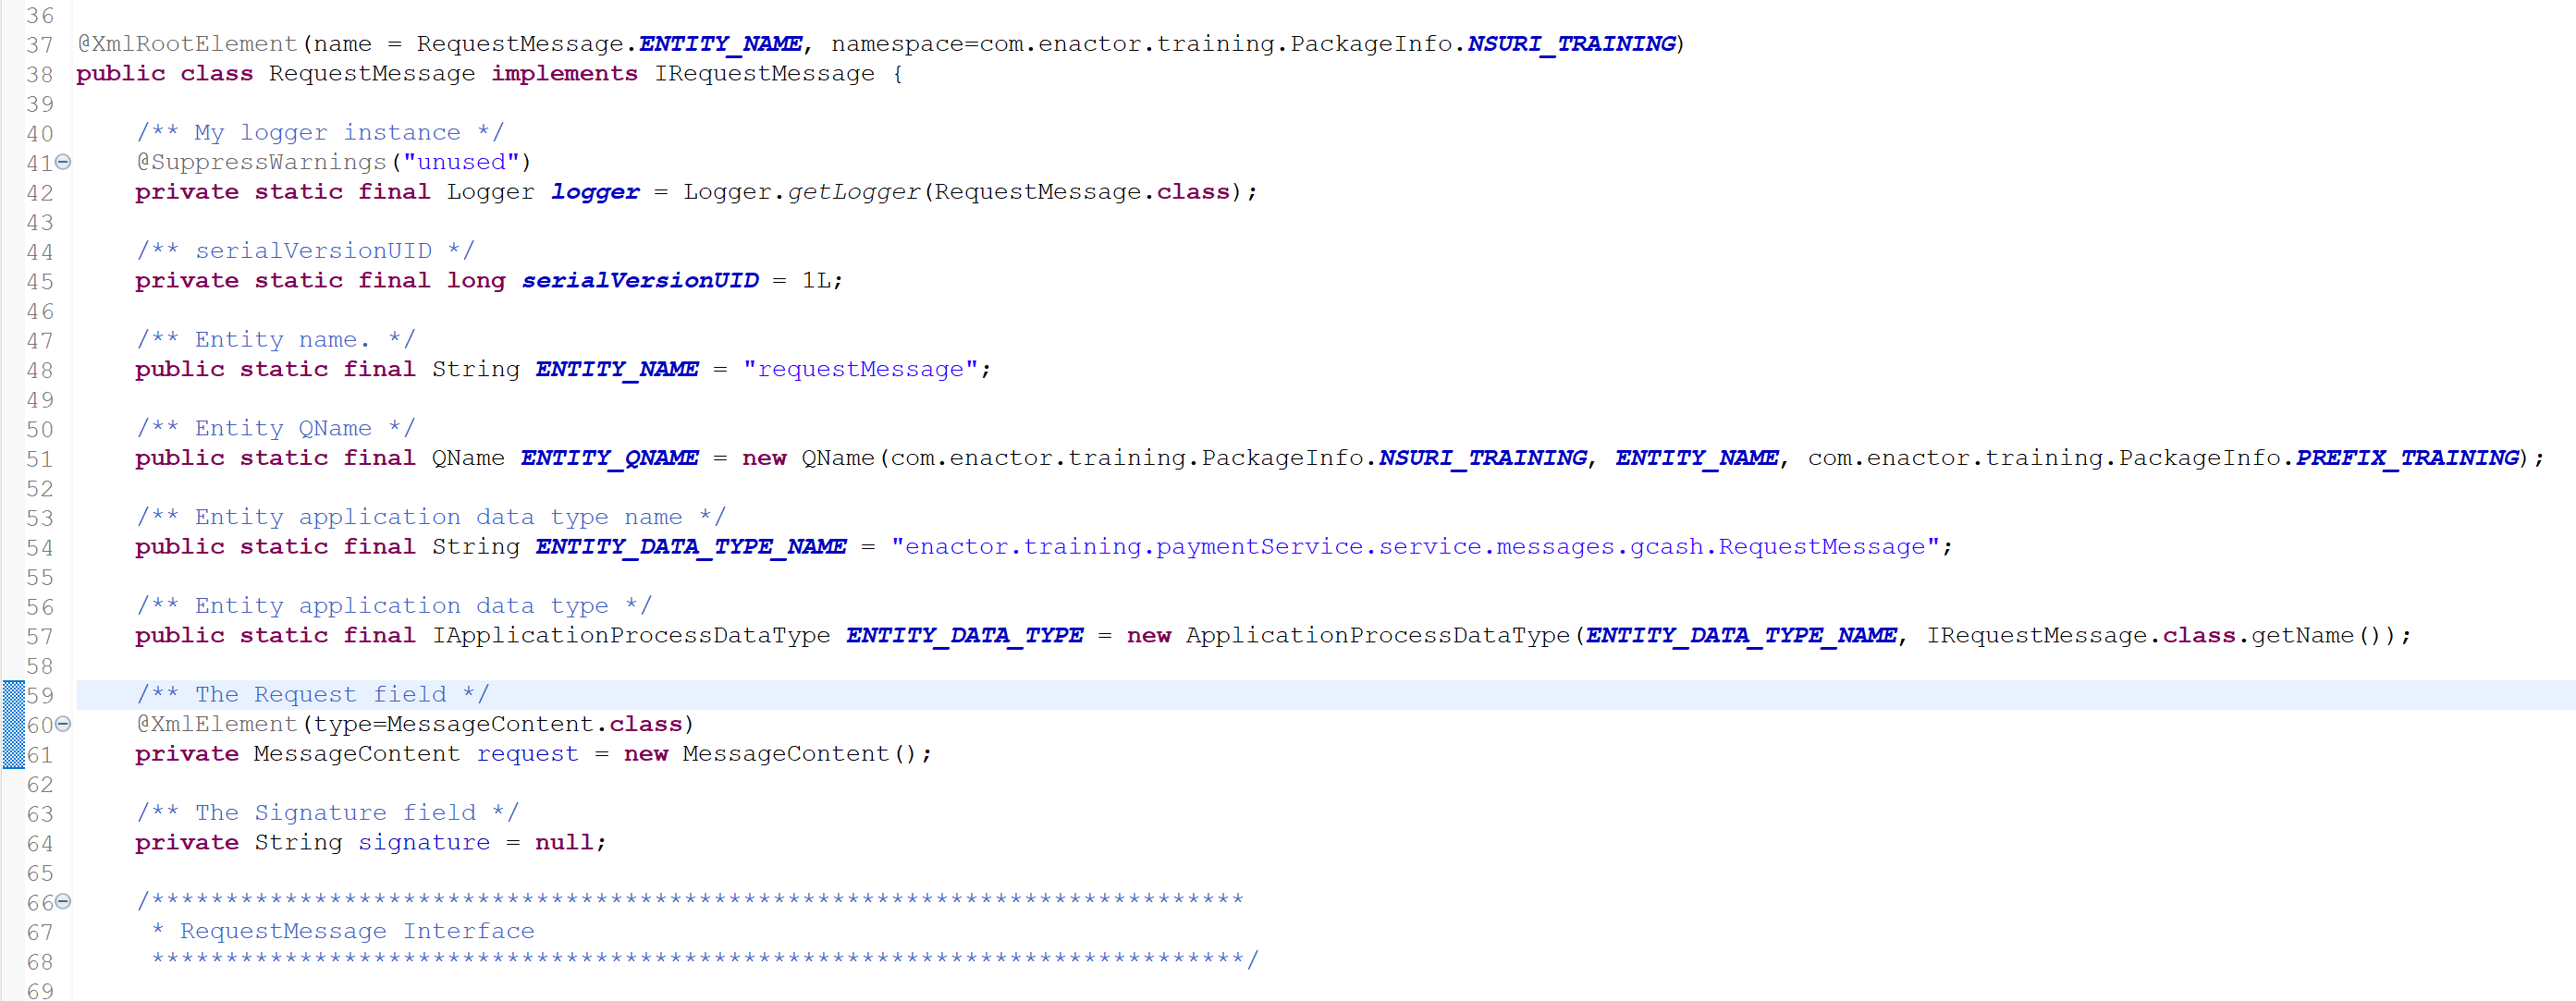
For the Entity Name enter RequestMessage
Deselect the Derive names from entity name check box
For the Entity Namespace Constant field, enter com.enactor.training.PackageInfo.NSURI_TRAINING
For the Entity Namespace, enter http://www.enactor.com/retail
For the XML Prefix Constant, enter com.enactor.training.PackageInfo.PREFIX_TRAINING
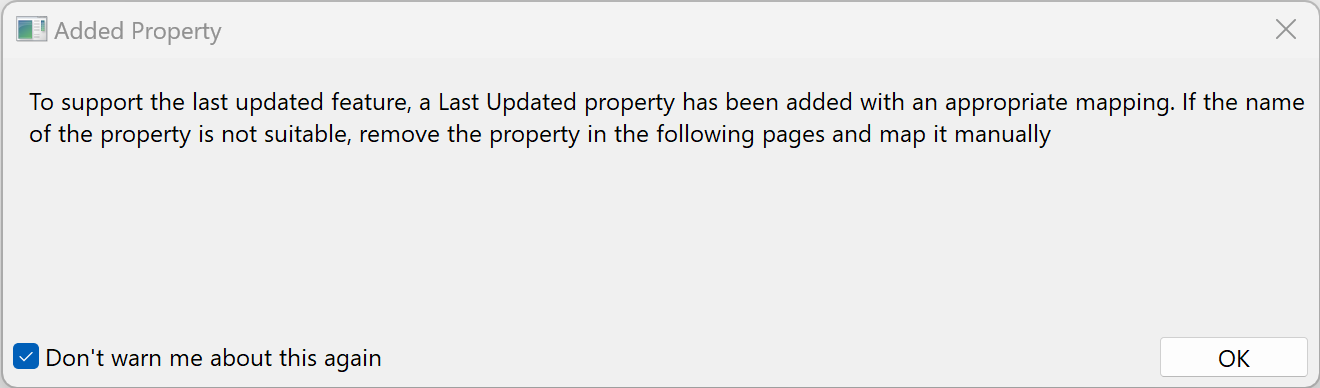
Dismiss the Added Property dialog
Deselect the Keyed and Timestamped options
Click Next
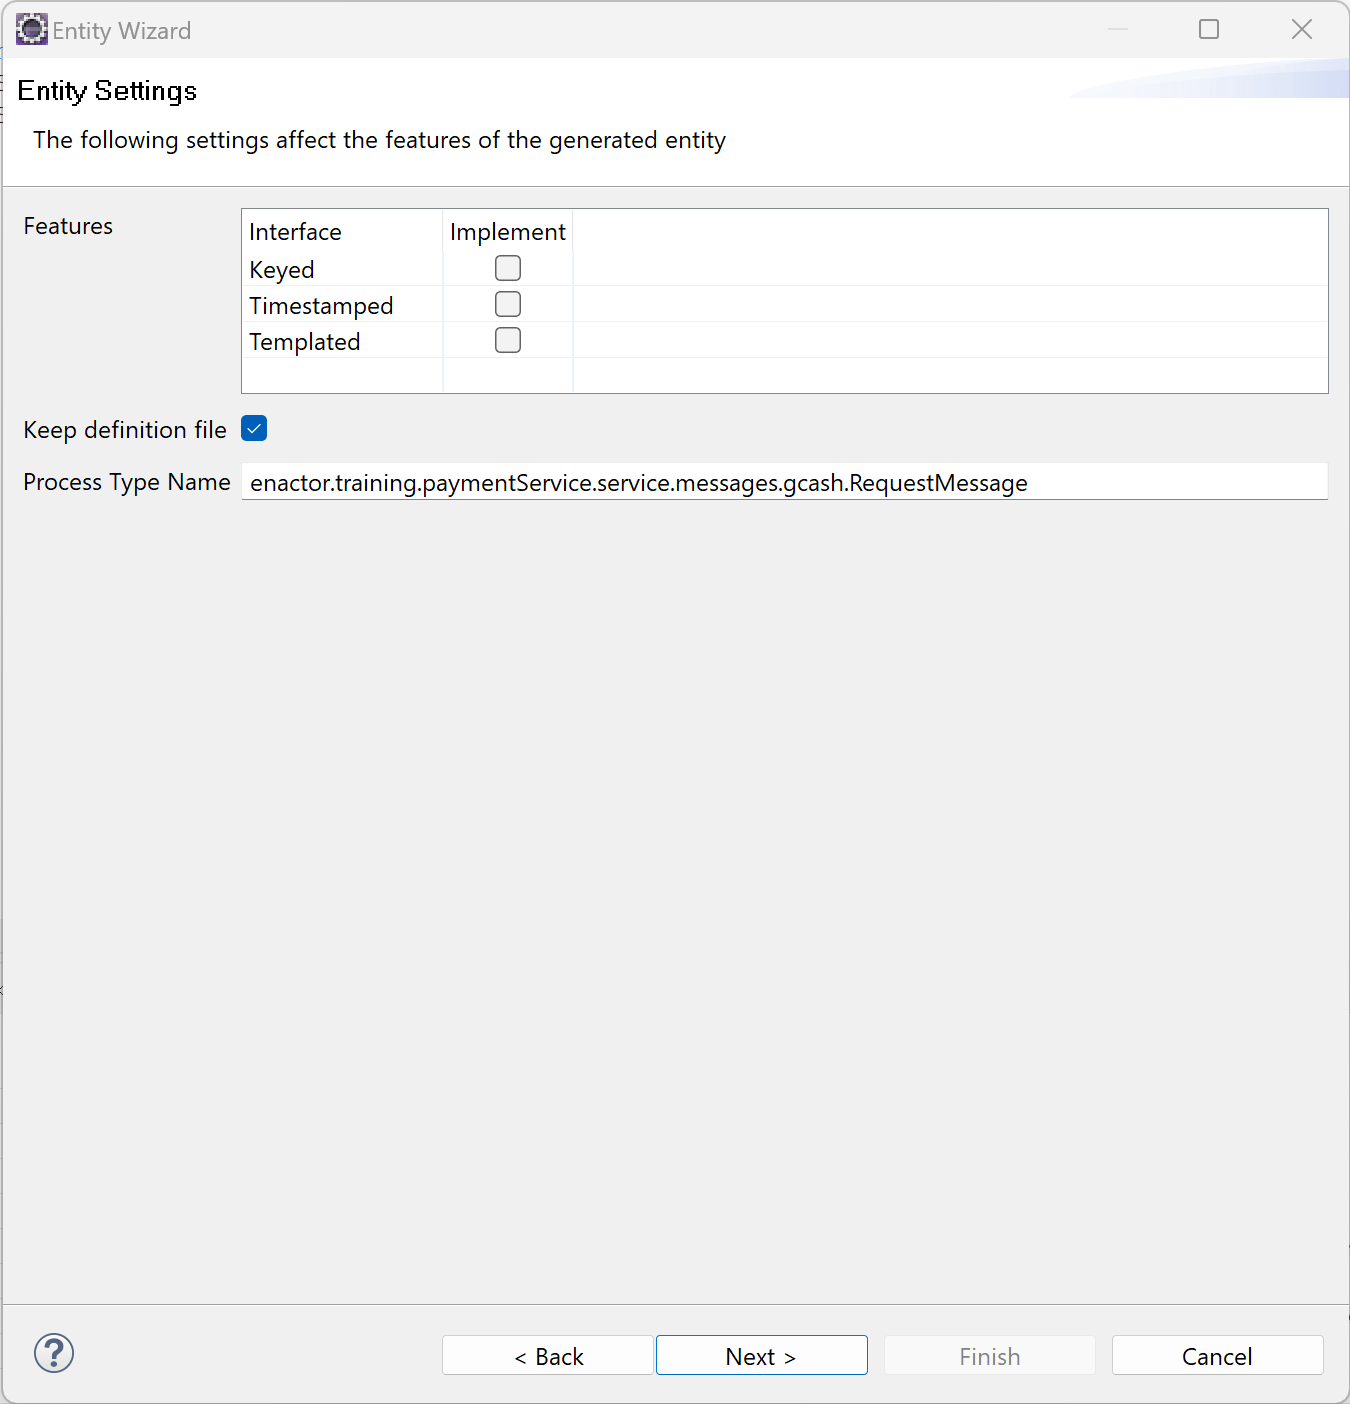
The Keyed and Timestamped properties are used when you want to map an Entity to the persistence layer. As we are only generating message entities, these are therefore not required at this time
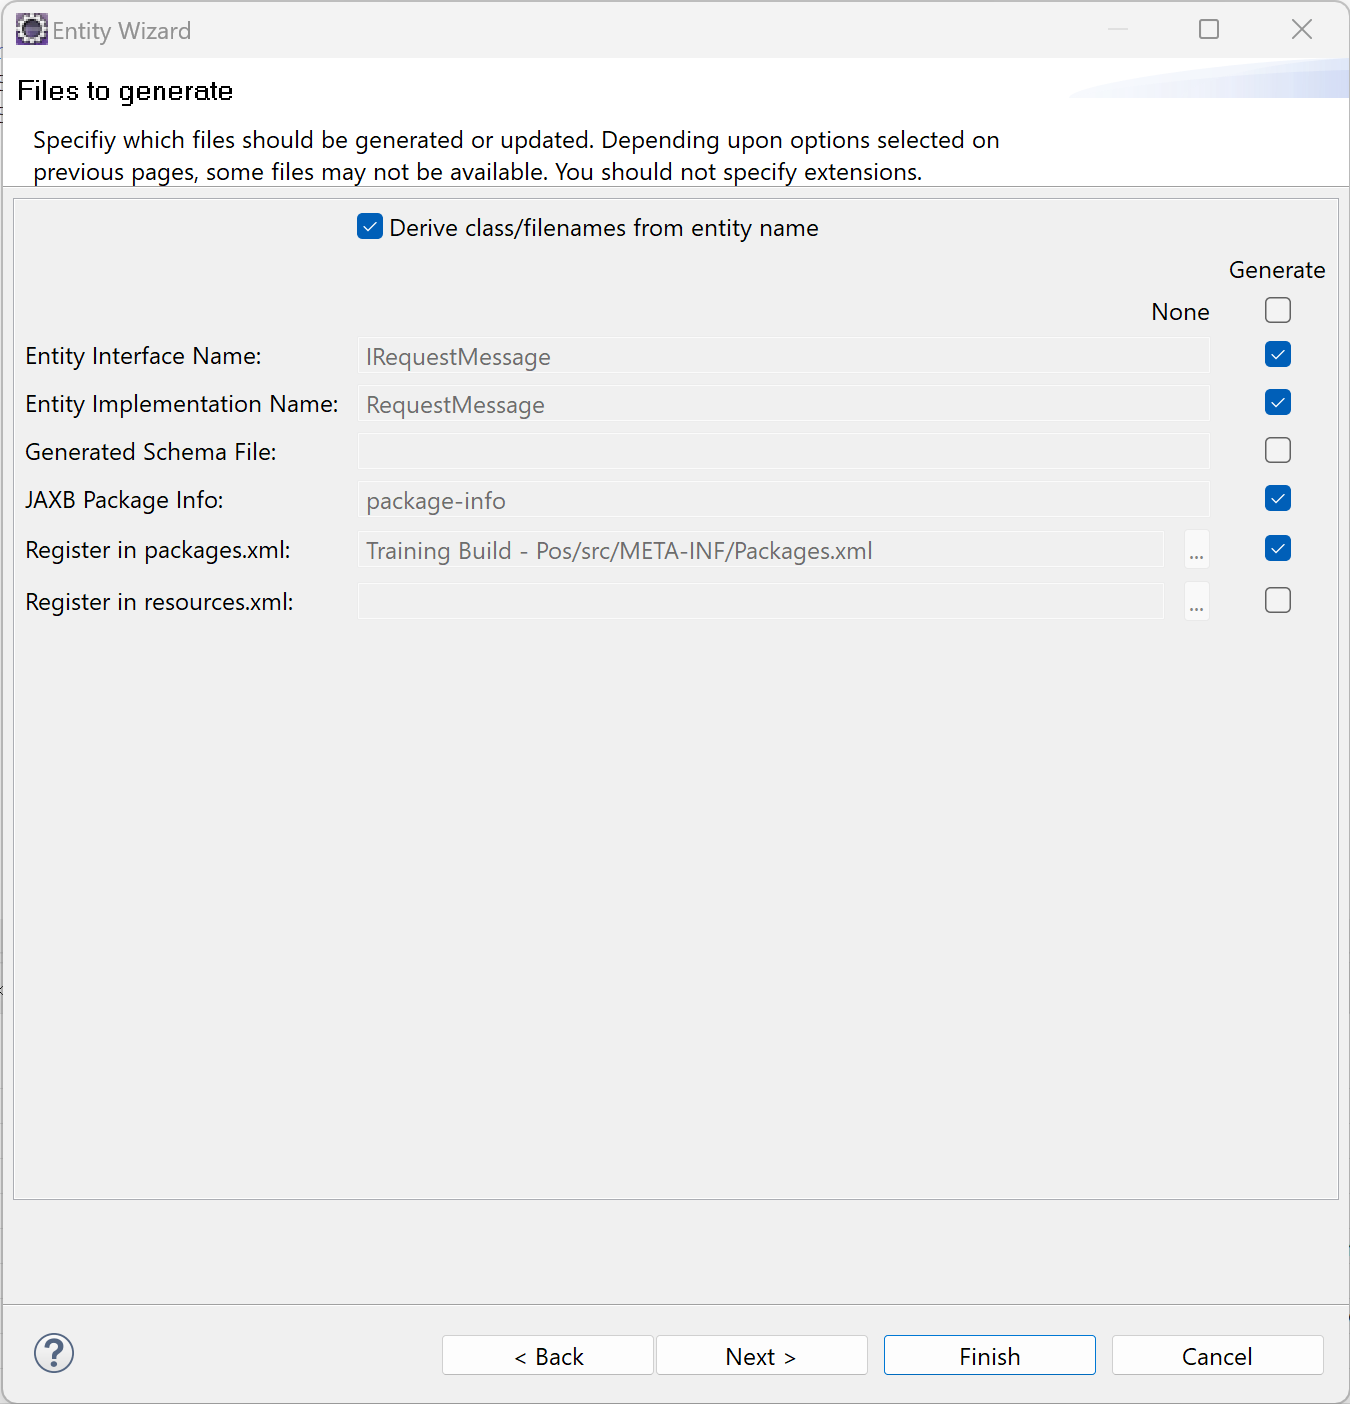
The wizard will then display the files it will generate, ensure they match the image shown to the right.
Click Next
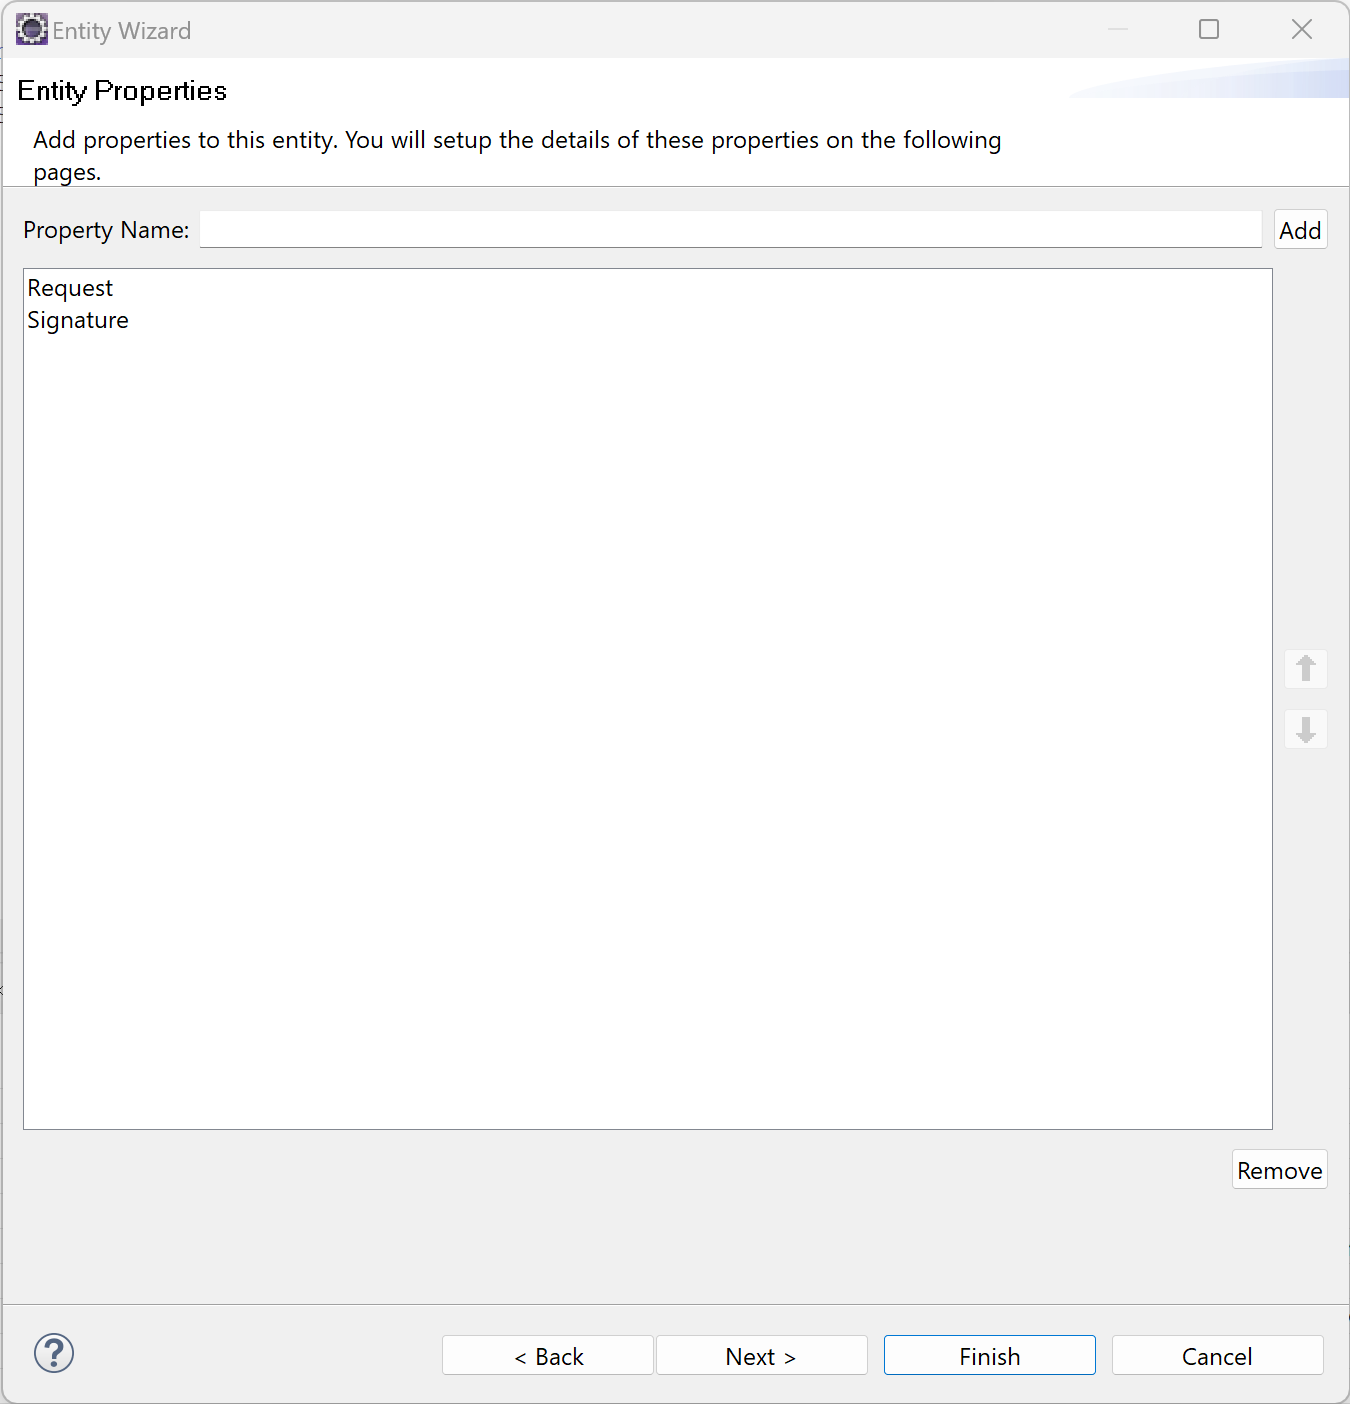
Add two new properties
- request
- signature
Click Next
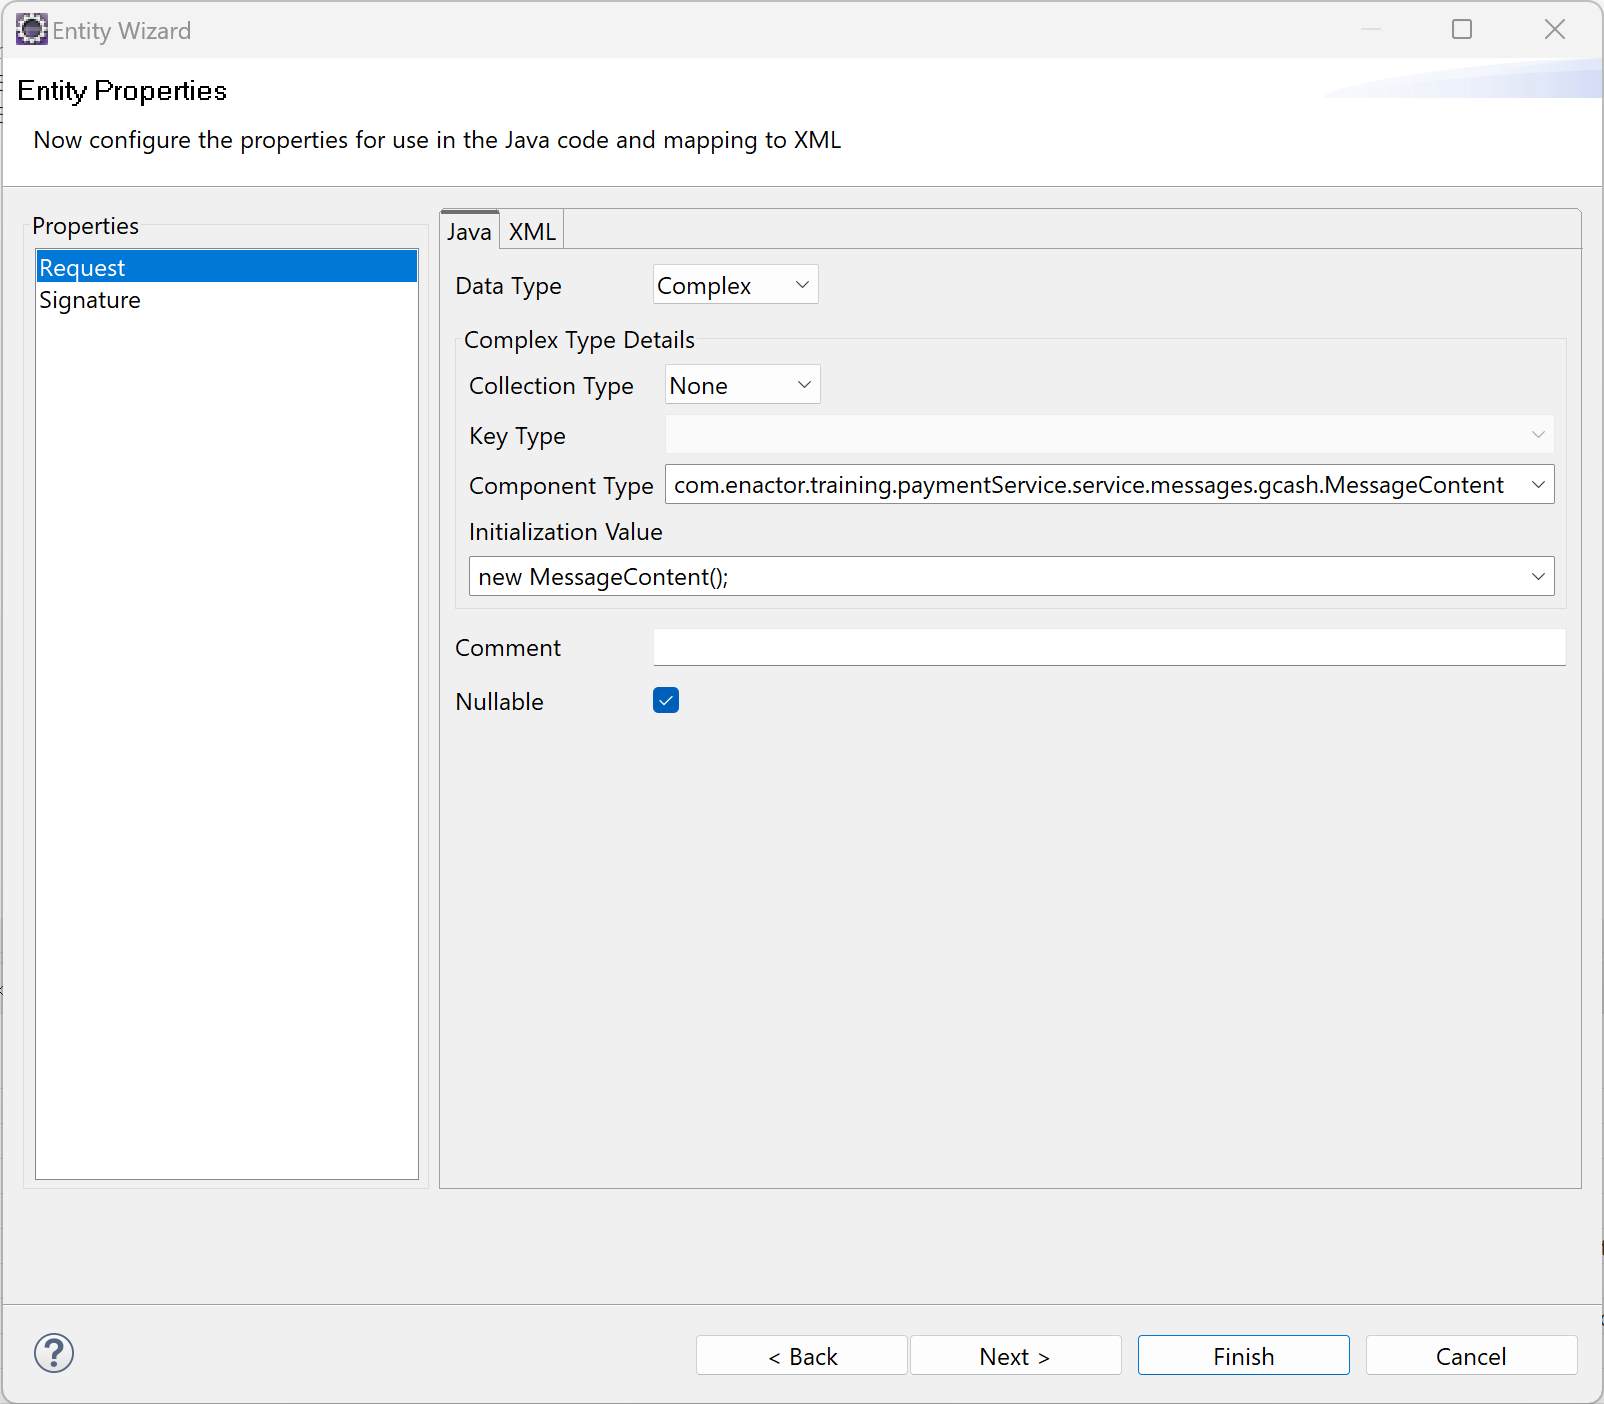
Select the Request property
From the Data Type drop down, select complex
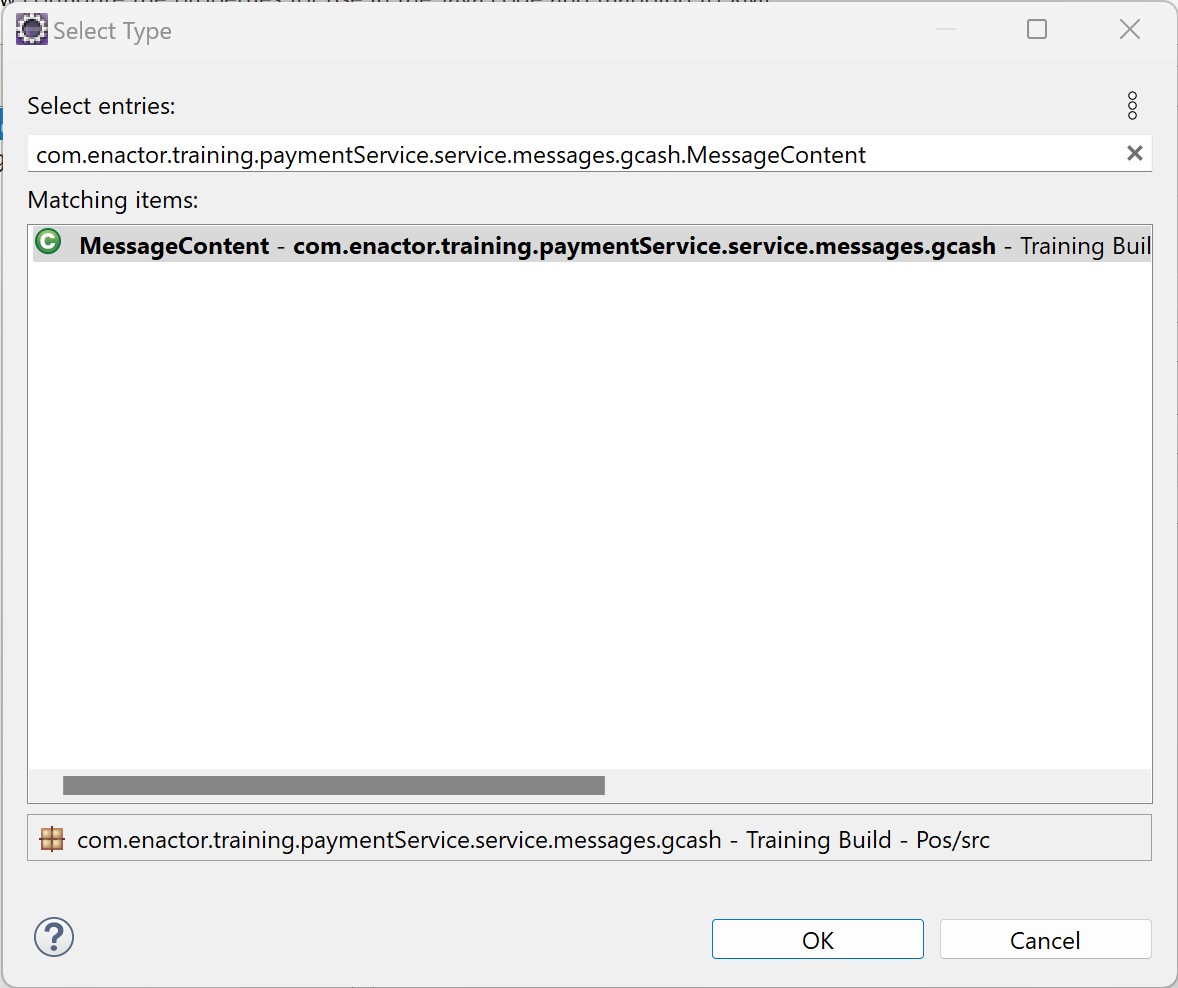
From the Component Type drop down, select Type...
In the search field enter com.enactor.training.paymentService.service.messages.gcash.MessageContent
Click Finish
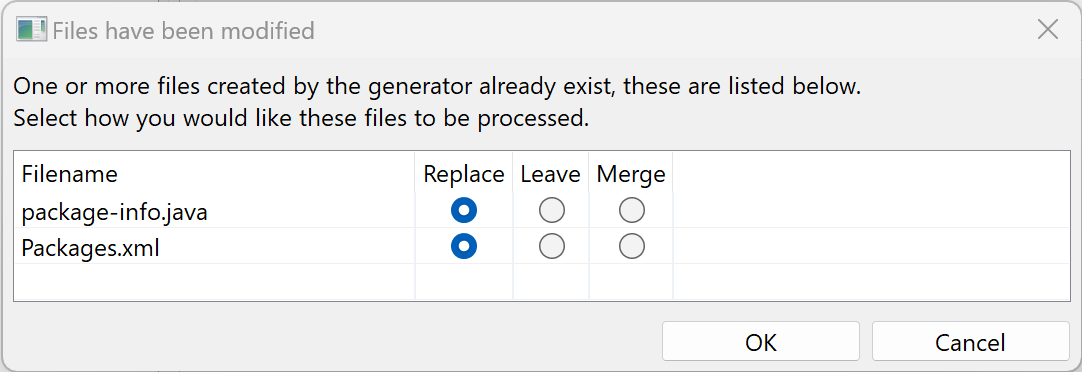
When prompted with the Files have been modified dialog, click OK
Open the newly create RequestMessage class and place the following annotation above the request variable
@XmlElement(type=MessageContent.class)
Connected Process
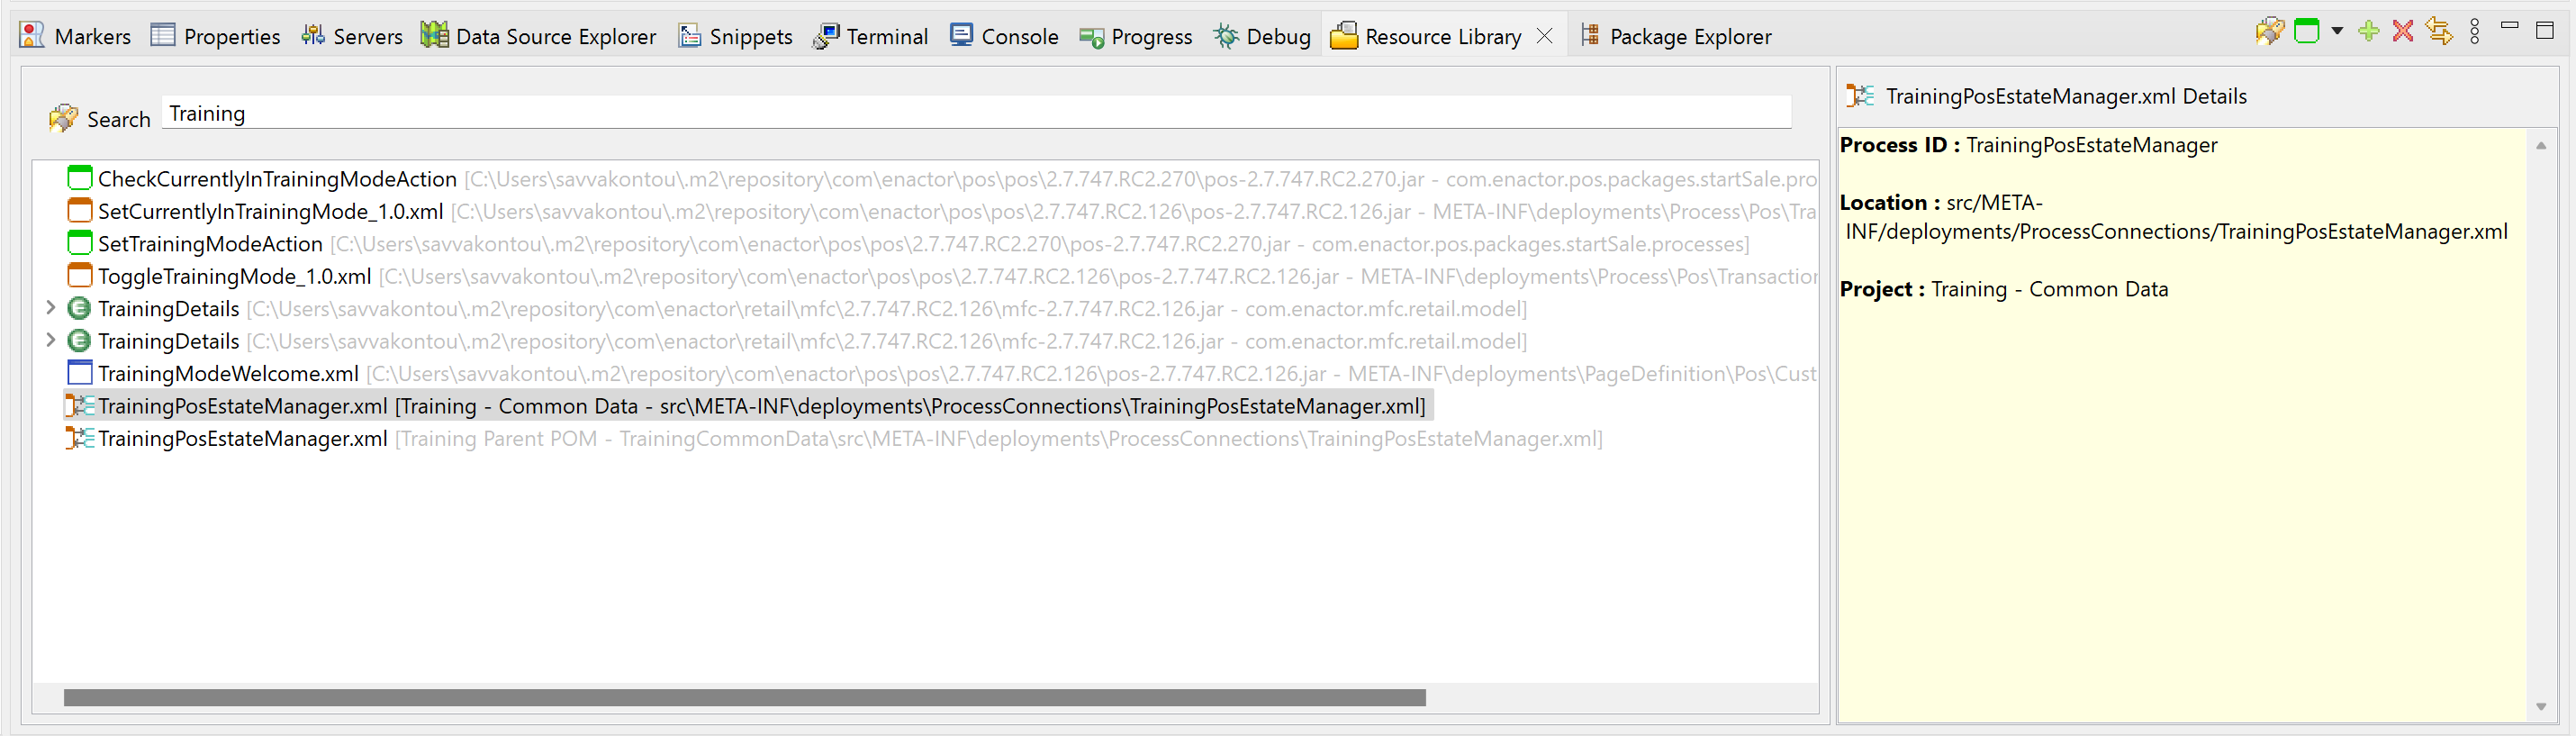
Bring up the Resource Library View and search for and open the Connection Diagram TrainingPosEstateManager
From the Palette, Add a new Application (Connected Process)
Select to view the properties of the Connected Process
For the Process ID, enter GCash
Edit the Outputs and add a new Output named Pay
From the Palette, add a new Web Service Group along side the GCash Connected Process
Select to view the properties of the Web Service Group
For the Name, enter GCashWebService
For the Service ID, enter GCashWebService
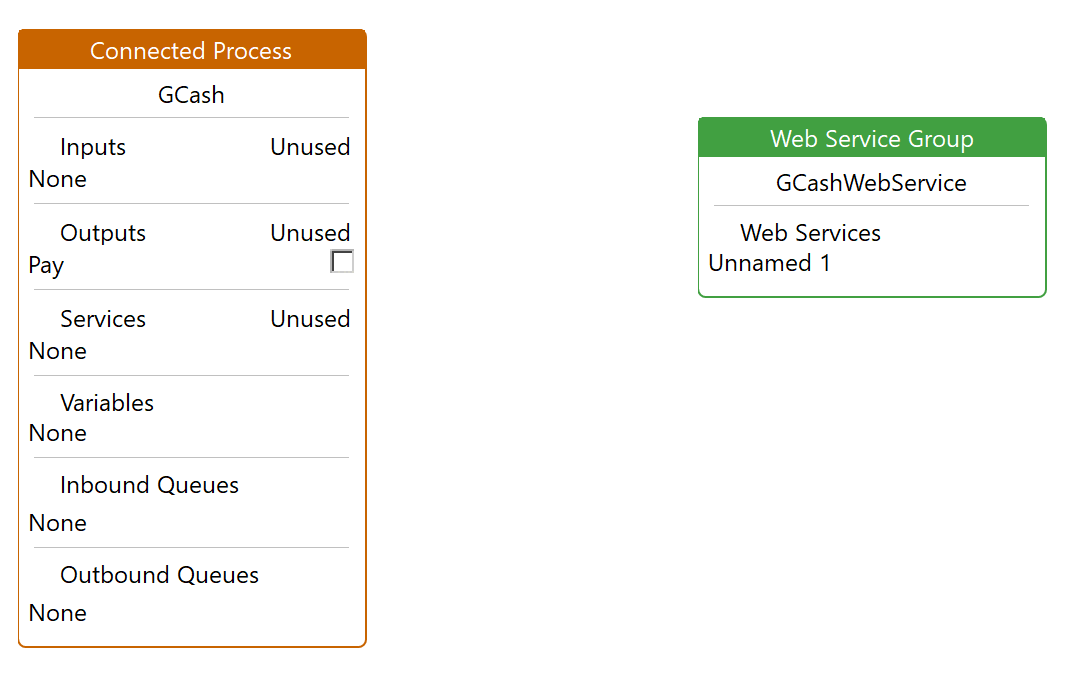
Select the Unnamed Service from within the Web Services section
Set the Endpoint Reference Type to Rest Endpoint
A new new set of properties should appear
Re Select the Unnamed Service from within the GCashWebService section
For the Account Credencials Id, enter GCASH_RETAIL_PAY
For the Dynamic Endpoint, select true from the drop down
For the HTTP Method, select POST from the drop down
For the Connection Provider ID, enter GCashWebService
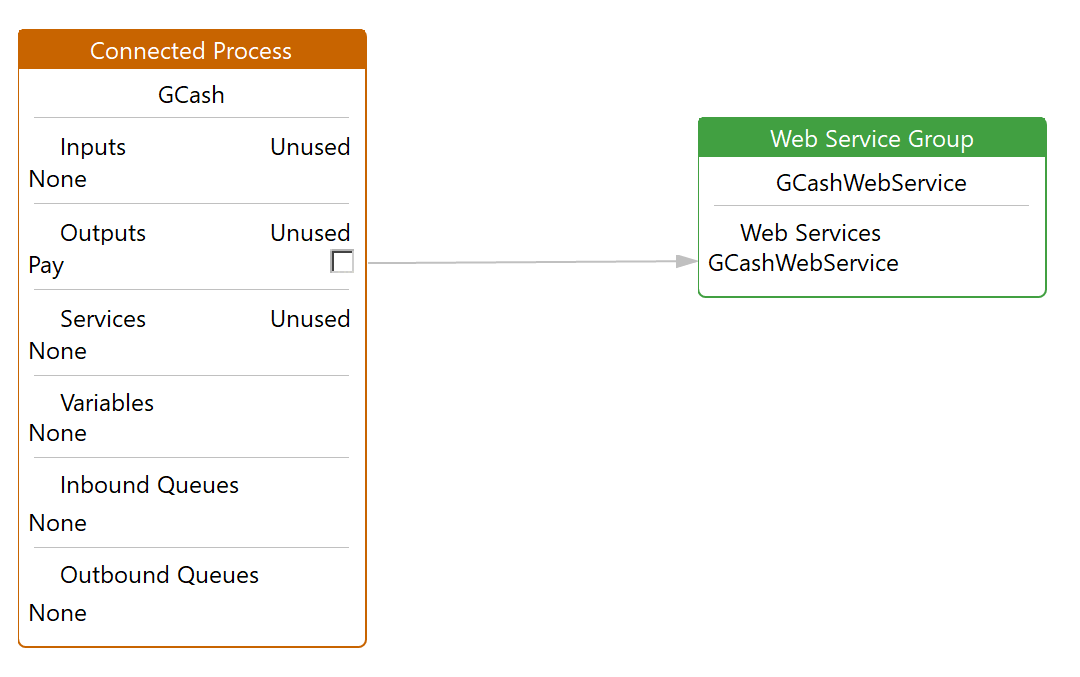
Add a link from the Pay output of the GCash connected process the Pay web service of the GCashWebService web service group
Connected Process Extension
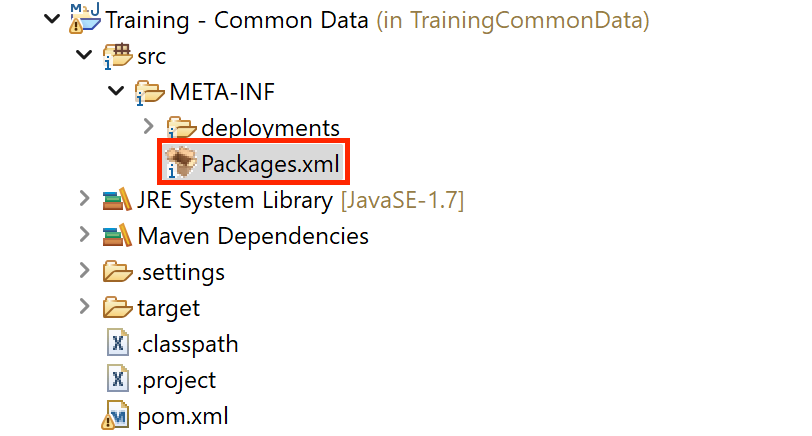
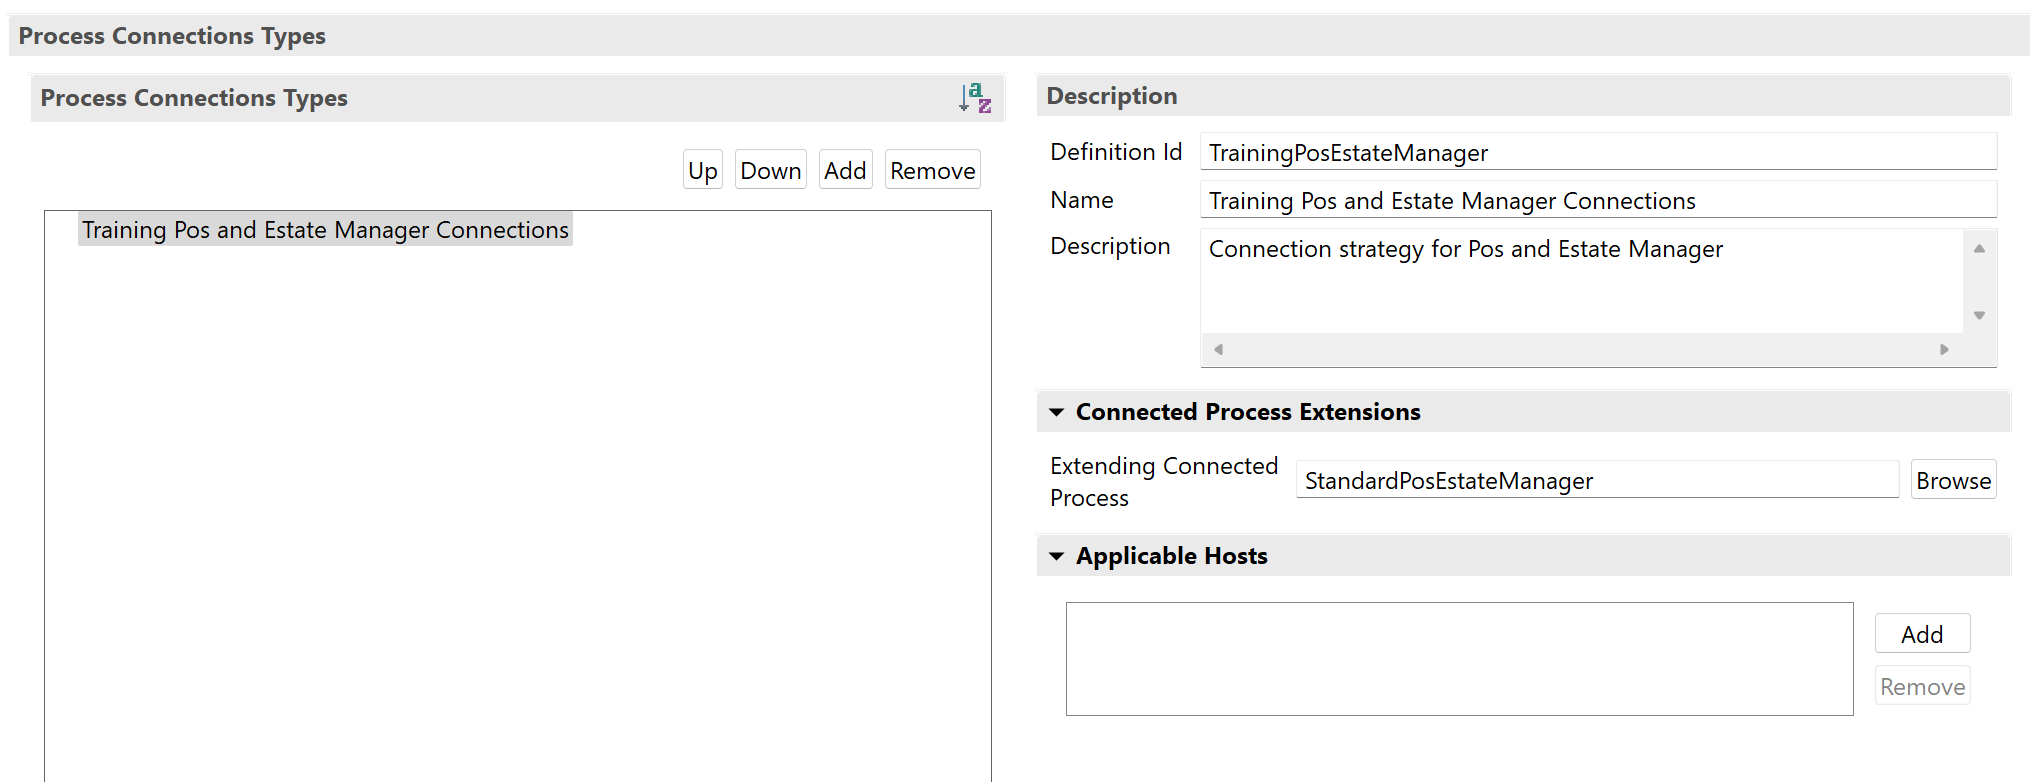
Open the Packages.xml located with the Training - Common Data Project (same project as the Process Connection Diagram)
Selected the Connected Processes Tab
Expand the Connected Process Extensions
For the Extending Connected Process, enter StandardPosEstateManager
Payment Service Call
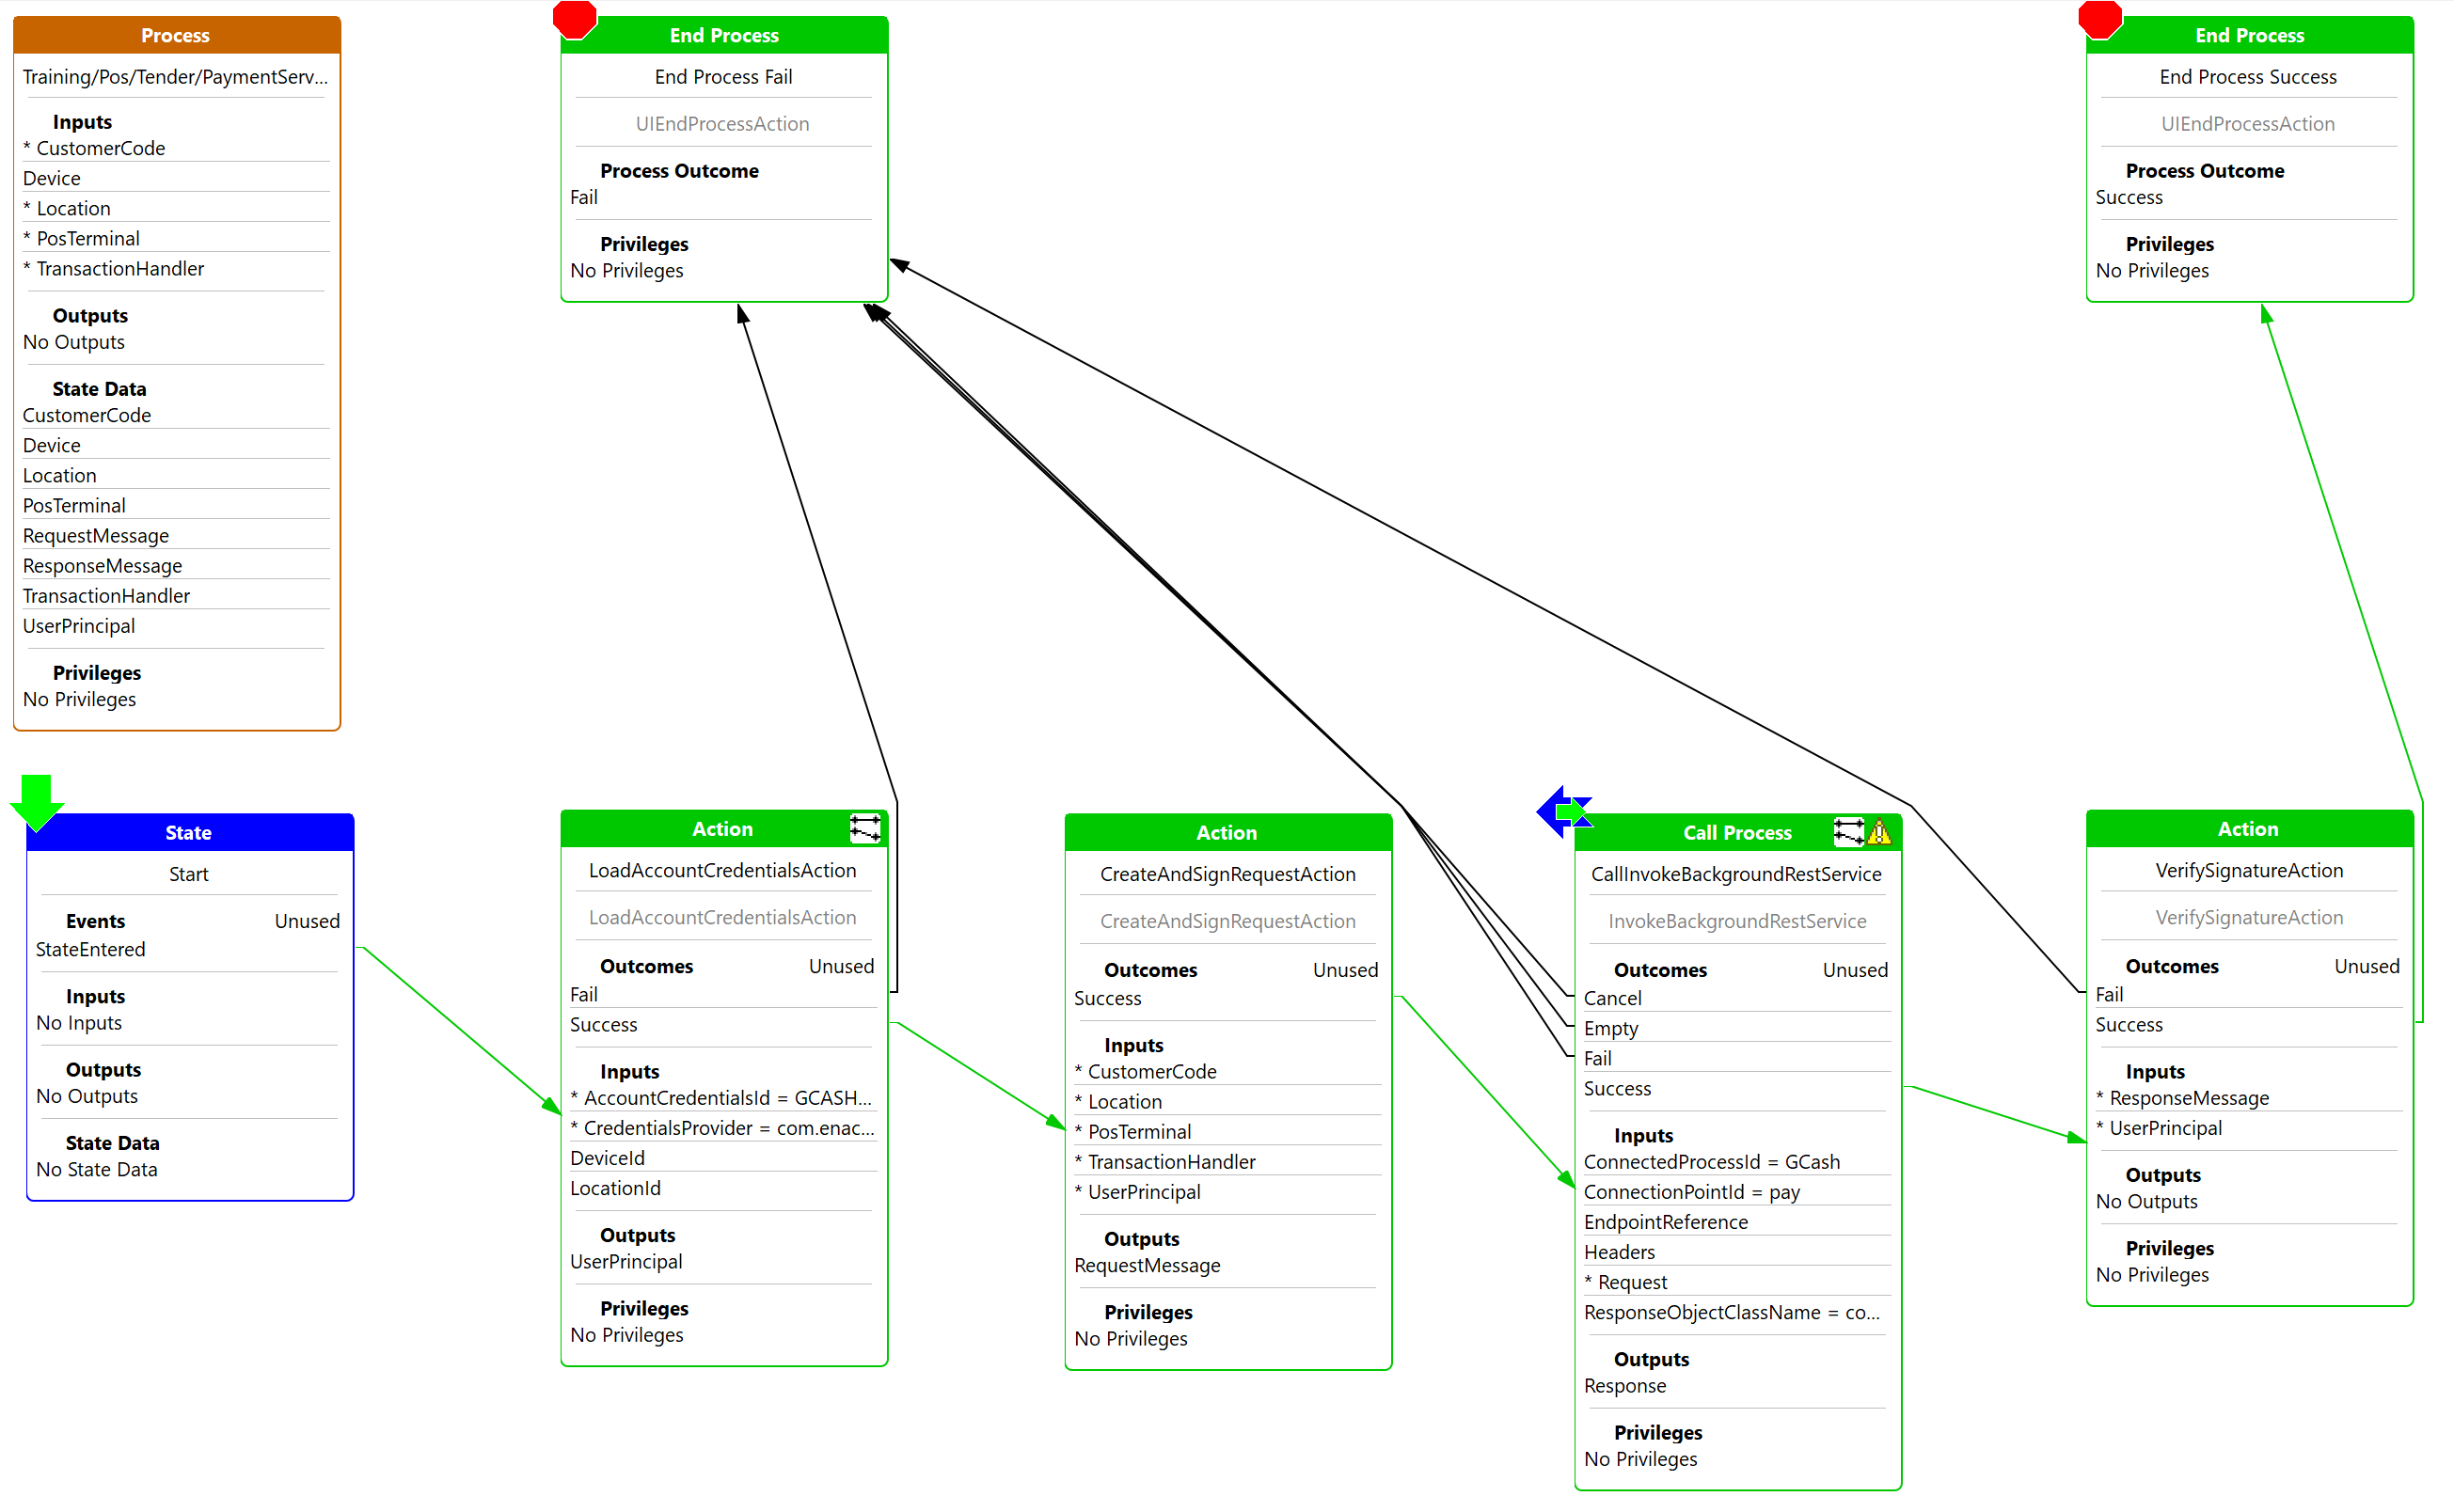
Create a new Application Process with an ID of PaymentServiceCall in the Tender folder
From the Palette, expand the States group, select and drag on a new State, placing it under the Process figure
For the State ID property, enter Start
For the Events property, enter StateEntered
Bring up the Resource Library View and search for and open the Action LoadAccountCredentialsAction
Select the LoadAccountCredentialsAction action and select to edit the Parameters property
Add the following entries
- Name : enactor.commonUI.AccountCredentialsId
- Value : GCASH_CREDS
- Name : enactor.commonUI.AccountCredentialsId
- Value : com.enactor.mfc.accountCredentials.AccountCredentialsProvider
Select the process figure and add the following State Data entry
- Name : enactor.commonUI.UserPrincipal
- Type : com.enactor.core.signOn.IUserPrincipal
Select the process figure and add the following Inputs
- Name : enactor.mfc.Device
- Type : com.enactor.mfc.device.IDevice
- Name : enactor.mfc.Location
- Type : com.enactor.mfc.location.ILocation
Add a link form the StateEntered event of Start state connecting to the LoadAccountCredentialsAction process
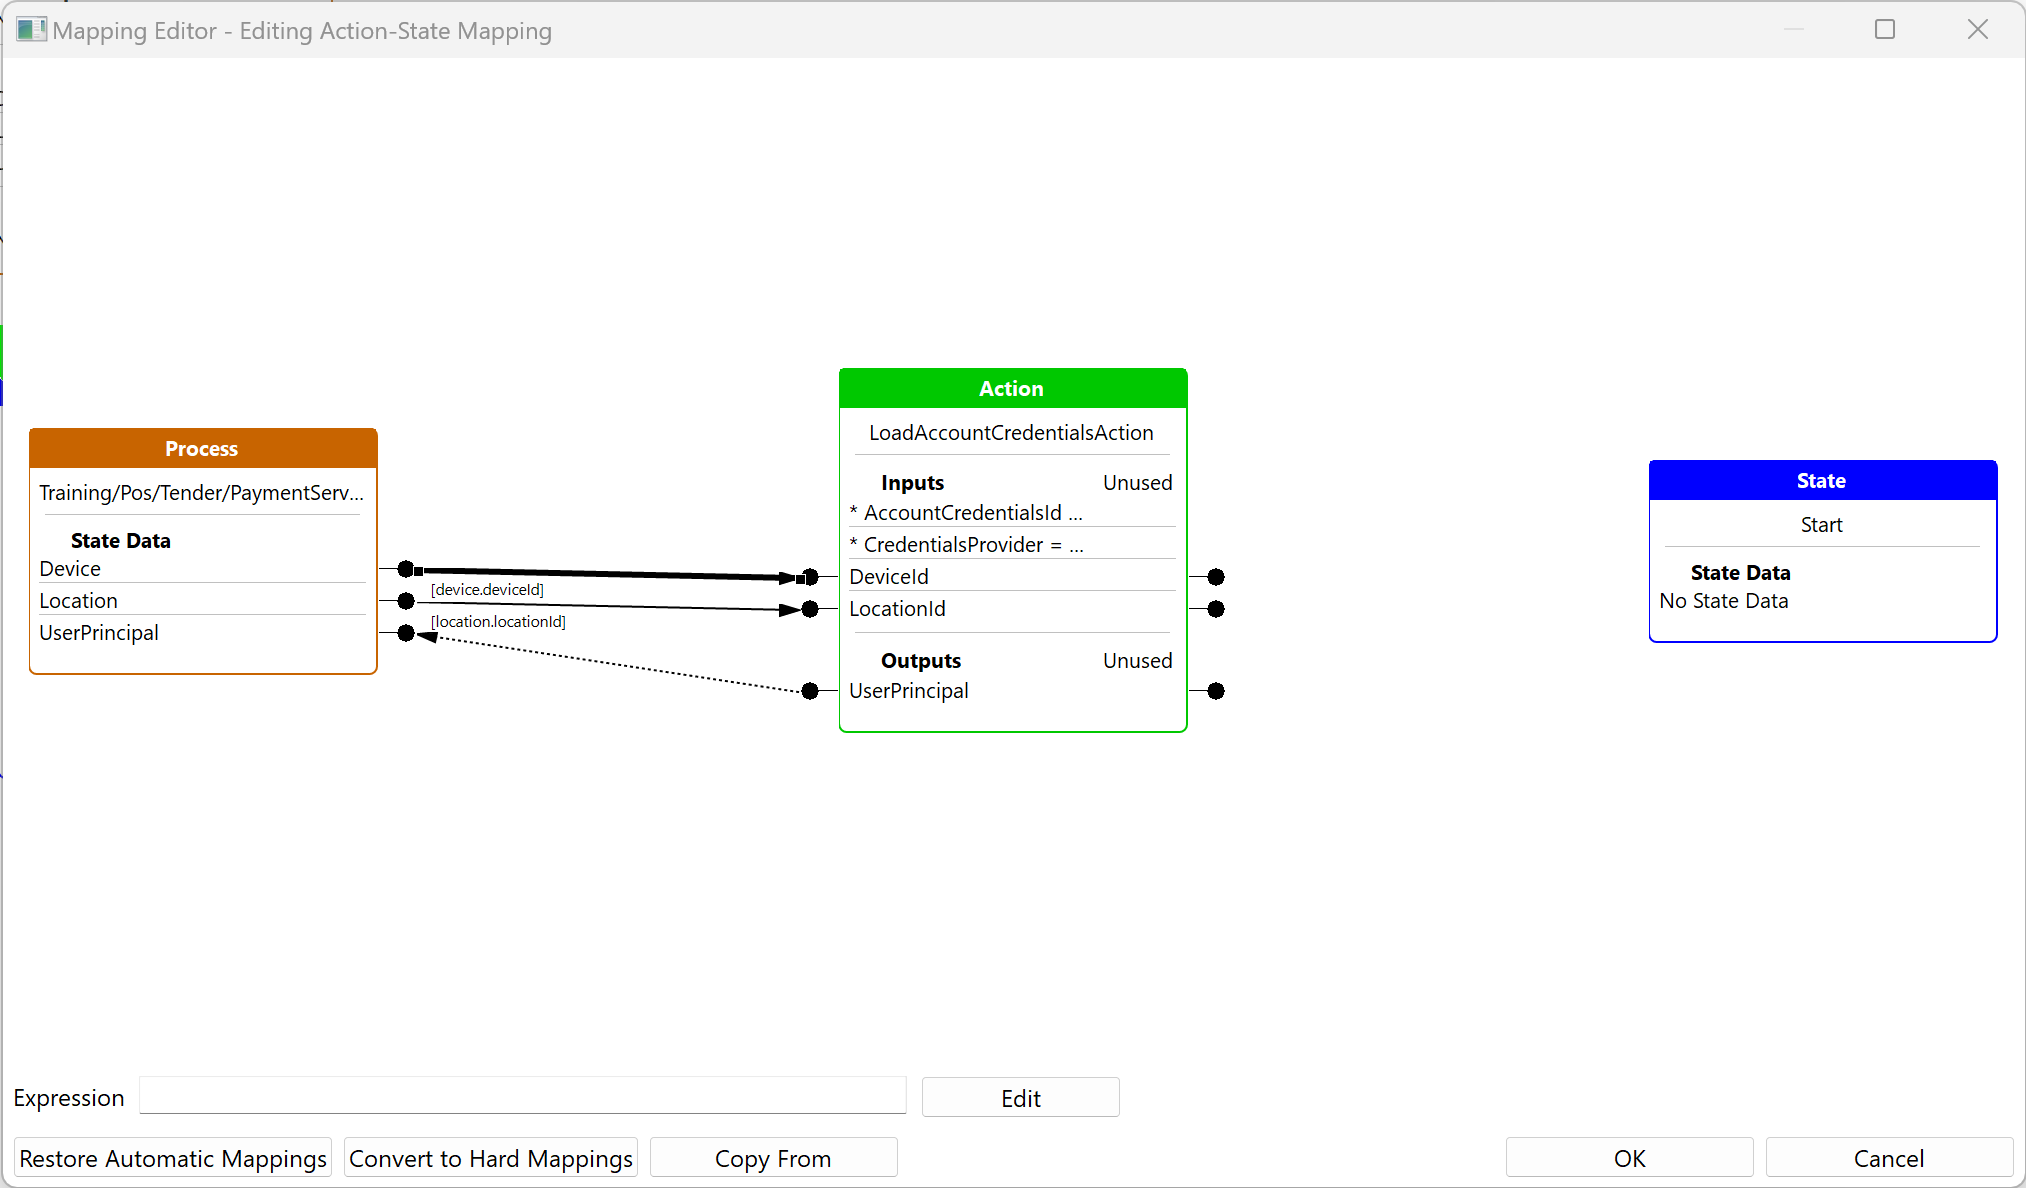
Righ click the LoadAccountCredentialsAction action and select Mappings -> Edit Action-State Mappings -> For State Start
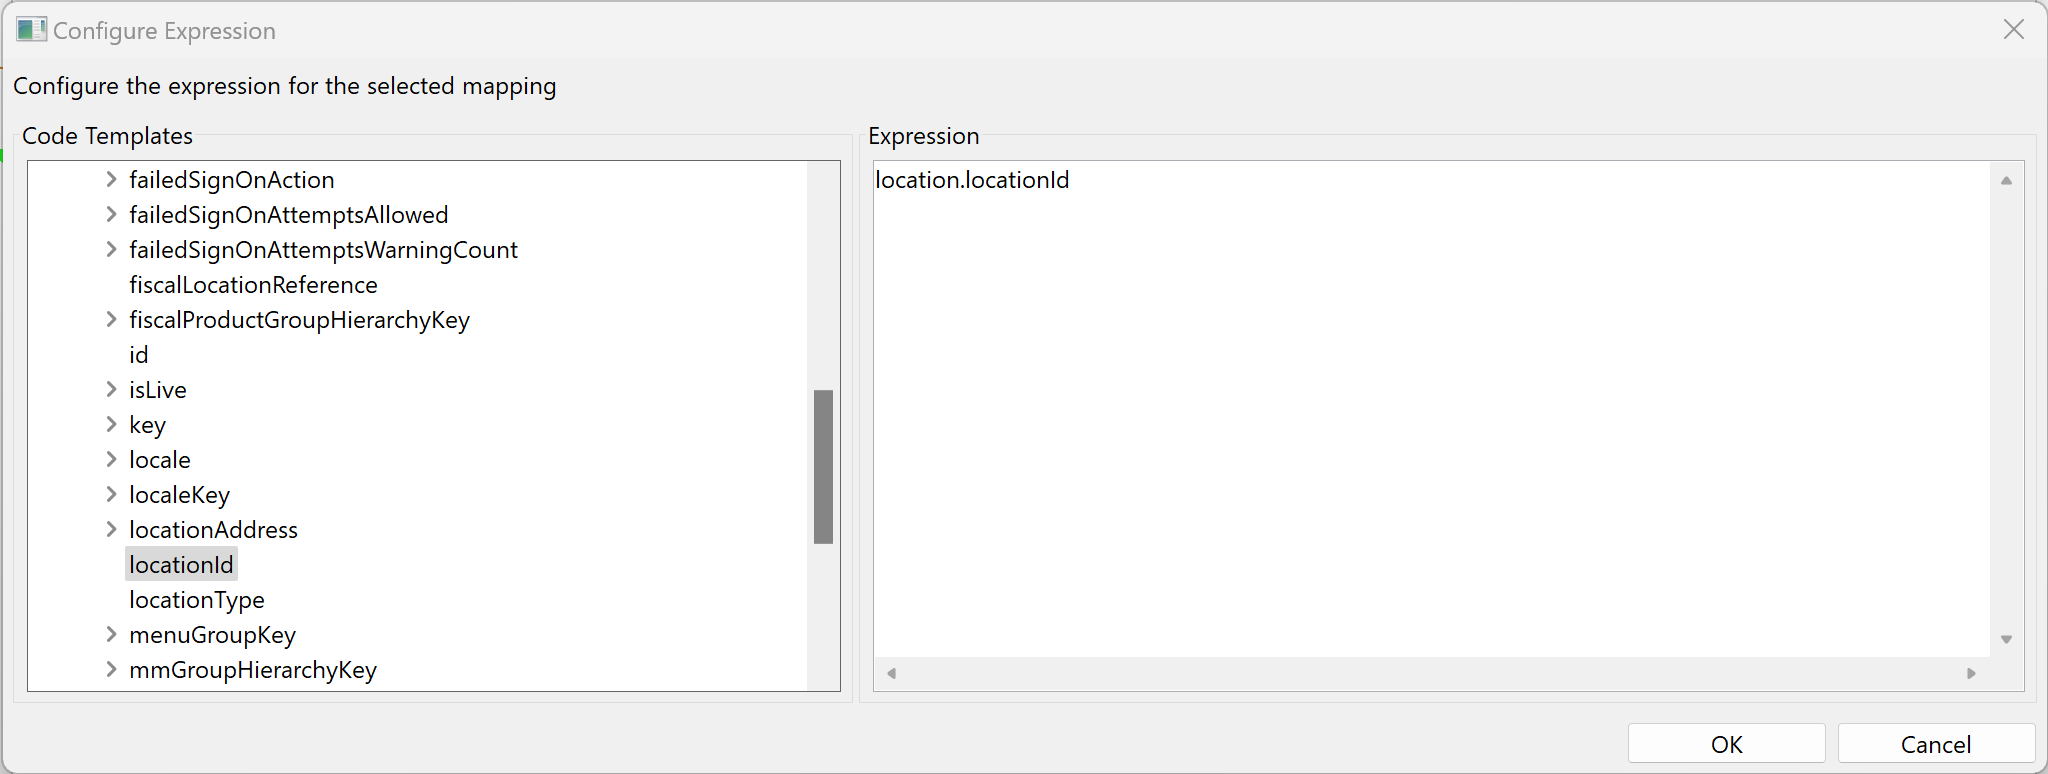
Add a link from the Location Process State variable to the LocationId input of LoadAccountCredentialsAction
Selecte the newly added link and select to edit its expression
Expand the location variable and double click the locationId property
The resualting expression should be location.locationId
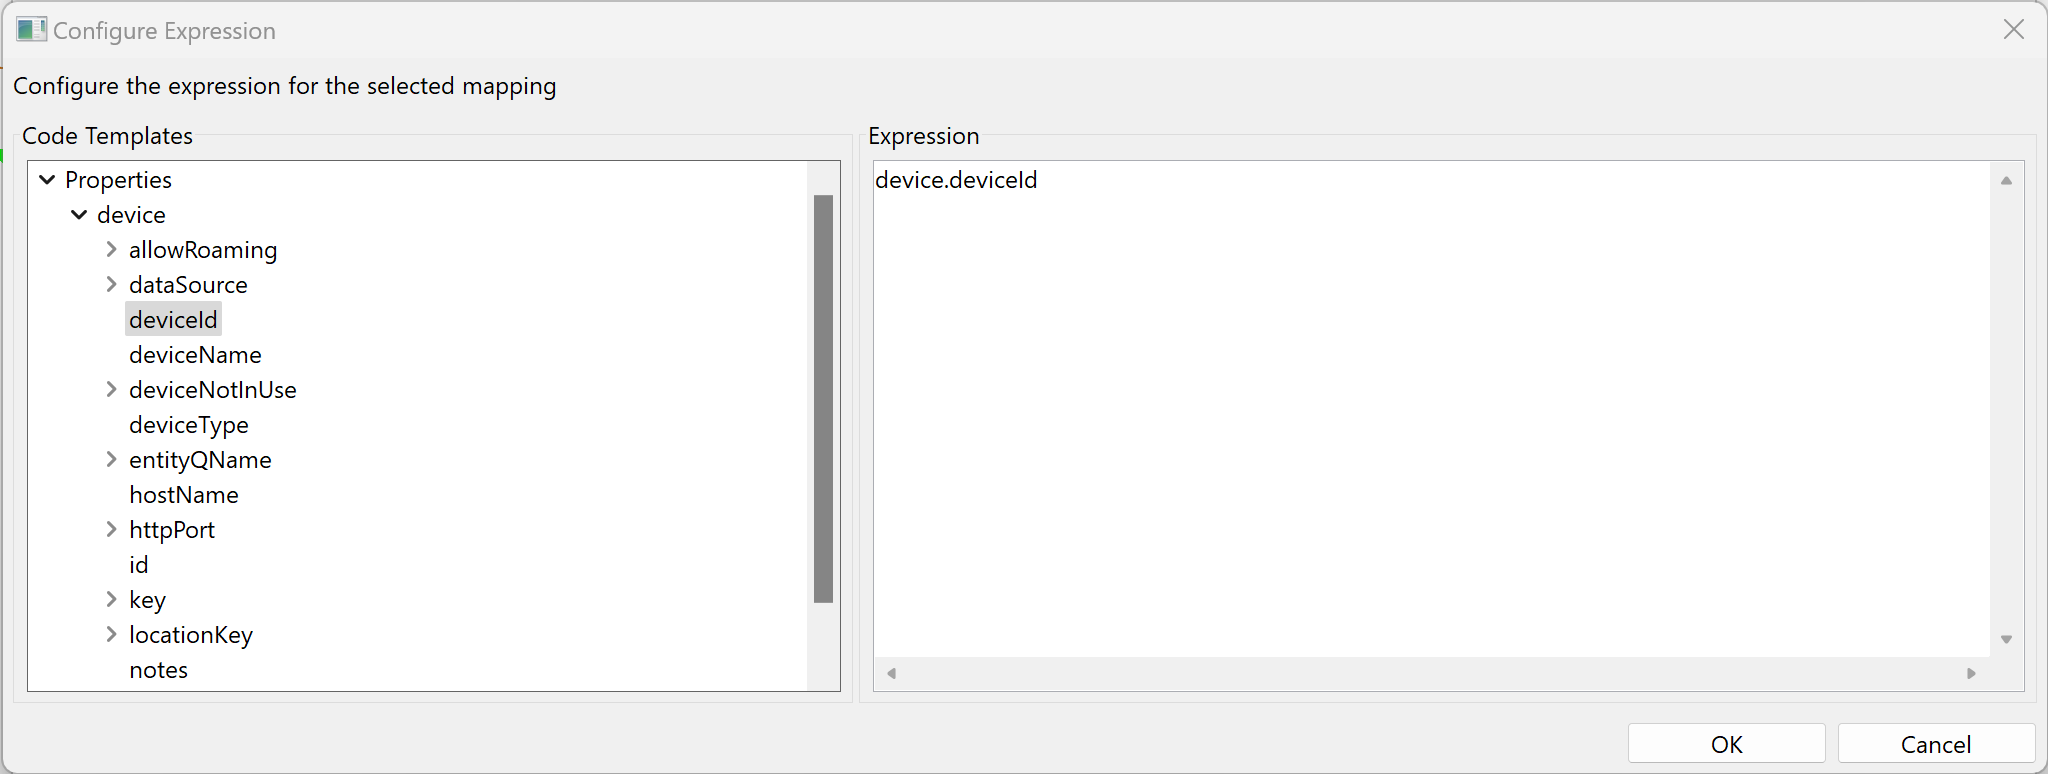
Add a link from the Device Process State variable to the DeviceId input of LoadAccountCredentialsAction
Selecte the newly added link and select to edit its expression
Expand the device variable and double click the deviceId property
The resualting expression should be device.deviceId
Click OK
From the Palette expand the Actions group, add an End Process Action placing above the LoadAccountCredentialsAction State
Set the Action ID to End Process Fail
Set the Process Outcome to Fail
Add a link from the Fail outcome of the LoadAccountCredentialsAction Action connecting to the newly created Action End Process Fail
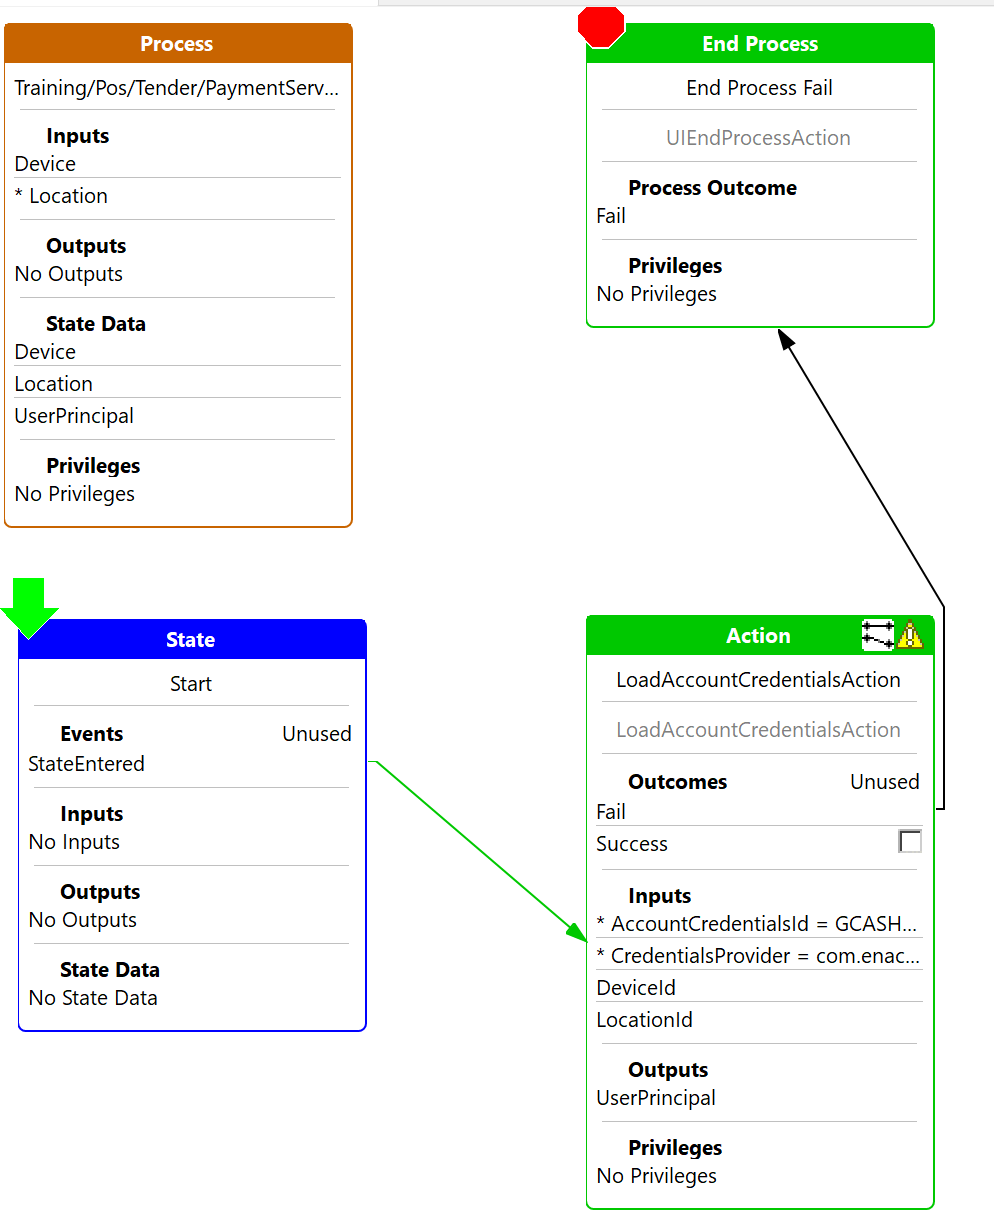
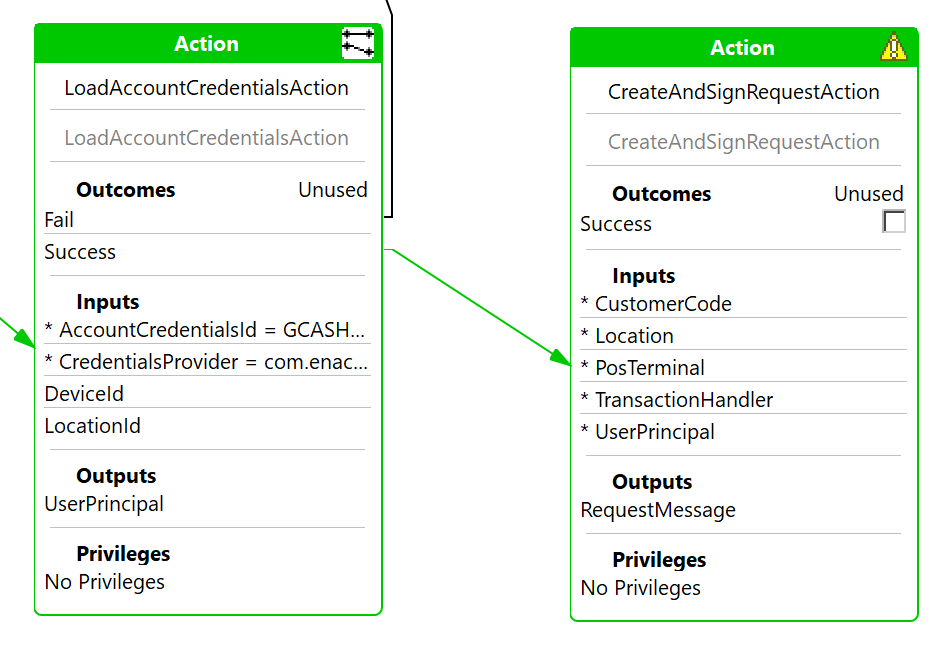
Bring up the Resource Library View and search for and open the Action CreateAndSignRequestAction
Add a link from the Success outcome of the LoadAccountCredentialsAction Action connecting to the newly added Action CreateAndSignRequestAction
Select the process figure and add the following Inputs
- Name : enactor.gcash.CustomerCode
- Type : java.lang.String
- Name : enactor.mfc.PosTerminal
- Type : com.enactor.mfc.posTerminal.IPOSTerminal
- Name : enactor.mfc.TransactionHandler
- Type : com.enactor.mfc.retail.transaction.IRetailTransactionHandler
- Name : enactor.training.paymentService.service.messages.gcash.RequestMessage
- Type : com.enactor.training.paymentService.service.messages.gcash.IRequestMessage
From the WorkspaceSetup\TrainingResources\CustomPaymentService\Application Process directory, copy the InvokeBackgroundRestService_1.0.xml Application Process into your Tender folder
Right click the InvokeBackgroundRestService_1.0.xml file select Enactor -> Register in Packages
Click Register
From the WorkspaceSetup\TrainingResources\CustomPaymentService\Application Process directory, copy the InvokeRestService_1.0.xml Application Process into your Tender folder
Right click the InvokeRestService_1.0.xml file select Enactor -> Register in Packages
Click Register
Bring up the Resource Library View and search for and open the Action InvokeBackgroundRestService
Add a link from the Success outcome of the CreateAndSignRequestAction Action connecting to the newly added Action InvokeBackgroundRestService
Select the InvokeBackgroundRestService process call and select to edit the Parameters property
Add the following entries
- Name : enactor.coreUI.ConnectedProcessId
- Value : GCash
- Name : enactor.coreUI.ConnectionPointId
- Value : Pay
- Name : enactor.service.ResponseObjectClassName
- Value : com.enactor.training.paymentService.service.messages.gcash.ResponseMessage
Select the process figure and add the following State Data
- Name : enactor.gcash.messages.ResponseMessage
- Type : com.enactor.training.paymentService.service.messages.gcash.IResponseMessage
Righ click the InvokeBackgroundRestService process call and select Mappings -> Edit Action-State Mappings -> For State Start
Add a link from the RequestMessage Process State variable to the Request input of InvokeBackgroundRestService
Add a link from the ResponseMessage Process State variable to the Response output of InvokeBackgroundRestService
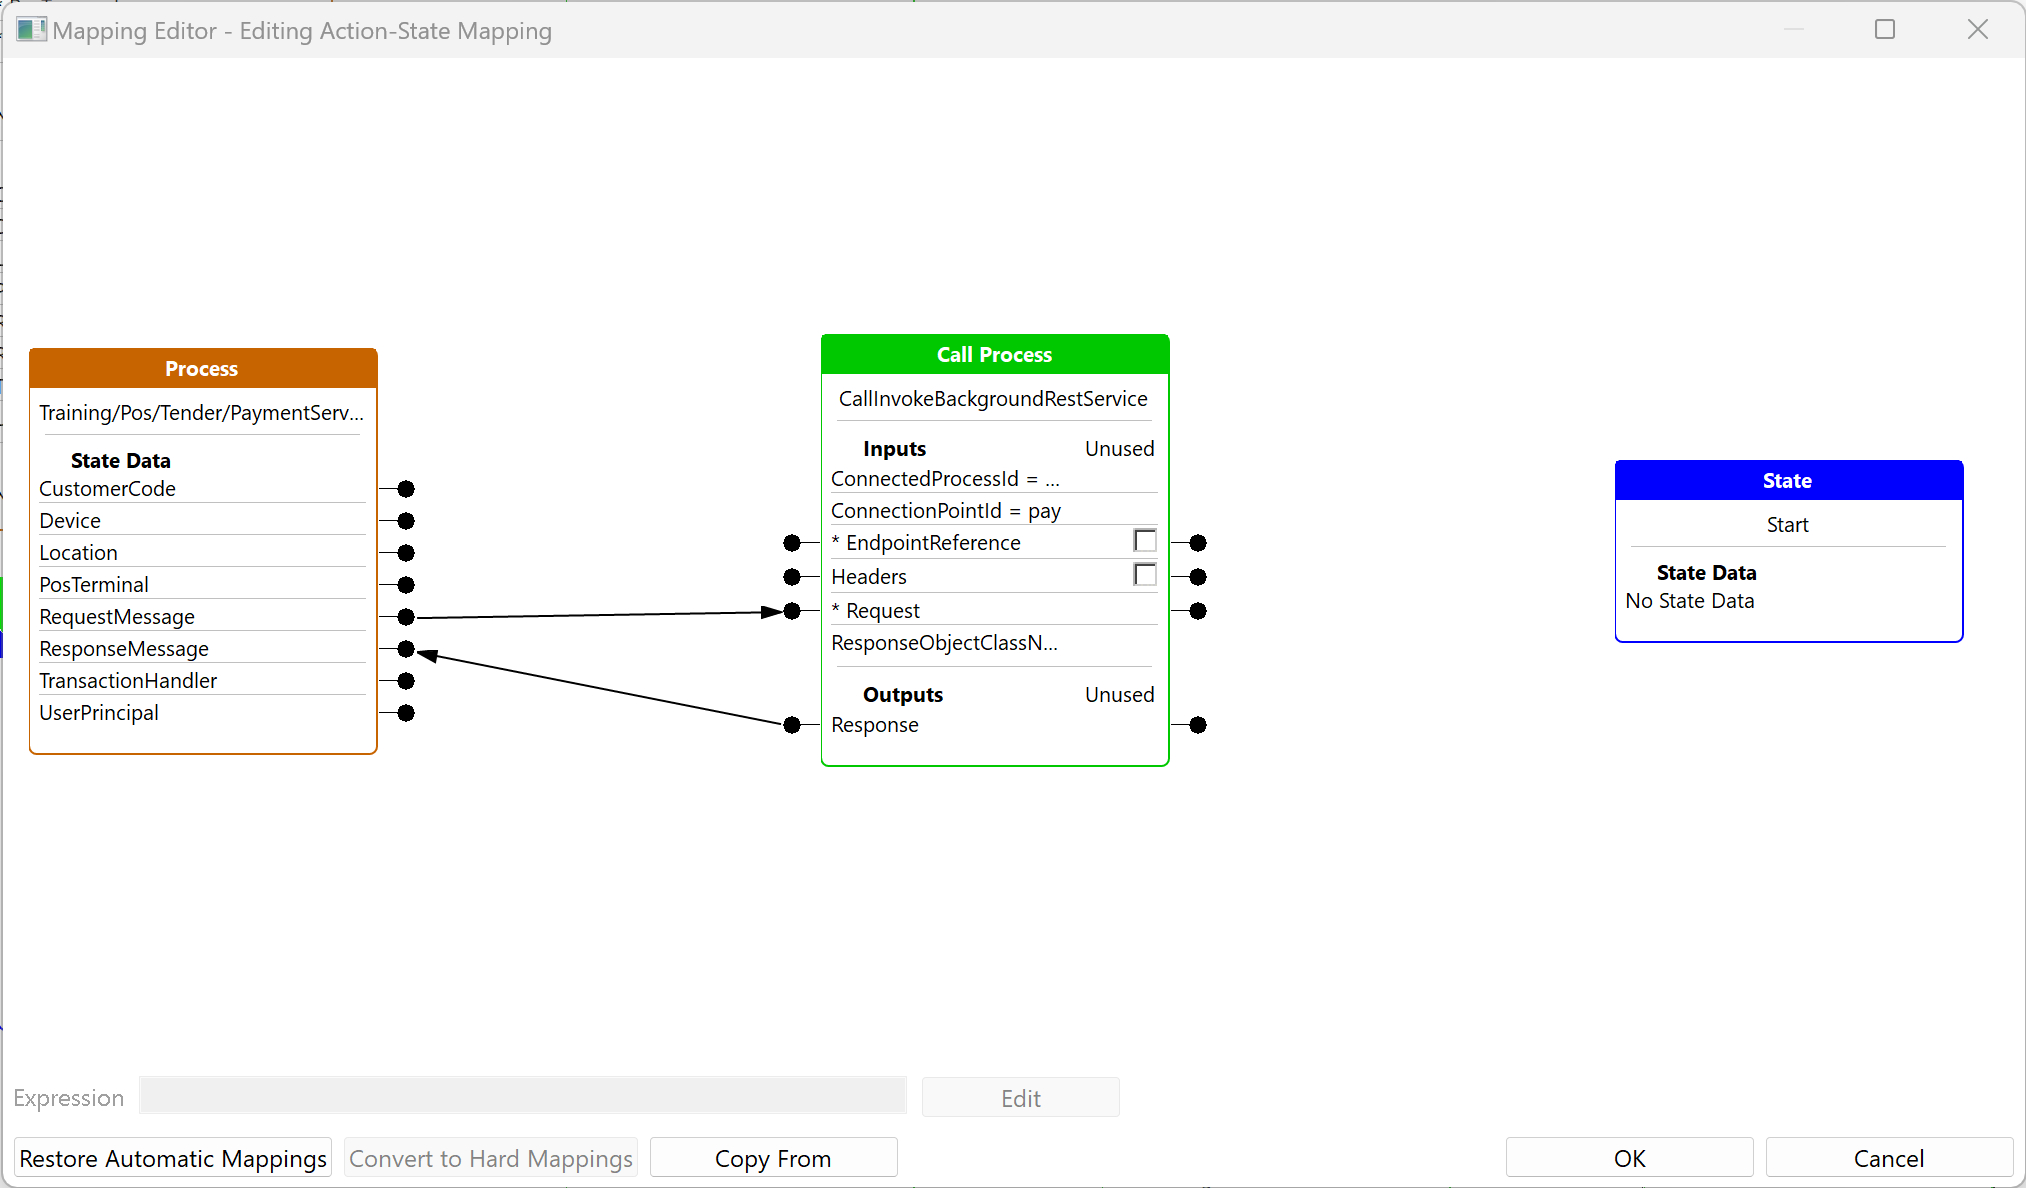
Click OK
Add a link form the Fail, Cancel and Empty outcome of InvokeBackgroundRestService connecting them to the End Process Fail action

From the Palette select and drag on a new Action
Double click the action and select to create a New Action
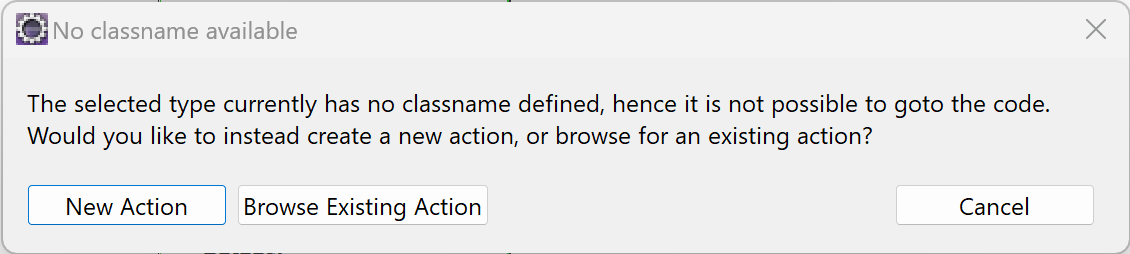
For the package enter to com.enactor.training.paymentService.service.actions.gcash
For the Name enter VerifySignatureAction
For the Input annotations add the following annotations
@Input(name = ResponseMessage.ENTITY_DATA_TYPE_NAME, type = IResponseMessage.class, required = true),
@Input(name = CommonUIDataTypesBase.USER_PRINCIPAL_NAME, type = IUserPrincipal.class, required = true)true)
For the Outcome annotations add the following
CoreUIOutcomes.FAIL_OUTCOME_NAME,
CoreUIOutcomes.SUCCESS_OUTCOME_NAME
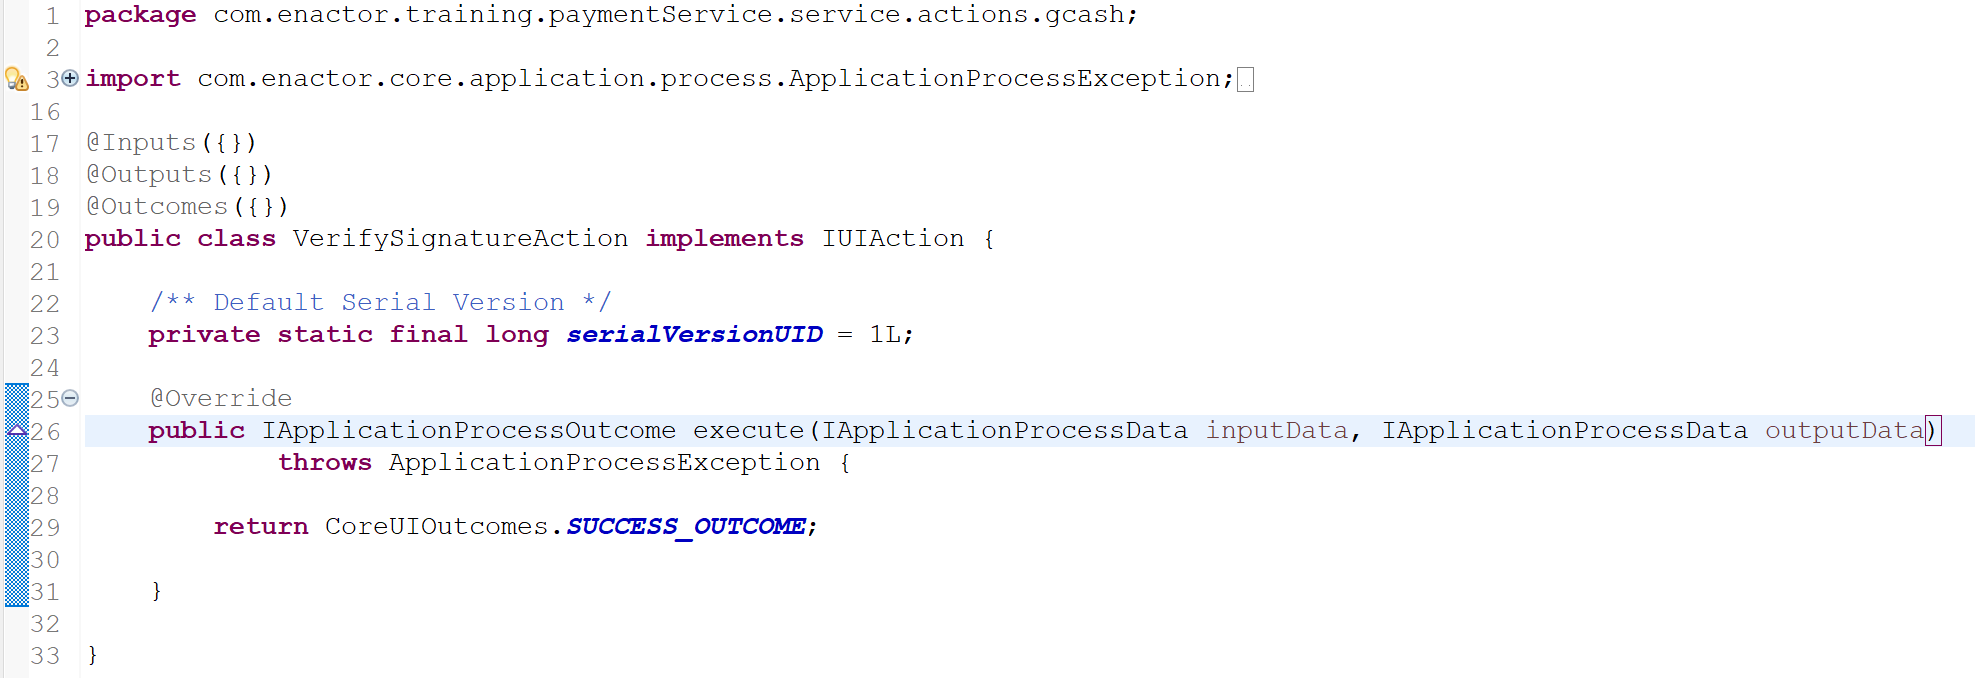
Replace the execute method with the following code snippet
    private static Logger logger = Logger.getLogger(VerifySignatureAction.class.getName());

	@Override
	public IApplicationProcessOutcome execute(IApplicationProcessData inputData, IApplicationProcessData outputData)
			throws UIProcessException, ApplicationProcessException {

		IResponseMessage responseMessage = UIActionFunctions.getRequiredDataItem(inputData, ResponseMessage.ENTITY_DATA_TYPE);

		IUserPrincipal userPrincipal = UIActionFunctions.getRequiredDataItem(inputData, CommonUIDataTypesBase.USER_PRINCIPAL);

		String keyPath = userPrincipal.getCredentialProperties().get(GCashFunctions.CREDENTIAL_PROPERTY_PUBLIC_KEY);

		IJsonSerializerUtil jsonSerializerUtil = JsonSerializerUtil.getInstance(com.enactor.core.json.serializer.JsonSerializerUtil.Format.ENACTOR);

		boolean isValid = false;

		try {
			String payloadJson = jsonSerializerUtil.getUnformattedJSON(responseMessage.getResponse());

			if (logger.isDebugEnabled()) {
				logger.log(Logger.LOG_DEBUG, "Response: \n\r" + payloadJson + "\n\r");
				logger.log(Logger.LOG_DEBUG, "Signature:\n\r" + responseMessage.getSignature() + "\n\r");
			}

			isValid = validateResponse(payloadJson, responseMessage, keyPath);

		} catch (JsonParseException e) {
			throw new ApplicationProcessException(e);
		}

		isValid = isValid && responseMessage.getResponse().getBody().getResultInfo().getResultCode().equals("SUCCESS");

		return (isValid) ? CoreUIOutcomes.SUCCESS_OUTCOME : CoreUIOutcomes.FAIL_OUTCOME;
	}

	protected boolean validateResponse(String payloadJson, IResponseMessage responseMessage, String keyPath) {
		try {
			return GCashFunctions.validateSignatureString(payloadJson, responseMessage.getSignature(), keyPath);
		} catch (Exception e) {
			e.printStackTrace();
			return false;
		}
	}
Return to the PaymentServiceCall Process
Right click the VerifySignatureAction and select Select Synchronise → With Class Annotations
For the Action ID property, enter VerifySignatureAction
Add a link form the Success outcome of InvokeBackgroundRestService process connecting to the VerifySignatureAction action
From the Palette expand the Actions group, add an End Process Action placing above the VerifySignatureAction State
Add a link form the Success outcome of VerifySignatureAction action connecting to the End Process Success action
Add a link form the Success outcome of VerifySignatureAction action connecting to the End Process Success action
Add a link form the Fail outcome of VerifySignatureAction action connecting to the End Process Fail action
Save the Process
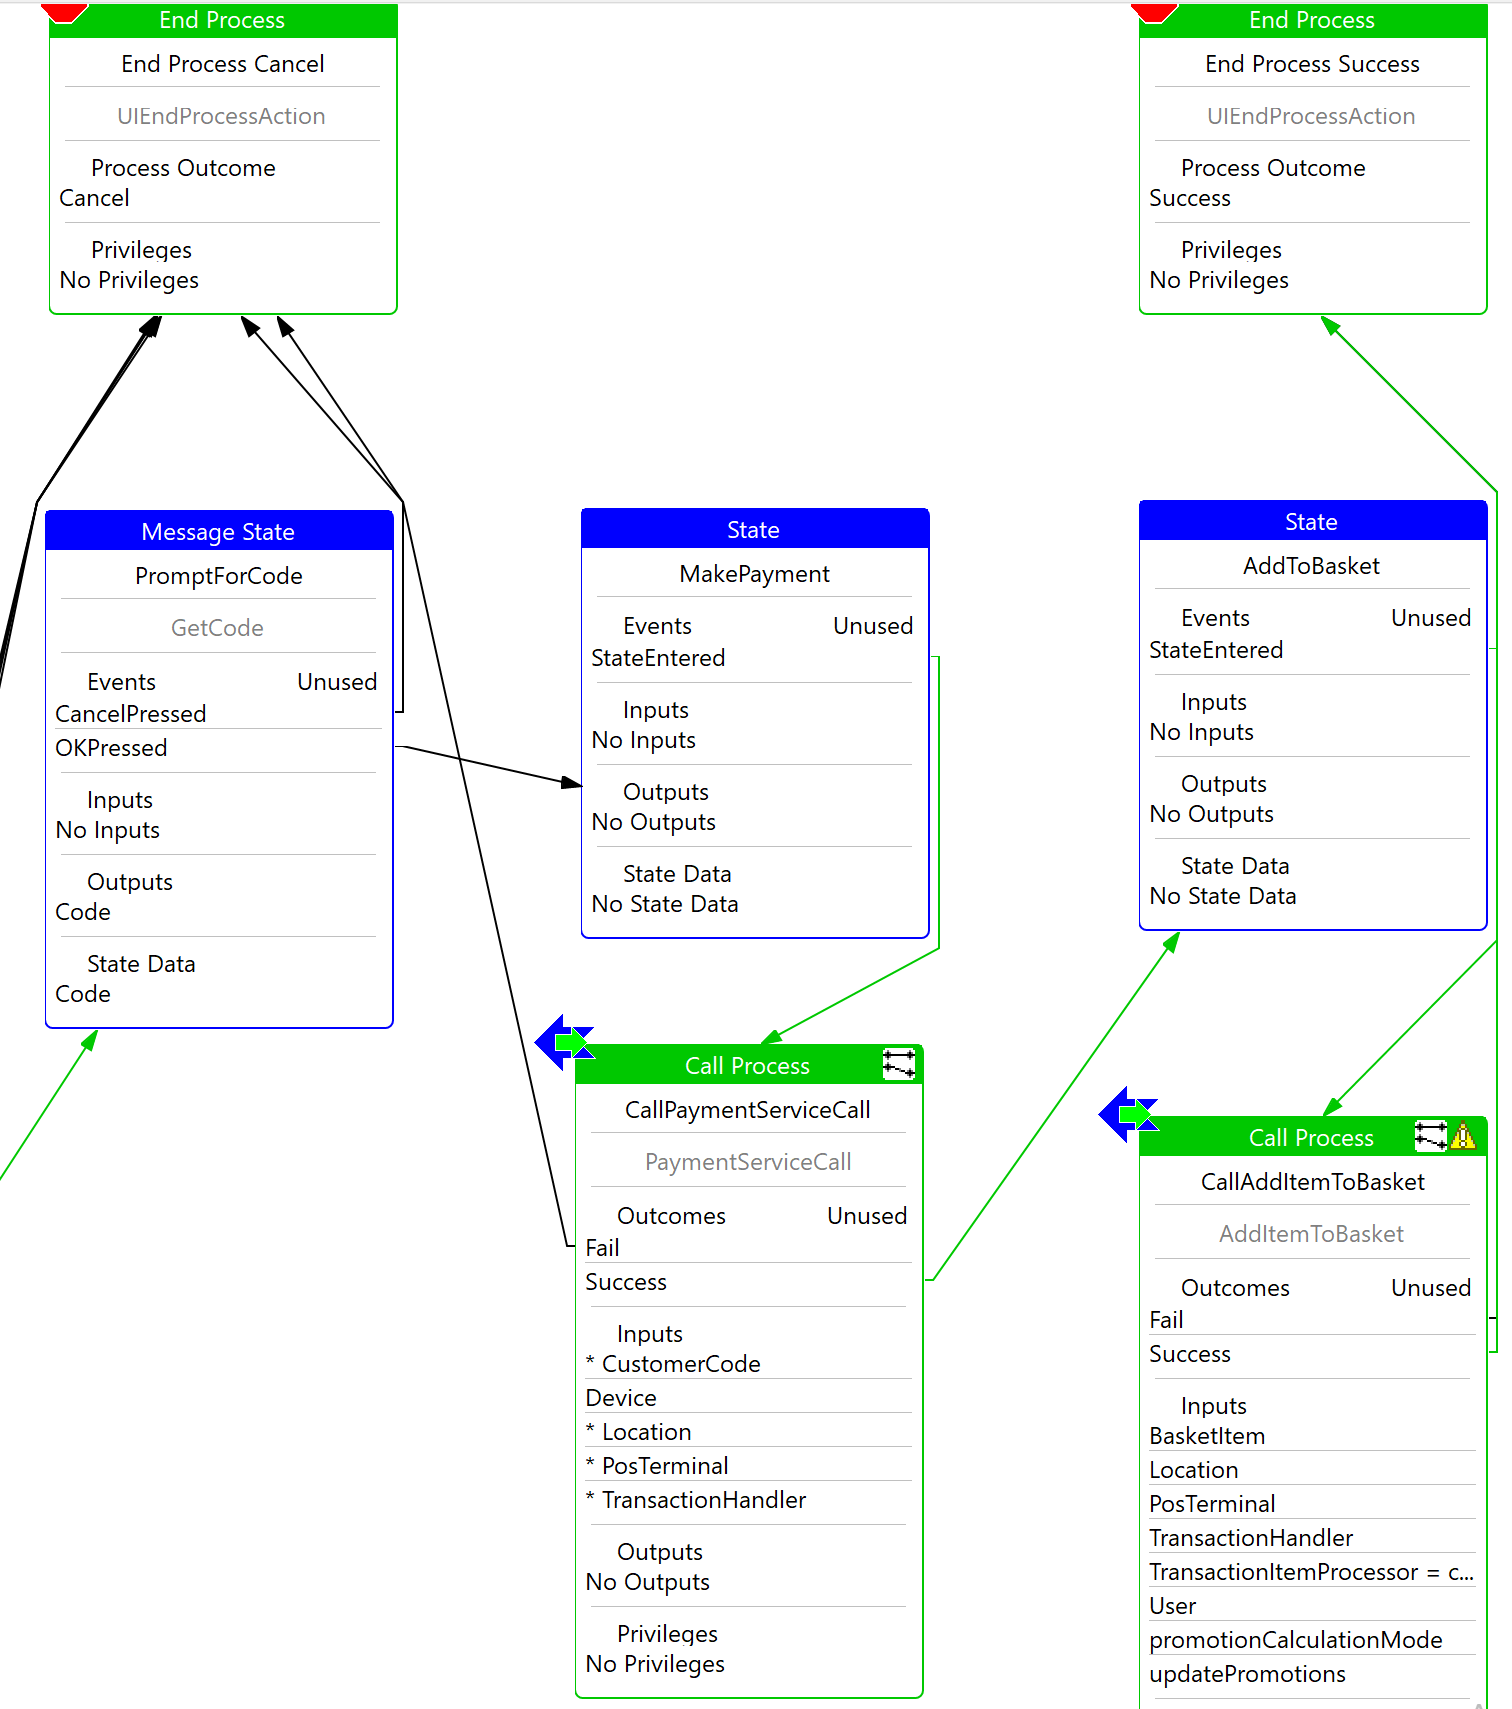
Open the Process CustomPaymentService
Bring up the Resource Library View and search for and open the process PaymentServiceCall
Select and drag to place it bellow the MakePayment State
Add a link form the StateEntered event of MakePayment state connecting to the PaymentServiceCall call process
Add a link form the Fail out of PaymentServiceCall Call Process connecting to the End Process Cancel call process
Add a link form the Success outcome of the PaymentServiceCall Call Process to the AddToBasket state
Answers
The completed solution can be found InvokingARestfulService Project located at /WorkspaceSetup/Solutions/CustomPaymentServiceGCash
To run the solution, import the project as a maven project to your workspace
Select the Training Solution - Custom Payment Service GCash Java launch