POS Automation Training Workspace Setup with Pre-Bundled Enactor Dependencies
Overview
This document explains how to set up a POS Automation Training Workspace for writing and executing automation tests on POS.
In this setup, all required dependencies are provided in a prepackaged ZIP bundle, ensuring a straightforward installation process without the need for external repository access.
By completing the steps in this guide, you will create a separate Eclipse workspace that includes all necessary projects, jars, launch configurations, and settings to act as the Automation Client.
When your already setup POS is configured to run in Automation Mode, it will operate as the AUT server, while the AUT launches from this Automation Workspace will serve as the AUT client, enabling end-to-end automation.
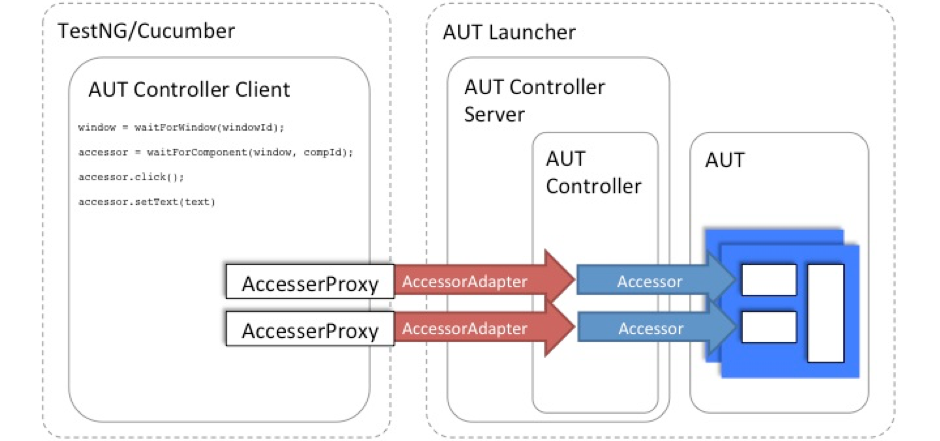
What You Will Learn
- How to setup Eclipse to support POS Automation
- How to set up the Eclipse workspace to run POS Automation using Maven scripts and MSI POS.
Pre-requisites
-
Java
- Java JDK 17 LTS https://adoptium.net/en-GB/temurin/releases/?version=17
-
Eclipse IDE
- If Your Workspace Platform Version is TRUNK-SNAPSHOT, 2.7-SNAPSHOT or above 2.7.1615 (i.e Compiler Compliance Level of the Projects is Java 1.8)
Download :Eclipse 2025-09
For Other Platform Versions (i.e Compiler Compliance Level of the Projects is Java 1.7)
Download :Eclipse 2024-06
- If Your Workspace Platform Version is TRUNK-SNAPSHOT, 2.7-SNAPSHOT or above 2.7.1615 (i.e Compiler Compliance Level of the Projects is Java 1.8)
-
Ensure that Enactor Automation POS is set up.
-
Need to have the Enactor POS Automation zip
Setup an MSI POS in Automation Mode
You will also need an installed Enactor POS (installed using the standard Enactor MSI).
Fresh Installation
Install MSI POS:
- The following installer property should be set in the
.inifile during the installationAUTOMATION_TEST_MODE=true
Existing Installation
If you have installed the Enactor POS without the property above in the .ini file, you can activate the Automation Mode using the following step:
-
Navigate to the POS installation directory (e.g. C:\enactor\pos\scripts), open the setEnv.ps script using a text editor and add the following line:
set AUTOMATION_TEST_MODE=true
Using the Workspace Setup
Download the following zip file AutomationWorkspaceSetup.zip and and extract it into the C:\Development directory
Launch Eclipse and when prompted for a workspace enter the following path C:\Development
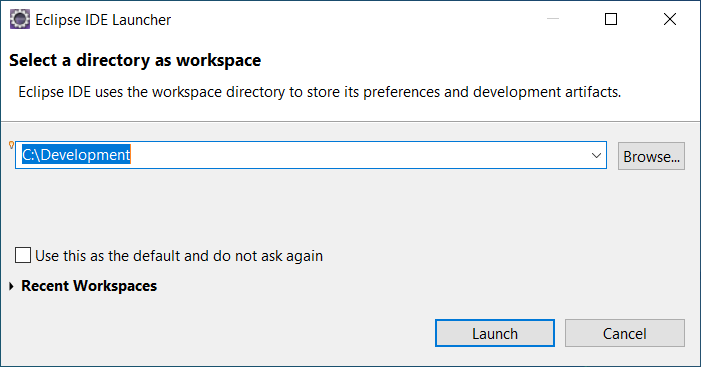
Click Launch... button
Cucumber Plugin Installation
Download Cucumber V2
Extract the ZIP file.
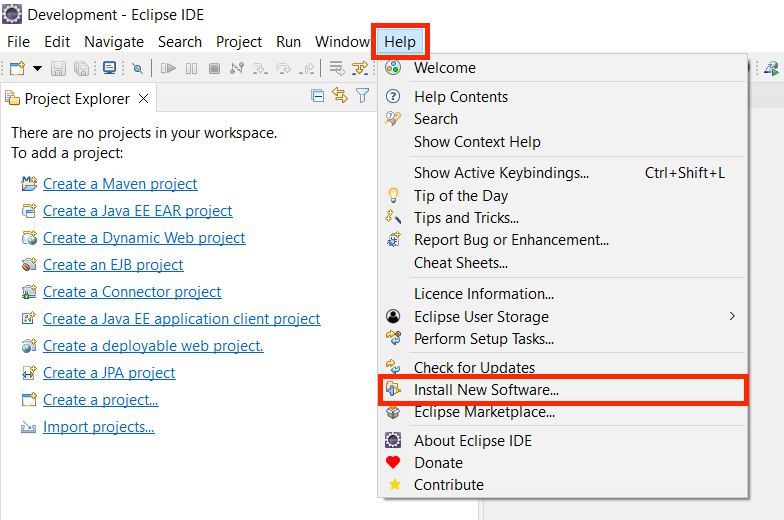
To install the Cucumber plugin, Open the Install New Software wizard by selecting the Help Menu -> Install New Software
Then, navigate to Add -> Local and Browse to the extracted folder.
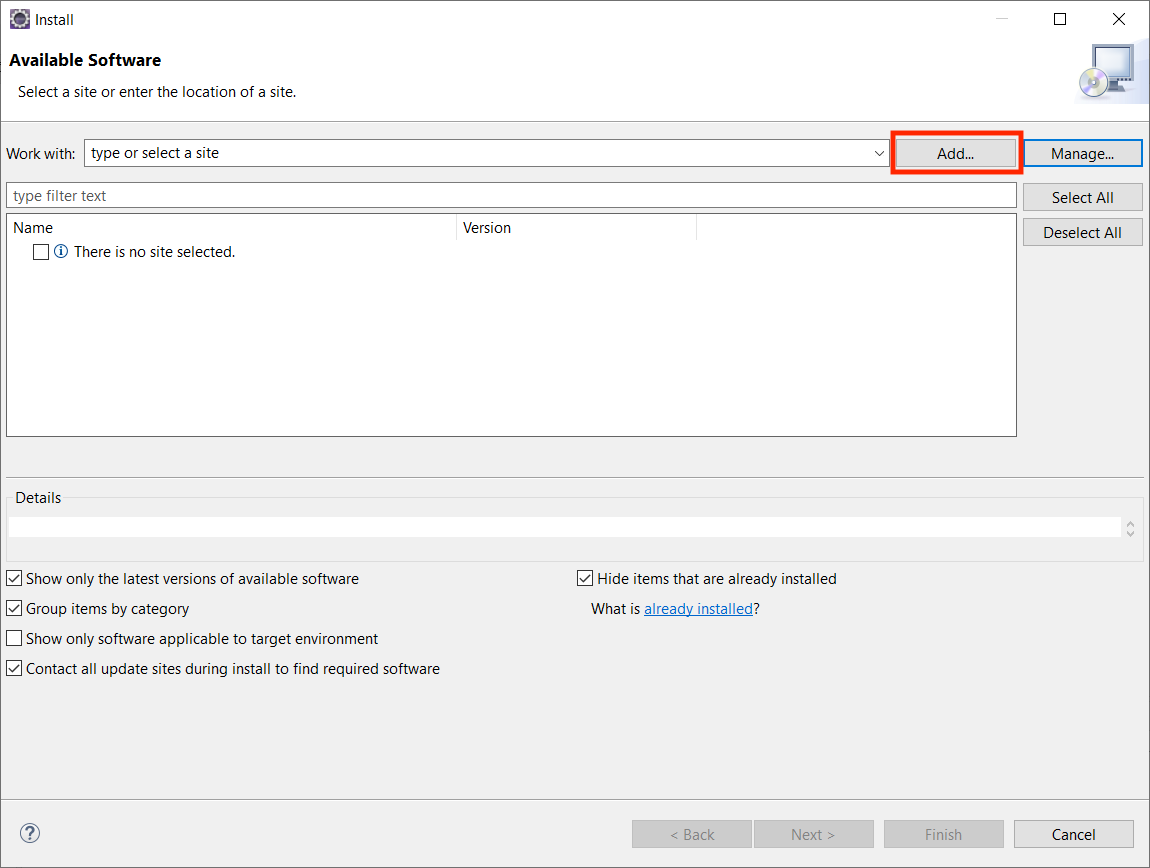
Select available plugin Cucumber Eclispe Plugin plugin and Click Next...button
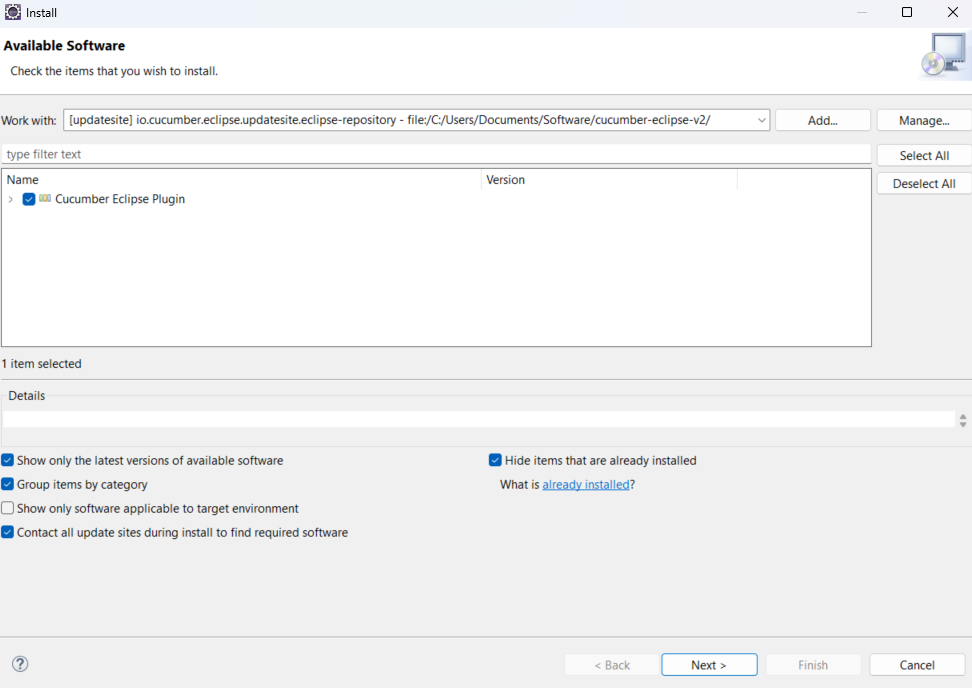
Complete the installation and allow Eclipse to restart.
Switching to the Automation Workspace
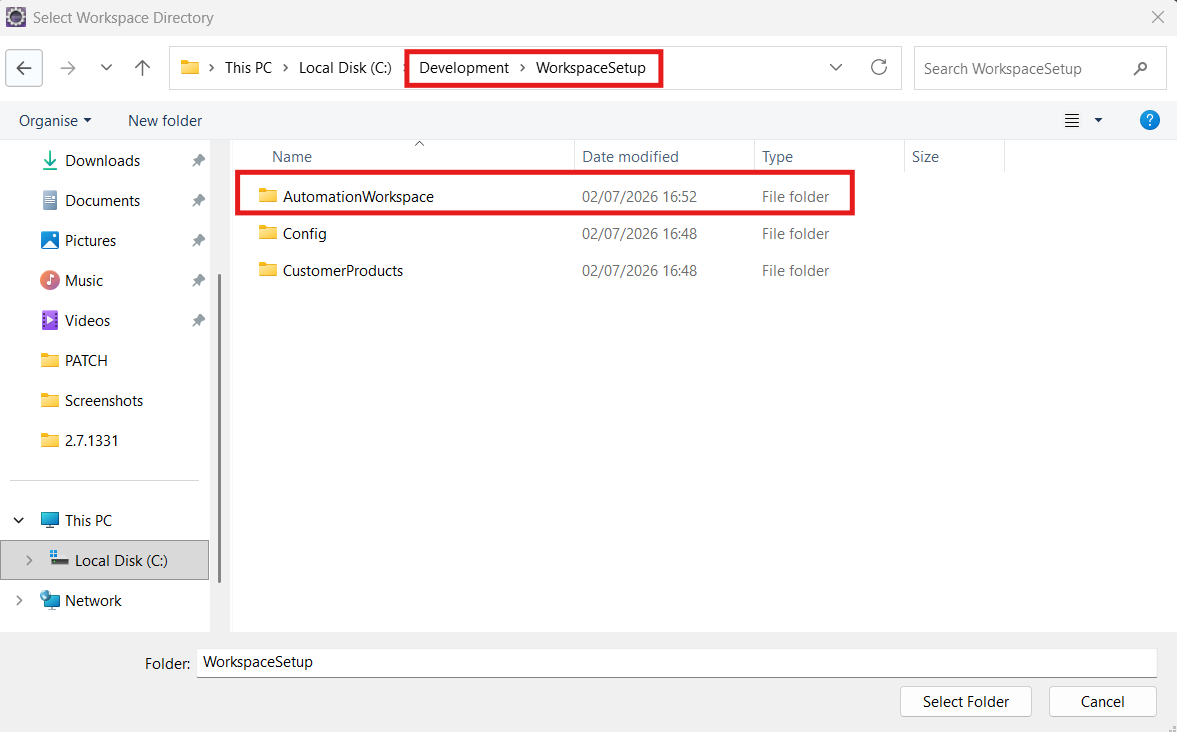
Browse to the AutomationWorkspace directory under /WorkspaceSetup/.
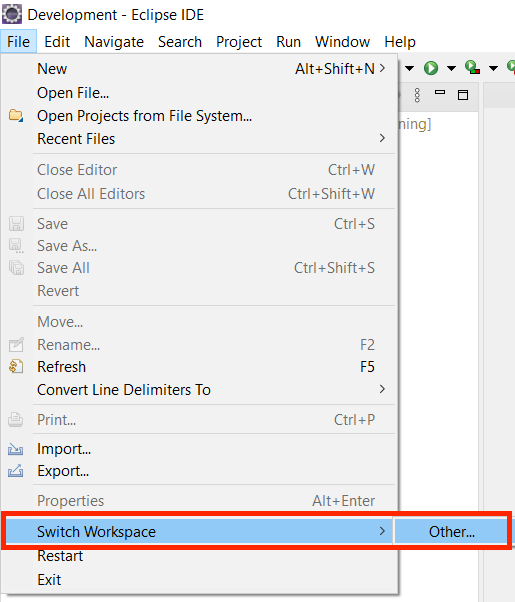
To switch to the Automation workspace, select File menu -> Switch Workspace -> Other
When prompted for a workspace browse to and select the /WorkspaceSetup/AutomationWorkspace directory and click the Select Folder... button
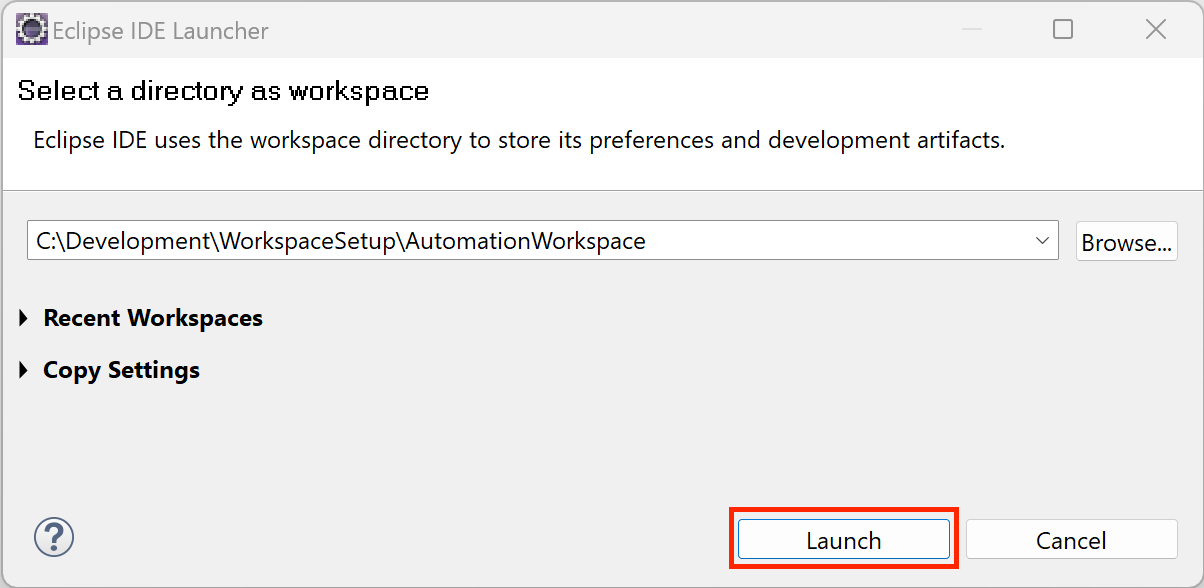
Click Launch... button
Defining an installed JRE
Open the Eclipse Preferences menu
Select Java -> Installed JREs
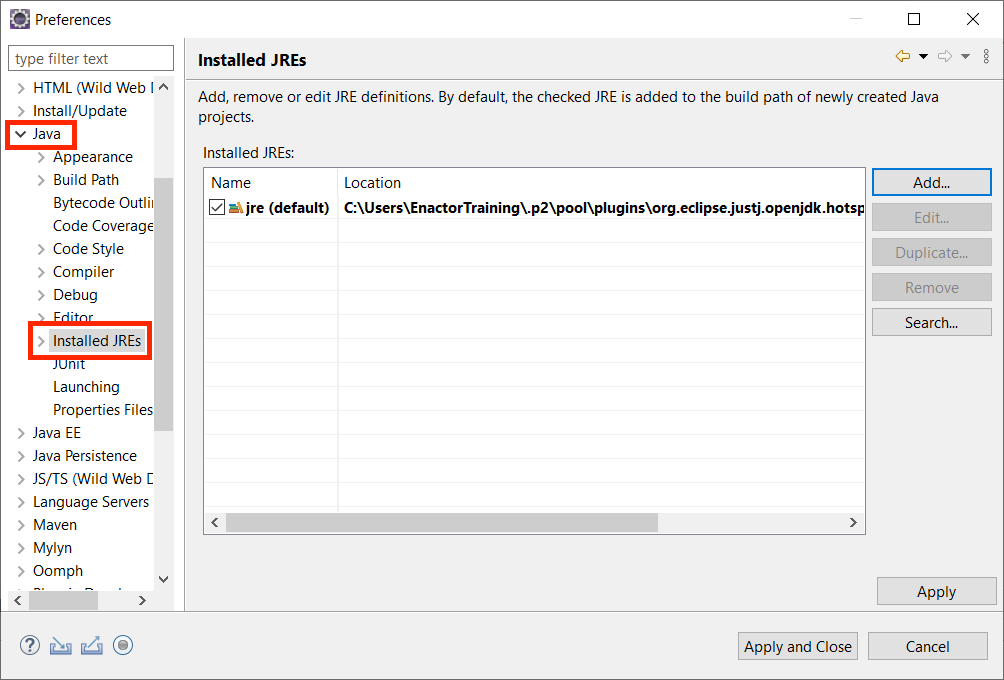
Click Add...button
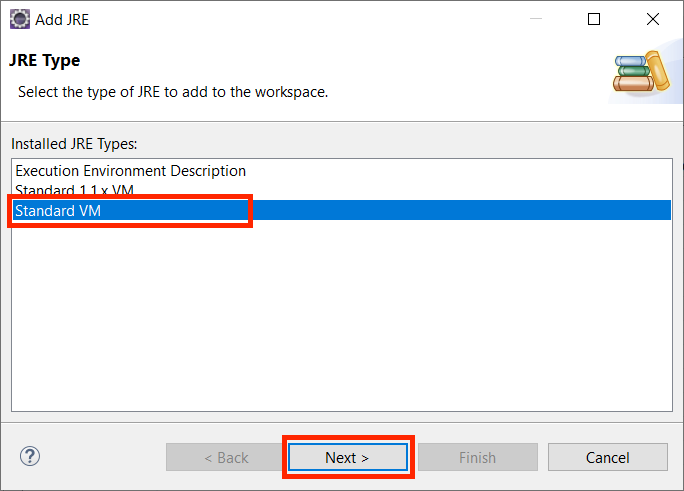
Select Standard VM for the installed JRE Type
Click Next...button
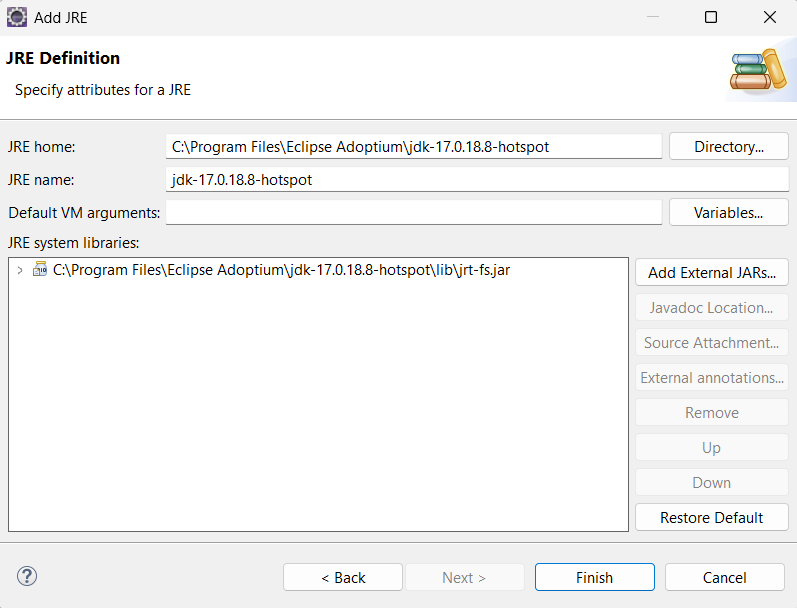
Update the JRE home text box by browsing / entering the location of the JDK home directory
Update the JRE name text box by entering default_jre
Click Finish...button
Check the default_jre to make it the default JRE eclipse should use
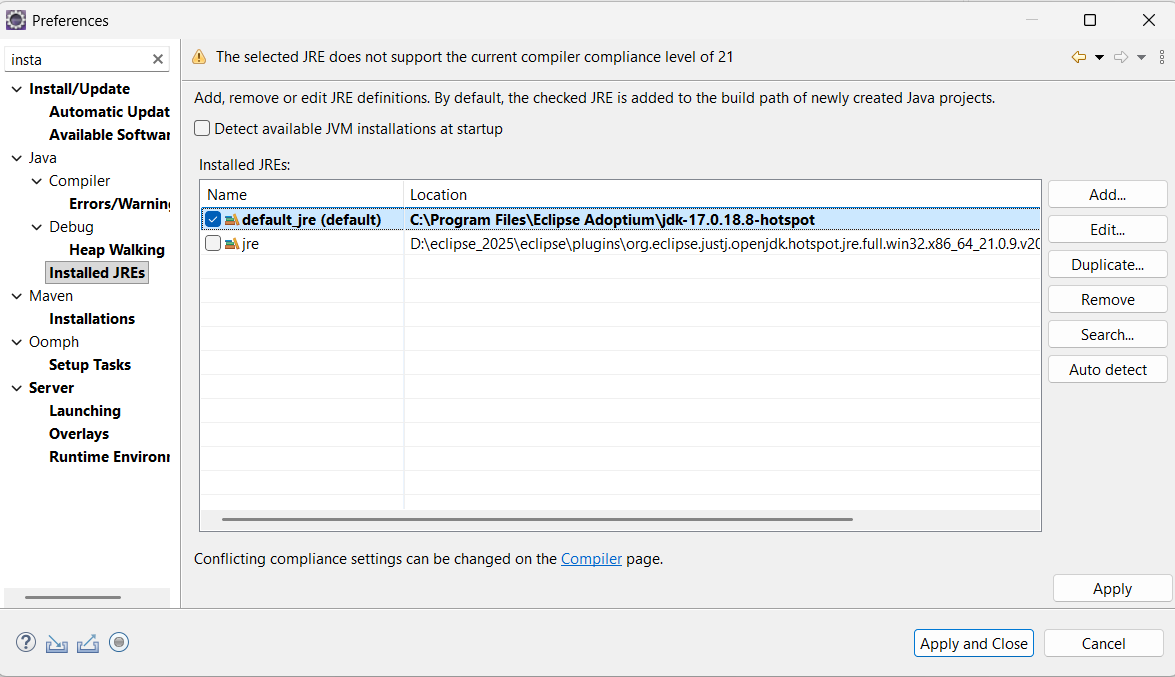
Click Apply and Close
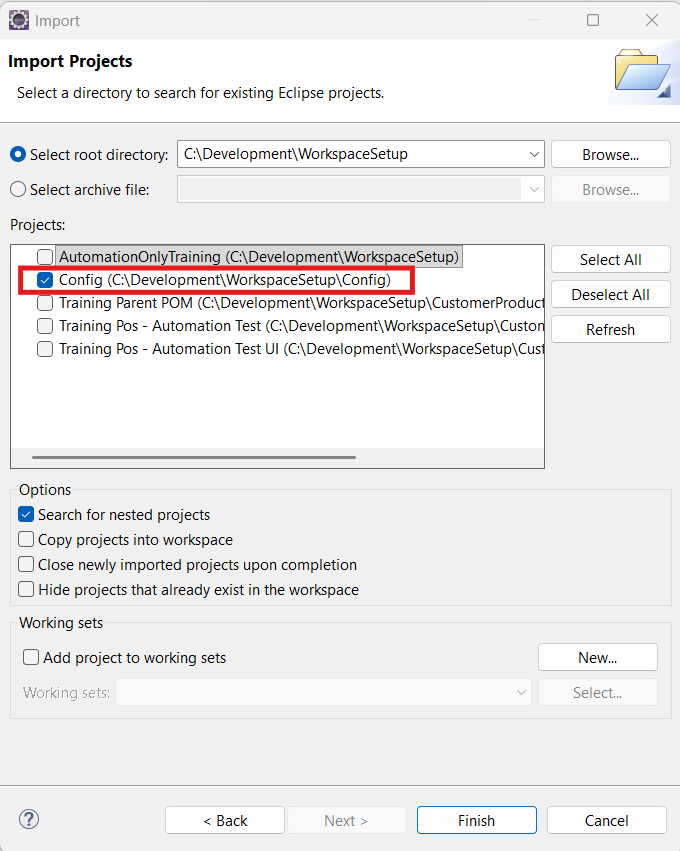
Import Config
Select File menu -> Import
From the Import dialog, Expand the General collection and select Existing Projects into Workspace
Click Next... button
Update the Select root directory text box by browsing to the location of the /WorkspaceSetup
Select Search for nested projects
Click on the Deselect All button
Select the Config project.
Click Finish
Importing The Working Projects
Select File menu -> Import
From the Import dialogue, Expand the Maven collection and select Existing Maven Projects
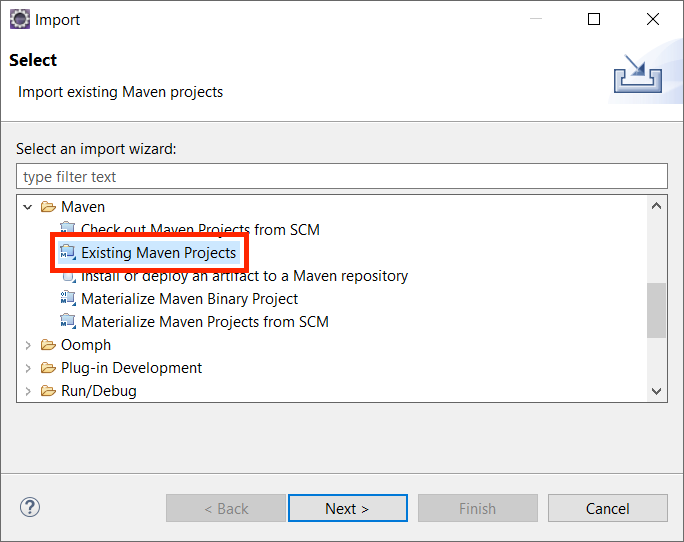
Click Next... button
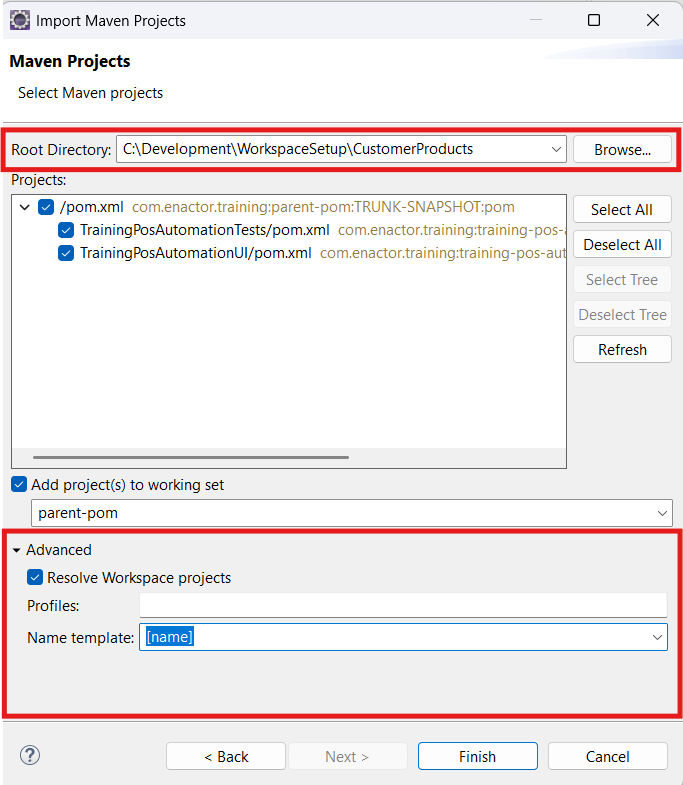
Update the Root directory text box by browsing to the location of the /WorkspaceSetup/CustomerProducts
Expand Advanced and from the drop-down of Name Template select name
Click Finish... button
Extract Enactor Dependencies
You need to install the bundled enactor dependencies.
For that, extract the given Automation.zip folder.
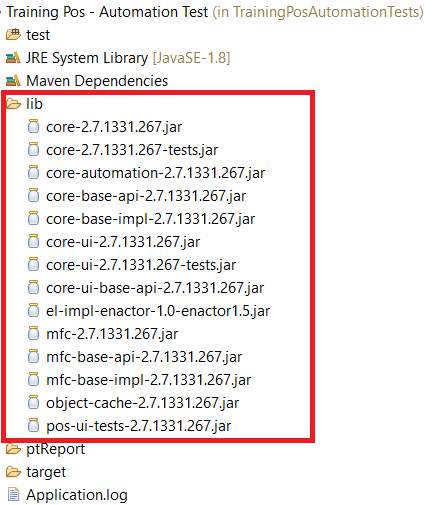
Copy all the jars in enactor-lib folder to the lib folder of Training Pos - Automation Test project.
Then, open the pom.xml of Training Parent POM project.
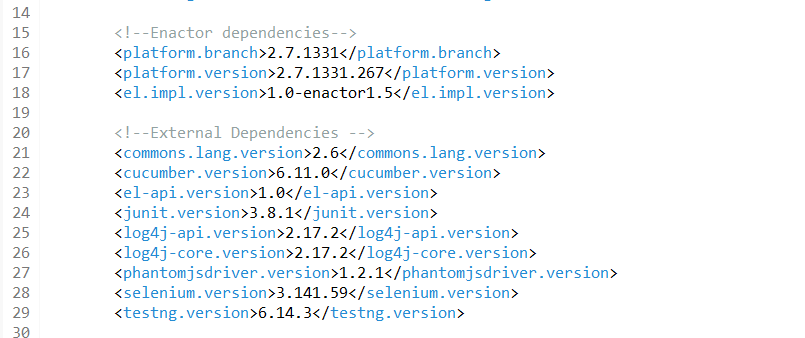
First, you need to update the versions of platform.branch and the platform.version.
For that,consider the core jar dependency inside the enactor-lib folder.
If the dependency name is core-2.7.1331.267.jar, update the pom.xml as follows.
- platform.branch - 2.7.1331
- platform.version - 2.7.1331.267
Then, update the versions of both Enactor and external dependencies by matching them with the extracted JAR files.
ex: If the el-impl-enactor-1.0-enactor1.5.jar is present, update the el.impl.version as follows.
<el.impl.version>1.0-enactor1.5</el.impl.version>
Further, Consider having the ext-lib jars as folllows.
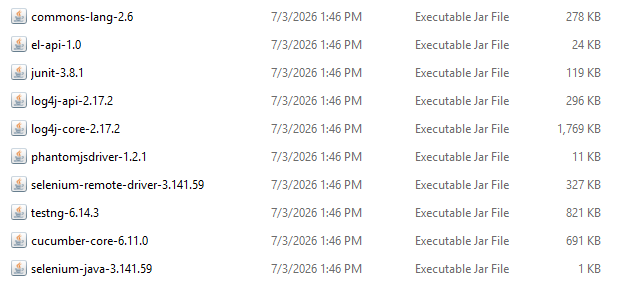
When the versions are updated accordingly, Your pom.xml should look as below.
Build Automation Jars
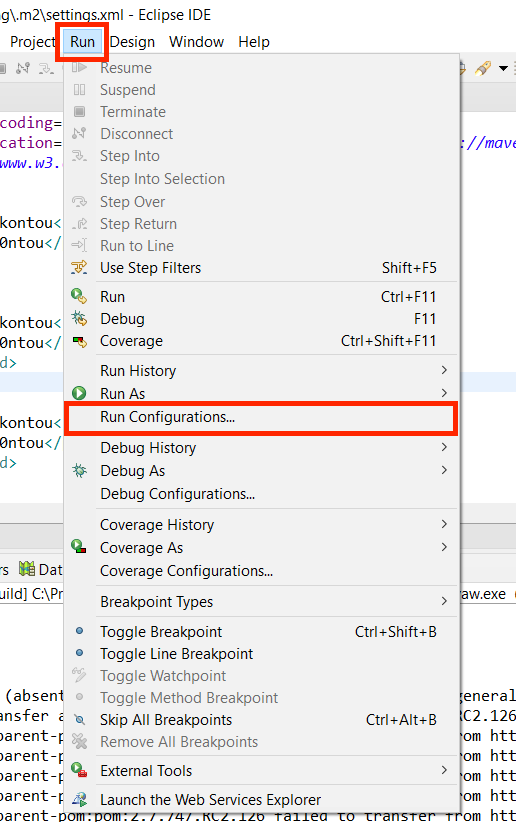
Build the extracted enactor dependencies using Run menu -> Run Configurations
Select Install Enactor Dependencies
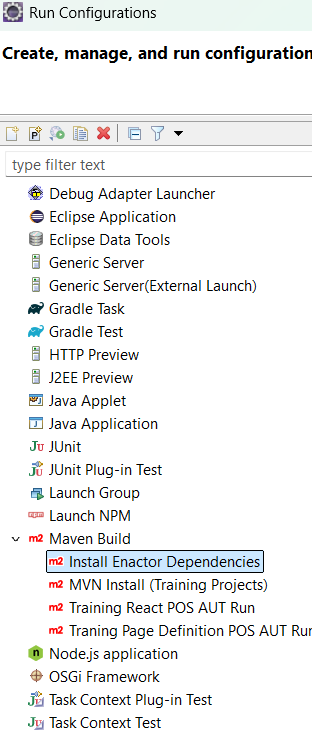
Go to the JRE section, choose Alternate JRE:, select the installed Java version (see details below), and click Run to proceed.
- Java JDK 17 LTS https://adoptium.net/en-GB/temurin/releases/?version=17
Build the Working Projects
Build the projects by refering Building local Projects and do a Maven update.
Running a feature
Refer Running a feature to run automation using Cucumber and Maven.