Sale Menu Function Extension Tutorial
Overview
The Sale Menu is the set of buttons shown on the POS during a transaction. Each button fires an Event when pressed. Core Enactor already handles its own built-in events (SellProduct, Total, PriceOverride, etc.) - but a custom event you define yourself needs somewhere to go. That "somewhere" is the Pos/Sale/HandleFunctions2 process, which calls an extension point named HandleFunctionExtension for exactly this purpose.
This tutorial adds a new button to the Sale Menu, gives it its own custom Event, and writes a custom Application Process that plugs into HandleFunctionExtension to catch that Event and display a confirmation message, before returning control to the sale screen.
What you will learn
- How to register your own Application Process against the
HandleFunctionExtensionextension point - How to use
CheckEventActionto react to a specific Event - How to use an
Assignaction to read the current Event's name - How to register a new Event on a Menu Set and add a button that uses it
Pre-requisites
- POS Extension Tutorial
- Java Action Tutorial
- Estate Manager (EM) up and running
- The
TrainingPOSExtensionproject created in the Create a POS Extension tutorial
Exercises
Step 1 - Find the extension point
-
Bring up the Resource Library view, switch to the Search tab, and search using the
ext:prefix (see Search Extension Points):ext:*handlefunction* -
This lists the registered extension point
HandleFunctionExtension.
-
Double-click the search result to open the
Pos/Sale/HandleFunctions2process in the Application Process Editor. -
In the Outline view, expand Actions and locate
CallHandleFunction2Extension- this is the action that calls out to theHandleFunctionExtensionextension point.
Step 2 - Create and register your process
-
In the Project Explorer, expand your
TrainingPOSExtensionproject down to its Process directory,src/META-INF/deployments/Process. -
Navigate to the
Pos/Salefolder (create it if it doesn't already exist, via right-click New -> Folder). -
Right-click the
Salefolder, select New -> Other, expand Enactor Development, select Application Process, and click Next >. -
Enter a Process ID of
ShowStoreNoteExtension, ensure Register in Packages is ticked, and click Finish. This creates the process file and opens it in the Application Process Editor.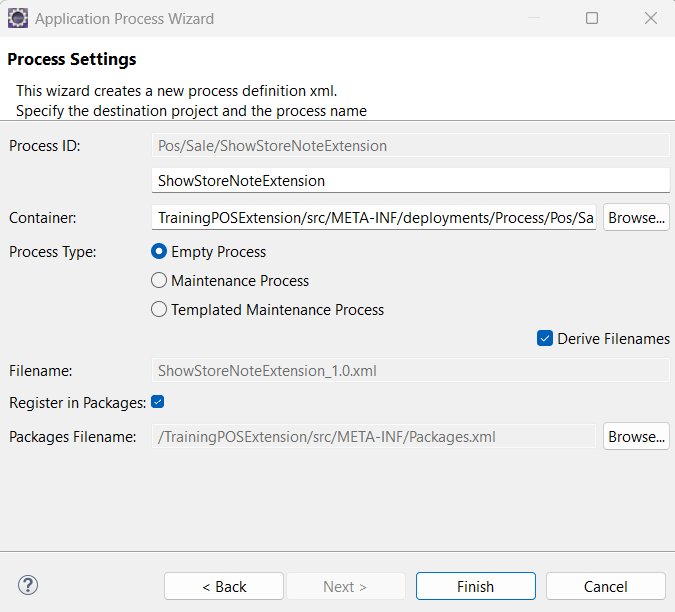
-
Open your project's Packages.xml and select the Extensions tab.
-
Within Package Extensions / Extensions, click Add.
-
Select the newly added row and fill in:
| Property | Value |
|---|---|
| Name | TrainingShowStoreNoteExtension |
| Extension Point | HandleFunctionExtension |
| Extension URL | Click Browse and select the ShowStoreNoteExtension process you just created |
| Type | Process |
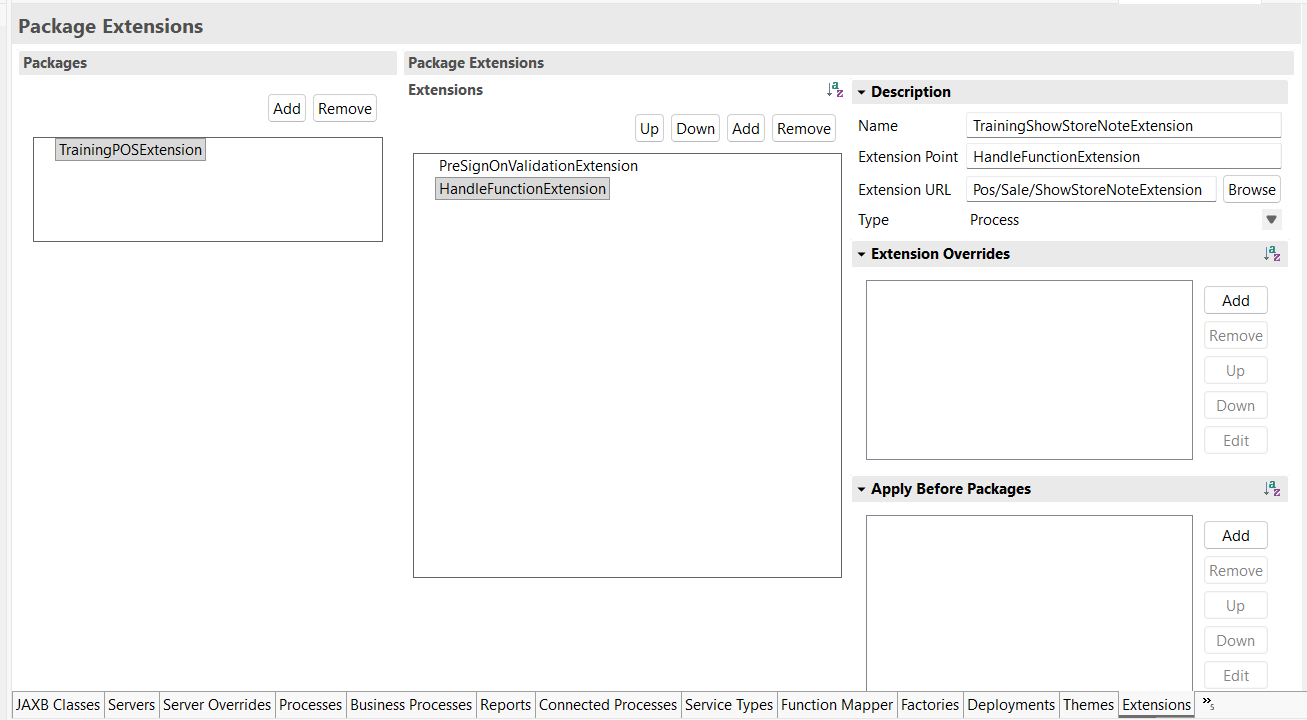
- Save Packages.xml.
Step 3 - Build the process
Open the newly created ShowStoreNoteExtension process.
- Right-click the Process and select Show Properties. Set:
| Property | Value |
|---|---|
| Inputs | enactor.coreUI.CurrentEvent [com.enactor.core.events.IEvent] |
| State Data | enactor.coreUI.CurrentEvent [com.enactor.core.events.IEvent] noteText [java.lang.String] |
-
From the Palette, drag a new State onto the canvas. Set State ID to
Startand add theStateEnteredevent. -
Bring up the Resource Library, search for
CheckEventAction, and drag it onto the canvas.
-
Right-click it, Show Properties, and set:
| Property | Value |
|---|---|
| Action ID | CheckStoreNoteEvent |
| Inputs | enactor.coreUI.CurrentEvent [com.enactor.core.events.IEvent] |
| Outcomes | ShowStoreNoteEvent, Unknown |
- Link the StateEntered event of Start to CheckStoreNoteEvent.
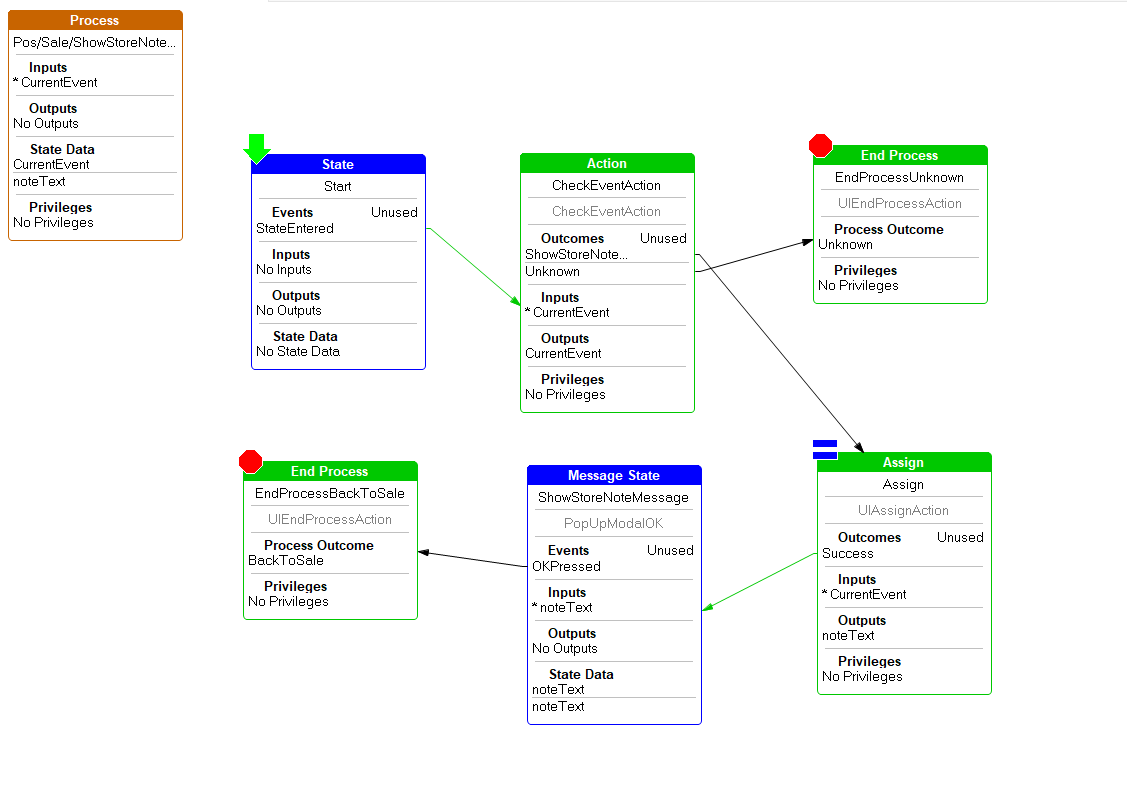
CheckEventAction compares the incoming event's name against the outcomes you've declared on it. If the event fired by the button is named ShowStoreNoteEvent, that becomes the outcome. Anything else raises Unknown, so the process ignores every other button on the Sale Menu and reacts only to its own.
Handle the matched event
-
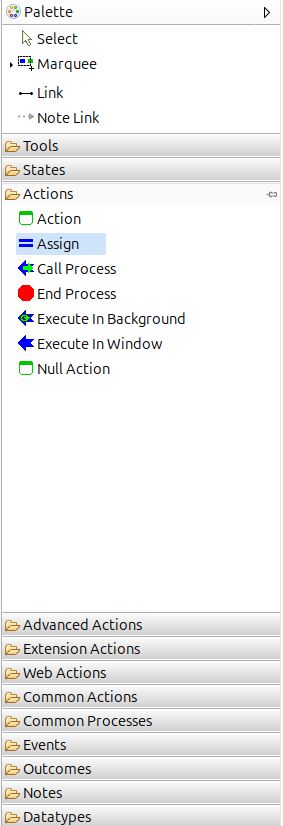
From the Palette, expand Actions and drag the Assign action (= icon) onto the canvas.
-
Connect the ShowStoreNoteEvent outcome of
CheckStoreNoteEventto this Assign action. -
Right-click the Assign action -> Show Properties, and set its Inputs to
enactor.coreUI.CurrentEvent [com.enactor.core.events.IEvent]and its Outputs tonoteText [java.lang.String]. -
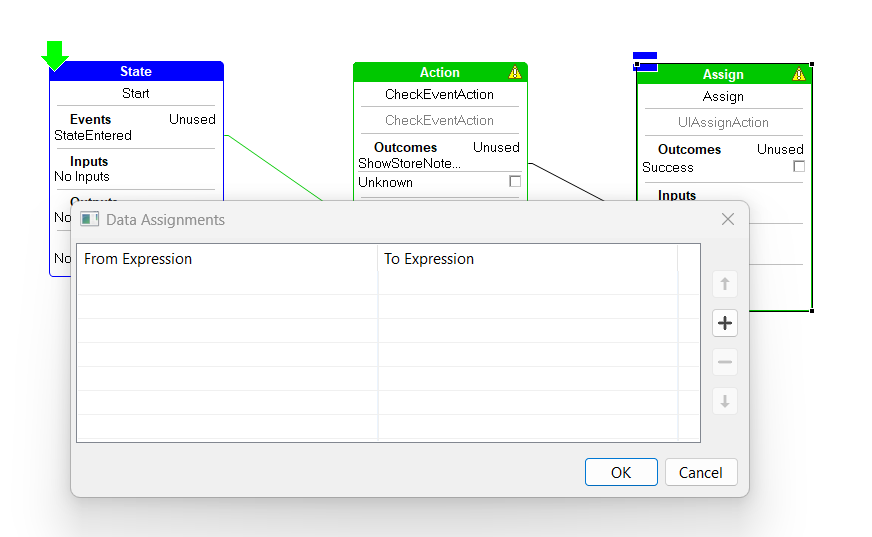
Double-click the Assign action to open its Data Assignments window. Click + to add a row.
-
Double-click the new row's From Expression cell to open Configure Expression, and enter:
currentEvent.eventName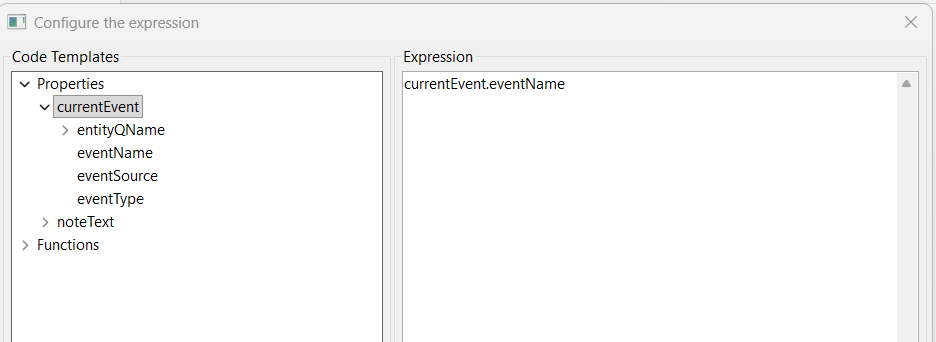
-
Double-click the To Expression cell of the same row and enter
noteText. -
Click OK on both dialogs, then OK on Data Assignments.
-
Add a Message State from the Palette. Set:
| Property | Value |
|---|---|
| Name | Show Store Note Message |
| State ID | ShowStoreNoteMessage |
| Events | OKPressed |
| Inputs | noteText [java.lang.String] |
| Message Base | TrainingPOSExtension/TrainingPOSExtensionMessages |
| Message ID | StoreNoteMessage |
| URL | /Message/PopUpModalOK |
-
Connect the Success outcome of the Assign action to
ShowStoreNoteMessage. -
Add an End Process action, Action ID
EndProcessBackToSale, Process OutcomeBackToSale. Connect the OKPressed event ofShowStoreNoteMessageto it.
Handle everything else
-
Add a second End Process action, Action ID
EndProcessUnknown, Process OutcomeUnknown. Connect the Unknown outcome ofCheckStoreNoteEventto it. -
Save the process. The completed process should look like this:
Step 4 - Add the message resource
Add the following line to TrainingPOSExtension/TrainingPOSExtensionMessages.xml:
<ns2:message key="StoreNoteMessage">You pressed a custom function: {noteText}</ns2:message>
Step 5 - Register the event and add the button to the Sale Menu
Menu content for the POS is configured in Estate Manager. Make sure any menu and menu set changes made here reach your POS (e.g. shared database, or broadcast/replication if EM and POS are on separate environments) before restarting it.
Register the event on the Menu Set:
- Log in to EM and navigate to Configuration > System > Menu Sets.
- Edit the POS menu set.
- Go to the Options tab and select Sale from the Menu dropdown.
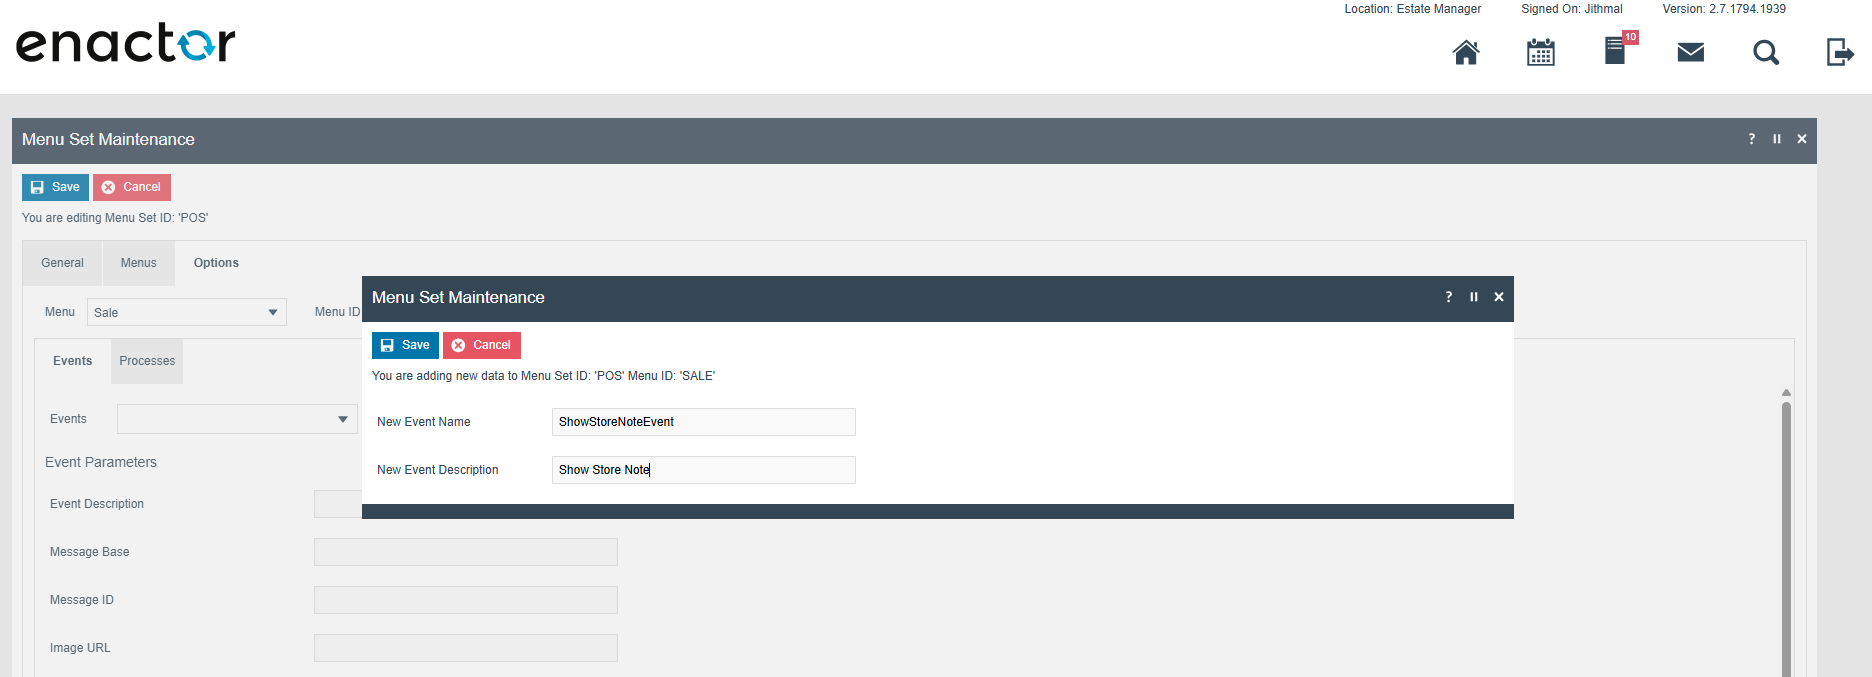
- Add a new Event with:
| Field | Value |
|---|---|
| Events | ShowStoreNoteEvent |
| Event Description | Show Store Note |
- Select Save.
Add the button to the Sale Menu:
-
Navigate to Configuration > System > Menus.
-
Filter by Menu Group
Default Standard POSand Menu IDSALE, then edit the filtered entry. -
Select an existing folder (e.g.
Sales) and click Add -> Add a new Button. -
Set the Button Label (e.g.
Store Note), a free Position, and the Event toShowStoreNoteEvent.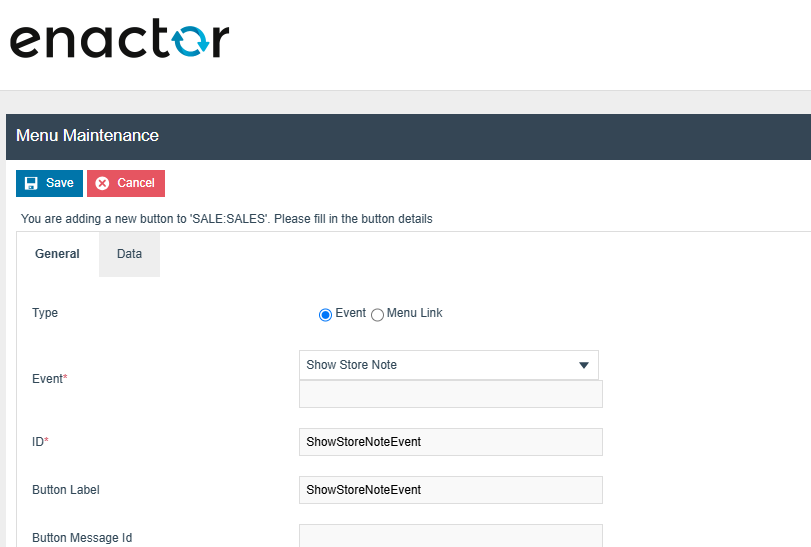
-
Save the menu.
Step 6 - Build and run
- Go to Run -> Run Configuration -> Maven Build and select MVN Install (TrainingPOSExtension), then click Run.
- After a successful build, go to Run -> Run Configuration -> Java Application, select Training React POS, and click Run.
Sign in, open the basket, and press the new Store Note button. A popup should appear showing:
You pressed a custom function: ShowStoreNoteEvent
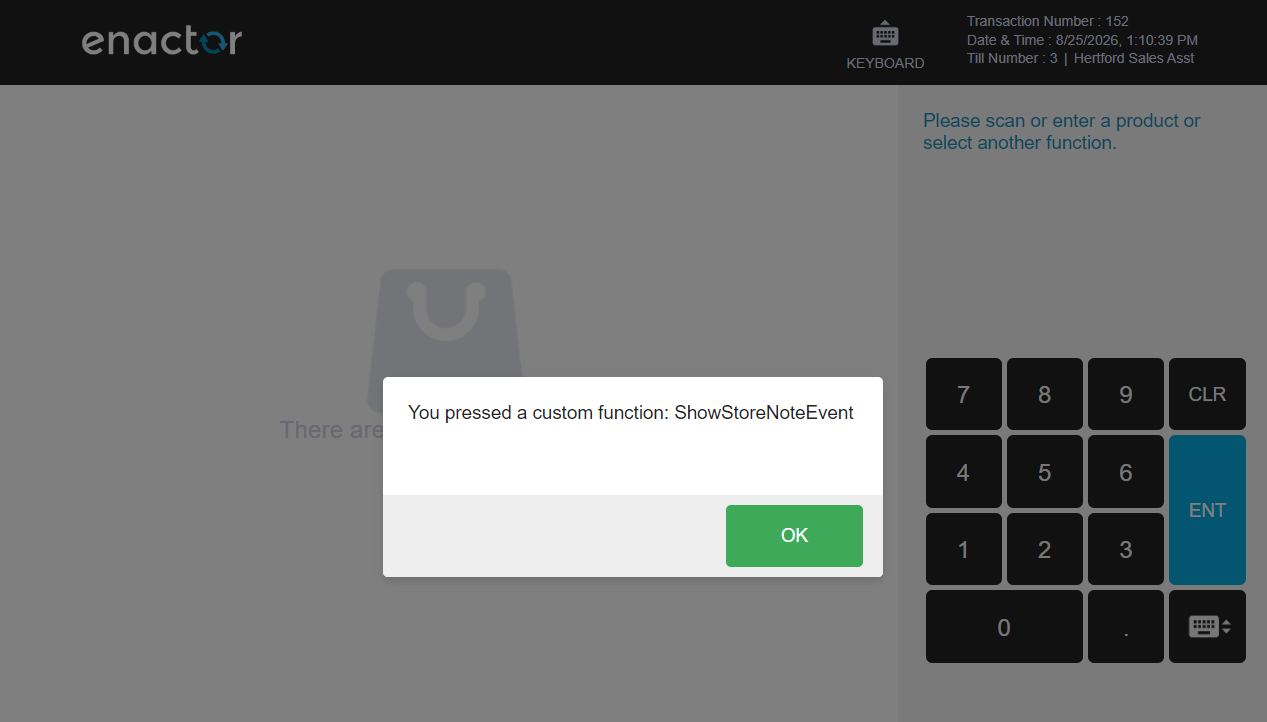
Press OK to return to the Sale screen.
Recap
- Sale Menu buttons carry an Event into the running Application Process when pressed.
- Unrecognised events fall through to
Pos/Sale/HandleFunctions2, which calls theHandleFunctionExtensionextension point. - You register your own Application Process against that extension point via
Packages.xml. - Inside it,
CheckEventActionlets you react only to your own Event, and anAssignaction lets you read values off the Event using an expression likecurrentEvent.eventName. - Finish with a valid outcome (e.g.
BackToSale,Unknown) to hand control back cleanly.