Messages and Localisation
Overview
This tutorial covers how to work with messages and localisation in the Enactor platform. It explains how to modify existing POS messages interactively, how to introduce a new language by configuring a locale in Estate Manager, and how to create new message resources for custom extensions.
What You Will Learn
- How to use the Interactive POS Translation Tool to amend existing messages
- How to add a new language by creating a locale in Enterprise Manager
- How to create new message resources for POS extensions
Changing Existing Messages
The Enactor solution provides the ability to interactively translate messages on the React POS.
The option can be enabled by adding the following parameter to the
enactor.xml file (<Enactor home>\pos\configuration), then restarting
the POS application.
core:coreProperty
<core:coreProperty name="ReactPos.AllowAdvancedConfiguration" value="true"/>
This function can slow POS performance, so should not be enabled on a production POS.
The On-Screen translation tool can only be used to amend Application Translations; it is not possible to translate, for example, Product descriptions or Menu labels.
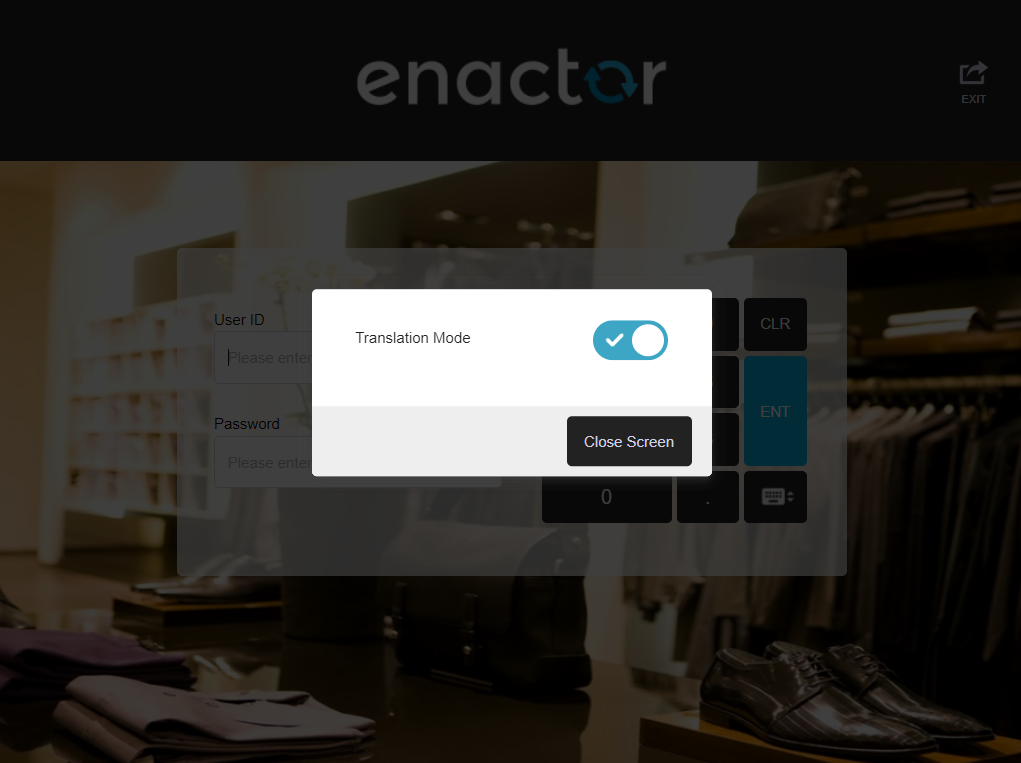
Once the above parameter is set, the Translation Tool can be enabled by clicking on the Enactor logo on the Sign-on Page.
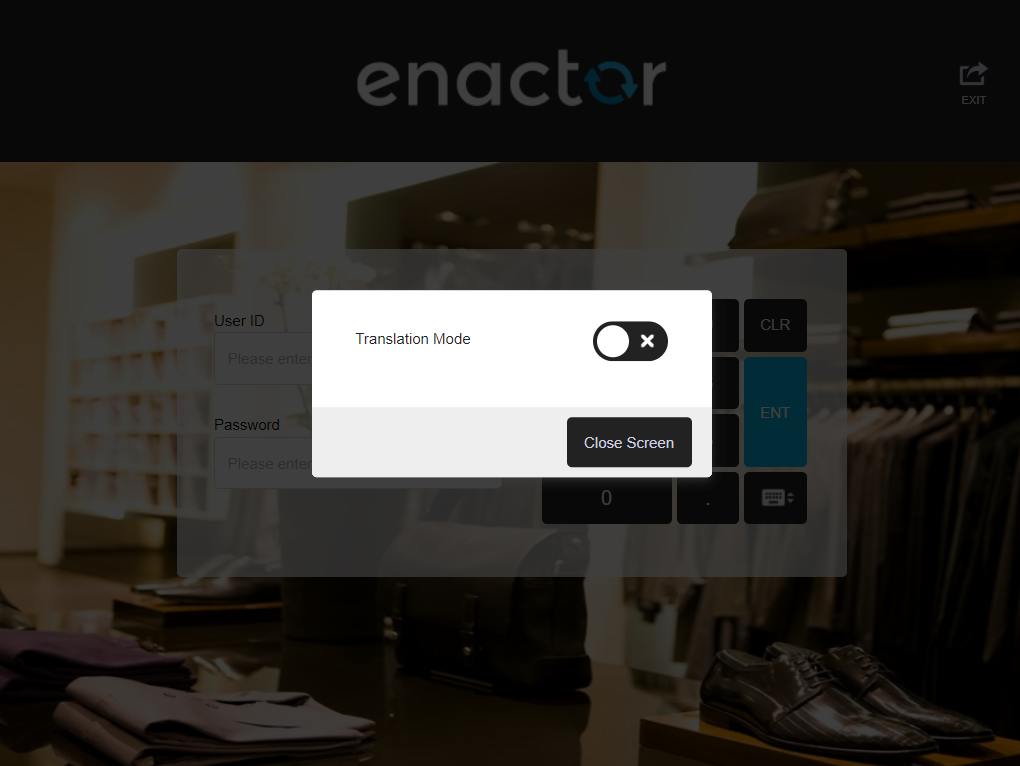
Translation mode for the POS can be enabled as below:
The user can then sign-on to the POS and using a combination of keystrokes and mouse clicks, can select a message on the POS and translate or amend it.
Editing a message can be done where a single message element will be displayed in the pop-up screen to edit or where the entire Prompt Page is selected, allowing for the translation of all message resources used on the current page. The keystroke combination used in the two instances are different.
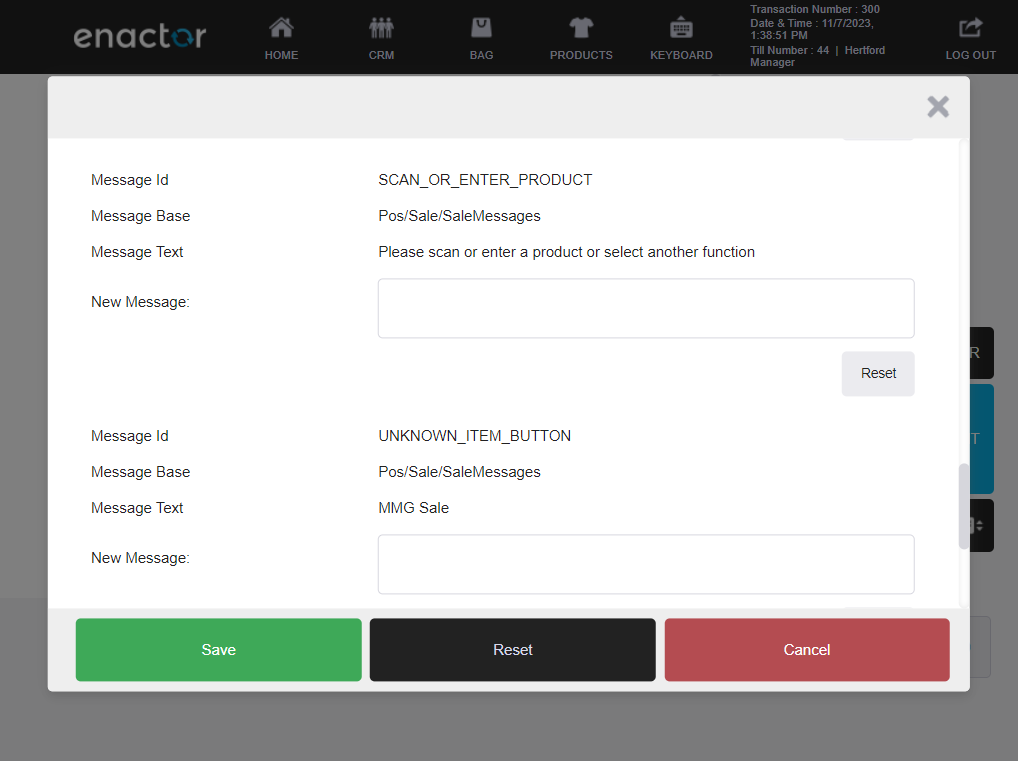
Single Element Selection
Hold Down Shift + Left Mouse Click on the message
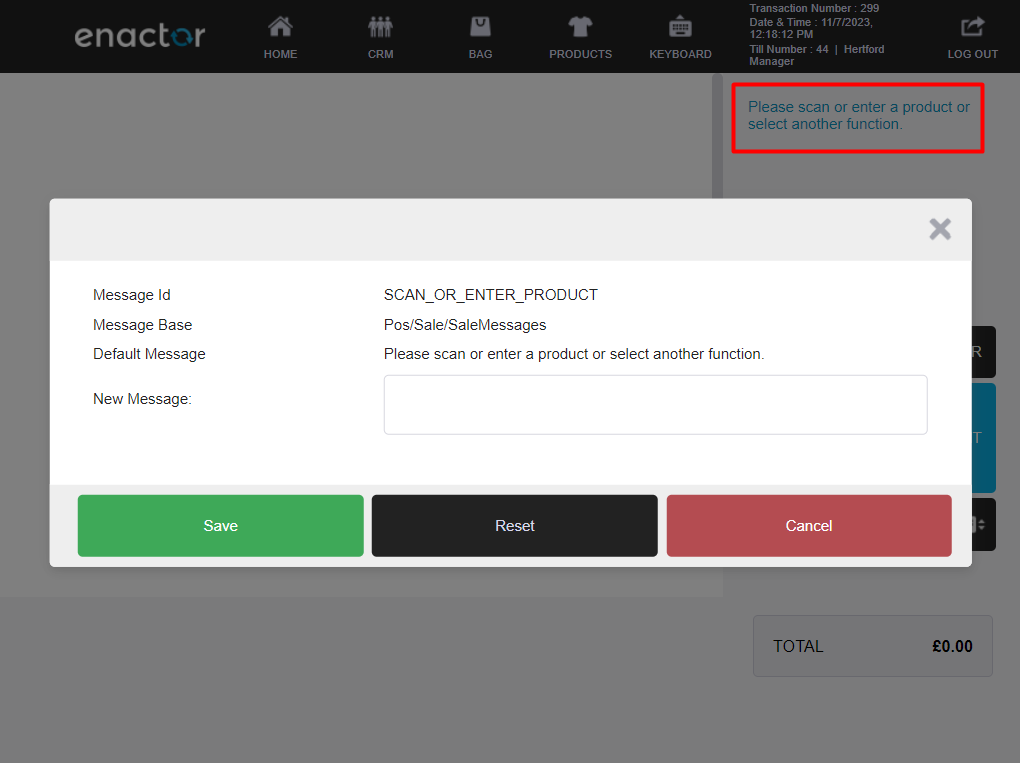
The user can update the New Message field and the text entered here will override the existing message. The Save button will save the changes, Reset will clear any text input and reset the field, and Cancel will terminate the action and return the User to the POS application.
A change to a message, once saved, will be updated on the POS in real time.
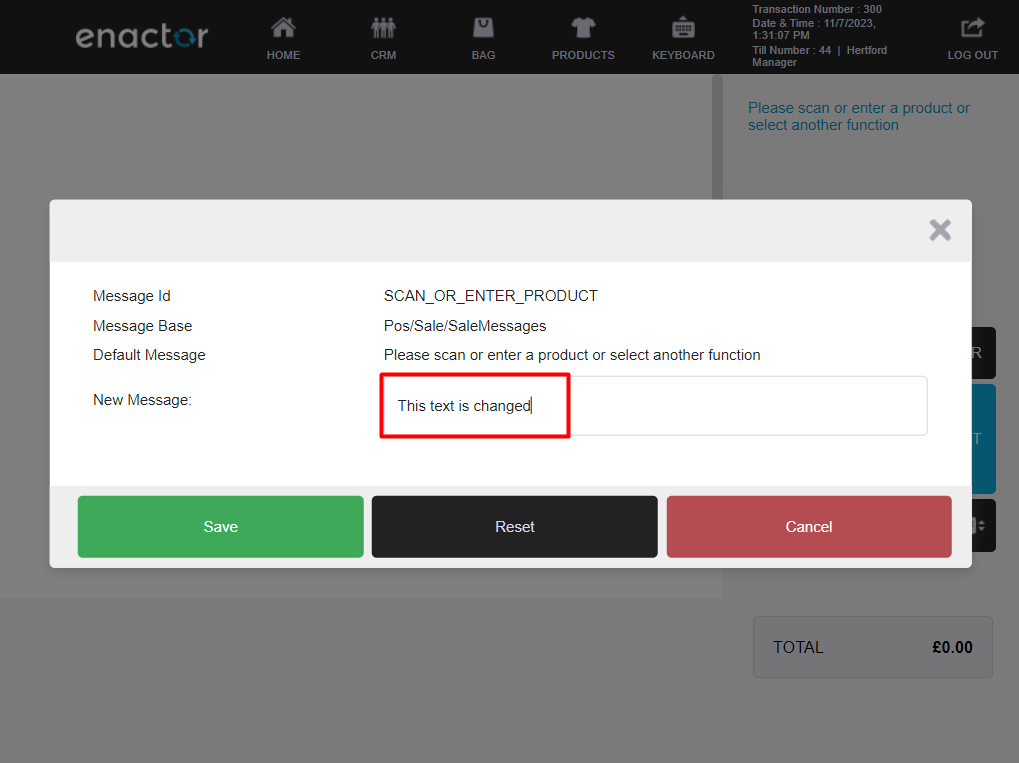
The above change, once saved, is reflected in the POS prompt.

Prompt Page Selection
Hold Down Ctrl + Left Mouse Click
All Message Resources used on the current page are listed for translation.
Multiple messages can be edited at the same time, then the changes saved.
Changes made to the messages are saved in
<Enactor home>\pos\Data\Enactor Pos\MessageResource where an XML file
is created for the Message Set.


While both methods described above reflect translation changes in the POS UI in real-time, the changes will only be applied to that one device. To propagate the changes to other devices, it is necessary to capture them, import them into the Estate Manager and then broadcast them.
The Home Directory of the target device receiving the Message Resources
must not contain the MessageResource folder in location
<Enactor home>\pos\Data\Enactor Pos\MessageResource, and the database
must be cleaned of message resources.
The XML files to be imported to the Estate Manager are produced
automatically whenever a change on a translation is saved. The files are
saved in the folder <Enactor home>\pos\Data\Enactor Pos\MessageResource.
The XML file can be zipped and imported to the Estate Manager through File Import Maintenance, which will update the Message details in the Estate Manager. These changes must be saved to the database and subsequently broadcasting the Message Resources entity to target devices will update the POS UI of those devices.
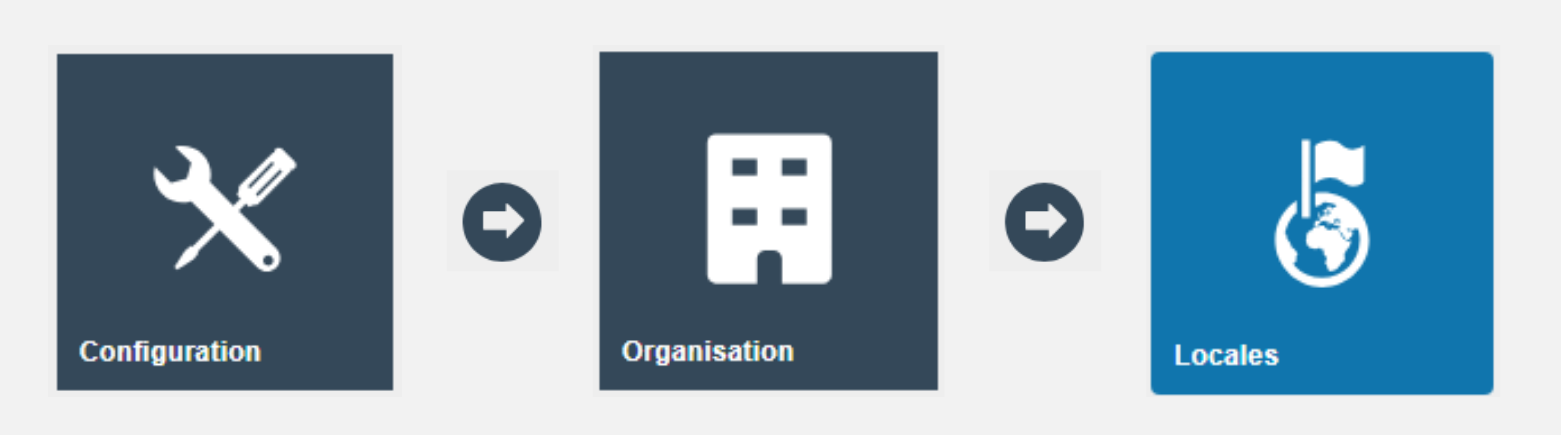
Introducing a New Language
New languages can be added via Locales Maintenance in EM. Locales Maintenance can be accessed through the path:
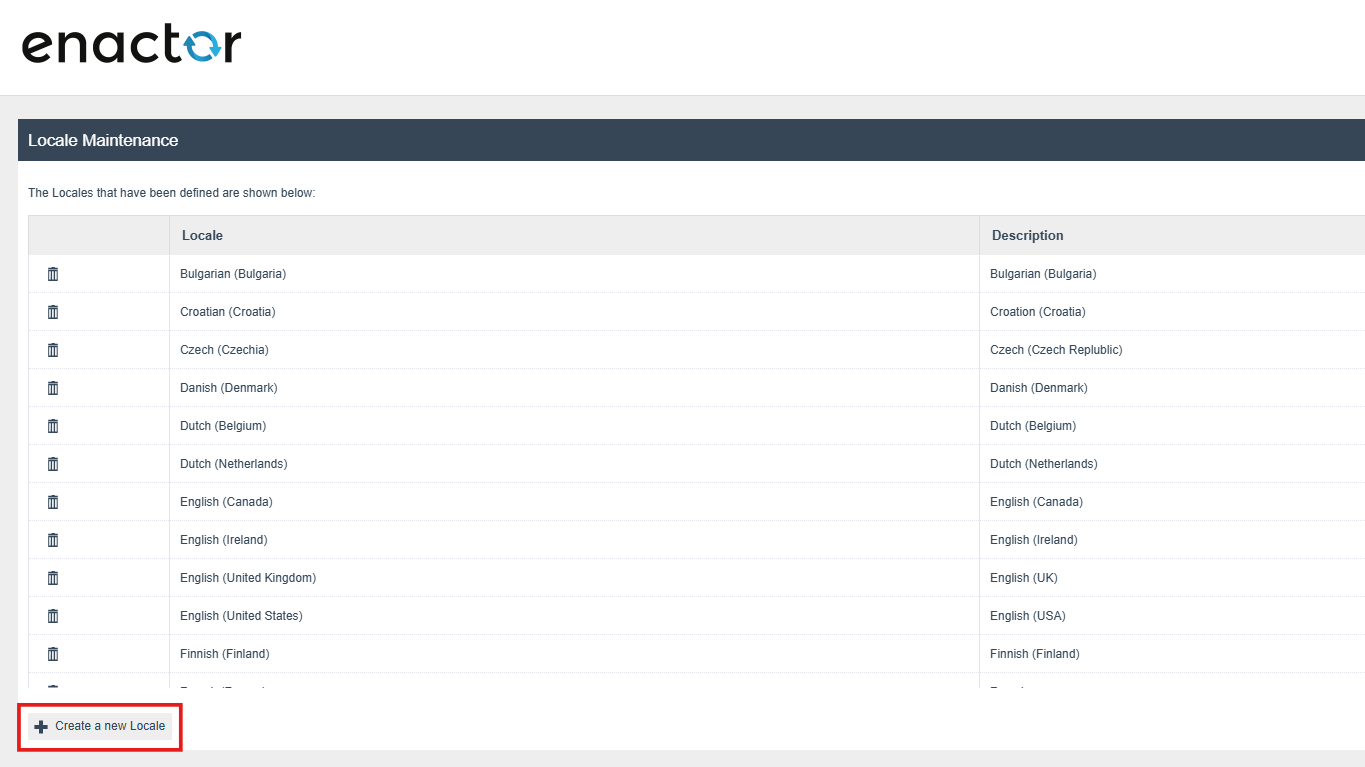
Click the Create a new Locale button.
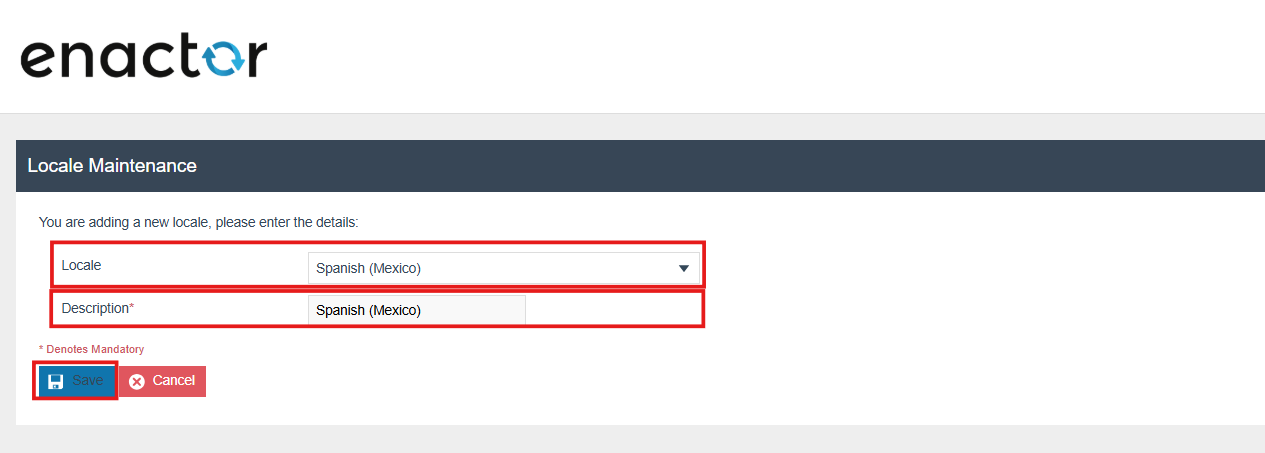
Select the required locale from the list, enter a description, and save.
The message resources can now be added to the newly created locale.
For more details, see How to: Configure Application Translations.
Creating New Messages for Extensions
We have already covered how to add new messages for a POS Extension.
When you generate a POS Extension, a new Message Resource is automatically created under:
META-INF -> Deployment -> MessageResource
This Message Resource is also registered against the Extension Process in the Packages.xml file.
Let's recall the POS Extension that we generated previously in the POS Extension Tutorial.