Create a New React Prompt
Overview
This tutorial guides you through the steps to create a new React Prompt.
In this exercise, you will extend the SignOnCompletedExtension in the sign_on_1.0.xml process by adding a custom process to display the POS terminal's location ID and name in a new prompt upon sign-on completion.
What you will learn
- How to create a new React Prompt in a POS Extension
Pre-requisites
- Ensure you are familiar with developing React changes using the Web POS. Refer to React Extension with Web POS for guidances.
Exercises
Navigate to SignOn Application Process
-
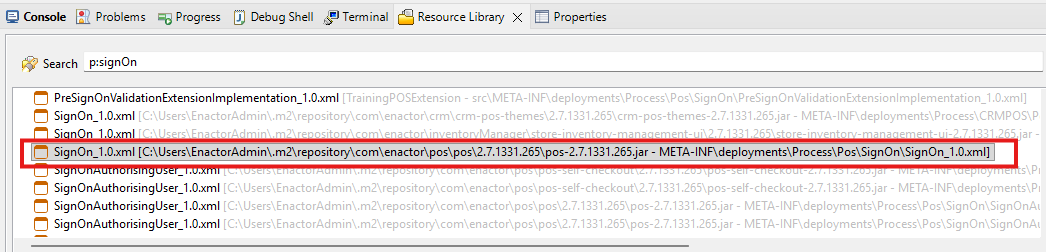
Go to Resource Library. (Window -> Show View -> Resource Library) (Ctrl + R +L)
-
In the search box, type
P:SignOn_1.0and press Enter.
-
Double-click on the
SignOn_1.0.xmlprocess under the POS dependency to open it. -
From the Outline view, expand the Actions group and search for the action SignOnCompletedExtension
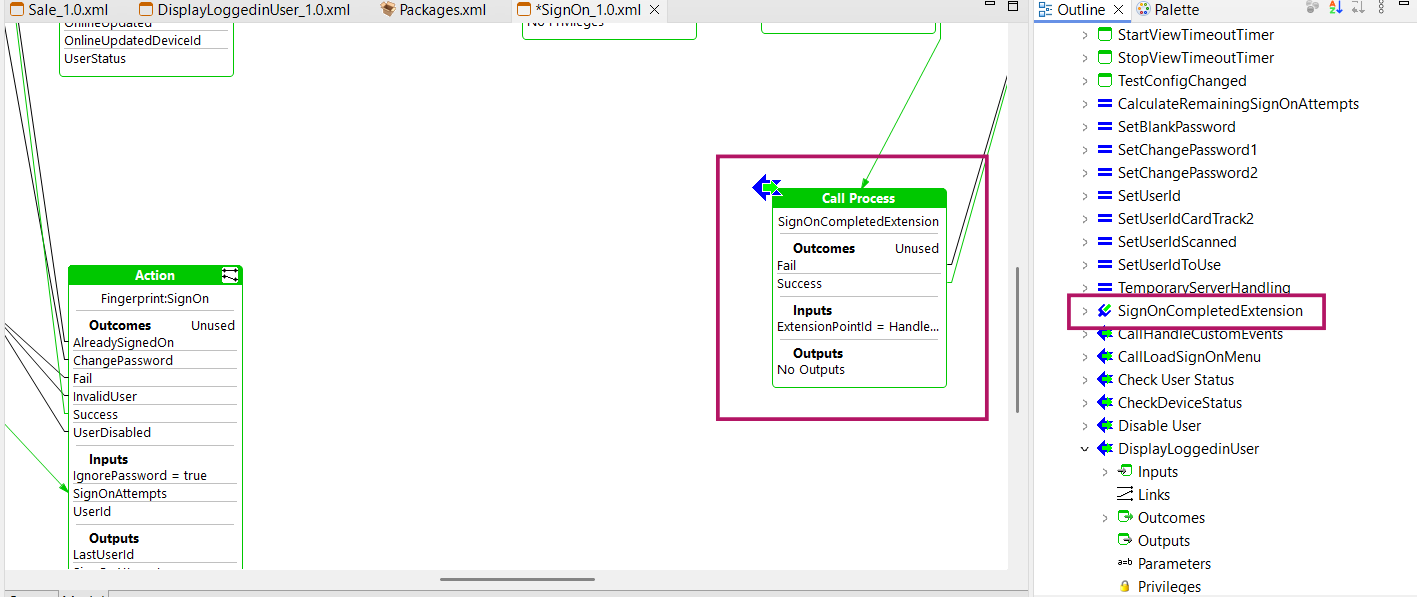
Then click on the SignOnCompletedExtension and locate it in the Process Editor

Create the New Extension Process
-
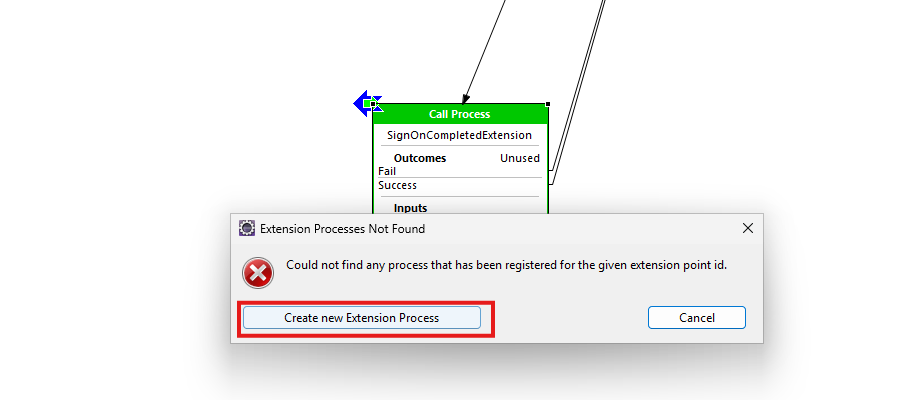
Double-click on the extension point to open the Extension Point Wizard.
-
Click the
Create New Extension Processbutton.
-
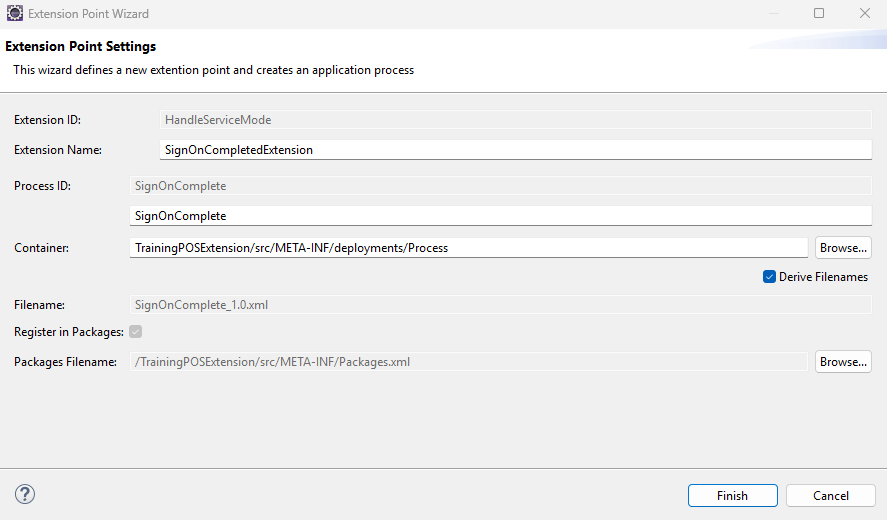
In the Extension Point Settings window,
-
Extension Id will be auto populated.
-
Fill Extension Name as
SignOnCompletedExtension. -
Enter Process ID as
SignOnComplete. -
Browse and select the container location as
TrainingPOSExtension/src/META-INF/deployments/Process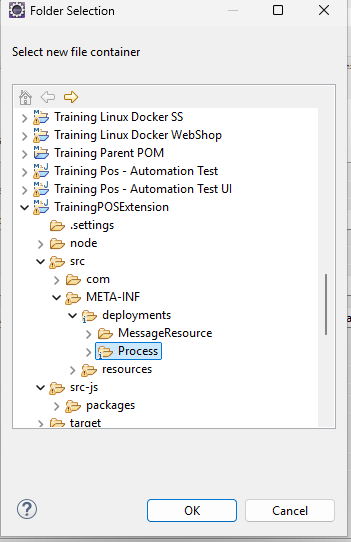
-
Ensure the Derive Filenames checkbox is checked.
-
Register in Packages should be checked.
-
Click Finish.
-
Verify Process
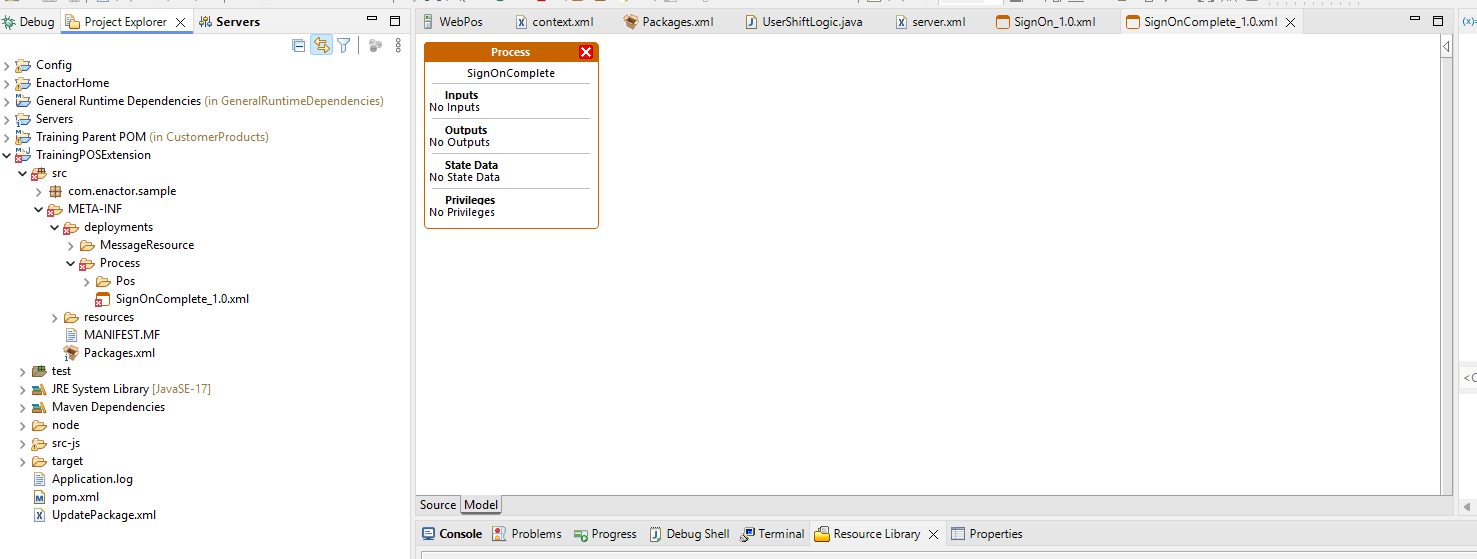
- Confirm that a new file named SignOnComplete_1.0.xml has been created under,
TrainingPOSExtension/src/META-INF/deployments/Process
Implement the Extension Process
Once your custom extension process (SignOnComplete_1.0.xml) is created, follow the steps below to build a simple process that displays the Location ID and Location Name using a React prompt
-
Open
SignOnComplete_1.0.xml -
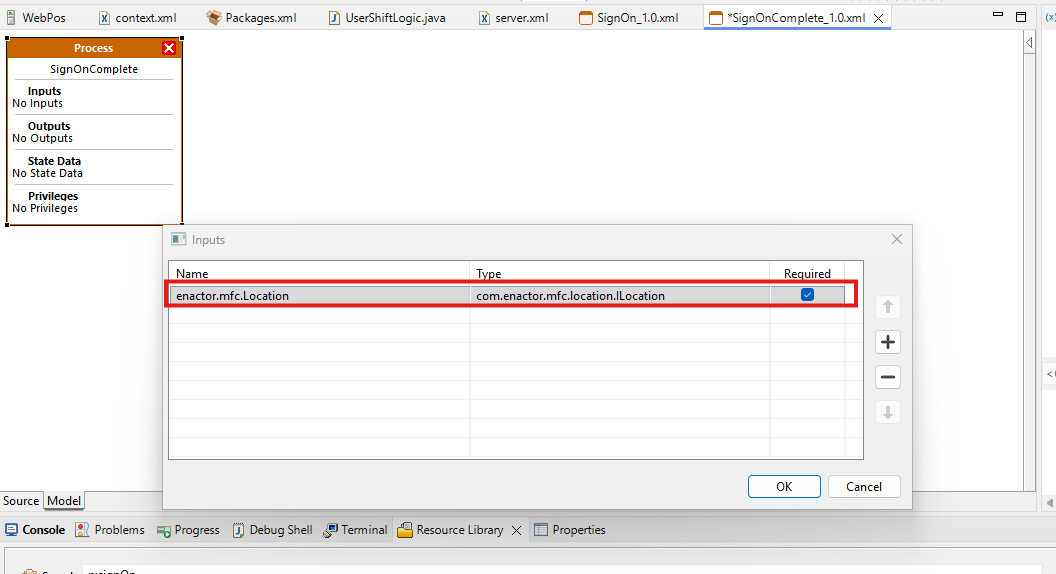
Double-click the Input field at the top of the process and add an input with Name as
enactor.mfc.Locationand Type ascom.enactor.mfc.location.ILocation, then Click OK.
-
Open the Palette view by navigating to Window -> Show View -> Other, then search for and open Palette.
-
From the Palette, under
States, drag State and Prompt State onto the process, then underActions, drag End Process onto the process. -
Double-click the Events field in the State, select StateEntered, and click OK.
-
Double-click the Input field in the Prompt State, add an input with Name as locationId and Type as java.lang.String, click the
+button to add another with Name as locationName and Type as java.lang.String, then click OK. -
Right-click on the prompt state and select Show Properties from the context menu. Then update the following properties.
Property Value State ID SignOnCompletionPrompt Events [OKPressed] Inputs [locationId,locationName] URL SignOn/Complete -
Double-click the Process Outcome field in End Process, select Success, and click OK.
-
Use the Link tool to connect the Prompt State to the End Process.
-
Select the Link tool from the Palette and create a link from State to Prompt State.
-
Right-click on the Prompt State and choose
Mappings -> Edit State-Process Mapping, then create the following mappings like this- From
Location -> locationId, double-click the link and selectlocation.locationId.
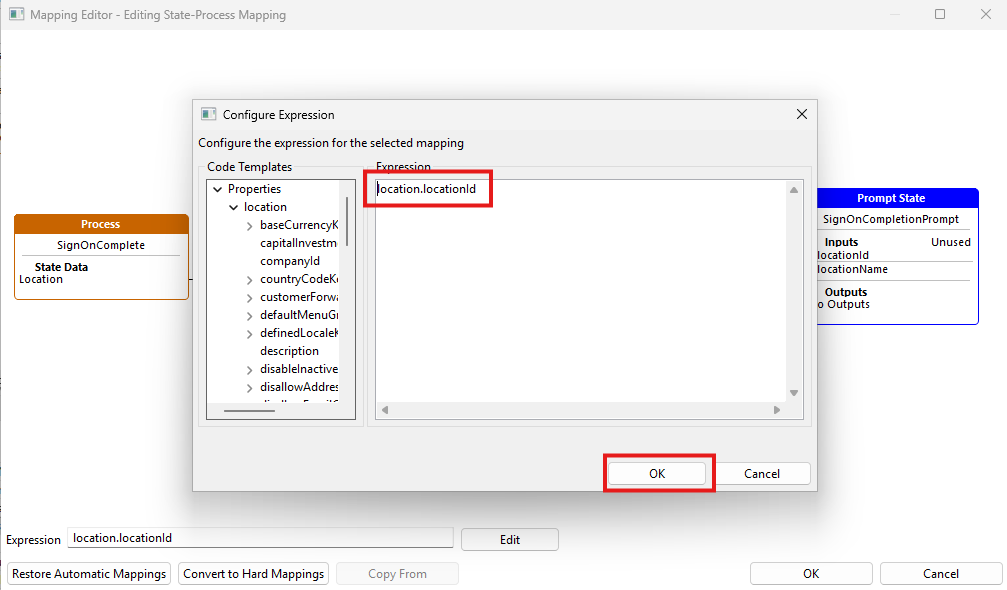
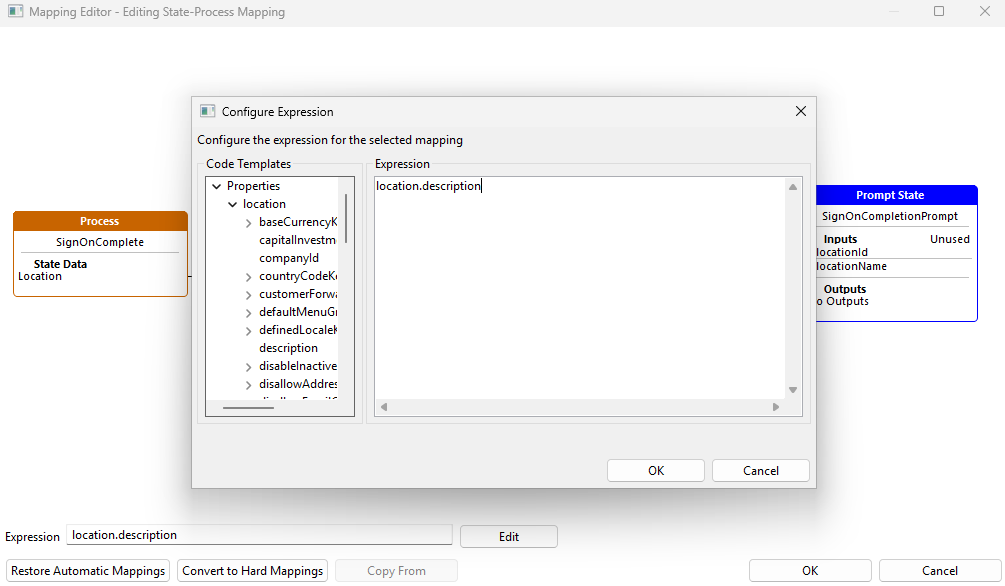
- From
Location -> locationName, double-click the link and selectlocation.description.
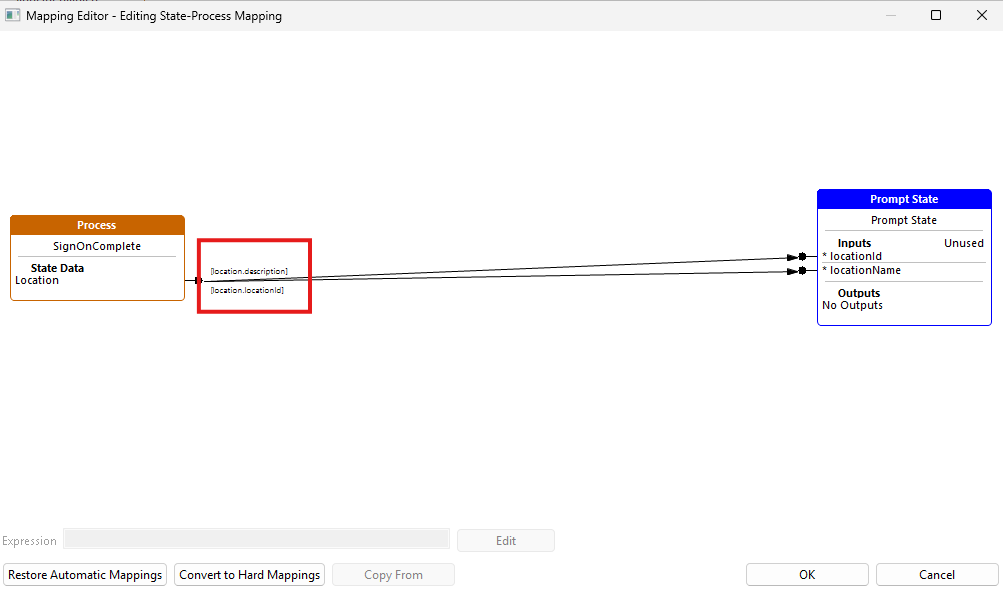
Then the mappings should look like this
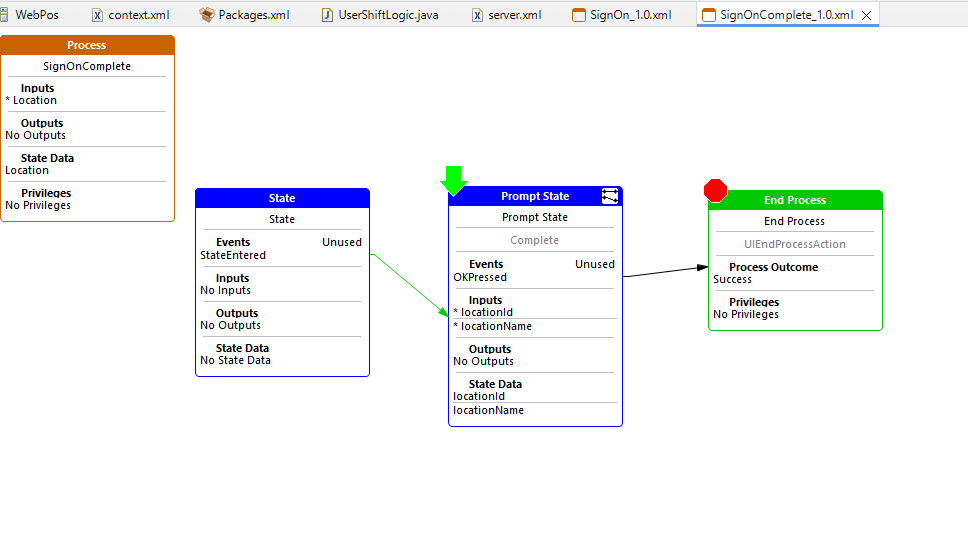
- From
After these changes the final process should like this
To complete the setup, you need to create a React component linked to the prompt state you added.
Implement the React Prompt
-
Right-click on the prompt state in the process diagram.
-
Navigate to Enactor -> Create React Component.
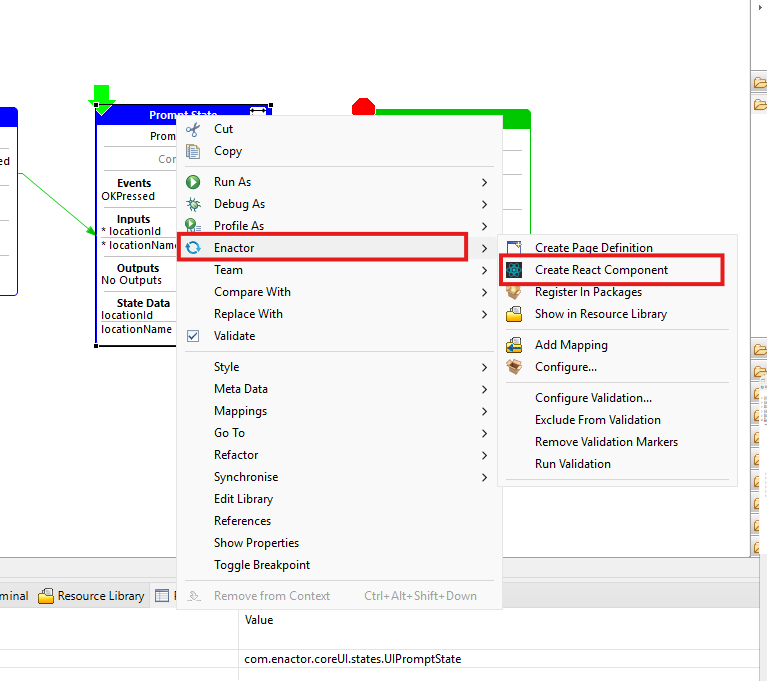
-
The React Component Settings window will open.
-
Complete the input fields as shown below and click Finish.
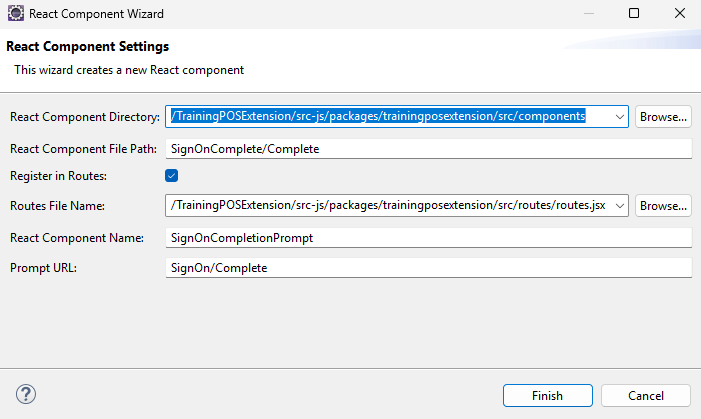
Click the Finish button to create the React component. You will be Navigated to the React Code
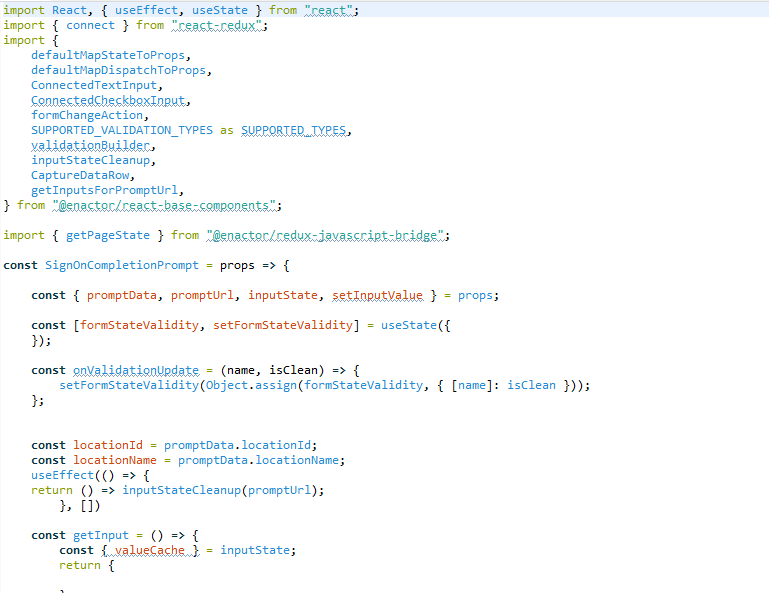
If you have chosen VS Code as your preferred code editor for JS files, this will open in VS Code.
Run the Web POS and Extension Dev Server
Recall how to develop React extension with Web POS to:
- Start the Web POS Tomcat server from Eclipse.
- Start the Extension Dev Server for your extension project.
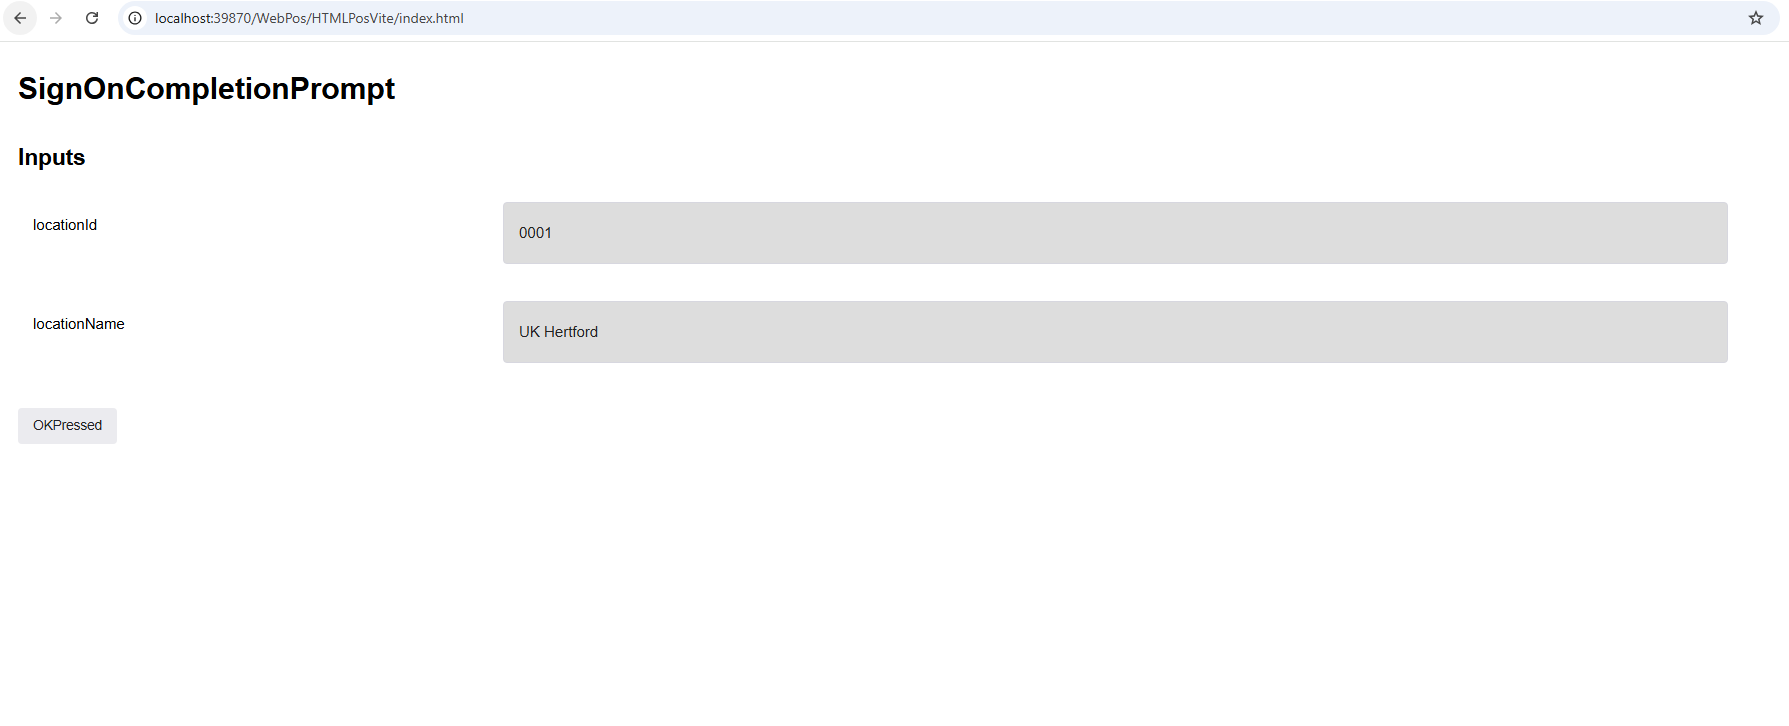
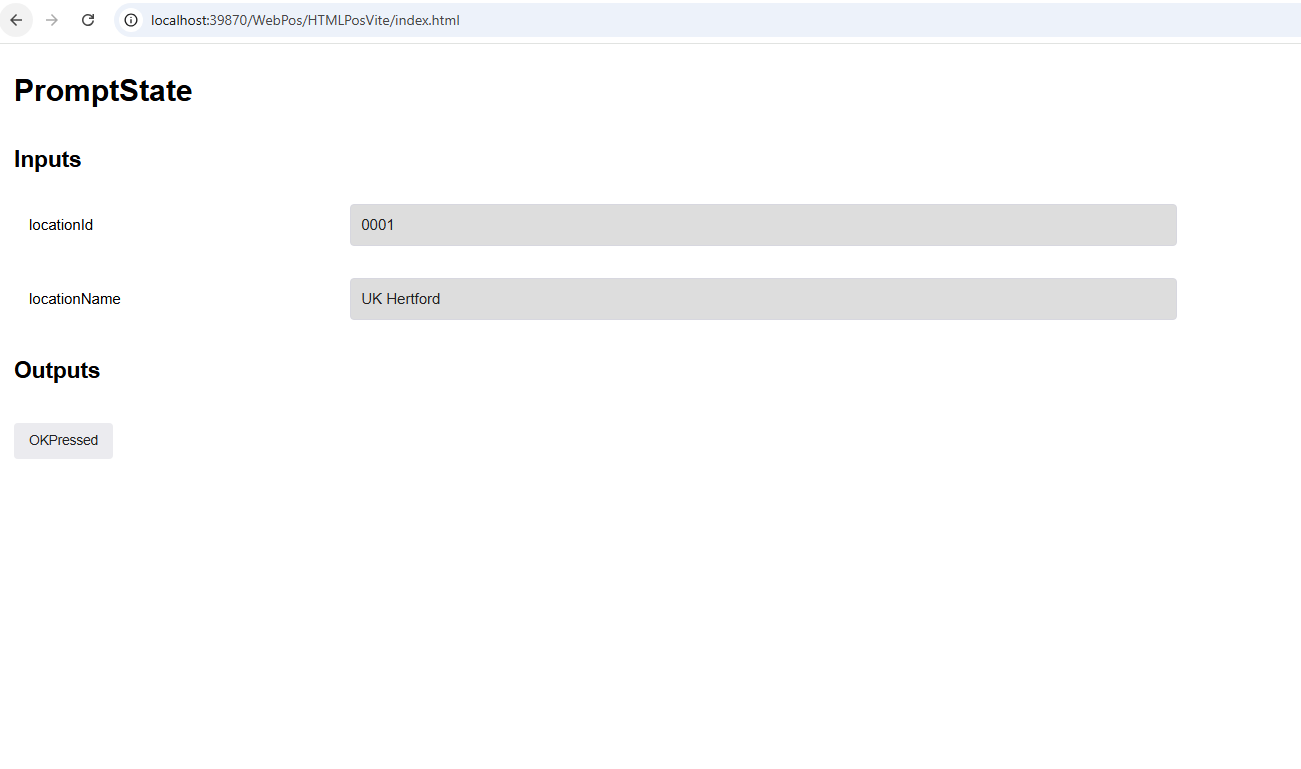
Once both are running, SignOn to the Web POS. http://localhost:39870/WebPos/HTMLPosVite/index.html
Use webpos1@0001.enactor as the Device Id and submit.
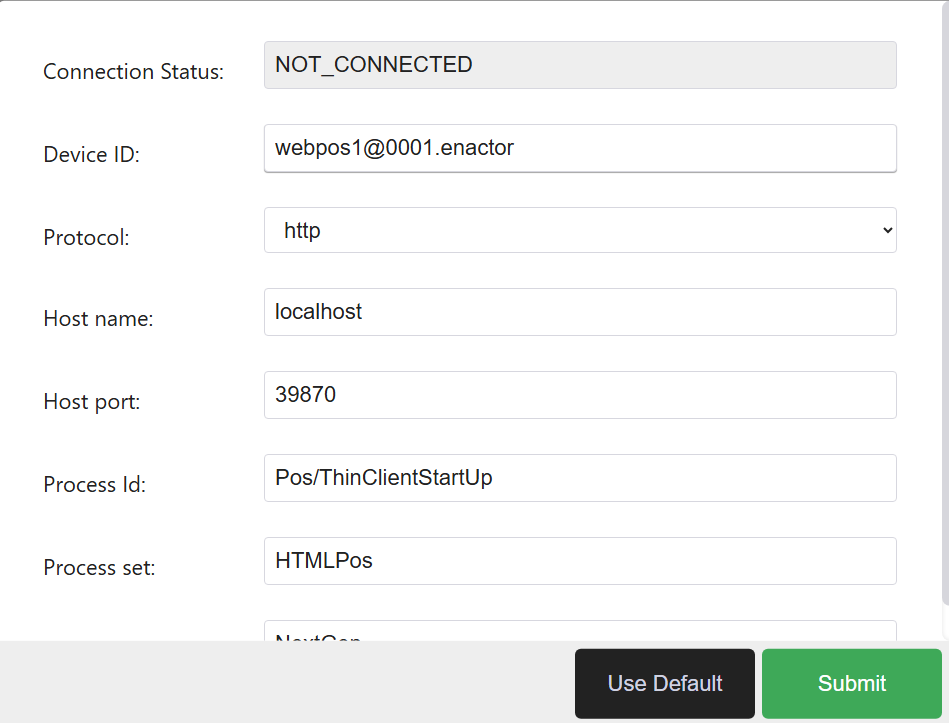
After sign-on completes, the custom prompt should appear displaying the Location ID and Location Name.
Update the React Component
The generated React component includes an output section by default. Since this prompt has no outputs, remove that section from the component.
Open the generated React component file in your extension project.
Locate and remove the output-related section from the component.
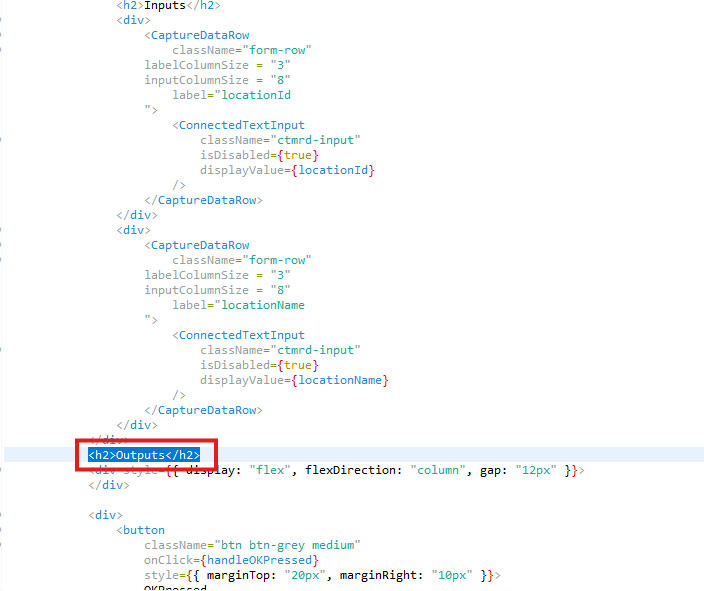
Save the file.
Watch the Eclipse terminal running the dev server and wait for the rebuild to complete successfully.
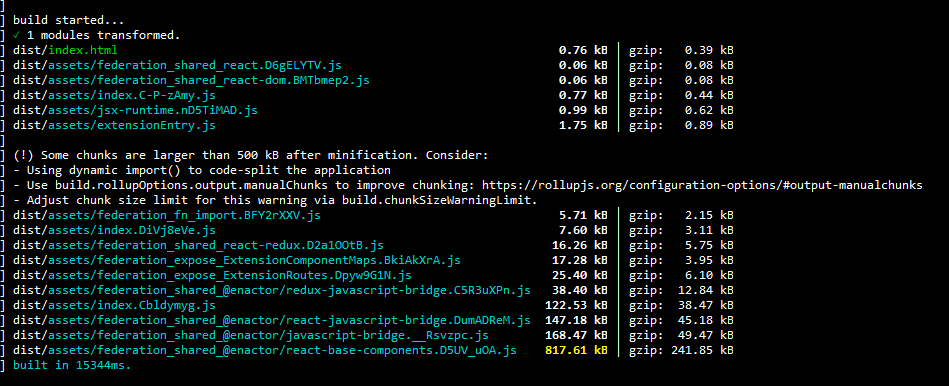
Once the terminal confirms the rebuild is complete, manually refresh the browser running the Web POS.
Confirm that the updated prompt is displayed correctly without the output section.