Web POS Setup
Overview
If you have already completed the Training Workspace Setup , your local workspace should include a Web POS.
If you have not set it up yet, switch to your Training Eclipse Workspace and follow the guidelines below.
Pre-requisites
- You must have followed the steps detailed in Training Workspace Setup
Web POS
Go to the Servers tab
Right-click on the space inside the Servers window, then click New -> Server.
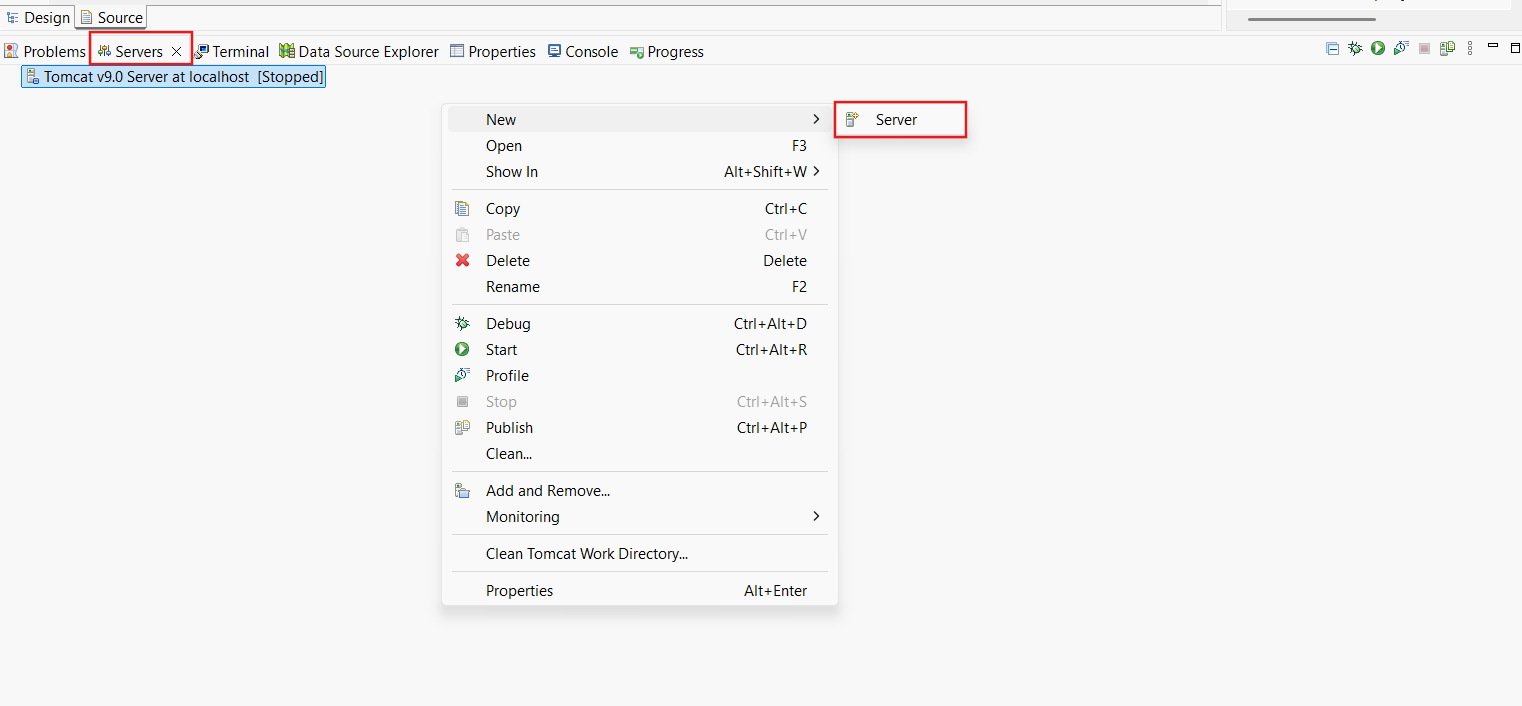
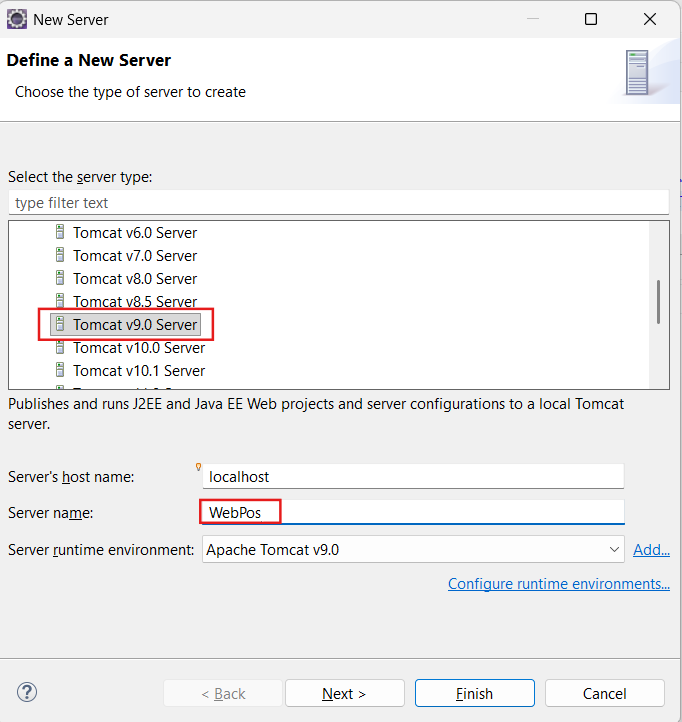
From the New Server dialog, expand Apache Group and select Tomcat v9.0 Server and Change the Server name as WebPos
Click Finish...button
WebPos Server Configuration files
A new Servers Folder containing the newly created tomcat configuration files would have been created in the Project Explorer view.
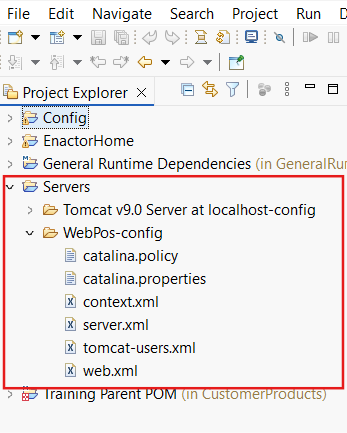
For convenience, a set of configuration files have been created.
Copy the contents from
WorkspaceSetup/Config/eclipse/Servers/webpos,
replacing the same files located in
\WorkspaceSetup\Workspace\Servers\WebPos-config

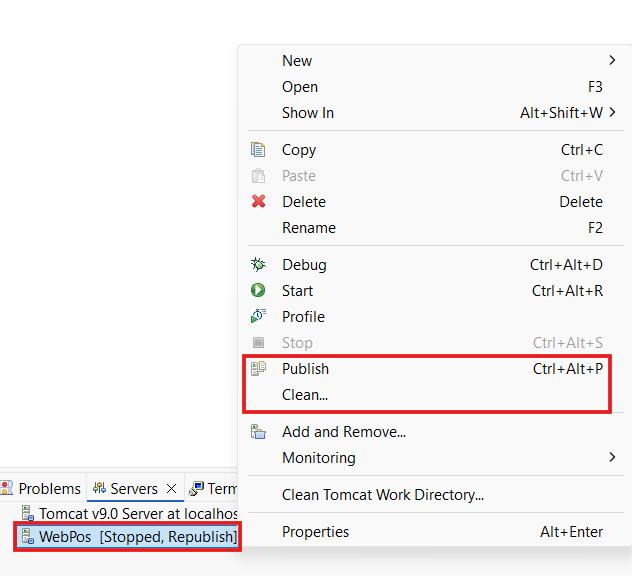
From the Servers view, right-click WebPos server and select Clean
Click OK...button when prompted
From the Servers view, right-click your server and select Publish
Adding Web Modules to WebPos
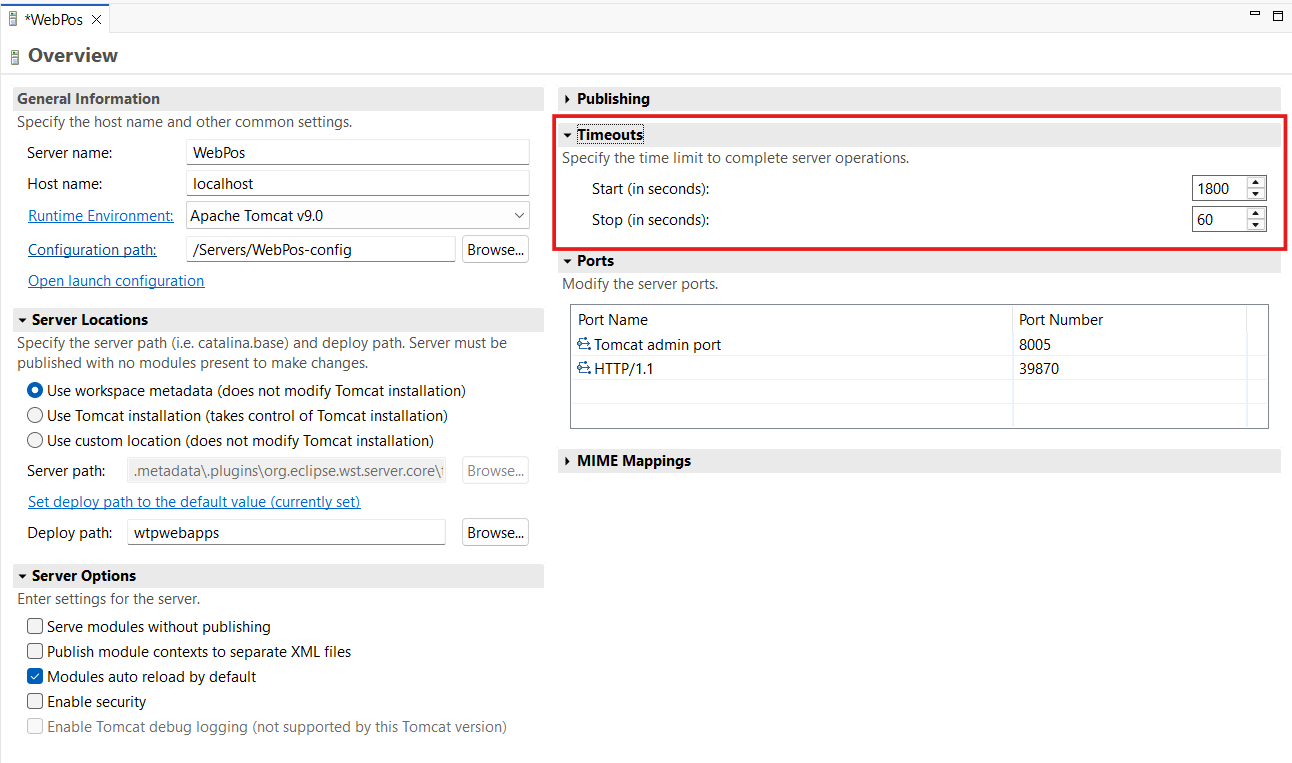
From the Servers view, double click the WebPos server. This will bring up the settings page for the selected server.
Expand the Timeouts section and set the Start value to 1800 and the Stop value to 60
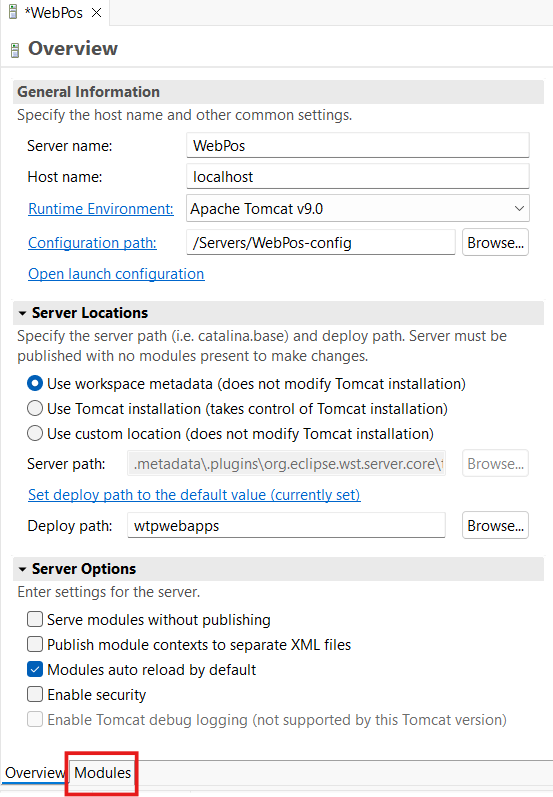
Select the Modules tab
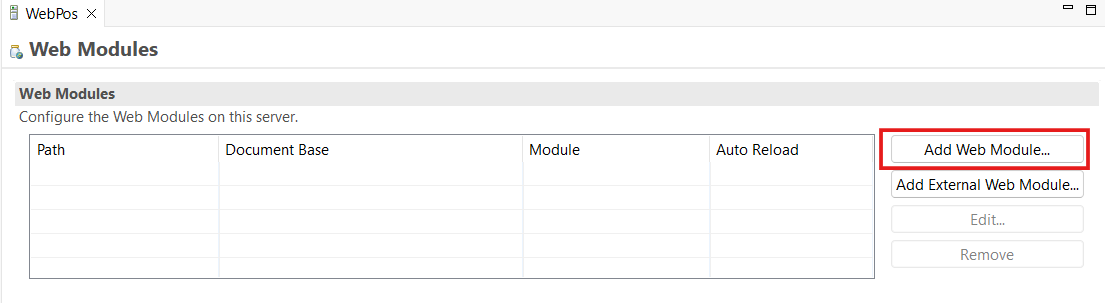
Select to add web modules by selecting the Add Web Module... button
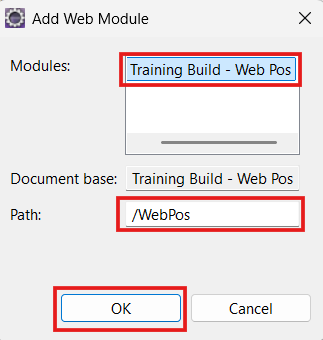
Select Training Build - Web Pos after selected make sure the path is /WebPos and click the OK button
Save the changes.
From the Servers view, right-click your server and select Publish
To run the WebPOS, Select Run menu -> Run Configurations
Expand the Apache Tomcat group and select WebPos
Click Run...button
( This will take few minutes to launch )
Once the WebPOS server has been started, the POS can be accessed through this link.