Customising an Inventory Business Process
Overview
This task will show you how to customise the standard Enactor Stock Adjustment Business Process, such that we are asked to approve an Adjustment before it is submitted for processing. If the Adjustment is rejected, it will return to the creator for amendment.
It will cover:
- Overriding the Stock Adjustment Business Process
- Adding a Custom Human Task
- Deploying the Business Process using the Estate Manager
Time to Complete: 60 minutes
What You Will Learn
Once complete, you will be able to work with Business Process and Human Tasks.
Pre-requisites
- Basic tutorials on Enactor Application Processes.
Instructions
Submit a Stock Adjustment using the Standard Business Process
This will test that a stock adjustment can be submitted and allow you to become familiar with the procedure.
- Sign on to the Estate Manager and navigate to Operations -> Inventory. Select Adjust Stock at Location.
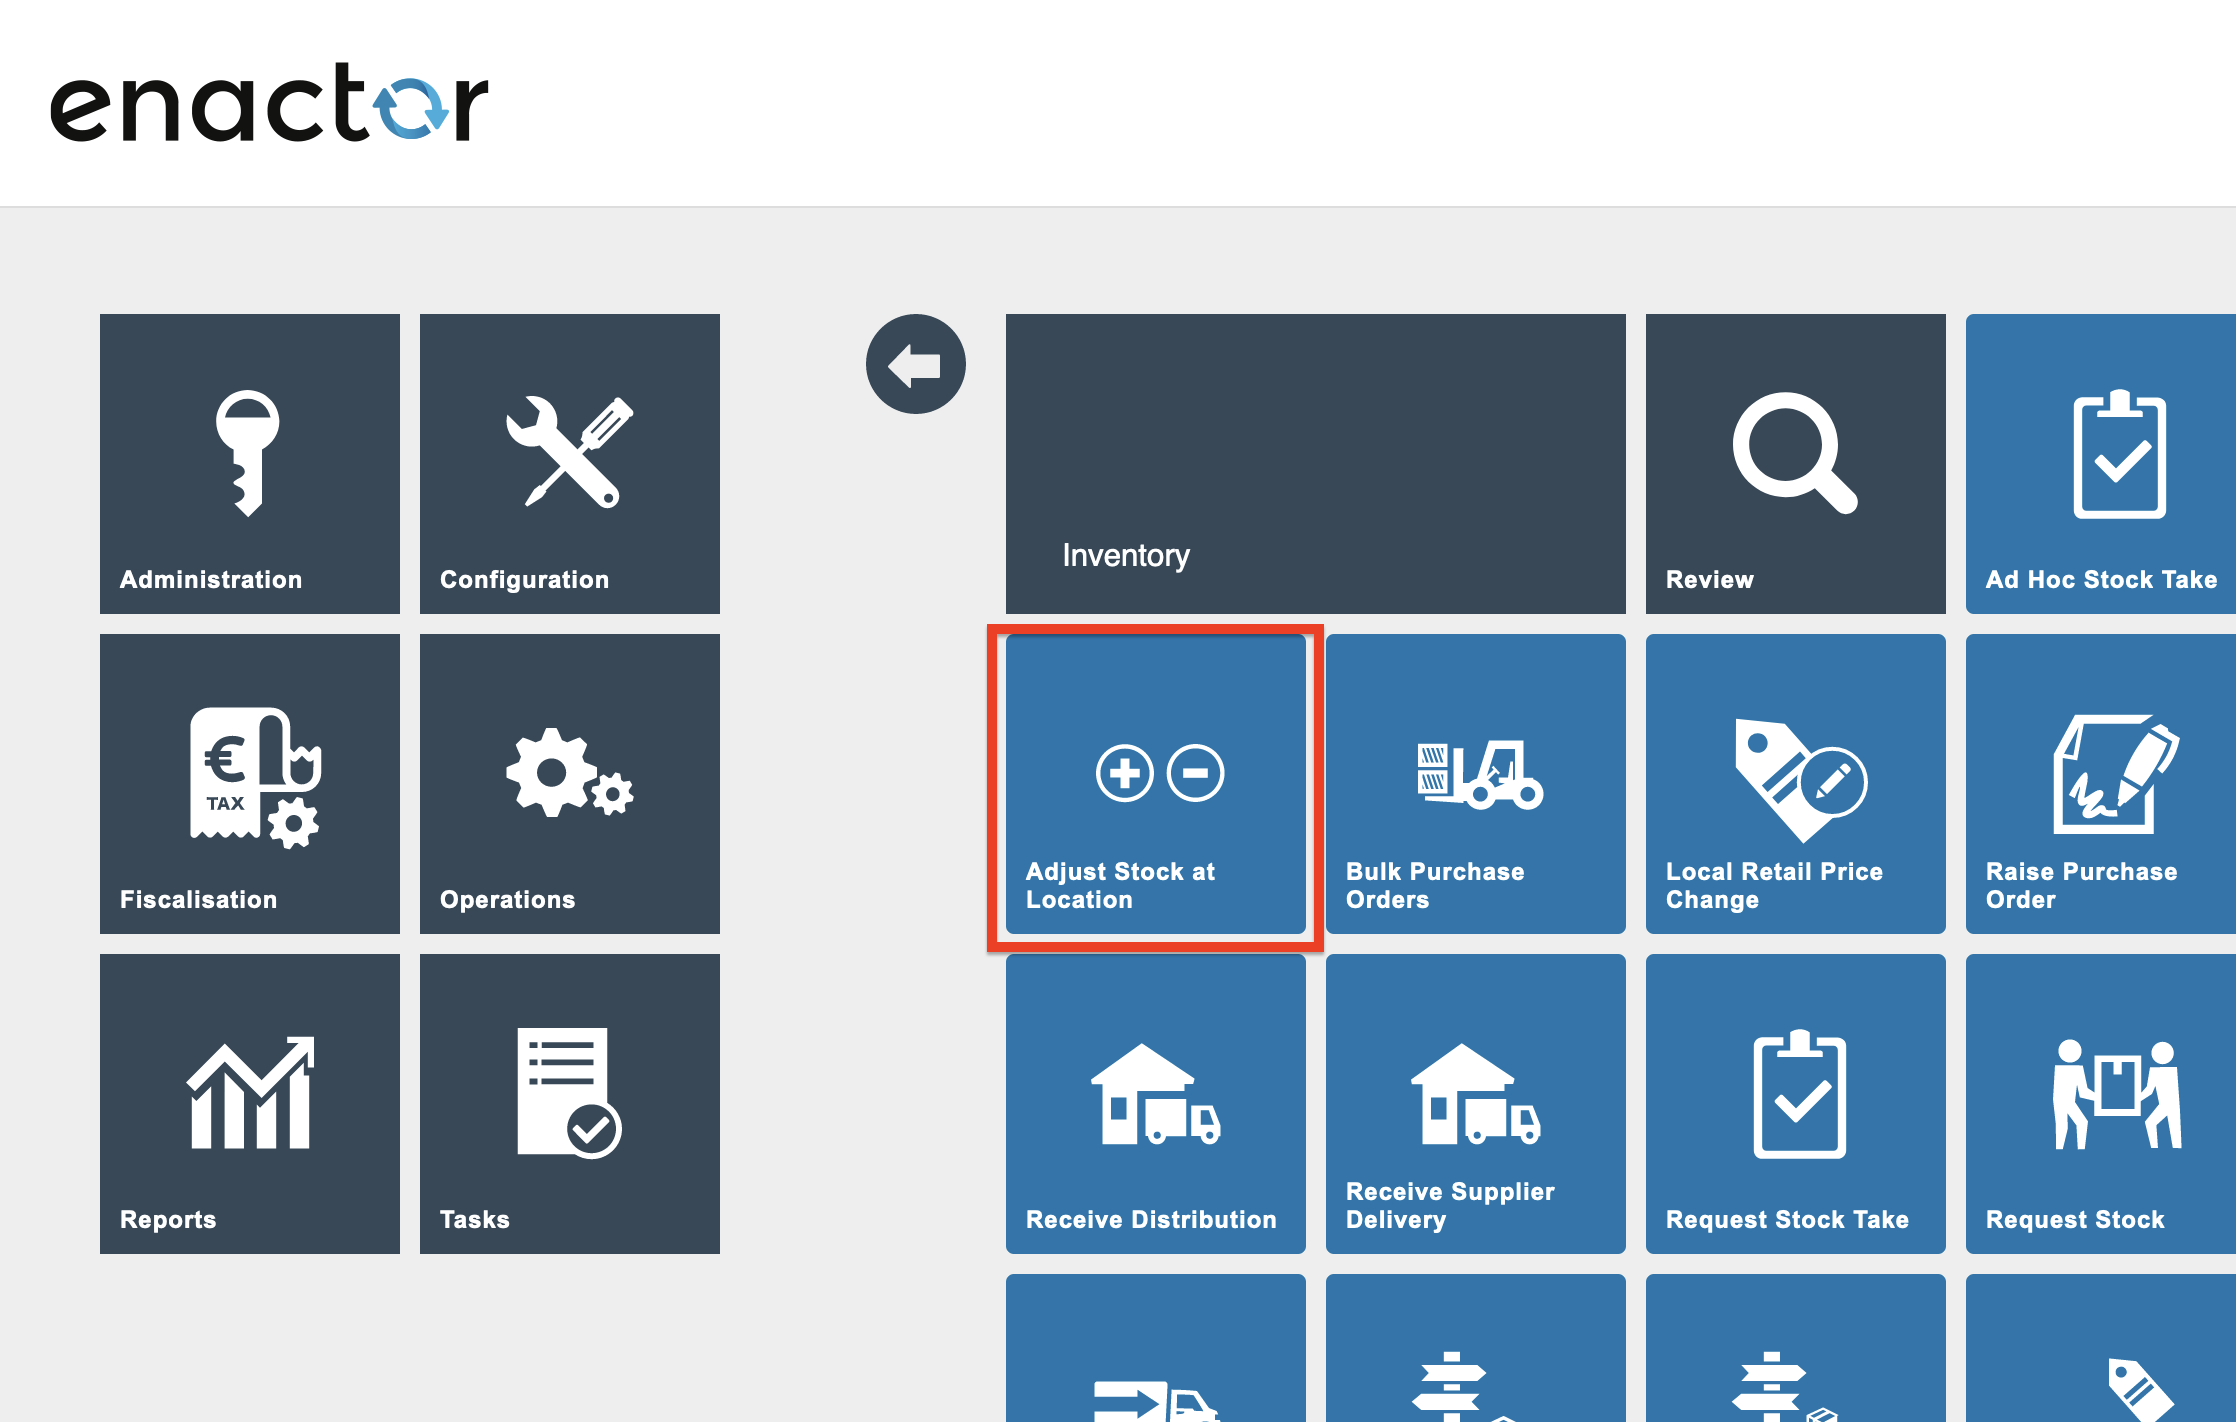
- On the Create Stock Adjustment page, select the UK Warehouse as the Adjustment Location - either type the location ID of 0100 into the input box or select the location using the Location Search button.
Also select the Reason Code of "Write On". This will cause the inventory levels of the product to increase.
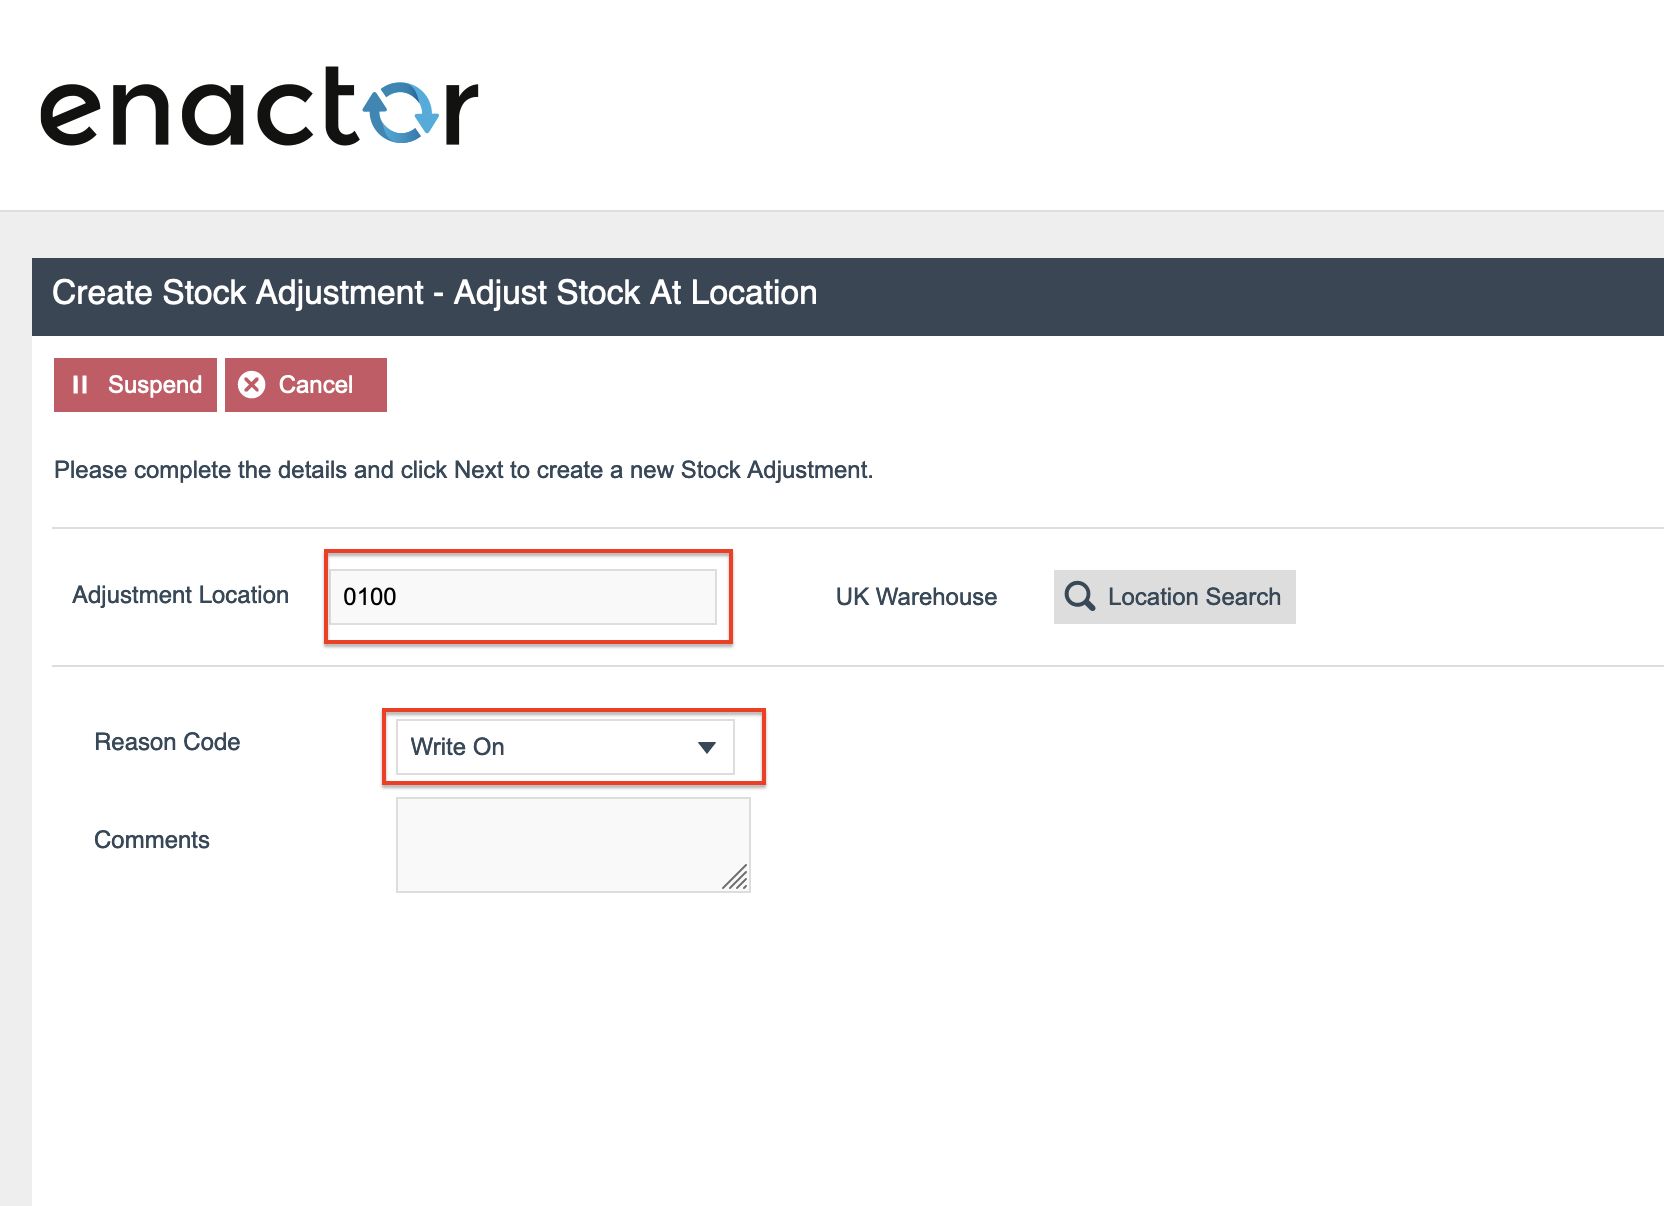
- Press the
Nextbutton on the bottom right of the page.

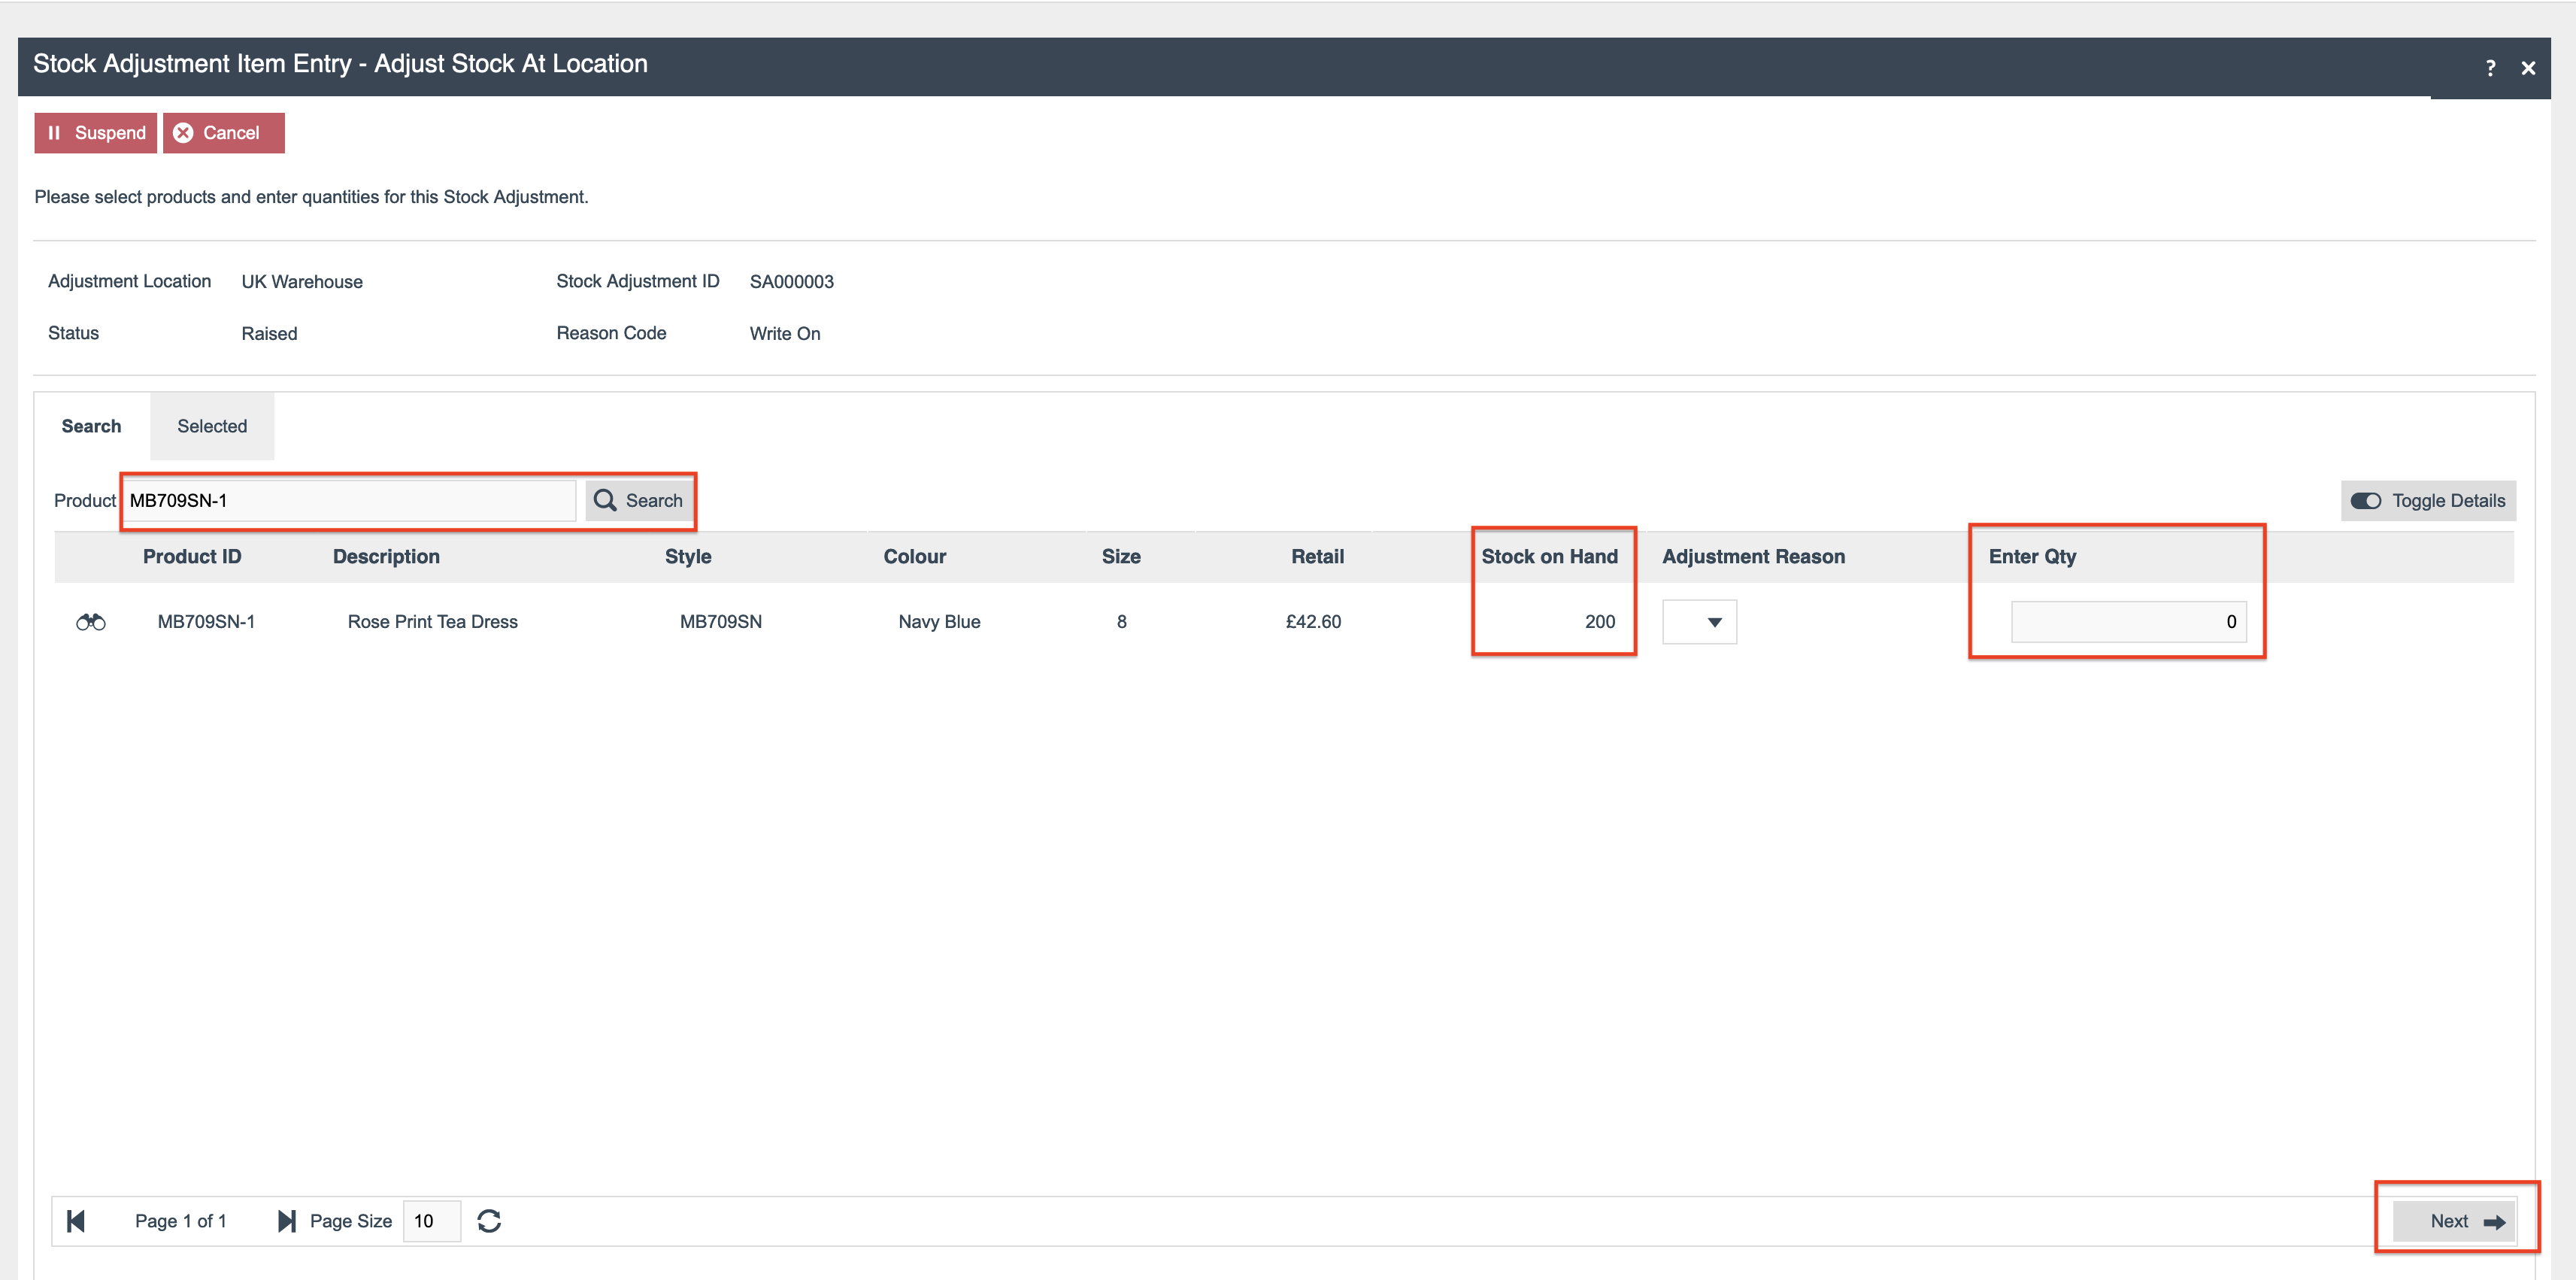
- On the Stock Adjustment Item Entry page, enter the product ID of
MB709SN-1into the Product input box and press the Search button. A single product will match the search criteria and is displayed on the page, with the current inventory level of 200.
Enter a quantity for the adjustment and press the Next button to submit. The "Write On" reason is configured so that the business process does not require any further human tasks and the administrator role should have privileges to skip any authorisation steps.
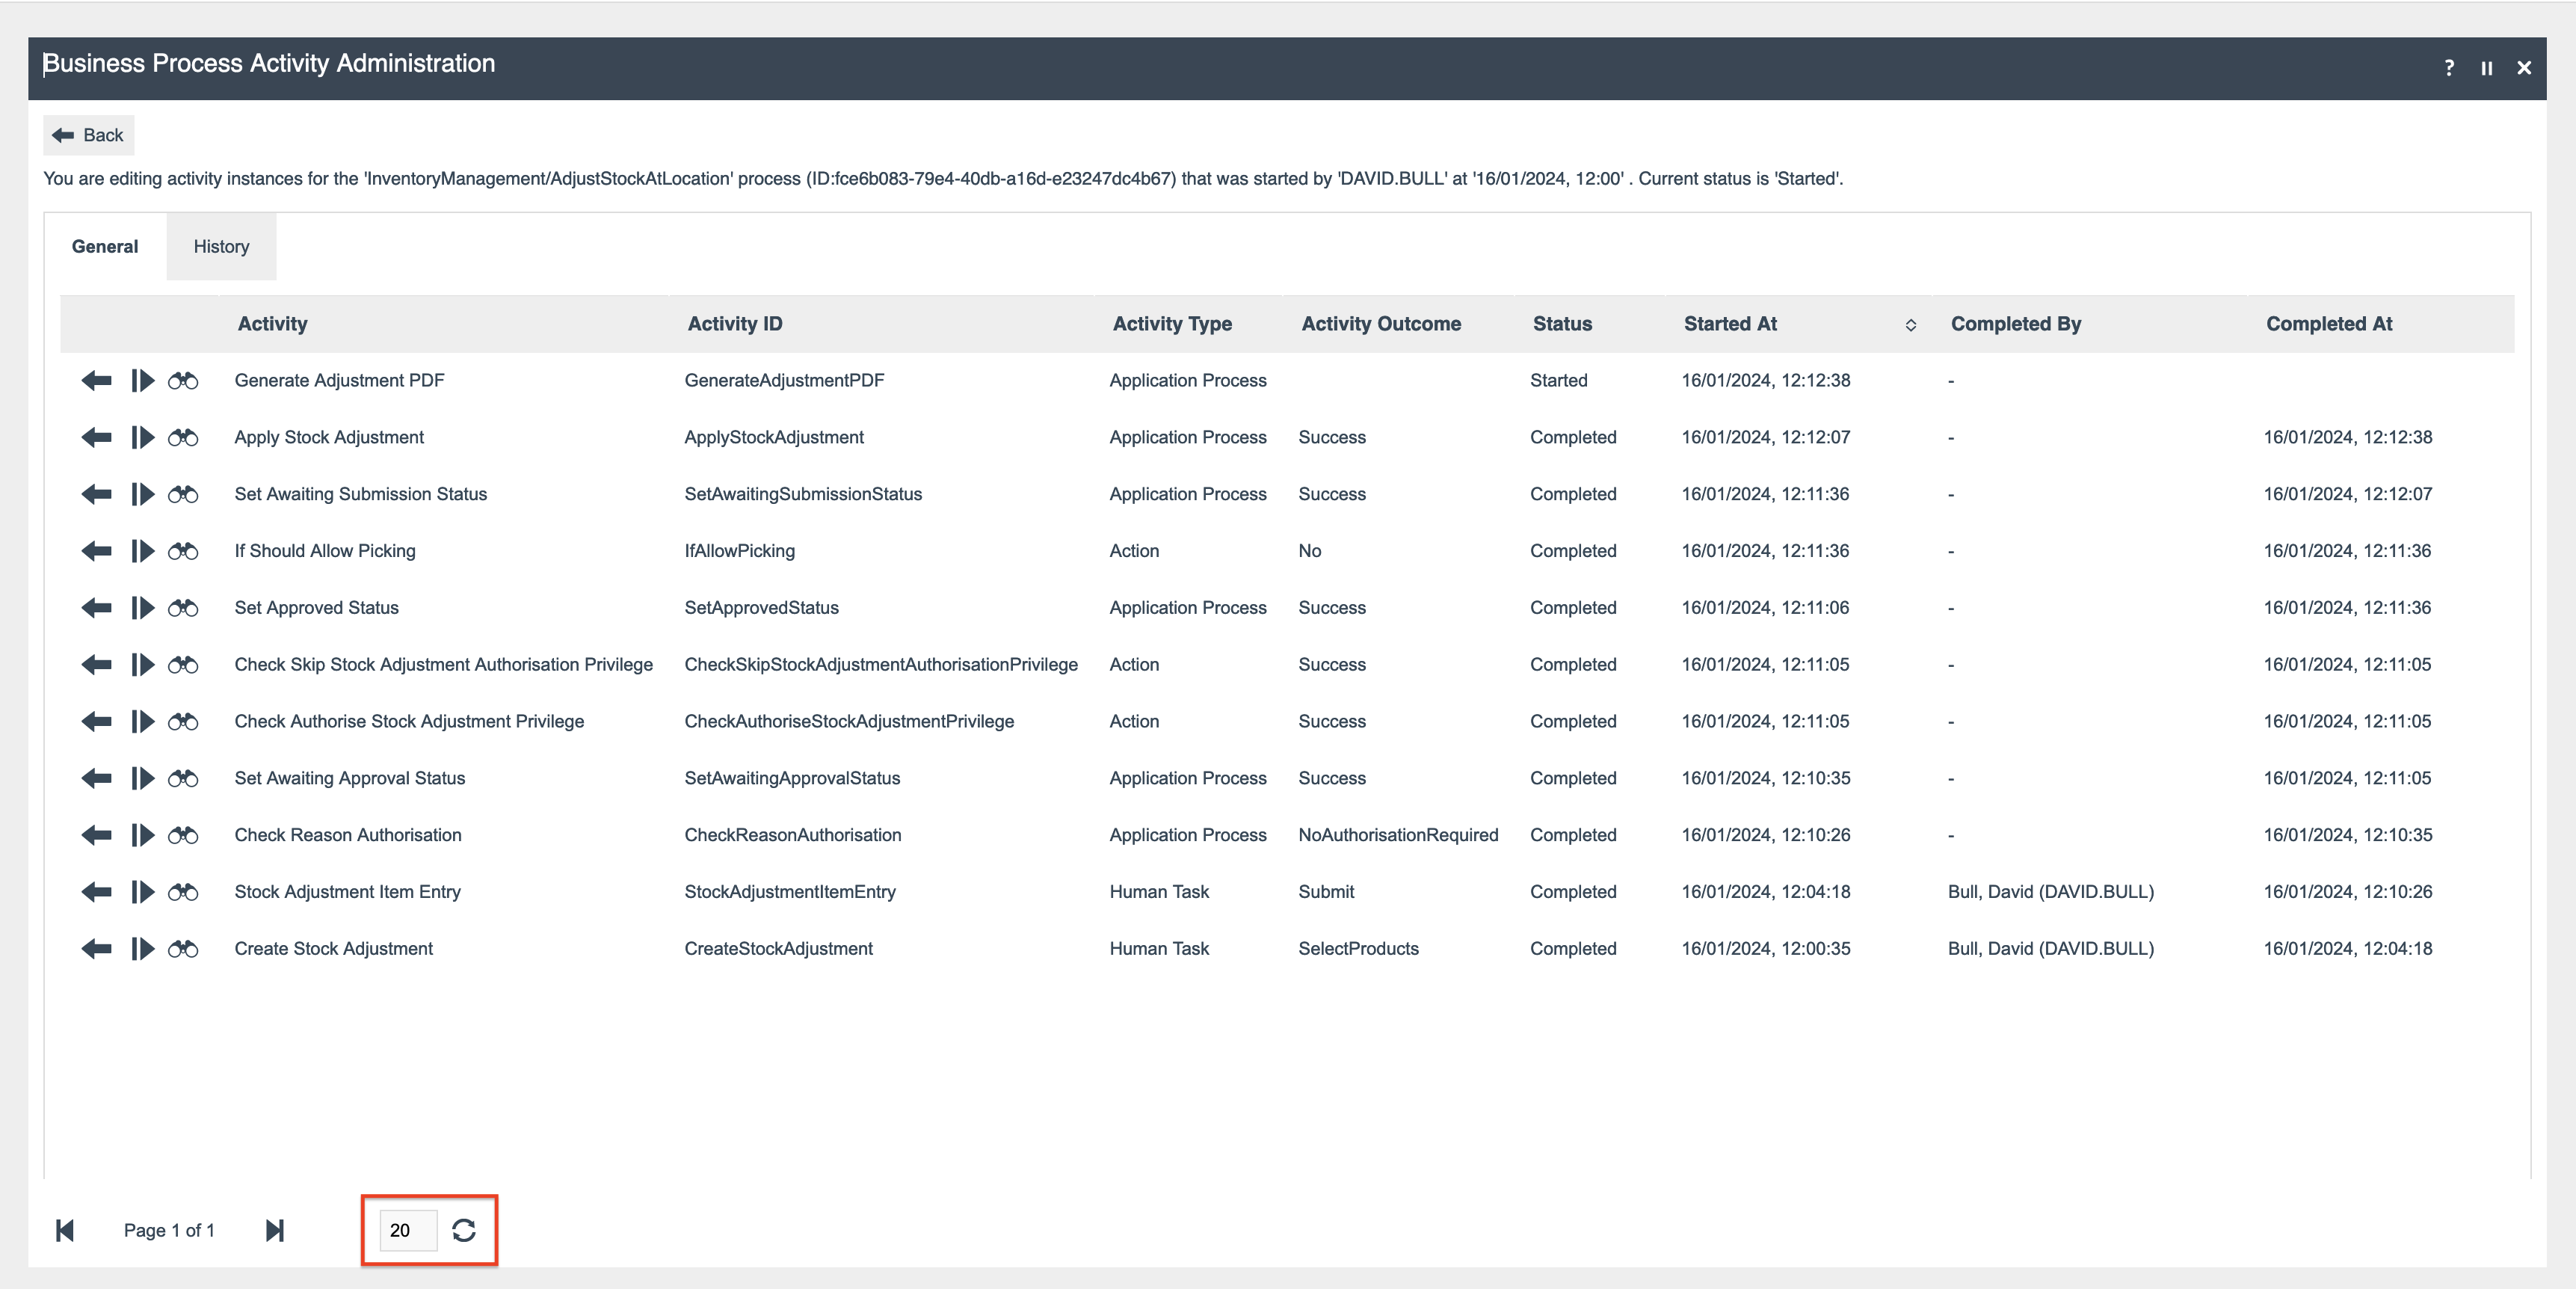
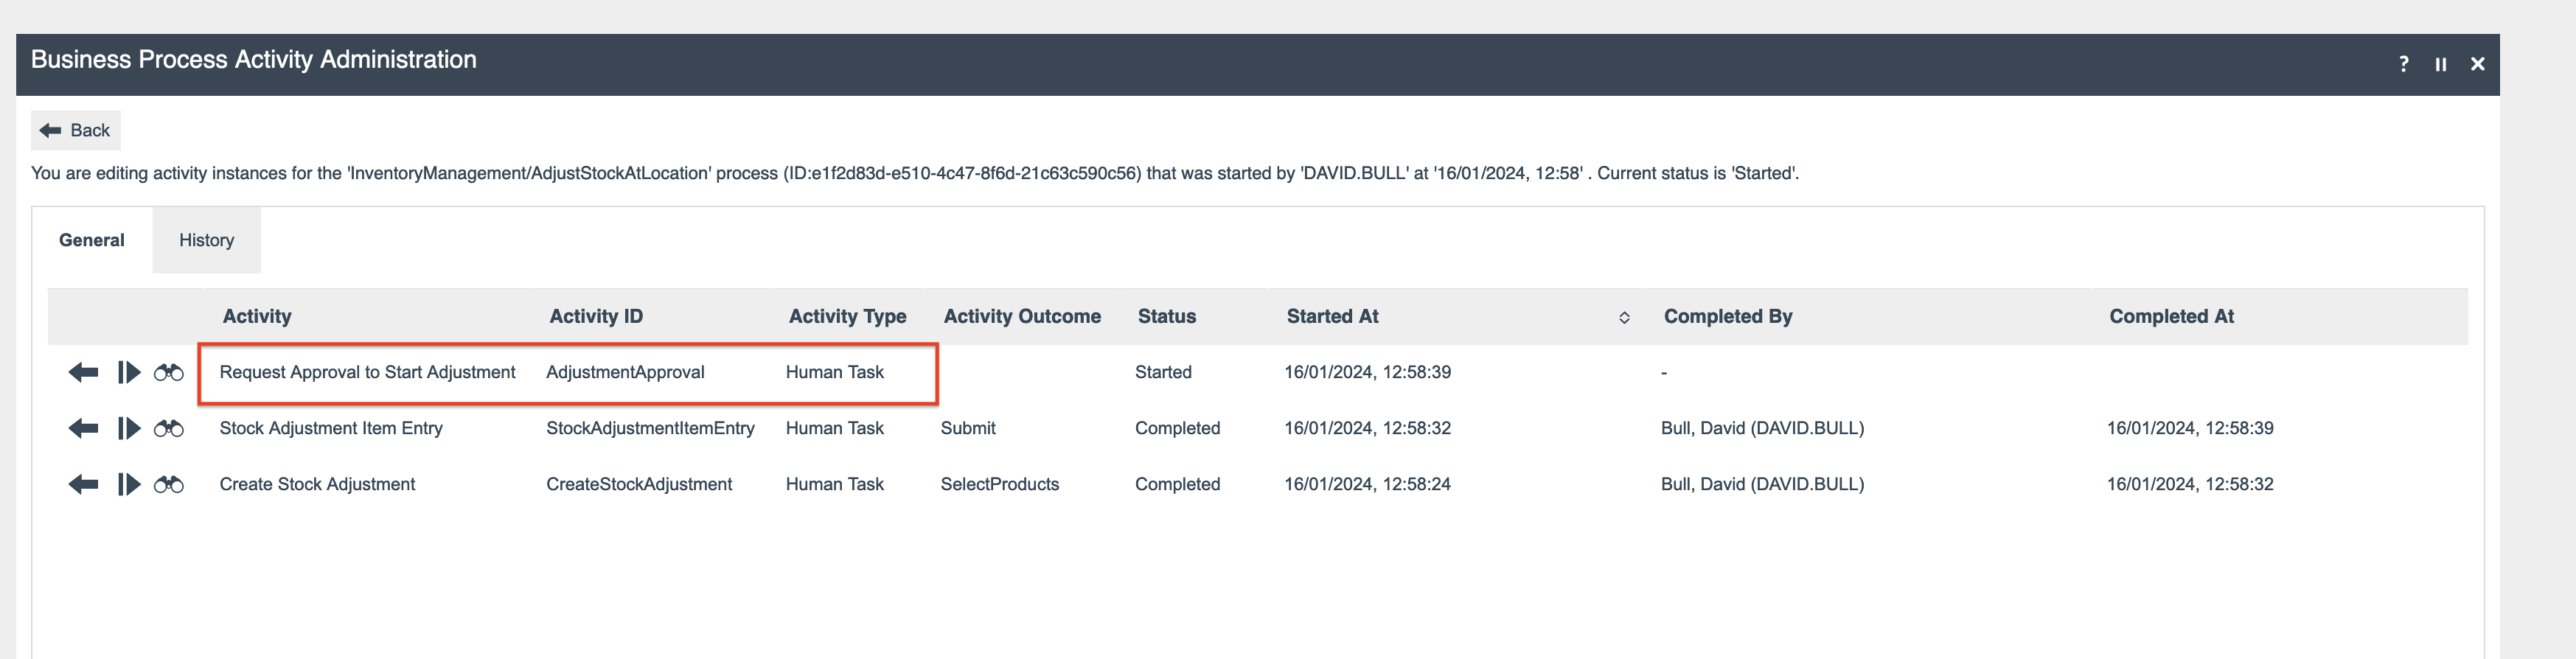
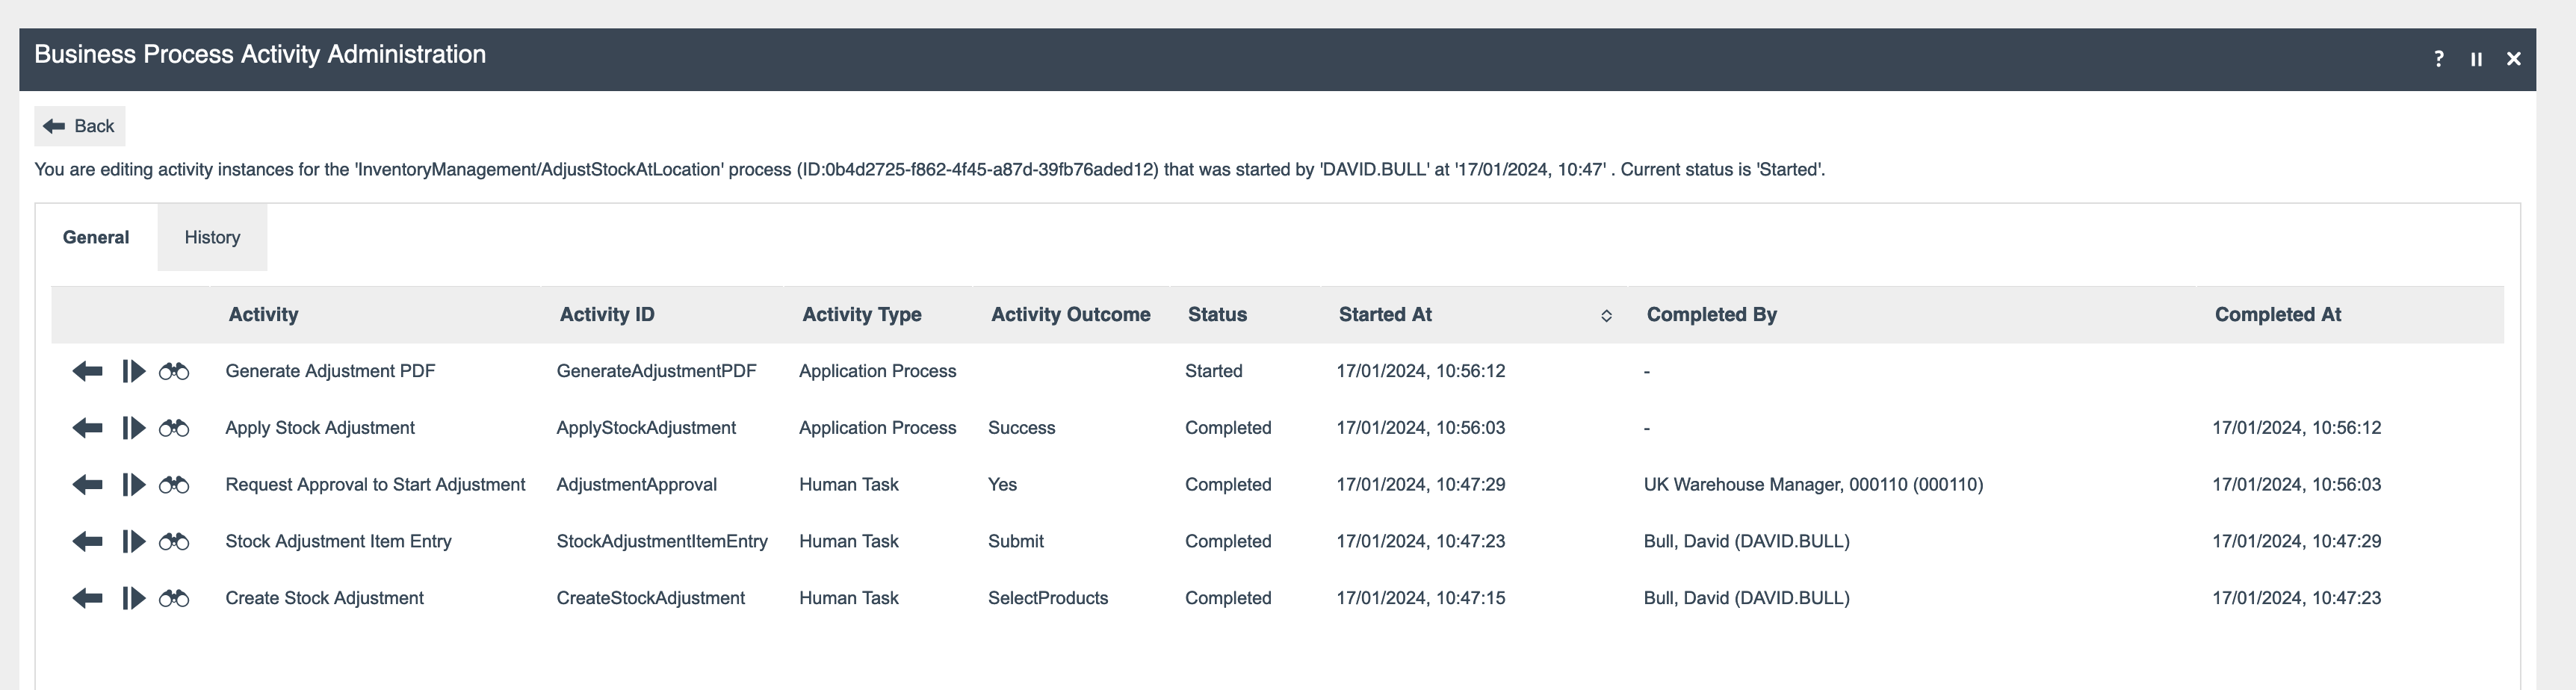
- To check the progress of the Business Process, navigate to Administration -> Business Process and select Business Process Administration.
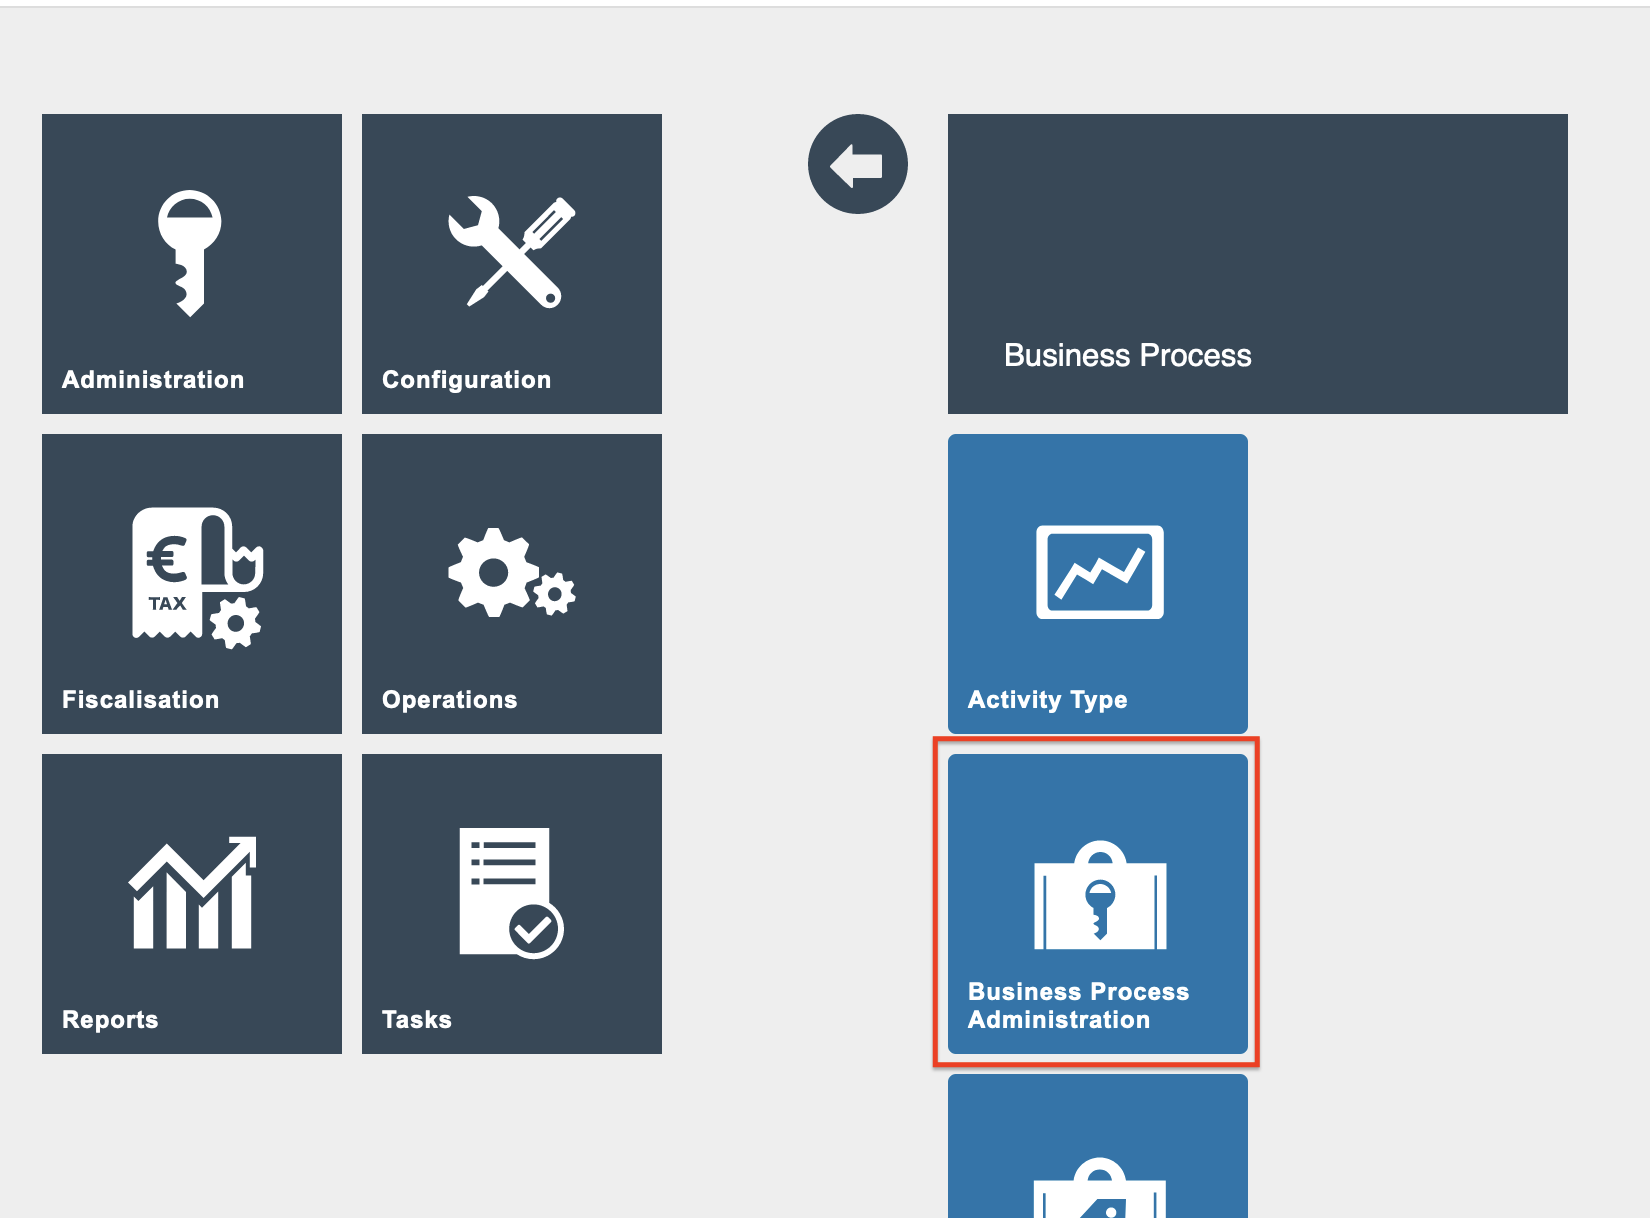
- Click the Edit button against the top business process, which will be the one you have just run, and may be the only business process in the list.

- The Edit view shows all the steps taken by the business process. Update the page count at the bottom to 20 to display all the activities on one page. You will recognise the two Human Tasks at the bottom - Create Stock Adjustment and Stock Adjustment Item Entry - these were the first two activities in the business process. No further human interaction should be required for a Write On reason, so the final step in the business process will be "Generate Adjustment PDF", which will stall because PDF generation is not including in the training workspace.
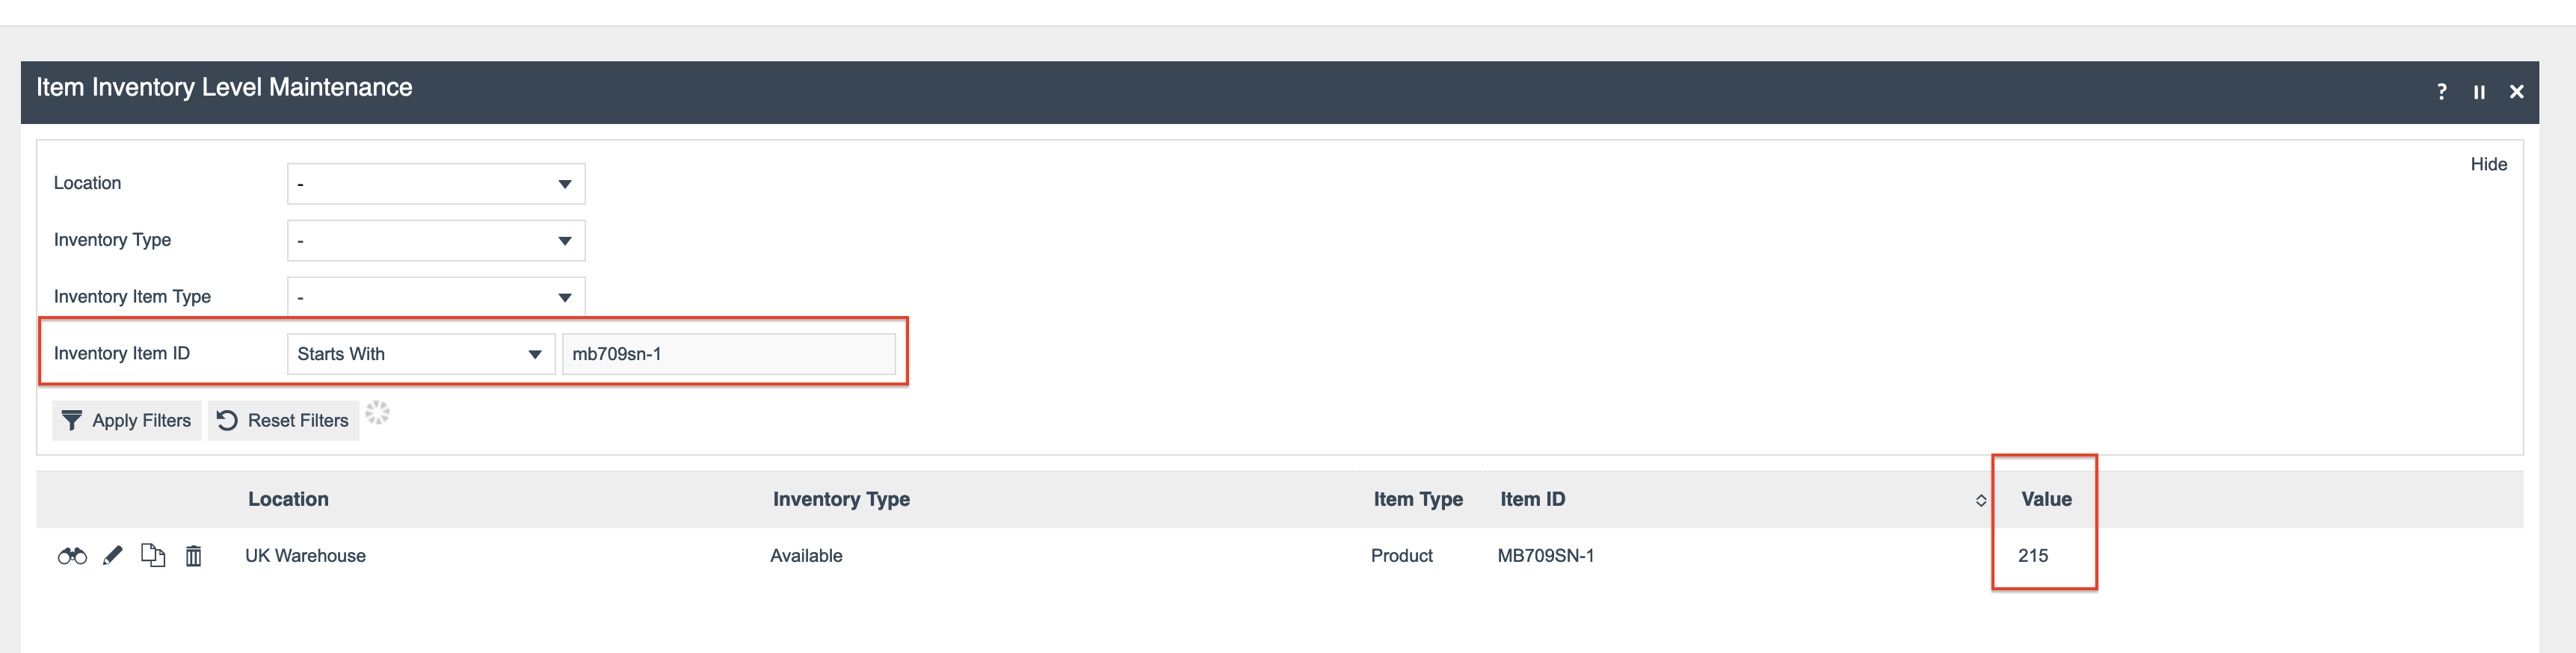
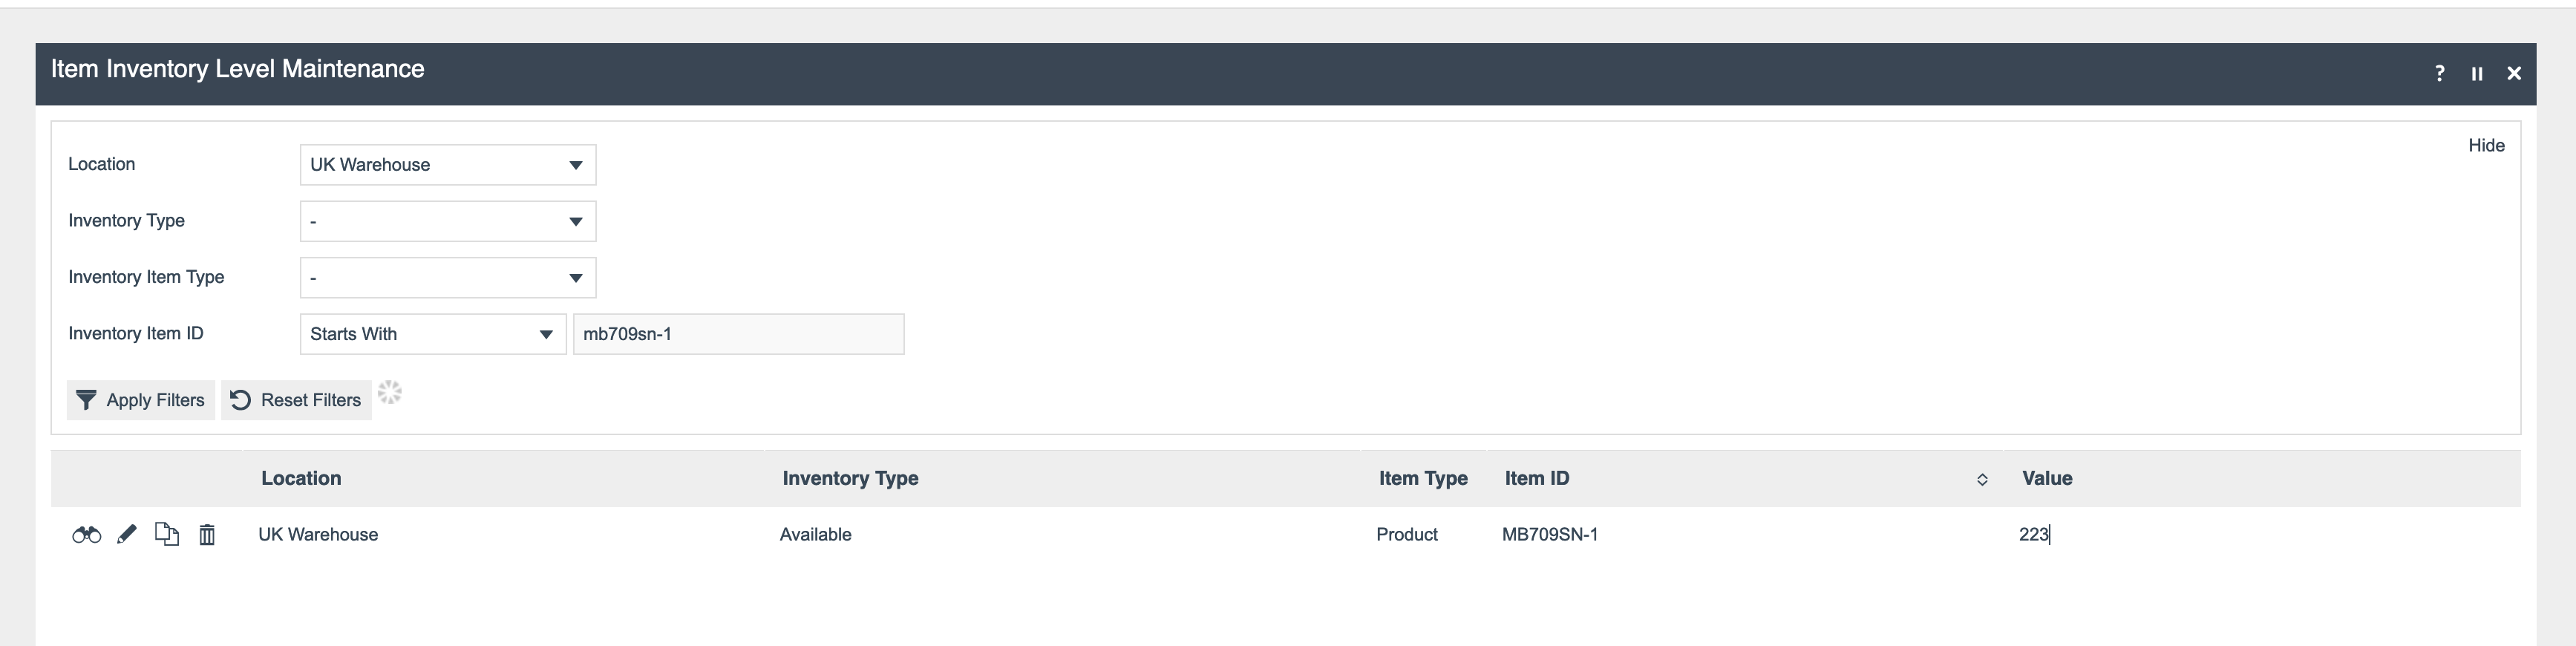
- If the business process has progressed beyond the Apply Stock Adjustment activity, then the inventory level of the product should have increased. Search or navigate to Configuration -> Merchandise -> Item Inventory Levels and add the Inventory Item ID filter of the product ID in your stock adjustment, i.e. MB709SN-1. You should see that the inventory level has been increased.
Creating a Custom Copy of the Business Process
First find the AdjustStockAtLocation business process. You can find it using the Ctrl+R key combination (on Windows), or by navigating to the following location in Eclipse:
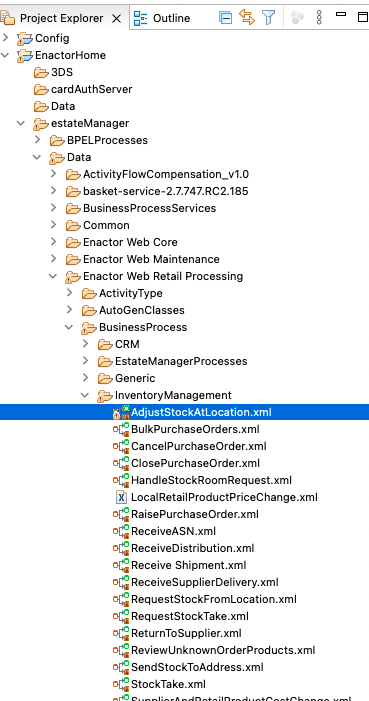
Once you have found the process, copy it to your custom projects, e.g. Training - Common Data/src/META-INF/BusinessProcess, although any location will suffice as we will be publishing this using the Estate Manager, rather than using the Enactor Deployment system.
Adding the Approval Step
The change we will make to the business process is to replace the complex reason and privilege checks to determine if authorisation is required for the adjustment and replace it with a single human task.
- Open your custom FulfilCustomerOrder business process:

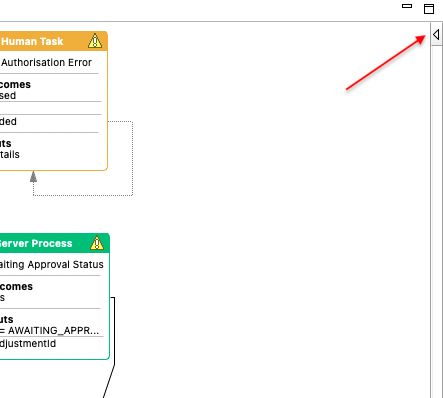
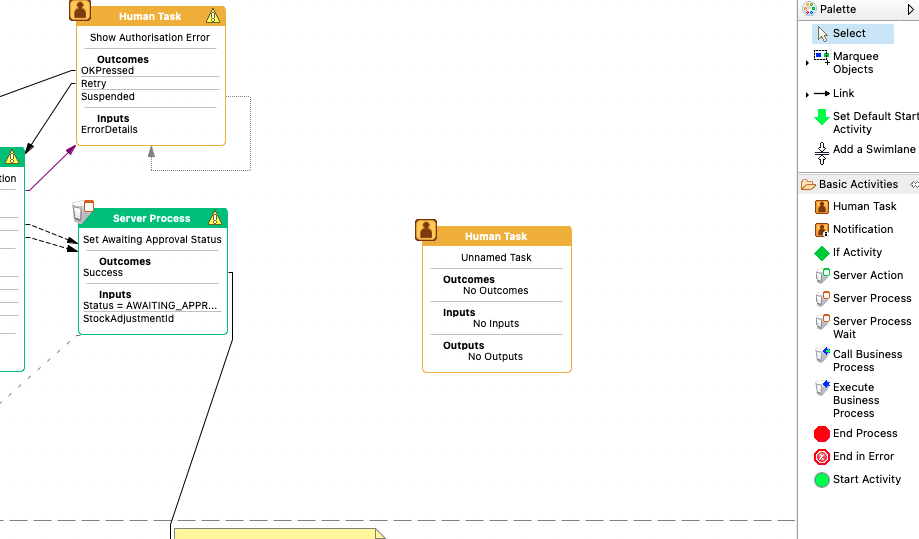
- Expand the tool palette clicking on the small triangle icon to the top-right of the canvas:
- Drag on a Human Task and place it to the right of the Set Awaiting Approval Status. You can now click again on the triangle to close the palette and save some space.
- Select the new task, and in the Properties view configure it as follows:
| Property | Value | Notes |
|---|---|---|
| Activity ID | AdjustmentApproval | A unique identifier for the activity |
| Activity Type | Generic/YesNoTaskActivityType | The ID for the activity type that describes how this activity should be run |
| Name | Request Approval to Start Adjustment | A human readable description for the activity. Appears in the editor and in the Estate Manager Administration UI |
| Job Description | Approval of Stock Adjustment | A complete description of the Task for the benefit of the User |
| Job Header | Stock Adjustment Approval #{stockAdjustmentId} | A description displayed as a part of the Task when it is assigned to a User. This should be more related to the task itself. Also appears on the User's Task List |
| Job Type | Adjust Stock at Location | A description displayed as a part of the Task when it is assigned to a User. This should generally be used to categorise tasks for the user |
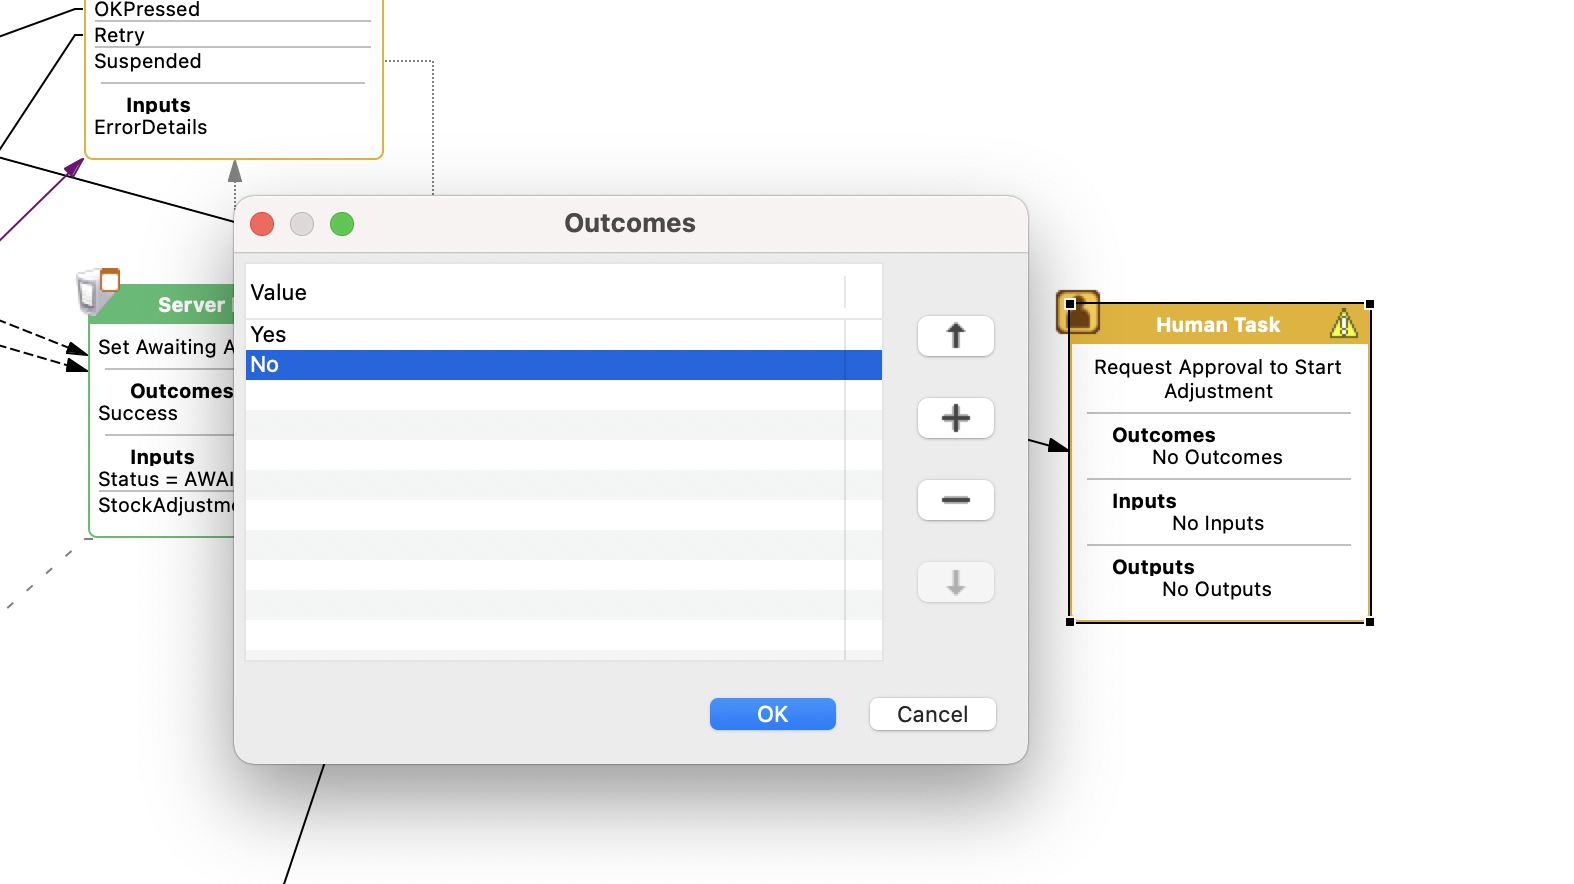
- Double-click the Outcomes section of the task, and add the Outcomes Yes and No:
- Double-click the Inputs section of the task, and add the following Inputs:
| Input Name | Type |
|---|---|
| enactor.task.maintenance.Message | java.lang.String |
| enactor.task.maintenance.MessageTitle | java.lang.String |
- Add another blank line, but this time from the drop-down select
enactor.customerOrders.CustomerOrderId. Click OK.
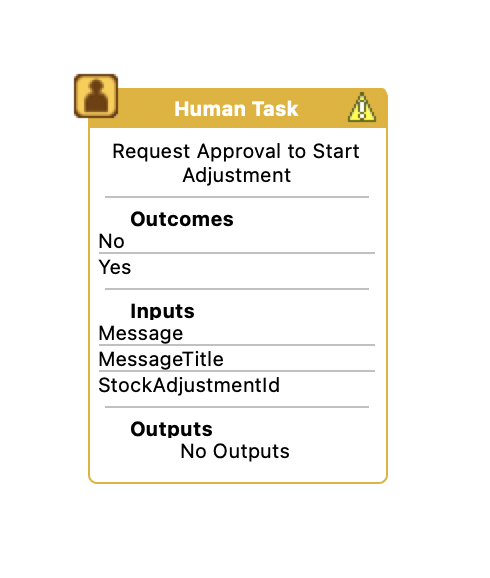
When you are done, the action should appear like this:
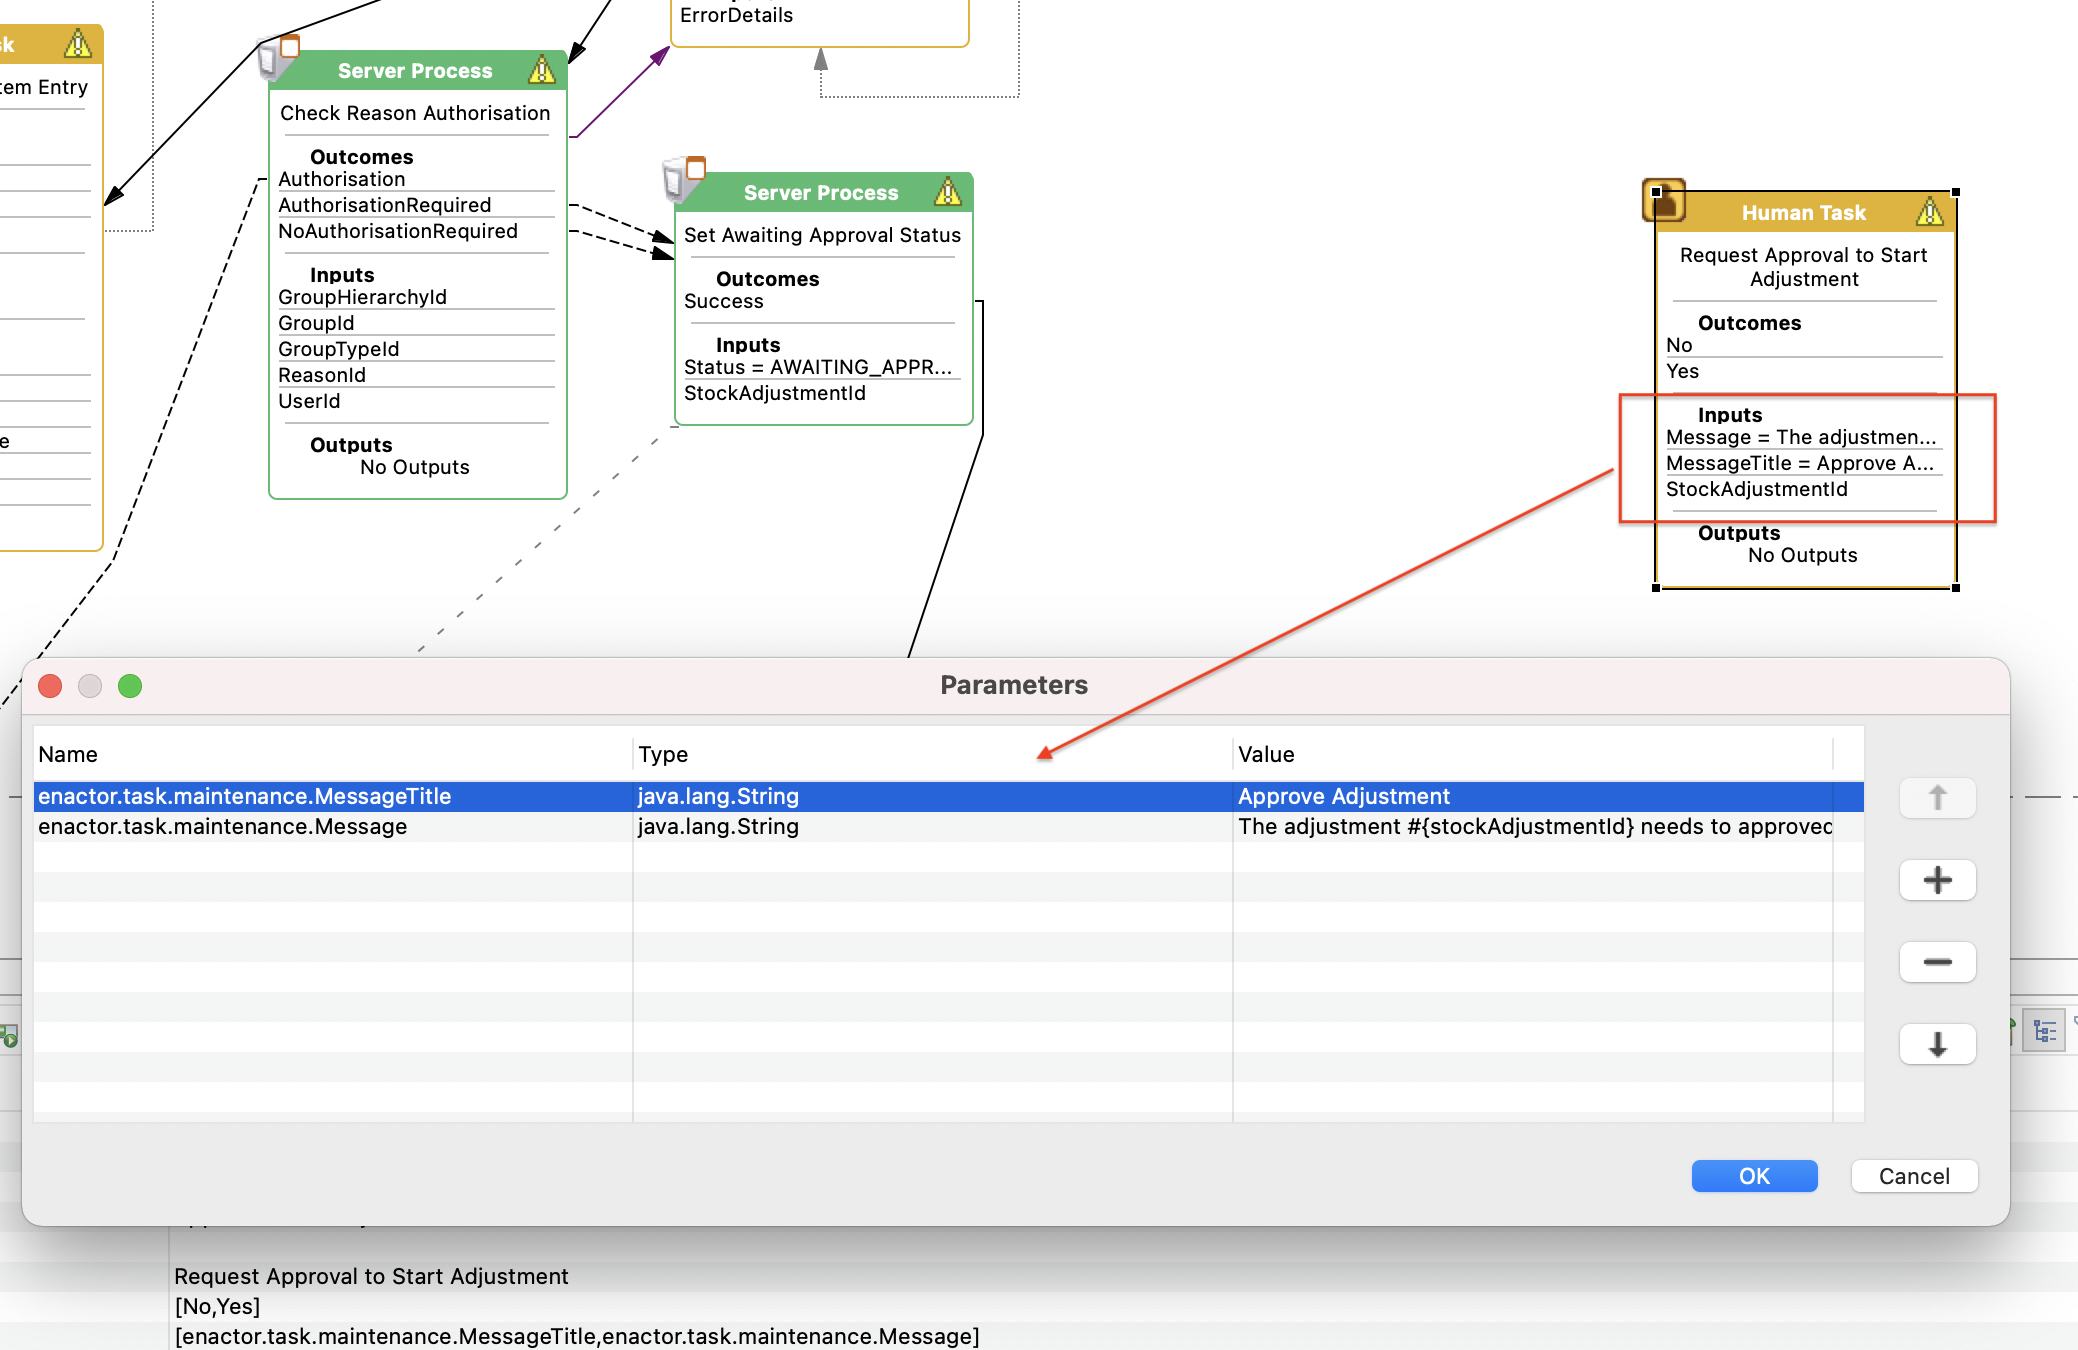
- Hold down the Shift key, and again double-click the Inputs section of the task to configure some Parameters:
| Parameter Name | Type | Value |
|---|---|---|
| enactor.task.maintenance.MessageTitle | java.lang.String | Approve Adjustment |
| enactor.task.maintenance.Message | java.lang.String | The adjustment #{stockAdjustmentId} needs to approved before it can start. |
- Finally we will link to the new activity into the business process so we skip the reason authorisation and privilege checks. Move the existing link from the
Stock Adjustment Item Entryactivity, Submit outcomt, so it connects to our new Request Approval activity. Next link the new Yes outcome from Request Approval to go directly to the Apply Stock Adjustment activity. Link the new No outcome back to Stock Adjustment Item Entry.
You may need to expand the tool palette if it is collapsed in order to create a new link.

Assigning the Human Task
When the Business Process arrives on the Human Task, it will need to know who should be able to complete it - this may be a single person, or a group of people with a particular role, or a group of people available at a particular location. In this case we will assign the task to any user who has the role CENTRAL_INVENTORY and whose location is the adjustment location.
To do this, select the Human Task, and in the Properties view select the People Group Evaluator property.
In the drop-down list select {http://www.enactor.com/task}LocationRoleEvaluator. If there is no drop-down, select Custom and add the data to the dialog manually.
| Name | Value |
|---|---|
| Namespace | {http://www.enactor.com/task} |
| Name | LocationRoleEvaluator |
This value is an identifier that specifies the type of people group evaluator to apply. There are many to choose from as standard, and you can add your own evaluators if necessary. In this case we have specified that the task should be assigned to any user who has a specified Role at a specified location.
Next configure the following parameters using the People Group Evaluator Parameters
| Name | Type | Value |
|---|---|---|
| roleId | java.lang.String | CENTRAL_INVENTORY |
| locationId | java.lang.String | #{locationId} |
Make sure all files are saved before you continue.
Deploying the Business Process
Business Processes can be deployed directly into the Estate Manager, without the need to restart the server.
-
Sign on to the Estate Manager with an admin user.
-
Click the search icon in the tool bar, search for 'Business Process', and then select it to open the application. Alternatively, navigate to Configuration -> Process -> Business Process.

- Click the Upload Business Process button at the bottom of the form:

- In the dialog that appears, click the Choose File button, and then from the file navigator select the business process you have been editing, e.g.
C:\Users\enactor\Development\WorkspaceSetup\CustomerProducts\TrainingCommonData\src\META-INF\deployments\BusinessProcess\AdjustStockAtLocation.xml
Then click the Upload button.
- You will be asked to confirm you want to overwrite the existing Business Process, select OK:

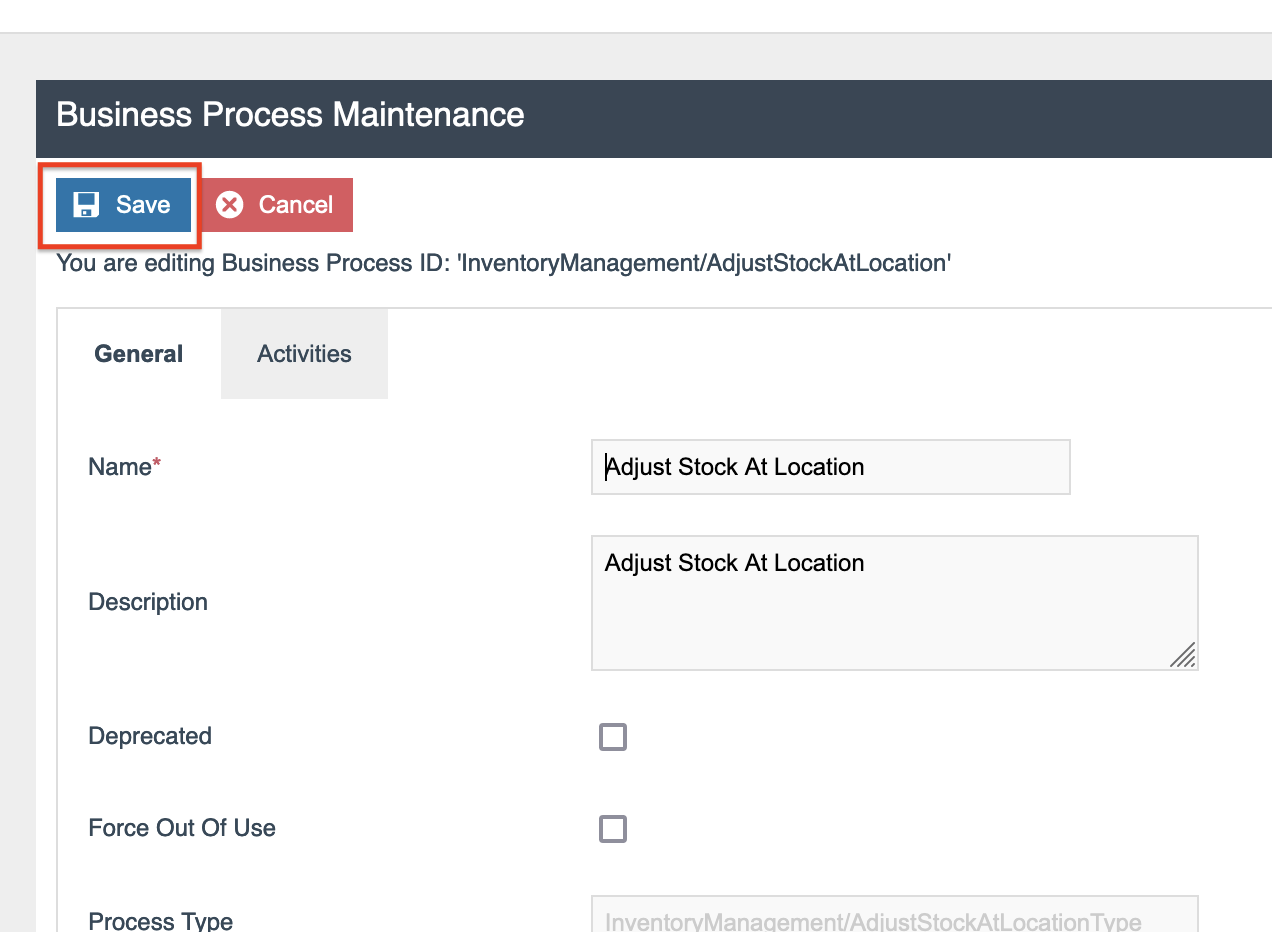
- The updated Business Process will then be displayed, click the Save button to commit your new file to the database:
Testing the Changed Business Process
We can now test the updated business process by submitting another Stock Adjustment.
-
Follow the same steps from the start of this tutorial to submit a stock adjustment, using the same product, location and reason code.
-
When checking the progress in Business Process Administration, you should see your new activity at the top - "Request Approval to Start Adjustment". This is the new human task that was added, skipping the previous activities. The human task should be assigned to someone with the Central Inventory role.
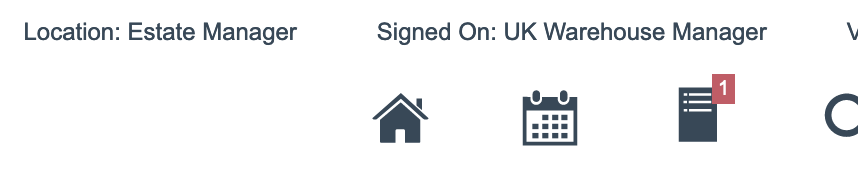
- If your current signed-on user does not have the correct role and the correct location, the new human will not be assigned to them. Their task count will remain at zero, which is the number decoration on the Task List icon on the top right of the Estate Manager page.

- Signing on with a UK Warehouse user (assuming the location of the adjustment was 0100), should show one task in their task list. Sign out and sign in again using user
000101, with a password of000101. The task list count should be one.
- Click on the Task List icon to display the users task list. You should see the new adjustment approval task.
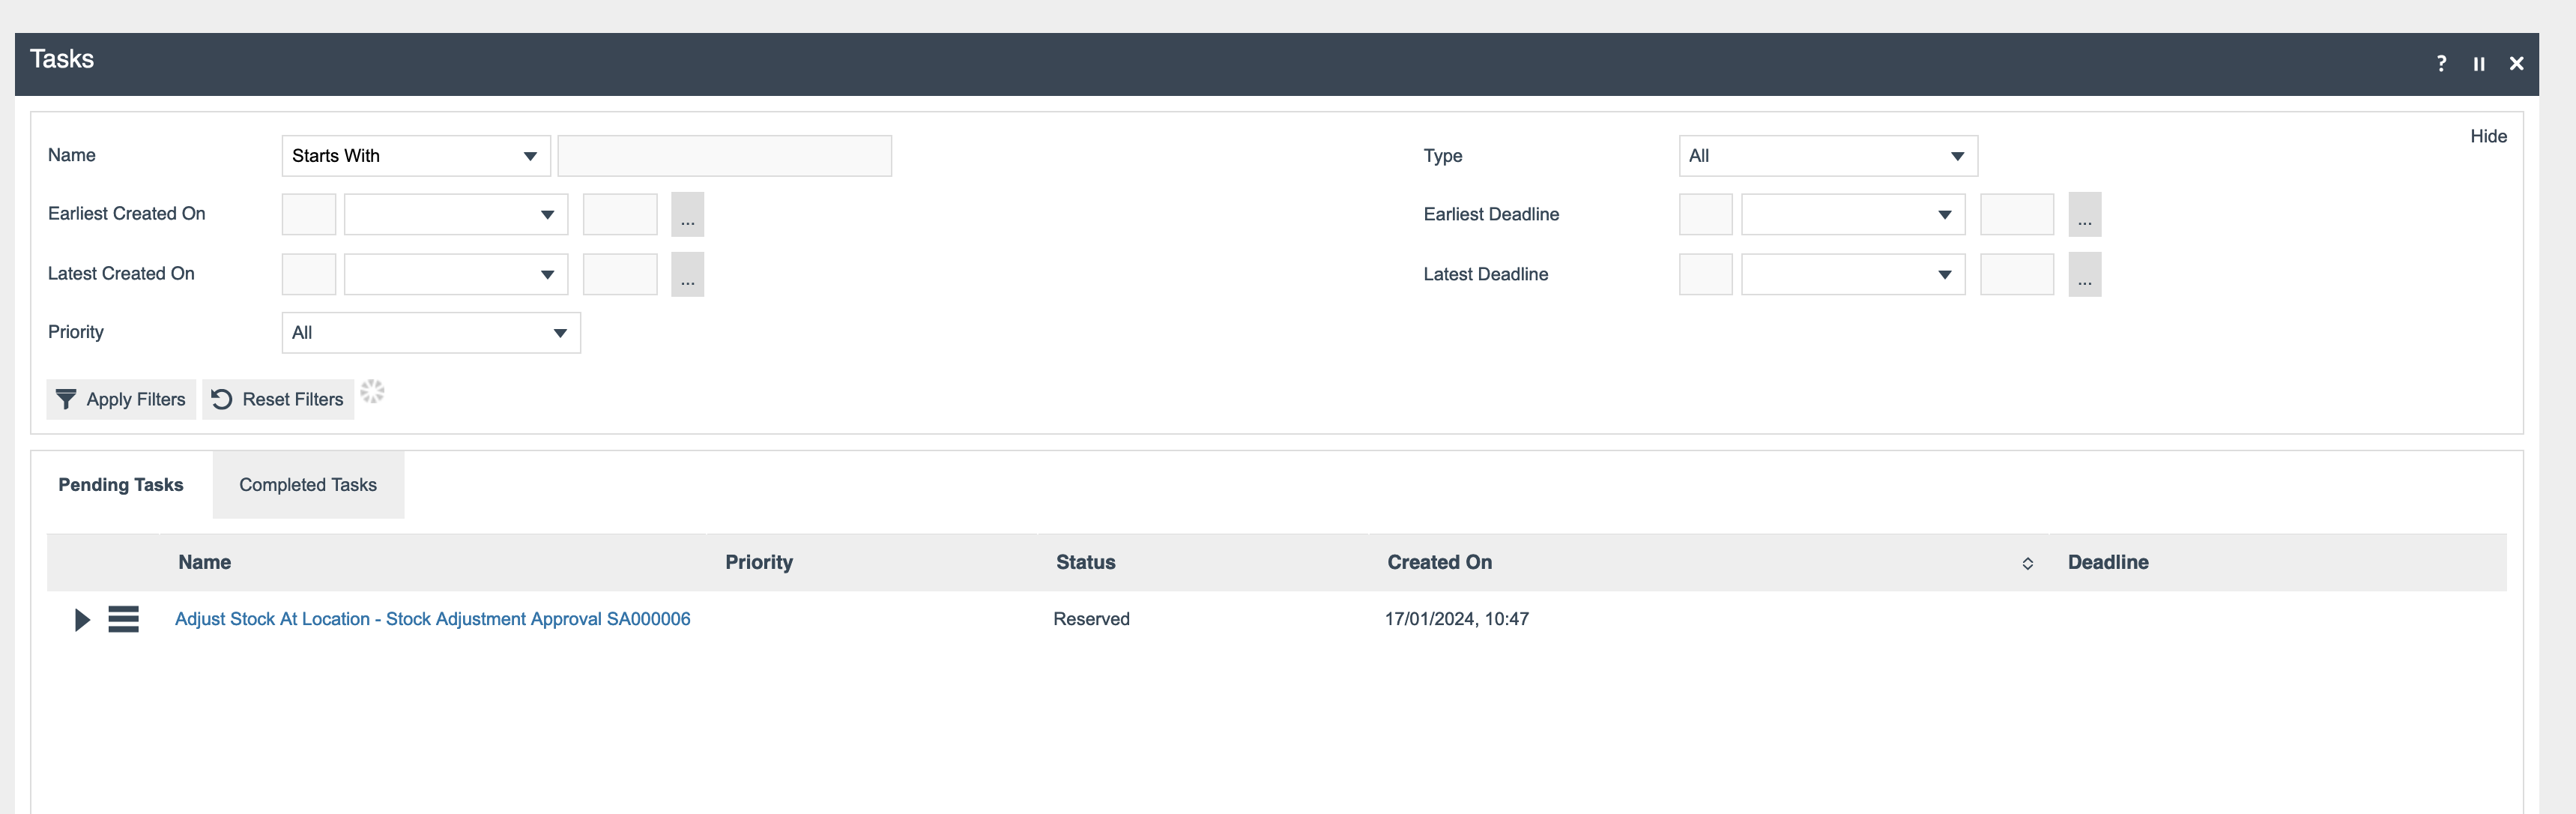
- Open the task by clicking on the task Name or the Play button. The generic Yes/No human task will show, with the message you added in the parameter of the activity in the business process. The task will look basic because it is using a built-in, generic page. However, the page could be customised to display any data.
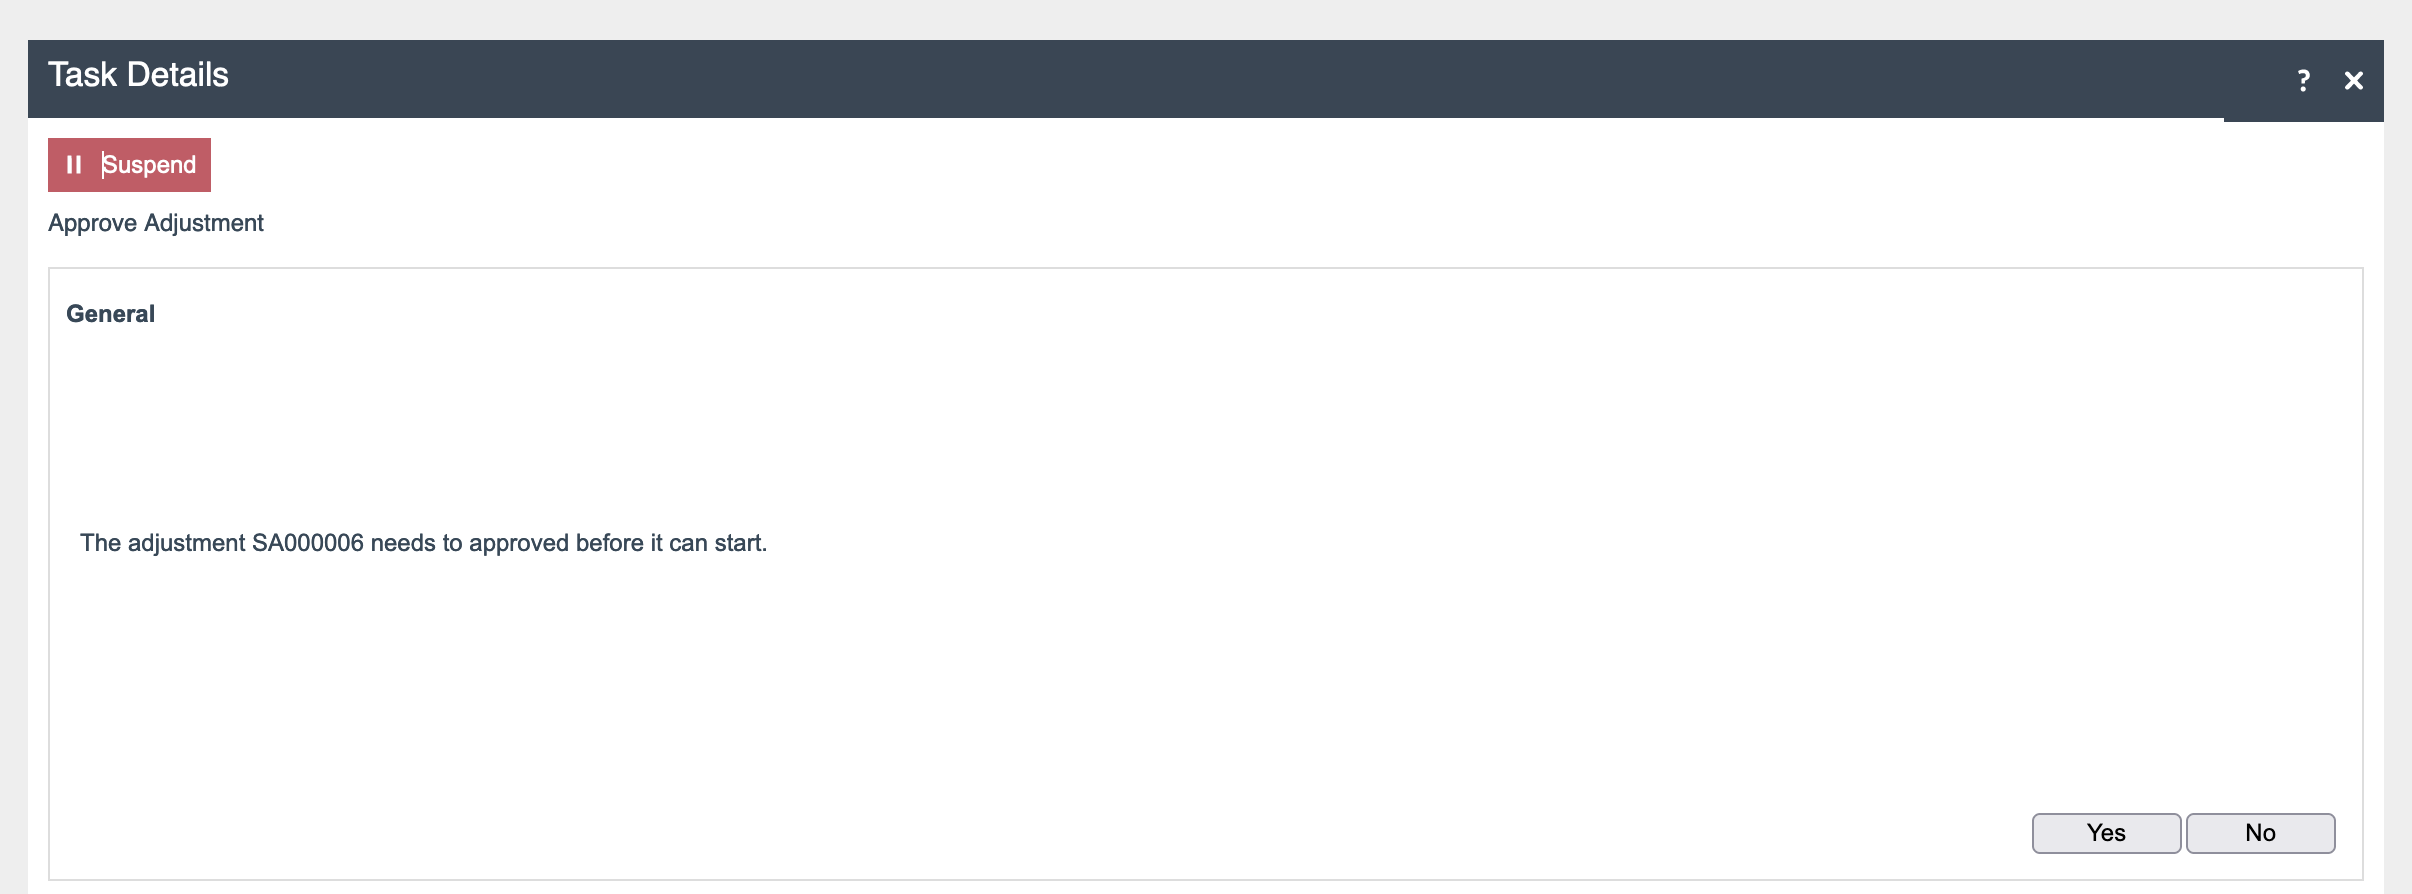
- Press Yes to approve the adjustment and navigate back to Business Process Administration (there is a shortcut at the bottom of the Task List). The business process should have continued, but this time in a simplified form, following the revised links you created earlier.
- The stock adjustment should have been applied to the inventory levels.
Resources
For reference, the Adjust Stock at Location business process, with the changes applied, can be downloaded here
Refer Business Process for more info.