How to Capture Data and Save them as Additional Data
Overview
The objective of this guide is to instruct on the process of storing additional data into the transaction. This could be captured from user input or returned from a service. This guide will show how to capture data through user input and how to store it in the transaction XML.
There are several areas where data can be saved:
- Each basket item has some explicit fields such as externalReference and externalReferenceNumber that can be used for a single value.
- Each basket item also has an additional data map that can store a key-value pair collection
- The basket itself also has a global (i.e. not specific to a single basket item) additional data map that has the same structure as the basket item additional data
What You Will Learn
- Identifying key locations in the application flow for capturing user input.
- Utilising the Resource library to search for reusable Application Processes and Actions.
- Learning the process of saving data to the current transaction.
Instructions
Identifying key locations in the application flow
Using Enactor Pos Overview of Key Application Processes as a reference, we need to identify an ideal extension point to use during the selling of a product.
Bring up the Resource Library View and search for the Process SellItem
Select and open SellItem_1.0.xml

Using the Outline View expand the Actions Group and search for CallPostSellItemExtension
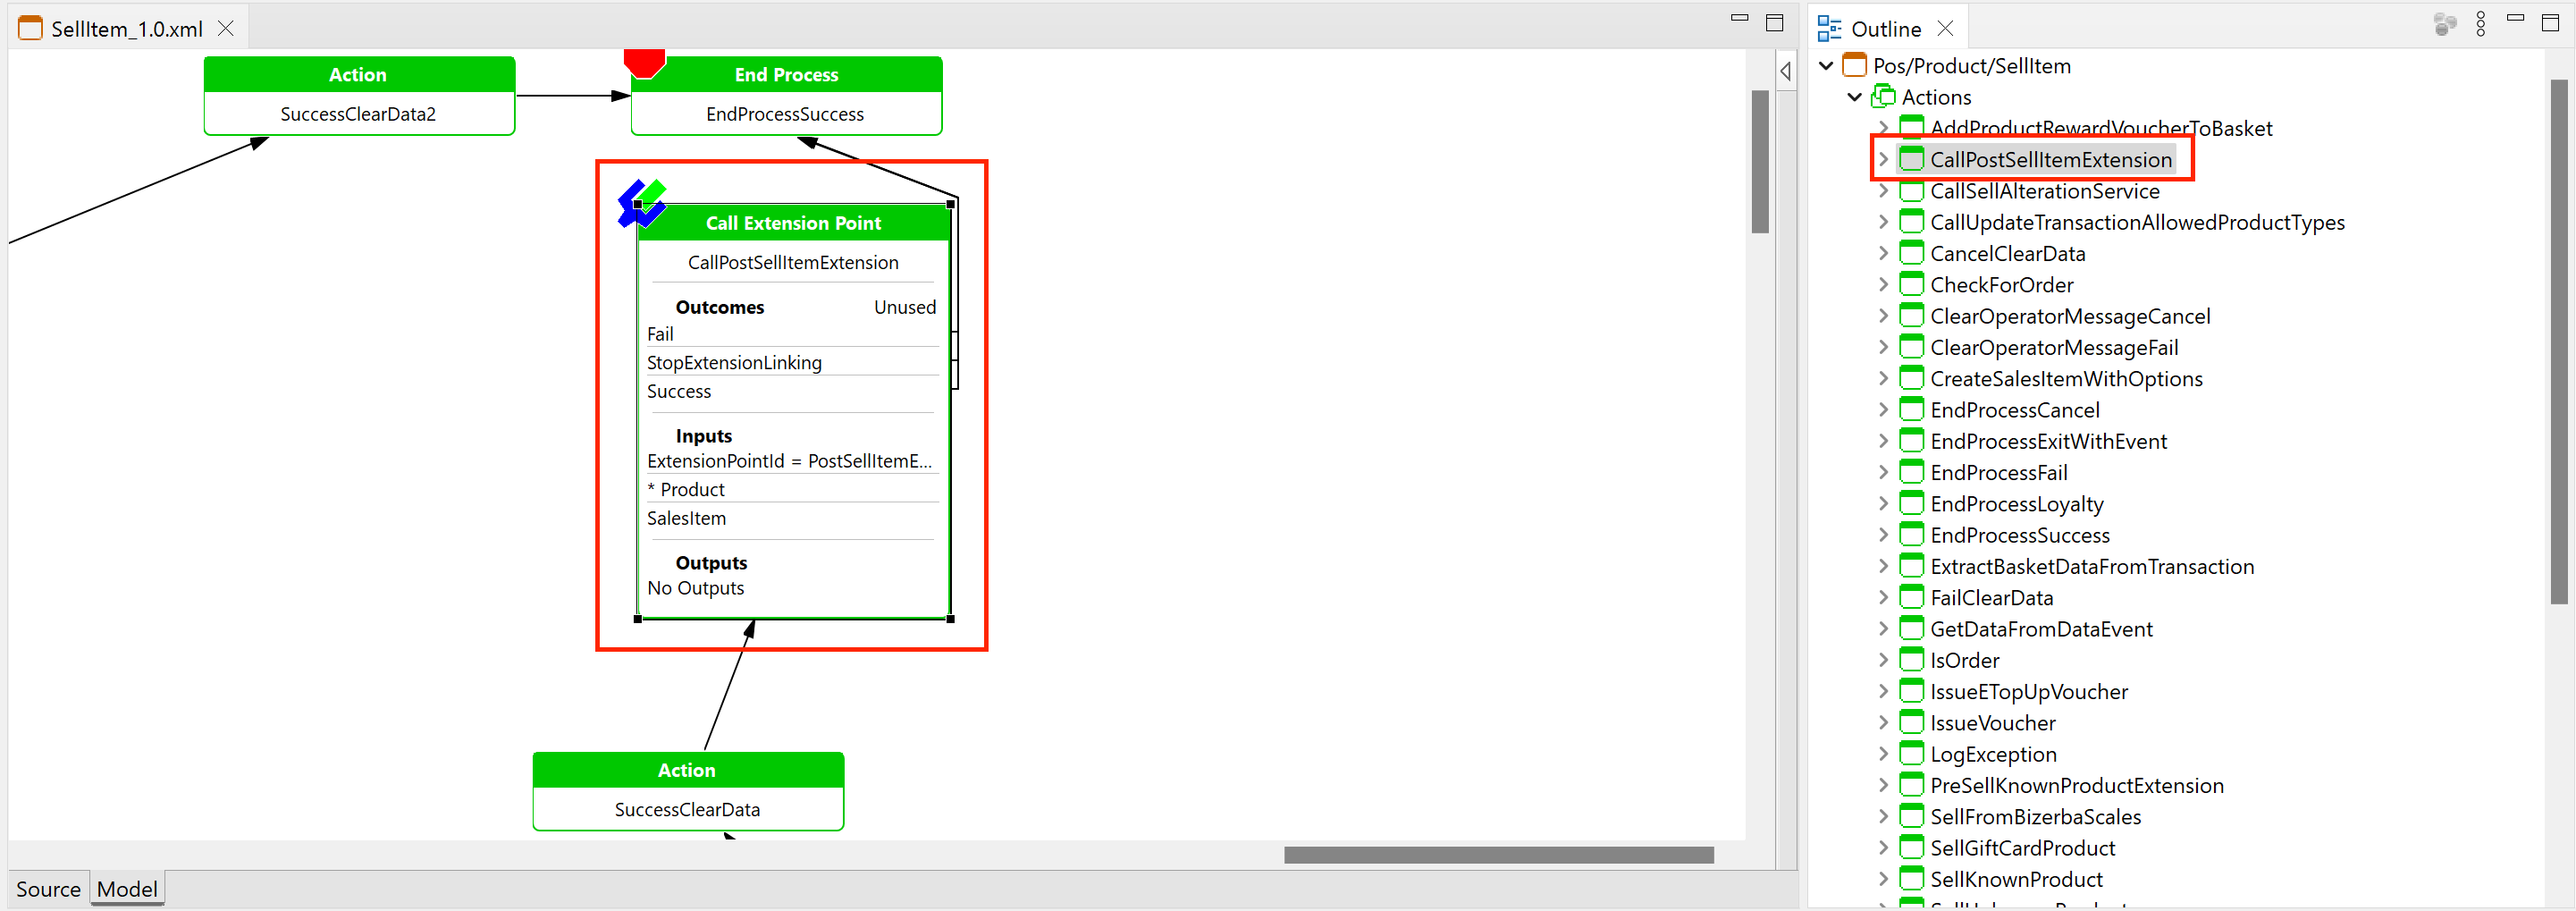
The PostSellItemExtension extension is well-suited for its purpose due to its positioning at the end of the sell item process. This strategic location ensures that the basket item provided to it is complete.
Creating an Extension Point Process
Capture a Reference Number
Create the following directory paths relative to the Process directory, Training/Pos/Transaction
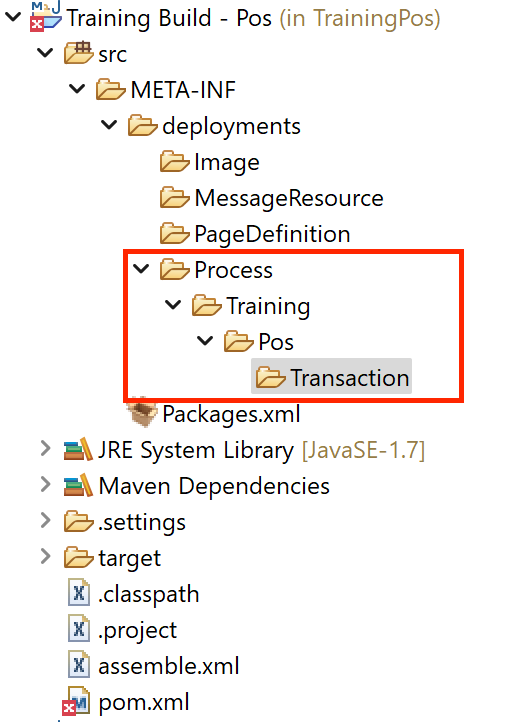
Create a new Application Process with an ID of CaptureAndSaveReference
Register the new Application Process CaptureAndSaveReference for the Extension Point ID PostSellItemExtension

Add a new Starting State
Add a new State Event StateEntered
Bring up the Resource Library View and search for the Process CaptureReference, Ensuring the Process ID Pos/Reference/CaptureReference is Selected, Place the new process call action alongside the State
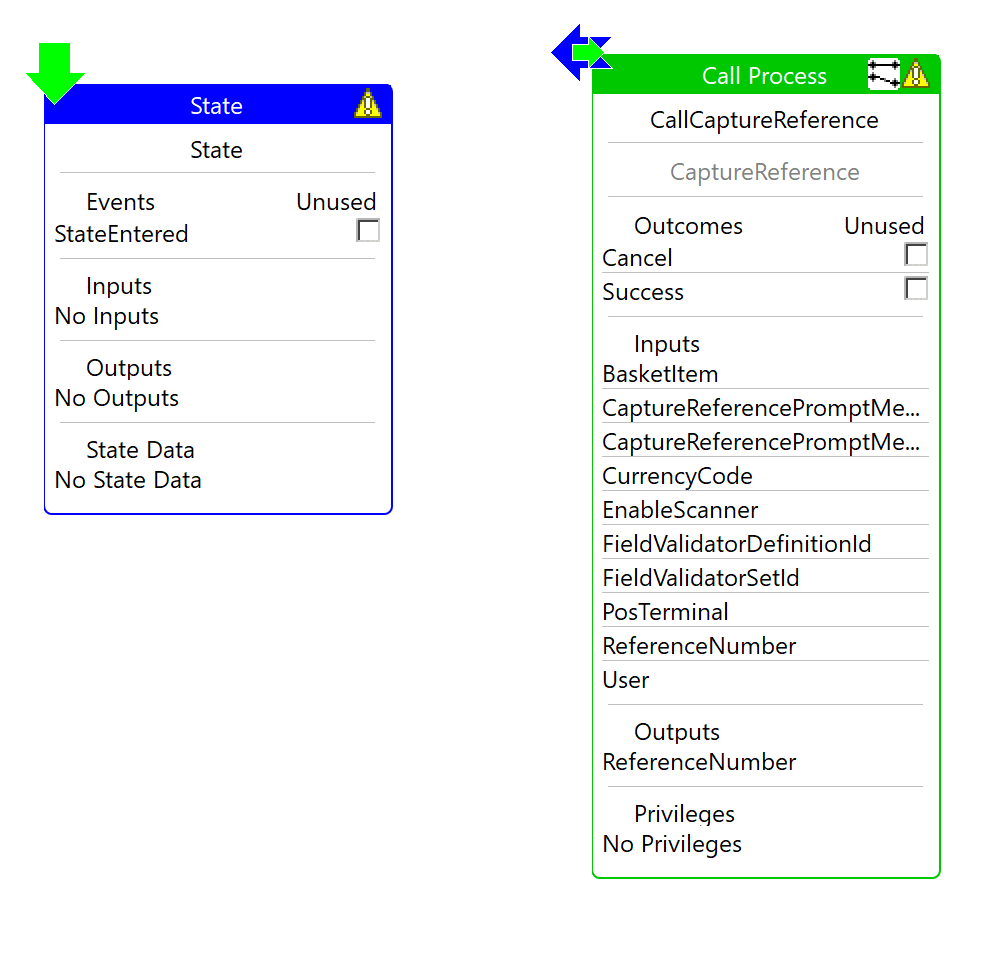
Connect the State and the CallCaptureReference action
Select to view the properties of the Process and create the following State Data
| Name | Type |
|---|---|
| ReferenceNumber | java.lang.String |
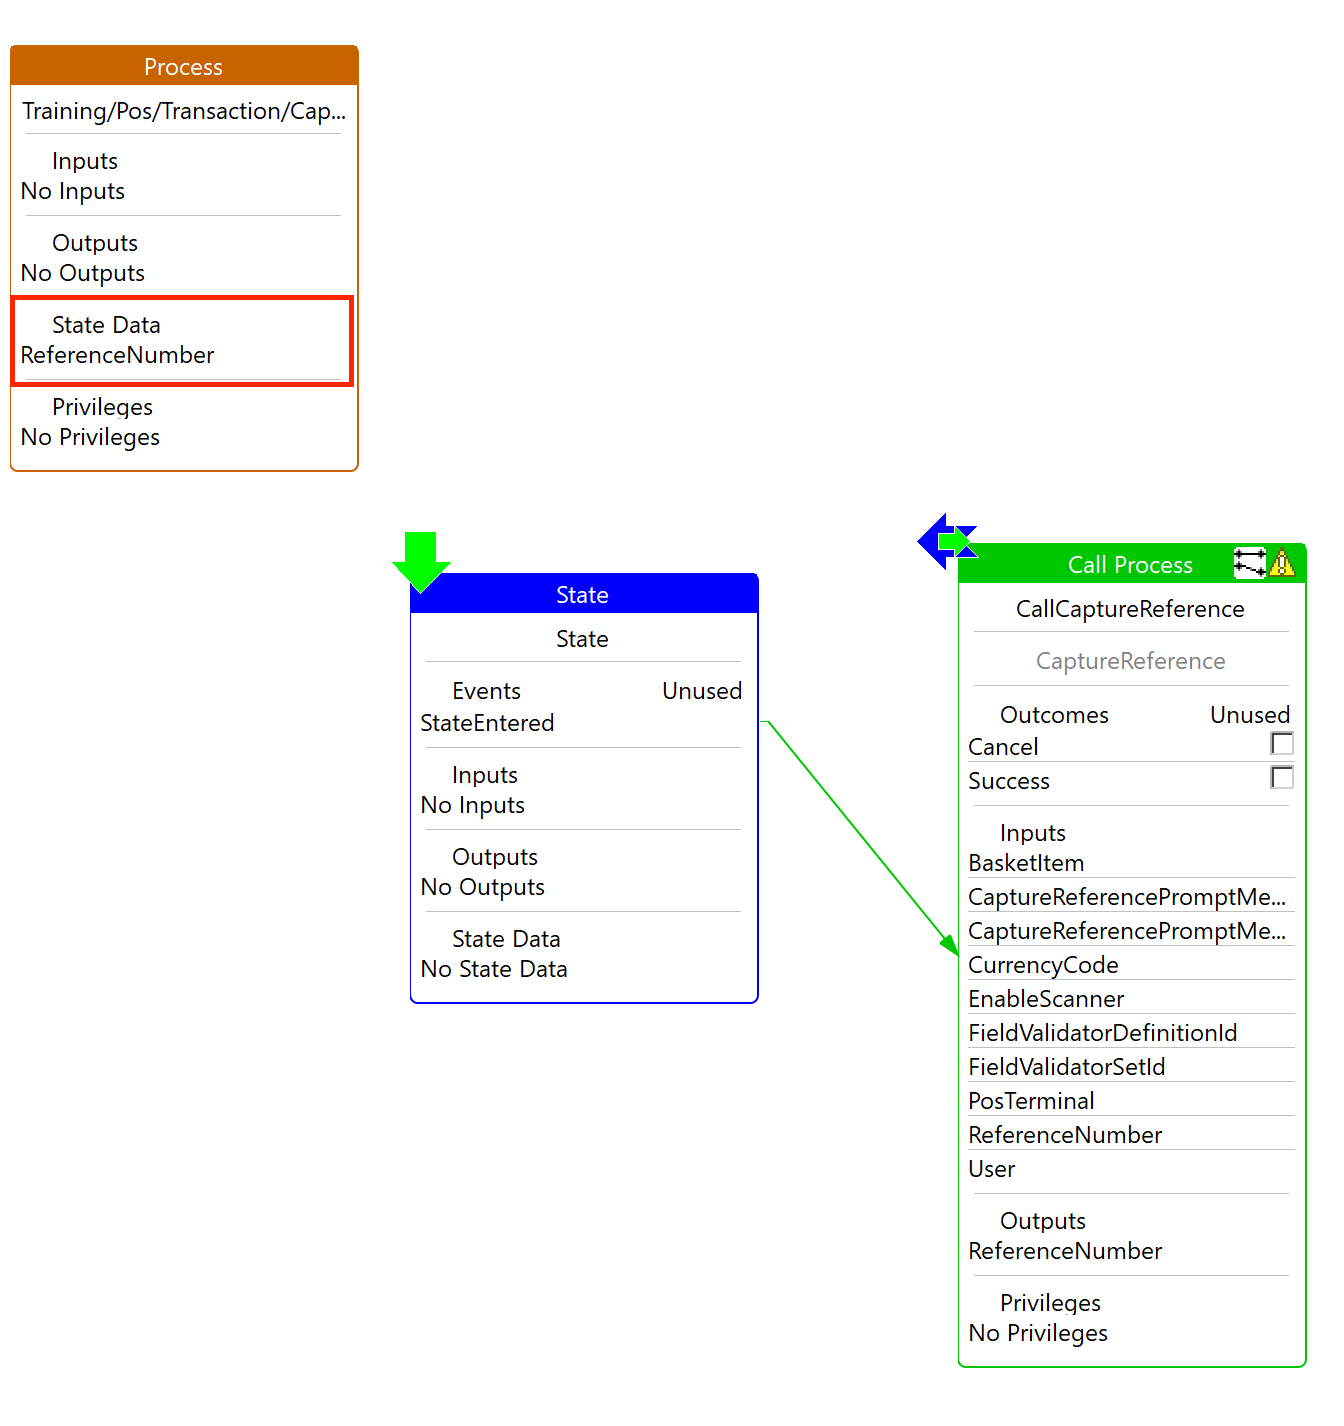
Select to edit the mappings for CallCaptureReference
Mark all the remaining Inputs as unsued
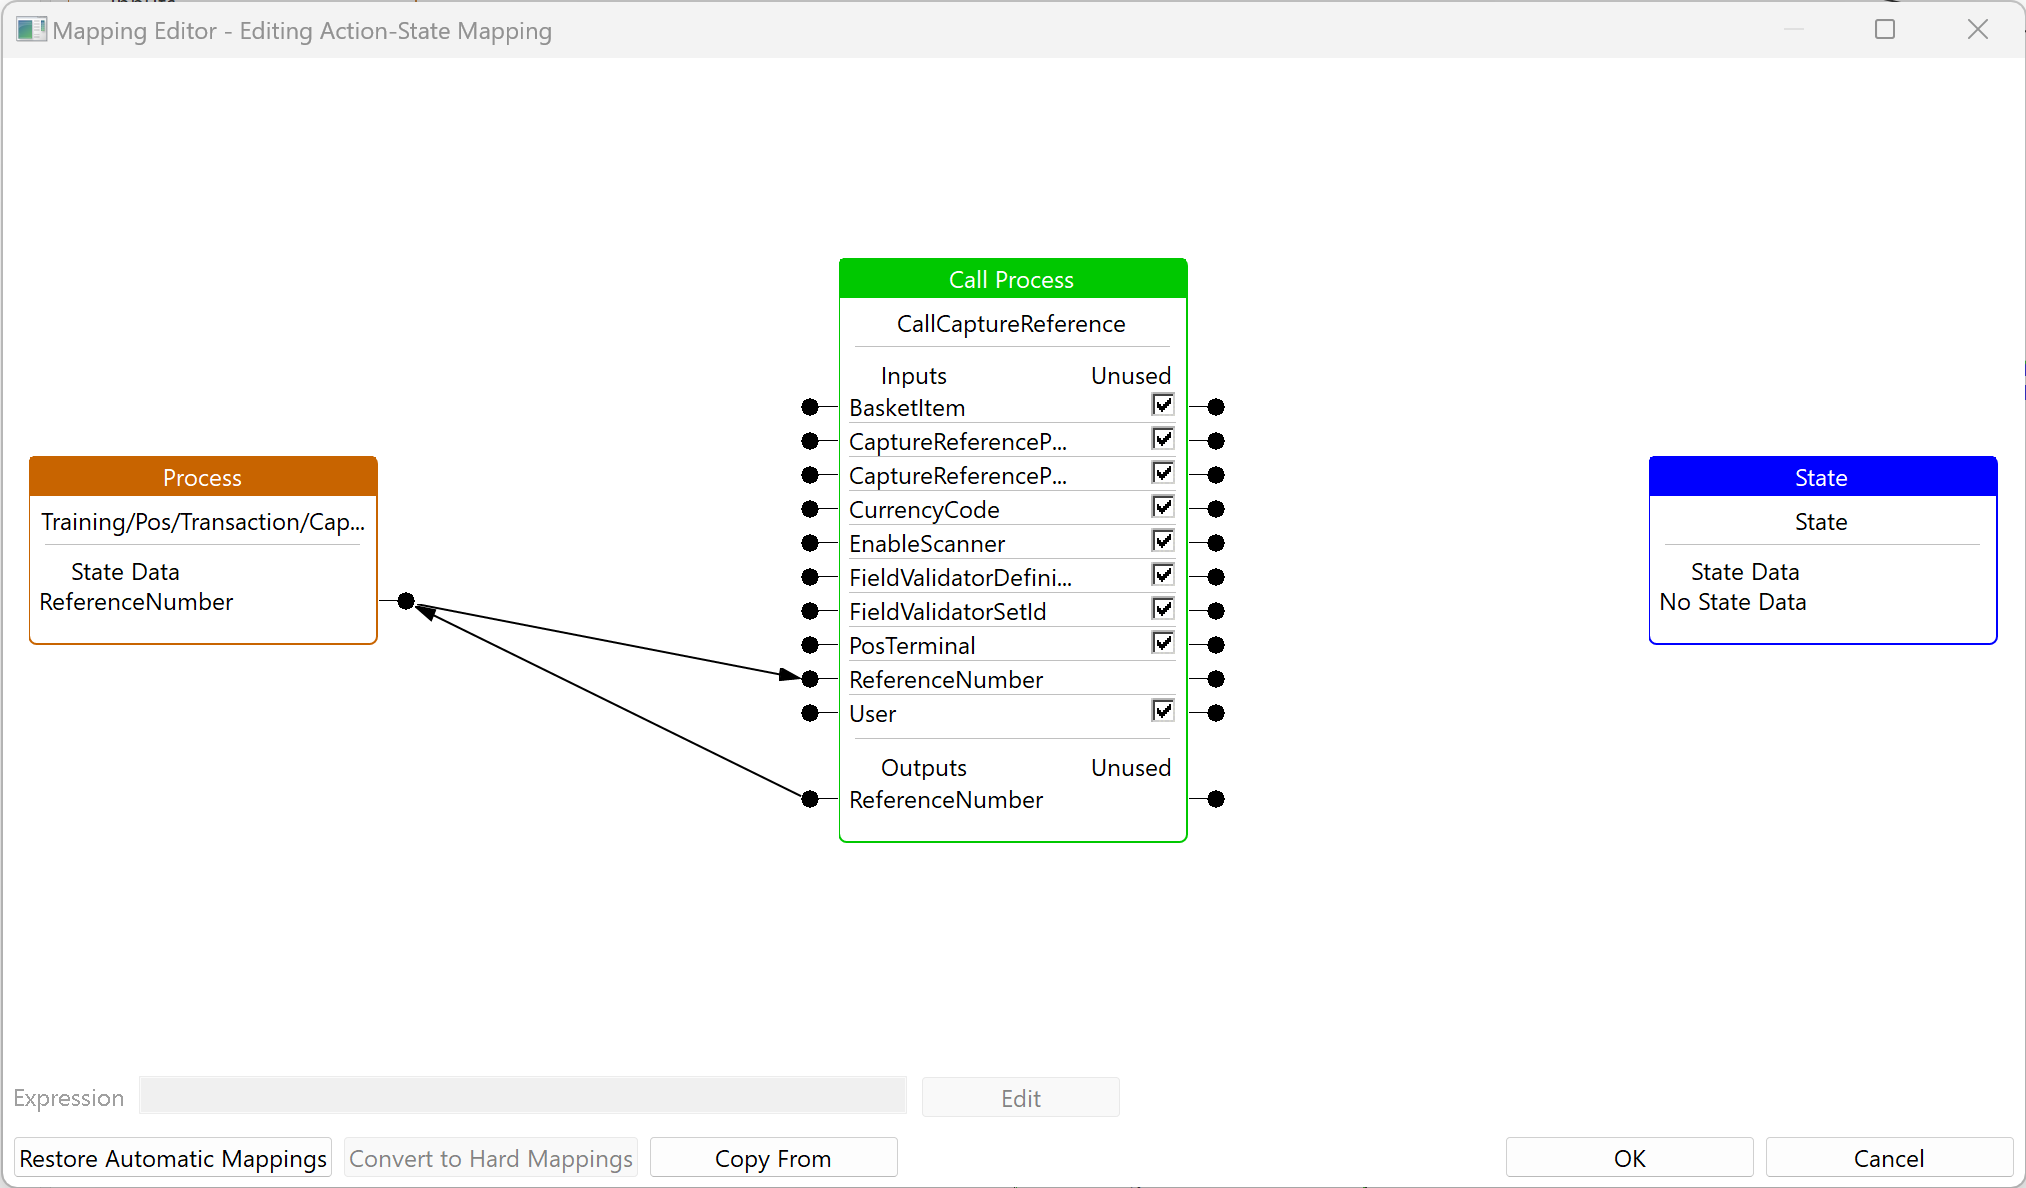
Add two End Process Actions one for each of the following outcomes
CancelSuccess
Link the Cancel Outcome of CallCaptureReference to the End Process Action for Cancel
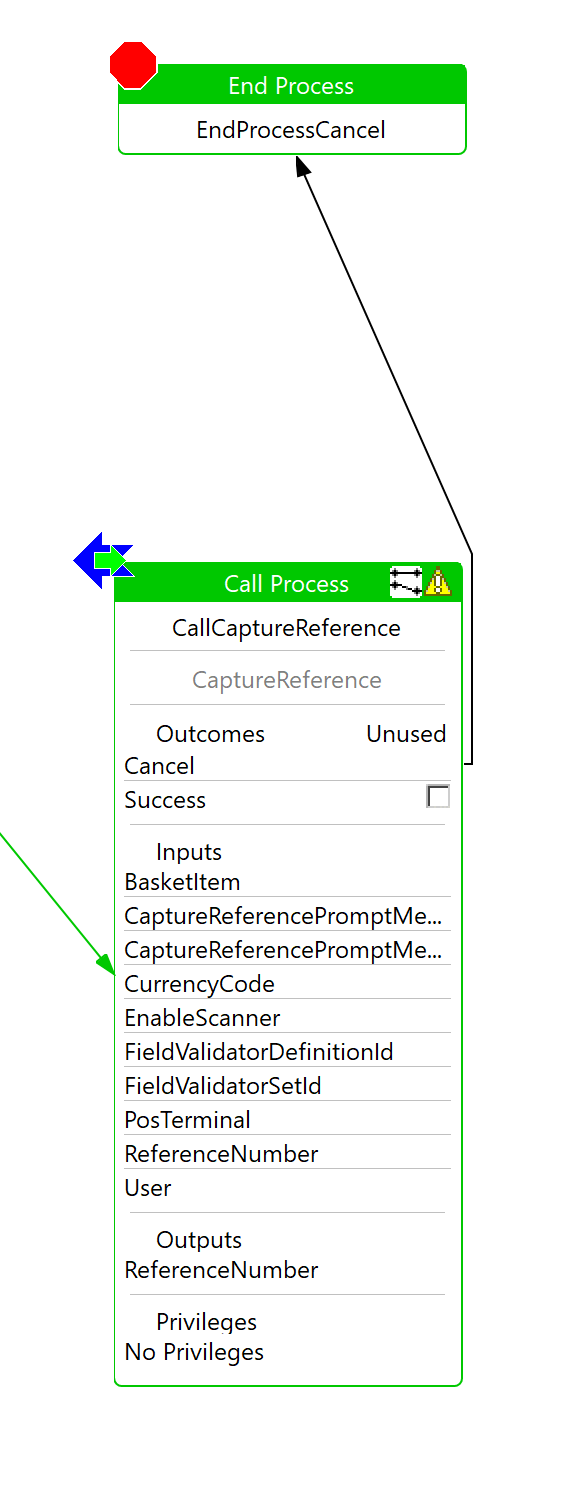
Add a new State with a State ID SaveReference and an event of StateEntered
Place the new State alongside CallCaptureReference
Link CallCaptureReference to SaveReference
Select to view the properties of the Process and create the following Input
| Name | Type |
|---|---|
| enactor.mfc.SalesItem | com.enactor.mfc.basket.items.ISalesItem |
Creating Inputs to the process will automatically create the State Data
Add a new Assign Action with an Action ID SetExternalReference
Place the new Assign Action alongside SaveReference
Select to view the properties of the Assign Action SetExternalReference and create the following Inputs and Outputs
| Name | Type |
|---|---|
| enactor.mfc.SalesItem | com.enactor.mfc.basket.items.ISalesItem |
| ReferenceNumber | java.lang.String |
Link the State SetExternalReference to SetExternalReference
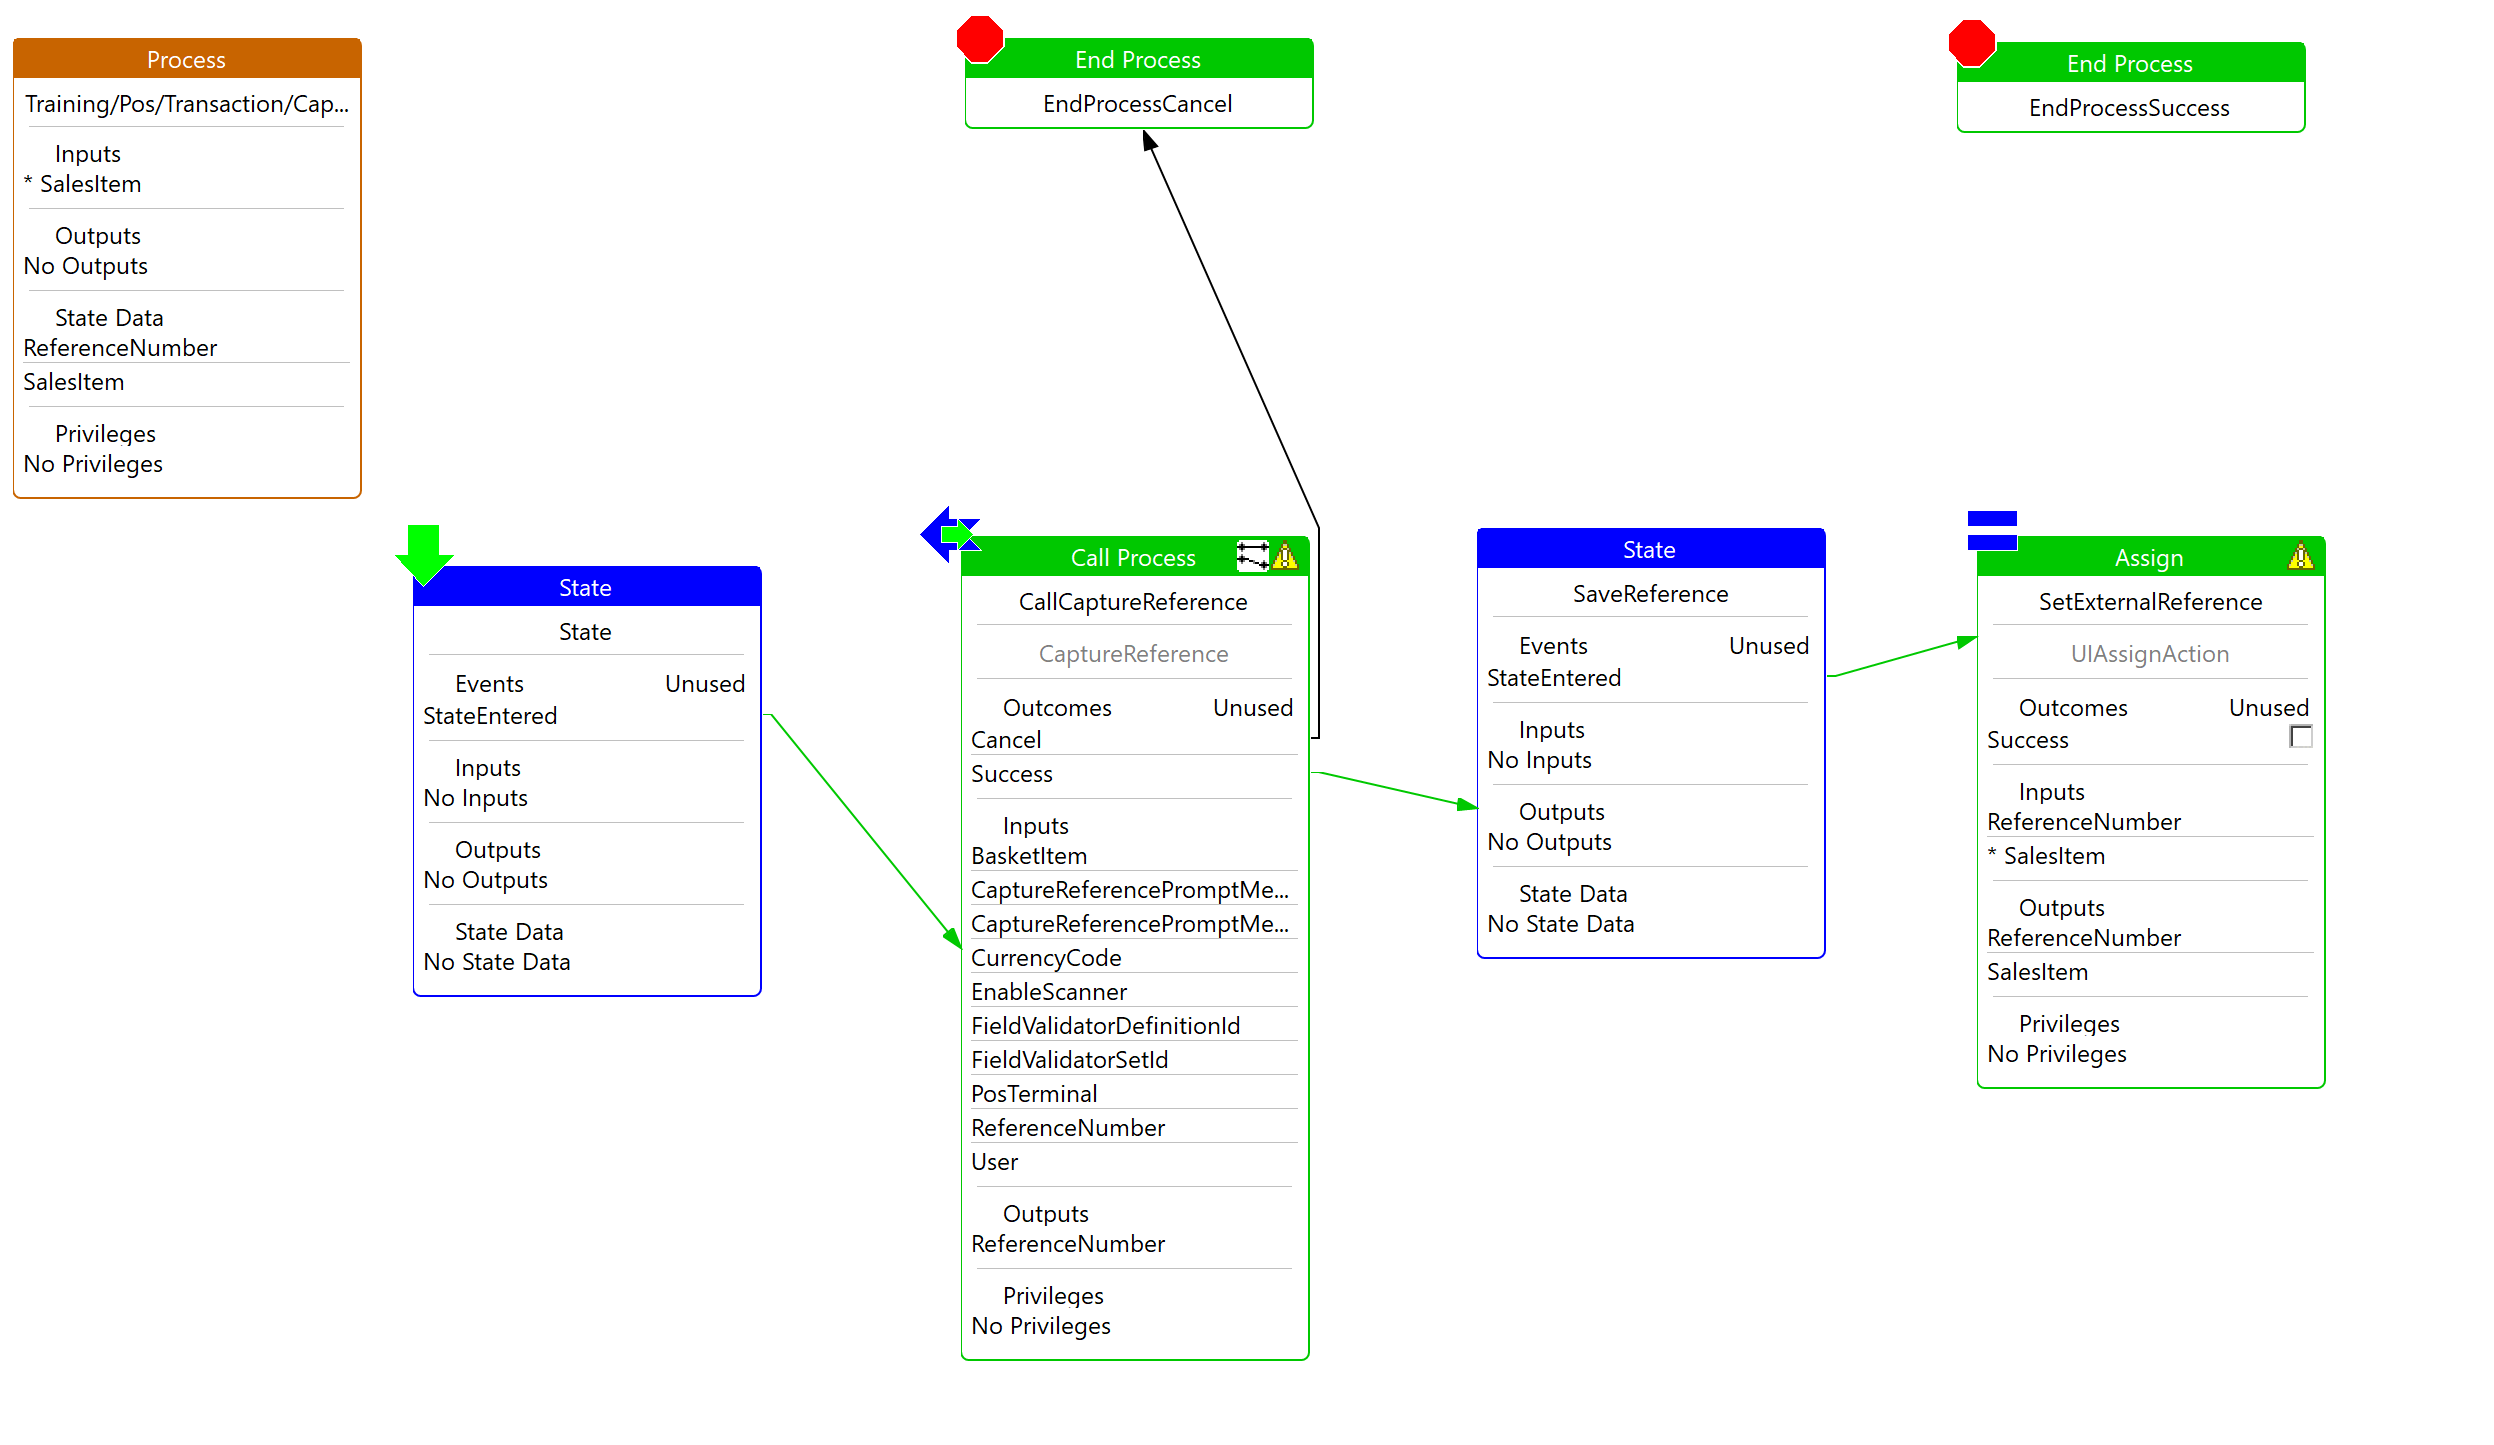
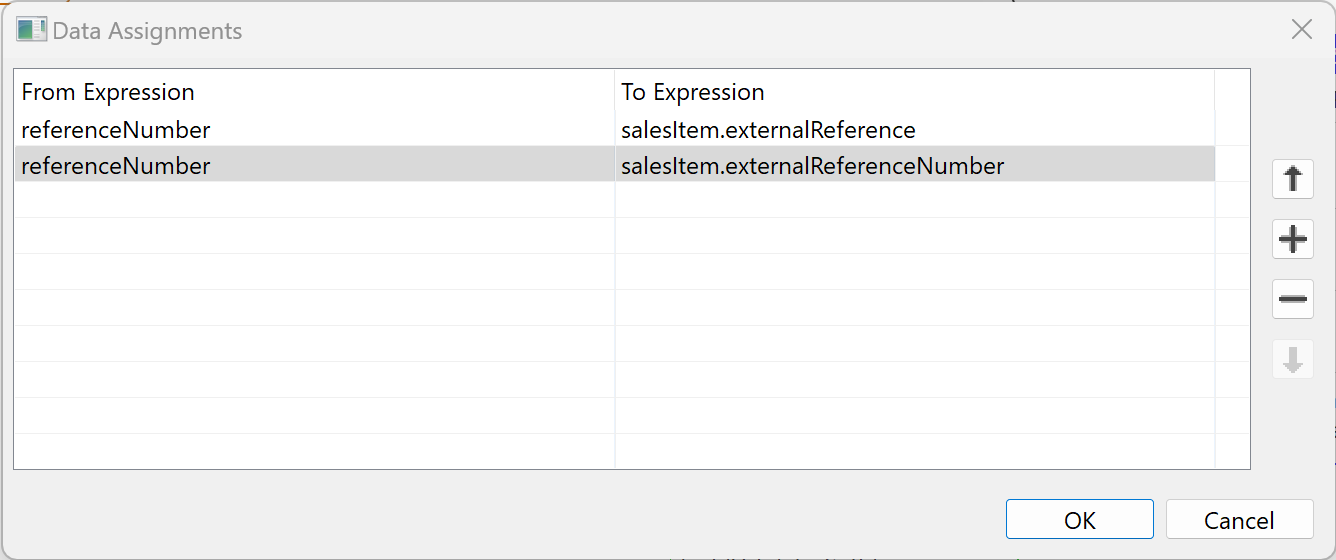
Select to Edit the Data Assignments of the SetExternalReference assign
Select to view the properties of the Assign Action SetExternalReference and create the following Data Assignments
| From Expression | To Expression |
|---|---|
| referenceNumber | salesItem.externalReference |
| referenceNumber | salesItem.externalReferenceNumber |
Bring up the Resource Library View and search for the Action AddBasketAdditionalDataAction
Place the new Action alongside SetExternalReference
Select to view the properties of the AddBasketAdditionalDataAction Action and Edit the Parameters
| Name | Value | Type |
|---|---|---|
| enactor.mfc.AdditionalDataKey | CapturedData | java.lang.String |
Select to view the properties of the Process and create the following Input
| Name | Type |
|---|---|
| enactor.mfc.TransactionHandler | com.enactor.mfc.retail.transaction.IRetailTransactionHandler |
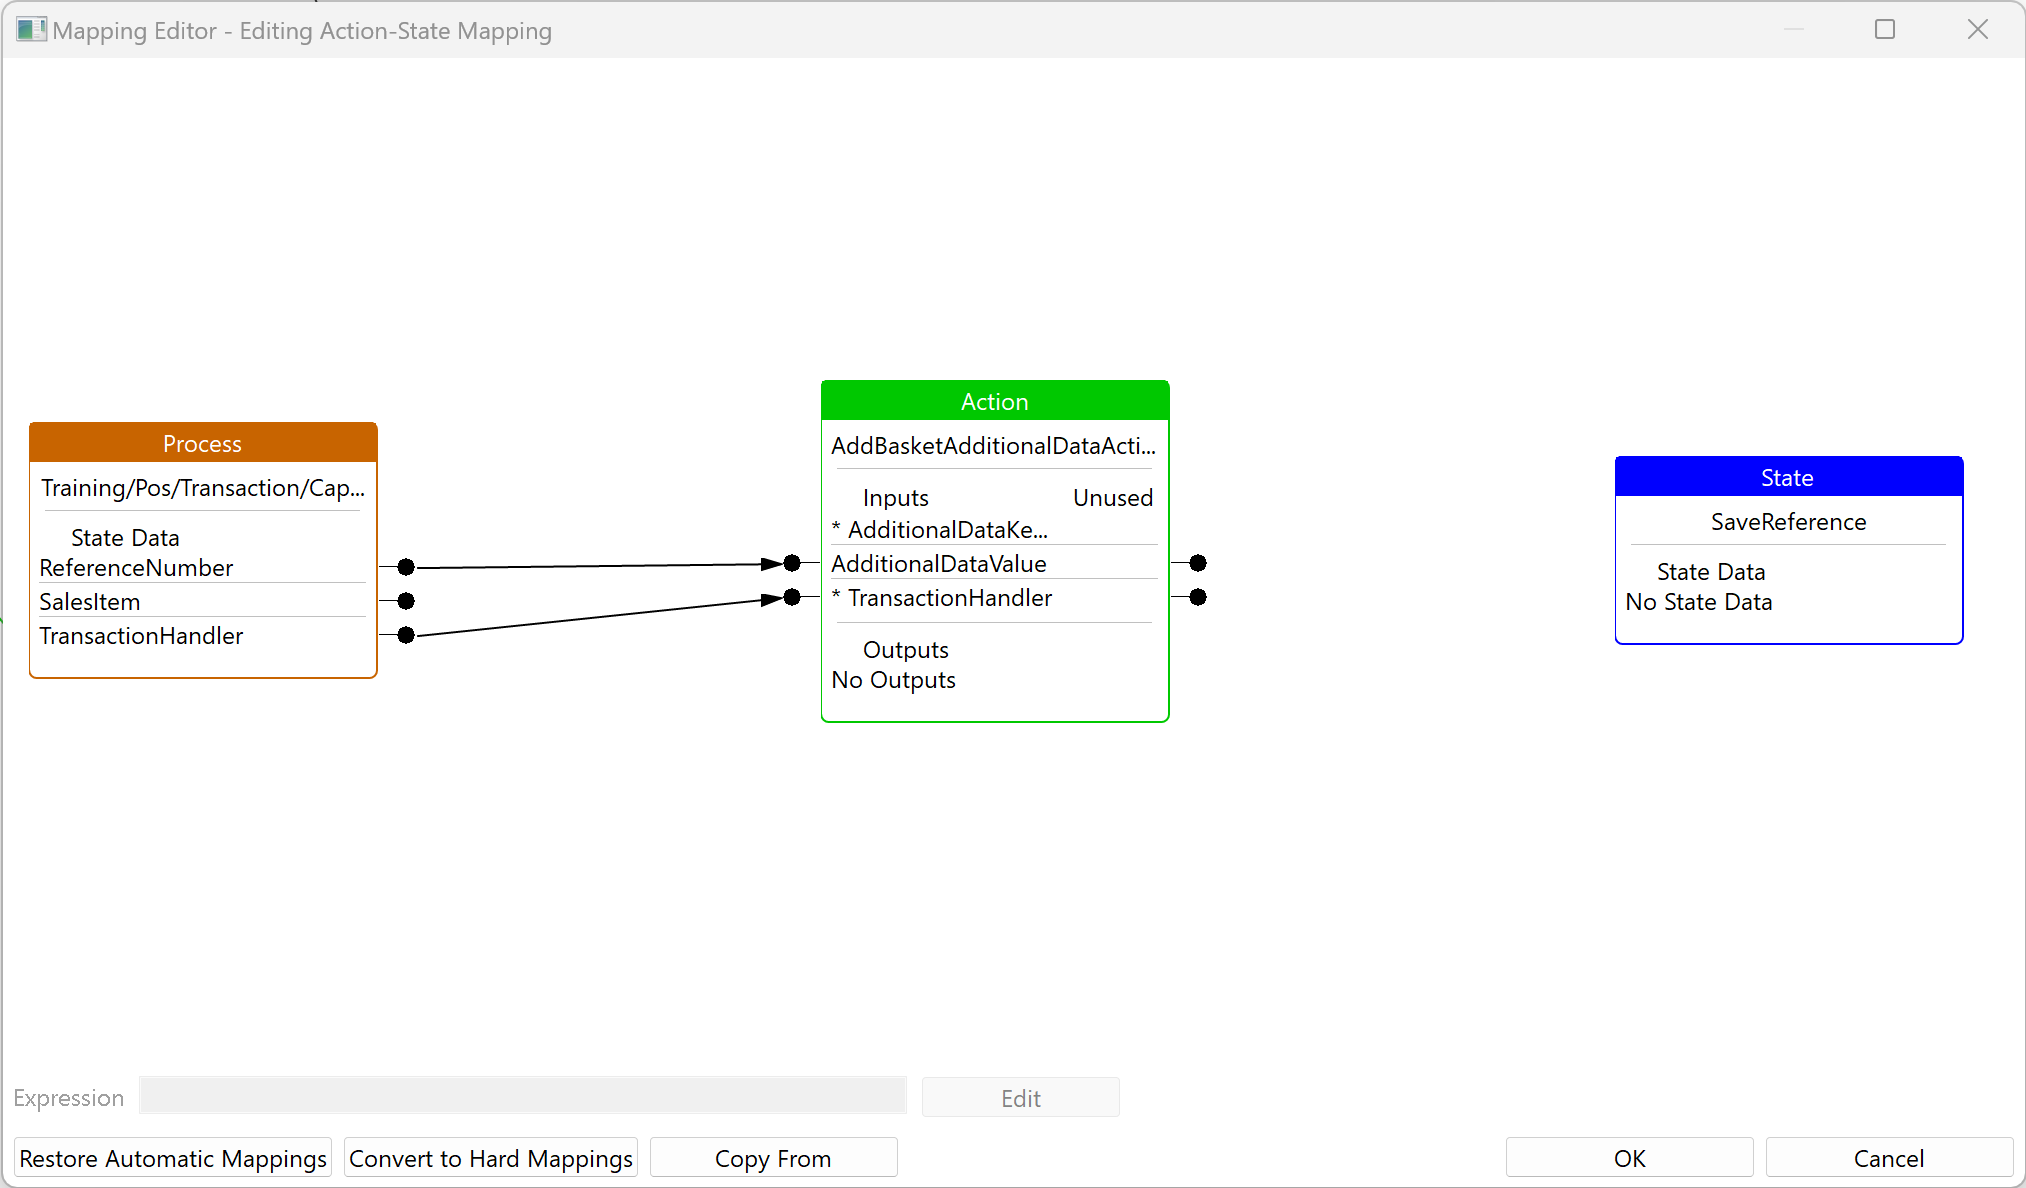
Select to edit the mappings for AddBasketAdditionalDataAction
Map the Process State Data ReferenceNumber to AddBasketAdditionalDataAction Input AdditionalDataValue
Add a new End Process Action with an outcome of Fail
Link the Fail Outcome of AddBasketAdditionalDataAction to the End Process Action for Fail
Link the Success Outcome of AddBasketAdditionalDataAction to the End Process Action for Success
Result
When running the Pos Application, during the sale of aproduct you should now be prompted to enter a reference value
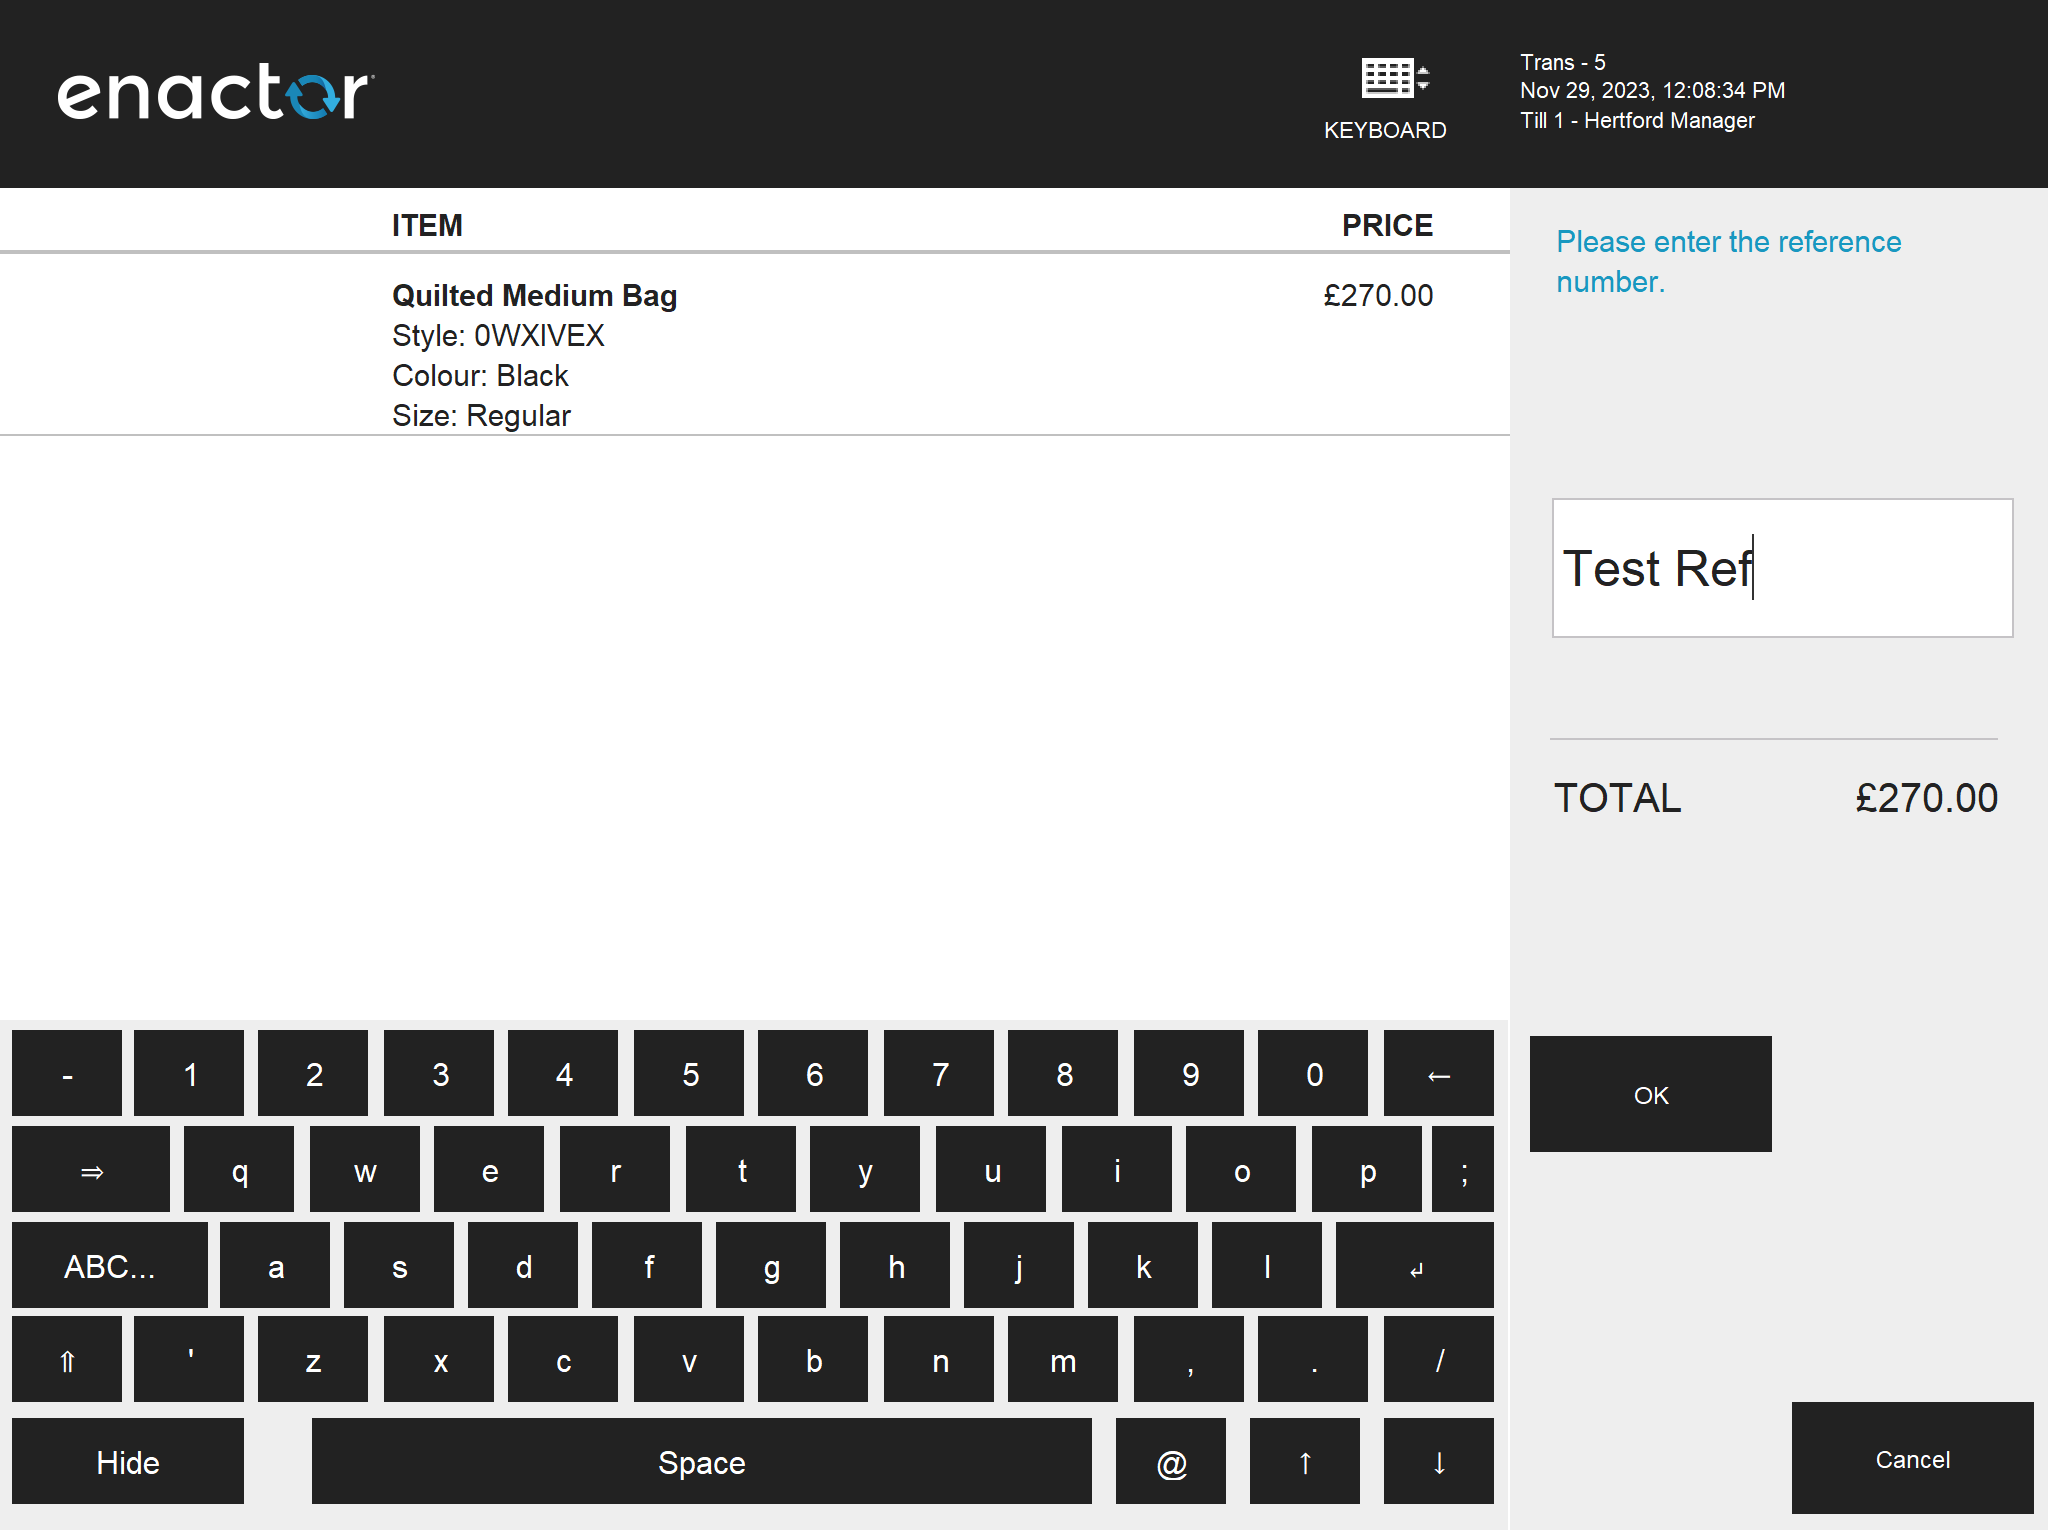
Apon completing the transaction, the transaction xml will contain three xml tags, two at the body of the BasketItem
<retail:externalReferenceNumber>Test Ref</retail:externalReferenceNumber>
<retail:externalReference>Test Ref</retail:externalReference>
The third at the body of the transaction
<retail:additionalData>
    <CapturedData>Test Ref</CapturedData>
</retail:additionalData>
Reference
Action | Description AddBasketAdditionalDataAction | Add a single key-value pair additional data to the Basket AddAdditionalDataAction | Add a single key-value pair additional data to a BasketItem AddAdditionalDataMapAction | Add multiple key-value pairs to a BasketItem
Answers
After completing the tutorial, this is how the application process should look like
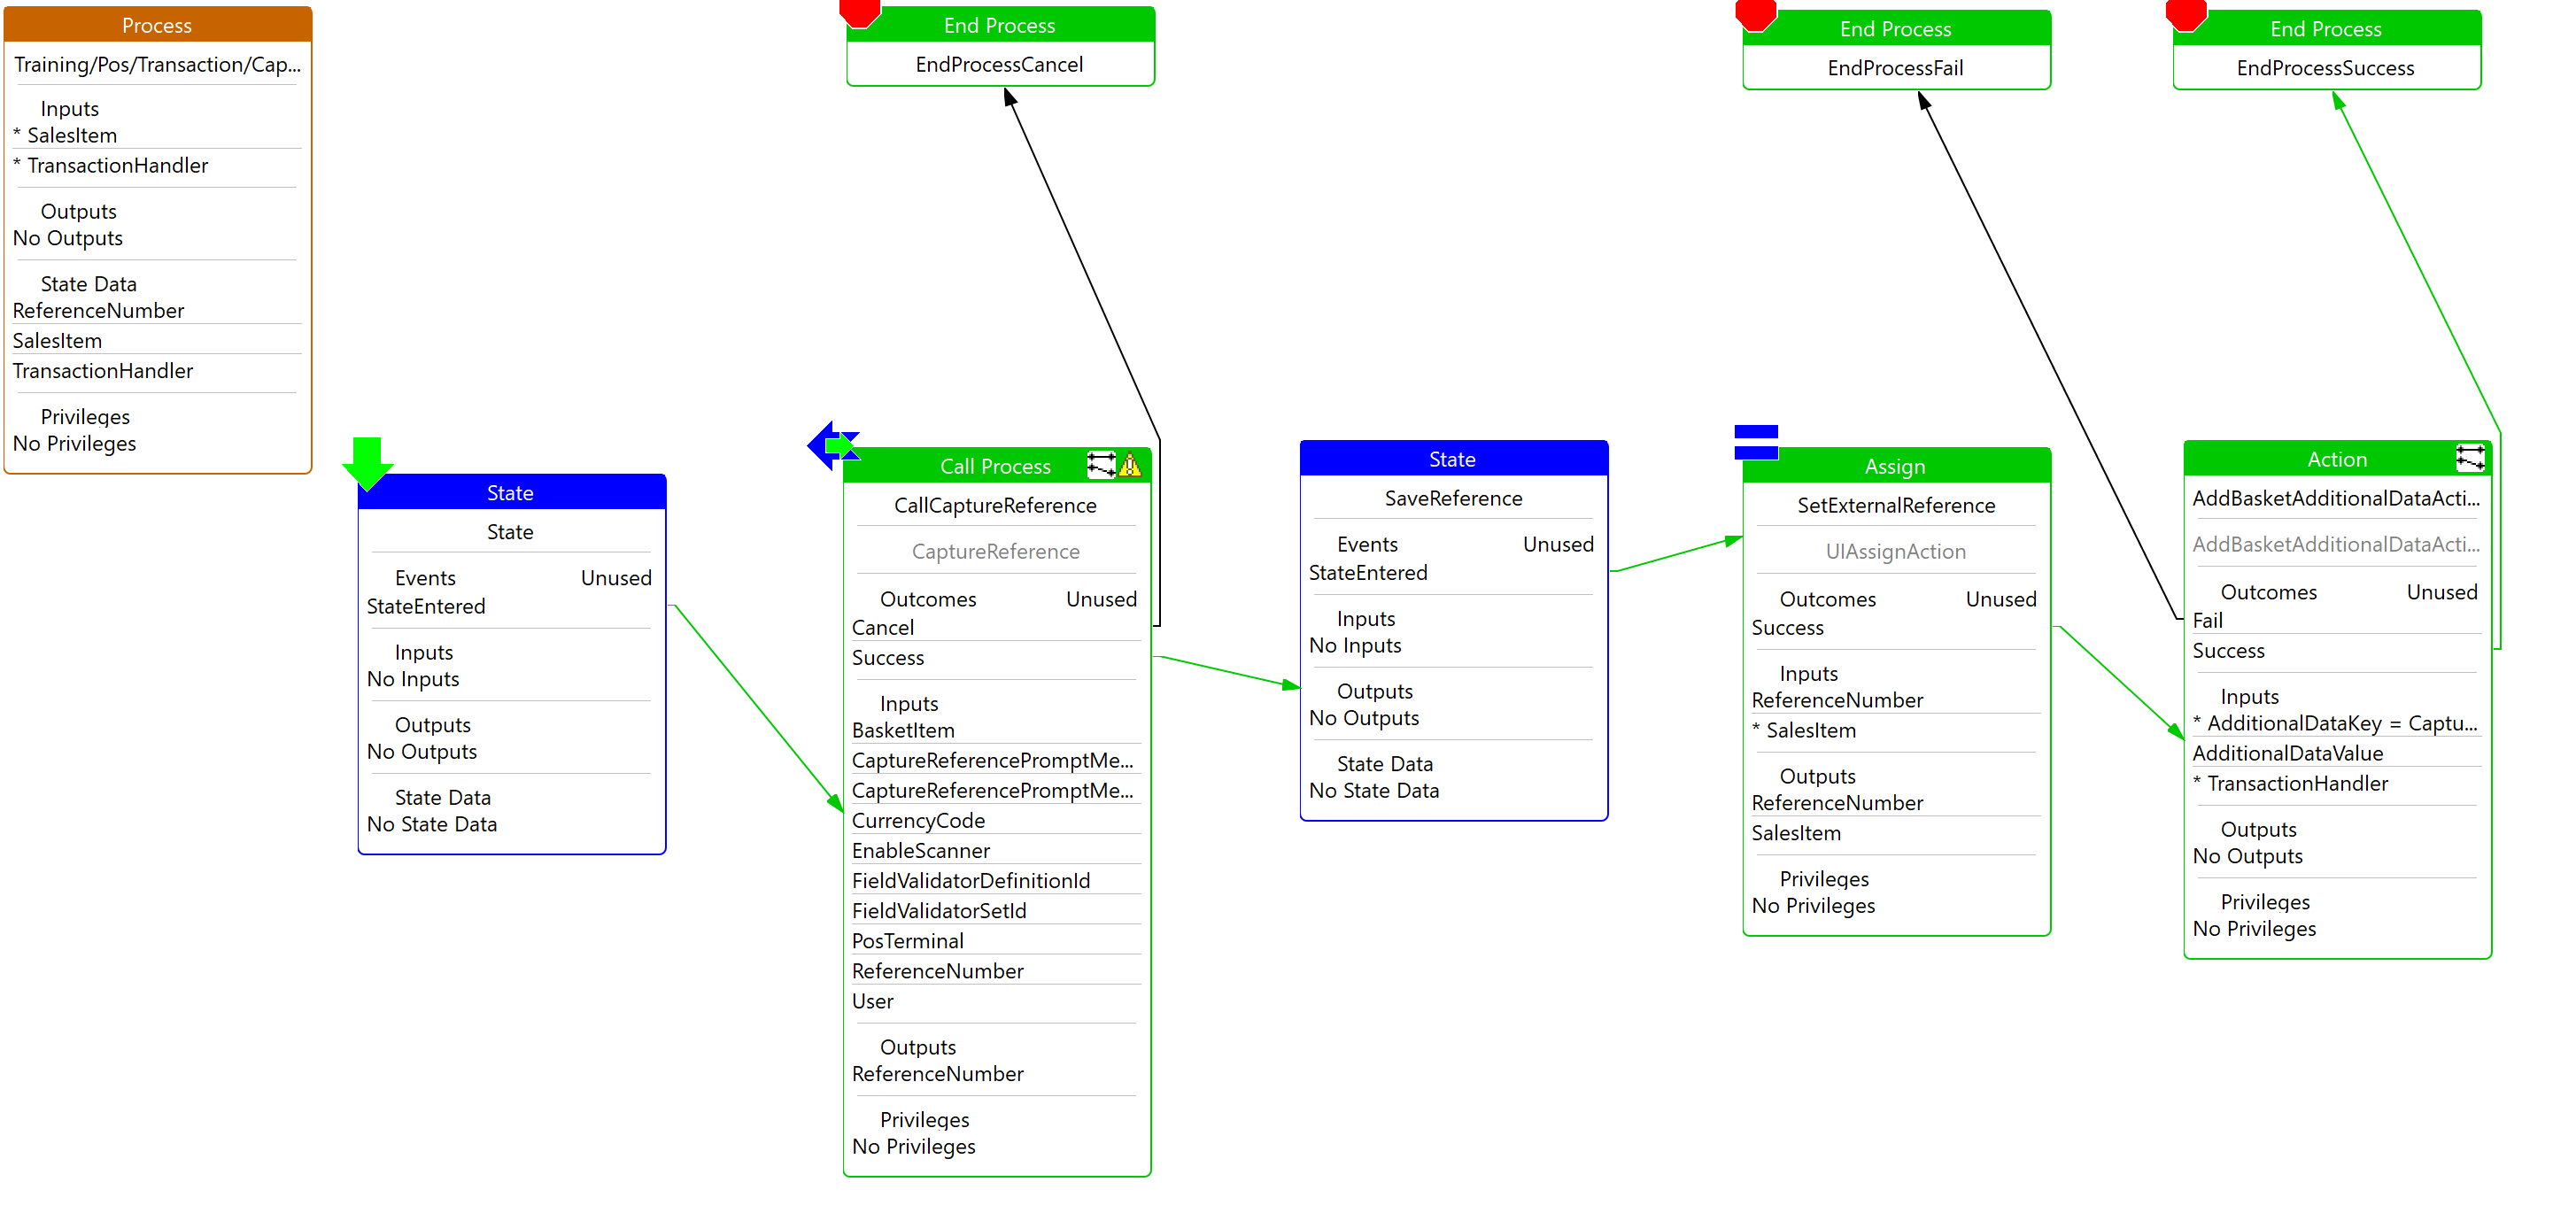
The completed solution can be found in the CaptureDataAndSave Project located at /WorkspaceSetup/Solutions/CaptureDataAndSave
To run the solution, import the project as a maven project to your workspace
Select the Training Solution - Capture Data And Save Java launch