Installing And Configuring Eclipse Plugins
Overview
The purpose of this tutorial is to install the Enactor Tools, which is an Eclipse plugin. Please ensure you have completed the pre-requisites before starting this tutorial.
The following guide has been written with Microsoft Windows as the base operating system. As a result, some references to application options and screenshots may differ if you use a different operating system.
What You Will Learn
- How to install the Enactor Tools
- How to configure Eclipse to support Enactor development
Prerequisites
Java
Java JDK 17 LTS https://adoptium.net/en-GB/temurin/releases/?version=17
MariaDB
Maria DB 10.9.7 https://mariadb.org/
For this documentation you should use the following configuration:
- Database with schema name of
enactorem - A root user with a password of
enactoris needed - Ensure a character set of
UTF8is used
Node
Node 18 (use NVM to manage versions) - https://github.com/nvm-sh/nvm
Pnpm
Run this command
corepack enable pnpm
Google Chrome
Browser Extensions
Visual Studio Code
Enactor Tools Plugin Installation
Launch the Eclipse application, when prompted for a workspace enter the following path C:\Development
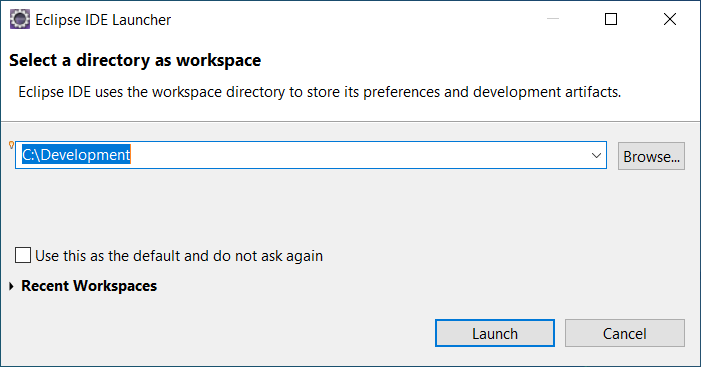
Click the Launch button
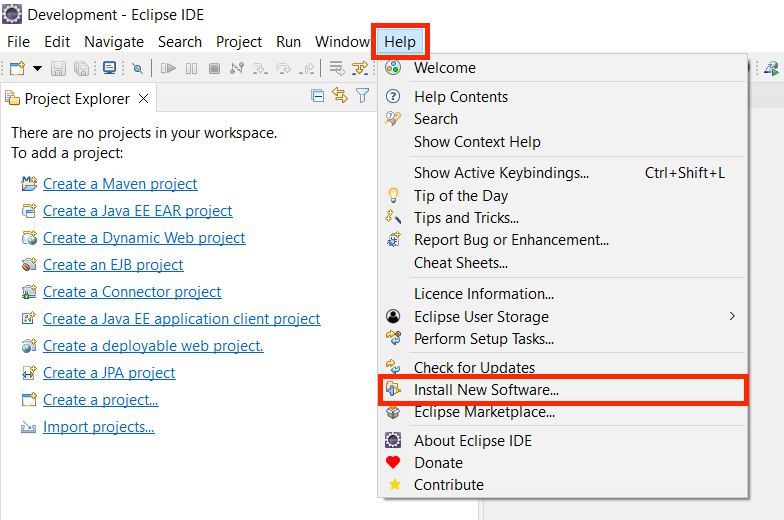
To install the Enactor Tools plugin, Open the Install New Software wizard by selecting the Help Menu -> Install New Software
Click the Add... button.
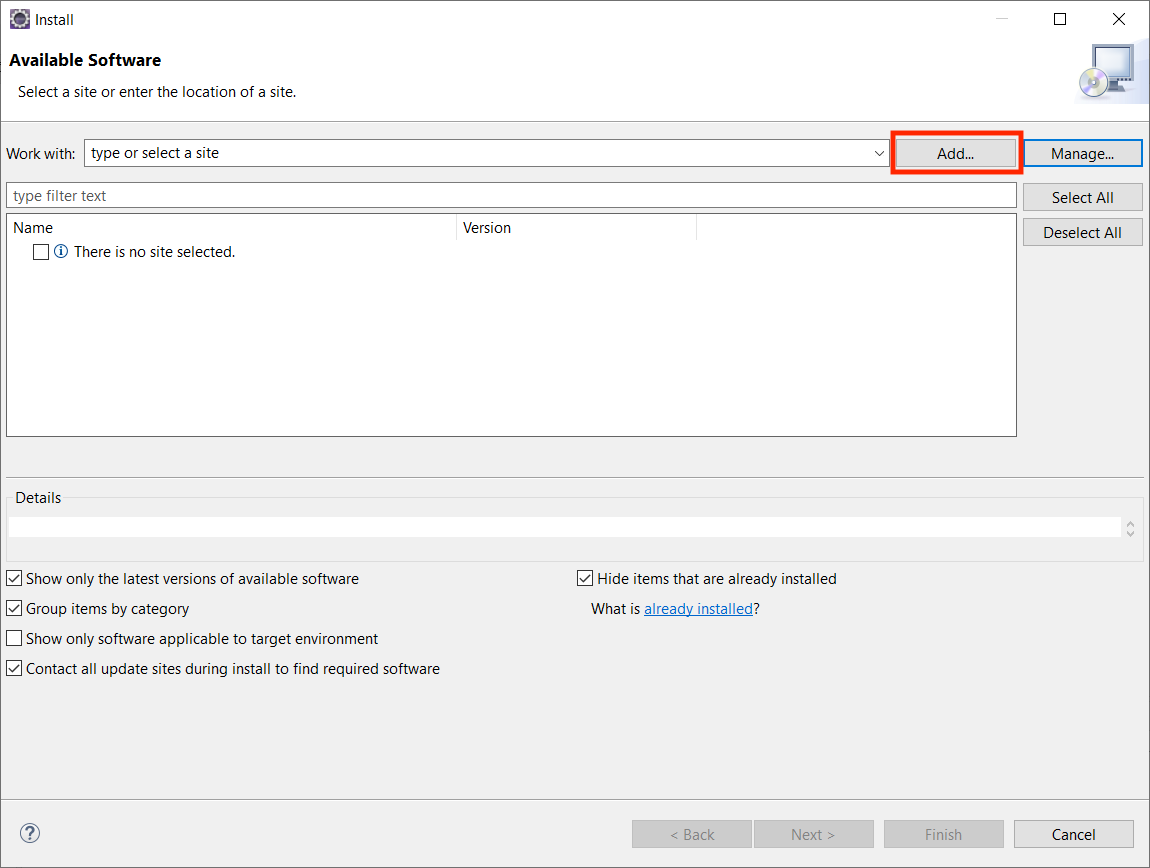
Enter the name Enactor Tools in the Name text box
Enter one of the following URLs in the Location text box;
- https://dev.enactor.co.uk/tools/current for the current stable release (recommended)
- https://dev.enactor.co.uk/tools/latest for the latest beta release

Click the Add button
Enter your Enactor Active Directory Credentials.
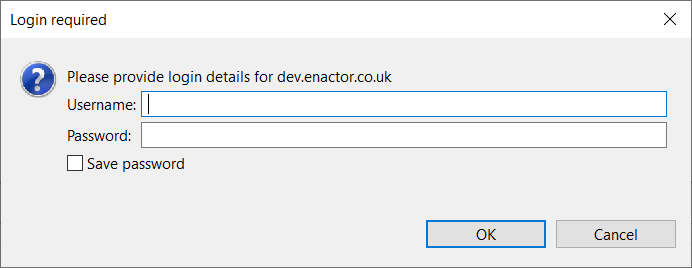
Click the OK button
Select the Enactor Tools plugin entry and click the Next... button
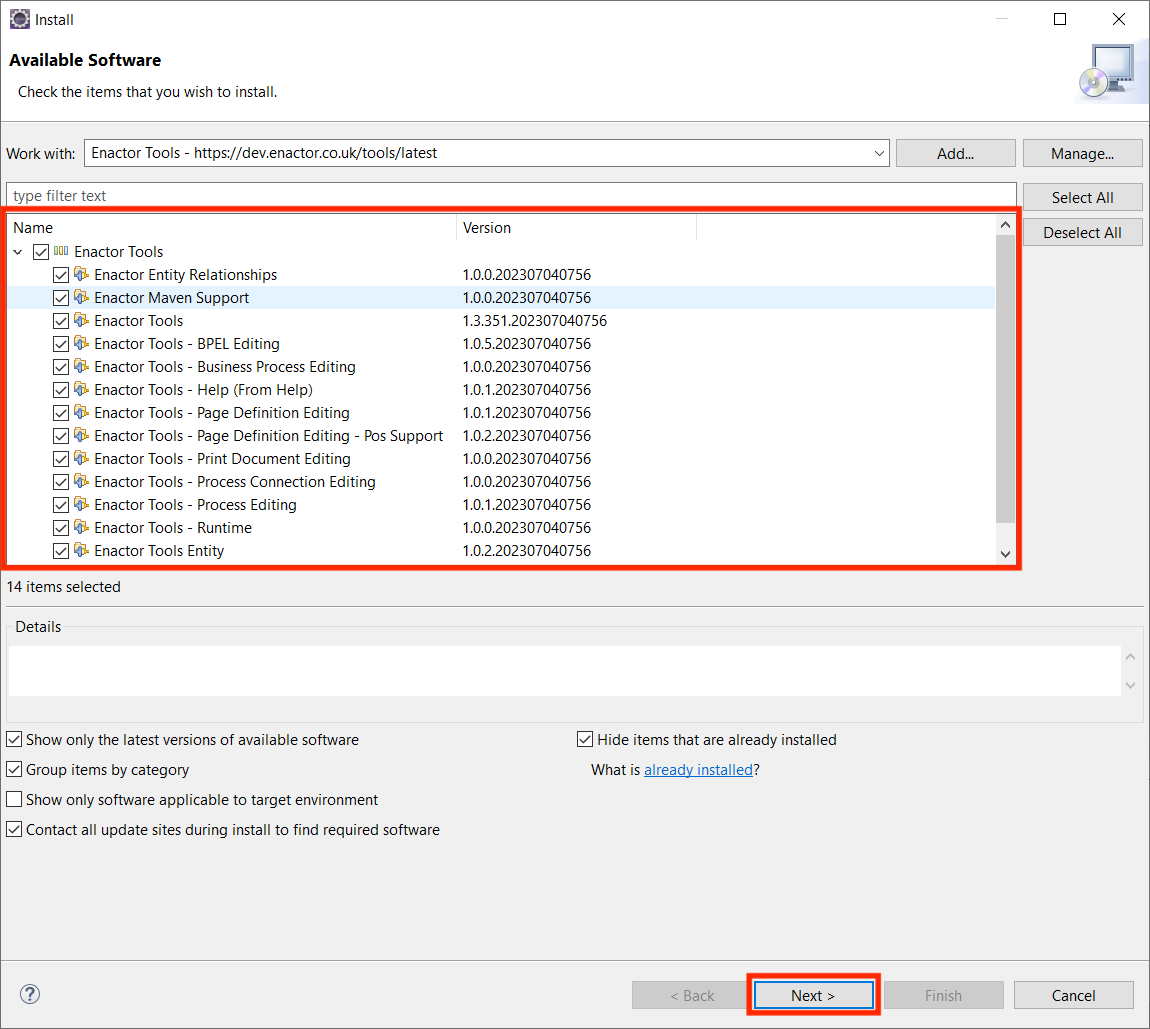
Complete the installation and allow Eclipse to restart.
-
Dismiss any errors/warnings regarding the Enactor Tools licence.
-
If there are any problems connecting to the Enactor Tools site over HTTP using Eclipse, it is possible to download a zip file of the update site from https://dev.enactor.co.uk/tools/ and manually add it to Eclipse from your local machine. For instructions on manually installing an Eclipse plugin, follow the instructions here.
Licence
After the installation of Enactor tools, Eclipse will restart with a warning due to the absence of an installed licence. This is the Enactor Developer Licence required for the use of the Enactor Toolset, as distinct from the Enactor Runtime Licence required for the execution of Enactor Applications in the implementation environment.
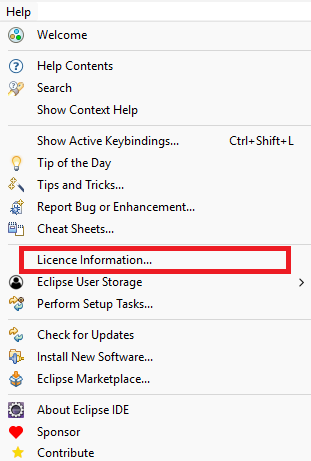
If you have not already received an Enactor Tools Licence, please contact the Enactor Support Team to request one. Note that you will be requested to provide a serial number for your product installation. You can obtain this from the Licence Information option of the Eclipse Help menu as shown following:
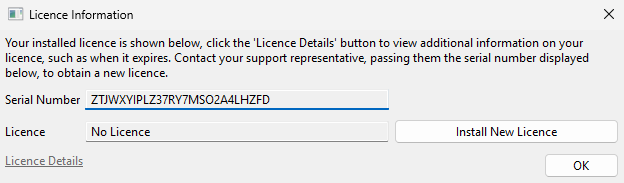
This panel also provides the means to install the new licence. After selecting the Install New Licence browse to the location where you have stored the Enactor Tools Development Licence file you have been provided.