Invoking a Restful Service
Overview
This document will explain how to use the Enactor framework to call your own Restful Services.
What You Will Learn
- Extending Process Connections
- Specifying an Endpoint for a Rest Service in the Connection Diagram
- Calling the service via an Application Process
Pre-requisite
Since you have already followed the React Extension Tutorials, your extension project is currently configured with the UIExtensionContentURL pointing to the React development server. As we are now focusing on POS development without UI changes, update the configuration to load the React build files instead:
<core:uiExtensionContentSourceType>FILE</core:uiExtensionContentSourceType>
<core:uiExtensionContentUrl>trainingposextension/assets</core:uiExtensionContentUrl>
This will make the extension load the React application from the packaged assets folder instead of the development server.
Mock Rest API
For this document, we will use a customer lookup service. If this is not already running, you can launch it by running the Start Mock Service shortcut on the desktop.
This has the following API:
-
URL:
-
http://localhost:3000/<productId> -
The mock implementation only supports a product id of 0WXIVEX-11
-
-
Method:
GET
-
Success Response:
-
Code: 200
-
Content:
"SN: 123456"
-
-
Error Response:
-
Code: 404 NOT FOUND
-
Content:
"PRODUCT_NOT_FOUND"
-
Process Connections Diagram
Connected Process Extension
To create a new extension:
-
The standard folder for Process Connections is:
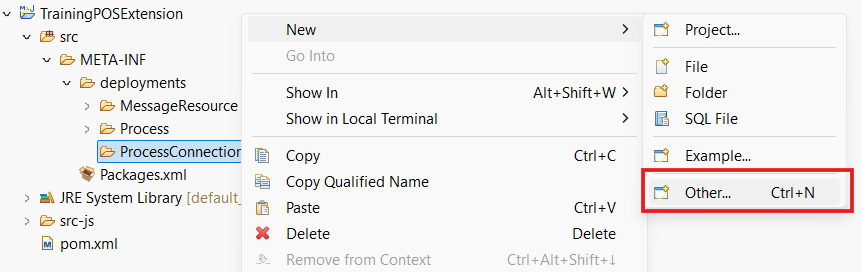
src/META-INF/deployments/ProcessConnections. Create an empty directory in theTrainingPOSExtensionproject. Right Click New -> Folder and Enter Folder Name as ProcessConnections. -
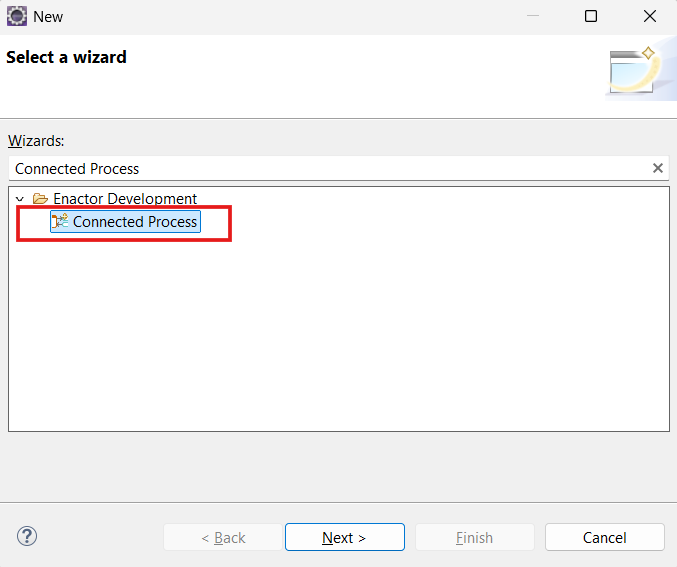
Right Click on ProcessConnections folder New -> Other and Search for Connected Process. Select Connected Process under Enactor Development and Click Next
-
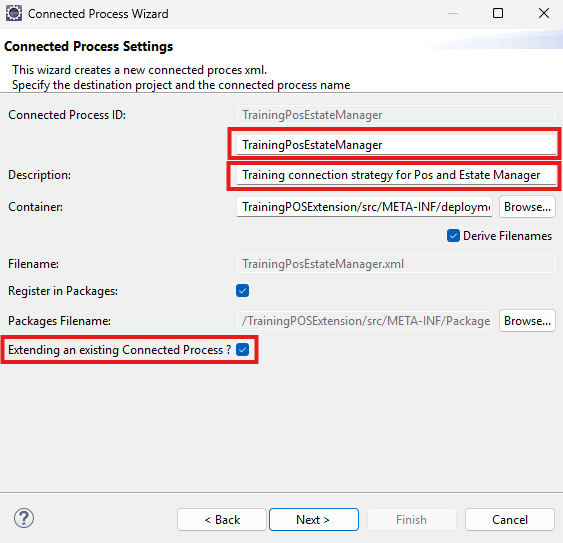
In the Connected Process wizard, enter TrainingPosEstateManager as the Connected Process ID and Training connection strategy for Pos and Estate Manager as the Description. Then tick the Extending an existing Connected Process checkbox and click Next.
-
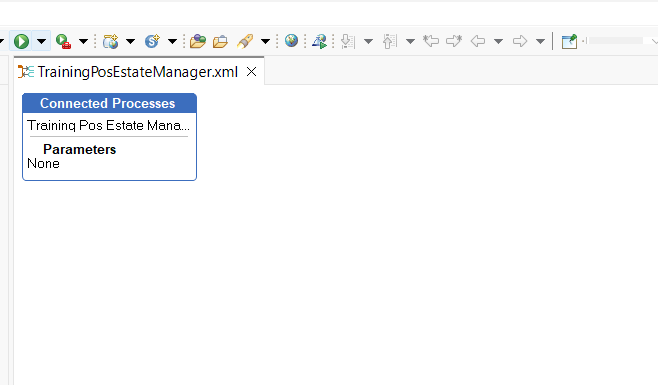
In the Extending Connected Process field, enter StandardPosEstateManager. Then click Finish.
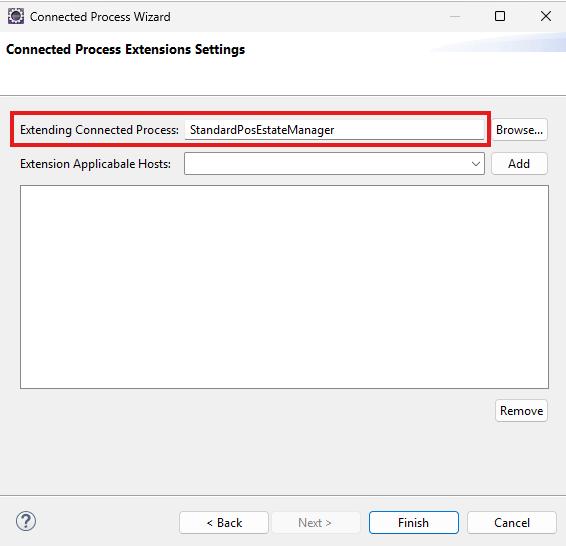
This will open the newly created Connected Process diagram.
Specifying an Endpoint
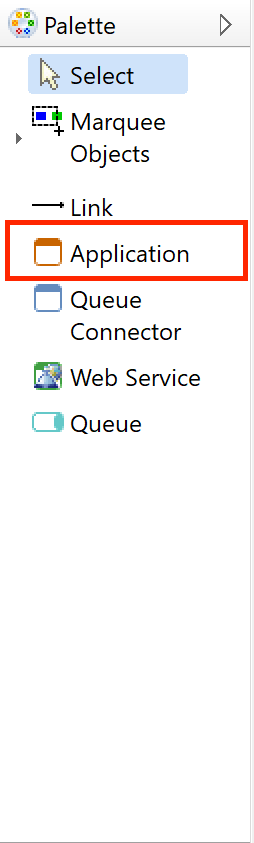
From the Palette, Add a new Application (Connected Process)
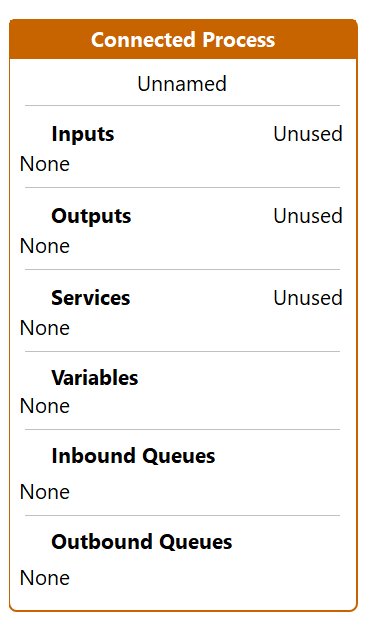
Select to view the properties of the Connected Process and edit the following
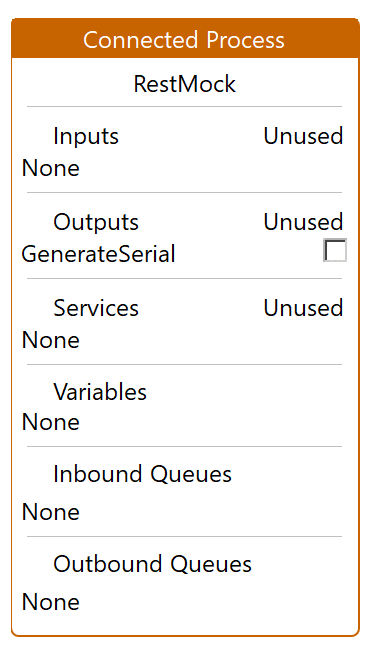
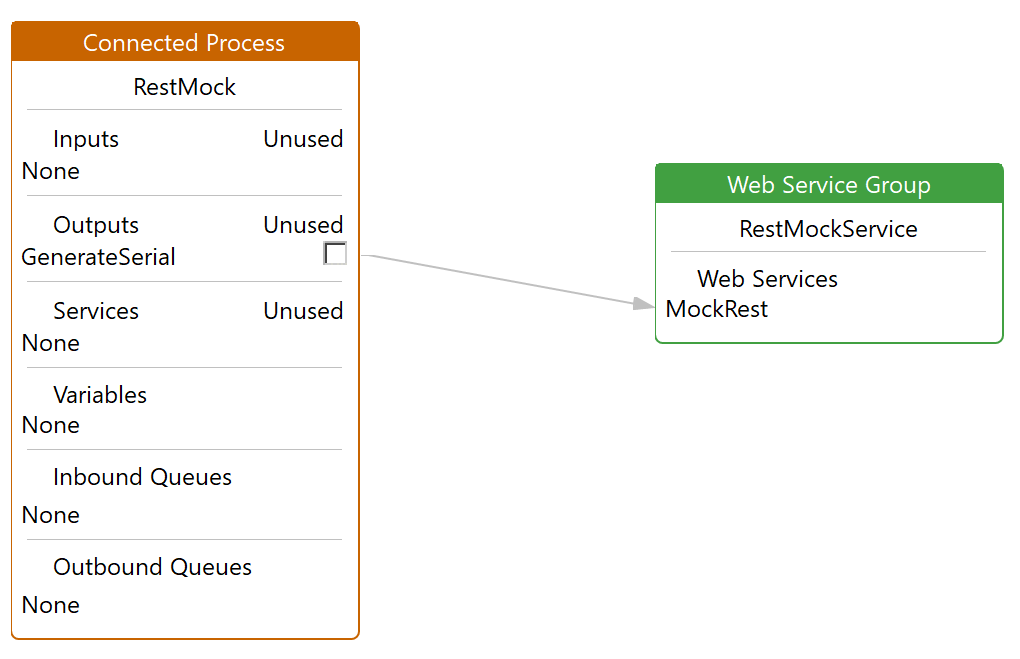
Set the Process ID to RestMock
Edit the Outputs and add a new Output named GenerateSerial
From the Palette, add a new Web Service Group

Select to view the properties of the Web Service Group and edit the following
Set the Name to RestMockService Set the Service ID to RestMockService

Select the Unnamed Service from within the Web Services section
Set the Endpoint Reference Type to Rest Endpoint
A new new set of properties should appear
Re Select the Unnamed Service from within the Web Services section
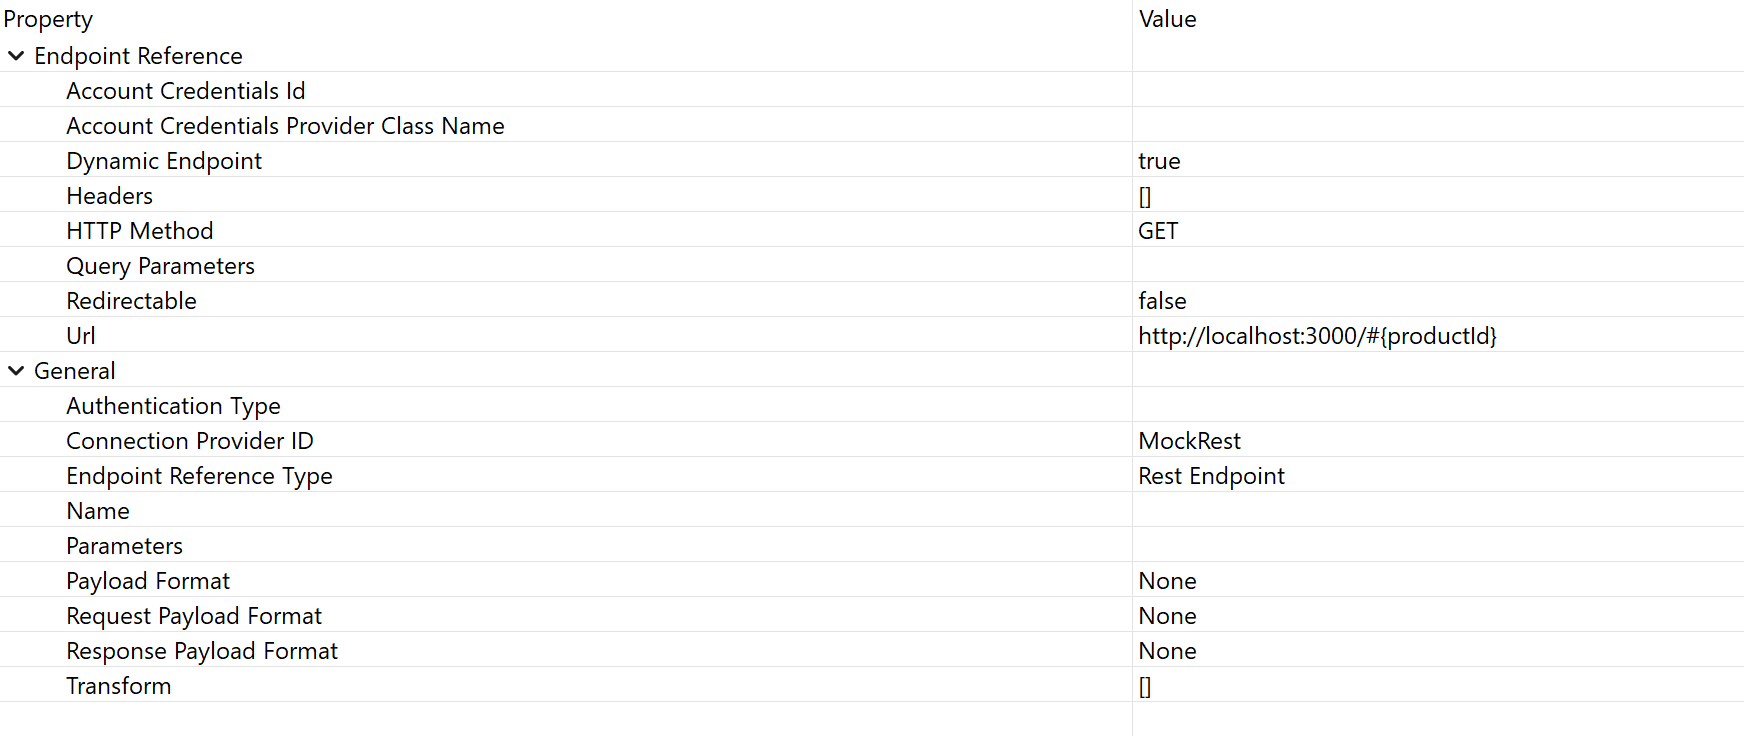
Set the following properties
- Dynamic Endpoint : Select true from the drop down menu
- HTTP Method : Select GET from the drop down menu
- URL : http://localhost:3000/#{productId}
- Connection Provider ID : MockRest
Link the GenerateSerial Output from the Connected Process to MockRest Service
Application Flow
Identifying key location in the application flow
Using Enactor Pos Overview of Key Application Processes as a reference, we need to identify an ideal extension point to use during the selling of a product.
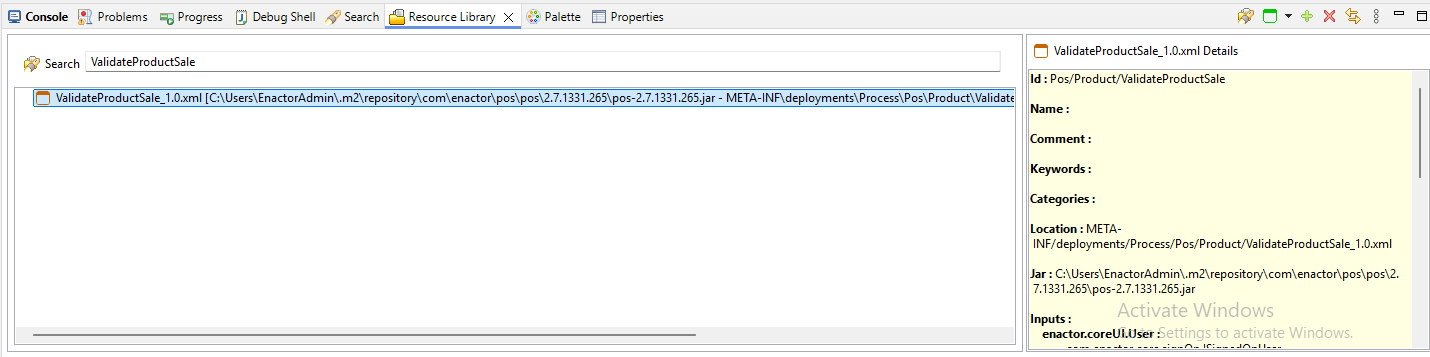
Bring up the Resource Library View and search for the Process ValidateProductSale
Select and open ValidateProductSale_1.0.xml
Using the Outline View expand the Actions Group and search for CallPostValidateProductExtension
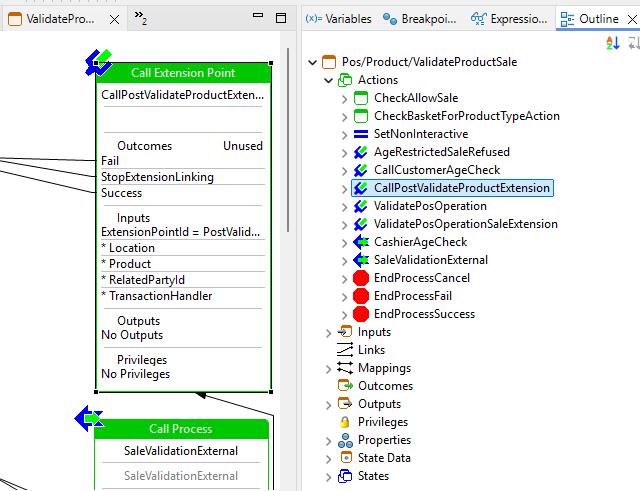
The PostValidateProductExtension extension is well-suited for its purpose due to its positioning at the end of validating a product. This strategic location ensures that the sell flow can be aborted if the service fails before creating a basket item.
Creating an Extension Point Process
Double-click on the CallPostValidateProductExtension, and then click Create New Extension Process in the open wizard.

Enter the Extension Name as Training Post Validate Product Extension and the Process ID as Pos/Product/GenerateProductSerialNumber, then click Browse to set the container.
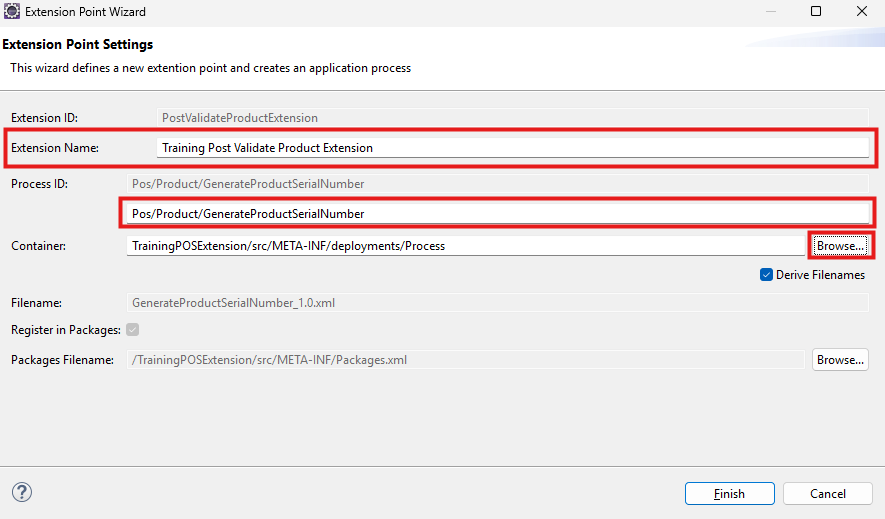
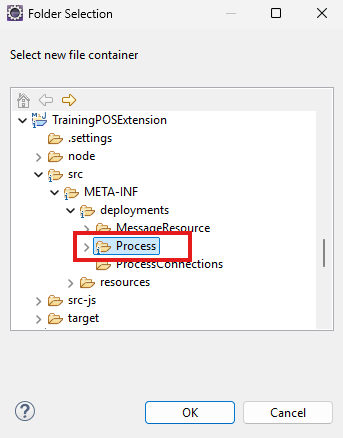
Select the Process in the TrainingPOSExtension folder and click OK
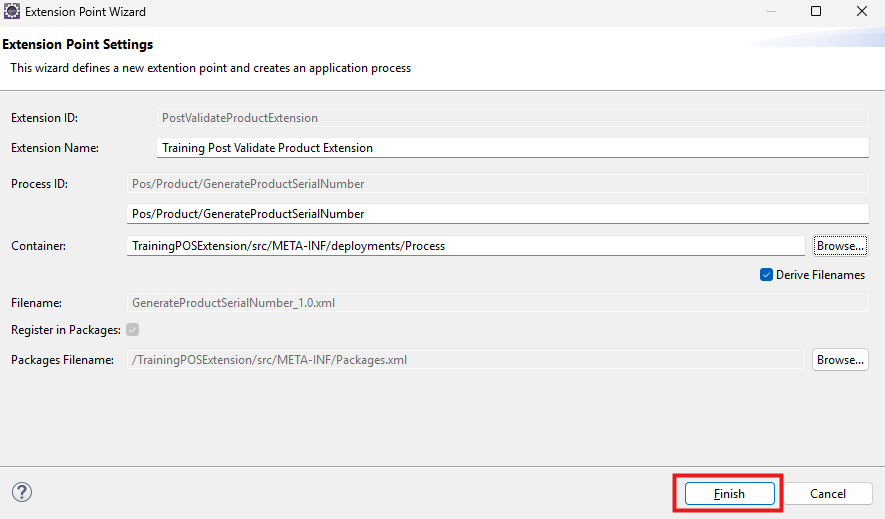
Click Finish to complete
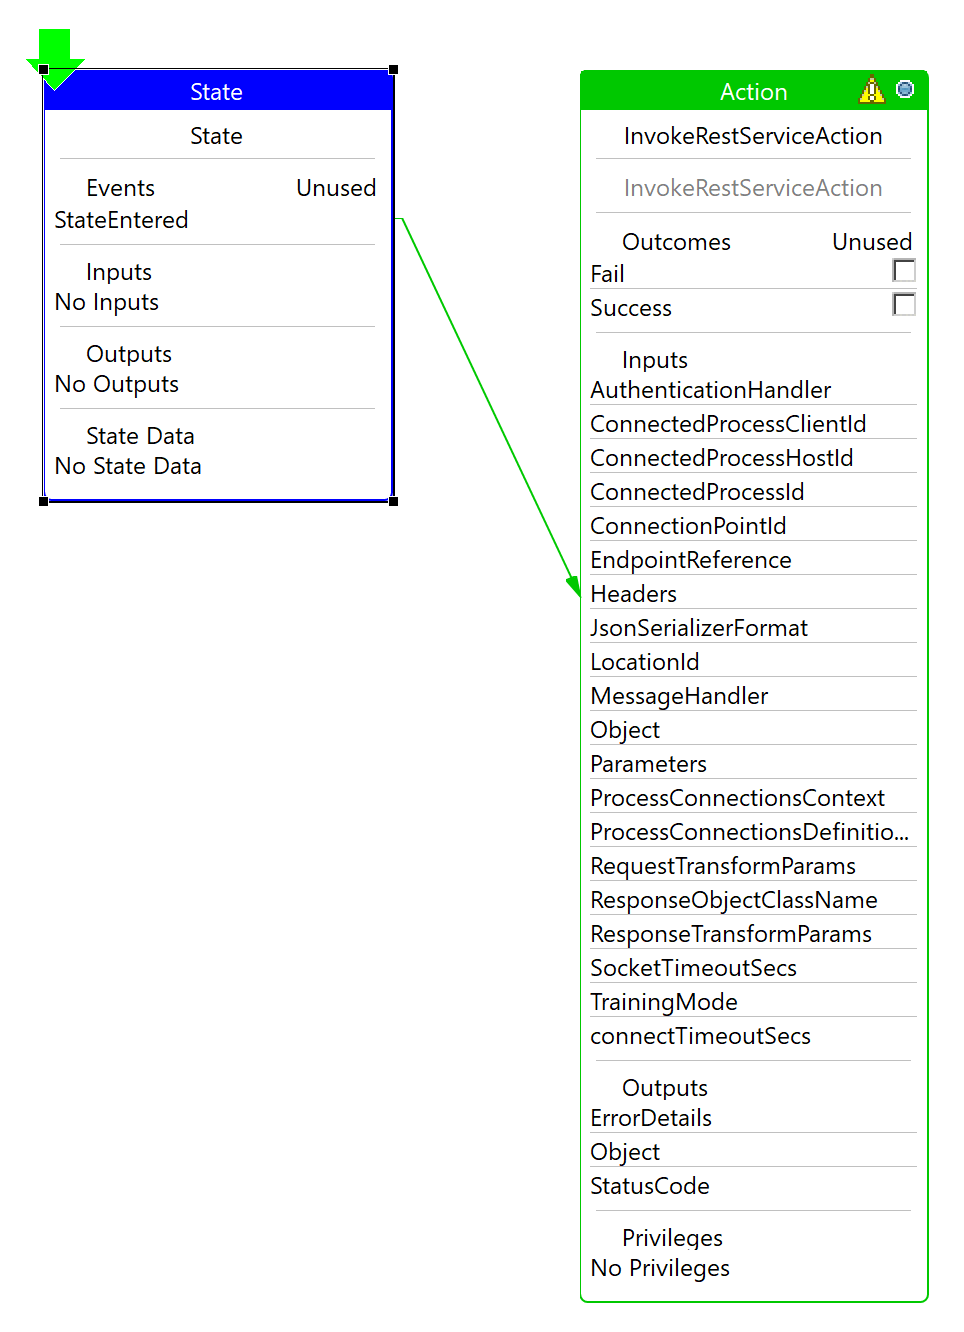
Add a new Starting State
Add a new State Event StateEntered

Bring up the Resource Library View and search for the Action InvokeRestServiceAction, Ensuring the Process ID InvokeRestServiceAction is Selected,
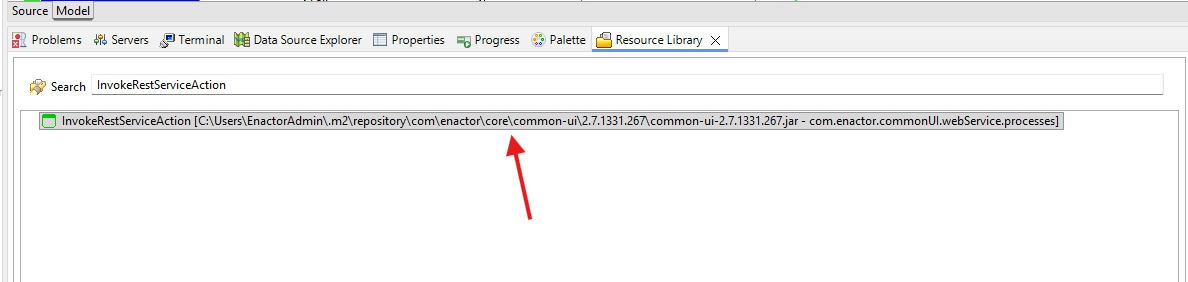
Drag and drop the selected action next to the State.
Reading the Extension point decleration for CallPostValidateProductExtension, we can see there is an input named Product. We need to declar this as an input to our own extension to make it available.
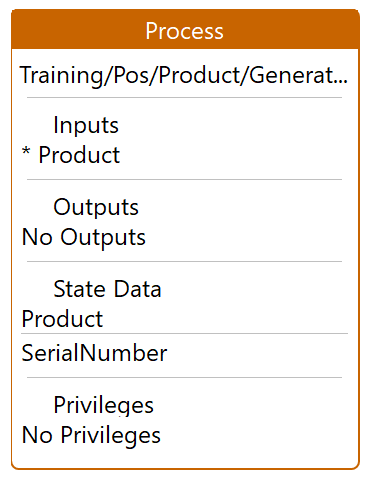
Select to view the properties of the Process and create the following Input Data
| Name | Type |
|---|---|
| enactor.mfc.Product | com.enactor.mfc.product.IProduct |
State data will be automatically populated when declaring new input variables
Select to view the properties of the Process and create the following State Data
| Name | Type |
|---|---|
| enactor.pos.SerialNumber | java.lang.String |
Select to view the properties of the InvokeRestServiceAction and add the foillowing Input
| Name | Type |
|---|---|
| productId | java.lang.String |
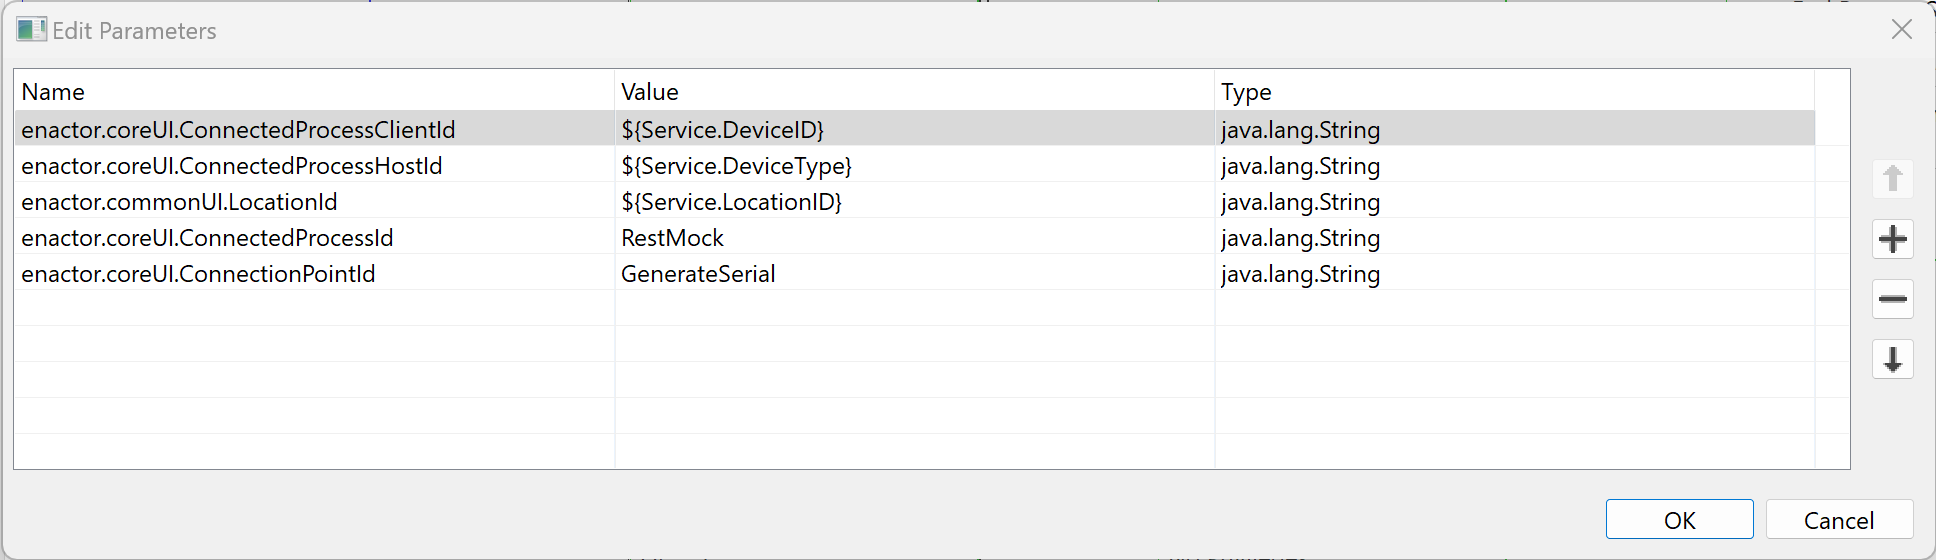
Select to view the properties of the InvokeRestServiceAction and add the foillowing Perameters
| Name | Value | Type |
|---|---|---|
| enactor.coreUI.ConnectedProcessClientId | ${Service.DeviceID} | java.lang.String |
| enactor.coreUI.ConnectedProcessHostId | ${Service.DeviceType} | java.lang.String |
| enactor.commonUI.Location Id | ${Service.LocationID} | java.lang.String |
| enactor.coreUI.ConnectedProcessId | RestMock | java.lang.String |
| enactor.coreUI.ConnectionPointId | GenerateSerial | java.lang.String |
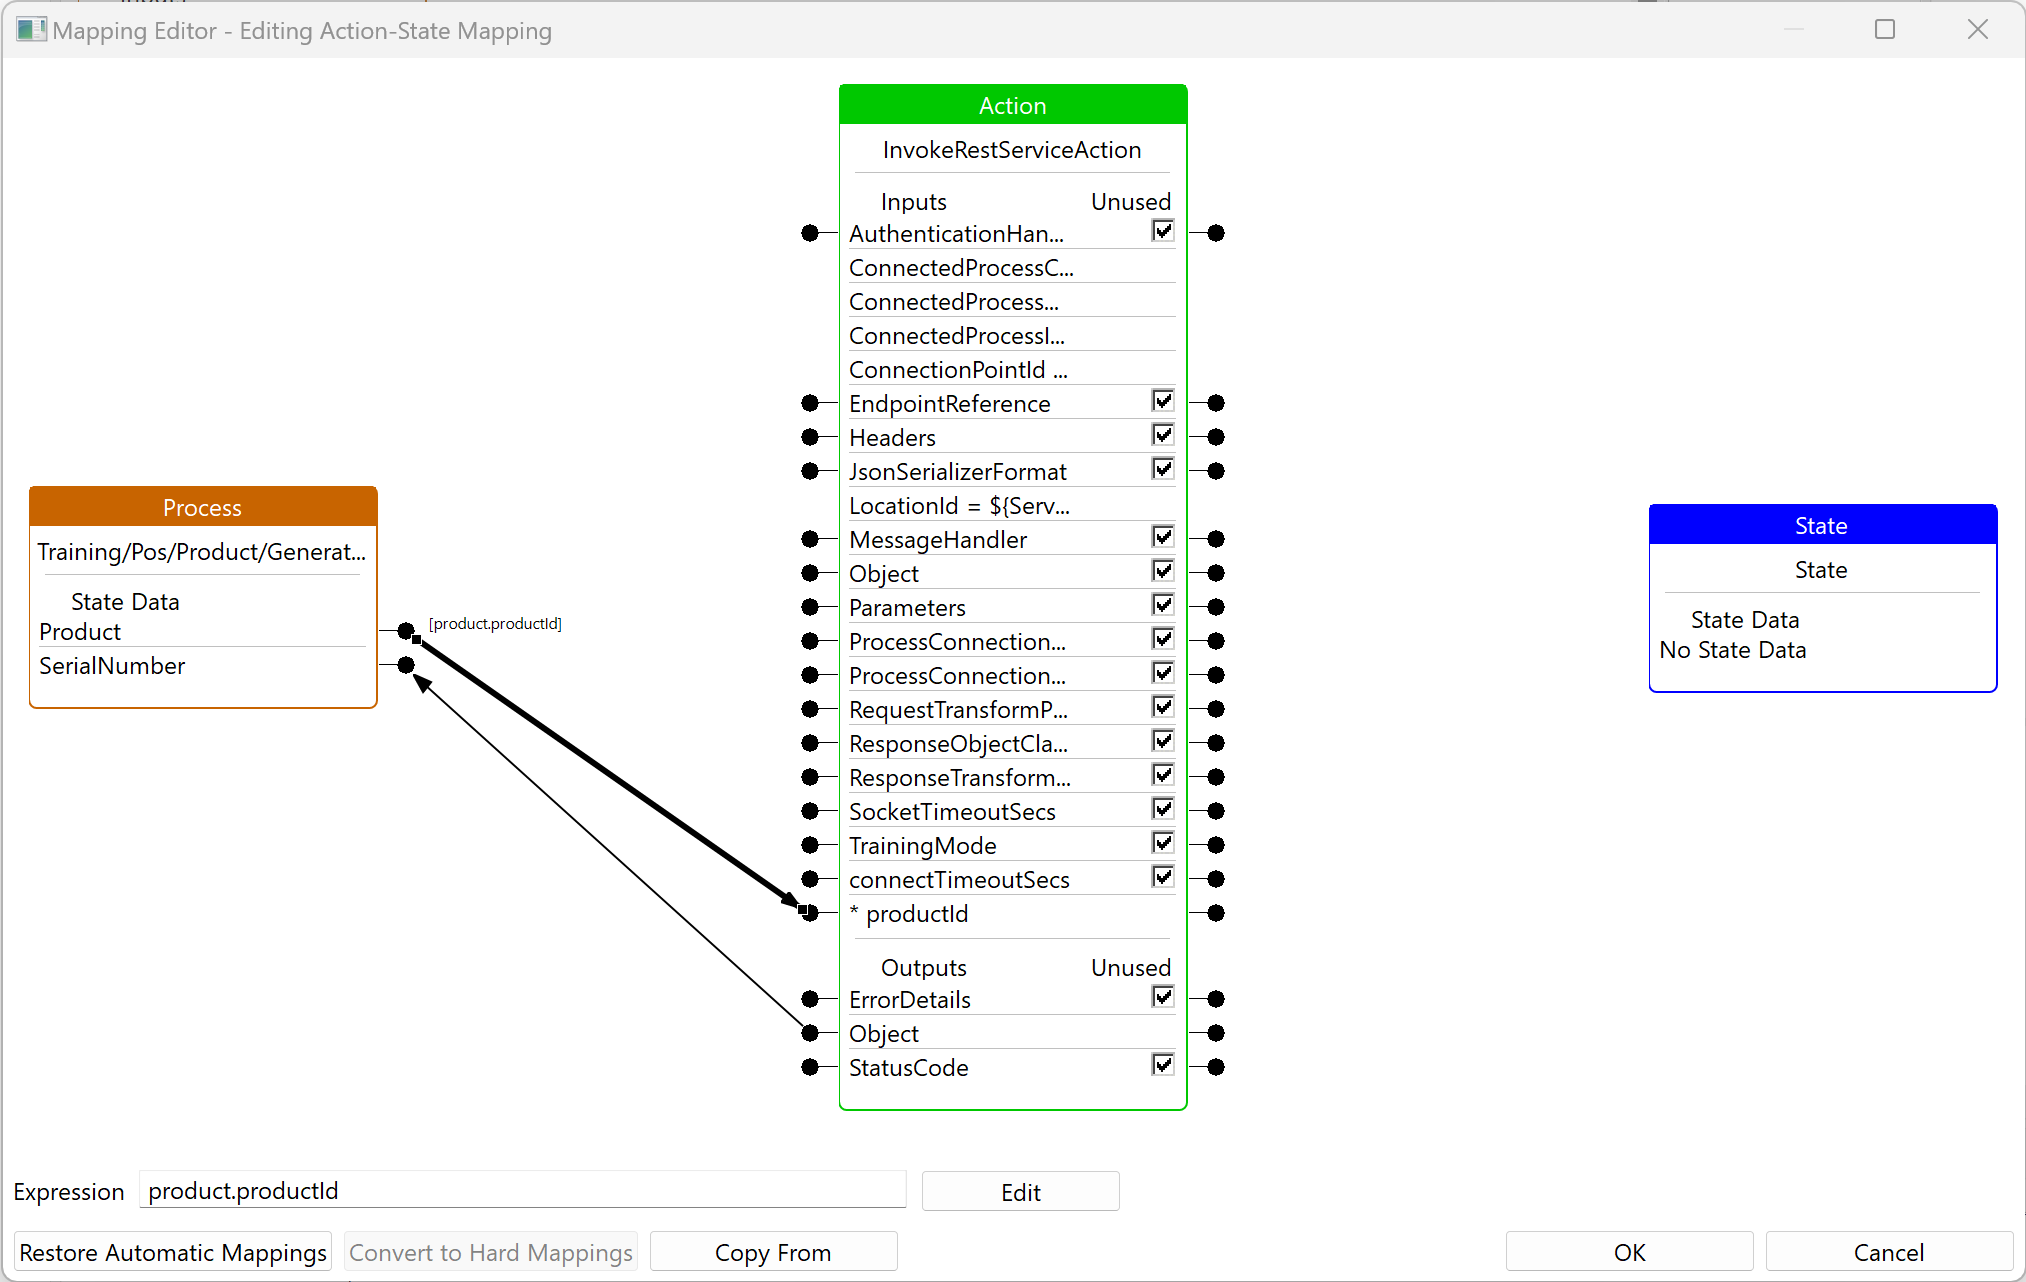
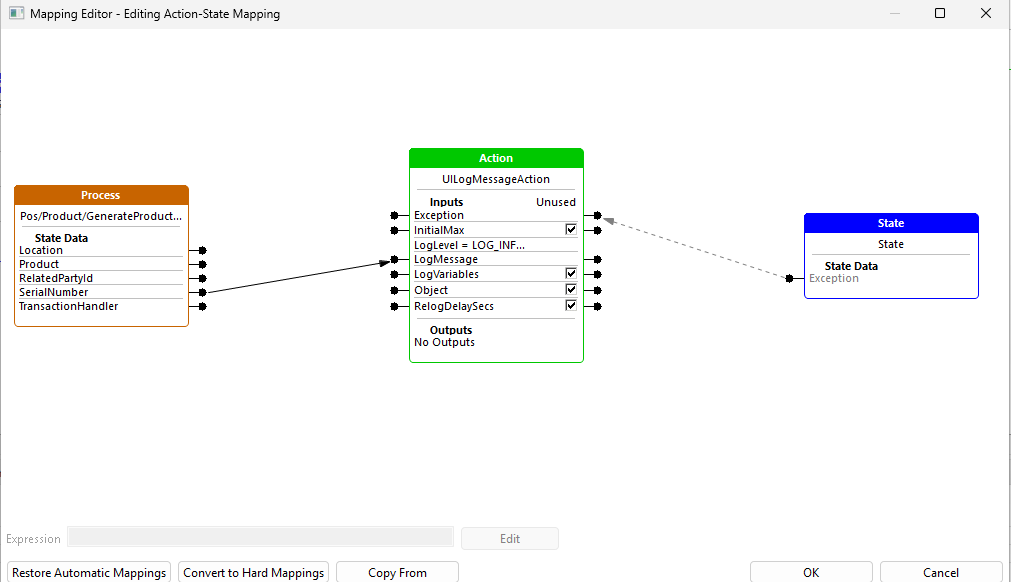
Select to edit the mappings for InvokeRestServiceAction
Link the Product Process State Data Object to the Action Input Data productId
Select the newly creasted link and enter the following expression product.productId
Mark all the remaining Inputs as unsued
Link the Object Output to the process State Data SerialNumber
Mark all the remaining Outputs as unsued
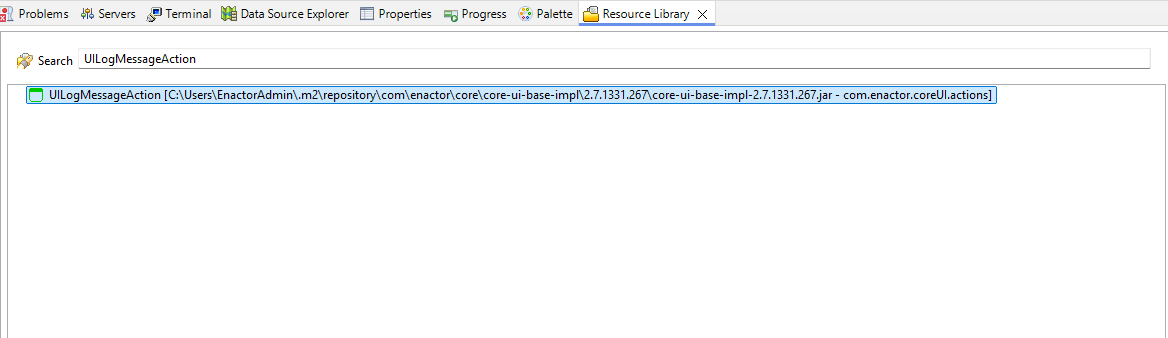
Bring up the Resource Library View and search for the Action UILogMessageAction
Drag and drop the selected UILogMessageAction next to InvokeRestServiceAction
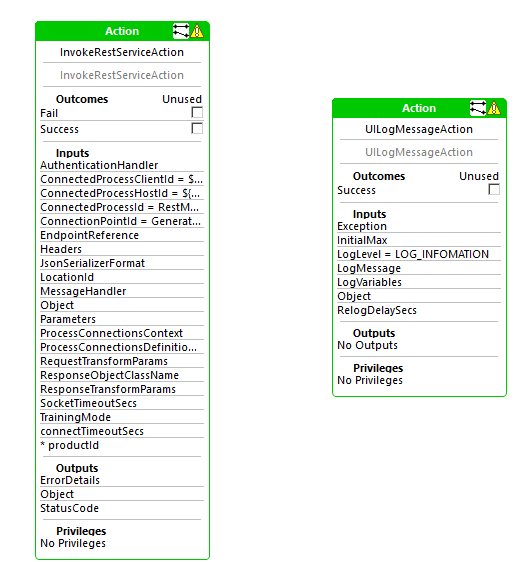
Link the Success Outcome of InvokeRestServiceAction to UILogMessageAction
Select to view the properties of the UILogMessageAction and verify the foillowing Perameters
| Name | Value | Type |
|---|---|---|
| enactor.coreUI.logging.LogLevel | LOG_INFOMATION | java.lang.String |
Select to edit the mappings for UILogMessageAction and link the Process State Data SerialNumber to the Input LogMessage
Mark all the remaining Inputs as unsued
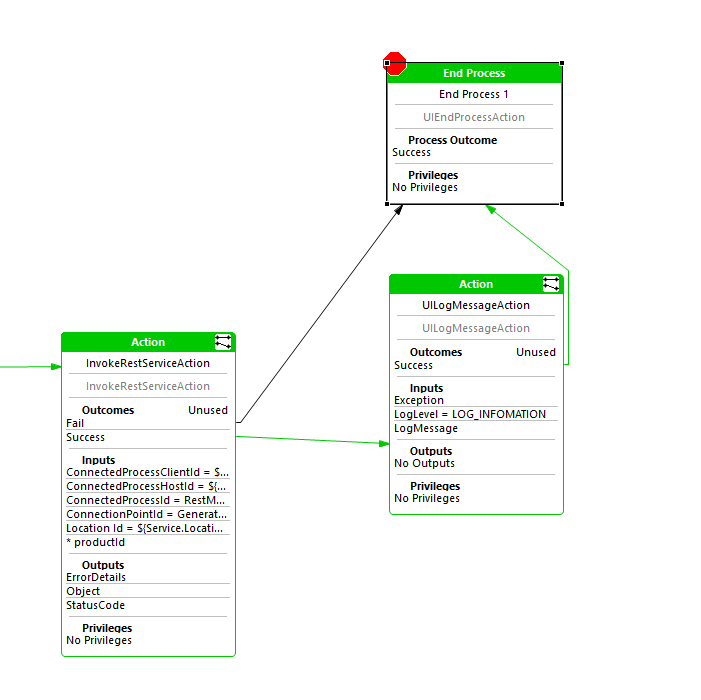
Add an End Process Actions with an outcome of Success
Link the Success Outcome of UILogMessageAction to the End Process Action for Success
Link the Fail Outcome of InvokeRequestServiceAction to the End Process Action for Success
By linking both the Success and Fail outcomes to a final "Success" state, the process avoids crashing or showing error screens. However, the logic ensures that a serial number is only logged if the service call actually succeeds, allowing the application to fail silently and continue the flow during training.
Answers
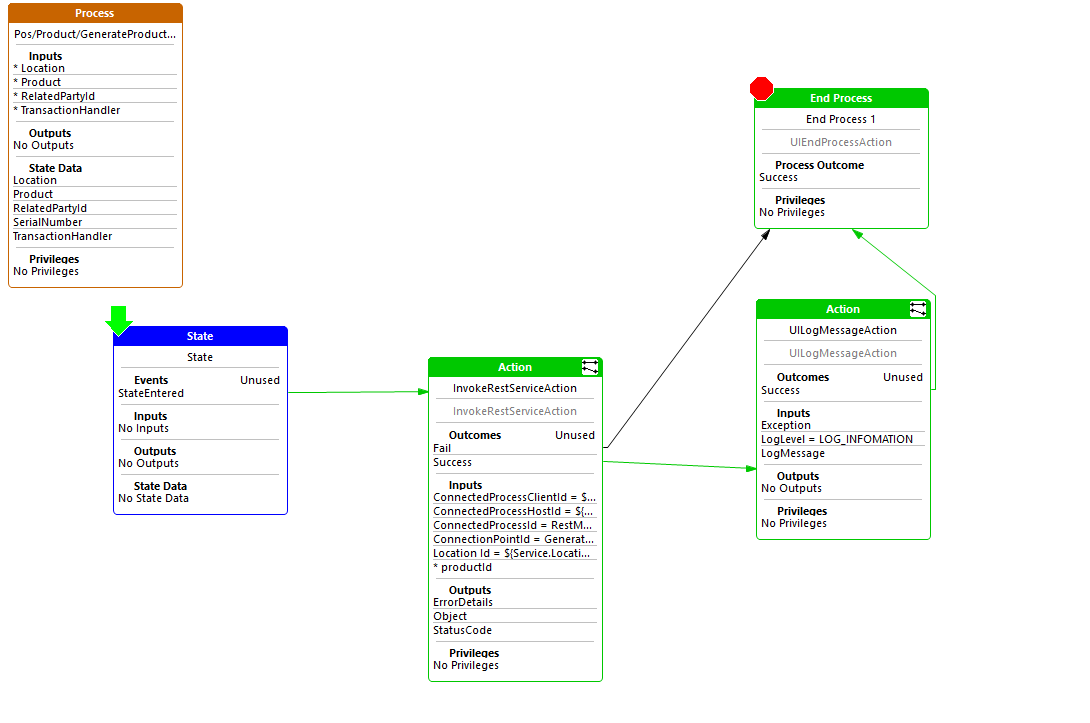
After completing the tutorial, this is how the application process should look like
Run The Solution
Run the Mock Server
Double click on the Mock Server service in the VM desktop.

Run the POS Application
SignOn to the POS and Add Product 0WXIVEX-11 to the Basket.
Check the POS logs. You will see the Serial Number getting logged as a result of the Succesful REST Service Invocation.
Process.Pos.Product.GenerateProductSerialNumber - "SN: 123456":Execute Action:'UILogMessageAction' State:'State' Process:'Pos/Product/GenerateProductSerialNumber'
UILogMessageAction:"SN: 123456"