Process Extensions
Overview
Process Extensions are a mechanism for injecting custom logic in an existing process flow. It also gives the ability to execute multiple processes in a defined sequence.
Unlike Process Sets which allow the developer to override a complete Application Process, Process Extension Points must be defined before-hand in the place where they will take effect. They provide a much more controlled way of supporting custom behaviour when compared with Process Sets.
You may also have multiple implementations for a single Extension Point, whereas when using a Process Override only one implementation can be active at a time.
What You Will Learn
- How to Add an Extension Point to an Application Process
- How to Implement an Process Extension and register it to the Packages.xml
Adding an Extension Point
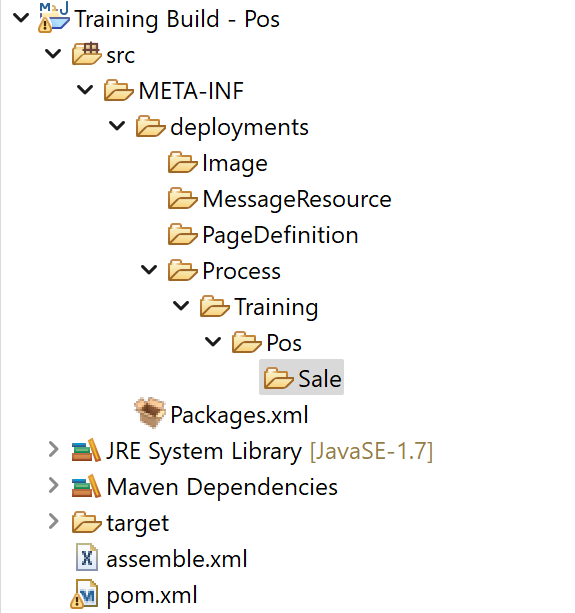
Create the following directory paths relative to the Process directory, Training/Pos/Sale
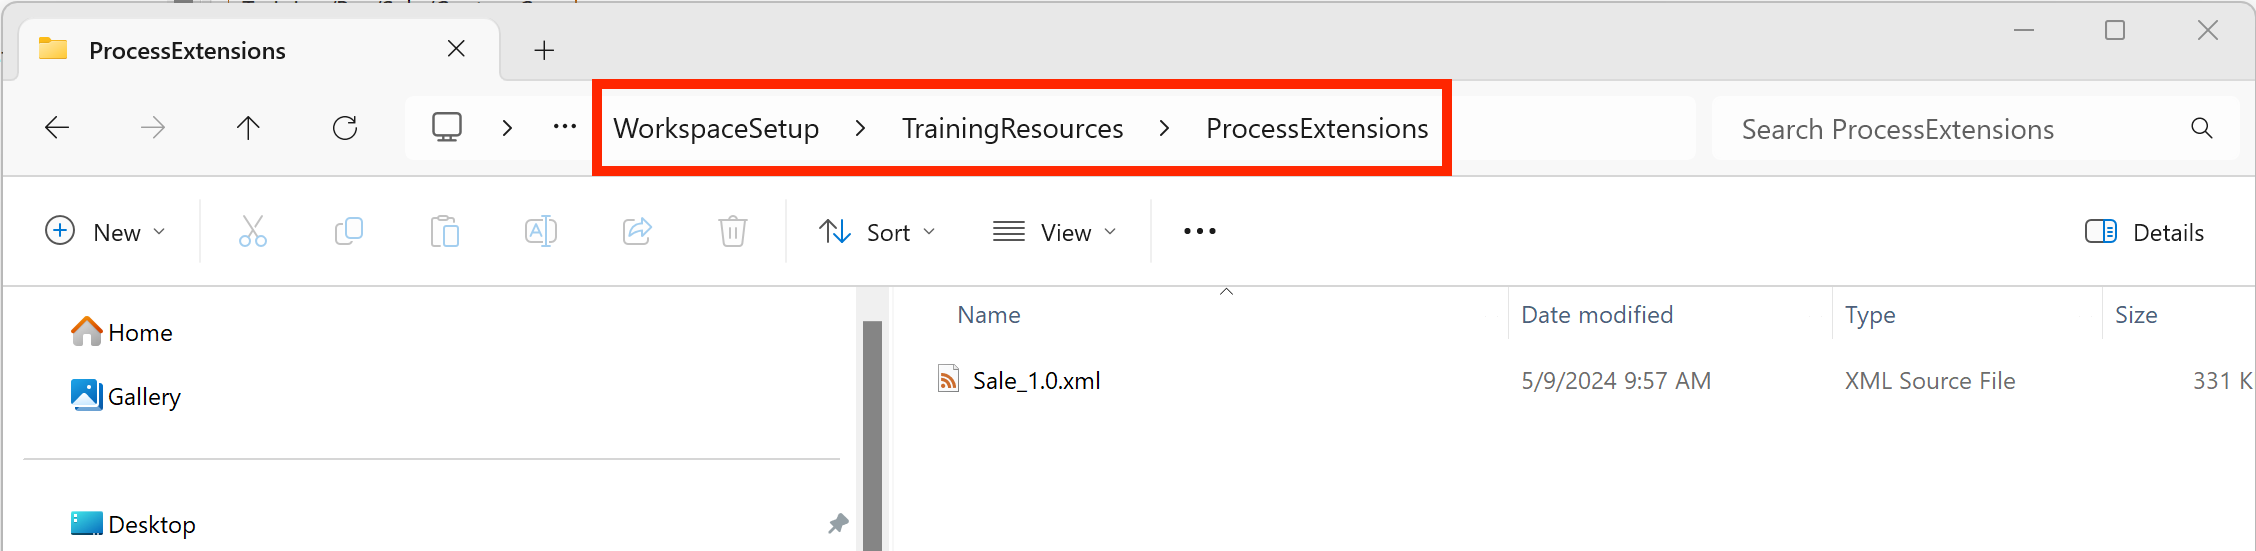
From the WorkspaceSetup\TrainingResources\ProcessExtensions directory, copy the Sale_1.0.xml Application Process into your newly created Sale folder
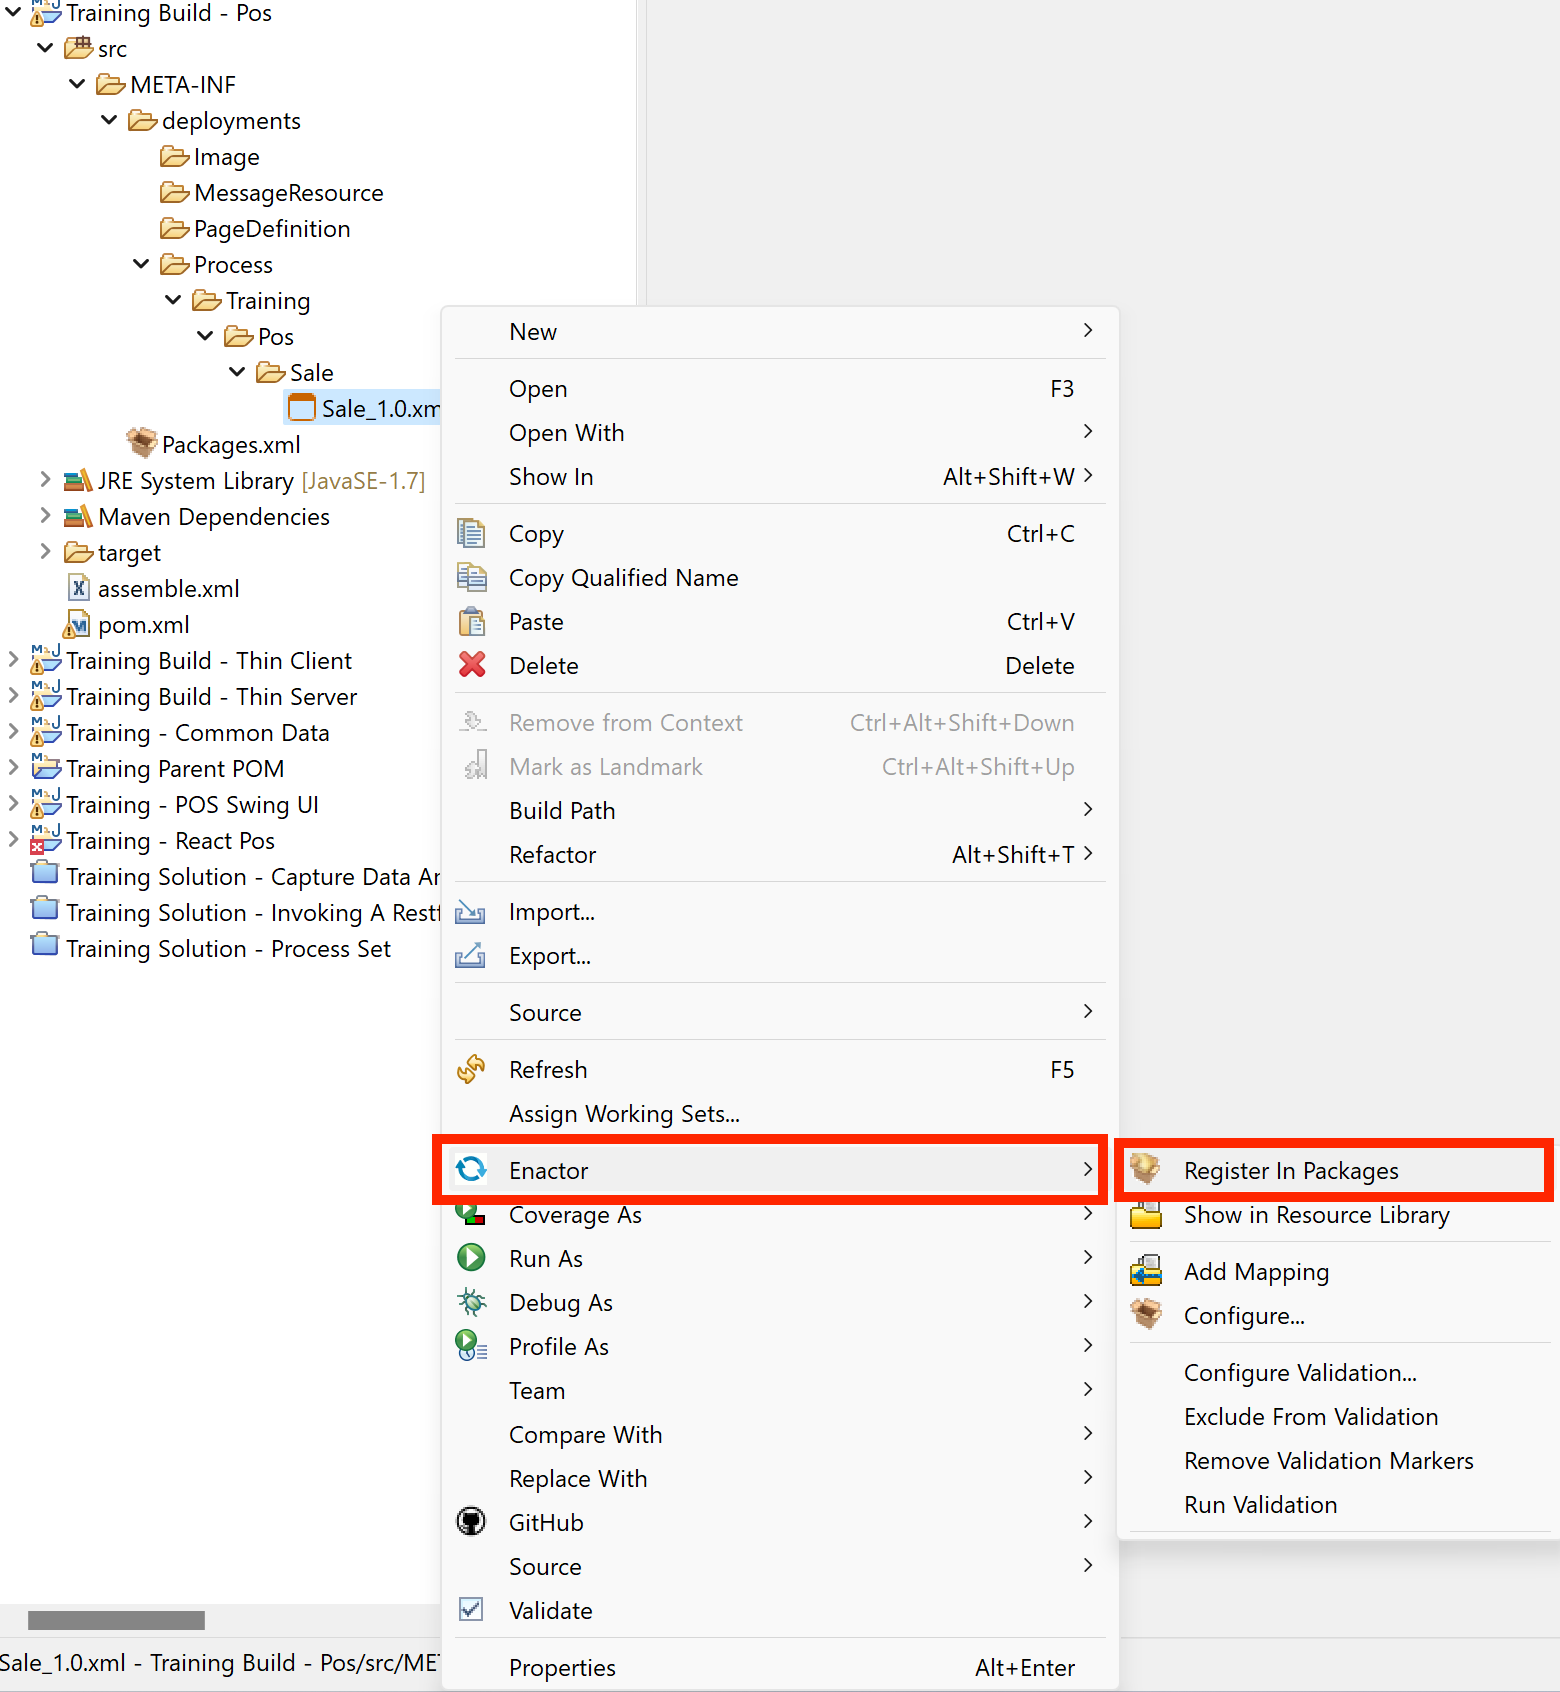
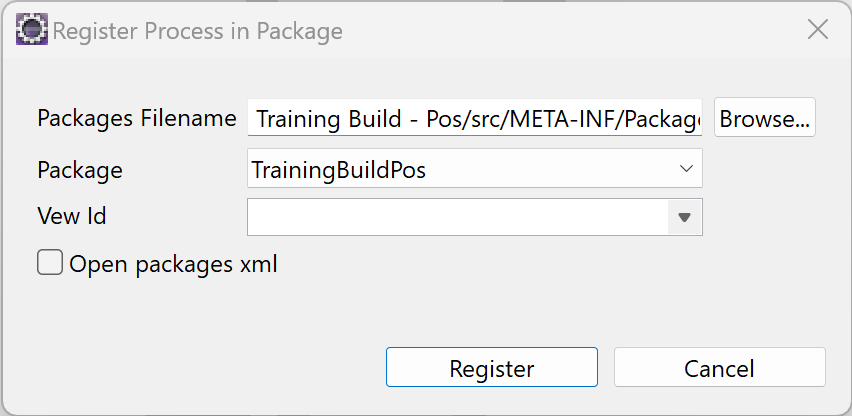
Right click the Sale_1.0.xml file select Enactor -> Register in Packages
Click Register
By copying the Sale Process, a process override using the Process set mechanisms was used. More details can be in the Process Set Tutorial
Open the Sale Process
From the Outline view, expand the Actions group and search for the action SetAutoTimeout
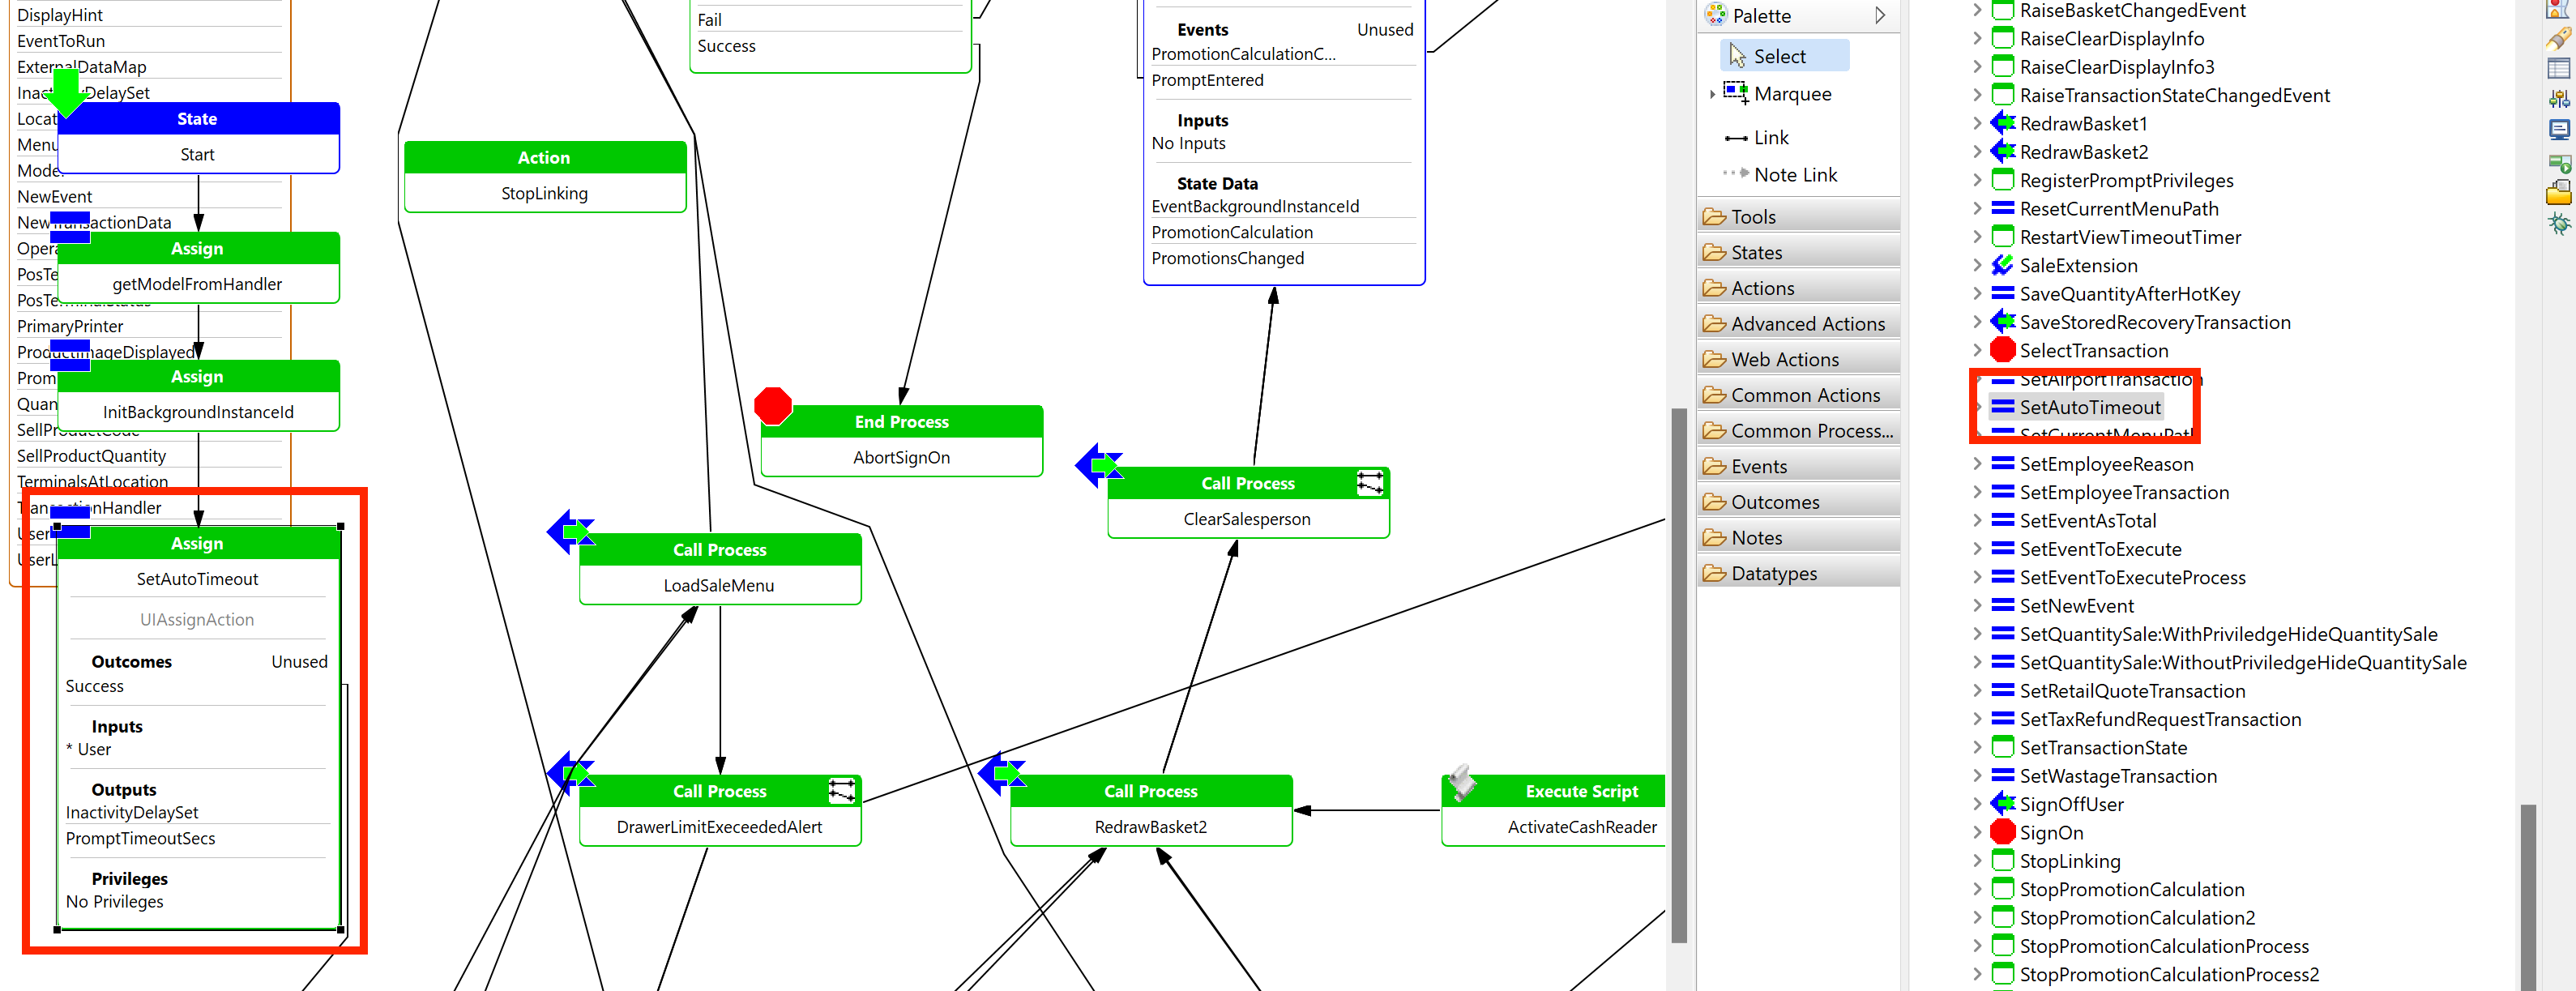
Just beneath this action, are three Actions (collapsed)
- CheckHideQuantitySalePriviledge
- SetQuantitySale:WithPriviledgeHideQuantitySale
- SetQuantitySale:WithoutPriviledgeHideQuantitySale
Drag a box around them to select all three, and then move them down slightly to increase the space below the SetAutoTimeout action
From the Palette, expand the Actions Group, Add a new Call Extension Point Expand the Actions Groups
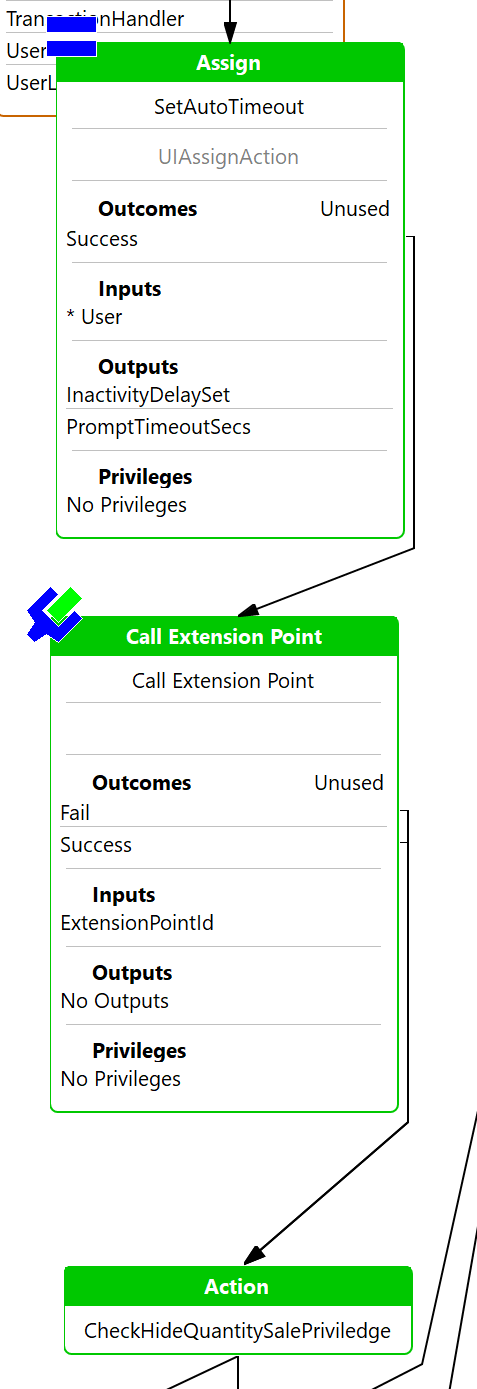
Place the Action bellow SetAutoTimeout Action
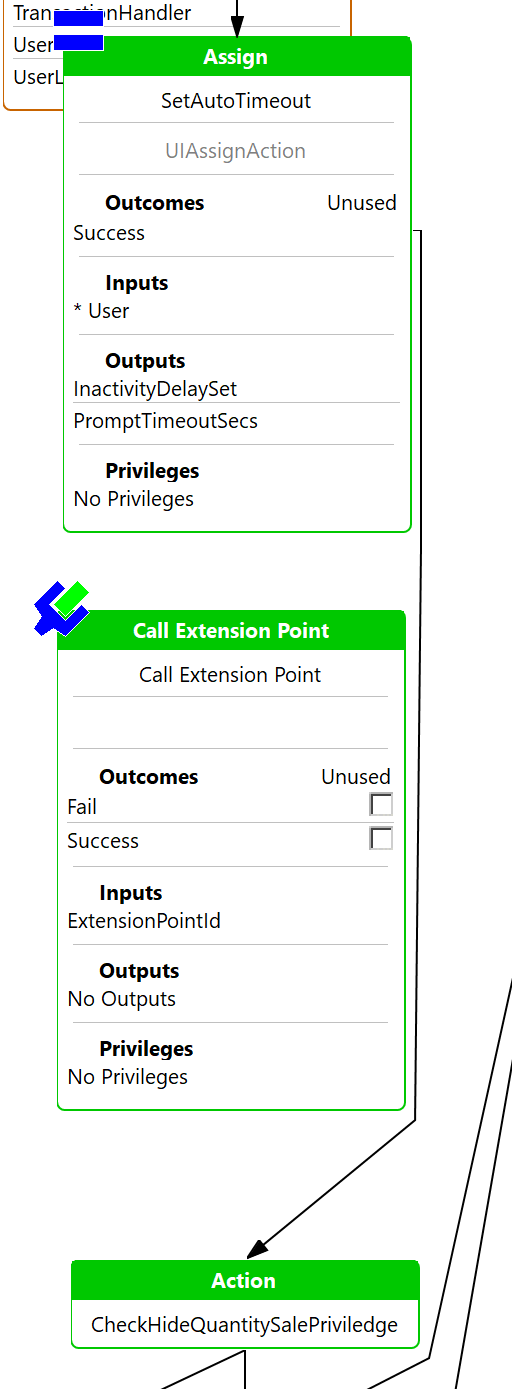
Move the link from Success outcome of SetAutoTimeout to the new Extension Point Action
From the Palette, click the Link tool and then add a link from the Fail outcome on the new action connecting it to the CheckHideQuantitySalePriviledge action.
Repeat this process to add links from the StopExtensionLinking and Success outcomes.
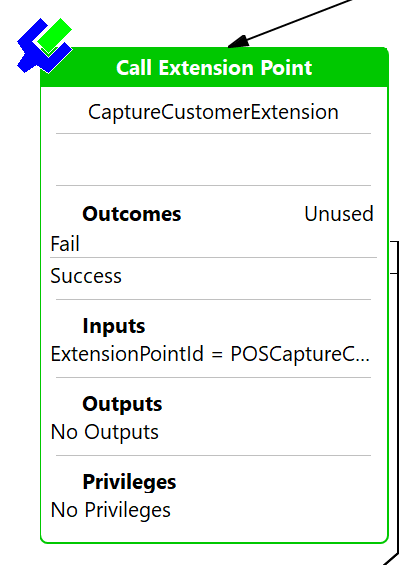
Right click the new Extension Point action and select Show Properties
Set the Action ID to CaptureCustomerExtension
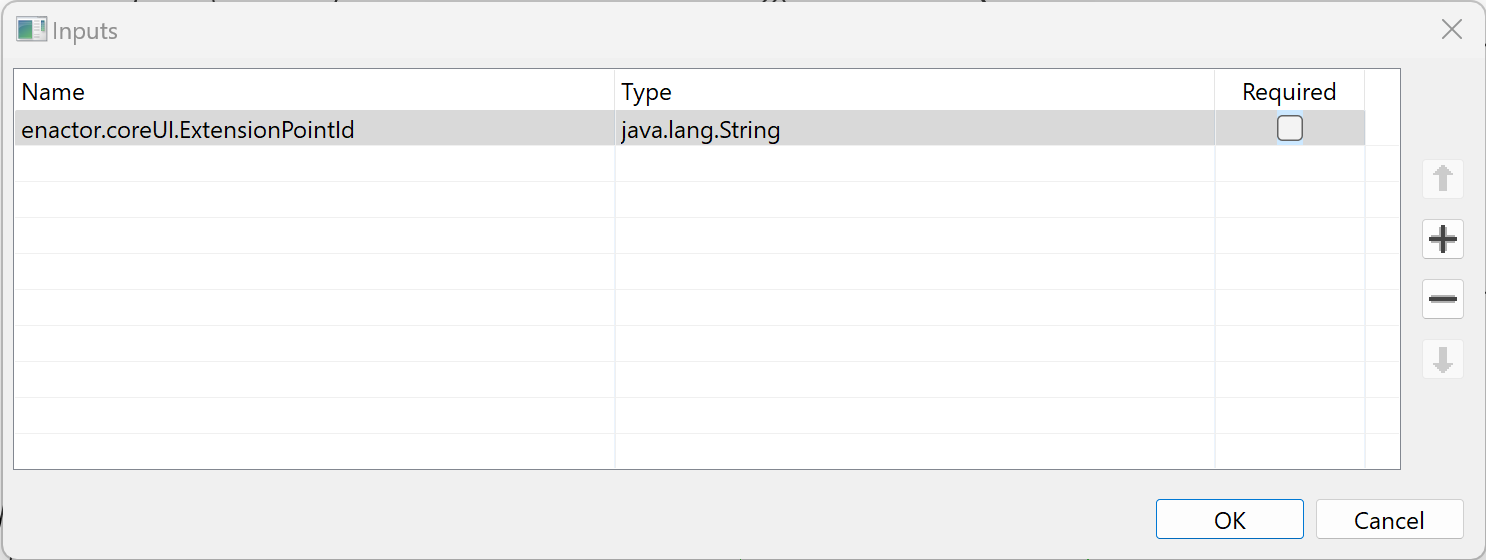
Select to edit the Parameters property:
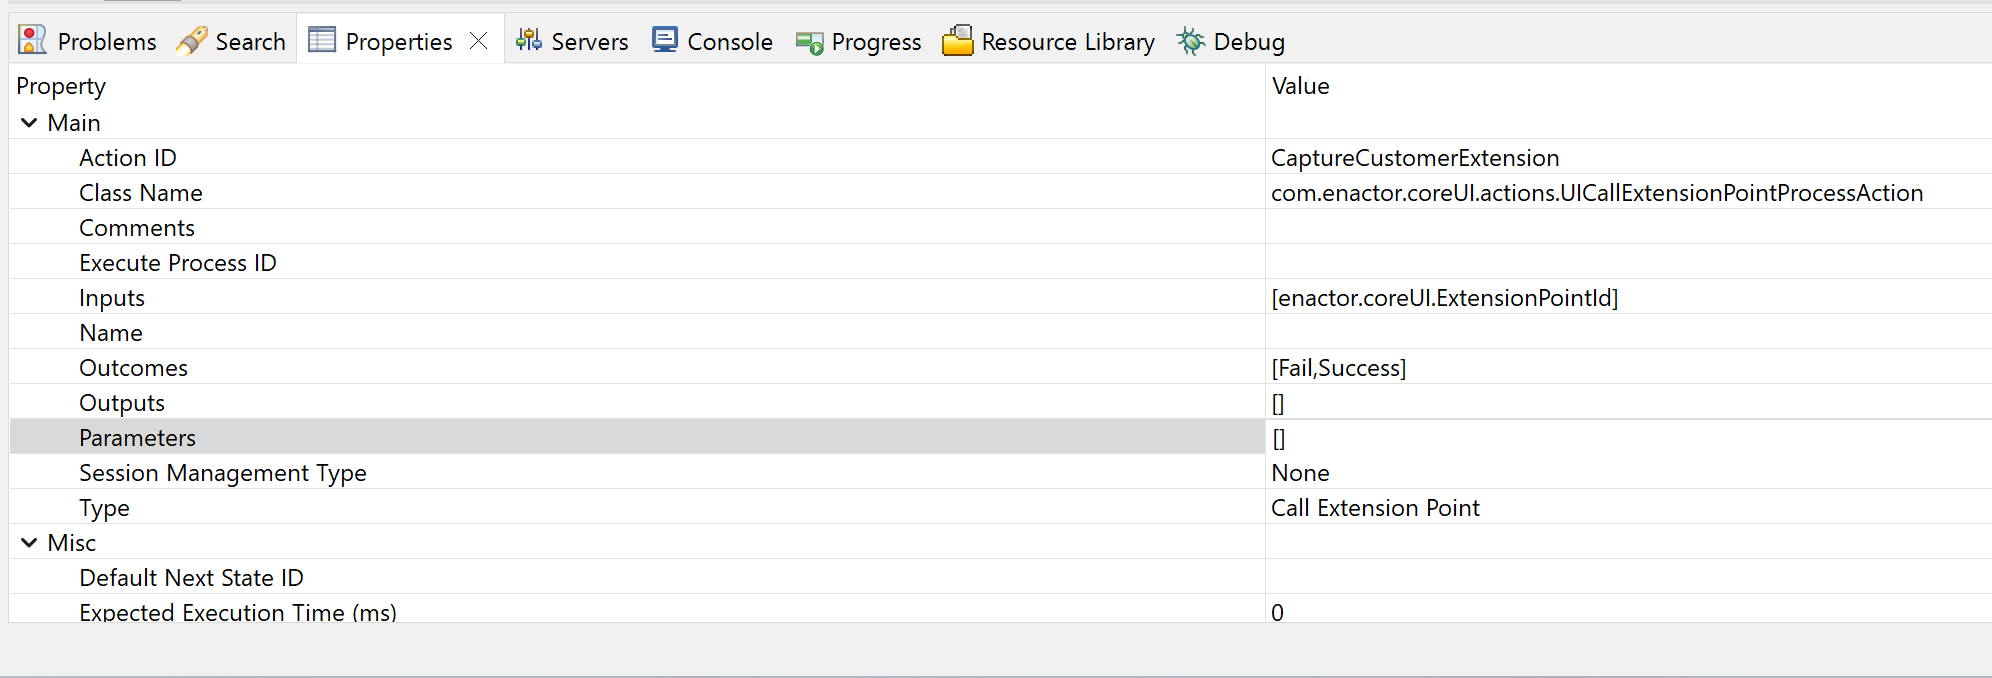
Add a new parameter by clicking on the :AddIcon: icon, or double-clicking on an empty line.
Set the parameter as follows:
Name field - select enactor.coreUI.ExtensionPointId from the drop down menu
Value field - Enter POSCaptureCustomerExtension
Click OK
Save the Process
Creating an Extension Point Process
Capture Customer Sale
Navigate to the directory path Training/Pos/Sale
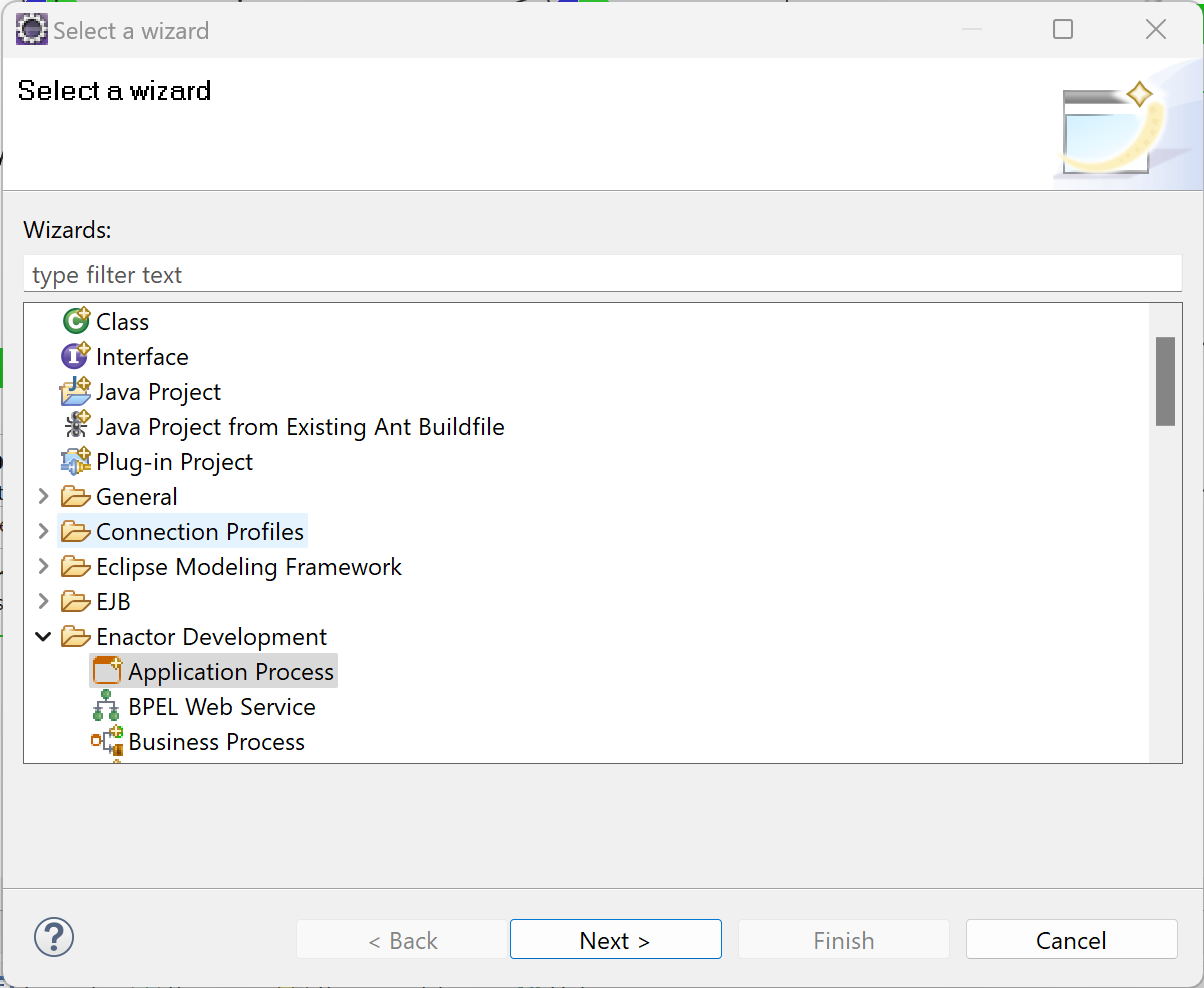
Create a new Application Process with an ID of CaptureCustomerSale in the Sale folder, Right click the sale directory, select New -> Other
From the Select a wizard dialog, Expand the Enactor Development Group and select Application Process
Click Next >
Enter CaptureCustomerSale or the Process ID
Ensure Register in Packages is selected

Click Finish
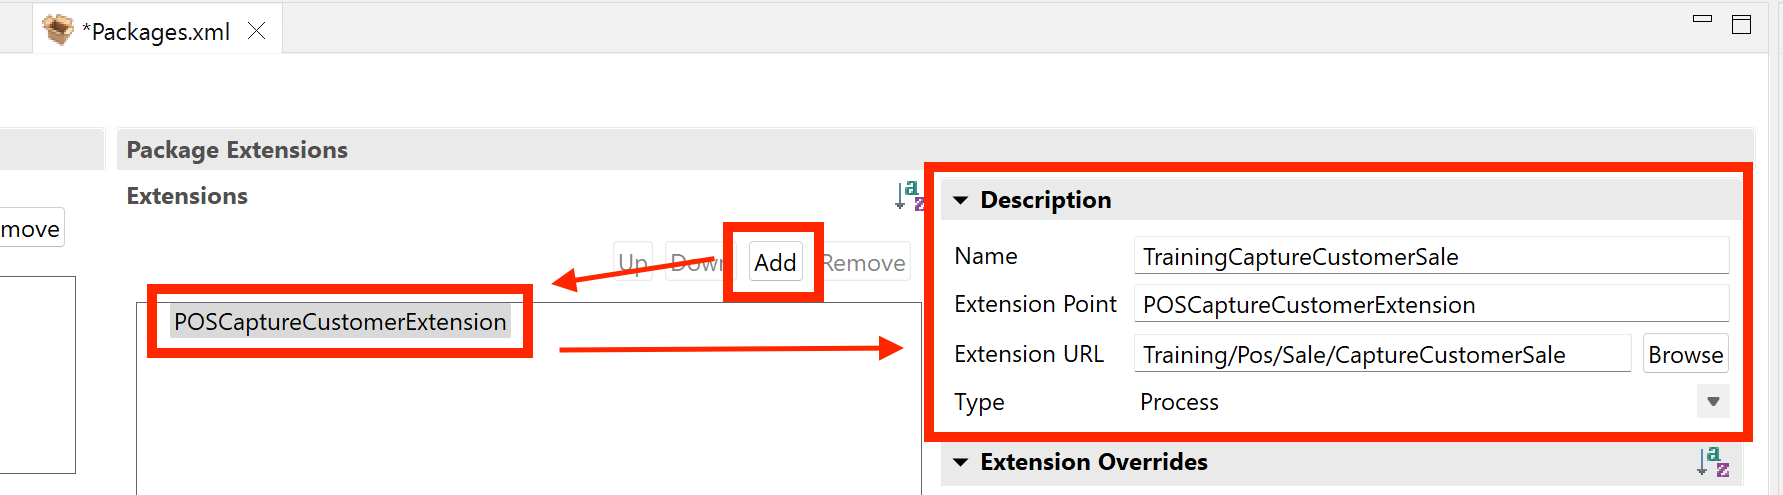
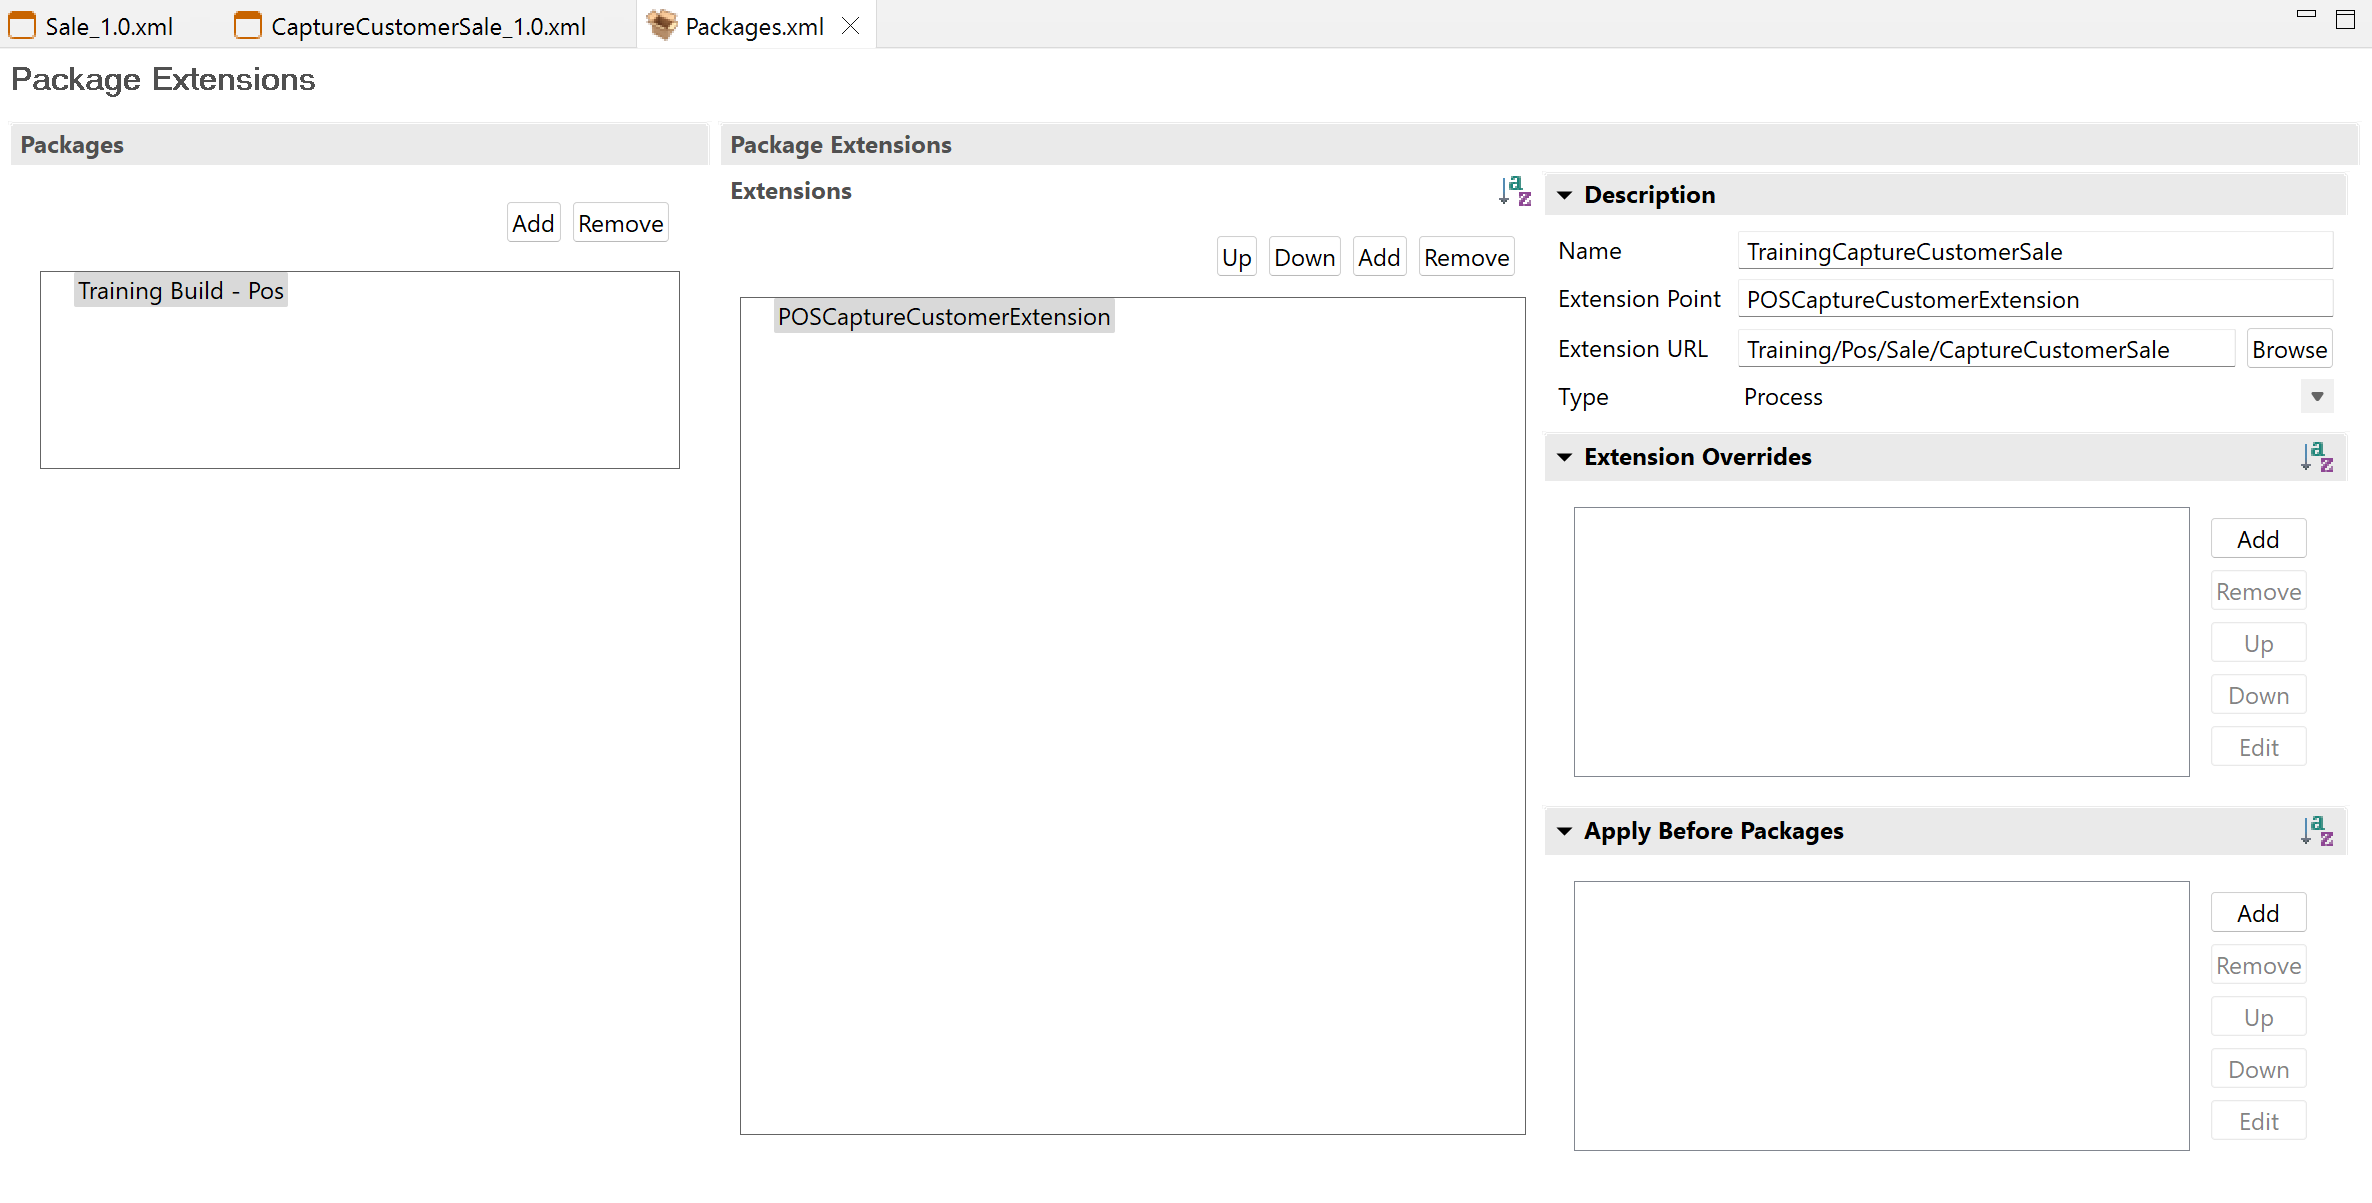
Open the Packages.xml and select the Extensions tab
Within the Package Extensions / Extensions Section Click Add
Select the newly added extension, and then enter the following values:
- Name - TrainingCaptureCustomerSale
- Extension Point - POSCaptureCustomerExtension
- Extension URL - Click Browse and search for your newly created process CaptureCustomerSale
- Type - From the drop down menu select Process
Save the Packages.xml
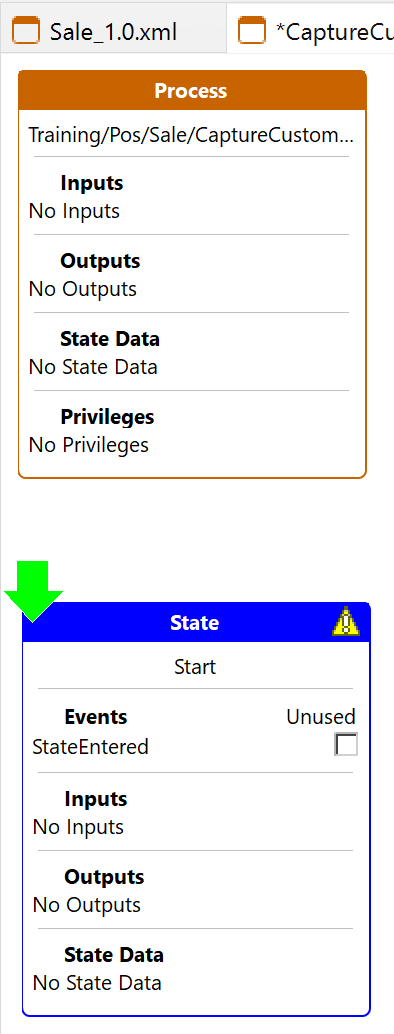
Return to the CaptureCustomerSale Application Process
from the Palette, expand the States group, select and drag on a new State, placing it under the Process figure
Right click the State and select Show Properties
For the State ID enter Start
Edit the Events property, add a StateEntered event
Click OK
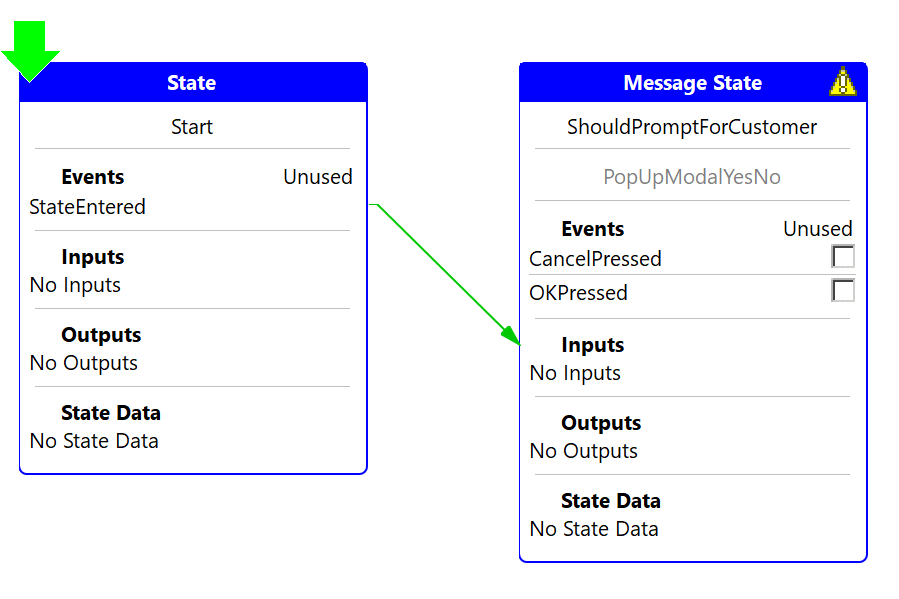
From the Palette add a new Message State, dropping it to the right of the Start state
Set the State ID to ShouldPromptForCustomer
Set the URL Property to /Message/PopUpModalYesNo
you can select the value from the drop down menu
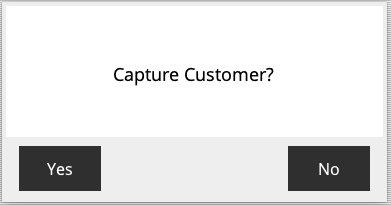
Set the Message Text Property to Capture Customer?
A translatable message can be provided using the Message Base and Message Text Properties
Edit the Events property
Add the following Events
- OKPressed
- CancelPressed
Click OK
Add a link from the StateEntered event of the Start State connecting to the newly created state ShouldPromptForCustomer
From the Palette expand the Actions group, add an End Process Action
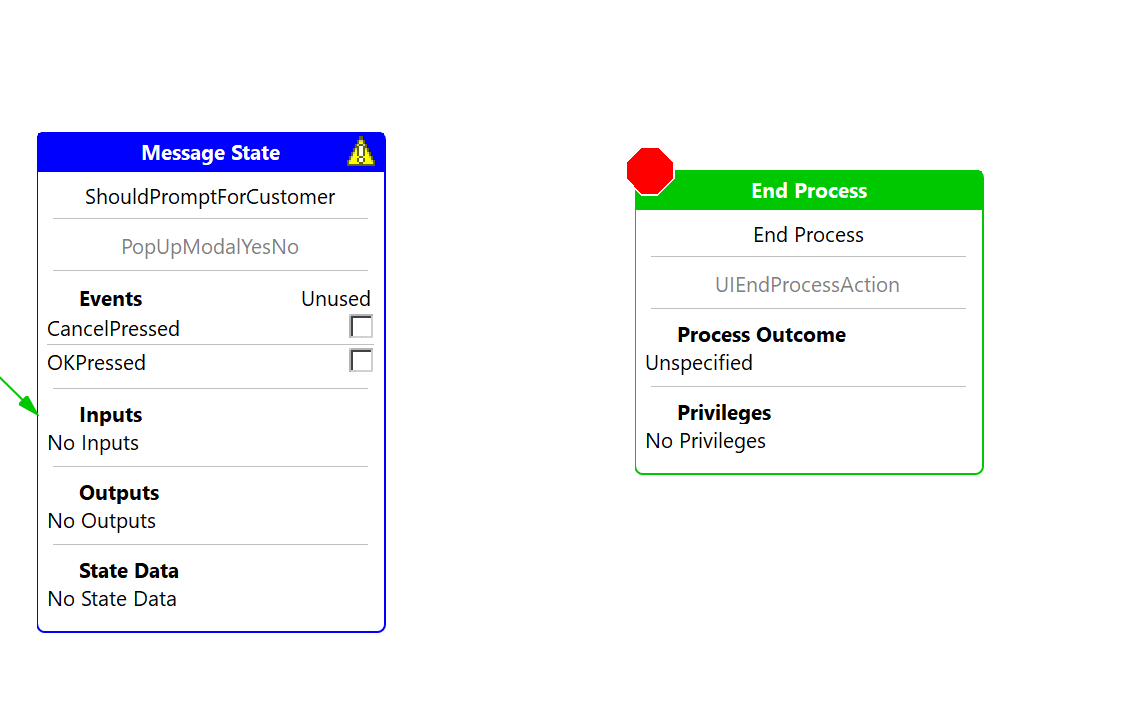
Edit the Properties for End Process Action:
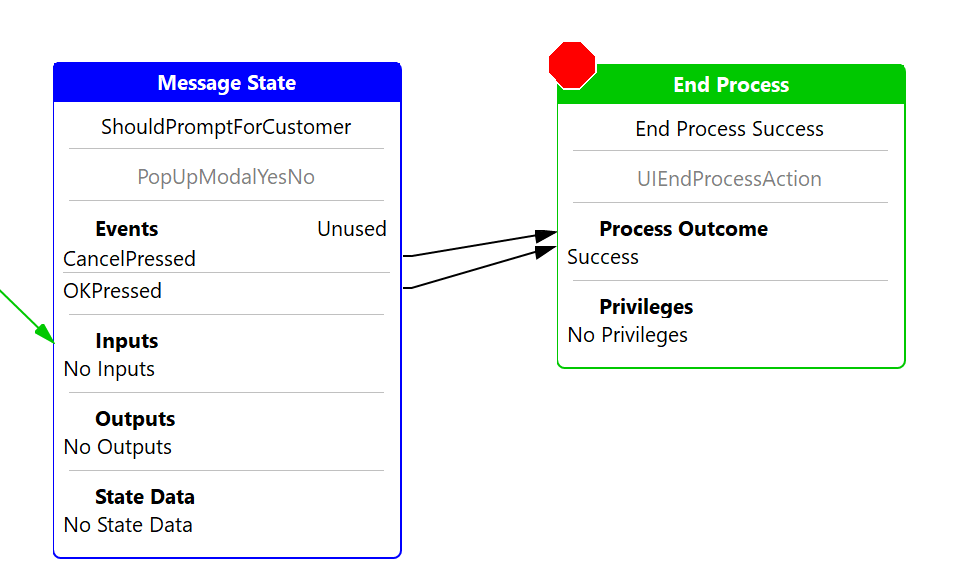
Set the Action ID to End Process Success
Set the Process Outcome to Success by selecting the value from the drop down menu
Link both the events from the ShouldPromptForCustomer State to the End Process Success Action
Save the Process
Launch the Pos application after you sign in a dialog should now be presented with the message Capture Customer? and with two options:
Extension Point Chaining
When there are multiple extension points implementing the same ID, Enactor will call them in sequence - if there is no order defined by the implementations (using either the Apply Before Packages, or Extension Overrides properties), then extensions may be run in any order.
If an Extension Point implementation wants to prevent chaining to further implementations, it can complete with the enactor.action.StopExtensionLinking or Fail outcomes. Any other outcome will be passed onto later implementations. Only the outcome from the last implementation will be returned to the calling process.
Answers
After completing the tutorial, this is how the application process and packages.xml should look like
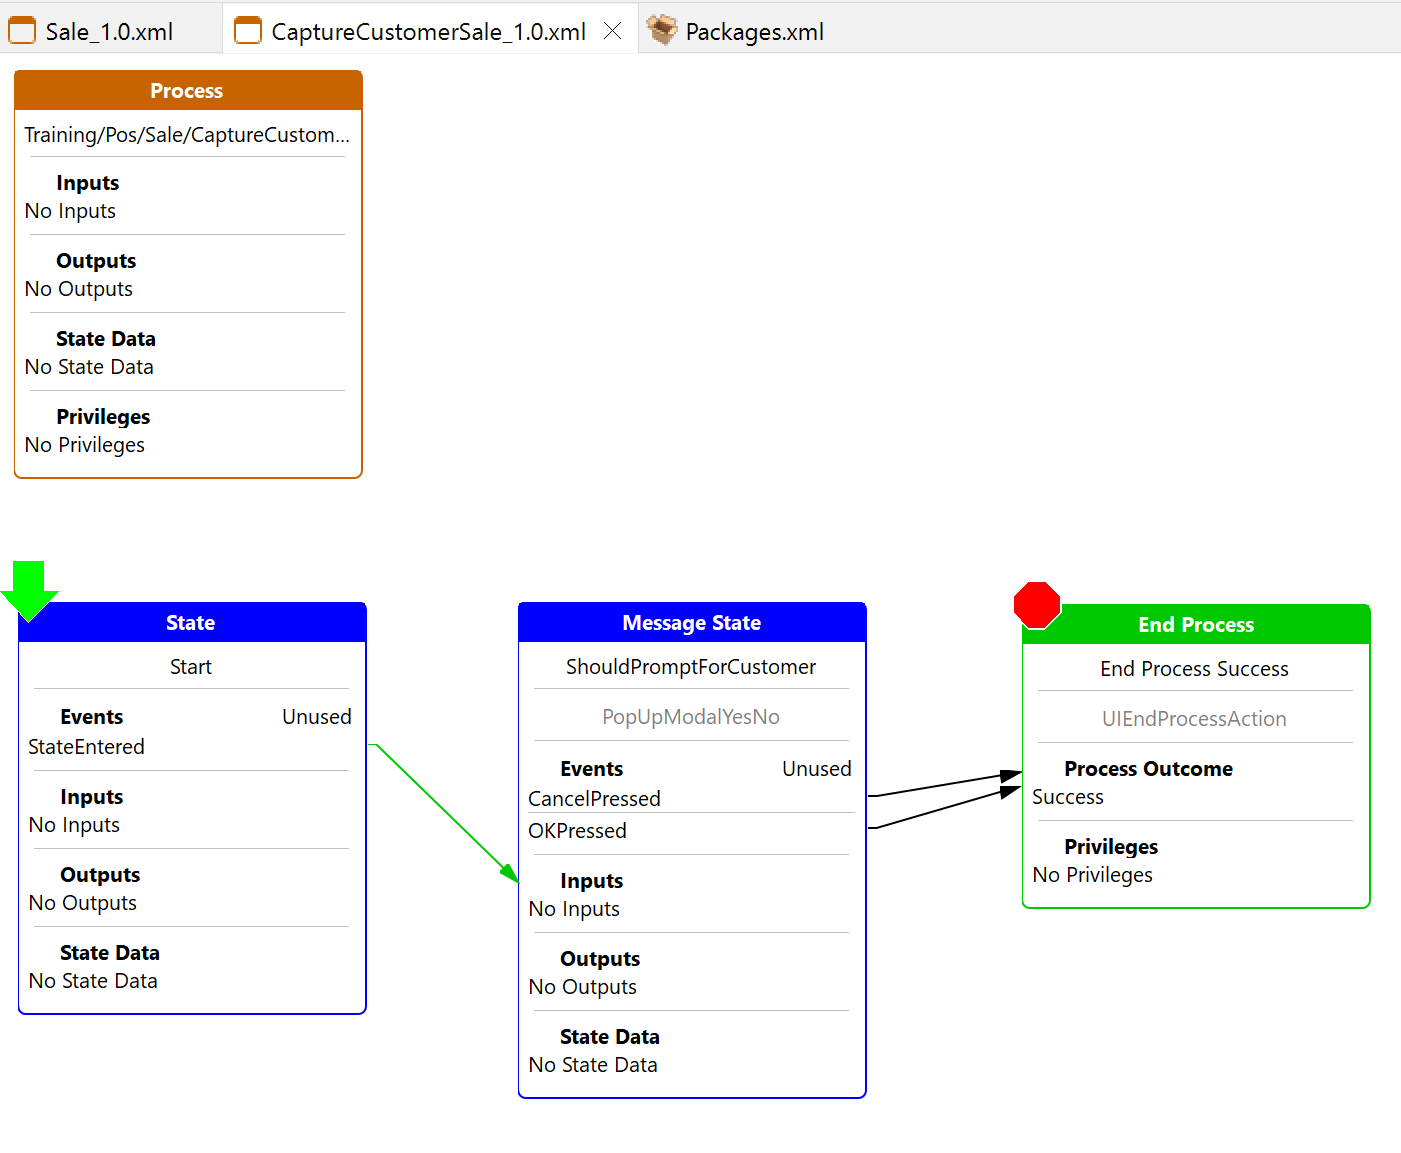
The completed solution can be found in the ProcessExtensions Project located at /WorkspaceSetup/Solutions/ProcessExtensions
To run the solution, import the project as a maven project to your workspace
Select the Training Solution - Process Extensions Java launch
Refer Extension Points for more info.