Themes with Page Definition UI & Stylesheets
Overview
Themes are used in Enactor to allow for styling and branding and layout of an application.
This document will show show how to create a new theme using Eclipse and apply it to your POS.
Theming Using The Enactor Tools
Create a new Theme
To create a new theme, there are three main components involved
- Images
- Page Definitions
- Style Sheets
To begin, we need to create the following structure within the <CUSTOMER NAME> Extension - Pos Project.
|-- "src"
|   |-- "META-INF"
|   |   `-- "deployments"
|   |       |-- "Image"
|   |       |-- "PageDefinition"
|   |       `-- "StyleSheet"
| 1 | Create the Packages.xml by right clicking on META-INF → New → Other | 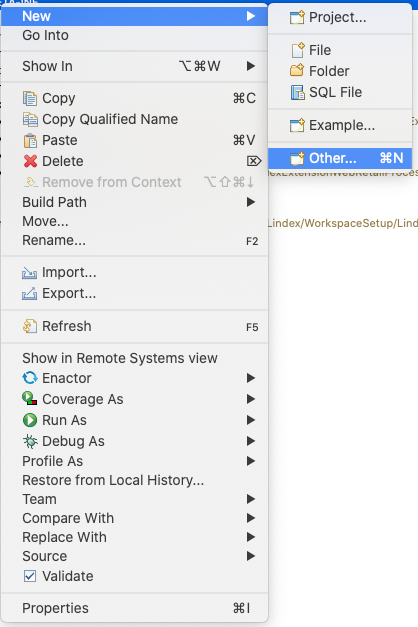 |
| 2 | From the Wizard selection prompt, expand Enactor Development collection and select Package. Click Next | 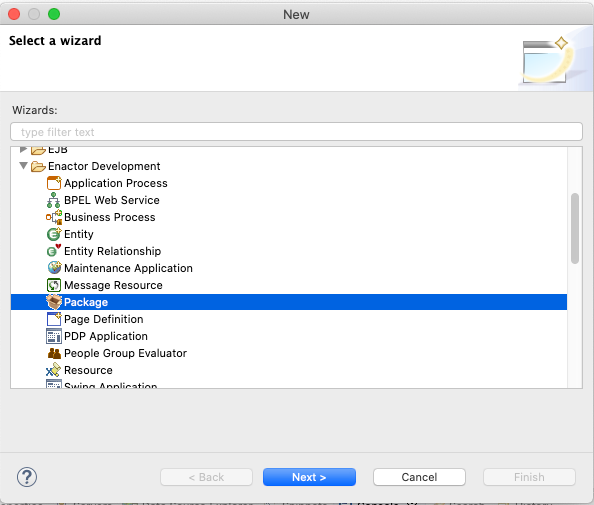 |
| 3 | Change the generated Package ID to <CUSTOMER NAME>Pos And set the Name to <CUSTOMER_NAME> Extension - Pos Click Finish | 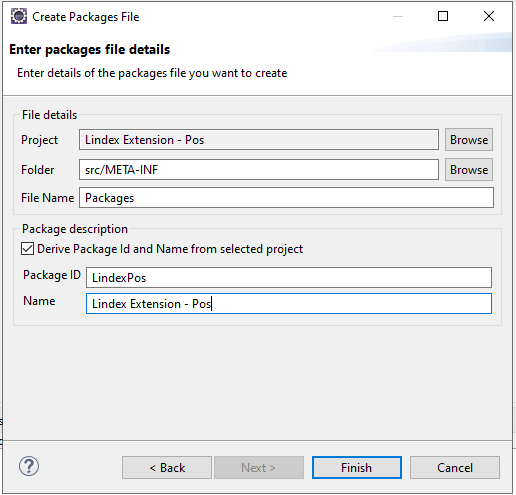 |
| 4 | Open the Packages.xml and select Themes tab | 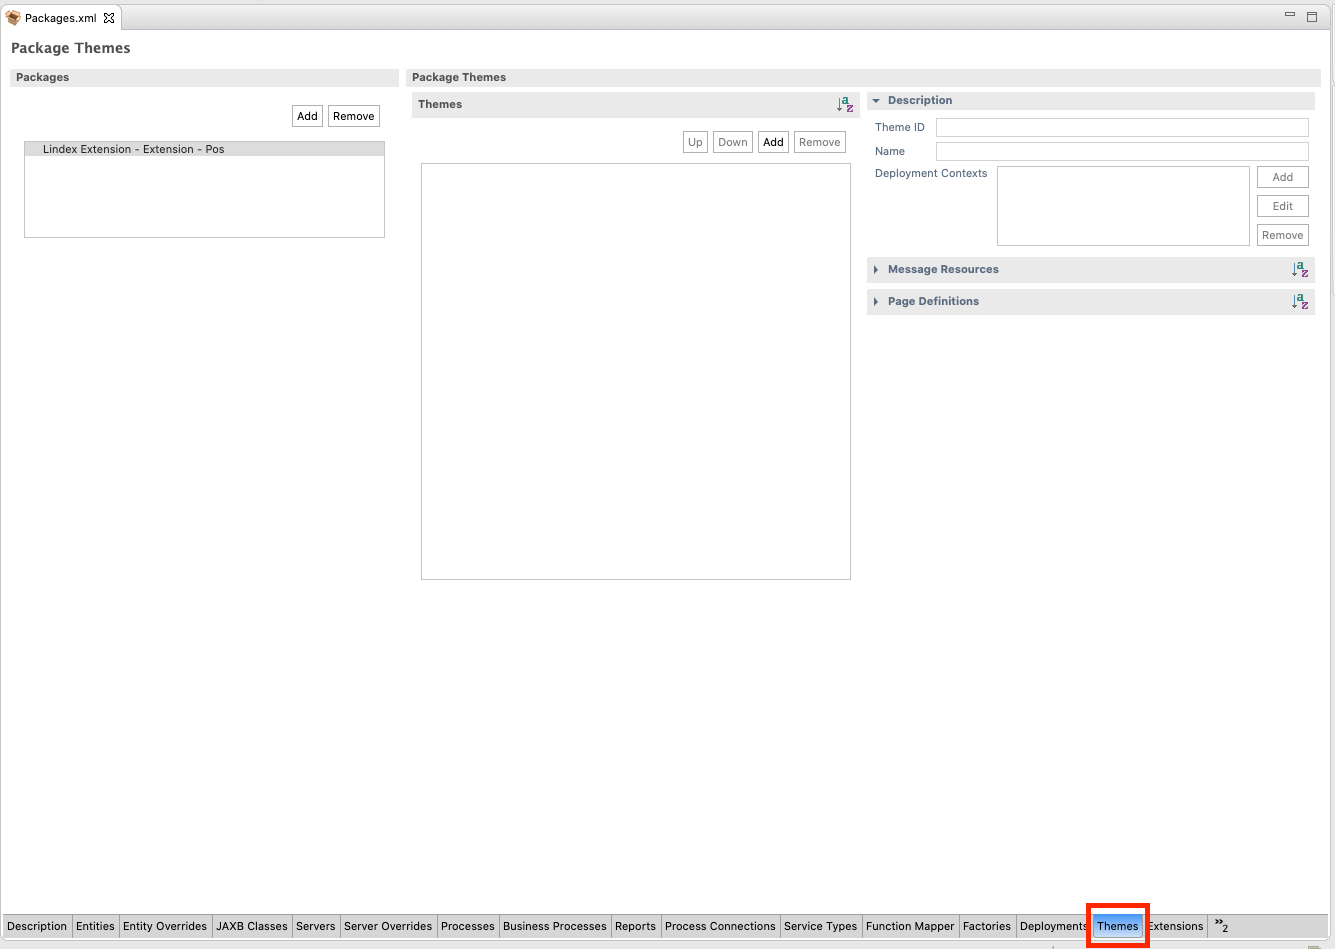 |
| 5 | Under the Themes header, click Add to add a new theme Select the new theme Set the Theme ID to <CUSTOMER NAME> Set the Name to <CUSTOMER NAME> Save your changes | 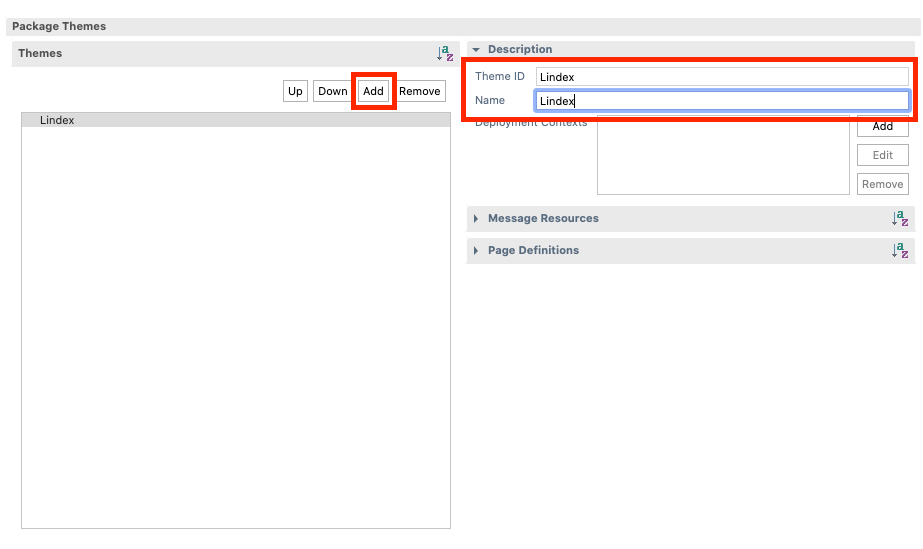 |
Style Sheet
| 1 | Create a new folder within the StyleSheet directory by right clicking on folder and selecting: New → Folder | 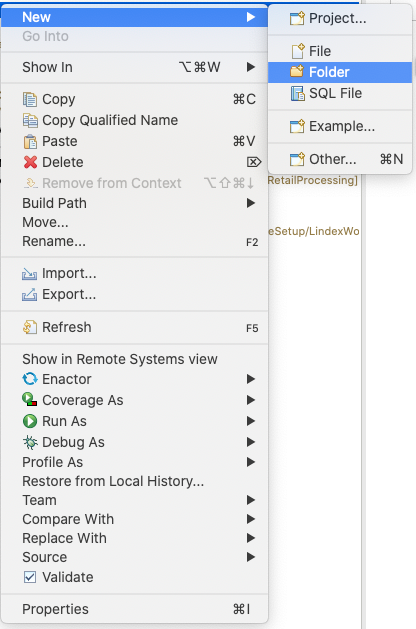 |
| 2 | Name the Folder the same as the Theme ID you configured above. Click Finish |  |
| 3 | Create a new file within the folder by right clicking on New → Other Expand the Web collection and select CSS File Click Next | 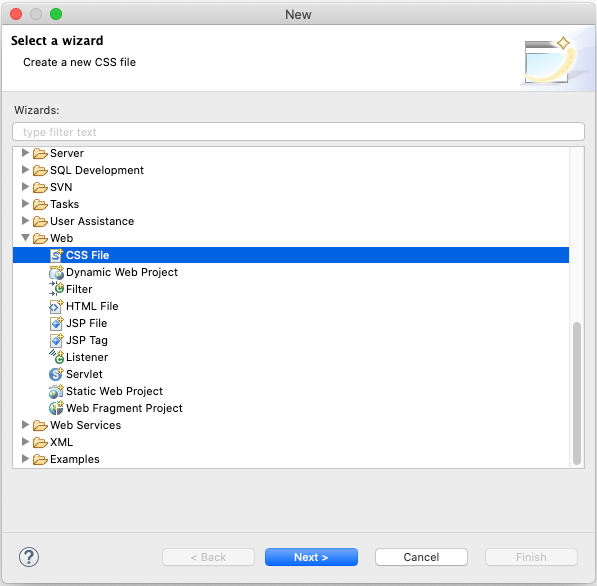 |
| 4 | Enter a file name of pos.css Click Next | |
| 5 | Deselect Use CSS Template Click Finish |  |
| 6 | Create a new style by adding the following css. Click Save | 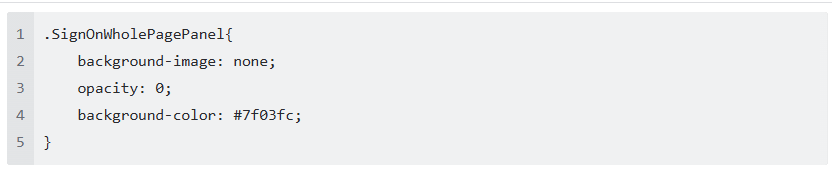 |
| 7 | Return to the Pos Terminal Maintenance Application in the Estate Manager. Select to edit the same Pos Terminal you did previously (pos1@0001.enactor) Navigate to User Interface → Branding/Style Set Operator View Theme to blank Click Save This allows us to specify the theme using the command line options (which are ignored if there is a theme configured in the database) | |
| 8 | Open the Run Menu → Run Configurations Under Java application, select POS Select the Arguments tab | 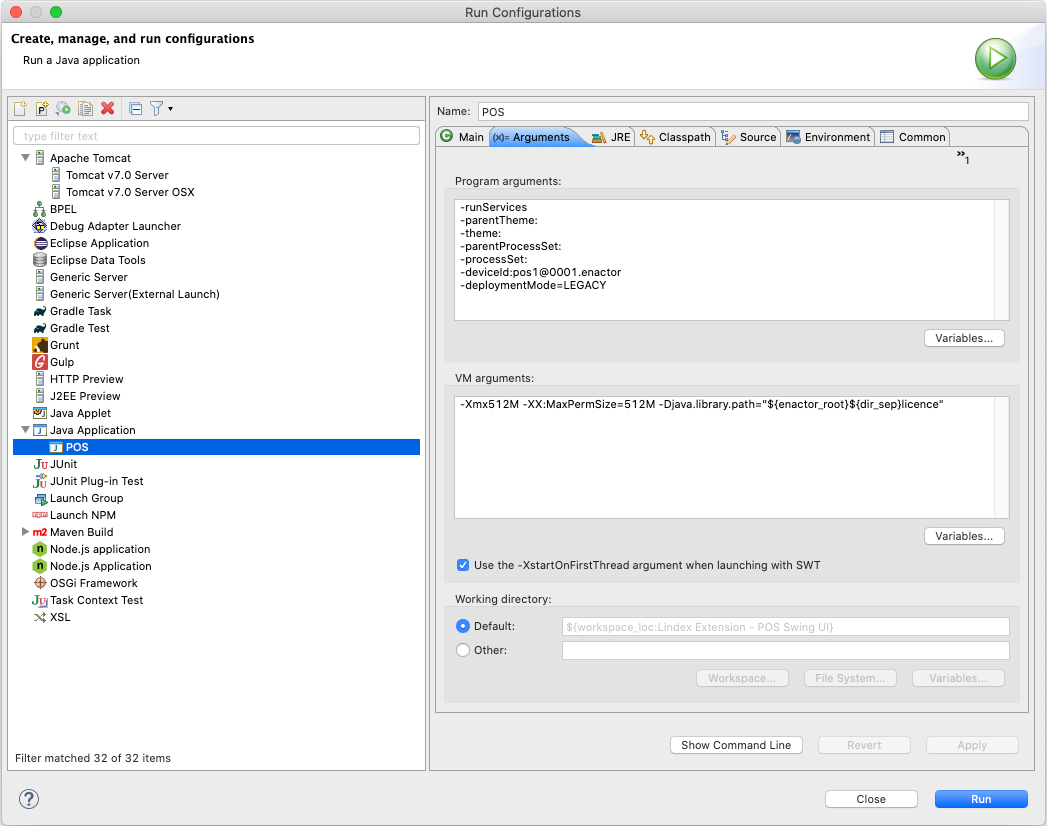 |
| 9 | Set the theme argument to -theme:<THEME ID>/NextGen1024x768 | 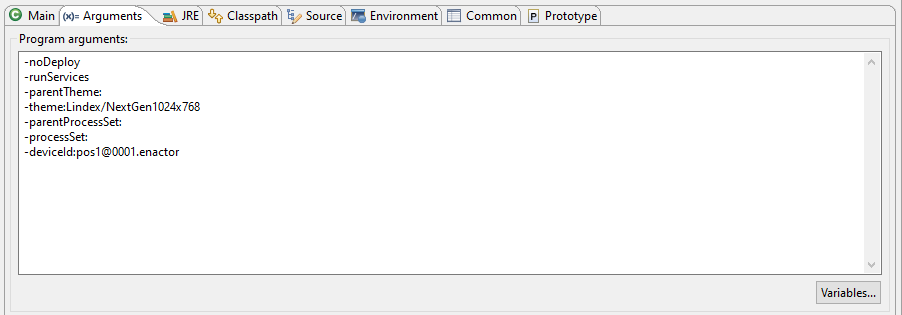 |
| 10 | Terminate the POS if it is already running and then relaunch it. You should see your new theme on the POS |
Page Definition Theme Overrides
| 1 | Back in the <CUSTOMER NAME> Extension - Pos project, create a new folder within the PageDefinition directory named the same as the Theme ID you created earlier | |
| 2 | Open the Open Resource… menu using either the top-level menu: Navigate → Open Resource… or using the following key combination: CTRL + SHIFT + R (Windows and Linux) or CMD + SHIFT + R (Mac) | 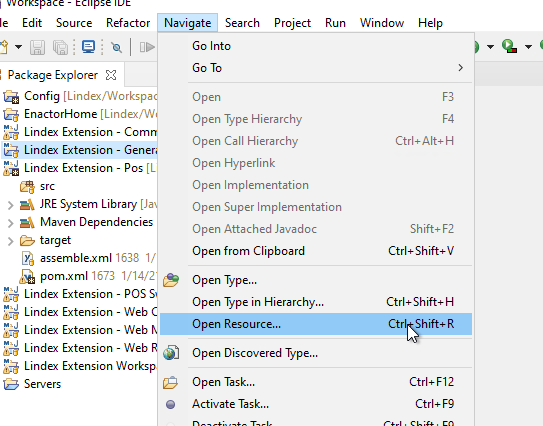 |
| 3 | Search for the resource EnterUser.xml Select the file located within NextGen1024x768/Pos/SignOn Click Open |  |
| 4 | Open the Properties View by Opening Window Menu → Show View → Other From the General collection select Properties | 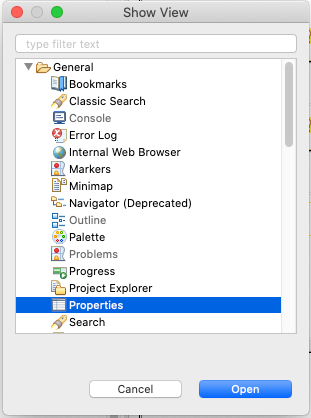 |
| 5 | Open the Outline View by Opening Window Menu → Show View → Outline Ensure both Outline and Properties views are visible | |
| 6 | From the Outline View, select the root of Page Definition Tree named Pos Prompt | 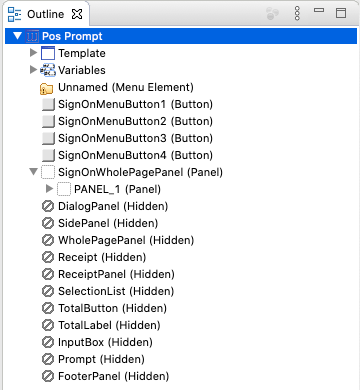 |
| 7 | From the Properties View, note the Page definition URL Property omitting the theme NextGen1024x768 | 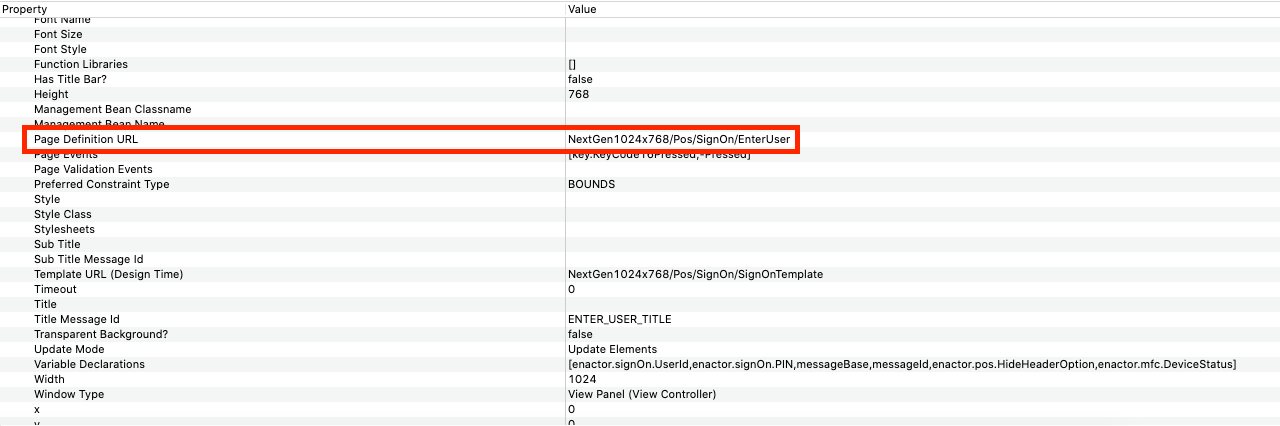 |
| 8 | Return to your <CUSTOMER NAME> Extensions - Pos project. Under the PageDefintion/<THEME_ID> folder, create a new folder with the following name:Pos/SignOn Copy the previously located file into this new folder |  |
| 9 | Open the copied file and close the original Selecting the root of the Page Definition again from the Outline view Locate the page Definition URL from the Properties view Replace the NextGen1024x768 part with your theme name so that the URL now correctly matches the location within the file system: <CUSTOMER NAME>/Pos/SignOn/EnterUser.xml | 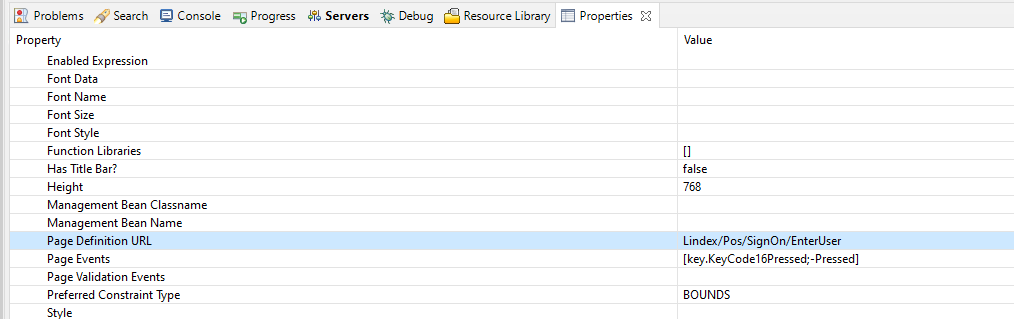 |
| 10 | Make a change to the file such as removing LABEL_1 Save the file when you are done | |
| 11 | Open the Packages.xml and select the Themes tab Expand the Page Definitions Section and select Add In the search dialog Enter the file name EnterUser.xml Select the file within your themed folder Click OK Save your changes | 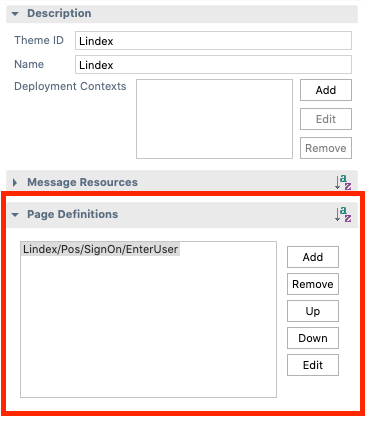 |
| 12 | Terminate and relaunch your POS application. You should see your POS has updated to display your new screen |